
My Zeiss Contaflex 860/24 camera
When I was much younger and starting to collect cameras, I would spend hours thumbing through books on old and historical cameras, wishing someday I'd be able to see one in real life, much less have them in my collection.
To this day, there are cameras that I haven't even seen in person, let alone have in my collection. Cameras like the original Daguerreotype camera, the original Kodak 1 camera, LeCoultre Compass cameras, Early French watch cameras, or a Leica 1, with a Dial Set Compur shutter, are cameras I've only seen in books. I've come close to purchasing a Compass camera, but the price was higher than what I was comfortable with at the time.
When I was younger, one camera that I had always wanted to have in my collection was the Zeiss Contaflex TLR camera, and I've actually had the opportunity to own a couple of them over the years. The first one I had not only had mechanical issues, as many of them do, but some of the leatherette was missing, and there were several marks on the body.
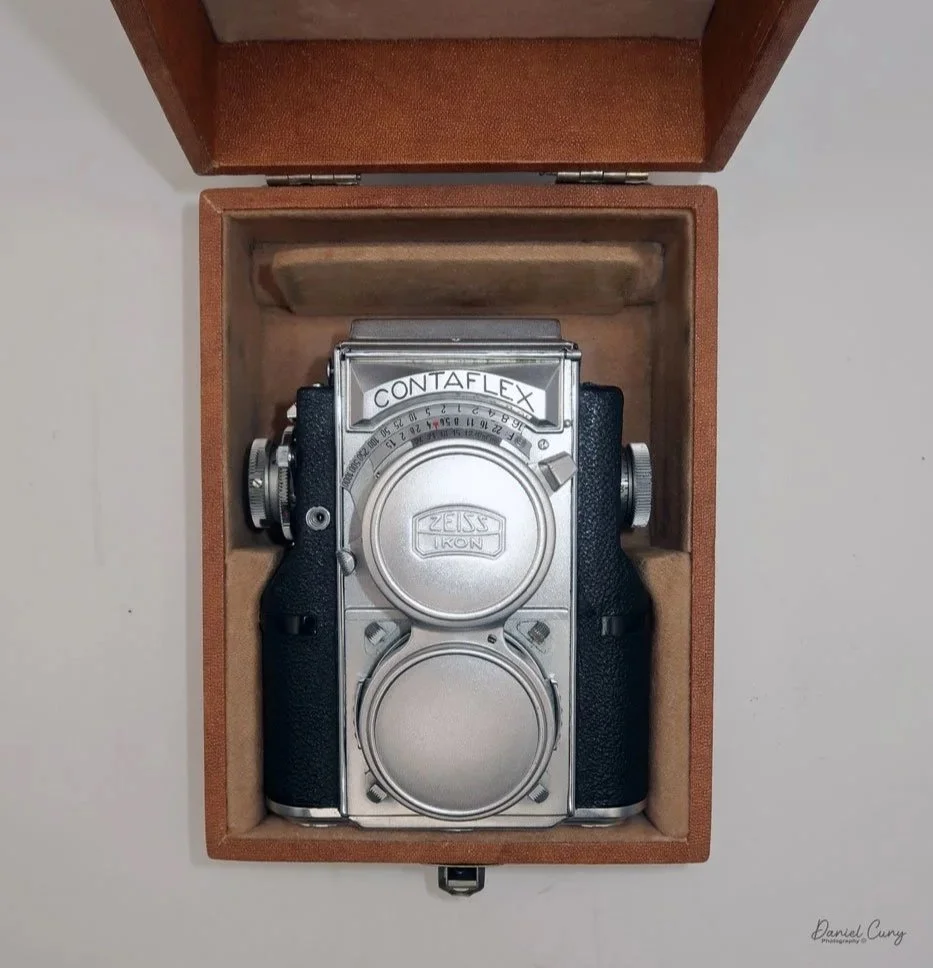
A few years ago, I came across another Zeiss Contaflex TLR on a selling app that I was scrolling through, but this one was considerably cleaner, had its lens cap, and came in the original presentation box. Knowing the camera was an upgrade from the one I currently owned, I made the purchase. I'd sell the one I had for close to the price I paid for the one on the app. With my fingers crossed, I took the older camera to a camera show, and as I had hoped, I sold it for very close to the price of the newer version, so I was happy that it all worked out in the end.
Unfortunately, like many of the Contaflex TLR or, as Zeiss Ikon designated, the model 860/24 camera, my shutter isn't working. At this time in German camera manufacturing, engineers overengineered many of the cameras during the 1930s, especially the shutter system. The Contaflex 860/24 has the same, or very similar, shutter system as the early Contax cameras, where the shutter was a metal curtain. I can only believe they thought this would last a very long time. Physically, they do last a long time, but unfortunately, mechanically, when they fail, having them serviced is a difficult chore, and usually very time-consuming and costly.
The Contaflex 860/24 was introduced in 1935 and produced through 1940. The camera's design is attributed to Oskar Bergen, who was part of the Zeiss Ikon Dresden team led by Hubert Nerwin. The design team sought an alternative to the rangefinder-style camera popularized by Leica and Contax cameras of this era.
History:
The history of Zeiss is both extensive and groundbreaking, tracing its origins to 1846 when Carl Zeiss established an optical workshop in Jena, Germany, initially focusing on the production and repair of microscopes. Zeiss's early years were marked by steady growth; by 1861, the workshop had expanded to employ over 20 people and had already achieved recognition for its precision instruments. The company's real leap into scientific innovation began when physicist Ernst Abbe joined the firm in 1866. Abbe's scientific approach to lens design transformed production from artisanal craftsmanship to methodical engineering, driving Zeiss ahead of competitors.

Ad for Zeiss Contaflex camera
By the late 19th century, Zeiss had already licensed some of its advanced lens designs to international manufacturers, including Bausch & Lomb and Ross—partnerships that would lay the foundation for Zeiss's future global reach in optics and photography. Key optical innovations soon followed, including Paul Rudolph's anastigmatic Protar lens in 1890, the Planar lens in 1896, and the classic Tessar lens in 1902, known as the "camera's eagle eye." These breakthroughs helped Zeiss transition from microscopes to the field of photography and camera lens development, making the company a household name among both professional and amateur photographers.
In the early 20th century, Zeiss aggressively expanded its camera production, acquiring companies like Palmos and forming alliances that led to the creation of Internationale Camera Aktiengesellschaft (ICA), ultimately resulting in the establishment of Zeiss Ikon in 1926. By the eve of World War I, Zeiss was the world's largest camera manufacturer, with a central production hub in Dresden. This era witnessed the advent of celebrated camera lines, notably the Contax, which rivaled Leica and set new standards for 35mm system cameras.
Zeiss also revolutionized lens technology through the invention of anti-reflective lens coatings in 1935, enhancing image clarity—a process still in use today across multiple brands. After World War II, following Germany's division, Zeiss split into two separate operations in Jena and Oberkochen. Both pursued advances in photographic, cine, and scientific lenses, including notable collaborations with manufacturers like Hasselblad, Linhof, and, later, Yashica and Sony.
Throughout its history, Zeiss has consistently set benchmarks in photographic optics, lens design, and manufacturing precision, maintaining a reputation for innovation and quality that endures to this day.
My Camera:
I need to start this section by saying that I haven't shot film through this camera because the shutter is not working. I also don't have, nor have I seen, a manual for the camera, so there are some switches that I'm not familiar with, or know precisely what they do. I'm going to provide my assessment of the camera based on just playing with the camera's dials and switches, so I hope some of the experts out there can correct any errors I've made in this post, and I hope there are very few.
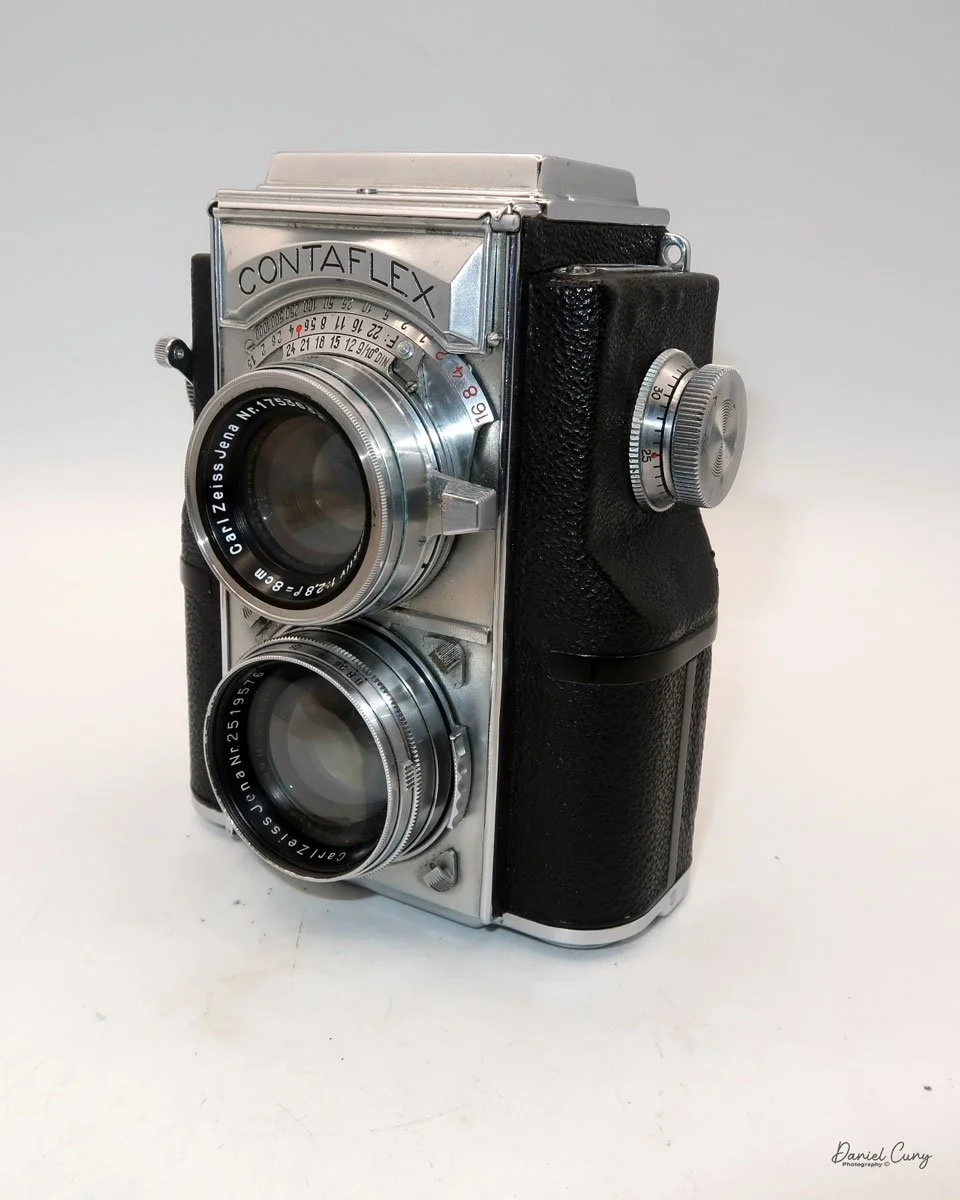
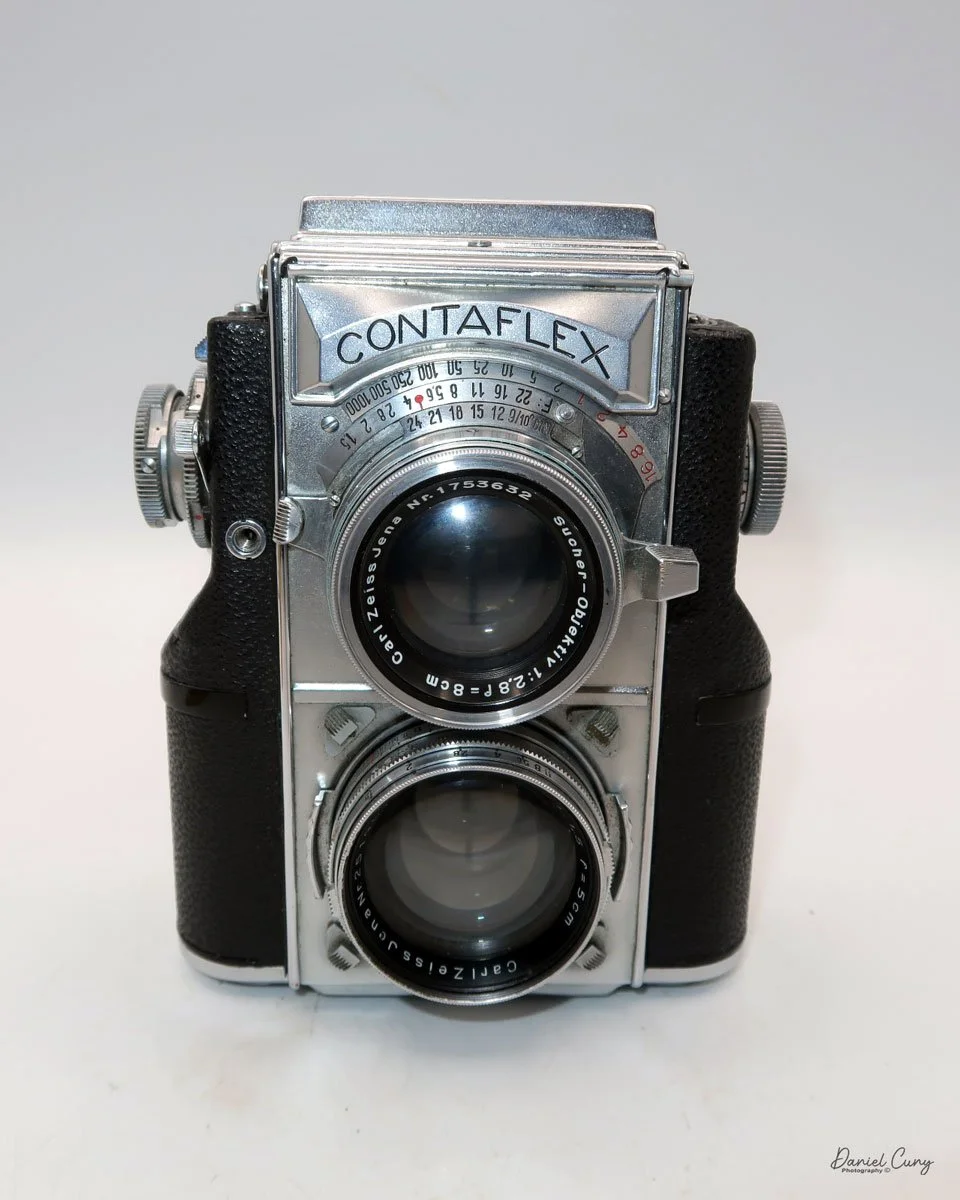
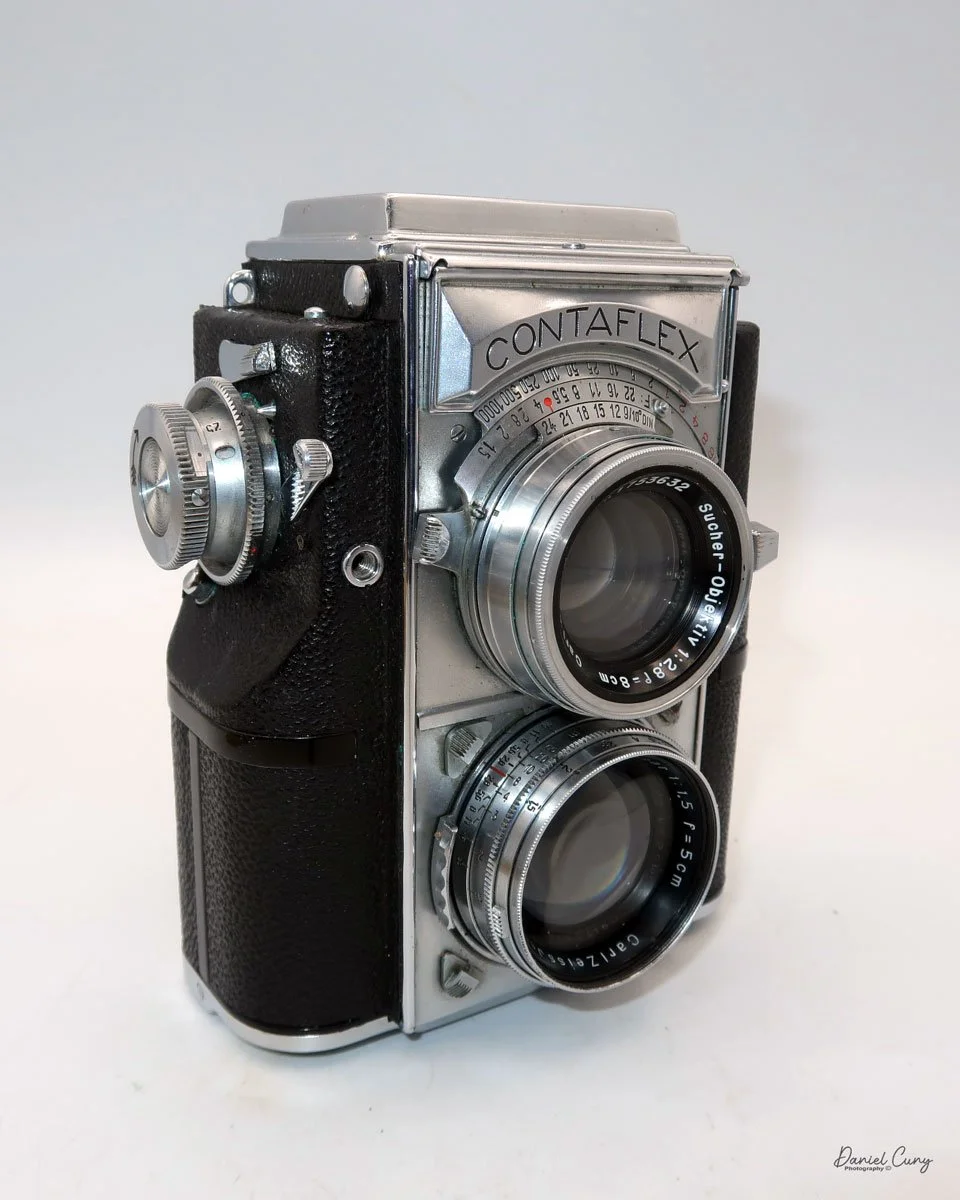
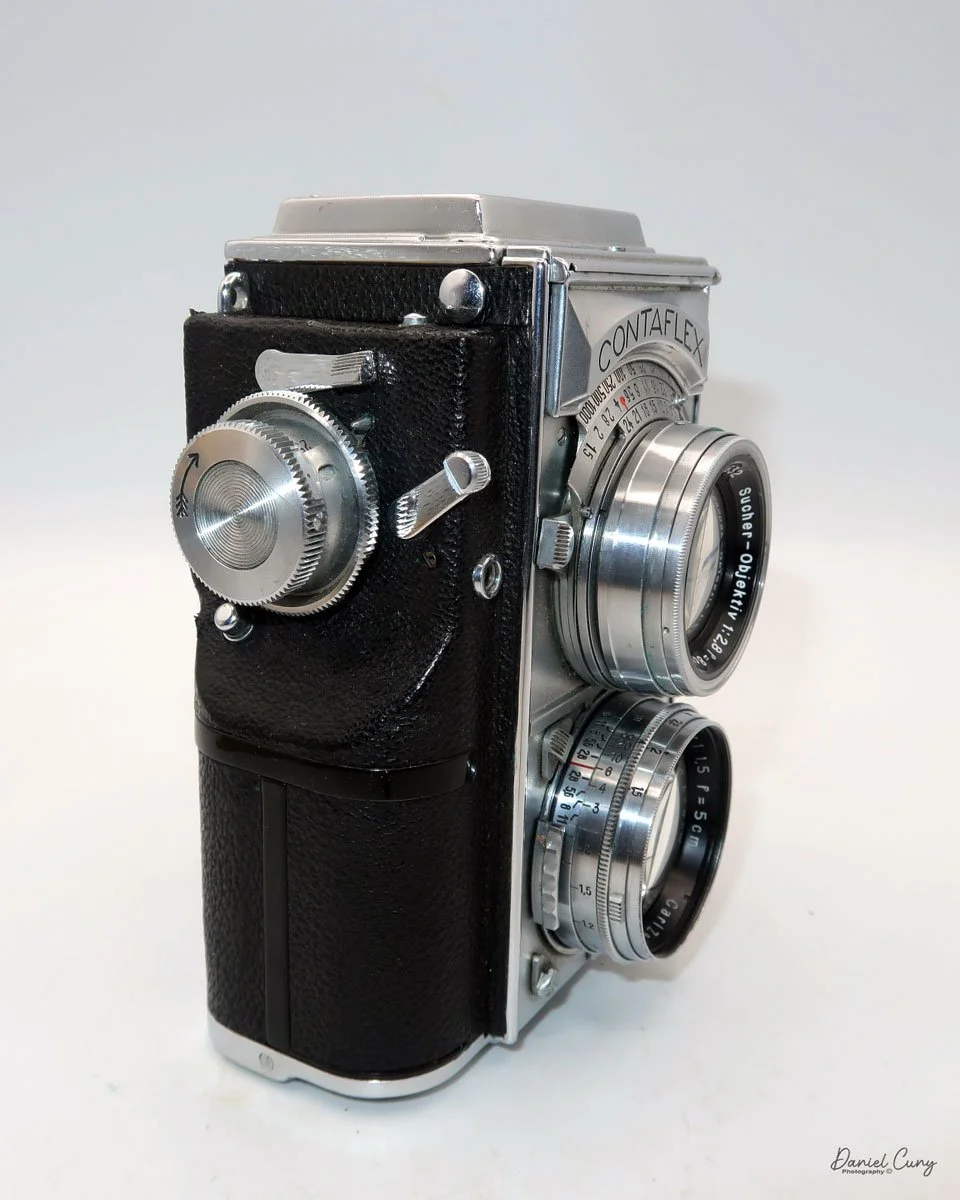
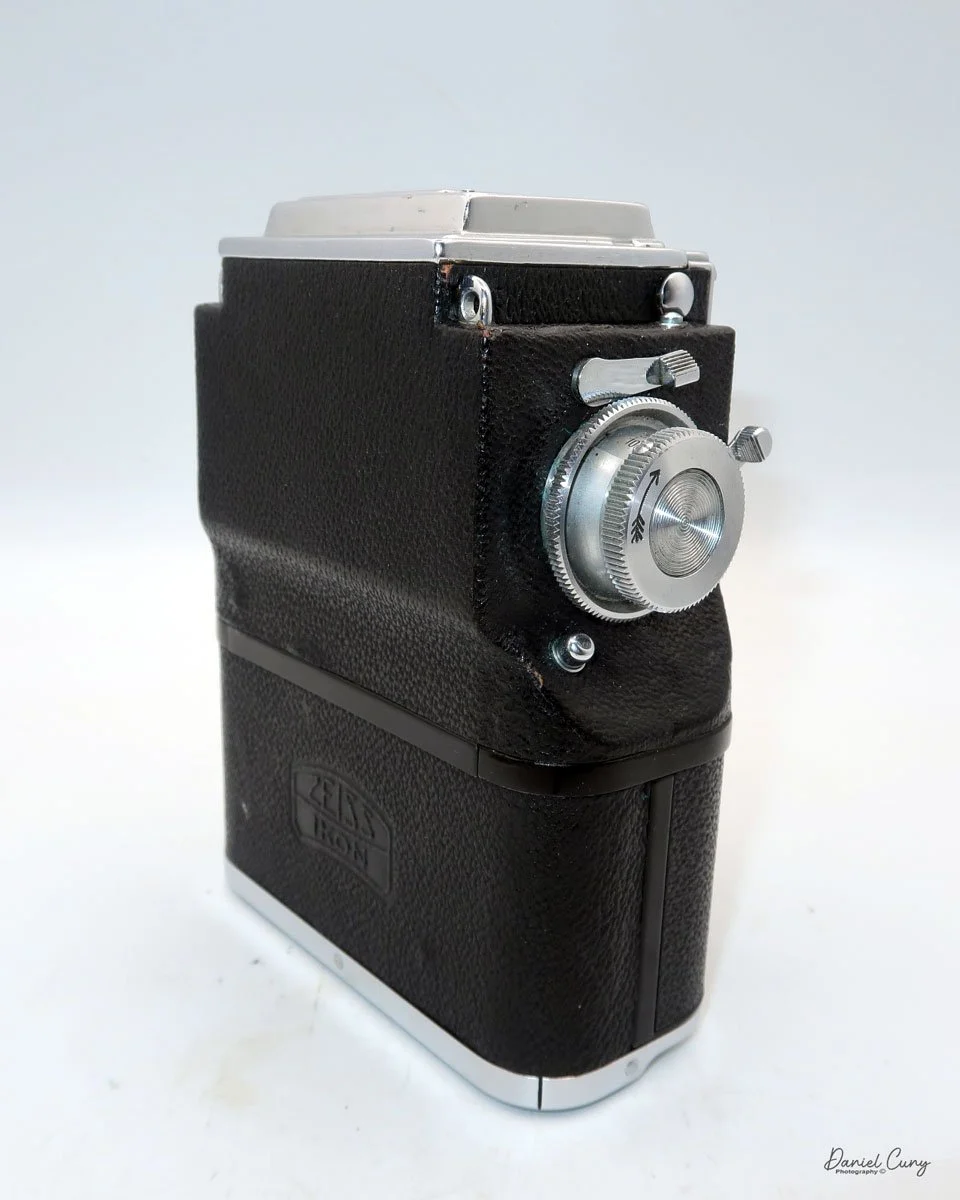
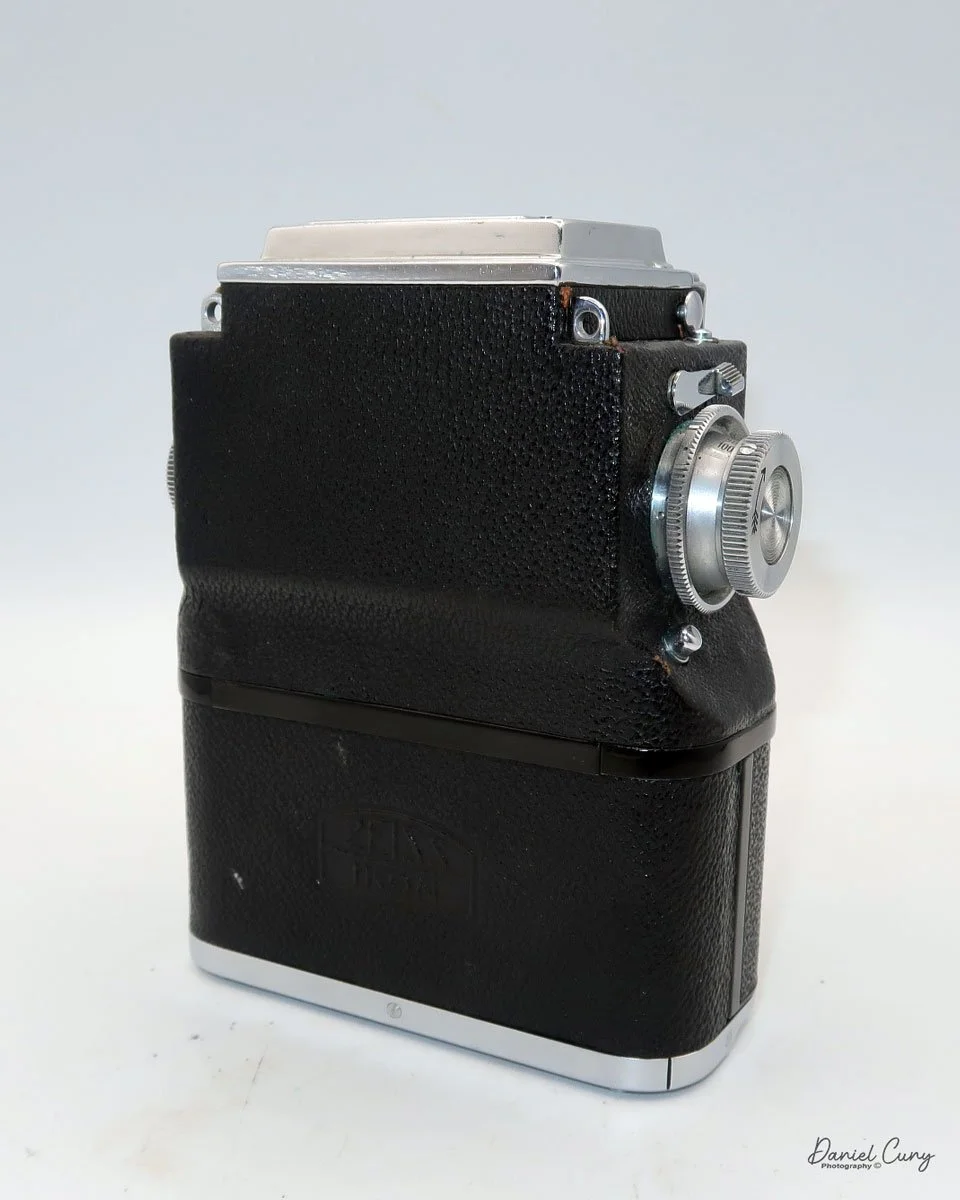
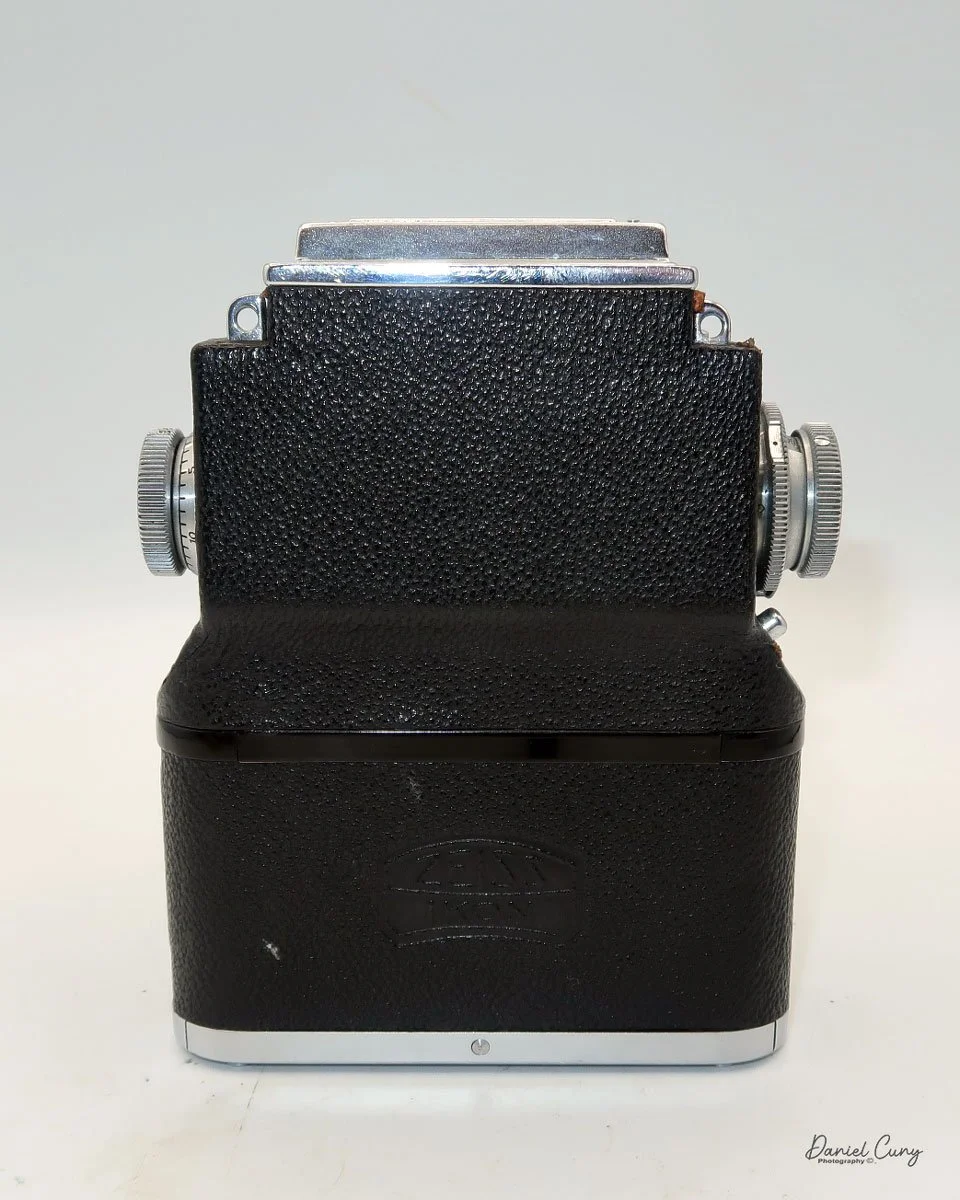
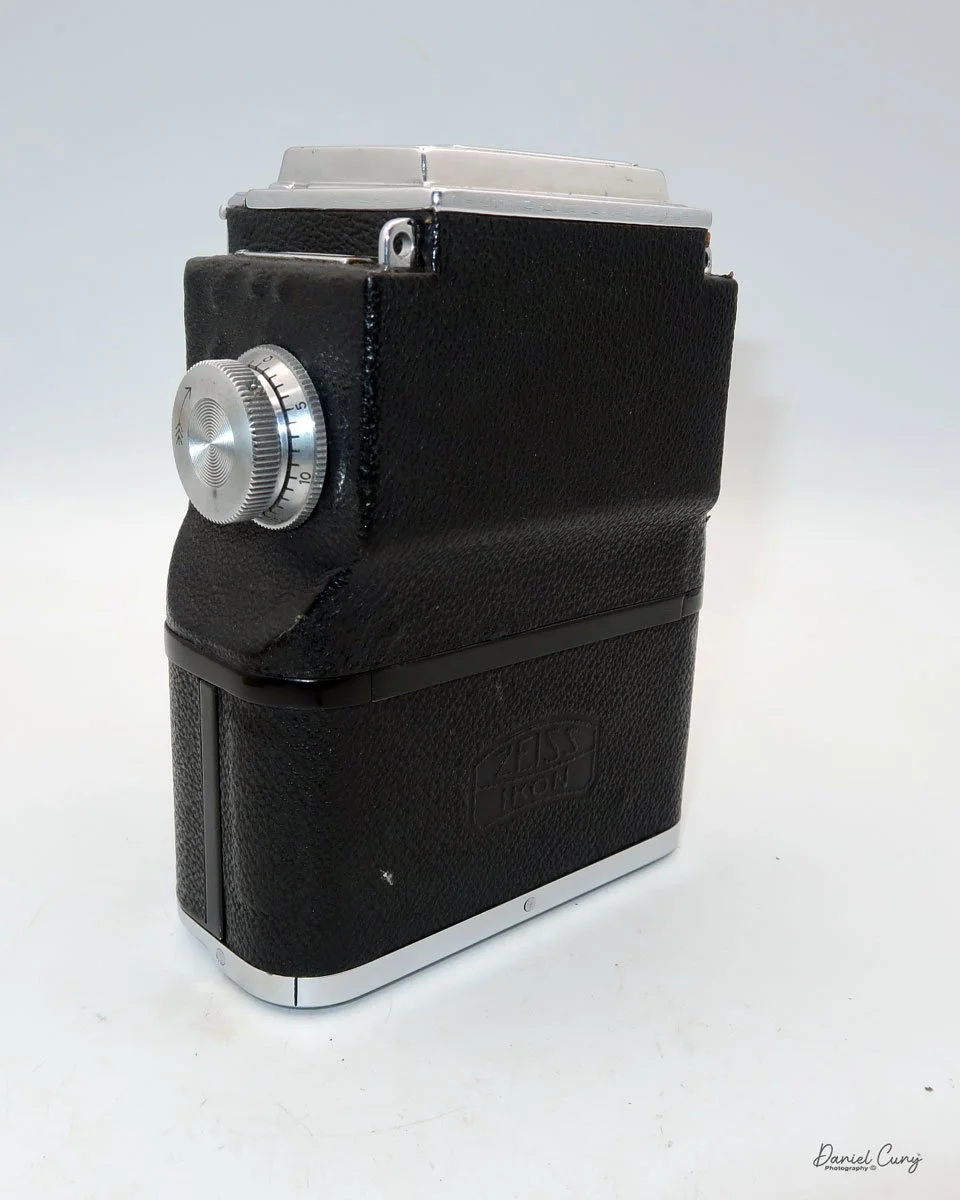
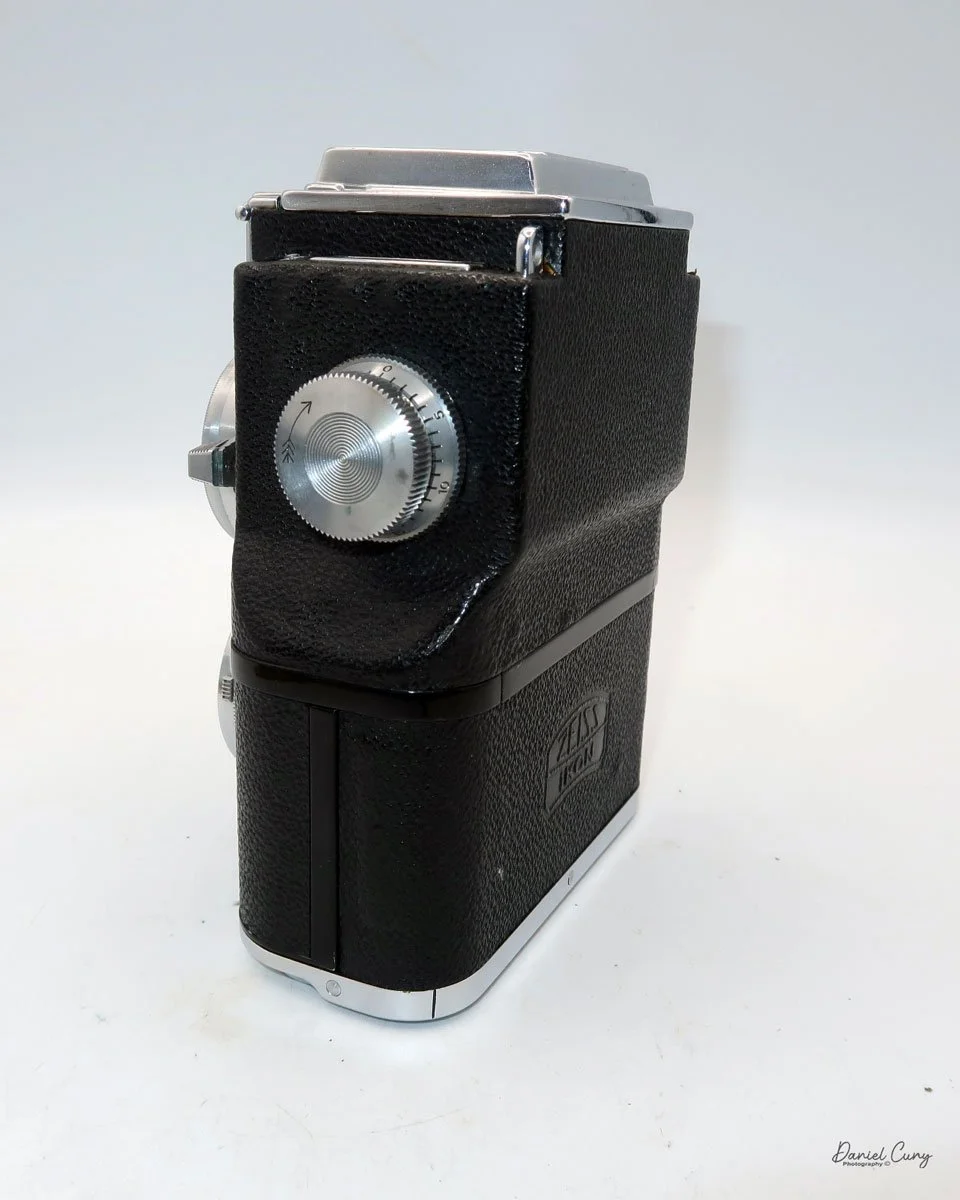
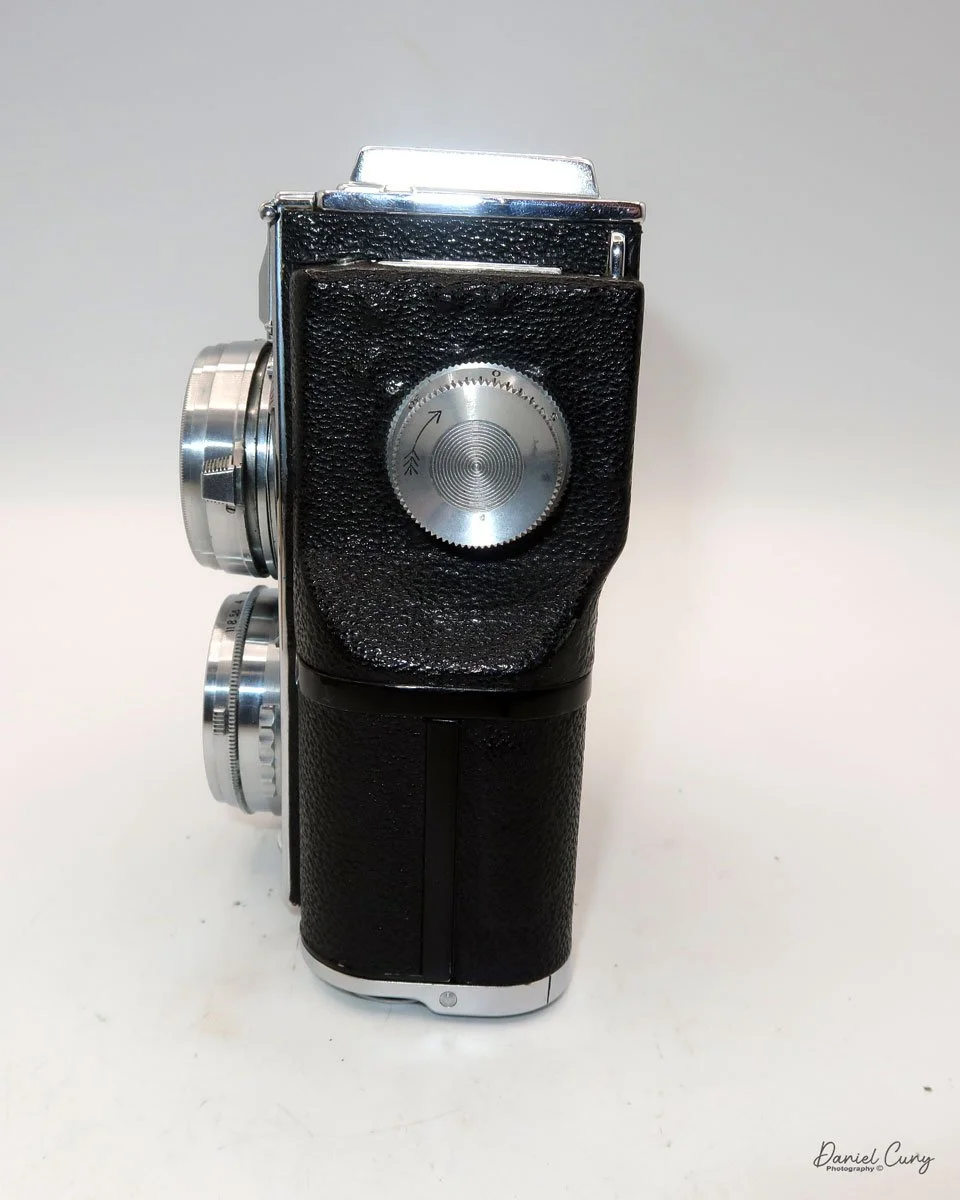
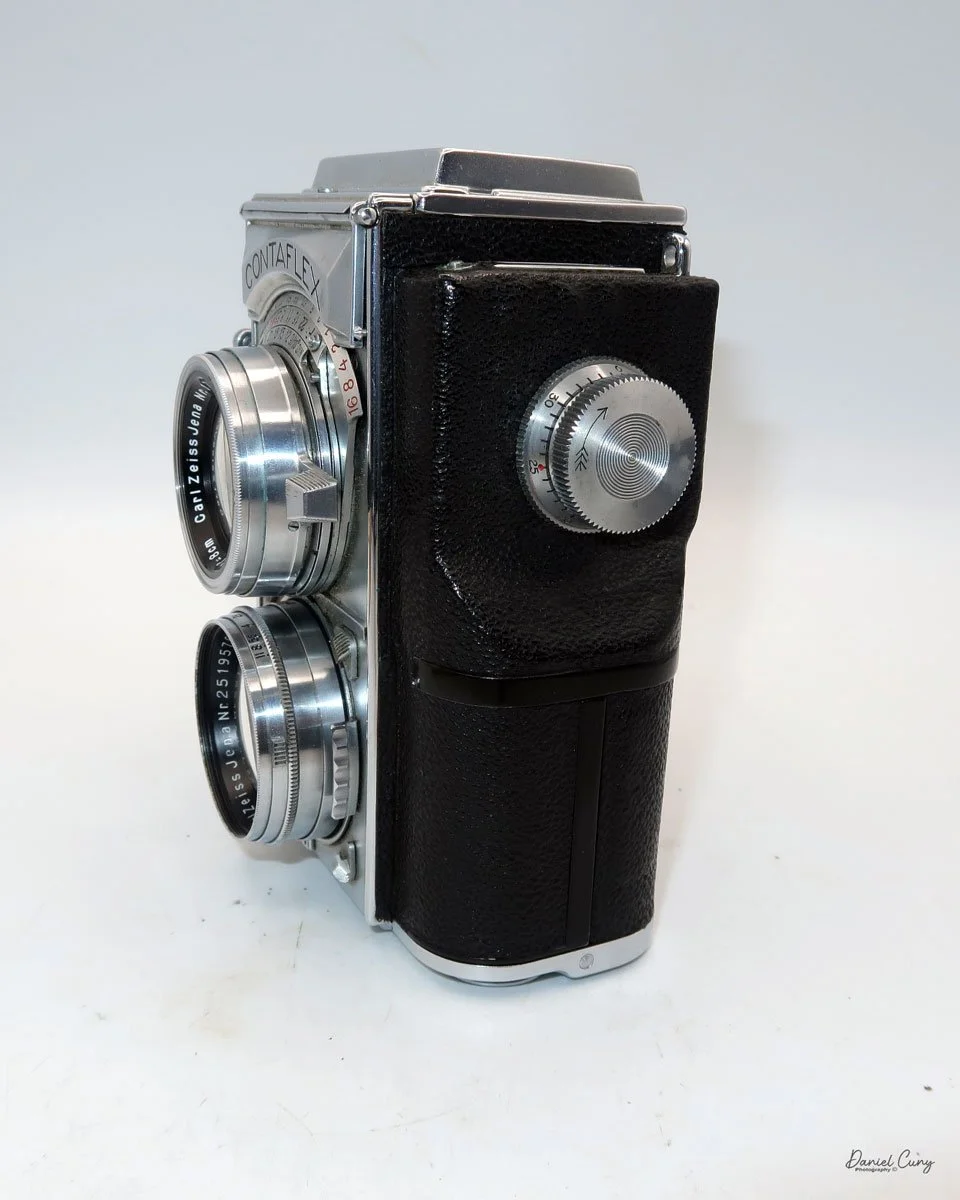
My Zeiss Contaflex 860/24 camera features a Carl Zeiss Jena 5cm f/1.5 Sonnar lens, serial number 2519576, for the taking lens, and a Carl Zeiss Jena Sucher-Objektiv 8cm f/2.8 lens for the viewing lens. My camera body serial number is A75744. The camera is quite hefty in weight when you first pick it up, weighing 3 pounds 4.2 ounces. The camera is 7" tall with the light chimney opened, and 5.5" tall with it closed. The camera's width is 4.5", and with the lens I have installed, it is 3" deep.
Because of the magnified viewing lens compared to the actual taking lens, frame lines for 85mm and 135mm are drawn onto the viewing screen when you lift the light chimney for focusing. To open the light chimney, locate the button on the right side of the camera, just below the chimney. Pressing this button opens the chimney. The first thing I noticed when the chimney is opened is a beautiful mirror on the front of the camera, which would be pointing towards the subject. On the top right of the chimney is a small switch that raises the magnifying lens when pressed. With the magnifying lens up, you can look through the rear opening, similar to a sports finder, and view the scene through the mirrored front. Upon reviewing it, lines are available for different lens magnifications.


The Contaflex 860/24 was the first camera with a built-in light meter system. It's a selenium cell, which is under the Chrome Contaflex name on the front of the camera. Like similar cameras, the cover is spring-loaded; to open, press the small tab on the upper left of the cover. Once pressed, the meter's cover will spring open, exposing the Selenium cell. On the top, left of the light chimney is where the light meter will give exposure information. Similar to my shutter system, the meter isn't working, which is common for this type of meter.
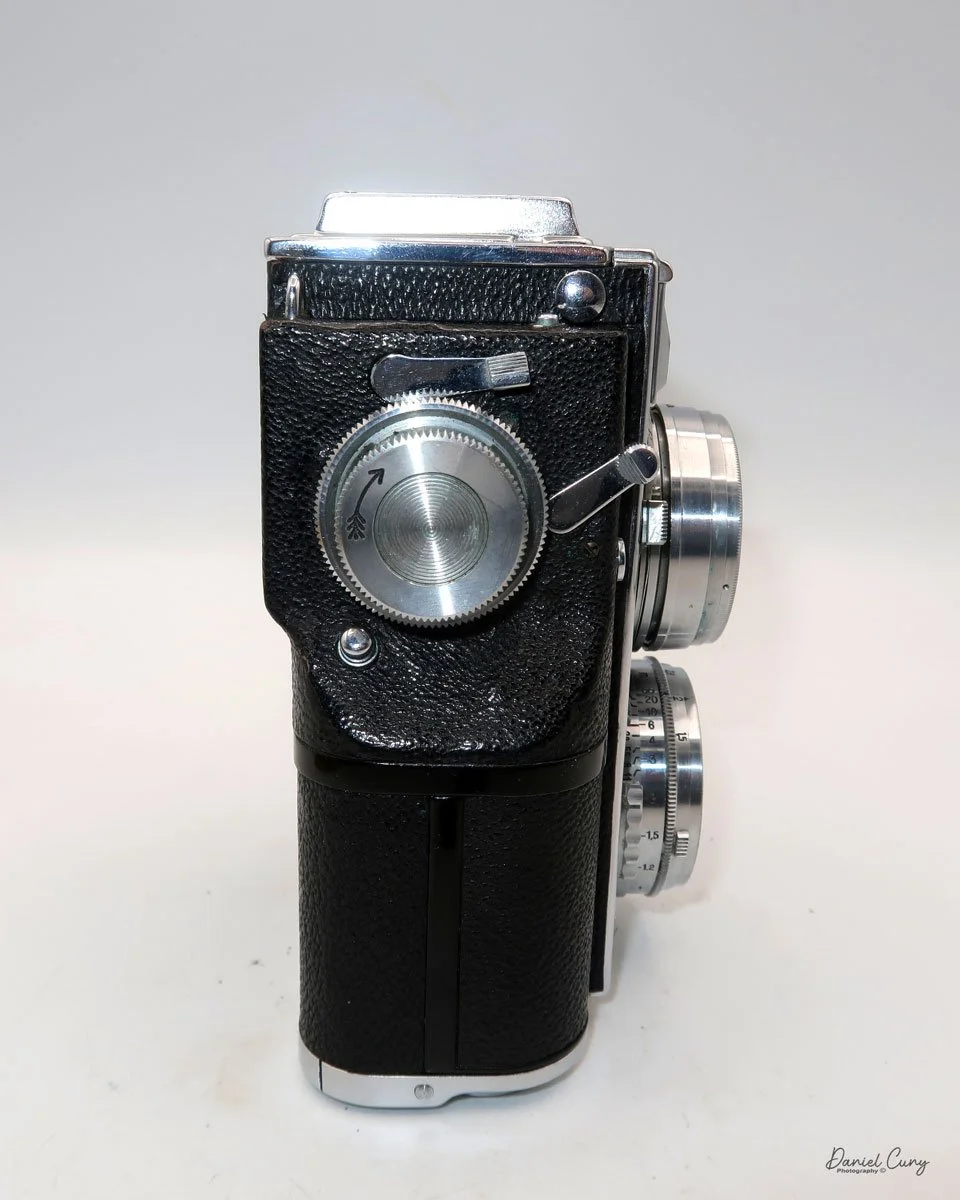
To focus the camera, a large protruding lever is located on the left-hand side of the top viewing lens. Move the lever up or down to focus the lens on the desired subject while looking through the ground glass in the viewfinder.
To set the built-in light meter, first, select the film's DIN number, which is equivalent to ASA in the US and now ISO, representing the film's sensitivity to light. To do this, just above the viewing lens are the DIN numbers. Just above that is a slider with a red dot, accompanied by a line that you move to the corresponding film speed you'll be using. When you flip up the light meter cover, a line will appear, indicating the current light level. On the other side of the viewing lens is another lever that moves the shutter speed for the light meter. This will also move the line to line up with the red arrow in the meter window. Once that is set, you have your shutter and aperture settings for the lighting condition just above the viewing lens. These are the settings only; they must now be transferred to the camera settings before you take your photo.


The aperture is set on the taking or bottom lens of the camera. On the outer edge of the lens are two knobs, opposite each other. Turn this ring and set the aperture setting to a small black dot on the outer edge of the lens. Around the outside of the lens itself are four clips at the corners of the lens. These are used to attach the accessory lens hood.
To remove the taking lens and put on a different lens, first press the small button under the lens with a red dot on it. Once that's pressed in, on either side of the lens are two grips that are attached to a ring, which need to be turned counterclockwise about a quarter turn to unlock the lens from the body. Once the lens is unlocked, you can remove the lens from the camera's body. To reinsert the lens into the body, align the red dot on the lens with the red dot on the small button, and then slide it into the camera body. Once in, move the rind with the two grips clockwise until the ring clicks, and the lens is locked onto the camera body.


Setting the camera's shutter speeds and advancing the film to the next frame are a bit different, but according to the camera's manual, which I got from a great camera guy that serves the photo community with an outstanding service by having many different camera manuals available, Mike Butkus, and his Camera Manual Library.
The shutter speeds are set into four different groups. Only one of the groups will be displayed on the shutter speed dial, located on the right-hand side of the camera body. Since my camera is in operable mode, I cannot change to any of the other groups, except for the one currently displayed on the dial, which is 25, 50, and 100. Around the shutter speed dial are two wheels. The inner ring is used to set the camera's shutter speed group, and the outer knob sets the camera to the desired shutter speed by pulling it out and turning it. It also advances the film and re-cocks the shutter once the photo is taken, and you turn the dial in a clockwise motion.
Just in front of the shutter speed dial and film advance is the shutter release lever. Above the shutter release lever is the self-timer for the camera. The lever should be folded to the left when not engaged, so mine has been set and won't return to its normal position. To release the self-timer, press the small button above the lever, and the self-timer will activate. Take the photo when done.


To load film into the Contaflex 860/24, turn the two clips on the bottom of the camera to unlock the film from the camera body. Once unlocked, slide the film back off the body to expose where the 35mm film will be loaded. Slide the cassette into the left chamber, bring the leader to the take-up spool, and thread it into the slot on the take-up spool. Ensure the sprockets of the film are riding on the gears that advance the film. Wind and click the shutter to advance the film. Once the film is loaded and advancing, slide the film back cover back onto the camera body and lock it into place, so you'll be ready to take photos.


Conclusion:
I only wish my camera were in good working condition. If I can find a qualified technician to perform the repair, which I believe I can, I'm wondering what the time and cost of the repair will be.
If any of you looking at this have had your Contaflex 860/24 serviced, please share your thoughts with me, as I'd love to hear how the camera is to use.
Thank you for taking the time from your day to become more familiar with this interesting and early 35mm camera.
I sell cameras and other photo items on my eBay store. Stop by sometimes, and maybe you'll see one of the cameras reviewed for sale at Cuny's Camera and Photo.
Here's a link to my other Camera Reviews.
Until next week, please be safe.