Zeh Zeca-Flex Camera

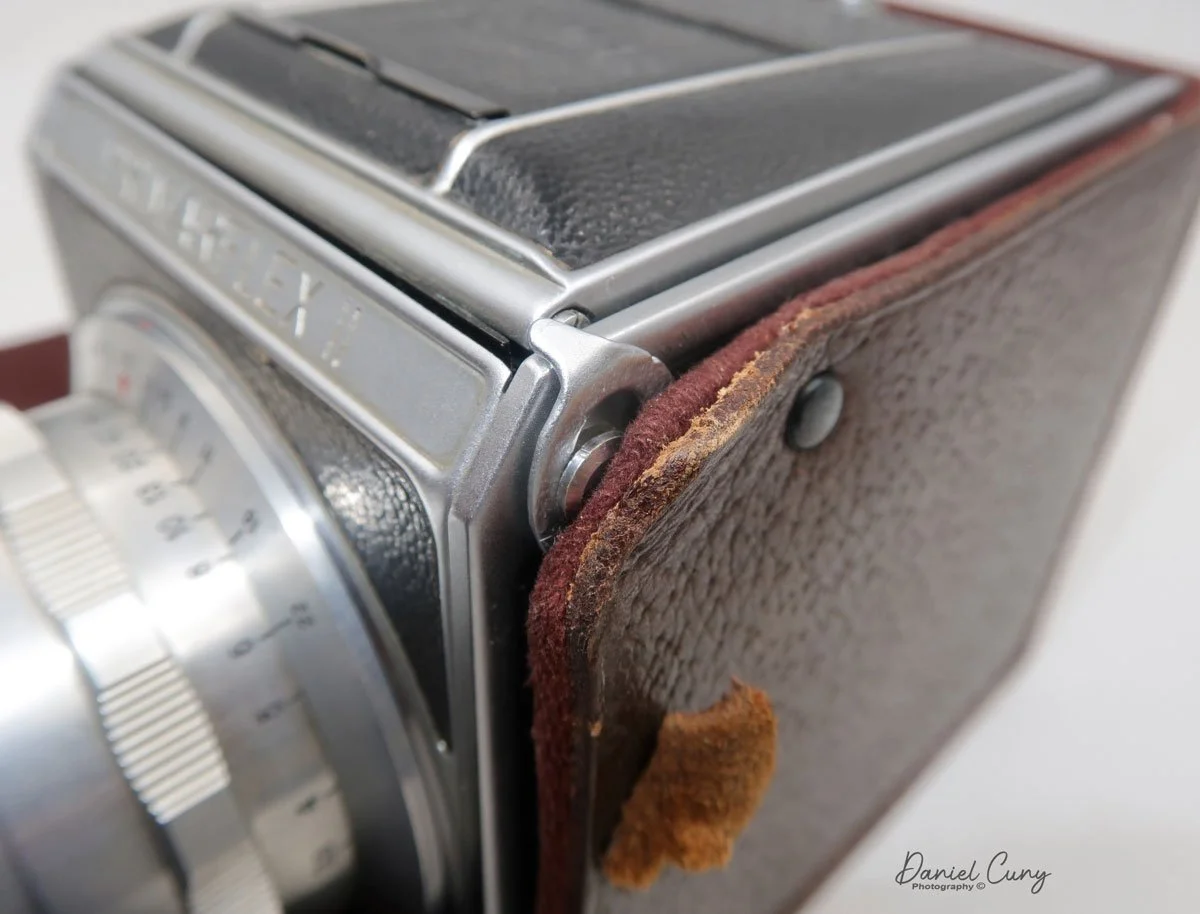
This camera combines the compactness of a folding camera with the quality and handling of a twin-lens reflex camera. The Zeh Zeca-Flex is just the camera mentioned above, and I've had my eye on it for many years. However, the rareness and price have always eluded me until I went into a great used camera store in Salt Lake City, UT, Acme Camera.

 The first time I went into Acme Camera, they were in their older location, and the store was filled with photo knickknacks. I struck up a conversation with the people there who were selling used gear, servicing cameras, and renting for the local photo community. On my second visit, back in one of the cases was the Zeca-Flex I currently have. The camera was in excellent condition, with clean optics and a working shutter. I offered a trade for the camera, and they accepted. I was elated to have the camera so I could do a blog article on my Zeca-Flex.

History:

In the early 1900s, around 1901-1902, Paul Zeh produced camera parts like shutters in his workshop in Dresden for some of the other local camera companies in Germany. In 1913, he started producing cameras, and by 1922, the company Paul Zeh Kamerawerk was started. In the early years, the company mainly produced folding plate cameras or cameras that took images on glass plates, which was very common at that time period.

During the 1920s, the company did very well. At this time in photo history, roll film was starting to become more popular. The photographer or photo enthusiast didn't need to carry bulky film holders. All the photographer needed to do was put in a roll of film and get 8, 10, 12, or 16 different photos on the same roll of film without the hassle or inconvenience of loading and carrying the film holders. 

The Pilot Reflex camera, produced in 1931 by Kamera-Werkstätten Guthe & Thorsch in Dresden, has a very similar style and appearance to the Perfekta and the Super Perfekta; you can see a review by Mike Eckman of the Pilot.

 During the late 1920s and 1930s, the company expanded production into folding roll film cameras. These cameras were more compact and allowed the photographer to travel with less equipment, so their popularity grew.

 By 1937, Zeh produced the Zeca-Flex, a folding, twin-lens reflex camera. Its design is very similar to that of the Welta Perfekta, which was produced in the 1933-34 timeframe, and the more robust Super Perfekta introduced in 1935. The Perfekta and Super Perfekta were made by Welta Kamera Werk, which was in Freital, a very close town to Dresden. 

I'm confident Zeh wanted to compete with Welta on this camera style. Unfortunately, this camera style didn't catch on with consumers. Hence, with all three cameras, the Perfekta, Super Perfekta, and Zeca-Flex were the only cameras made and are rare and somewhat expensive.

 WWII took a toll on Dresden as the Allies leveled the city due to its large manufacturing capabilities. By 1948, the Zeh plant closed, and the company went out of business. My guess is that some of the Russian companies took some of the camera manufacturing machines to produce some of the after-war cameras. This is just my guess, though.


My Camera: 

The condition of my Zeca-Flex is unusually excellent for a camera that is almost 90 years old. The metal is still shiny, and all the functions move like when the camera was first purchased in the late 1930s.

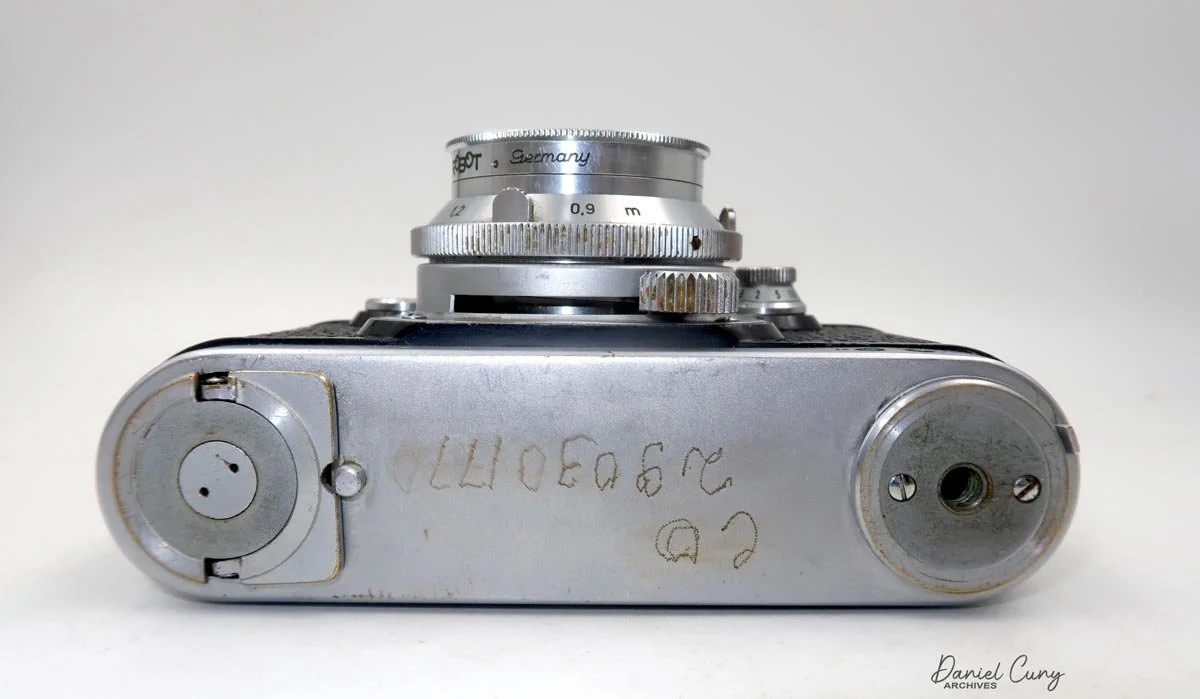
 The camera measures 7.5" long without the light hood open. When the light hood is open, it measures 9.25" tall. The Zeca-Flex is 3.75" wide and closed; it's 2.5" from the front of the viewing lens to the rear of the camera. When the camera is open, it measures 4.75". The Zeca-Flex weighs 2lb—5.2 oz.

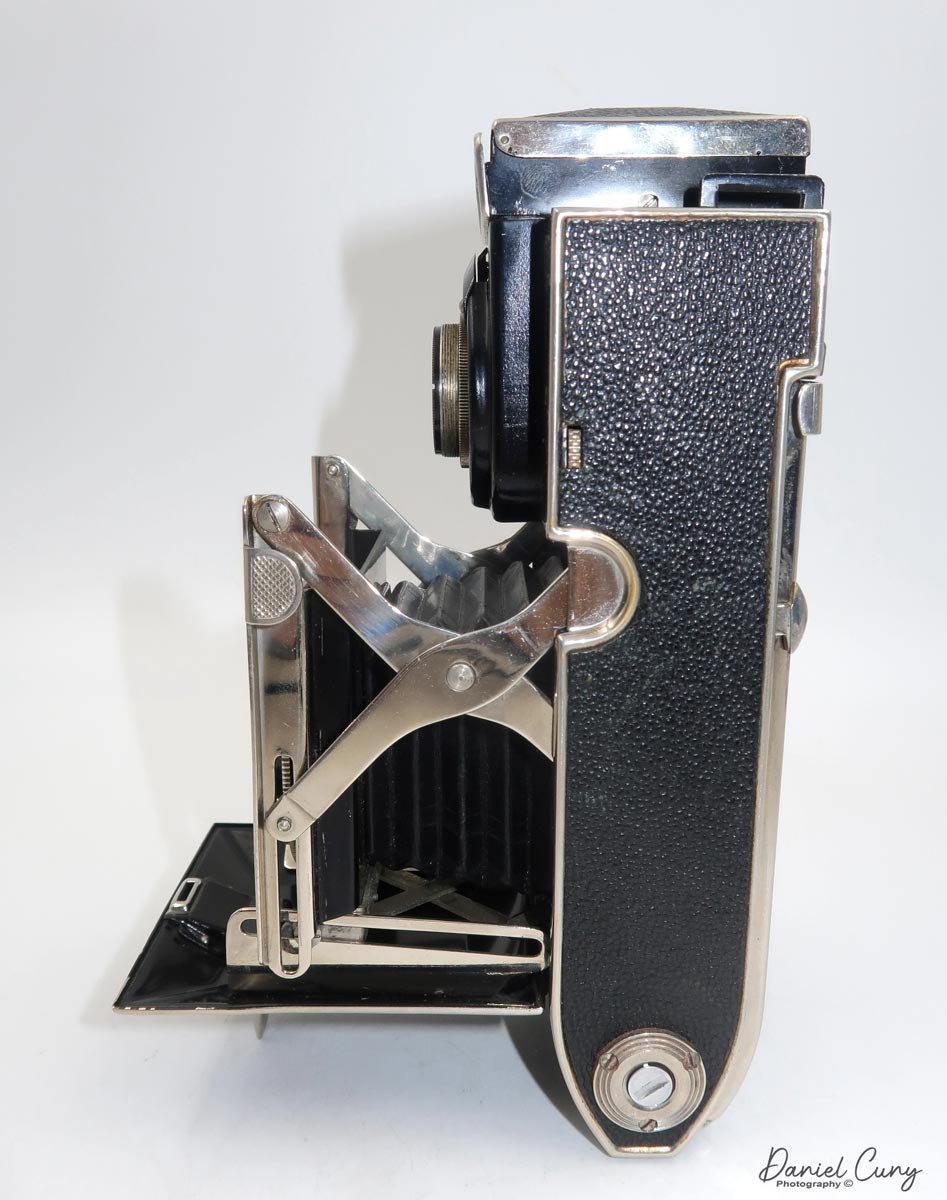
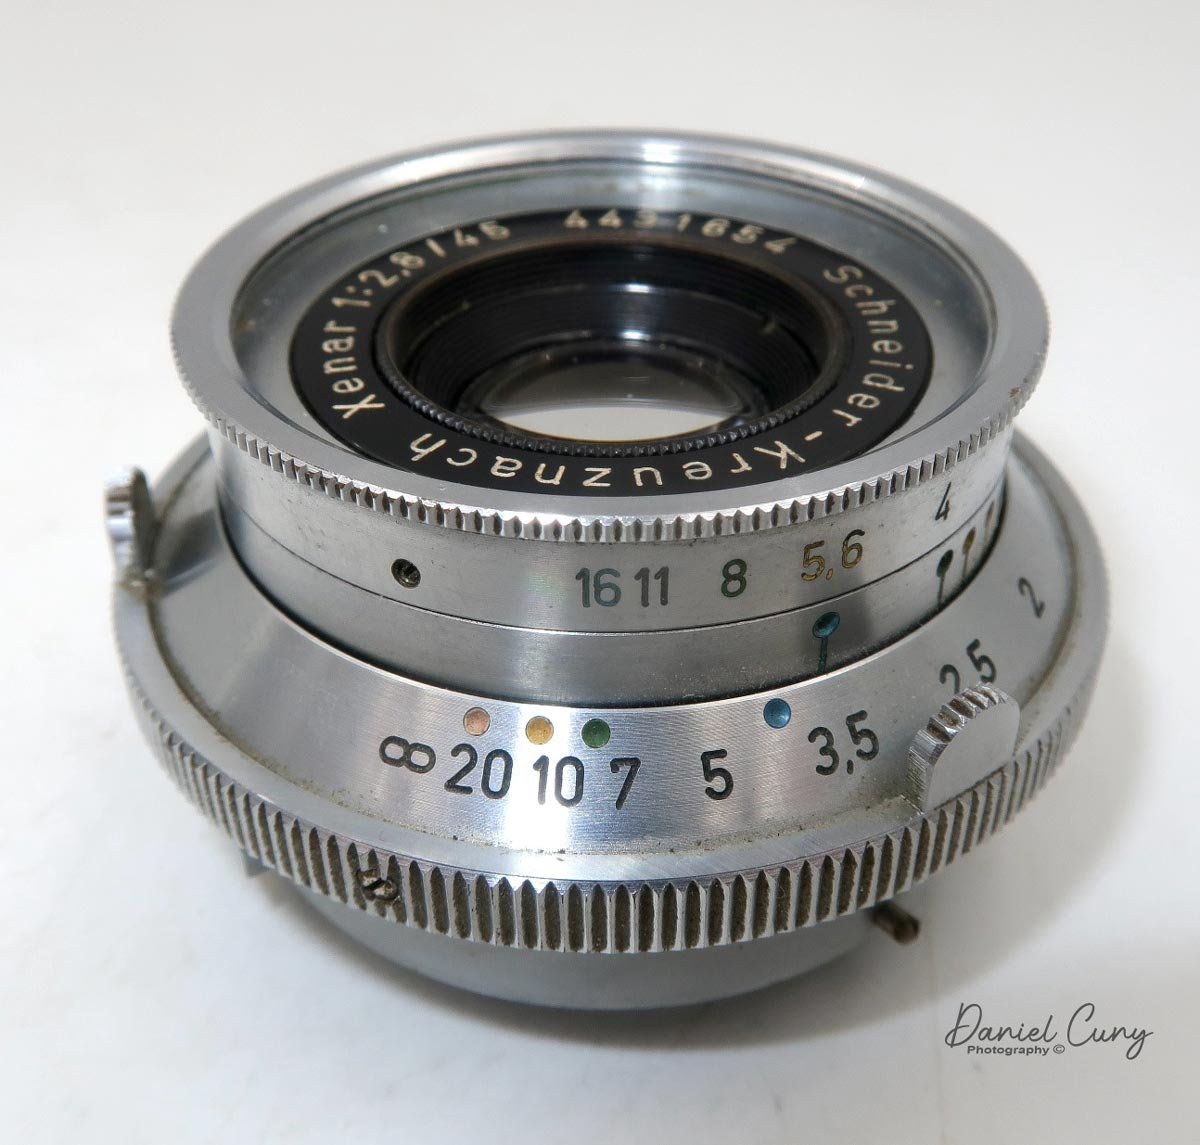
The lens on my Zeca-Flex is a Schneider Xenar 7.5cm (75mm) f 3.5 in an F. Deckel Compur Rapid shutter. The shutter speeds go from 1/400 to 1 sec with both "T" and "B" settings. Since I don't have a proper shutter tester, all the shutter speeds sound accurate to my trained ear. The viewing lens is a Sucher Anistigmat f2.9 lens.

To open the camera, there is a small button on the left side as you hold it to take a photo. Press that small button in, and the lens door unlocks. On my camera, you need to pull out the lens to put it into the taking position. There are knurled grips on the sides of the lens door to pull the lens out. Also on the lens door is a flip-out stand that allows you to stand the camera up, which is very common in folding cameras.

Note the small button on the side of the camera used to open the lens.

To close the lens, there are two buttons on either side of the backdoor. You press in towards the camera body, then slide the lens back into it and close it until you hear the locking "click" sound, which means the lens is back and locked in the camera body.

 On the back of the light hood, there is a sliding bar you slide over to open the light hood for viewing purposes, and on the side of the light hood is a switch you can flip up or down the magnifying glass for critical focusing.

There is a latch at the top of the back door, which you slide up to open the film door to load and unload film. In my camera, there is a roll film holder you put the roll of film into before putting it into the camera. The film holder is something I've never seen before, and on the first roll, I needed to figure out which way the film rolled across the shutter, but it was easy to figure out. Now that I've done it, it makes sense, and I won't have difficulty in the future.

 The frame counter resets to number 1 when I close the back of my camera, or at least it was there when I put film in it. There is a button on top of the frame counter. When I slide that button over, the frame counter goes to number 5, so my guess is that isn't correct. I can't find an instruction manual for this camera online, so I'm not 100% sure of the correct way to get maximum frames from the camera. 

There is a red window on the back, which I'll use in the future, as I did miss a few frames at the beginning of the roll when I shot with it. The film advance is on the bottom of the camera and is directly tied into the frame counter, whether you have film in it or not. The frame spacing on my camera was good once I got to the first frame and used the frame counter to find the next frame.

 To focus the lens, as you hold the camera to take photos, there is a wheel next to the viewing lens. I rolled my finger across it one way or the other to achieve proper focus, which was the easiest and made the most sense to me.

This is the focusing wheel. I used my finger to slide back and forth to focus.

Results:

Now that I had a roll of film in the camera, I took it out and walked around the neighborhood to get some photos.  Here are some pictures I took on my walk with the stunning Zeca-Flex camera.


Conclusion:

The viewfinder wasn't the brightest, and achieving good focus was difficult even with the magnifying glass up. Another negative about using the camera is where the shutter release is placed. There is no shutter release button, so you need to cock the shutter and then release it with the shutter release button, which is in an awkward place and thought my finger would be in the photo, but it wasn't.

Besides these two items, the camera was a joy to shoot with, and I feel lucky that my camera is in such good condition. I will use it again, but I'm putting it back on the shelf and trying something different for next week's blog post.

 Thank you for taking a few minutes to review some of the cameras in my collection.

 Please be safe, and I hope to hear from you soon.

Robot Royal 36 Camera

Being a big fan of The Robot cameras and having done an earlier blog post on the Robot Luftwaffen Eigentum camera, I wanted to get a camera I could use when we went on vacation or just out for the weekend. Years ago, I came across an excellent and working condition Robot Royal 36 camera. It was from an online auction, so I made a relatively low offer and won it.

 When I received it, I was surprised by the weight and heft of this particular camera. I put it through routine tests to see if the shutter was indeed opening and closing, which it was. The lens was clean, another positive, and the transport was active and in good working condition.

 When COVID hit, I was laid off from one of my favorite jobs. I started writing my camera blog. After being off work for ten months, I got hired for a better position and loved the job, company, and boss, but I put the camera on my shelf for the next four years until I recently retired and started writing my camera blog again.

History:

Otto Berning & Co. started in Dusseldorf, Germany, in 1933. Otto Berning and Co. began to manufacture amateur cameras in 1934 when a young watchmaker in his 30s, Heinz Kilfitt, designed the first compact camera for what Robot would be so well known for. The design had a spring-loaded motor winder, a unique item brought to the camera industry due to his watchmaking skills. Heinz Kilfitt also designed the camera to have a 24x24mm film format. He offered the format size to both Kodak and Agfa, who rejected it, so he sold the design to a young Hans Berning, who was only 23 and worked for his father's company. 

 Robot cameras provide a film format of 24x24mm on most of their cameras. An advantage of the 24x24mm frame size was that the photographer could get 50 images on a roll of film instead of the standard 36 in the traditional 24x36mm format. Another advantage was that there was no need to turn the camera for vertical shots.

Some unique features of the Robot cameras are that they use a rotary shutter and sprocket film drive system, which are more common in the cine cameras of the time. Robot cameras also have a 90-degree switchable viewfinder, allowing the photographer to point the camera in a different direction while looking through the viewfinder and taking photos. All the cameras have a winding motor of film advance system that allows the photographer to wind the motor and shoot rapidly up to 5-6 frames on a single wind, depending on the camera.

 Robot also provided either Carl Zeiss or Schneider-designed lenses on their cameras, which gave the photographer unparalleled sharpness in their images. The cameras were die-cast zinc and stamped stainless steel bodies chalked full of clockwork inside, and they are very sturdy and extremely well made, a testament to the high-quality materials used in their construction. 

During WWII, Robot produced cameras for the German Luftwaffe to put on their Stuka dive bombers. After the war, Robot continued producing high-end cameras like the Robot Star and Junior cameras. Robot produced the Robot Royal in three formats, with a few feature and film format variations. 

My Camera:

My model is the Robot Royal 36, model III, and it has the film format of 24x36, the most common film format for 35mm cameras. My camera has a Schneider Xenar 45 mm f2.8 lens. My camera has a Schneider Xenar 45mm f2.8 lens. It measures 5.5" wide x 3" tall x 2.75" deep from the front of the lens to the back of the camera and weighs a whopping 2 lbs. 0.4 oz. That's the first thing I noticed when I unwrapped the camera. This is a very solid and well-built camera with unique features that set it apart from other cameras. 

To open the camera, as you hold the camera there is a chrome tab with etching on it on the left side. With your thumb, you lift that and the latch and open the back of the camera. Unlike most 35mm cameras, this camera has a take-up spool you need to load the leader into as opposed to just putting the film leader into the take-up slot, and the camera takes up the film. You need to take the take-up spool apart and thread the film leader into the spool, then put the cassette back together and load the film and take-up cassette into the camera. Then fire two frames, and you're ready to go.

My camera has shutter speeds from 1/2 sec to 1/500 sec, along with B for timed exposures. The bottom of the camera has a winding mechanism that allows me to fire 12 photos at full wind, which takes me about ten and a half cranks to wind fully.

Yellow, Green and Blue dots on lens and Aperture number for Zone Focus.

 The rangefinder on my camera is very bright and easy to focus. The other significant item about the Robot camera and lens system is they allow the photographer to shoot with zone focusing, which is fantastic for street photography. The lenses have yellow, green, and blue dots, which correspond to the colored apertures on the lens. The lens's apertures 2.8 and 5.6 are in yellow, F8 is in green, and f16 is blue. All you need to do is match up the color dot on the focus dial and the aperture used, and the lens shows you your depth of field. This procedure is similar to all other lenses, but the color coding makes the system more "user-friendly."

Removing and reattaching the lens of the Robot Royal 36 is simple. A tabbed collar at the bottom of the lens, when moved to the left, allows the lens to be detached. To reattach the lens, align the two red dots and slide the collar counterclockwise. This careful procedure ensures the lens is securely in place.

Switch for “Green Dot” normal film advance, “Red Dot” Close viewfinder and “R” Rewind film back into canister.

Once I shot the film, One the back of the camera and to the right of the viewfinder is a switch with a green dot for regular forward film transport, there is a red dot which closed the viewfinder half way and "R" for film rewind. I put the camera in the "R" position and reminded the film as a regular 35mm camera procedure. On the bottom front of the camera are the flash sync ports for "X" (electric flash) or "M" (bulb flash) settings.

Results:

 I took a roll of film, put it through my camera, and walked around my backyard to see how the camera performed. This is the first time I got to shoot with the camera since I bought it 4-5 years ago, and there were a few anomalies in the camera. There seems to be a slight light leak, but to be 100% transparent, the film I used was old, and one I had shot just a few frames with and rewound the film with the leader exposed more than ten years ago, so I can't 100% blame it on this camera.

Conclusion:

While Leica has the prestige, Robot and Alpa are probably the best-built cameras in terms of craftsmanship and overall quality. The camera is excellent, the lenses are fantastic, and it offers things built into the system, like motor advancement and an excellent feel. I had a great time shooting with it, and I need to run a fresh roll of film through this beauty more often.

Thank you for taking time from your busy day to review this blog.

Until next time, please be safe.

Argus Model K Camera

I was looking through a group of cameras purchased a while ago, and when I opened the case to look inside, I remembered thinking that I’d never heard of an Argus Model K camera. 

My Argus Model K Camera

 I was familiar with the camera company Argus and have owned hundreds of their very familiar models, like the grand old dad of cameras, the Argus C3. I’ve had Argus C4, C33 and lenses, C44, Argoflex, many of the different A series, and even projectors.

 At this point, I figured it was an interesting camera to do a blog post on, as it had some real oddities, and I’d never done a post on Argus, so here it goes.

The Company:

The company Argus started as International Radio Corp., was started in Ann Arbor, Michigan, in 19931 by a group of local businessmen and produced radios during this time. Some of these prominent business people were William E. Brown Jr., who became the mayor of Ann Arbor; George Burke, a prominent judge at the Nuremberg Trial after WWII and who later became director of the Argus; and Charles Albert Vershoor, the company’s president.

 International Radio Corp. employed around 75 people, producing radios made from molded plastic rather than wood, which was popular at the time. Producing the radios from molded plastic was also less expensive, which made them popular during the Depression era. These radios were sold under the “Kadette” brand and are still collectible today.

Radios were a seasonal business that did well in the fall and winter seasons. To keep the company busy in the slower spring and summer periods, the company produced a low-priced 35mm camera, the Model A, made from molded plastic and sold for the ridiculously low price of $12.50 in May 1936.

 The camera became wildly popular due to its low cost and the rising popularity of Kodachrome film. Because of the camera’s popularity, the company decided to sell its radio patents and change its name to International Research Corp., where it concentrated on the photographic portion.

In 1940, Argus produced optics and radios for the war effort. In 1942, all domestic production was halted to concentrate their effort on military optics and radios for the US and allied forces. With Government loans, Argus expanded, and in 1944, the company changed its name to Argus, Inc. and won several awards for its war effort in producing products.

 After the war, Argus, Inc. revamped production for its consumer line, and by the 1950s, Argus Cameras was the second largest camera producer in the US, second to Eastman Kodak. Later, in 1957, Argus was purchased by Sylvania, the flash bulb company. In 1962, Sylvania sold Argus to Mansfield, a Chicago company, where they started to move out of Ann Arbor. There were several different transactions, and in 1969, all domestic camera production ended.

 An interesting note is that Argus’s most popular camera, the Argus C3, started production in 1939. It was a departure from their molded plastic A series with a metal body. The ever-popular camera, fondly known as “The Brick,” sold for $25.00, and by 1962, 2 million cameras had been produced. The Argus C3 was known for its robust build, simple controls, and excellent image quality, making it a favorite among photographers.

A tremendous website is dedicated to The Argus Reference Site. It includes links to the Argus Museum, a treasure trove of information and artifacts related to the company's history, and a book on the company, Argus - Fine American Cameras -- a book by Bob Kelly, Ron Norwood, Mike Reitsma, and Phil Sterritt. The book provides a comprehensive overview of Argus's journey from a radio manufacturer to a camera producer, along with many other great links.

My Camera:

First, my camera isn’t by any means in perfect condition. But all the shutter speeds sounded accurate, and the aperture opens and closes, so that’s a good first step. Now for the not-so-good things about my camera. The front viewfinder glass is missing, and the extinction meter window is completely black, which means I’ll need to use my handheld meter.

The transport was in good condition, so I opened the back of the camera and wanted to put a roll of 35mm film to see how this camera performed. Not having the instruction manual didn’t help, especially when loading the film. I kept looking at the film chamber and thinking, “There’s no way a 35mm cartridge will fit into that area”. So I started to pull, prod, and push different things until the film plug popped off the bottom of the camera, exposing where to put the film to load the camera. That’s an interesting thing to do to load the camera. For demonstration purposes, I had a roll of color for the photos, but below, I shot B&W.

The camera loads like any 35mm camera, but similar to cameras like the Kodak Pony 35, to advance the film to the next frame, you need to “unlock” the advance gear. This button is also the button you need to release the advanced gear so you can rewind the film into the film canister.

 Now that I have film loaded in the camera, and my viewfinder didn’t effectively work due to the missing front glass, I needed to guess on composition. Around the lens is the focus ring, which moves pretty smoothly on my camera. I walked around my front yard, focusing on my subjects and composing in my mind what the photo would look like. Using my trusty handheld meter, I set the shutter speed at 1/200 and my aperture to what the meter told me. The aperture settings are on the bottom of the camera and are right next to the shutter speeds, which are coupled to the extinction meter. There is a second shutter speed dial around the lens, too. My camera has an Argus Anistigimat f4.5 lens. There is no focal length on the lens.

The camera has an odd design as the viewfinder and aperture controls are on the bottom of the camera. I kept wanting to hold the camera upside down to take images, but without a working viewfinder, it didn’t matter. The camera shape is slightly different for a 35mm, and more resembles a smaller medium format camera or one that shoots 127 or 828 film, as opposed to 35mm. The camera measures 4.75” wide x 3” from the front of the lens to the back of the camera x 3.25” tall, measured from the top of the film plug to the bottom of the winding knobs. The camera weighs in at 1 lb. 3.2oz without film.

Now that I had shot the film and wound it back into the cassette, it was time to take it to my darkroom, process it, digitize the negs, and show you what I had done.

 The Results:

Here are some of the images I took with the Model K camera. Overall, the lens did a good job; the photos are relatively clear and sharp. The film I used was some older B&W T-Max 400, so it was a bit grainy, but I was surprised by the results.

Conclusion:

Besides the flaws I mentioned above, the camera was surprisingly fun to shoot and produced very nice images. My case is very stiff, as the leather is very dry, and the front is coming off. I didn’t realize this camera is rare, as they only produced about 2000 before they ended production. I would be inclined to sell it at some point, but I’m thrilled I put film in it and shot with it.

 Thank you for taking a few minutes from your day to look through this blog post. I have a few other gems to review, so I hope you’ll watch for the next post.

 Until then, please be safe and well.

Primarflex II by Bentzin

I have been excited to do a blog post on this camera since I acquired it a couple of years ago as part of a group of cameras from an auction. The camera came as a kit with the case, extension tubes, lens hood, and film holders. When it arrived in excellent condition with a working shutter and clean lens, I was anxious to put some film in it and take a walk around my yard snapping photos.

History:

Bentzin has always been known as an innovator and a company that excelled in quality cameras like Primar, Primarette, and Primarflex. Carl Bentzin was born in Görlitz on February 8, 1862, died on May 23, 1932, and is buried in grave number 260, Old Görlitz Cemetery. He opened his first factory in 1989, located at Rauschwalder Strasse 28 in Görlitz, Saxony. He changed it in 1893.


In 1899, Bentzin entered into negotiations with Carl Zeiss regarding a collaboration with Dr. Paul Rudolph, who had developed their anastigmats: Planar, Protar, and Ulnar lenses. Zeiss was looking to build cameras so they could put these lenses on them, and Bentzin had the expertise of the time to do so.

 The "Aktiengesellschaft Camerawerk Palmos" was founded in 1900. They produced cameras at the Zeiss factory in Jena and the Bentzin factory in Görlitz. In late 1900, the "Film-Palmos 6x9" camera was produced at the factory. In 1901, the bank ran into financial difficulties, and Zeiss took over production in Jena. Bentzin ran their own company, run by Carl Bentzin, in Görlitz.

 In the following years, the Carl Bentzin Company produced many high-caliber SLR cameras and even cameras for companies like Voigtlander, Emil Busch, and other German camera companies.

Soon after WWI, Carl started having his son Ludwig take over more of the day-to-day operations of the company, where he honed his manufacturing and business skills. In 1928, Carl turned the company over to his son Ludwig, his daughter Helene, and Helene's husband.

 Carl Bentzin died in 1932 at the age of 70. From 1928, Helene and Ludwig ran the company together until Ludwig's death in 1945. After Ludwig's death, the company went through several different reorganizations as part of the state-owned system, ending as VEB Feinoptisches Werk Görlitz.

The Camera:

Upon my first encounter with the camera, I was immediately drawn to its unique layout. All the controls and settings are conveniently located on the right side, including the film advance, shutter speed control, shutter release, frame counter, self-timer, and flash sync terminals. This thoughtful design, detailed in the manual, makes it easy to navigate the camera's functions.

The camera exudes a sense of robustness and reliability. It's more compact than a Hasselblad and larger than a Twin Lens reflex, striking a perfect balance. As an SLR camera, it offers the unique experience of focusing and observing the depth of field through the lens, a feature I particularly appreciate.

To open the back, just behind the viewfinder is a knob that has duo functions. To open the finder, you slide the knob back towards the rear of the camera. Then, open the back to load the film. While the knob is back, you press it down, and the back door opens, revealing the film cassette, which is removable to load the film. To remove the film cassette, you'll need to pull out the winding lever just a bit like you would any film advancing knob to release the gear from the body and the film cassette is easily removable by holding the center handle and pulling it away from the body of the camera.

Loading the film onto the cassette is straightforward for any medium-format camera. Put the empty spool onto the top area where the gear for the film advance is located. Load the new film onto the other area and bring the leader over the pressure plate so the black paper backing is facing out or towards the shutter when you put the film cassette back into the camera body. Put the end tab into the spool slot and wind it a bit until you know the film won't pop off the spool and is starting to take up on the take-up spool. I like to advance the film until I see the arrows of the paper backing, and then I put the film cassette back into the camera. The manual says to reset the frame counter, turn the counterclockwise until it stops, and lift it. DO NOT FORCE IT. A red "zero" appears in the window, then advance the film until the number one appears, then you're ready to go. Unfortunately, my camera reset on the frame counter didn't work, so I advanced until I thought I was at number 1 and started shooting.

Now that I have the film loaded, the viewfinder or light hood, as they call it in the manuals, has a couple of different variations. You can remove it for cleaning. It does have a magnifying glass folded down on the rear of the hood if needed for fine focus. Just lift the magnifying lens into position and focus. It also has a "sports" type finder, which many medium format cameras have, where you can lift a portion on the hood and look through the rear opening through the front opening to get a general sense of composition for quick action photos. If you're going to use this, be sure to pre-focus the camera and use a smaller aperture to allow the depth of focus to compensate for any missed focus.

Focusing the lens and setting the aperture is straightforward. The lens doesn't have an automatic aperture, so you need to open the lens to focus and then manually stop the lens down to the desired and needed setting for proper exposure. A "locking" mechanism for the aperture is used to help with this. You pull back the collar with the red dot and turn it to the desired aperture setting. Releasing the collar "locks" the lens into that setting, which means you cannot go past that setting when you turn the collar back and forth. This lock allows the photographer to open the aperture for brighter focusing, then quickly turn the dial back to the "locked" aperture setting to take your photo. It's easy, and the benefit is that when the lens stops down, you'll see the actual depth of field you'll get in your photograph. When I turned the advance lever, the mirror returned as it should, and to cock the shutter; there was a little extra turn needed to get the shutter cocked again. Having the additional amount to turn is standard, as It did the same function every time I advanced to the next frame.

When I received the "camera lot," it included a set of 4 extension tubes for the camera and three separate cut film holders. I'm very familiar with extension tubes and love shooting with them, but what would you ever use 6x6 film holders for when using this camera? I've never heard of a 6x6 cut film ever produced, so I'm curious how you'd even use them. Doing a bit of fussing around with the camera, the only mention I found was the availability of the cut film holders, but nowhere in the manual does it say how to load them. 

You'll need to open the back of the camera to use the film holders and take out the cassette. A silver clip is at the back of the light hood (Viewfinder). When you slide that clip back towards the back of the camera, you can slide up an insert with a couple of tabs on the top and a couple of small rollers within the insert. At that point, you can slide the film holders into that slot and take out the dark slide, exposing the film to the shutter and, eventually, the light when the shutter opens/closes. After using the film holders, you can put the roller insert back and slide the silver tab towards the lens, locking the insert into place so the film cassette works as it should within the camera.

The lens is a Carl Zeiss Jena 105mm T f3.5 lens, and it has threads on the back, which you use when using the extension tubes, but to put the lens onto the body, there is a red dot on the front of the camera at the 10 o'clock position. All you need to do is line up the red dot on the lens and turn it to the right or clockwise, and the lens locks into place by pressure. To remove, grab the lens and turn counterclockwise; the lens comes off after about a quarter of a turn.

The fitted case is exceptionally well-built. When you open it, the right side of the case folds down so you can access the different operation dials, which is very handy. While my strap is broken, I do see where it's attachable in several places to hold and distribute the weight evenly. The case can be held tightly in the case by a hook on the front and looping into the rear of the case.

Results:

I walked around my front and back yards using my light meter to get the proper exposure for each shot. The shutter works great, and as mentioned above, the aperture and focus move smoothly, so taking the photos was relatively easy.

 Here are the results from the camera.

Overview:

WOW, what a fun camera to shoot with. When I looked through the finder, the images were bright and clear. The focus was sharp, and using the "locking" mechanism on the lens was intuitive and straightforward. I didn't use the extension tubes on this shoot, but I plan on trying them out on an upcoming post for my blog, so keep tuned for that experience.

 Thank you for taking a few minutes to review this posting on a wonderful, well-built camera that should rival any medium-format SLR camera. 

 Until next time, please be safe and well.

Lark & Kandor "Sardine Can" Cameras

When I was younger and starting to collect cameras, I can remember looking at the Lark Camera in McKeown's camera book, the bible I use regularly, and seeing this odd and unusual-looking camera that appears to have been made out of a sardine can. The funny thing is, that's what they called this style of camera coming from the Irwin Company of New York.

 Another fascinating item about this camera is that few of them come up for sale on eBay, and when they do, they sell in the $100.00 range. My guess is because of their unusual design and looks, along with the popularity of Lomography that's taken place in the past twenty years and the rise of film photography again.

Recently, I had the opportunity to pick up not only the Lark camera in three different versions but also its twin brothers, the Kandor Camera, which came in different versions, too. The price was right for all five cameras and a few other camera gems. I snatched all five cameras and decided to write a blog post since you don't see much about them online.

HISTORY

Before I dive into the cameras I purchased and some of the refinements, Let me tell you what I know about the Irwin Corp. of NY, Irwin Corporate History which made these interesting cameras. The folklore of how the camera company started is that an American sailor was in France in the early 1930s and made a camera from a sardine can. After his release from the service, the sailor moved to Chicago and teamed up with some mobsters who helped him import sardine cans to manufacture these cameras.

This is a charming and far-fetched story, especially since the Irwin Corporation was located at 27 W. 20th Street in New York. After doing a bit of digging, I found where someone admits he made up that story. You can find it here: French Site

 In my opinion, there must have been some link between Irwin Corp. and some of the Chicago camera companies during this timeframe, as the faces of the cameras on the Lark and Kandor cameras are very similar to those of companies like Falcon Camera Co. and Herold Mfgr. My guess Utility Mfg Co, which had ties in NY and Chicago, was somewhat involved.

 Irwin Corp also made a few fundamental TLR cameras, as seen from the website above.

THE CAMERAS

When the cameras arrived, and I started taking them out of their bubble wrap, the first thing I noticed was how hefty they were. I was expecting a very tinny and flimsy camera, but these cameras have a bit of heft. Maybe sardine cans were heftier in the 1930s and 40s, but it surprised me.

Simple screws holding the lens barrel in place.

The camera measures 5" wide by 2.75" tall body, then another 1/2" for the viewfinder, which brings the total height to 3.25", and from the back of the camera to the front of the lens is 2.5". The Lark and Kandor cameras are a very oddly built camera with the lens barrel screwed onto the body by two screws placed on the top and bottom of the lens flange. As mentioned above, the face of the camera has a very similar look to the cameras from Utility Mgf. Co. 

Lark Camera showing viewfinder and Art Deco Design

 Another wonderful design of both the Lark and Kandor cameras is the beautiful Art Deco look to their faceplates and each model's unique design and look. Some of the cameras are somewhat plain, while others have chrome stripes on the body and elaborate faceplates, which just exude the look of the Art Deco period.

The front of the camera does not list a maximum aperture, but it does state that it has a 50mm Eyvar lens with shutter settings of either time for "bulb" or long exposures or Inst for normal snapshots. My best guess is that the "inst" shutter shoots at around 1/50 shutter speed.

More robust viewfinder on one of the Kandor cameras

The camera has a simple viewfinder strapped onto the top and held into place by two small chrome rivets. On the front, there is a chrome fitting with a rectangular mask, and on the rear, there is a chrome fitting with a round mask. The Kandor Classic has a more elaborate chrome-fitted viewfinder, so this must have either been a later model or just a more robust version.

To open the back of the camera to load the film, you unscrew a thumb screw on the back of the camera. The Kandor camera doesn’t have the screw on the back, but a more simple “press on” method. The back of the camera wraps around the body and has some foam where the body meets the back plate. The camera produces 1.25" x 1.75" size negatives on 127-size roll film. Two red windows on the back of the camera show the numbers printed on the film's paper backing, so you know what frame you're on when taking photos. On the top left of the camera, as you're holding the camera to take a pictures, is the winding knob to advance the film to the next frame.

I wish I had some 127 film to take photos with these cameras, but if/when I get some, I'll add to this blog post. For now, I don't have images I can share.

CONCLUSION

While these cameras aren't elaborate, as they are just the opposite, they are essential and just a step up from pinhole cameras. They are very well-constructed cameras, but their shining point is the look of the cameras. They are a real bright point to put into your collection, and while I've been looking for these for a while, to get five of them at one time and for a reasonable price, I plan on keeping them for a bit to spruce up the collection.

 I plan to do more writing and blogging in the future. I took a few years off to run a few photo companies, but I plan on retiring soon and getting back into writing about my camera collection again. 

 Thank you for taking time from your busy schedule to read my blog. I appreciate it. Until my next post, please be safe and well.