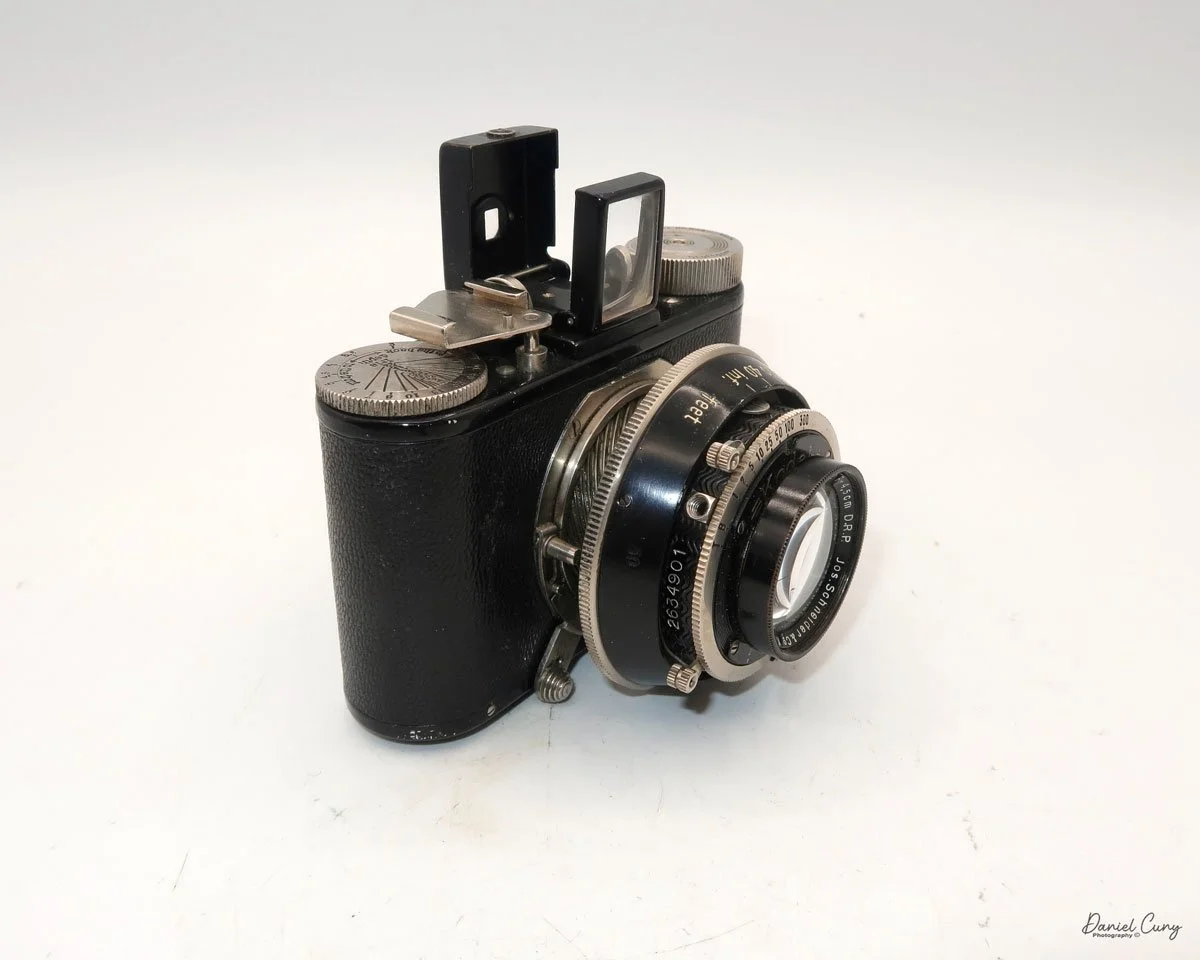
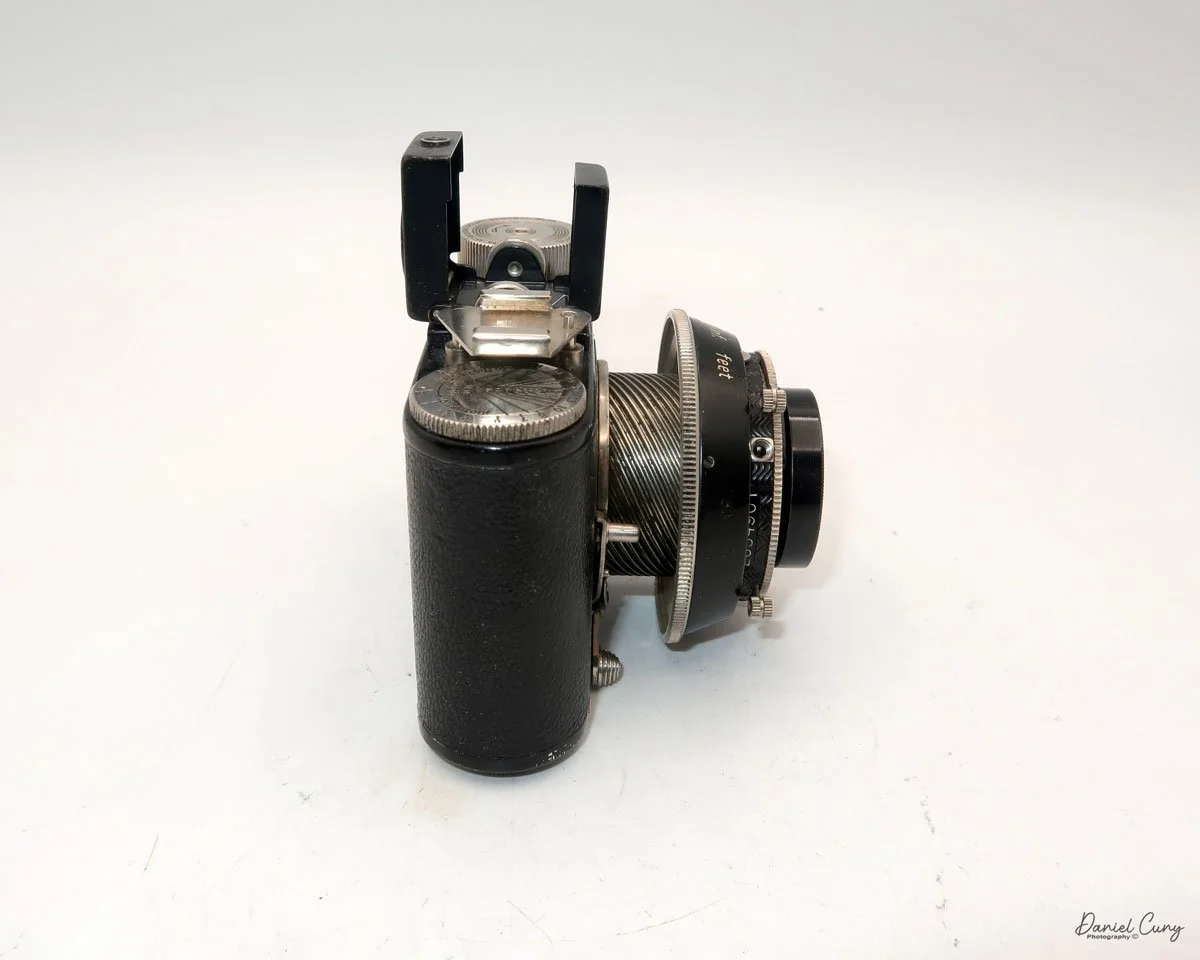
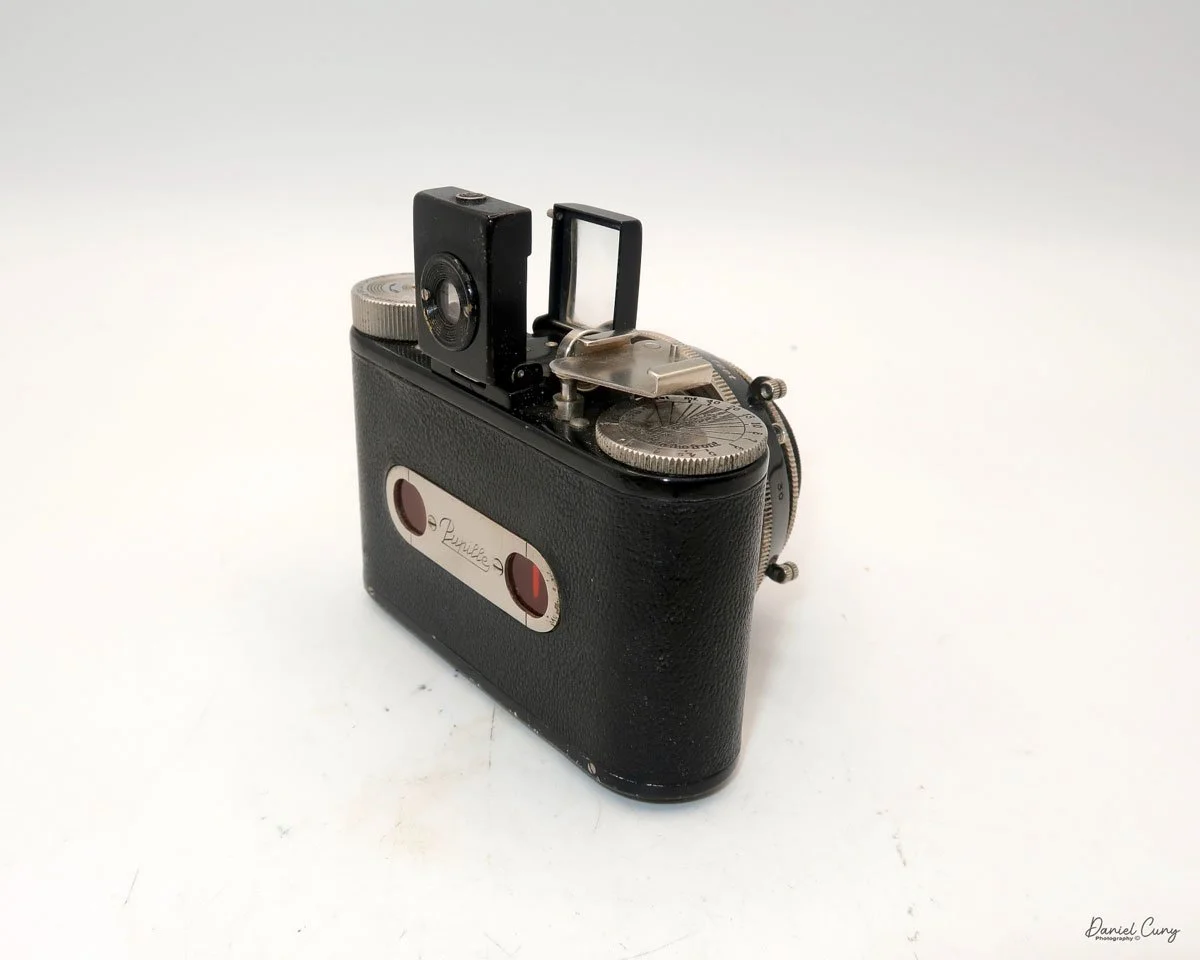
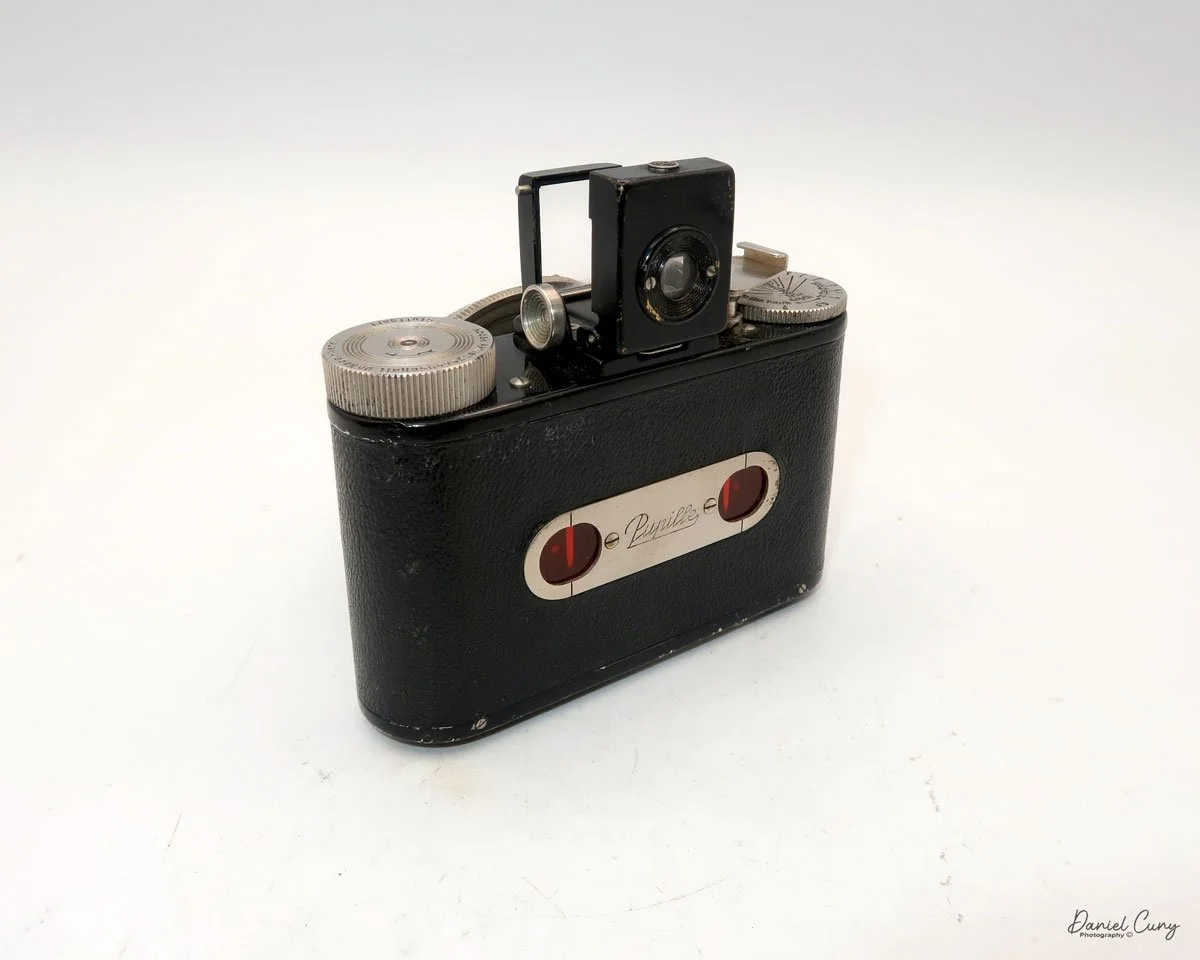
Welta Perfekta

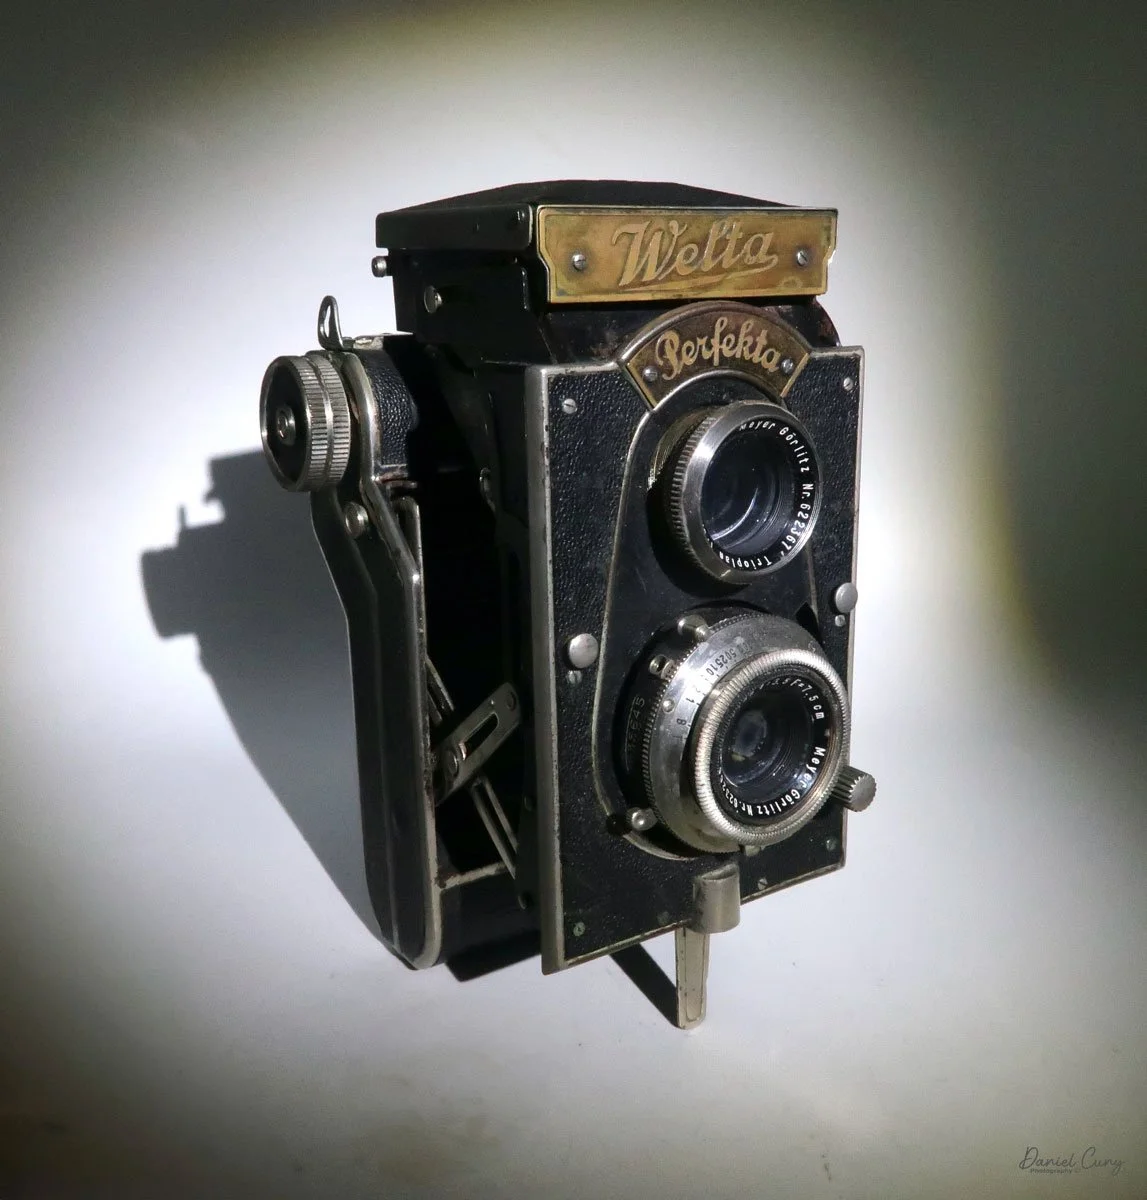
My Welta Perfekta camera

As I've mentioned in the past, I'm always drawn to the colorful, or odd and unusual cameras. As a camera collector for over 50 years, and having spent countless hours poring over many of McKeown's price guides to cameras, there are cameras that I'm always intrigued by and would love to own. Cameras like an original daguerreotype camera, the Rectaflex Rotor, a three-lens camera, or a beautiful Compass camera made by Swiss watchmakers Le Coultre et Cie for Compass Cameras Ltd., London, England. All of these cameras are out of my league in terms of pricing, unless I win the lottery and have a few hundred dollars burning a hole in my pocket.

 To me, the most enjoyable aspect of collecting cameras is the hunt to find a rare or somewhat rare camera, lens, or other photographic item. Every once in a while in this collecting game, you come across a hidden bargain.  It could be something at the bottom of a box, or just that the person selling the item isn't fully aware of the value of items, and (to me), that is a highly satisfying feeling.

 Having had that same feeling about a year ago when I was at a garage sale in one of the neighboring towns, and I saw a Welta Perfekta camera. As I picked up the camera, it appeared to be in good condition. The shutter worked, the viewfinder seemed clean for being nearly 100 years old, and all the leather was intact. It was a nice camera, and one I'd love to have in my collection. When I asked about the price for the camera, the person selling it said it was her grandfather's. 

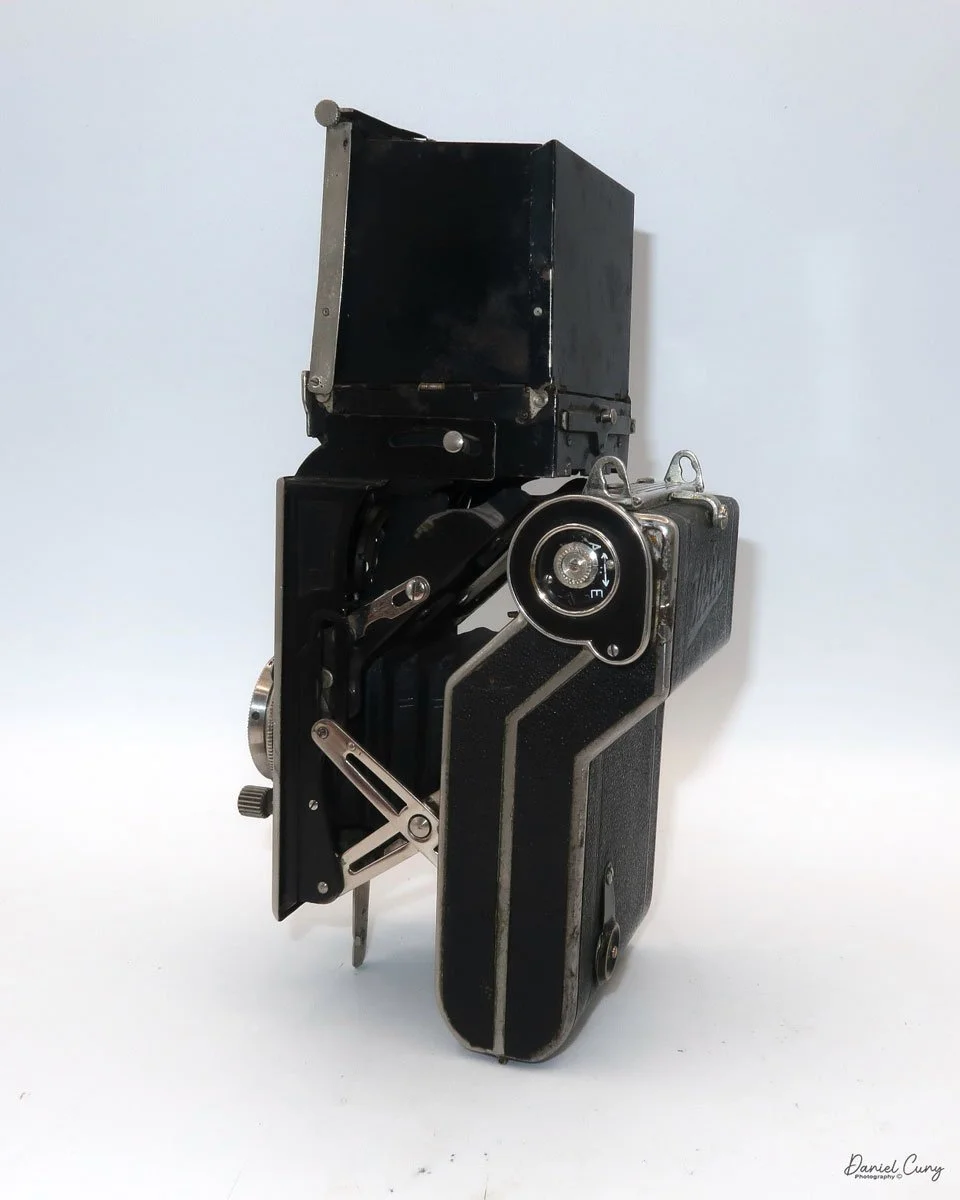
Odd shaped camera body

 Letting the seller know that the camera was in good condition and nice shape. I provided the seller with some information on the camera's age and a brief overview of the company. I let them know that I had collected the camera, written a weekly blog about it, and would love to have it in my collection. The seller said that, since I was a collector, it was important to them that the camera go to a good home, and they offered me the price of $50.00. I was happy to pay that price for such a nice example, and at that point, we were both pleased that the camera had a new home.

 I was familiar with the camera because I had written about the Zeca-Flex camera a while ago, and its shape had intrigued me. The Perfekta has a very similar shape to the Zeca-Flex as they are both folding Twin Lens cameras. These are twin-lens cameras with a large viewfinder that opens and closes, comparable to other twin-lens reflex cameras. The body of the camera folds into the film area, making the camera much smaller and more portable. 

History:

Since I just wrote about the history of Welta in last week's review of their Penti camera, I thought I would spend this review focusing on the history of the Reflekta camera, along with its older brother, the Superflekta camera.

 Both the Superflekta and Reflekta cameras are folding twin-lens cameras. As I previously mentioned, they are considered pocket cameras, which means they are smaller cameras intended to be easily transported in your coat pocket. They are a mix of pocket cameras introduced by Kodak in 1912 with their Vest Pocket cameras, and a Twin Lens Reflex camera introduced by Rolleiflex in 1929.

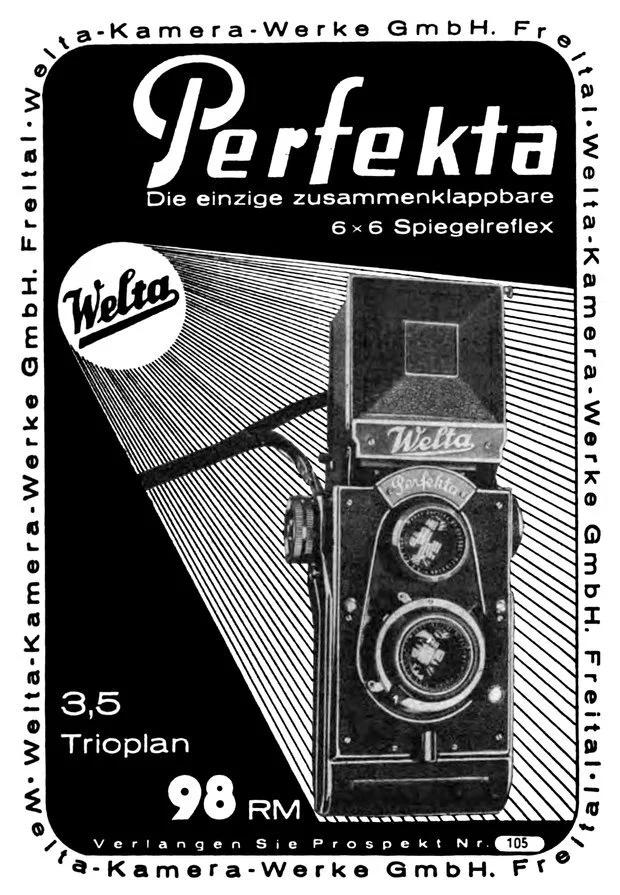
 The Perfekta camera was introduced in 1934. It's a medium-format camera that takes 6x6cm images on 120mm film. It features a large viewfinder that opens like the Rolleiflex and other Twin Lens Reflex cameras of its time. The body of the camera pops away from the film chamber, utilizing a bellows system that separates the lens from the film chamber, and forms an oddly shaped camera. There is a tripod socket and arm on the bottom of the lens area that allows the camera to stand upright on a flat surface, such as a table, if needed.

 The Perfekta could be purchased with one of three different lenses they sold. You had your choice of either a Meyer Trioplan 75mm f/3.5, Schneider Xenar, or Carl Zeiss Tessar 75mm f/3.8 lenses.

 The Superflekta was the first of this style of camera introduced by Welta in 1932. It's a larger camera that takes 6x9cm images on 120 film. The most intriguing feature of the Superflekta camera is that the film chamber rotates from a vertical position to a horizontal one for landscape-style images. This is very similar to how the Cornu Ontoflex operates. The photographer doesn't rotate the camera; instead, they rotate the film to achieve a horizontal image. 

 Rotating the film's back makes sense, as the camera features a ground-glass viewfinder to focus on the image. If you rotated the whole camera, the viewfinder would be on the side, which would affect composition. Turning the film chamber is a remarkable achievement in that camera. I can see where the Perfekta came into play as it's a bit smaller than the Superfekta. With the square format, Welta could cut down the size of the camera and make it even more "pocketable".

 The difference between the Zeca-Flex and both the Superfekta and Perfekta cameras is that the Zeca-Flex is more linear in design, and doesn't have the almost "S" shape that the Welta cameras incorporate. Only the bottom portion of the Zeca-Flex pops out to take the photo, then can be slid back into the camera's body for transport. 

 While Welta wasn't the first to introduce this style of camera, that honor goes to the Pilot 34 or Pilot Reflex camera made by Kamera-Werkstätten Guthe & Thorsch, another great camera manufacturer in Dresden. This camera was introduced in 1931 and was also a twin-lens camera with a bellows system.

 Both the Welta Superflekta and Perfekta cameras were only produced for a few years due to the complexity of their manufacturing. Another factor that contributed to the downfall of the Superfekta and Perfekta was the larger size of the viewfinder, which prevented it from folding into the camera body, thereby making the camera less compact.

My Camera:

My Welta Perfekta camera is 6.5" tall, by 4" wide including the film advance knob and frame counter, by 3.5" deep. These measurements are with the camera completely closed and in it's most compact state. When the camera is fully open, the camera measures 8.5" tall by 4" wide by  5" deep, and the camera weighs 2 lbs—2.2 oz. My camera has the Meyer Trioplan 7.5cm F/3.5 lens.

 To open the camera and pop the lens area from the film area., There is a round button on the right side of the camera, under the film advance knob, that you press. Once pressed, the body pops away from the film area, exposing the camera's bellows, along with the angled mirror area of the viewfinder system.

On the back, to the right of the viewfinder, is a small button that you slide to the left to open the light chimney of the viewfinder. The light chimney should pop up, exposing the ground glass for focusing. On the inside of the front wall of the light chimney is a magnifying glass that helps with focusing, a feature common in twin lens reflex cameras. On the left side of the chimney is a knurled knob that flips up the magnifying glass when turned, and flips down when turned in the opposite direction. 

Closing the light chimney, fold the sides in first, then the back, and finally, fold the chimney down into the camera's body. It will then lock into place.

 To focus the camera, a knob located just to the left of the lens/shutter assembly slides up and down, allowing you to adjust the focus on your subject. The lens moves in and out on a helicoid from the camera's faceplate. There is no focus distance written on the side of the camera, so you can't set the distance and shoot. All the focusing is done through the viewfinder, which I find somewhat dark and difficult to view on darker days.

 To close the body of the camera for transport, press the two buttons located on either side of the front plate. Once pressed, the body will push into the film chamber area and click into place. Just be sure to flip up the leg under the camera; otherwise, the leg keeps the camera from fully closing. I learned that when I tried to close the camera, I noticed the lever sticking out, ops!!

Taking the photo is pretty basic. The shutter speeds on my camera go from 1/300 to 1 sec. along with "B" and "T" for timed exposures and are set via a ring around the lens. The aperture ranges from F/3.5 to F/22 and is set by a slider arm located under the lens. The shutter cocking lever is located at the top of the lens, and the shutter release is positioned on the right side of the lens.

Loading the film is similar to that of many other medium-format cameras. On the back of the film door is a button that you slide to the left and pull down; the film's back will then open. I first noticed that where you put the fresh roll of film, along with the take-up spool, are hinged guards that both of these items fit into. The winding knob pulls out to make it easier to insert the empty spool into the chamber. Then, flip the small guard down to keep the spool in place. Similar to where you insert the fresh roll of film, once the film is in place, flip the guard down to keep it in position.

While the camera features a covered red window on the back, it also has a unique frame counter. On the inside of the film's door is a slotted rod that rolls on the film's paper backing, and it is equipped with a gearing system attached to a round frame counter, which tells the photographer which frame they are on. 

Here's how it works. Once you load the film, use the red window to access frame number one. On the inside of the frame counter, you slide the knurled wheel from A (Aus=Off) to E (Ein=On). Doing this sets the frame counter to number one, and after you take a photo, the ribbed wheel advances the frame counter every time you advance the film from one frame to the next.


Results:

I loaded the camera with an older roll of T-Max 100, the fastest 120 film I had available, and went for a walk with my sister, Laura, and her dog, Sally, taking photos along the way.

 Unfortunately, the day was overcast, and I had forgotten to bring my light meter with me, so I was forced to use a light meter app on my phone, which I dislike doing, as it always seems to get it wrong. However, it didn't fail me again, and the negatives I processed were underexposed.

 Here are some of the better ones from the walk.

Conclusion:

I must say that this camera was delightful to shoot with, and for the price paid, it was well worth every penny. The only drawback would be the darker viewfinder and difficulty I had focusing on the subject.

 I liked the size of the camera; I enjoyed how compact the camera is to use. The shutter and aperture worked well, and the odd shape of the camera was certainly a conversation piece when I talked to some of the neighbors I met along the walk to take photos. The camera is less bulky to transport and carry around than a traditional twin-lens camera, and the optics are excellent—an enjoyable camera that I plan on using regularly.

 Thank you for taking a few minutes from your day to read about this unusual, yet jewel-like, camera. 

 Click on the link for some of the other cameras reviewed.

 I also run an online eBay store, Cuny's Camera and Photo. If you're interested in older cameras and other camera oddities, I have for sale.

 Until next week, please be safe.

Kodak Retina Model 117

My Kodak Retina 117 camera

I purchased this original Kodak Retina 117 with a group of various Kodak and other branded cameras from the daughter of a Kodak engineer several years ago. She mentioned that the Retina was in his office in Rochester and was one of his favorite cameras, and she could remember him using it to take family photos. She didn't know what this model was other than it was the camera that Dad used to take family photos with.

 These stories bring a human element to purchasing items from family members. The cameras are not just mechanical items, which I happen to enjoy, but they are objects that evoke memories of dad, mom, aunt, or uncle holding the camera and taking photos at family Bar-B-Ques, birthday parties, Christmas morning, and so many other memories families have together.

Kodak Retina 117 Front View

 When the group of cameras arrived, I knew there was an early Retina in the group. Still, I didn't realize that it was the first Retinas model to be made. During the unwrapping of the camera, I first noticed how worn the camera's leatherette was. The was smooth in many locations, which gave the first indication that the camera was well used and most likely loved by the person using it. The front door was a bit sticky to open, but that's not unusual for a camera made 90 years ago. I'm sure the spring has lost some of its pulling power with age. Once opened, I wanted first to check the shutter. That seemed in great shape; even the 1 second seemed accurate to the ear. The transport was working, and I didn't see any real issues with the camera. I put it on my shelf with many of the other cameras I have.

 This week, while thinking about what camera to write about, I started to look over one of the shelves with cameras, and the Retina popped out to me. I know it was in good working condition, at least when I put it on my shelf a year or so ago. Opening the camera was as good as the day I put it on the shelf, so I decided to put a roll of film into the camera and see what a 90-year-old, German-made 35mm camera could offer. 

Retina History

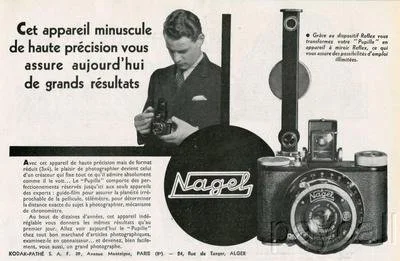
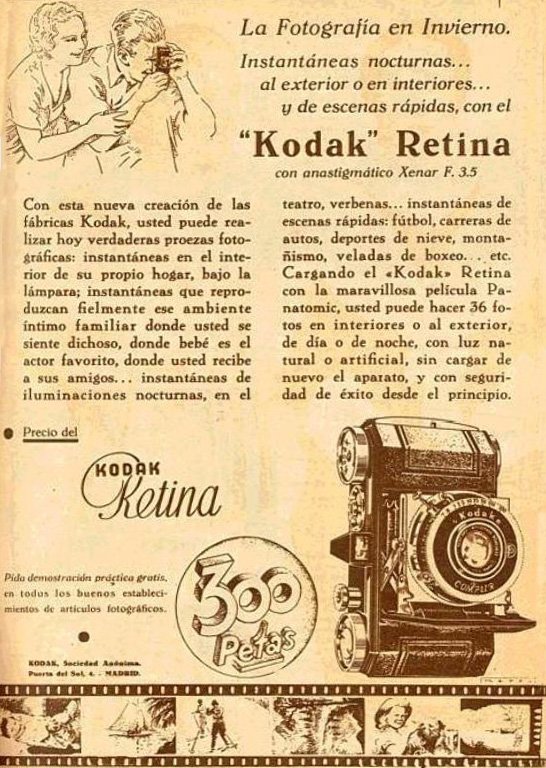
The Kodak Retina series is a fantastic camera design, blending American ingenuity with German precision. Introduced by Kodak in 1934, the Retina cameras were manufactured in Stuttgart, Germany, by Kodak AG, formerly known as Nagel Kamerawerk, which Kodak had acquired in 1931. The Retina line is celebrated for its compact design, quality construction, and innovations in photography, becoming a favorite among amateurs and professionals. The Retina series began with the Kodak Retina I (Type 117), a 35mm folding camera. The Retina was one of the first cameras to use Kodak's new 135 film cartridge, which would become the industry standard. The Retina I was compact, featuring a collapsible lens and a rugged design. The model underwent several iterations, improving lens quality, shutter speeds, and build but always retaining the folding design that defined the early Retinas.

Spanish ad for Kodak Retina 117 camera

 In 1936, Kodak introduced the Retina II (Type 122), which added a coupled rangefinder, making focusing more precise. This feature positioned the Retina as a premium camera for enthusiasts. By the mid-1950s, the Retina line had evolved into non-folding models with the introduction of the Retina Reflex series. These single-lens reflex (SLR) cameras incorporated interchangeable lenses, advanced metering, and a sharp Schneider-Kreuznach or Rodenstock lens, which appealed to serious photographers.

 The post-war years saw significant advancements. The Retina IIc and IIIc, introduced in the 1950s, became icons of the series. They featured interchangeable front lens elements, making the cameras versatile while maintaining their compact, folding design. These models also integrated advancements like exposure meters and faster shutters, ensuring the Retina line kept pace with competitors.

The Retina Reflex series launched in 1957, showcasing Kodak's foray into the SLR market. While innovative, these cameras faced stiff competition from Japanese manufacturers like Nikon and Canon. Despite this, they remain a testament to Kodak's ability to innovate during an era of rapid technological change.

 By the 1960s, the Retina line gradually faded due to the rise of inexpensive, high-quality Japanese cameras. The last Retina camera, the Retina S2, was produced in 1969. Despite their discontinuation, Kodak Retina cameras remain highly collectible, admired for their craftsmanship and role in popularizing 35mm photography. Their legacy remains a reminder of Kodak's golden era in the photography industry.

My Camera:

My Kodak Retina 117 camera is a wonderfully small and compact camera that you can put into your pocket and travel with very easily. One thing I enjoy about the look of the camera is all the knobs on the outside of the camera are nickel as opposed to the shinier chrome, which can give reflections when using the camera.

 The camera is 5" wide, just under 3" tall, and 1.5" deep with the lens closed and 3.5" deep with the front door opened and the lens out, ready to take a photo, and weighs just under a pound at 15.7 oz. My camera has a Schneider-Kreuznach Xenar 5cm f3.5 lens in a Compur-Rapid shutter. The shutter has speeds from 1/500 of a second to 1 second, along with "B" and "T" settings for timed exposures. The aperture of the lens has a range of f3.5 to f16.

 To open the lens on the camera, you press a small button on the bottom of the camera. Once depressed, the front door should usually spring open, and the lens, which is on a very short bellows system, should come out into the erect position. As previously mentioned, my front door doesn't spring open, so I needed to give it a little bit of help and pull it open.

Once opened, the camera is relatively straightforward in the settings. The shutter speeds are set by turning a dial on the top of the camera if you have it in the vertical position. Like many Kodak cameras from this era, or for many folding styles of cameras, the front door has the ability to set the camera upright just by pulling out the "Kodak" logo on the front door, which will make for a leg for the camera to rest on if you want to set it down for display or to take a photo. I always do that when in a store or seeing a folding camera on display. I'll flip down the camera's leg, allowing the camera to stand upright instead of on the platform the lens pulls out onto.

Select shutter speed by turning wheel. The top lever cocks the shutter and the one on the left side trips the shutter.

A small slider sets the aperture on top of the shutter as you hold the camera horizontally. The focus on the camera is by guess only as this camera doesn't incorporate a rangefinder. This function will come in later models. There are two different sets of focus distance numbers, both on the top of the shutter, but it depends on if you have the camera either vertically, in which the numbers are black, or if you're holding the camera horizontally, then the numbers are red. To focus the lens, there is a small knob on the bottom of the lens as you hold the camera horizontally that rotates the focus collar.

To take a photo, you'll need to cock the shutter with the lever on the top of the shutter while holding the camera vertically. Once the shutter is cocked, the other lever releases the shutter making the exposure. I've seen a very small shutter release button that fits into the cable release socket on the Retina camera. Unfortunately, my camera is missing this. I wish it did have it because when I was taking photos with the camera and looking through the viewfinder on top of the camera, my finger would cover some of the viewfinder, obstructing the subject when releasing the shutter. It wasn't too bad, but the small release would have made the experience a bit better. Now, I'm hunting for a small release to put onto the camera for future use.

 To close the front door, the lens must be focused to infinity so it is in the retracted position on the camera. You'll need to depress two small buttons on the lens strut, one on top and one on the bottom, to retract the lens back into the camera body. Once this is done, the front door will click closed.

Loading the camera with film is pretty straightforward. On the side of the camera is a lever you pull down, and the back door unlocks so it can be opened. Loading the film is just like any other 35mm camera. I needed to do a couple of operational things to advance the film to the next frame. Looking on top of the camera going from left to right is the rewind wheel, the frame counter, the viewfinder, a round knurled wheel with an arrow pointing counterclockwise, and the film advance wheel. Inside the advance wheel is a second rotating wheel with a small cutout and arrows pointing in clockwise and counterclockwise directions. This inner wheel can rotate to have either an "A" showing for advancing the film forward or an "R" for rewinding the film into the film canister when all the photos have been taken. 

After making an exposure, keep the inner wheel to "A." To wind to the next frame, the knurled wheel just to the left of the advance wheel needs to be turned slightly until you feel a slight release, then you can use the larger wheel to advance to the next frame. If you don't move the knurled ring slightly, the film won't advance. This wheel is the unlocking lever that allows the camera to advance to the next frame. Also, once you load the film, be sure to set the frame counter to the number 1 to keep track of how many exposures you've taken. Once you've taken the entire roll of photos, turn the inner wheel on the advance wheel to the "R" position to rewind the film back into the film cassette. Open the back of the camera and process your film.


My Results:

I loaded the camera with a roll of T-Max 125 film, and while taking our dog, Ernie, a 15-year-old Pug, through the neighborhood, I took photos of things that caught my eye. Here are some of the results of our walk.

Conclusion:

I must be getting better at guessing distance, which has always been a problem (one of many) of mine. I also understand that the sunny day and smaller aperture helped with some of the focusing distances I would generally have with "guesstimate" focusing. Nonetheless, the camera was small, compact, accurate in the exposures, and fun to shoot.

 As I previously mentioned, if I could find one of the small shutter release items to add to the cable release socket, this would have helped and made the camera easier to use. Besides that small item, I can see why the previous owner enjoyed shooting with this camera.

 While I enjoyed this camera, I have it for sale on my eBay store. If you're interested in this or any other items in my eBay store, please email me to work out a deal.

 Thank you for taking a few minutes from your day to read about this fun and historic Eastman Kodak camera. The Retina line of cameras is often overlooked but highly collectible and usable.

 Until next week, please be safe.


Zeh Zeca-Flex Camera

This camera combines the compactness of a folding camera with the quality and handling of a twin-lens reflex camera. The Zeh Zeca-Flex is just the camera mentioned above, and I've had my eye on it for many years. However, the rareness and price have always eluded me until I went into a great used camera store in Salt Lake City, UT, Acme Camera.

 The first time I went into Acme Camera, they were in their older location, and the store was filled with photo knickknacks. I struck up a conversation with the people there who were selling used gear, servicing cameras, and renting for the local photo community. On my second visit, back in one of the cases was the Zeca-Flex I currently have. The camera was in excellent condition, with clean optics and a working shutter. I offered a trade for the camera, and they accepted. I was elated to have the camera so I could do a blog article on my Zeca-Flex.

History:

In the early 1900s, around 1901-1902, Paul Zeh produced camera parts like shutters in his workshop in Dresden for some of the other local camera companies in Germany. In 1913, he started producing cameras, and by 1922, the company Paul Zeh Kamerawerk was started. In the early years, the company mainly produced folding plate cameras or cameras that took images on glass plates, which was very common at that time period.

During the 1920s, the company did very well. At this time in photo history, roll film was starting to become more popular. The photographer or photo enthusiast didn't need to carry bulky film holders. All the photographer needed to do was put in a roll of film and get 8, 10, 12, or 16 different photos on the same roll of film without the hassle or inconvenience of loading and carrying the film holders. 

The Pilot Reflex camera, produced in 1931 by Kamera-Werkstätten Guthe & Thorsch in Dresden, has a very similar style and appearance to the Perfekta and the Super Perfekta; you can see a review by Mike Eckman of the Pilot.

 During the late 1920s and 1930s, the company expanded production into folding roll film cameras. These cameras were more compact and allowed the photographer to travel with less equipment, so their popularity grew.

 By 1937, Zeh produced the Zeca-Flex, a folding, twin-lens reflex camera. Its design is very similar to that of the Welta Perfekta, which was produced in the 1933-34 timeframe, and the more robust Super Perfekta introduced in 1935. The Perfekta and Super Perfekta were made by Welta Kamera Werk, which was in Freital, a very close town to Dresden. 

I'm confident Zeh wanted to compete with Welta on this camera style. Unfortunately, this camera style didn't catch on with consumers. Hence, with all three cameras, the Perfekta, Super Perfekta, and Zeca-Flex were the only cameras made and are rare and somewhat expensive.

 WWII took a toll on Dresden as the Allies leveled the city due to its large manufacturing capabilities. By 1948, the Zeh plant closed, and the company went out of business. My guess is that some of the Russian companies took some of the camera manufacturing machines to produce some of the after-war cameras. This is just my guess, though.


My Camera: 

The condition of my Zeca-Flex is unusually excellent for a camera that is almost 90 years old. The metal is still shiny, and all the functions move like when the camera was first purchased in the late 1930s.

 The camera measures 7.5" long without the light hood open. When the light hood is open, it measures 9.25" tall. The Zeca-Flex is 3.75" wide and closed; it's 2.5" from the front of the viewing lens to the rear of the camera. When the camera is open, it measures 4.75". The Zeca-Flex weighs 2lb—5.2 oz.

The lens on my Zeca-Flex is a Schneider Xenar 7.5cm (75mm) f 3.5 in an F. Deckel Compur Rapid shutter. The shutter speeds go from 1/400 to 1 sec with both "T" and "B" settings. Since I don't have a proper shutter tester, all the shutter speeds sound accurate to my trained ear. The viewing lens is a Sucher Anistigmat f2.9 lens.

To open the camera, there is a small button on the left side as you hold it to take a photo. Press that small button in, and the lens door unlocks. On my camera, you need to pull out the lens to put it into the taking position. There are knurled grips on the sides of the lens door to pull the lens out. Also on the lens door is a flip-out stand that allows you to stand the camera up, which is very common in folding cameras.

Note the small button on the side of the camera used to open the lens.

To close the lens, there are two buttons on either side of the backdoor. You press in towards the camera body, then slide the lens back into it and close it until you hear the locking "click" sound, which means the lens is back and locked in the camera body.

 On the back of the light hood, there is a sliding bar you slide over to open the light hood for viewing purposes, and on the side of the light hood is a switch you can flip up or down the magnifying glass for critical focusing.

There is a latch at the top of the back door, which you slide up to open the film door to load and unload film. In my camera, there is a roll film holder you put the roll of film into before putting it into the camera. The film holder is something I've never seen before, and on the first roll, I needed to figure out which way the film rolled across the shutter, but it was easy to figure out. Now that I've done it, it makes sense, and I won't have difficulty in the future.

 The frame counter resets to number 1 when I close the back of my camera, or at least it was there when I put film in it. There is a button on top of the frame counter. When I slide that button over, the frame counter goes to number 5, so my guess is that isn't correct. I can't find an instruction manual for this camera online, so I'm not 100% sure of the correct way to get maximum frames from the camera. 

There is a red window on the back, which I'll use in the future, as I did miss a few frames at the beginning of the roll when I shot with it. The film advance is on the bottom of the camera and is directly tied into the frame counter, whether you have film in it or not. The frame spacing on my camera was good once I got to the first frame and used the frame counter to find the next frame.

 To focus the lens, as you hold the camera to take photos, there is a wheel next to the viewing lens. I rolled my finger across it one way or the other to achieve proper focus, which was the easiest and made the most sense to me.

This is the focusing wheel. I used my finger to slide back and forth to focus.

Results:

Now that I had a roll of film in the camera, I took it out and walked around the neighborhood to get some photos.  Here are some pictures I took on my walk with the stunning Zeca-Flex camera.


Conclusion:

The viewfinder wasn't the brightest, and achieving good focus was difficult even with the magnifying glass up. Another negative about using the camera is where the shutter release is placed. There is no shutter release button, so you need to cock the shutter and then release it with the shutter release button, which is in an awkward place and thought my finger would be in the photo, but it wasn't.

Besides these two items, the camera was a joy to shoot with, and I feel lucky that my camera is in such good condition. I will use it again, but I'm putting it back on the shelf and trying something different for next week's blog post.

 Thank you for taking a few minutes to review some of the cameras in my collection.

 Please be safe, and I hope to hear from you soon.

Robot Royal 36 Camera

Being a big fan of The Robot cameras and having done an earlier blog post on the Robot Luftwaffen Eigentum camera, I wanted to get a camera I could use when we went on vacation or just out for the weekend. Years ago, I came across an excellent and working condition Robot Royal 36 camera. It was from an online auction, so I made a relatively low offer and won it.

 When I received it, I was surprised by the weight and heft of this particular camera. I put it through routine tests to see if the shutter was indeed opening and closing, which it was. The lens was clean, another positive, and the transport was active and in good working condition.

 When COVID hit, I was laid off from one of my favorite jobs. I started writing my camera blog. After being off work for ten months, I got hired for a better position and loved the job, company, and boss, but I put the camera on my shelf for the next four years until I recently retired and started writing my camera blog again.

History:

Otto Berning & Co. started in Dusseldorf, Germany, in 1933. Otto Berning and Co. began to manufacture amateur cameras in 1934 when a young watchmaker in his 30s, Heinz Kilfitt, designed the first compact camera for what Robot would be so well known for. The design had a spring-loaded motor winder, a unique item brought to the camera industry due to his watchmaking skills. Heinz Kilfitt also designed the camera to have a 24x24mm film format. He offered the format size to both Kodak and Agfa, who rejected it, so he sold the design to a young Hans Berning, who was only 23 and worked for his father's company. 

 Robot cameras provide a film format of 24x24mm on most of their cameras. An advantage of the 24x24mm frame size was that the photographer could get 50 images on a roll of film instead of the standard 36 in the traditional 24x36mm format. Another advantage was that there was no need to turn the camera for vertical shots.

Some unique features of the Robot cameras are that they use a rotary shutter and sprocket film drive system, which are more common in the cine cameras of the time. Robot cameras also have a 90-degree switchable viewfinder, allowing the photographer to point the camera in a different direction while looking through the viewfinder and taking photos. All the cameras have a winding motor of film advance system that allows the photographer to wind the motor and shoot rapidly up to 5-6 frames on a single wind, depending on the camera.

 Robot also provided either Carl Zeiss or Schneider-designed lenses on their cameras, which gave the photographer unparalleled sharpness in their images. The cameras were die-cast zinc and stamped stainless steel bodies chalked full of clockwork inside, and they are very sturdy and extremely well made, a testament to the high-quality materials used in their construction. 

During WWII, Robot produced cameras for the German Luftwaffe to put on their Stuka dive bombers. After the war, Robot continued producing high-end cameras like the Robot Star and Junior cameras. Robot produced the Robot Royal in three formats, with a few feature and film format variations. 

My Camera:

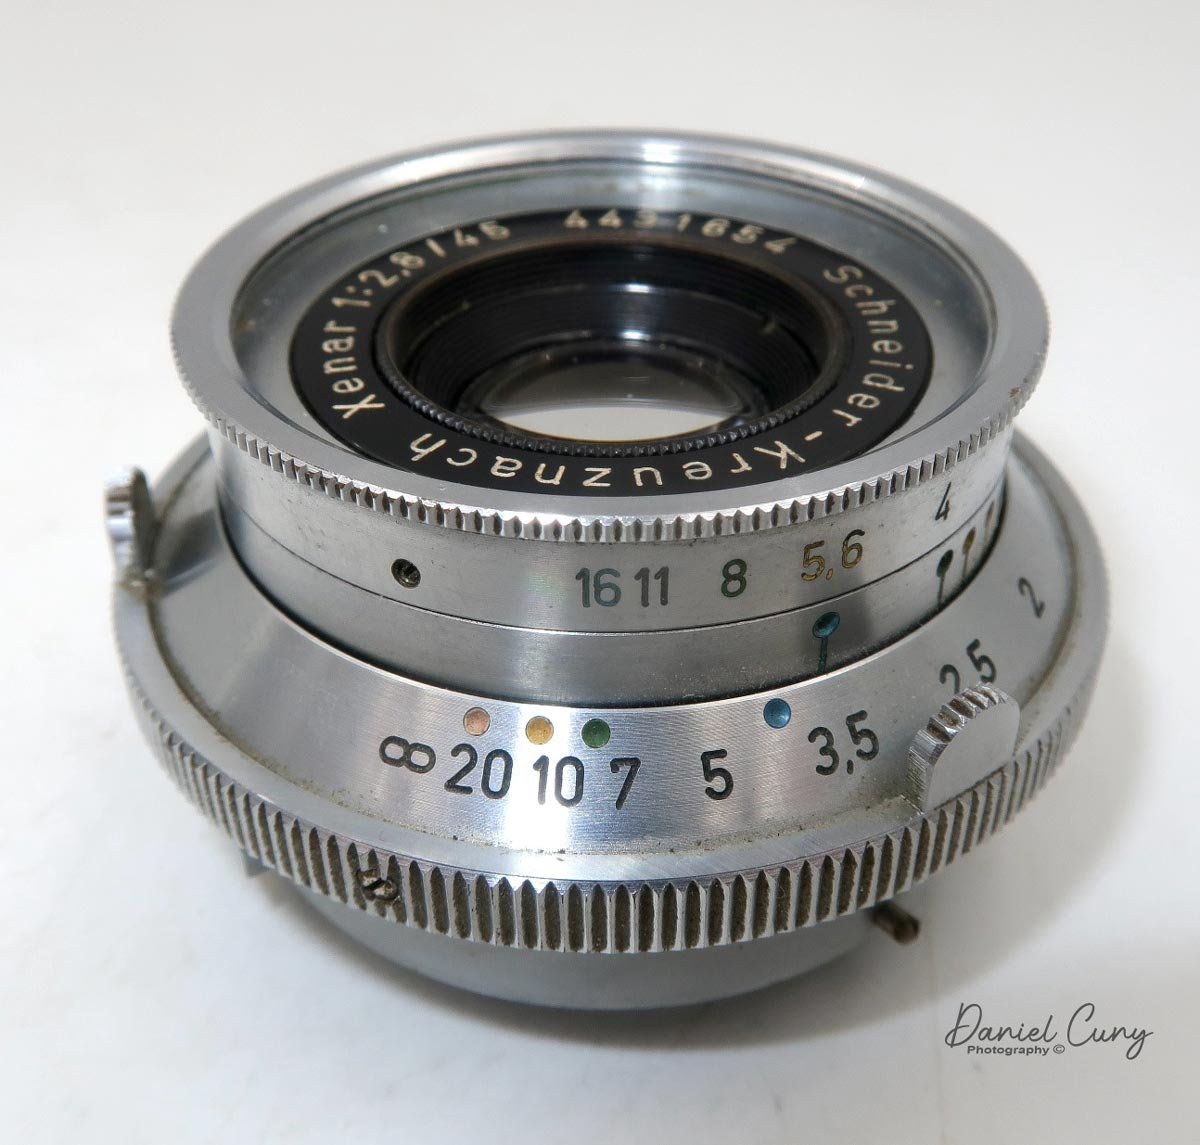
My model is the Robot Royal 36, model III, and it has the film format of 24x36, the most common film format for 35mm cameras. My camera has a Schneider Xenar 45 mm f2.8 lens. My camera has a Schneider Xenar 45mm f2.8 lens. It measures 5.5" wide x 3" tall x 2.75" deep from the front of the lens to the back of the camera and weighs a whopping 2 lbs. 0.4 oz. That's the first thing I noticed when I unwrapped the camera. This is a very solid and well-built camera with unique features that set it apart from other cameras. 

To open the camera, as you hold the camera there is a chrome tab with etching on it on the left side. With your thumb, you lift that and the latch and open the back of the camera. Unlike most 35mm cameras, this camera has a take-up spool you need to load the leader into as opposed to just putting the film leader into the take-up slot, and the camera takes up the film. You need to take the take-up spool apart and thread the film leader into the spool, then put the cassette back together and load the film and take-up cassette into the camera. Then fire two frames, and you're ready to go.

My camera has shutter speeds from 1/2 sec to 1/500 sec, along with B for timed exposures. The bottom of the camera has a winding mechanism that allows me to fire 12 photos at full wind, which takes me about ten and a half cranks to wind fully.

Yellow, Green and Blue dots on lens and Aperture number for Zone Focus.

 The rangefinder on my camera is very bright and easy to focus. The other significant item about the Robot camera and lens system is they allow the photographer to shoot with zone focusing, which is fantastic for street photography. The lenses have yellow, green, and blue dots, which correspond to the colored apertures on the lens. The lens's apertures 2.8 and 5.6 are in yellow, F8 is in green, and f16 is blue. All you need to do is match up the color dot on the focus dial and the aperture used, and the lens shows you your depth of field. This procedure is similar to all other lenses, but the color coding makes the system more "user-friendly."

Removing and reattaching the lens of the Robot Royal 36 is simple. A tabbed collar at the bottom of the lens, when moved to the left, allows the lens to be detached. To reattach the lens, align the two red dots and slide the collar counterclockwise. This careful procedure ensures the lens is securely in place.

Switch for “Green Dot” normal film advance, “Red Dot” Close viewfinder and “R” Rewind film back into canister.

Once I shot the film, One the back of the camera and to the right of the viewfinder is a switch with a green dot for regular forward film transport, there is a red dot which closed the viewfinder half way and "R" for film rewind. I put the camera in the "R" position and reminded the film as a regular 35mm camera procedure. On the bottom front of the camera are the flash sync ports for "X" (electric flash) or "M" (bulb flash) settings.

Results:

 I took a roll of film, put it through my camera, and walked around my backyard to see how the camera performed. This is the first time I got to shoot with the camera since I bought it 4-5 years ago, and there were a few anomalies in the camera. There seems to be a slight light leak, but to be 100% transparent, the film I used was old, and one I had shot just a few frames with and rewound the film with the leader exposed more than ten years ago, so I can't 100% blame it on this camera.

Conclusion:

While Leica has the prestige, Robot and Alpa are probably the best-built cameras in terms of craftsmanship and overall quality. The camera is excellent, the lenses are fantastic, and it offers things built into the system, like motor advancement and an excellent feel. I had a great time shooting with it, and I need to run a fresh roll of film through this beauty more often.

Thank you for taking time from your busy day to review this blog.

Until next time, please be safe.