Welta Perfekta

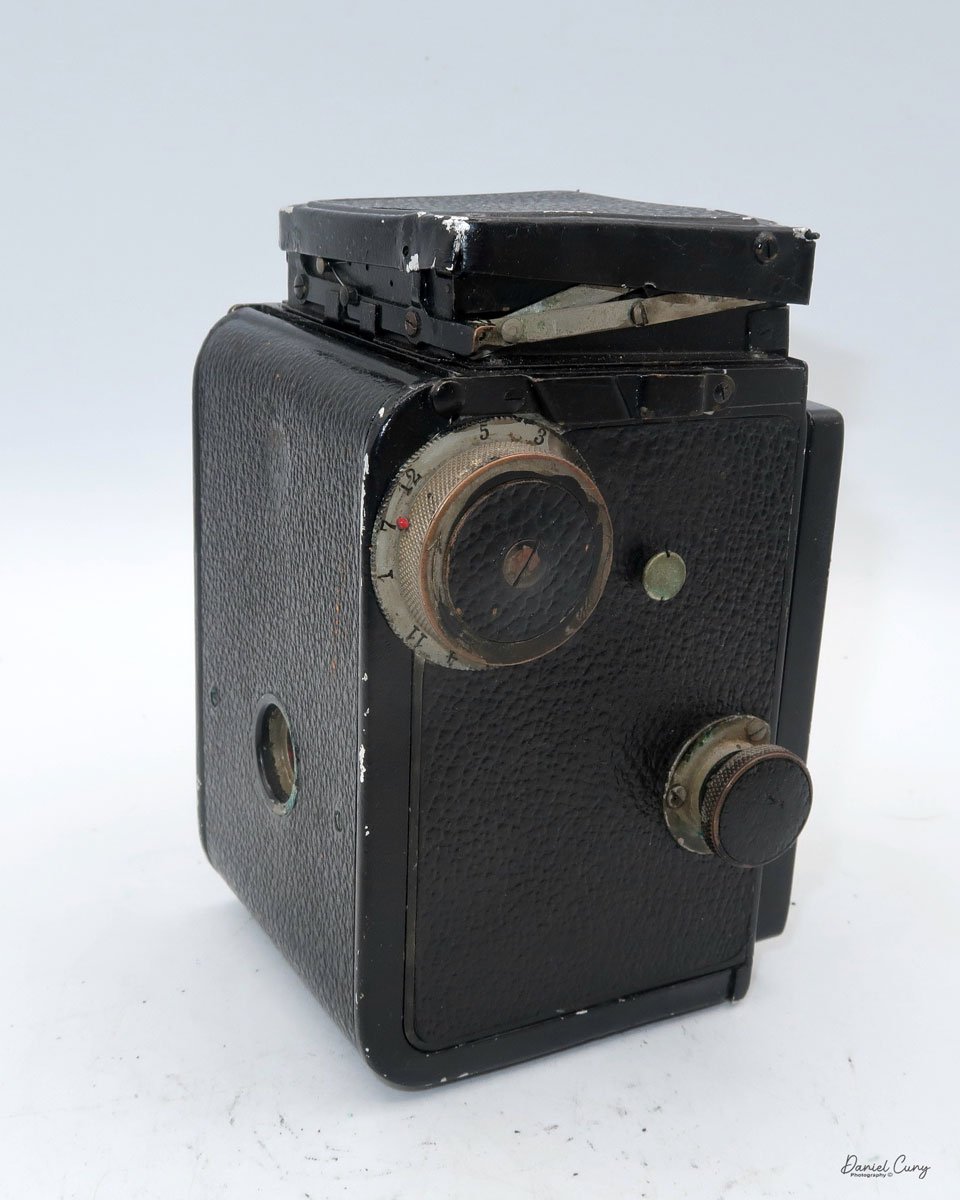
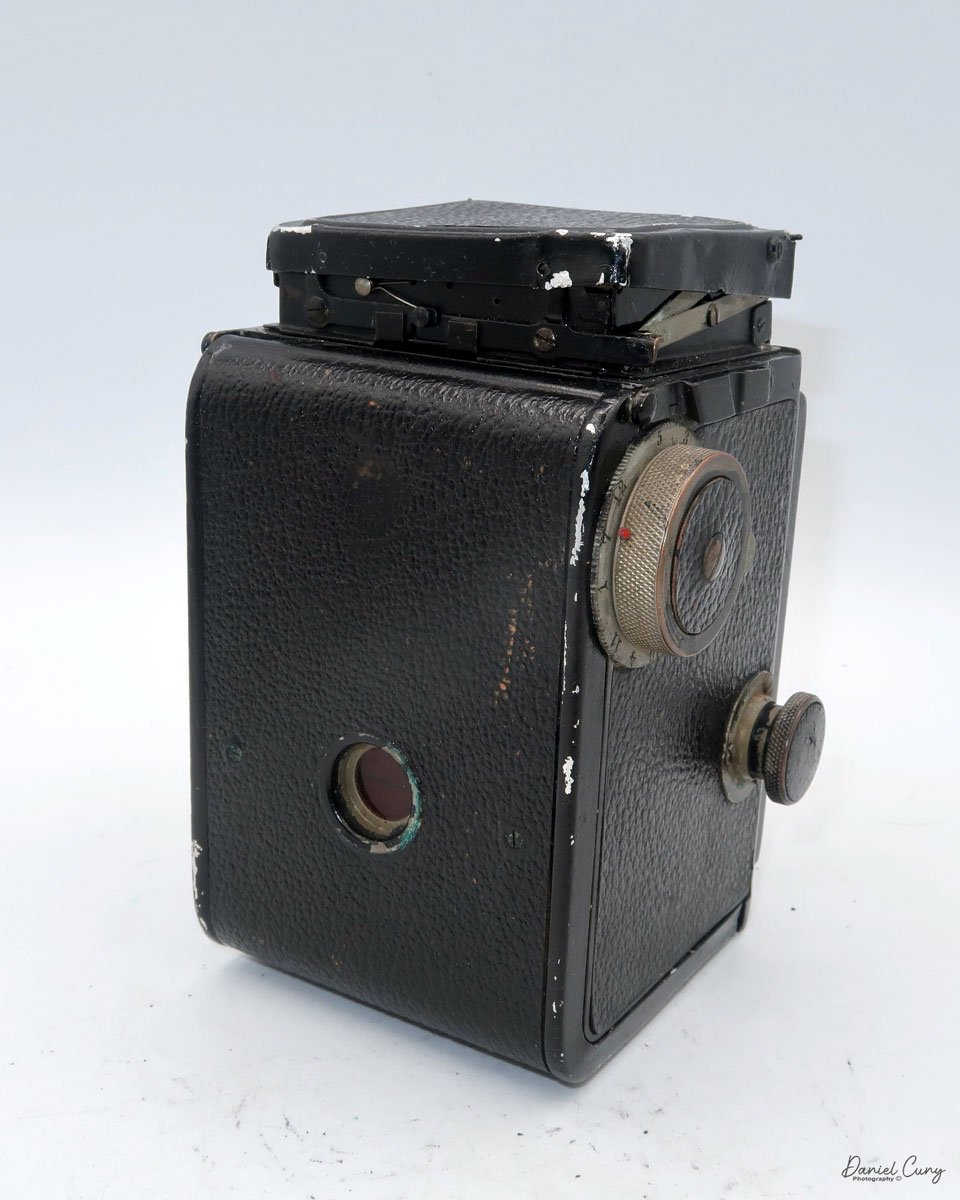
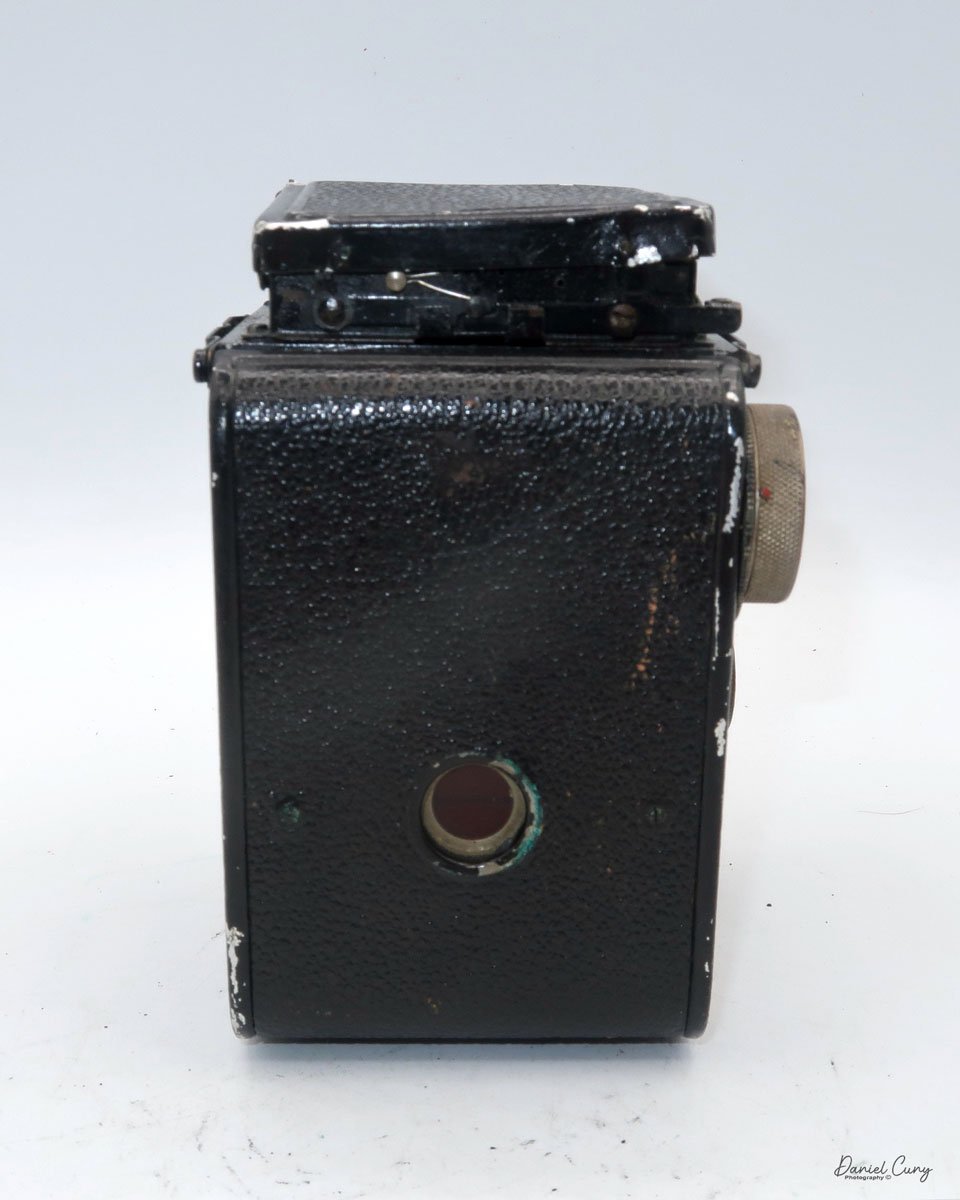
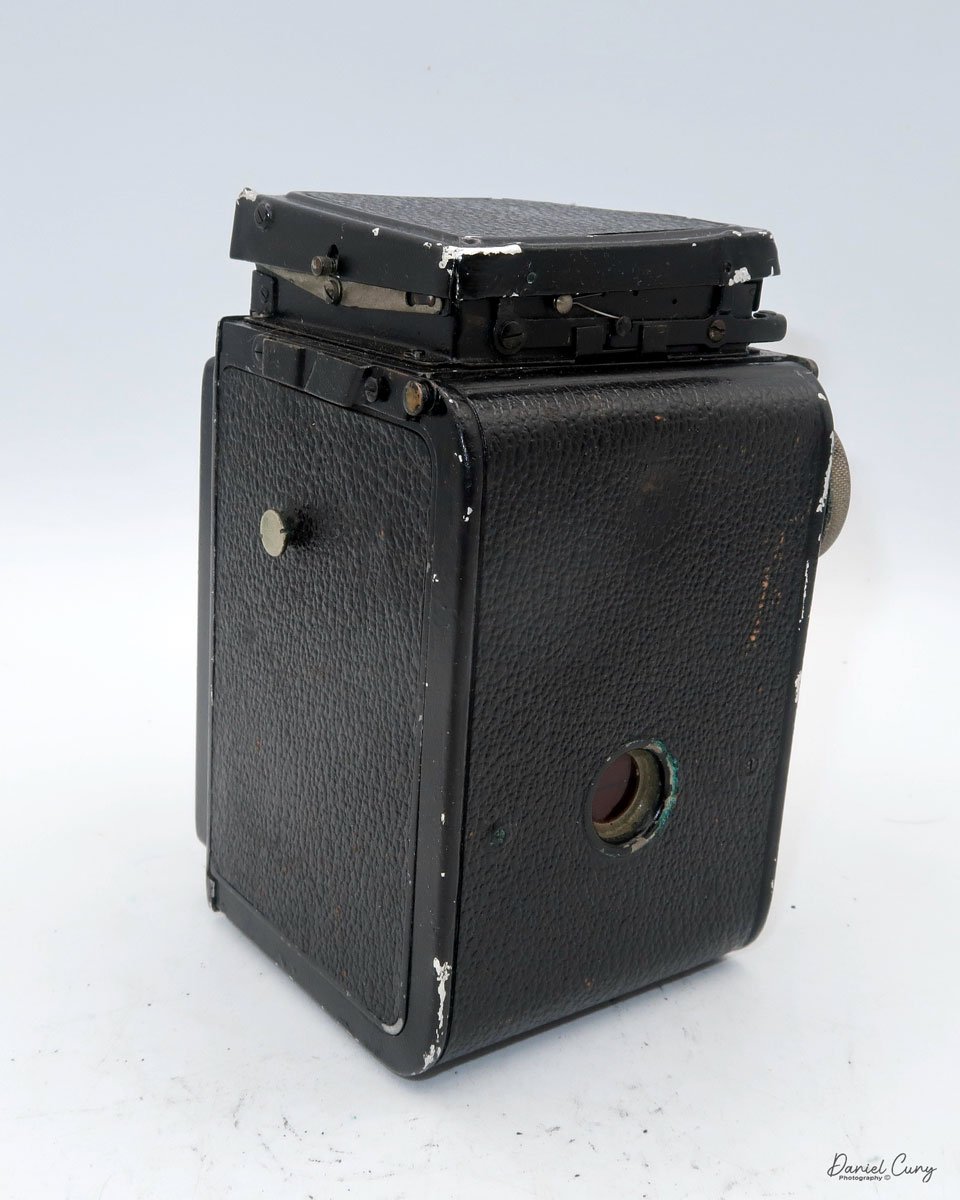
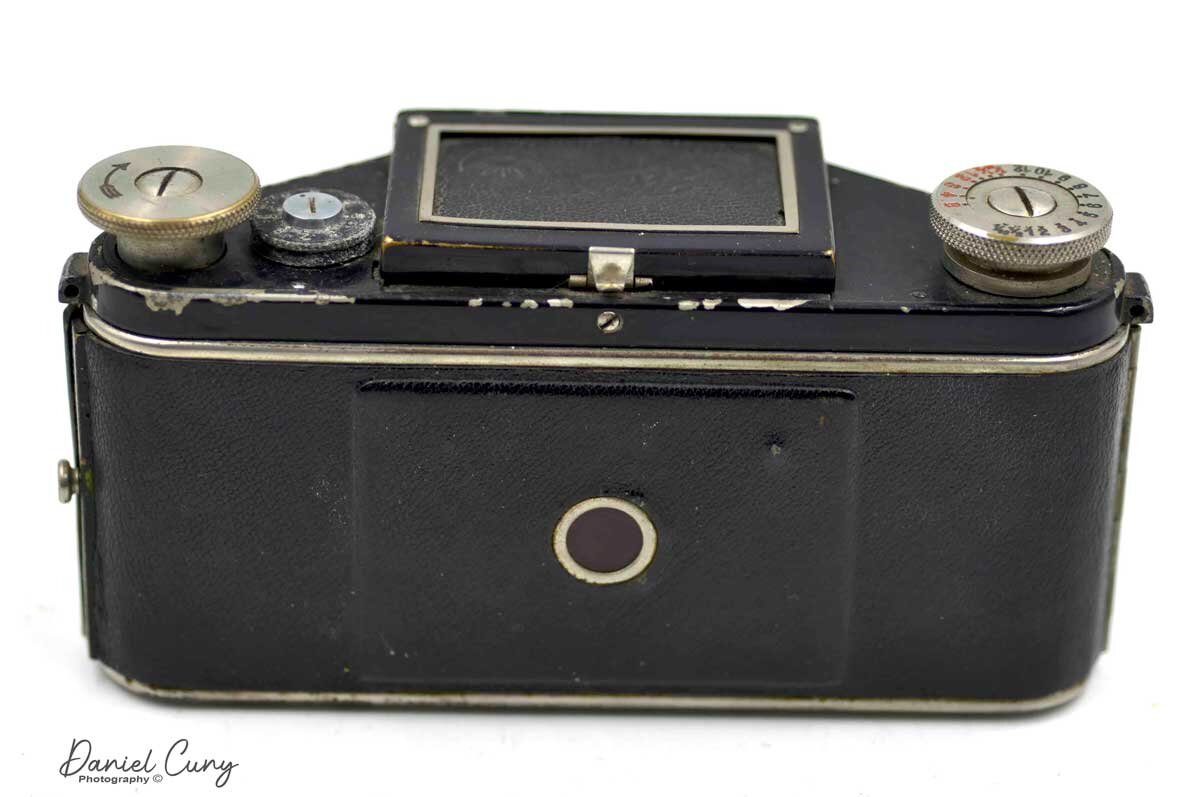
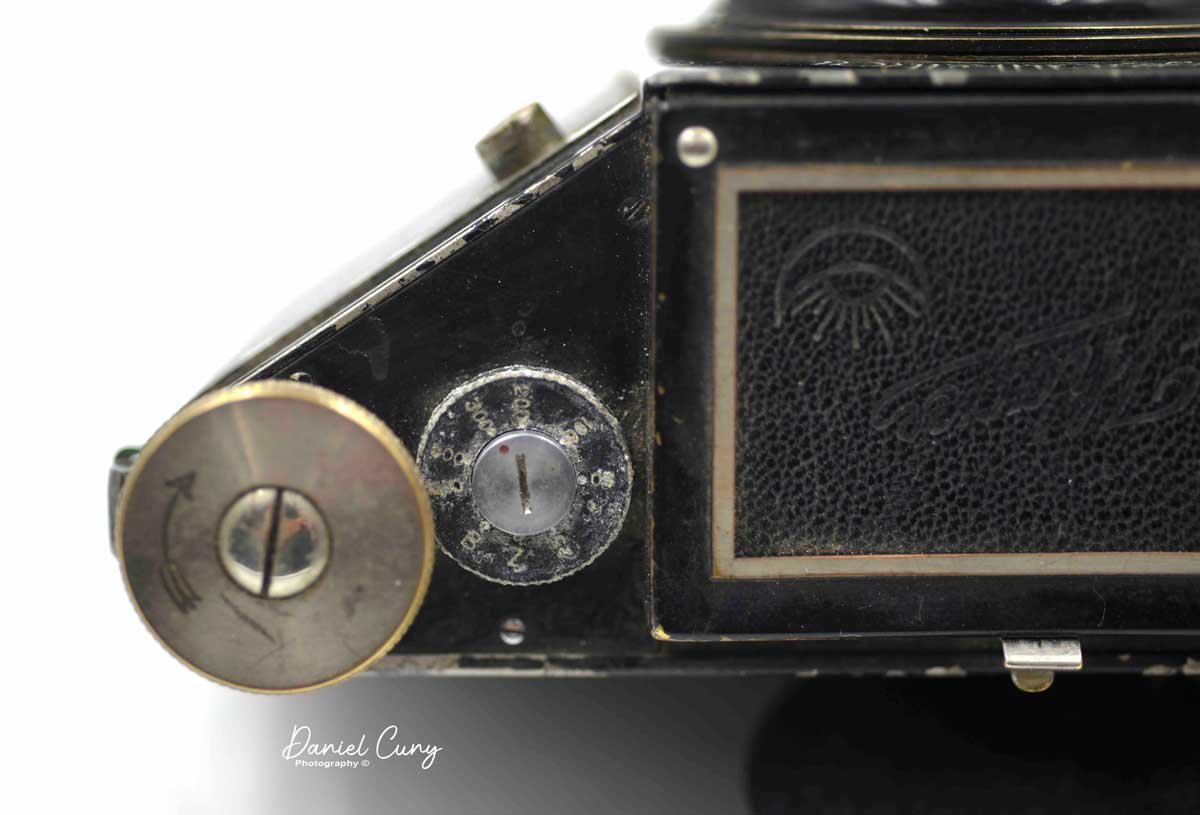
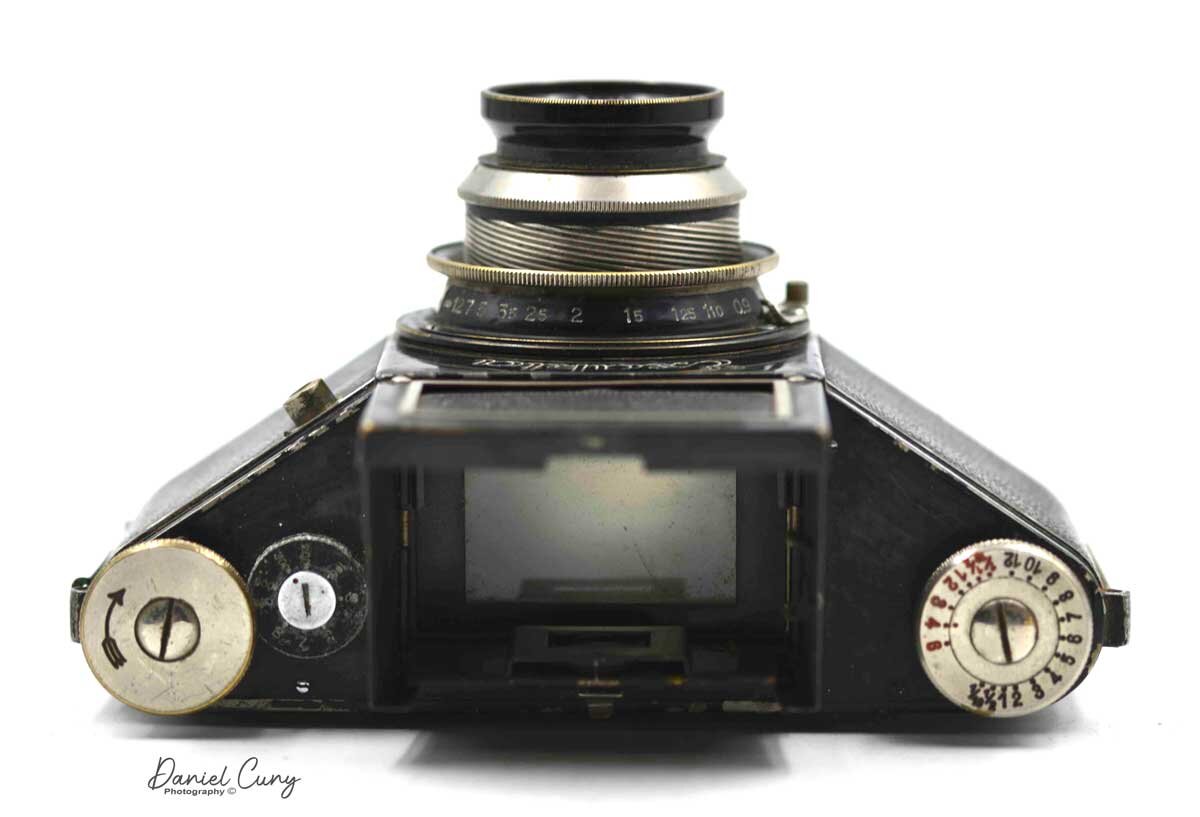
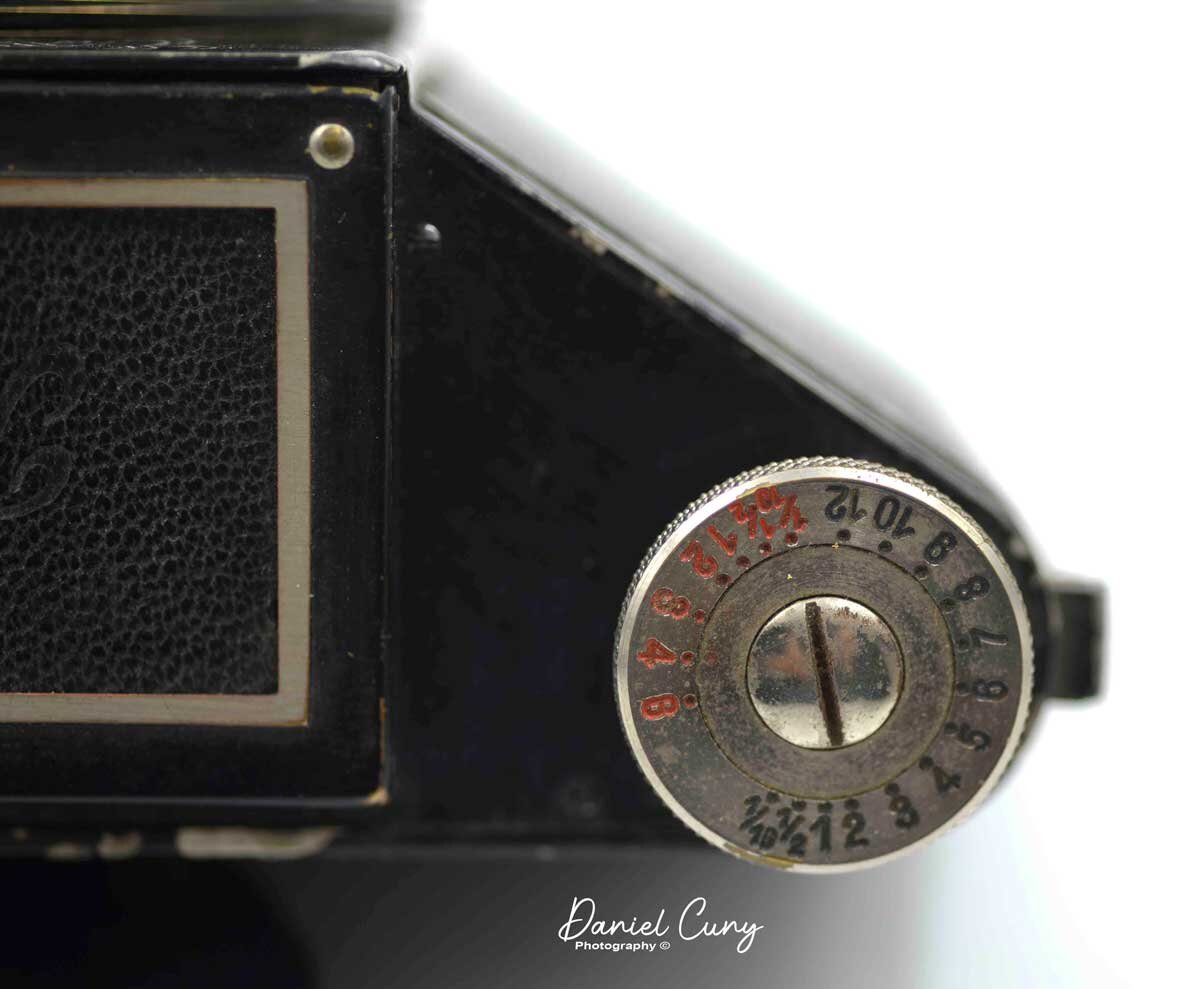
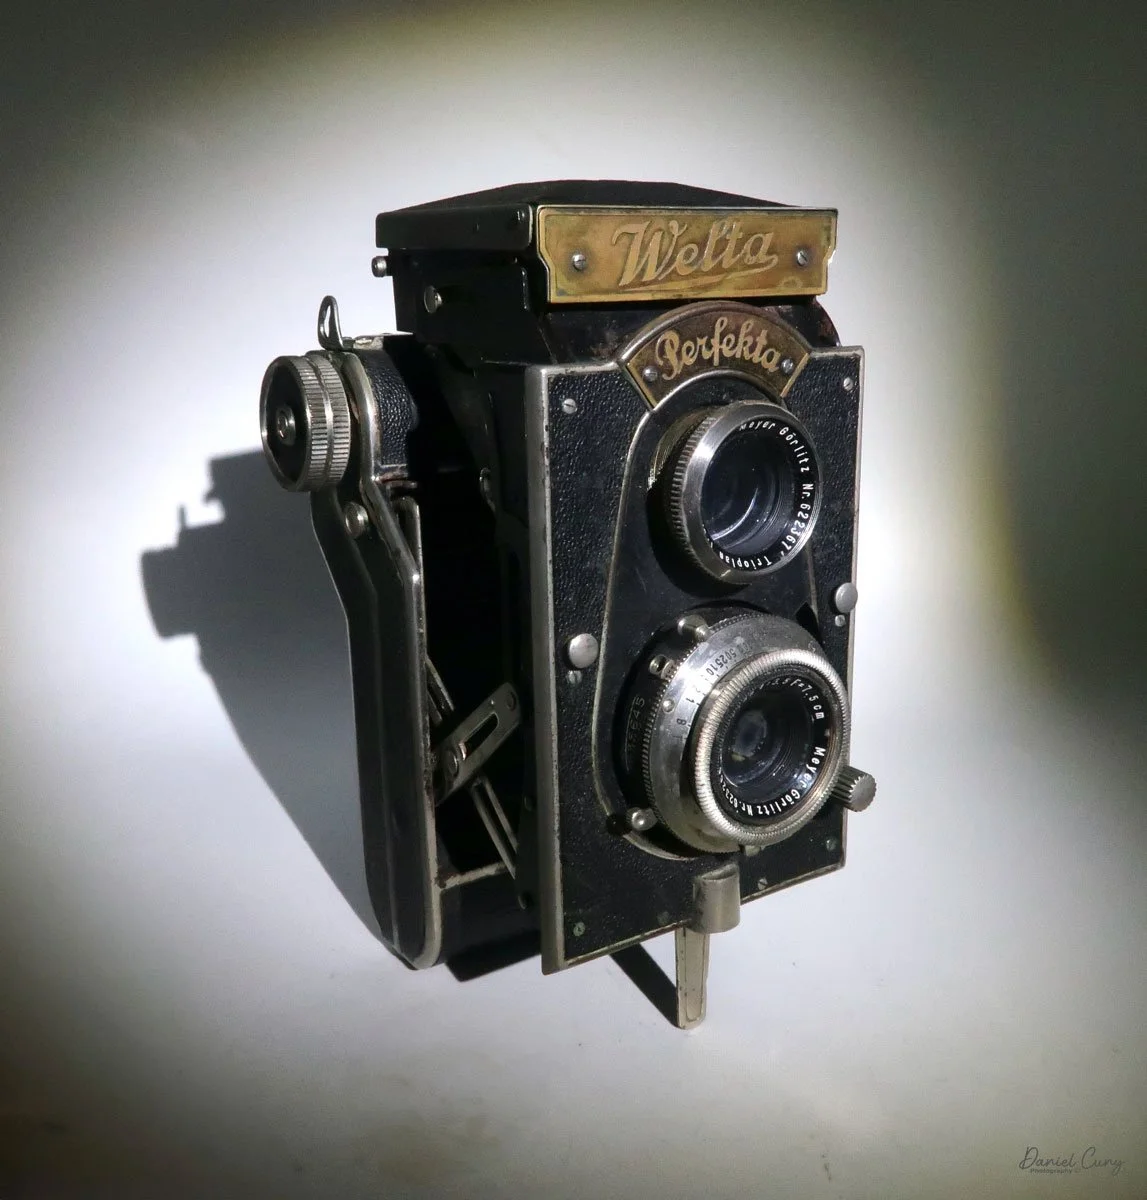
My Welta Perfekta camera

As I've mentioned in the past, I'm always drawn to the colorful, or odd and unusual cameras. As a camera collector for over 50 years, and having spent countless hours poring over many of McKeown's price guides to cameras, there are cameras that I'm always intrigued by and would love to own. Cameras like an original daguerreotype camera, the Rectaflex Rotor, a three-lens camera, or a beautiful Compass camera made by Swiss watchmakers Le Coultre et Cie for Compass Cameras Ltd., London, England. All of these cameras are out of my league in terms of pricing, unless I win the lottery and have a few hundred dollars burning a hole in my pocket.

 To me, the most enjoyable aspect of collecting cameras is the hunt to find a rare or somewhat rare camera, lens, or other photographic item. Every once in a while in this collecting game, you come across a hidden bargain.  It could be something at the bottom of a box, or just that the person selling the item isn't fully aware of the value of items, and (to me), that is a highly satisfying feeling.

 Having had that same feeling about a year ago when I was at a garage sale in one of the neighboring towns, and I saw a Welta Perfekta camera. As I picked up the camera, it appeared to be in good condition. The shutter worked, the viewfinder seemed clean for being nearly 100 years old, and all the leather was intact. It was a nice camera, and one I'd love to have in my collection. When I asked about the price for the camera, the person selling it said it was her grandfather's. 

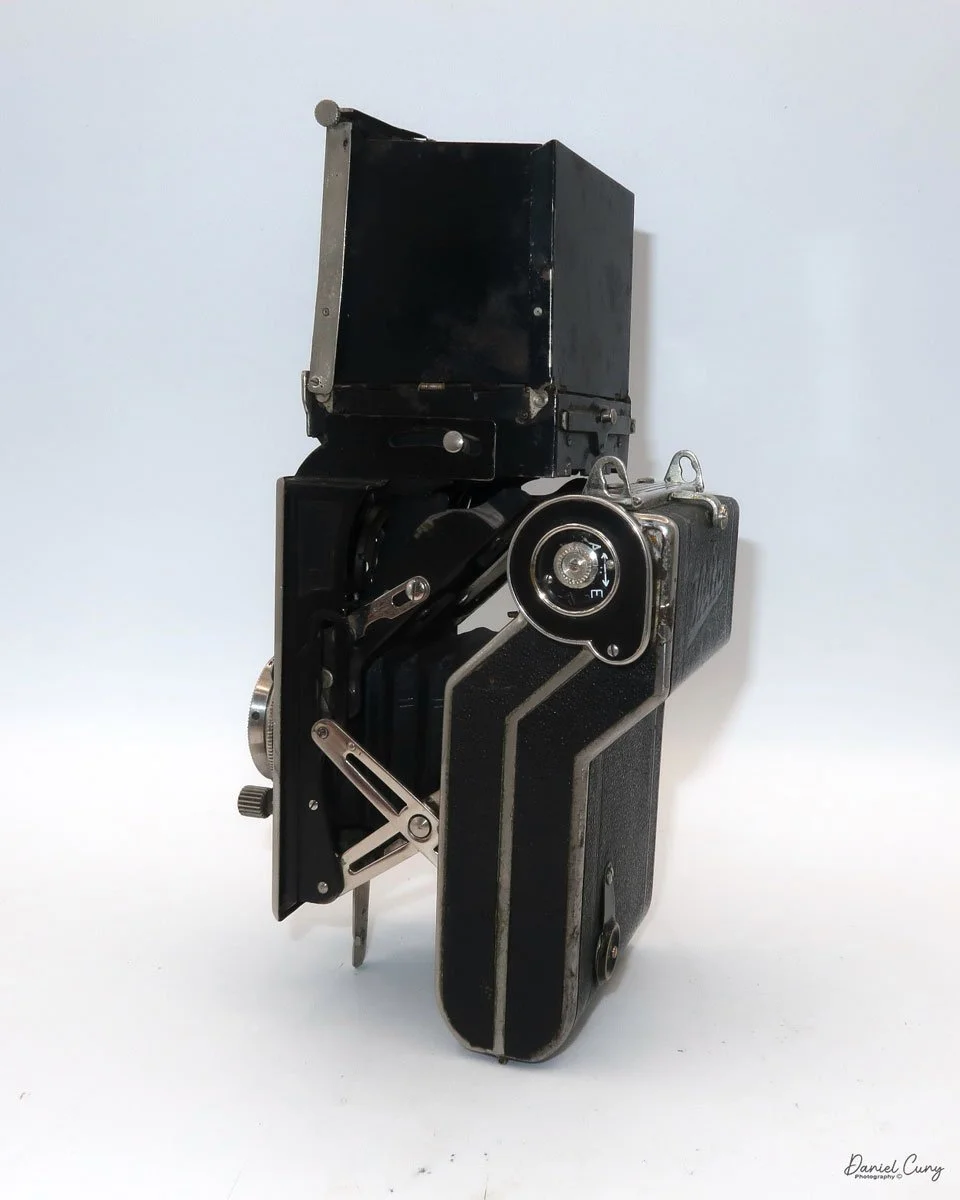
Odd shaped camera body

 Letting the seller know that the camera was in good condition and nice shape. I provided the seller with some information on the camera's age and a brief overview of the company. I let them know that I had collected the camera, written a weekly blog about it, and would love to have it in my collection. The seller said that, since I was a collector, it was important to them that the camera go to a good home, and they offered me the price of $50.00. I was happy to pay that price for such a nice example, and at that point, we were both pleased that the camera had a new home.

 I was familiar with the camera because I had written about the Zeca-Flex camera a while ago, and its shape had intrigued me. The Perfekta has a very similar shape to the Zeca-Flex as they are both folding Twin Lens cameras. These are twin-lens cameras with a large viewfinder that opens and closes, comparable to other twin-lens reflex cameras. The body of the camera folds into the film area, making the camera much smaller and more portable. 

History:

Since I just wrote about the history of Welta in last week's review of their Penti camera, I thought I would spend this review focusing on the history of the Reflekta camera, along with its older brother, the Superflekta camera.

 Both the Superflekta and Reflekta cameras are folding twin-lens cameras. As I previously mentioned, they are considered pocket cameras, which means they are smaller cameras intended to be easily transported in your coat pocket. They are a mix of pocket cameras introduced by Kodak in 1912 with their Vest Pocket cameras, and a Twin Lens Reflex camera introduced by Rolleiflex in 1929.

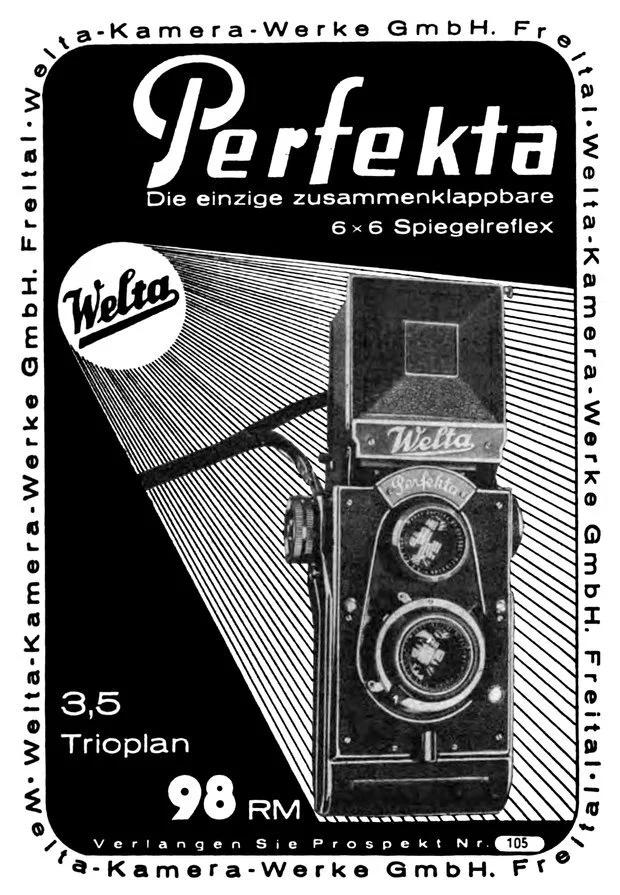
 The Perfekta camera was introduced in 1934. It's a medium-format camera that takes 6x6cm images on 120mm film. It features a large viewfinder that opens like the Rolleiflex and other Twin Lens Reflex cameras of its time. The body of the camera pops away from the film chamber, utilizing a bellows system that separates the lens from the film chamber, and forms an oddly shaped camera. There is a tripod socket and arm on the bottom of the lens area that allows the camera to stand upright on a flat surface, such as a table, if needed.

 The Perfekta could be purchased with one of three different lenses they sold. You had your choice of either a Meyer Trioplan 75mm f/3.5, Schneider Xenar, or Carl Zeiss Tessar 75mm f/3.8 lenses.

 The Superflekta was the first of this style of camera introduced by Welta in 1932. It's a larger camera that takes 6x9cm images on 120 film. The most intriguing feature of the Superflekta camera is that the film chamber rotates from a vertical position to a horizontal one for landscape-style images. This is very similar to how the Cornu Ontoflex operates. The photographer doesn't rotate the camera; instead, they rotate the film to achieve a horizontal image. 

 Rotating the film's back makes sense, as the camera features a ground-glass viewfinder to focus on the image. If you rotated the whole camera, the viewfinder would be on the side, which would affect composition. Turning the film chamber is a remarkable achievement in that camera. I can see where the Perfekta came into play as it's a bit smaller than the Superfekta. With the square format, Welta could cut down the size of the camera and make it even more "pocketable".

 The difference between the Zeca-Flex and both the Superfekta and Perfekta cameras is that the Zeca-Flex is more linear in design, and doesn't have the almost "S" shape that the Welta cameras incorporate. Only the bottom portion of the Zeca-Flex pops out to take the photo, then can be slid back into the camera's body for transport. 

 While Welta wasn't the first to introduce this style of camera, that honor goes to the Pilot 34 or Pilot Reflex camera made by Kamera-Werkstätten Guthe & Thorsch, another great camera manufacturer in Dresden. This camera was introduced in 1931 and was also a twin-lens camera with a bellows system.

 Both the Welta Superflekta and Perfekta cameras were only produced for a few years due to the complexity of their manufacturing. Another factor that contributed to the downfall of the Superfekta and Perfekta was the larger size of the viewfinder, which prevented it from folding into the camera body, thereby making the camera less compact.

My Camera:

My Welta Perfekta camera is 6.5" tall, by 4" wide including the film advance knob and frame counter, by 3.5" deep. These measurements are with the camera completely closed and in it's most compact state. When the camera is fully open, the camera measures 8.5" tall by 4" wide by  5" deep, and the camera weighs 2 lbs—2.2 oz. My camera has the Meyer Trioplan 7.5cm F/3.5 lens.

 To open the camera and pop the lens area from the film area., There is a round button on the right side of the camera, under the film advance knob, that you press. Once pressed, the body pops away from the film area, exposing the camera's bellows, along with the angled mirror area of the viewfinder system.

On the back, to the right of the viewfinder, is a small button that you slide to the left to open the light chimney of the viewfinder. The light chimney should pop up, exposing the ground glass for focusing. On the inside of the front wall of the light chimney is a magnifying glass that helps with focusing, a feature common in twin lens reflex cameras. On the left side of the chimney is a knurled knob that flips up the magnifying glass when turned, and flips down when turned in the opposite direction. 

Closing the light chimney, fold the sides in first, then the back, and finally, fold the chimney down into the camera's body. It will then lock into place.

 To focus the camera, a knob located just to the left of the lens/shutter assembly slides up and down, allowing you to adjust the focus on your subject. The lens moves in and out on a helicoid from the camera's faceplate. There is no focus distance written on the side of the camera, so you can't set the distance and shoot. All the focusing is done through the viewfinder, which I find somewhat dark and difficult to view on darker days.

 To close the body of the camera for transport, press the two buttons located on either side of the front plate. Once pressed, the body will push into the film chamber area and click into place. Just be sure to flip up the leg under the camera; otherwise, the leg keeps the camera from fully closing. I learned that when I tried to close the camera, I noticed the lever sticking out, ops!!

Taking the photo is pretty basic. The shutter speeds on my camera go from 1/300 to 1 sec. along with "B" and "T" for timed exposures and are set via a ring around the lens. The aperture ranges from F/3.5 to F/22 and is set by a slider arm located under the lens. The shutter cocking lever is located at the top of the lens, and the shutter release is positioned on the right side of the lens.

Loading the film is similar to that of many other medium-format cameras. On the back of the film door is a button that you slide to the left and pull down; the film's back will then open. I first noticed that where you put the fresh roll of film, along with the take-up spool, are hinged guards that both of these items fit into. The winding knob pulls out to make it easier to insert the empty spool into the chamber. Then, flip the small guard down to keep the spool in place. Similar to where you insert the fresh roll of film, once the film is in place, flip the guard down to keep it in position.

While the camera features a covered red window on the back, it also has a unique frame counter. On the inside of the film's door is a slotted rod that rolls on the film's paper backing, and it is equipped with a gearing system attached to a round frame counter, which tells the photographer which frame they are on. 

Here's how it works. Once you load the film, use the red window to access frame number one. On the inside of the frame counter, you slide the knurled wheel from A (Aus=Off) to E (Ein=On). Doing this sets the frame counter to number one, and after you take a photo, the ribbed wheel advances the frame counter every time you advance the film from one frame to the next.


Results:

I loaded the camera with an older roll of T-Max 100, the fastest 120 film I had available, and went for a walk with my sister, Laura, and her dog, Sally, taking photos along the way.

 Unfortunately, the day was overcast, and I had forgotten to bring my light meter with me, so I was forced to use a light meter app on my phone, which I dislike doing, as it always seems to get it wrong. However, it didn't fail me again, and the negatives I processed were underexposed.

 Here are some of the better ones from the walk.

Conclusion:

I must say that this camera was delightful to shoot with, and for the price paid, it was well worth every penny. The only drawback would be the darker viewfinder and difficulty I had focusing on the subject.

 I liked the size of the camera; I enjoyed how compact the camera is to use. The shutter and aperture worked well, and the odd shape of the camera was certainly a conversation piece when I talked to some of the neighbors I met along the walk to take photos. The camera is less bulky to transport and carry around than a traditional twin-lens camera, and the optics are excellent—an enjoyable camera that I plan on using regularly.

 Thank you for taking a few minutes from your day to read about this unusual, yet jewel-like, camera. 

 Click on the link for some of the other cameras reviewed.

 I also run an online eBay store, Cuny's Camera and Photo. If you're interested in older cameras and other camera oddities, I have for sale.

 Until next week, please be safe.

Contessa Nettel Cocarette I DeLuxe

My Contessa Nettel Cocarette I DeLuxe camera

As I've mentioned in other posts, colored cameras are some of my favorite cameras to collect. That's a good thing when the camera is a different color than the standard drab black camera and a beautiful, rich brown-toned camera. When the camera is a rich brown-toned camera and is a rarer version, that makes the camera even more special to me. When the camera is a rich brown tone, a rarer version of the black model of the same camera AND, the camera is in good working condition and has a clean lens, then to me, it's, as we say in the U.S. and to use a baseball term  "a real home run."

 The Contessa Nettel Cocarette I Luxus camera was purchased from a seller in Florida five or six years ago. I purchased this camera along with a few other wonderful cameras, like the Zeiss Super Nettel, a Zeiss Tenax II, a Zeiss Nettax, and a few others, which were real gems in my collection for a long time until I sold them, which at times I look back and regret. That's all part of the collecting world.

 The camera appeared to be in great working condition. The bellows seemed to be light-tight, the aperture moved smoothly, and the camera came with an upgraded Carl Zeiss Jena Tessar lens and a Compur shutter, which, upon inspection, were in excellent condition. Also, the exterior leather was without tears and with minor scuffs, and the Cocarette I handle on the camera was still intact.

 When I received the camera, I wanted to find out more about the camera, so as I usually do, I saw if there was a manual or catalog on the camera. My go-to website for camera manuals is www.butkus.org , which has an extensive collection of manuals. They did have the Zeiss Cocarette manual,

According to the manual, Contessa Nettel made three different Cocarette models, each with four cameras of various sizes.

 The three  Cocarette models are:

Special: Called I/0, II/0, III/0, and IV/O, covered in black leatherette and with hinged metal front.

Standard: Described as Cocarette I, II, III, IV, With real black leather coverings, leather bellows, and hinged "Stirrup" front.

DeLuxe: Styled respectively "de Luxe" I, "de Luxe" II, "de Luxe" III, and "de Luxe" IV. This type is covered in the finest brown Morocco leather and has bellows of the same. ​ All the edges are bound in German silver.

 The different negative sizes of the models described above are as follows:

l/0, I and "de Luxe" I . Film 3 1/4 x 2 1/4 inches

II/0, II and "de Luxe" II . Film 4 1/4 x 2 1/2 inches

III/0, III and 'ode Luxe" III . Film 4 1/4 x 3 1/4 inches

IV/O, IV, and "de Luxe" IV. Film  5 1/2 x 3 1/4 inches

History

Contessa-Nettel AG was a prominent German camera manufacturer based in Stuttgart. It was formed in 1919 by merging two influential companies: Contessa Camerawerke Drexler & Nagel and Nettel Camerawerk. This merger combined the innovative strengths of both firms—Contessa Camerawerke, founded by Dr. August Nagel, and Nettel Camerawerk, known for its advanced strut folding cameras and focal plane shutters. Dr. Nagel, who began his camera design business 1908 as Drexler & Nagel, quickly rebranded it as Contessa Camerawerke before acquiring Nettel in 1919 and establishing Contessa-Nettel AG.

Ad showing the different negative sizes.

 Contessa-Nettel became renowned for its diverse and technically advanced range of cameras. The company offered approximately forty different models, including many variations of the Cocarette, a folding camera that became one of its most famous products during the 1920s. Other notable models included the Deckrullo-Nettel series, which featured self-capping focal plane shutters—a significant innovation. The company also specialized in stereo cameras and produced various compact and portable designs, such as the Piccolette and the Stereax.

 The Deckrullo-Nettel cameras, initially developed by Nettel, continued to be produced under the Contessa-Nettel name after the merger. These cameras were admired for their engineering, particularly their strut folding mechanisms and reliable shutters. Contessa-Nettel's products were recognized for their build quality and design excellence, reflecting Dr. Nagel's eye for detail.

 In 1926, Contessa-Nettel became part of Zeiss Ikon, a new conglomerate formed by merging several major German camera manufacturers, including ICA, Ernemann, and Goerz, alongside Contessa-Nettel. This consolidation aimed to strengthen the German photographic industry and create a powerhouse capable of competing internationally. After the merger, many Contessa-Nettel designs and models continued under the Zeiss Ikon brand, and the Stuttgart factory became a critical Zeiss Ikon site.

 Although Contessa-Nettel, as an independent brand, ceased to exist after 1926, its influence persisted. Feeling out of place at Zeiss Ikon, Dr. August Nagel left to establish the Nagel-Werke factory, which Kodak later acquired. Nagel's subsequent innovations, such as the Kodak Retina and the first pre-loaded 35mm film cassette, trace their lineage to the design philosophy he honed at Contessa-Nettel. The Contessa-Nettel name also lived on in Zeiss Ikon's product lines, most notably in the Zeiss-Ikon Contessa cameras of the postwar era.

 Contessa-Nettel's history is marked by technical innovation, quality craftsmanship, and a legacy that shaped the evolution of camera technology in the 20th century.

My Camera:

My Contessa Nettel Cocarette I Deluxe camera is 6 5/8" long by 3.5" wide, 1.5" deep when closed, and 5.5" deep when opened, with the lens extended from the body. It weighs 1 Lb. 6 oz. My camera's serial number is 422872. It also has a Carl Zeiss Jena Tessar 10.5cm f4.5 lens, serial #588166.

 To open the camera, there is a button on the side of the camera, which is similar to another folding camera, which you press, and the front door opens, exposing the front of the camera. Just below the shutter is the company name, Contessa Nettel, and on either side of the name are two knobs which you grab and pull the front standard of the camera out from the camera body until they stop. You're now ready to take a photo if you have film loaded into the camera

Pulling the front standard from the camera body lets you see the controls on the camera much better. Looking down at the camera, you have a bright waist-level viewfinder with indents on each corner representing a vertical or horizontal format for framing your photo. Currently, the camera is in the vertical position or, in modern terms, in portrait mode. The viewfinder can also tilt to the side if you plan on using the camera in the horizontal position to photograph in landscape mode. Right next to the viewfinder is a red bubble level to ensure the camera is level for straight photos and does not have crooked horizon lines.

On the camera's bed, just to the right of the shutter, is a focus lever, which allows the photographer to get closer to their subject and take clear photos. The focus lever can go from 2 meters to infinity, with a few different distances in between.

 When you look at the front of the camera and focus on what is on the Compur shutter, on the right side is the shutter release lever, and on the left side is a dial with Z, D, and M. These are used for different shutter functions. Z opens the shutter when you release the shutter lever and closes when you pull the shutter release again. D opens the shutter when you pull down on the shutter release and closes when you release it, and M is for the more normal use of the shutter speeds built into the shutter. The shutter speed ranges from 1 second to 1/250. All the shutter speeds on the camera seem reasonable, even the 1 sec, which is fantastic for a 100-year-old camera.

A small lever is on the bottom of the shutter. Sliding the lever from one side to the other changes the aperture setting, which you can see on top of the shutter. The camera's operations are very easy to see while holding it. You can view the shutter speed, the aperture settings, the focus distance, the viewfinder, and the bubble level, all while composing the photo in the vertical or portrait position.

 On the right side, as you're holding the camera, is a chrome knob on top of the lens standard. This slightly raises the camera lens, which will correct for vertical distortion. It doesn't do much, but it gives you a little movement in several of the better-quality folding cameras from this era.

For horizontal photos, you can swing a wire finder around the lens. On the back of the camera, a small eye finder slides out to create an action or sports finder from the two pieces. Using the camera in this position is a bit more clumsy due to where the shutter release is positioned.

Eyepiece on back up, and wire frame in place for action photo.

Fortunately, the Cocarette I cameras can use the popular 120-size film. The film chamber slides out from the camera body to load the film. On the left side of the body is a lever that you slide to unlock the film chamber from the body. Once the film chamber is unlocked, it can slide up to reveal the take-up spool and the film area. To put the film in the film area, there are holders that you flip up to get the take-up spool and the film into the respective areas.

 When loading the film, slide the paper packing under the thin channel to keep it flat across the opening. Another oddity of this camera is a large cut-away on the top of one of the corners of the exposure areas. I don't understand why this is there, as it did produce the cutout on the negative. If you know why that is there, I'd love to know. It may have had something to do with the older films of that time.

Once the film is loaded into the film back of the camera, slide it back into the camera and lock the back onto the camera body to prevent it from getting exposed to light. A small square red window with a cover is on the back of the camera. Winding the film with the take-up spool will take you to the number 1 photo, and now you're ready to make your first photo.


My Results:

I loaded the camera with a roll of Rollei RX100 film and walked through the neighborhood with my trust Sekonic L-308 meter. The day was somewhat overcast, so the contrast in the images wasn't the best. I also used the focus control on the camera. Since the day was cloudy, the settings on many of the photos were a shutter speed of 1/100 and aperture settings of f/4.5, which means there's not a lot of play when it comes to depth of field, and the photos show that.

 Here are the results I got from the Contessa Nettel Cocarette I Deluxe.

Conclusion:

The camera is straightforward to use, which I’m used to because I often use folding cameras. The controls were straightforward to define and comfortable to hold for composition purposes. However, the results I received weren't the best when I used the focus control on the camera. It's very possible my distances were off, and having to use a shallow depth of field didn't help.

 It wasn't bad, but my expectations were too high. Getting a 6x9 format negative with a Zeiss lens, I was hoping for better results. That shows I'll need to take this camera out and try again.

 Thank you for taking the time to read about this beautiful and very functional camera. It certainly looks terrific in my collection, and I enjoy having it.

 Click on the link if you're interested in reading some of the other camera reviews

 If you are interested in some of the cameras and other camera oddities I have for sale, I have a store on eBay called Cuny's Camera.

 Until next week, please be safe.

Original Model K1 Rolleiflex

My Rolleiflex K1 Camera

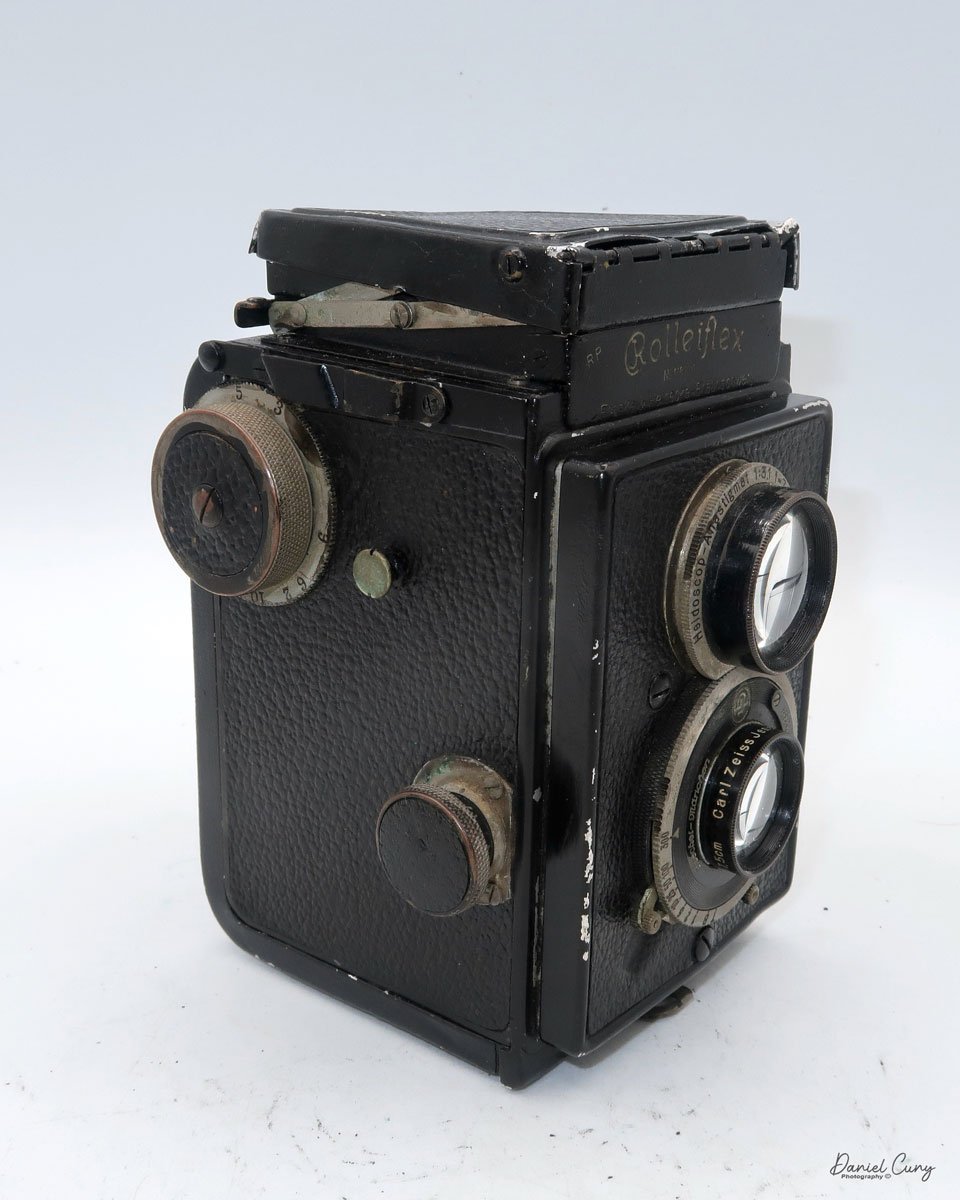
As is common for me, I purchased this original Rolleiflex model with many cameras, which included some other items I was more interested in. In the photo of the camera lot, I could see the Rolleiflex name, but the image was so small that I couldn't tell what model it was or even if it was in working condition. I took a shot; as I mentioned earlier, I was more interested in some items, and the Rolleiflex was more of the icing on the cake regarding the importance.

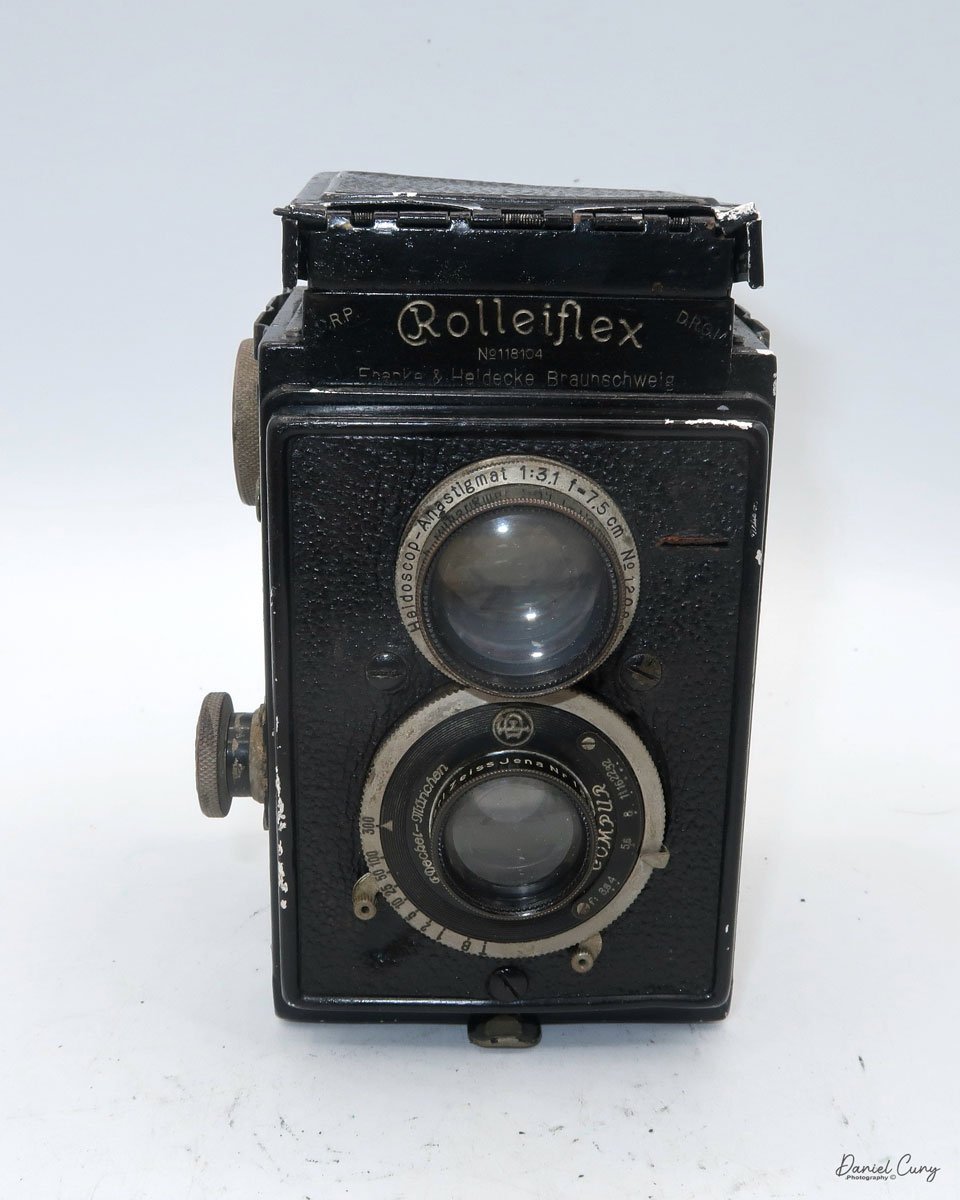
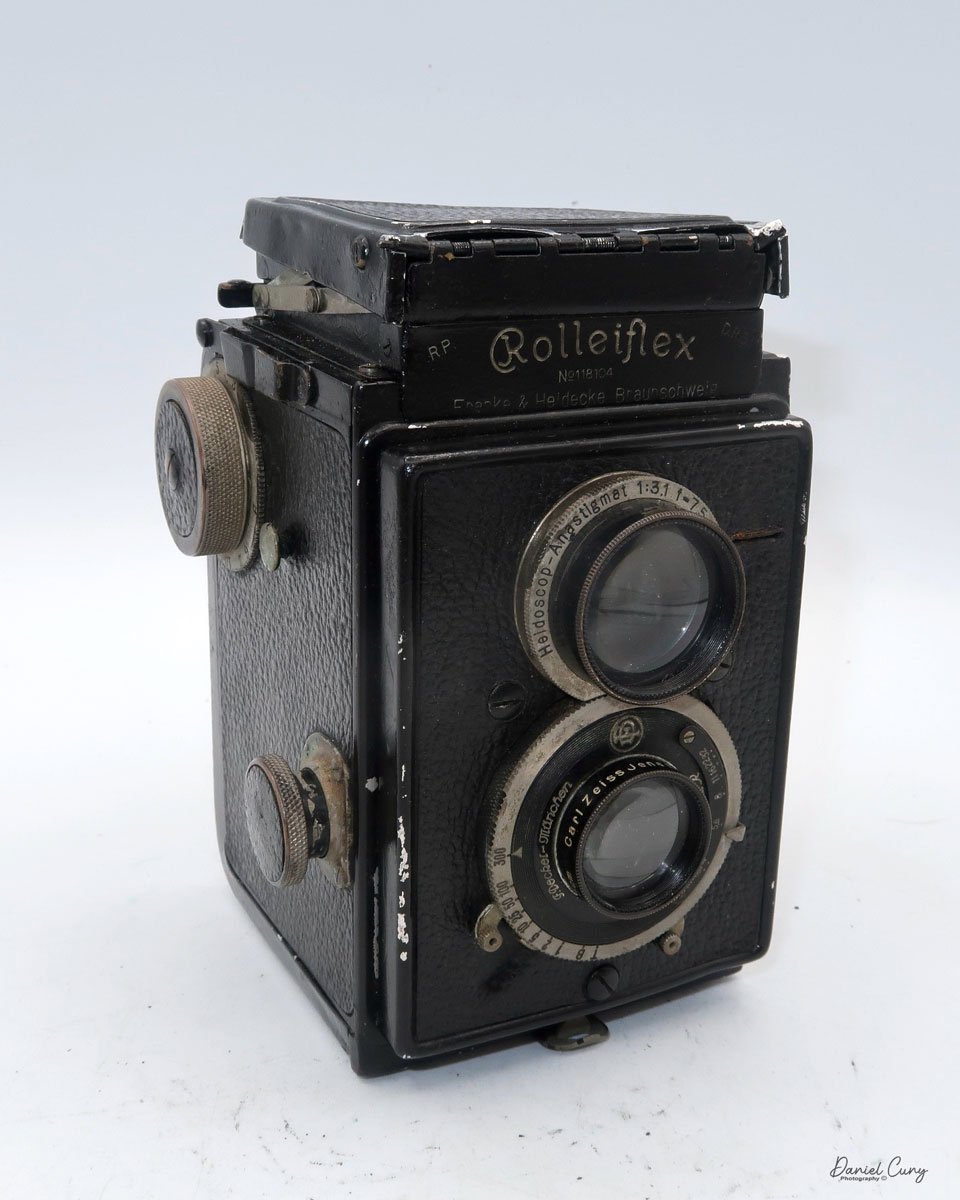
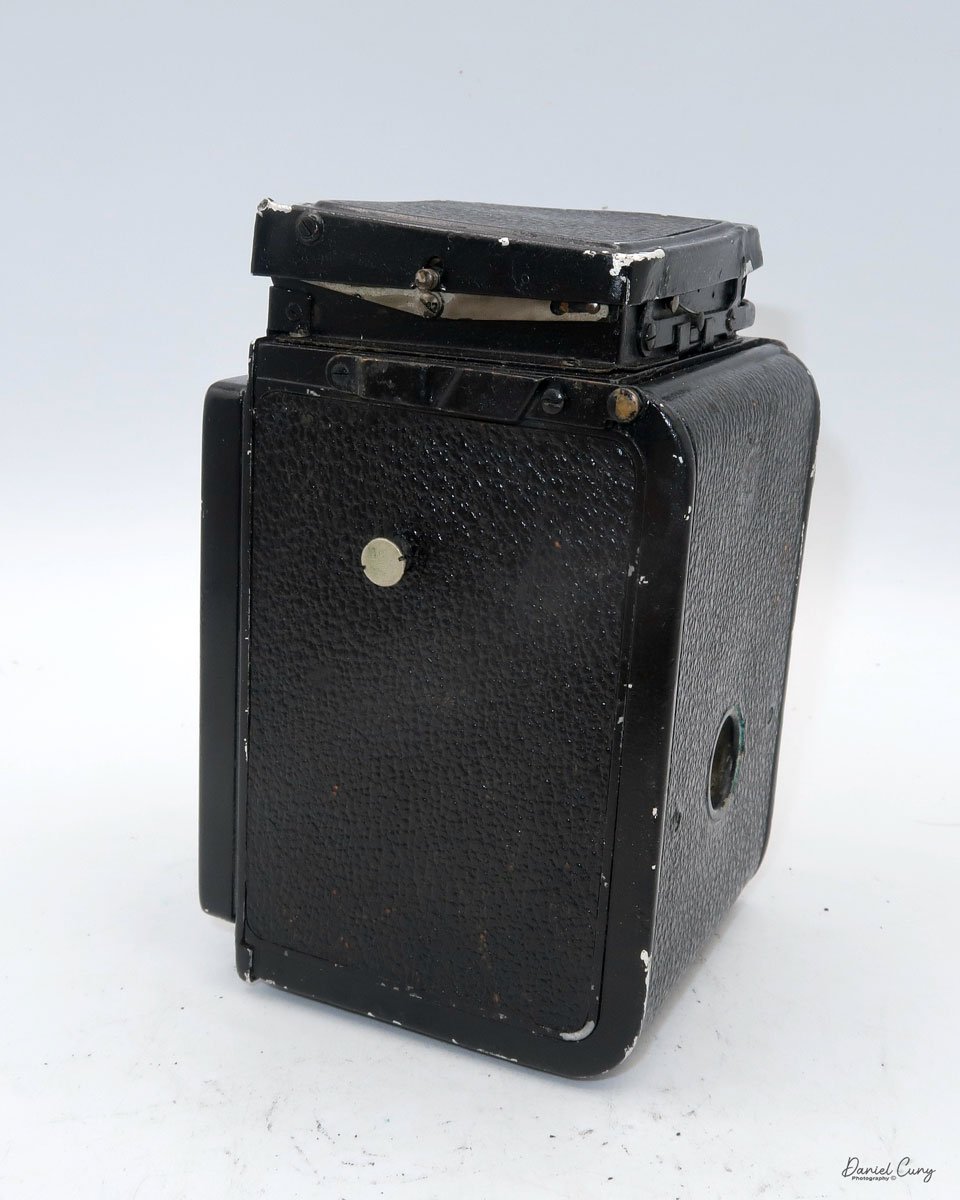
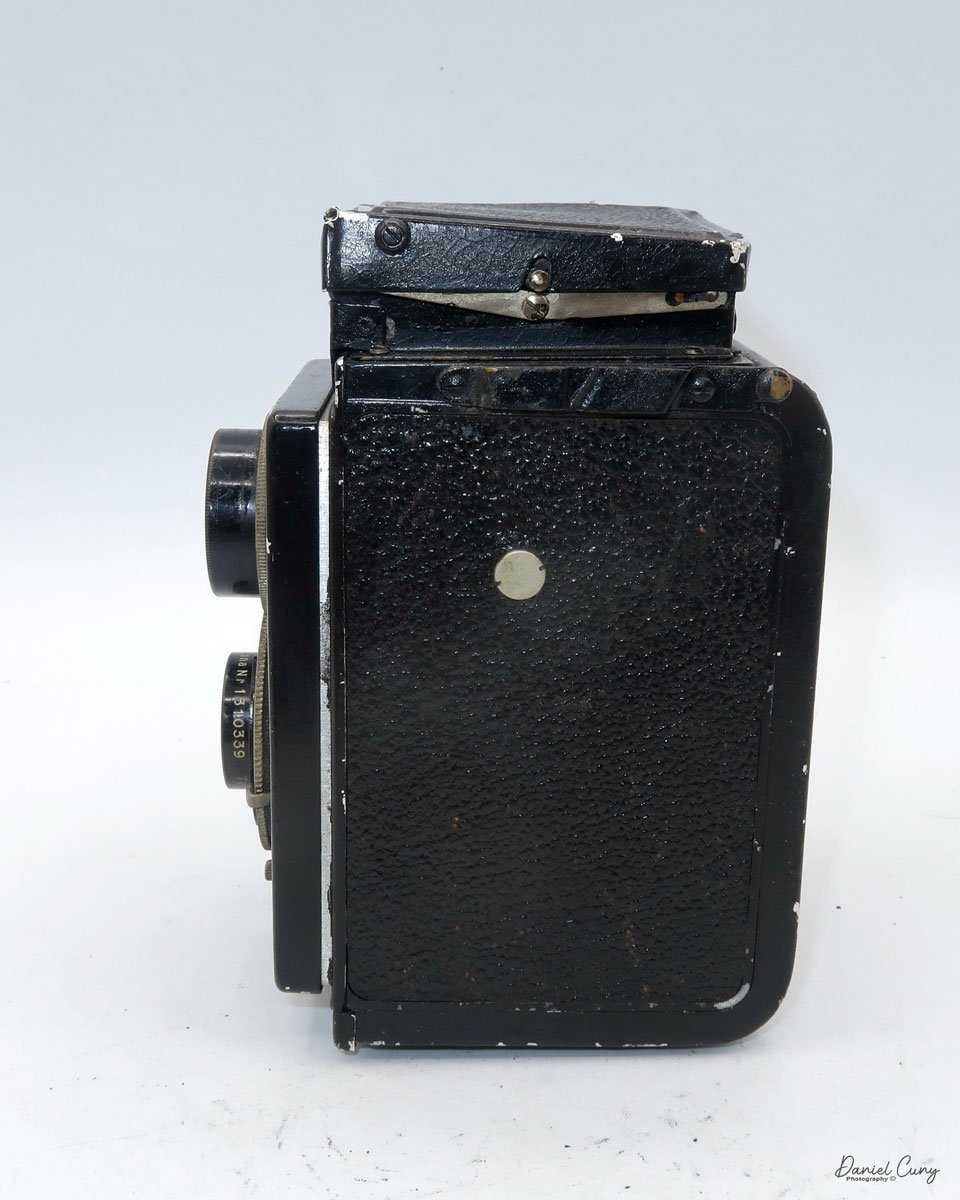
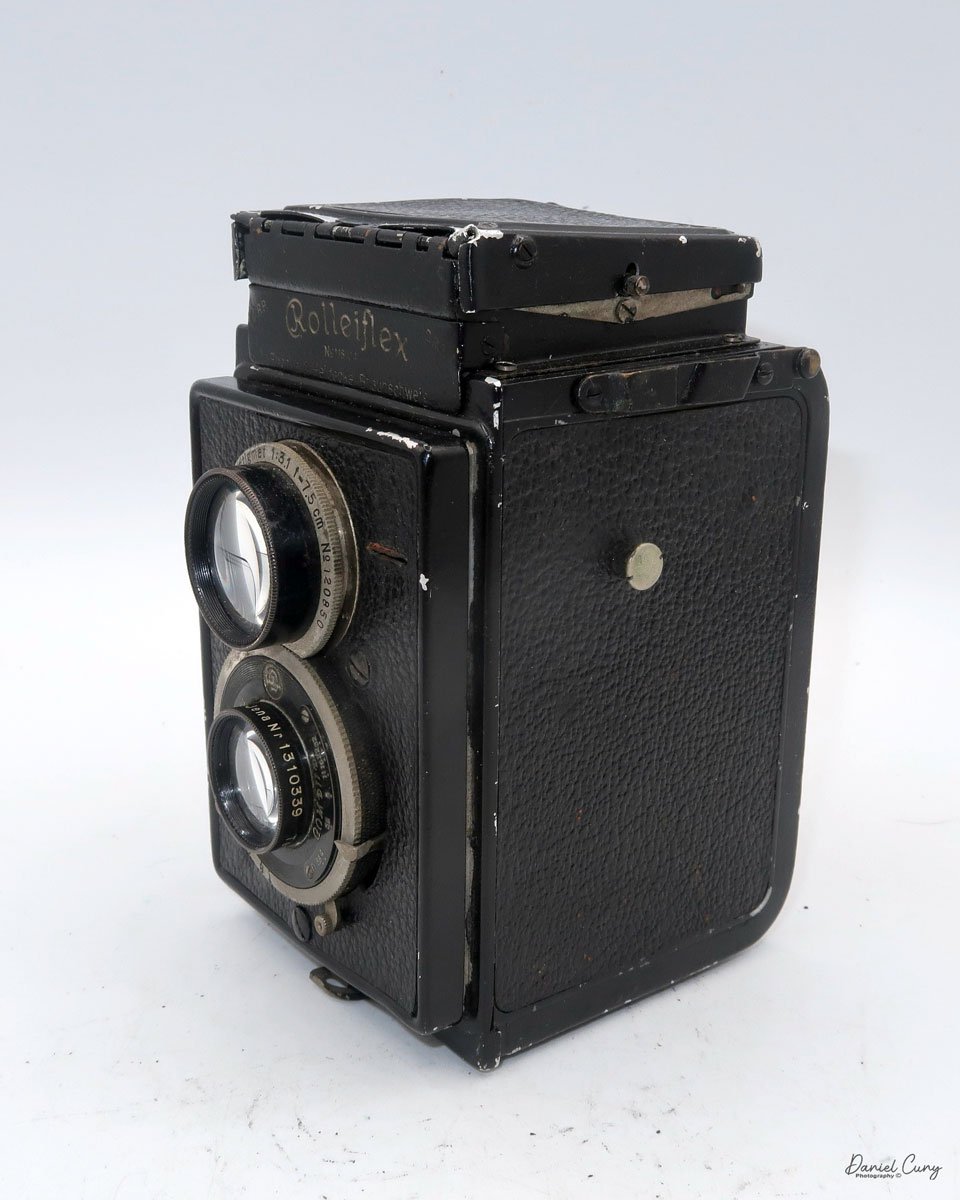
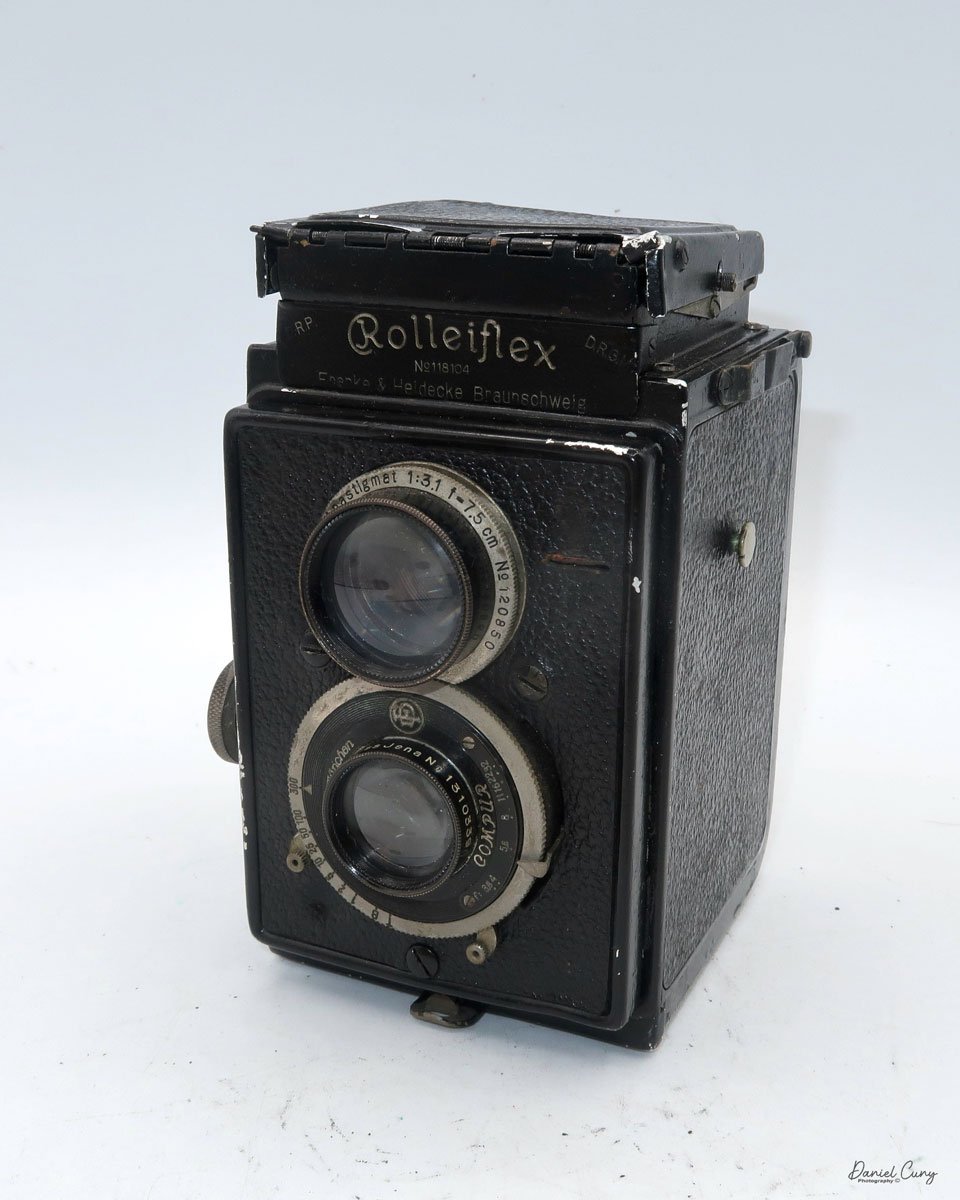
 Once I received the items in the lot and looked them over, the main items were great, and I was happy to have them. I picked up the Rolleiflex and checked on the camera's serial number, which was a low number. I have serial number 118104. From what I can see online, this is one of the first batches of cameras made. While the original Rolleiflex camera was only made from 1929 to 1932, a few modifications were made.

 In the photo, the Rolleiflex looked well used, and the top light chimney looked a bit wonky, which it was and still is today. When I tried to open the top, one of the side wings was jammed closed and wrapped under one of the other side wings, and I couldn't look down the chimney to see if the focusing screen was there. I took out my set of small screwdrivers and unscrewed the top 4 screws to remove the light chimney to fix it and bend the sides out a bit to make the chimney more usable.

Early Rolleiflex name and serial number

 Once I took the top off, I noticed the focusing screen was in good condition and still had the bubble level. It was a very clever idea to put in the camera when it was manufactured almost 100 years ago. 

The Company:

I reviewed the original Art Deco-style Rolleicord a few months ago, and here's what I wrote about the company's history then.

 Rollei holds a significant place in photographic history. Founded in 1920 in Braunschweig, Germany, by Paul Franke and Reinhold Heidecke, the company originally bore the name "Franke & Heidecke." Initially, it focused on precision mechanical devices, but by the mid-1920s, Rollei began producing cameras that would revolutionize photography.

 Rollei gained international recognition in 1929 with the launch of the Rolleiflex, the first twin-lens reflex (TLR) camera. The Rolleiflex was compact, robust, and designed for medium-format photography. Its unique twin-lens system featured one lens for viewing and focusing and another for capturing the image on film. This innovative design allowed photographers to frame shots at waist level, making candid photography more discreet and practical. The Rolleiflex quickly became a favorite among professionals and enthusiasts, particularly for portrait and documentary work.

The success of the Rolleiflex led to the introduction of the Rolleicord, a more affordable version aimed at amateur photographers. Both models showcased Rollei's commitment to precision engineering and optical excellence, which became hallmarks of the brand.

 During the 1930s and 1940s, Rollei continued to innovate, refining the Rolleiflex and Rolleicord lines with features such as automatic film winding and improved optics. Despite the challenges of World War II, the company maintained its reputation for high-quality cameras. In the post-war era, Rollei played a significant role in the resurgence of the German camera industry.

The 1950s and 1960s marked a golden age for Rollei. The Rolleiflex TLR became synonymous with professional photography and was used by renowned photographers such as Richard Avedon, Diane Arbus, and Vivian Maier. Rollei also ventured into other formats and technologies. The Rolleiflex 35mm SLR, introduced in the late 1950s, showcased the company's adaptability to the changing market demands.

 By the 1970s, the rise of Japanese camera manufacturers like Nikon, Canon, and Minolta introduced intense competition. These companies offered high-quality single-lens reflex (SLR) cameras at more affordable prices, challenging Rollei's dominance in medium-format and professional photography. However, Rollei's resilience and ability to adapt to changing market conditions inspired by its history.

In response, Rollei diversified its product line, introducing the Rolleiflex SL66, a medium-format SLR, and the compact Rollei 35, which became one of its most miniature 35mm cameras. Despite these innovations, Rollei struggled to maintain its market share due to its higher production costs and its competitors' rapidly advancing technology.

 In the 1980s and 1990s, Rollei faced financial difficulties, leading to changes in ownership and restructuring. The company shifted focus to digital imaging and niche markets, including high-end studio cameras and digital backs for medium-format systems.

The Rollei legacy endures as a symbol of German engineering and innovation, reflecting a century of dedication to the art and science of photography. This enduring legacy evokes a sense of respect and admiration for the brand's contribution to the field of photography.

My Camera:

My early Model K Rolleiflex is 5.25" tall and 3.5" wide by 3.75" deep. These measurements are with the light chimney closed. If I open the light chimney, the camera is 7.5" tall and weighs 1 lb. 9.7 oz. with the original lens cap and without film loaded into the camera. My camera has a Carl Zeiss Jena Tessar 7.5cm f3.8 lens, serial #1310339, for the taking lens, and for the viewing lens is a Heidoscope Anastigmat 75mm f3.1 lens, serial #120850. 

The lens is in an F.Deckel-Munchen Compur shutter with speeds from 1/300 to 1 sec. along with "B" & "T". The shutter speeds are set by turning a chrome ring on the outside of the shutter ring. The shutter cocking lever is on the left side of the camera as you view it from the front, and the shutter release is on the right side. The aperture ring goes from F3.8 to F32 and is set by a sliding ring just outside the shutter ring.

Taking lens, and shutter-aperture settings on my original K1 Rolleiflex

The light chimney or light hood is the most interesting thing about the camera. To open the light chimney, on the back of the camera, there is a small lever you need to press down to unlock the chimney. The front and sides will spring open if the chimney is in good working order. Since mine is not in perfect condition, the front opens, but I need to coax the sides to open correctly. Once the chimney is open, you can view the focus screen.

 On the back of the chimney is a magnifying glass on a spring. It can be flipped over and locked into the front part of the chimney, where it can be used for critical focus. Pressing the front part of the chimney releases the magnifying glass, and it returns to its normal position. 

 On the backside of the front wing of the chimney was a mirror, or a highly polished metal piece that flips down with a lever on the left side of the chimney. When the magnifying glass is in the "up" position, and you flip the lever down, the mirror will be at an angle that you can use the back as a level finder and focus the camera while viewing the image through the back opening of the chimney. I really liked this feature as it gives the camera a lot of flexibility when shooting. To close the chimney, fold down the sides first; the back and the front will close, covering the camera.

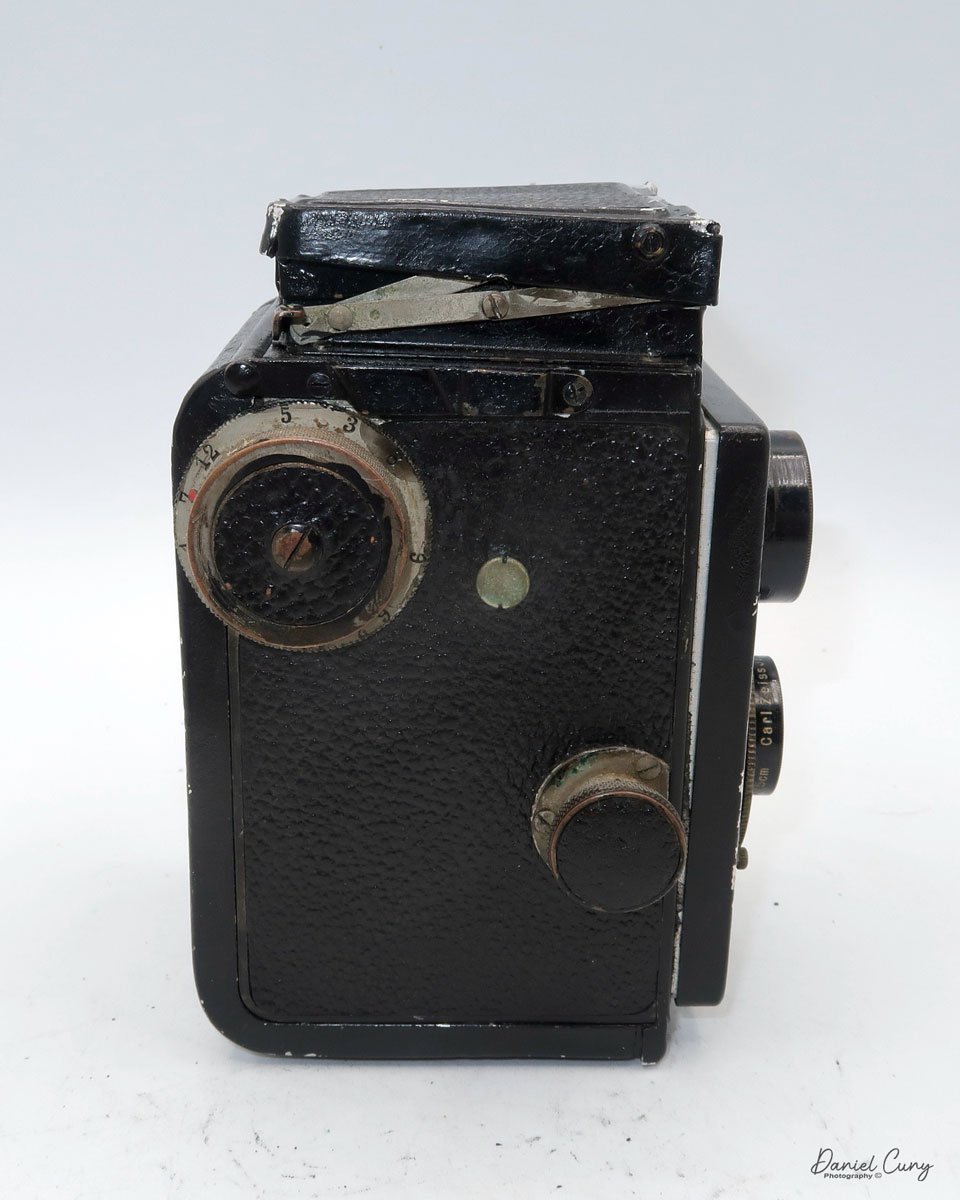
On the right side of the camera are two knobs. The larger knob on the top is the film advance knob. Around the knob are numbered from 1-12, but the numbers aren't in order; they go 1,7,12, small space, then 5,3,8, small space, 9, small space, and 6,2,10,1,11. At first, I thought these were frame numbers, but the sequences are so off. I know the first camera models were made for film size 117, and the camera only took six exposures with larger gaps between frames. There is also a red arrow pointing towards the number, but it didn't change when I put the film in the camera and advanced it to the next photo. Maybe someone can explain this sequence to me.

 The lower and smaller knob is the focus knob. On the inside are distance numbers, but there is no feet or meter setting. On the camera's left side is a lug, which was used to connect the strap.

The back door locking mechanism is on the bottom of the camera, and there is a tripod socket and a second red window with a cover. I didn't use that frame counting window, as I used the one on the back of the camera as I would for most cameras. To open the back door to load film, you lift the silver-hinged locking mechanism, which opens the back door. After doing some research on the camera, I found that this model doesn't take 120 film like all the other Rolleiflex models. 

I tried anyway, and it's too wide and didn't fit into the film chamber. Luckily, I have some outdated Agfa 620 films that fit correctly. I put the empty spool on the top. You can pull out the larger knob to load film into the camera, then press it in to lock the reel into place. I put the outdated Agfa roll into the camera, fed the leader into the empty spool, wound the film to start, closed the back of the camera, and wound the film to frame number 1. Now, I'm ready to take the camera out on an adventure to see how the camera performs.


My Results:

My wife and I planned a trip to Lake Quinault in the Olympic National Forest, so I wandered the lake's hotel grounds with a fantastic camera loaded with film and took some photos. Here are a few of the images from this trip.

Conclusion:

The camera performed very well, and the images were nice and sharp. The focusing screen was dark compared to the newer cameras. Still, it did an excellent job for a camera almost 100 years old and was extremely fun to shoot with. Due to the age of the film, the images have a mottled appearance when looking at something without detail, like the sky or lake. But that doesn't affect the camera's usability, which was overall very good.

 I'd love to hear from you. If you have one of these cameras and have questions or want to let me know what you think of the camera, please leave a comment, and I'll get back to you soon.

 Thank you for taking a few minutes from your day to read about this fantastic camera.

 Until next week, please be safe.

Zeiss Ikon Super Nettel

Upon my first encounter with the Super Nettel camera, I was immediately drawn to its understated elegance and subtle Art Deco influence. This is my second Super Nettel, having previously owned the Super Nettel II, a similar model with a few distinct modifications.

My Zeiss Ikon Super Nettel Camera from 1934

 When my wife and I were in Paris earlier this year, I always enjoyed visiting local flea markets to look for anything photographic, whether it's cameras, lenses, old negatives to digitize, daguerreotypes, or just photo nickknacks or accessories. I made my way to their larger flea market area on a Saturday morning, and in one of the stalls, a lovely gentleman had some Leicas and other rarer cameras. I would have liked to purchase more than I did, but I'd pick up this very nice looking and working Super Nettel camera. In the back of my mind, I always pictured myself doing a blog post on it, especially since the camera was in good working condition, especially for a camera built 90 years ago.

 The Company:

Zeiss Ikon, a company formed in 1929 through the merger of four prominent camera companies in Germany, including Ernemann, Goerz, Ica, and Contessa-Nettel, was a significant investment by the Carl Zeiss Foundation. The company had two main divisions: the camera and the optical. 

 With the new company's formation, almost all of the cameras had Carl Zeiss lenses, and the other companies that had optical manufacturing, like Goerz, had to shut down their optical divisions. With the formation of the new company, almost all of the cameras were using Compur shutters, and like the optical companies, the majority of the shutter companies were also absorbed within the new company.

This group was one of the biggest manufacturers of cameras and lenses in the world, producing many top-quality 35mm cameras like Contax and several high-quality folding cameras like Super Ikonta, which to this day are highly desirable due to their workmanship and quality optics. Until WWII, Zeiss was also a major manufacturer of movie cameras and medical optics.

The cover of the instruction manual. Thank you Pacific Rim Camera.

 After WWII, Zeiss was split into East and West German companies. The company was in Stuttgart in the West, and there were disputes with East Germany about the trademark. The West German ceased production of cameras in 1972. In East Germany, many of the factories were dismantled and sent to the Soviet Union. The Soviet camera manufacturer Kiev received much of the equipment, and in 1948, the Zeiss company became government-owned

 In 1948, the company introduced the new Contax S model, which had a different look from their earlier line of rangefinder cameras, but due to the split between different countries, there were trademark and naming disputes with West Germany, so in 1958, the company changed the name to VEB Kinowerke Dresden and later was rolled into Pentacon.

 After Germany's unification, Carl Zeiss reintroduced the Zeiss Ikon name and produced a rangefinder camera that was introduced at Photokina in 2004. The camera was built by Cosina in Japan and had the Leica M mount for lenses. Like the Contax G and G2, there were lenses made in both Japan and Germany for the camera.

My Camera:

For me, the reason I enjoy shooting with a Rangefinder 35mm camera is due to a few different reasons. The cameras are smaller and more compact to carry. They are less noisy to photograph due to the shutter system and not having the noise of the clunking mirror flopping up and down. Granted, the rangefinder focus is more challenging to use. It takes some time to get used to, or the ability to see what you're getting when you put on different lenses, so there is a trade-off between an SLR and a Rangefinder-style camera.

 The Super Nettel camera was made in 1934 as a "less expensive" camera to their Contax line. To open the front door to expose the lens system, there is a button on the top center of the top plate you press in, and the lens, which is attached to the bellows, pops out. My camera has the less expensive Carl Zeiss Jena 5cm (50mm) f3.5 Triotar lens. The camera had a more expensive Zeiss Tessar 5cm f2.8  or 5cm f3.5 lens. Around the lens are three screws in the 2 O'clock, 5 O'clock, and 8 O'clock positions, which are for holding on an accessory filter or the lens hood.

When closed, my camera measures 5.5" wide by 3" tall by 1.5" deep. When the lens is exposed, it is 4" deep, including the front door, which folds down. The camera weighs 1 lb, 6.3oz. 

 Around the lens is the aperture control, which goes from F3.5 to f22. The Super Nettle incorporates the same or a very similar rangefinder system as the Super Ikonta cameras. Around the outer rangefinder window is a knurled ring that you turn to focus the rangefinder system, bringing the two images together to get a focused image. On the outside of the knurled ring is the focus distance in meters, along with a small depth of field scale.

Note the three screws aaround the lens to hold the accessory filters and hood.

 To retract the lens and close the front door for travel, there are two knobs on the outside of the door that you press in, and at that point, you can press the lens back into the camera body, which will also close the front door, which will lock once pushed in.

 On the back of the camera are two windows. The window on the left is the viewfinder for composing the photo, and the window on the right is the rangefinder window for focus. They are both pretty small windows, but they do an adequate job.

The left window is the viewfinder, and the right is the rangefinder.

On top of the camera is an accessory show for putting on an accessory viewfinder, which has a few different options according to the instruction manual. Next to the accessory show is the frame counter, and next to the frame counter is the advancing knob which also incorporates the shutter speed settings and cocks the shutter. Inside the winding knob is the shutter release. On the far left side is the camera's rewind knob to retract the film when you're finished shooting the entire roll of film. In between the frame counter and the winding knob is a small button. This button unlocks the winding sprocket, so when you rewind the film into the canister, you don't rip off the sprockets of the film.

From left to right are Rewind knob, Viewfinder window, Accessory Shoe with Opening button in front of AS, Frame Counter, Rewind unlock, Winding knob with Shutter Speeds.

To take the back off to load the film, you'll need to look at the bottom of the camera, where there are two handles on either end of the camera. Flip up the handle and turn the handle 90 degrees. One knob will go clockwise and the other counterclockwise. The back will slide off the camera, exposing the incredible metal rolling curtain-style shutter system, the same as the Contax and other Zeiss cameras have incorporated into them.

 You load the camera like you would any other 35mm camera with the film canister going on the left, pulling the leader to the take-up spool, and making sure the sprockets are engaged with the "advancing" sprocket, which is advancing the film across the shutter. Once on the take-up spool, I always take up the slack on the rewind knob, so when I put the back on and advance the film, I watch for the knob to turn when the film pulls out of the canister s. I know the camera is loaded correctly. To put the back on, slide the back into the camera and turn the locking handles the opposite way, and the back is locked into position.

My results:

I need to practice what I teach. I only got a few good photos from this roll of film, as after the sixth frame, the film sprockets tore, and the film didn't advance through the camera. However, the frames I did get were well-exposed and very sharp.

Conclusion:

What another fun camera to shoot with! I enjoyed the camera's ability to focus and handle when out and about shooting. Since I had a mishap with the film tearing, I wanted to get the blog out. I will add more photos down the road when I take the camera for a trip some weekend, and I want a great-quality camera with a very sharp lens to be creative.

 I already have the camera picked for my post next week, which I hope you'll come back to look at at your leisure. 

 Until next week's post, please be well and safe.


Robot Royal 36 Camera

Being a big fan of The Robot cameras and having done an earlier blog post on the Robot Luftwaffen Eigentum camera, I wanted to get a camera I could use when we went on vacation or just out for the weekend. Years ago, I came across an excellent and working condition Robot Royal 36 camera. It was from an online auction, so I made a relatively low offer and won it.

 When I received it, I was surprised by the weight and heft of this particular camera. I put it through routine tests to see if the shutter was indeed opening and closing, which it was. The lens was clean, another positive, and the transport was active and in good working condition.

 When COVID hit, I was laid off from one of my favorite jobs. I started writing my camera blog. After being off work for ten months, I got hired for a better position and loved the job, company, and boss, but I put the camera on my shelf for the next four years until I recently retired and started writing my camera blog again.

History:

Otto Berning & Co. started in Dusseldorf, Germany, in 1933. Otto Berning and Co. began to manufacture amateur cameras in 1934 when a young watchmaker in his 30s, Heinz Kilfitt, designed the first compact camera for what Robot would be so well known for. The design had a spring-loaded motor winder, a unique item brought to the camera industry due to his watchmaking skills. Heinz Kilfitt also designed the camera to have a 24x24mm film format. He offered the format size to both Kodak and Agfa, who rejected it, so he sold the design to a young Hans Berning, who was only 23 and worked for his father's company. 

 Robot cameras provide a film format of 24x24mm on most of their cameras. An advantage of the 24x24mm frame size was that the photographer could get 50 images on a roll of film instead of the standard 36 in the traditional 24x36mm format. Another advantage was that there was no need to turn the camera for vertical shots.

Some unique features of the Robot cameras are that they use a rotary shutter and sprocket film drive system, which are more common in the cine cameras of the time. Robot cameras also have a 90-degree switchable viewfinder, allowing the photographer to point the camera in a different direction while looking through the viewfinder and taking photos. All the cameras have a winding motor of film advance system that allows the photographer to wind the motor and shoot rapidly up to 5-6 frames on a single wind, depending on the camera.

 Robot also provided either Carl Zeiss or Schneider-designed lenses on their cameras, which gave the photographer unparalleled sharpness in their images. The cameras were die-cast zinc and stamped stainless steel bodies chalked full of clockwork inside, and they are very sturdy and extremely well made, a testament to the high-quality materials used in their construction. 

During WWII, Robot produced cameras for the German Luftwaffe to put on their Stuka dive bombers. After the war, Robot continued producing high-end cameras like the Robot Star and Junior cameras. Robot produced the Robot Royal in three formats, with a few feature and film format variations. 

My Camera:

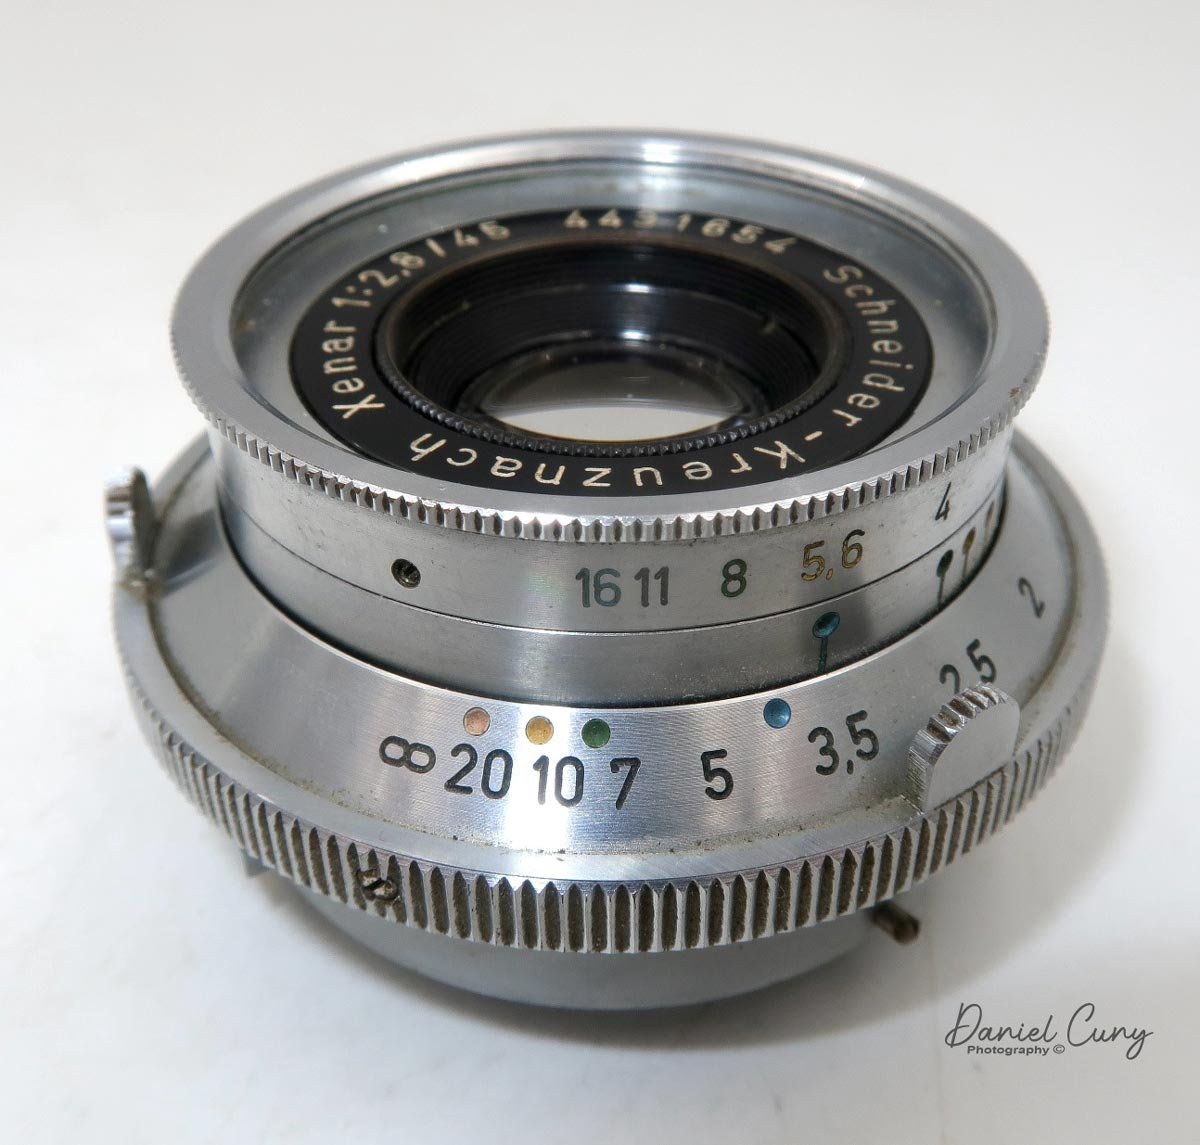
My model is the Robot Royal 36, model III, and it has the film format of 24x36, the most common film format for 35mm cameras. My camera has a Schneider Xenar 45 mm f2.8 lens. My camera has a Schneider Xenar 45mm f2.8 lens. It measures 5.5" wide x 3" tall x 2.75" deep from the front of the lens to the back of the camera and weighs a whopping 2 lbs. 0.4 oz. That's the first thing I noticed when I unwrapped the camera. This is a very solid and well-built camera with unique features that set it apart from other cameras. 

To open the camera, as you hold the camera there is a chrome tab with etching on it on the left side. With your thumb, you lift that and the latch and open the back of the camera. Unlike most 35mm cameras, this camera has a take-up spool you need to load the leader into as opposed to just putting the film leader into the take-up slot, and the camera takes up the film. You need to take the take-up spool apart and thread the film leader into the spool, then put the cassette back together and load the film and take-up cassette into the camera. Then fire two frames, and you're ready to go.

My camera has shutter speeds from 1/2 sec to 1/500 sec, along with B for timed exposures. The bottom of the camera has a winding mechanism that allows me to fire 12 photos at full wind, which takes me about ten and a half cranks to wind fully.

Yellow, Green and Blue dots on lens and Aperture number for Zone Focus.

 The rangefinder on my camera is very bright and easy to focus. The other significant item about the Robot camera and lens system is they allow the photographer to shoot with zone focusing, which is fantastic for street photography. The lenses have yellow, green, and blue dots, which correspond to the colored apertures on the lens. The lens's apertures 2.8 and 5.6 are in yellow, F8 is in green, and f16 is blue. All you need to do is match up the color dot on the focus dial and the aperture used, and the lens shows you your depth of field. This procedure is similar to all other lenses, but the color coding makes the system more "user-friendly."

Removing and reattaching the lens of the Robot Royal 36 is simple. A tabbed collar at the bottom of the lens, when moved to the left, allows the lens to be detached. To reattach the lens, align the two red dots and slide the collar counterclockwise. This careful procedure ensures the lens is securely in place.

Switch for “Green Dot” normal film advance, “Red Dot” Close viewfinder and “R” Rewind film back into canister.

Once I shot the film, One the back of the camera and to the right of the viewfinder is a switch with a green dot for regular forward film transport, there is a red dot which closed the viewfinder half way and "R" for film rewind. I put the camera in the "R" position and reminded the film as a regular 35mm camera procedure. On the bottom front of the camera are the flash sync ports for "X" (electric flash) or "M" (bulb flash) settings.

Results:

 I took a roll of film, put it through my camera, and walked around my backyard to see how the camera performed. This is the first time I got to shoot with the camera since I bought it 4-5 years ago, and there were a few anomalies in the camera. There seems to be a slight light leak, but to be 100% transparent, the film I used was old, and one I had shot just a few frames with and rewound the film with the leader exposed more than ten years ago, so I can't 100% blame it on this camera.

Conclusion:

While Leica has the prestige, Robot and Alpa are probably the best-built cameras in terms of craftsmanship and overall quality. The camera is excellent, the lenses are fantastic, and it offers things built into the system, like motor advancement and an excellent feel. I had a great time shooting with it, and I need to run a fresh roll of film through this beauty more often.

Thank you for taking time from your busy day to review this blog.

Until next time, please be safe.
Primarflex II by Bentzin

I have been excited to do a blog post on this camera since I acquired it a couple of years ago as part of a group of cameras from an auction. The camera came as a kit with the case, extension tubes, lens hood, and film holders. When it arrived in excellent condition with a working shutter and clean lens, I was anxious to put some film in it and take a walk around my yard snapping photos.

History:

Bentzin has always been known as an innovator and a company that excelled in quality cameras like Primar, Primarette, and Primarflex. Carl Bentzin was born in Görlitz on February 8, 1862, died on May 23, 1932, and is buried in grave number 260, Old Görlitz Cemetery. He opened his first factory in 1989, located at Rauschwalder Strasse 28 in Görlitz, Saxony. He changed it in 1893.


In 1899, Bentzin entered into negotiations with Carl Zeiss regarding a collaboration with Dr. Paul Rudolph, who had developed their anastigmats: Planar, Protar, and Ulnar lenses. Zeiss was looking to build cameras so they could put these lenses on them, and Bentzin had the expertise of the time to do so.

 The "Aktiengesellschaft Camerawerk Palmos" was founded in 1900. They produced cameras at the Zeiss factory in Jena and the Bentzin factory in Görlitz. In late 1900, the "Film-Palmos 6x9" camera was produced at the factory. In 1901, the bank ran into financial difficulties, and Zeiss took over production in Jena. Bentzin ran their own company, run by Carl Bentzin, in Görlitz.

 In the following years, the Carl Bentzin Company produced many high-caliber SLR cameras and even cameras for companies like Voigtlander, Emil Busch, and other German camera companies.

Soon after WWI, Carl started having his son Ludwig take over more of the day-to-day operations of the company, where he honed his manufacturing and business skills. In 1928, Carl turned the company over to his son Ludwig, his daughter Helene, and Helene's husband.

 Carl Bentzin died in 1932 at the age of 70. From 1928, Helene and Ludwig ran the company together until Ludwig's death in 1945. After Ludwig's death, the company went through several different reorganizations as part of the state-owned system, ending as VEB Feinoptisches Werk Görlitz.

The Camera:

Upon my first encounter with the camera, I was immediately drawn to its unique layout. All the controls and settings are conveniently located on the right side, including the film advance, shutter speed control, shutter release, frame counter, self-timer, and flash sync terminals. This thoughtful design, detailed in the manual, makes it easy to navigate the camera's functions.

The camera exudes a sense of robustness and reliability. It's more compact than a Hasselblad and larger than a Twin Lens reflex, striking a perfect balance. As an SLR camera, it offers the unique experience of focusing and observing the depth of field through the lens, a feature I particularly appreciate.

To open the back, just behind the viewfinder is a knob that has duo functions. To open the finder, you slide the knob back towards the rear of the camera. Then, open the back to load the film. While the knob is back, you press it down, and the back door opens, revealing the film cassette, which is removable to load the film. To remove the film cassette, you'll need to pull out the winding lever just a bit like you would any film advancing knob to release the gear from the body and the film cassette is easily removable by holding the center handle and pulling it away from the body of the camera.

Loading the film onto the cassette is straightforward for any medium-format camera. Put the empty spool onto the top area where the gear for the film advance is located. Load the new film onto the other area and bring the leader over the pressure plate so the black paper backing is facing out or towards the shutter when you put the film cassette back into the camera body. Put the end tab into the spool slot and wind it a bit until you know the film won't pop off the spool and is starting to take up on the take-up spool. I like to advance the film until I see the arrows of the paper backing, and then I put the film cassette back into the camera. The manual says to reset the frame counter, turn the counterclockwise until it stops, and lift it. DO NOT FORCE IT. A red "zero" appears in the window, then advance the film until the number one appears, then you're ready to go. Unfortunately, my camera reset on the frame counter didn't work, so I advanced until I thought I was at number 1 and started shooting.

Now that I have the film loaded, the viewfinder or light hood, as they call it in the manuals, has a couple of different variations. You can remove it for cleaning. It does have a magnifying glass folded down on the rear of the hood if needed for fine focus. Just lift the magnifying lens into position and focus. It also has a "sports" type finder, which many medium format cameras have, where you can lift a portion on the hood and look through the rear opening through the front opening to get a general sense of composition for quick action photos. If you're going to use this, be sure to pre-focus the camera and use a smaller aperture to allow the depth of focus to compensate for any missed focus.

Focusing the lens and setting the aperture is straightforward. The lens doesn't have an automatic aperture, so you need to open the lens to focus and then manually stop the lens down to the desired and needed setting for proper exposure. A "locking" mechanism for the aperture is used to help with this. You pull back the collar with the red dot and turn it to the desired aperture setting. Releasing the collar "locks" the lens into that setting, which means you cannot go past that setting when you turn the collar back and forth. This lock allows the photographer to open the aperture for brighter focusing, then quickly turn the dial back to the "locked" aperture setting to take your photo. It's easy, and the benefit is that when the lens stops down, you'll see the actual depth of field you'll get in your photograph. When I turned the advance lever, the mirror returned as it should, and to cock the shutter; there was a little extra turn needed to get the shutter cocked again. Having the additional amount to turn is standard, as It did the same function every time I advanced to the next frame.
When I received the "camera lot," it included a set of 4 extension tubes for the camera and three separate cut film holders. I'm very familiar with extension tubes and love shooting with them, but what would you ever use 6x6 film holders for when using this camera? I've never heard of a 6x6 cut film ever produced, so I'm curious how you'd even use them. Doing a bit of fussing around with the camera, the only mention I found was the availability of the cut film holders, but nowhere in the manual does it say how to load them. 

You'll need to open the back of the camera to use the film holders and take out the cassette. A silver clip is at the back of the light hood (Viewfinder). When you slide that clip back towards the back of the camera, you can slide up an insert with a couple of tabs on the top and a couple of small rollers within the insert. At that point, you can slide the film holders into that slot and take out the dark slide, exposing the film to the shutter and, eventually, the light when the shutter opens/closes. After using the film holders, you can put the roller insert back and slide the silver tab towards the lens, locking the insert into place so the film cassette works as it should within the camera.

The lens is a Carl Zeiss Jena 105mm T f3.5 lens, and it has threads on the back, which you use when using the extension tubes, but to put the lens onto the body, there is a red dot on the front of the camera at the 10 o'clock position. All you need to do is line up the red dot on the lens and turn it to the right or clockwise, and the lens locks into place by pressure. To remove, grab the lens and turn counterclockwise; the lens comes off after about a quarter of a turn.

The fitted case is exceptionally well-built. When you open it, the right side of the case folds down so you can access the different operation dials, which is very handy. While my strap is broken, I do see where it's attachable in several places to hold and distribute the weight evenly. The case can be held tightly in the case by a hook on the front and looping into the rear of the case.

Results:

I walked around my front and back yards using my light meter to get the proper exposure for each shot. The shutter works great, and as mentioned above, the aperture and focus move smoothly, so taking the photos was relatively easy.

 Here are the results from the camera.

Overview:

WOW, what a fun camera to shoot with. When I looked through the finder, the images were bright and clear. The focus was sharp, and using the "locking" mechanism on the lens was intuitive and straightforward. I didn't use the extension tubes on this shoot, but I plan on trying them out on an upcoming post for my blog, so keep tuned for that experience.

 Thank you for taking a few minutes to review this posting on a wonderful, well-built camera that should rival any medium-format SLR camera. 

 Until next time, please be safe and well.

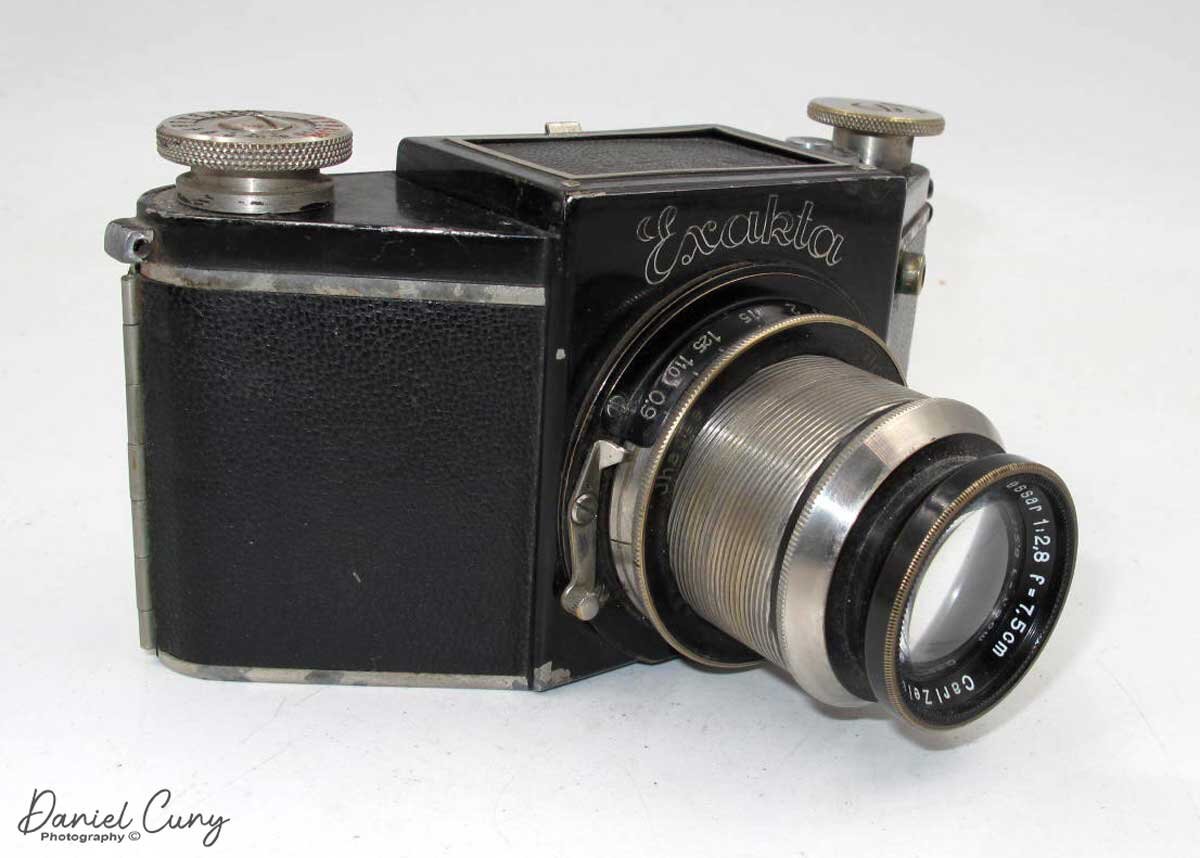
VP Exakta Model B

Knowing me, the more odd and unusual the item is, the more I enjoy it. The VP Exakta, also known as the "standard" Exakta, is just one of these cameras. The VP Exakta camera has such a classic design. They are sleek, angular, somewhat small but fits well into your hands when holding them. The VP stands for Vest Pocket, which refers to the 127 size film used in this camera and was introduced to fit into the folding Vest Pocket cameras from Kodak started in 1912. This camera isn't small by any stretch of the imagination, but interesting. They call this the VP model due to the size of the film used.

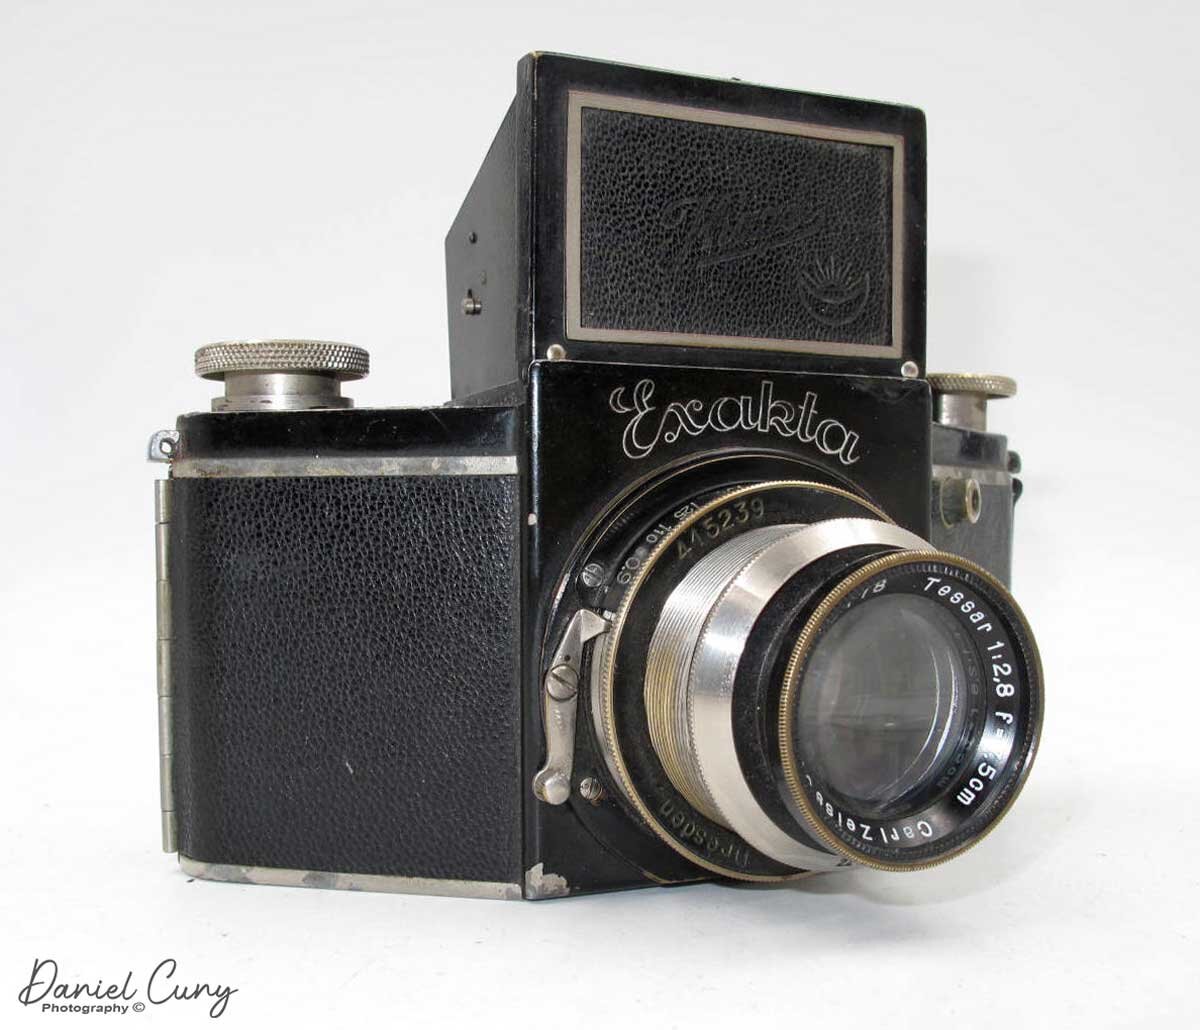
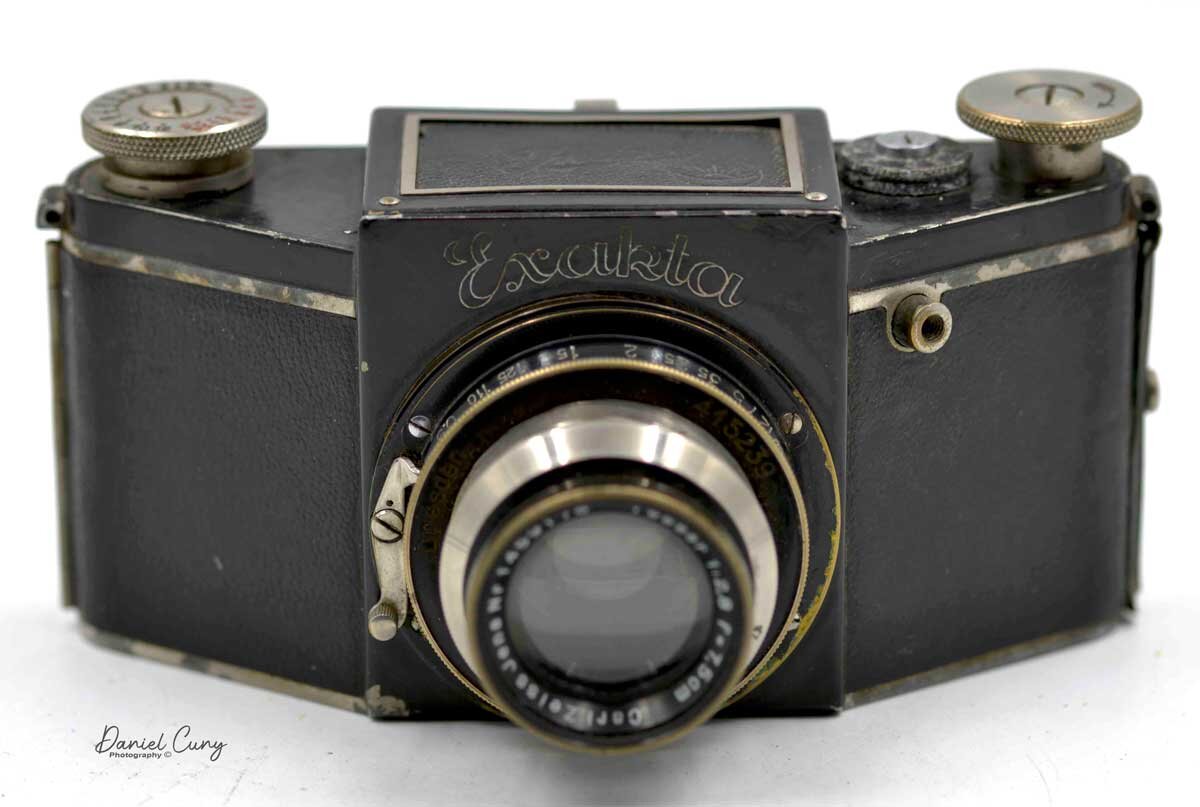
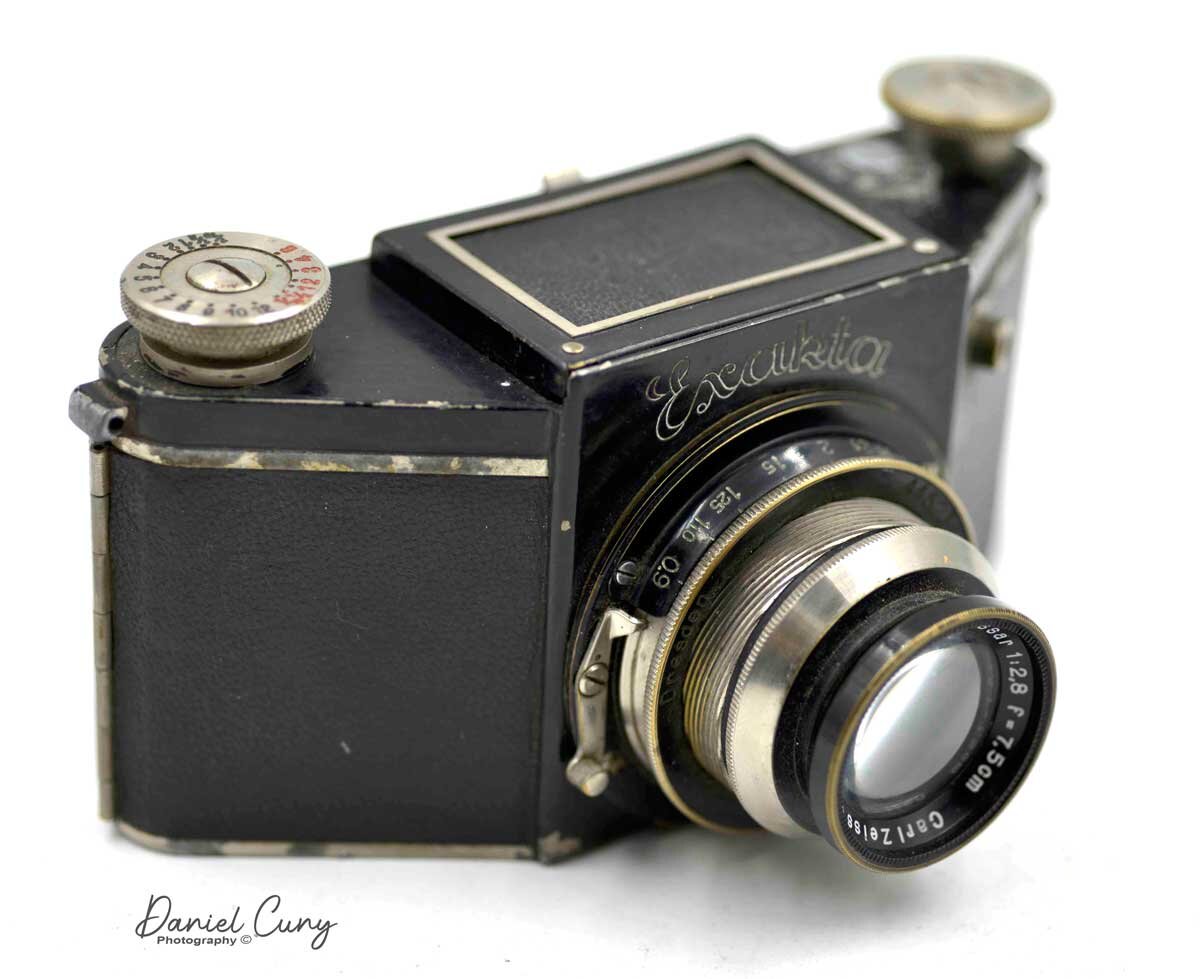
My VP Exakta Model B camera

My VP Exakta Model B camera

The VP Exakta started being produced in 1933 and is an SLR or Single Lens Reflex camera utilizing the 127 size film made by Ihagee in Dresden, Germany. The Ihagee company has a very long history and well known in the photographic community for its cameras and accessories. Here is one of the best websites about the company and cameras. Let me tell you a little about the company before I get more into the camera.

The Company

The company started as Industrie- und Handelsgesellschaft in Dresden, Germany. Johan Steenbergen, a Dutchman, started it in 1912. The name changed to Ihagee due to the German pronunciation of IHG or "ee-hah-get." In the early years, the company was making wooden plate style cameras. You can see their 1914 German language catalog here. In 1918 they changed their name to Ihagee Kamerawerk Steenbergen & Co and six woodworking employees producing products.

After WWI, they had some horrible financial problems, much as other German companies did. After the war, the company dissolves but reappears in the early 1920s, whereby in 1925, they are producing 1000 roll film cameras a day. In 1933 they introduced the first in this line of cameras known as the Exakta A. The camera has a cloth focal-plane shutter that had shutter speeds up to 1/1000 sec, which was extremely fast for its time. Even the Leica's of the same era only had shutter speeds to 1/500 sec.

During WWII, production ceased, and Steenbergen, a Dutch national, transferred ownership of the company to an excellent friend and the company employees due to the tensions between the Netherlands and Nazi Germany. After WWII, Dresden was part of the Soviet-occupied part of Germany. Because Ihagee was Dutch-owned, the East Germans didn't want to damage international relationships, so they produced their popular 35mm Kine Exakta. These were the first 35mm SLR cameras made, and the VP Exaktas paved the way for this prevalent model. It's the camera most people are familiar with or associate what Exakas are today.

 In 1950, Pentacon took over Ihagee and was producing cameras under their name. In 1959, Steenbergen returned to Frankfurt, Germany, and started Ihagee West, making some unsuccessful camera. Steenbergen died in 1967, and the company dissolved in 1976.

The Camera.

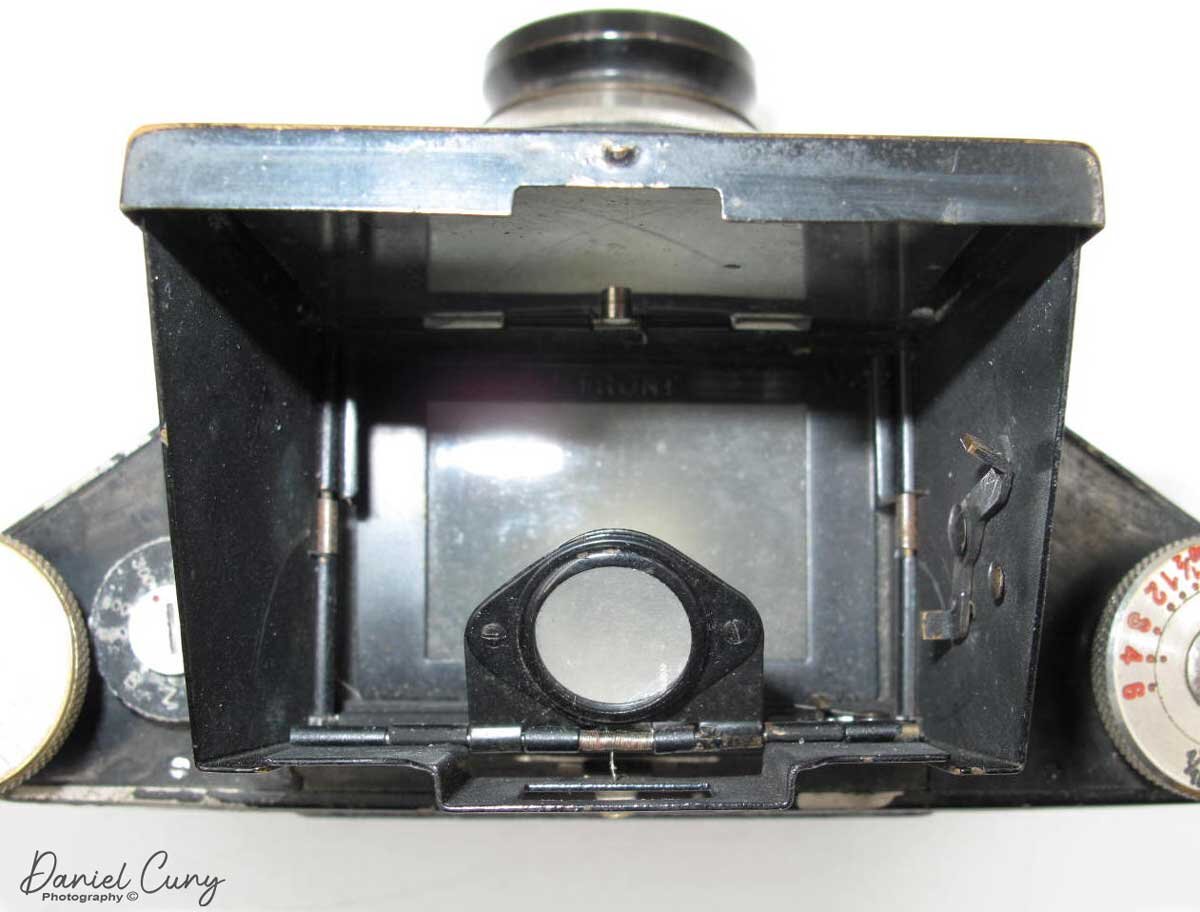
The VP Exakta or Standard Exakta took eight 6x4.5cm exposures on 127 size film. They have shutter speeds from 1/25, 1/50, 1/100, 1/200, 1/300, 1/600, and 1/1000 plus "B." The newer "B" model came out later the same year. They started calling the original model "A." The more recent "B" model incorporated extended shutter speeds and a self-timer. The extended shutter speeds were 1/10, 1/2, and seconds of exposure up to 12 seconds, giving the "B" model a shutter speed range from 12 sec. to 1/1000. There are also settings for B and Z. The Z setting is for "time" exposures on the shutter speed dial. I own this model of Exaktas. The later model "C" incorporated interchangeable backs for ground glass focus and film plates. It also had a film advance lever, and they also made the camera with a chrome finish.

The camera's size is 6" wide by 2" tall by 2.5" deep, including the lens, and it weighs 28 oz. I enjoy the camera's trapezoid shape, which, to me, is one of the finer points. The cameras came with several different lenses. The camera I have has the more expensive Tessar f2,8 lens, similar in price to the Zeiss Xenar 2.9 lens. You can look through the 1933 German catalog here. The aperture range on my camera goes from f2.8-22 and is set by the knurled ring outside the lens. I also enjoy seeing the exposed helicoid when you focus the lens. It gives the camera a more industrial look. The helicoid on my camera freezes up and is next to impossible to move unless I put some lighter fluid on the helicoid to loosen it up, but that only lasts a few hours, then it freezes up again.

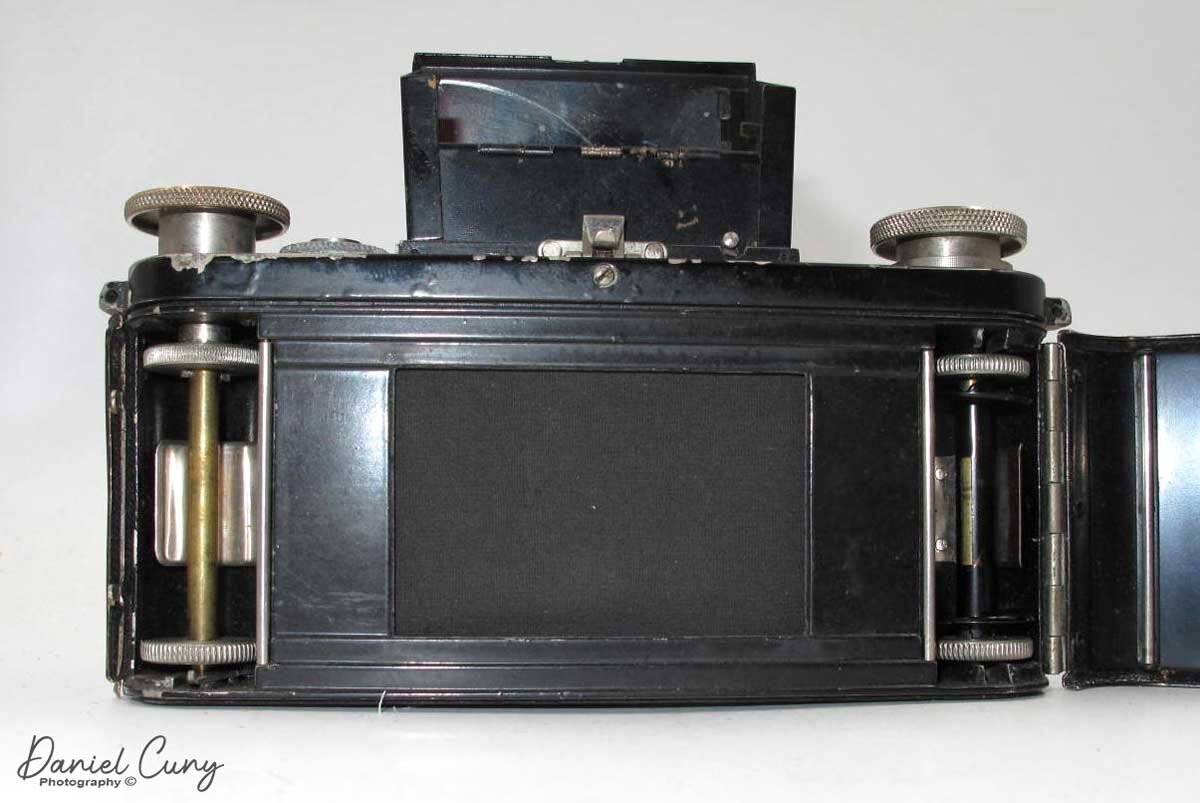
The focal plane shutter on my camera sometimes works, but it is mainly in the closed position. I can get it to fire at times, but winding the camera to advance the shutters is exceptionally challenging, so I mostly use the camera for display purposes. The film fits into a holder, which then fits into the camera body. To put the film spool on the holders, you unscrew the film holder's bottom and slide the film reel over the holder's center and screw the base back onto the holder before putting it back into the camera.

Conclusion:

I enjoy this camera and am looking into getting the camera repaired to shoot film through it. If any of you out there have had one repaired or know of a reputable repair facility in the US that can handle the repair, please let me know. I'd enjoy running through some 127 films through it to see how it operates, especially if I can get it to shoot for 12 seconds.

 Thank you for taking a few minutes from your schedule to read my post. If you have questions or concerns regarding this post or any of the others I've written, please email me. I'd love to hear from you.

 Until next week, please be safe and hope you have a joyous holiday.