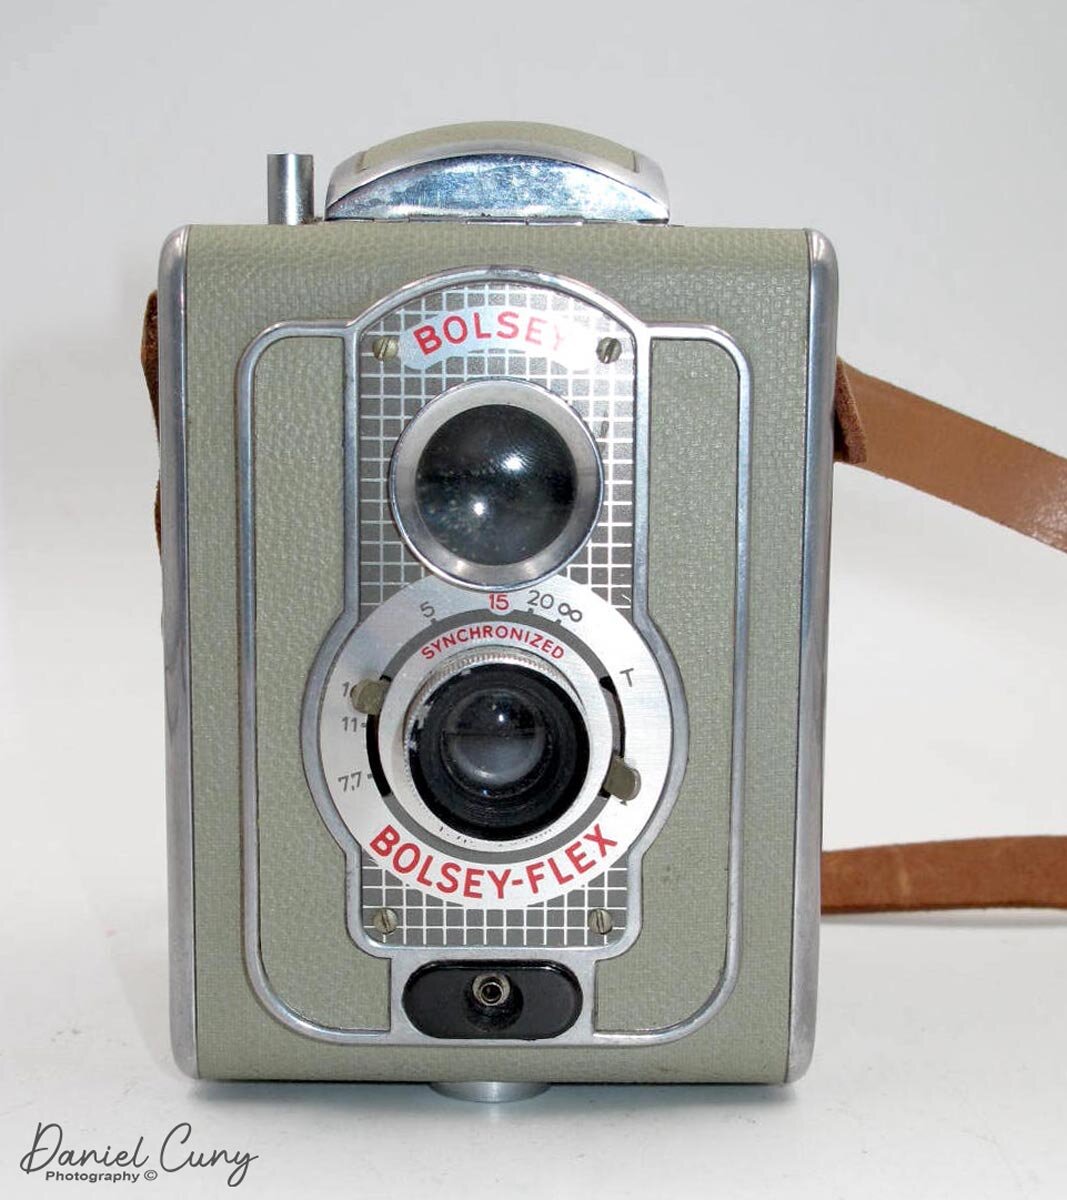
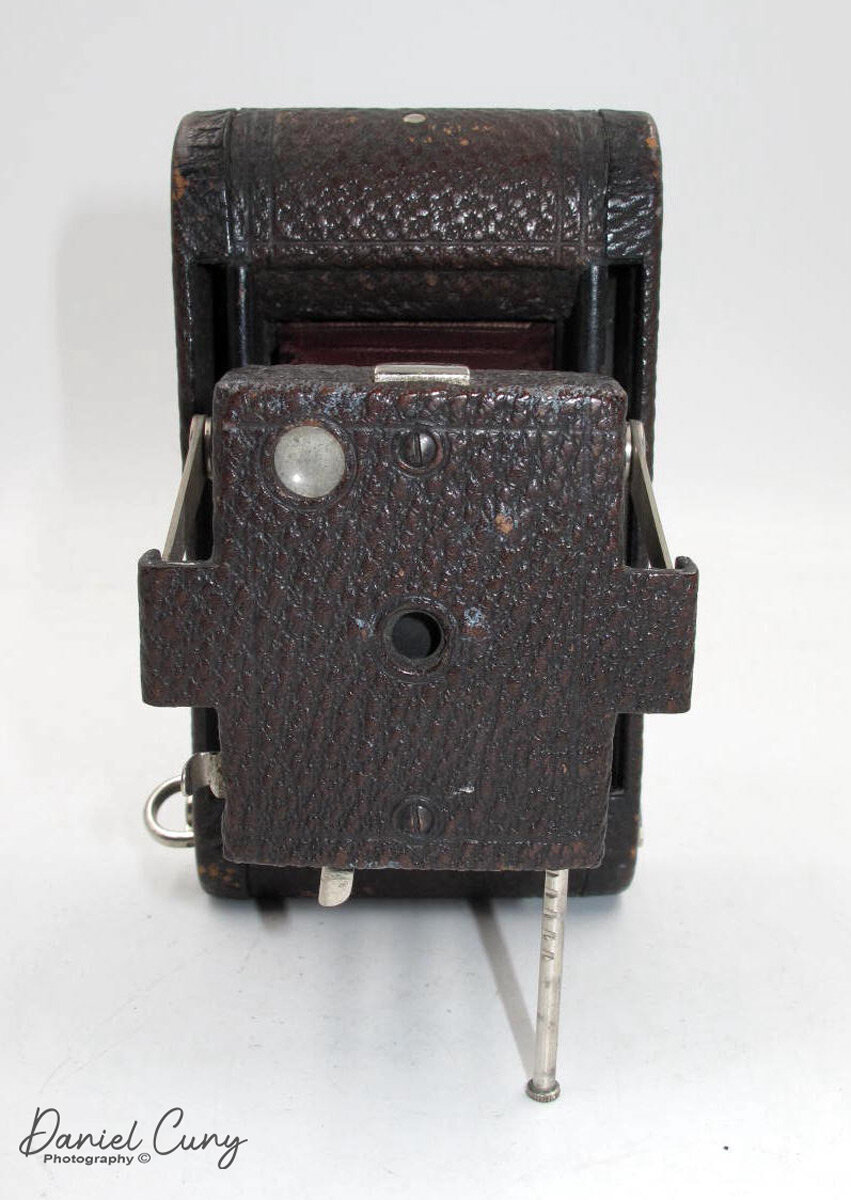
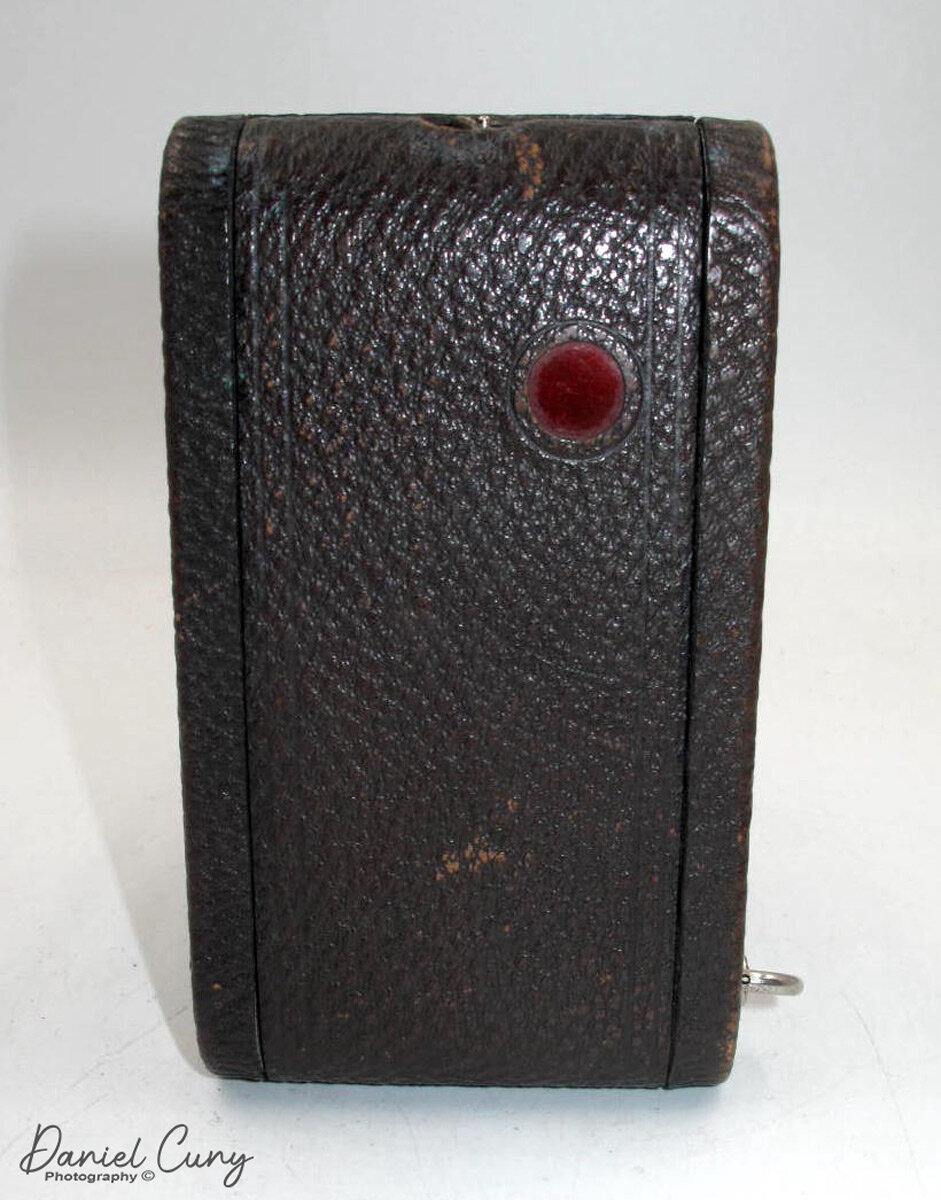
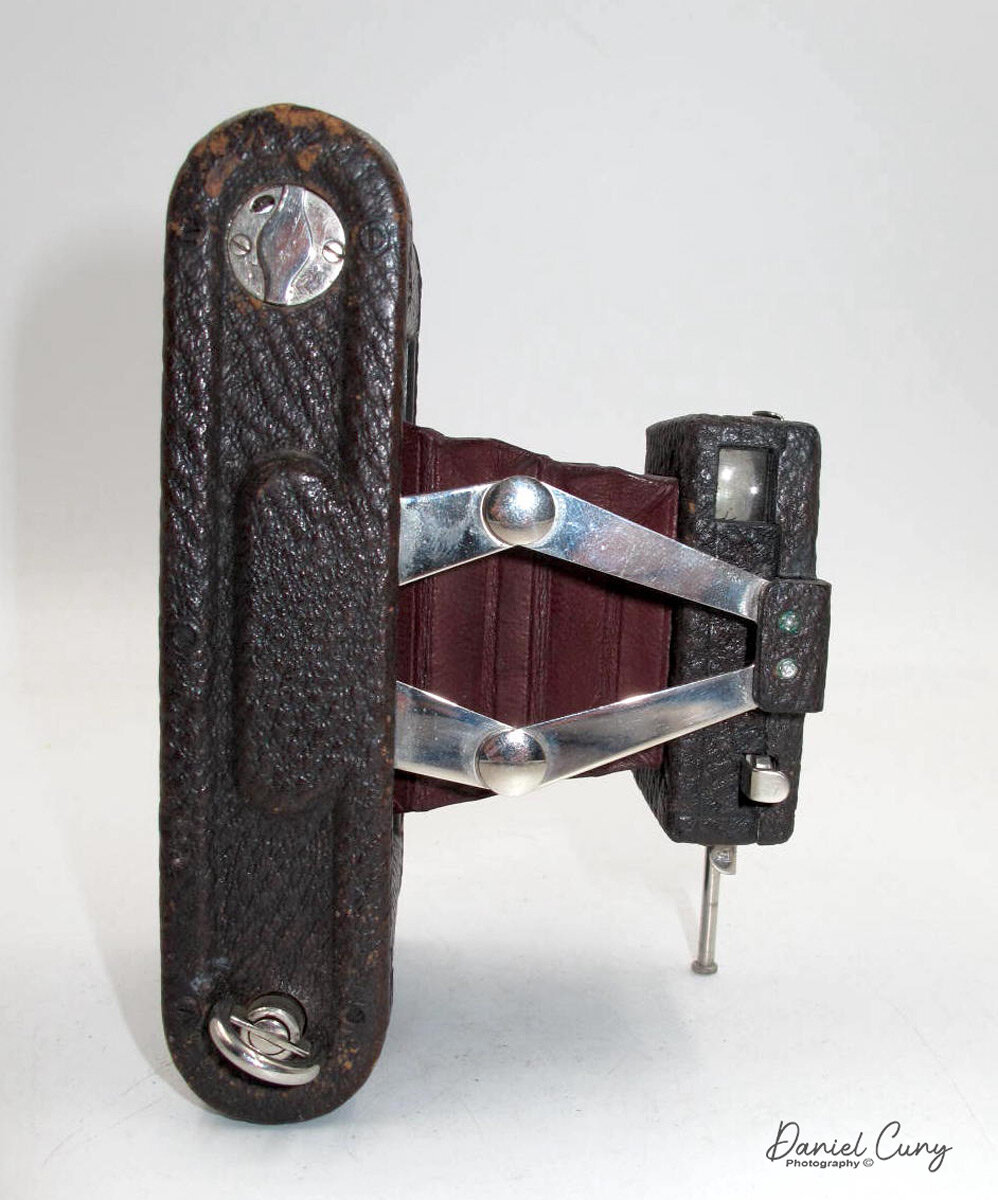
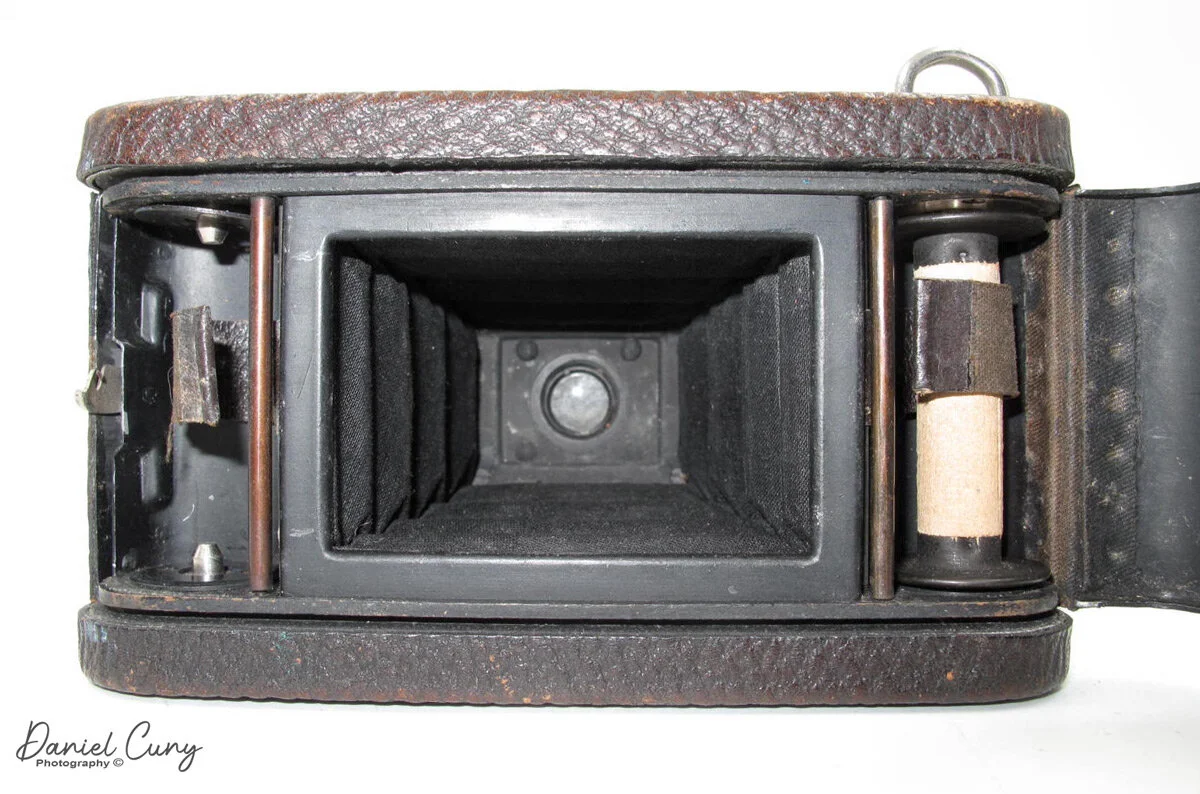
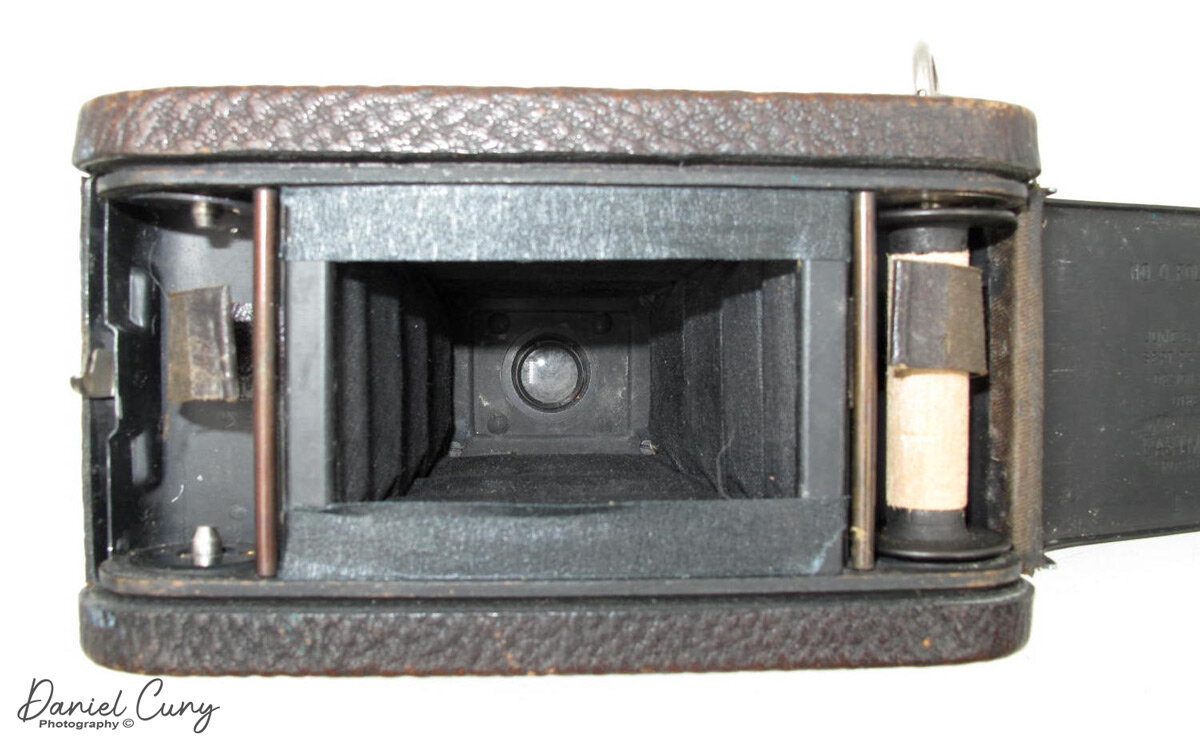
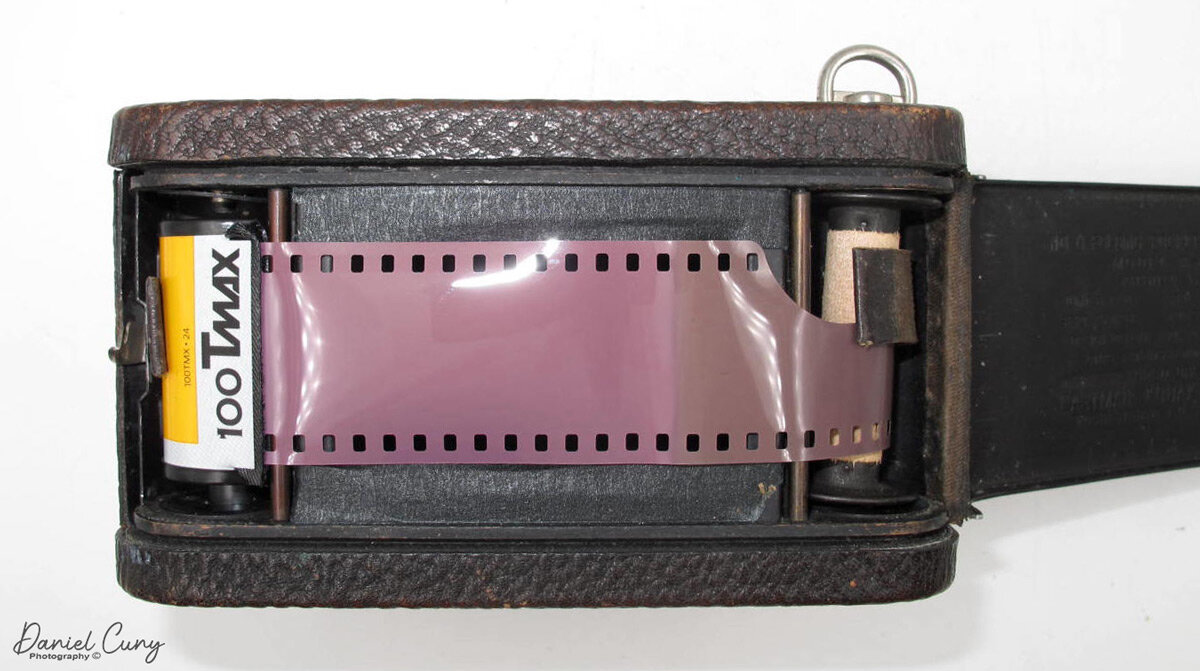
Bolsey-Flex Trio Camera

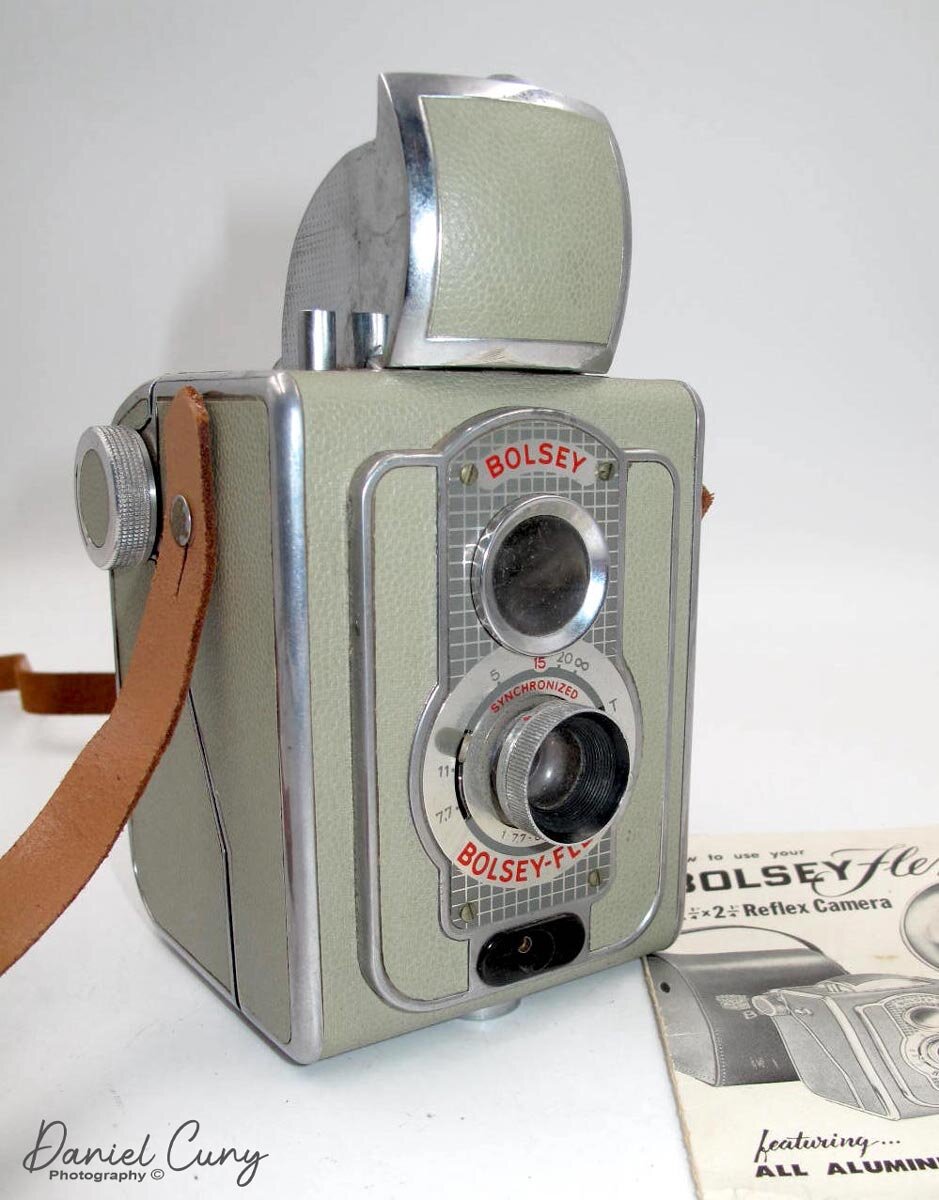
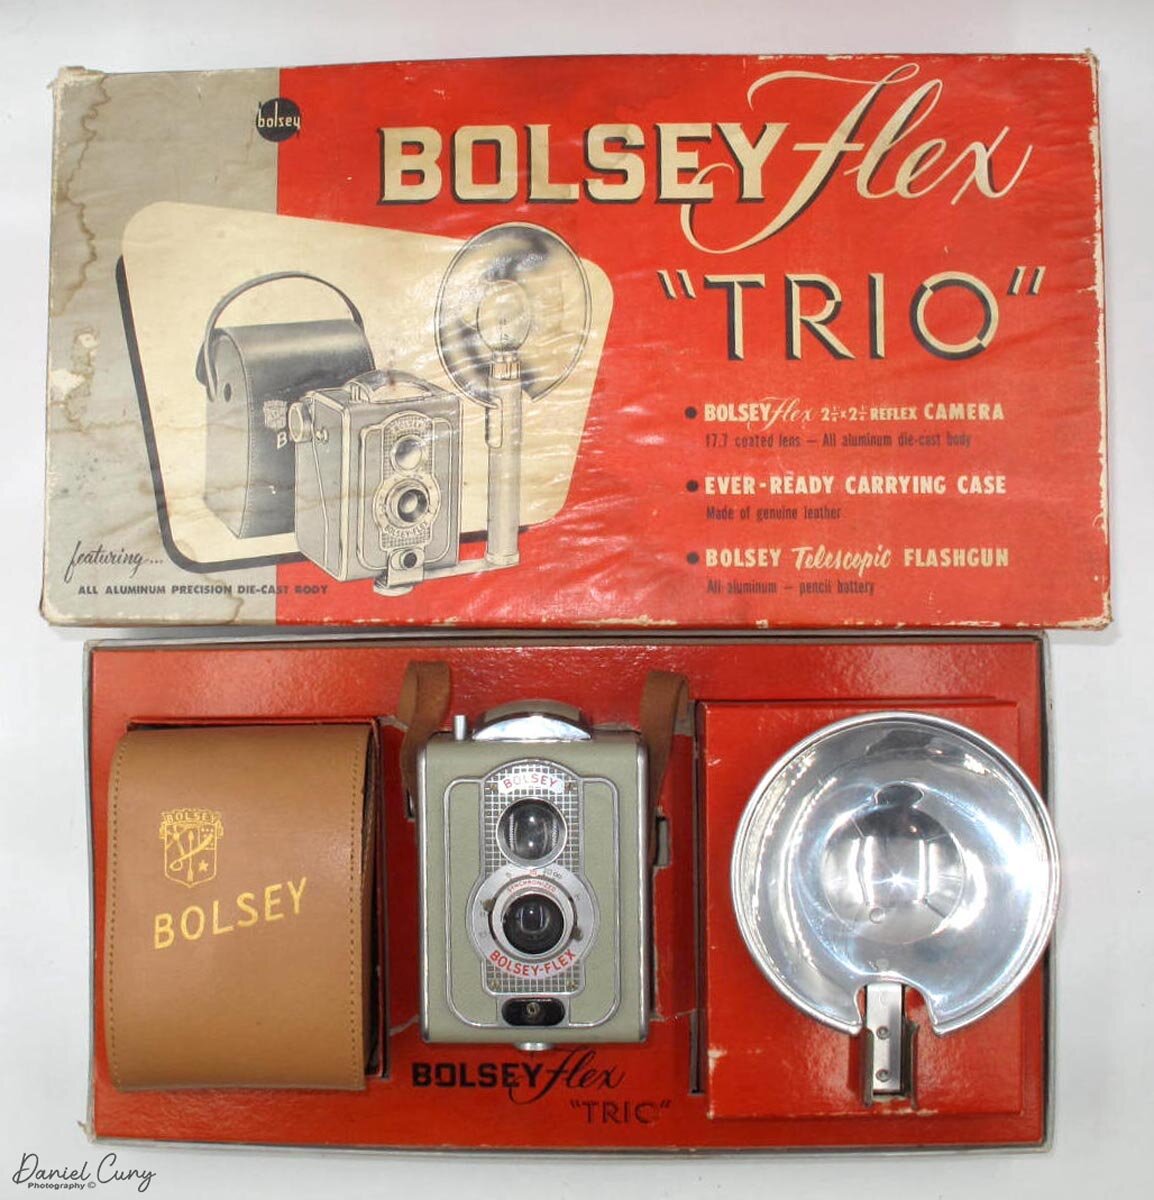
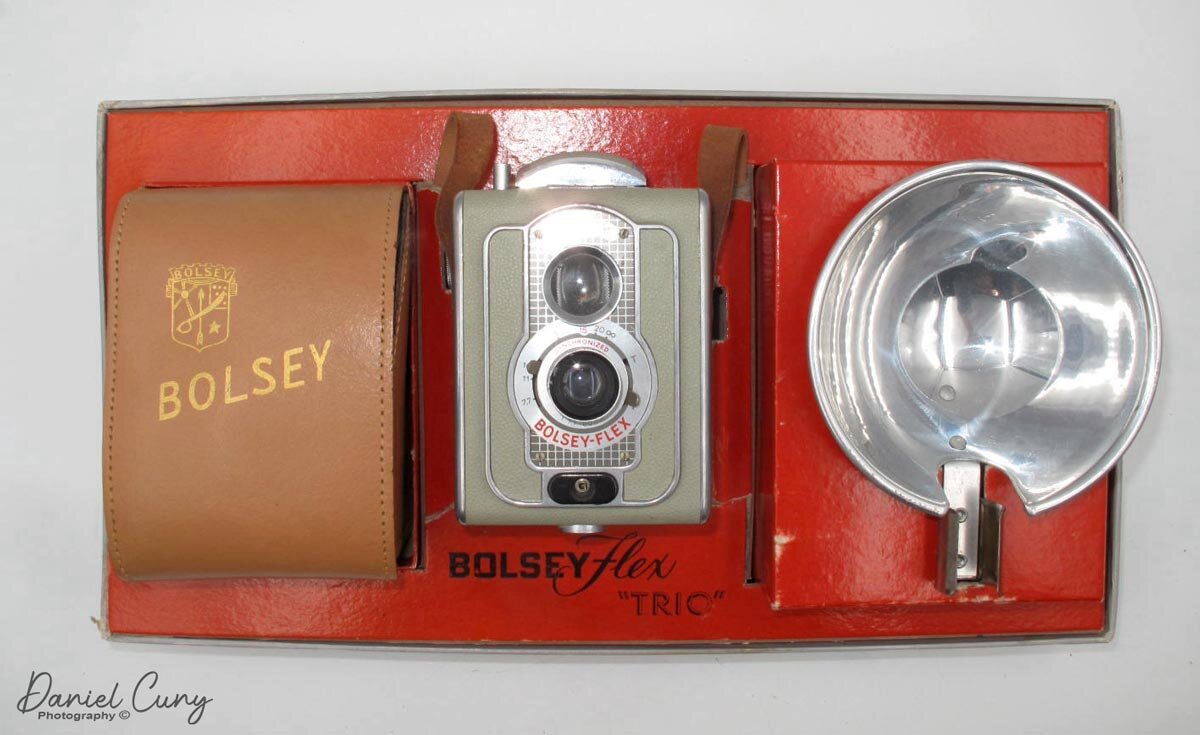
As I was sitting at my desk a few weeks back as I was figuring out what camera to write about next, I looked down at a box of cameras I have in my office, and on top was the Bolsey Flex Trio, which is in the box and complete with the instructions. As I started putting together my thoughts about the camera, I had to pull out the camera, and many different ideas came into my mind.

My Bolsey-Flex Camera & Instructions

My Bolsey-Flex Camera & Instructions

The camera for its age isn't in great shape but does work. The camera uses 120 size film, which is a HUGE benefit to me since the film is so readily available. I decided to load a roll of Black and White film in it to shoot as I walked through my neighborhood. I processed the film and was somewhat impressed by the Bolsey-Flex. It's a Pseudo Twin Lens Reflex camera, which means it looks and feels like a TLR camera but works more like a Box Camera due to its simplicity.

Camera Research

I was researching the camera, only to find that a friend of mine, a brilliant writer and camera collecting blogger, Mike Eckman did a blog post on the same camera just a few months ago, which you can read here. With that said, Mike has quite a bit of information on the designer, Jacques Bogopolsky, and camera companies he worked for. The famous movie camera, Bolex, was named after Jacques Bogopolsky, and he also designed cameras for Pignons S.A., the original company that made Alpa Cameras.

For my blog post, I want to concentrate on the experience of using the camera, the image quality, and my overall thoughts on how such a beautifully designed camera handles out in a natural shooting environment. I want to offer a few facts on the camera in general. The camera is an all-aluminum cast body with beautiful light green coverings. In the box comes all you need to take the camera out into the world to take photos.

The Camera

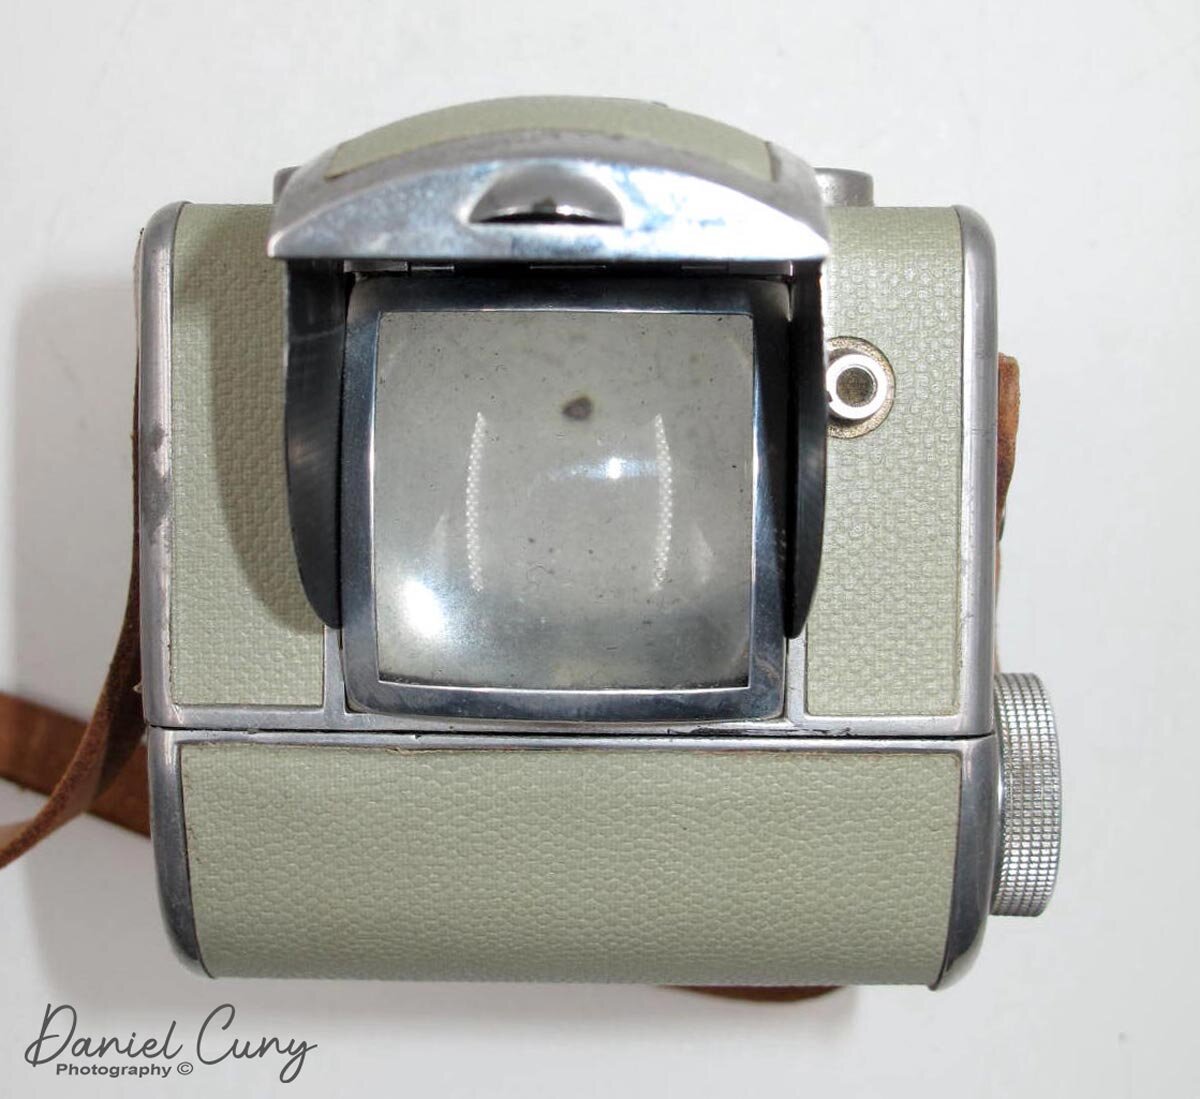
The camera measures 4.75" tall without the viewfinder in the closed position and 6" with the finder in the "up" position. The camera is 3.75" wide, which includes the width of the knobs. It is 3.75" deep, including the lens in the focused to the closest focused position, and 3.5 with the lens focused to infinity. The Bolsey-Flex incorporates an elementary zone focusing lens which can focus from 5 feet to infinity. The focus on the camera is strictly a "guess focus" style. While this is a Psuedo TLR camera, the top lens does nothing more than frame the photo in the camera. There is no focusing capability when looking through the viewfinder.

On the Bolsey-Flex shutter, you have the capability of "I" for an instant, which shoots the shutter at 1/50th of a second shutter speed, and "T" for a time exposure. The camera does have a synchronized shutter which couples with the flash attachment. The camera also has an 80mm lens with three aperture settings, F7.7, f11, and f16. 

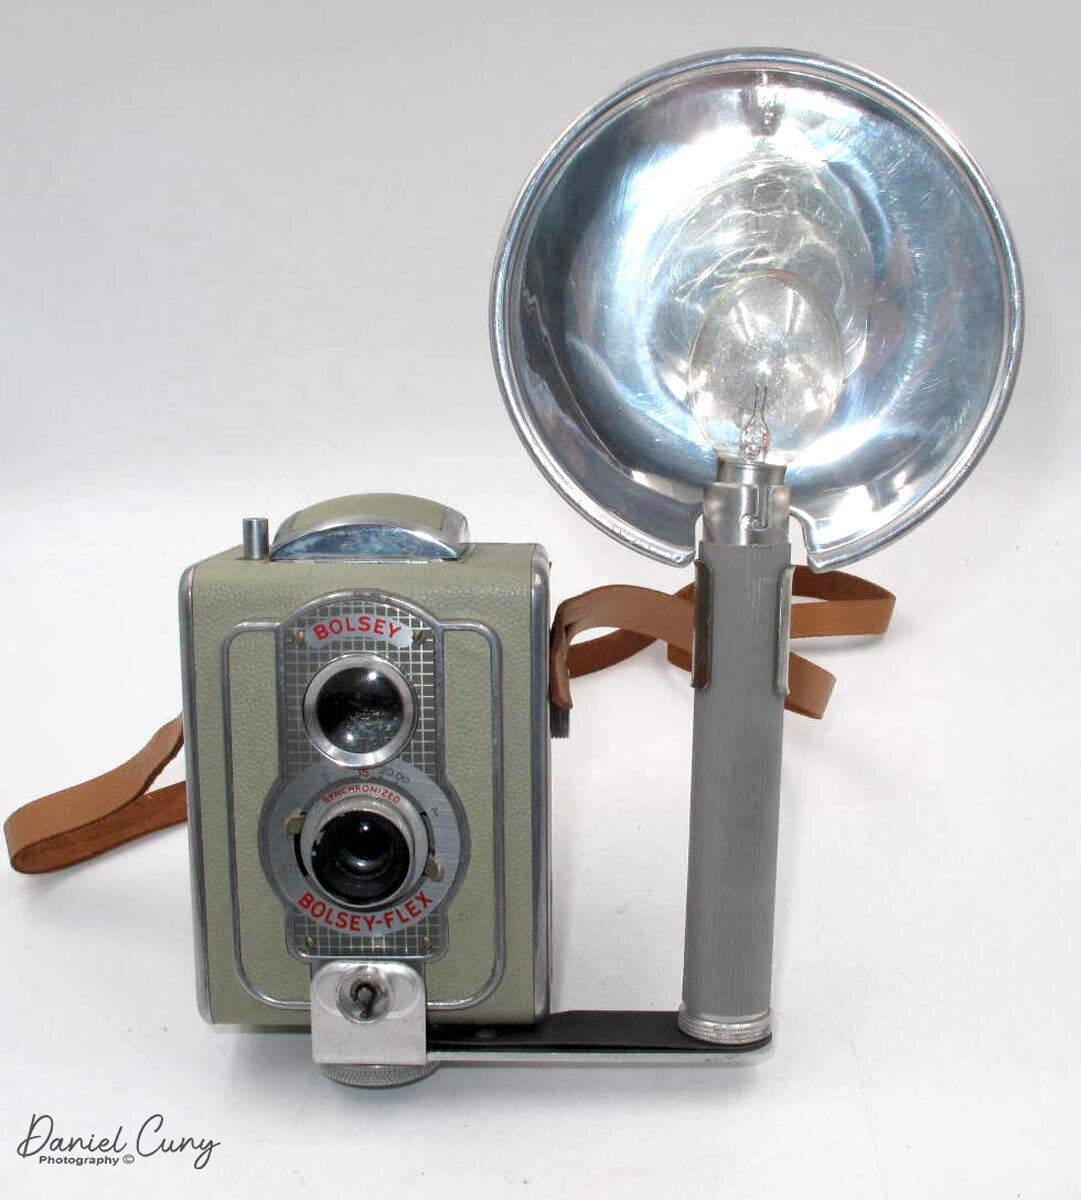
The flashgun takes 2-"AA" batteries to power the Type No.5 flashbulbs that fit the top. You unscrew the bottom of the flashgun to put the batteries into it. It would be best if you took the camera case off the camera to use the flash. The flashgun fits into the camera synchro port, which is below the lens and held by the screw that holds the case into place. When you trip the shutter, the camera sends a signal to the flashgun, which fires the flashbulb. 

My unit seems to be in good working condition. Unfortunately, I didn't have bulbs when I loaded the camera with film and did all my shots outdoors. It would have been fun to shoot with bulbs. I'll need to test another camera that uses a flashbulb in a future post, not that I have some bulbs to try.

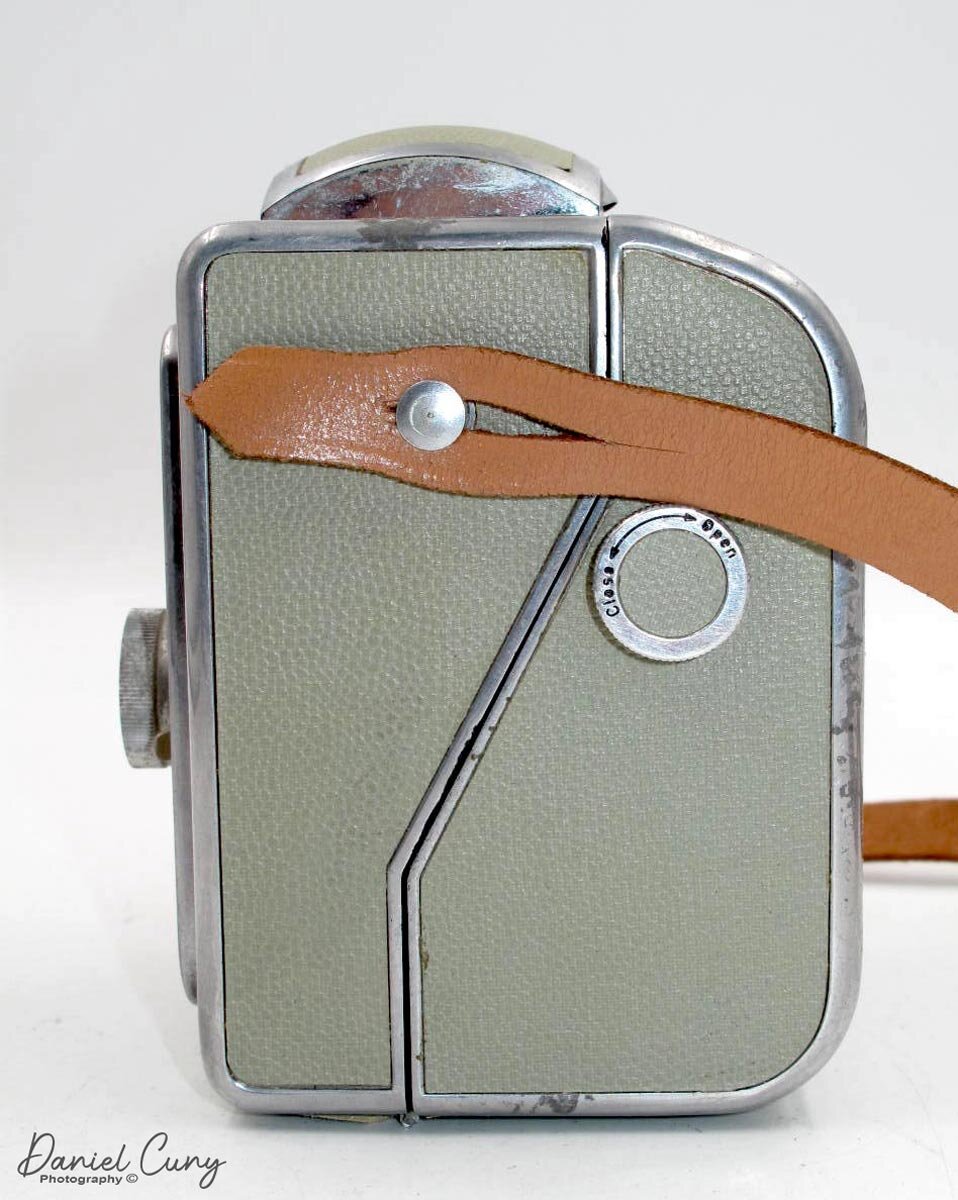
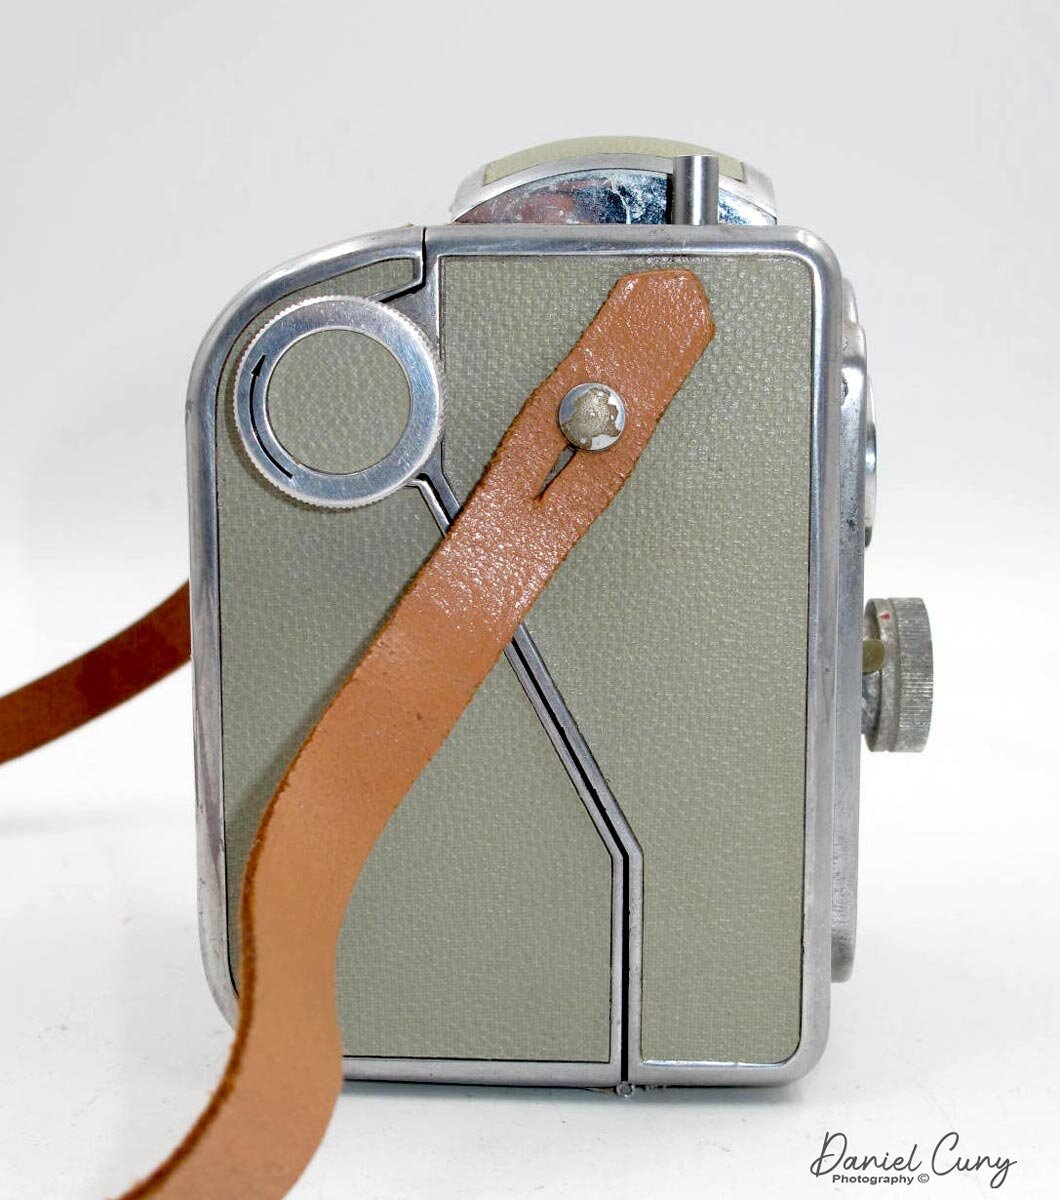
To load film into the camera, there is a knob on the left side of the camera with "Open," Close" on it. Turn the knob to "open," and the top of the back swings down open to load the film into the camera. Nothing special here as the. Put the empty spool on the top and film onto the bottom area. The shutter won't fire until the winding lever is turned to advance the film. On the back of the camera is the red window with a sliding cover to see when the film is advanced to the following frame number.

 Images

Here are some of the images I took with the Bolsey-Flex camera.

Rocks

Rocks

Backyard Aspen

Backyard Aspen

Evergreen Tree

Evergreen Tree

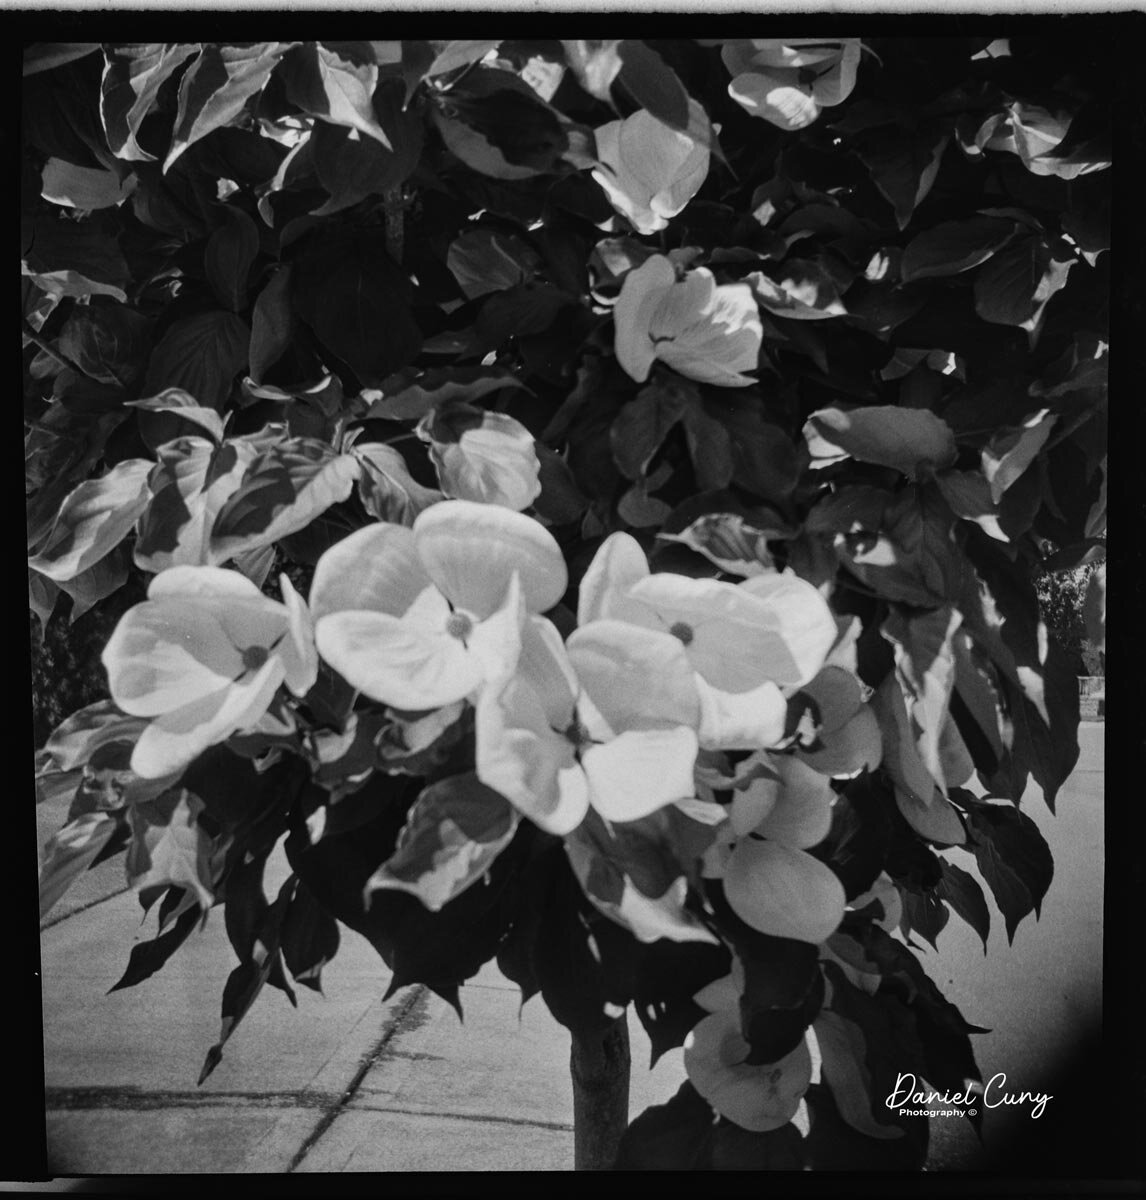
Dogwood

Dogwood

Conclusion

I thought the camera did a very excellent job for a pseudo-TLR camera. It's not much more than a glorified box camera. The camera was easy to hold, the exposures were good, thanks to my sunny 16 rule when exposing to sunlight. The lens vignettes a bit, but I enjoy that. The ease of operation and see the frames in the red window when advancing were spot on. I'd recommend this very well-built camera to anyone.

 Thank you for taking some time to look over this post. Until next time, please be safe.

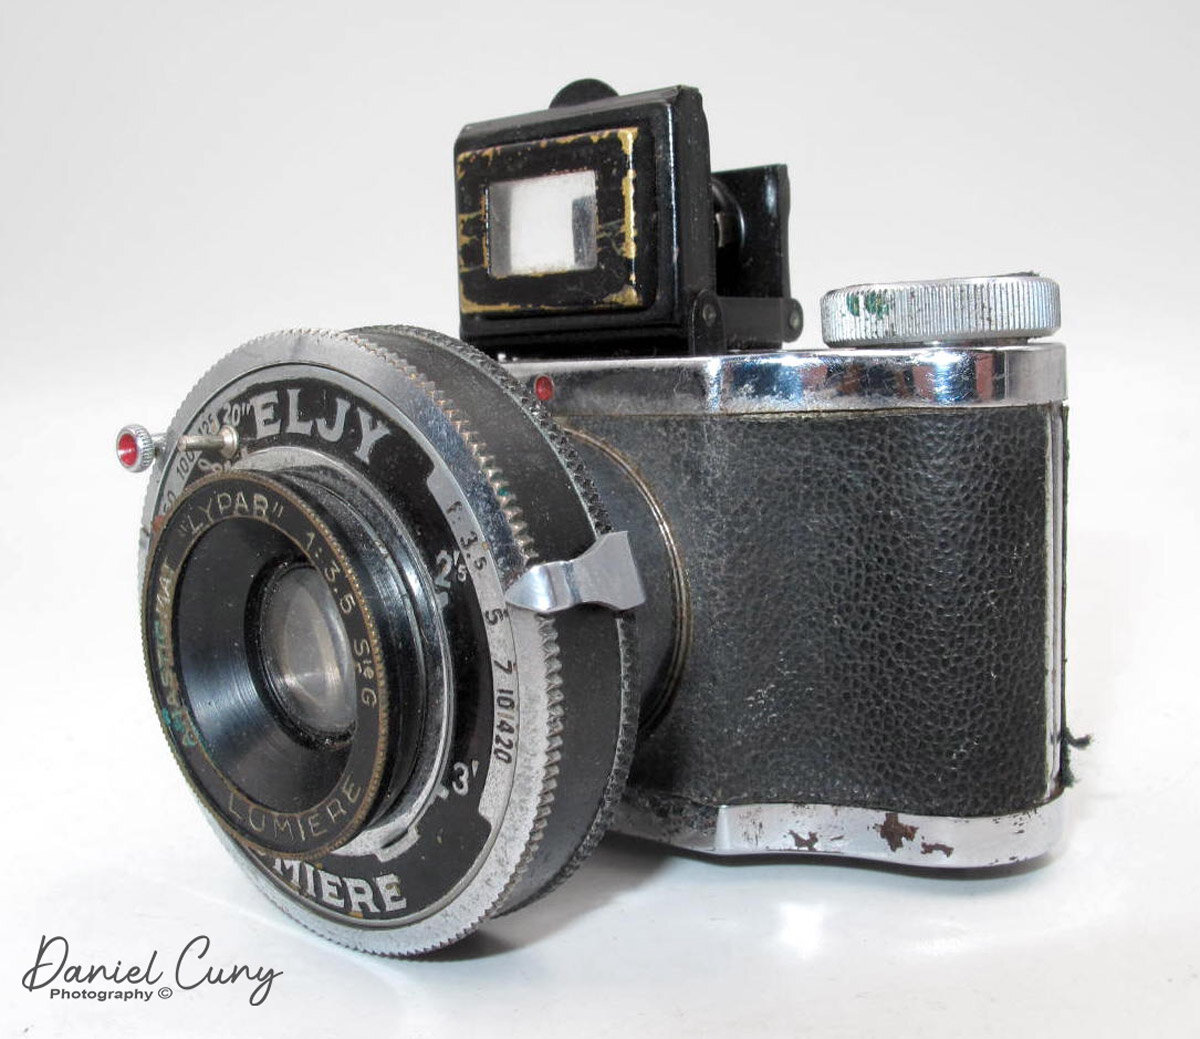
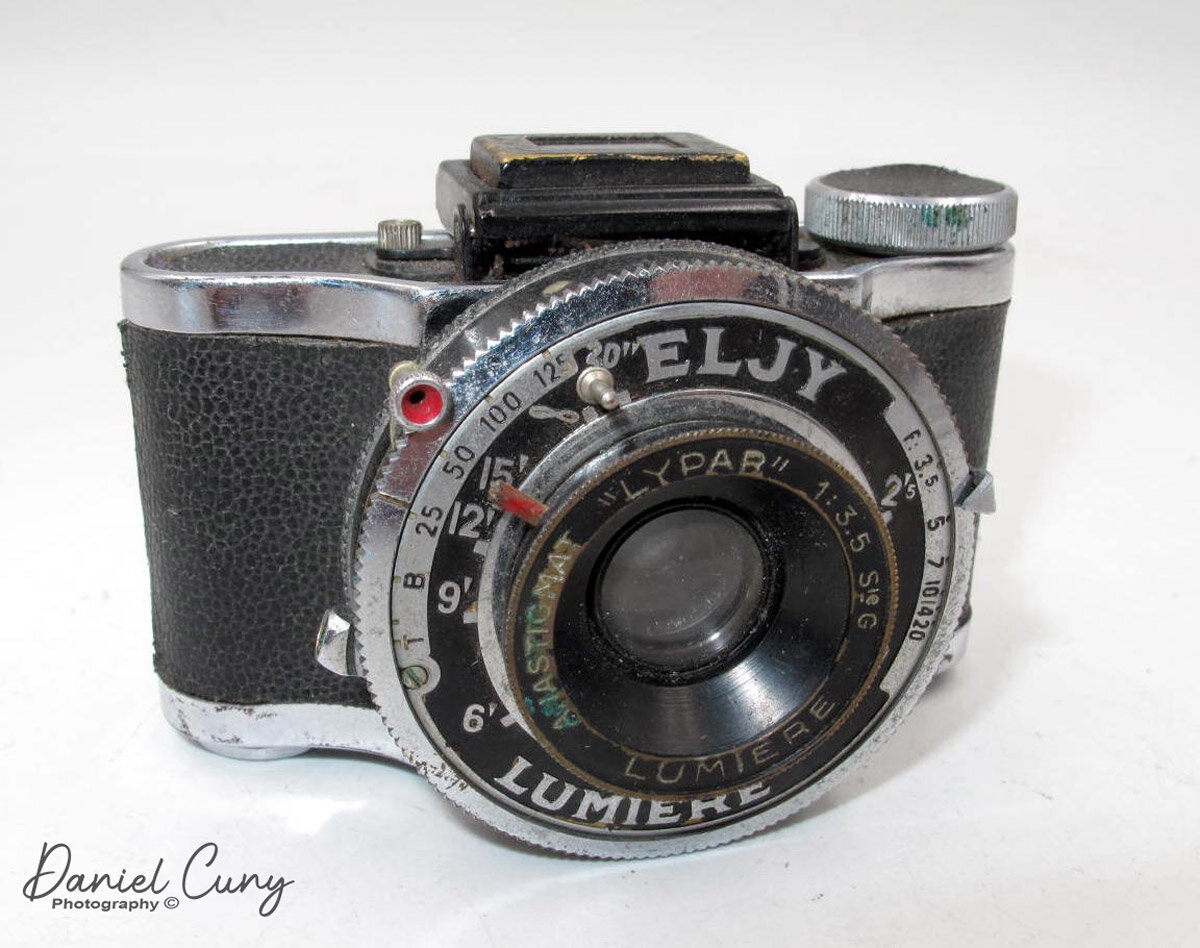
Lumiere Super ELJY, (Type 3)

Looking through many of McKeown's Camera Guides, which is the Bible of all camera collecting books, the Lumiere ELJY camera is one camera that always caught my eye. I believe it has to do with the size proportion of the lens to the camera body that caught my eye. The much larger proportion the lens has compared to the camera body reminds me of the Leica Dial-set Compur cameras of the mid-1920s.

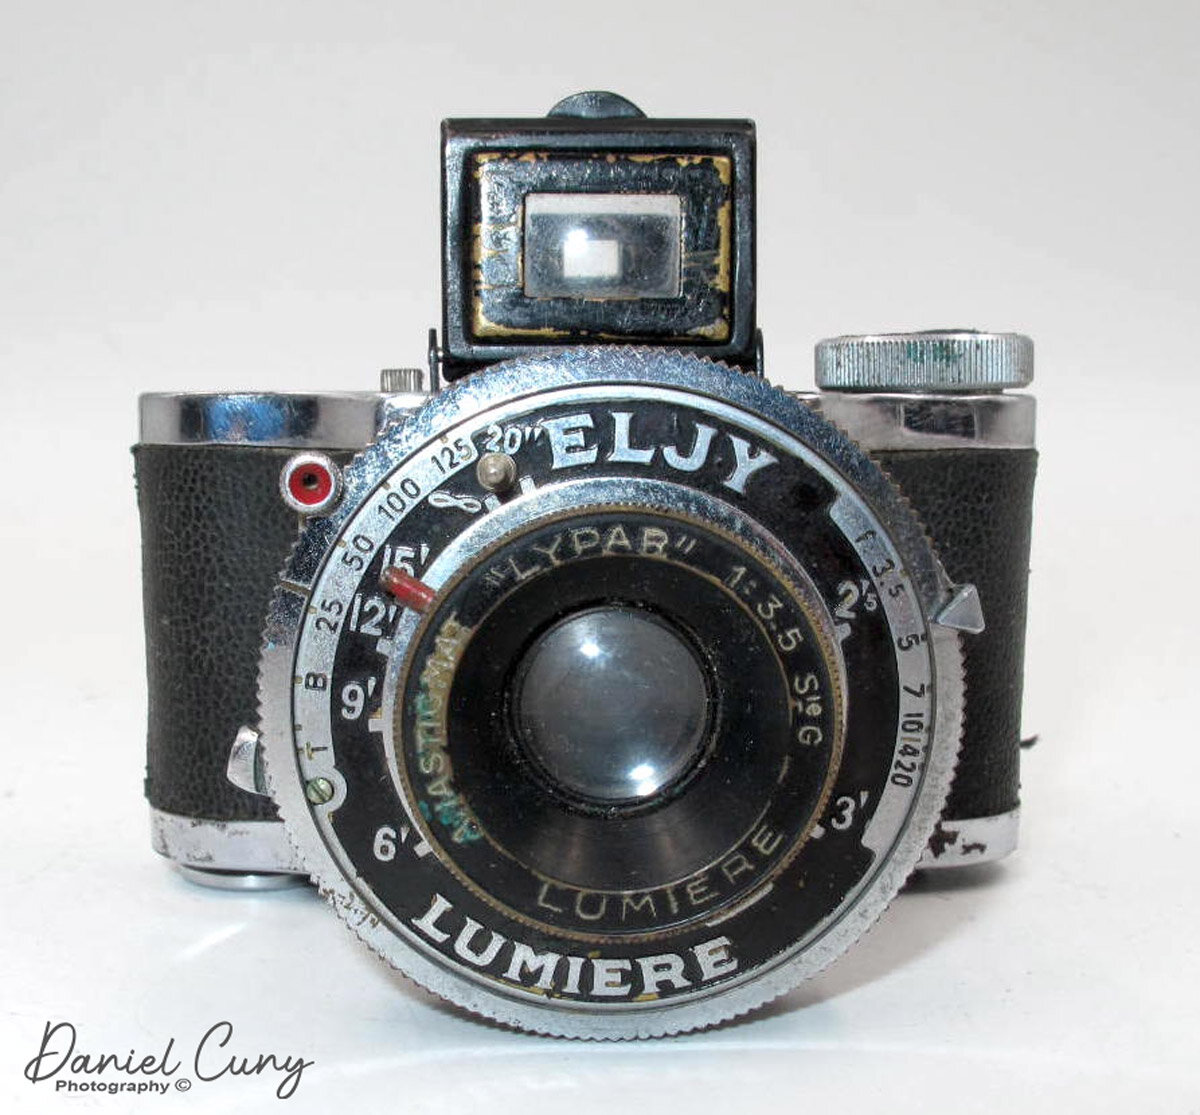
My Lumiere Super ELJY camera.

My Lumiere Super ELJY camera.

The Company

The Lumiere company is a French company founded in 1893 by Charles Antoine Lumière, which started out as a film manufacturer and is most well known in the cinematography world. Charles's sons, Auguste and Louis Lumière, were the first to make a mark in the cinema world. The two produced short films starting in 1895 and what is now know as modern kind of movies.

In 1903, they invented a new photographic patent that was a successful color process for a film that lasted for years. They began to produce the Autochrome, a black & white plate but combined 3 color filters to create a color image that continued until the 1930s. They then started making sheet and roll film using the same process.

Lumiere started producing cameras in the 1920s through 1961 with all different cameras, including plate, folding, 35mm in different styles, colors, and shapes. Doing research on the blog and looking at all the different cameras Lumiere produced, I recognized a few other cameras in my collection. For this post, I'm just going to focus on the ELJY camera.

My Camera

There are many different models of the ELJY camera with versions and upgrades to the camera. The ELJY model that I own and am talking about is the Super ELJY, type 3. If you're interested in seeing the different models and variations, you can see them here (http://corsopolaris.net/supercameras/eljy/eljy.html). Personally, I didn't realize there were so many. The ELJY was produced between 1937-1960.

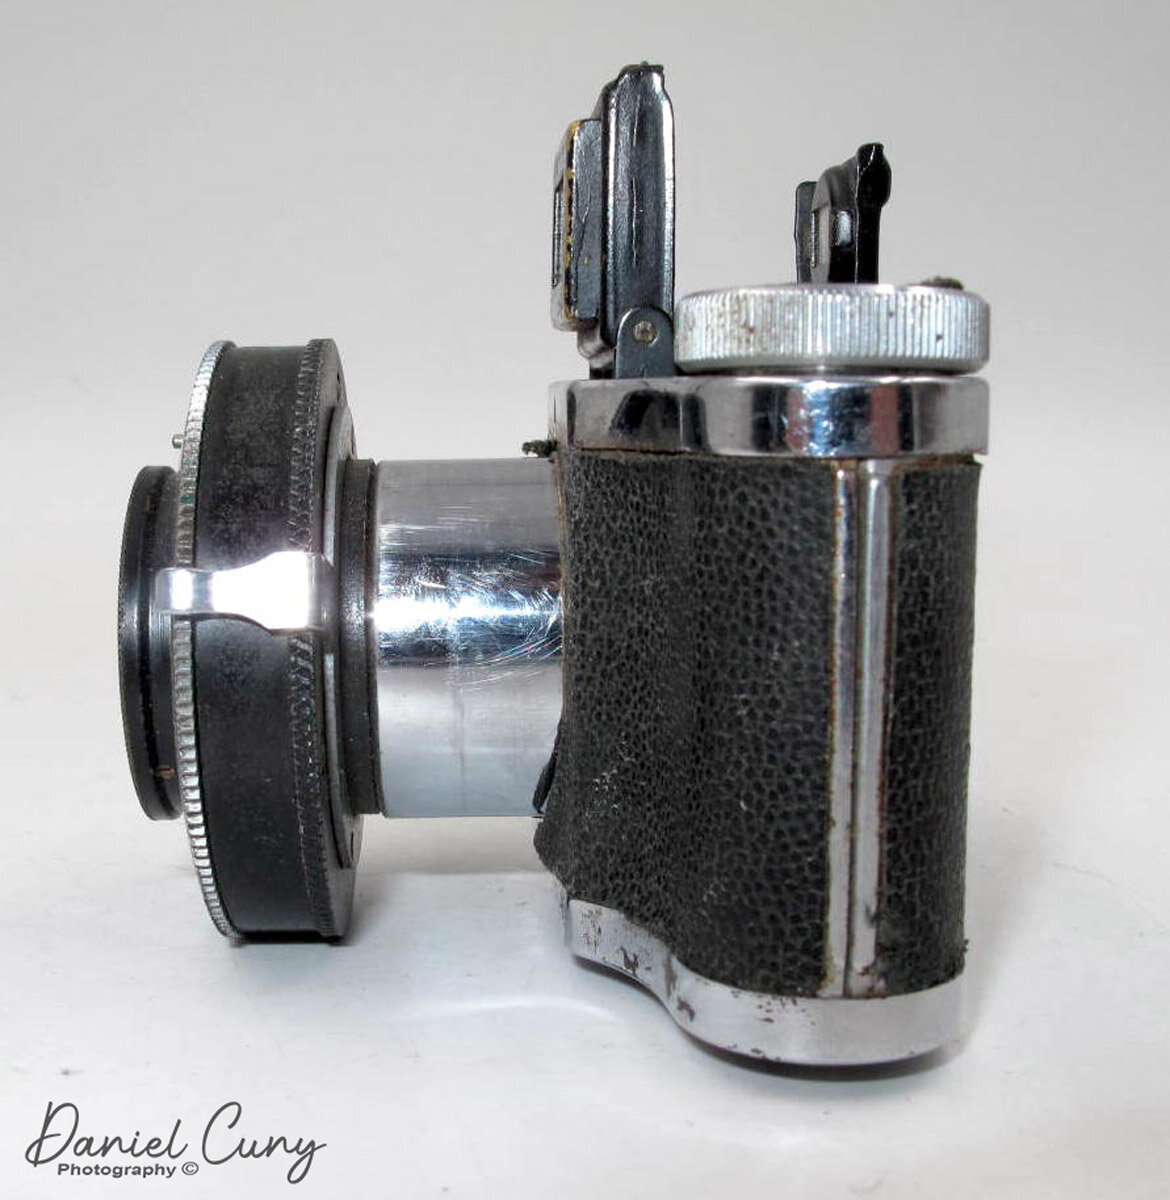
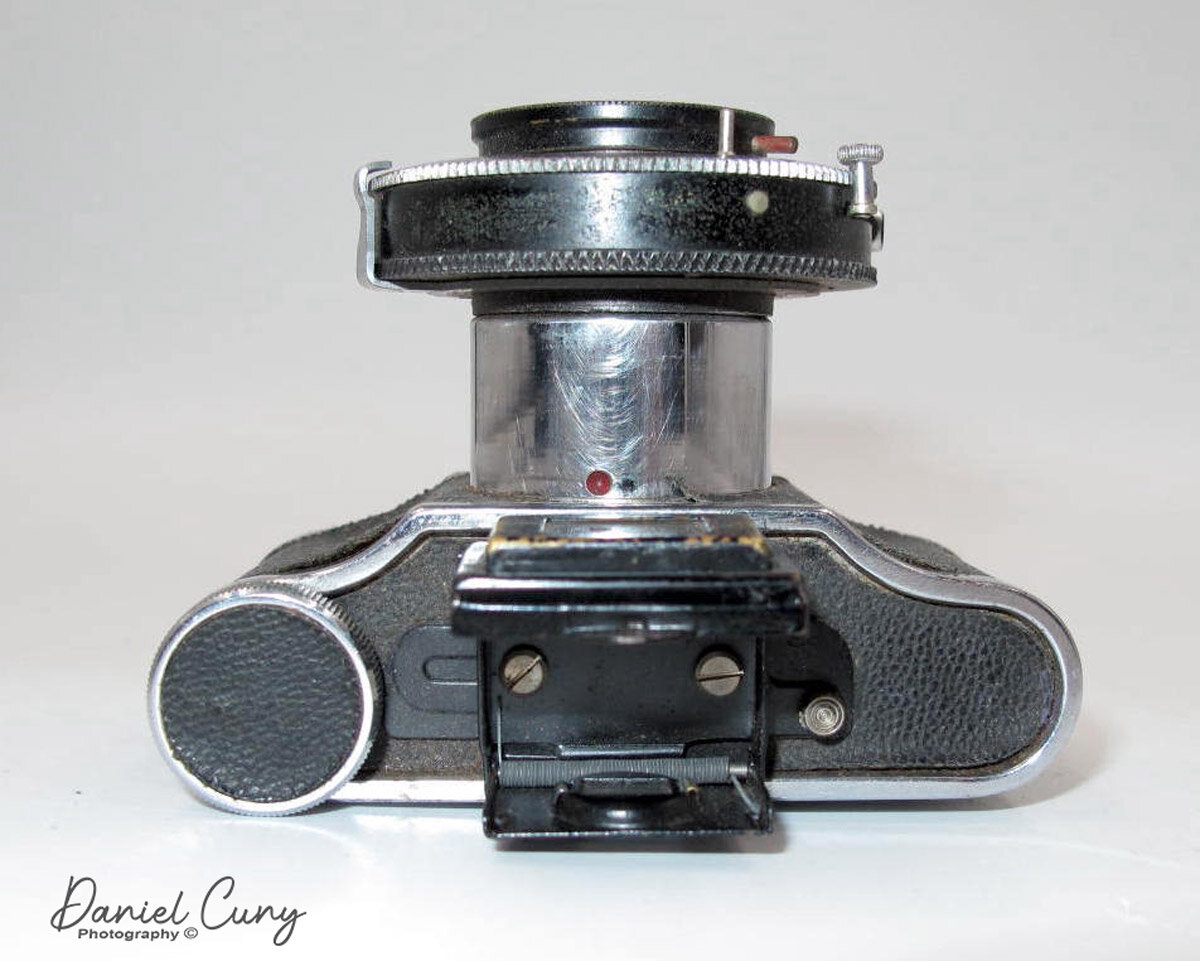
 The Super ELJY camera is a ruggedly built camera with a pull-out lens similar to the modern-day Rollei 35 cameras. To put the lens in the position to take a photo, you rotate the lens clockwise and pull the lens away from the camera body. The lens is on a very sturdy chrome barrel. Once extended, you turn the lens counterclockwise to lock the lens into position, and the lens won't slide back into the camera body.

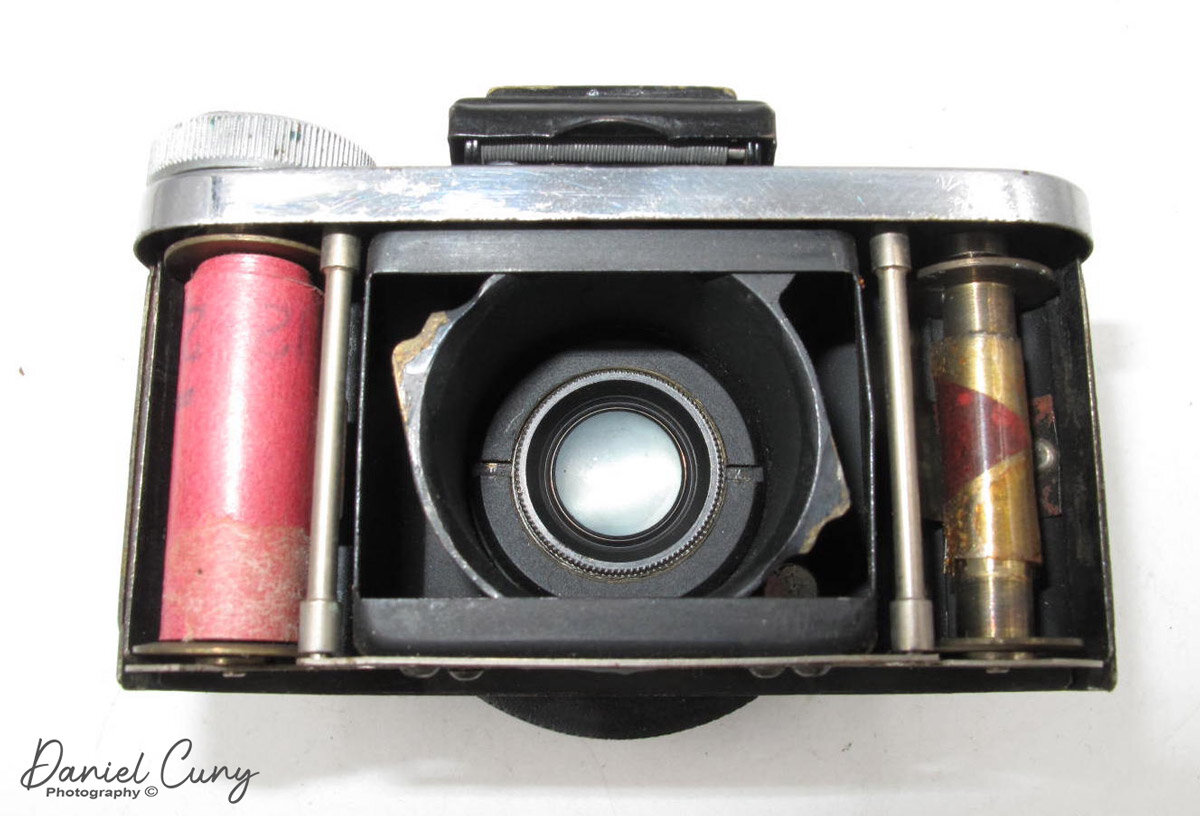
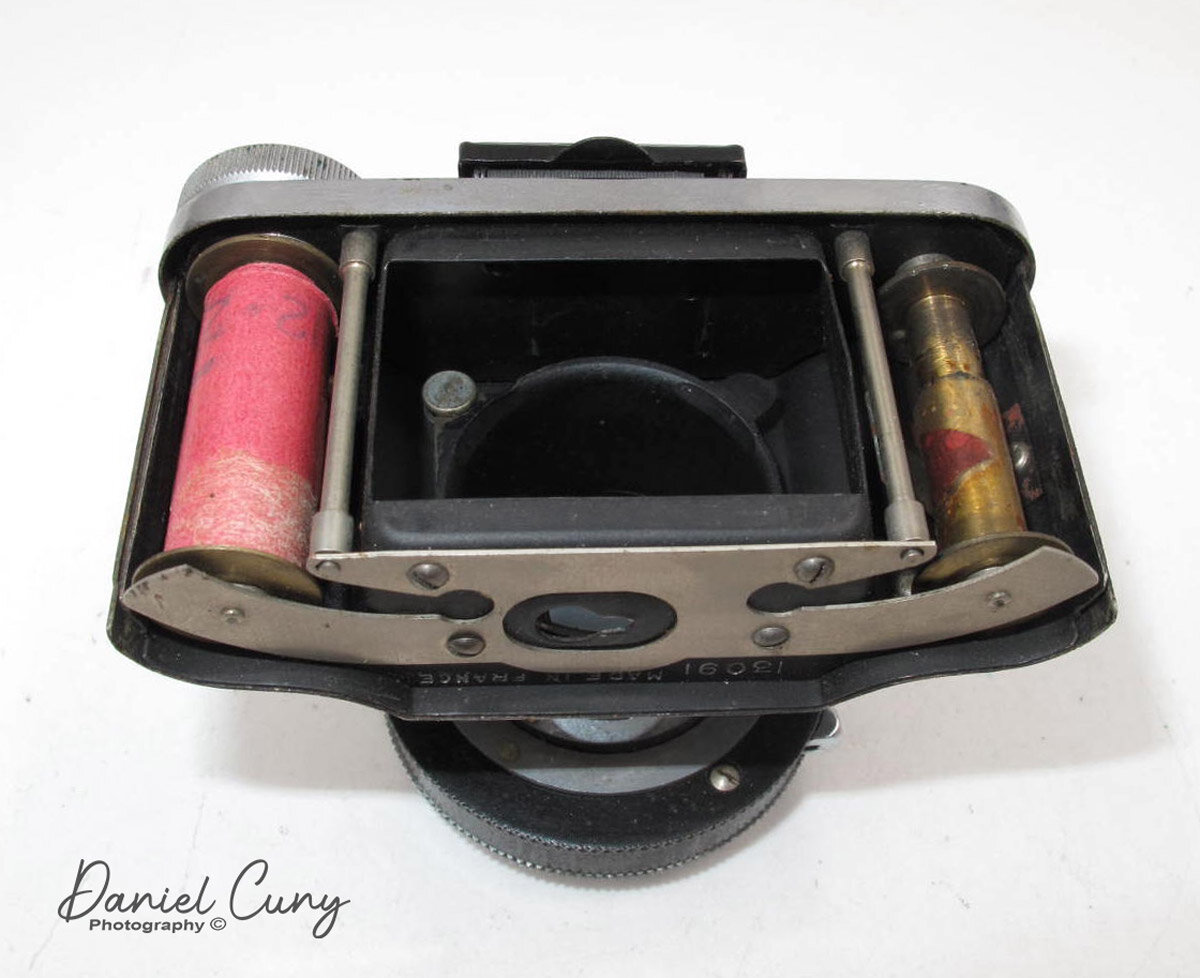
 While the image size is 23x35mm, which is almost the same as 35mm, the camera takes a paperback roll film which is more similar to 127 or 120 films than 35mm. Some people say this is the "large format" miniature camera due to the camera and film size. The camera is more significant than the subminiature cameras that I have but considerably smaller than the 35mm camera, even the previously mentioned Rollei 35.

The camera is just over 3" wide by 2" tall without the finder up; with the finder up, it's 2.5" tall, and the camera is 1.75" deep with the lens retracted, or 2.25" with the lens extended. The lens is a Lypar 40mm f3.5 lens with aperture settings going to f20. It's odd because the aperture settings are 3.5,5,7,10,14 & 20. The shutter speeds go from "T" for time exposure, "B," 25, 50, 100, 125. The focus range is from 0.5m to Infinity.

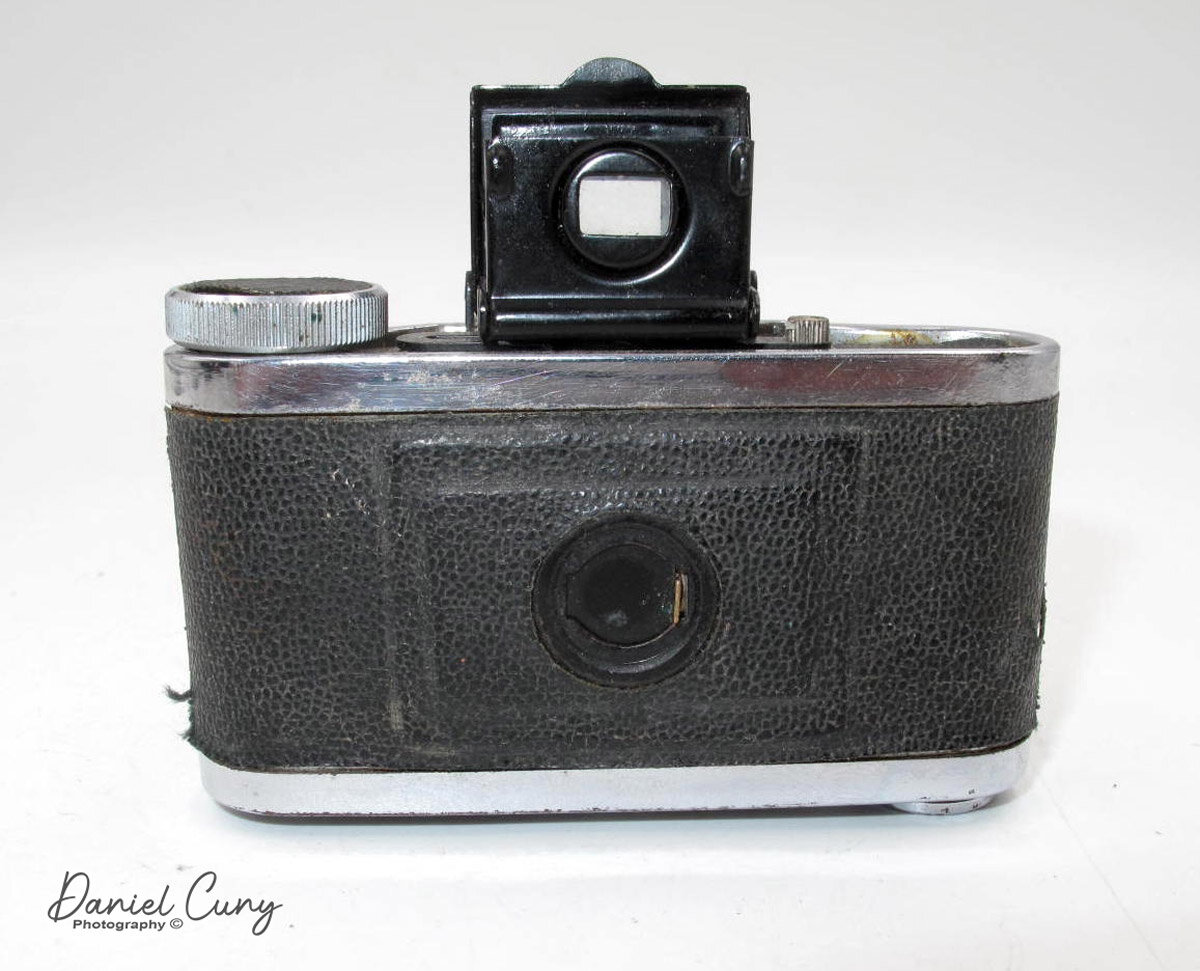
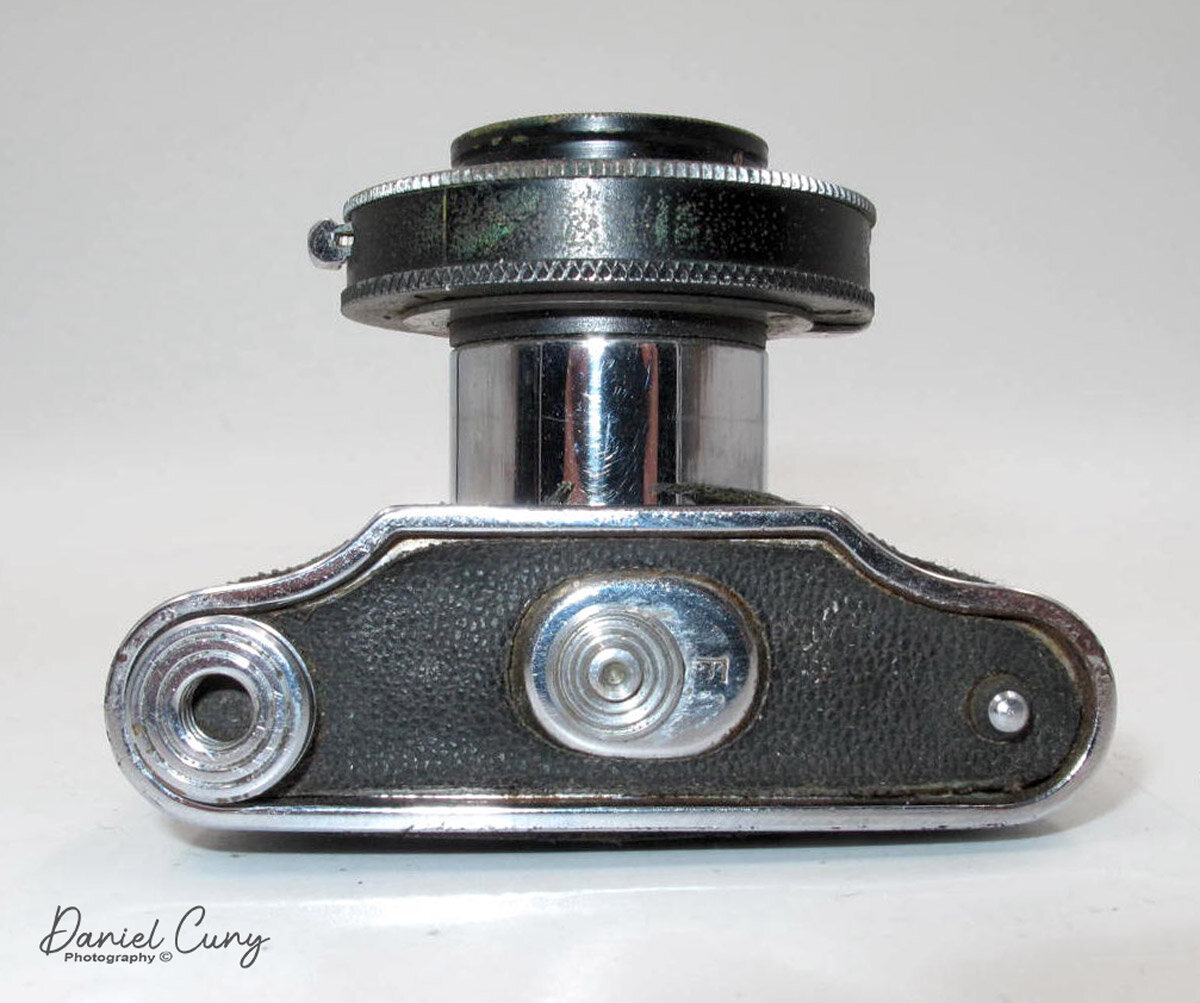
 The camera has a simple pivoted, two-blade shutter which there is no cocking; just press the shutter release to take a photo, and there is a place for a cable release for the longer exposures. To open the back, the back door locking lever is on the bottom of the camera. The entire back comes off the camera to load and replace the film. There is also a tripod socket on the bottom of the camera. The red window on the back of the camera used to count exposures has a sliding door to open to view the film numbers.

On the top of the camera is the winding lever to advance the film. There is also a pop-up viewfinder. There is also a lever to slide out next to the viewfinder to correct for parallax when focusing close. When I first opened the camera, I noticed an exposed roll of film still in the camera. I'm going to have to find a way to process the film to see what treasures are on the film.

Thank you for taking a few minutes out of your busy schedule to read my blog. It's very much appreciated, and I would love to hear from you. One of the great joys of writing this article is hearing from people. Many tell me about their camera collection, which I enjoy hearing about. Until next time, please be safe.


Konishiroku Snappy Camera

It's been a few weeks since I wrote my last camera collecting blog post because I've started a new position. Now that I feel comfortable in the new job, I think it's time to write about some of my cameras. I love the new responsibilities, the company I'm working for again. I also think I have my nose above water and can take on other enjoyable tasks such as writing about one of my passions: cameras within my collection

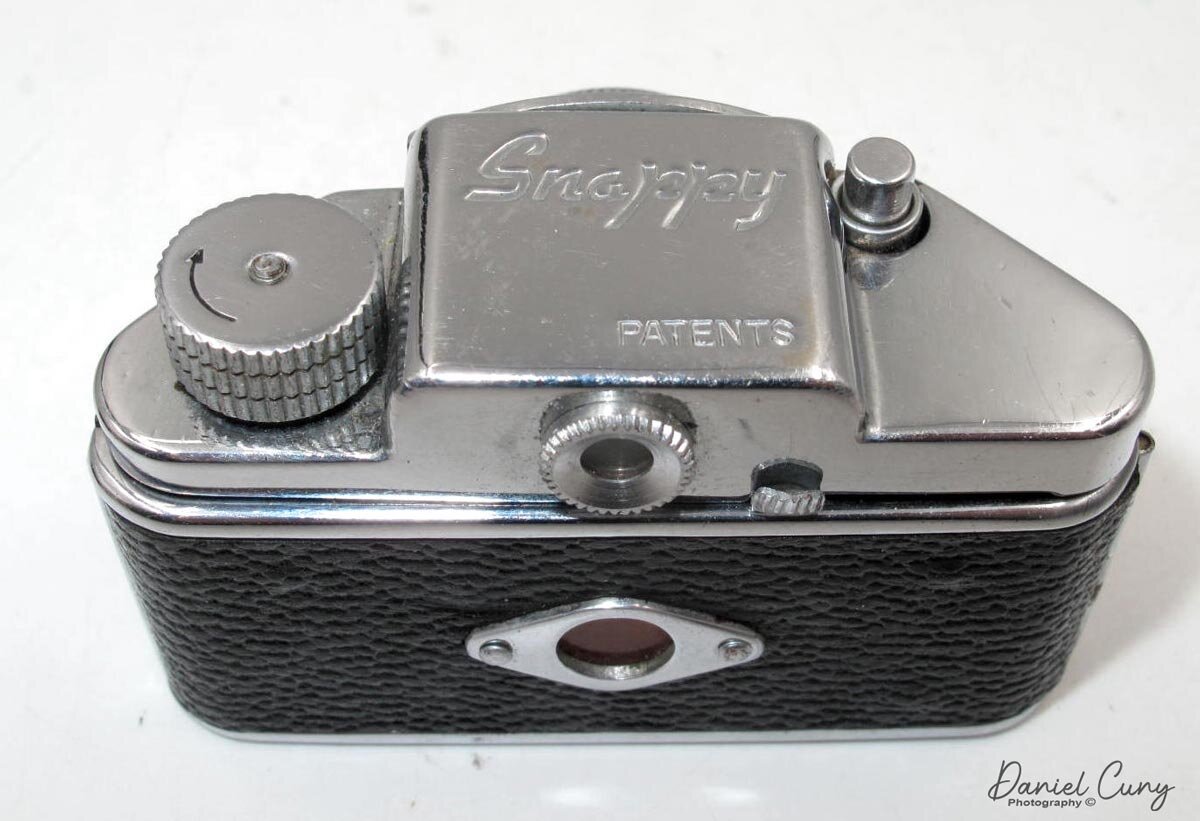
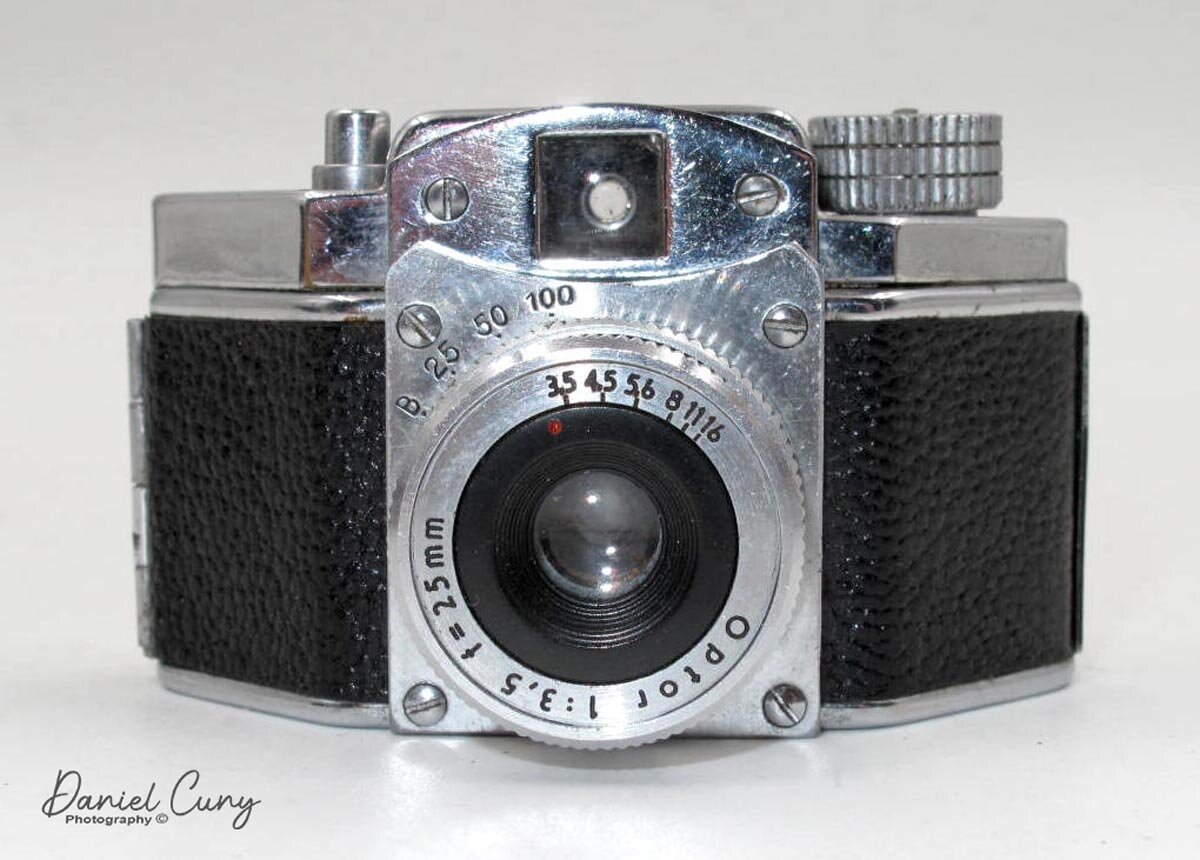
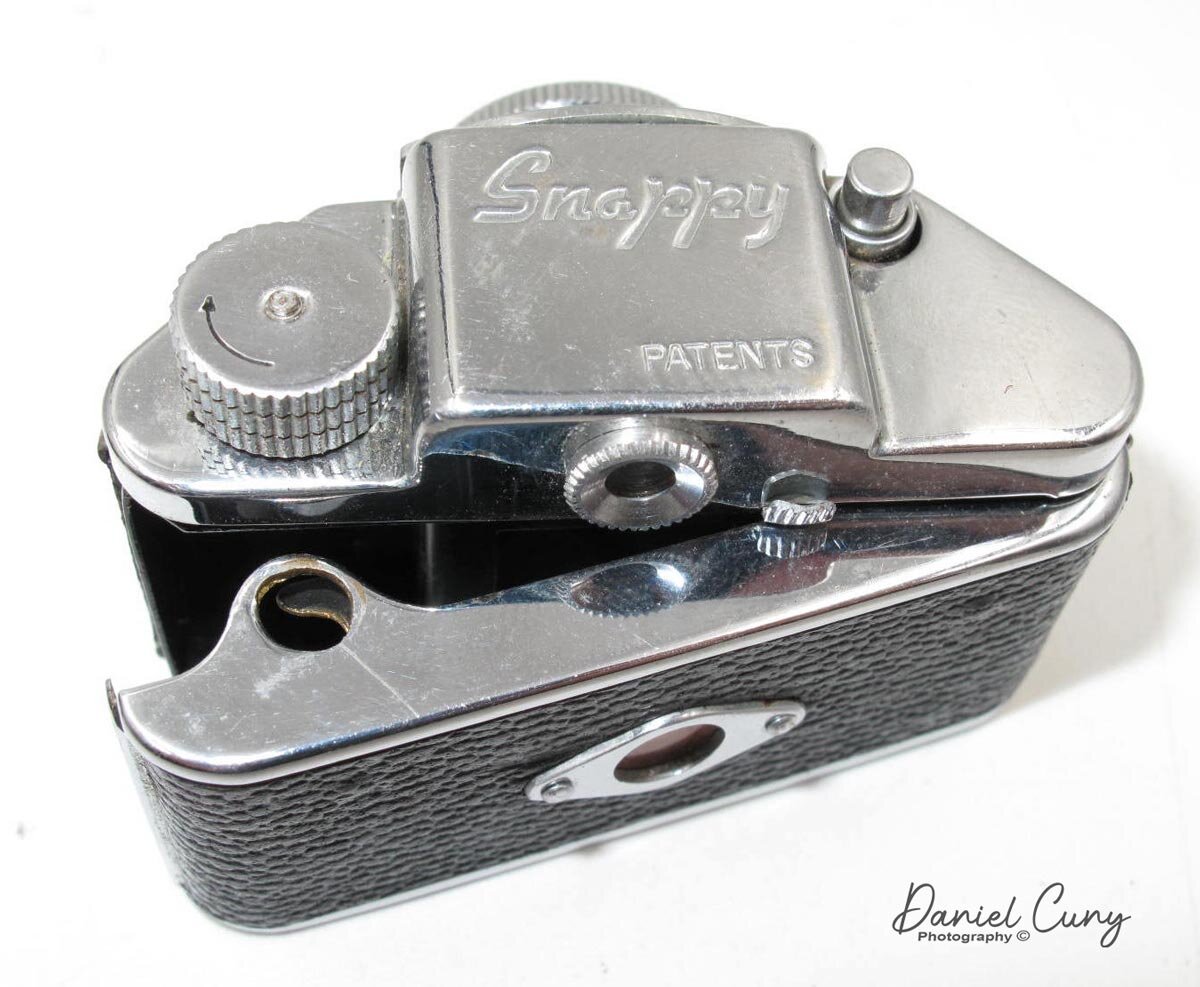
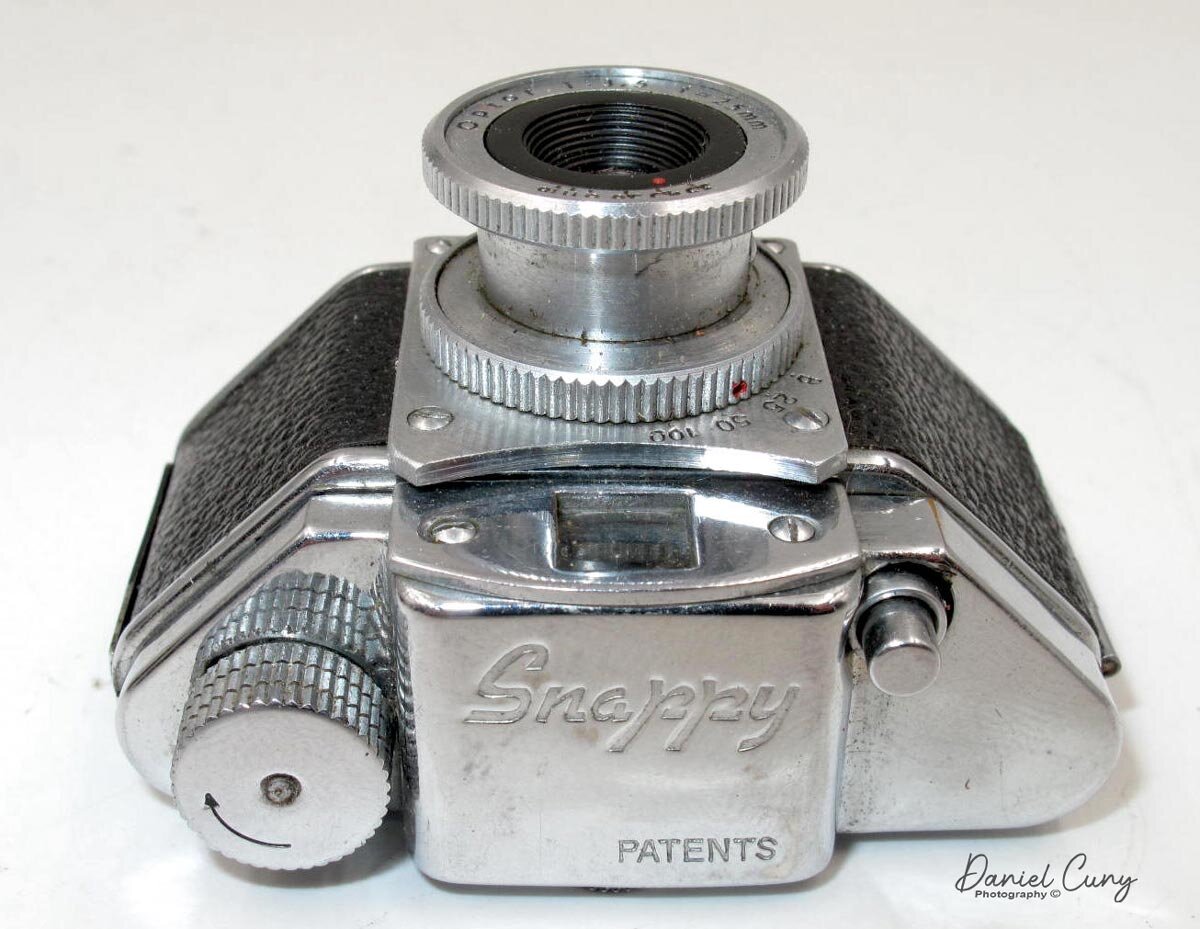
My Konishiroku Snappy Camera

My Konishiroku Snappy Camera

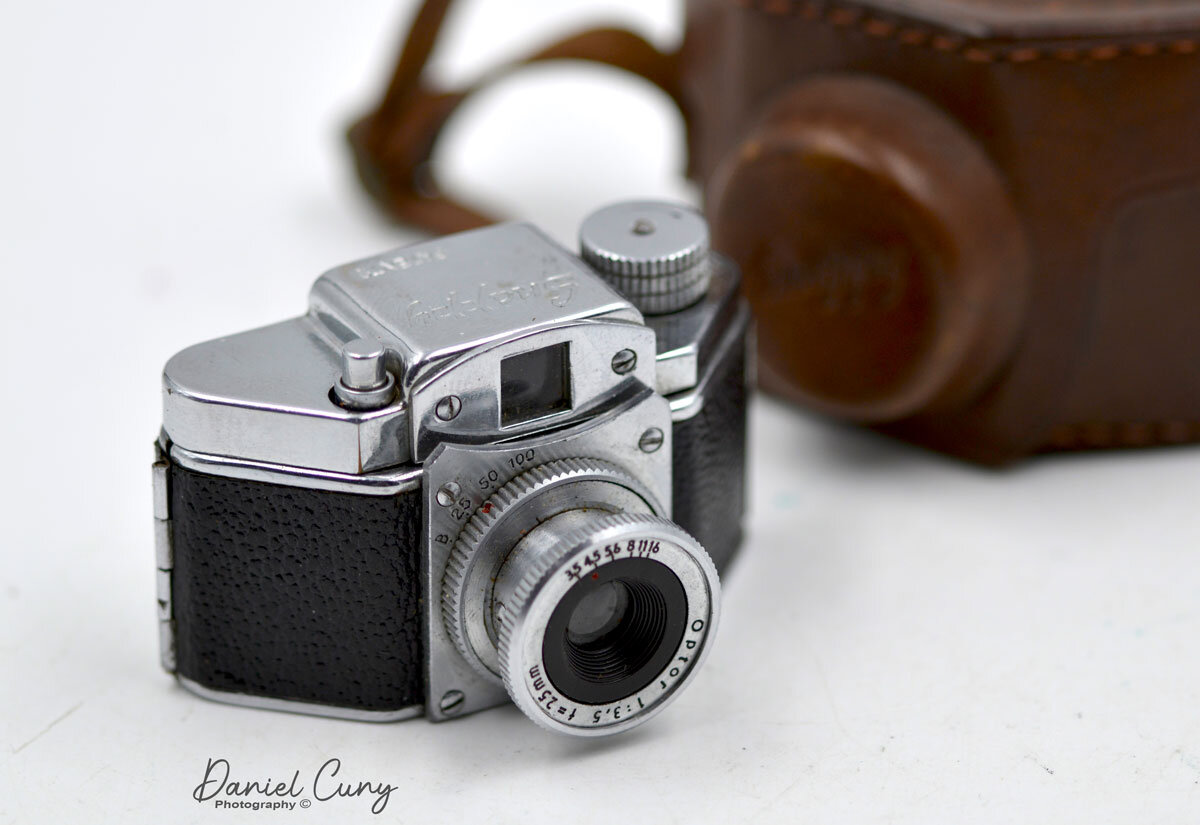
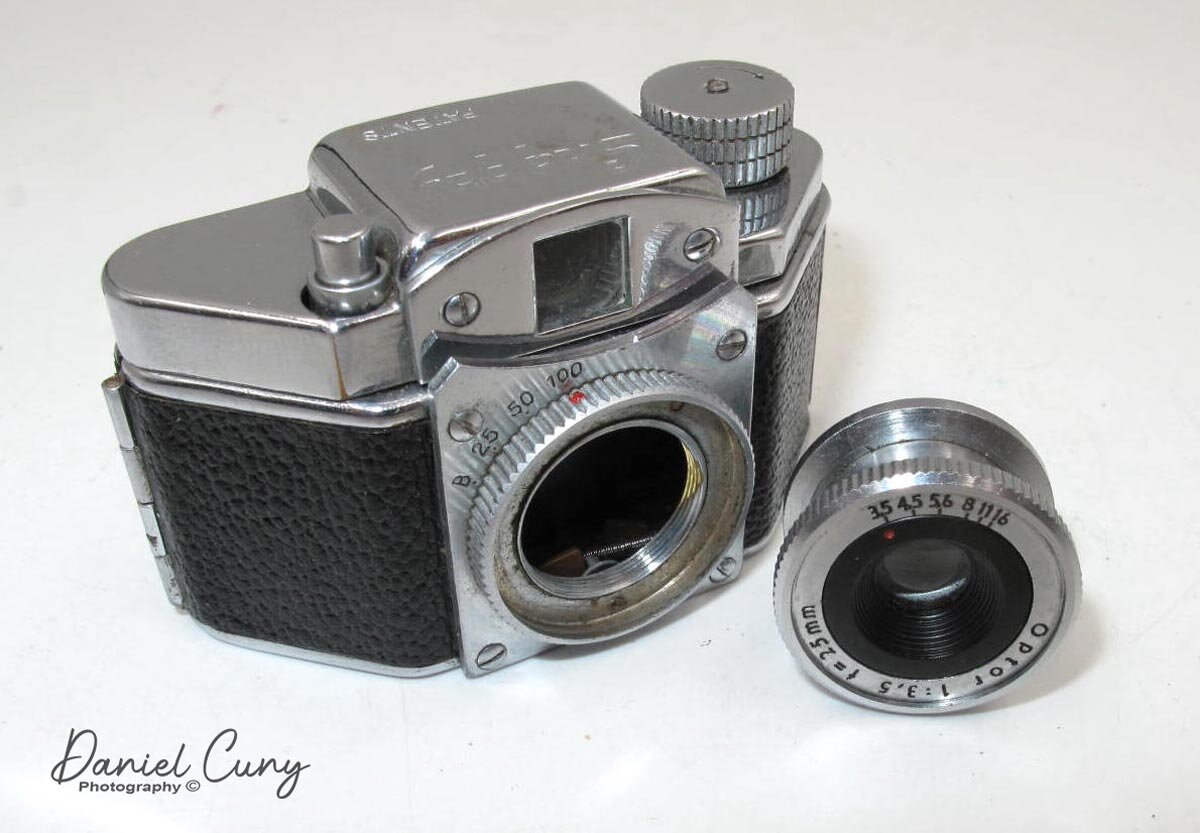
Looking over the cameras above my desk, I came across this small and what I believe is an underappreciated gem of a camera. So, in this week's blog post, I wanted to write about the Konishiroku Kogaku Snappy camera. A camera is exceptionally well built, especially for a subminiature-style camera coming out of Japan just after WWII.

Company History

Konishiroku is one of the oldest photographic companies coming out of Japan, even older than Kodak. The company traces back to 1873 when a pharmacist, Rokusaburo Sugiura, started selling photographic items out of the largest pharmacy in Toyoko that he owned. In 1878, Rokusaburo gave the original shop to his younger brother and launched a new shop, Konishi Honten, in Tokyo's Nihonbashi district.

In 1882, Konishi began to produce photography-related materials in Japan. In 1902, Konishi started to sell the Cherrimportedy Portable Camera, the first Japanese-built camera made for the public. In 1921, Konishi named his son Konishi Honten to succeed in the family business. The company turned into Konishiroku Honten, later Konishiroku, an abbreviation of their names Konishi Rokuemon.

 After WWII, Konishiroku was well known for its Konica brand of cameras, which they released the Konica I camera in 1948. Later in 1965, Konica produced the first auto-exposure SLR camera, the Konica Autoreflex. In 2003, they merged with Minolta and exited the photo market in 2006. they are now more recognized in the copier business.

The Camera

The Konishiroku Snappy was designed, developed, and sold in 1949. According to sources, the Snappy original design was in spring, with the first model released in August 1949. They were somewhat popular and sold approximately 40,000 units.

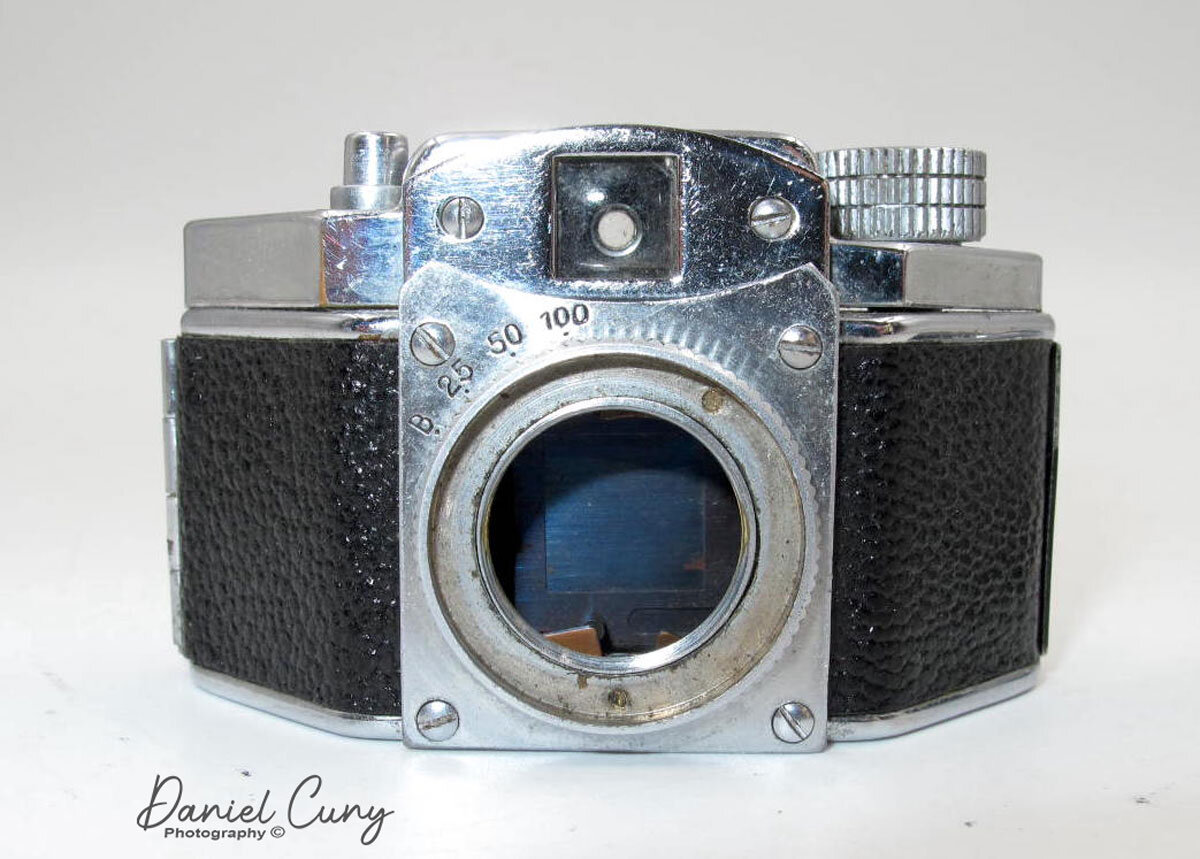
The camera has a trapezoidal-shaped camera that incorporates items seen in 35mm cameras of its time. The camera is a "system" with other lenses and accessories. In form, it reminds me of the VP Exakta, model B, which I wrote about in an earlier post, only considerably smaller. The camera measures 2.5" wide by 1 5/8" deep and 1.5" tall and weighs 5 oz. with a very sturdy and well-built leather case.

 Another item the camera has is a pull-up rewind knob that allows you to open the back. There are integrated shutter speeds of "B," 25, 50, 100. The lens is an Option 25mm f3.5 lens that allows the photographer to set aperture settings between f3.5-16 by turning the lens's outer ring. You would think this operation would focus the lens, but the lens is a fixed focus, and you're changing the aperture settings.

The camera has a horizontal running guillotine shutter tripped by the shutter release on the top of the camera. The winding leaver on the back of the camera advances the film and cocks the shutter.

 When you lift the rewind knob and swing the door open as you would a 35mm camera, you see there are rill film reels in the camera. The camera shoots 14x14mm square images on the 17.5 paper-backed roll film, which was popular in the "Hit" style cameras, but the Snappy film was much better quality.

The System

The lenses on the Snappy are also interchangeable, and they unscrew from the camera body. There is a Cherry 40mm f5.6 telephoto lens which also comes with an auxiliary frame that fits the front viewfinder window. Other accessories for the Snappy camera are Close up lens, which fits over the standard 25mm Optor lens, hoods and filters, tripod adapter, and the sturdy brown leather case with strap. The Snappy came in a kit with all the accessories in one red and black presentation box.

Conclusion

The Snappy is an excellent camera and a camera that I enjoy having in my collections. Having researched the camera, I'll need to hunt down the other accessories for the camera, especially the telephoto lens and filters. Maybe it's time to see if I can find the whole kit. Now that would be the crowning gem.

 Thank you for taking time from your busy schedule to read my blog post. I'll do my best to do this every other week, time permitting. Until next time, please be safe.

Petal Camera

In my early days of collecting, I was never a real huge fan of the smaller subminiature cameras, mainly since most of them were the lesser quality cameras, or as I called them, "carnival camera" like the Hit camera. Then there was the other end. The 007 spy style camera was coming from Minox. As I grew in my camera maturity, coming across cameras like the Minolta or Yashica 16mm camera gave me an appreciation of some of these cameras' quality and quality.

My Round Petal camera

My Round Petal camera

For this week's camera blog post, I wanted to go back to one of the subminiature cameras I have in my collection. The Petal camera has always intrigued me since it's the smallest of the small non-medical cameras made according to Guinness World Records. As far as cameras go, this one is tiny and just a little larger than a quarter in the US or a 2 Euro coin. The St. Peter Optical Company made the Petal camera, whose Japanese name was Sei-Petero Kōgaku, in 1948. According to some, I've seen some references where it stated its introduction in 1947. The first US advertising of the camera was in U. S. Camera in February 1949, which you can see here.

The Camera:

The Petal camera comes in two different styles, with an even rarer third version named the Evarax A. The two primary Petal camera are either a round-faced camera, which is what I own, or a second model with an octagonal shaped face. The Evarax A camera is an octagonal shaped face camera with a more elaborate etching on the faceplate. The Petal camera is only 1.25" across by 1.75" tall by 5/8" deep and weighs 2.2oz. The camera has a 12mm f5.6 lens, placed in the upper middle on the front of the camera. There are two shutter speeds, either "B" for time exposures or "I" for instant, which is 1/25th of a second, controlled by a wheel on the camera's front.

My Petal camera compared to a U.S. Quarter.

My Petal camera compared to a U.S. Quarter.

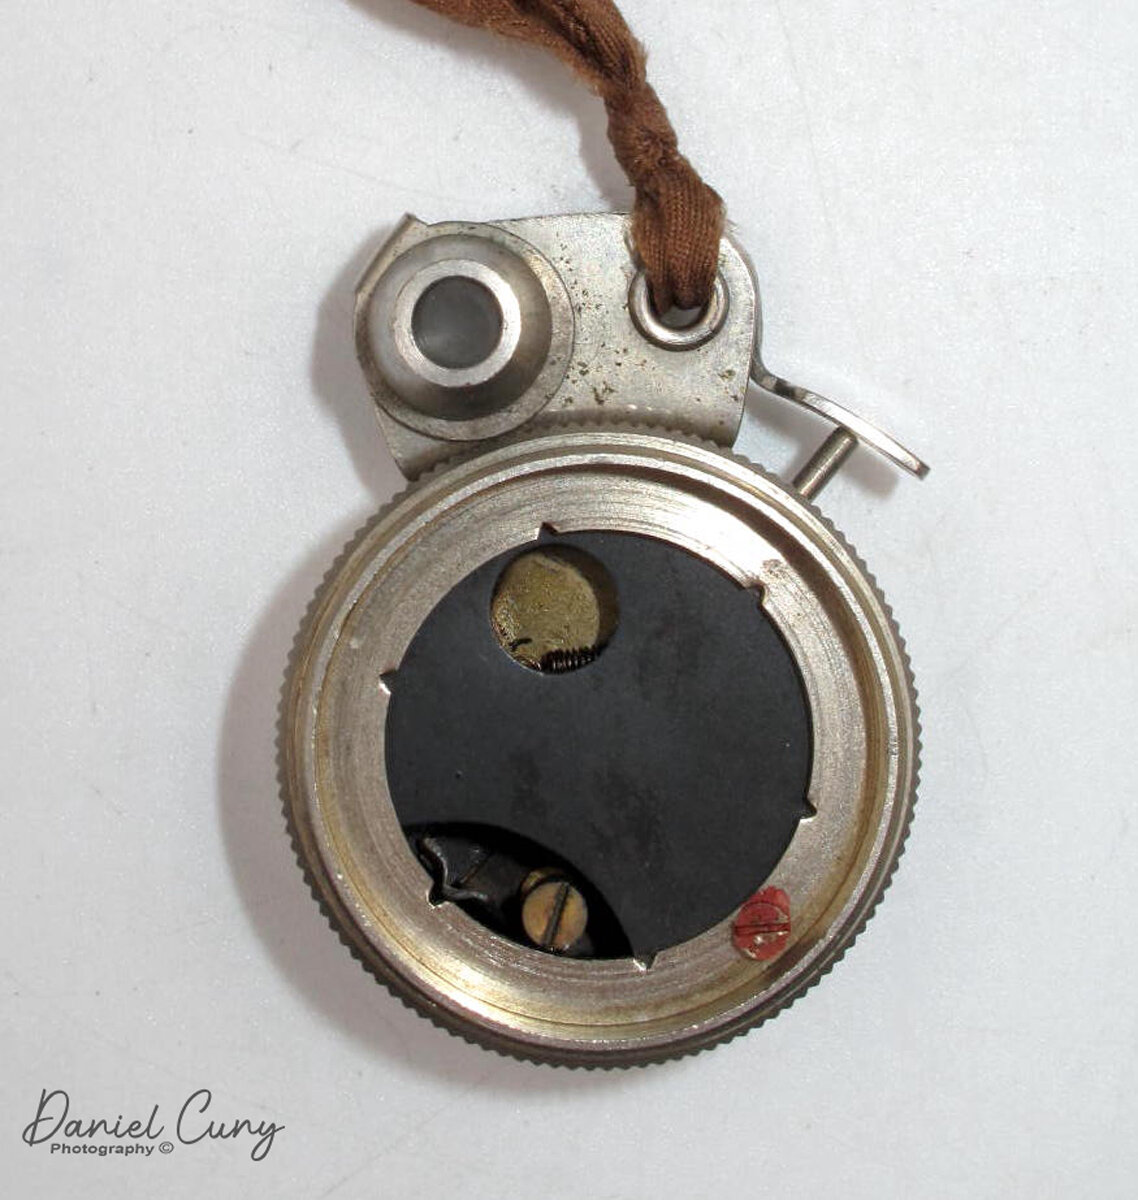
On the top of the camera is an optical viewfinder, and to the right of the viewfinder is the shutter trigger lever. Along the top of the optical viewfinder is a lever that can be mover over the trigger arm to lock it so you cannot take a photo when you don't want an accidental image taken. The shutter release lever pushes a plunger down into the camera, which trips the shutter. On the camera side is a knurled ring that you rotate to advance the film to the next exposures. To the side of the knurled ring, number 1 to 6 with indents stops the ring at the next photo.

Loading the Camera:

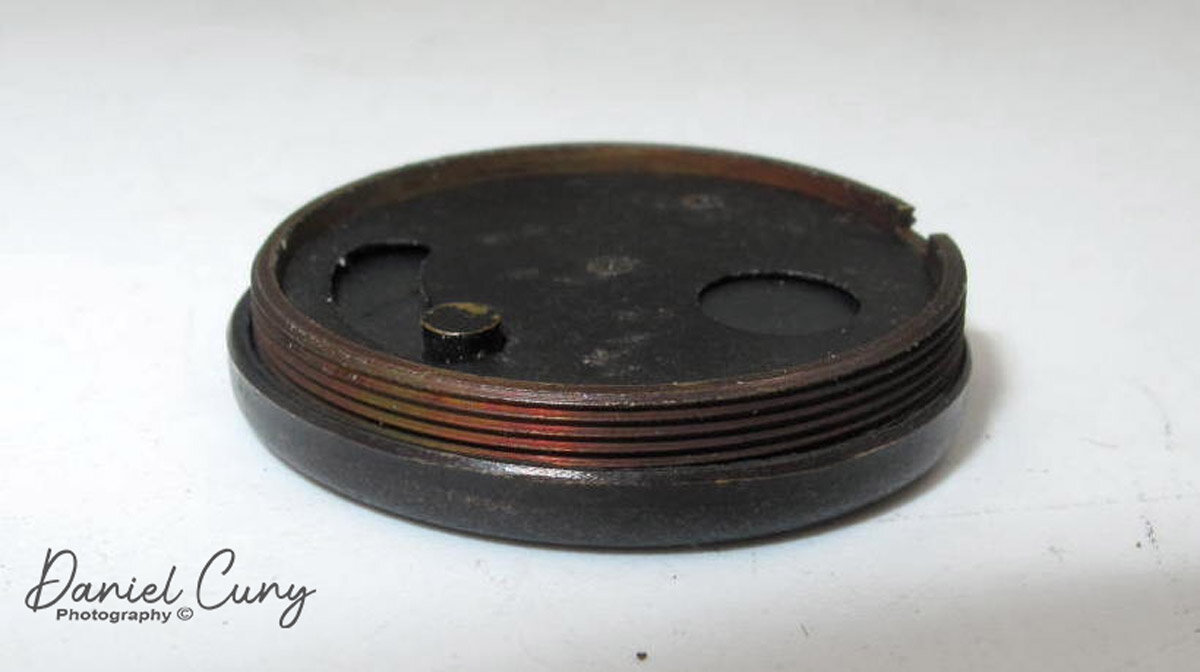
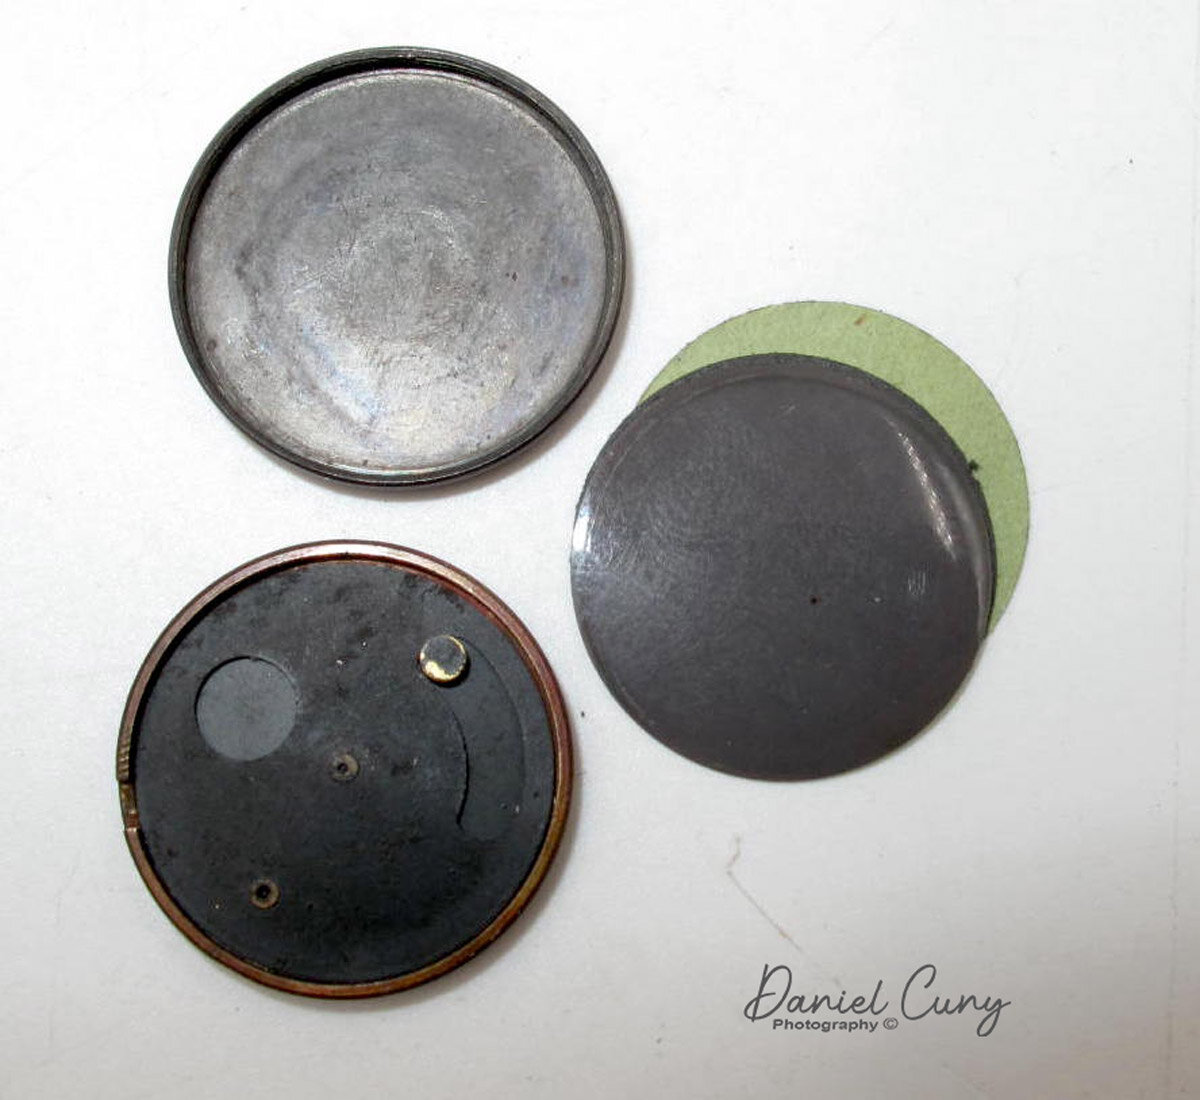
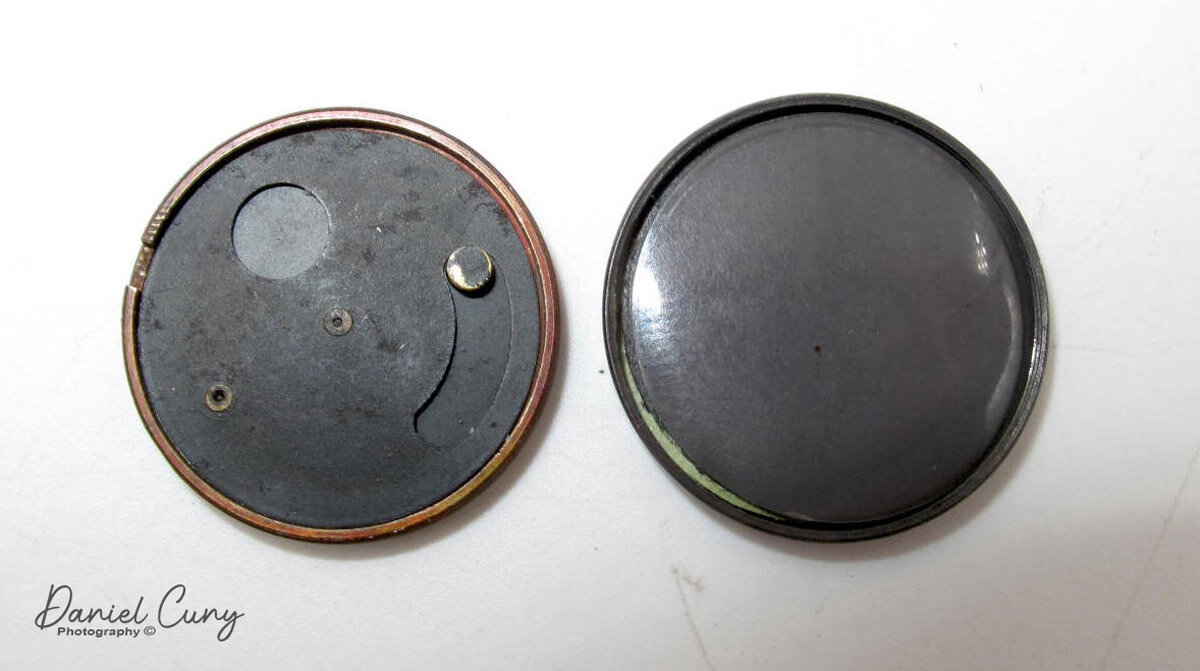
It took me some time to figure out how to get to the film chamber. After playing for about 15 minutes or so, I noticed that the back of the camera. The camera back can be unscrewed to get to the film cassette. Once the back is off, it exposes the film cassette. Once that's removed, you can see the shutter mechanism and the inside of the camera itself.

Unthreaded the back off the Petal camera. You can also see the exposure counter.

Unthreaded the back off the Petal camera. You can also see the exposure counter.

The film came in preloaded discs with 6-6mm images on each film cassette. The film cassette holds the film. To get to the film, the cassette needs to be unscrewed too. The original Petal film was a panchromatic film, which needed to be loaded in complete darkness. Many people used orthochromatic film like that can be loaded and unloaded under a red safelight, which doesn't affect the film. A film cutter allowed the Petal camera owners to cut 35mm film to use in the film cassettes.

Once the film is in the cassette and back into the camera, you thread the back onto the camera. You need to rotate the back portion of the camera one to two revolutions clockwise until the #1 is next to the exposure indicator. Doing this opens the film window on the film cassette and allows light to get to the film once the shutter is triggered.

Exposure counter on the Petal camera.

Exposure counter on the Petal camera.

After you took the six exposures, the exposure counter is at number six to unload the film. You need to turn the number counter clockwise two numbers to number 4, closing the film window and allowing the photographer to unscrew the back and take out the film cassette for processing.

Conclusion:

The Petal camera is a lot more sophisticated of a camera than I first thought when I purchased it many years ago. It's very well built and a prized camera to own for the "spy" photographers. Extremely small, very well made, and a beloved camera in my collection. The shutter on my camera is inoperable. It would be fun to cut some film and take it out for a spin.

 If you have questions or comments about this camera or any others in my collection, I'd love to hear from you. Thank you for taking a few minutes from your day to read about this fun camera. Until next week, please be safe.
No. 0 Folding Pocket Kodak

Due to the holiday season, I thought I'd do something a bit different for the blog this week. I did pick out a camera to write about, but as you can imagine, I didn't have a lot of time to do the research, but I did have an opportunity to take the camera out and use it. The camera I picked for this week's post is a camera that's well over 110 years old, and I received some pretty peculiar looks when I took it out to shoot.

No. 0 Folding Pocket Kodak

No. 0 Folding Pocket Kodak

The Camera

This week's camera is the No.0 Folding Pocket Kodak camera built between 1902 and 1906. It's a very compact folding camera that takes  121 size film that produced 1 5/8" x 2 1/2 size film negatives. The No.0 folding pocket Kodak is one of the earliest Kodak folding cameras and measures 5 5/8" long by 3 1/4" wide by 1 1/4" deep when closed, and 3 1/2" deep with the lens extended and weighs in at 11.5 oz.

The No.0 folding pocket Kodak is a fundamental camera that was marketed for horizontal shooting. When you pull the lens away from the body, it has a scissor-style hinge system to keep the lens erect, along with a pull-down leg on the front, right side of the camera so the camera can stand on its own. I'm a big fan of the red bellows style cameras produced during this period, and the bellows on my camera are light tight and a vibrant dark red color. The No.0 folding pocket Kodak has a Meniscus lens along with an Eastman Automatic shutter. To open the back of the camera is just a simple latch on the left side of the camera, and it opens on a hinge to load the film.

When you're holding the No.0 folding pocket Kodak with the lens extended and ready to take a photo, there is only one viewfinder, and it's for horizontal images. Most cameras have two viewfinders, one for horizontal and one for vertical photos. On the other side of the viewfinder is the shutter release button for normal instant style photos, which I'm guessing is approximately 1/60 sec. On the right side of the extended lens area is a protruding shutter release for time exposures. You click once to open the shutter and a second time to close it. On the left side of the extended lens area is the sliding mechanism, which changes the aperture setting. There are three different aperture settings set by moving the slider out to get to the desired aperture.

I am preparing the camera to shoot.

When I played with the camera, I had a roll of 35mm film on my desk. When I opened the back, the camera, it still had the wooden take-up spool in it. I picked up the 35mm film and laid it in the film chamber, and noticed how well it fit there. Pulling the film leader over to the take-up spool, I figured I'd be able to shoot 35mm through this camera.

The 35mm film's width was too small, so I needed to put something across the film area to keep the film flat when shooting. I had some black masking tape in my office, which I use to mask my light table when shooting glass negatives. I measured the width of 35mm film in the camera and cut some masking tape to fit across the film chamber so the film would lay flat.

Now I needed to figure out how many turns of the winding lever would take to advance the film to the next frame without overlapping frames. I did this with a dummy roll I had in my office. It takes two full turns of the winding lever to advance to the next frame. It probably is 1 3/4 turns, but I like to keep it simple. There is a red window on the back of the camera, which I needed to block out the light since 35mm film isn't a paper-backed film like other roll films. I put a couple of black tape layers over the red window to block that light as well.

 I loaded up the film into the camera and took my dogs to the local dog park to try out the No.0 folding pocket Kodak. Once I took the roll of film, I brought it home to unload the film. There is no rewind on the No.0 folding pocket Kodak, so I put the camera into my trusty dark bag for film processing and unloaded the film.

Photos from the camera.

My local dog park, from No. 0 Folding Pocket Kodak camera

My local dog park, from No. 0 Folding Pocket Kodak camera

Lulu from the dog park. She was sitting so nicely, then got too close. Photos from No. 0 Folding Pocket Kodak

Lulu from the dog park. She was sitting so nicely, then got too close. Photos from No. 0 Folding Pocket Kodak

Vertical photo from the No. 0 Folding Pocket Kodak

Vertical photo from the No. 0 Folding Pocket Kodak

Conclusion.

It was enjoyable to put a film through this 110 plus-year-old camera. There were a couple of hiccups as I hit the time exposure shutter button a couple of times to take the photo as I'm used to having the trigger on the side of the camera instead of on top, but other than that, the results are pretty good.

 Thank you for taking a few minutes to read my camera collecting blog. I enjoy hearing from you about this or any of the other posts I've made so far. I hope everyone has a very happy and safe new year and until next week, please be safe.

No. 0 Graphic Camera

In my opinion, the No. 0 Graphic camera is one of the real sexy models made. It's a small yet sophisticated, high-quality design and somewhat technical that it advanced camera manufacturing forward. The camera is a fixed focus camera made by Folmer & Schwing, a division of Eastman Kodak at the time, manufactured between 1909 and 1926.

Graphic No.0 Camera & Case

Graphic No.0 Camera & Case

The Company

Folmer & Schwing, Mfg. Co. first started as a gas lamp manufacturing company. The company was started in 1887 by William F. Folmer and William E. Schwing. When the decline of gas lamp sales occurred in the 1890s, Folmer & Schwing moved into Bicycle and camera manufacturing. Their cameras first appeared in their 1896 catalog and their first Graphic camera in 1898, which you can see here. Mr. Folmer also introduced the photographic world to the very well-known Graflex cameras in 1898, known as the Graflex Reflex camera, a single lens and moving mirror (SLR). Looking at some of their later catalogs, it's interesting that there were so many bicycle-related cases, etc. You can see the No. 0 Graphic advertised here.

In 1905, Eastman Kodak purchased  Folmer & Schwing Mfg. Co., and up until 1926, they were a division of Eastman Kodak. In 1926 the U.S. government forced Kodak to divest its professional division due to the Sherman Anti Trust Act. With no one buying Folmer & Schwing, they became Graflex Inc., which was an independently owned company up until 1958. After 1958, the company had a few other owners and was officially closed in 1973.

Top view of No. 0 Graphic camera

The Camera

Looking at the No. 0 Graphic, I like the intricacy of the top of the camera and the rest of the camera's simplicity. Looking at photos of the camera, I thought the camera would be larger than it is. The camera measures 5 1/4" wide by 3 3/4" tall, including the viewfinder, by 3 1/2" deep, and weighs 1 lb. 10.6 oz. without film. To open the lens, or I guess I should say to open the door to expose the lens as the lens is fixed focus, you press the thumb knob on the camera body's upper left as you face the lens. By pressing the knob back, the door to the lens opens. To close it. Press the button to the left of the lens, and the door closes. The camera has a Zeiss Kodak anastigmat lens, f6.3.

The camera uses a cloth focal-plane shutter system with shutter apertures (distances between shutter curtains) of 1/4, 3/4, and 1 1/2 inches. There is a tension regulator on the top of the camera that regulates the shutter speed and the shutter aperture used. There is a graph on the top of the camera showing what shutter speed the camera will fire at depending on the tension and shutter aperture used. Looking at the chart on the top of the No. 0 Graphic, the shutter speeds range from 1/10 to 1/500. Also on the top of the camera is the aperture setting, which varies from f6.3-f32. You move the pointer wheel to the desired setting.

The No. 0 Graphic takes six 1 5/8 x 2 1/2 inches on No. 0 F.P. Kodak roll film. Later the film was called Kodak 121 film, which you would load just like any roll film camera with the take-up spool on the right-hand side. To open the camera's back is simple, pinch the top and bottom springs and pull the camera back off. This method is similar to many of the Kodak Autographic cameras of this era.

 The camera also incorporates an exciting viewfinder system, which allows for discreet photo taking. There is a mirror in the viewfinder which can be placed in either a 45-degree or 90-degree position. The 45-degree position enables the photographer to view from a 90-degree position from your subject. What they call it deceptive angles camera. You can also open the mirror to 90 degrees making the mirror even with the viewing plane to point it forward towards the subject. In the manual, which you can see here.

The camera I own still has the camera strap on the side and the fitted camera case. While the No.0 Graphic I have is missing the leather on the lens door, it's something I overlook as I generally display it with the door open. My camera is serial number 26602, embossed on the camera's bottom, just behind the tripod socket.

No. 0 Graphic camera in the fitted case.

No. 0 Graphic camera in the fitted case.

Conclusion

The No. 0 Graphic is a prized camera in my collection, especially with how complete the camera is. The shutter is a bit slow, and since 121 film is no longer available, I might want to see if possibly something like 127 size film might work. The camera is small, and I love the quality they put into the design and display on the camera's top.

 Thank you for taking some time from your busy schedules to look over this post, and I always love to hear from you. If you have any questions, comments, or concerns about this or any of the other cameras I've written about, please drop me a line.

 Until next week, please be safe.
Mamiya Six II, Early Version

For the past few years, I've enjoyed shooting with older folding medium format cameras. These cameras are generally smaller and something I can fit into my pocket for easy transportation. They also use larger than 35mm film, so the ability to enlarge or crop the image gives more flexibility. Their lenses are somewhat flat in contrast, but I can change that after processing and digitizing the images. The Mamiya Six camera I have is one of the cameras I like to use often. There are some exciting features built into this camera that make the camera fun to use. The Mamiya Six was the first camera manufactured by Mamiya, and the camera I have, I believe, is the second version.

My opened Mamiya Six camera.

The Company

Mamiya was started in May of 1940 by Mamiya Seiichi and Sugawara Tsunejirō in Toyko, Japan. The first and only camera they produced for eight years was the Mamiya Six, which incorporates a coupled rangefinder on a 6x6 camera that moves the film plane for focusing instead of the lens. Even though they only made one camera, Mamiya managed to grow and gain success throughout the wartime. By February 1944, Mamiya had up to 150 employees and had moved their manufacturing to a new facility. In March 1944, they also opened a second manufacturing facility that made and assembled their lenses. In October 1945, just a month after Japan's surrender, Mamiya was the first company to receive a substantial order, bringing them back to full production.

In 1947, Mamiya started to produce Stamina shutters and Neocon lenses. In 1950, the Setagaya plant became the company Setagaya Kōki K.K. making their shutters and lenses. The name Sekor that appears on most Mamiya lenses comes from Setagaya ki, with the r most likely for Renzu meaning lens. 

I should mention one item I have a real fondness for Mamiya cameras as I was an employee for Mamiya America for about six years during the early 2000s. Some of my fondest memories are working with the wonderful people at MAC Group (Mamiya America Corp.). Phase One purchased a 45% stake of Mamiya in 2009 that changed its dynamic, but they still make cameras and lenses under the Phase One name.

The Camera

Over the years the Mamiya Six was manufactured there have been many changes and modifications. To see some of the changes, you can look here. This is also not to be confused with the Mamiya 6 which was introduced in 1989. I believe the version I have is the Mamiya Six II because the strap eyelets are no longer on the camera as they were on the original models.  Looking at the camera, the first thing I noticed when I bought it was the camera has both a waist-level finder and an incorporated rangefinder, which you can see from the window on top of the camera. Just to the left of the waist level finder window is a small button to open the camera. Depress the button, and the lens extends downward. To me, it resembles the Zeiss Ikon Super Ikonta 530/16 in size and weight. The Mamiya Six I have is 4" tall by 5.5" wide and 2" deep unopened or 4.5" deep opened, and weighs 1lb 12.5 oz without the case or film.

The Mamiya Six I have has a 7.5cm (75mm) f3.5 K.O.L. Sola Special Anastigmat lens in an NKS-TOKIO shutter with speed from 1-200 & "B." The aperture setting range from f3.5-32. To change shutter speeds, you move the knurled ring on the outside of the lens to the desired shutter speed. There is also a knurled ring on the back of the lens are on the right side that allows you to change aperture settings. It's somewhat hidden and took me a minute to find it, but it's easy to change once found. The pin on the top of the shutter cocks the shutter. There is a self-timer on the bottom of the shutter, which has a red dot. On the top of the camera at the far right are the focus distance and a depth of field scale. My scale only goes to F8, which is standard on the early cameras. The Mamiya Six I have also arrived with a Mamiya Six Y-2 filter.

On the back of the Mamiya Six is the viewfinder window. To the right of that is a thumbwheel that focuses the camera. Looking through the viewfinder is the typical rangefinder for focusing the camera. Once the shutter is cocked and you depress the shutter button on top of the camera, a red window appears in the viewfinder letting the photographer they have taken a photo. Under the viewfinder and to the left is a switch with an arrow pointing to the left. Moving that switch to the left allows you to wind the film to the next frame and also takes the red warning out of the viewfinder. The frame counter is at the top of the camera. It's a small round window next to the film advance knob. On the back of the Mamiya Six is also a red window and cover, which you can see the film advance and stop at the next frame, which is automatic. 


Close-up of lens & shutter on Mamiya Six camera.

Loading the film is a bit tricky. I always make sure my film counter is at number 1 before loading. Since the film plane moves for focusing, the pressure plate is a removable plate that slides into the film plane. You slide out the pressure plate. Load the film on the right side of the camera. Drag the leader through the slots where the pressure plate goes and wind onto the take-up spool. Slide back the pressure plate into place, and turn the advance knob until you see the starting arrow on the film leader. Close the back and with the rear window open, advance the film to number 1. Now the frame counter and the film frame number coincided with each other. Once you take a photo, slide the switch to remove the red warning label, unlocks the film advance, and wind to the next frame.

Photos

Here are a few quick shots I took walking around my neighborhood.

Conclusion

I enjoy using the Mamiya Six I have. I like the waist level finder, especially when I want to get the camera low to the ground. It's small for a medium format camera, the optics are good, and the aperture goes to F32, which I utilize when in the day time. The Mamiya Six is, in my opinion, a real keeper, especially when I want to put something in my pocket and shoot medium format.

 I appreciate you taking a few minutes to read this week's blog post. I enjoy hearing from you about your experiences with this or any other camera you have in your collection. Feel free to comment if you have a question or concerns regarding this or any other posts I've done.

 Until next week, be safe.

R. F. Hunter, Gilbert Box Camera

The cameras that caught my eye early in my collecting years were mainly colored cameras. Red, blue, green, brown tan cameras were the cameras I enjoy. If they had the original color bellows, it was that much better, or If the cameras had some design, even better still. Then I started to add red bellows cameras, as well as the odd and unusual cameras. When I first got a look at the Gilbert Box camera, which had the name R. F. Hunter LTD. London, under the lens, I knew I needed to own one. I thought it was not only a great camera but close to a work of art and a mid-century masterpiece.

R.F. Hunter, Gilbert Box Camera with filter

R.F. Hunter, Gilbert Box Camera with filter

Company Background

R. F. Hunter, LTD. London was an importing and distribution company which was initially located at 40 Doughty St., in central London, England. In their later days before going out of business, they were located at 51 Gray's Inn Road, London. They started in the early 1930s, mainly distributing cine projectors and cameras.

Their main claim to fame was Franke & Heidecke Rollei products in the UK in the 1930s. This was the first distribution of their products outside of Germany, mainly due to Cyril Hunter, the Managing Director of R. F. Hunter's close relationship with Herr Franke. The story goes that Herr Franke brought his son to the UK just before WWII and asked Cyril Hunter to watch him in the UK during the wartime. He did so but needed to report to the authorities frequently with his son.

After the war, Franke & Heidecke went back into full production, but licensing the UK's distribution was limited. It wasn't until 1950 that the country changed the licenses, and robust distribution could of the product started to flow freely. According to advertising for the Gilbert camera, R.F. Hunter introduced it in 1953.

The Camera

The brushed stainless steel body with lizard skin sides are what drew me to this camera. When I first saw it, I needed to have it for my collection, just for the camera's refined look, the shine, the color, and Lizard skin sides. It had everything someone like me coveted. It had it all. Once I bought it and received it and started to play with it, I knew I had a superb camera. The whole viewfinder rotates for vertical or horizontal photos. The camera has a double exposure lock, so you can't take multiple images on the same frame. It takes 8-6x9 negatives on 120 film.

The camera measures 4.5" tall by 3.5" wide by 5" deep, including the lens. The lens is an approximate 105mm lens with two aperture setting (Dull) F5.6 or (Sunny) F11. The aperture settings are controlled by lifting or depressing a tab on the camera's upper right, next to the viewfinder. There are two shutter speeds for taking photos (fast) 1/50 and (slow) 1/30, a tab on the camera's left side. My camera doesn't allow me to pull up the tab to get the "slow" settings, so mine is 1/50. There is another setting located on the shutter release of the camera. If you pull the shutter release away from the body, there s an option for "T" or time exposure if needed. Another oddity about this camera is on the side where you focus the lens. As you rotate the lens, there are settings for 8,12, or 20 feet. I wonder why this was in feet as opposed to meters? Was this made for the US market?

On the left side of the camera is the film advance knob, which also cock the shutter, preventing double exposure. Behind the film advance wheel is a liftable latch that holds the camera's body portion to the lens/shutter area. Lifting the latch and pulling the body away from the lens, opens the camera for film loading. The camera's back has a slight curve outwards to replicate the film plane's arc, and there's a window that opens/closes so the photographer can see the frame numbers pass by when advancing the film.

Looking at the top's rotating viewfinder, you can see the etched line for registering your image for vertical or horizontal photos. I prefer the etched lines instead of the cropped corners many other box cameras have. My camera also came with the yellow filter, which fits snuggly into the lens. Next to the shutter release is a couple of flash sync posts. The camera's bottom has a tripod socket in the middle of 3 legs that prevent the camera from sitting directly on a table or ledge, which keeps the bottom from getting scuffed up.

Images

I loaded the camera up with Ilford Delta 125, black and white film. I only wished I had a faster film to shoot as the day I went to shoot was very overcast, so the photos are a bit dark, but not too bad. These images are also unretouched and quickly scanned for the post.

Conclusion

I've enjoyed this camera for many years from afar as it was sitting with my other cameras, but I am happy that I took it off the shelf and took photos with it. To me, it's a beautiful camera. I love the design, the look, and the lizard skin coverings. It is a mid-century beauty that I intend to cherish for many more years for an almost seventy-year-old camera.

 Thank you for taking a few minutes out of your day to look this over. I'd love to hear from you about your experience with the camera and if you've taken it out to use. If you have questions or comments about this or any of the other cameras I've written about, drop me a line. Until next week, please be safe.
Voigtlander Superb

The Voigtlander Superb is a camera I owned for a short time, almost thirty years ago. At that time, I was buying and selling cameras rapidly and not using them. To me, at the time, it was more of a commodity. The Superb I owned also had a more rare lens, and someone was willing to pay me handsomely for it. At the time, with growing children, It's something I needed to do. Things have changed, and I've evolved in my appreciation for cameras.

My Voigtlander Superb.

My Voigtlander Superb.

Company Background

In my post about the Voigtlander Vitessa, I made a brief history of the camera company that you can see here. The thing that amazes me about Voigtlander is how early they got into the photography industry and the names and products associated with them.

 In 1839, publications introduced photography to the public; Voigtlander's optics were the first mathematically calculated optics made by mathematics professor Josef Petzval. Peter Voigtlander gave technical advice regarding these lenses, which cut down exposure times to about one minute. That was revolutionary. By 1840, they were not only producing cameras, the all-metal Voigtlander Daguerreotype camera, they also introduced the first Petzval photographic portrait lens, with a maximum F stop of F3.6, know as the fastest lens of the time.

 
Camera and case

Camera and case

In 1923, Schering AG's photo division purchased Voigtlander, and by 1925, they started mass production of cameras and photo equipment. Voigtlander introduced such everyday items as the zoom lens, the 36–82/2.8 Zoomar in 1959, and the first 35mm compact camera with a built-in flash, the Vitrona in 1965. Voigtlander introduced the Superb model from 1933 until 1939. There weren't many modifications during that time. The early cameras had "bunny ears" as camera strap holders and the later years had a winged slot for the strap. You can see a version here, and there is an instruction manual here.

My Camera

Recently, a Voigtlander Superb became available to me, and the price was fantastic, so I immediately jumped on the offer. The seller stated it was in excellent working condition and also had the original case. Voigtlander made the Superb with two different lenses. The rarer and challenging to find 7.5cm (75mm) f3.5 Heliar, the one I owned previously. The more common lens is the 7.5cm (75mm) f3.5 Skopar, which this camera had. When I received the camera, there was no mold, mildew, or fungus on the lens, and indeed the camera was in fine working condition. Now it was time to take the camera out for a spin.

Using the Camera

It was time to get myself familiar with the camera again. Holding the camera is very comfortable. Popping up the viewfinder, I immediately noticed there's a bubble level in the upper right-hand corner. I liked that. The magnifier is held in place by a small clip, so it doesn't pop up when you press on the front of the hood like the Rolleiflex's do. At least mine didn't. You focus the camera by sliding a bar on the bottom of the taking lens. The focusing is very similar to the Minolta Autocord. I prefer this method as opposed to the focus knob on the side of the camera. It allows me to keep my hands under the camera when focusing. The viewing lens points down when you focus closer, which corrects for parallax. That's fantastic.

Looking at the shutter speeds around the Compur shutter, I noticed they are reverse. Then I noticed a small prism/mirror right next to the lens. Holding the camera and looking down allows you to see the shutter speed set in the window of the prism/window. That's genius. The shutter speeds go from 1/250 to 1 sec, along with 'T' and 'B.' The aperture settings are f3.5-22 and on a small dial to the right of the viewing and taking lens. When you're looking down from the top of the camera, you can see the shutter speeds and aperture settings without tilting the camera up to view them. You can easily see the focus distance, which you can see on the top of the viewing lens.

Here's where the camera gets fun, loading the film. The Voigtlander Superb has a horizontal loading and transport system. If not all other Twin Lens Reflex cameras, the majority use a vertical loading and transport system. On the left side of the camera is an angled bar that attaches to a metal nub on the back. Lifting the bar from the nub and opening it to the left exposes the take-up spool on the camera. Opening the back to the right reveals where you load the film in the camera. Put the fresh roll of film on the right, and pull the leader across the shutter area to the take-up spool on the left.

Viewing the shutter speeds.

Viewing the shutter speeds.

Just above the film chamber is an advance lever. Wind the lever to advance the film. Close the back. On the right side of the camera is the red window. There is an inside cover for the window. It's opened/closed by the square knob above the red window. I watch until the frame number reaches #1. Then I close the window. Above the square knob is a switch. This switch resets the frame counter, which you can see on the back of the camera. The film advance lever doesn't automatically stop at the next frame, so you need to advance it until you see the frame number which is five cranks.

Images

I took the camera out a couple of times this week. Here are some of the images from the camera.

Conclusion.

The Voigtlander Superb is an 80-year-old gem of a camera. It's easy to load and unload. The ability to see the shutter speed and aperture settings when looking down on the camera is excellent. I enjoy the bubble level in the viewfinder, so I know my camera is level. It fits nicely in my hand and isn't too heavy. The viewfinder is just a bit dark, but nothing to deter me from using it in the future. Another oddity is when I processed the film, and the images are across the film sideways instead of running top to bottom. It just kind of surprised me, but putting the negatives in my sleeves, they work better that way. If you run across one for a reasonable price, buy it, and I don't think you'll be disappointed. A great camera.

 I truly appreciate you taking the time to read my post. It does mean a lot to me. If you have comments or concerns about the article or the camera, please drop me a line. I'd love to hear from you. Until next week, please be safe.
You can subscribe to my Camera Collecting Blog below.