Konica Pearl II camera

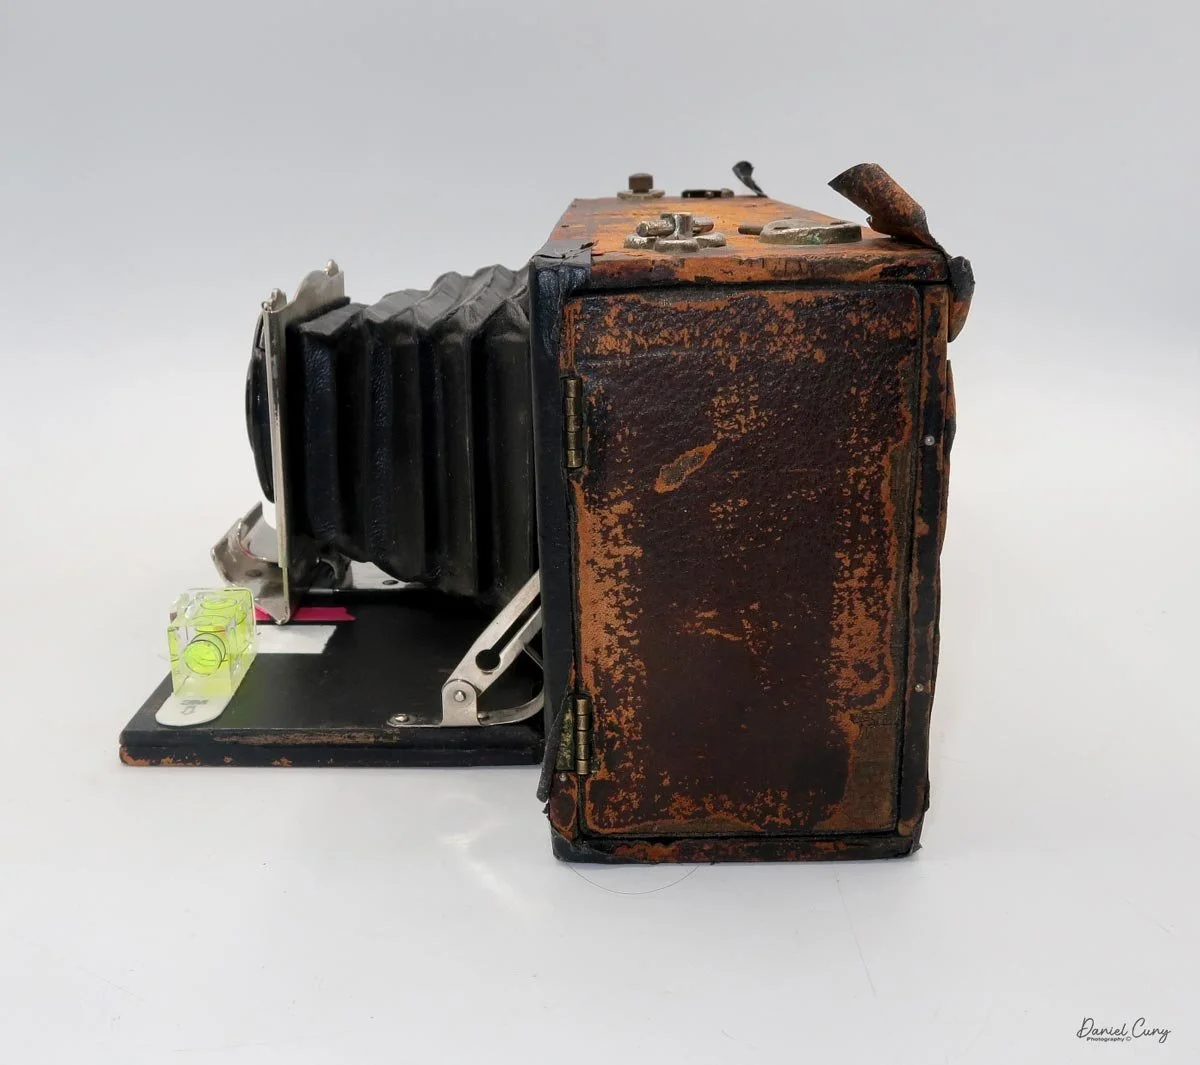
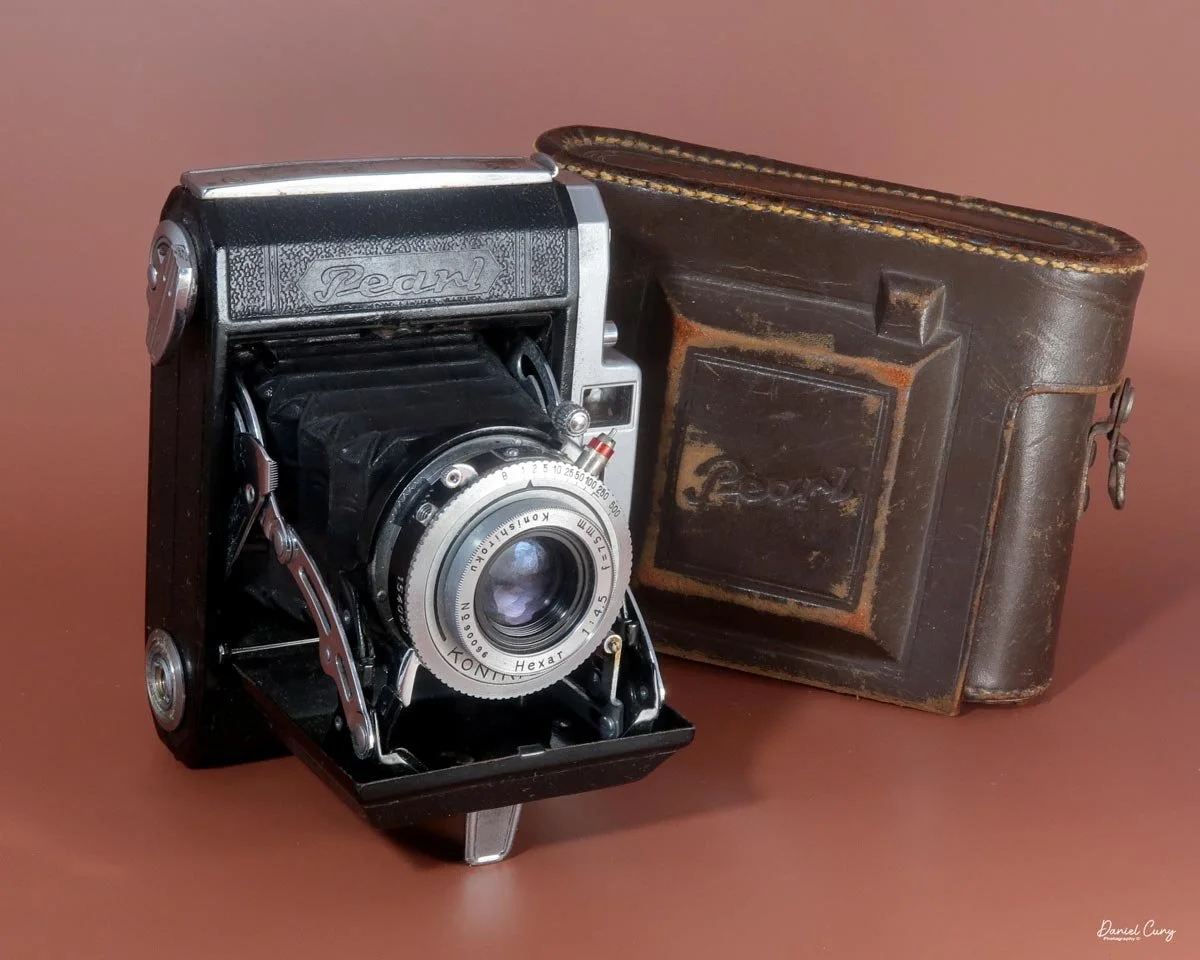
My Konica Pearl II camera & case

I purchased the Konica Pearl II on my first visit to Kitamura Camera, when I hired Bellamy Hunt of Japan Camera Hunter to show me many used camera stores in Tokyo. 

 It was our last stop on the half-day tour when we visited this massive, seven-story flagship store, which is one of more than 45 Kitamura Camera locations in Tokyo. It's on the fourth floor where they show their "high-end" items such as rare Leica cameras and lenses, Nikon rangefinders, Hasselblads, Rolleis, Mamiyas, and quite a few camera oddities. It's the floor that if you have an extra $10,000, $20,000, or even $100,000 burning a hole in your pocket to purchase rare photo items, they most likely have it.

 Unfortunately, I didn't win the lottery before coming to Japan, so I needed to be much more frugal in my camera purchases. Because of this, I much prefer the third floor of Kitamura's flagship store. It's where they have their "bargain" items. Personally, it has the items I'm much more accustomed to purchasing.

 The Konica Pearl II was a camera I didn't really notice until the second time I passed by a particular showcase. It was tucked in a back corner, not really visible except for the film winding knob, which I thought looked odd and different from many of the winding levers on this style of camera. It has more of a winding-key appearance rather than the standard round knob you see on most 120-style folding cameras.

 We asked one of the salespeople to get the camera out of the showcase for me to get a better look at, and he didn't even see the camera at first, tucked back in a corner of the showcase. But after guiding him to the correct camera I wanted to see, he took it off the shelf and put it on a mat in a lower showcase for me to look over.

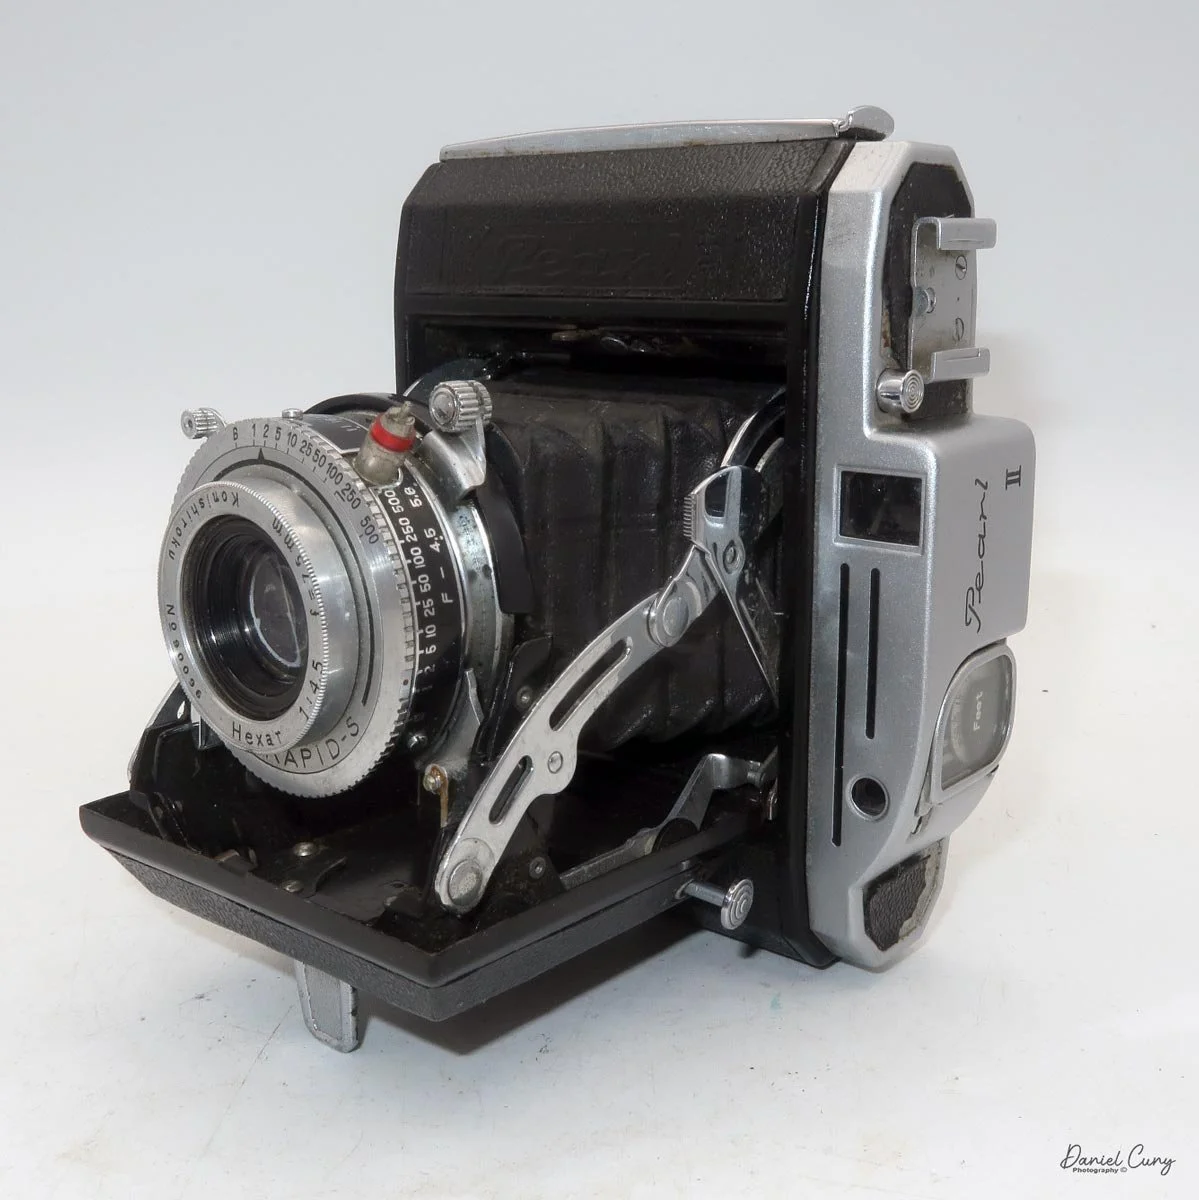
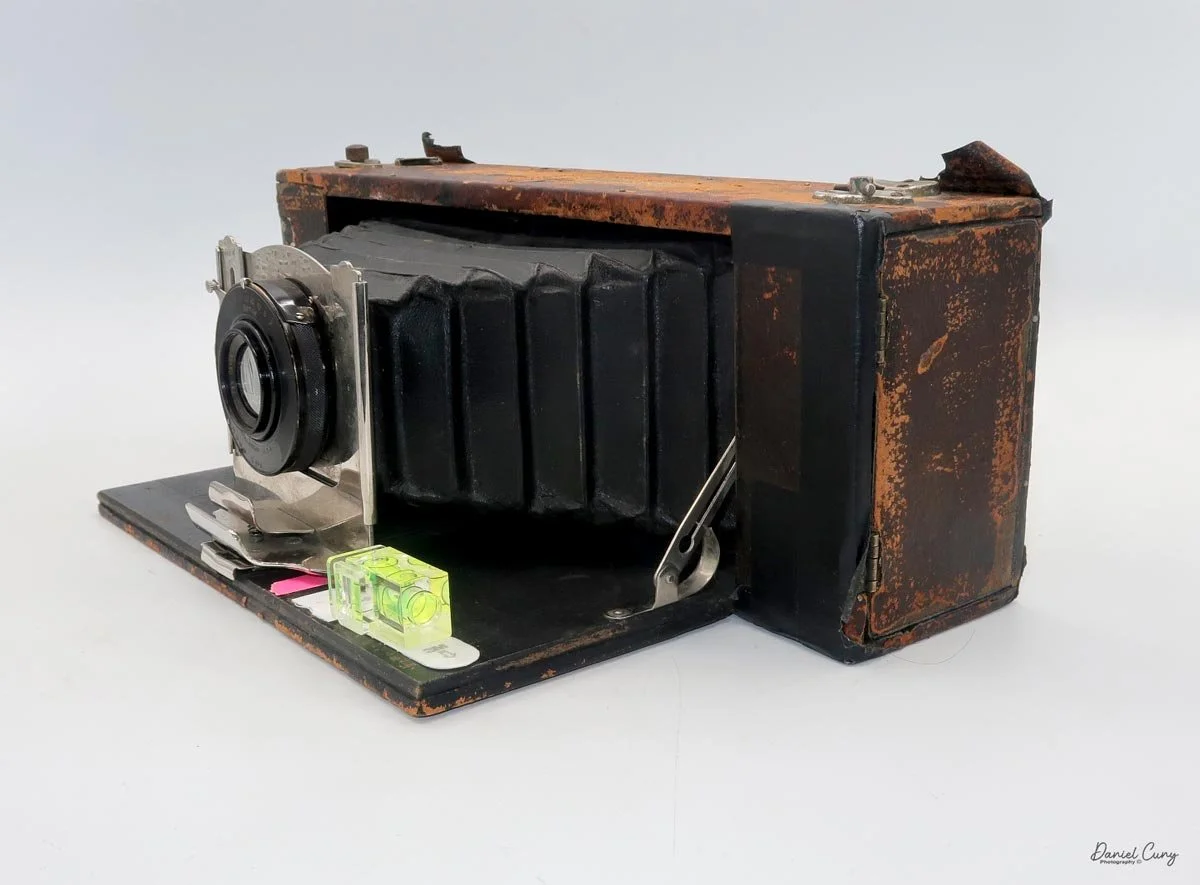
Different angle of the Konica Pearl II camera. Notice the shutter release on the lens door.

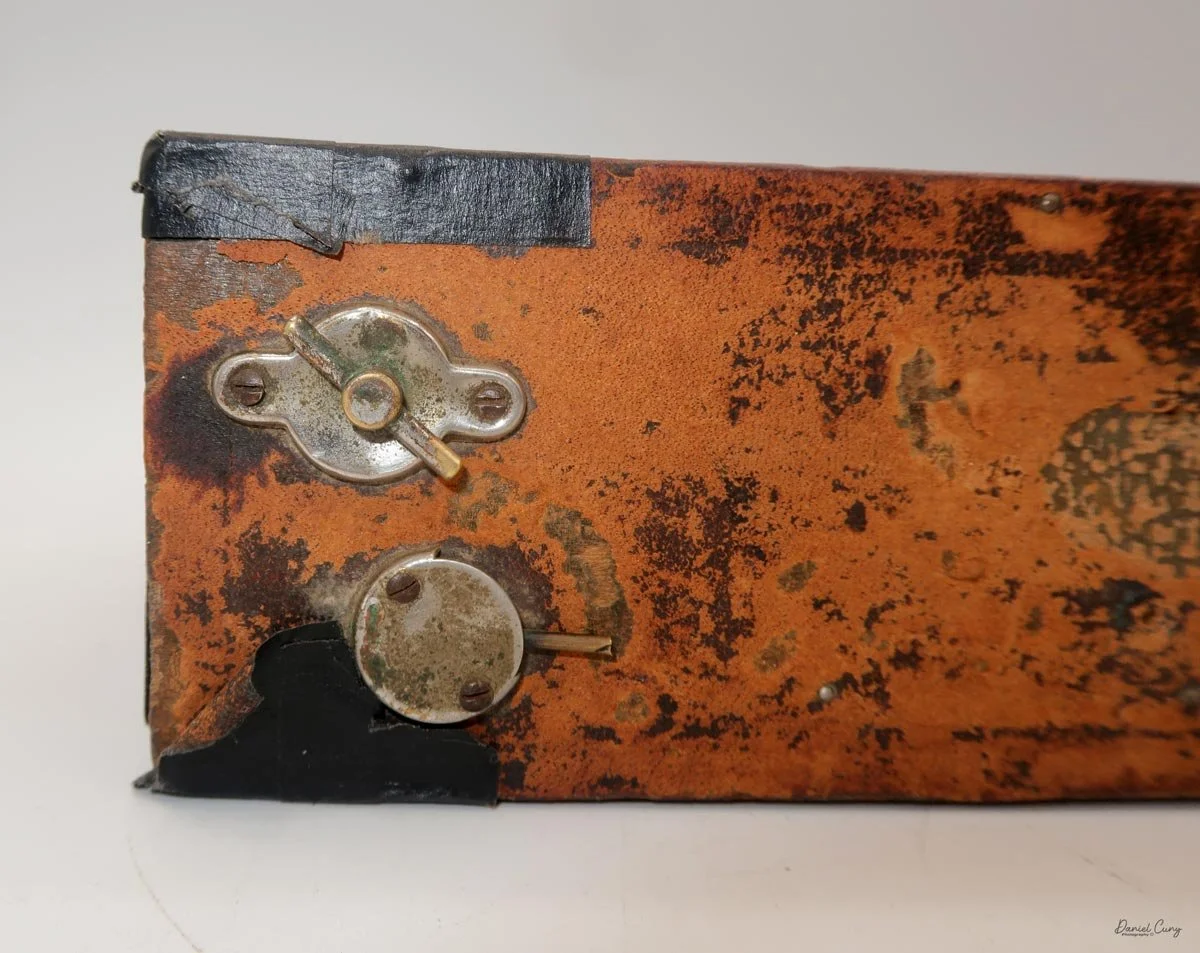
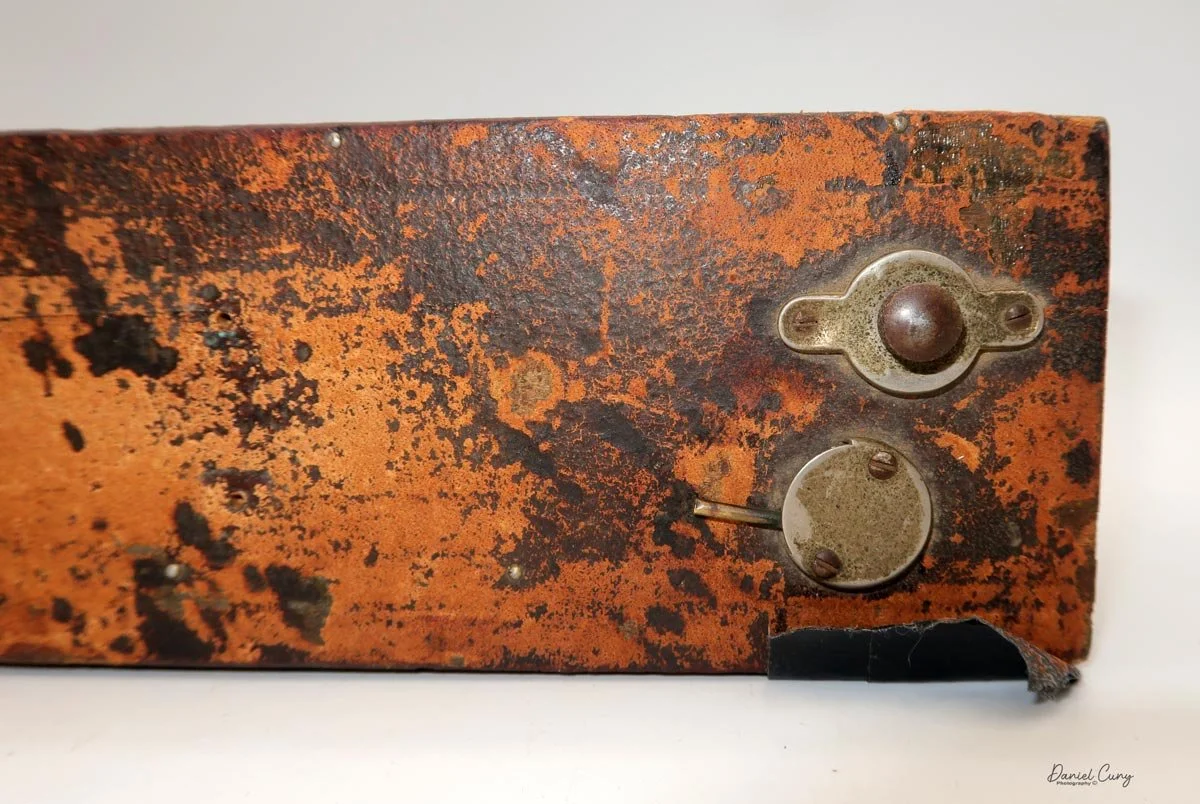
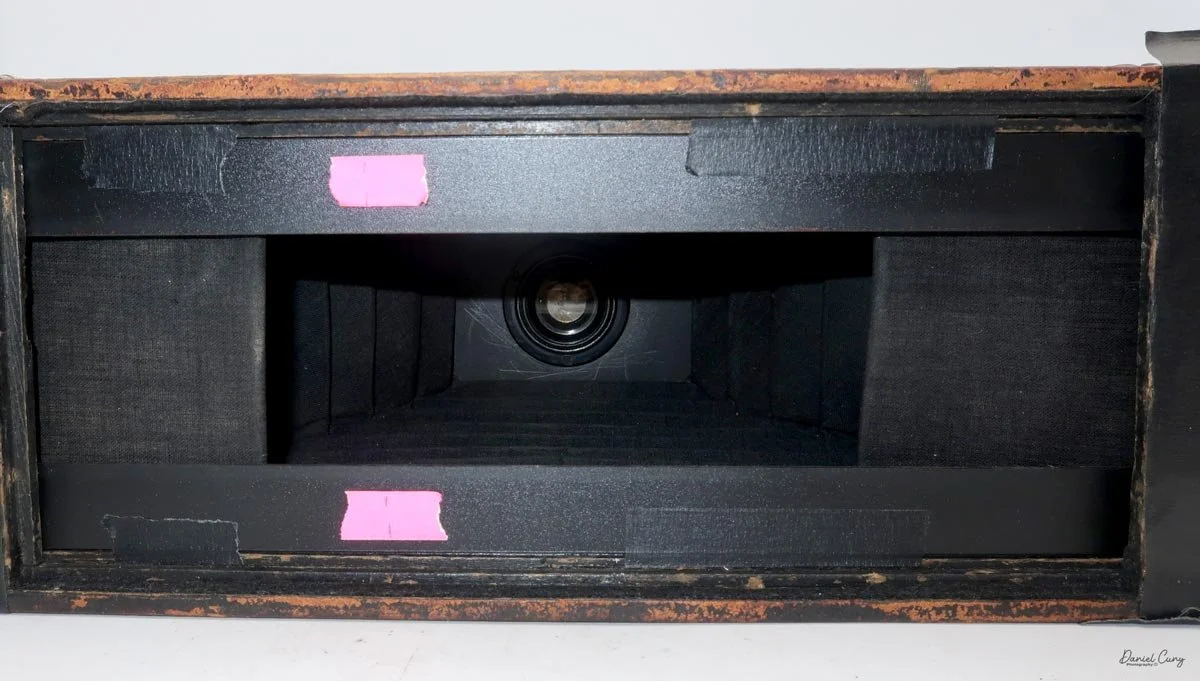
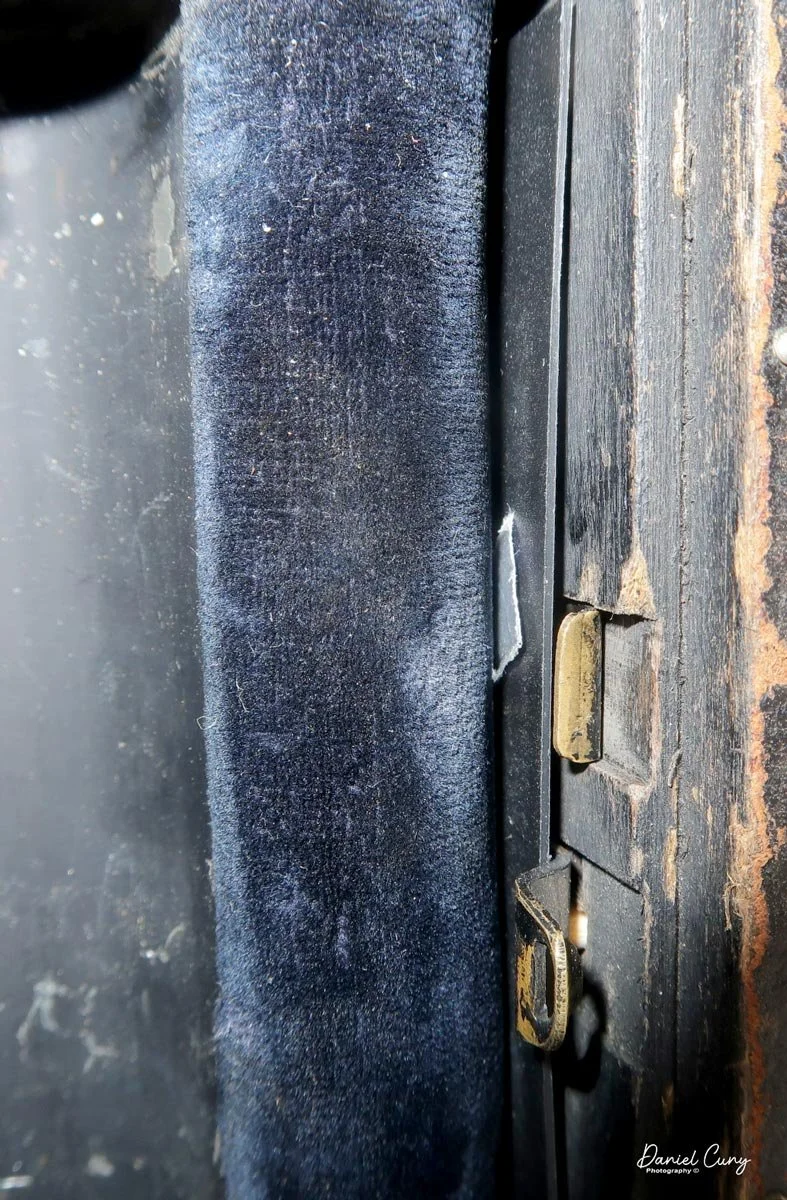
 To my surprise, the camera seemed to be in wonderful condition. The price for the camera seemed low, so I started to look over it with the thought in the back of my mind that there must be an issue. The shutter worked, the aperture moved smoothly. The camera opened and closed with ease, and the fitted leather case was also in good condition. 

 Putting the camera up to my eye to look through the viewfinder, I found the issue. The back eyepiece was absent from the camera. Because of that, there were a couple of issues. First, when you looked through the viewfinder, the image was blurry, and you couldn't really see or frame it well.

 The second issue was something I didn't realize until the salesperson mentioned it. You couldn't see the yellow center area on the rangefinder. Initially, when I first picked up the camera, I didn't notice the two windows on the front, which would indicate a rangefinder-style camera, but on second look, there were two windows, which makes perfect sense.

 For the price of the camera, they offered to acquire a very compact medium-format camera with a functioning shutter, smooth focus, a light-tight bellows, and a fitted case. I figured I couldn't go wrong. All I needed (hopefully) was to find a "parts" camera to source the viewfinder glass from, and make this wonderful early 1950s camera whole again.

 During my time in Tokyo, I did spend time looking for a "parts" camera, but it wasn't until just a few weeks ago that I came across one for a reasonable price that I could harvest the viewfinder glass, and try to make this camera whole again. Unfortunately, it hasn't arrived yet. I'm eager to write this post, so once the glass arrives, I'll update it with the camera's progress (or lack thereof) with the new glass.


History:

 Konica's early history begins in 1873, when Rokusaburō Sugiura started selling photographic materials in Tokyo, at a time when Japan was still importing nearly all such supplies from the West. That founding date makes the company older than Eastman Kodak, and it places Konica at the very start of Japan's photo industry.

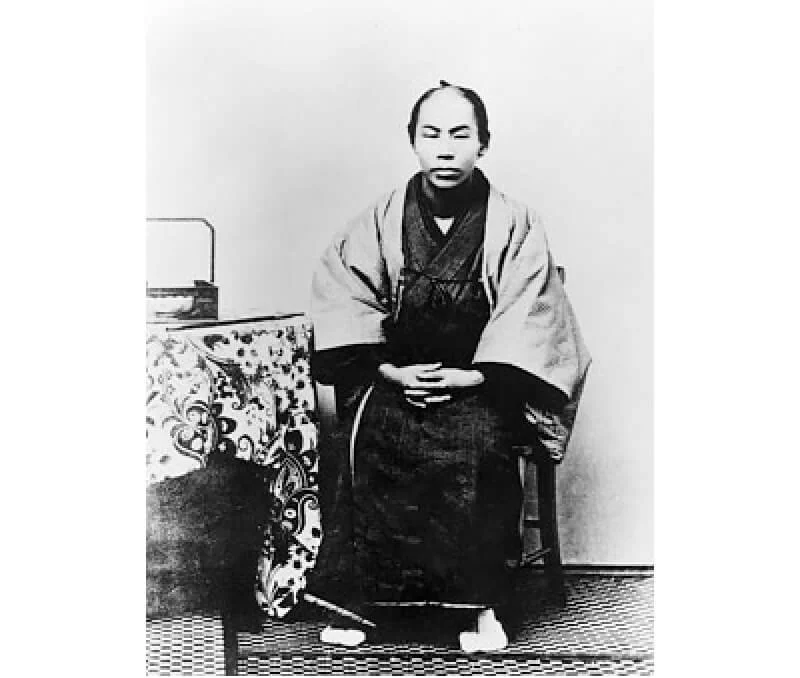
Early photo of Rokusaburō Sugiura. Credit Konicaminolta website.

 Sugiura first operated through the family business in Tokyo's Nihonbashi area, where demand for photographic goods was growing fast enough to justify a separate line of business. By 1878, he had founded Konishi Honten, and in the 1880s, the firm moved beyond retailing imported goods to producing its own photographic materials in Japan. This shift mattered because it helped move Japanese photography from dependence on foreign products toward domestic production.

 In 1902, Konishi began producing its own photographic plates and printing paper, and soon after, in 1903, it introduced the Cherry portable camera, widely described as Japan's first branded camera. That product established the company as a pioneer rather than just an importer. Over the next decades, Konishi built a reputation as one of Japan's leading camera and materials companies.

 During the 1910s and 1920s, the company continued to expand its manufacturing base and deepen its role in Japan's optical and photographic sectors. Its name evolved through several forms, including Konishi Honten and Konishiroku, reflecting both family succession and corporate growth. By the interwar period, the firm was part of a broader Japanese camera industry that was still small by global standards but increasingly capable of making its own products.

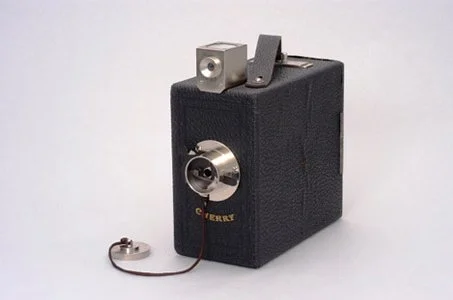
Popular Cherry camera: Credit Konicaminolta history page

 In the 1930s, Konishiroku pursued further camera development, including prewar prototype work that pointed toward later 35mm designs. Like much of Japan's industrial base, its development was increasingly shaped by the era's tensions, and the coming war would disrupt civilian camera production. Still, by the eve of World War II, Konica's predecessor had already established the core identity that would define the brand: a Japanese photographic pioneer rooted in import substitution, careful manufacturing, and gradual technological independence.

 In the 1950s, Konishiroku cemented its medium-format legacy with the exceptional Pearl series of folding cameras. Shooting 6x4.5cm frames on 120 film, these compact powerhouses combined portability with remarkable optical precision. The decade introduced the Pearl II (1951), the Pearl III (1955), and the pinnacle of the lineup: the Pearl IV (1958). These beautifully engineered models proved that medium format didn't have to be bulky, providing a professional-grade folding tool that easily slipped into a coat pocket.

My Camera:

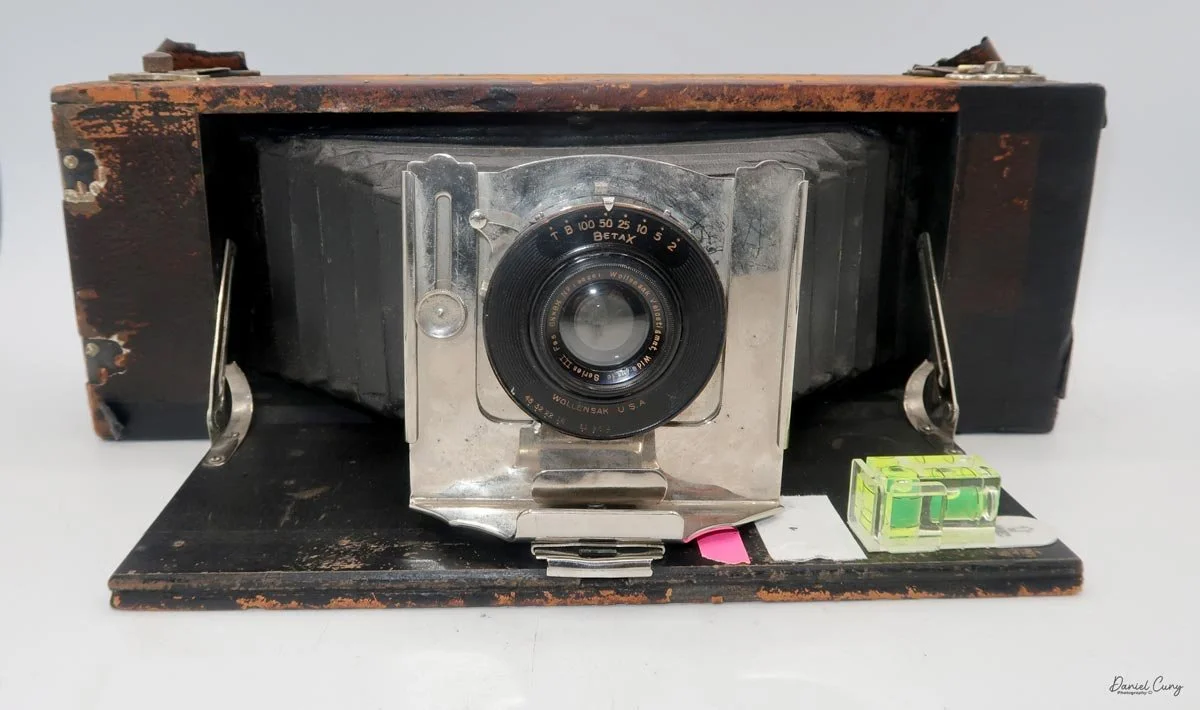
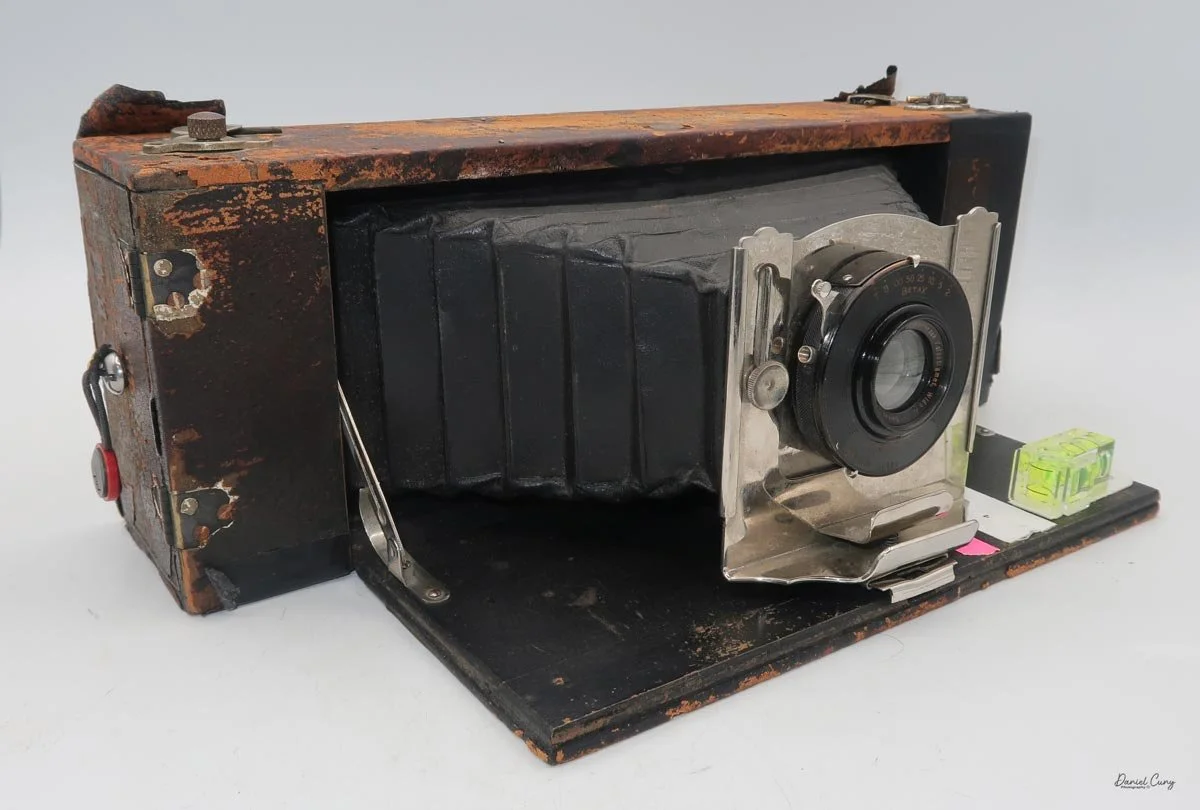
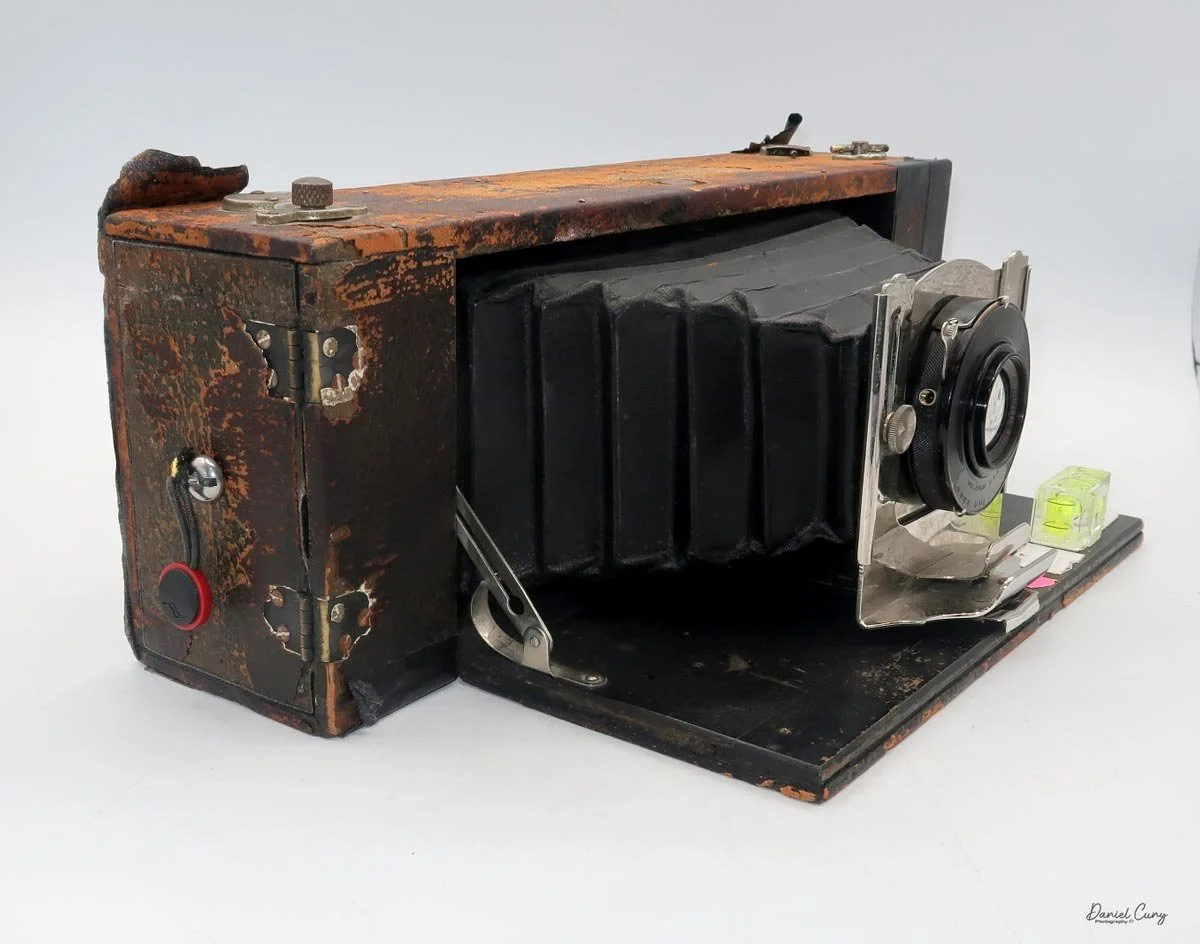
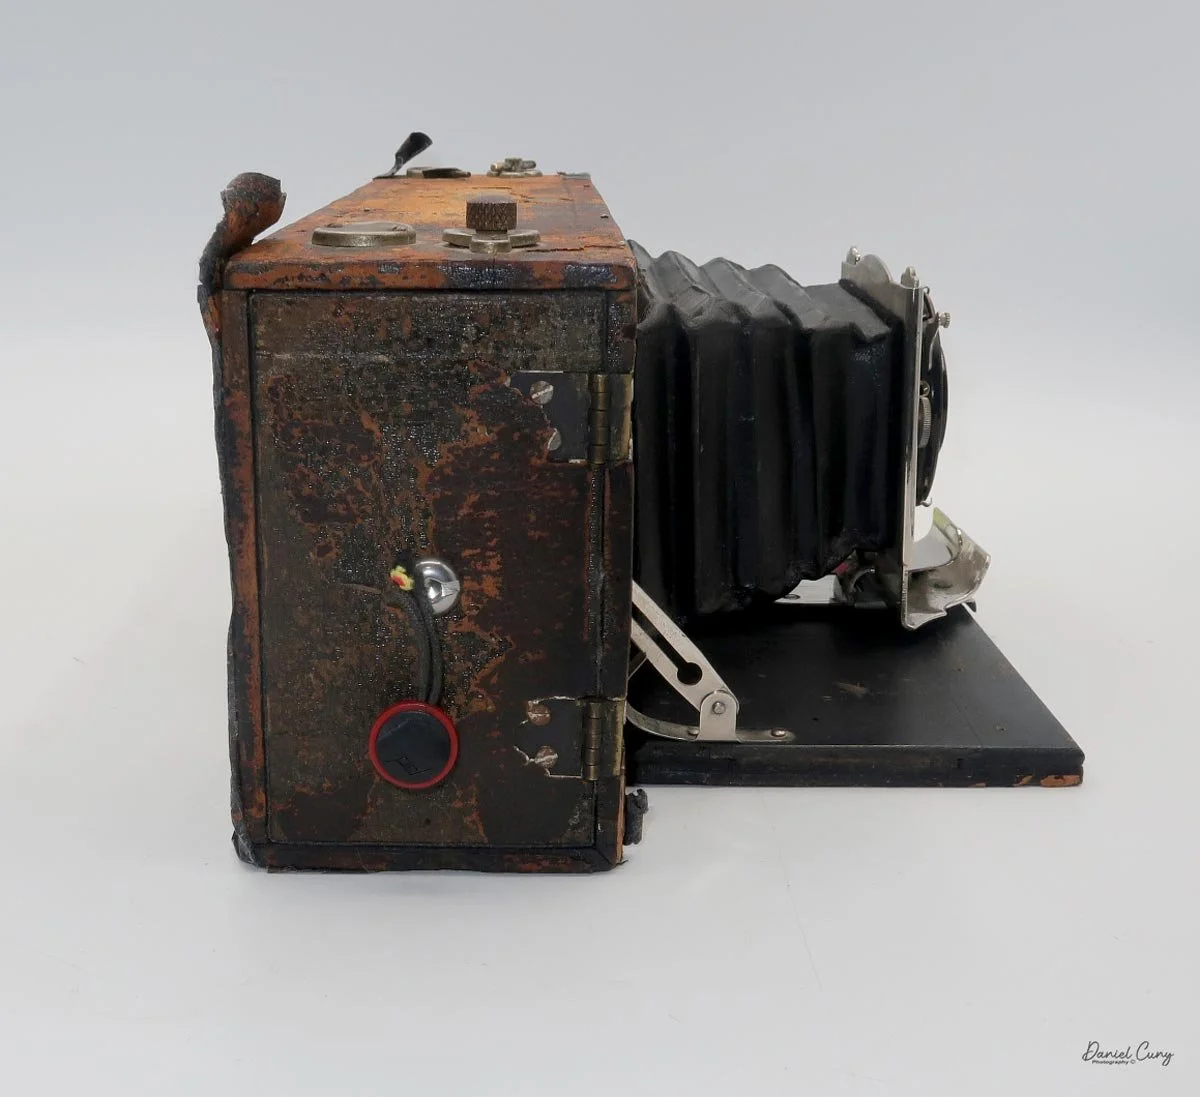
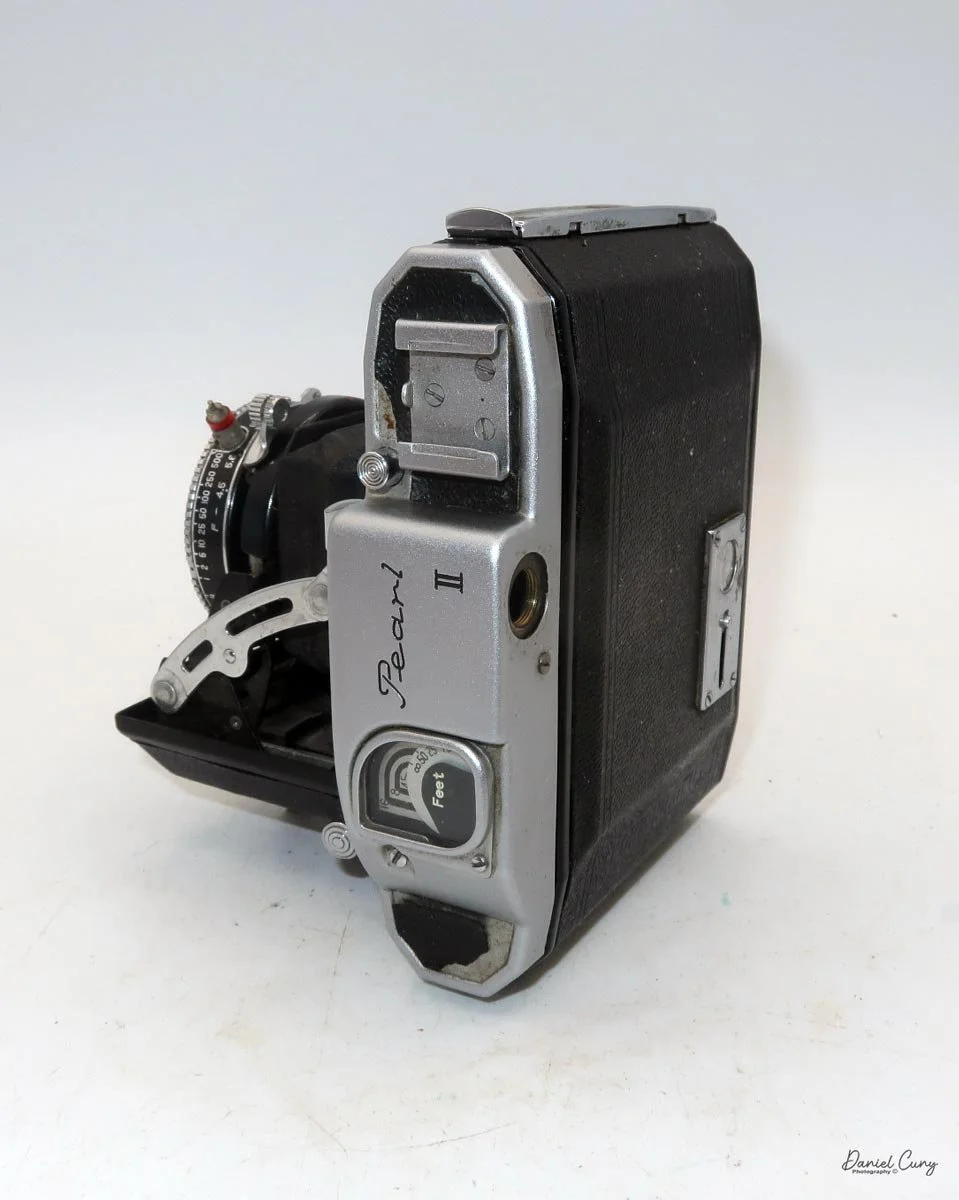
 My Konica Pearl II camera, manufactured in 1951, is a 6x4.5cm vertical-format camera. The physical size of the camera is 4.75" wide by 4.5" tall and 1.5" deep with the lens closed in the camera body, and 4" deep when you depress the button on the top of the camera, located in front of the accessory shoe, to open the camera's lens door. The camera weighs 1 pound, 4 ounces without film loaded.

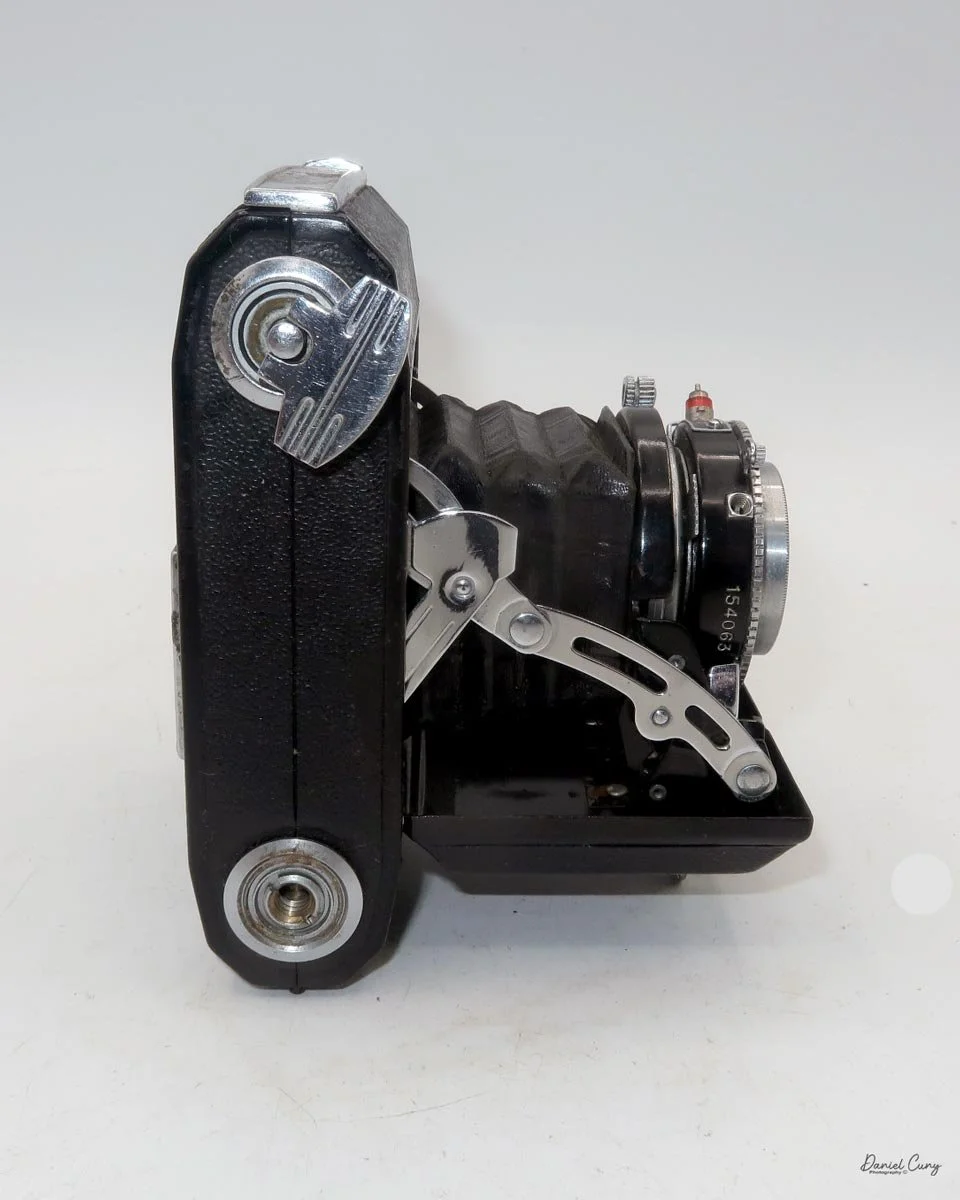
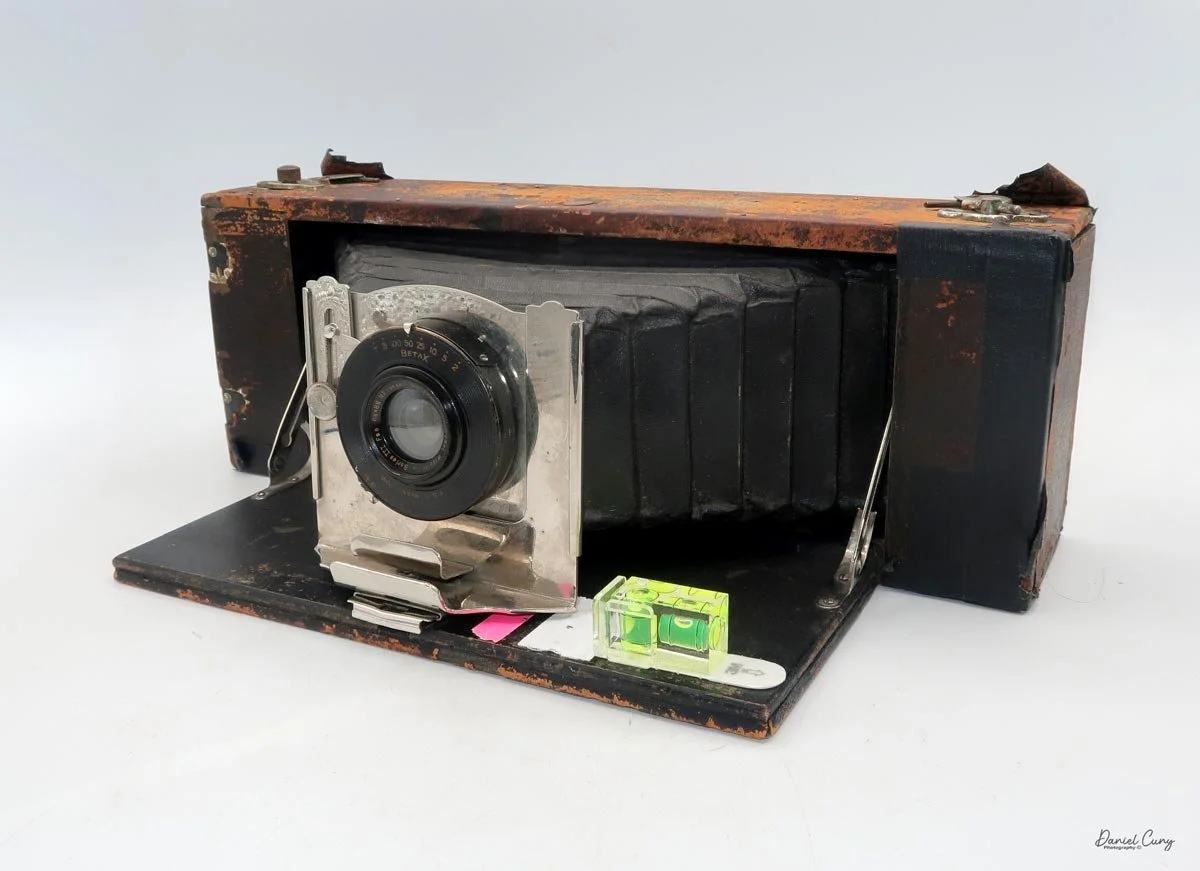
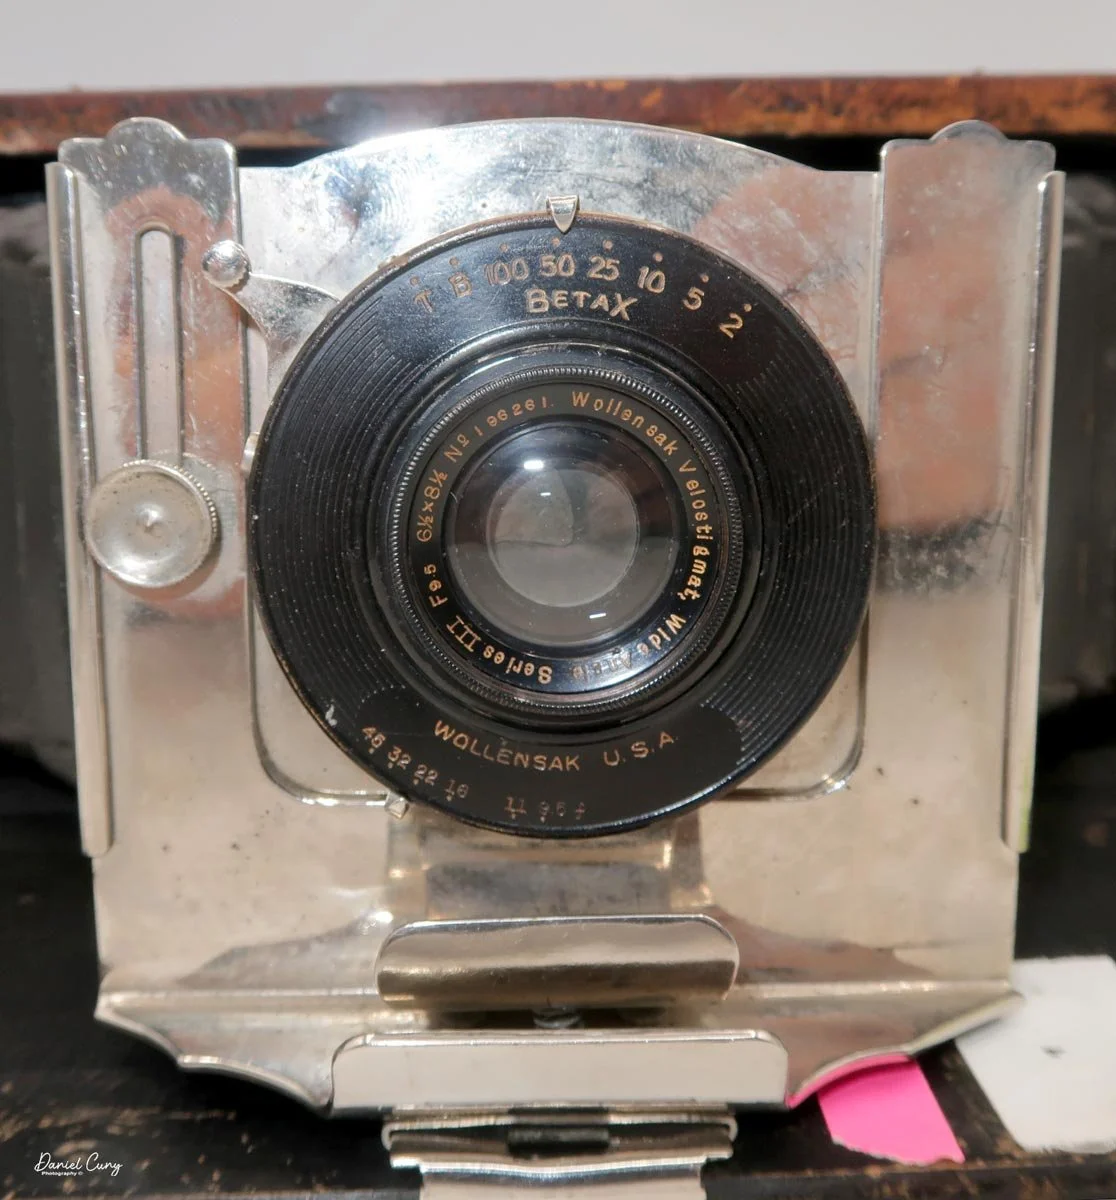
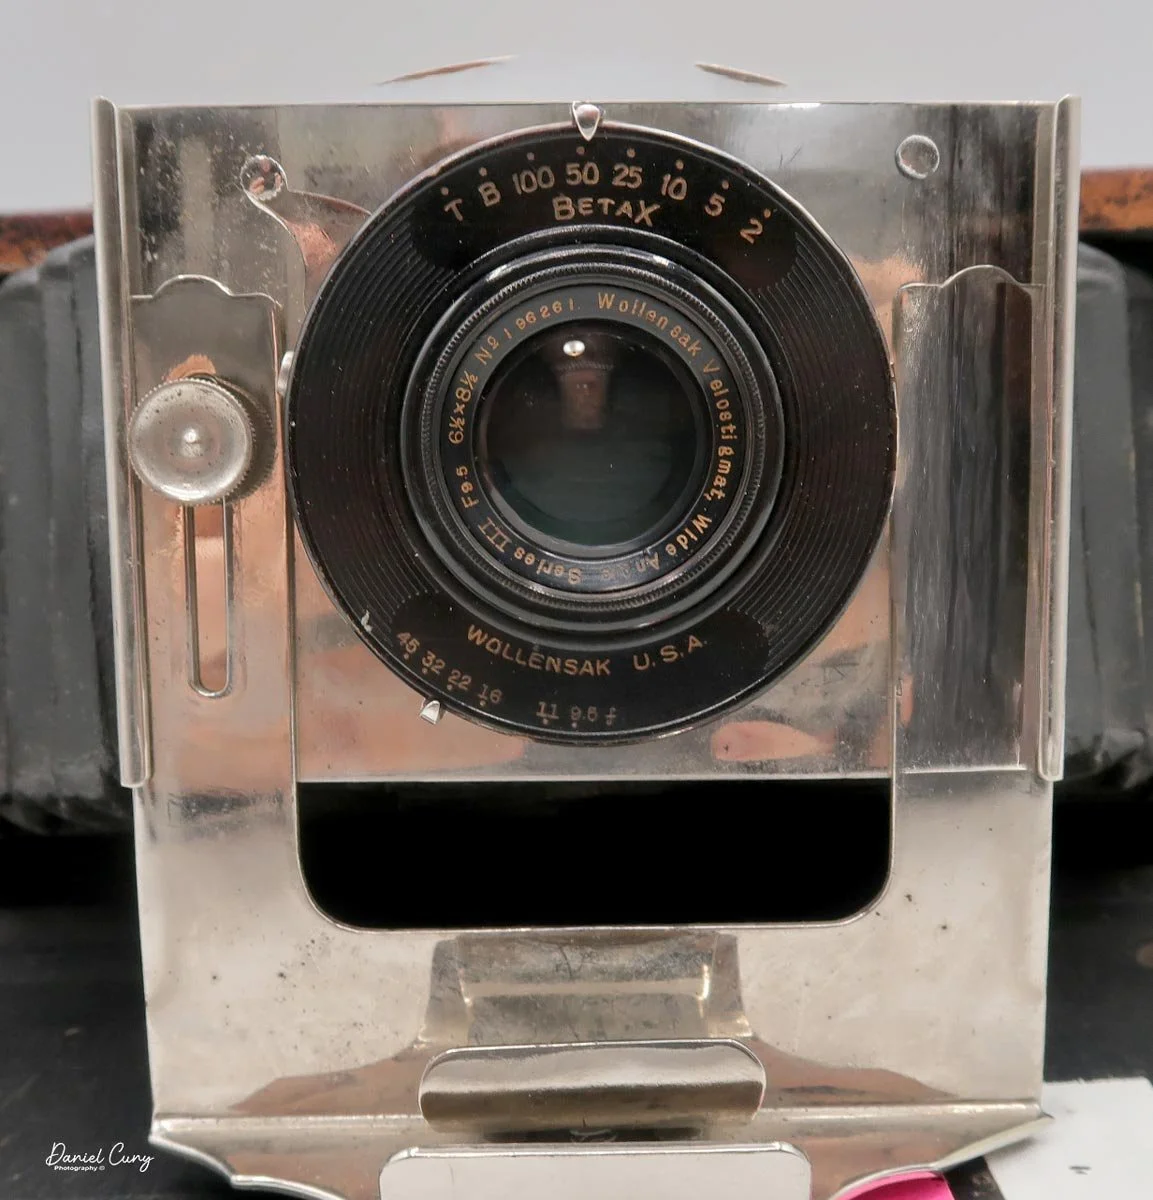
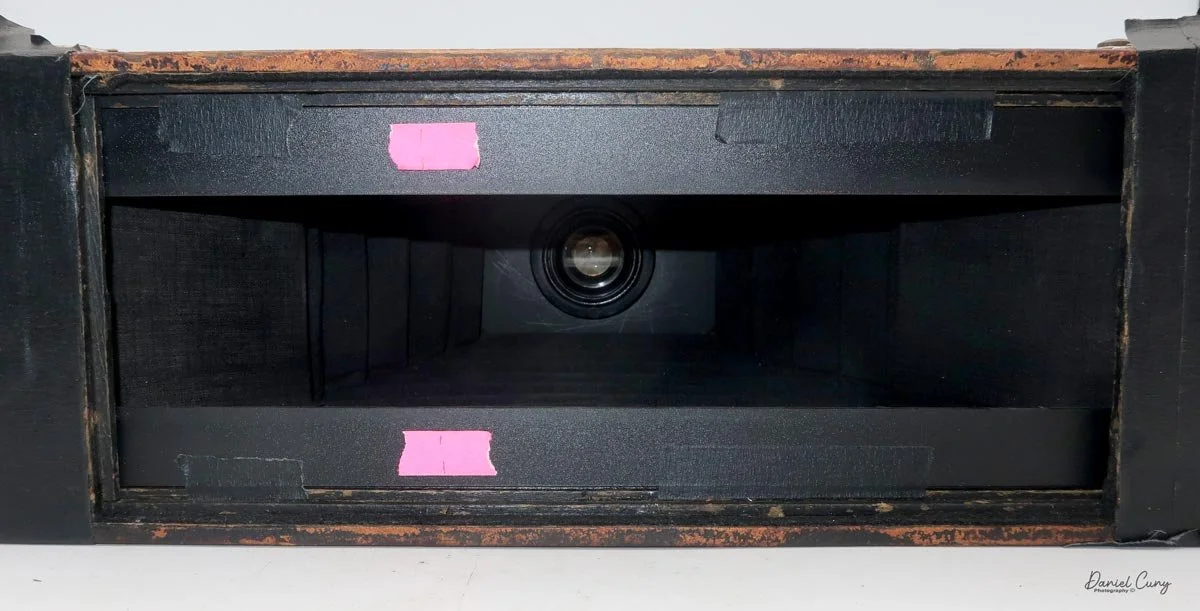
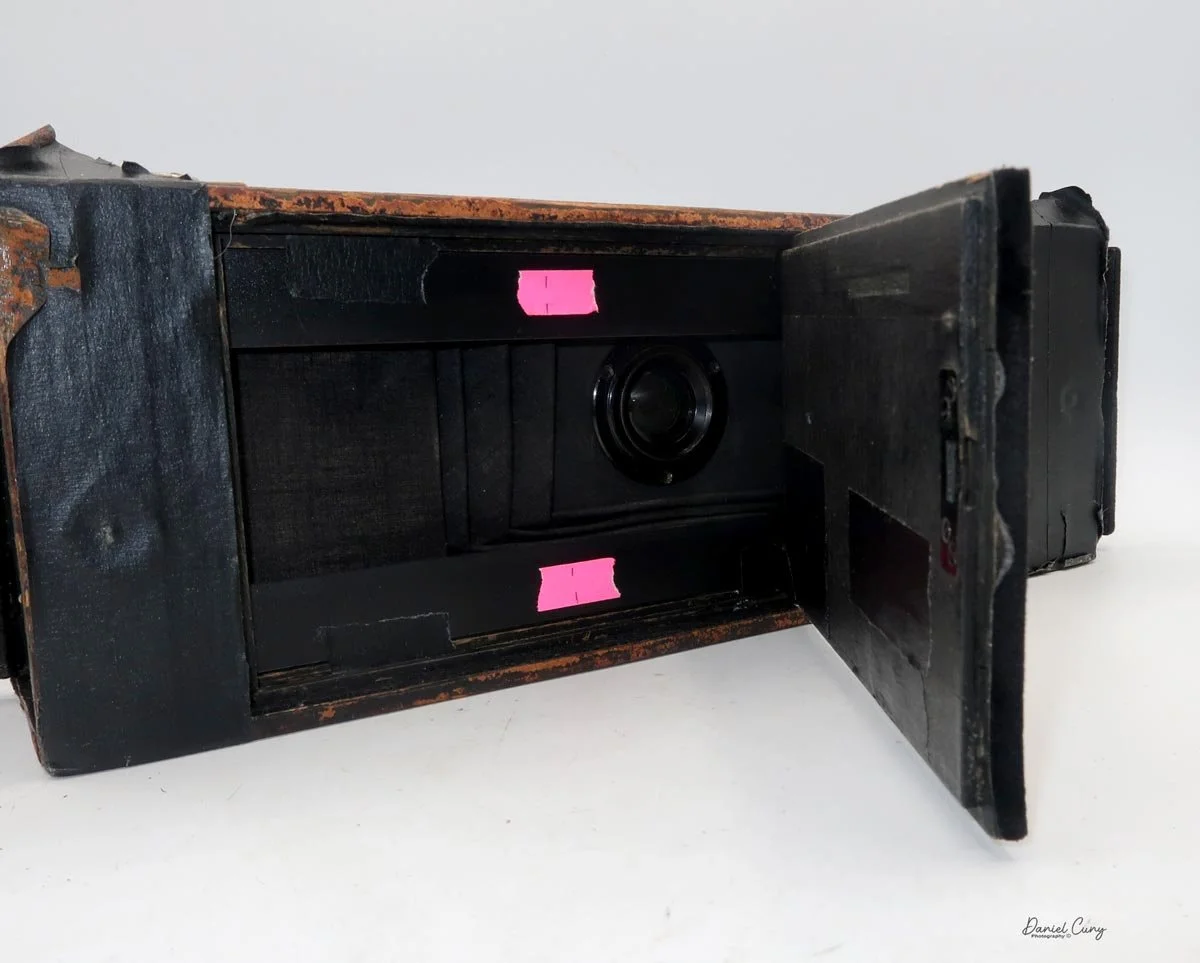
With the lens door open, it exposed the Konishiroku Hexar 75mm F/4.6 lens, serial #90096, in a Konirapid-S shutter with a range of 1/500 to 1 second, along with "B" for timed exposures. On so many cameras, shutter speeds are set by turning a ring to the desired value along the outer portion of the shutter. There is a shutter cocking lever located just behind the shutter speed setting ring on the shutter.

 The camera's shutter release button is located on the lens door and trips the cocked shutter via a linkage to the shutter release. A cable release socket is also in the shutter just next to the cocking lever.

The aperture ranges from F/4.5 to F/22 and is adjusted by turning a knurled ring at the back of the shutter to the desired aperture, indicated by a red dot on the setting ring. Also on the camera's shutter is an ASA flash terminal, which would be used for bulb flash units popular at this time.

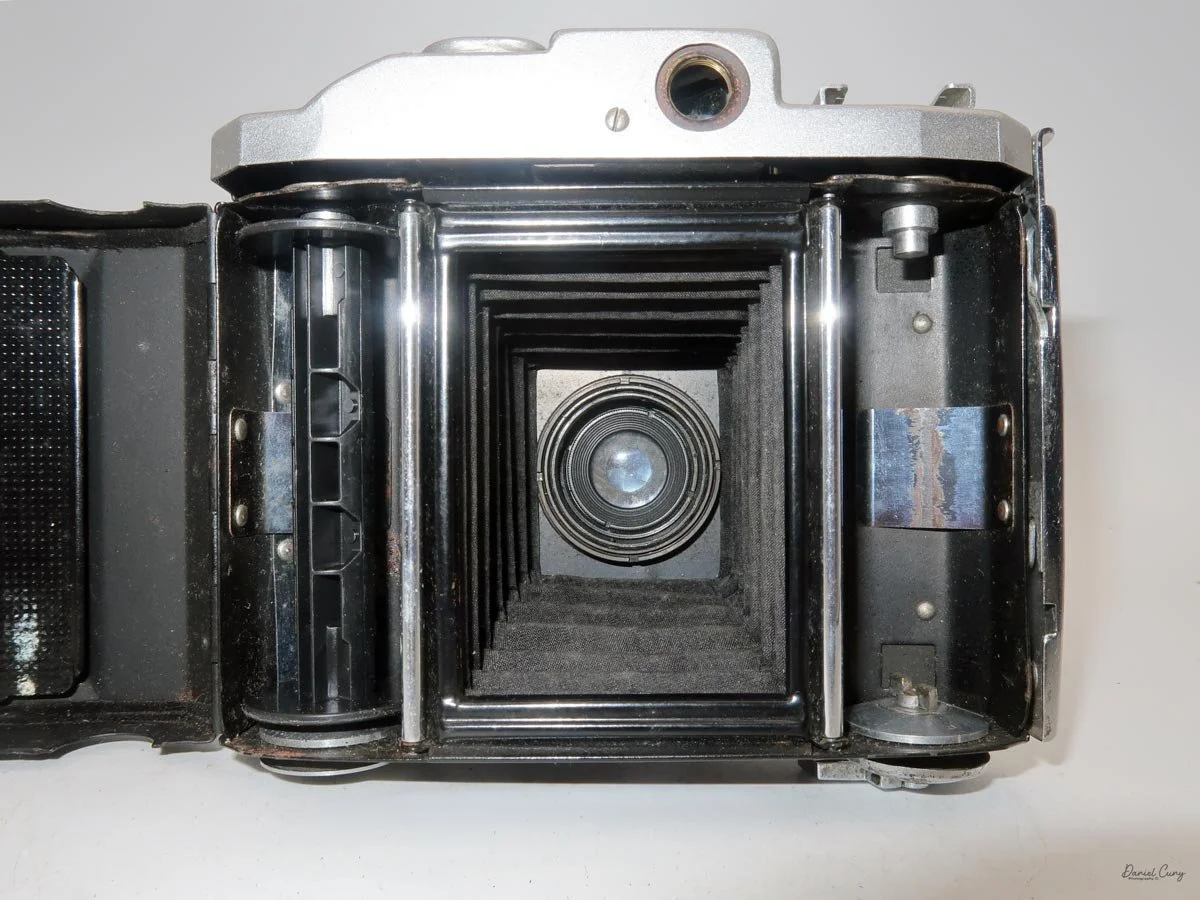
Behind the camera's shutter is a larger knob used to focus the camera through the rangefinder system. As mentioned earlier, I'm not sure whether my rangefinder is working. There's another way to check, and that's the method I used to get the photos for this article. 

 Moving the focus knob on the camera one way or the other moves a bar in and out located on the opposite side of the shutter release linkage. This bar's movement changes the focus distance to the subject, which you can see through a window on top of the camera. I find these simple features on cameras fascinating. I don't know why, but I do.

To close the lens door back into the camera body, press inward on the side struts holding the lens erect, and the struts will collapse, allowing you to fold the lens back into the camera's body. Pressing it back locks it into place. You'll also need to set the camera's focus to infinity before it will close all the way.

 Looking down at the top of the camera, there are just a few objects to see. There is a small area on the front of the rangefinder housing that is losing some of its leatherette. The wonderfully designed focus window with a depth-of-field scale. The name "Pearl II" is in a modernistic font, with the camera's accessory shoe on a lower plane and the button for releasing the lens door.

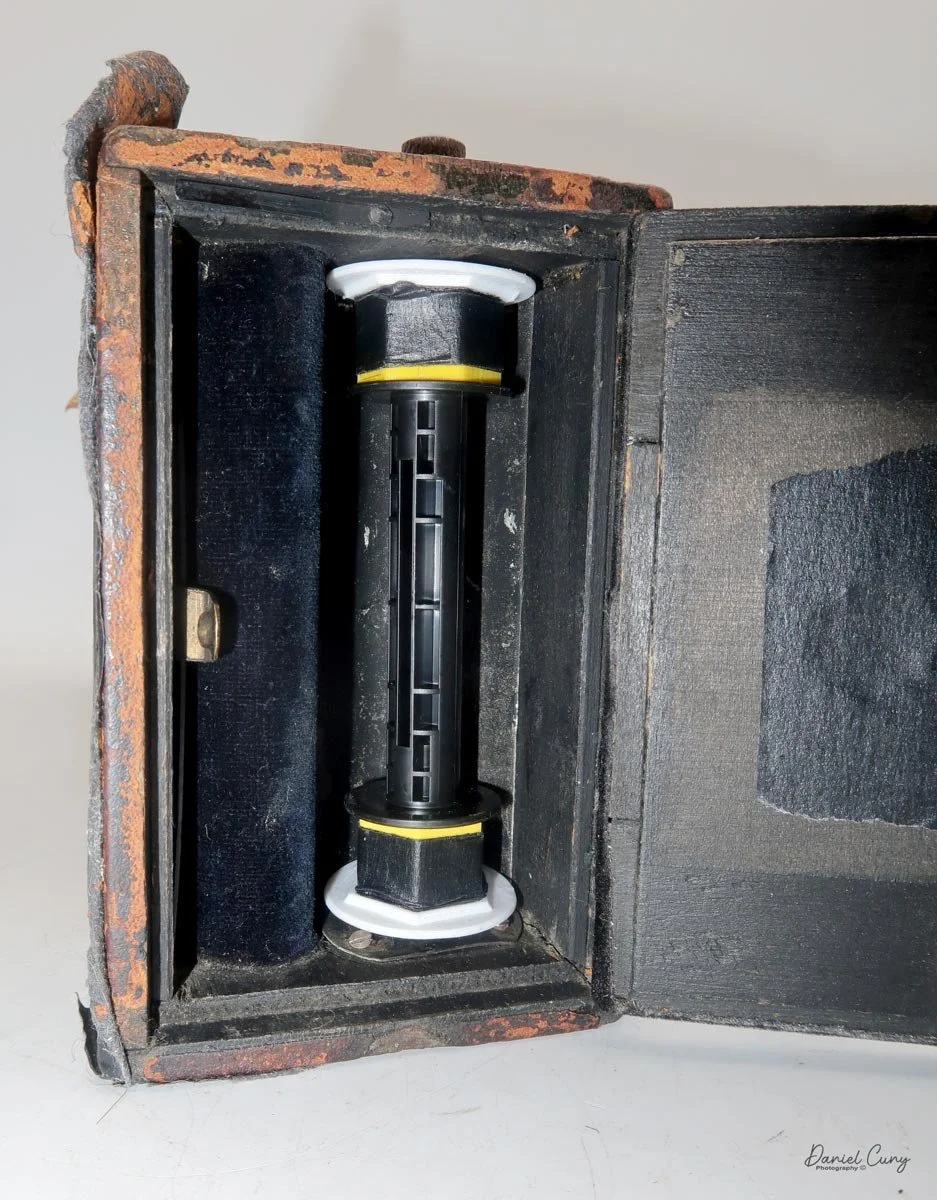
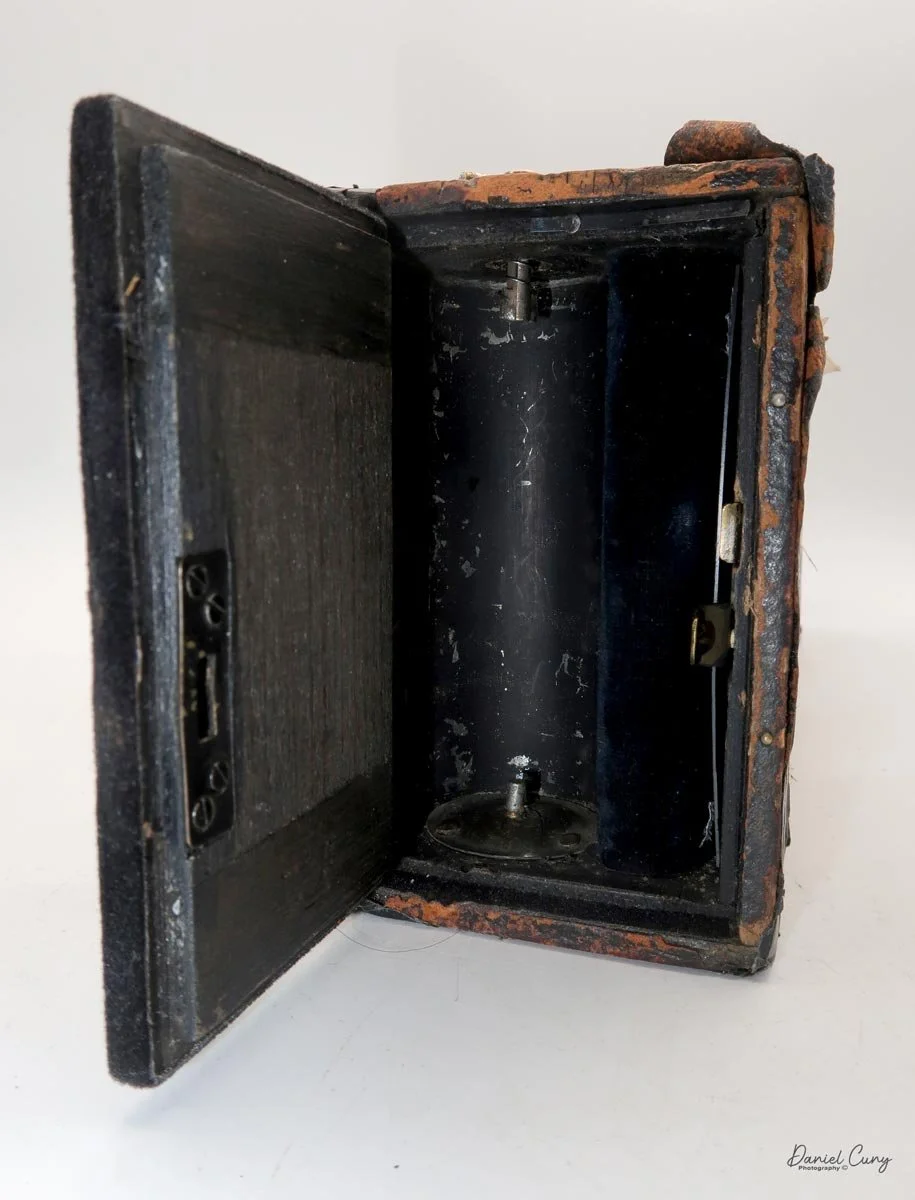
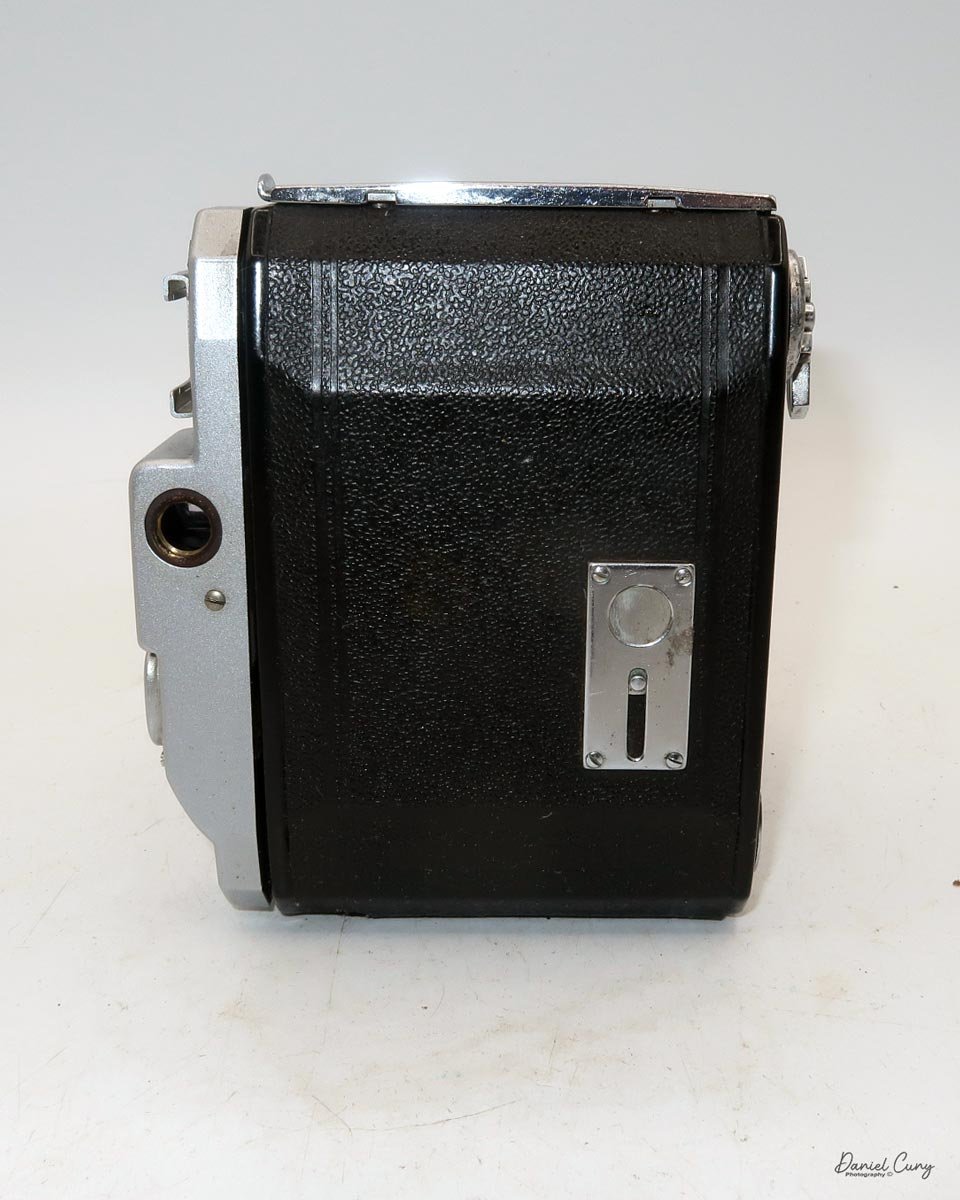
To load the camera with film, the film door release is on the right side of the Pearl II. Lifting the lever on top unlocks the film door, allowing you to open it and load film. The fresh roll fits on the left side, and the take-up spool will be on the right, where the larger key-style winding lever is located. Once loaded, close the back of the camera and wind until you see the number 1 in the rear chrome window, which has a sliding cover.

 With the film loaded in the camera, let's take a walk through the neighborhood to see how it performs. Even though I don't have a usable rangefinder, the distance scale on top of the camera should help me take sharp photos.

 My Results:

 Since the camera has a vertical 6x4.5 format, you can take 16 images on a roll of 120 film. If you're taking a horizontal image, you'll need to turn the camera to landscape orientation.

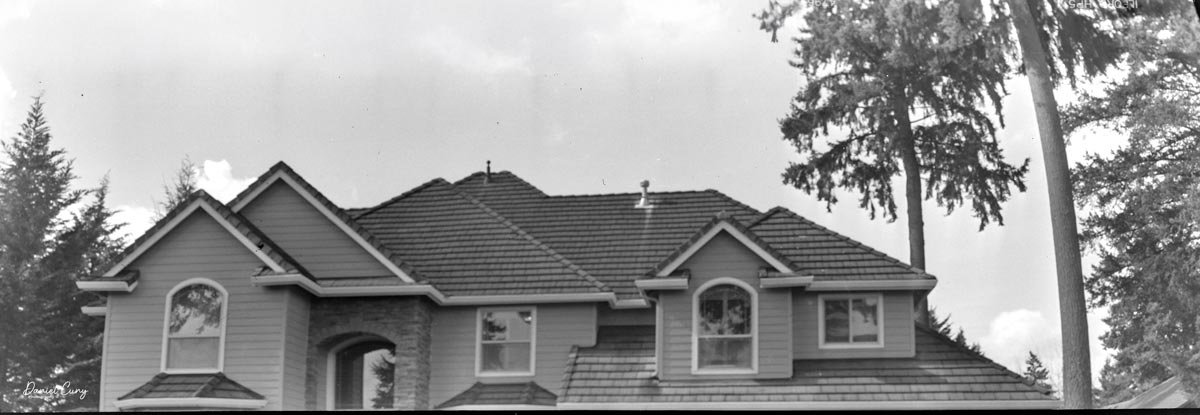
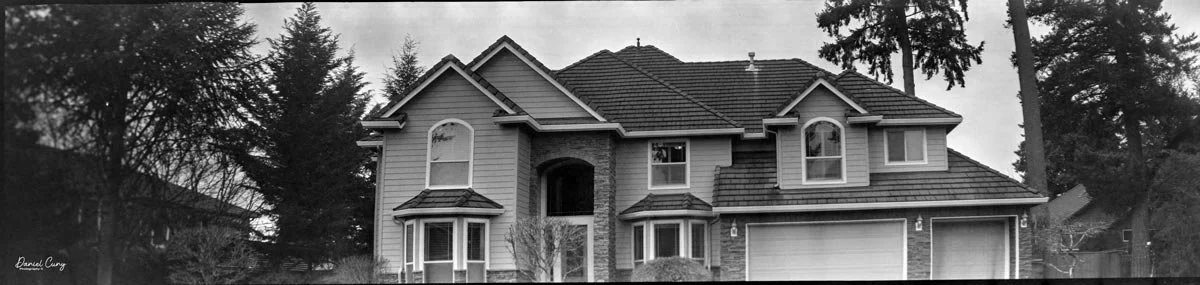
 Here are some of the photos I took during my walk in our neighborhood.

Conclusion:

 I understand why the Konica Pearl lineup is so desirable for an everyday pocketable film camera. It's sophisticated, yet simple. The camera can focus on your subject via an internal rangefinder system, rather than relying on a less desirable "guess" focus system. 

 The higher shutter speed of 1/500 for the time period allows for less camera or subject movement, and the iconic Konica Hexar lens is sharp and provides wonderful contrast to the images.

 I'm very glad I purchased this camera, and am keeping my fingers crossed that the viewfinder glass will bring the camera's rangefinder back to life, allowing for even easier focusing and possibly a sharper image.

 Thank you for taking the time to learn about this wonderful camera from Japan's early camera revolution after WWII, when many cameras had "Made in Occupied Japan" embossed somewhere on them, just like this one.

 Here are some of my other Camera Reviews

 I also have a YouTube channel where you can view overview videos of some of the cameras I've written about.

 Cuny's Camera and Photos is my online eBay store where I sell many of the cameras reviewed, along with other cameras, lenses, and photo oddities I've accumulated in my 50-plus years of collecting. Stop by and see if there's something for you there.

 Until next week, please be safe.

Bell Panorama and Panel Camera

My Bell Panoraams & Panel camera

I didn’t start out chasing rare panoramic cameras like the Bell Panorama; my first love was colorful and unusual box cameras. As a new collector—newly married, young son at home, and a very limited budget—I hunted for Kodak Rainbow cameras, Univex AF models with painted faces, and bright Agfa and Falson colored folding cameras whenever I could afford to add another piece to the shelf.

 Somewhere in those early years, about 45 years ago, I spotted my first Bell Panoramic camera in a local antique shop. Sitting in a locked glass case, it looked like a strangely long box‑style camera, and I honestly had no idea what I was looking at. I asked the clerk to pull it out, turned it over in my hands, and saw a price tag of about 80 dollars—far more than I was paying for box cameras at the time—so I reluctantly handed it back and walked away, wondering why on earth this plain, elongated camera was priced like that.

 A few years later, flipping through one of the many camera guides in my collection, I stopped cold on a photo of an extremely long box‑style camera: a Bell Panorama. Instantly my mind jumped back to that antique‑store shelf, and the mystery price tag suddenly made sense. Now my interest in panoramic cameras was growing, fueled by swing‑lens classics like the Kodak Panoram, Al‑Vista, and Russian Horizont, but the big boys—Fujifilm 6×12 and 6×17 systems or the Horseman 6×17—were still well out of my price range, so the Bell stayed in the realm of daydreams.

A Bell Panorama & Panel camera compared to a Kodak No. 3 Brownie

 Fast‑forward about 40 years. While browsing online listings for vintage panoramic cameras, I stumbled onto a modified Bell Panorama and Panel Camera that had been converted to shoot 120 film instead of its original 118/122 roll film. The seller mentioned the shutter was working but pointed out some odd “home‑brew” details. The price was finally in my comfort zone, so I messaged them, made the deal, and waited (not very patiently) for my first Bell panoramic camera to land on my doorstep.

 Unlike swing‑lens panoramic cameras, the Bell Panorama uses a fixed wide‑angle lens and a huge image circle, more like a compact, wooden ancestor of a Horseman or Fujifilm 6×17. When the package arrived and I unboxed it, I was greeted by a lot of black masking tape on the body, a mysterious metal bar on top, and bellows that actually looked pretty healthy. The shutter sounded sluggish with the lens mounted, but once I unthreaded the retaining ring and tested the lens and Betax shutter off the camera, the speeds snapped back to life—turns out the ring was pinching the shutter housing just enough to slow everything down.

 On the back I noticed strips of white tape covered in handwritten numbers. Some clearly related to shutter accuracy tests, while others looked suspiciously like film‑advance notes—my best guess was someone had already mapped out how many turns of the advance knob you need between panoramic frames when shooting 120 film in this old #122 panoramic body.​

How my Bell Panorama & Panel camera arrived to me.

 Opening the back confirmed that a previous owner had done a thoughtful 120‑film conversion. One chamber already had a custom adapter so a 120 spool would sit where the original 118/122 spool once lived, but to actually shoot the camera I still needed a second adapter for the take‑up side. Thankfully, I’d already bought a pair of 120 adapters for my Kodak Quick Focus camera, and I was pretty sure they could be coaxed into service in the Bell Panorama as well.​

 If you’d like to dive deeper into the different Bell Panorama and Panel Camera models, I highly recommend David Silver’s excellent article, which goes into far more historical detail than I can fit here.​

History: 

 The Bell panoramic cameras were a short‑lived but important American attempt to make wide images simple and affordable for ordinary photographers in the early 20th century.

 In 1908, Iowa inventor Isaac A. Bell patented what he called Bell's Straight Working Panoramic Camera, produced by the Bell Camera Company in Grinnell, Iowa. At a time when most panoramic cameras used rotating or "swing" lenses and curved film planes, Bell's design stood out for its fixed wide‑angle lens and straight focal plane, eliminating the need for complex clockwork drives and curved backs. He built his camera around then‑standard #122 roll film, offering a generous 3¼ × 11 inch frame while still allowing normal postcard‑size exposures on the same roll, which made the camera attractive to amateurs who didn't want a dedicated specialty system.

Bell’s distinctive label on the original 1908 Bell Panorama camera.

 The first Bell Panorama combined a folding bellows body, a brass Gundlach shutter, and a wide‑angle lens that could cover the long negative at small apertures, trading speed for even coverage across the frame. While industrial reviewers praised the camera's practical engineering, it received little advertising and sold poorly, so surviving examples are rare and collectible today. Bell remained committed to the concept, refining the design and securing a second U.S. patent in 1911.

 In 1912, he introduced the revised Bell Panorama and Panel Camera, built more cheaply but upgraded with better Wollensak optics, stronger internal panel levers, and a redesigned reflex viewfinder that could be used for either postcard or panoramic framing. Distribution shifted to the American Northern Photo Supply Company, and then to Sears, Roebuck, which finally gave the camera a modest, stable market for several years. A smaller No. 10 model using #118 roll film appeared in 1916, but by 1918, changing tastes and newer panoramic systems ended Bell production. 

 In retrospect, Bell's panoramic cameras are seen as rare but influential examples of how existing rollfilm, folding‑camera ergonomics, and wide‑angle optics could be intelligently combined to democratize panoramic photography.

My Camera:

 My Bell Panorama camera is 13.5" wide by 4.75" tall and 3" deep with the lens retracted. With the front cover closed, the camera is 7.25 "deep. When the front cover is opened and the lens extended, the camera is 7.25" deep. The camera weighs just under 3 pounds, at 2 pounds, 14.6 ounces. 

To open the front, press the button in the middle on top; you can then pull down the lens board and pull out the bellows. The Bell Panoramic camera has a Wollensak Velostigmat Wide Angle, series III, 6 1/2 x 8 1/2 lens, serial # 196261, in a Wollensak Betax shutter with speeds from 1/2 to 1/100, along with "T" for time exposures and "B". The aperture settings range from F/9.5 to F/45. The lens can also rise to correct perspective.

There are a couple of items missing from my camera: the viewfinder, which is usually on the lens, is missing, as with other folding-style cameras, and the handle is gone. When the camera arrived, a long metal piece was taped to its top. Since the long piece on top had accessory shoes, I'm guessing the long piece on the top had a removable finder which wasn't included with the camera. There is also a bubble level added to my camera, which they placed on the lens base, opposite to where the viewfinder would be.

 It also didn't have the secondary winding lever shown in the David Silver article. Still, it is a screw that holds the film adapter in the camera. It is very natural, but not original.

 My camera is a later version, specifically named the Bell "Improved" Panorama and Panel camera, because the back of the camera doesn't fully come off. The bellows are a thicker black material that replaced the original red bellows. The lens base is painted black in place of the original polished natural wood. Still, the flaps on the sides of the camera, which allow the photographer to change the negative format used to photograph their subject, are included and in good working condition. 

These flaps are controlled by two separate control arms, one for the right and one for the left. These arms are on the top of the camera, close to the film advance and the film locking pin. When the lens is extended, you can move the arms forward to move the flap out of the way, making the negative size longer. When these are pulled back, the flaps cover a portion of the negative, reducing its size.

 Depending on the number of flaps used, the camera can produce either a 6x17 when both flaps are used, a 6x24 when only one flap is used, or an astonishing 6x29 negative when both flaps are flipped forward. These are also the numbers on the white tape on the back of the camera. My guess is still the number of turns you do to advance the film to the next frame, because the red windows on the back of the camera are both taped over and not viewable on 120 film when used in the camera.

Back side of the Bell Panorama camera. Note numbers on the white tape.

To open the back of the camera to load film, you first need to open each film chamber. This is done by pressing a small button on the back of the camera, close to the edge. Once pressed, you can open each side. On the left side, where the film takes up the reel and the advance handle is located, inside the chamber is a small handle you pull out that unlocks the back door. Pull out the handle, and with a fingernail or something thin, you can open the left side of the back and slide out the right side of the camera, exposing the film path.

 To load film, I unthreaded the right side, where the adapter is. I put in a fresh roll of 120 film into the camera, replacing the screw that holds the film and adapter in place. One of the tricky parts of this modified camera is threading the film over the plastic pieces taped into the camera's holding frame, which crops the pieces into place. I threaded the film in several times, but it always ended up under the cropping pieces rather than above them. I finally found a solution and got the film through.

With the 3D-printed adapters I used for the No. 3B Quick Focus Kodak, the take-up spool barely fit, and it was extremely tight. I needed to cut a channel into the side so I could slide the adapter over the bottom stem, since it was fixed in place. Usually, on folding cameras, there is a spring-loaded pin that you can pull down and slide the film reel into place, but this camera doesn't offer that. Cutting the channel into the adapter's side allowed me to slide the film into the camera and spool it onto the take-up reel.

 With the camera loaded, I went out to take some photos and see if the film advance numbering system actually works.

My Results:

 The old adage "Live and Learn" is very popular when I go out to shoot with cameras. It generally takes a couple of rolls of film to get to a normal comfort level with a new camera, and that's what happened with the Bell Panoramic camera.

 I shot my first roll of film, thinking the flaps would magically spread out during shooting. After carefully counting the turns to reach the next frame and "thinking" I was shooting in the 6x19 format, I noticed I had only two images on the roll, and they weren't in the widest format. 

 I also noticed the images were very "top-heavy on the negative, meaning the images almost bled off the top of the film, and there was more room on the bottom. This indicated that the adapter didn't work as it should, but the good news is that the exposures were good.

 Excited to know the camera didn't have any light leaks and the shutter was working well, I decided to make some changes and shoot another roll to see what I could get. The first thing I noticed was that when you pull out the lens, that's when you need to determine the format you want to shoot in. When the lens is closed, the flaps are always pulled back, leaving the film unexposed to the full width. That was the easy fix…. remember to flip the flaps forward AFTER you pull out the lens.

 I also needed to make adjustments to the film adapters for the take-up spool. Since the images were top-heavy, I trimmed off about 1/4" off the bottom of the lower adapter. This would push the film lower, making it easier to turn the film advance crank. 

 Loading the camera with a second roll of film, which was much easier than the first time, I headed out to my front yard to take more photos. Pulling the lens out of the camera's body, then flipping the wings forward this time. Now I knew I was going to get a longer image on the negative. Carefully counting the turns of the film advance crank, I took my first photo of the second roll. Advancing the film to the second frame, I leveled the camera using the bubble level and snapped my second photo. The third photo wouldn't be full-width because the film wasn't long enough to capture three full-frame images, so I shot a photo and hoped for the best.

 Here are the results from the first roll.

Here are the results from the second roll.

Conclusion:

 Here are my thoughts on this camera: it's extremely fun to shoot with, and I think the lens is sharp and produces great images. I'm anxious to try the camera out using the different formats, but here are some of my frustrations.

 Not having a viewfinder is rough. I needed to guess at what I was pointing the camera at. That's the first. I really didn't know what the angle of view was, and looking at the photos, it's wider than I anticipated. The Kodak Panoram and other panoramic cameras have lines on top that indicate the approximate angle of view. There's nothing on this camera that shows that.

 It's difficult to hold, but not too bad. I should use a tripod, especially when the top shutter speed is just 1/100. I also need to refine the number of turns to reach the first frame and the number needed to reach the next frame.

 Still, I absolutely LOVE this camera. The images are great, and it's compact and more lightweight than other panoramic cameras. It's a camera I'm extremely happy to have in my collection, and I will be on the lookout for more in the future.

 If you were the original owner or the person who owned this camera before me, great job on the modification. Reach out to me, I'd love to talk to you.

 Thank you for taking the time to read about this small, extremely wide panoramic camera that produced an almost 2.25" x 11" negative. Just incredible.

 Here are my other Camera Reviews.

 Cuny's Cameras and Photos is my online eBay store where I sell cameras I've reviewed, along with other photographic oddities. Stop by and see if there are items you're looking for.

 Until next week, please be safe.