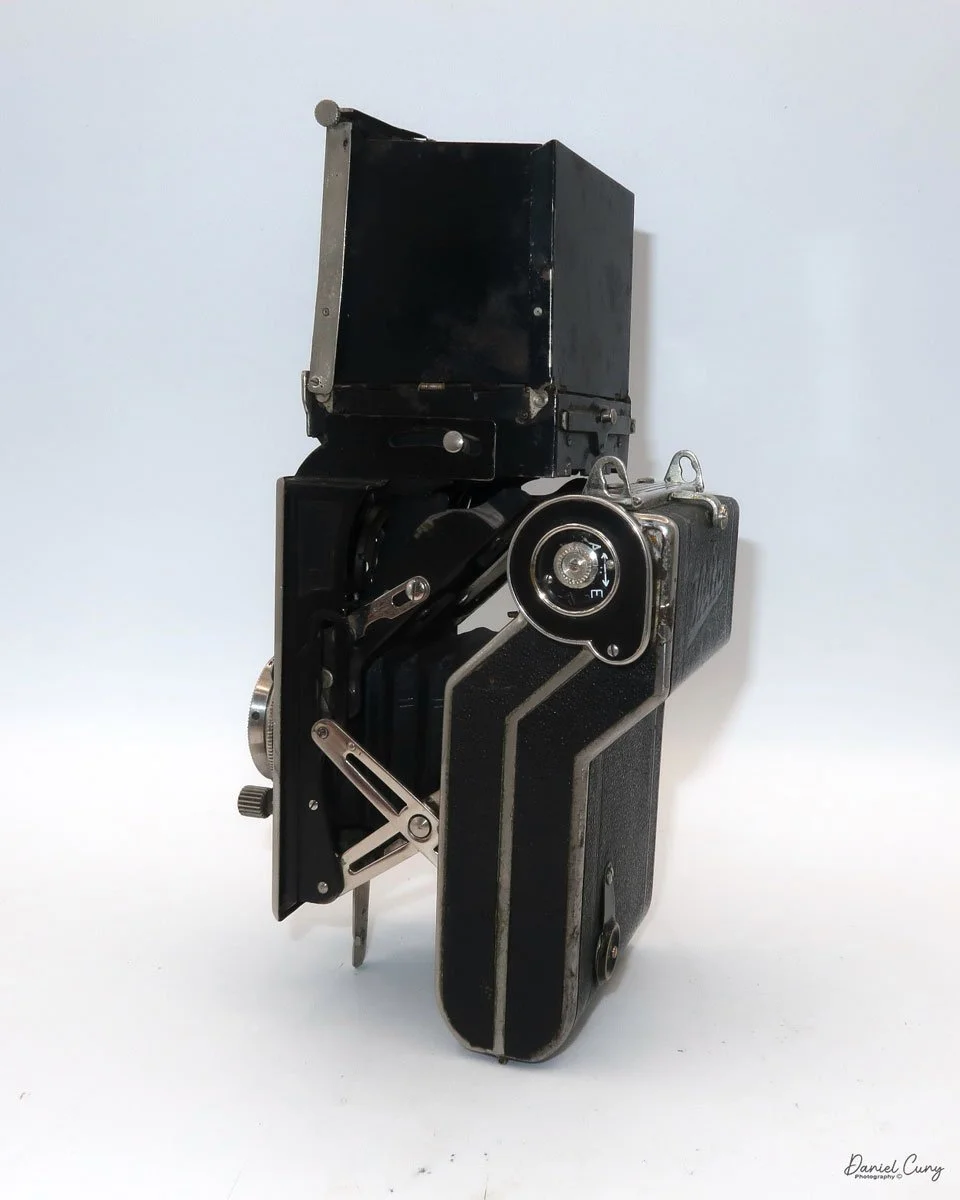
Zeiss Ikon Ikoflex III (853/16) camera

My Zeiss Ikon Ikoflex III camera

My first real camera, a Univex Uniflex, was a gift from my Uncle Bud, my mother's younger brother. He was a free-spirited soul, living a bohemian lifestyle that left a lasting impression on me and my older brother. This camera, a symbol of his unique spirit, became my gateway to the world of photography. 

 Uncle Bud was the photographer in the family gatherings, went to art school in Chicago, where he met his wife, made wine, went antiquing, purchased an old school bus, and was converting it into a camper for the family, was health-conscious, all of this in the 1960s, as I was young and impressionable. 

 I tell you this because the Univex Uniflex was a somewhat inexpensive twin-lens reflex camera that I used for many of my early years taking photos, so the twin-lens reflex style has always felt comfortable to me. I've always enjoyed looking through a larger viewfinder and framing my subject, albeit backward when looking down into the camera. It's similar to looking through a view camera, although the view camera isn't backwards, just upside down. 

 Last week, as my wife and I were in Yosemite and the San Francisco Bay Area. One of the reasons we went there was that on the first Sunday of the month, there's a large flea market in Alameda, which I miss since moving away from the area about 9 years ago. I planned the trip partly to visit the flea market and look for cameras and other photo items.

 I arrived at the flea market early and started looking over the many tables. At one of the tables, I found this fantastic Zeiss Ikoflex III camera I've been looking for for many years. As I picked up the camera, the shutter worked at higher speeds and lagged at lower speeds. The lens was clean and the transport worked well. 

 After a bit of negotiation, I left the flea market with the Ikoflex III and a few other small items. The joy of this find was so great that I couldn't wait to share it with you, my fellow camera enthusiasts. Even though I had recently written about the Zeiss Contaflex camera, the Ikoflex III was a gem that I couldn't wait to put a roll of film into and share its story on my camera blog.

Ikoflex History:

 The Zeiss Ikoflex emerged in 1934 as Zeiss Ikon's direct answer to the burgeoning success of the Franke & Heidecke Rolleiflex. The inaugural model, affectionately nicknamed the "Coffee Can" for its distinctive upright, cylindrical body, marked a departure from the more conventional TLR design. This initial offering was a clear statement of intent from the German optics giant to compete in the professional and enthusiast photographer market.

Ad for Zeiss Ikon Ikoflex III camera

 Throughout its production, which spanned until 1960, the Ikoflex series underwent significant evolution, with a clear demarcation between its pre-war and post-war iterations. Before World War II, Zeiss Ikon introduced several models, progressively refining the design and features. The early lever-wind and knob-wind "Coffee Can" models gave way to more streamlined, traditionally styled TLRs. These pre-war cameras often featured high-quality Zeiss lenses, such as the Tessar and Novar. They were equipped with Compur or Klio shutters, offering photographers a range of options in terms of both price and performance. A notable pre-war innovation was the Ikoflex III, introduced in 1939, which boasted a fast f/2.8 Tessar lens and a unique Albada direct-vision viewfinder integrated into the focusing hood, setting it apart from its contemporaries.

 Following the end of the war, Zeiss Ikon resumed production in West Germany and continued developing the Ikoflex line. The post-war models, such as the Ikoflex Ia and IIa, reflected the technological advancements of the era. These cameras often featured coated lenses for improved contrast and flare reduction, as well as synchronized flash capabilities. The final models in the series, like the Ikoflex Favorit, even incorporated a built-in, uncoupled light meter, a significant feature for the time.

 Despite its innovative features and the esteemed Zeiss pedigree, the Ikoflex line always existed in the shadow of the Rolleiflex. While highly capable and well-regarded for their robust build and excellent optics, the Ikoflex cameras ultimately ceased production in 1960, leaving behind a legacy as a compelling, if not dominant, force in the golden age of twin-lens reflex photography.

My Camera:

 My Zeiss Ikon Ikoflex is in very good condition, except for some of the slower shutter speeds, which I'll exercise and hopefully bring back to life; otherwise, I'll have it CLA'd. The camera's serial number is 836152, and it has a Carl Zeiss Jena Tessar 8cm f/2.8 lens, serial number 1851589. The camera is 6" tall when the light chimney is closed and 8" tall when it is open, by 4" wide, including the focus knob and film winding lever, and by 4.25" deep when the camera is focused at infinity.

To open the light chimney and look into the viewfinder, on the back of the camera, behind the closed chimney, is a button to press to open it. Unlike many twin-lens reflex cameras, the light chimney opens from the front rather than the rear, which I find interesting. On the right side of the back wall, the small switch locks and unlocks the flip-up magnifying glass for critical focus on the ground glass. On the side walls of the light chimney are "Zeiss Ikon" on one side and an exposure index on the other.

 If you want to use the Albada sports finder, it shows bright frame lines as you peer through it, and the front of the light chimney is a very polished, mirror-like surface, very similar to the previously mentioned Zeiss Ikon Contaflex TLR camera. To close the chimney, fold down the sides, then the front, and finally the rear portion. 

Similar to the Rolleiflex, both the aperture and shutter speed settings can be viewed when peering down the light chimney. Two separate windows show the aperture setting on the left and the shutter speed on the right. To move either setting, there's a lever on each side of the lens; slide it up or down to change the setting. The shutter speeds go from 1/400 to 1 sec, along with "B" for timed exposures. The aperture goes from F/2.8 to F/22. Just behind the shutter-speed slider is the cable release socket. Just to the right of the lens is a small round window that shows black when the shutter is tripped, and red when the shutter is cocked and ready to shoot.

On the right side of the camera, from top to bottom, is the frame counter in a stylized circular window, placed directly behind the shutter release. To activate the shutter, you press down on the shutter release to take the photo, which I prefer to pressing into the camera's body. The main object on the right side of the camera is the transport/winding lever. It is so much more than just a film transport lever; it also cocks the shutter with only about half a rotation. 

On the left side of the Zeiss Ikon Ikoflex II camera is the focus knob, which has a minimum focus distance of 4' to infinity. Just above the focus knob is the depth-of-field scale for the different apertures. Above and below the focus knob are two knurled knobs that can be pulled out to load and unload the film once the back of the camera is opened.

To open the back of the camera to load the film, there is a small disk on the back that is pulled down to open the back. The back will flip down, unlike Rolleiflex cameras, where the back pulls up. Loading the film is just like any other twin-lens reflex camera. Once the new film is on the bottom, bring the lead to the top spool and thread it into the slot, and wind the transport lever. Do this until the arrows on the paper backing point to two white dots on the side of the film chamber. At this point, close the back and wind until you see frame number 1 in the frame counter. Do not go past the first frame (frame 1) in the film counter, or you'll lose images on the film. This may be a flaw in my camera, but at first it doesn't stop at frame 1.


My Results:

 The forecast for the end of last week called for rain, so on Wednesday, I loaded up the camera with film and took a short drive to Duggan Falls in Washougal, WA. It's about a 30-minute drive. While it was overcast, it wasn't raining, and I wanted to try the Ikoflex III before the rain hit.

 The camera produced very sharp images. Here are a few photos I took at the falls.

Conclusion:

 The Zeiss Ikon Ikoflex III camera was an absolute pleasure to shoot with. It was similar to many other twin-lens reflex cameras. The viewfinder could have been a bit brighter, but the focus knob was smooth and easy to move. The shutter speed and aperture windows seem a tad dark, but the camera is close to 90 years old, so a good CLA would brighten them up nicely.

 I really enjoyed the short turn of the transport lever. I was surprised that such a small motion would properly transport the film AND cock the shutter, too. It does a fantastic job, and it's one of the reasons I enjoyed the camera so much. Overall, an excellent camera to have in the collection, and one I'll be taking out more often to shoot with, given how sharp the images are.

 Thank you for taking the time out of your day to learn about this fantastic vintage German camera.

 Here's a link to my other Camera Reviews.

 I also have a store on eBay, Cuny's Camera and Photo. Stop by sometime and see what cameras and other photo oddities I have for sale.

 Until next week, please be safe.

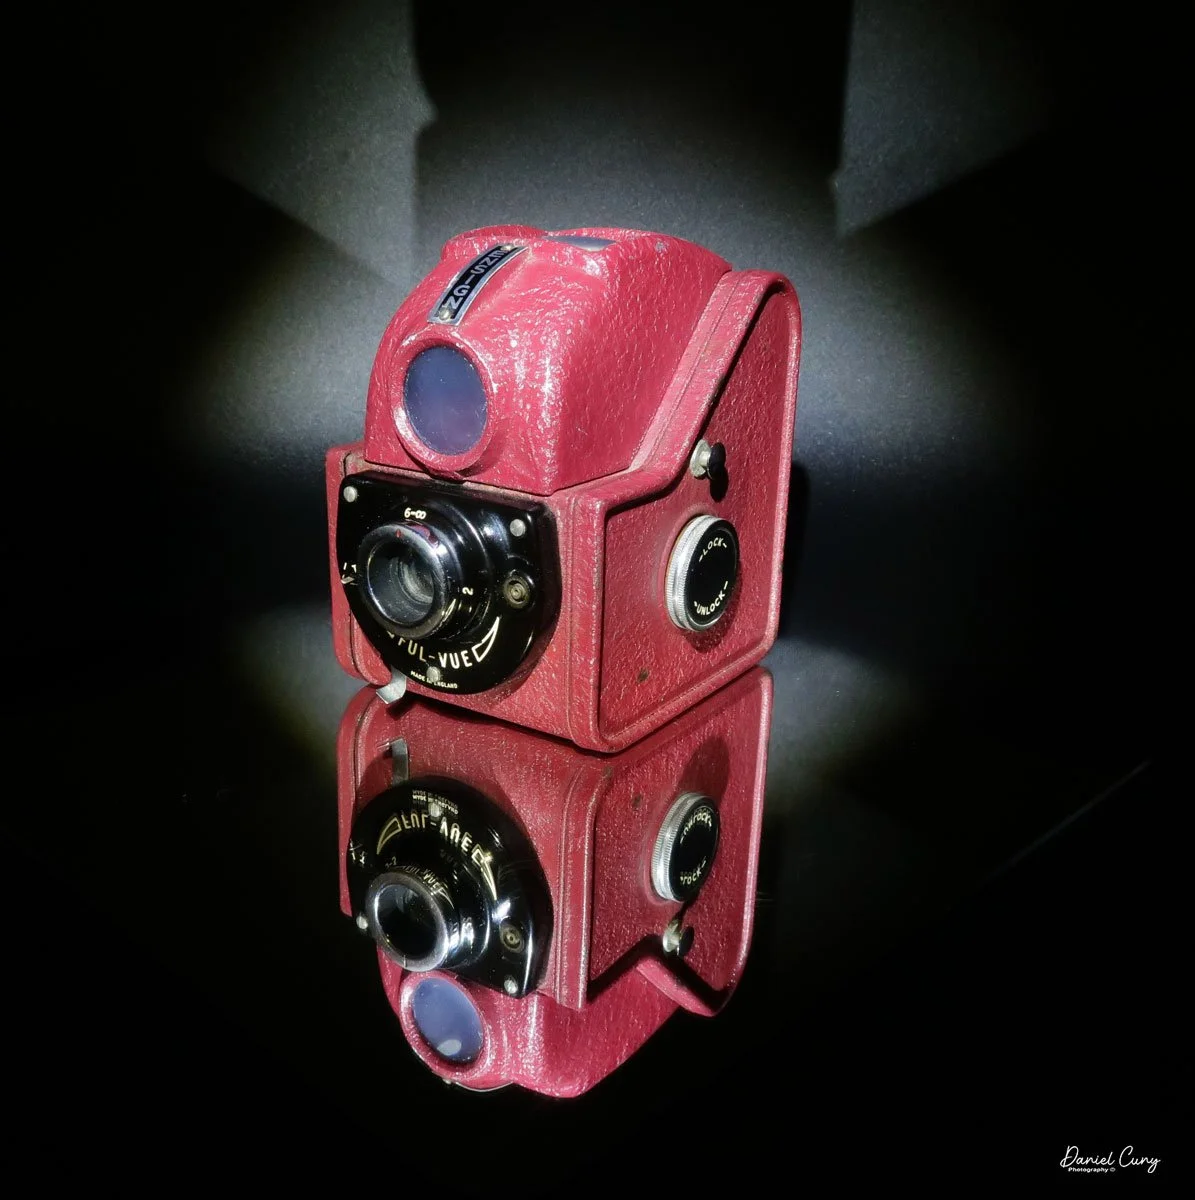
Ensign Ful-Vue camera

My Ensign Ful-Vue camera

My wife and I were planning a trip back to California, visiting one of my favorite places on earth, Yosemite, and then heading to San Francisco to visit a friend whom we had moved away from nine years ago. We had been going to Yosemite together since before we were married in the mid-1970s, and there are just so many beautiful and memorable events that have happened there. It doesn't matter what time of year you go; there are things to see and photograph that make it a magical place for us to visit.

 As I was browsing through the many cameras on my shelves, I must have had a subconscious desire for the Ensign Ful-Vue camera. As I looked at the camera and thought about Yosemite, I noticed that the shape of the top of the camera's viewfinder resembles the shape of Half Dome in Yosemite Valley. 

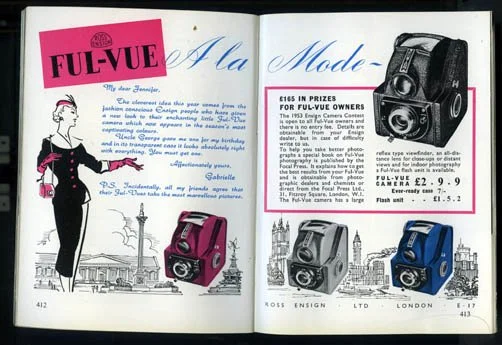
 As I've mentioned in several blogs, I have a passion for colored cameras, so I have two different Ful-Vue cameras in my collection. I have an Ensign Ful-Vue camera that's red in color. Why have a black camera when there are cameras in various colors? This camera was also sold in Black, White, and Blue colors. The other Ful-Vue camera I have is a Ross Ensign Ful-Vue Super in burgundy. The Ross Ensign Ful-Vue Super is a later and more refined camera than the earlier Ful-Vue I took to Yosemite.

The two Ful-Vue cameras in my collection

 It might be fun to put a roll of film into the camera and take it with me to Yosemite. It doesn't take much room in my bag, and I have plenty of 120-size film in my refrigerator, so that's the plan. As I was packing for the trip, I threw a roll of 120 T-Max 400 film, along with the Ensign Ful-Vue camera (a Half Dome lookalike), into my bag and took it with me on the trip.

 Another thought about taking the Ensign Ful-Vue to Yosemite was that the camera is straightforward, and it would be fun to take snapshots of Yosemite as my wife and I walked around the park, taking in all the natural wonders. It would be like I was 8 years old, and I would take my Kodak Holiday camera on summer vacations, taking random photos of the family and other interesting views. 

 That's where my love for photography began, wandering through summer vacation spots with my family, taking photos of the interesting things I enjoyed, and looking back at them to remember the time spent with my family or friends. To this day, I look back at photos with friends that we took when we were younger, and many bring a smile to my face as I recall these memorable times.

History:

 Houghton and Ensign were pivotal names in the history of British photography and camera manufacturing, known for innovation, extensive product lines, and significant contributions to photographic technology from the 19th to the mid-20th century.

French ad for the Ensign Fun-Vue camera

 The roots of Houghton trace back to 1834, when George Houghton, together with Frenchman Antoine Claudet, managed a glass warehouse in London known as Claudet & Houghton. The company initially focused on optical and sheet glass products, but the rise of photography in the late 1830s opened new avenues, with Houghton quickly supplying materials for Daguerreotypes.

 After Claudet died in 1867, the firm became George Houghton & Son, as George Houghton's son joined the business. The family firm steadily expanded, becoming George Houghton & Sons by 1892, and deepened its involvement in the photographic equipment industry.

 By the late 19th century, Houghton was producing a wider range of photographic supplies and had become a full-fledged manufacturer of cameras. Among their early notable products was the Sanderson camera, produced from 1895 to about 1910, which became renowned for its quality. In 1901, they launched the Ensign brand of photographic film, marking the rise of a name that would soon become synonymous with the company's signature camera line.

 In 1903, Houghton introduced Ensign Daylight Loading Film, a crucial development that broadened consumer access to photography. This innovation was followed by the absorption of several other camera firms in 1904, including Holmes Bros. (makers of the Sanderson), A.C. Jackson, Spratt Bros., and Joseph Levi & Co., which formed Houghtons Ltd. This move enabled large-scale production and a wider range of camera selections.

Ad with different colors available

 With their expansion and absorption of other brands, Houghton established the Ensign Works in Walthamstow around 1905. By 1908, it was the largest British camera factory, employing over 700 people. Houghton's reputation was further cemented with magazine cameras such as the Klito and the innovative folding Ensignette.

 In 1915, Houghton's Ltd. partnered with W. Butcher & Sons to form the Houghton-Butcher Manufacturing Company. The merger strengthened their manufacturing and distribution during turbulent times.

 In 1930, Ensign Ltd. was formally established, representing the heritage of both Houghton's and Butcher's. The Ensign Ful-Vue, introduced in 1939, became iconic for its simplicity and bright viewfinder, attracting amateur photographers and children. Throughout the 1930s and 1940s, Ensign was renowned for its box cameras and advanced folding models, such as the Multex.

 World War II brought massive challenges. The company's London headquarters suffered severe bomb damage in 1940. While Ensign continued to manufacture at Walthamstow, the brand's prominence waned in the post-war years.

 From its origins in optical glass to producing some of Britain's finest and most popular cameras, Houghton and Ensign chart a history of adaptability, invention, and a lasting impact on the UK photographic market.

My Camera:

 My Ensign Ful-Vue is 4" tall by 4.25" deep and 3.25" wide, and weighs 14.2 ounces, so not even a pound. It's viewfinder on top is one of the dominate features of the camera. The size of the viewfinder itself is 1.5" square on the top of the camera, and with the camera being the small stature it is, makes the viewfinder seem huge when looking at the camera.

The Ensign Ful-Vue camera is the epitome of the classic snapshot camera, as there are really only a few settings on the camera that you need to make before snapping the photo. There is a shutter setting for either "I" for instant or "T" for time, allowing for a longer exposure. There is a tripod socket on the bottom of the camera, but there is no cable release socket available for use if you want to make a timed exposure with the camera.

 The other setting in the Ensign Ful-Vue camera is focus. The lens is set to three different focus distances: 2 meters, 3-5 meters, and 6 meters to infinity. Turn the chrome rig and point the red dot on the front of the ring to the desired distance to set your focus distance. There is a separate flash PC outlet to connect an external flash, ideal for low-light photography. The flash would have to be screwed into the tripod socket, and it would be located on the left side of the camera, I guess.

To take a photo, the shutter release is located below the black nameplate, where the lens is positioned, and is pulled up to activate the shutter in the camera.

 Loading the film is pretty straightforward on the Ensign Ful-Vue. On the left side of the camera is a locking lever that you turn clockwise to unlock the film chamber from the camera body. Once the film back is unlocked, the film chamber slides out of the camera body. Once the film chamber is removed from the camera body, you load the camera like any other roll film camera. Just ensure the film covers the larger area, rather than the thinner area closer to the lens.

 Once the film is loaded into the film chamber, slide the chamber back into the camera body and secure it in place by turning the locking ring counterclockwise to lock it into position. On the right side of the camera is the camera's film advance knob. Turn the knob until you see the arrows inside the red window on the back of the camera. 

Just above the red window on the back of the camera is a small knob that opens and closes the curtain, preventing light from coming through the red window. Make sure the curtain is open so you can see the film advancing. If you don't, you'll wonder when it will get to number one and go through the entire roll of film before noticing something is wrong. Once you see the arrows, slow down because you're coming to number one and your first exposure.


My Results:

 The Ensign Ful-Vue was a great camera to take to Yosemite, although looking back, the one thing I wish I had taken was a comparison photo of the Ensign Ful-Vue and Half Dome. I should have taken a picture with my phone of me holding the camera up with Half Dome in the background to show the comparison between the two. Like they say, hindsight is 20/20.

 The camera actually did pretty well. The photos are relatively sharp, the viewfinder was HUGH and bright to look through. 

 Here are a few examples of the photos in Yosemite and San Francisco.

Conclusion:

 The camera was what I expected. The viewfinder was very easy to work with and made centering the image easy. The only thing I wish the camera had that I was surprised it didn't have was the ability to use different aperture settings. Generally, even the most basic of cameras offer the option of two different apertures. Not on the Ensign Ful-Vue, though.

 Thank you for taking the time to read about this very basic, but oddly shaped camera. It was fun to throw it in my camera bag and have something fundamental to use at times.

 Here's a link to some of my other Camera Reviews.

 Stop by Cuny's Camera and Photo if you're interested in purchasing some of the cameras I've reviewed. I also have many other photo odds and ends that interest you.

 Until next week, please be safe.

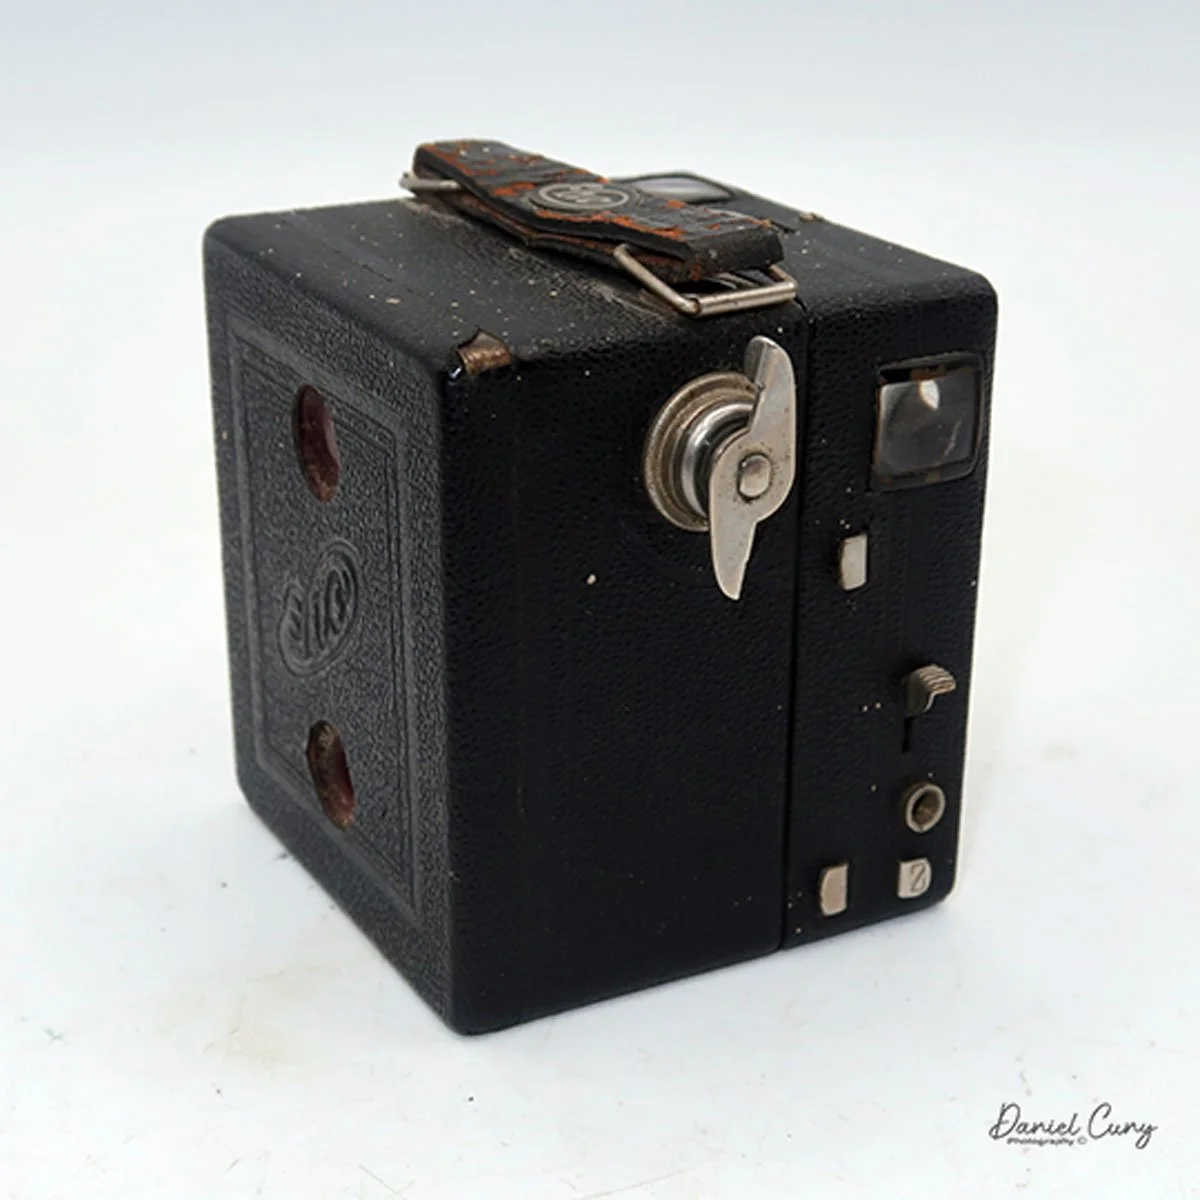
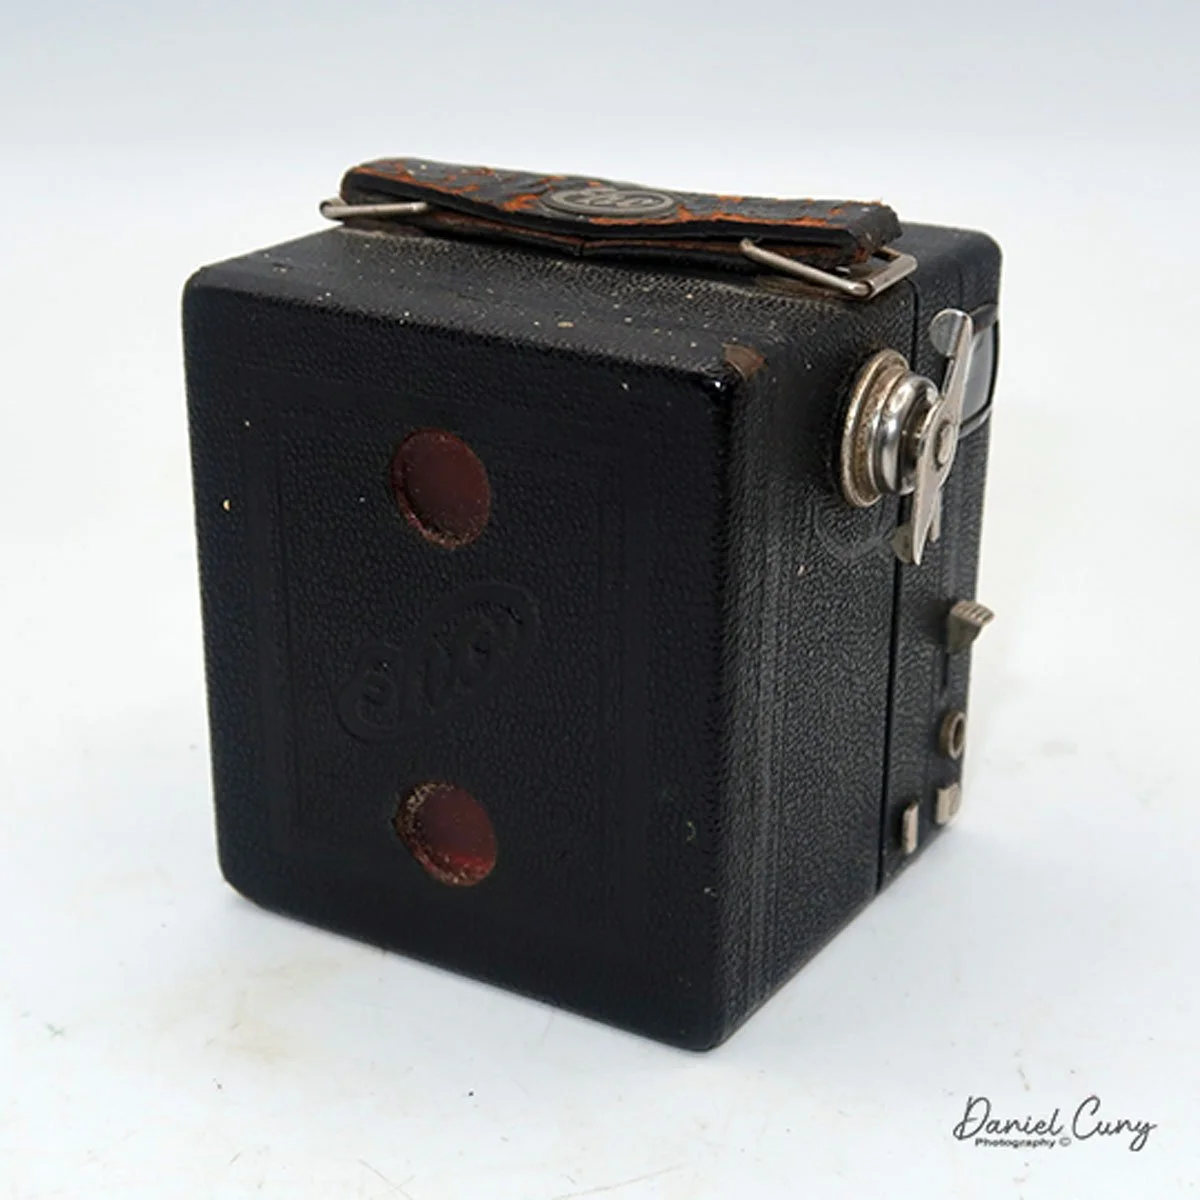
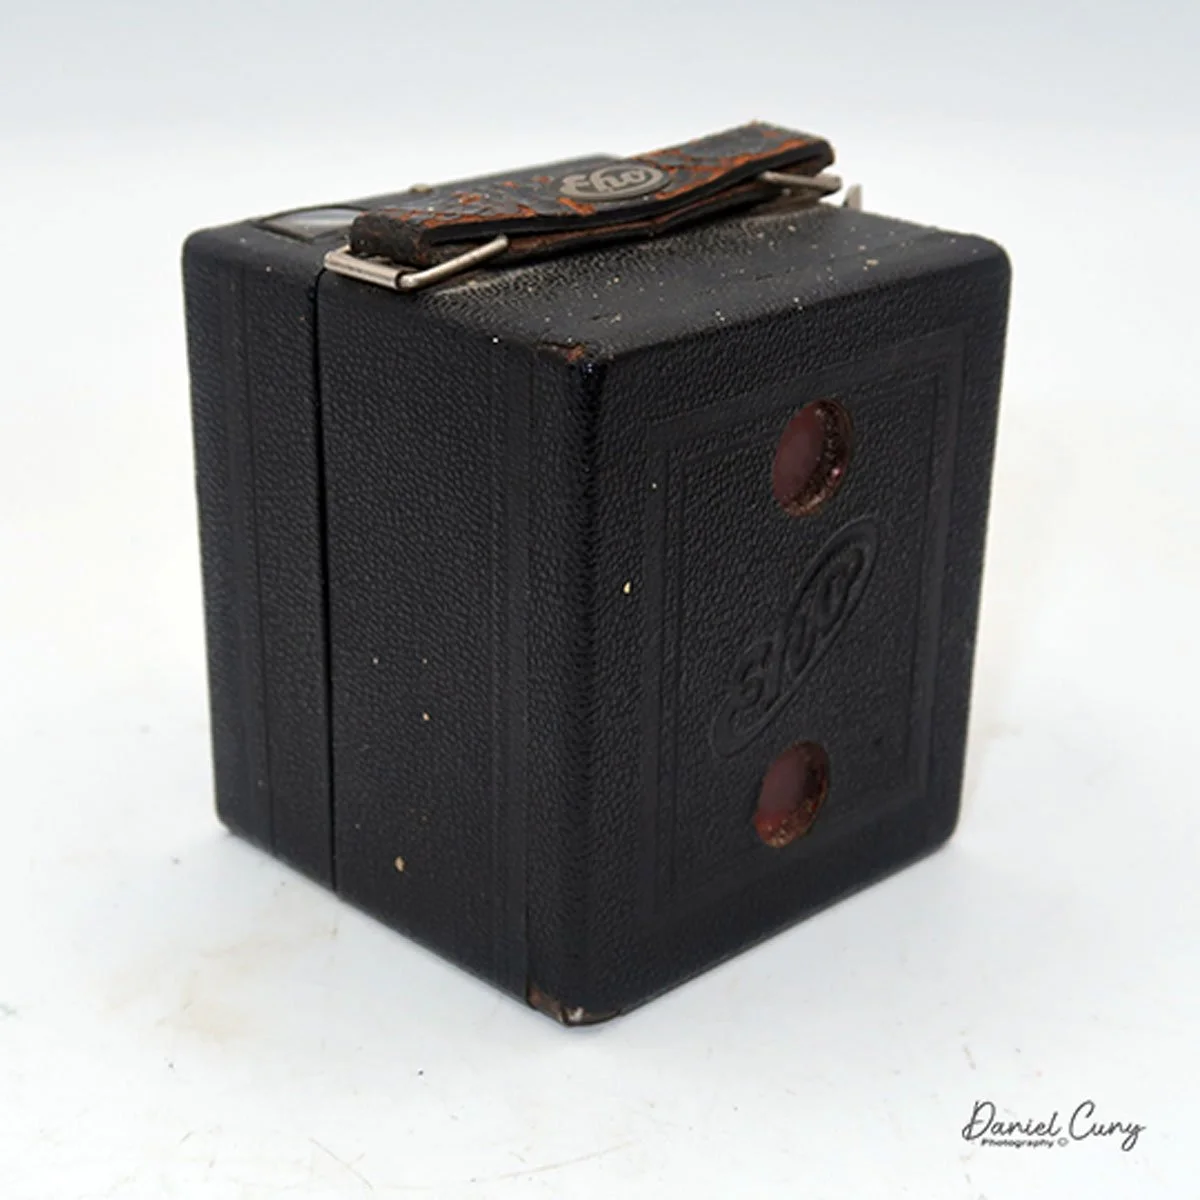
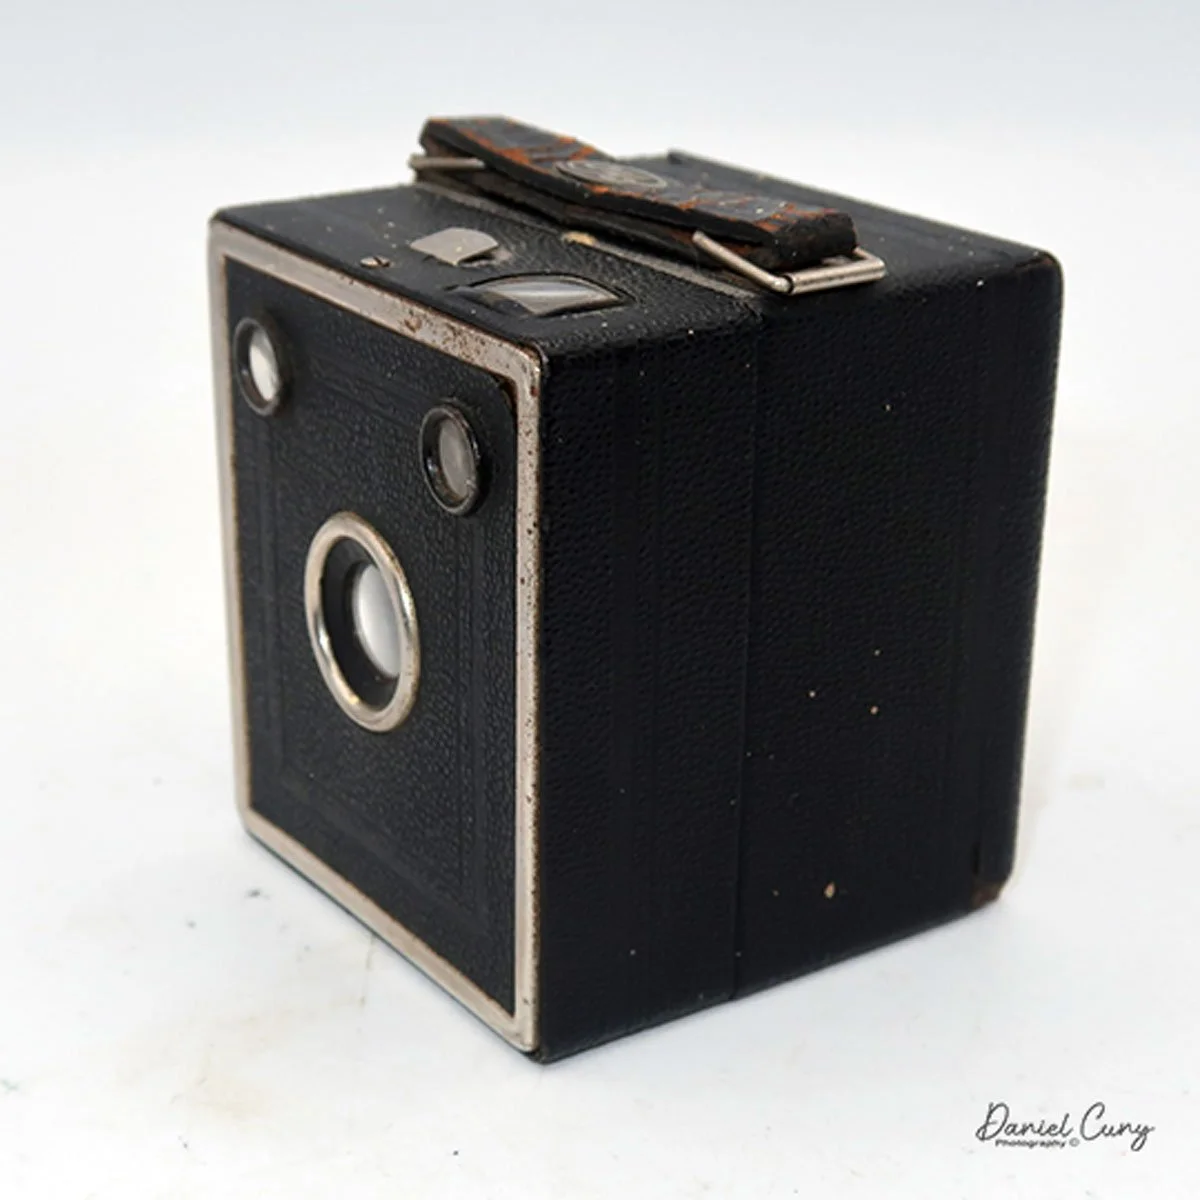
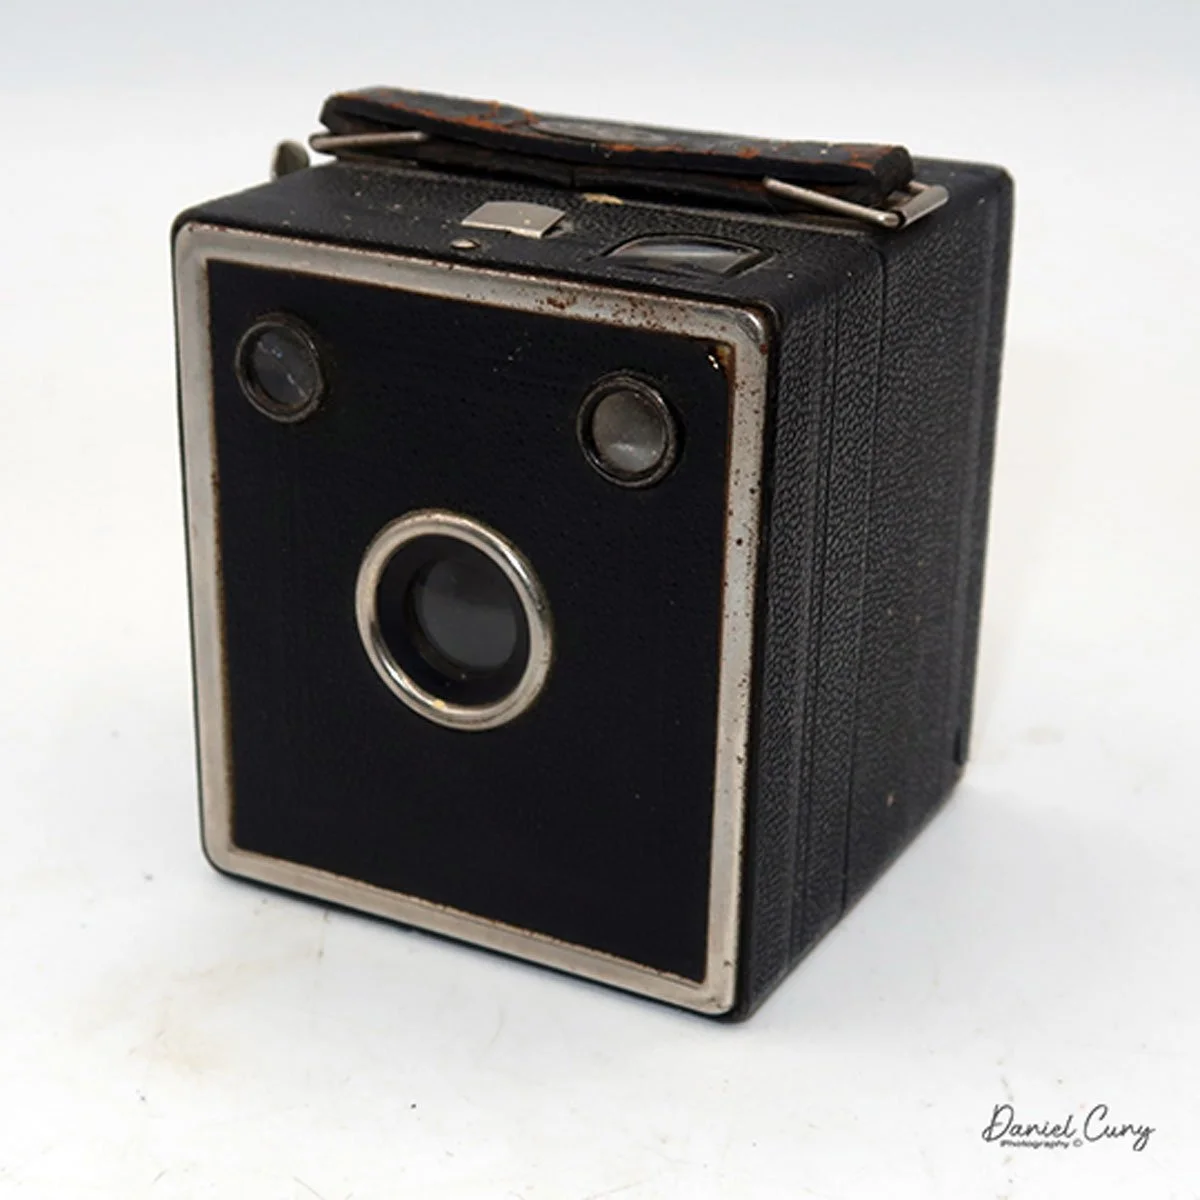
Eho Baby Box camera

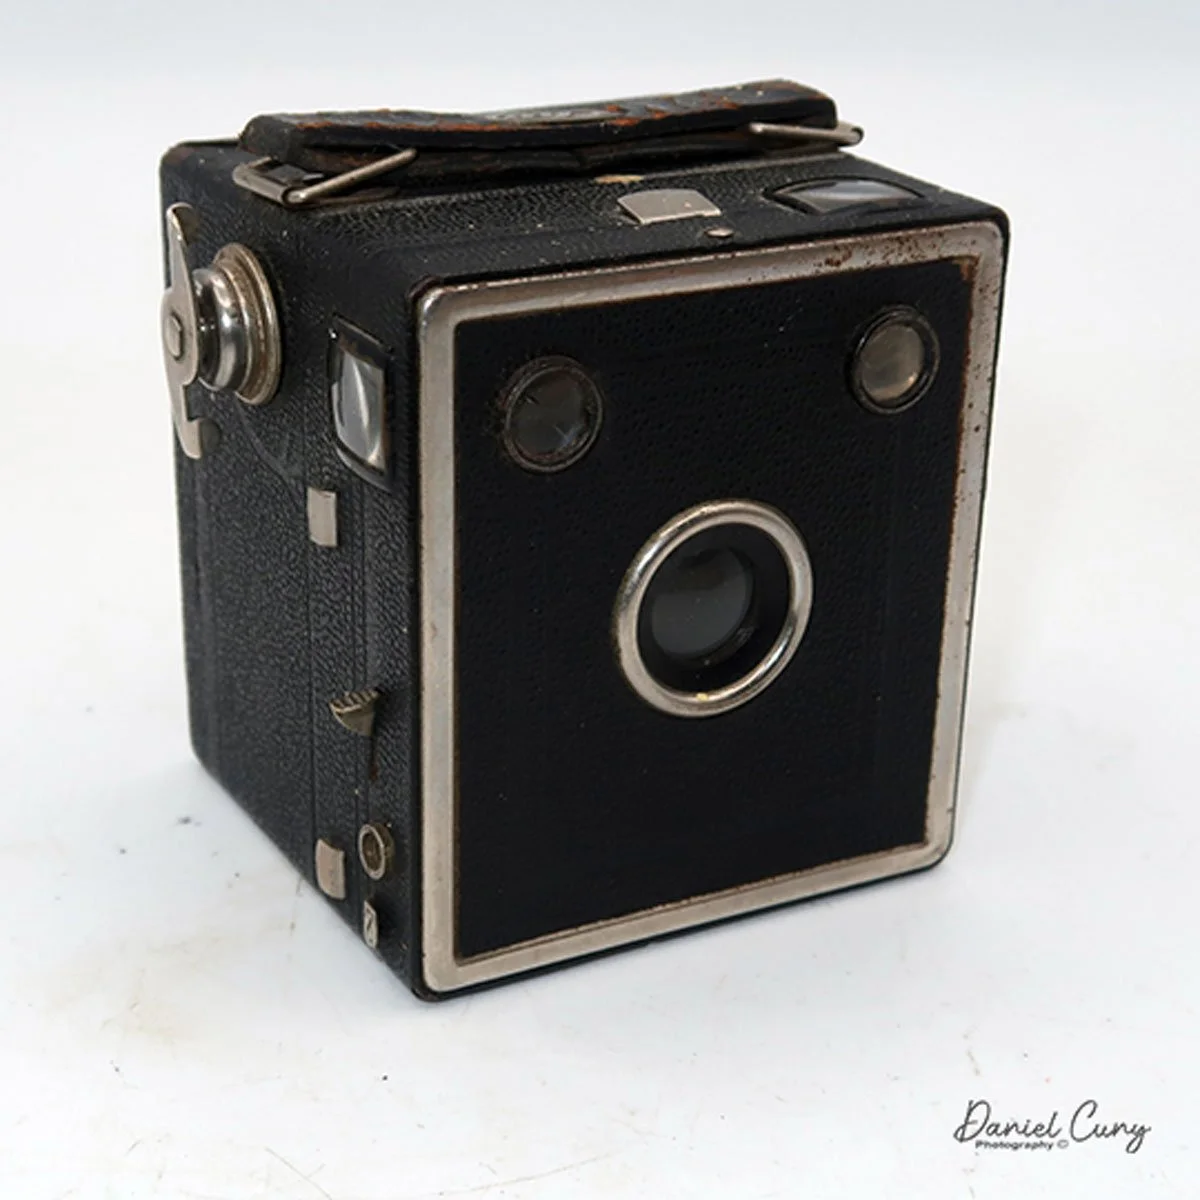
My Eho Baby Box camera

During my search for cameras, I found many of the very common black folding or box Kodak cameras, as well as the plentiful Argus C3 and Polaroid cameras. However, it's rare to come across something that sparks an interest. I can't define the feeling very well, but when you attend a Flea market or Garage sale and walk up to a table to see something you like or haven't seen before. It's a surprise, and you get a tiny rush from it.

 That's what happened when I first saw the Eho Baby Box camera. I was at a Flea market probably 20 years ago, and a person had a cloth on the ground with several cameras on it. I visually scanned through the lot and found the regular Kodak box, folding and Polaroid cameras, but something didn't make sense when I peeked behind one of the cameras.

 I could see the top of the camera, which had a small handle on it. I thought it was part of another camera, but as I moved a bit, I could see it was a separate camera itself. Thinking, that's interesting, I went in to have a closer look, and that's when I saw the Eho Baby Box camera.

 It really piqued my interest, as I hadn't seen this manufacturer's baby camera before. I've seen and owned the Baby Zeiss box camera, but the squareness and manufacturer were new to me at the time. Picking it up and playing with it, the camera was in clean condition, and the shutter was working, at least most of the time. The camera even had an intact strap with the maker's name on it, which I always prefer.

 Since the camera had a strap and a somewhat working shutter, I wanted to know what the seller wanted for it, so when I asked, the seller said $5.00. Being a person who likes to haggle on price,  I had to ask if he would take $3.00, which he did. I paid the seller the money for the camera, and I was thrilled to have a new addition to my camera family, especially since I discovered a camera manufacturer I wasn't aware of, and for such a small and cute camera.

History:

 Eho-Altissa was a German camera manufacturer with a rich history tied to the evolution of photographic technology in the 20th century. The company originated in 1892 in Leipzig under Richard Knoll as "Photo Spezialhaus" and began repairing and building its own photography equipment from 1904 onwards. In 1910, the operation relocated to Dresden, a hub for Germany's camera production. By 1927, ownership was transferred to Emil Hofert, who renamed it "Eho" after his initials.

 By the early 1930s, the company was manufacturing box cameras, known for their simplicity and reliability, and often rebranded for warehouse and supplier stores under various names. The mechanician Karl Heinrich Altmann designed the notable Altissa Box camera line, which featured an eye-level viewer, differentiating it from other box cameras of the era. Several stereo and twin-lens reflex (TLR) models followed, including the Altiflex in 1937, a notable reflex camera of its time.

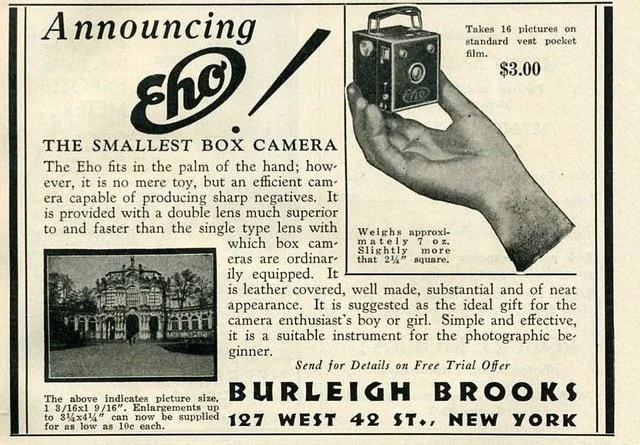
Ad for Eho Baby Box camera

 In 1939, the company introduced its Altix series of compact 35mm viewfinder cameras, marking the beginning of a legacy that lasted nearly two decades. The Altix models were key innovations for Eho-Altissa, and their popularity solidified the company's reputation for offering affordable, high-quality cameras with reliable mechanics.

 Throughout its development, the company underwent several renamings. In 1931, it became EHO-Kamerafabrik GmbH. During and after World War II, it transitioned to Amca Werk Berthold Altmann (1940). Altissa Camera Werk (1941), and finally, in 1952, VEB Altissa Camera Werk was nationalized under the East German state.

 World War II severely affected Eho-Altissa; its Dresden factory was destroyed during Allied bombing raids. Nevertheless, the company was revived post-war, with camera production resuming by 1947. The firm remained small enough to avoid early state intervention but was eventually nationalized in 1959, merging with VEB Kamera- und Kinowerke, which was later incorporated into VEB Pentacon.

Camera output ceased in 1961. Notably, the Altix VI model continued to be produced briefly under license in Sarajevo, Yugoslavia, using equipment from the shuttered factory.

 Eho-Altissa produced renowned models such as the Altissa Box series, Altiflex, and Altix, and supplied rebranded products to European photo retailers. Its story reflects the broader turmoil and adaptability of the German camera industry in the wake of economic and political change throughout the 20th century.

My Camera:

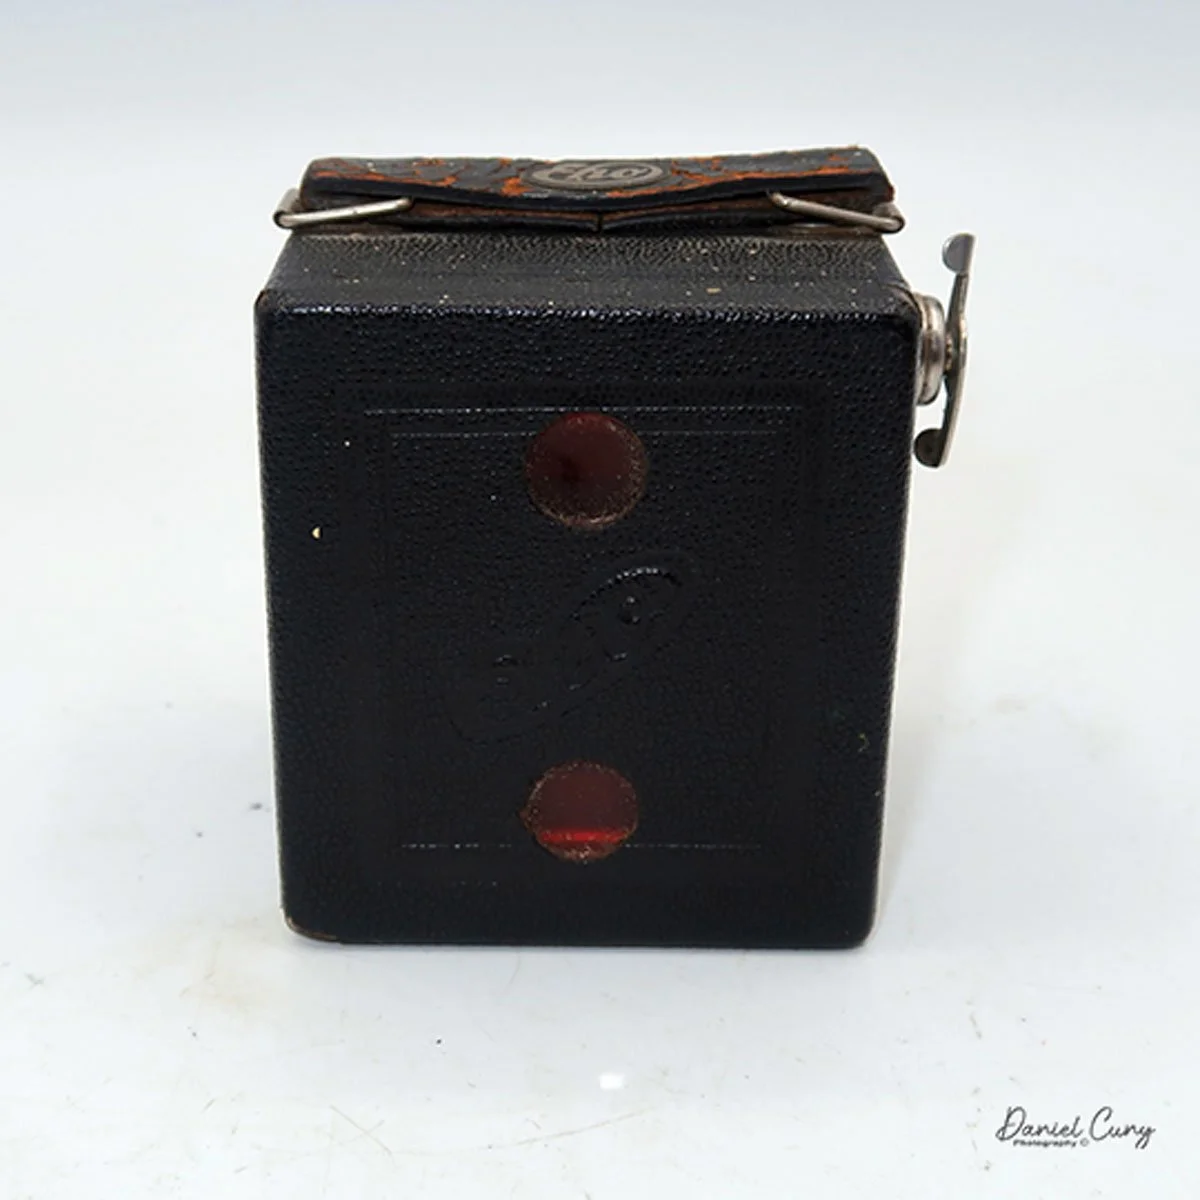
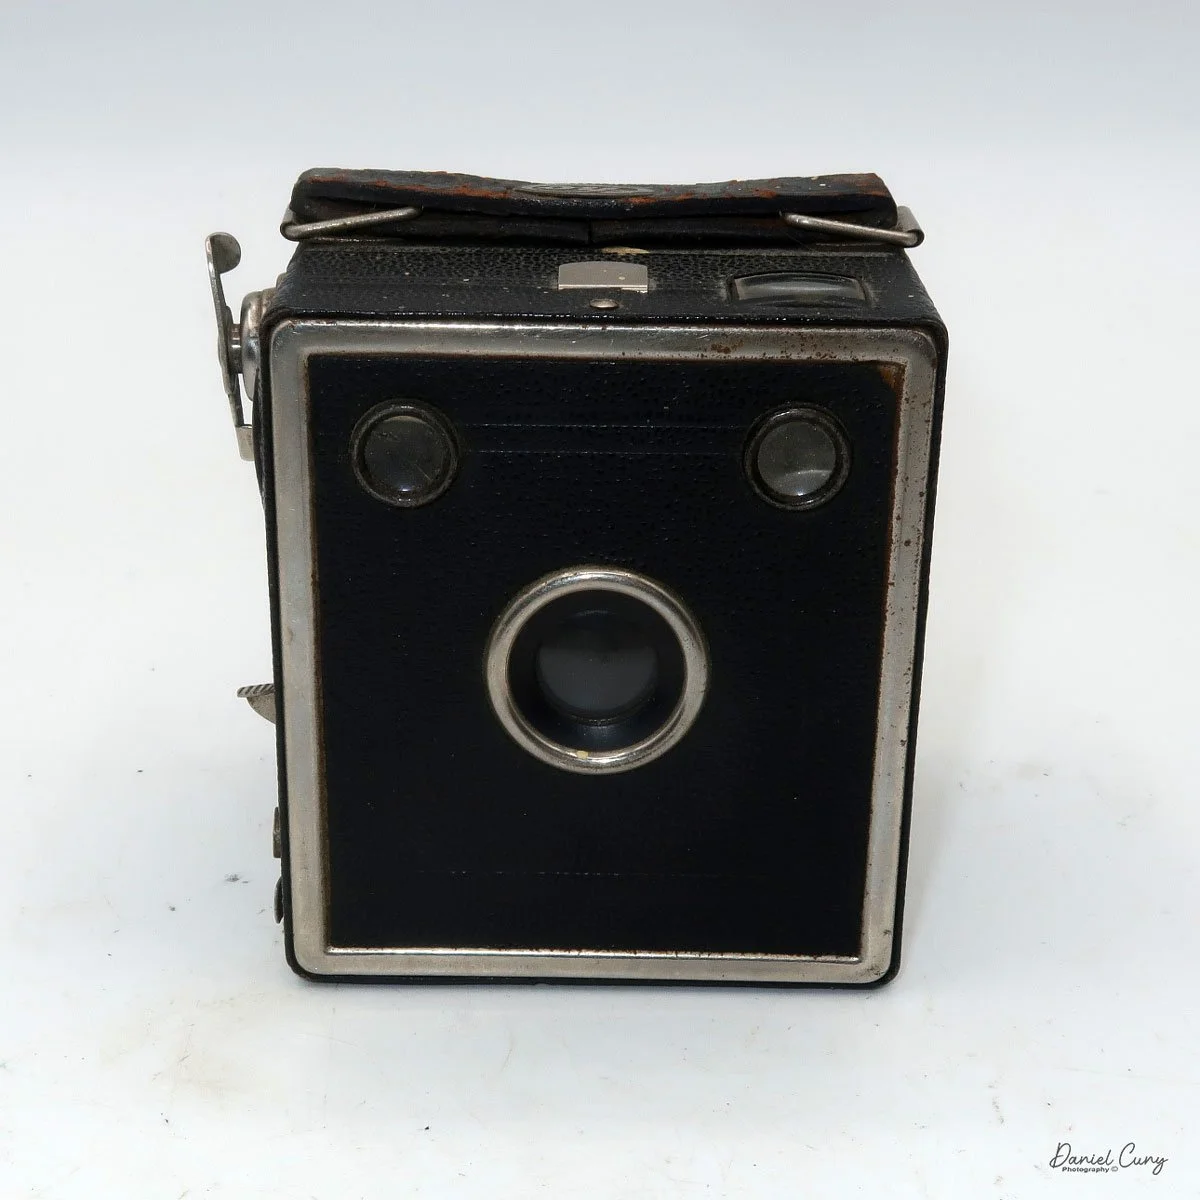
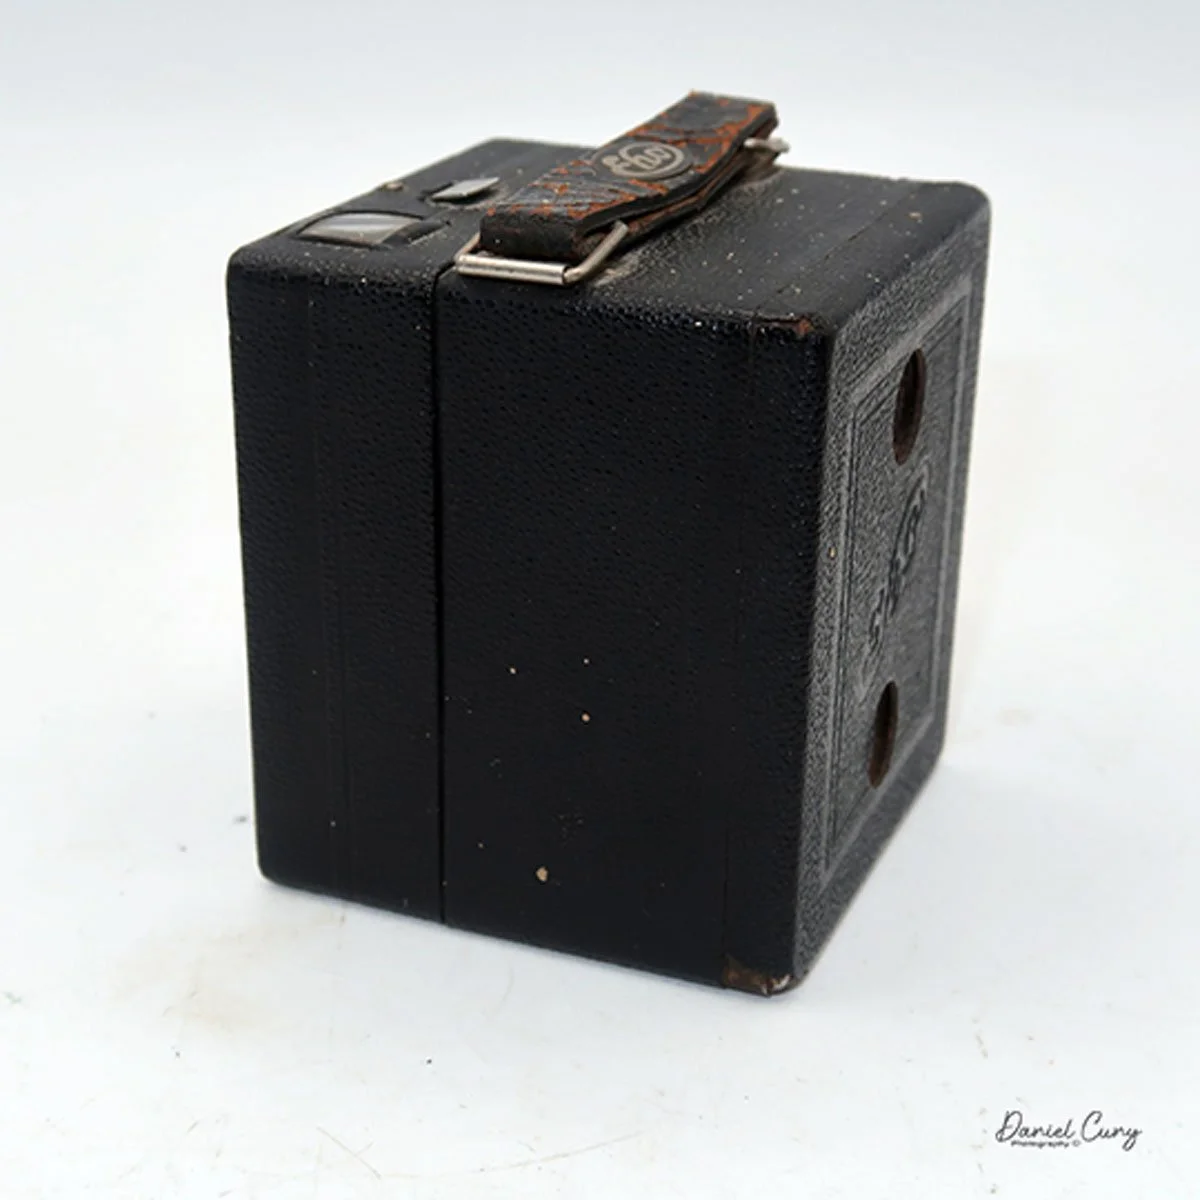
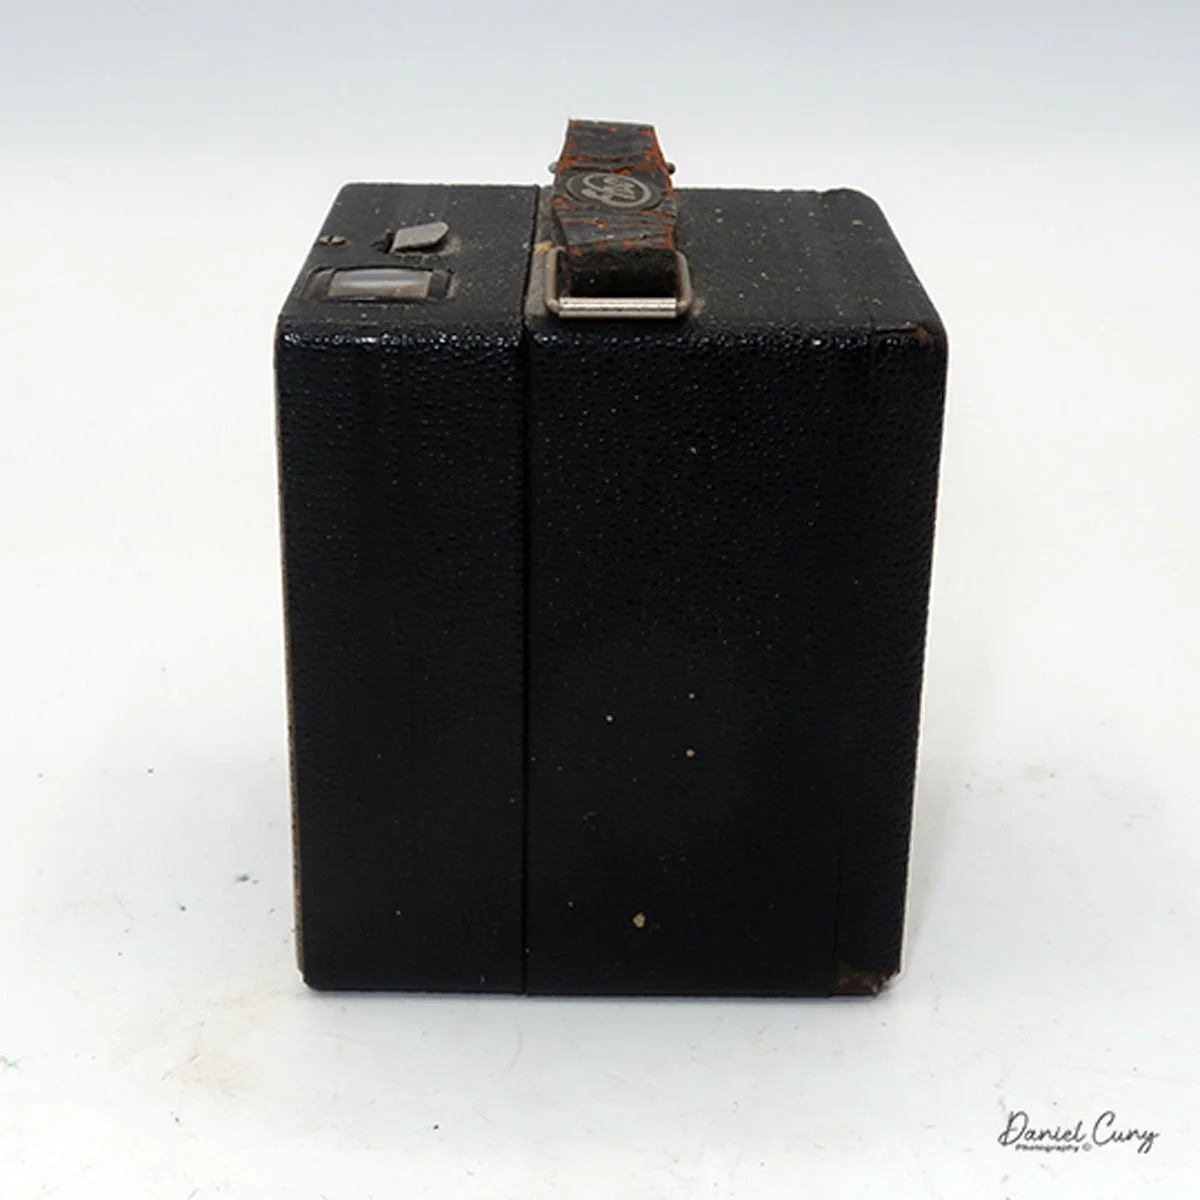
 The Eho Baby Box camera is very small, measuring 2 5/8" tall by 2 3/8" wide and 2 3/8" deep, so almost a perfect cube, and weighing only 6.8 ounces. This is one of the smallest, if not the smallest, box cameras I have that still accepts a standard 127-sized roll film, which was common for the time the camera was manufactured. The camera features dual red windows on the back, allowing it to produce 16 3x4cm-sized negatives on a roll of film.

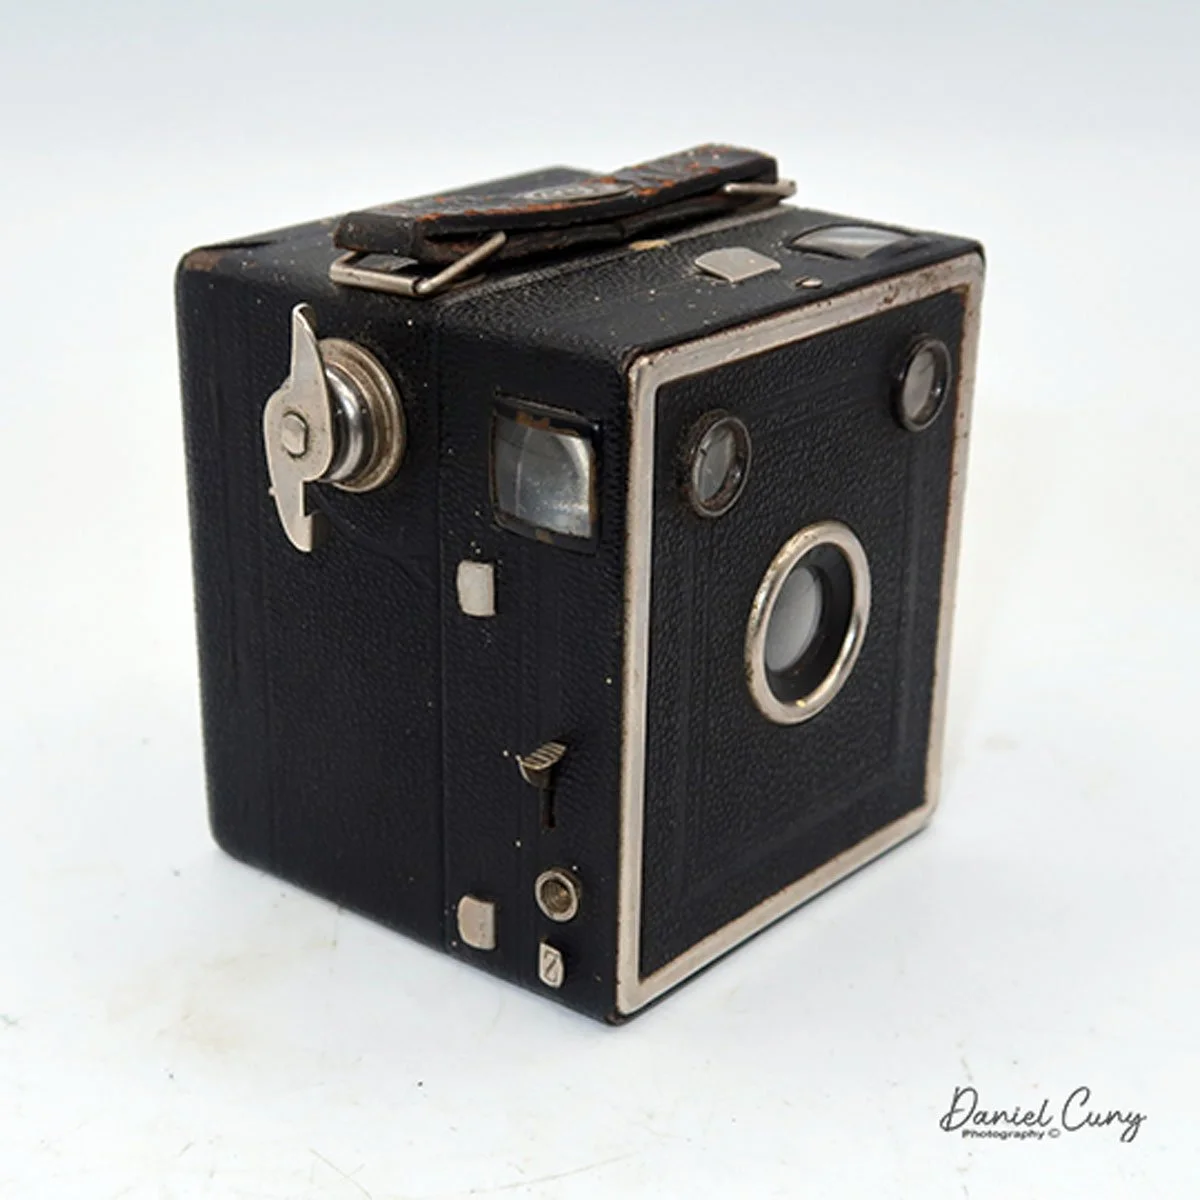
The camera was made between 1932 and 1939 and comes with a fixed-focus Eho Doplar lens that's fixed at F/11. The Eho Baby Box camera is made of metal with a leatherette covering and features a classic chrome ring around its face. The camera has a chrome lever on top that allows you to change the aperture from F/11 to F/22, based on the size of the aperture's opening.

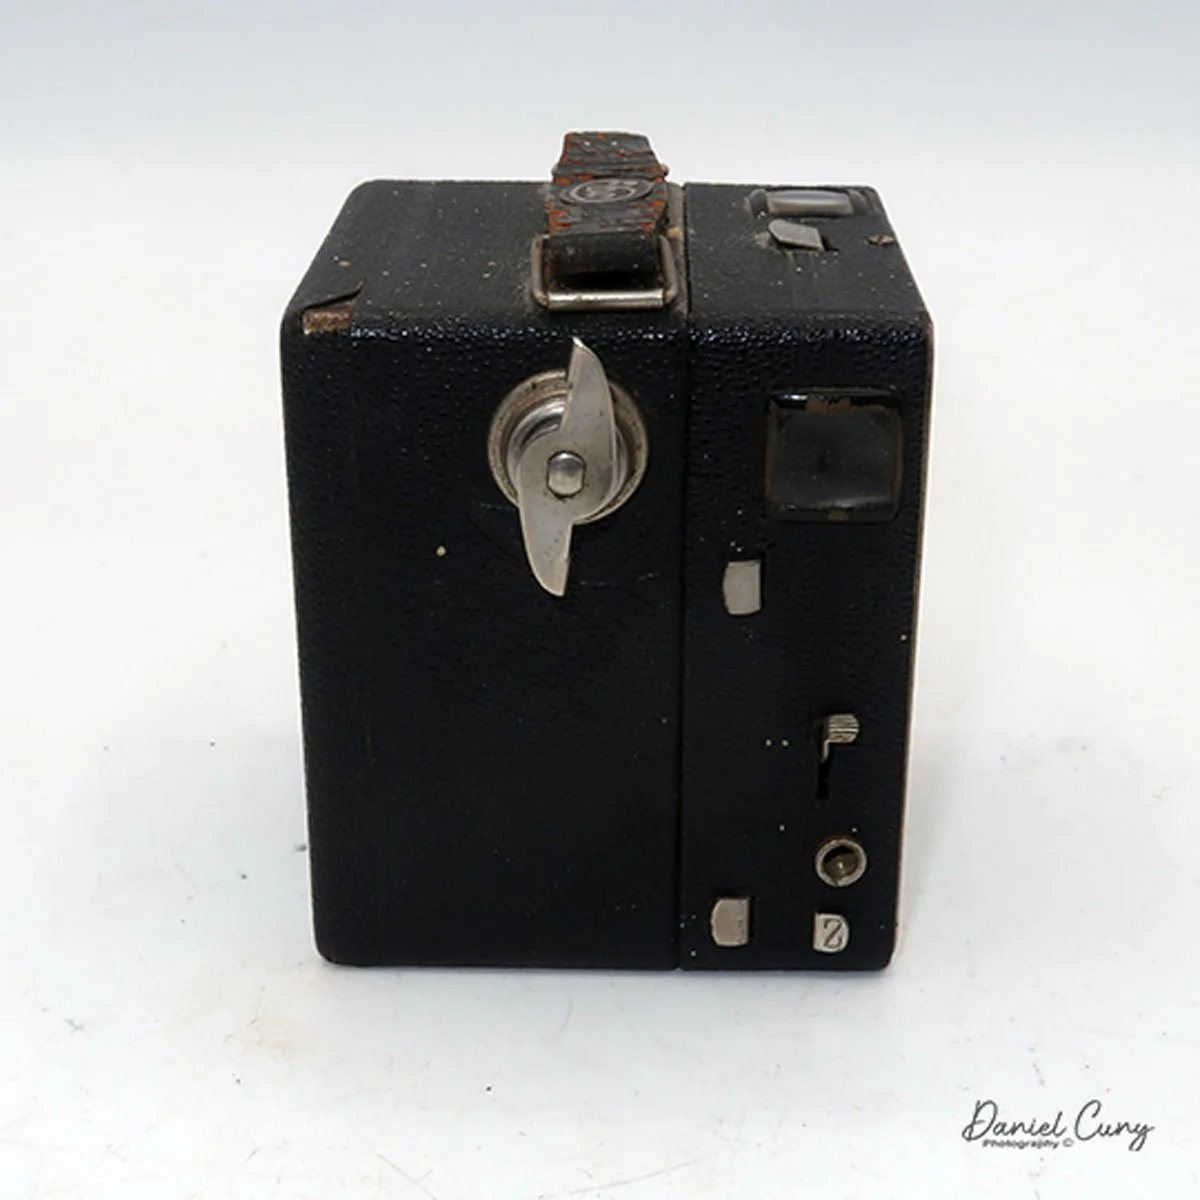
Shutter speed “Z” slide, Cable release socket and shutter release

All of the other camera controls are on the right side of the Eho Baby Box camera. On the bottom right of the camera is a lever with a "Z". This is the shutter speed control. If the lever is pressed in, the shutter clicks at its normal speed. However, if pulled out, the camera can perform a timed exposure for as long as the shutter is depressed. Just above the "Z" lever is a cable release socket. If you plan to take a timed exposure, place the camera on a stable surface, as there is no tripod mount on the bottom, and hold the cable release in for the required exposure time.

It is odd to have a camera with a cable release socket, but no way to secure the camera on a tripod. Then again, the camera is tiny, and adding a tripod socket to the bottom would increase its size.

 Just above the cable release socket is the shutter release, which has a lined grip on the metal, making it easier to grip, especially when needed, as the lever is relatively small. Above the shutter release is one of the two waist-level viewfinder windows. The one on this side of the camera is for vertical, or portrait, images, and the one at the top of the camera is for horizontal, or landscape, images.

To open the camera to load film into it, you'll need to pull out two levers on the right side of the camera. Both levers are located closest to the separation between the front and rear of the camera. Pulling out the two tabs unlocks the front of the camera from the rear, exposing the area where you load the 127-size film. Take the empty spool from the bottom of the camera and place it in the top, which is now the take-up spool. Load the fresh roll on the bottom and pull the leader over the shutter area. Then, place the leader in the slot of the take-up spool.

 Put the back on the camera, and press the two clips to lock the front to the back. Wind the film until you see arrows or some indication that you're approaching the first frame. Wind slowly until you see the number 1 appear in the bottom red window. At this point, you're ready to take your first image. After taking the first picture, wind the film slowly until you see the number 1 in the top red window. This is when you're ready to take your second photo. Follow the same process with the number that first appears in the bottom red window, then in the top one, through number 8. After you take your last frame with the number 8 at the top of the window, wind the film to the end. The film should then be ready to be taped closed and processed.

My Results:

 Before inserting a roll of 127-size film into my Eho Baby Box camera, I tested the shutter. It clicked 9 out of 10 times, so I was confident that even though the camera would miss a frame or two, I'd have enough images from a roll of film to pick four or five to put in the blog post.

 After taking my first image, which required me to click the shutter release twice to capture a photo, the camera refused to cooperate for most of the roll. On the times the shutter didn't fire, I did notice that the shutter would partially open, but not fully, so the film was only getting a small sliver of light through a portion of the lens. This happened for the majority of the roll of film, and I managed to capture only 2-3 fairly good images from it.

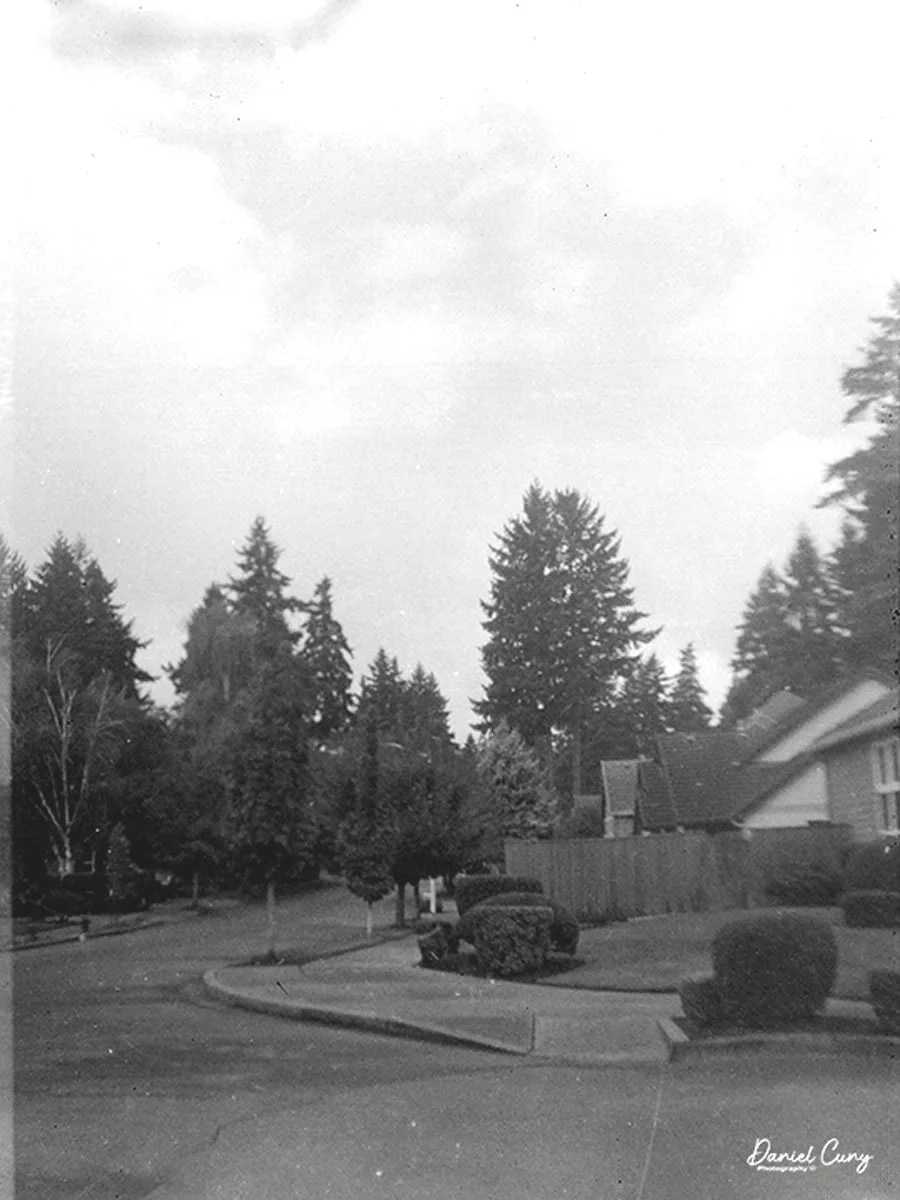
 Here are the results of the better images taken:

Conclusion:

 To say I was a bit disappointed is an understatement. I'm more upset that the camera's shutter messed up during the shoot, and when I see how nice the two good images are, it would have been great to have 12-13 more to choose from for the article.

 Overall, the good images are pretty good, so if the shutter were in good working order, the camera would have been enjoyable to carry around or put in your pocket and travel with. It's small, a pocketable camera, and produces nice images; you don't have to worry about a tear in the bellows like with other pocket cameras.

 It's certainly a great camera to have in the collection, and a good step from the subminiature style of cameras and the folding pocket cameras. I like the camera and am happy to have it, although I'm frustrated by the timing issue with the shutter not working.

 Click on the link to see my other Cameras Reviews.

 If you'd like to browse some of the cameras, lenses, and accessories I have for sale, please visit my eBay store at Cuny's Camera and Photo.

 Thank you for taking the time to read about this tiny gem of a camera. 

 Until next week, please be safe.


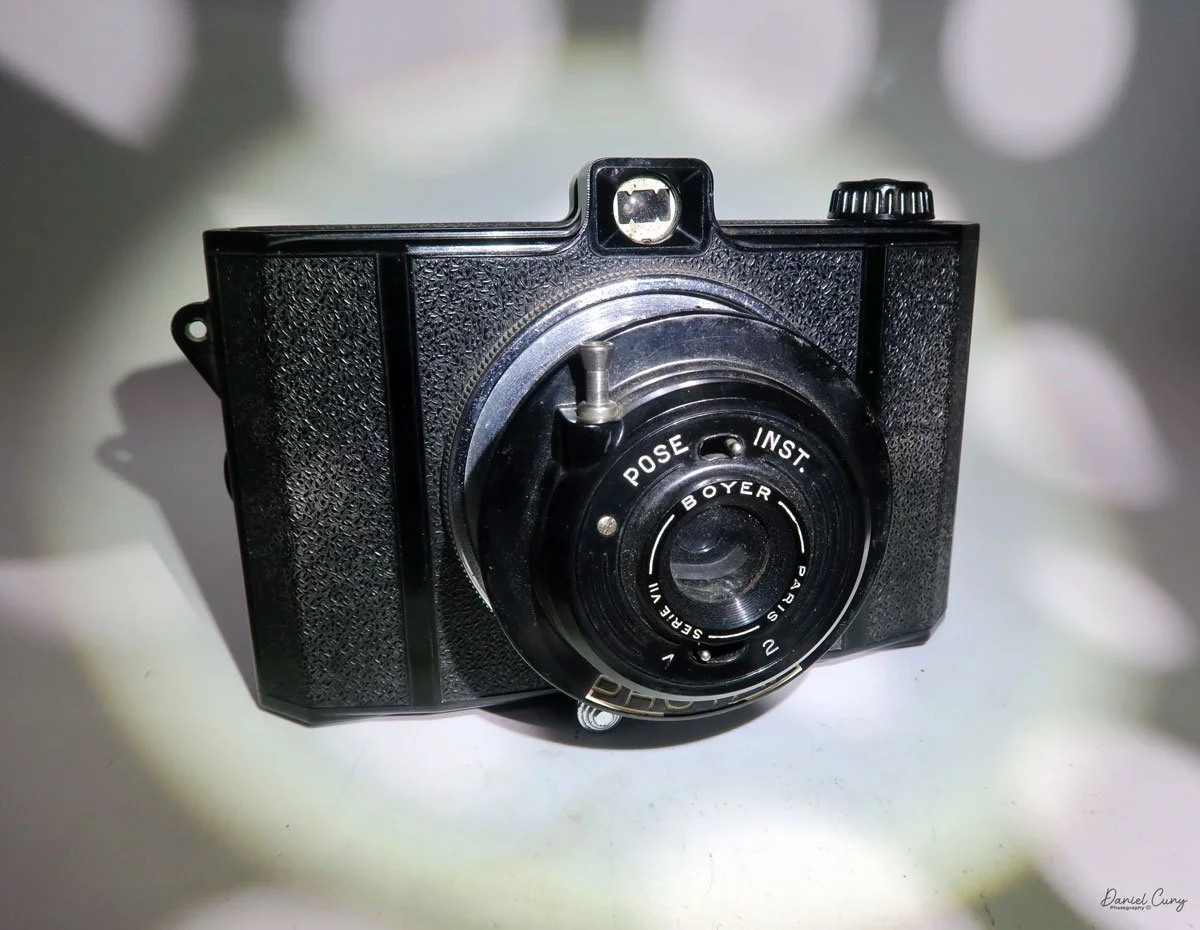
Photax 1 camera

My Photax camera

This summer, as my wife and I visited Barcelona on a day when my wife was working, I decided to go to the local flea market to look for photo items to add to my collection. Attending local flea markets is something I look forward to, especially when we visit new cities and countries. My main objective was to find a camera built in Spain, which I accomplished by purchasing the Captain camera, which I reviewed earlier this year.

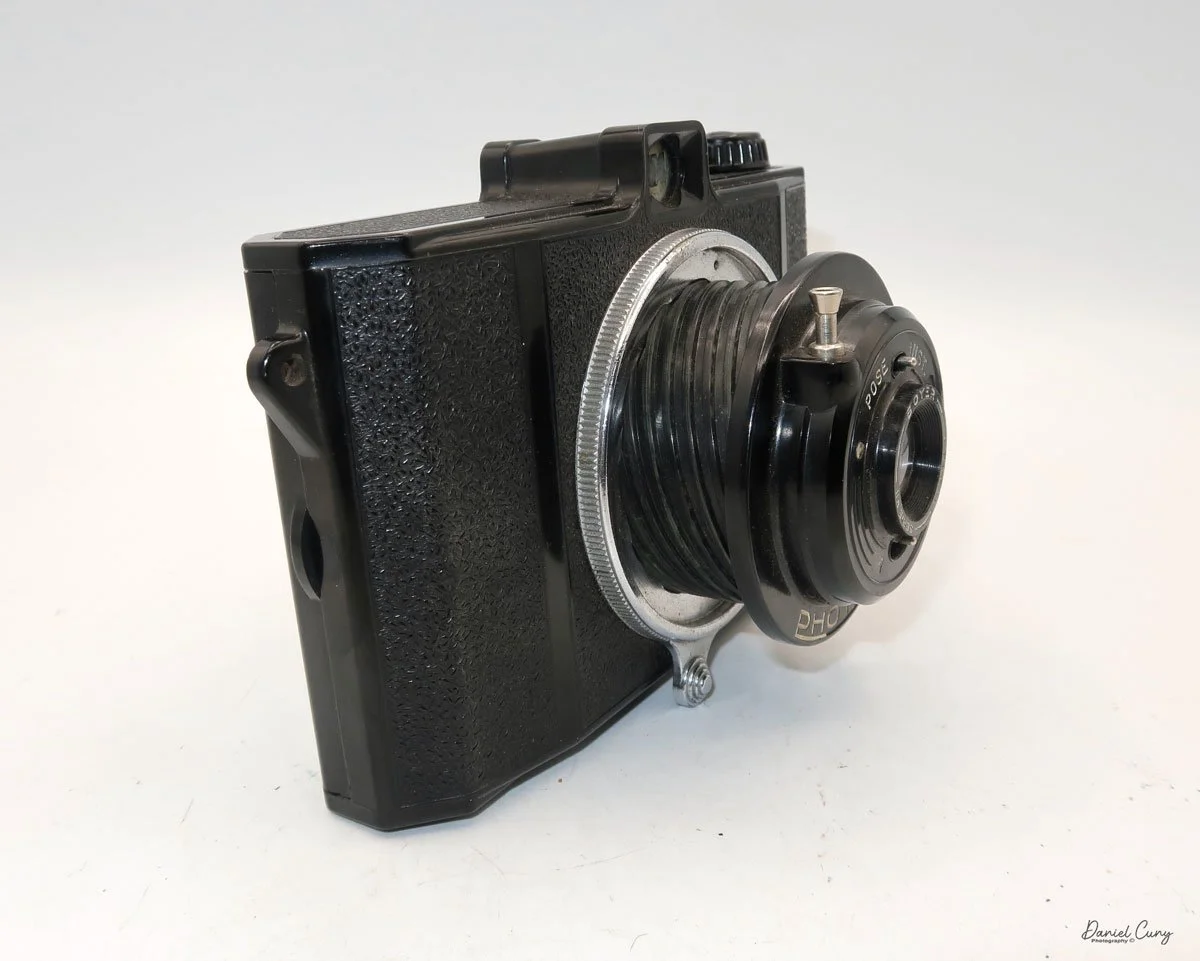
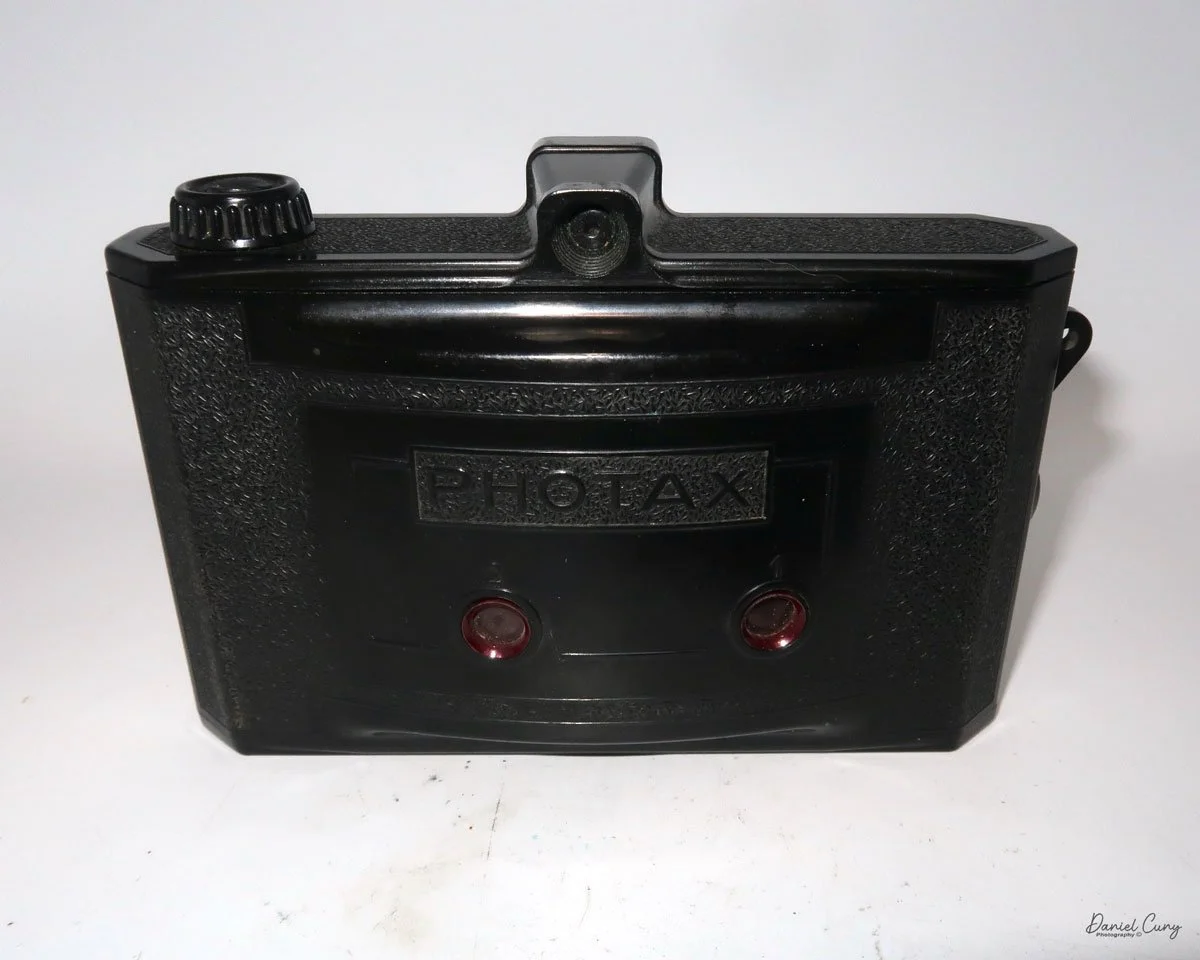
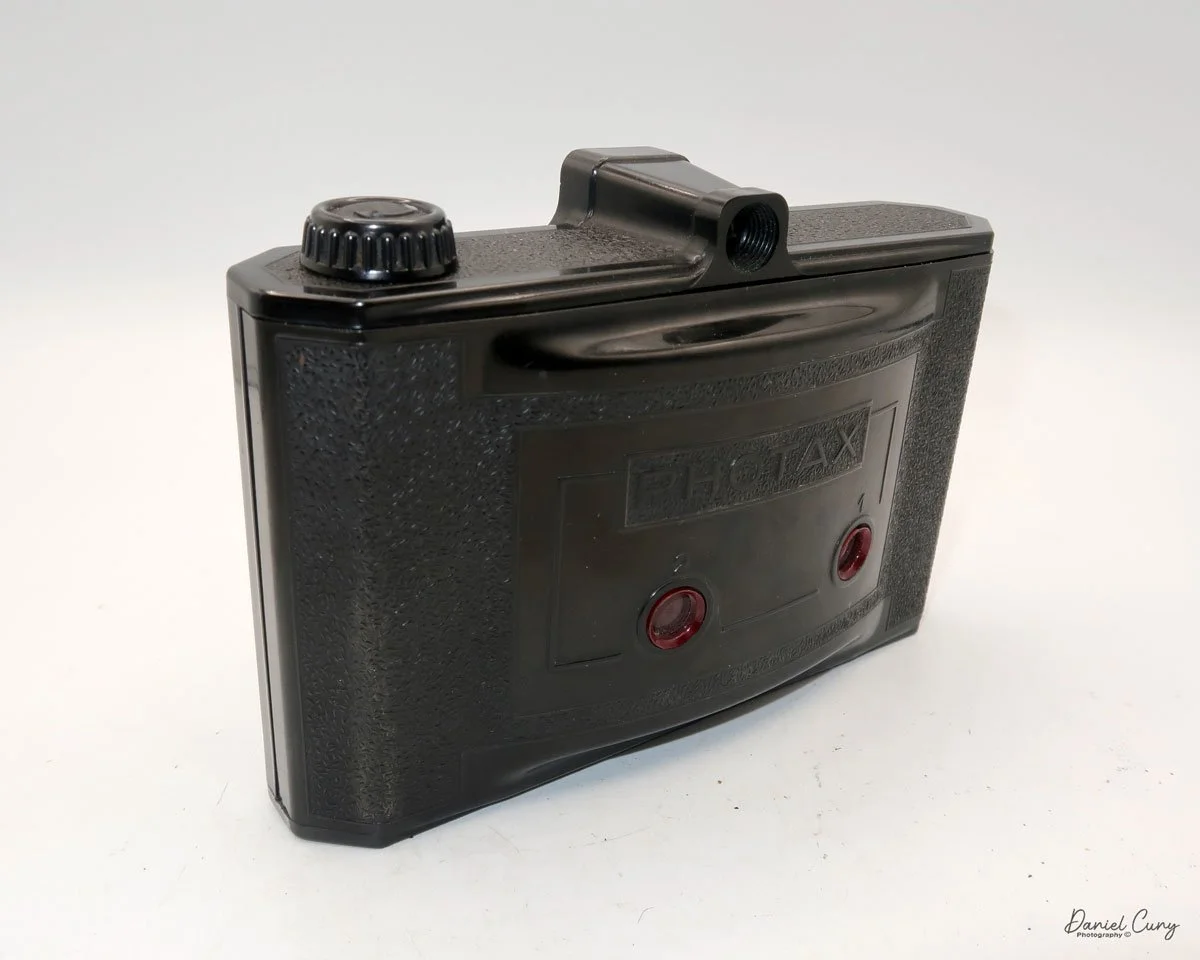
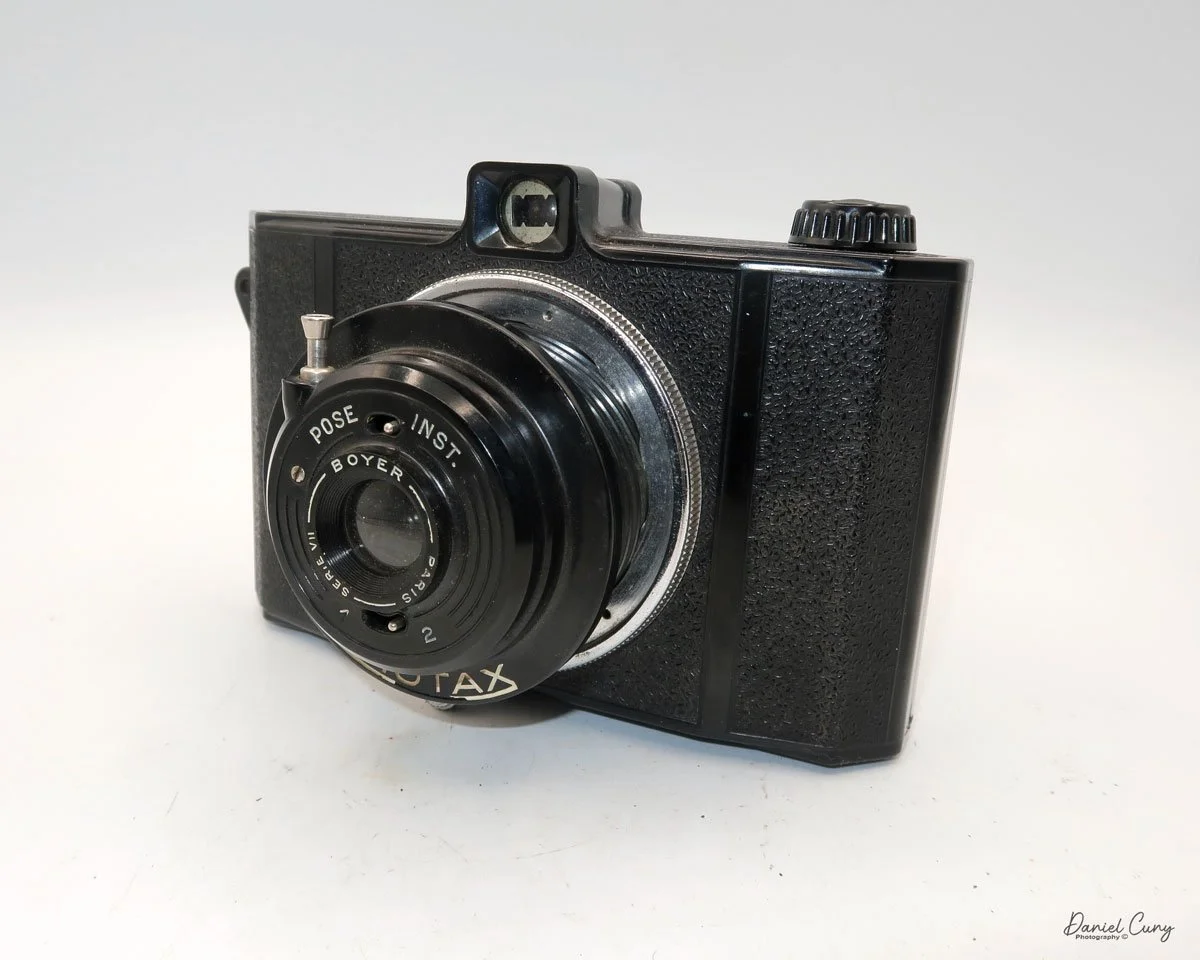
 Strolling the stalls at the flea market, I came across a very large Bakelite camera, which intrigued me. It was a Photax 1 camera made by MIOM in France. What I liked about the camera was its large size, and that came with the original fitted case. As I pulled out the camera to examine it, I noticed a very familiar twist-out style lens, and the shutter was working, which gave me confidence in my purchase. Talking to the person at Stoll about pricing for the camera, I offered a reasonably low price, which they rejected. However, they came back with a counteroffer, which I needed to consider for a while.

 As I spent more time examining different stalls and cameras. Still, my mind kept returning to the Photax 1 camera, which is the large camera with the untwisting lens. Before I left the flea market, I went back to the stall and renegotiated the price with the camera owner, coming to an agreeable price and purchasing the camera.

 This camera was one that I wanted to write about. It's an unusual-shaped camera made of Bakelite and is quite large. When I opened the back of the camera, I noticed that it was a 6 x 9 cm format, which intrigued me. Many of the cameras made by 

MIOM we're a smaller format, generally 6 x 4.5 cm.

 Let me tell you a little bit about the company.

History:

 MIOM (Manufacture d'Instruments d'Optique et de Mécanique) was a French company known for producing optical and mechanical instruments in the mid-20th century, particularly cameras. The firm operated mainly from the post-World War II era into the 1960s, a time when France was striving to rebuild its industrial base and compete in the rapidly evolving consumer goods market.

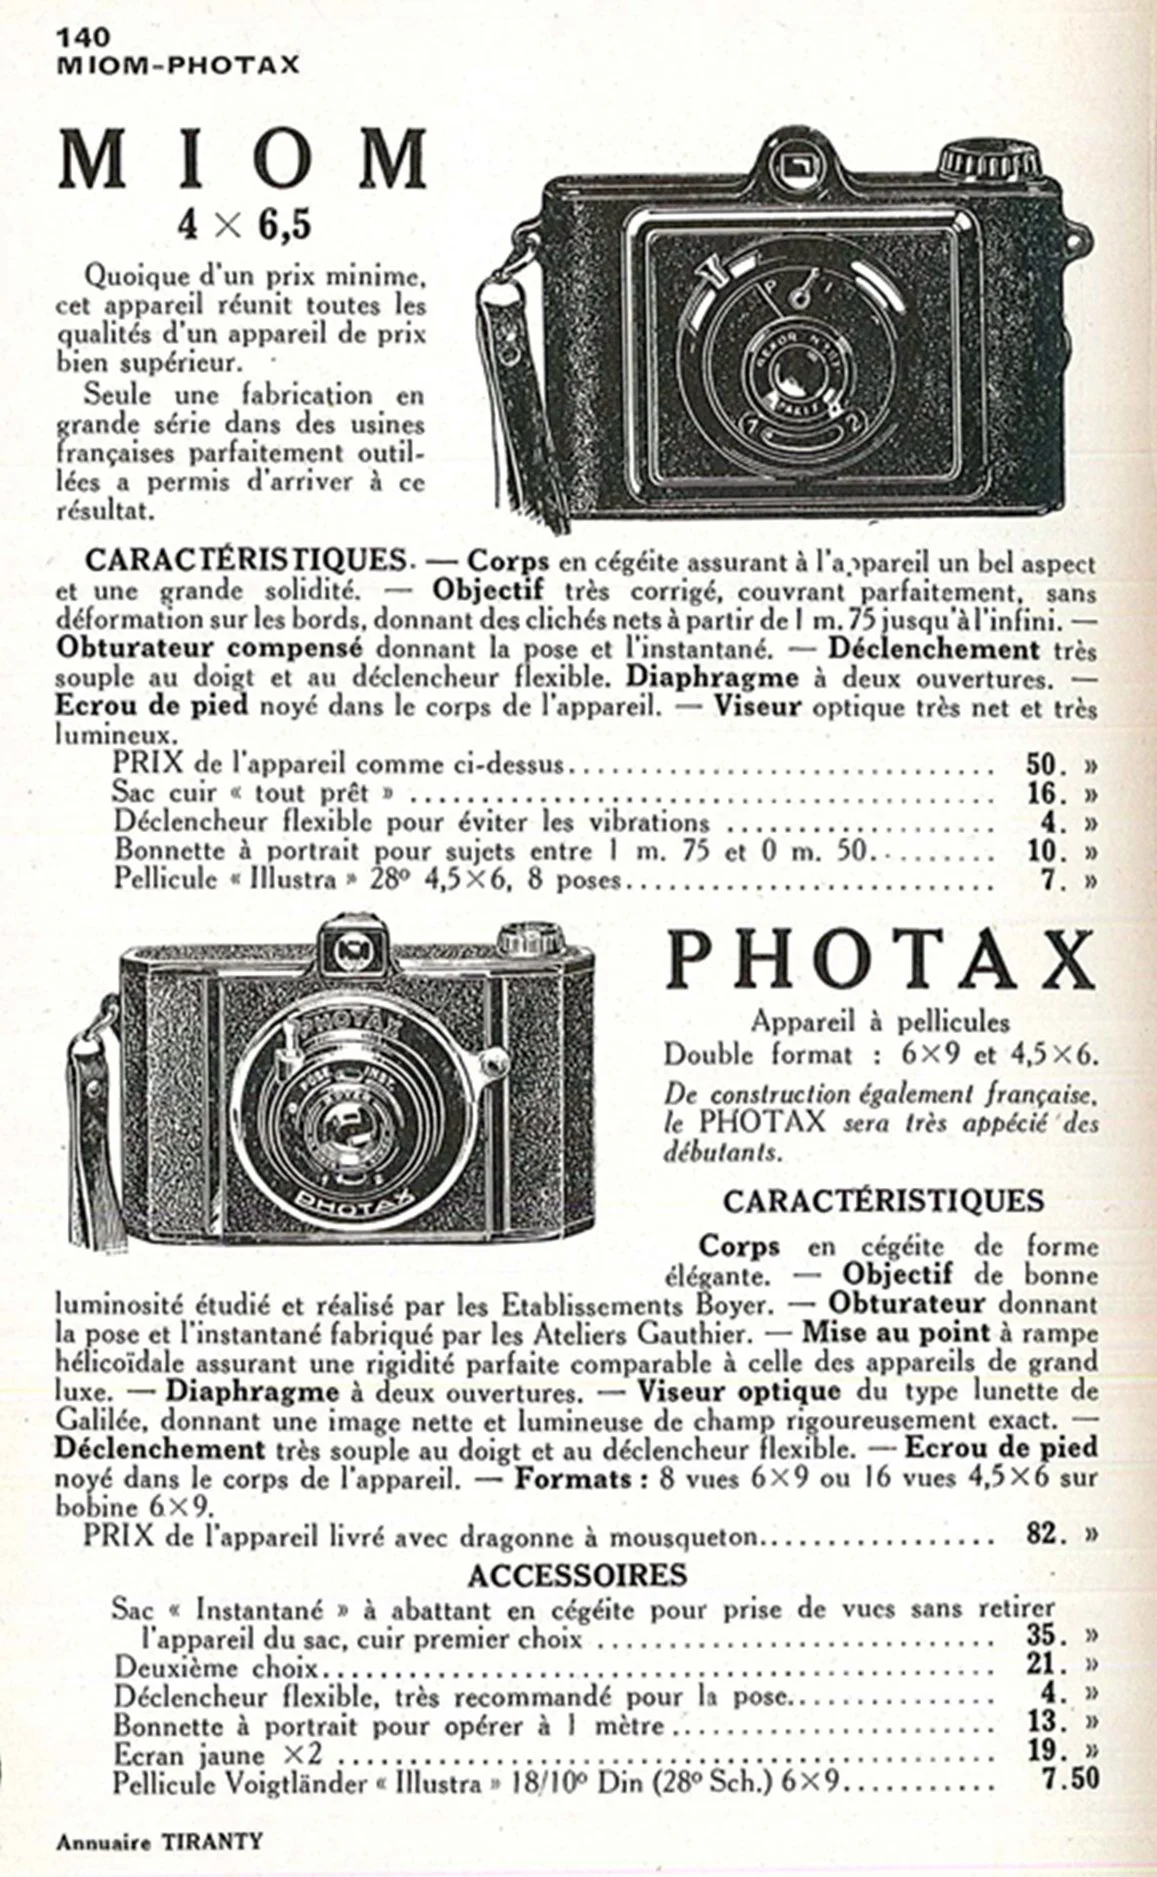
French Photax ad

 MIOM's roots were in precision engineering, and the company initially focused on optical devices before expanding into the field of photographic equipment. Its location in France allowed it to tap into a tradition of fine optical craftsmanship, drawing on expertise that had developed in Paris and other industrial centers since the 19th century.

 In the camera field, MIOM was best known for manufacturing compact and affordable models aimed at the amateur photography market. Among their most recognizable products was the MIOM Photax series—a line of simple, durable cameras using roll film. The Photax models often featured Bakelite bodies, a lightweight and inexpensive molded plastic popular in mid-century camera production. These cameras were designed for ease of use, appealing to the growing middle class and to families seeking to document their lives without investing in complex photographic gear.

 The Photax range evolved over the years, with various iterations accommodating different film formats, primarily 6×9 cm images on 120 roll film, and later 4.5×6 cm formats. Some models incorporated basic focusing and exposure controls, while others remained strictly fixed-focus, point-and-shoot devices. Though not technically advanced compared to contemporary offerings from Germany or Japan, MIOM's cameras were reliable, affordable, and accessible, helping to democratize photography in France.

 MIOM also ventured into specialized cameras, including stereo models, reflecting the brief postwar enthusiasm for 3D photography. Their designs maintained the company's hallmark of straightforward construction and modest pricing.

By the late 1960s, increasing competition from Japanese manufacturers, whose products offered superior optics and more advanced features at competitive prices, had eroded MIOM's market position. The brand gradually faded, and production ceased as the company either closed or shifted away from photographic equipment.

 Today, MIOM's cameras—especially the early Bakelite Photax models—are collected for their retro aesthetic and as examples of France's postwar consumer design. While they may never have rivaled the technical prowess of major brands, MIOM's work remains an essential chapter in the history of accessible, everyday photography.

 Below is a timeline outlining the evolution of MIOM's Photax camera series.

 1937 – Photax I- MIOM launches its photographic division with several models, including the original Photax (also branded as Camera 77, Loisirs), all of which use 120 film for 6×9 cm images. The Photax I is recognizable by its centrally positioned shutter button and Guillotine shutter, which offers two speeds. 

1938 – Photax II (and Blindé variant)- Introduced in 1938, the Photax II adopts the Boyer Serie VIII meniscus lens and maintains the simple two-speed shutter design. A "blindé" version appears—with a protective Bakelite lens cover that also shields the shutter release. 

1947 – Photax III- Following World War II, MIOM debuts the Photax III, featuring a threaded shutter release and leveraging the same Boyer Serie VIII lens. It introduces additional shutter settings (1/25 sec, 1/100 sec, and T) and continues to use the 620 film format. 

1951 – Photax IV (and IV F)- The Photax IV arrives with a Boyer Rexar meniscus lens and identical shutter options as the III, with enhanced flash synchronization. The IV F variant includes flash sync capabilities via a RIM shutter. 

1955 – Photax V- A stylish redesign marks the launch of Photax V in 1955. It features a modernized Bakelite aesthetic, bi-format capability (6×9 and 6×6 cm), and upgrades to an Angénieux Heanar Type V lens with full flash sync via RIM shutter 

1960–1962 – Photax VI -The final model in the Photax lineage, produced between 1960 and 1962, transitions from Bakelite to molded plastic, featuring a sleek, streamlined design. It's a square-format 6×6 medium-format camera that utilizes an Angénieux Heanar Type VI lens and RIM shutter with flash synchronization.


My Camera:

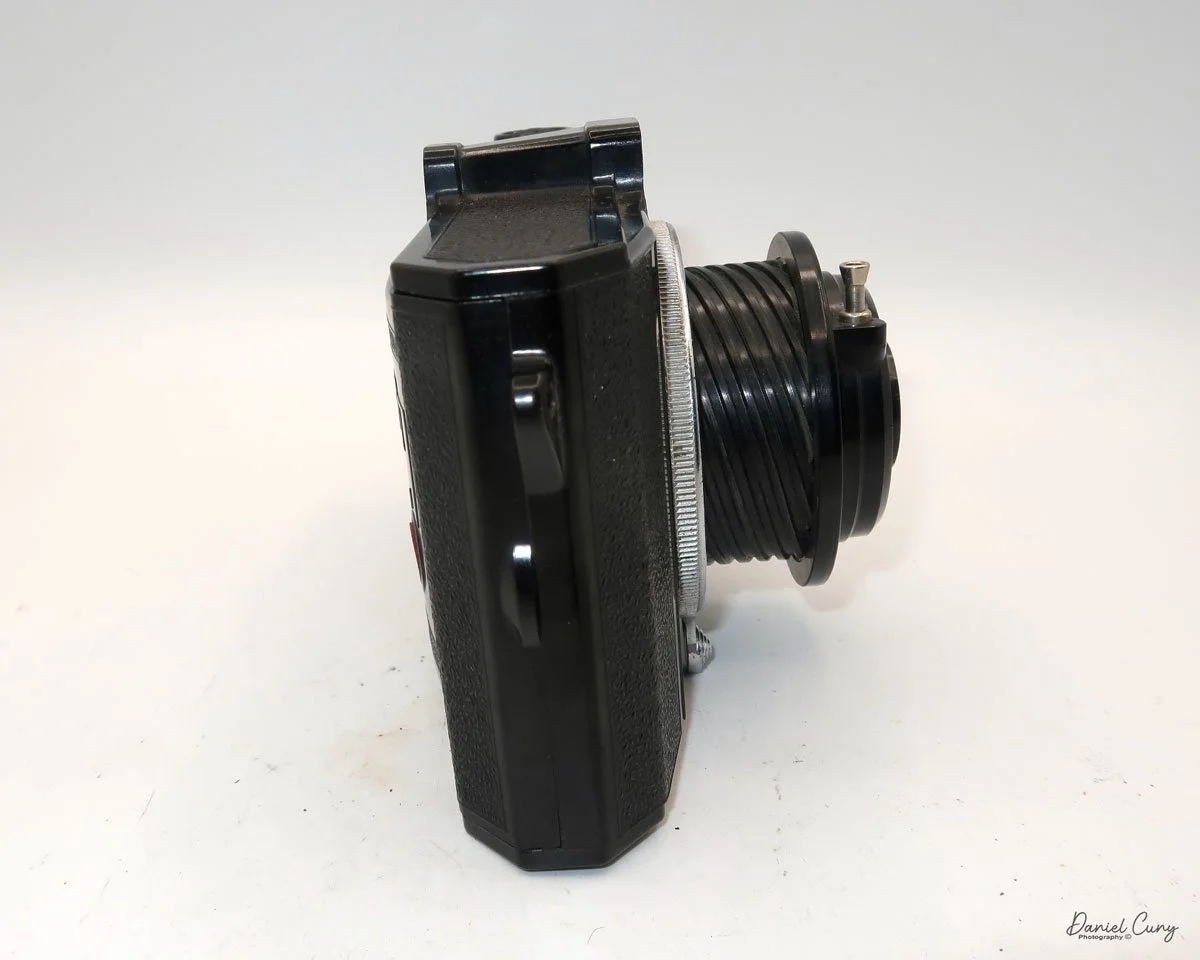
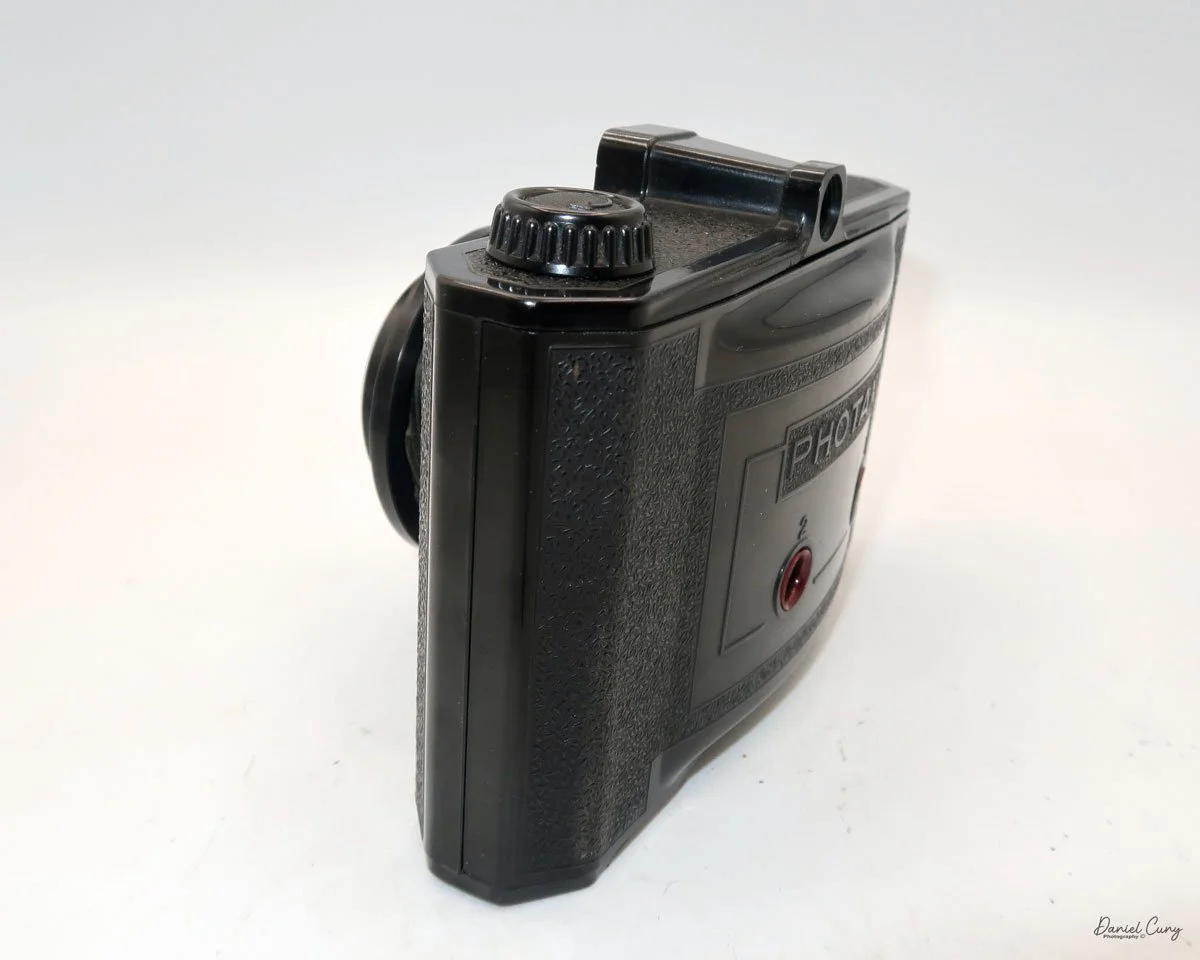
 My camera is 6 1/2 inches wide by 4 1/2 inches tall by 4 inches deep when the lens is unscrewed. In its closed position, the lens is 3 1/4 inches long. Without the case, my camera weighs 1 pound, 2.7 ounces.  The lens on the camera is a Boyer, Series VII lens.

The Photax 1 was produced for approximately one to two years, from 1939 to 1940. The Photax 1 camera uses 120 film, a departure from MIOM's earlier cameras, which used 127 film. As I mentioned earlier, this is a 6 x 9 cm format camera. The Photax 1 was sold with a film mask that allowed the photographer to shoot in the 6 x 4.5 cm format. Unfortunately, when I purchased this camera, the mask was missing, so my camera is only compatible with the 6 x 9 format.

 To extend the lines, there is a chrome ring around the lens with a knob at its top. Twist the ring clockwise, and the lens, which is on a helical screw, unscrews and moves into the taking position. The camera's controls are fundamental. There are only two shutter settings. One is "INST", which is for normal snapshots, and "POSE", which is for time exposures. These are changed by a little switch between the two settings. To control the aperture. There is a similar switch beneath the lens. One setting is the larger aperture, which is number one, and the second setting is for a smaller aperture.

There is no lock on the back of the camera to secure the back to the front of the camera body. To open the camera, on the right side, is a little foam plate that you pull away from the camera body, and the back of the camera comes off. To load the camera, follow a process similar to loading a 120 format or 120 film-style camera. The first thing you would do is to take the take-up spool from the right side of the camera and place it on the left side, under the film, and under the film advance knob. Place a fresh roll of film on the right-hand side and bring the leader over the shutter area. Insert the leader into the slot of the take-up spool and begin winding, ensuring the film advances smoothly. You turn the advance knob until you see "start" on the film's paper backing. At this point, put the back on the camera by just pressing it onto the camera‘s body.

At this point, wind the film advance knob until you see the number 1 in the first window, which is designated for the 6x9cm format. For the 6 x 4.5 format, you would wind until you see the number one in the number one window. After you take the picture, wind until you see the number one in the number two window. You repeat the steps through number eight, which would be the end of the roll of film. For 6 x 9 cm format images, you get eight images per roll. For 6 x 4.5 cm format, you get 16 pictures per roll of film. 

Fitted case for Photax 1 camera. Note the large plastic front cover.

 IMPORTANT: Be sure to turn the chrome ring so that your lenses are in the taking position before you start taking photographs. Failure to do this will result in your pictures being incredibly out of focus. On other MIOM cameras, if the lens is in the transport position, the shutter will not work. Unfortunately, with this camera, the shutter works when the lens is in the retracted or transporting position.

 The viewfinder on top of the camera is tiny, making it difficult to view your subject when framing your photograph. To take your photograph, the shutter release is located in the upper right-hand corner of the lens. Press the shutter button to take your picture. My camera has a cable release socket, and on the bottom of the camera, there is a tripod socket as well.

My Results:

 I cleaned the lens on the camera, loaded a fresh roll of 120 film, and took a walk around the neighborhood to see how this camera would perform.

 For 100% transparency. I broke my arm two days before I took these photographs. It was challenging to hold the camera while taking the photos, so some of the blur or out-of-focus images may have been caused by camera movement.

 Here are the results.

Conclusion:

 The images produced by the camera were disappointing. I'm not sure if the blur in the

photo was caused by my lack of holding the camera still. According to the information on the back of the camera, the minimum focus distance is approximately 1 m. Many of the photographs I took, I tried to be more than 1 m away from the subject.

 Due to the sunny situation, having only one shutter speed to work with, and using the smallest aperture, the photographs are unimpressive. At this point, I'm not sure I'll use this camera again due to the quality of the images, which I found disappointing, especially considering it's a 6x9 format camera.

 Thank you for taking the time to read about this interesting Camera from France, built in the late 1930s. 

 If you're interested in seeing other camera reviews, click the link.

 I also have a store on eBay where I sell some of the cameras reviewed, along with a host of other photo items, Cuny's Camera & Photo.

 Until next time, please be safe.

Welta Perfekta

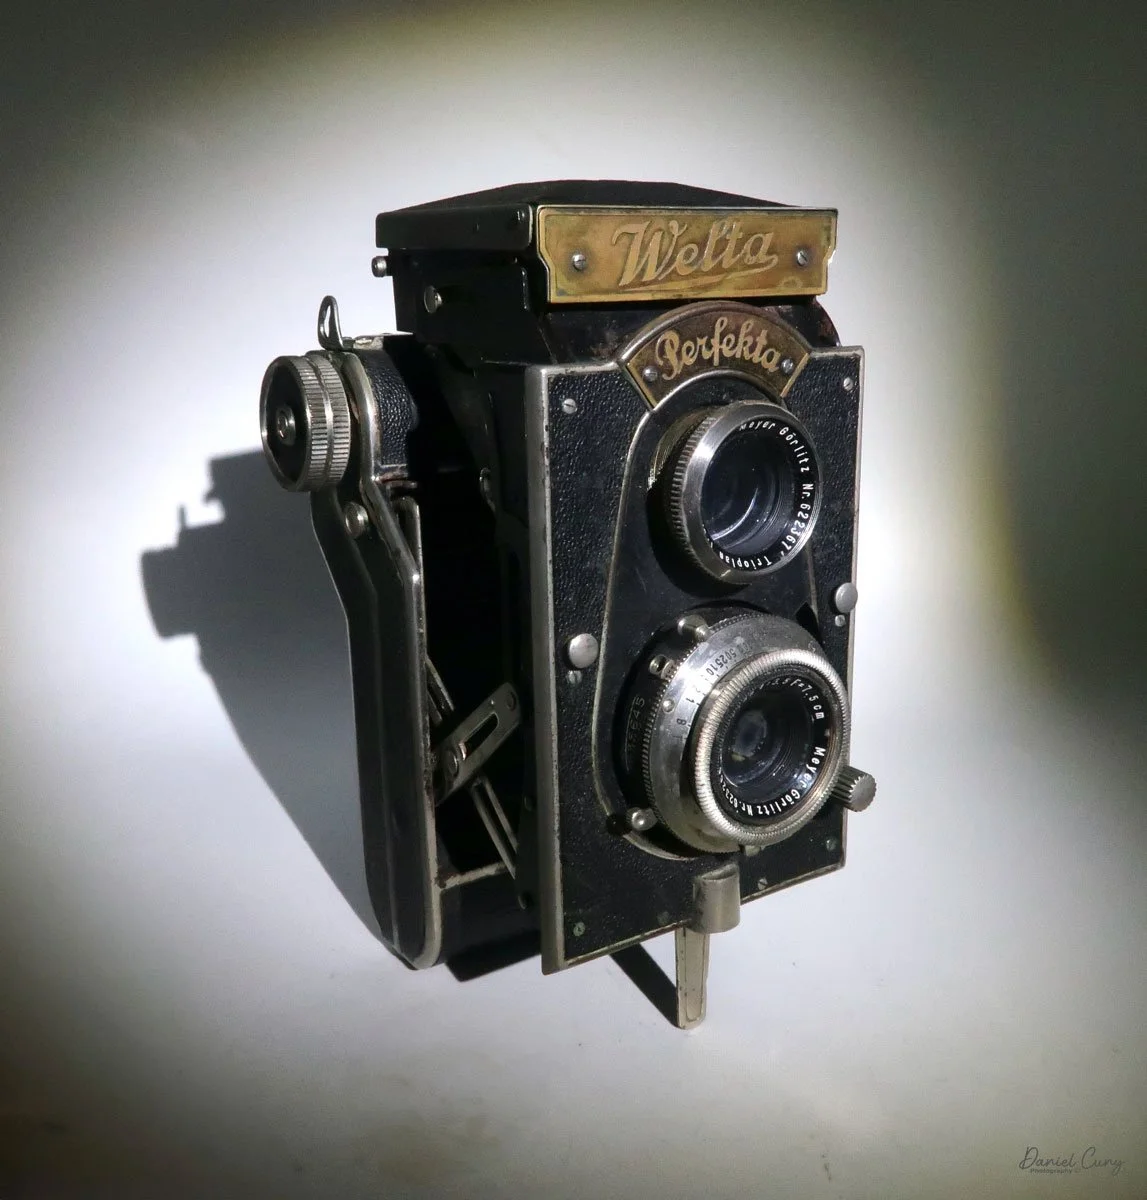
My Welta Perfekta camera

As I've mentioned in the past, I'm always drawn to the colorful, or odd and unusual cameras. As a camera collector for over 50 years, and having spent countless hours poring over many of McKeown's price guides to cameras, there are cameras that I'm always intrigued by and would love to own. Cameras like an original daguerreotype camera, the Rectaflex Rotor, a three-lens camera, or a beautiful Compass camera made by Swiss watchmakers Le Coultre et Cie for Compass Cameras Ltd., London, England. All of these cameras are out of my league in terms of pricing, unless I win the lottery and have a few hundred dollars burning a hole in my pocket.

 To me, the most enjoyable aspect of collecting cameras is the hunt to find a rare or somewhat rare camera, lens, or other photographic item. Every once in a while in this collecting game, you come across a hidden bargain.  It could be something at the bottom of a box, or just that the person selling the item isn't fully aware of the value of items, and (to me), that is a highly satisfying feeling.

 Having had that same feeling about a year ago when I was at a garage sale in one of the neighboring towns, and I saw a Welta Perfekta camera. As I picked up the camera, it appeared to be in good condition. The shutter worked, the viewfinder seemed clean for being nearly 100 years old, and all the leather was intact. It was a nice camera, and one I'd love to have in my collection. When I asked about the price for the camera, the person selling it said it was her grandfather's. 

Odd shaped camera body

 Letting the seller know that the camera was in good condition and nice shape. I provided the seller with some information on the camera's age and a brief overview of the company. I let them know that I had collected the camera, written a weekly blog about it, and would love to have it in my collection. The seller said that, since I was a collector, it was important to them that the camera go to a good home, and they offered me the price of $50.00. I was happy to pay that price for such a nice example, and at that point, we were both pleased that the camera had a new home.

 I was familiar with the camera because I had written about the Zeca-Flex camera a while ago, and its shape had intrigued me. The Perfekta has a very similar shape to the Zeca-Flex as they are both folding Twin Lens cameras. These are twin-lens cameras with a large viewfinder that opens and closes, comparable to other twin-lens reflex cameras. The body of the camera folds into the film area, making the camera much smaller and more portable. 

History:

Since I just wrote about the history of Welta in last week's review of their Penti camera, I thought I would spend this review focusing on the history of the Reflekta camera, along with its older brother, the Superflekta camera.

 Both the Superflekta and Reflekta cameras are folding twin-lens cameras. As I previously mentioned, they are considered pocket cameras, which means they are smaller cameras intended to be easily transported in your coat pocket. They are a mix of pocket cameras introduced by Kodak in 1912 with their Vest Pocket cameras, and a Twin Lens Reflex camera introduced by Rolleiflex in 1929.

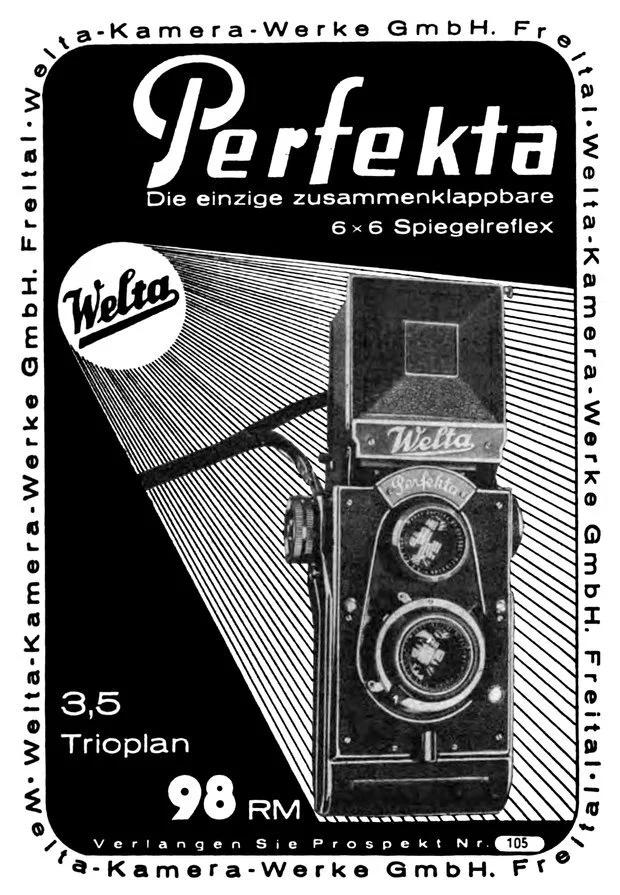
 The Perfekta camera was introduced in 1934. It's a medium-format camera that takes 6x6cm images on 120mm film. It features a large viewfinder that opens like the Rolleiflex and other Twin Lens Reflex cameras of its time. The body of the camera pops away from the film chamber, utilizing a bellows system that separates the lens from the film chamber, and forms an oddly shaped camera. There is a tripod socket and arm on the bottom of the lens area that allows the camera to stand upright on a flat surface, such as a table, if needed.

 The Perfekta could be purchased with one of three different lenses they sold. You had your choice of either a Meyer Trioplan 75mm f/3.5, Schneider Xenar, or Carl Zeiss Tessar 75mm f/3.8 lenses.

 The Superflekta was the first of this style of camera introduced by Welta in 1932. It's a larger camera that takes 6x9cm images on 120 film. The most intriguing feature of the Superflekta camera is that the film chamber rotates from a vertical position to a horizontal one for landscape-style images. This is very similar to how the Cornu Ontoflex operates. The photographer doesn't rotate the camera; instead, they rotate the film to achieve a horizontal image. 

 Rotating the film's back makes sense, as the camera features a ground-glass viewfinder to focus on the image. If you rotated the whole camera, the viewfinder would be on the side, which would affect composition. Turning the film chamber is a remarkable achievement in that camera. I can see where the Perfekta came into play as it's a bit smaller than the Superfekta. With the square format, Welta could cut down the size of the camera and make it even more "pocketable".

 The difference between the Zeca-Flex and both the Superfekta and Perfekta cameras is that the Zeca-Flex is more linear in design, and doesn't have the almost "S" shape that the Welta cameras incorporate. Only the bottom portion of the Zeca-Flex pops out to take the photo, then can be slid back into the camera's body for transport. 

 While Welta wasn't the first to introduce this style of camera, that honor goes to the Pilot 34 or Pilot Reflex camera made by Kamera-Werkstätten Guthe & Thorsch, another great camera manufacturer in Dresden. This camera was introduced in 1931 and was also a twin-lens camera with a bellows system.

 Both the Welta Superflekta and Perfekta cameras were only produced for a few years due to the complexity of their manufacturing. Another factor that contributed to the downfall of the Superfekta and Perfekta was the larger size of the viewfinder, which prevented it from folding into the camera body, thereby making the camera less compact.

My Camera:

My Welta Perfekta camera is 6.5" tall, by 4" wide including the film advance knob and frame counter, by 3.5" deep. These measurements are with the camera completely closed and in it's most compact state. When the camera is fully open, the camera measures 8.5" tall by 4" wide by  5" deep, and the camera weighs 2 lbs—2.2 oz. My camera has the Meyer Trioplan 7.5cm F/3.5 lens.

 To open the camera and pop the lens area from the film area., There is a round button on the right side of the camera, under the film advance knob, that you press. Once pressed, the body pops away from the film area, exposing the camera's bellows, along with the angled mirror area of the viewfinder system.

On the back, to the right of the viewfinder, is a small button that you slide to the left to open the light chimney of the viewfinder. The light chimney should pop up, exposing the ground glass for focusing. On the inside of the front wall of the light chimney is a magnifying glass that helps with focusing, a feature common in twin lens reflex cameras. On the left side of the chimney is a knurled knob that flips up the magnifying glass when turned, and flips down when turned in the opposite direction. 

Closing the light chimney, fold the sides in first, then the back, and finally, fold the chimney down into the camera's body. It will then lock into place.

 To focus the camera, a knob located just to the left of the lens/shutter assembly slides up and down, allowing you to adjust the focus on your subject. The lens moves in and out on a helicoid from the camera's faceplate. There is no focus distance written on the side of the camera, so you can't set the distance and shoot. All the focusing is done through the viewfinder, which I find somewhat dark and difficult to view on darker days.

 To close the body of the camera for transport, press the two buttons located on either side of the front plate. Once pressed, the body will push into the film chamber area and click into place. Just be sure to flip up the leg under the camera; otherwise, the leg keeps the camera from fully closing. I learned that when I tried to close the camera, I noticed the lever sticking out, ops!!

Taking the photo is pretty basic. The shutter speeds on my camera go from 1/300 to 1 sec. along with "B" and "T" for timed exposures and are set via a ring around the lens. The aperture ranges from F/3.5 to F/22 and is set by a slider arm located under the lens. The shutter cocking lever is located at the top of the lens, and the shutter release is positioned on the right side of the lens.

Loading the film is similar to that of many other medium-format cameras. On the back of the film door is a button that you slide to the left and pull down; the film's back will then open. I first noticed that where you put the fresh roll of film, along with the take-up spool, are hinged guards that both of these items fit into. The winding knob pulls out to make it easier to insert the empty spool into the chamber. Then, flip the small guard down to keep the spool in place. Similar to where you insert the fresh roll of film, once the film is in place, flip the guard down to keep it in position.

While the camera features a covered red window on the back, it also has a unique frame counter. On the inside of the film's door is a slotted rod that rolls on the film's paper backing, and it is equipped with a gearing system attached to a round frame counter, which tells the photographer which frame they are on. 

Here's how it works. Once you load the film, use the red window to access frame number one. On the inside of the frame counter, you slide the knurled wheel from A (Aus=Off) to E (Ein=On). Doing this sets the frame counter to number one, and after you take a photo, the ribbed wheel advances the frame counter every time you advance the film from one frame to the next.


Results:

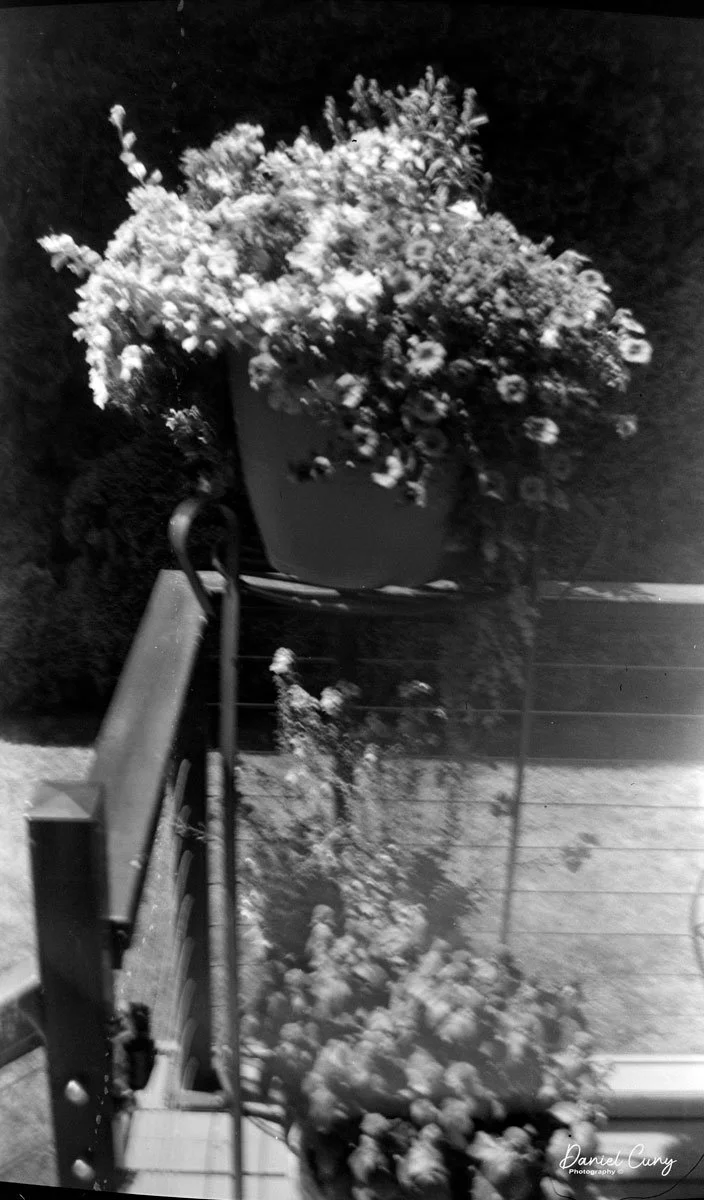
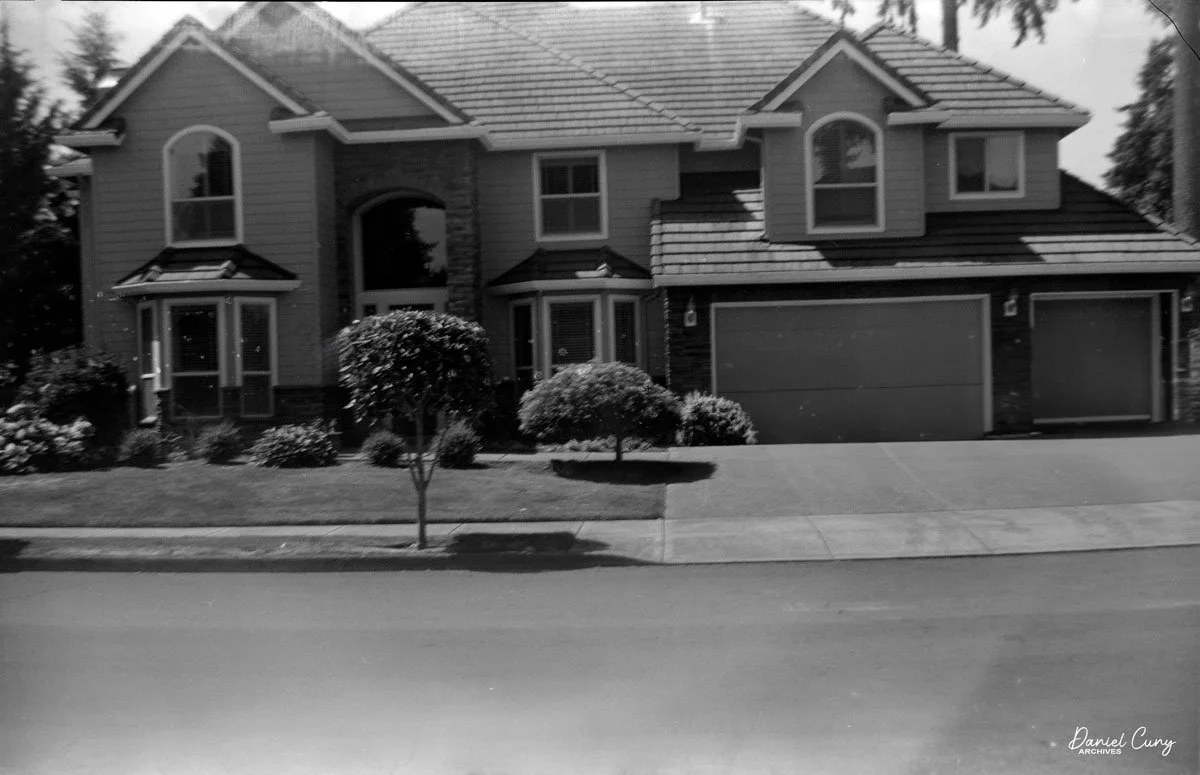
I loaded the camera with an older roll of T-Max 100, the fastest 120 film I had available, and went for a walk with my sister, Laura, and her dog, Sally, taking photos along the way.

 Unfortunately, the day was overcast, and I had forgotten to bring my light meter with me, so I was forced to use a light meter app on my phone, which I dislike doing, as it always seems to get it wrong. However, it didn't fail me again, and the negatives I processed were underexposed.

 Here are some of the better ones from the walk.

Conclusion:

I must say that this camera was delightful to shoot with, and for the price paid, it was well worth every penny. The only drawback would be the darker viewfinder and difficulty I had focusing on the subject.

 I liked the size of the camera; I enjoyed how compact the camera is to use. The shutter and aperture worked well, and the odd shape of the camera was certainly a conversation piece when I talked to some of the neighbors I met along the walk to take photos. The camera is less bulky to transport and carry around than a traditional twin-lens camera, and the optics are excellent—an enjoyable camera that I plan on using regularly.

 Thank you for taking a few minutes from your day to read about this unusual, yet jewel-like, camera. 

 Click on the link for some of the other cameras reviewed.

 I also run an online eBay store, Cuny's Camera and Photo. If you're interested in older cameras and other camera oddities, I have for sale.

 Until next week, please be safe.

Capta Camera

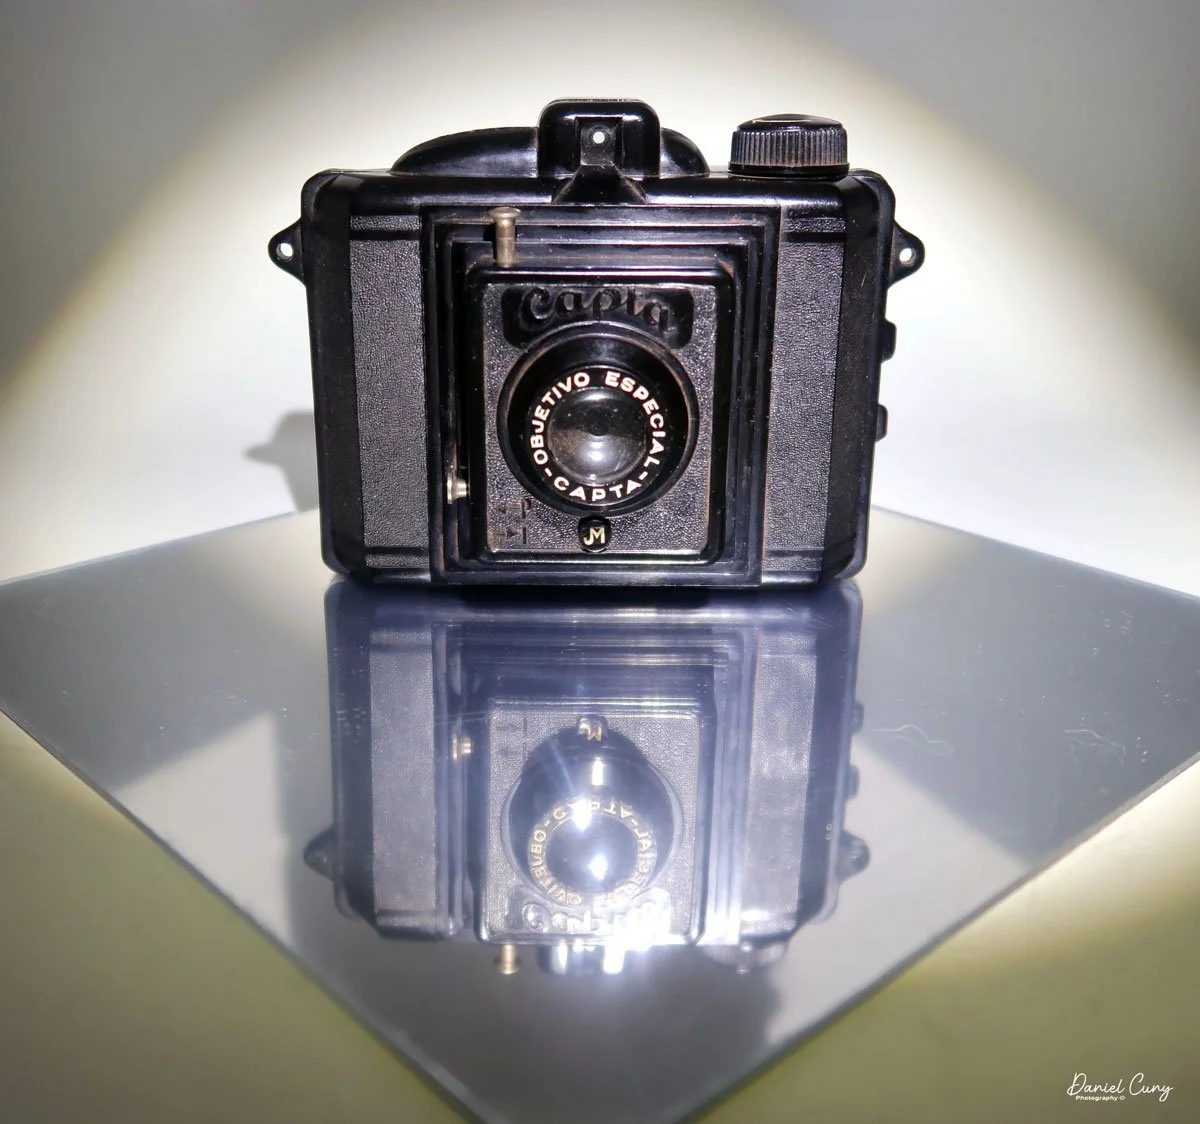
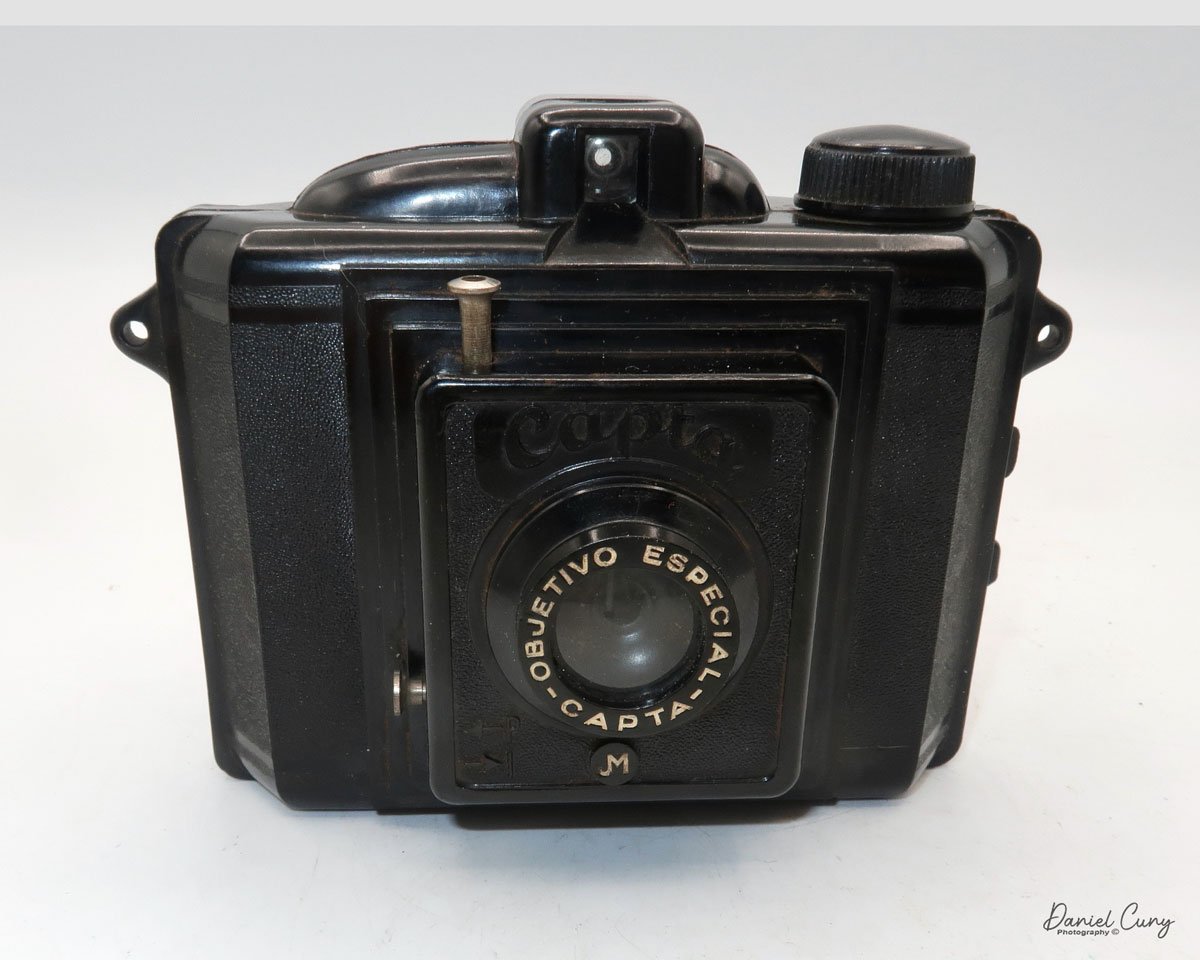
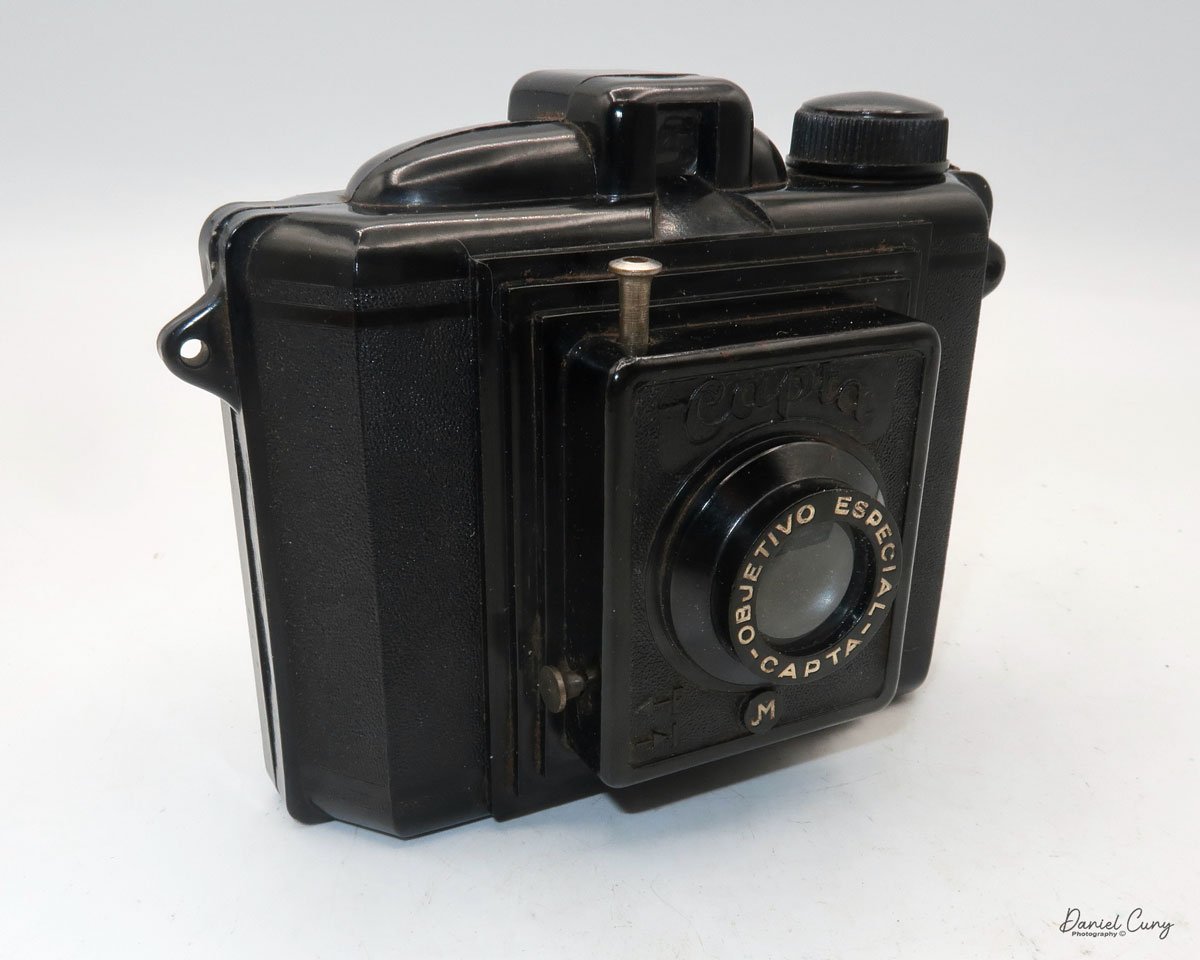
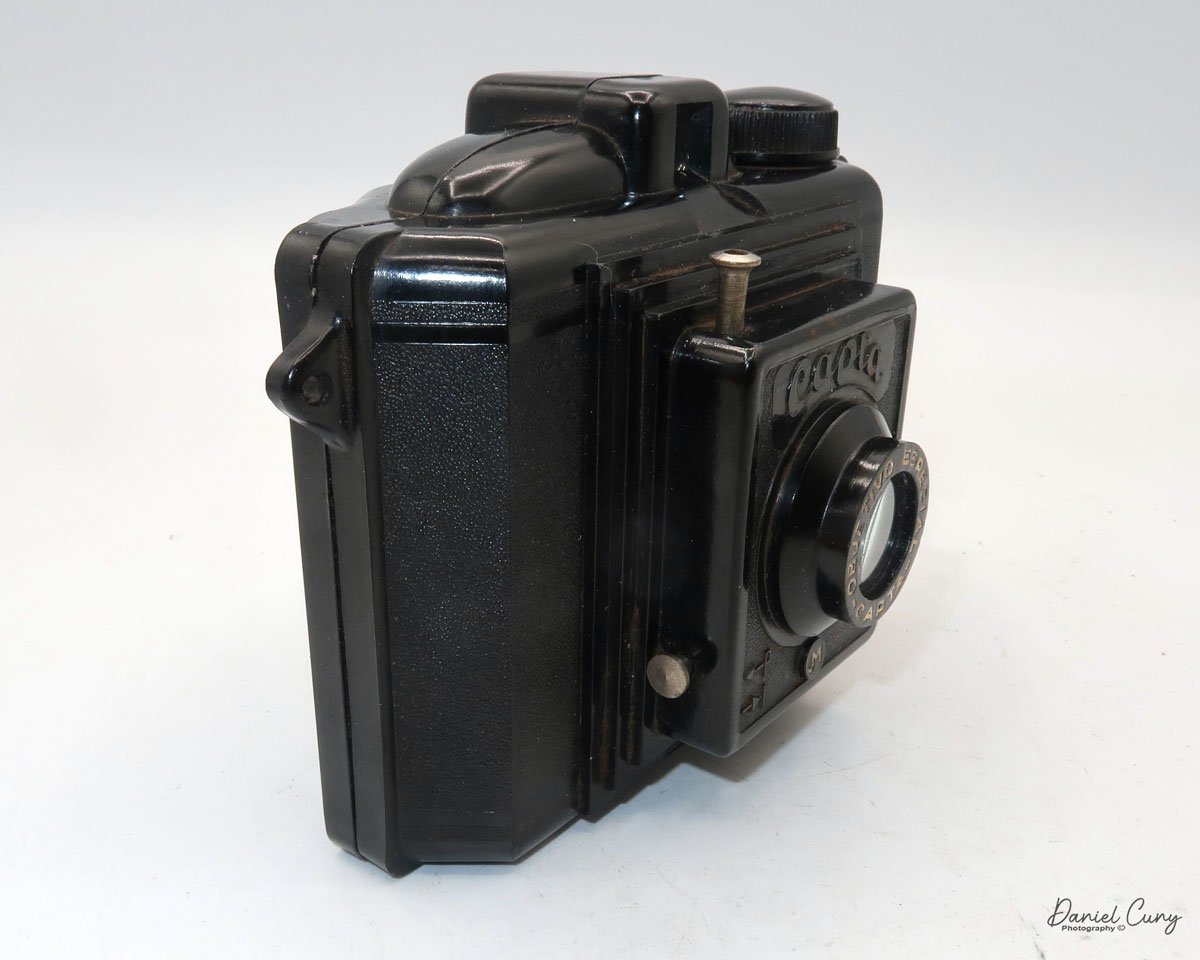
My Capta camera

When visiting another country, I research to find out if there are cameras made in that country that I'm unaware of. If I'm fortunate enough to find one, I can add it to my collection. We were fortunate enough to plan a trip to Barcelona last month, as my wife had a conference to attend and participate in, so I planned on tagging along on the journey to Spain.

 I had a few objectives for this trip, as I'd have time on my own. These objectives were to use my new Fujifilm camera, shoot black and white with my Widelux F7 camera, and attend local flea markets to find Spanish cameras that I wasn't aware of. All three objectives were accomplished. 

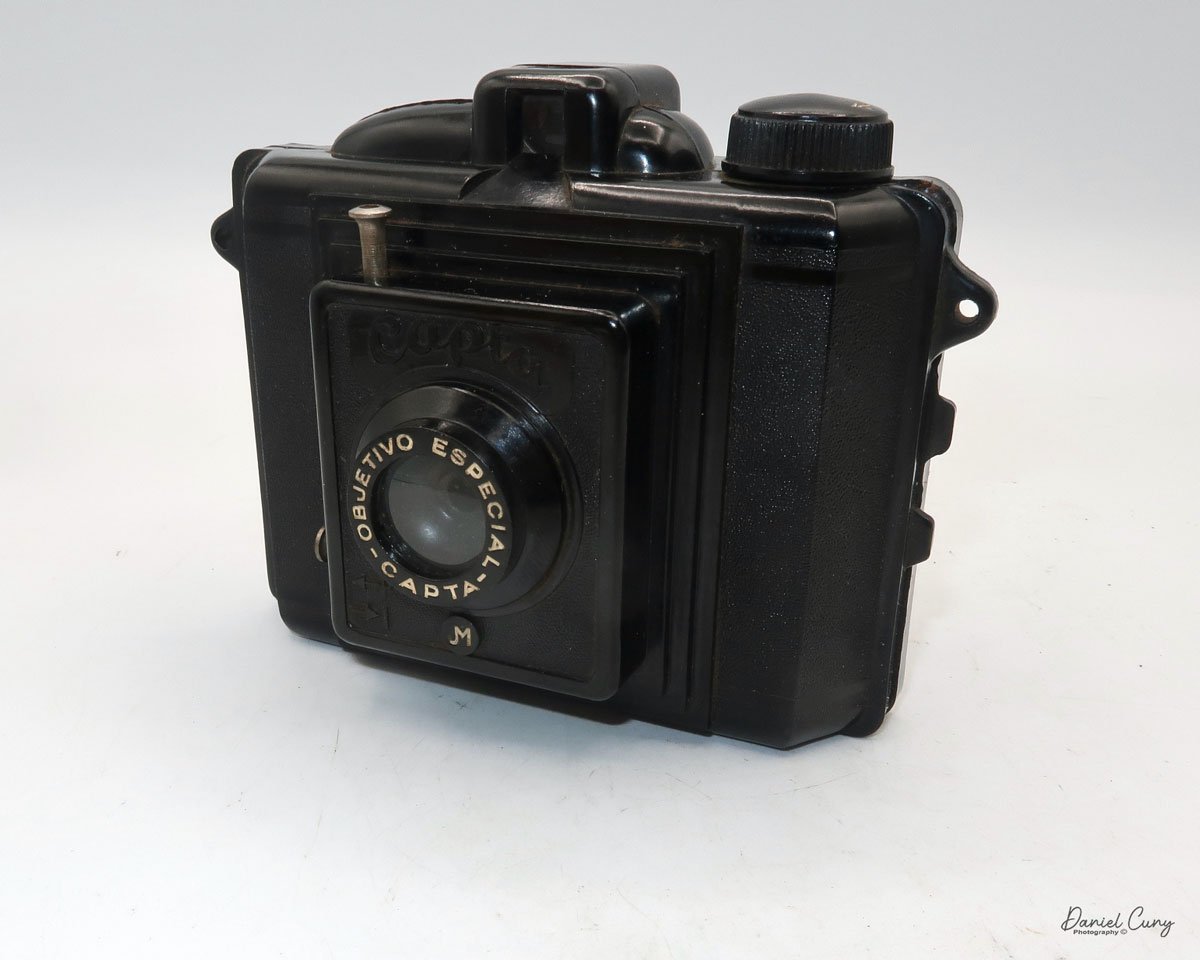
 At the local flea market in Barcelona, I stumbled upon a hidden gem-a relatively unknown Spanish Bakelite camera, a Capta camera in a tattered case. The thrill of this discovery was palpable. The camera was in good working condition, took 120 film, and had a 6x4.5 format. I didn't see any chips in the Bakelite. For a decent price, I eagerly made the purchase, already envisioning the stories I would share about this Spanish wonder.
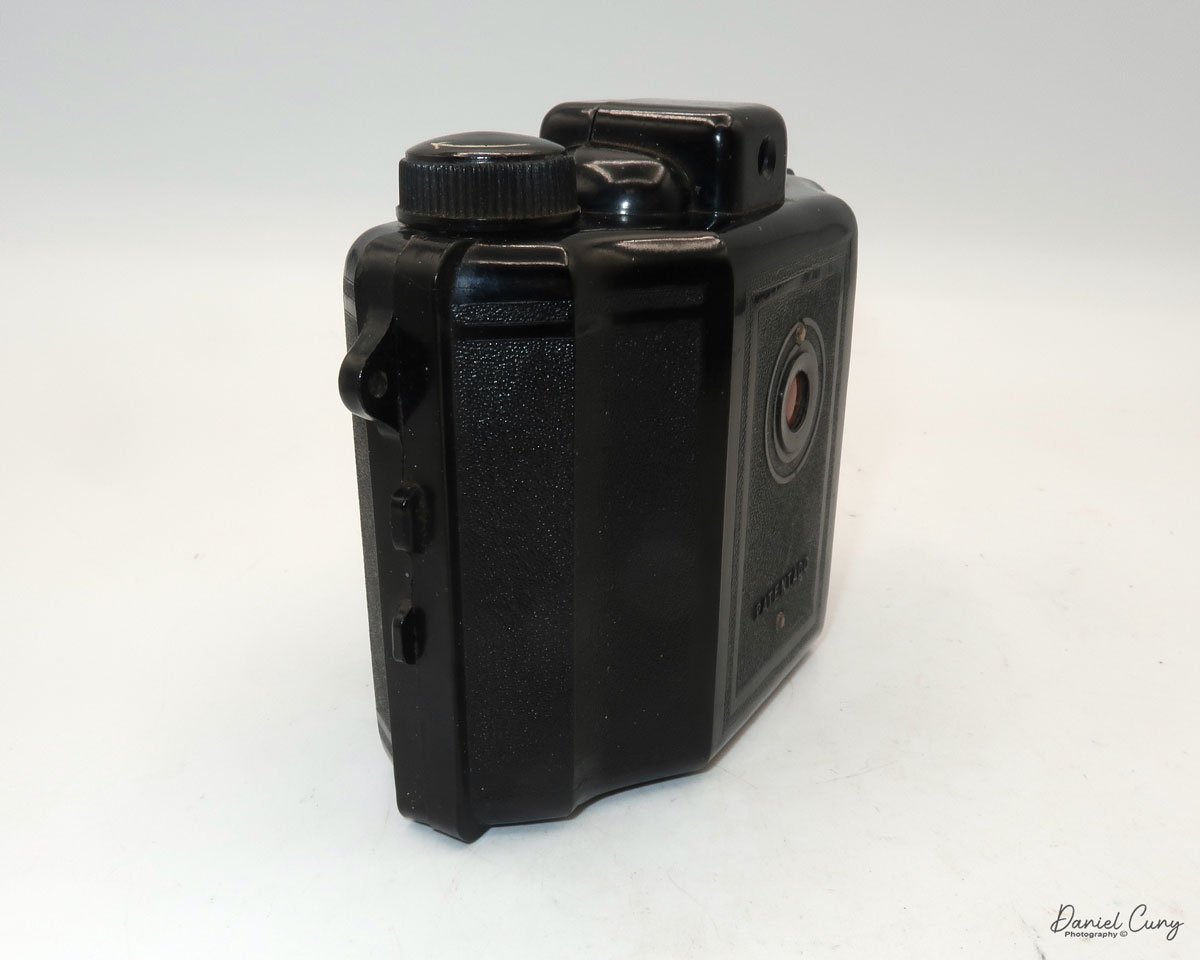
 Upon returning home, I eagerly unpacked the Capta camera. Despite its better-than-expected condition, it was covered in a layer of grime, likely from the leather dust of the case. I  cleaned the camera with a soft cloth, Q-Tips, and lightly soapy water, restoring its original charm. With the camera now sparkling, I was ready to delve into its history and put it to use.

History:

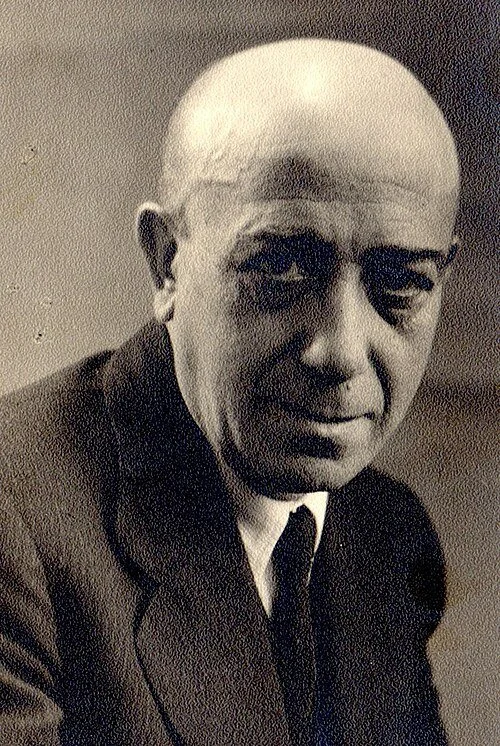
Julio Matutano Benedito

Capta was the brainchild of Valencian pictorialism photographer, Julio Matutano Benedito. Born into a modest family in 1892, he had a passion for art from an early age. At the age of 12, he began his apprenticeship with a local sculptor. Between the ages of 14 and 20, he attended evening classes for artistic drawing at the School of Craftsmen in Valencia. 

 He was an accomplished engraver with his shop in Valencia until he took up photography in 1923, where he honed his craft by taking photos of his family. In 1928, Julio Matutano and a group of his friends formed Foto Club Valencia. Between 1928 and 1936, Julio Matutano won several national and international awards for his photography.

 In 1935, Julio Matutano changed careers. He embarked on designing and manufacturing a new camera company in Spain. His first creation, the Nerva, was a testament to his innovative spirit. This camera, made from stamped aluminum, used 127 film with a 3x4cm format and featured a German Rodenstock lens. It was a true pioneer in its time, selling for 13 pesetas, equivalent to approximately $35.00 in today's dollars.

 In 1942, he designed a wooden camera with a SACO (Sociedad Anónima de Cristales Ópticos) lens, which took 127 film in a 6x4.5 format, named PERFECTA. I couldn't find this camera anywhere, except for the German Perfecta. If you have any information on it, please let me know.

 Julio Matutano registered the CAPTA trademark in 1944. That year, he also designed and introduced the Capta I, a Bakelite camera manufactured by Industrias Sintéticas Abril in Barcelona. The camera featured an optical viewfinder on top and used 120 film with a 6x4.5 format. At this time, the Capta sold for 101 pesetas. Later in 1944, Capta introduced the Baby Capta. I created a smaller version of the Capta, which I named the Baby Capta, featuring a metal face and capable of taking 127 film in a 6x4.4 format. This camera was marketed for a younger audience.

 The Captaflex was designed in 1947. The Captaflex was a Bakelite camera that took 120-size film with an unusual 52.5 x 52.5 cm image area (6x6) format. The camera had a 90mm f/8.5 lens and a helical screw, variable focus lens capable of focusing from 1.5 meters to infinity. The camera bears a strong resemblance to the British-made Ensign Ful-Vue camera. Unfortunately, Julio Matutano died in 1947 before the camera came to market, but his two sons, Julio and Vincente, who had been working in the company since they were 12 and 13. Both sons were artists when they took over the company and moved it to Valencia. From then on, the company's logo was JVM, and the Captaflex was released in 1948 for 375 pesetas.

 The brothers expanded the business during the 1950s, as the resurgence of photography following World War II gained momentum. In 1952, the Capta II was introduced, featuring a coated lens, a focusable lens, and an accessory close-up lens.

 Capta's first 35mm camera, the Capta 35, was introduced in 1953. A 24x24 format camera made of injected aluminum alloy with three shutter speeds and a rectilinear lens. In 1955, the company expanded into other areas and introduced the Capta-Movie. In 1956, Capta introduced the Universal Tank, a film developing tank compatible with 35mm, 127, and 120 films.

 After 1959, the collaboration with Gaspar Mampel ended, and Capta started selling all its products directly to the public. During this time, Capta introduces a microscope, an enlarger, and several other photo-related products. In 1966, the company ceased all production and closed due to extreme financial difficulties.

My Camera:

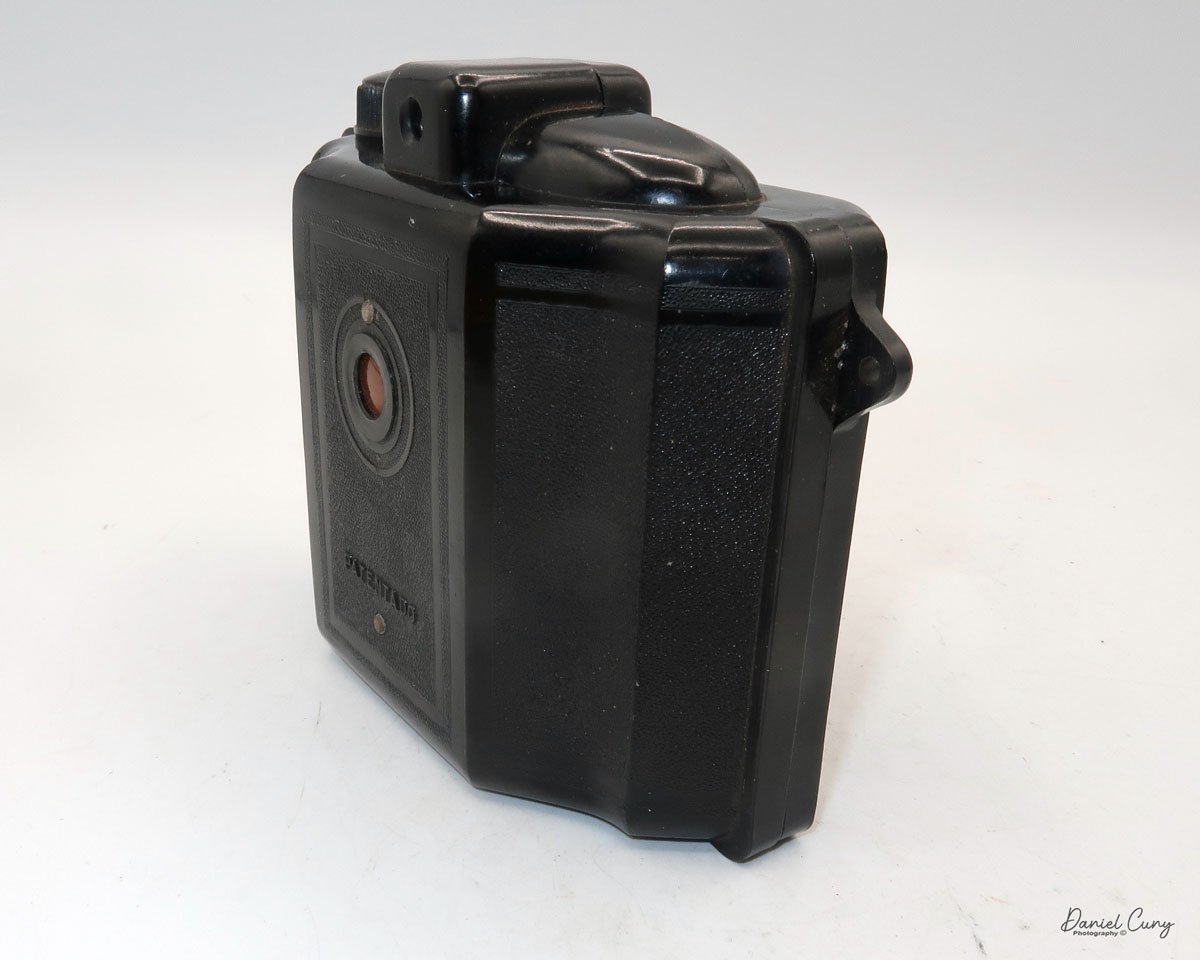
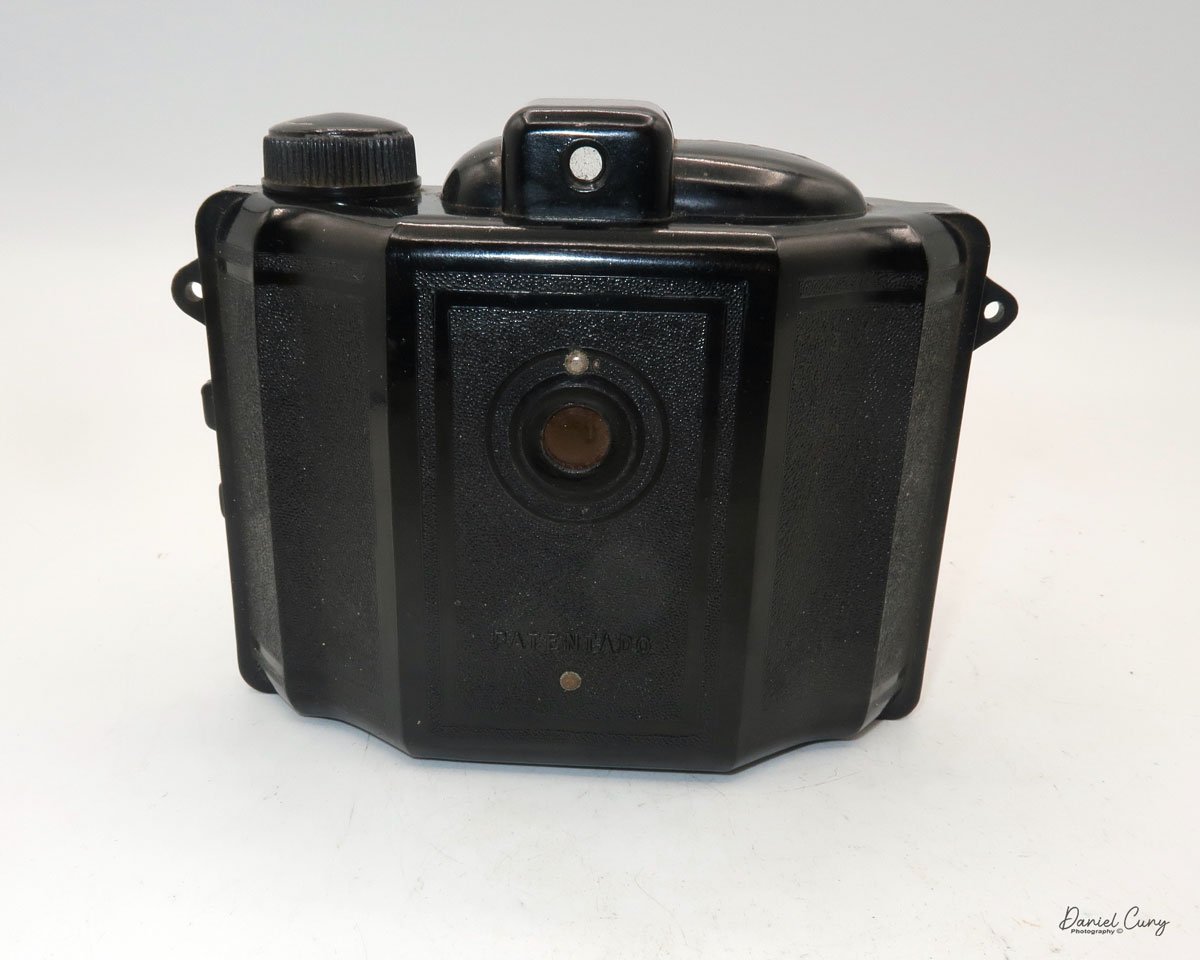
My Capta camera is 5" wide by 4" tall by 2.75" deep and weighs 10.2 oz without the fitted leather case. The Capta is a straightforward camera with a fixed focus, meniscus lens, and a basic optical viewfinder on top. The camera is a 6x4.5 vertical format camera, and it also has a tripod socket on the bottom.

For shutter speeds, the Capta camera has either "I" for instant, or "P" for timed exposures. These are set by pulling out or pressing in a metal bar that sets the shutter's capability, which is on the right side, below the lens. According to my shutter tester, the shutter speed is 1/40 for instant exposures. The shutter release is above the lens at an approximate 11:00 position, and above the "CAPTA" name on the front of the camera. A shutter release cable can be connected to the shutter release for timed exposures.

To load the camera with film, the back is held to the body with friction. There is no locking mechanism on the camera that secures the back onto the body. On the side of the camera are two small tabs. Push these two tabs apart, and the back separates from the camera body, exposing the area where you load the film. When the camera back is off the body, and you're ready to load film into it. There are three "wings" that can be pulled up to insert the film. These wings make it easier to load the film as opposed to trying to jam the film roll into one of the sides of the camera. There was an interesting empty spool in the camera from a film manufacturer I wasn't aware of. The spool is from Infonal, a Spanish film manufacturer in Barcelona.

The side with the take up spool and winding knob only has one wing that lifts to help load the film. Loading the empty spool is a bit more challenging, as the winding knob doesn't lift to assist with loading the empty spool. After a bit of wiggling, the take-up spool fit into the correct position. Once the film is in the camera, all you need to do is press the back onto the body, and friction hold the back in position.

 The red window on the back of the camera seemed low for the numbers on my roll of film. Still, I was able to see the numbers as they passed and stopped at the appropriate places to capture the whole roll of images on the film.


My Results:

I loaded a roll of T-Max 100 film into the camera and took it for a walk through the neighborhood. I should have given the camera one more Spanish experience by purchasing a roll of 120 film at Casanova Camera in Barcelona and trying it out there; unfortunately, I didn't think of it, so I was forced to use the camera in my neighborhood.

 After developing the negatives, I was pleasantly surprised by the results. While the images were relatively sharp in the center, the fall-off of sharpness is rapid as you move to the outer portions of the image, making this a wonderful Lomography camera. It almost has a very dreamy effect on the outer edges which I personally like.

Conclusion:

The camera was enjoyable to photograph with. Using the camera was really applying photography's basic rules, which include ensuring the sun is behind you, framing the image in the viewfinder, pressing the shutter release, and winding to the next frame. In today's world, we'd call this a "point and shoot" camera, as it has no settings. Am I taking photographs or snapshots? Does this make it better or worse? That could be a topic for discussion on another day.

 My trip to Barcelona was a successful one. I photographed many beautiful areas of the town, uploaded my favorite Widelux Images of Barcelona, and purchased a relatively unknown and simple Spanish camera to add to my collection.

 Click on the link to see other cameras I've reviewed from my collection.

 If you're interested in older and collectible cameras, I do have a store on eBay, Cuny's Camera and Photo, where I sell cameras, lenses, and other camera items.

 I'd love to hear from you. If you have a question, comment, or concern, please don't hesitate to contact me.

 Thank you for taking the time to read about this little known Spanish camera.

 Until next week, please be safe.