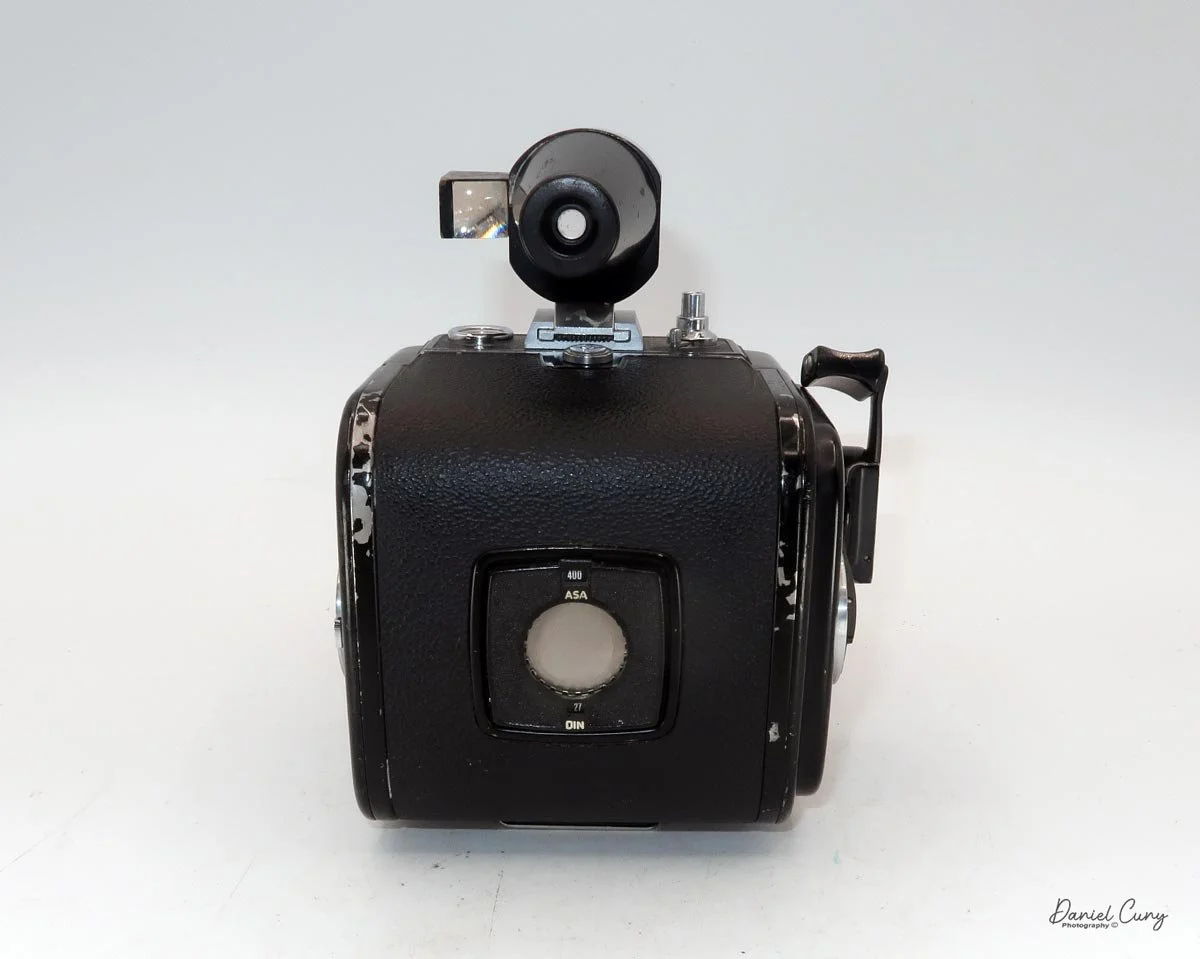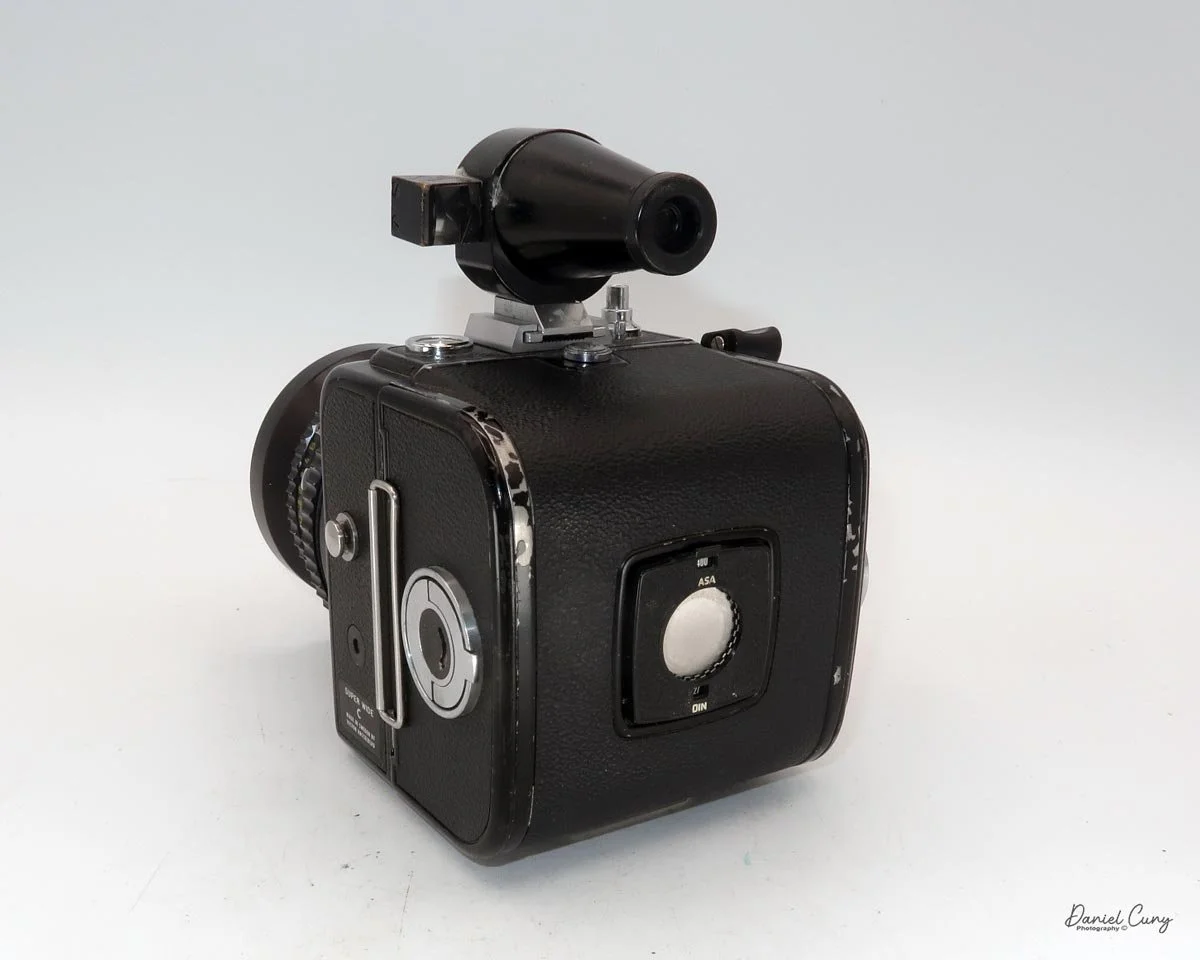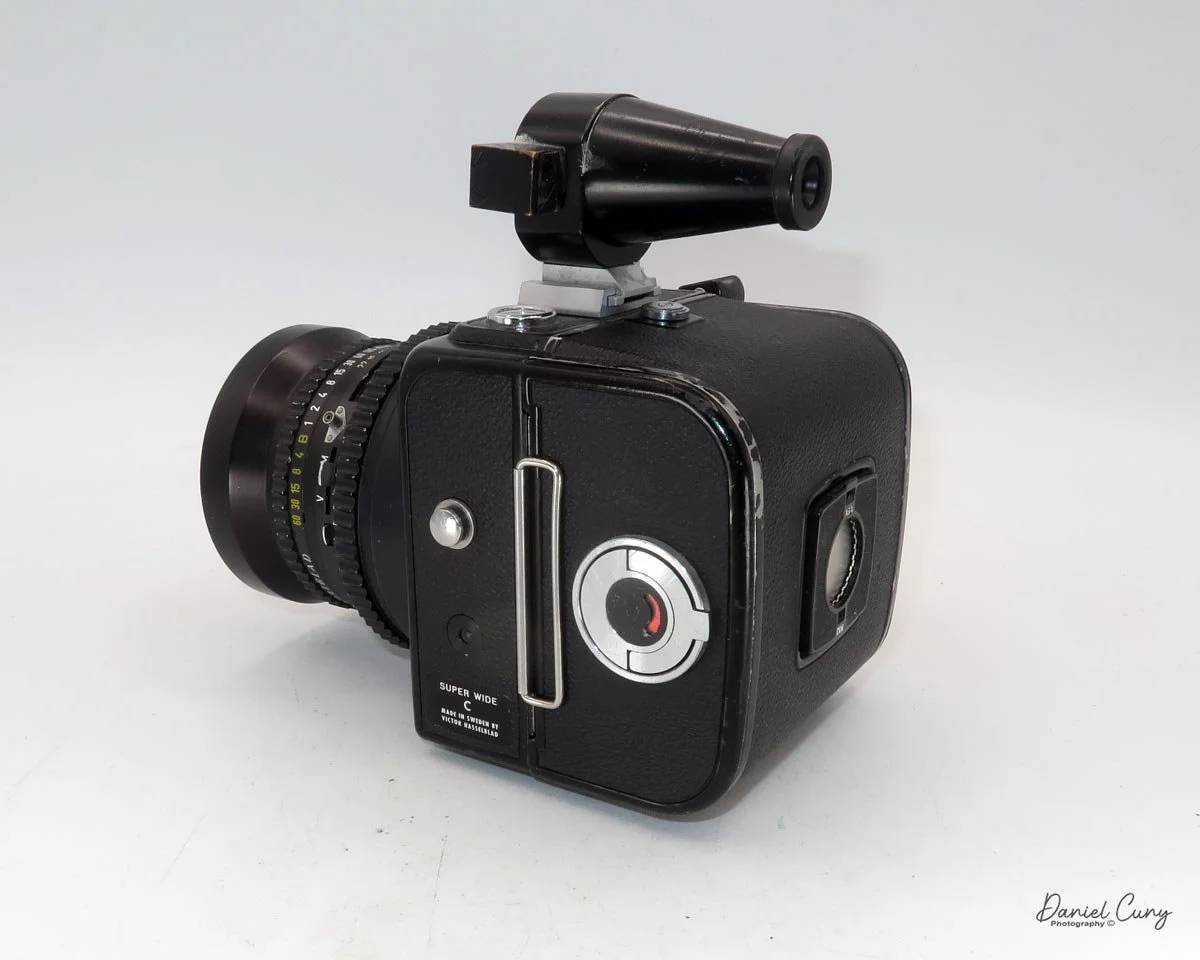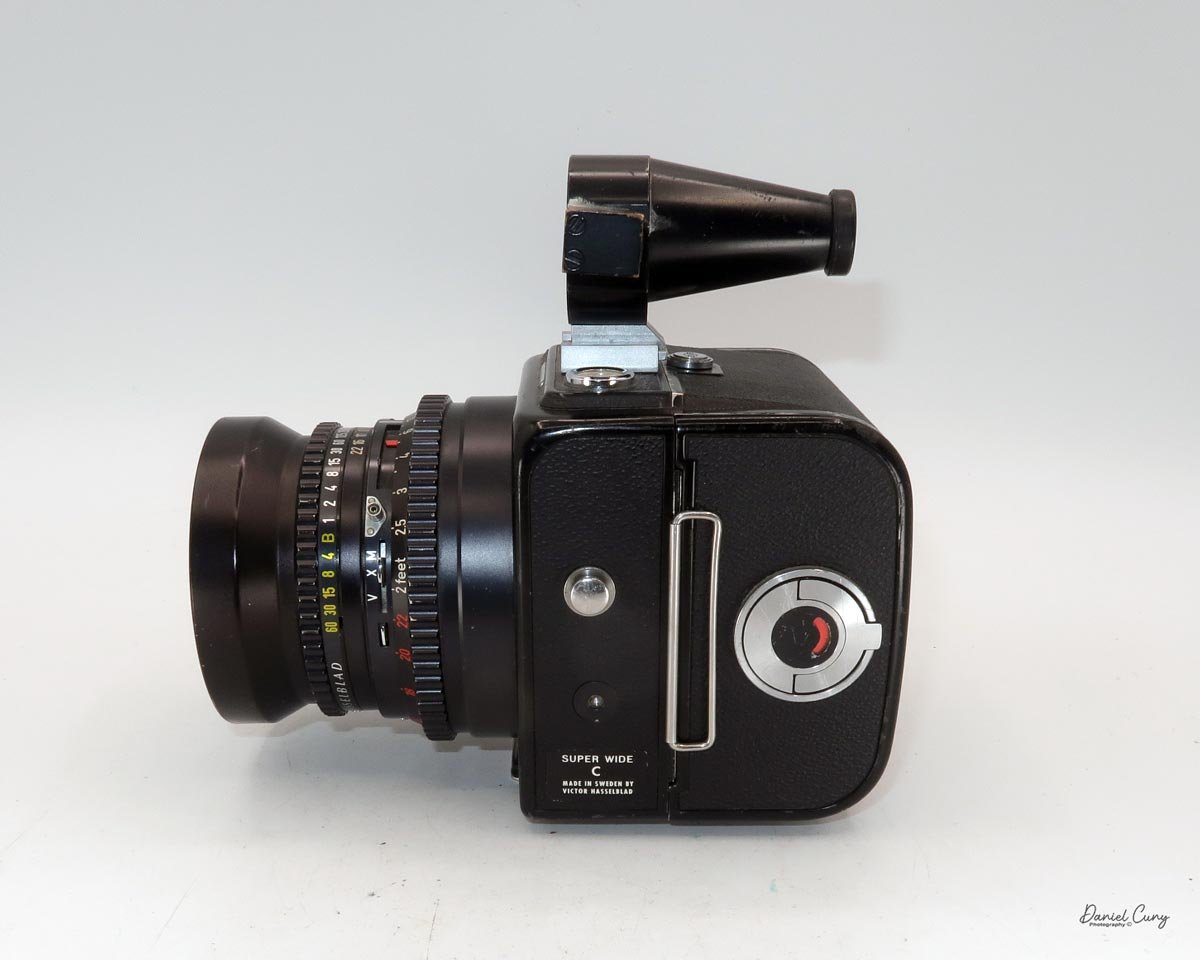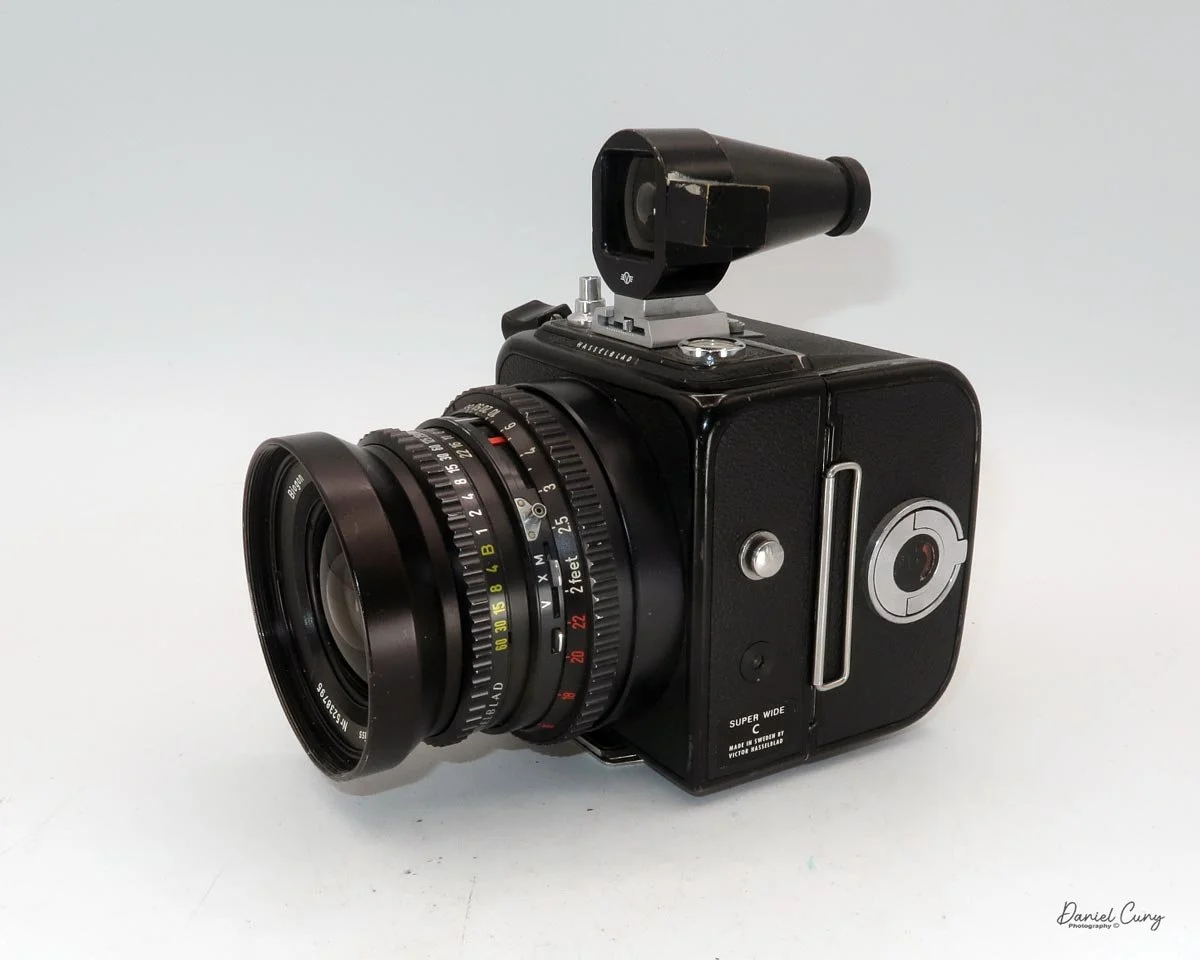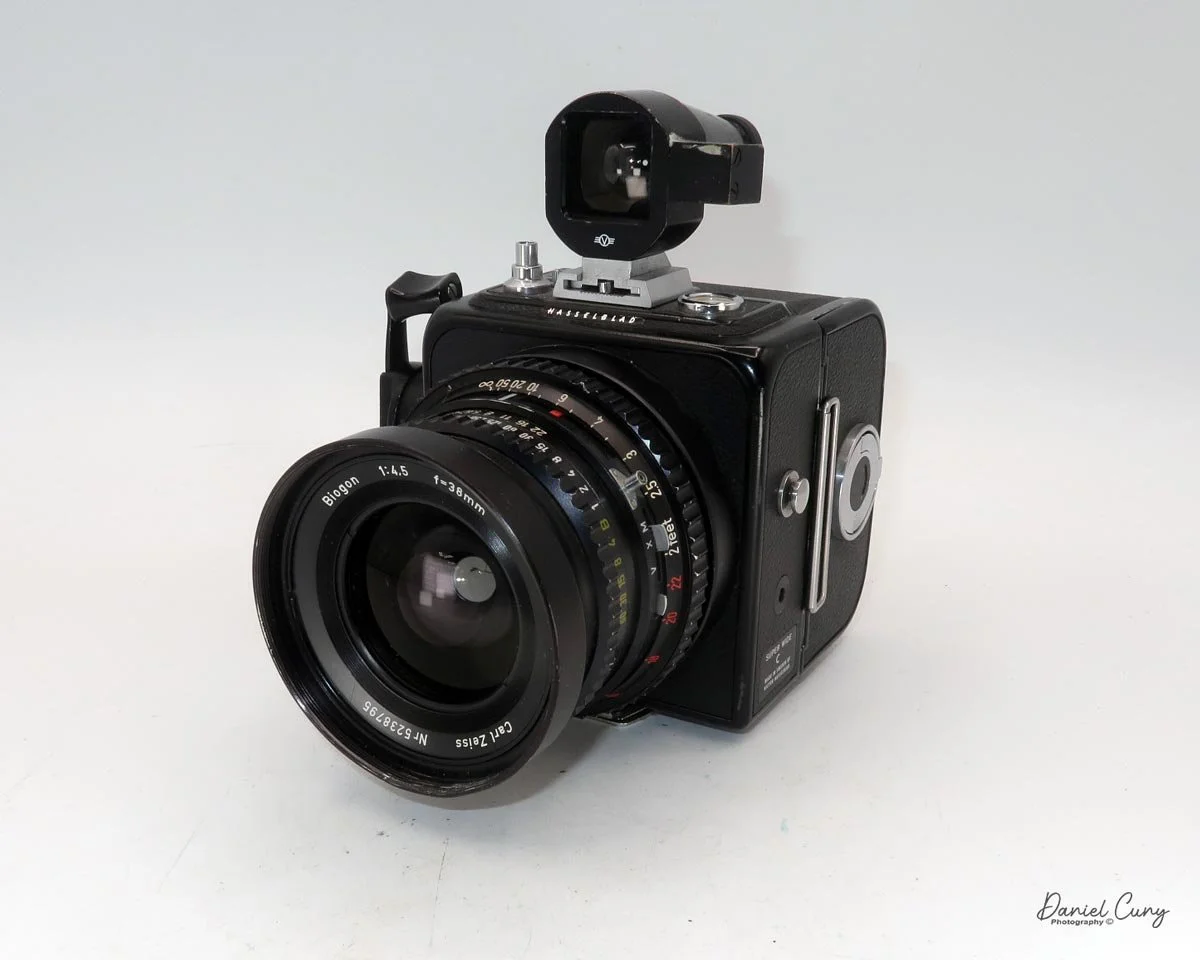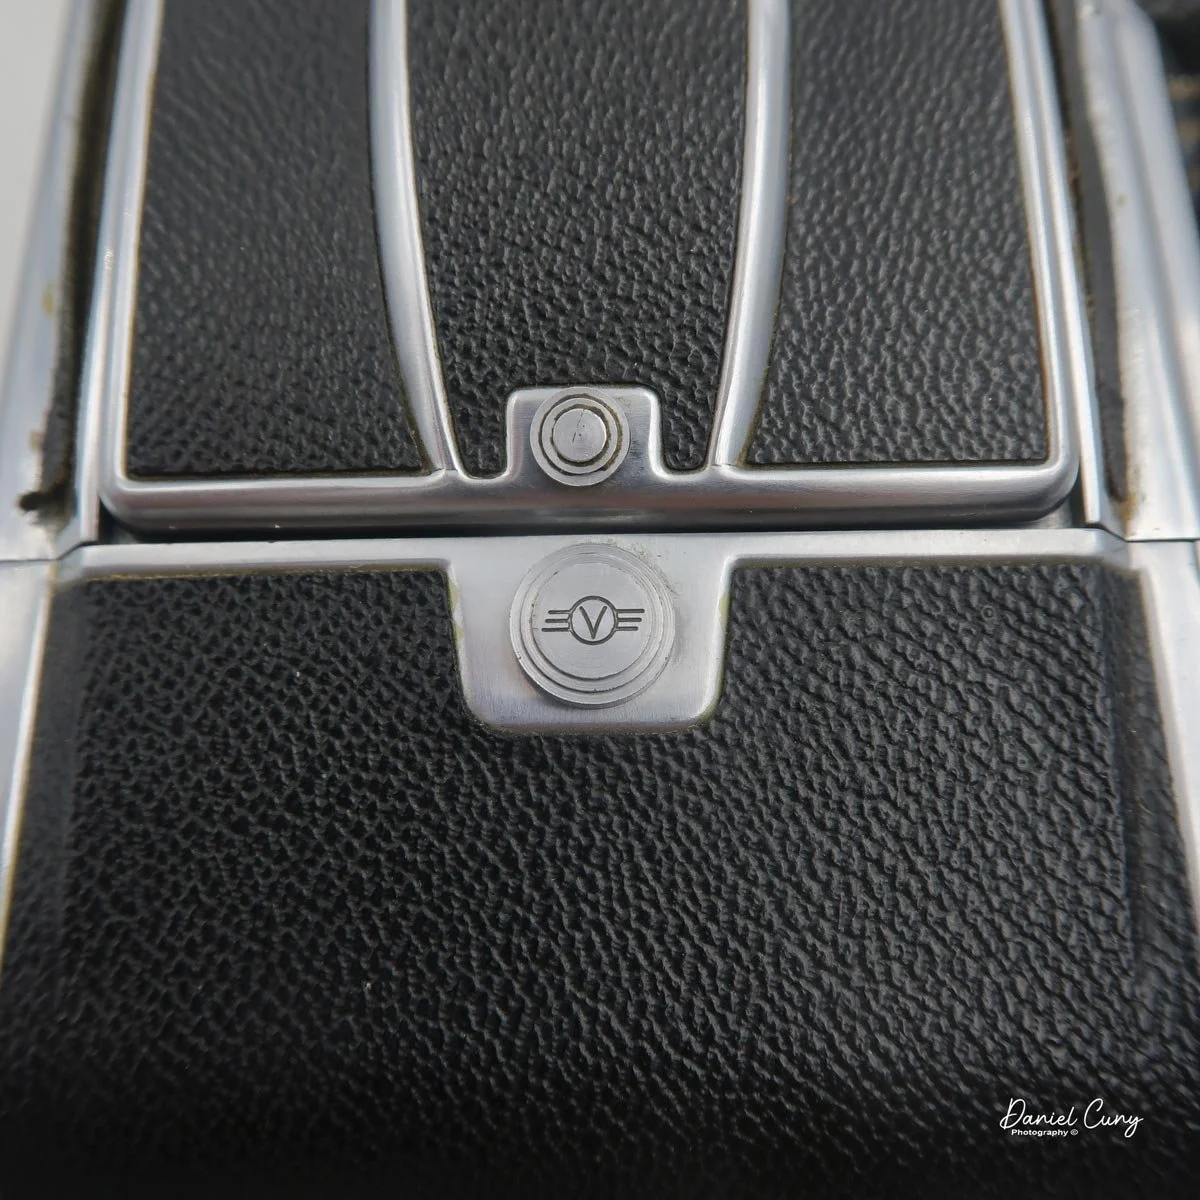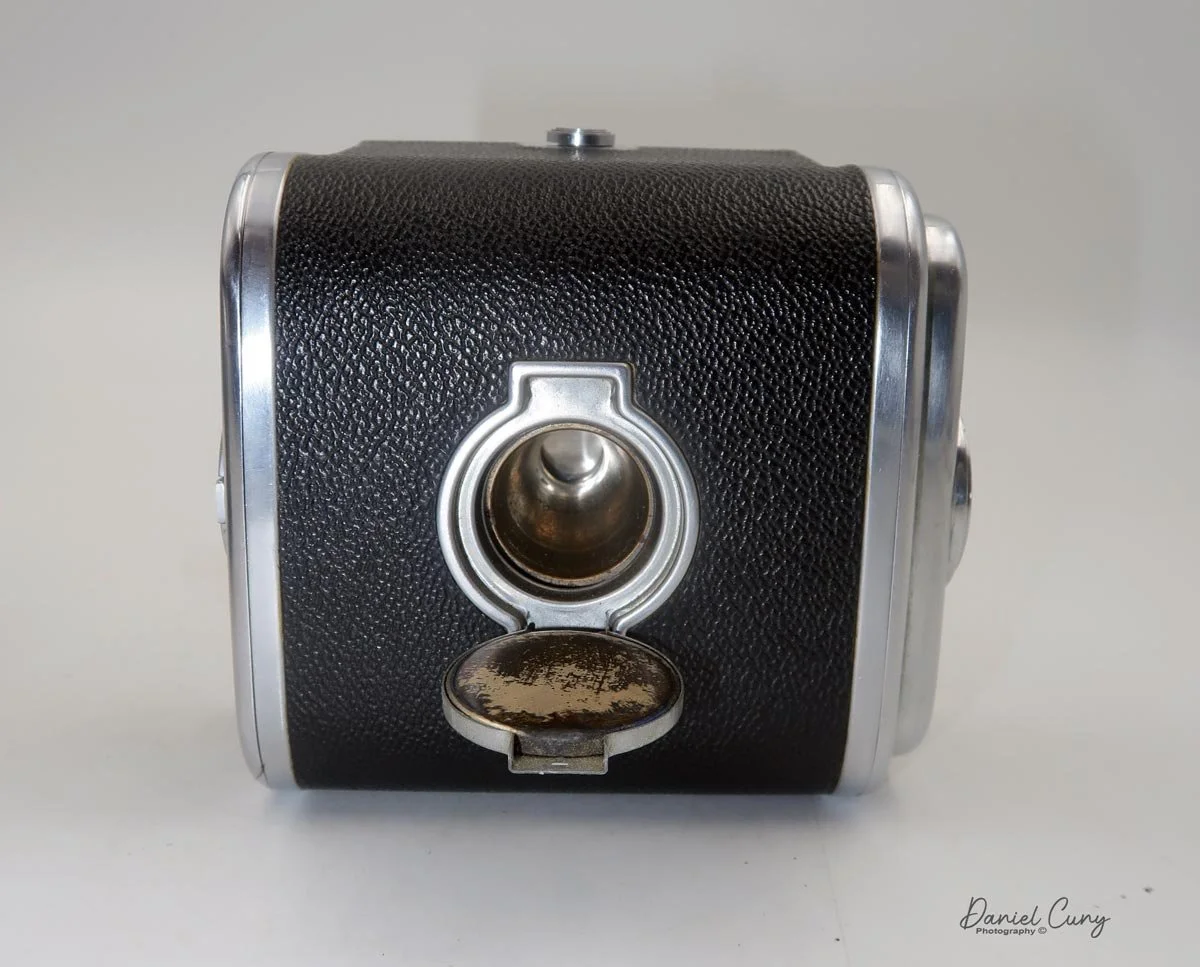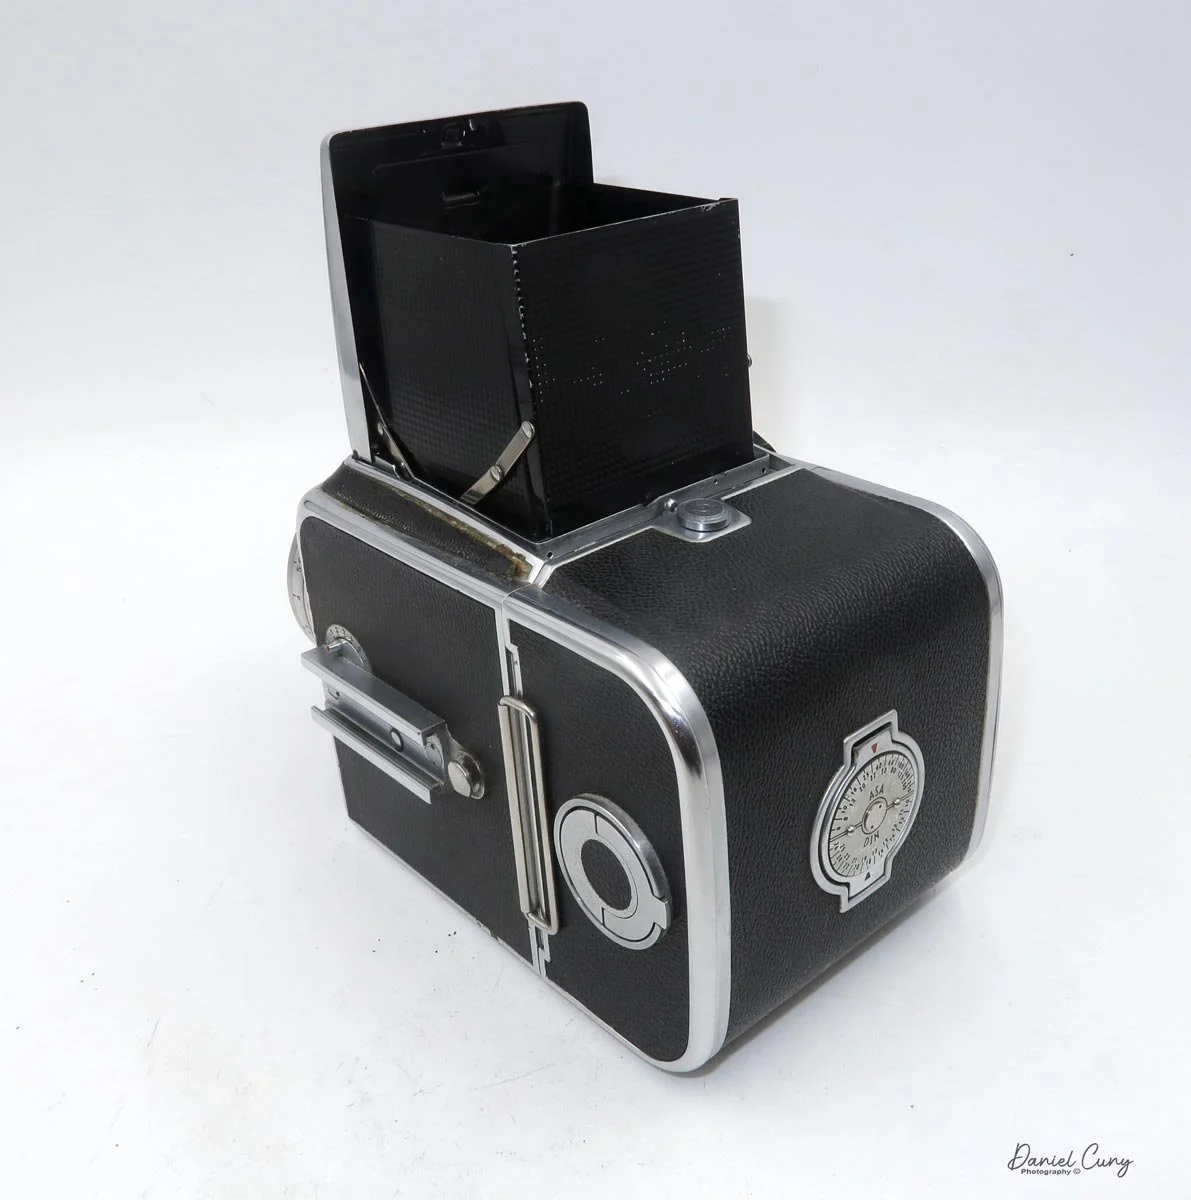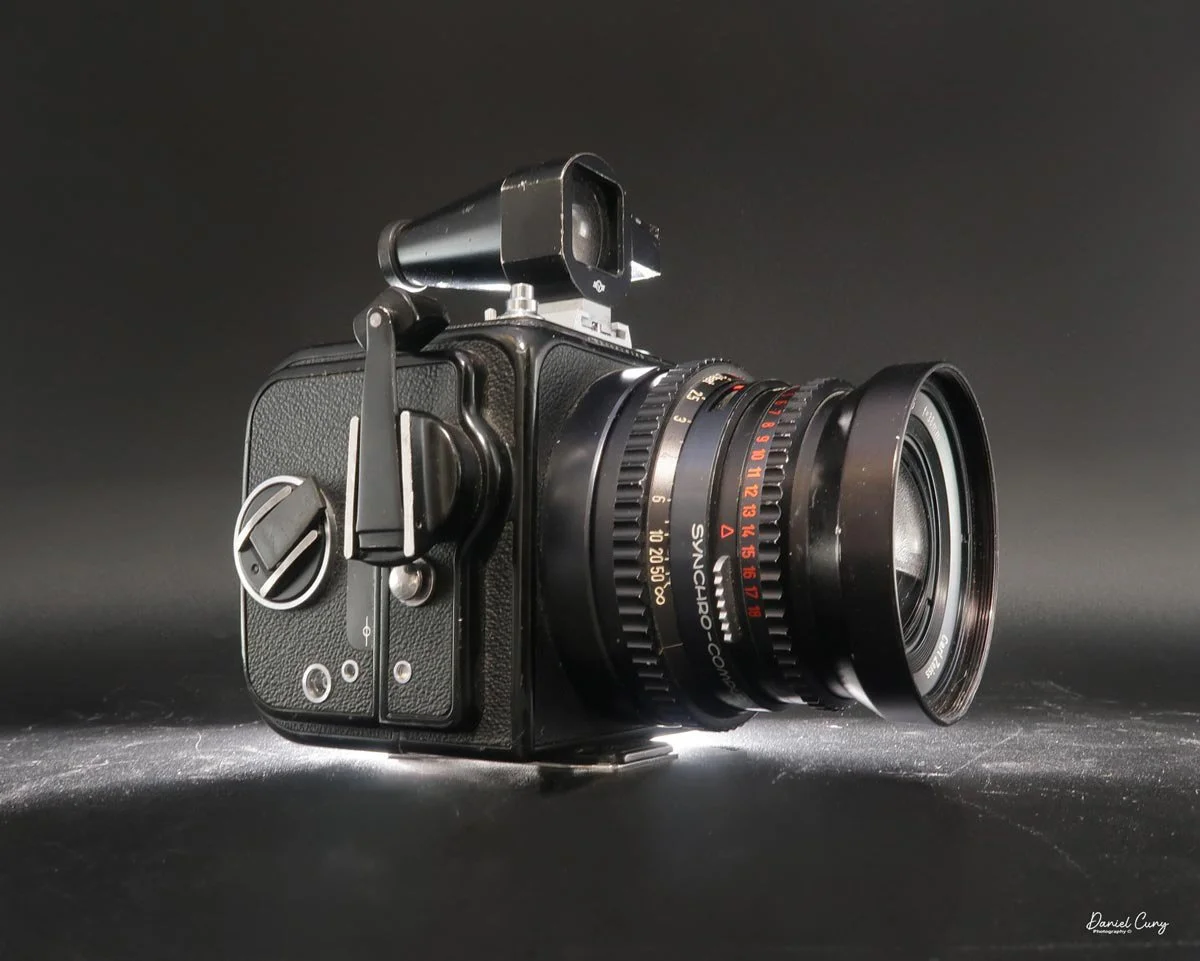
Hasselblad Super Wide C (SWC) camera

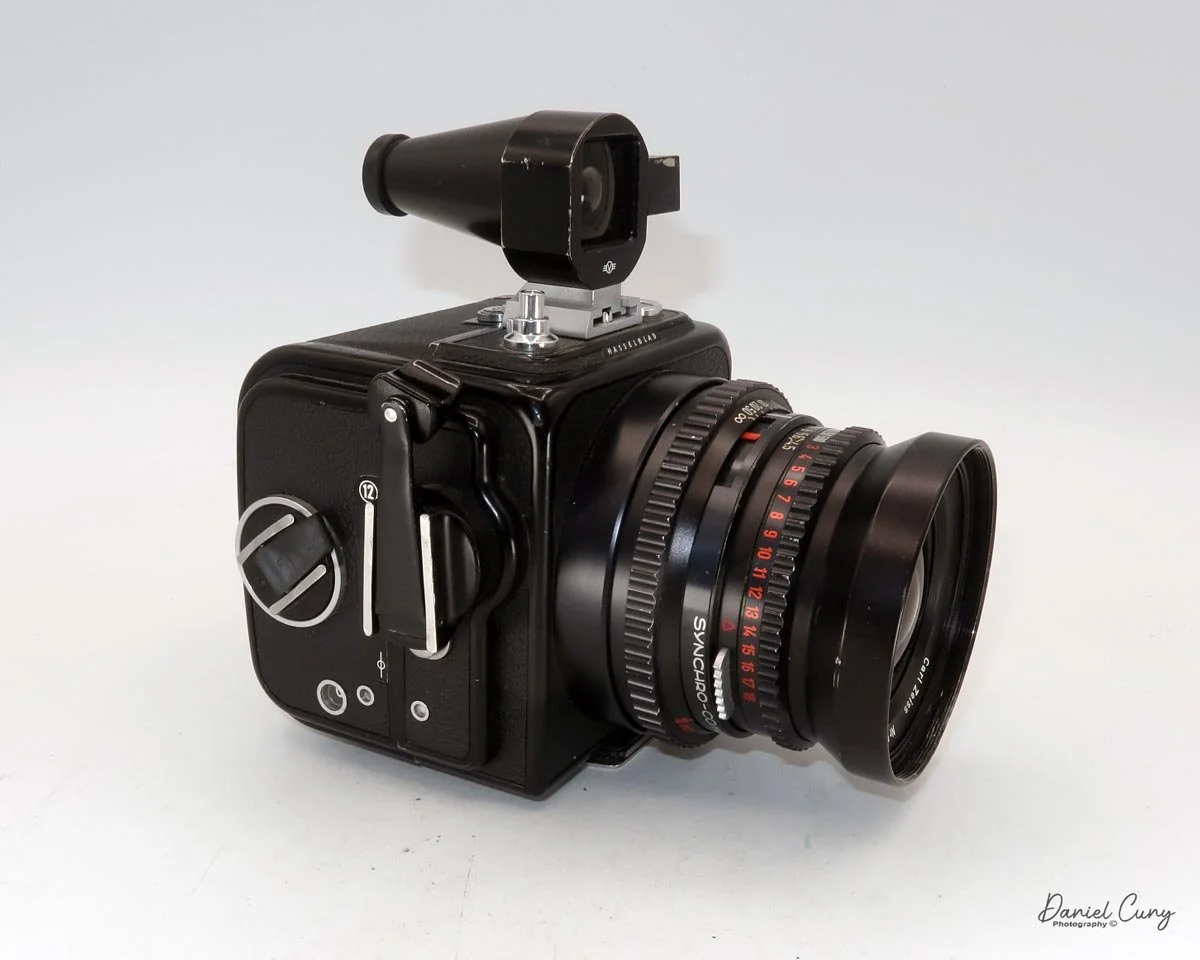
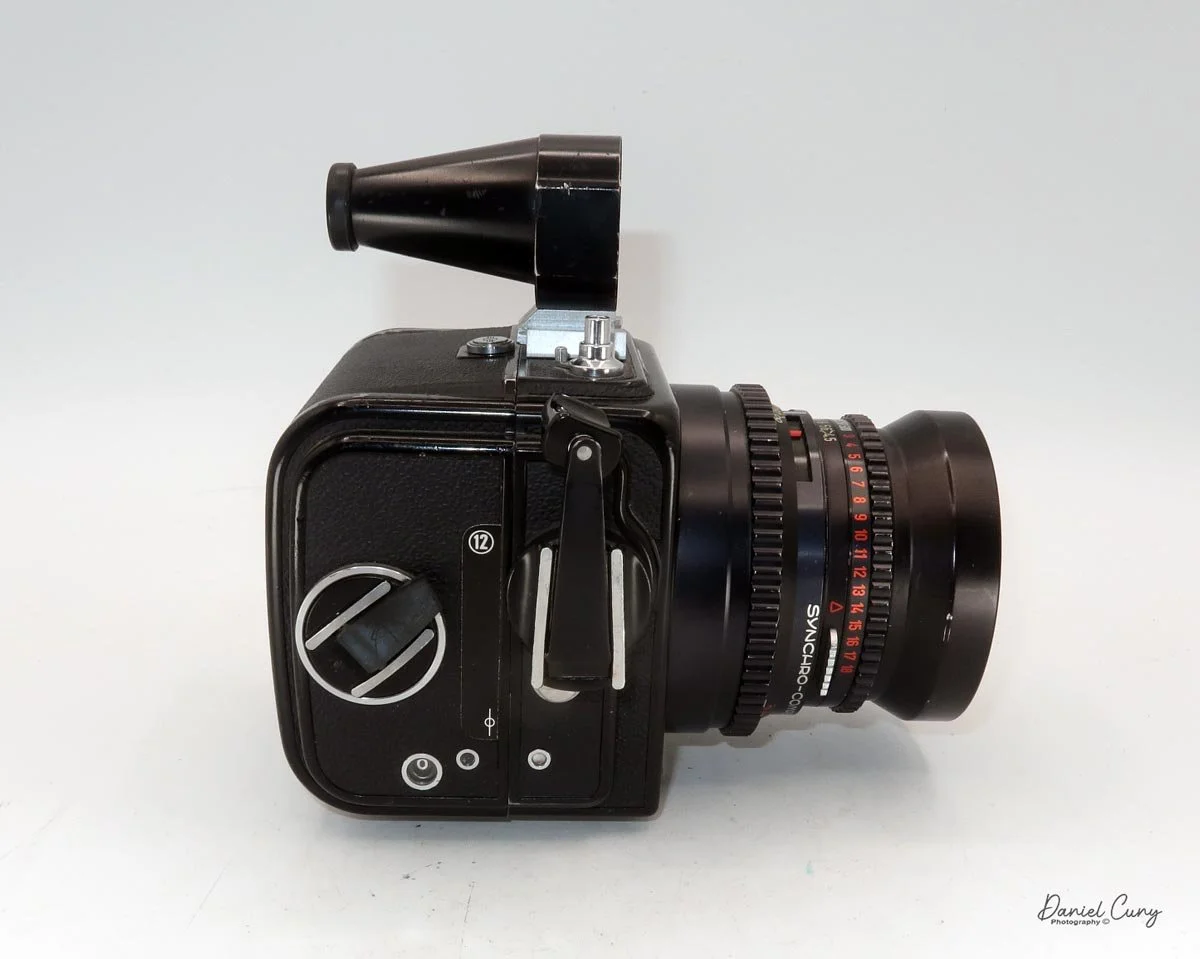
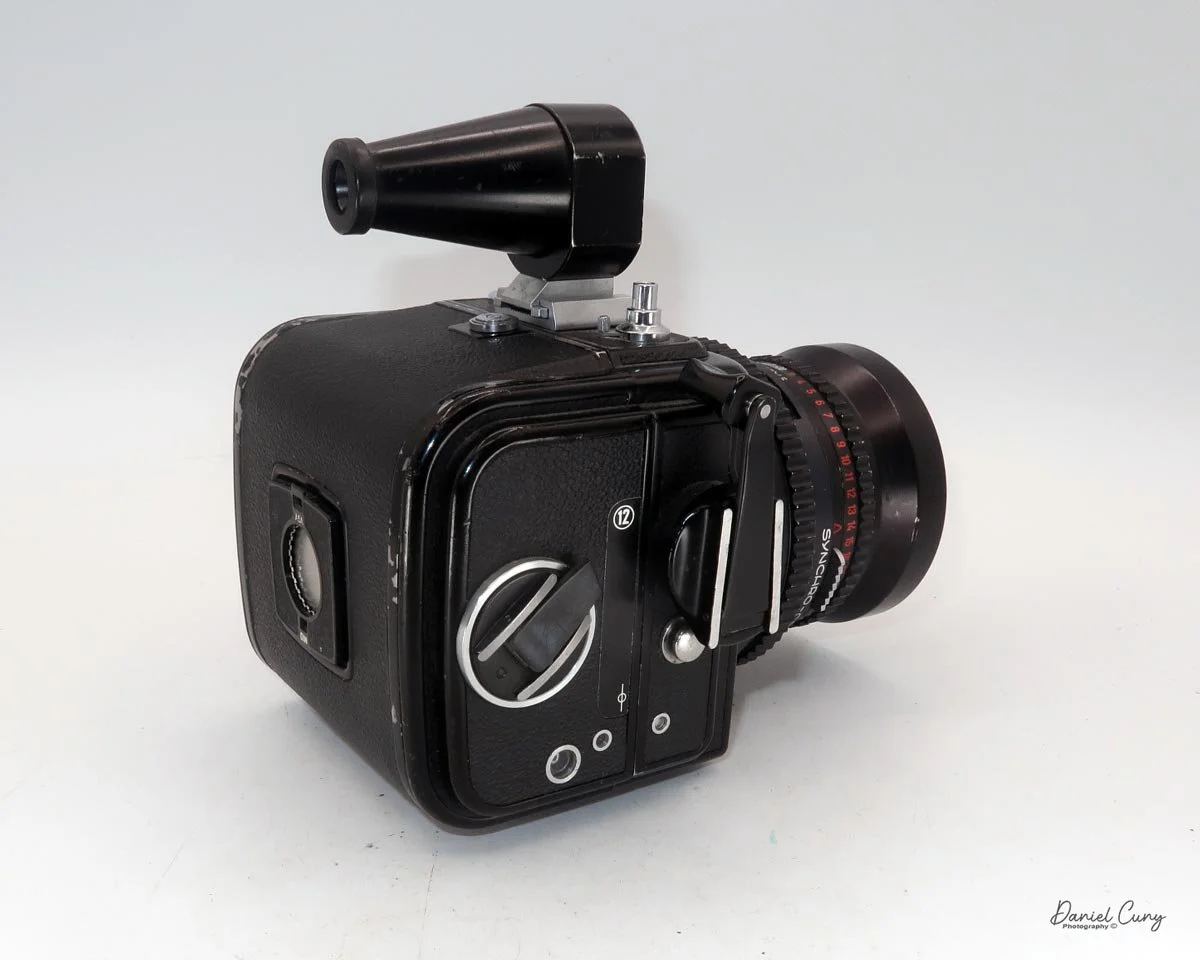
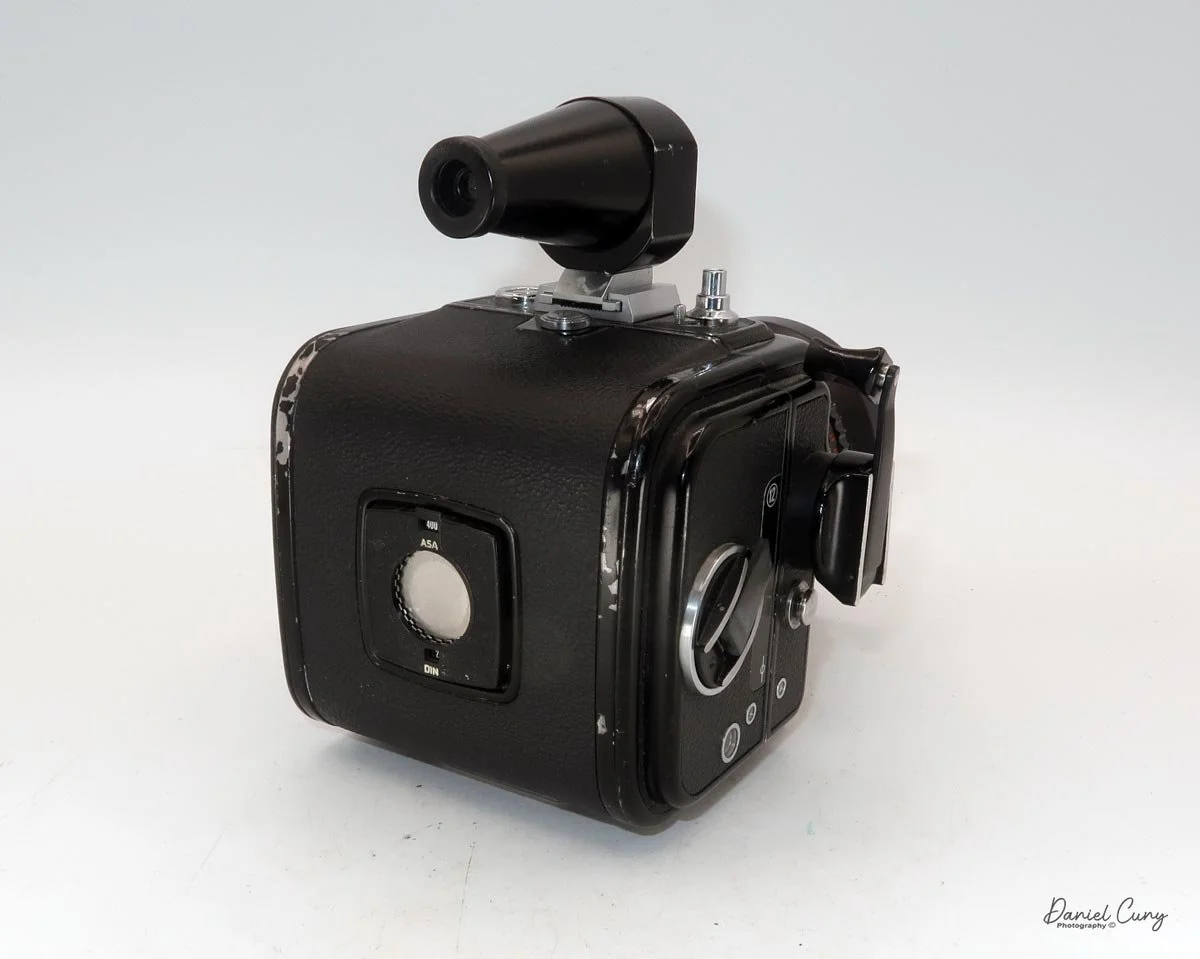
My Hasselblad Super Wide C camera.

Having spent over fifty years working in the photo industry, I have always felt that Hasselblad cameras exist at a level close to nirvana. When discussing gear with professionals, Hasselblad cameras were consistently at the top of the conversation. Pros absolutely loved these medium-format cameras.

 I would see them being used in television commercials, on professional photo shoots, and in movies and magazines. I got to know many of the sales representatives and repair technicians over the years, and they were always incredibly professional, which perfectly reflected how the brand was represented.

 Knowing my love for colored, unusual, and panoramic cameras, it's no surprise that wide-angle cameras are right near the top of my list as well. The more I can capture in a photo, the better. Taking in wide-open vistas and getting as much into the frame as possible has always been a favorite of mine.

 When I first started this blog, I did a post on the early version of the Hasselblad Super Wide, which I had purchased at a very reasonable price because it featured a crudely modified viewfinder. It was glued to a block of metal and screwed into the accessory shoe mount! The good news was that the shutter worked beautifully, and the lens was clean.
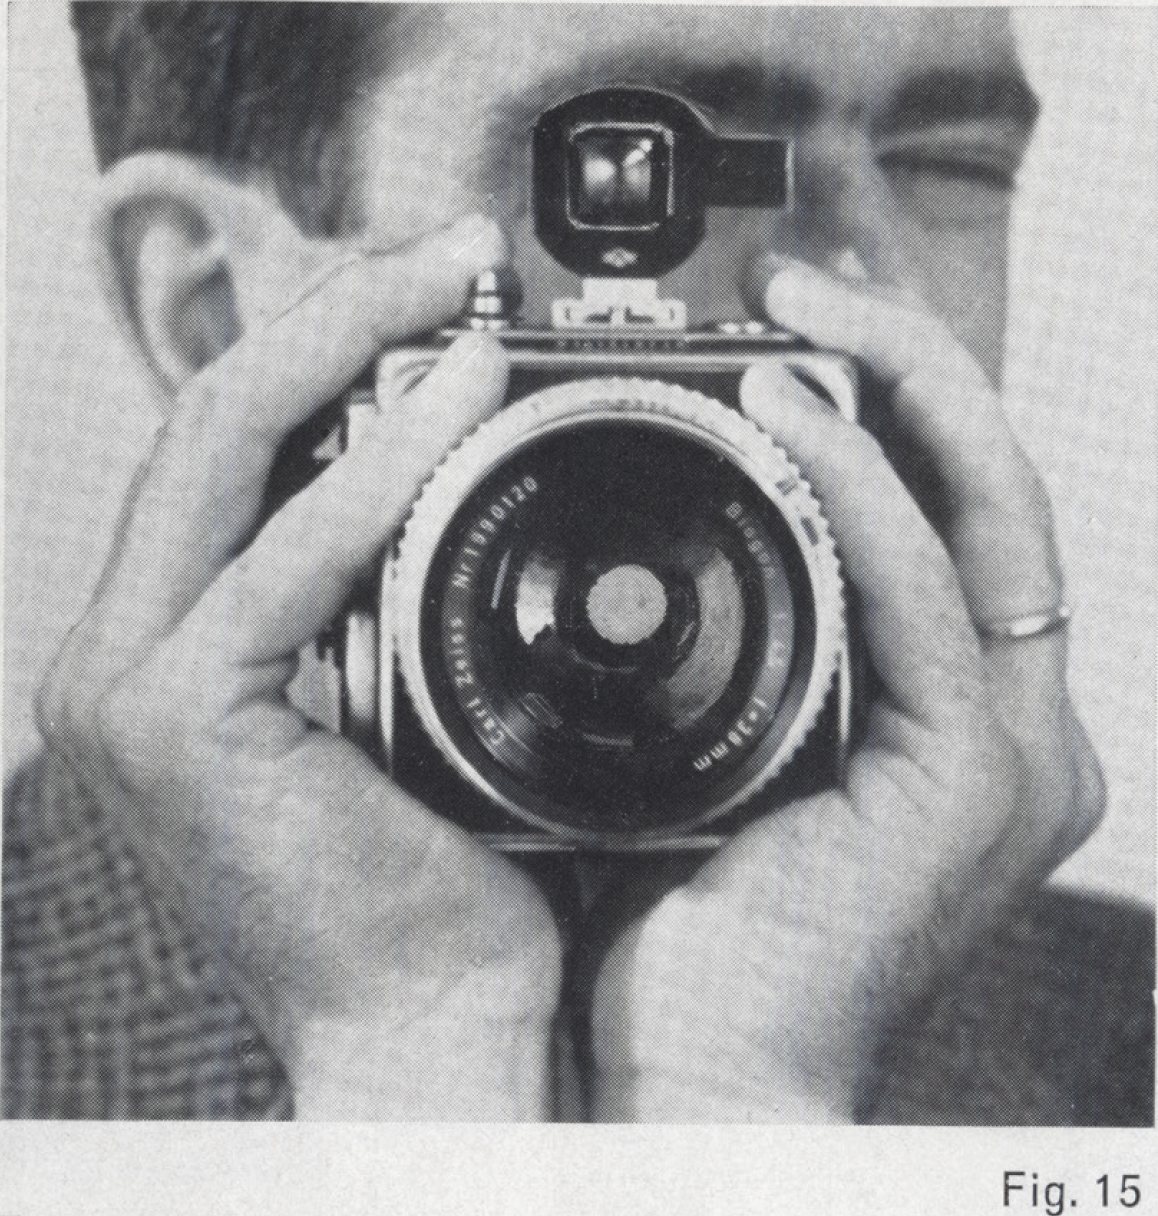
Image from Hasselblad’s Super Wide C Manual.

 The Super Wide, produced between 1956 and 1959, was one of the first cameras to feature Hasselblad's legendary Carl Zeiss 38mm f/4.5 Biogon lens. (It was actually introduced a couple of years earlier, in 1954, when Hasselblad debuted the Supreme Wide with that fantastic wide-angle lens).

 Years before I retired from the photo industry in 2024, I purchased a beautiful, black-body Hasselblad Super Wide C (SWC) with a Hasselblad A12 film back. The body was in stellar condition. The back had a few scuffs, but the price was right—especially for the time. I was thrilled to add another wide-angle camera to my collection, particularly one boasting such fantastic optics.

 Next to the phenomenal lens, my second favorite thing about this camera is its compactness. It's a very thin body. According to the instruction manual, when handholding it, you should hold it similar to a movie camera: cradled in the palms of your hands with your fingers wrapped around the top to trip the shutter easily.

 Initially, this felt a bit awkward to me, but the more I shoot with it, the more comfortable it becomes. Changing positions after setting the focus and shutter/aperture combination can be slightly cumbersome. Still, I genuinely believe the camera is much more stable in my hands when held this way.

History

 The Hasselblad brand is synonymous with modular medium-format photography, but its most unique and enduring legacy lies outside that modularity: the ultra-wide, fixed-lens cameras. The story begins in 1954 with the introduction of the Supreme Wide Angle (SWA). Victor Hasselblad realized that adapting an extreme wide-angle lens to his reflex mirror cameras was optically compromised due to the flange distance required for the mirror box. The solution was radical yet elegant: eliminate the mirror.
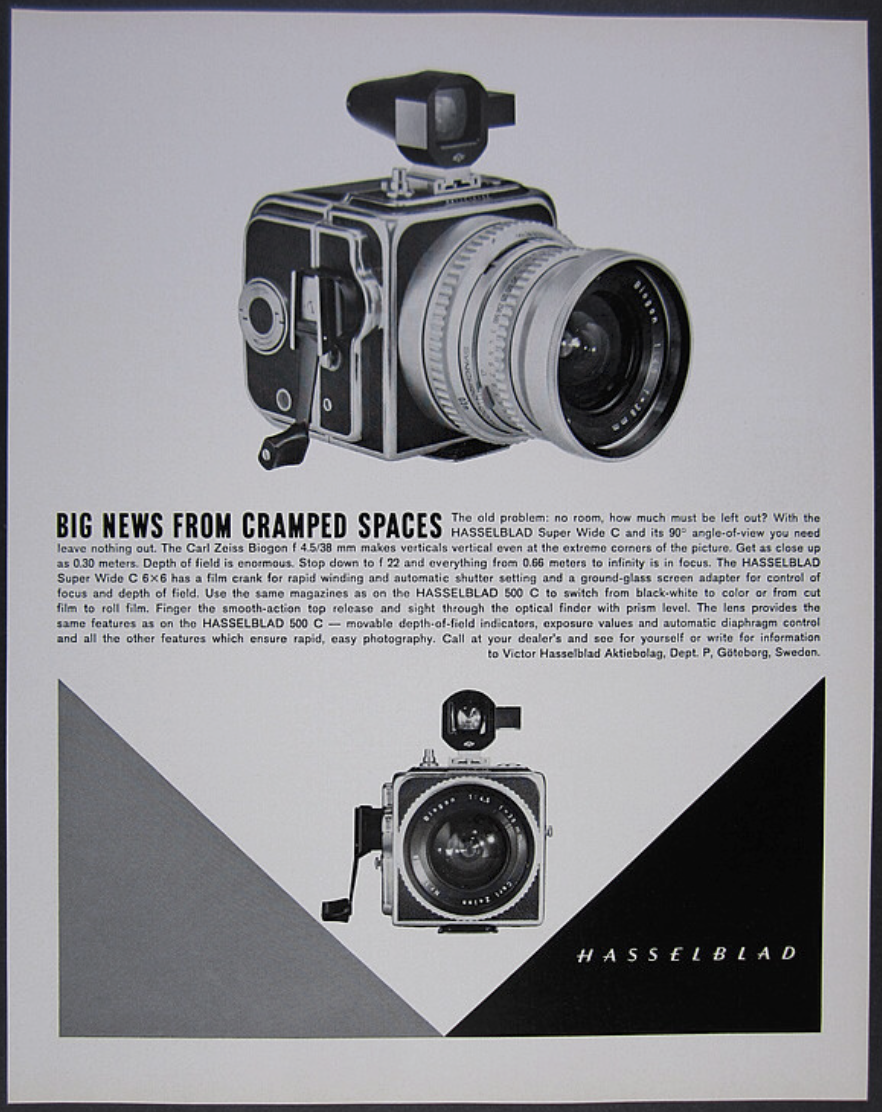
Hasselblad Super Wide C advertisment

 The SWA was built around the legendary Carl Zeiss 38mm f/4.5 Biogon lens, an optical masterpiece offering a 90-degree angle of view with virtually zero rectilinear distortion. By mounting this lens onto a shallow body that accepted standard Hasselblad film magazines, photographers gained unparalleled optical performance in a compact form. The camera was briefly renamed the Supreme Wide (SW) in 1955 before evolving into its most famous iteration.

 In 1959, Hasselblad released the SWC (Supreme Wide Camera). The SWC shifted the shutter release from the lens barrel to the top of the camera body, vastly improving ergonomics and stability. It utilized the new Synchro-Compur shutter, synchronizing with electronic flash at all speeds up to 1/500th of a second. For decades, the SWC remained the gold standard for architectural, landscape, and interior photographers who demanded medium-format resolution without the bulk of a large-format view camera. In 1980, the SWC/M was introduced, featuring a modified viewfinder and the ability to accept Polaroid backs.

 As lens technology and manufacturing evolved, so did this iconic lineage, eventually transitioning into the 900 series. The 903 SWC, introduced in 1988, replaced the older SWC/M. While structurally similar, it featured an updated Zeiss 38mm Biogon lens with advanced anti-reflective T* multi-coating, significantly improving contrast and flare resistance. The final chapter arrived in 2001 with the 905 SWC. Because the environmentally hazardous glass types used in the original Biogon design were phased out, Zeiss reformulated the 38mm f/4.5 lens using eco-friendly glass, designating it as a CFi lens.

 Despite the rise of digital sensors, the Hasselblad 900 series and its SWC predecessors remain highly coveted by film photographers. They stand today as a testament to bold, purpose-driven camera design, proving that intentionally removing features, like the bulky reflex mirror, can directly result in an uncompromising, highly specialized photographic tool that consistently produces images of breathtaking optical clarity and unmatched visual scope. These cameras truly represent a unique pinnacle of mid-century optical engineering.

My Camera

 My Hasselblad Super Wide C camera is 6 inches long (including the A12 film back) by 3.75 inches tall without the viewfinder mounted on the accessory shoe, and 5.5 inches tall with the viewfinder on top. It measures 4 inches wide. If you measure just the camera body alone without the film back, it is just under 4 inches long with the lens focused to infinity. The camera weighs 2 pounds, 14.4 ounces with the film back and viewfinder attached.
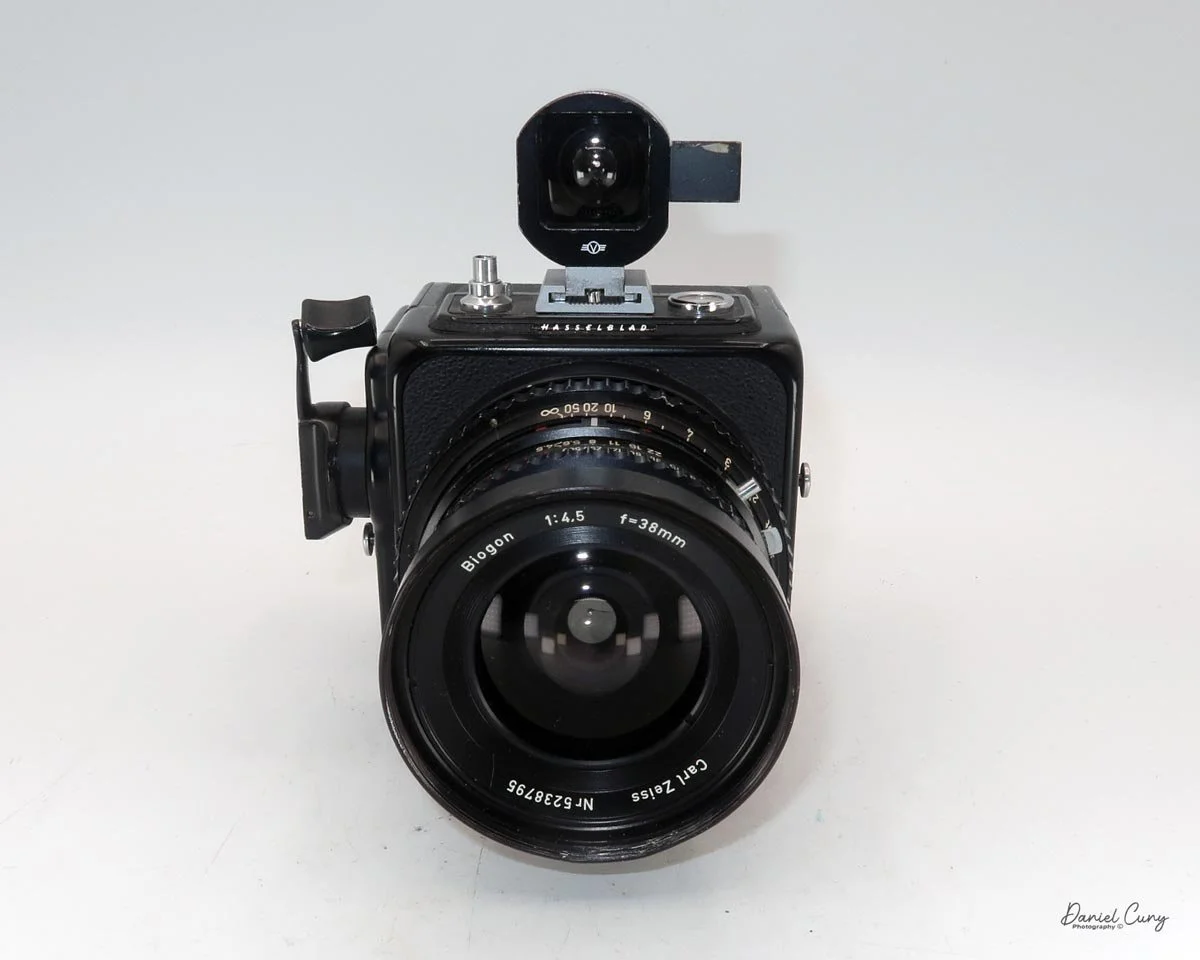
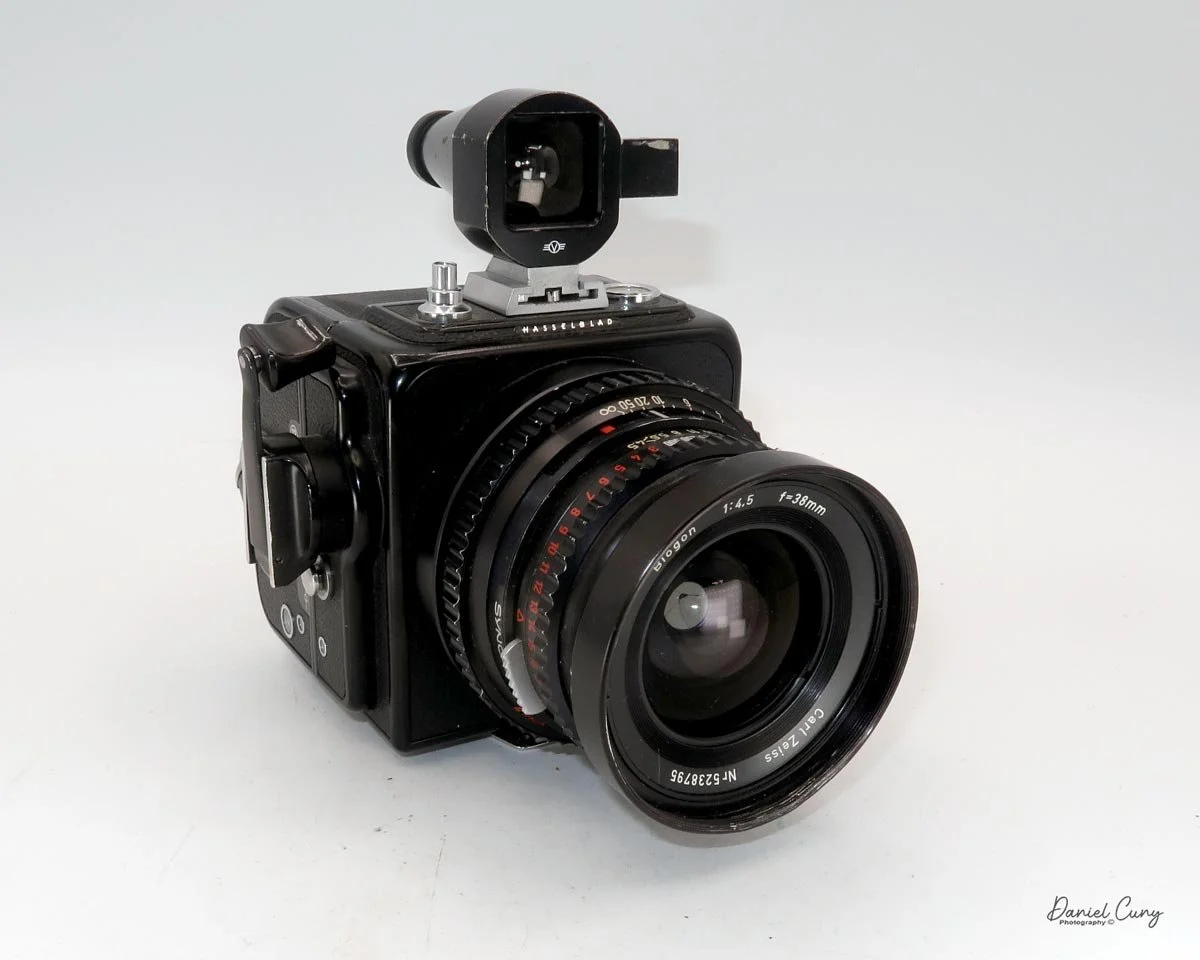
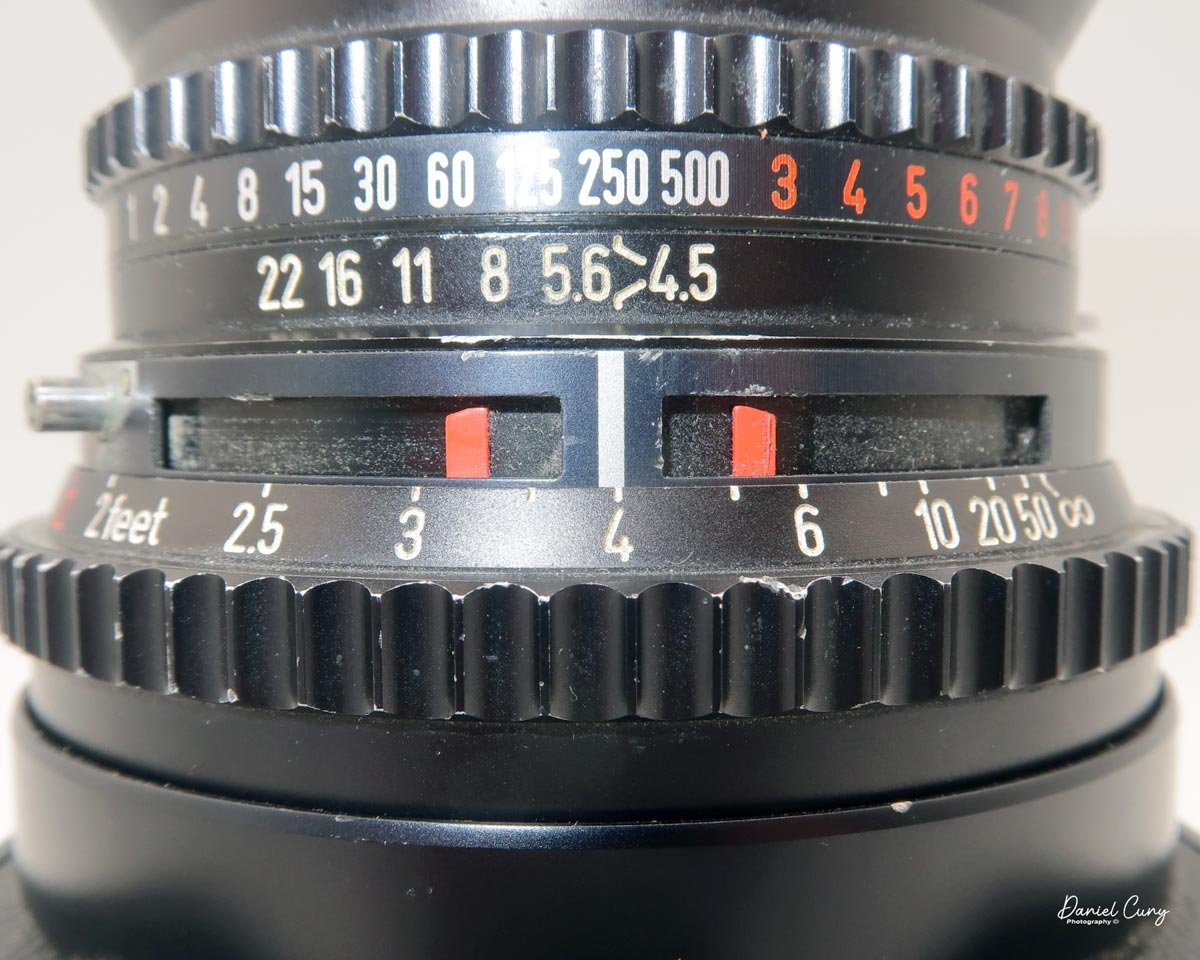
The camera features a Carl Zeiss Biogon 38mm f/4.5 lens in a Synchro-Compur shutter. This superb wide-angle lens has a 91-degree angle of view with very minimal distortion. The Synchro-Compur shutter offers speeds ranging from 1/500 of a second down to a maximum 60-second exposure, along with a "B" mode for longer exposures if needed.

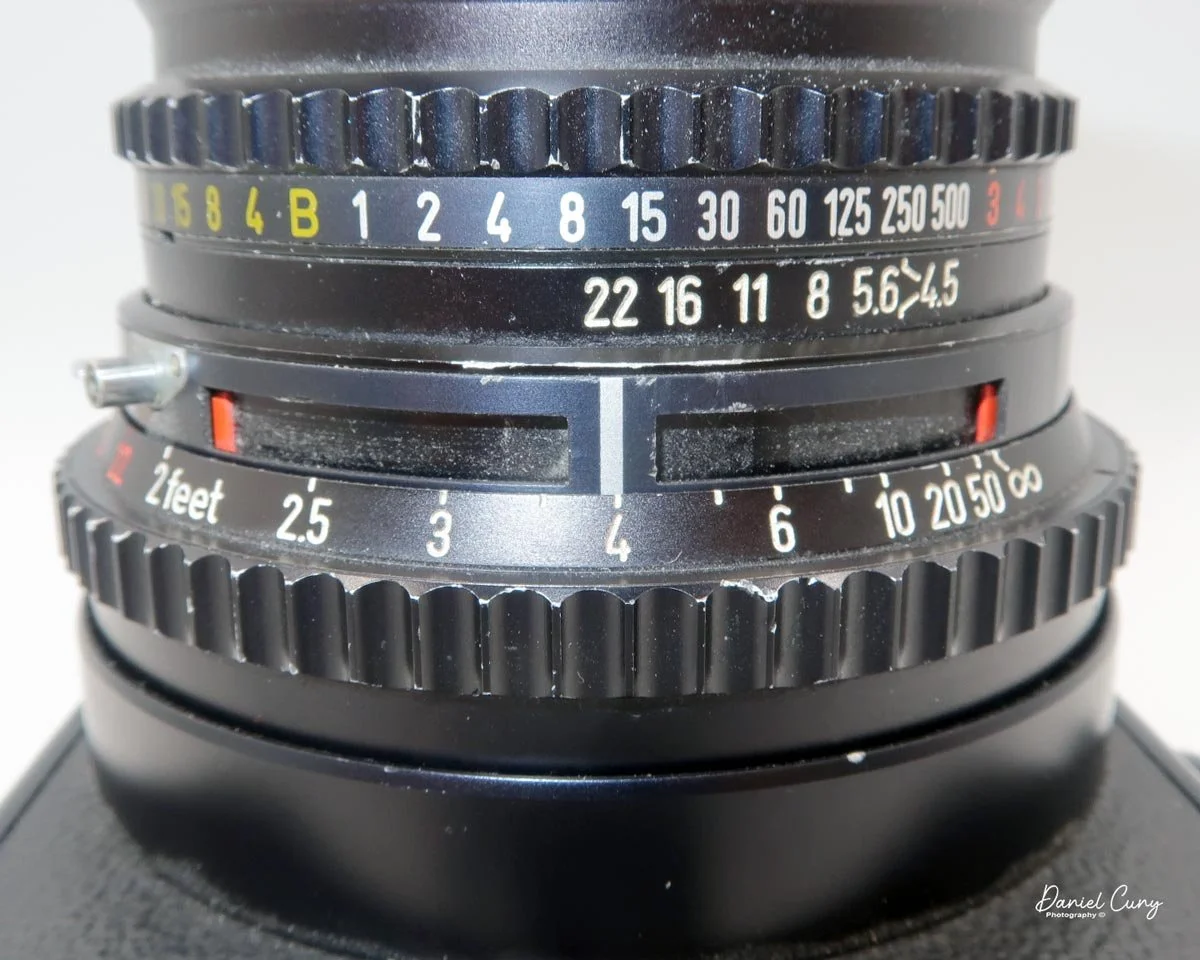
 Another feature I love about the Hasselblad system is how setting the shutter speeds and aperture gives you a "locked-in "EV" (Exposure Value) system. The shutter speeds are set via a knurled ring on the outside portion of the lens, but the speed is limited by where the aperture ring is currently set. If you need a higher or lower shutter speed, you have to change the aperture ring to achieve it.
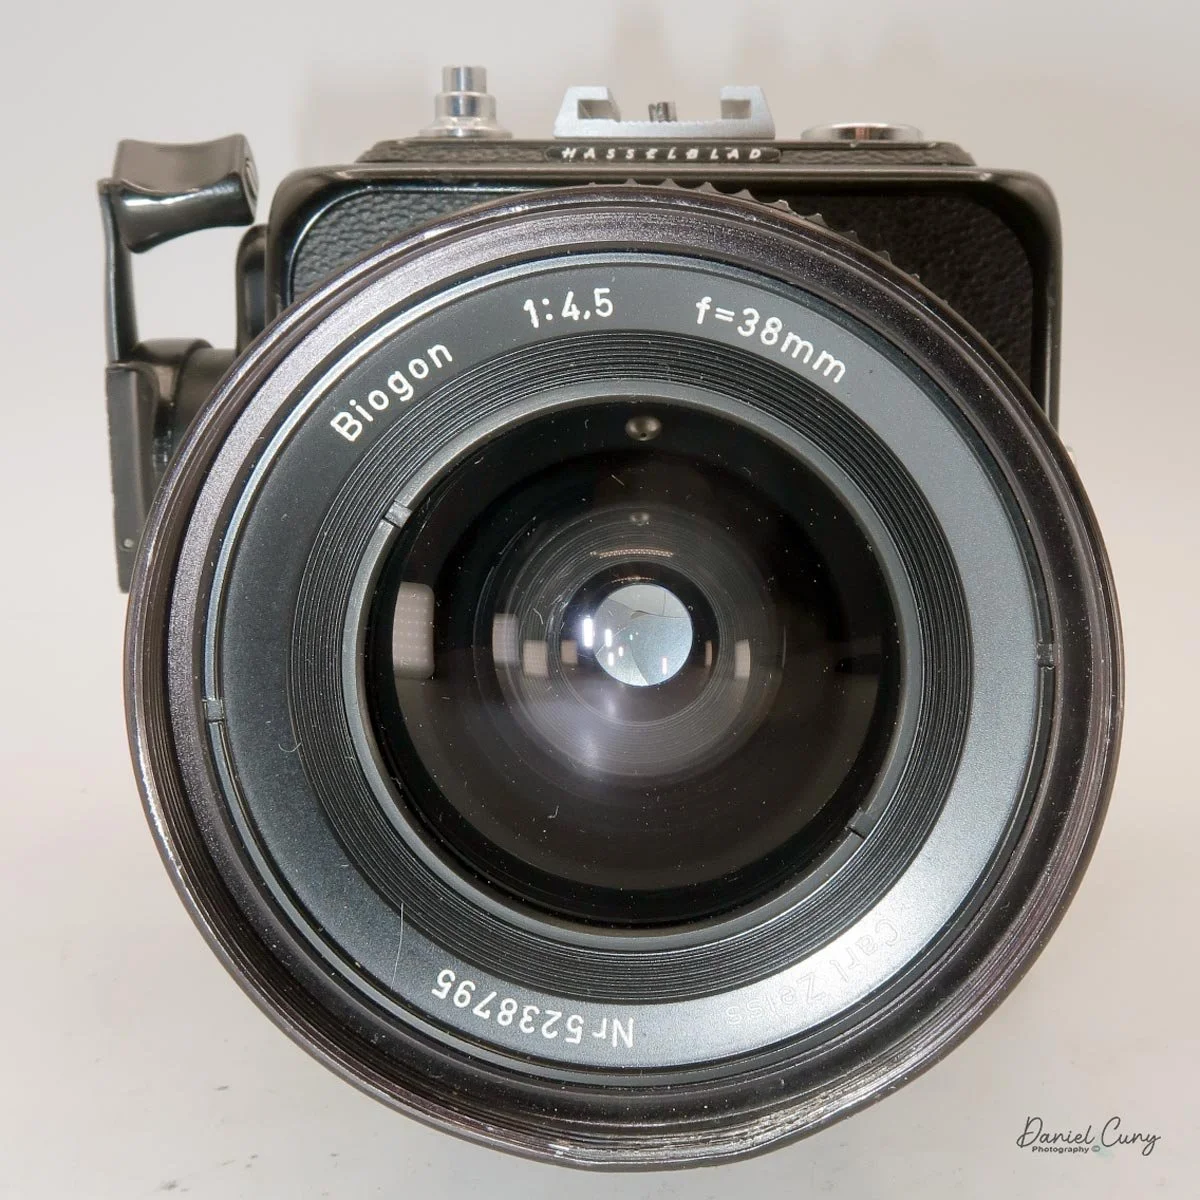
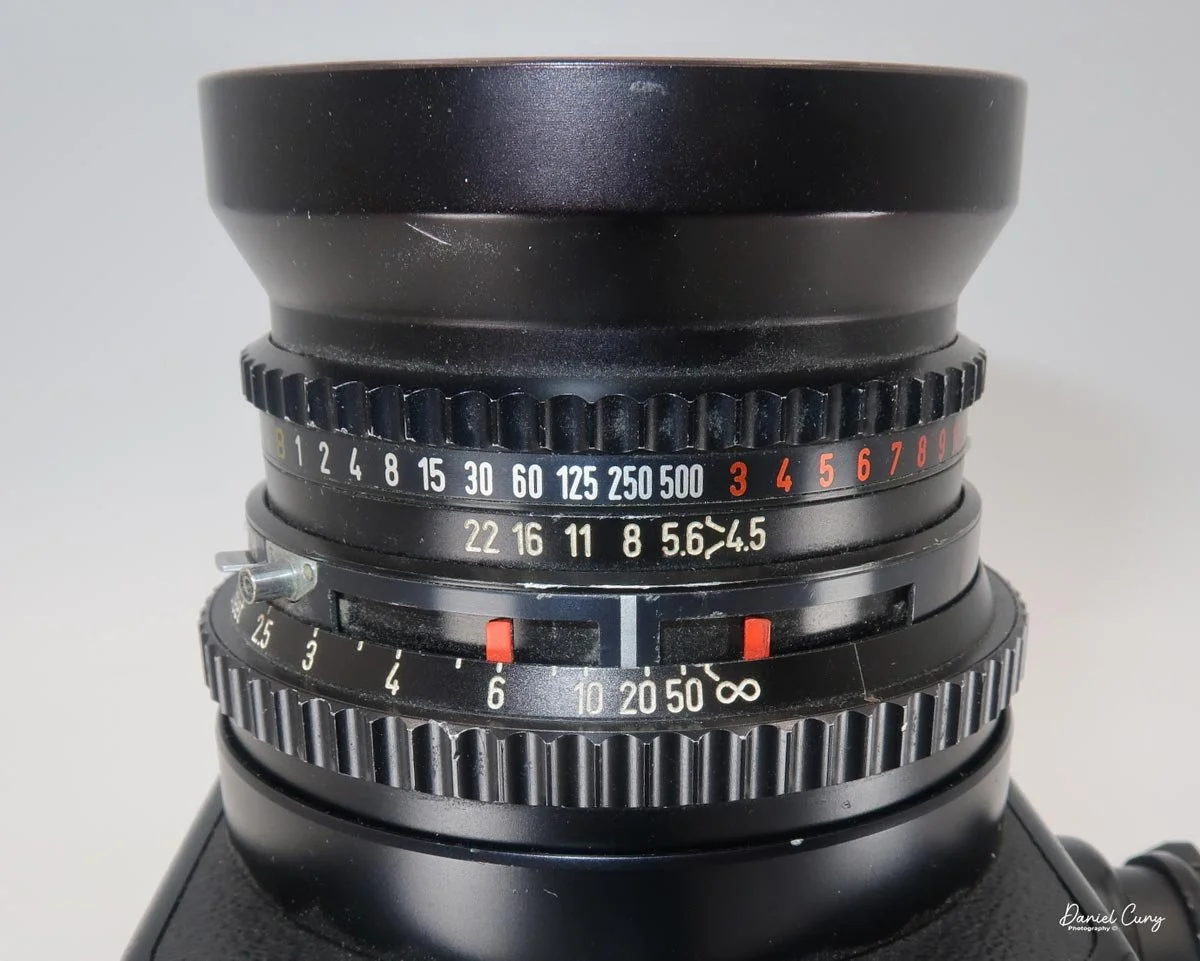
To change the aperture, you pull back on a small silver tab on the side of the aperture ring, then slide it up or down to adjust your shutter speed. Because Hasselblad uses an EV system, the exposure value is "locked" when you set your combination. This is wonderful because once you are locked in, changing the shutter speed automatically shifts the aperture value, maintaining the proper exposure you originally metered for.

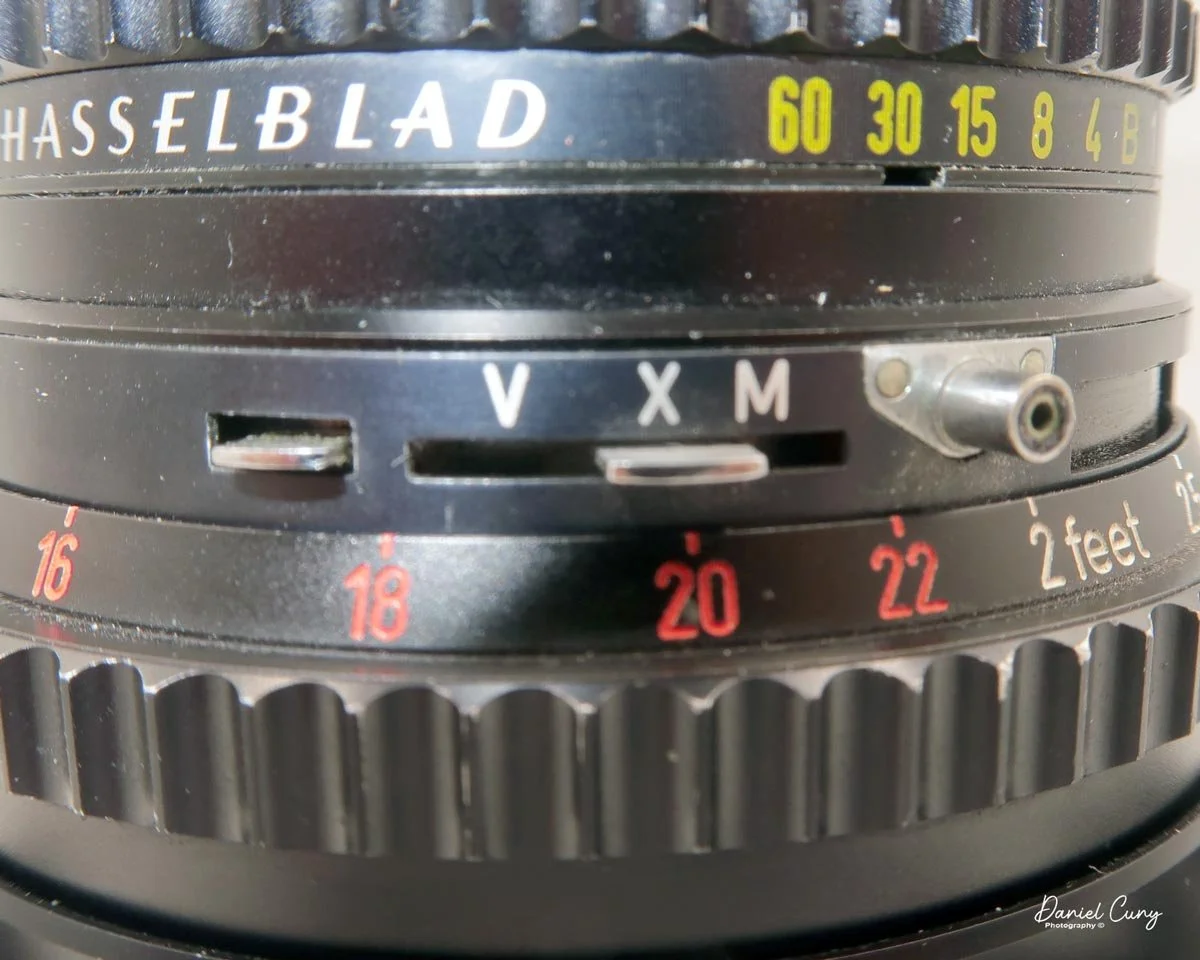
 You'll also notice two red bars on either side of the focus line on the lens barrel. These move in or out when you change the EV setting, corresponding to your focused distance. They provide a quick visual of the depth of field you'll have based on the shutter speed and aperture combination you've chosen.
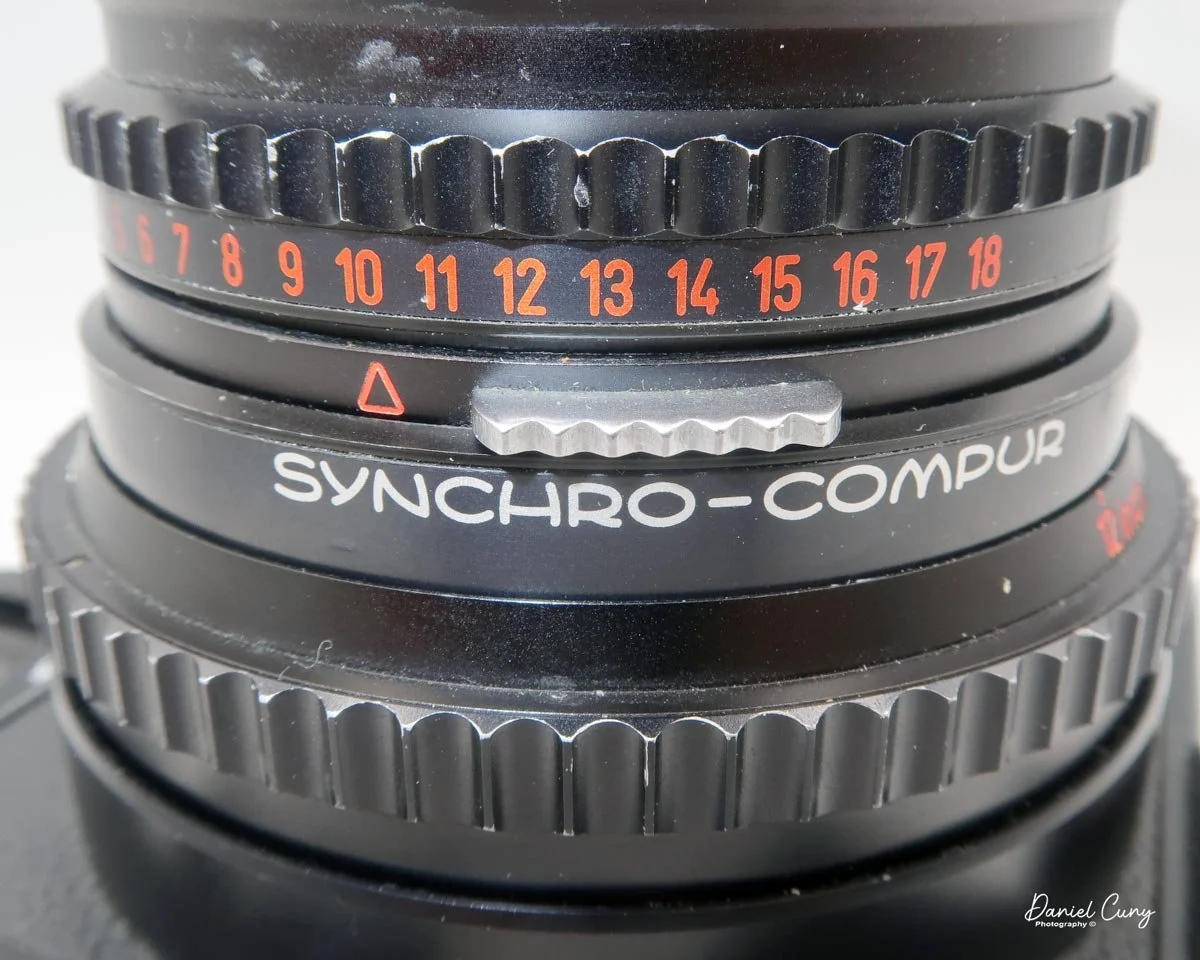
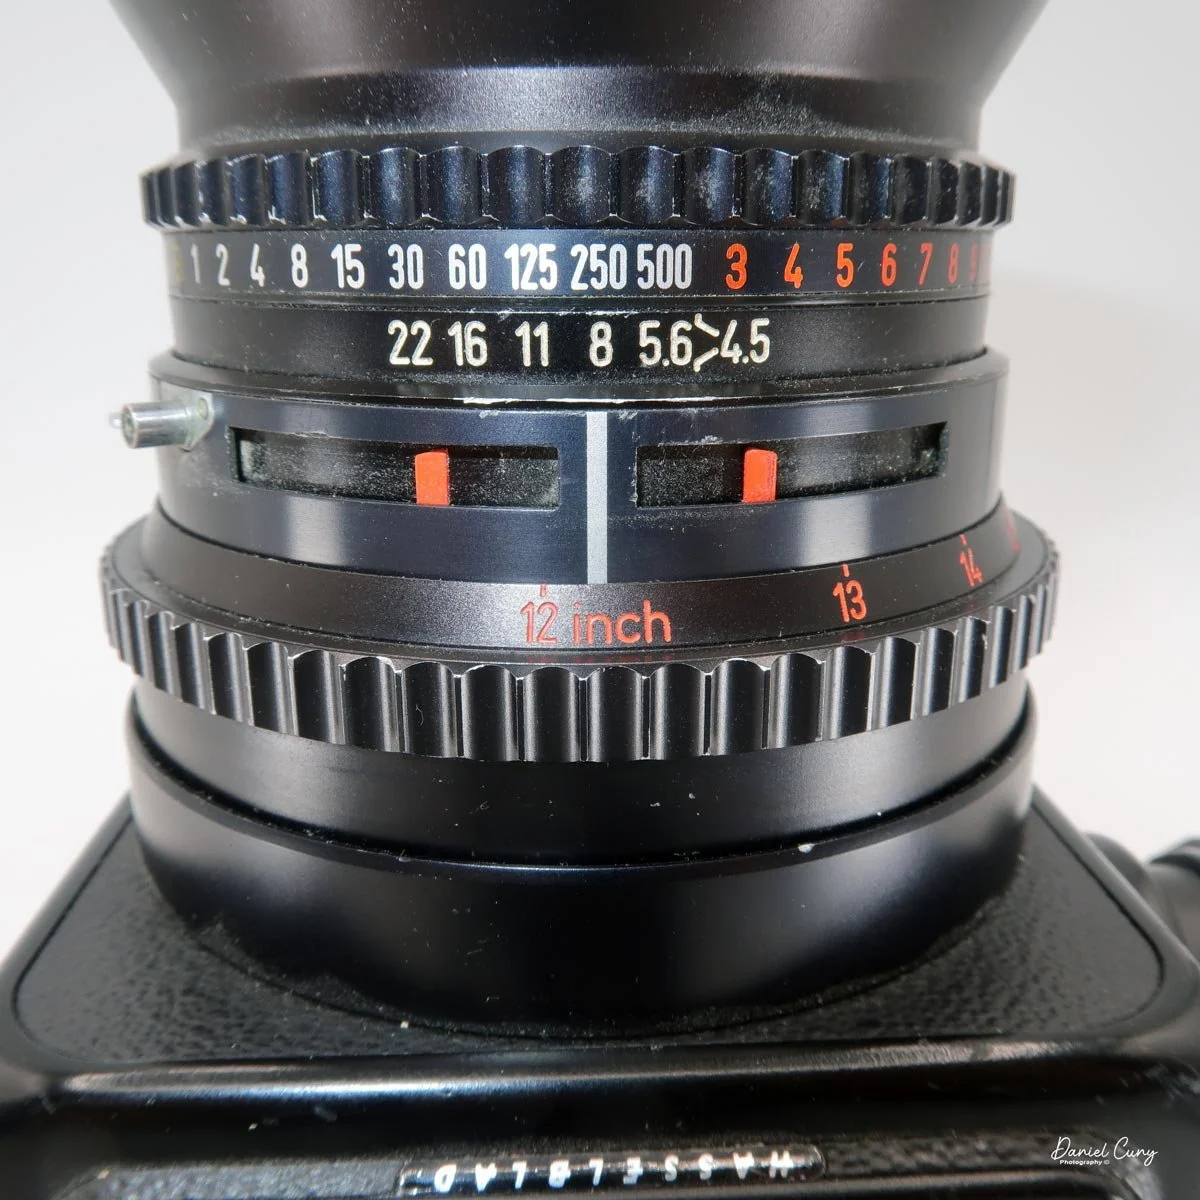
On the left side of the lens is a switch that sets the flash sync type: "M" for bulb, "X" for electronic flash, and "V" for an 8.5-second self-timer. To set the camera to the "V" position, you must press a small button just under the setting before the switch will move. After the self-timer fires, the switch automatically returns to the "X" position. Just above this switch is the PC sync terminal where you connect your flash cable, as this camera does not have a hot shoe.

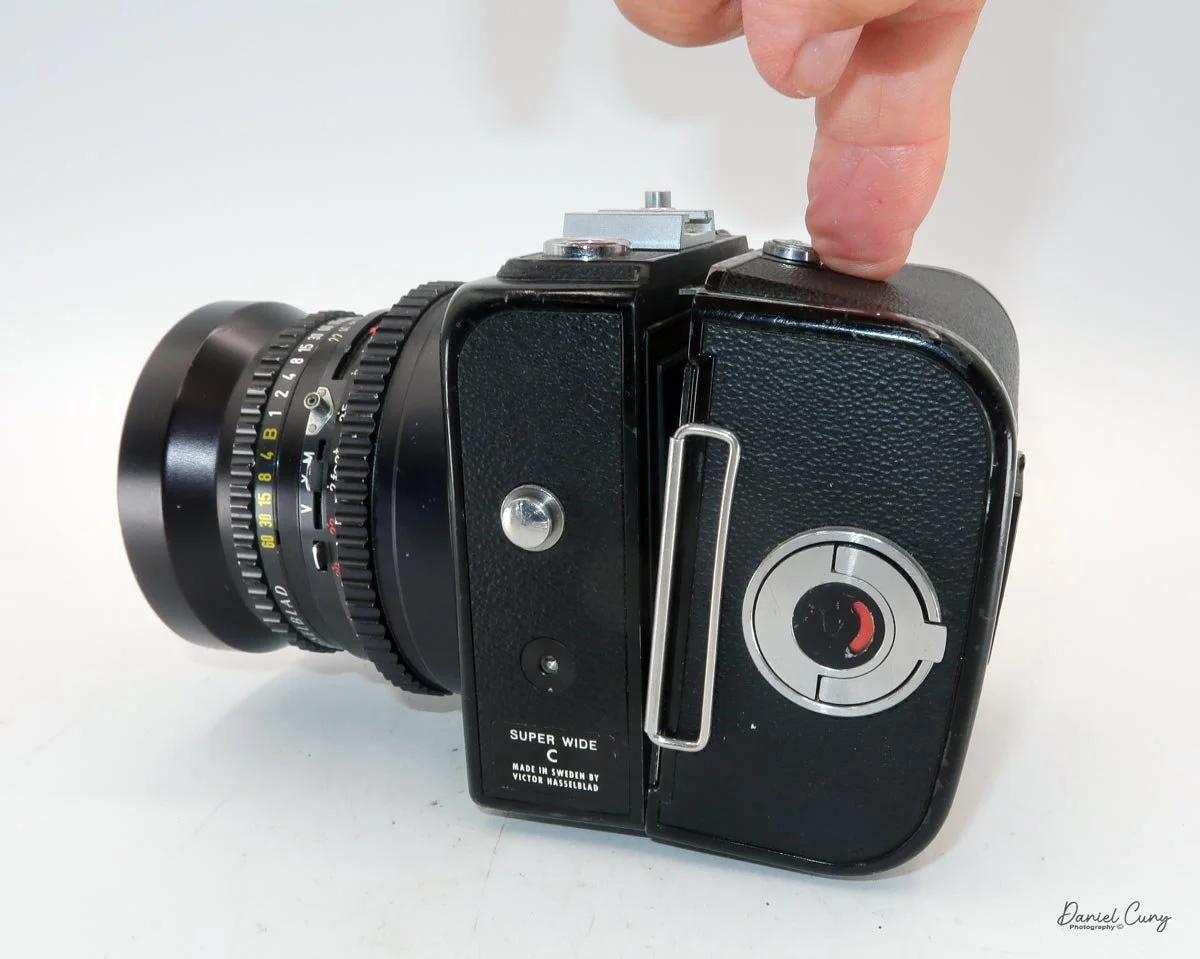
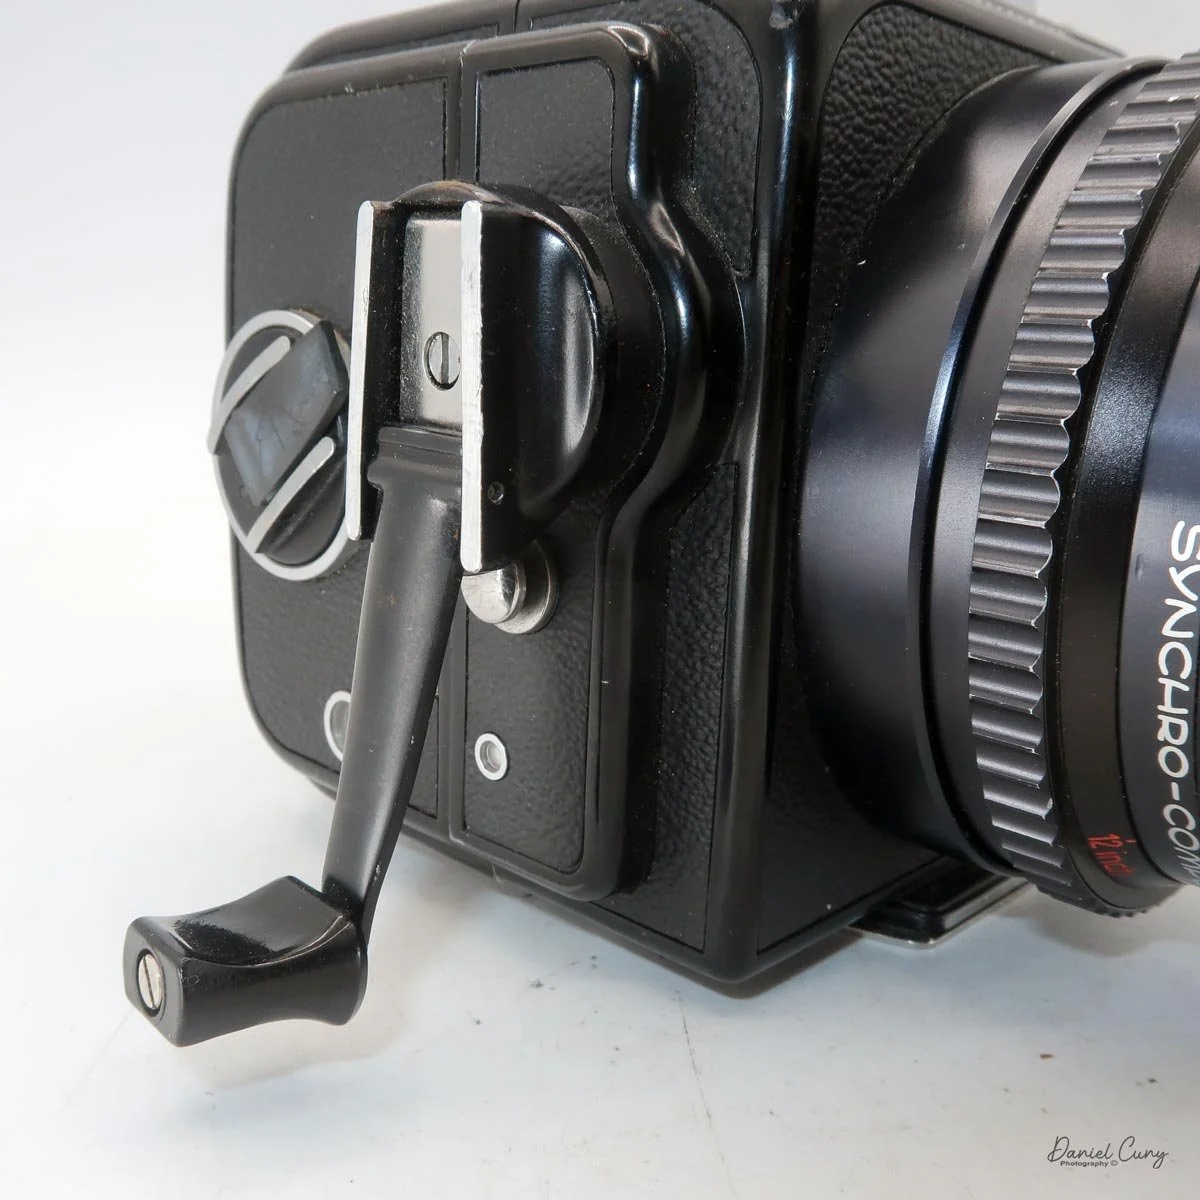
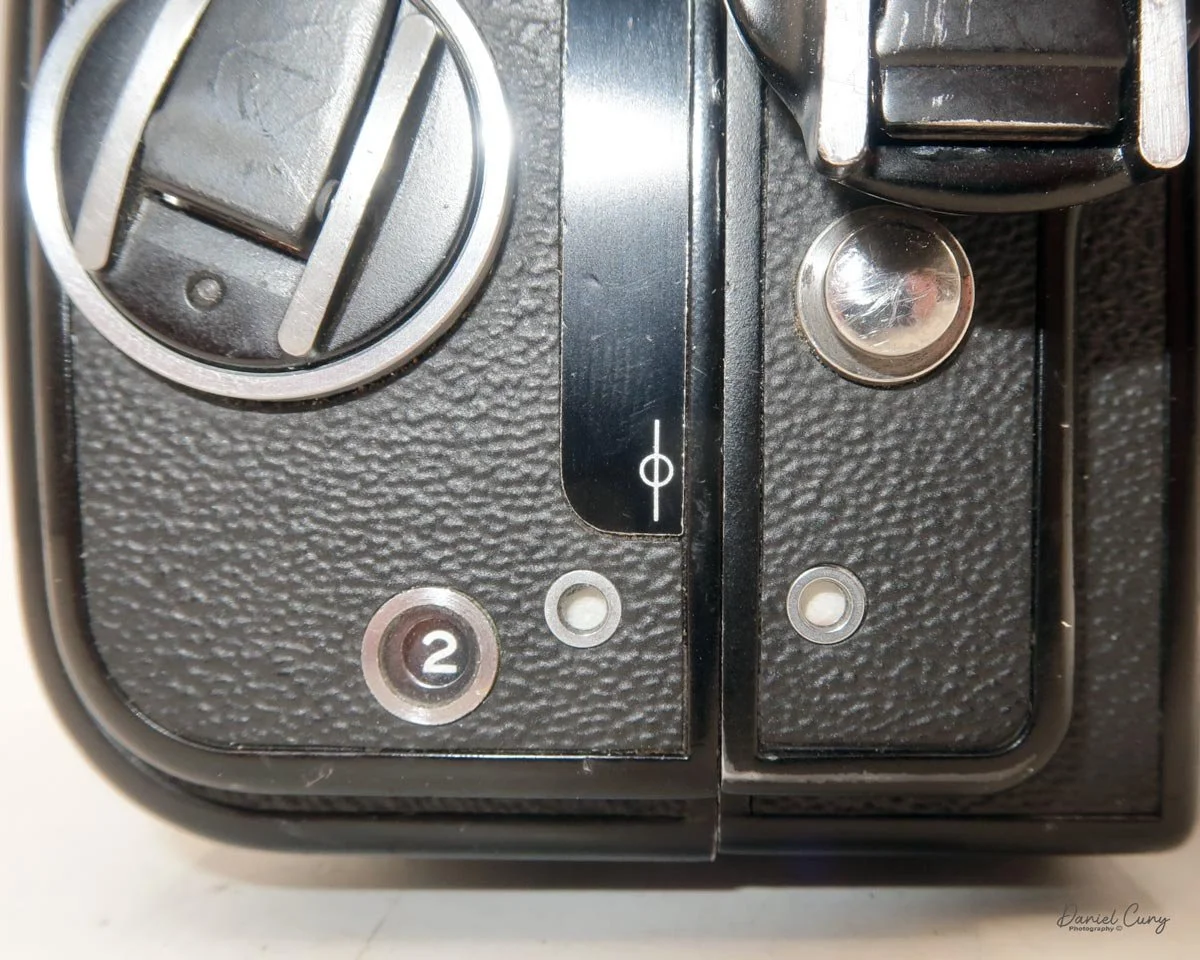
 On the right side of the body sits the winding lever. Just under it is a small status window. If the window is white, the camera is cocked and ready for the next exposure. If it is red, the camera needs to be wound.
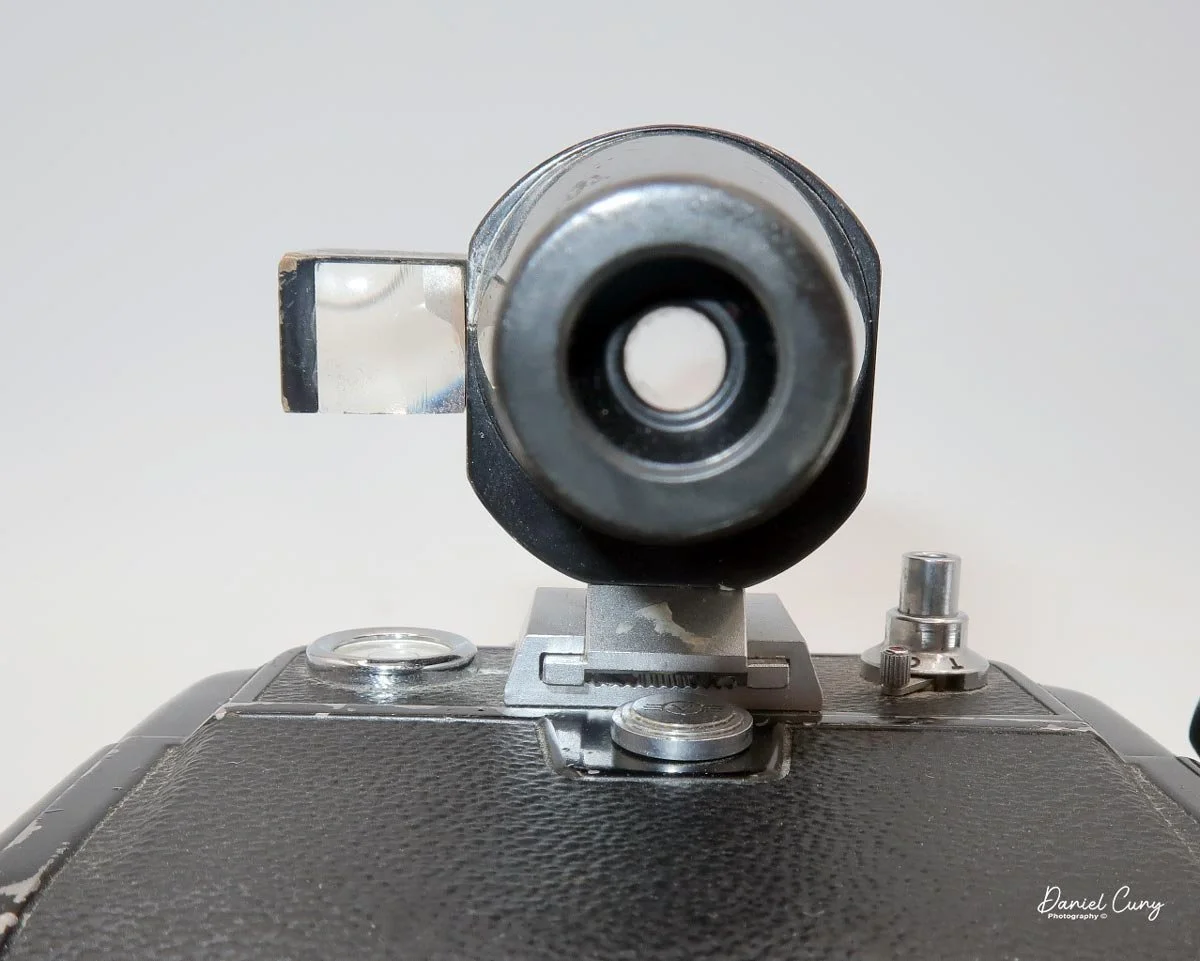
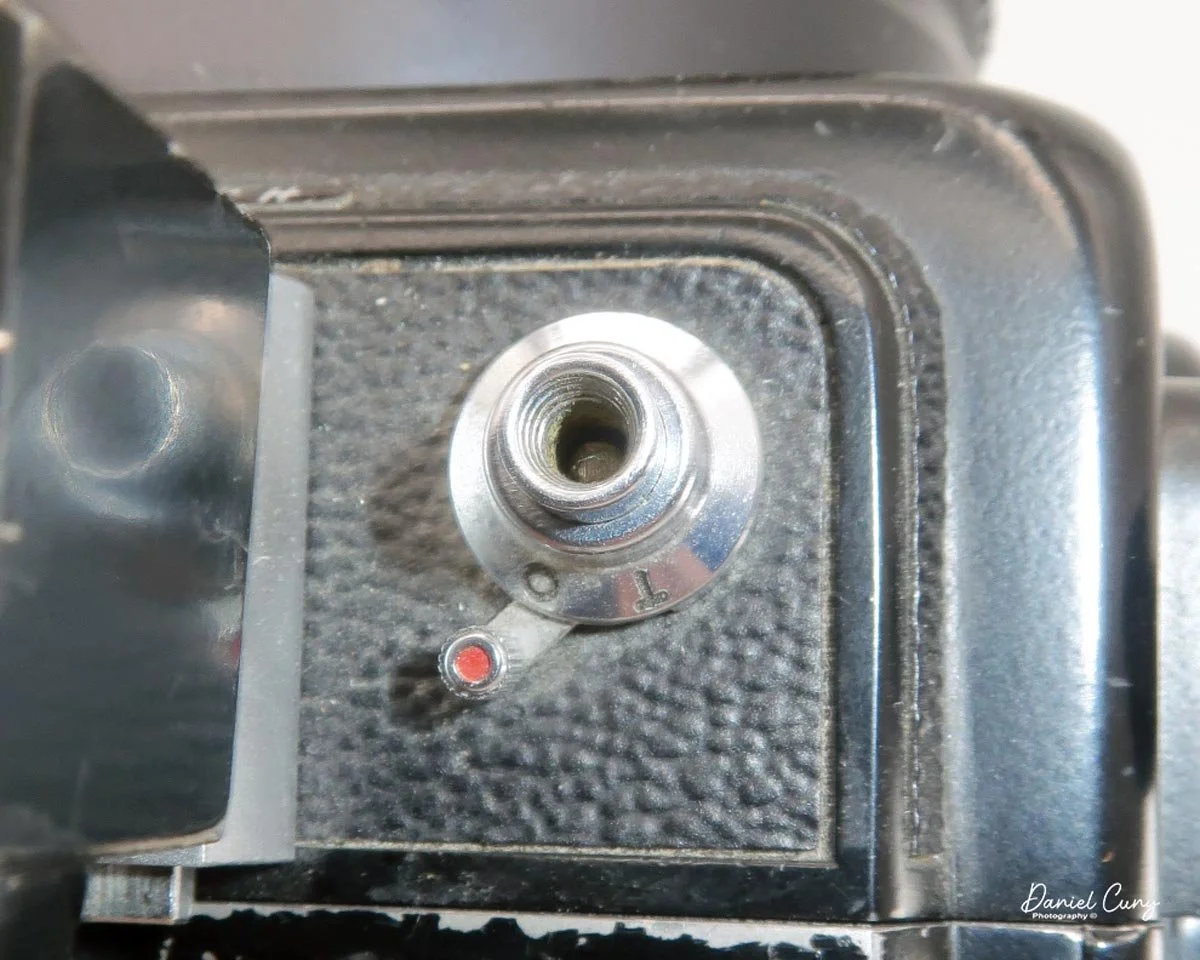
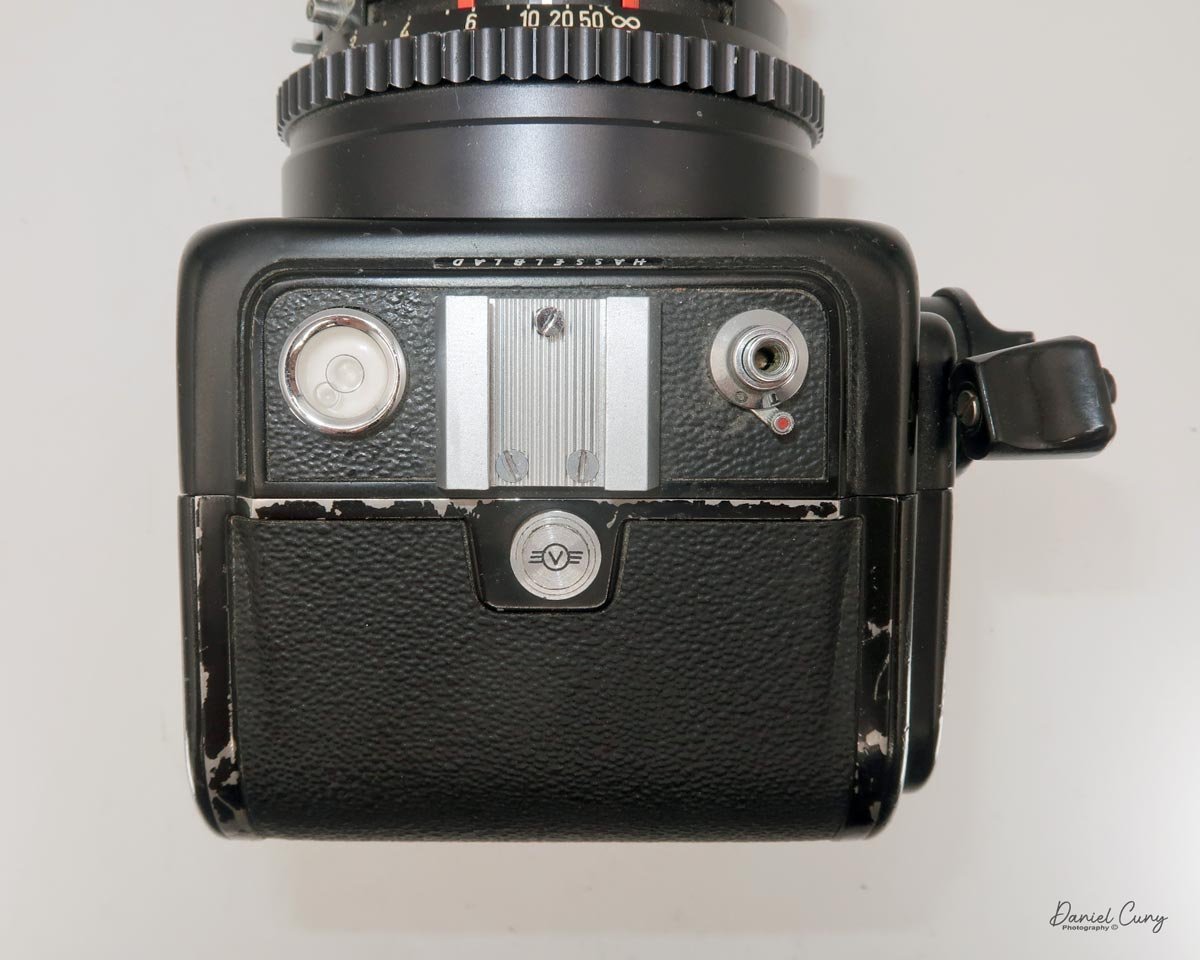
On top of the camera, there is a bubble level just to the left of the cold shoe (which houses the optical viewfinder). To the right of the cold shoe is the shutter release. The shutter release features a small switch behind it to lock or unlock the button, preventing accidental exposures.

The optical viewfinder is fantastic and highly functional. One of my absolute favorite parts of the finder is the small prism on the left side. This prism (or optical mirror) is placed directly over the camera's bubble level. When framing a photo through the viewfinder, it's incredibly easy to glance over and ensure the bubble is centered. This guarantees your camera is plumb with the horizon and perfectly straight.

 Both sides of the camera body feature lugs for attaching a leather carrying strap.
Loading the Film

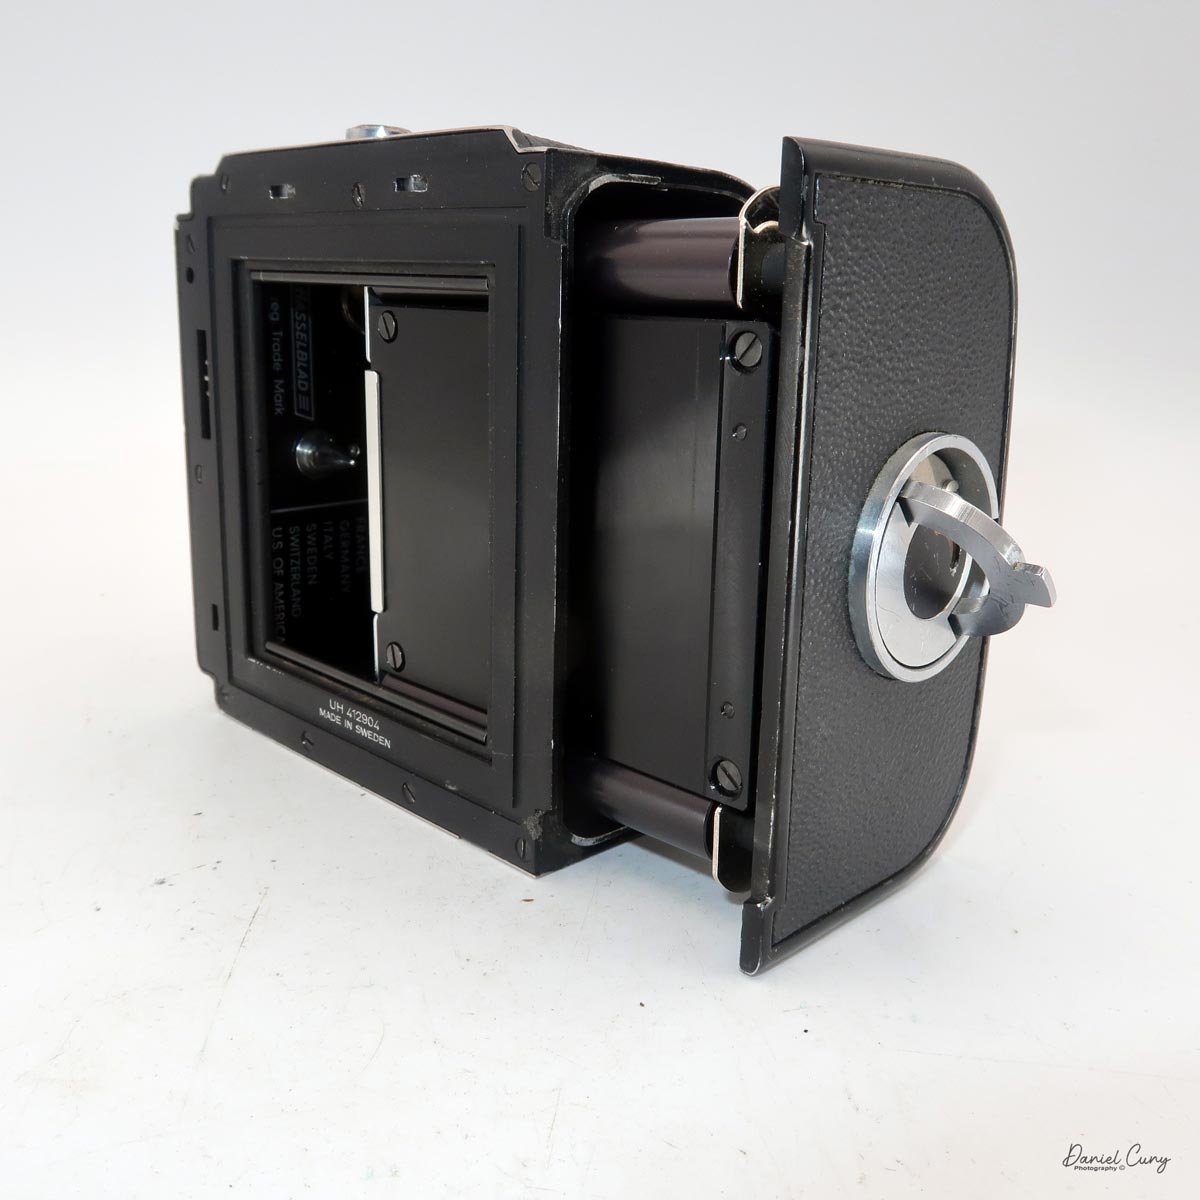
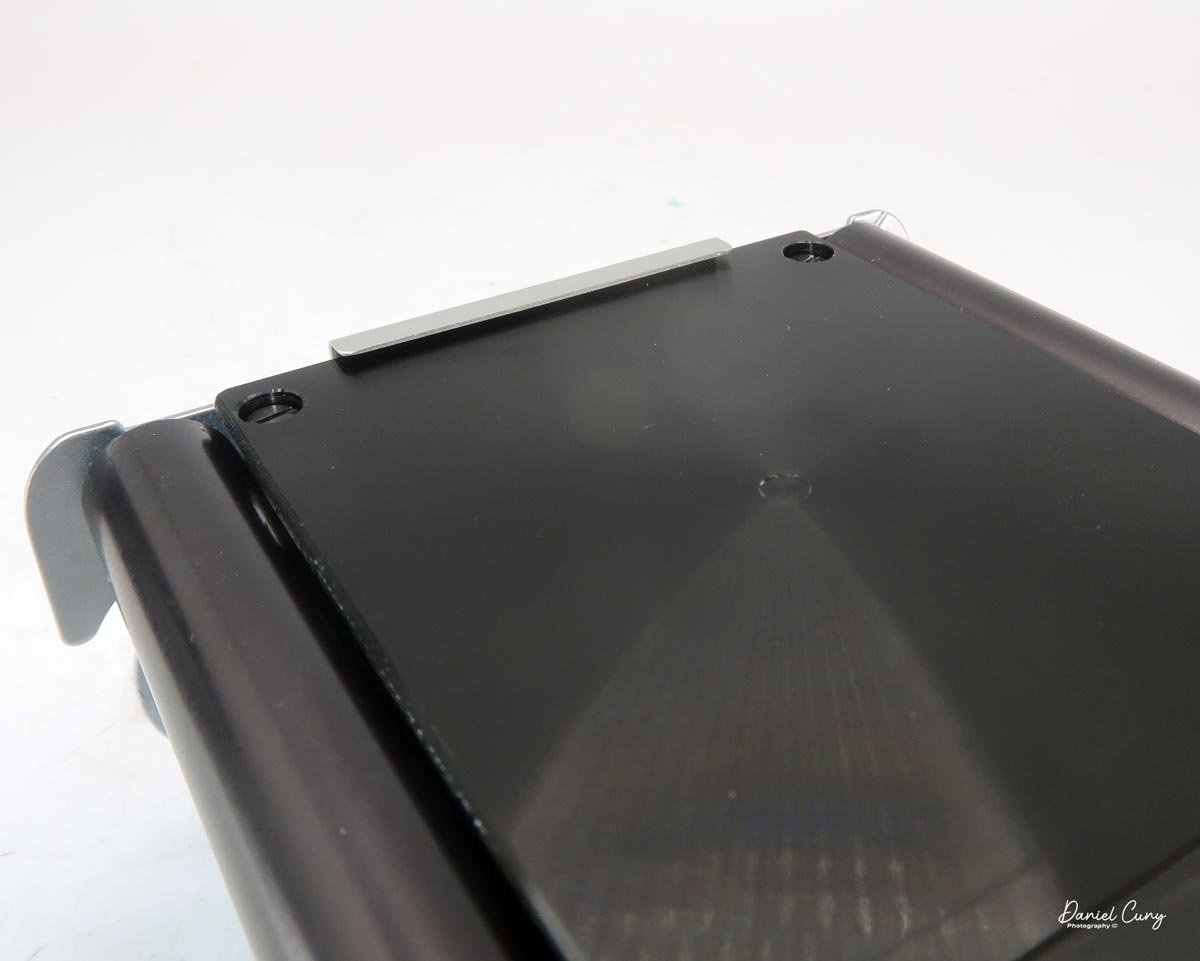
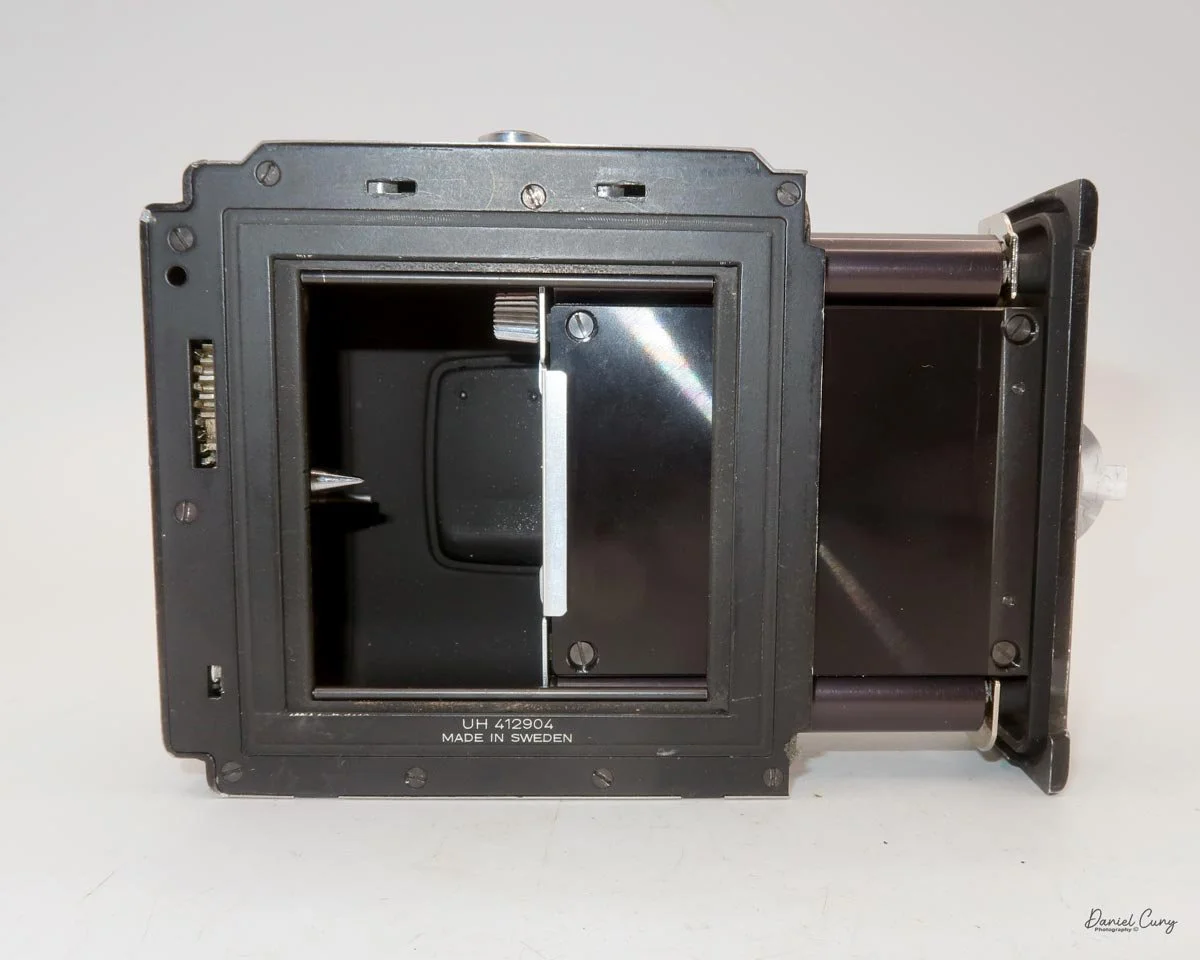
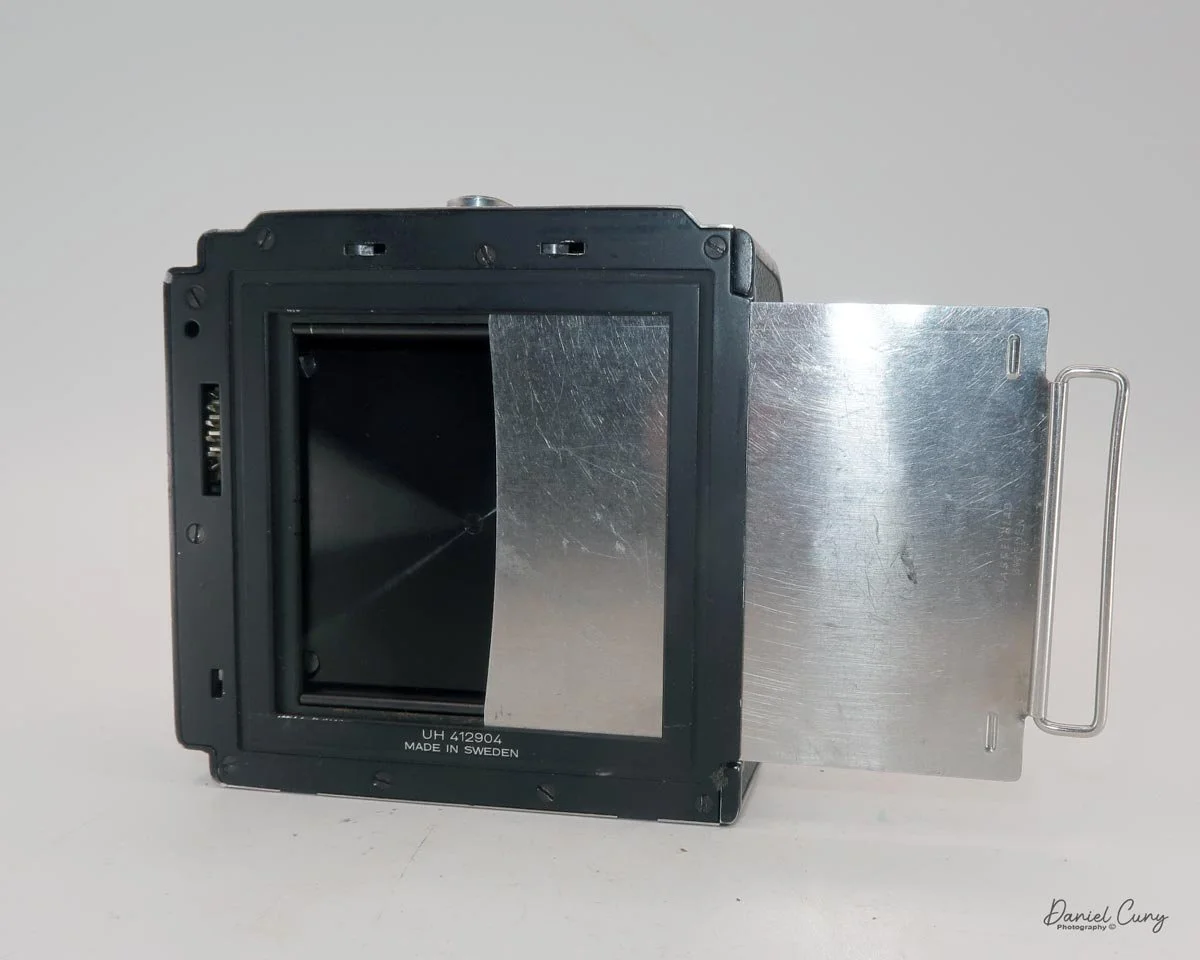
 The film back is removed by sliding the round button on the top of the back, tipping it away from the camera body, and lifting it off. The film back features a chrome dark slide that fits into a thin slot on the left side. Note: The dark slide must be inserted before the camera will allow you to remove the back, and it must be removed before you can fire the shutter.

 Here is the step-by-step process for loading film:

  1. Remove the Film Chamber: On the left side of the film back, turn the latch to unlock and pull the film chamber out.

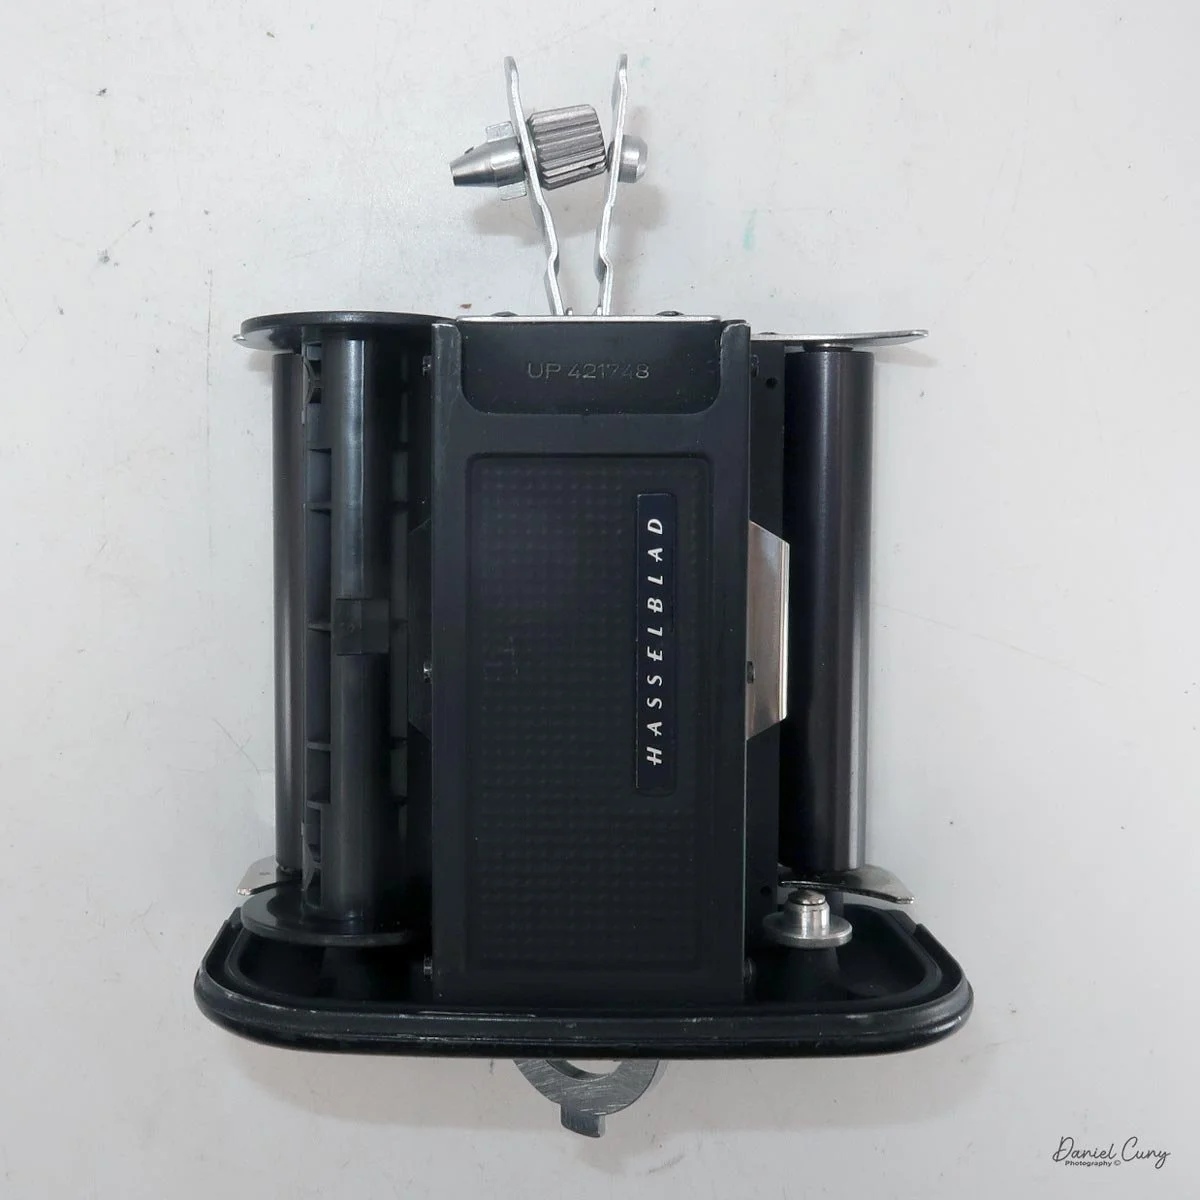
  2. Prep the Spools: Lift the film holders on the chamber to make loading easier. Place your empty take-up spool on the side with the small knurled handle, then close the holder to secure it.

  3. Load the Fresh Film: Place your fresh roll of 120 film into the opposite side and pull down the arm to lock it in place.

  4. Thread the Leader: Draw the film leader across the silver pressure plate. Turn the latch that unlocks the chamber so the small retaining ledge lifts up; slip the edge of the film under it.

  5. Secure and Wind: Insert the leader tab into the take-up spool slot. Turn the knurled knob on top to begin taking up the slack. Continue winding until the "Start" arrows on the film paper align with the designated mark.

  6. Reinsert the Chamber: Turn the locking knob back so the loaded chamber can slide back into the housing, then lock it firmly into place.

  7. Advance to Frame 1: MAKE SURE your dark slide is inserted! Use the winding crank on the right side of the film back, cranking it until it physically stops. You will now see the number "1" in the small circular window beneath the crank.

  8. Attach to the Camera: Place the two small slots on the bottom of the film back onto the two hooks on the lower rear of the camera body. Tilt the back upward until it clicks into the latches. You may need to slide the top locking button over slightly to ensure it is fully secure.
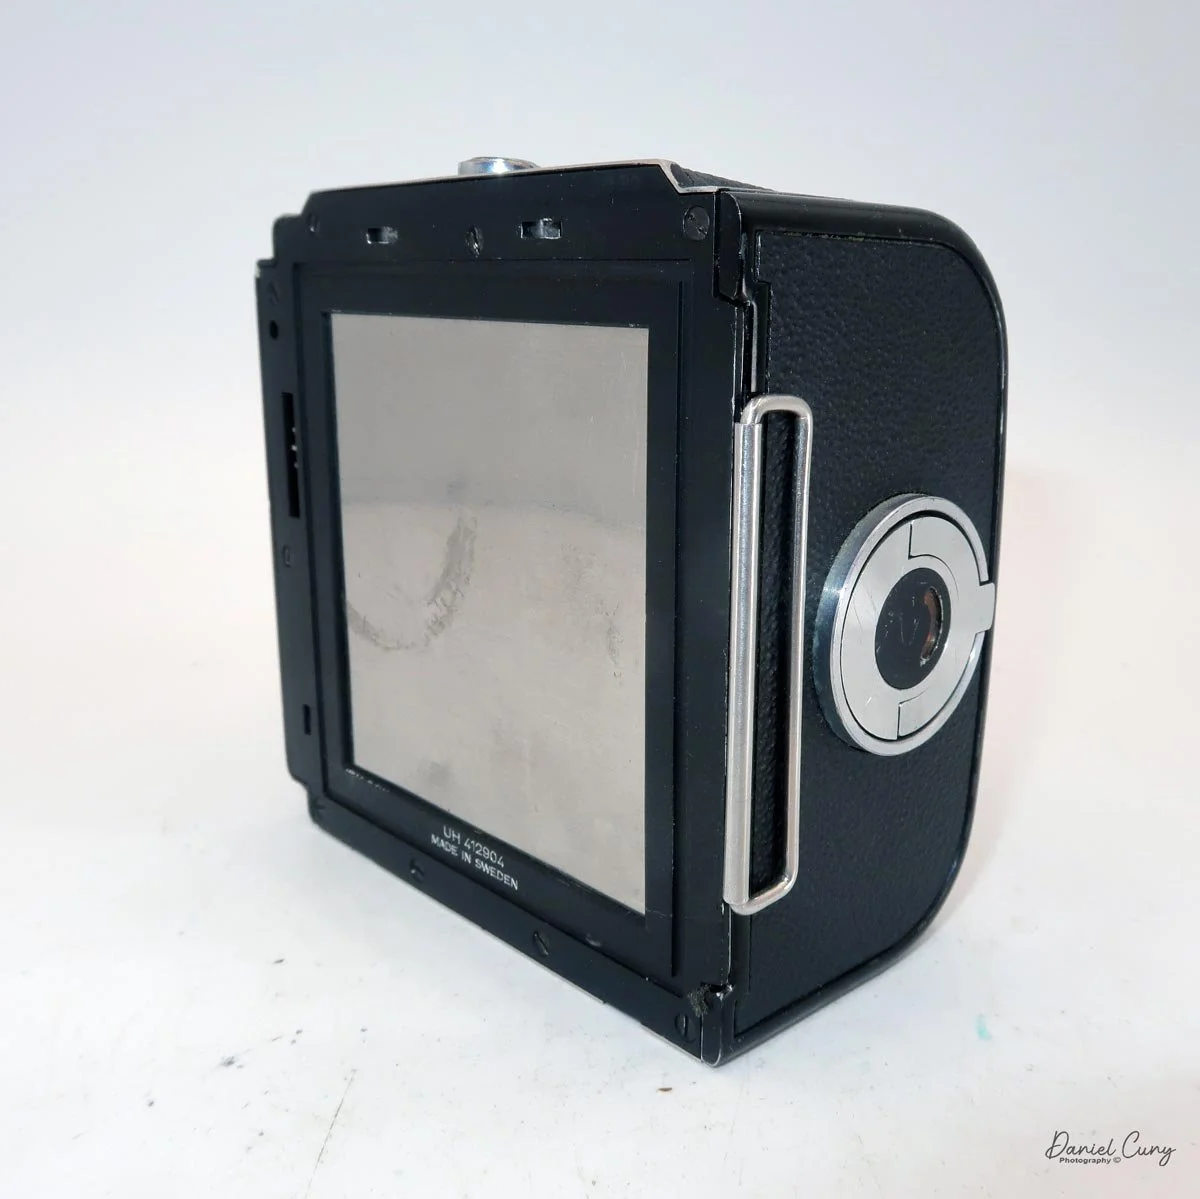
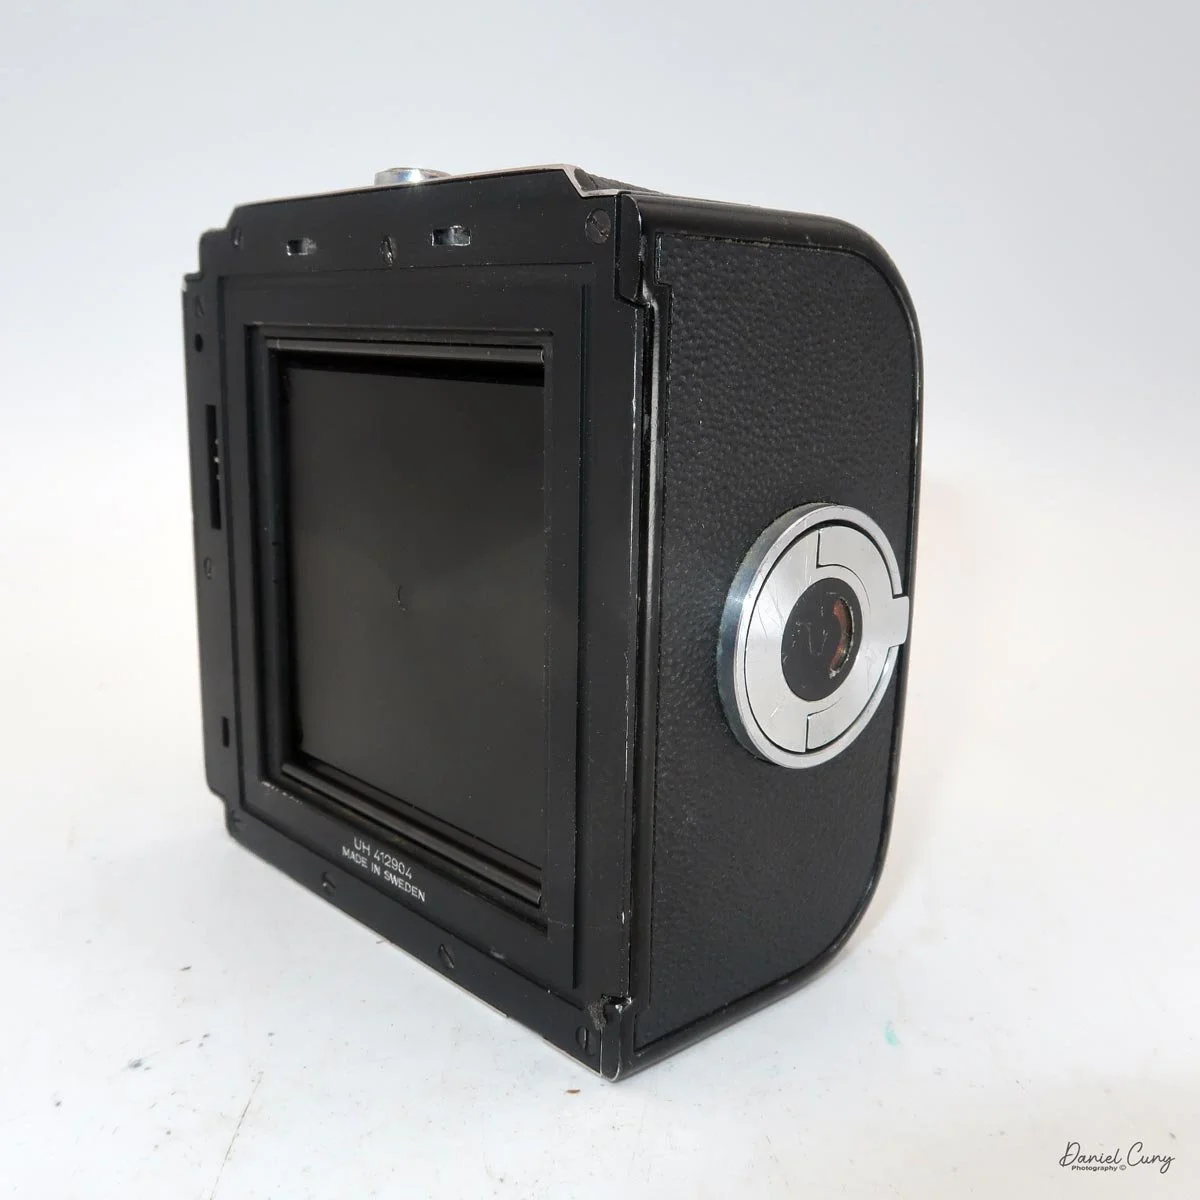
 You'll also notice a small status window to the right of the frame counter. When the film is ready for exposure, this window is white. After taking a photo, it turns red, signaling that the film needs to be advanced. The winding lever on the camera body handles everything in one motion—it cocks the shutter and advances the film to the next frame. Once wound, both the camera body and film back windows will turn back to white, and the frame counter will advance.
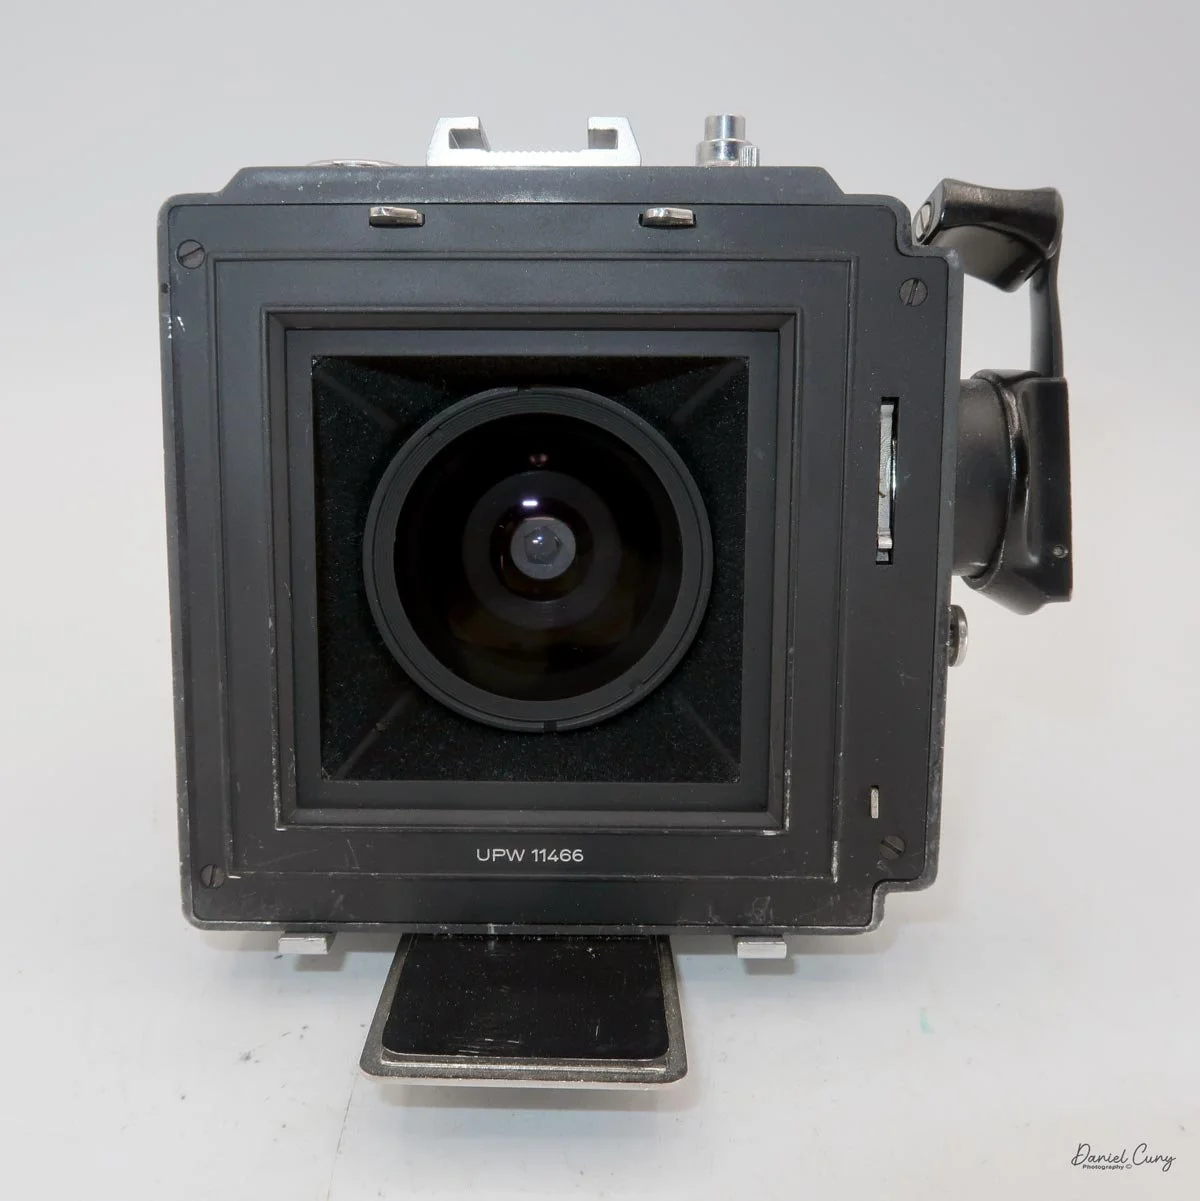
 Now that we have film loaded and the back attached, let's go out, take some photos, and see how the camera performs!

Hasselblad Super Wide C (SWC) Overview Video
My Results

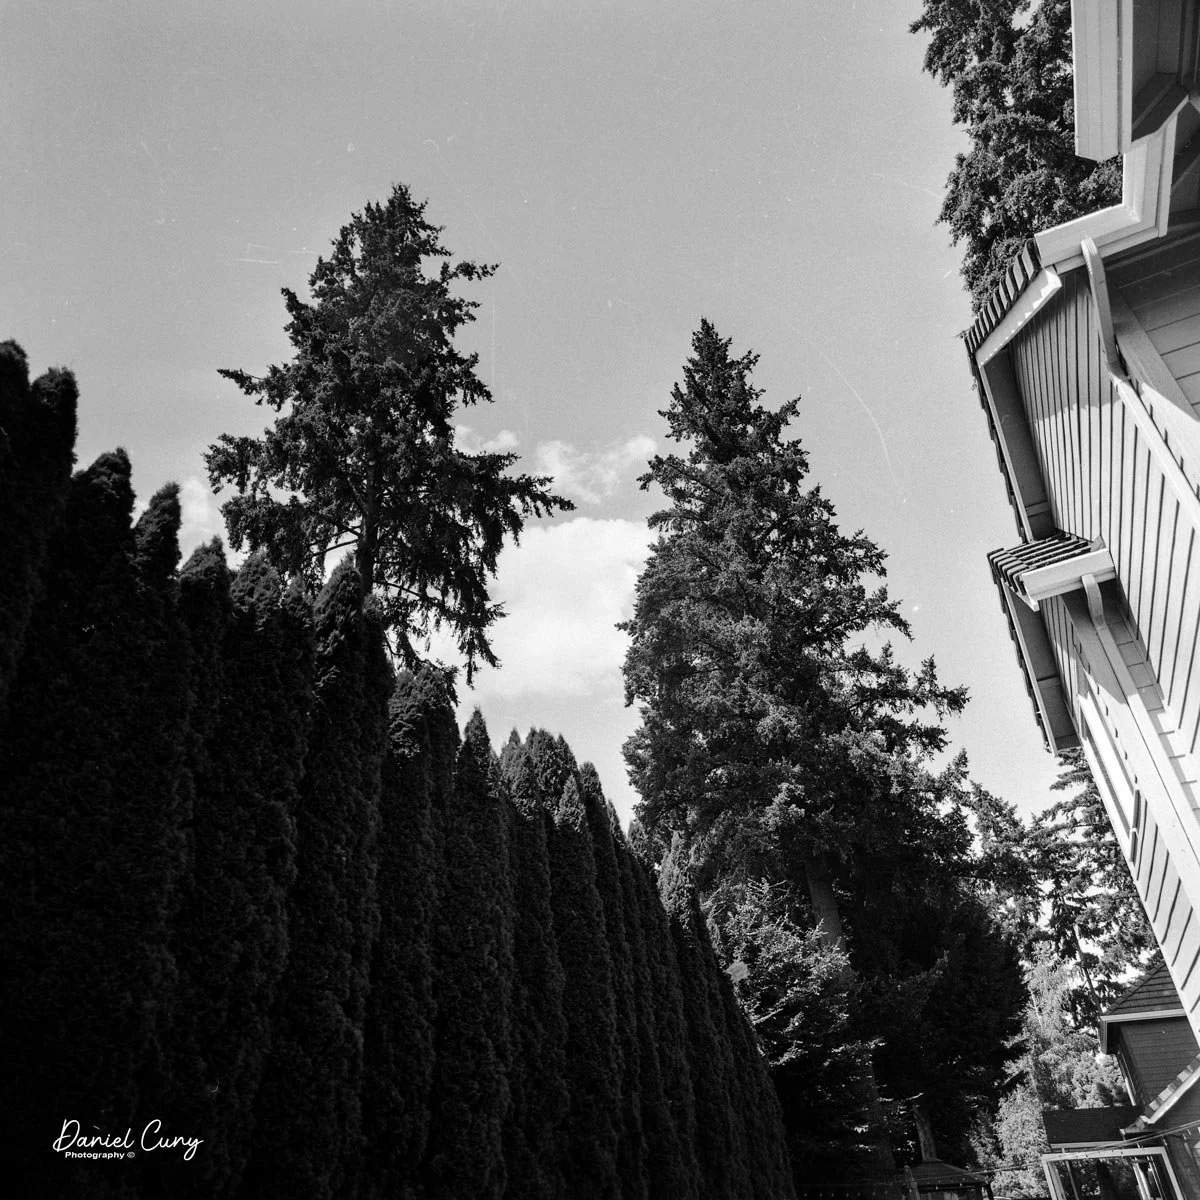
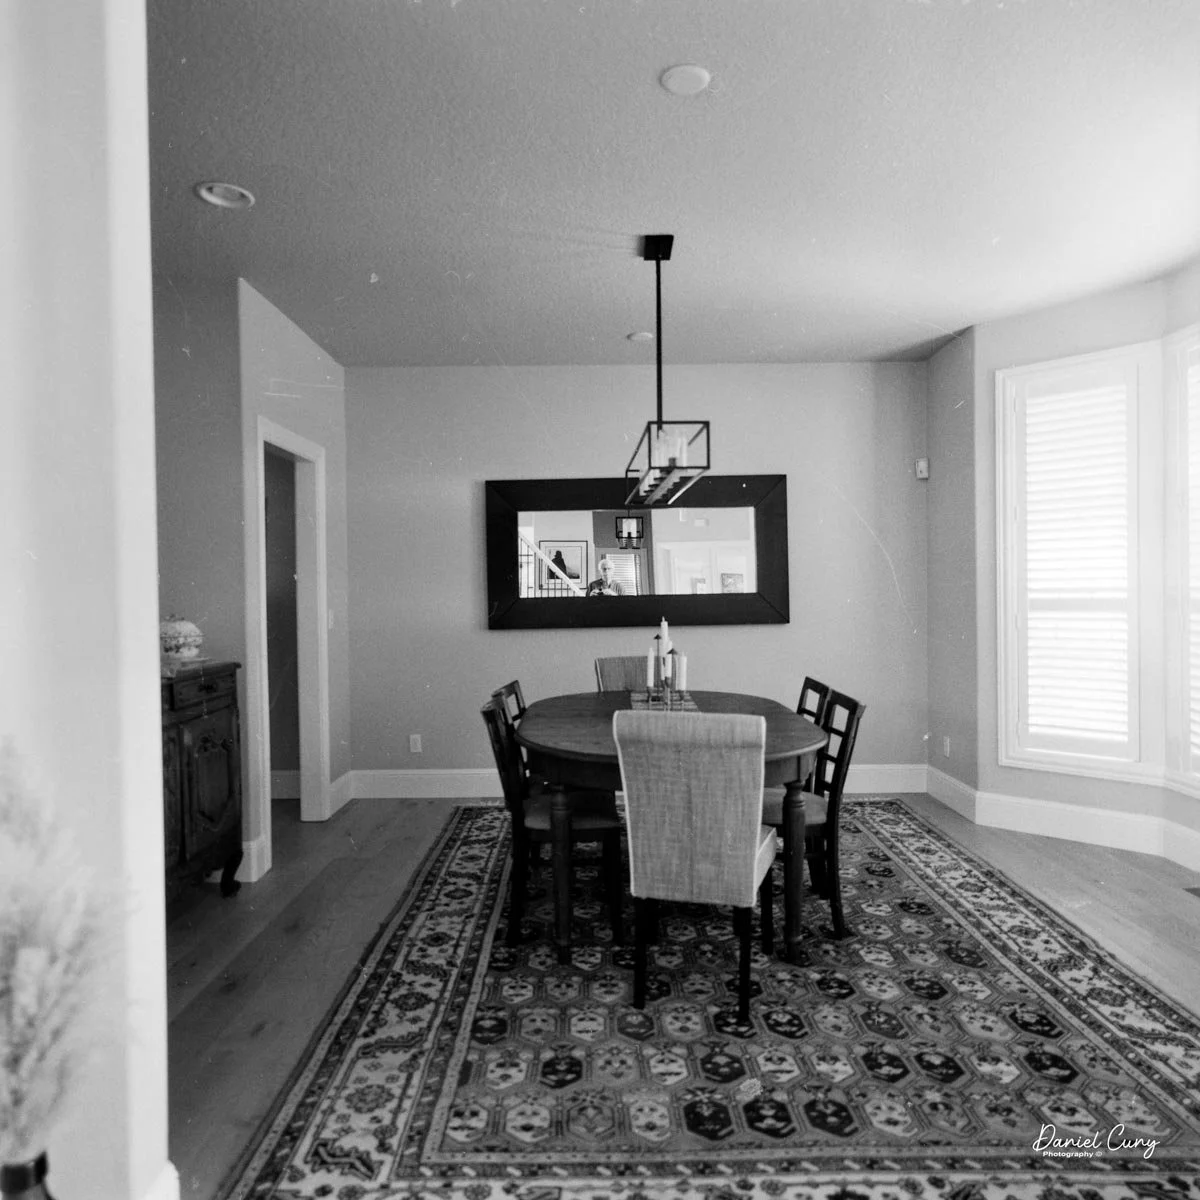
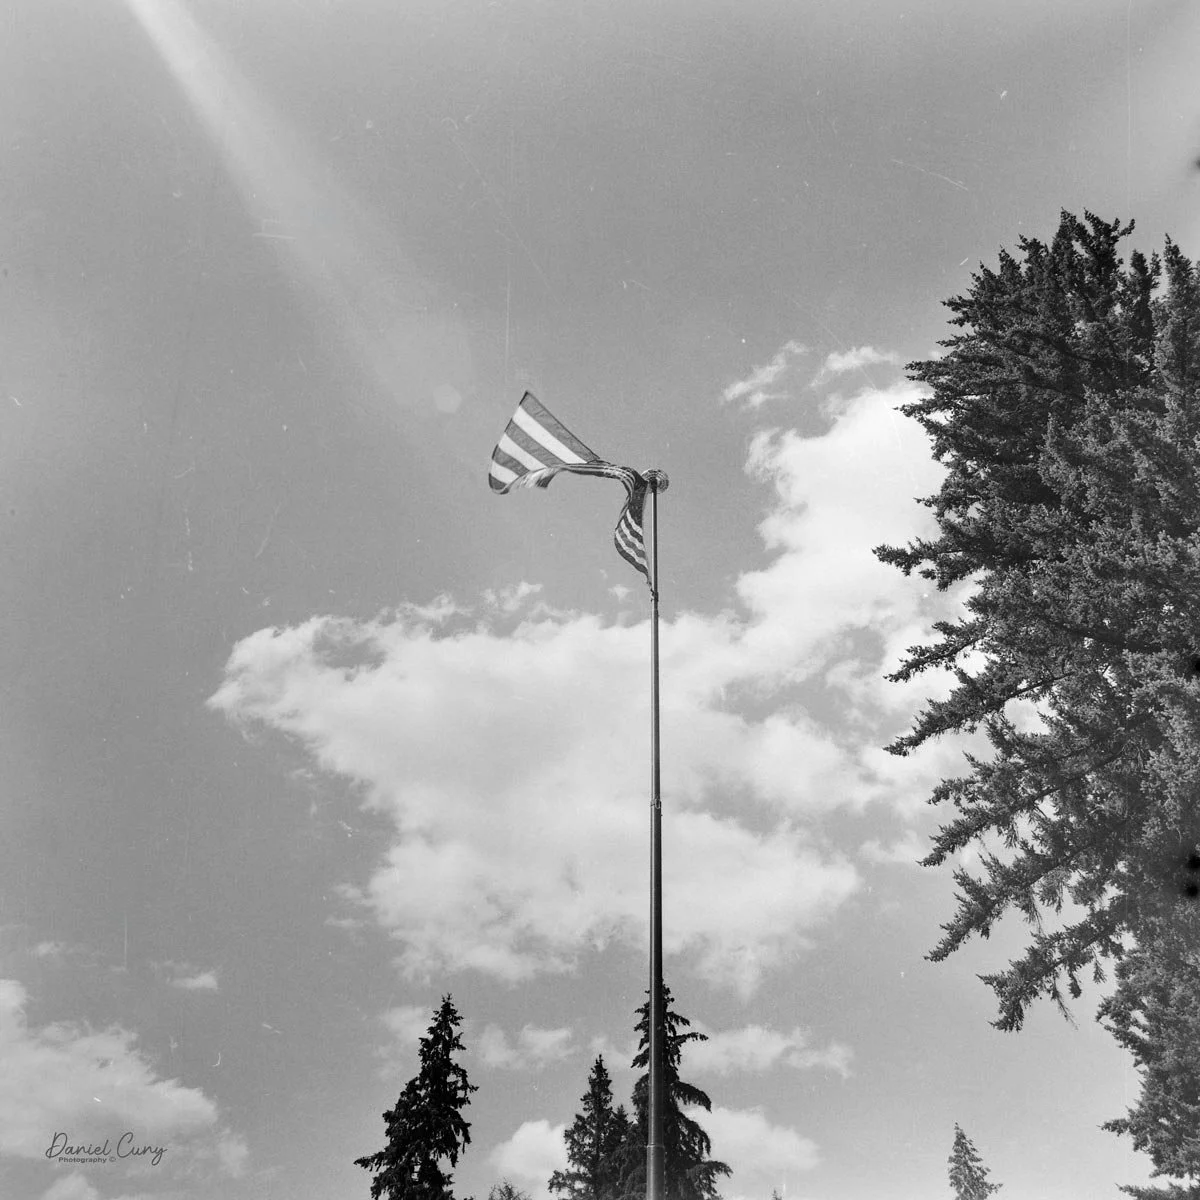
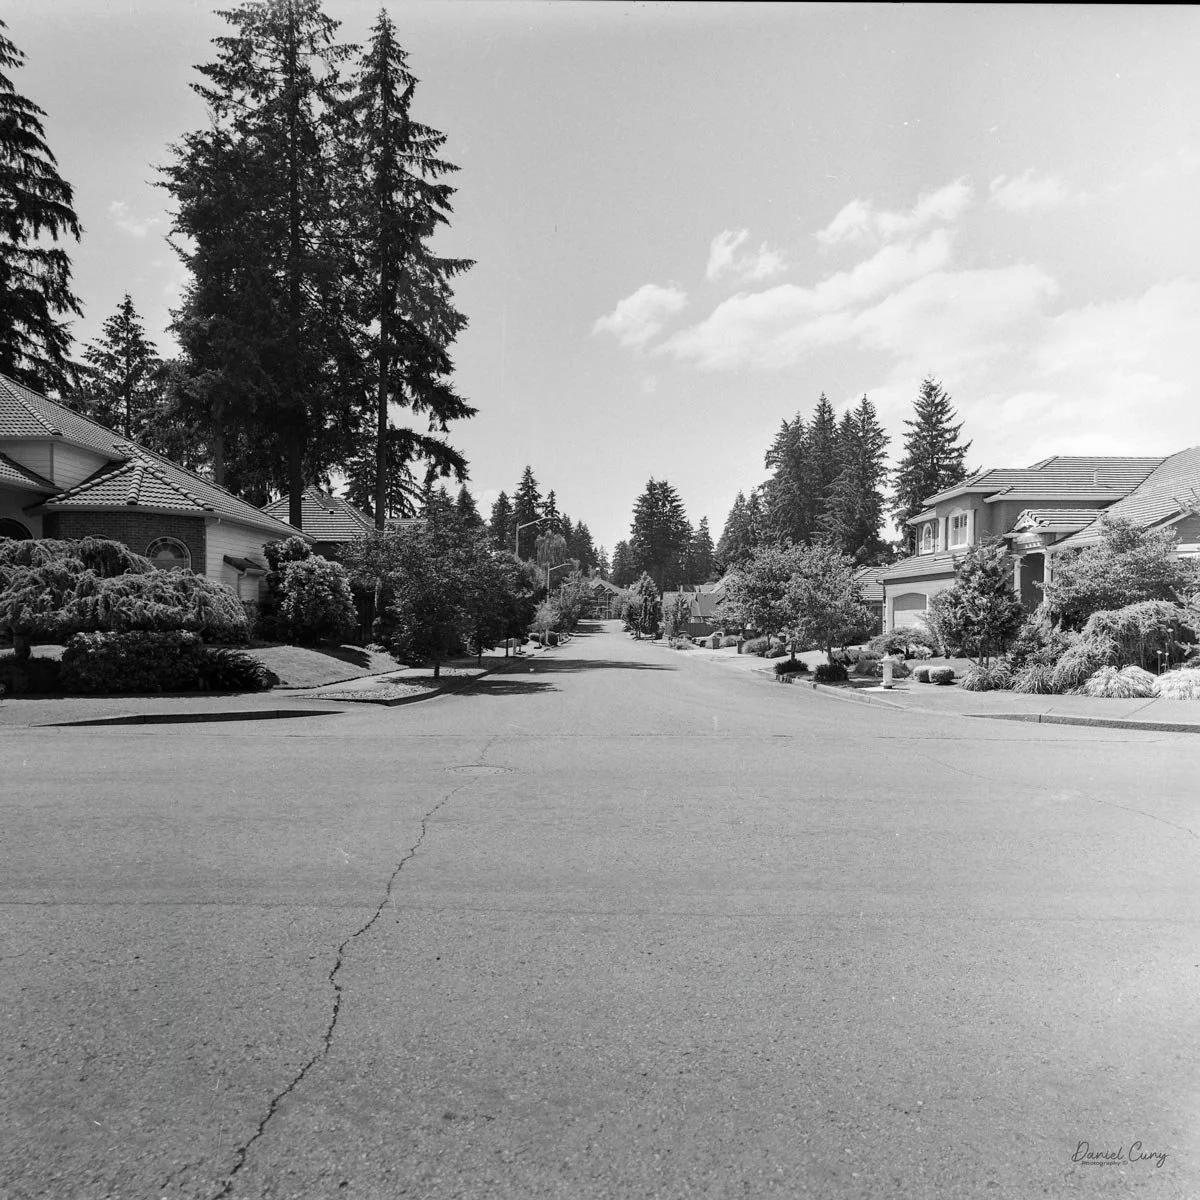
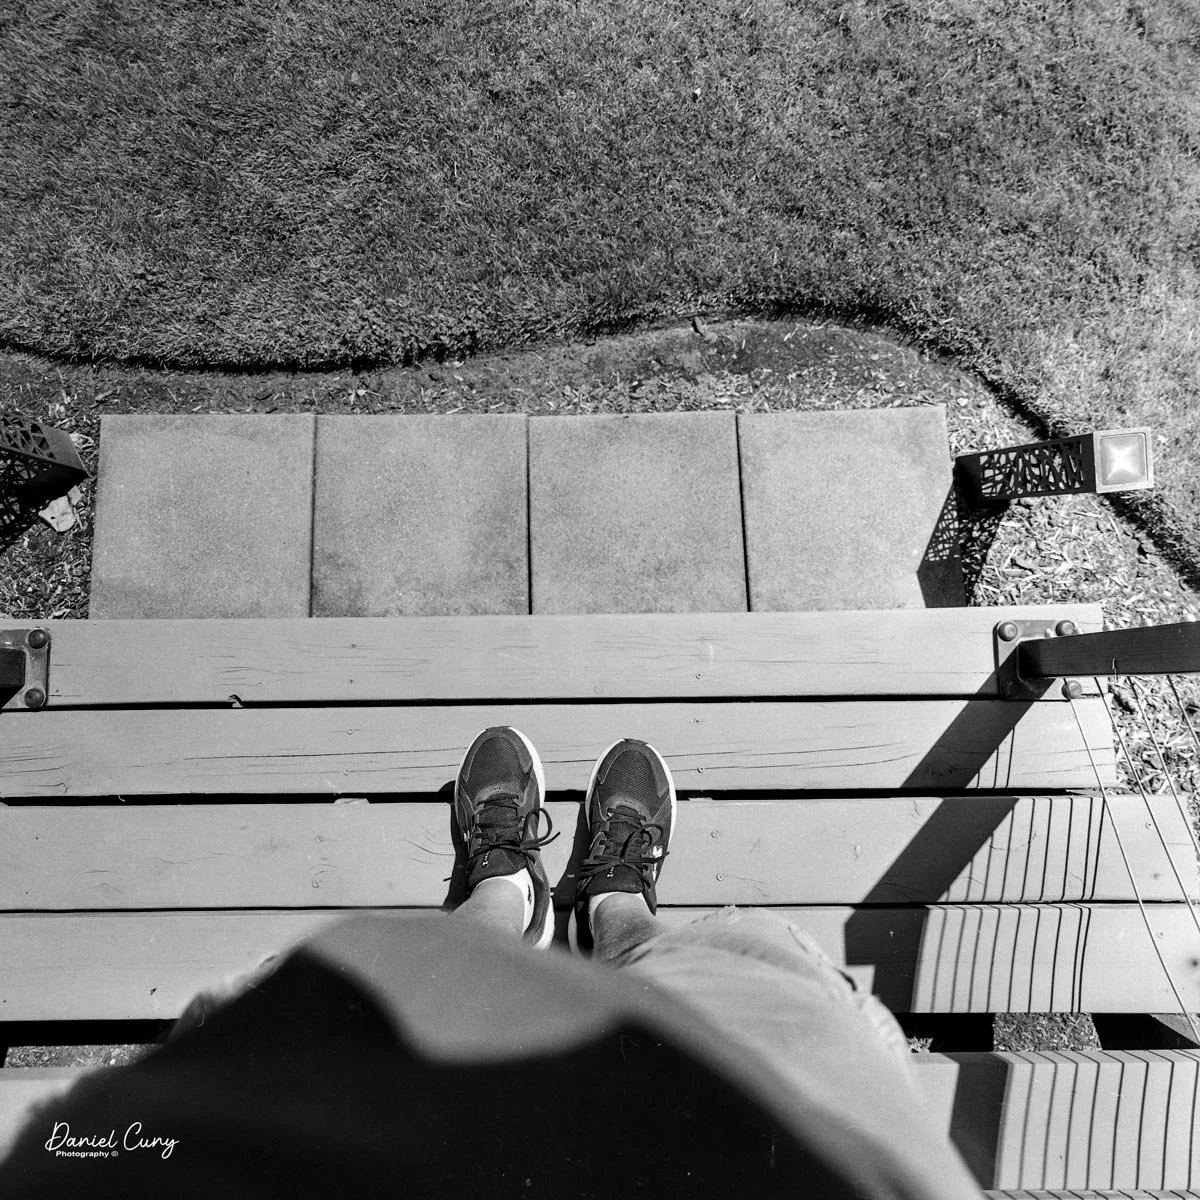
Here are some of the results from my walk around the neighborhood.
Conclusion

WOW!!! What a fun camera to use. I really need to take this one out more often!

There were some fantastic images taken on this walk, though I did have a few duds where I forgot to change the focus—that was definitely operator error rather than a camera malfunction.

 The lens is REALLY sharp and wonderfully wide. The viewfinder is highly accurate for framing the subject, and I absolutely LOVED the prism mirror that let me keep an eye on the bubble level.

Thank you for taking the time to learn about this incredible mid-century Hasselblad film camera.

Here are some of my other Camera Reviews.

 Check out my Cuny's Camera Collection YouTube channel, where I am putting together video overviews of the cameras I write about. Be sure to subscribe and like the channel, too!

 Cuny's Cameras and Photos is my online eBay store, where you will find some of the cameras I have reviewed, along with a wide range of other cameras, lenses, and items from my collection that I am thinning out.

 Until next week, please be safe.
Hasselblads Kamera Express

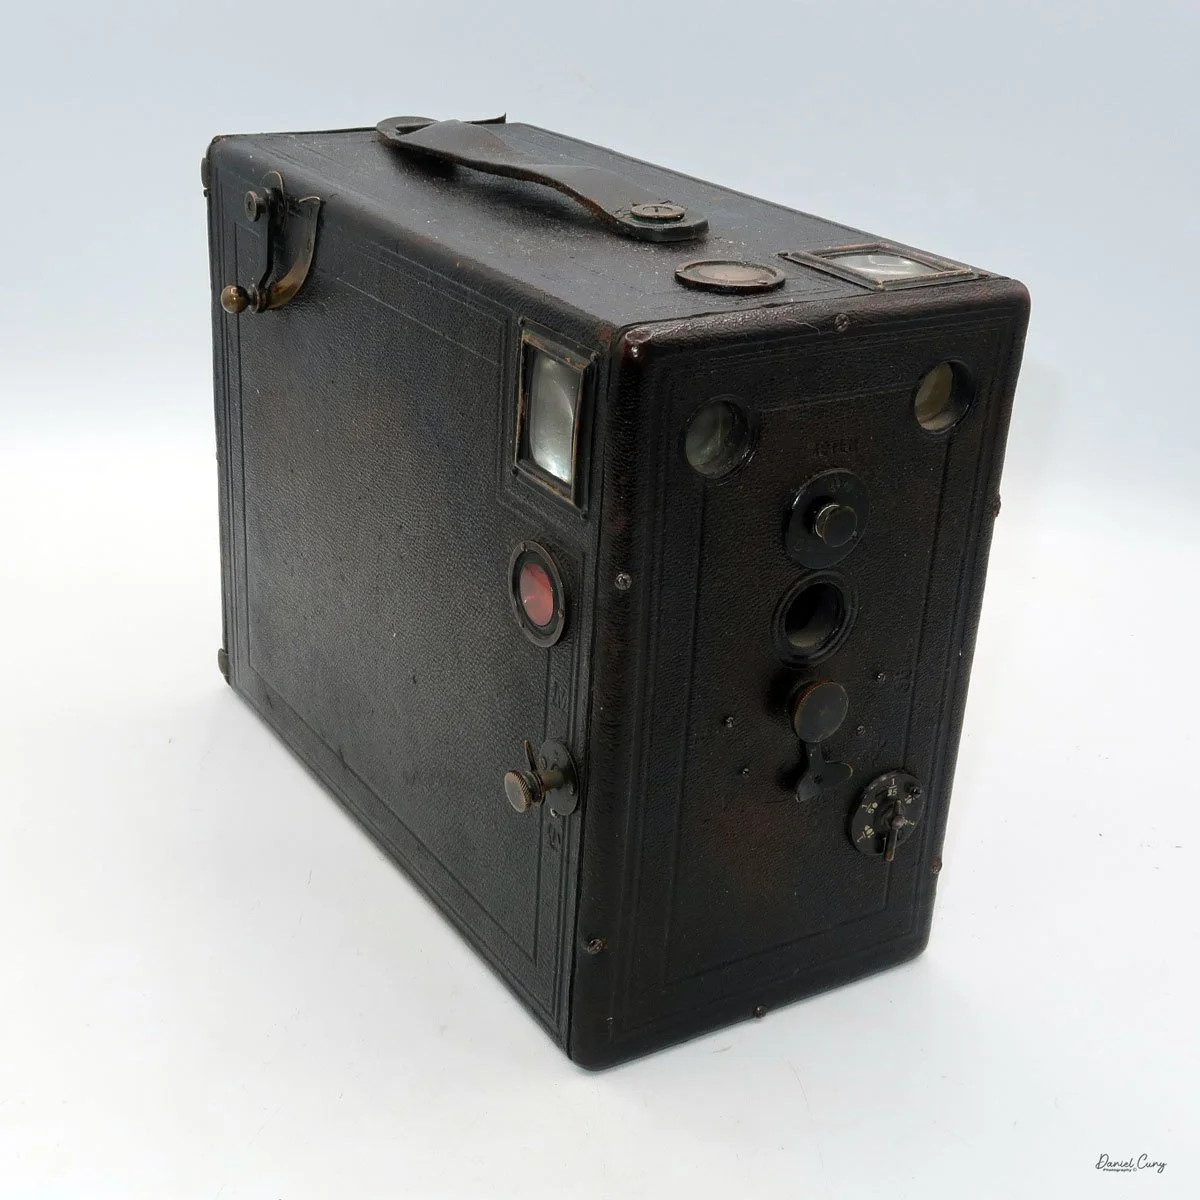
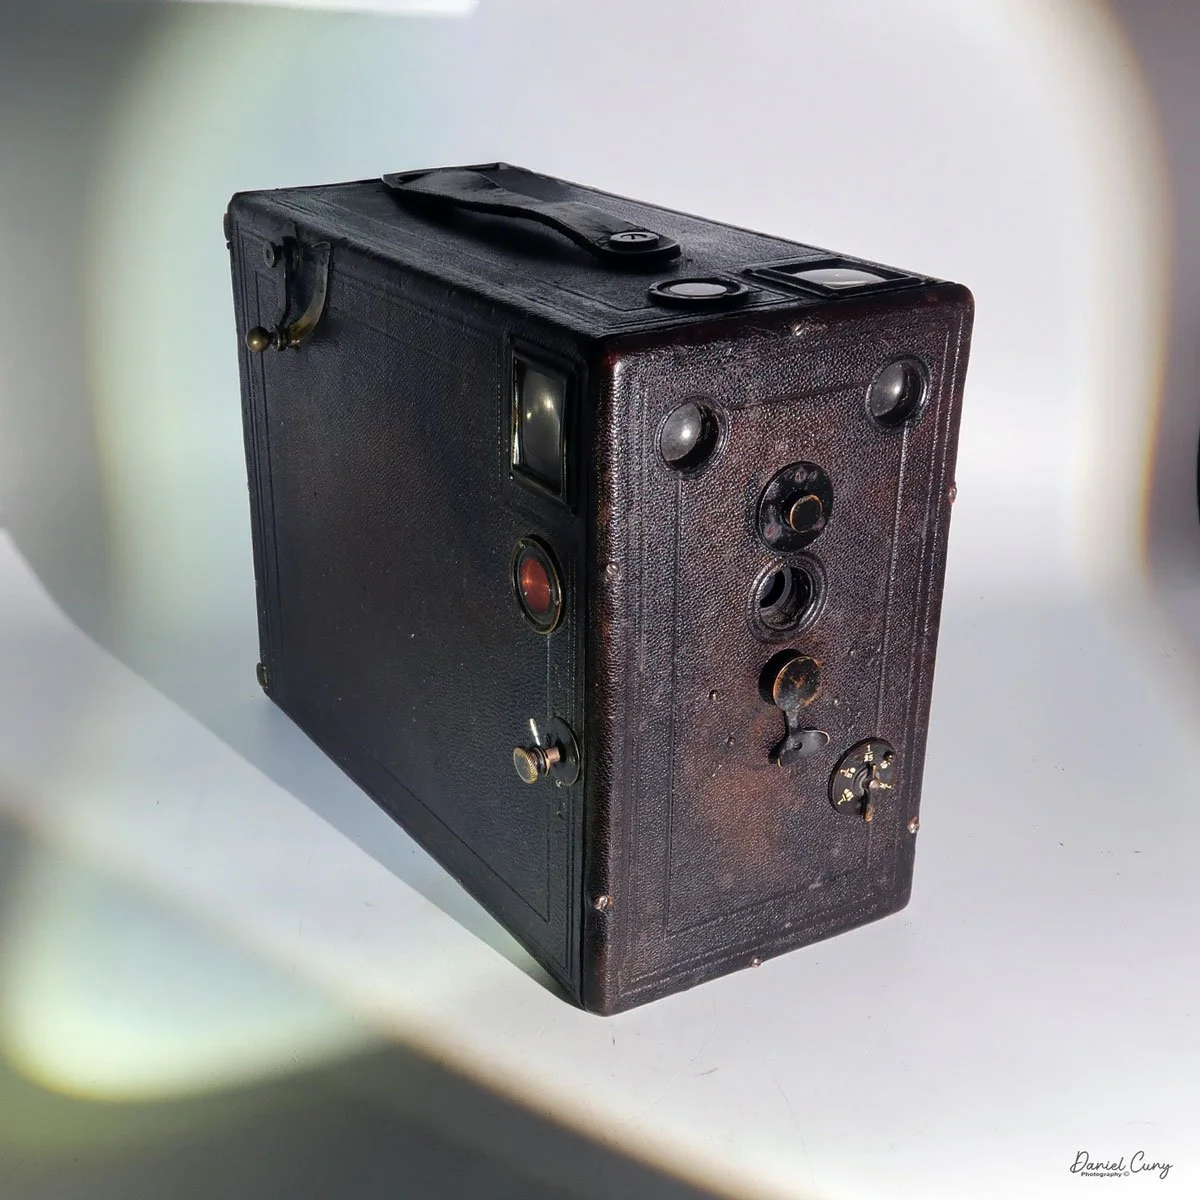
My Hasselblads Kamera Express

When I first saw this camera, which was only a month or so ago, it was on an online camera auction. Seeing the name Hasselblad on the back of the camera, my first thought was to write a blog post about it, since the very prestigious Hasselblad made it, but not the Victor Hasselblad Company most people are familiar with. 

 As I delved into the research of this rare camera, I was filled with a sense of excitement. The scarcity of information about this specific camera only added to its allure. My initial assumption that it was crafted by Victor Hasselblad's Grandfather, Arvid Viktor, was proven wrong, adding a layer of mystery to this unique piece. 

 This camera is the Hasselblads Kamera Express, and it dates from 1893. Hasselblad didn't really make it; it was produced for them by another Swedish company, Hugo Svensson & Company, another camera manufacturer in Gothenburg, Sweden. Here's where it gets a little strange. 

 According to McKeown's Camera Guide, they state the camera was manufactured by Murer & Duroni, of Milan, Italy. Others have said that the camera made by Hugo Svensson & Co. is nothing but a copy, or just very similar to the Murer-built camera. 

 Let me give you a brief history of the Pre-Victor Hasselblad & Hugo Svensson & Co., and how the two became intertwined in the late 1890s.

History:

 The History of Hasselblad goes all the way back to Victor's Great Grandfather, Fritz Viktor, who in 1841 founded the F.W. Hasselblad Company in Gothenburg, selling fabrics, travel accessories, and household goods, sort of the Pre-Ikea company (just a joke). One of Fritz's sons, Arvid Viktor (Victor's grandfather), met George Eastman in 19885 and sparked a business relationship, giving the F.W. Hasselblad Co. exclusive distributorship of Eastman Film & plate in Sweden.

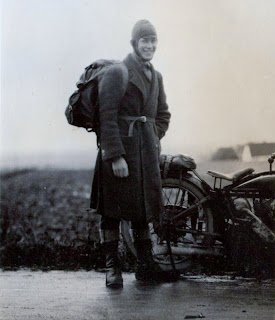
Victor Hasselblad photographed by Per-Olof Swanberg. In search of Skåne's storks. Image Courtesy:Sören Gunnarsson.

 In 1908, Arvid broke away from the F.W. Hasselblad Co. and started a new company, Hasselblad Fotografiska AB, which sold solely photographic equipment to meet the product demands of customers in Sweden. Just two years before opening Hasselblad Fotografiska AB, Victor Hasselblad was born.

 When Victor was 18, he was sent to Dresden, Germany, to learn the camera trade, as many companies manufactured cameras in the area at the time. Victor also traveled the world, including the US, where he worked in camera stores, processing labs, and camera manufacturing. He even worked in Rochester, New York, with George Eastman before returning to Sweden in 1934.

 In 1937, Victor opened his own camera store in Gothenburg named Victor Camera. The first camera Victor made was the HK-7 in 1941. During WWII, he was asked to improve a captured German aerial camera for the Swedish Air Force. After WWII, he went on to produce some of the most iconic medium-format cameras used by professionals worldwide for close to 100 years.


Hugo Svensson & Co. 

 There is some excellent information about Swedish Camera history, although it’s in Swedish, you can use Google Translate to convert the text for your language.

 John Hugo Svensson (1867-1942) was trained as an engineer and worked with C.G. Dahlgren & Co. The company was next door to F.W. Hasselblad & Co., where they repaired goods for them. As cameras became more prevalent at Hasselblad, the C.G. Dahlgren Co. took on their repairs.

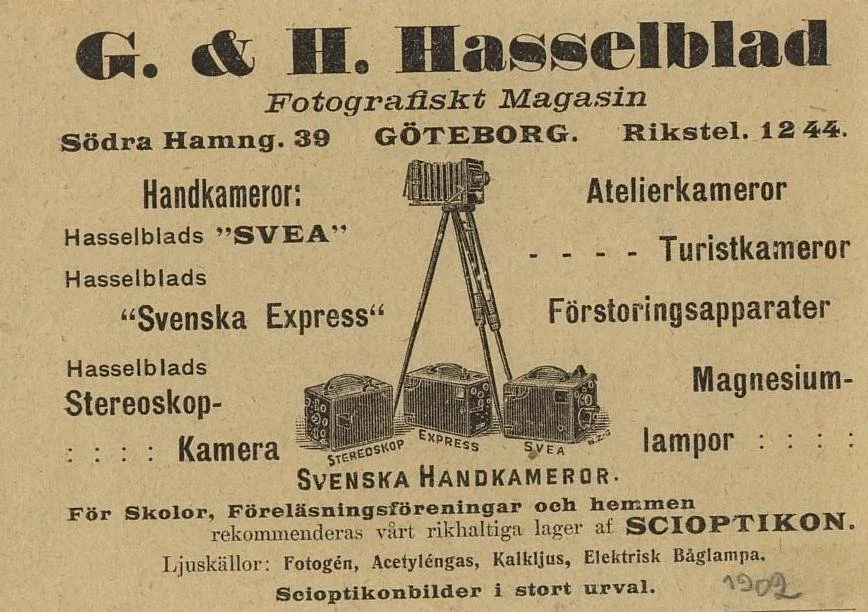
Hasselblad store advetising from 1902: Image courtesy: Sören Gunnarsson.

 As Svensson repaired the camera, he found ways to improve it, then began designing his own cameras based on those improvements. These cameras were then sold through the F.W. Hasselblad Co. store. 

 When the owner of C.G. Dahlgren & Co. passed away in 1896, Svensson bought out Dahlgren's widow and started his own company, Hugo Svensson & Co., which also included the younger brother of the original owner.

 Hugo Svensson's first camera, built around 1893, was the "Svenska Express", a drop-plate camera for either 6x9, 9x12, or 10x15cm plates. It was a copy of the Italian company Murer's Express camera built in 1900. My guess is Svensson worked on the Murer version and thought he could improve it. Hasselblad also marketed the Murer's Express Newness. 

 By 1902, Hugo Svensson & Co. produced a 20-page catalog of the products it manufactured and sold, including the "Svenska Express", "Simil Express", "Svea", and "Stella". Hugo Svensson produced catalogues until the 1940s, where he also sold German cameras, lenses, and instructions, making the catalog similar to a handbook.

My Camera:

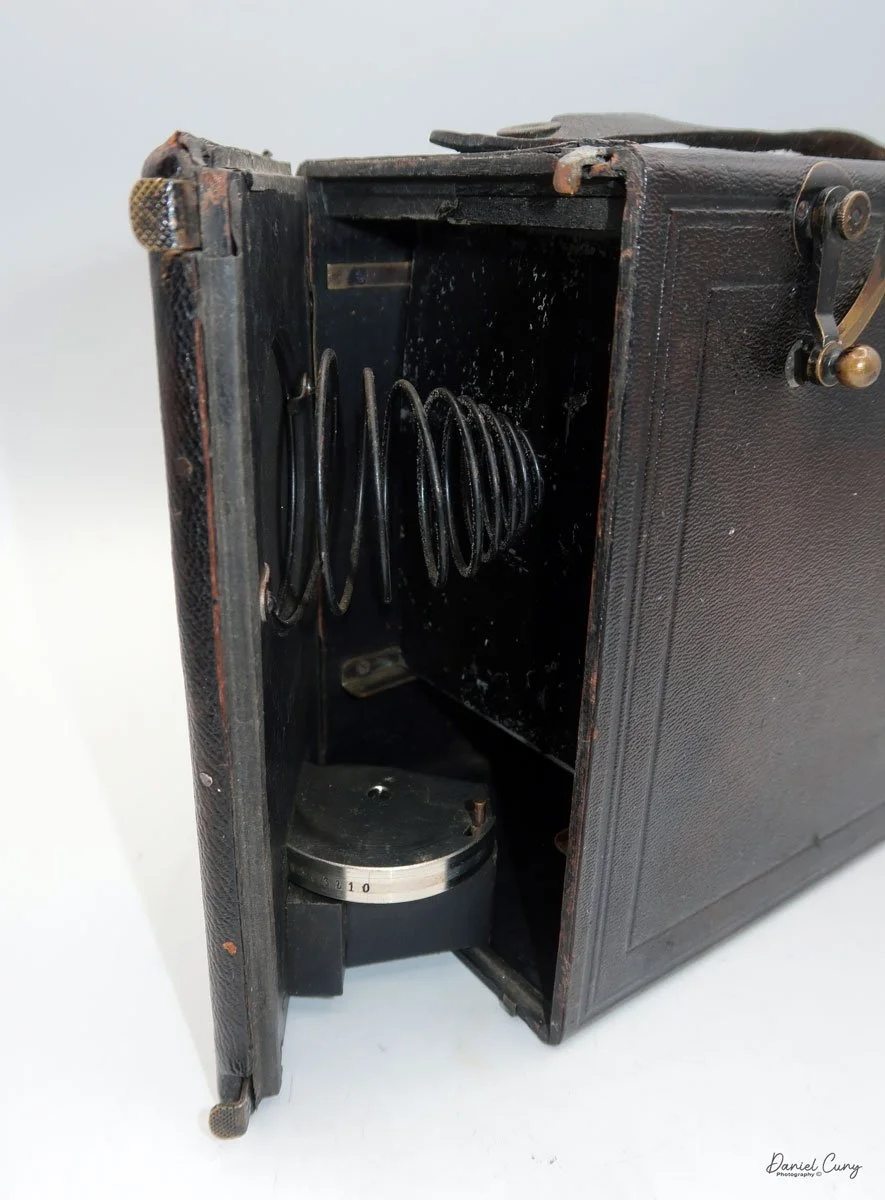
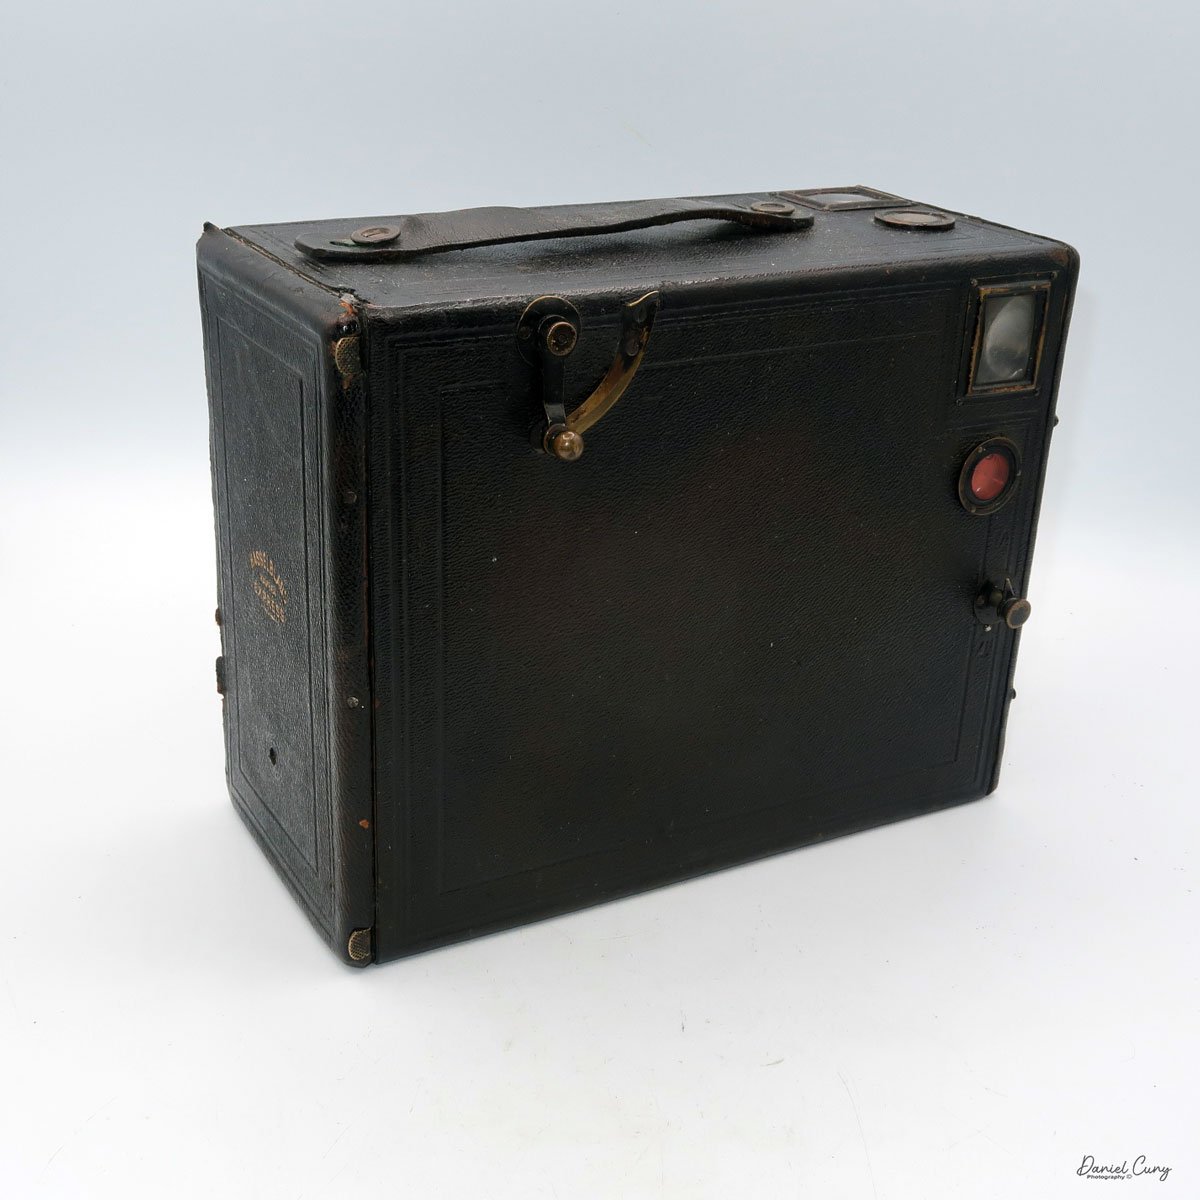
 The camera I am fortunate to own is a slight variation of the models mentioned above. My Hasselblads Kamera Express, standing at 7" tall by 9" long by 4" wide, and weighing 2 pounds, 11.6 ounces, with a serial number of 111566, holds a special place in my collection. This serial number is imprinted on the inside of the back door, where you load the 9cm x 12cm film holders. My camera comes with five film holders, each holding a unique story.

Initially, I was unsure if my camera's shutter was operational. However, as I began to explore the camera, I discovered its hidden secrets. As I turned the center knob, just below the lens, it clicked, and when I pushed in the shutter release on the side of the camera, the shutter fired. This moment of discovery filled me with joy and fascination.

 Let me give you the camera's layout. Above the lens is a small knob that you can pull out. The rod moves the lens on the inside of the camera body and focuses it to the required distances, measured in meters.

 As just mentioned, the knob below the lens can be turned clockwise to cock the shutter. Just to the left of the shutter cocking mechanism is the aperture setting. To set the aperture, pull up the arm and slide it to the desired aperture number. The numbers on my camera are pretty worn and difficult to see, but I believe they are F/11 to the far left, then, as you swing the arm counterclockwise, the next stop is "S" (or closed), then f/14, F/22, and f/36.

On the lower right of the camera's faceplate is the shutter speed control. The shutter speeds available are 1/100, 1/50, 1/25, 1/10, 1/5 and 1. You turn the dial to the desired speed.

 At the top of the camera is the camera's handle, a spirit level, and a waist-level finder for vertical photos. On the right side of the camera is the viewfinder for horizontal photos, another spirit level, and the shutter release, which can be set to "M" for snapshots or "T" for timed exposures. Towards the rear of the camera is the lever that changes the internal film plates. Slide the lever to the top to drop the plate down from the exposed area. As you slide the arm back, it catches the next plate, making it ready for exposure.

 If you're not familiar with how a falling plate camera works, let me tell you what I know. The film holders are stacked vertically on the top of the camera, with the film pointing towards the lens. They are held in place by a spring on the back of the camera, which pushes the film holders forward in the upper chamber. As you take a photo, you flip the switch on the side of the camera forward, which moves the exposed plate a bit, and it drops into the lower chamber of the camera. The next frame is pressed forward by the spring, you then expose the film plate, and so forth until all the frames have been exposed. At that point, you'll need to remove the film holders from the camera in a dark room to prevent exposure to light. The loading process also needs to be done in a dark room for obvious reasons.

To open the back to load the film plates, there are two latches on the top and bottom of the back door on the right-hand side. Pull them out to open the back, then place the plates in. Close the back and press in the two bars to keep it closed.

 On the bottom and on the left side of the camera are tripod sockets.


My results.

 At first, I didn't think the shutter was working, but then I found out how to cock the shutter. I can't figure out how the plates drop within the camera. Unfortunately, I didn't try using the camera because I don't have any sheet film, but once I do, I'll try and see how the camera handles making images. I'll need to do it one frame at a time until I figure out whether it's an operator or a camera malfunction.

 I also found Jabcam's overview of a similar falling plate camera. 


Conclusion.

 It's nice having an older Hasselblad in my collection, although Hasselblad didn't particularly make it. My real intention was to write about it for the camera blog. Not being a big fan of drop plate cameras, you'll likely see the camera for sale in my eBay store soon.

 If you're interested in purchasing it, let me know; otherwise, you can see some of the cameras I've reviewed for sale in Cuny's Cameras and Photo.

 Here's a link to my other Camera Reviews.

 Thank you for taking the time to read about the intertwined camera companies that worked together in the early 1900s.

 Until next week, please be safe.

References:

Jabcam overview of falling plate cameras: https://jabcam.wordpress.com/2013/04/29/topic-a-falling-plate-camera/

Swedish Camera History: https://www.fotopaw.se/texter/svkam.htm

History Of Hasselblad-Soren Gunnerson: https://gunnarssonforum.blogspot.com/search/label/Fritz%20Victor%20Hasselblad


Hasselblad 1600F Camera

Looking through my collection, I had a couple of different cameras in mind, but they use 127-size film, which I ordered a few days before the intended day to take photos. Unfortunately, the film hasn't arrived in time for me to shoot photographs when the weather is nice and sunny, so I'll put them off for the next blog. 

 As I gazed at the items in my collection, the Hasselblad 1600F caught my eye. I had purchased it many years ago, and the last time I had the pleasure of using it was a couple of years ago. The thought of loading a roll and exercising the focal plane shutter in this early version of the Hasselblad camera filled me with anticipation. 

 I generally use the Zeiss 80mm f2.8 lens on the camera, but looking through some of the lenses I have for this and the 1000F, I do have the Kodak Ektar 80mm f2.8 lens, which was the lens initially sold with the 1600F here in the US, and later the Zeiss 80mm f2.8 was available. For this shoot, I got out a roll of Ilford FP4 125 film, which I loaded into the film back, and I put on the Ektar lens to see how it would work. I was pleasantly surprised.

The Company:

When I think of cameras that have made an indelible mark on the field of photography, Hasselblad undoubtedly comes to mind. They are known for capturing iconic moments on Earth and beyond. Hasselblad cameras are synonymous with precision, durability, and unmatched image quality. At the heart of this remarkable brand is the story of its founder, Victor Hasselblad, and his relentless pursuit of excellence.

Original Swedish Ad for Hasselblad 1600f

 Victor Hasselblad was born in Gothenburg, Sweden, in 1906 into a family with a photography and photographic supplies background. While Victor initially followed in his family's footsteps, he soon developed a desire to innovate and improve upon existing camera technology. At 18, he traveled to Dresden, Germany, to work with the best optical manufacturers of the time, gaining invaluable experience in the technical aspects of cameras and photography. This laid the foundation for his future endeavors and innovations.

 During World War II, Victor's knowledge of cameras caught the attention of the Swedish Air Force. They approached him with a German aerial surveillance camera they wanted to replicate. Victor accepted the challenge and famously responded, "I don't want to make a copy of it—I want to make a better one." This led to the development of the first Hasselblad camera, the HK7, designed explicitly for military aerial photography. Victor's ingenuity soon proved invaluable, and his cameras became crucial tools for aerial reconnaissance.

 After the war, Victor focused on developing cameras for the consumer market. In 1948, the first consumer-oriented Hasselblad, the 1600F, was introduced. This camera was revolutionary for its time, featuring a modular design that allowed photographers to change lenses, viewfinders, and film magazines, making it highly versatile. The 1600F also used medium-format film, which produced images of superior quality compared to 35mm film cameras available at the time. However, the early models faced technical issues, particularly durability, and required further refinement.

Ad for the Hasselblad 1600F

Despite the initial technical issues, Hasselblad was committed to improving its designs. By the 1950s, Hasselblad cameras had developed a reputation for being highly reliable, and photographers worldwide began to take notice. In 1952, Hasselblad introduced the 1000F with an improved shutter and slower maximum speed of 1/1000. The camera also came with a Zeiss 80mm f2.8 lens, marking a significant improvement in the brand's offerings.


The subsequent 500C model, released in 1957, solidified Hasselblad's place in the professional photography world. With its leaf-shutter system and modular components, the 500C became a workhorse for studio photographers, renowned for its reliability and image quality. This camera design remained in production, with upgrades, for decades and became the foundation of Hasselblad's success.


Hasselblad cameras are most famous for their role in space exploration. In 1962, NASA astronaut Walter Schirra brought a Hasselblad 500C on the Mercury-Atlas 8 mission, sparking a long-standing relationship between Hasselblad and NASA. The camera's build quality, high resolution, and adaptability made it an ideal choice for capturing images in the challenging conditions of space.

Walter Schirra and the Hasselblad 500C

 Hasselblad worked closely with NASA to modify the cameras for space use. The resulting 500EL model was specially adapted for the Apollo missions, where it would ultimately capture some of the most iconic images in history, including the first steps on the moon by Neil Armstrong in 1969. The modifications included [specific modifications], which allowed the camera to function effectively in the challenging conditions of space. To this day, the image of Earth from space, known as the 'Blue Marble,' remains one of the most famous photographs ever taken, and it was captured with a Hasselblad. The brand's involvement in the space program elevated its reputation further and established Hasselblad as a premium name in photography.

 With the arrival of digital photography, Hasselblad continued to innovate, embracing the transition while retaining the high standards that defined its analog cameras. In the early 2000s, Hasselblad launched the H-System, a line of digital medium-format cameras that maintained the quality associated with the brand while integrating advanced digital features. This line set new benchmarks in the industry, offering extremely high-resolution sensors, modular components, and sophisticated imaging capabilities that appealed to professional photographers and high-end studios alike.

 More recently, Hasselblad has also embraced the mirrorless trend, launching the X1D, a compact digital medium-format camera that balances portability with the image quality of medium format. This new direction has helped the brand stay relevant, catering to a new generation of photographers who demand portability without sacrificing image quality.

 Today, Hasselblad remains a symbol of excellence in photography. Known for its attention to detail, superior image quality, and dedication to craftsmanship, Hasselblad has cultivated a loyal following of professional photographers, collectors, and photography enthusiasts. While the digital age has transformed the landscape of photography, Hasselblad continues to adapt and push the boundaries of what is possible, ensuring that its legacy endures.

Victor Hasselblad's legacy is a testament to the power of innovation, and his vision inspires photographers worldwide. From capturing wartime reconnaissance to the moon's surface and beyond, Hasselblad has not only documented history but has become a part of it.

My Camera:

My Hasselblad with the Kodak Ektar 80mm f2.8 lens is 6.5" long by 4.5" wide, including the winding knob, and is 4" tall with the waist level finder closed. The camera weighs in at 2 lbs. 15.9oz. This camera is in excellent condition for being around 75 years old. Hasselblad made this camera with a maximum shutter speed of 1/1600, which was very ambitious for a medium-format camera. There is some minor tarnish on some chrome, a small dent in one of the shutter curtains,  and the leatherette is starting to come loose around the waist level finder, but that seems to be it. It's also important to know that the 1600F and the 1000F use focal plane shutters. After these models, the 500c and model moving forward have leaf shutters in the lenses, not the camera body. The exception was the 2000FC model.

Having owned several different Hasselblad models, the camera operations are similar to mine. The film back on my camera is the older C12 film back. To load the film, you need to take the film back off the camera. Well, you don't need to, but I've always done it. You have to have the dark slide in the slot on the left to remove the film back from the camera. The dark slide in the holder presses a pin within the film back that allows the back to come off. If the dark slide isn't in the film back, you cannot take the back off the camera. To remove the film, on the top of it is a sliding circle with a Hasselblad "V" logo that you slide to the right and pull back down to remove it from the body.

 On the left side of the film back is the lock. Pull up the tab on the lock and turn it counterclockwise until it stops, then pull it away from the film back, and the insert will pull out. The film insert is what you load the film into. With the lock on the left, take the empty film spool from the bottom holder by pulling out the roll holder on a hinge to quickly load and unload the rolls of film. Put the empty spool onto the top. The top has a knurled grip on the hinged holder to wind the film before loading it back into the film back to shoot. Put your fresh roll of film into the lower holding area, pull the paper over the black pressure plate and slide the leader into the empty spool and turn the knurled knob to load the film onto the reel. Keep turning the knob until you see the "start" word on the paper backing. 

 Slide the film into the body portion and lock the back securely into the body. On the right side of the film back is a winding knob. Lift one of the handles and wind. On my film back, which is a C12 back, there is a hinged door where you can see the frame numbers as you turn the winding handle. Open the backdoor, watch for "1" to appear, and stop winding. At this point, turn the winding lever in a counterclockwise motion, and the frame counter under the winding knob will reset to number 1. Put the back onto the camera and prepare for the first photo. As you take photos, the film will advance back in, and you can check the frame counter on the film back to see what frame you're on.

Now that the film is loaded into the camera let's go out and shoot a few frames. Remove the front lens cap to focus the camera and pop up the waist level finder. A smaller "V" Hasselblad logo slider is on top of the waist level finder to open the finder. Slide that to the right, and the waist-level finder will pop open, showing an image you're pointing the camera toward. Turn the focus ring on the lens to get a sharp image. If you want a more critical focus, you can slide the slider to the right again, and a magnifying lens will pop up. You can put your eye closer to the magnifying lens to see an enlarged area of the focusing screen to fine focus on your subject. To close the waist level finder, one by one, flip down the side panels over the focusing screen, then the back panel, and close the top, which will click when closed.

 Before you press the shutter button on the front of the camera in the lower right corner, as you're holding the camera, you need to take out the dark slide from the film's back. The camera will not fire if the dark slide is engaged in the film's back. Be sure the shutter is cocked and ready to shoot. To cock the shutter, there is a large knob on the right side of the camera. Pull out the dark slide and turn that knob in a clockwise motion, or so the knob is going forward. This cocks the shutter. Set the shutter speed, which is on the right side of the camera, on the knob that cocks the shutter. 

 Because this model and the 1000F cameras use a focal plane shutter, it's VERY IMPORTANT: DO NOT SET THE SHUTTER SPEED WITHOUT COCKING THE SHUTTER FIRST. If you do, the camera can jam, and with this and the 1000F models, it's extremely expensive to service and, due to the age, possibly not able to be serviced due to lack of parts.

On my Eastman Kodak Ektar lens, the aperture is entirely manual, meaning you need to open the aperture for focus and then stop down to take the photo. Being used to "automatic" apertures where the aperture closes during exposure and opens after the exposure, it's easy not to remember to stop the lens down before taking the photo. Being one that uses a myriad of different cameras, I'm getting used to checking before, but every once in a while, I forget and need to retake the photo.

 If you want to change the lens on your camera, as you hold the camera, there is a button on the front of the camera in the lower left corner, opposite the shutter release. Press the button and turn the lens in a counterclockwise motion to release the lens and put on a new one. To put on a different lens, line up the red dot on the lens and the red dot on the camera body and turn the lens clockwise until the lens "clicks" into place and is secure on the body.

 Now that you've shot the 12 frames on the roll of film, it's time to take the film out, get it processed, and see how you did. To do so, take the dark slide out of the film back, remove the film back from the camera, open the film chamber, unload the film, and put in a fresh roll to shoot some more.

My Results:

After walking around my block taking photos on a sunny afternoon, I wanted to see how the lens would handle and the image quality it would produce. The lens focuses close, down to 20" from the film plane, so I was able to get in close for detail. Here are the results from the Eastman Kodak Ektar 80mm f2.8 lens.


 Conclusion:

I'm a photo nerd. I love using cameras, especially the older mechanical versions. There's something gratifying and calming about having a mechanical camera in my hands. Whether looking through an eye-level or waist-level finder, taking photos is an absolute joy.

 The Ektar 80mm f2.8 lens is terrific. I liked how the focus was fluid and easy to turn, the ease of opening and closing the aperture, and the picture quality was better than expected. The older Ektar lenses are superb, like those on the Ektar 35mm camera.

 Thank you for taking a few minutes out of your day to read about this early Hasselblad camera. I plan to use it for more shoots in the upcoming months.

 Until next week, please be safe.
Reference:

Hasselblad Website: https://www.hasselblad.com/about/history/first-consumer-camera/