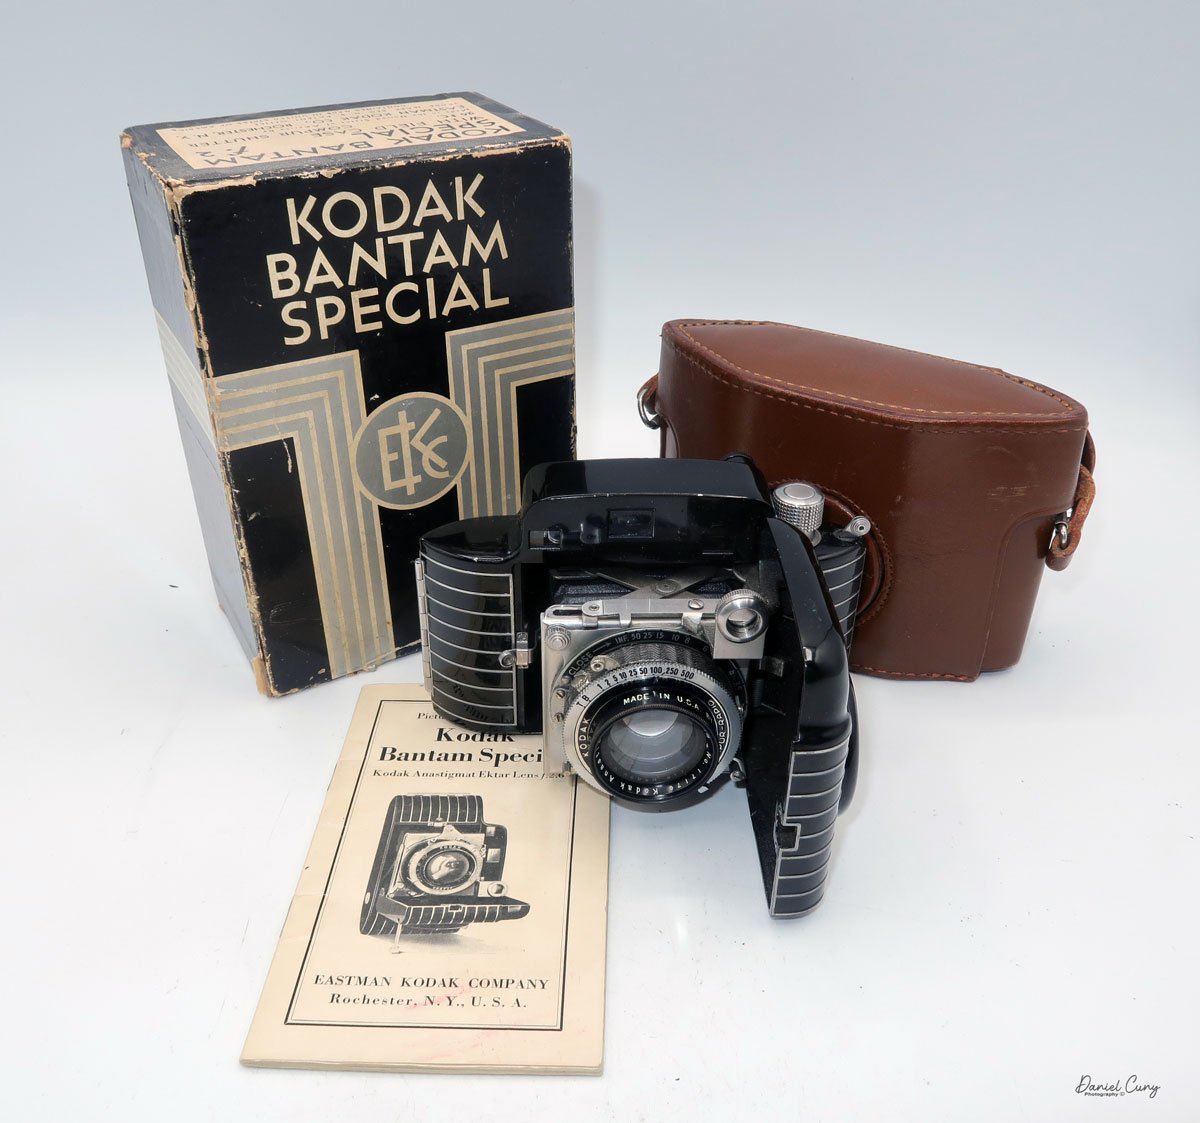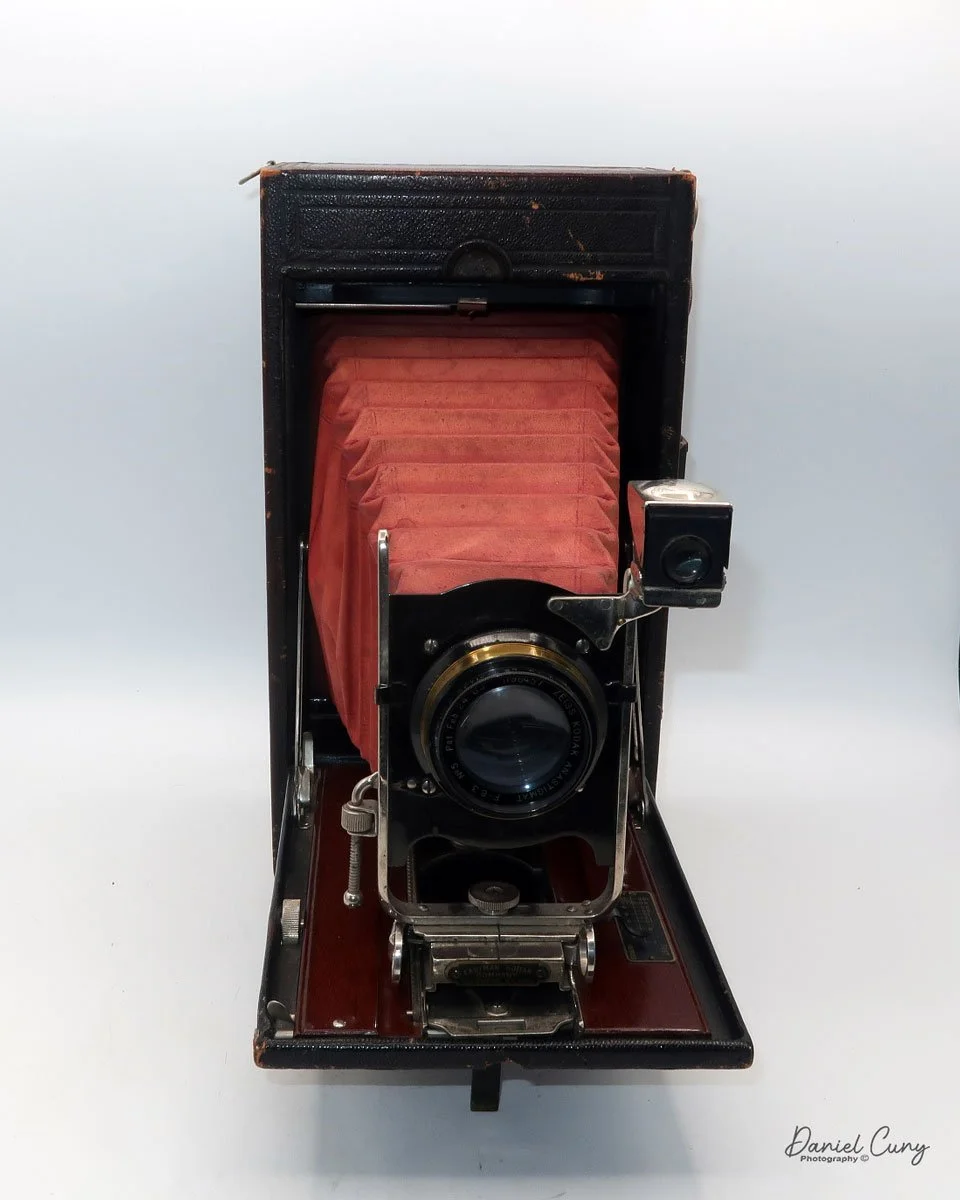
My Kodak Panoram 1, Model D camera
Panoramic cameras and images have always fascinated me. The thought of seeing such a wide area in a photo seems so natural to me. Whenever I look at subjects, the human eye always sees a wide field of view, and narrowing it down to a smaller angle just seems peculiar to me. Even when I look through telephoto lenses, I want to see a wider angle, just closer. Unfortunately, that’s not how lenses work, so the ability to get a wider view is wonderful.
The Kodak Panoram 1 is one of the first panoramic cameras I've owned. The first panoramic camera I bought was a Russian Horizont, a 35mm model that came with an accessory handle, viewfinder, and case. Unfortunately, this model of camera, due to the lack of workmanship, has a tendency for image "banding" as the lens doesn't rotate smoothly when making the exposure, so when the lens hesitates, it creates a change in exposure, creating a vertical exposure difference, which is darker due to the extra exposure time.
I only had that camera for a short time, but it was a wonderful one to learn from, and from that experience I found the Kodak Panoram 1. One of the main reasons I knew about Kodak's early panoramic cameras was a set of negatives of two of my friends, which I purchased around 35 years ago. They were a set of 40 nitrate panoramic negatives, measuring 2 1/4" x 7", from a family who visited San Francisco and the surrounding area in 1906. There were photos of the rubble from the 1906 earthquake, along with other images of the family traveling up the delta to Sacramento and into the forest areas. If you're interested, here is a link to pictures from the aftermath of the 1906 San Francisco Earthquake.
While researching the negative size and cameras built around 1900, I came across the Kodak Panoram 1 and the Multiscope Baby Al-Vista. I believe the Baby Al-Vista's negatives are just a bit smaller. At this point, due to my love of panoramic images, I really wanted to find a good Kodak Panoram 1 camera not only to have in my collection, but also to shoot with.
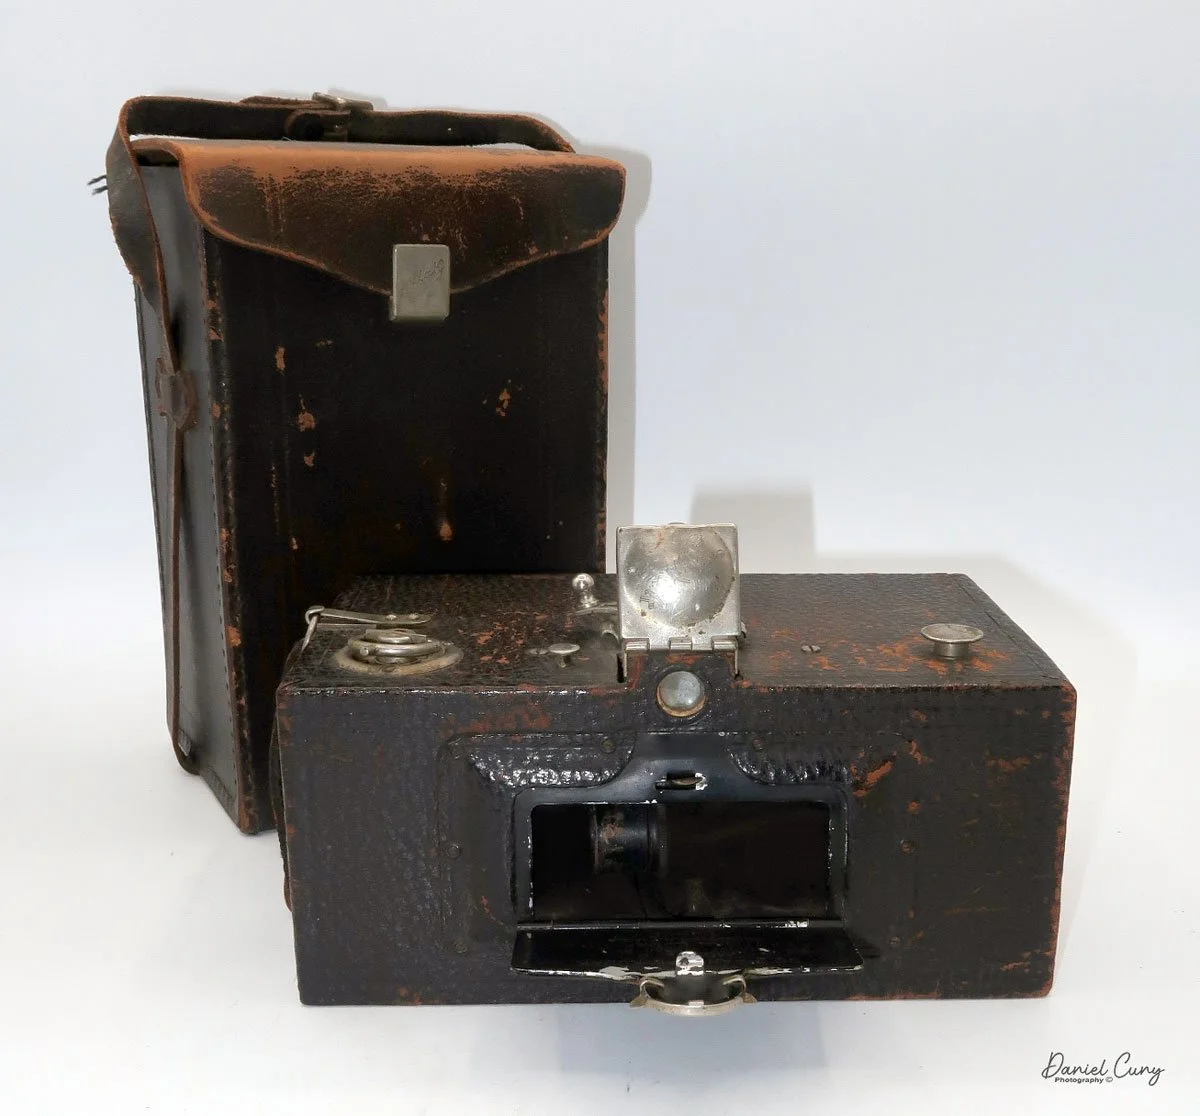
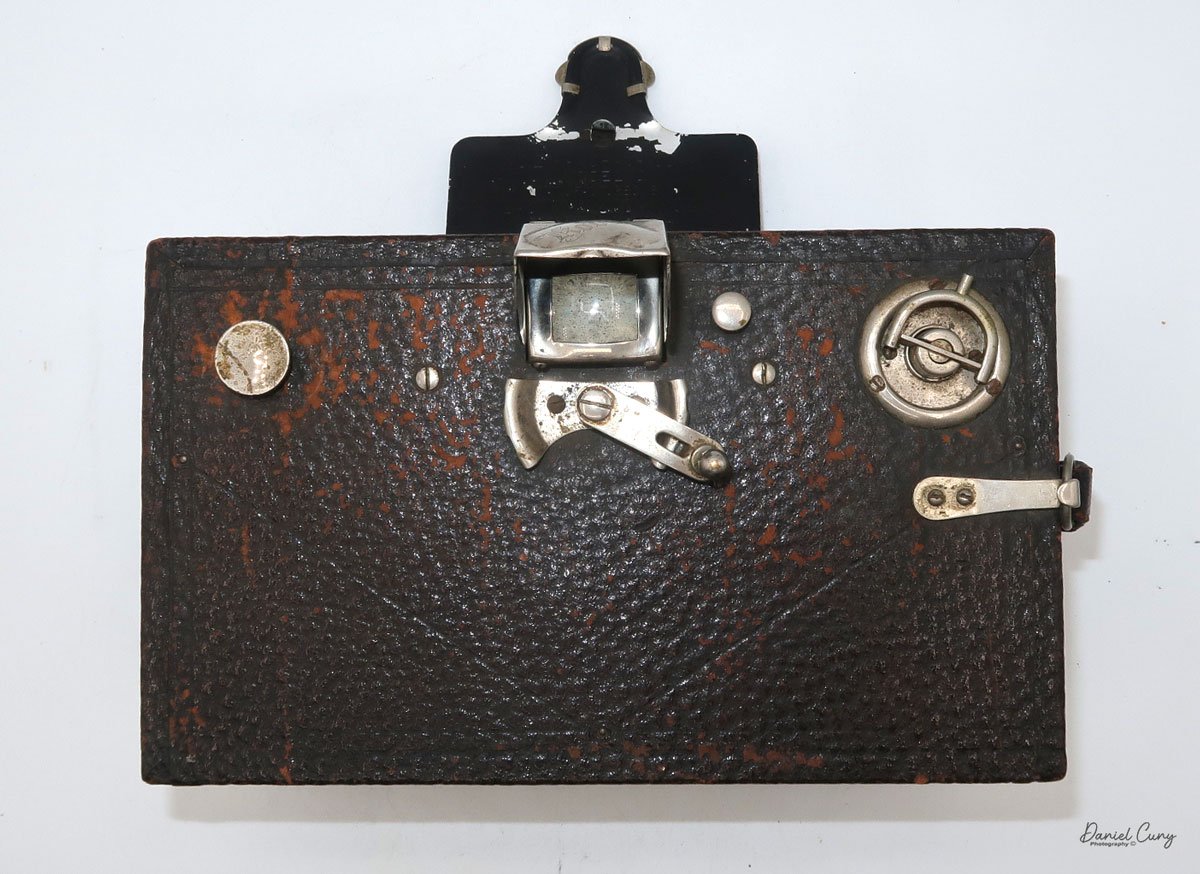
My Kodak Panoram 1, Model D with Case.
The Kodak Panoram 1 camera used 105 film when it was manufactured, which is the same width as 120 film; the spools are just a bit different, as the flange is wider on 105 spools. Knowing that I could shoot 120 film in the Kodak Panoram 1 camera made it considerably more desirable.
Kodak also made larger Panoram cameras, the 3A and 4, which used larger film. The 3A produced 3 1/4" x 10 3/8" negatives on size 122 film; the 4 made 3 1/2" x 12" negatives on size 103 film. Since the necessary larger film is unavailable, choosing a usable Panoram was easy: I purchased the Panoram 1.
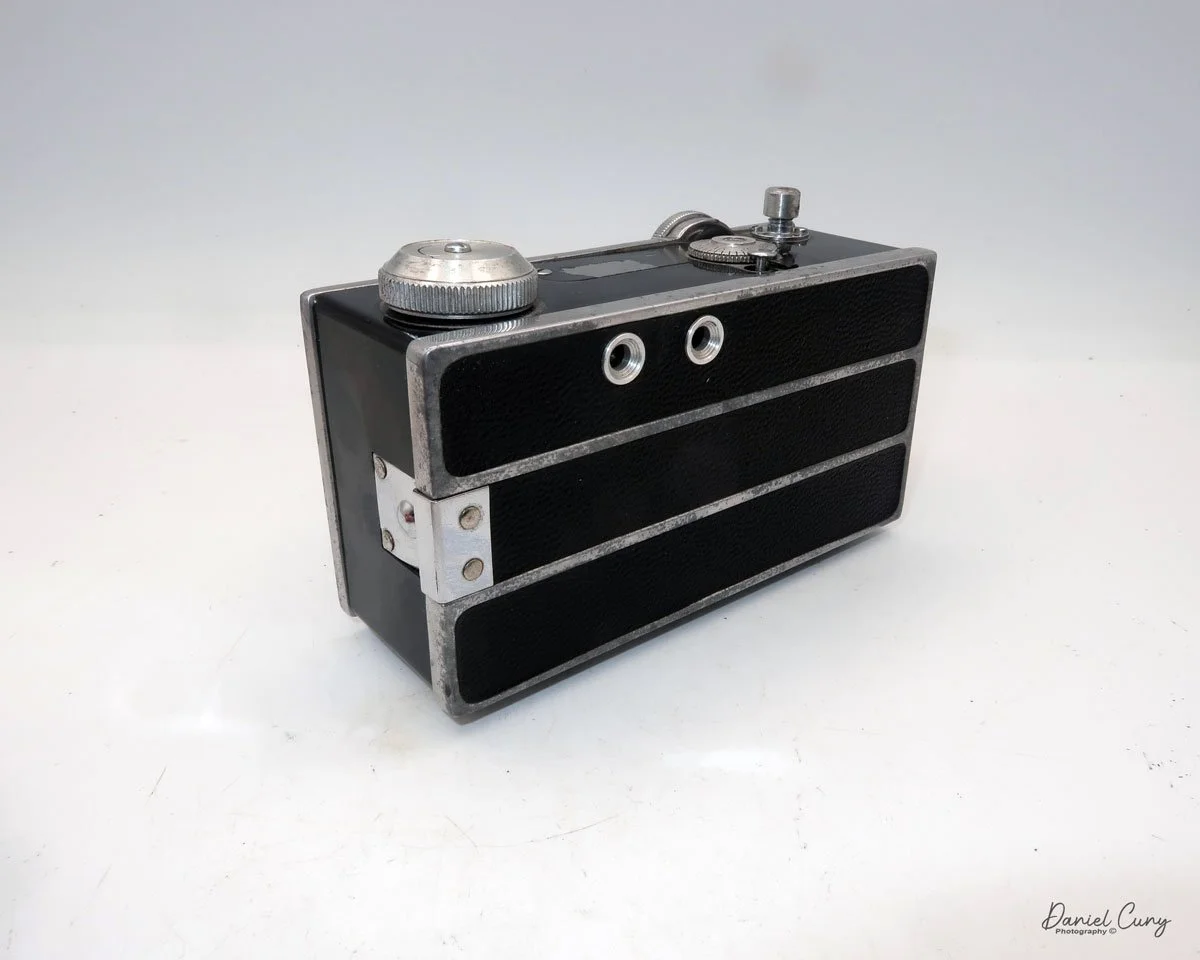
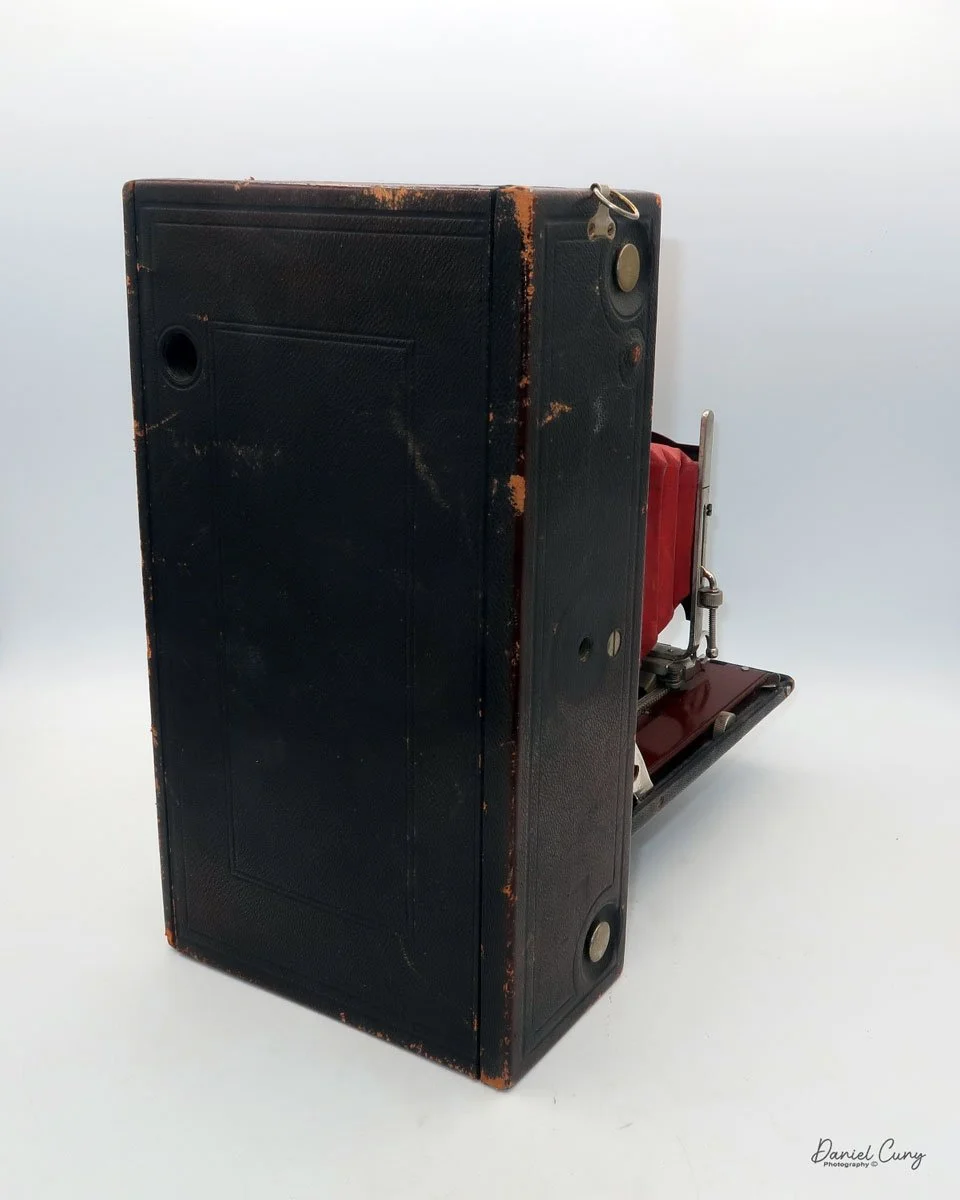
The Kodak Panoram 1 comes in two distinct versions. There's the original Panoram 1, where the entire back of the camera comes off the body, revealing the curved arc of the film plane. The back of the camera is held to the camera body by two clips.
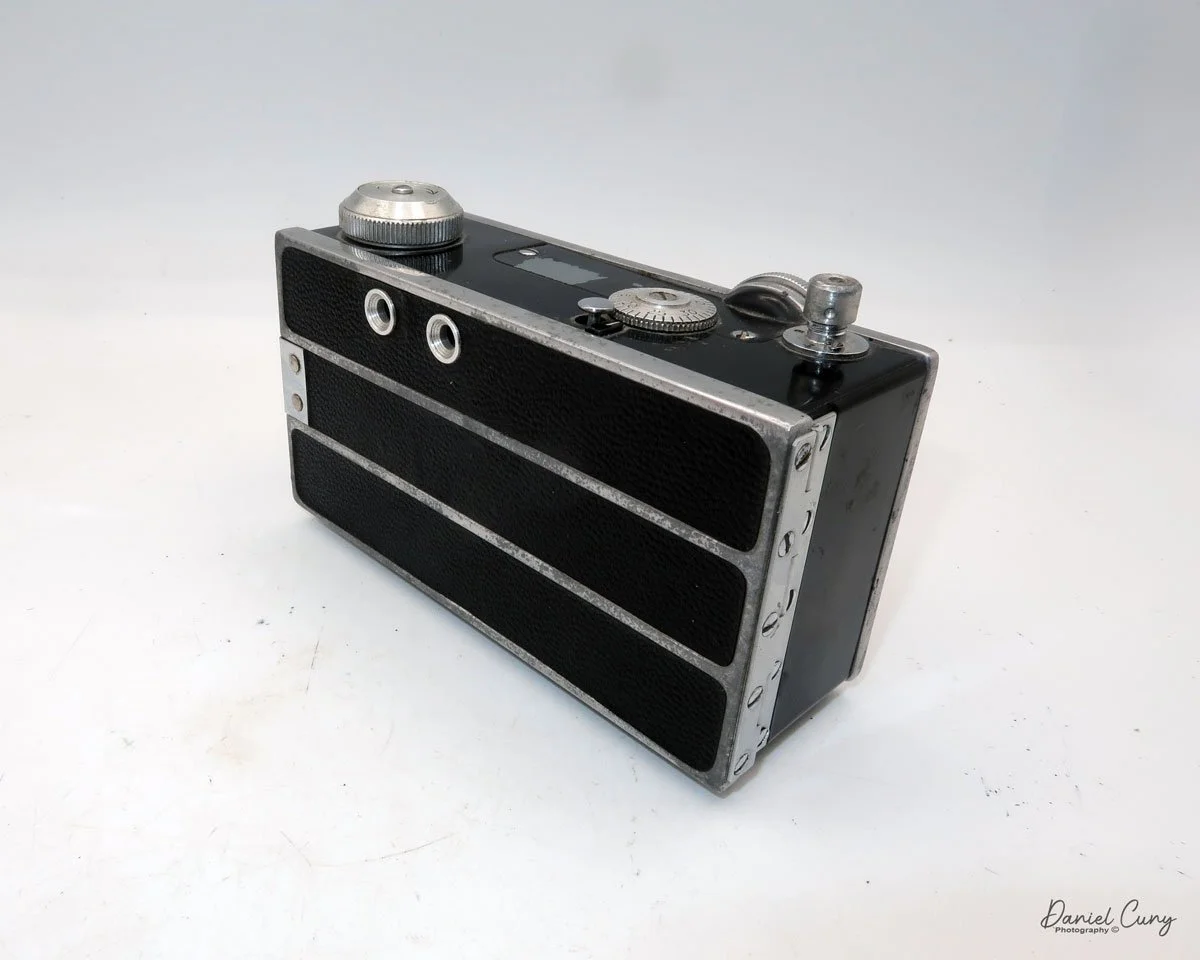
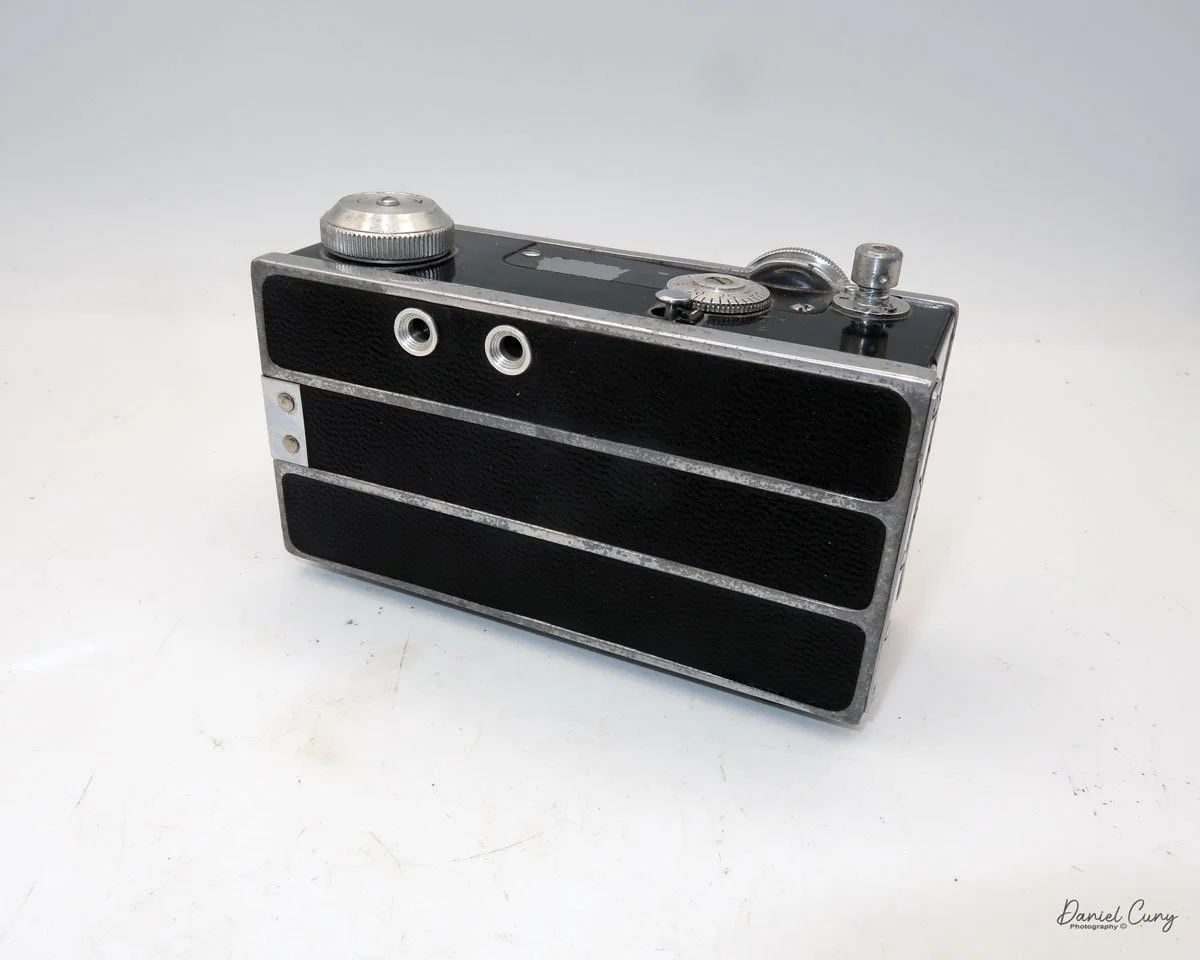
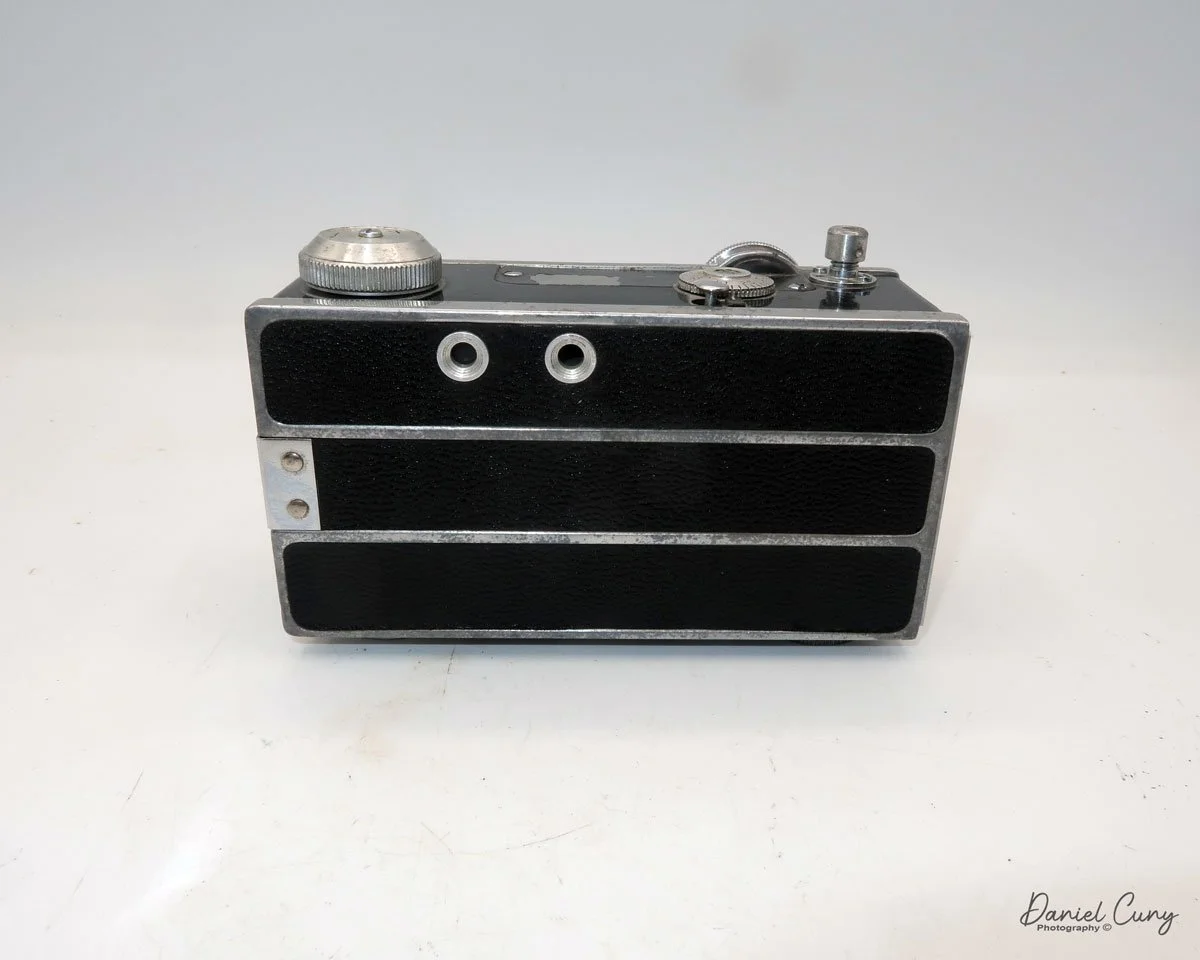
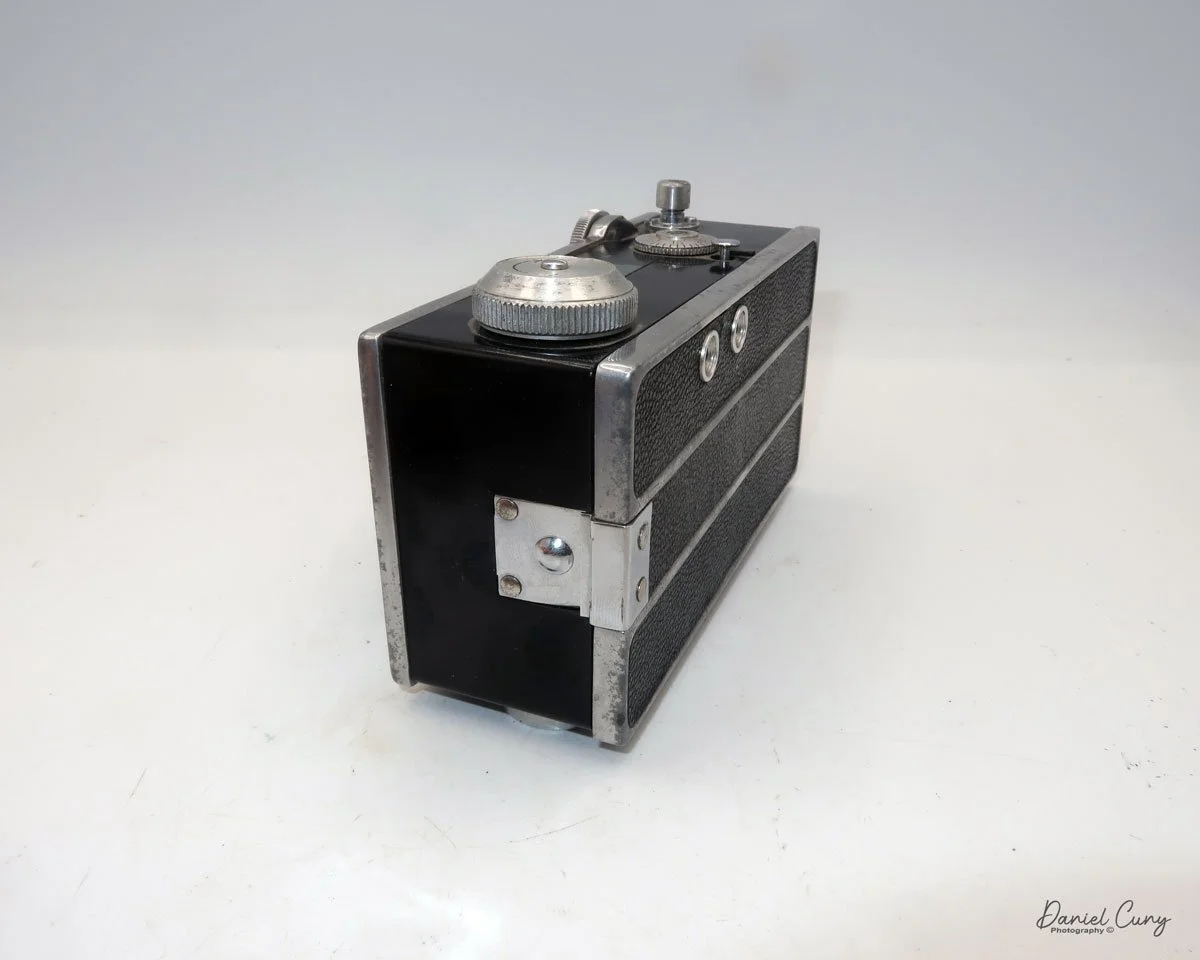
The second version of Kodak Panoram 1, the Model D, which I've had in my collection for 30-plus years, is slightly different. The back of the camera doesn't detach from the body, but, like some horizontal-folding cameras, there are buttons on either side you press to release it and fold it down. Then the camera's sides swing out to allow you to load and unload film.
I have owned and restored several of both models, as the lens-swinging mechanism is the same, and the leather or suede bellows are similar. The main reason for the change in style was to reduce the camera's size. I prefer the original with the removable back, but both deliver fantastic images.
History of Kodak Panoram:
Introduced by Eastman Kodak at the turn of the 20th century, the Kodak Panoram series democratized wide-angle photography, bringing it out of the domain of professional specialists and into the amateur market. Debuting in 1899 with the No. 4 and in 1900 with the smaller, popular No. 1, these "shoe-box"- shaped cameras remained in production until 1928.
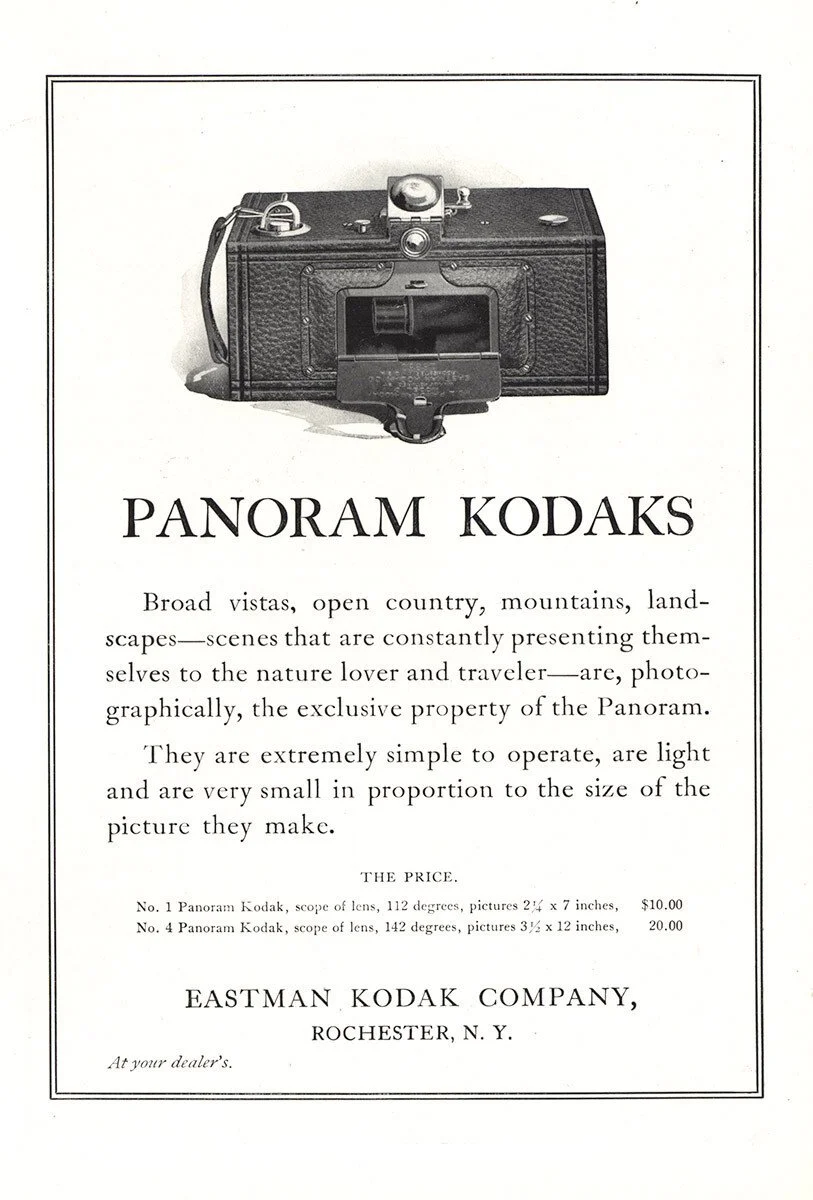
Advertisment for the Kodak Panoram cameras
The Panoram’s defining feature was its ingenious swing-lens mechanism. Unlike standard cameras with fixed lenses, the Panoram featured a lens mounted on a pivoting turret. When the shutter was triggered, the lens swung in an arc—typically between 112 and 142 degrees—sweeping light across a curved plane of film (the area of film bent to match the arc) at the back of the camera. This design minimized horizon distortion while capturing vast landscapes or large-group portraits in a single exposure. A swing-lens mechanism means the camera’s lens actually moves or "swings" during the exposure, rather than remaining stationary as in most cameras, to create a wide panoramic image.
Aimed primarily at outdoor and travel use, Panoram cameras were used to document landscapes, expeditions, and colonial scenes, including polar exploration and industrial development in Southeast Asia. Their relatively simple wooden-and-leather construction, fixed focus, and minimal controls reflected Kodak’s broader strategy of making specialized photography accessible to non‑experts. At the same time, the nearly three‑decade production run indicates sustained popularity among enthusiasts of wide‑angle views.
Three primary models defined the line: the No. 1 (using 105 film), the No. 4 (using 103 film for massive 12-inch negatives), and the short-lived No. 3A (introduced in 1926). While eventually displaced by newer formats and the 35mm revolution, the Panoram remains a cult classic today, prized by collectors and photographers for the unique, sweeping perspective that only a mechanical swing-lens can provide.
My Camera:
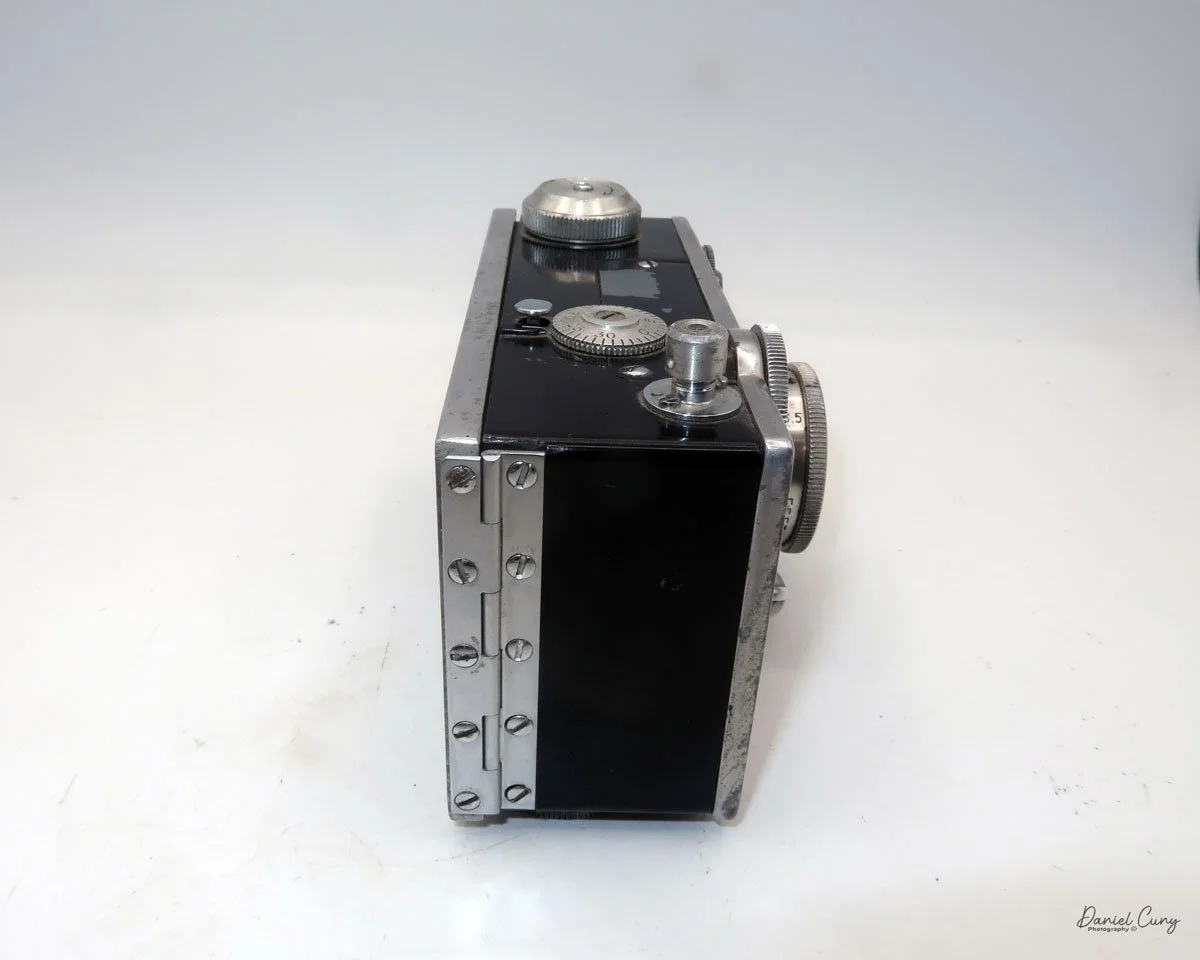
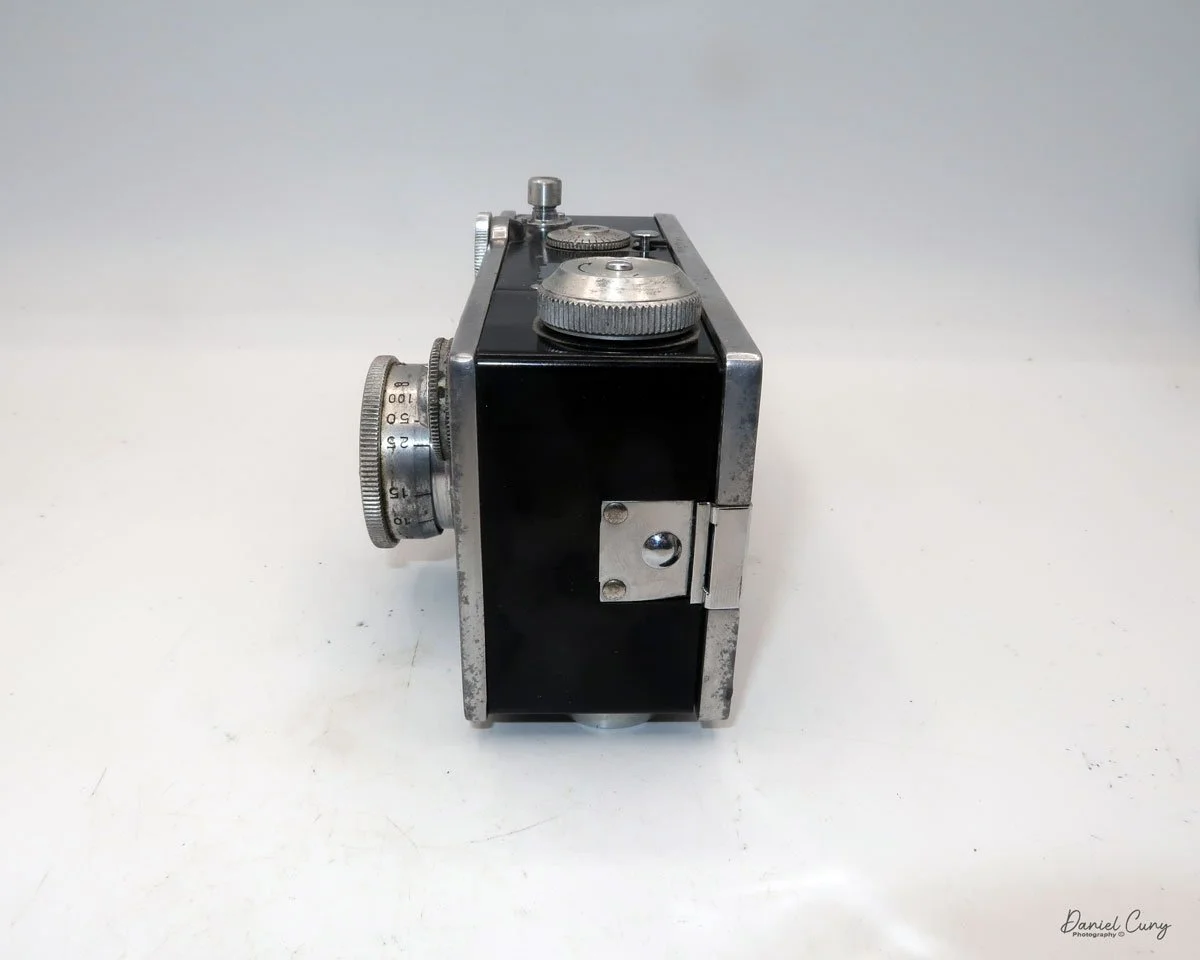
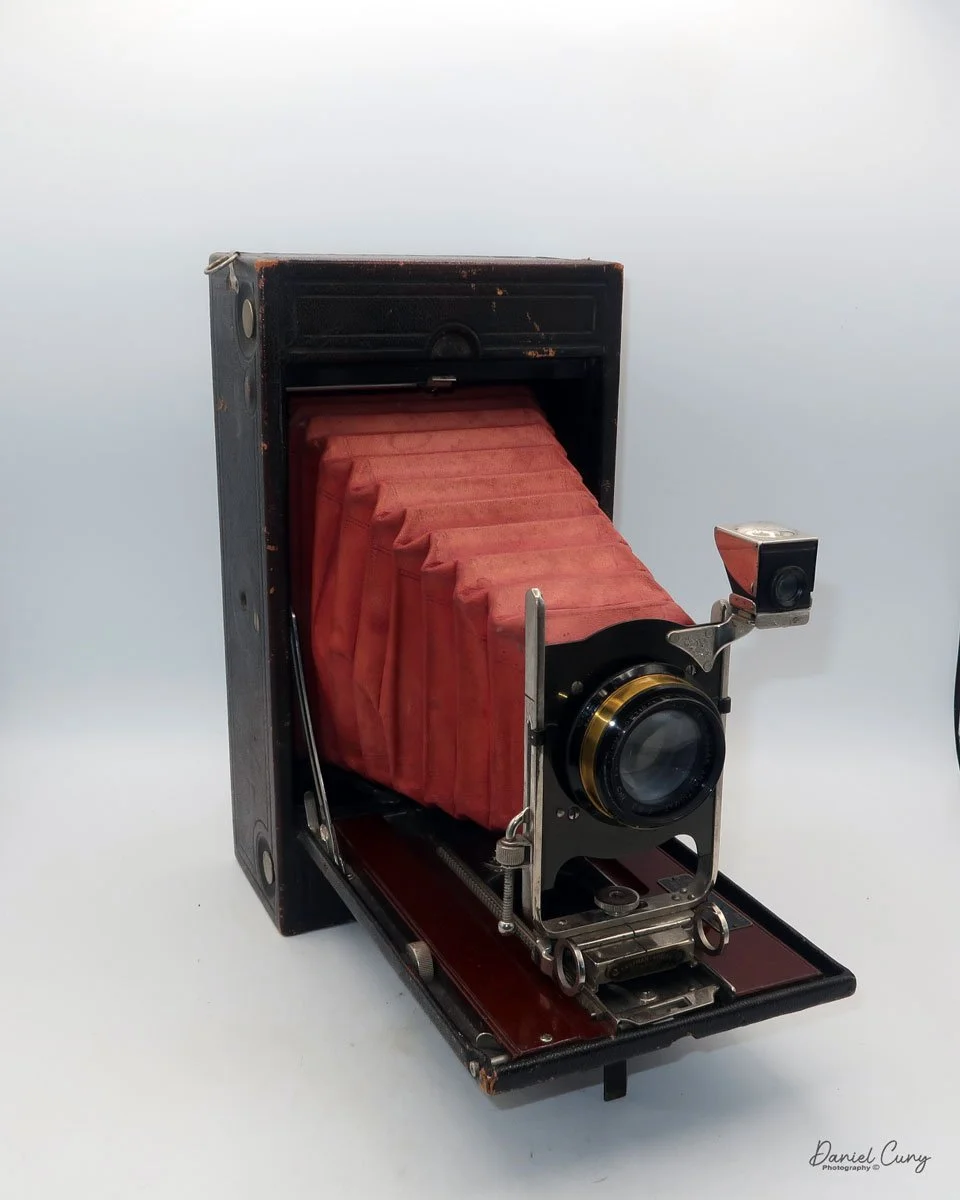
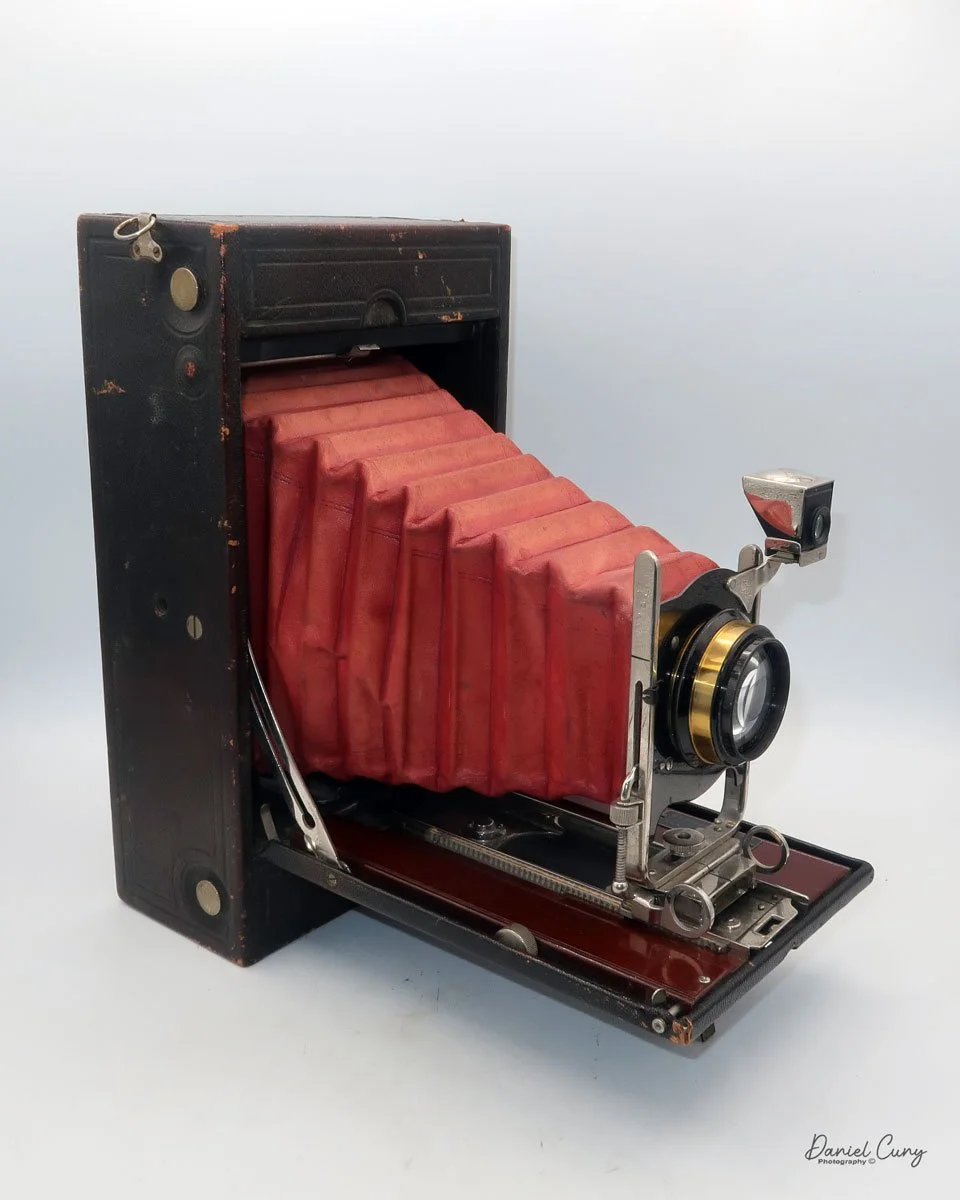
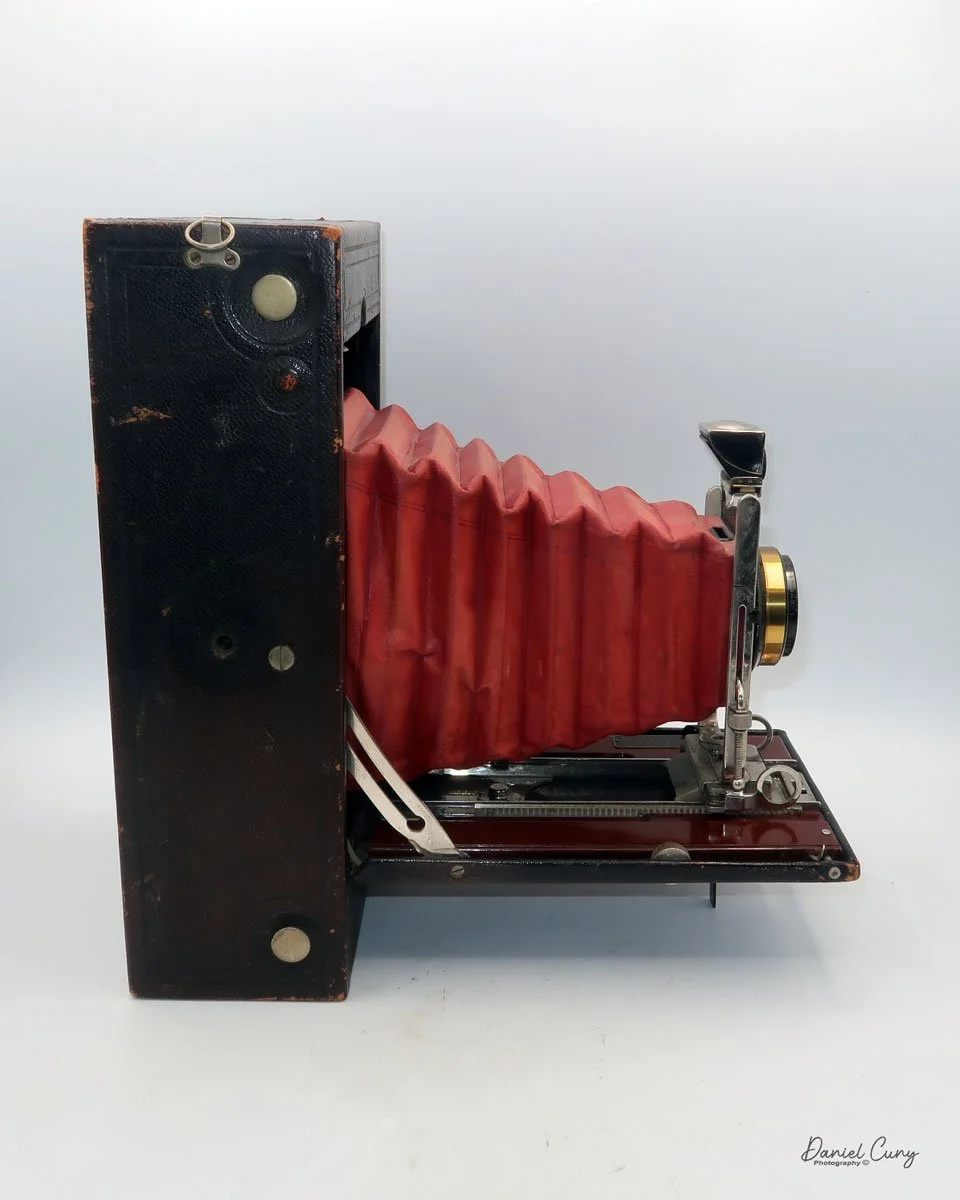
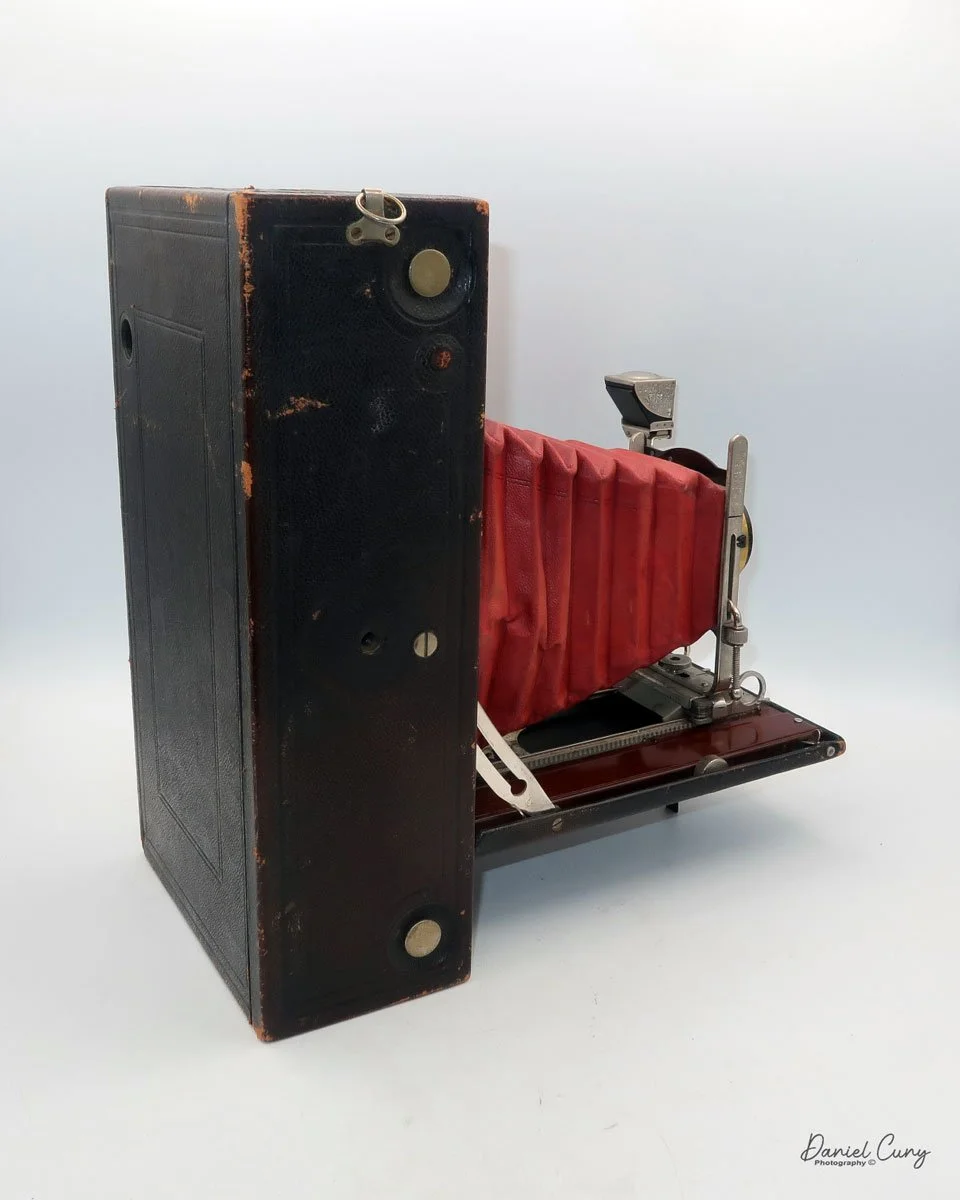
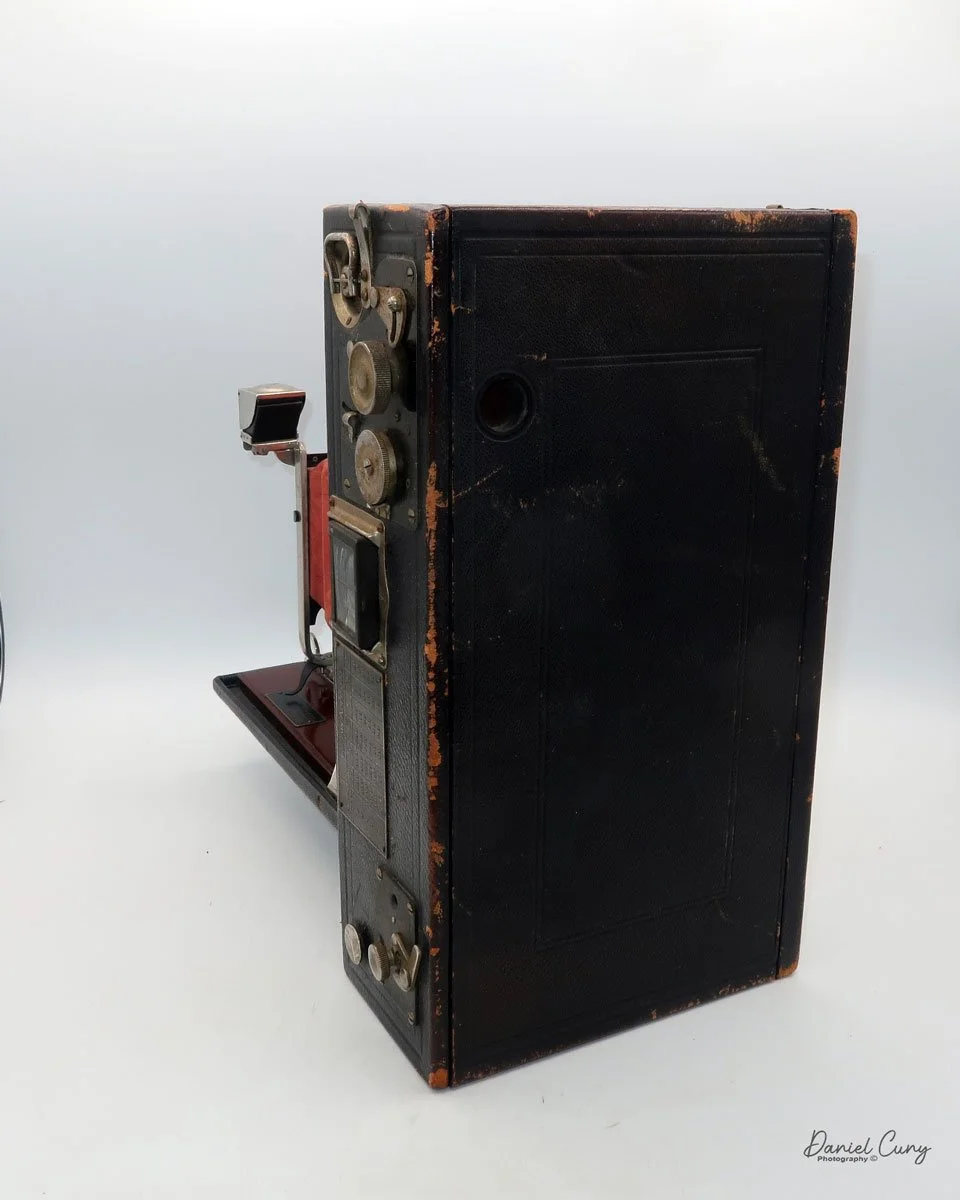
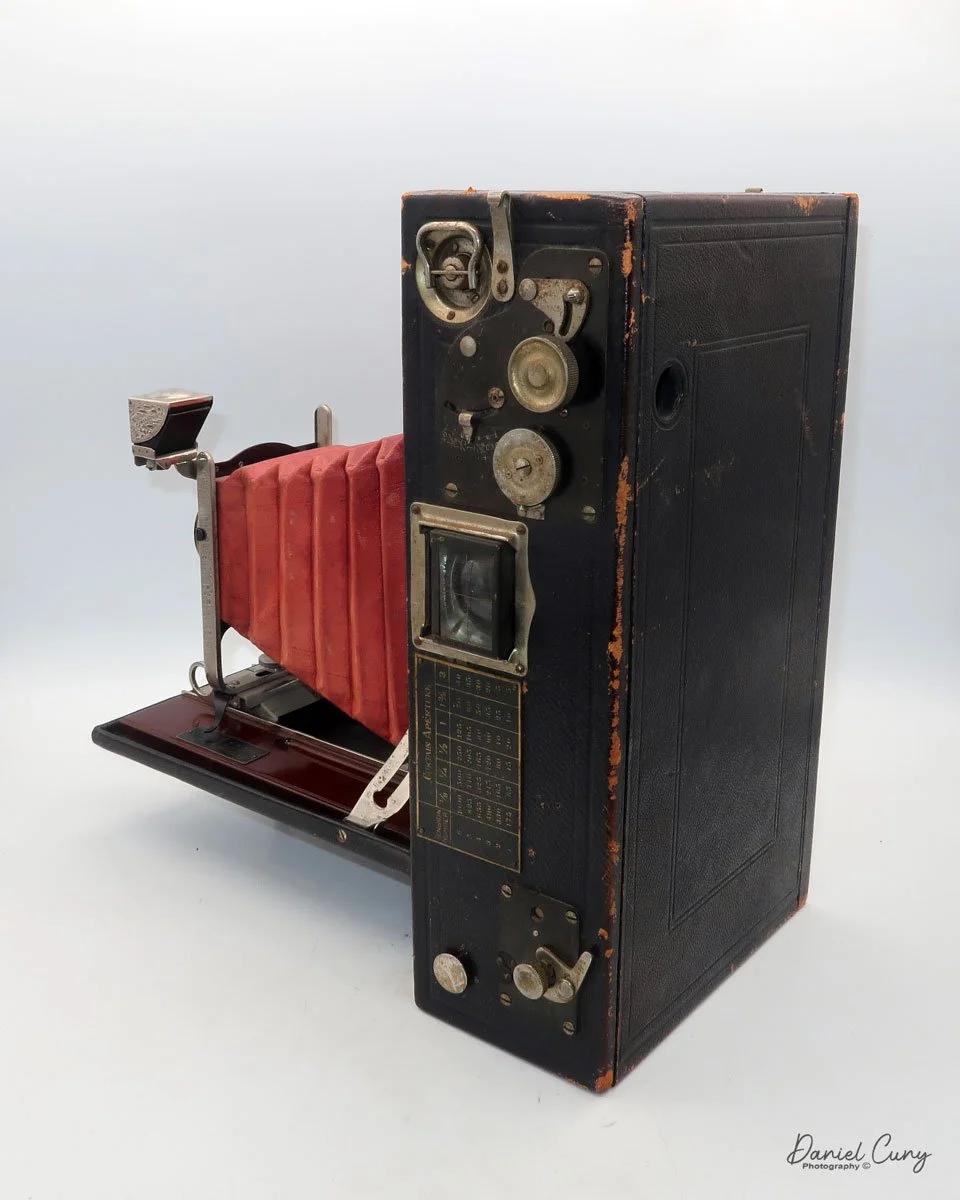
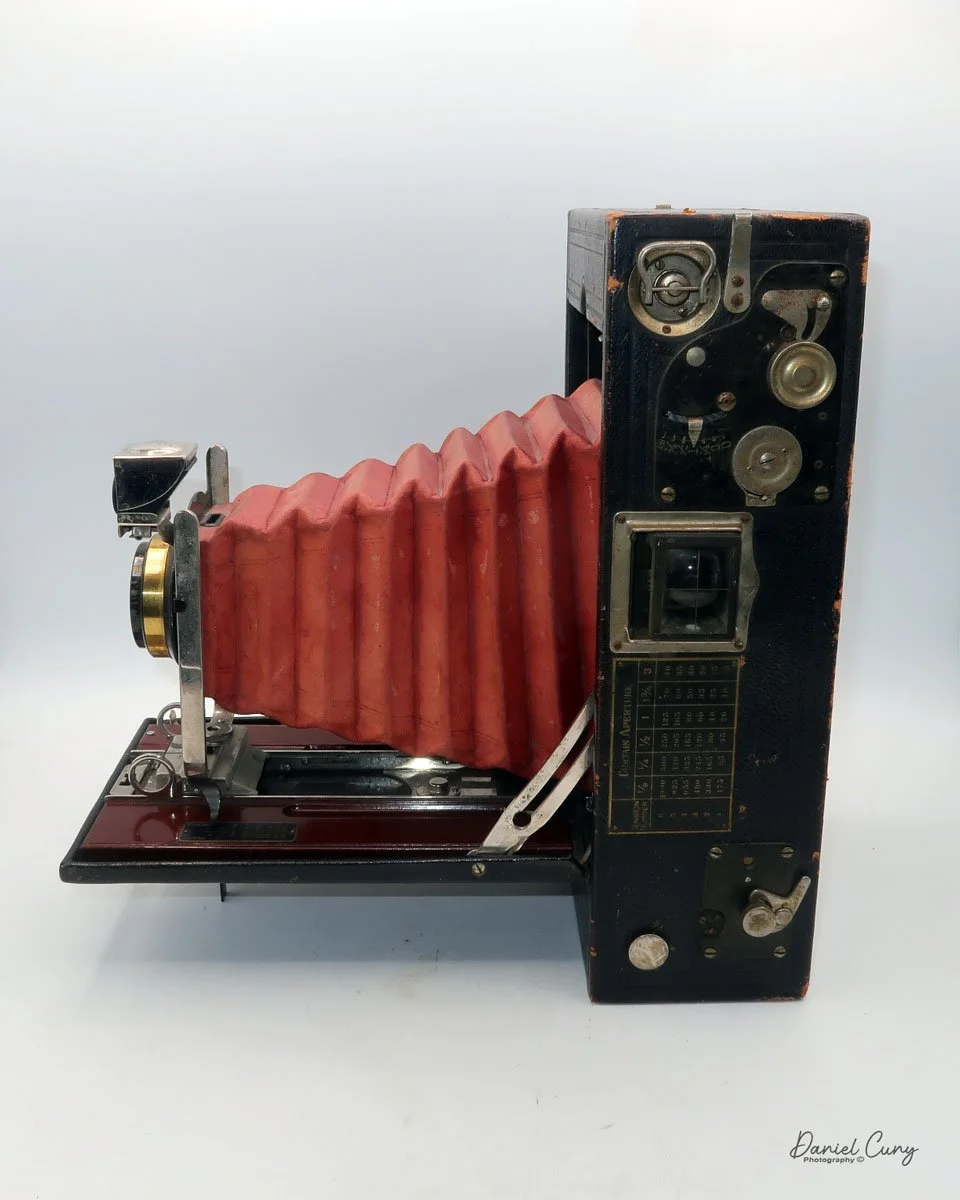
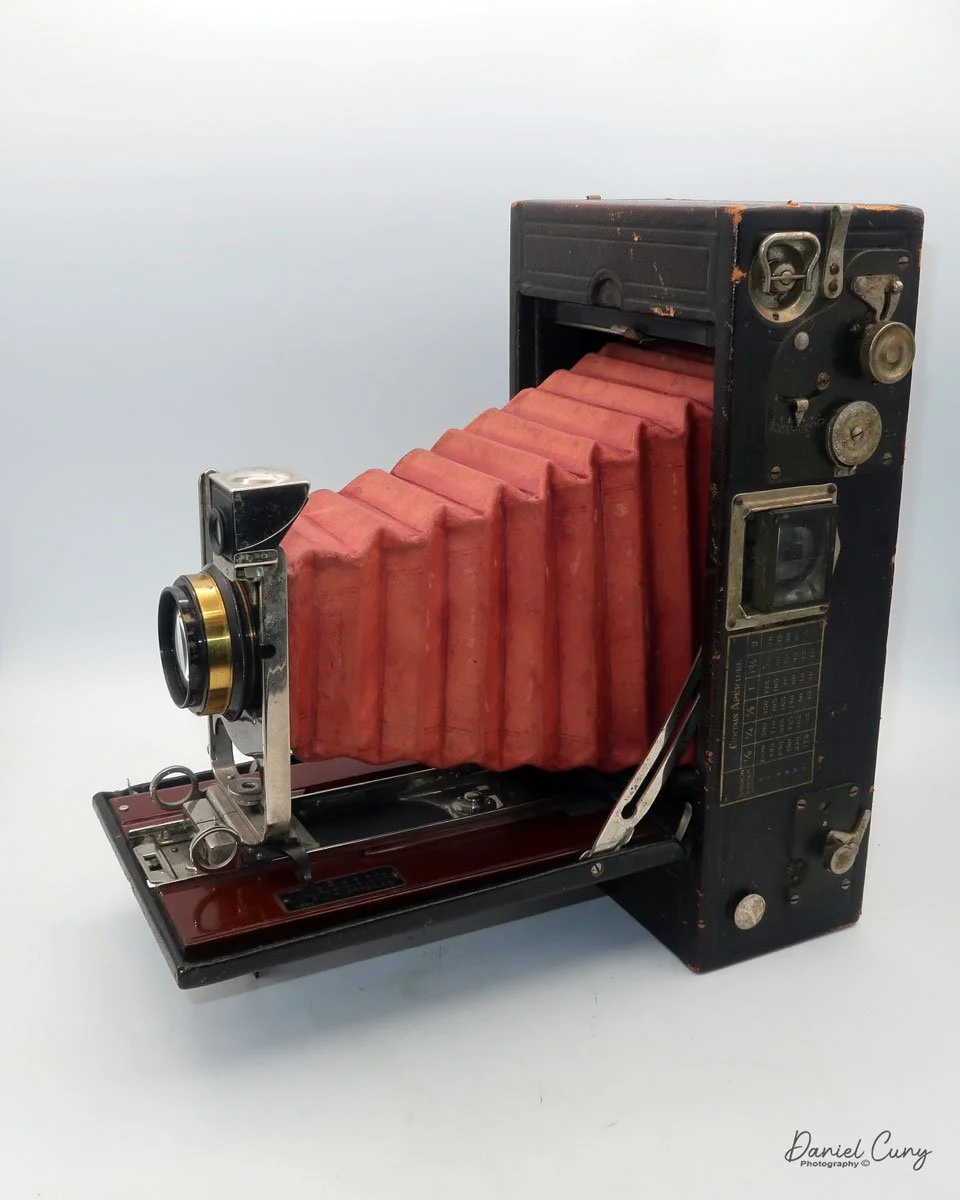
My Kodak Panoram 1, Model D camera is 7.5" wide with the strap, by 4.5" deep by 4" tall, including the optical viewfinder, and weighs 1 pound 9.5 ounces without film loaded in the camera.
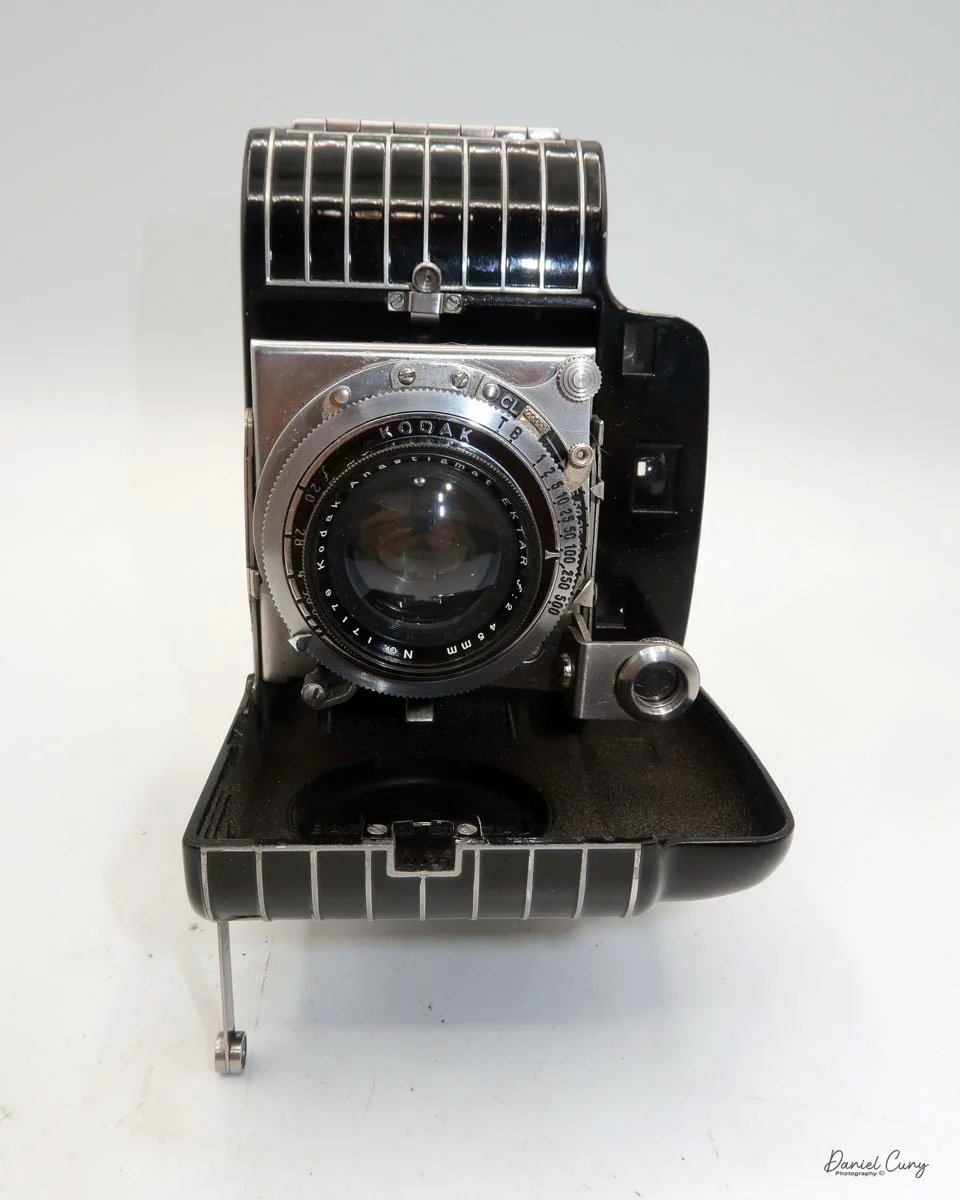
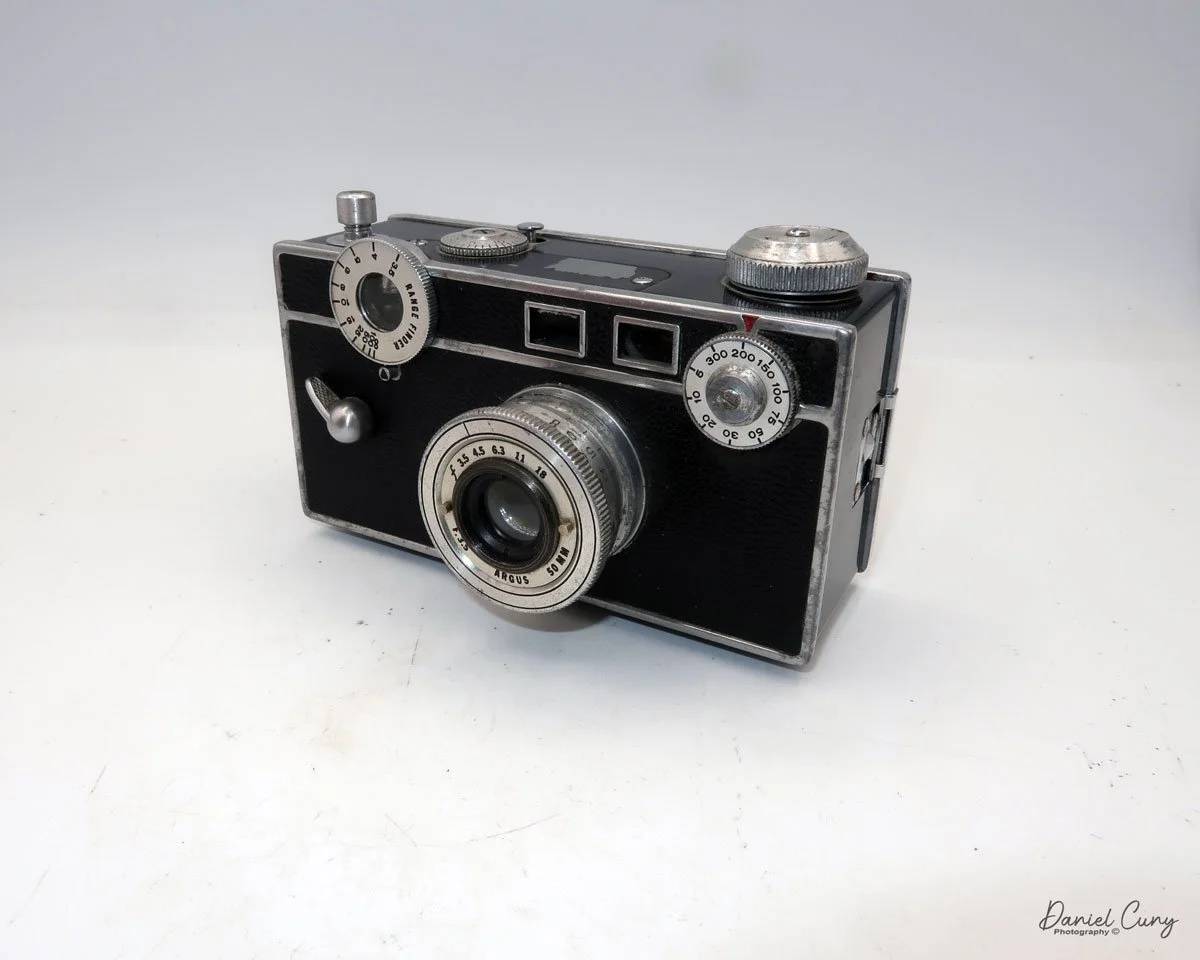
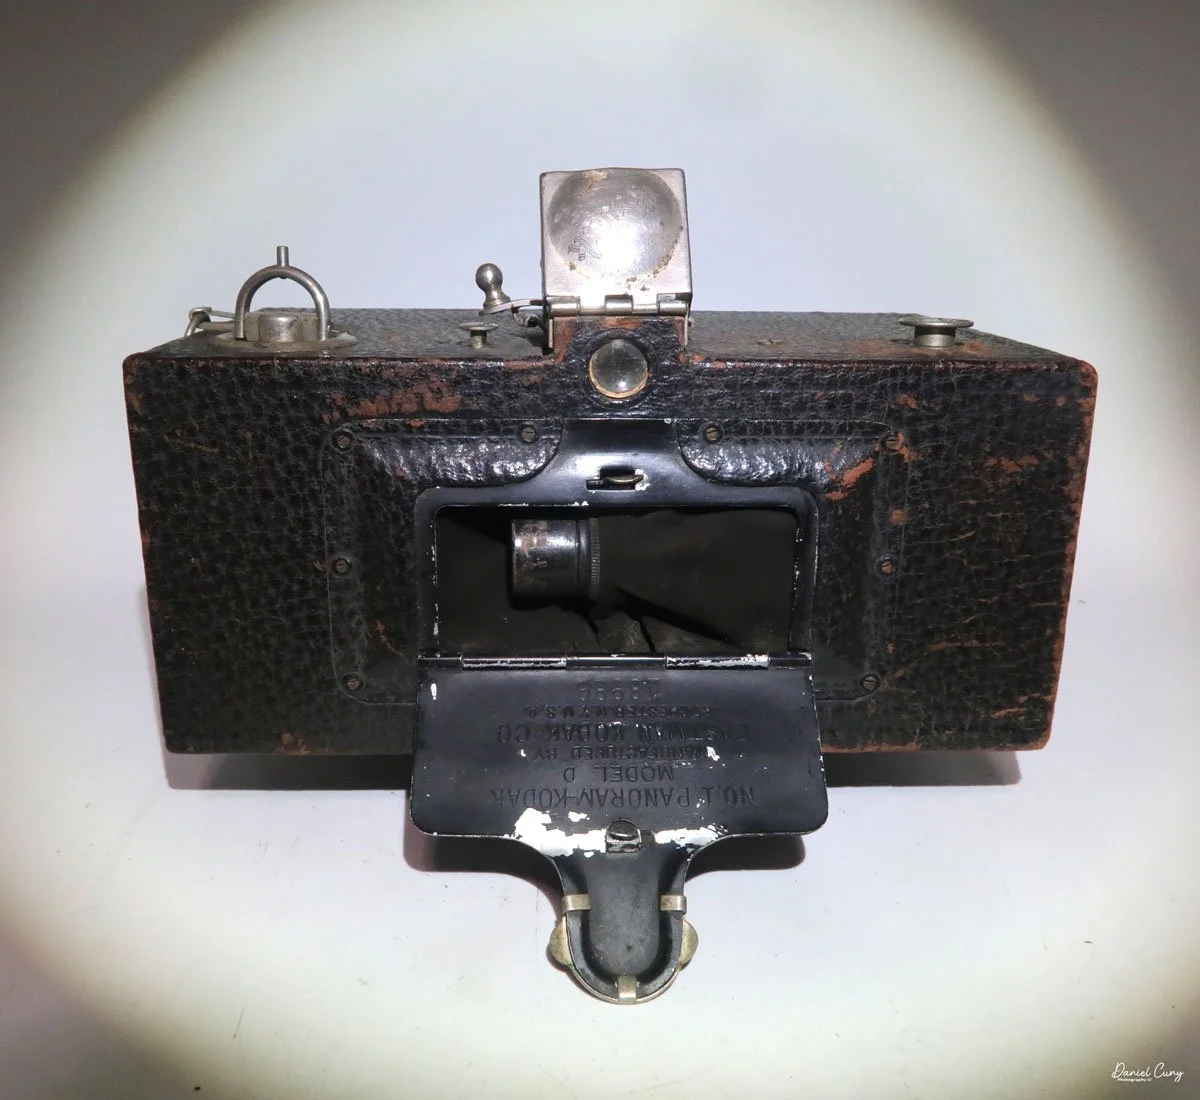
To open the lens, pull down the front lens cover to reveal the swing lens to one side or the other. If it were pointing straight ahead, the lens cover wouldn't close. On the inside of the lens cover is the camera name, No. 1 Panoram, Kodak, Model D. On the bottom is the camera's serial number. My camera's serial number is 18986.


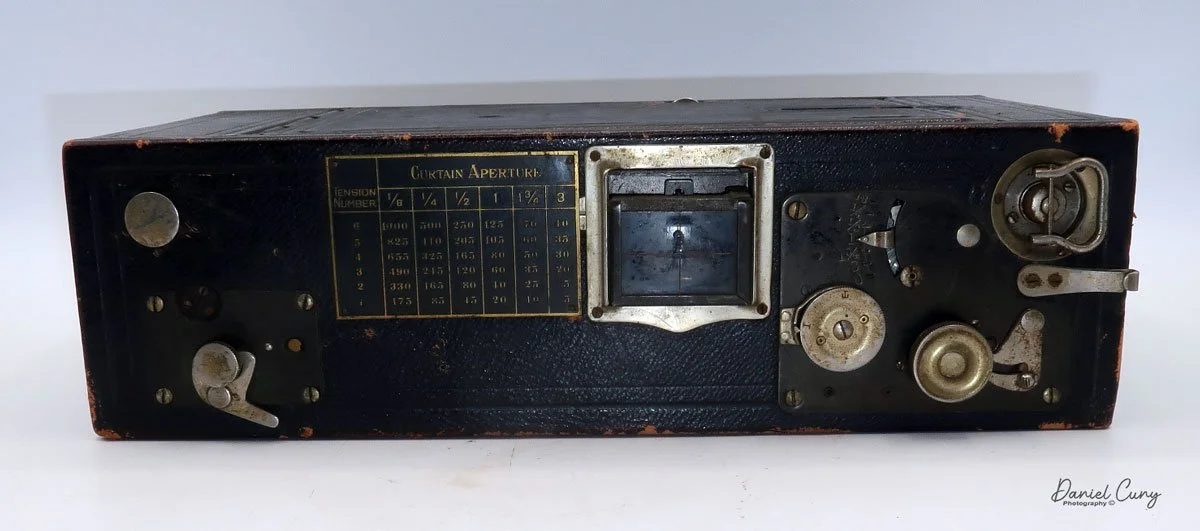
The camera is simple with minimal controls. On top is the etched nickel Kodak waist-level finder, which you lift to reveal the viewfinder. Behind the finder is the shutter speed selector. There are two notches: the one near the center is for a slower shutter speed, and pulling the selector to the end increases spring tension, making the lens swing faster at that speed.
To set the speed, slide the bar opposite the lens direction. If the lens faces right, slide the bar left to set the next photo's shutter speed. Lock the chosen slow or fast speed with the clip under the selector bar. The shutter release is just right of the optical waist-level finder. Press the shutter button to release the lens and watch it swing to expose the film. Two lines form a "V" at the top, indicating the camera's approximate field of view.


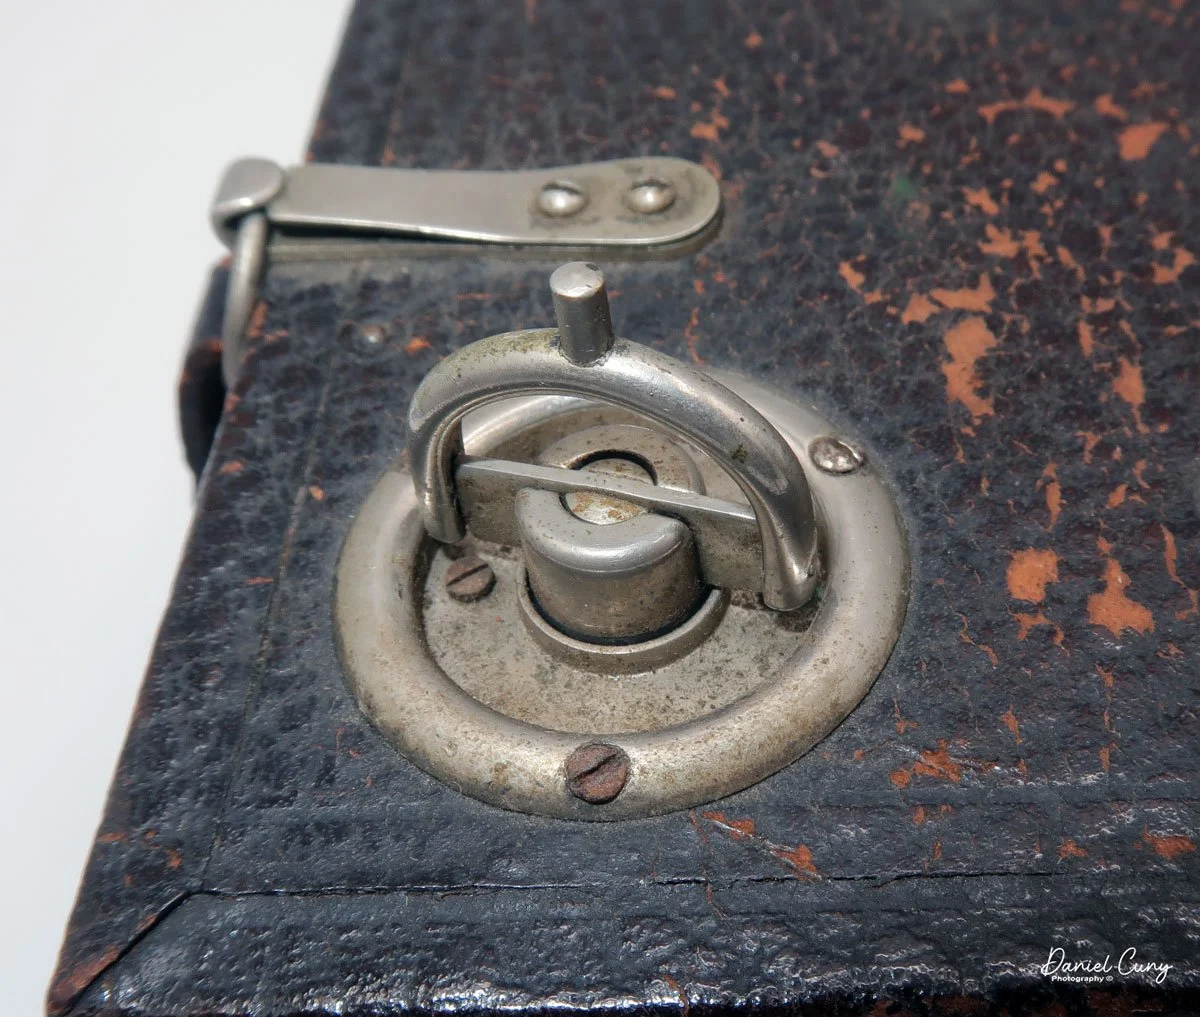
As mentioned previously, to open the back to load the film, unclip the strap on the right side of the camera, then press in the two buttons on the sides of the camera, which will release the camera's back, and it will swing down, and the sides of the camera will also swing open, revealing the film chamber. There you'll see the curved film plane the film travels over, and the very impressive cone on the back of the lens guiding the light onto the film as the lens swings from one side to the other.


To load film into the camera can be a bit tricky because the newer plastic film reels—that is, the circular pieces at each end of a roll that hold the film—can at times be thicker than what was used originally back in the early 1900s, when Kodak would use metal for the reel ends and wood for the film cores, meaning the spools—the cylinder around which the film is wound—would be a bit thinner. When I went to load film for the blog post, I tried a brand I'd never used before. The spool was just a bit too thick and wouldn't fit into the camera easily, and once I did get it in, it was so stiff that the film wouldn't transport across the shutter easily.
I loaded a new roll by placing the empty spool on the right, then lifting the winding lever and button to fit it. Then I placed the new roll on the left, brought the paper backing over the film plane, and threaded the leader into the empty spool slot. I wound the film until the start arrows appeared, pressed in the camera sides, and swung the back up to lock it.


Since 120 film isn't designed for panoramic cameras, the numbers 2, 6, 10, and 14 appear on the back of my camera. These indicate the frame numbers to stop at for each of the four photos on 120 film. I wound the film to 2 and was ready to take my first shot.
My Results:
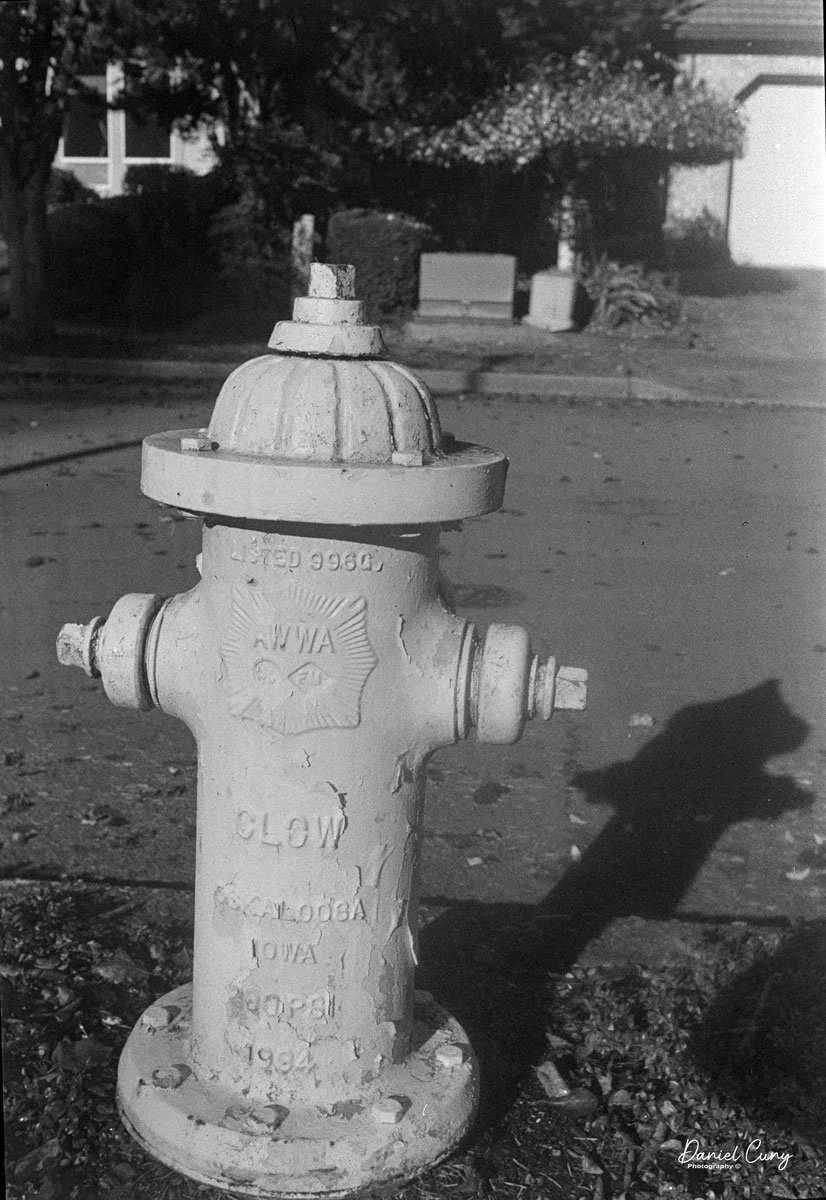
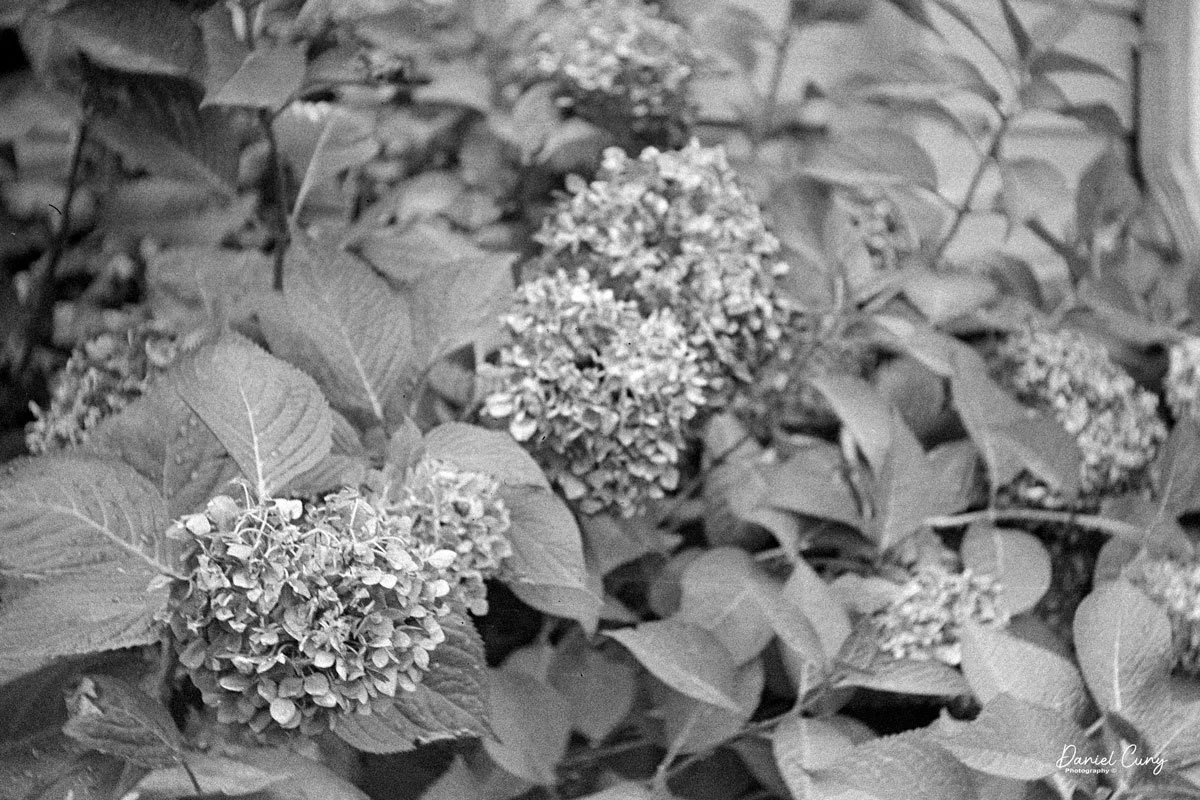
The film I loaded into the camera was an older roll of Kodak BW400CN film I purchased at a local camera show a few months ago. One thing about the film is that it needs to be processed in C-41 chemicals, which is a standard color film developing process. For the article, I wasn't sure I'd have enough time to get the film processed. Looking online, people mentioned the film can be processed in B&W (black-and-white) chemicals, so that's what I did.
There was a break in the rain on Sunday, so I loaded the film into the camera because the Kentmere I had didn't fit because the spool was too thick. I took the photo and went back to the house to develop the negatives. Maybe I didn't process the film long enough, since the images were extremely thin. I had to do some magic in Photoshop to get the images I have, so my apologies for the poor examples.
However, I used the camera when I went to Yosemite a few years ago, and the images turned out great, so I'm adding a couple of color images from Yosemite to this blog to show how well the camera performs.


Conclusion:
I've always been a huge fan of both the Multiscope Al-Vista and the Kodak Panoram camera. It's interesting that I've only owned the Panoram 1 camera and never the 3a or 4 Panoram, but I do have some of the larger Al-Vista cameras.
The Panoram 1 is a fun camera to use, and the results are surprisingly good. I should have a camera with a smooth shutter. The cameras are compact, use 120 film, and, unfortunately, are becoming increasingly expensive as people learn about them and how much fun they are to use.
Fortunately, I've had mine for many years, and I also have the camera case, which is a plus. It's just a real gem in my camera, and truthfully, I'm surprised I haven't written about it sooner than I have.
Thank you for taking a few minutes from your day to read about his wonderful panoramic camera from over 100 years ago.
Here's a link to my previous Camera Reviews.
I also have an eBay shop, Cuny's Camera and Photo, where I sell cameras I've reviewed, along with other photo oddities. If you're interested in anything from my store, reach out to me, and I'll offer a discount. Just mention my blog.
Until next week, please be safe.