QRS Kamra

My QRS Kamra in box with manual

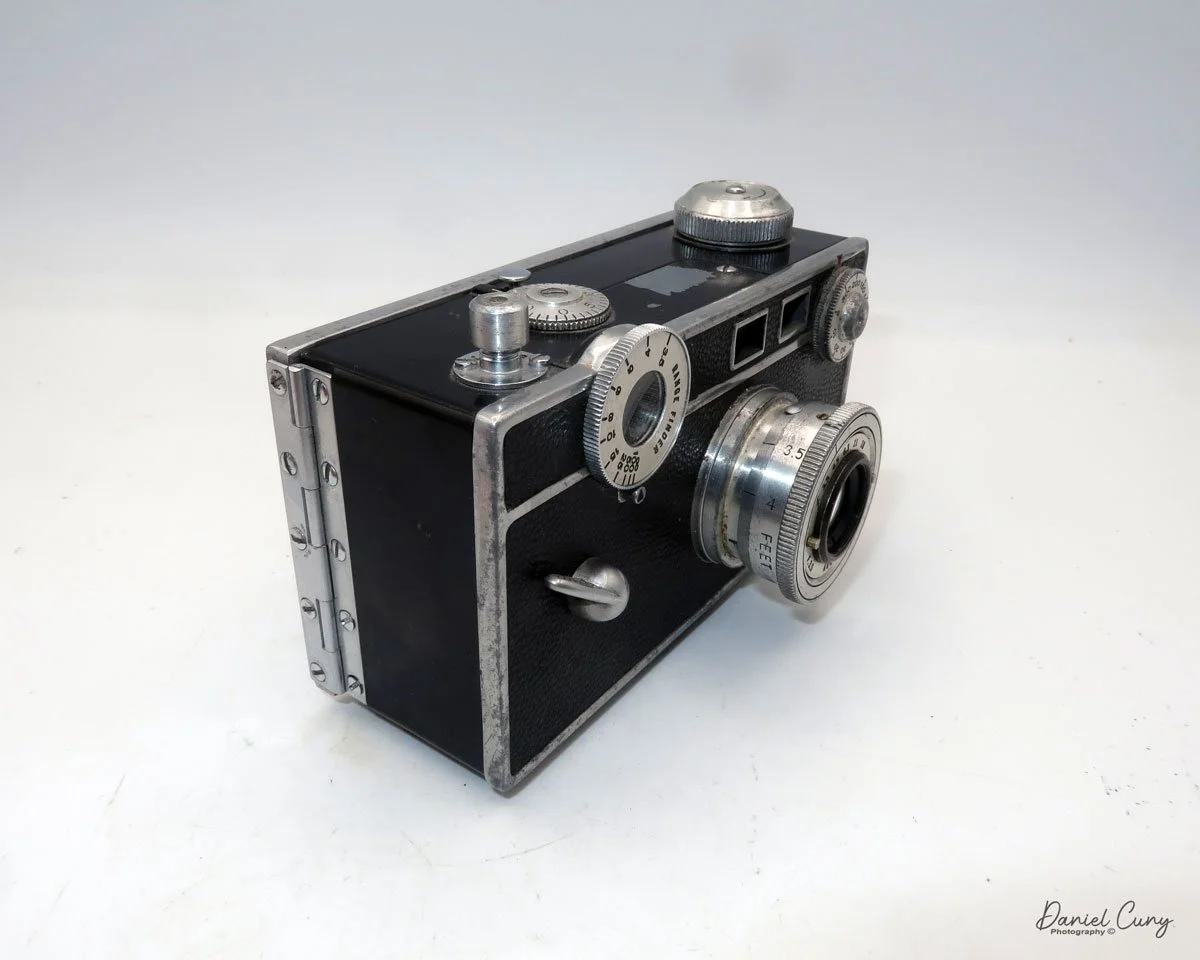
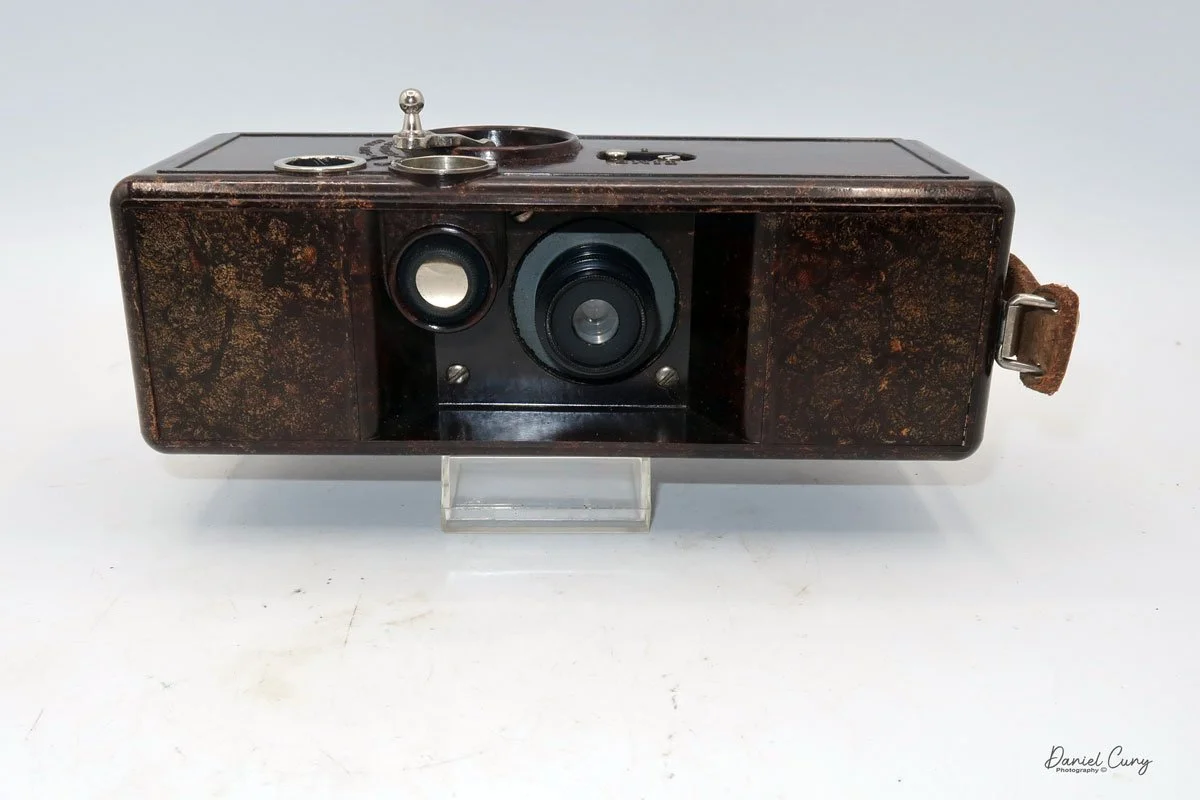
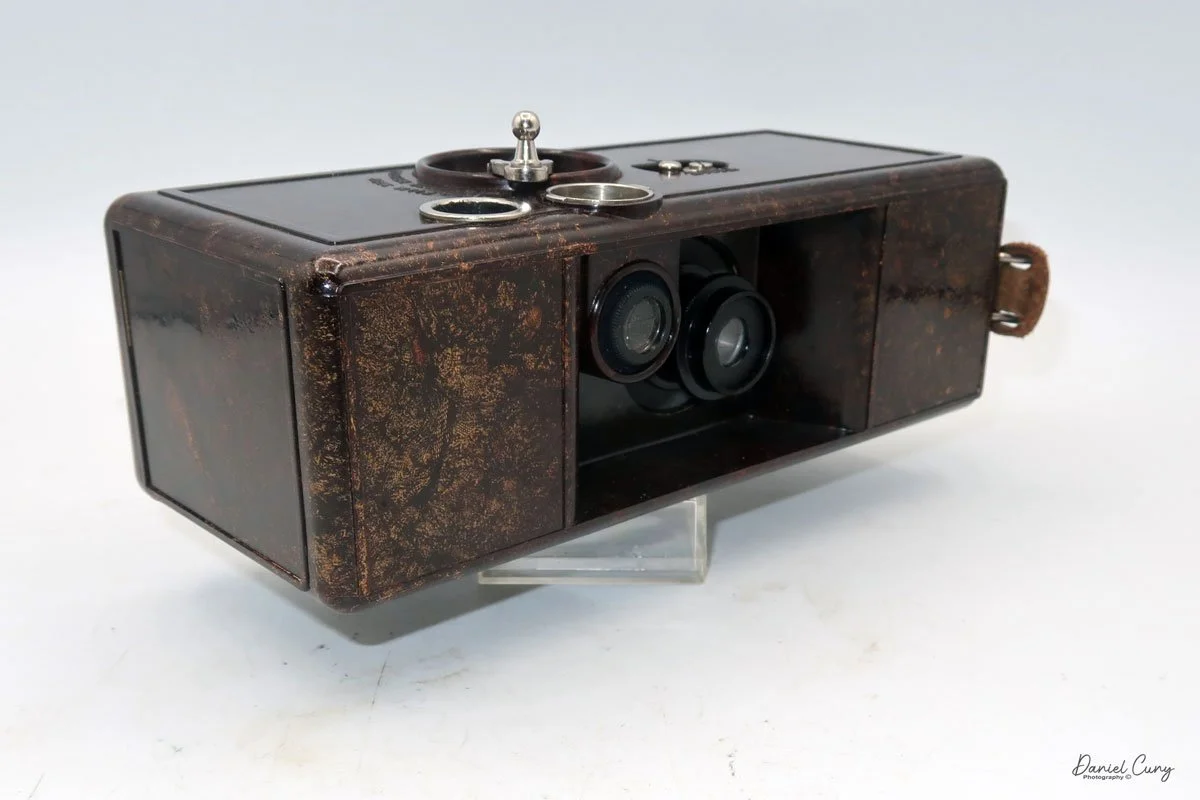
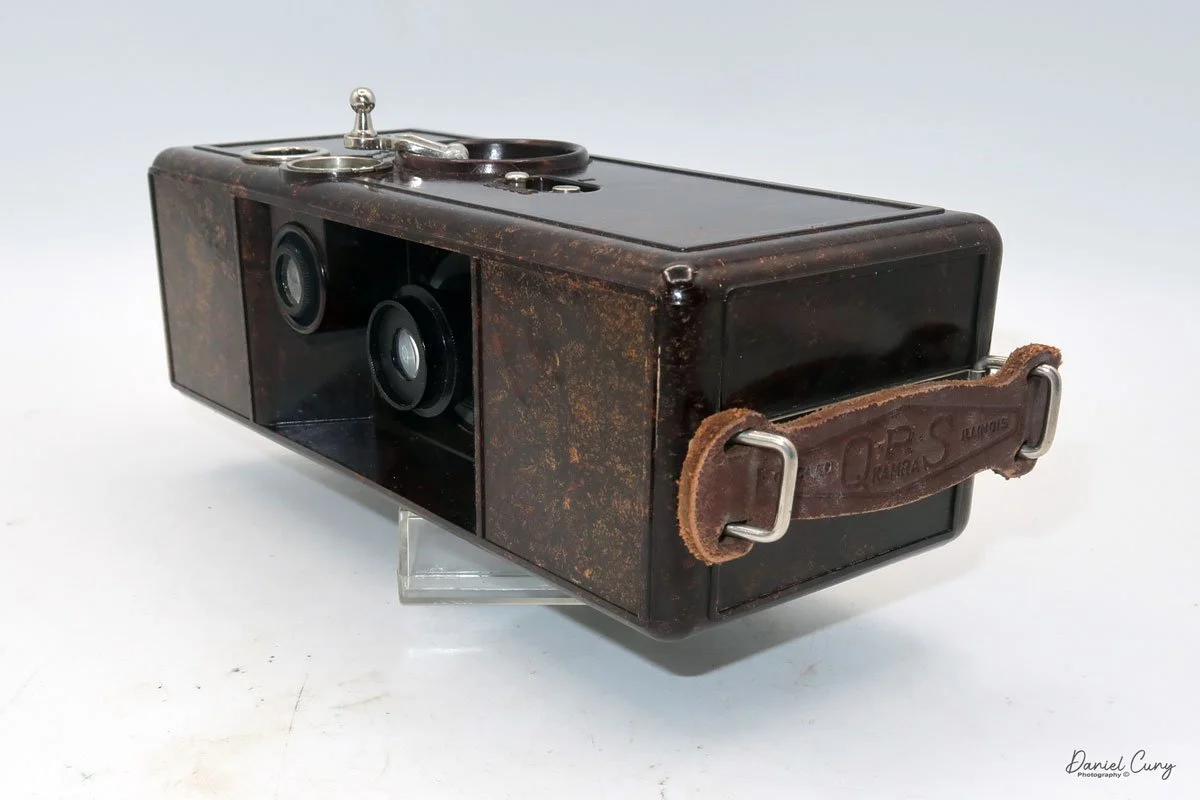
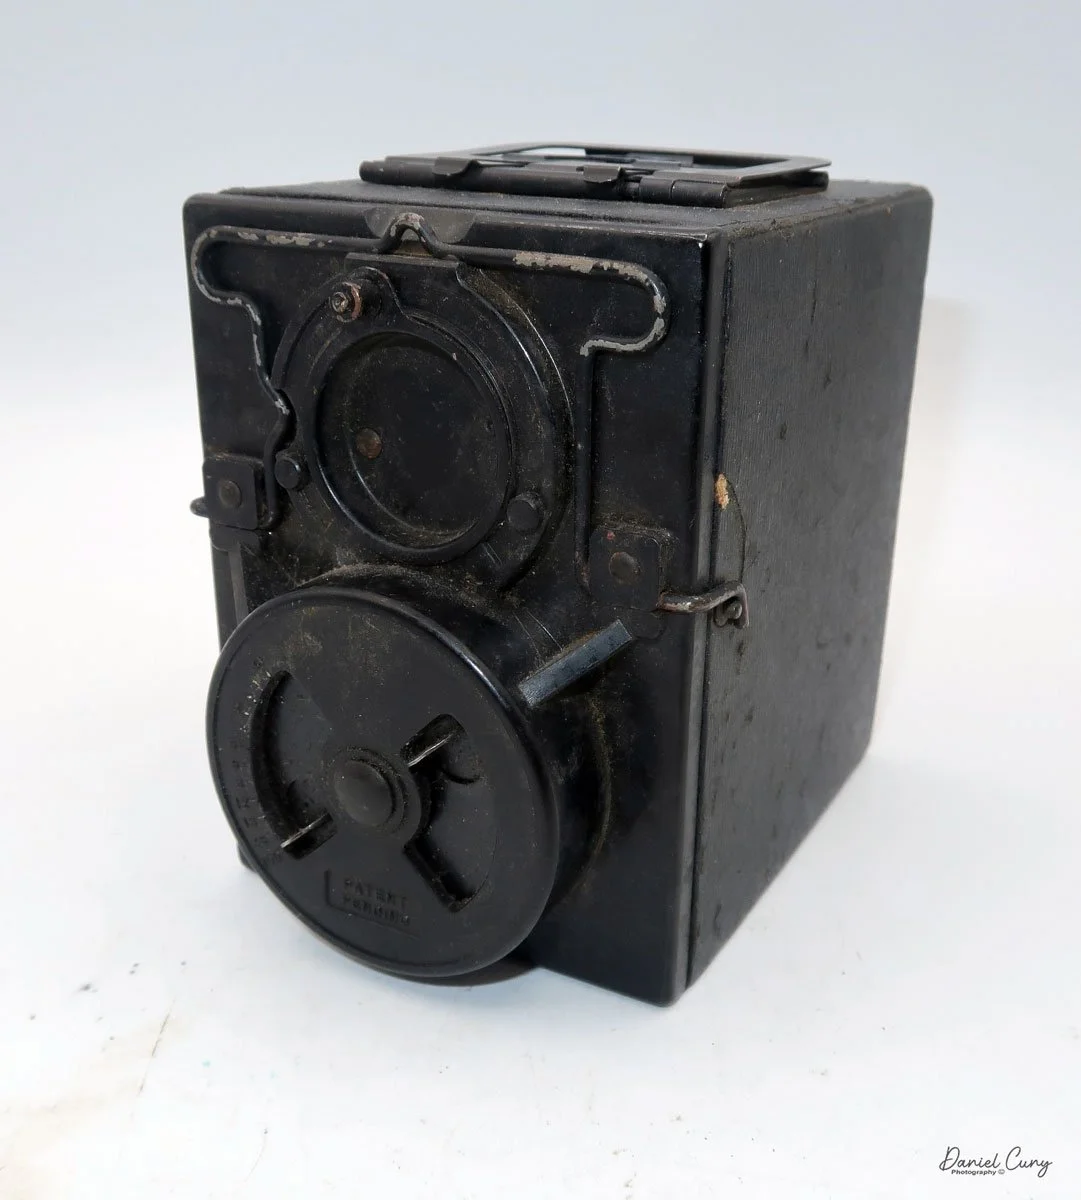
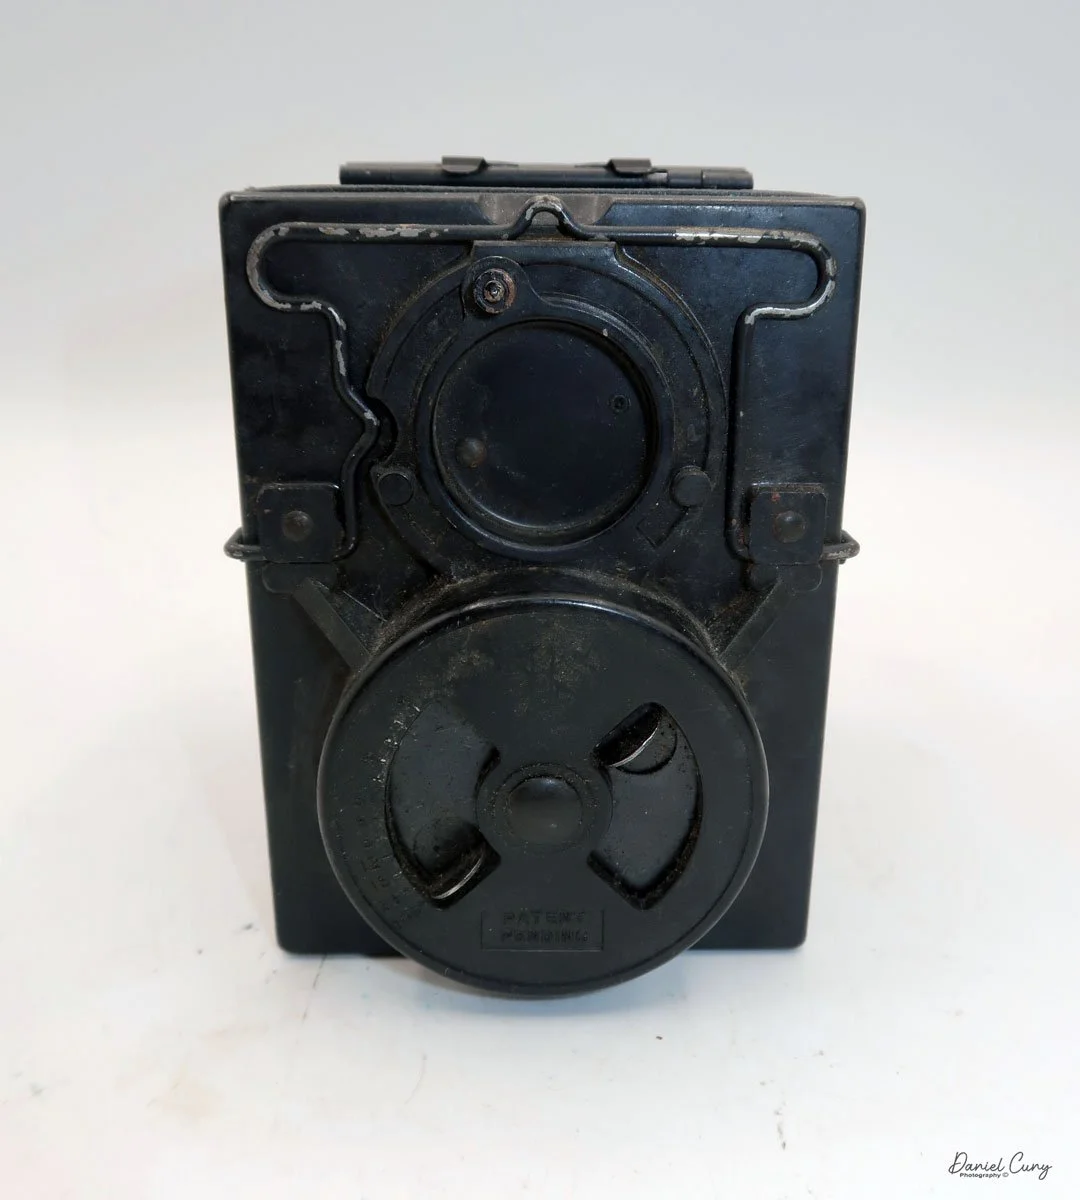
I first saw the QRS Kamra many years ago at a camera show when I was still living in the San Francisco Bay area. The camera has a look unlike any 35mm camera I had seen before. Up until this time, I was used to looking at a 35mm camera as either a single-lens reflex or a rangefinder style camera. When I first came across the QRS Kamra, my initial impression was that it was a movie camera, given that many cameras from this era have a rather boxy style.

 I spoke with the vendor who had the camera, and he let me try it out, warning me that it wasn't working, which is a common issue with this camera. Still, after picking up and looking at the beautiful brown mottled finish, odd looking shutter release that also seconds as the film transport, and the overall oddness (to me) of the camera, I told myself that I'd like to have one for my collection some day, because the price of the camera was more that I could spend on a camera at the time.

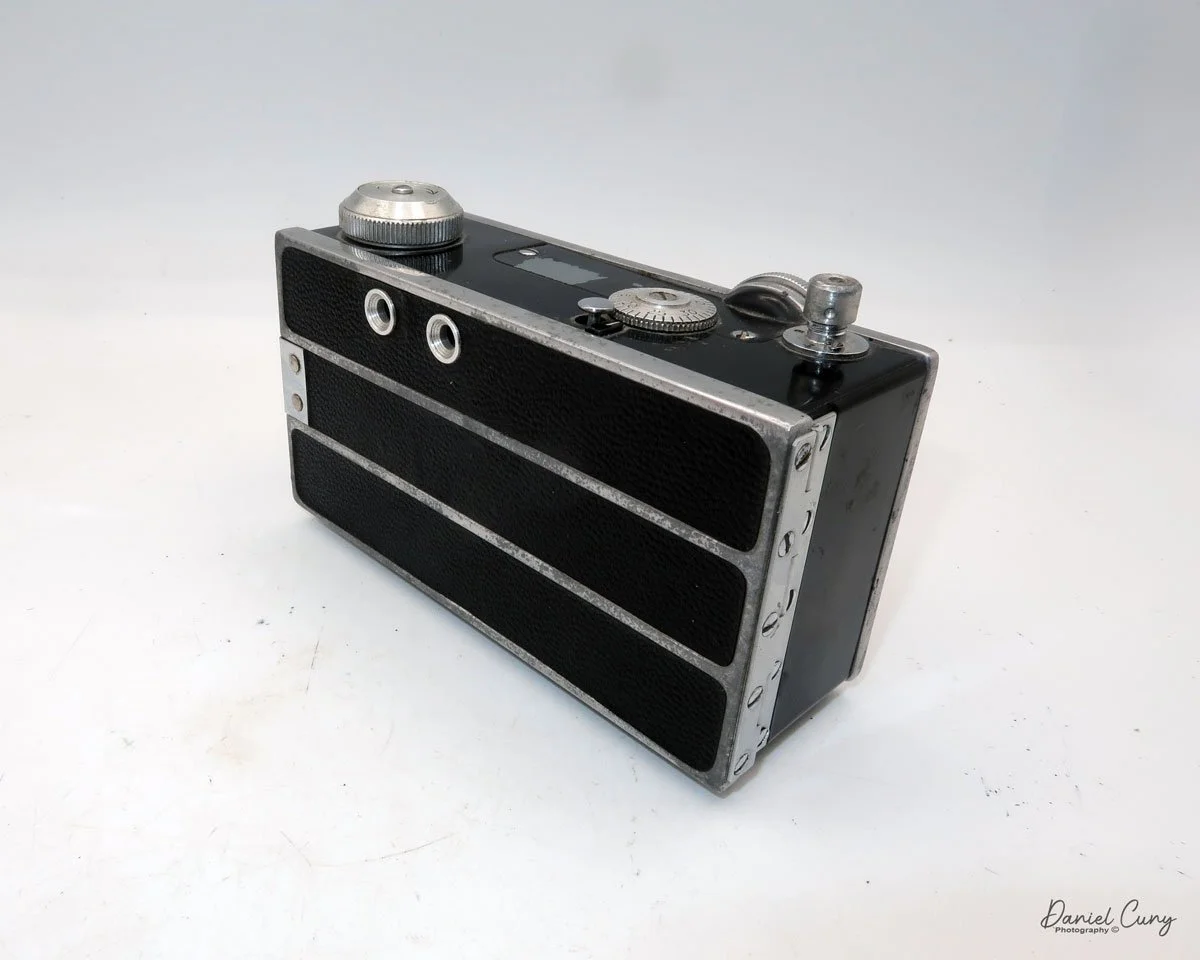
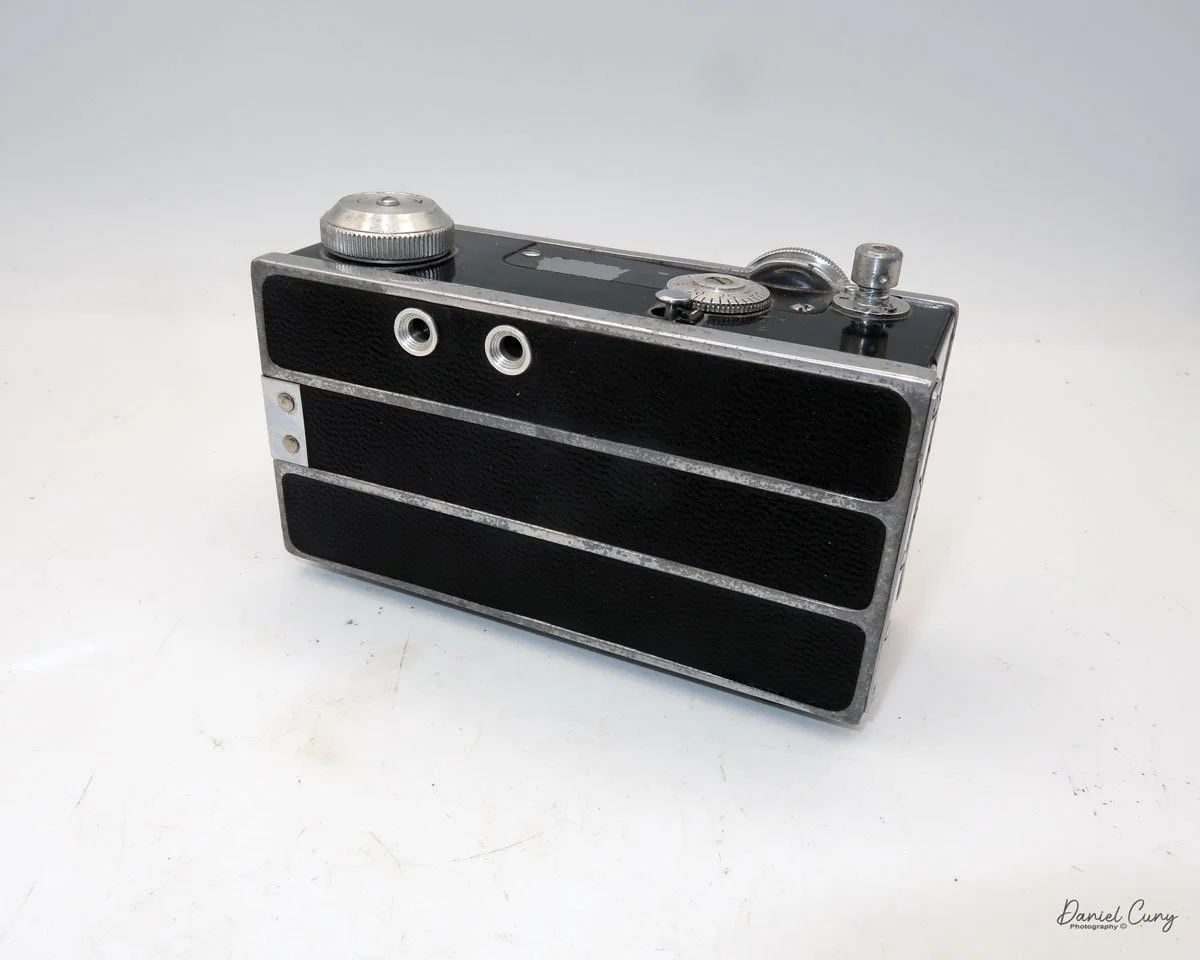
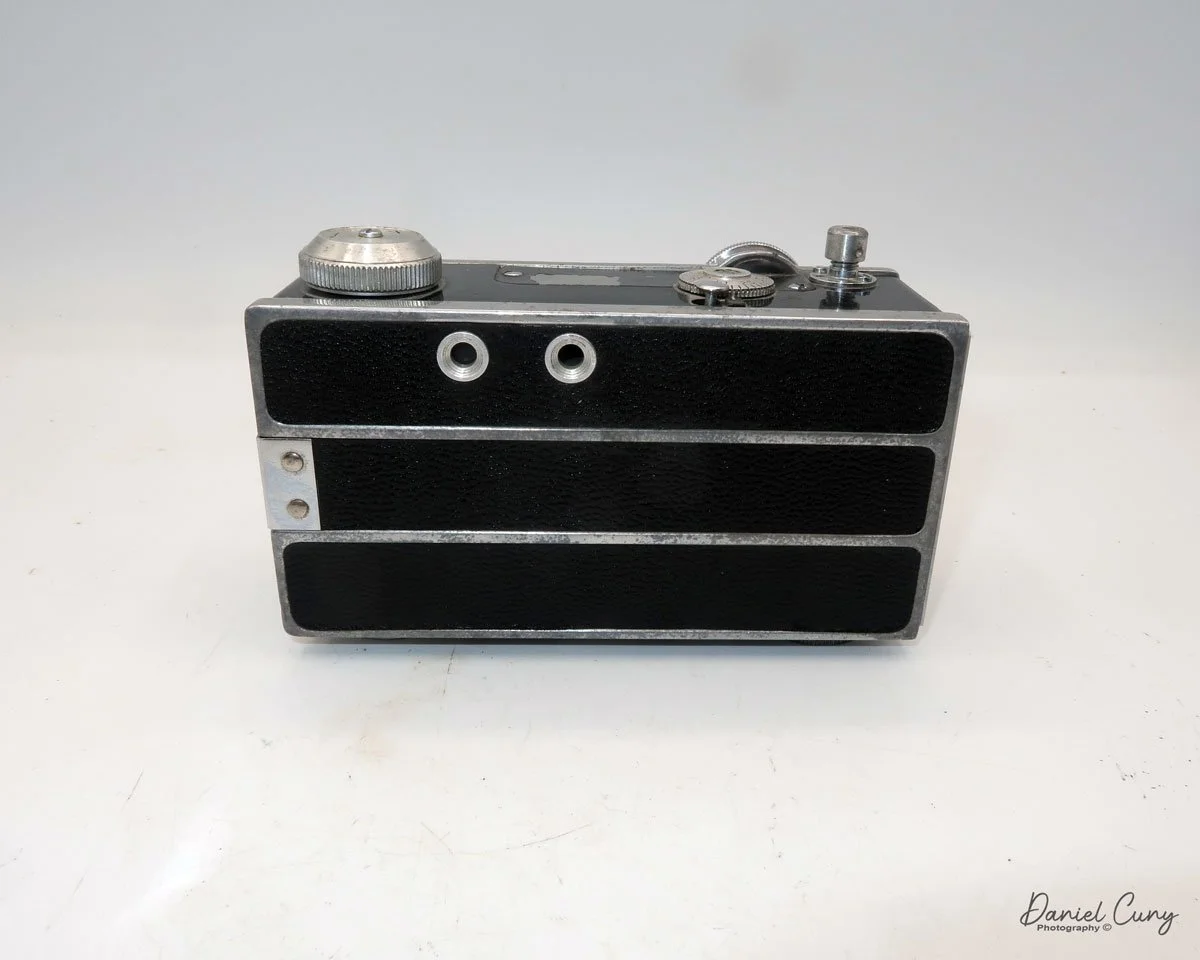
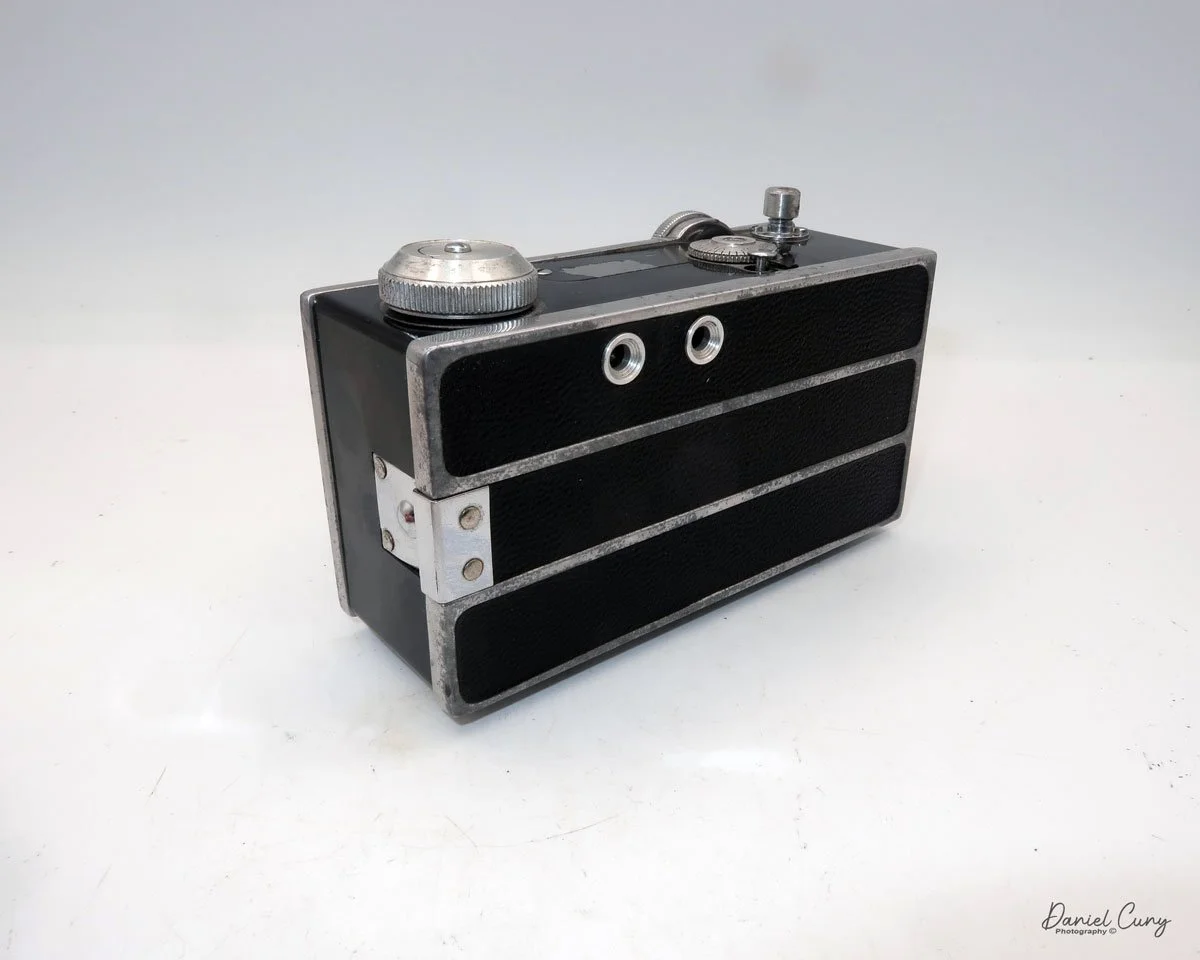
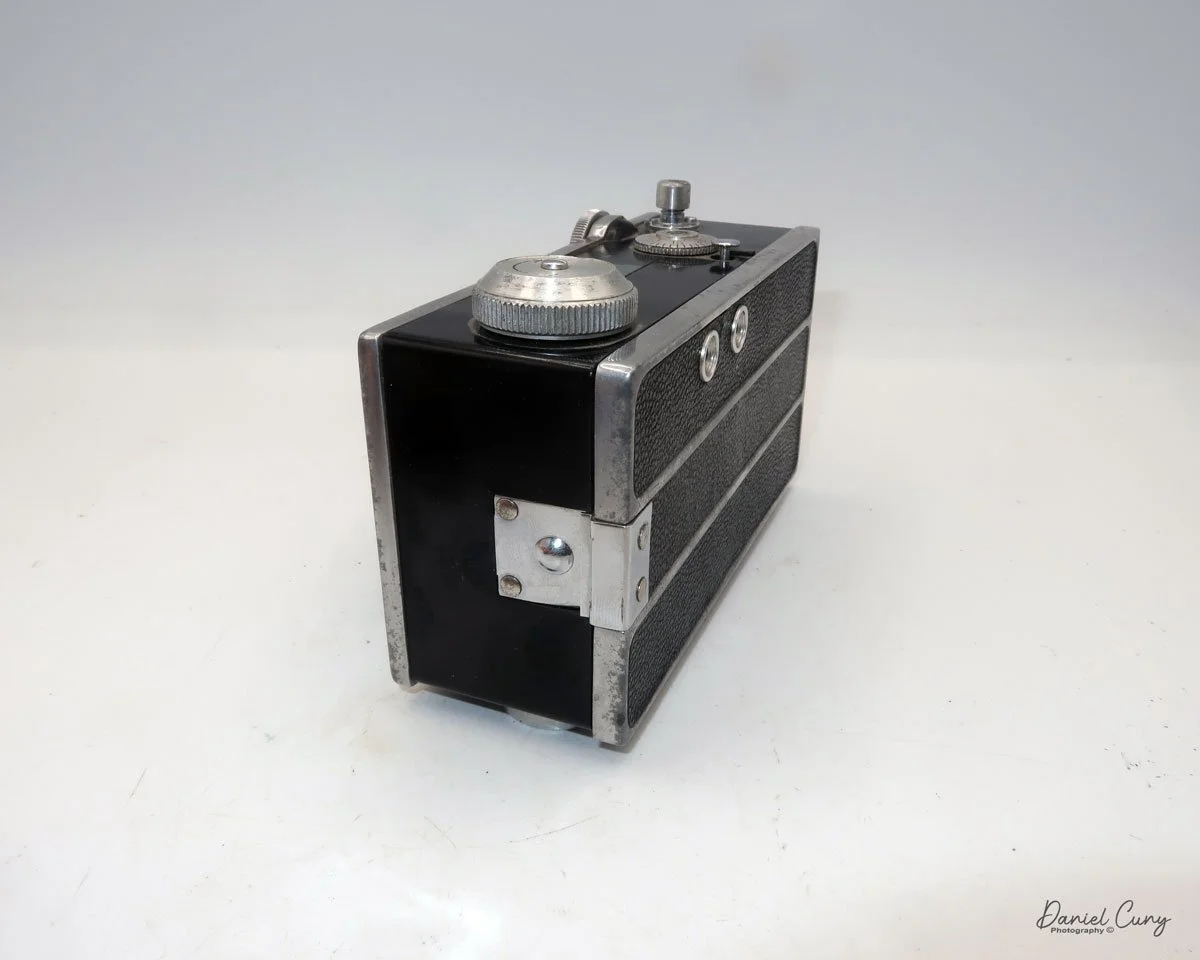
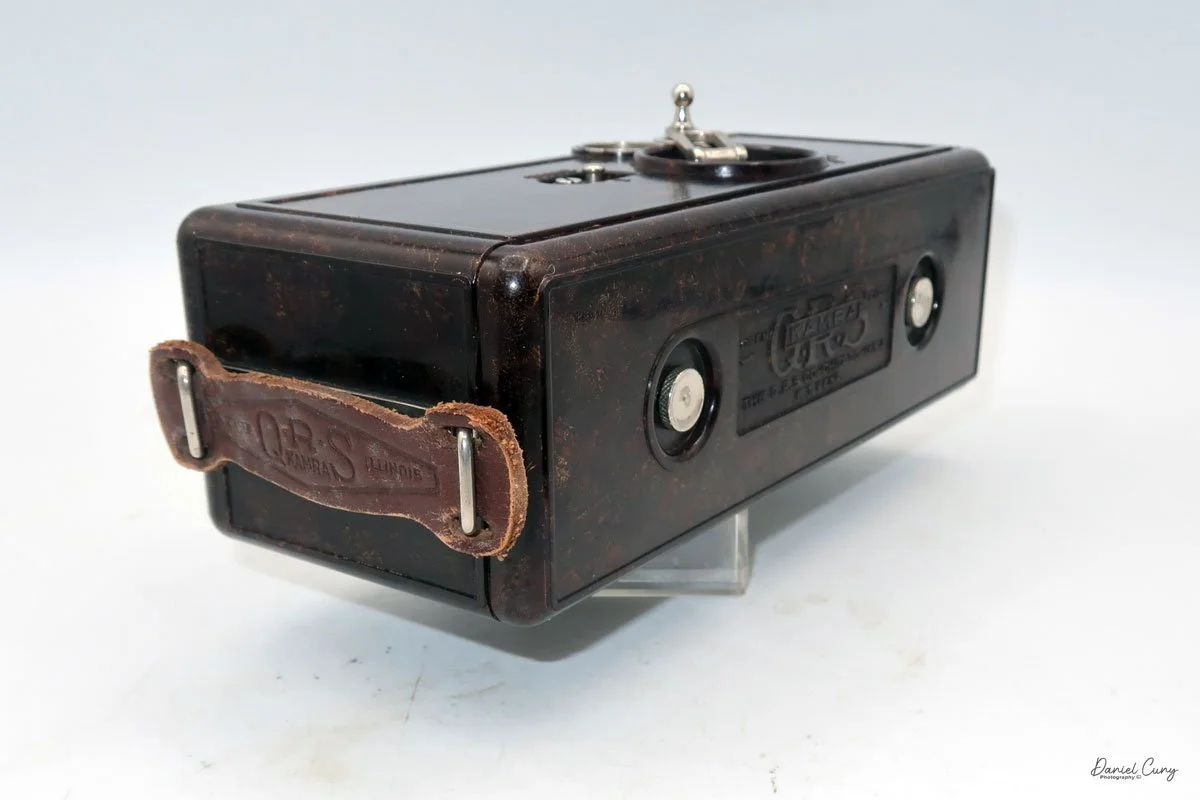
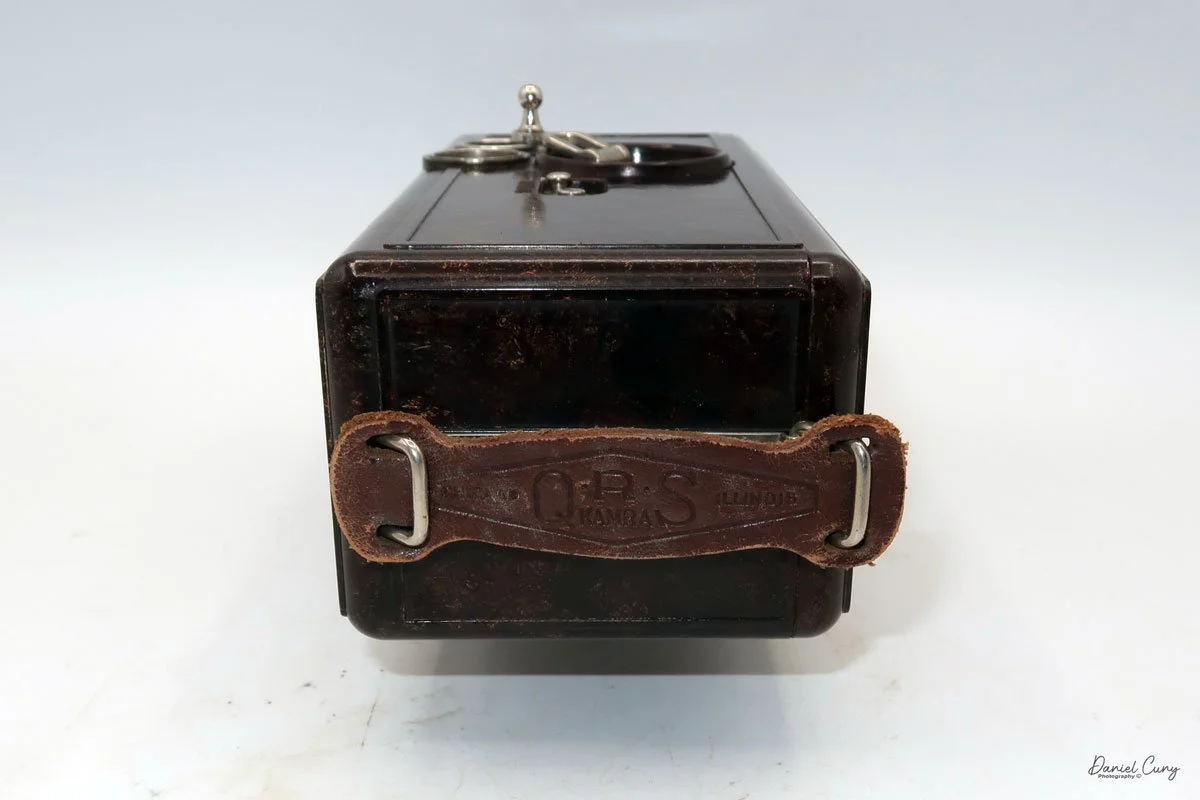
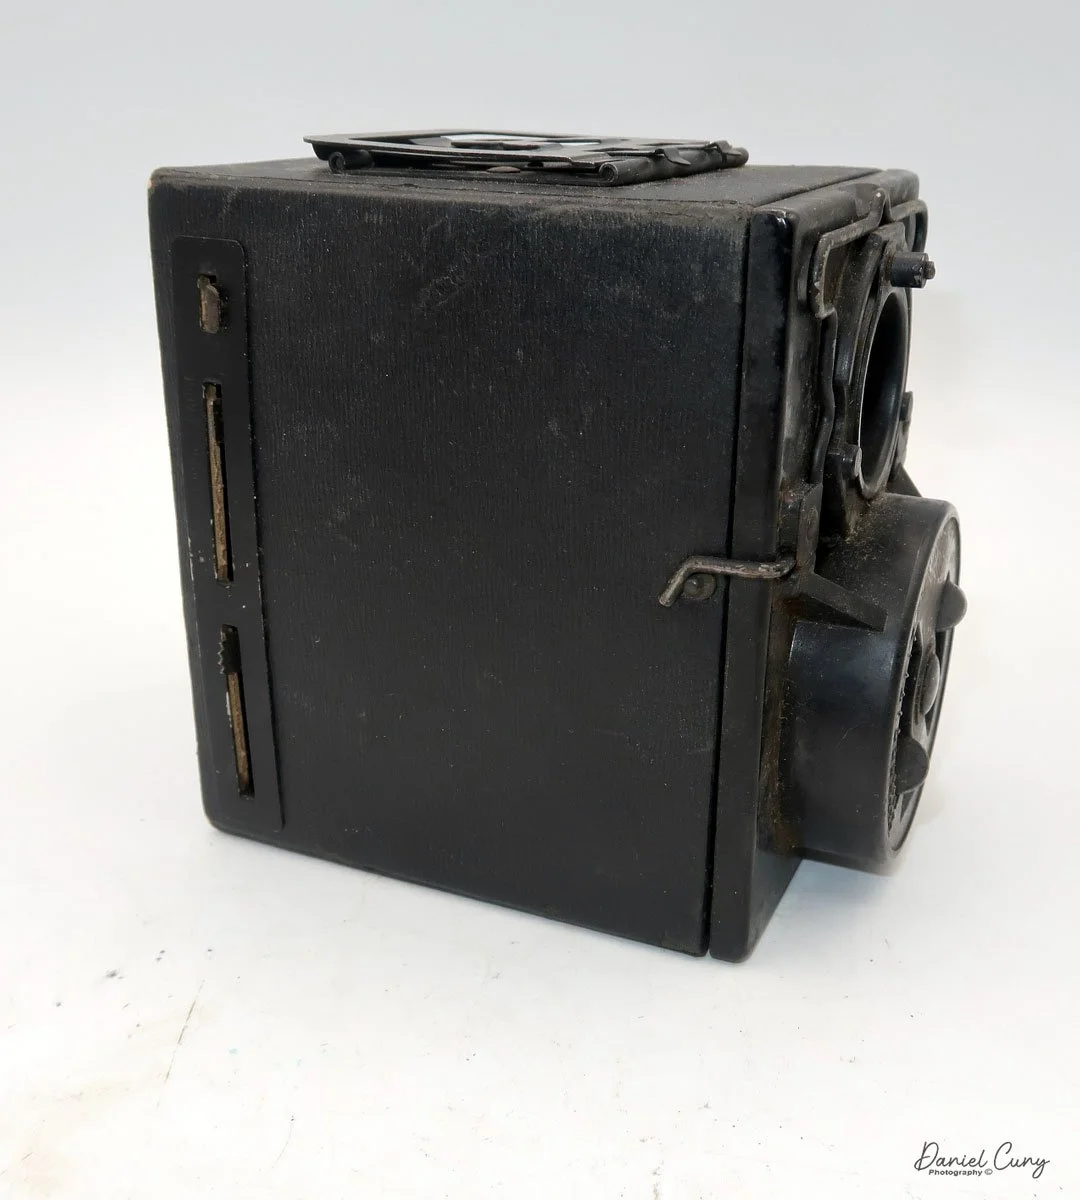
Back portion of the QRS Kamra

 Years go by, and the kids grow up, all the while my fascination with cameras kept growing. During these times, I would frequent a local flea market held at a drive-in theater on Sunday mornings, and I can still remember looking over one person's goods for sale and recognizing what I had many years earlier at the camera show. It was indeed a QRS Kamra. I spoke with the vendor at the flea market, and they mentioned that the camera was their grandfather's from a small collection he had owned. They just wanted to get rid of it, so I bought it for a reasonable price. Unfortunately, this camera was missing the shutter release and winding crank, a common issue with this model. At the time, I was thrilled to have it in my collection.

QRS Kamra w/Registration cards.

 I generally keep cameras in my collection for a few years, then look for a better version if I plan to keep it. About eight to ten years after purchasing the QRS Kamra, I put it up for sale on eBay and sold it to someone else looking to add it to their collection. Since then, I purchased another QRS Kamera in the box with a handle, although it had a broken handle.

 On another occasion, many years after selling the QRS Kamra, I purchased a "lot" of cameras and photo items. Hidden in the photos, I found an Ellison Kamra, a camera very similar to the QRS Kamra. It's slightly larger, featuring a pull-down lens and viewfinder, and is made from Bakelite, dating back a couple of years. I was amazed to find it among this lot of cameras. Looking back at the photo, all you could see was one of the ends, as it was buried under several different items.

 In 1926, Michael Ellison and Edward McAuliffe of Los Angeles filed a patent for a new two-bladed shutter system. They wanted to use the new shutter on a camera they designed and built called the Ellison Kamra. They only produced one camera, which used 35mm film, a format popular in both movie and still cameras at the time. Unfortunately, the Ellison Kamra only lasted a few years, and by 1935, they were out of business.

 The QRS Kamra was also sold under the DeVry Kamra after QRS purchased DeVry in 1929, but this only lasted for a year. The unusual item I still can't put together is the relationship between both the Ellisons and QRS Kamra's. They both have similar-looking cameras, use the same shutter system, and share very similar layouts.

History:

 The histories of DeVry and QRS, though largely separate, are linked by a noteworthy, albeit brief, corporate union in the early 20th century. Both companies originated in Chicago with a focus on cutting-edge technology of their time.

Michael Ellison and Edward McAuliffe Patent

 Herman DeVry, an inventor and innovator in visual education, founded the DeVry Corporation in 1913. He made a name for himself by creating the "Theater in a Suitcase," the first portable motion picture projector, which revolutionized the use of film in schools and other institutions. His work was dedicated to making learning more visual and accessible through technology.

 Around the same time, the QRS Music Company, founded in 1900 by Melville Clark, was a dominant force in the music technology of the era: the player piano. QRS became the world's largest manufacturer of piano rolls, capturing the live performances of famous artists and making music widely available for in-home entertainment long before the advent of widespread audio recording.

 The paths of these two innovative companies converged in 1929 when QRS, looking to diversify its technology portfolio, purchased the DeVry Corporation. For a short period, the company operated under the name QRS-DeVry, producing devices like movie cameras and projectors. However, this merger was short-lived.

 By the early 1930s, the two entities went their separate ways. Herman DeVry, in collaboration with Dr. Lee de Forest, shifted his focus entirely to technical education, establishing DeForest Training School in 1931. This institution would evolve over the decades, becoming DeVry Technical Institute and eventually the well-known DeVry University, a prominent for-profit institution focused on career-oriented education.

 Meanwhile, QRS returned to its musical roots. After a series of ownership changes, it continued to produce piano rolls for decades and adapted to new technologies, eventually developing modern digital player piano systems. While their corporate marriage was brief, both DeVry and QRS left lasting, independent legacies in the fields of education and automated music technology.

My Kamra (Camera):

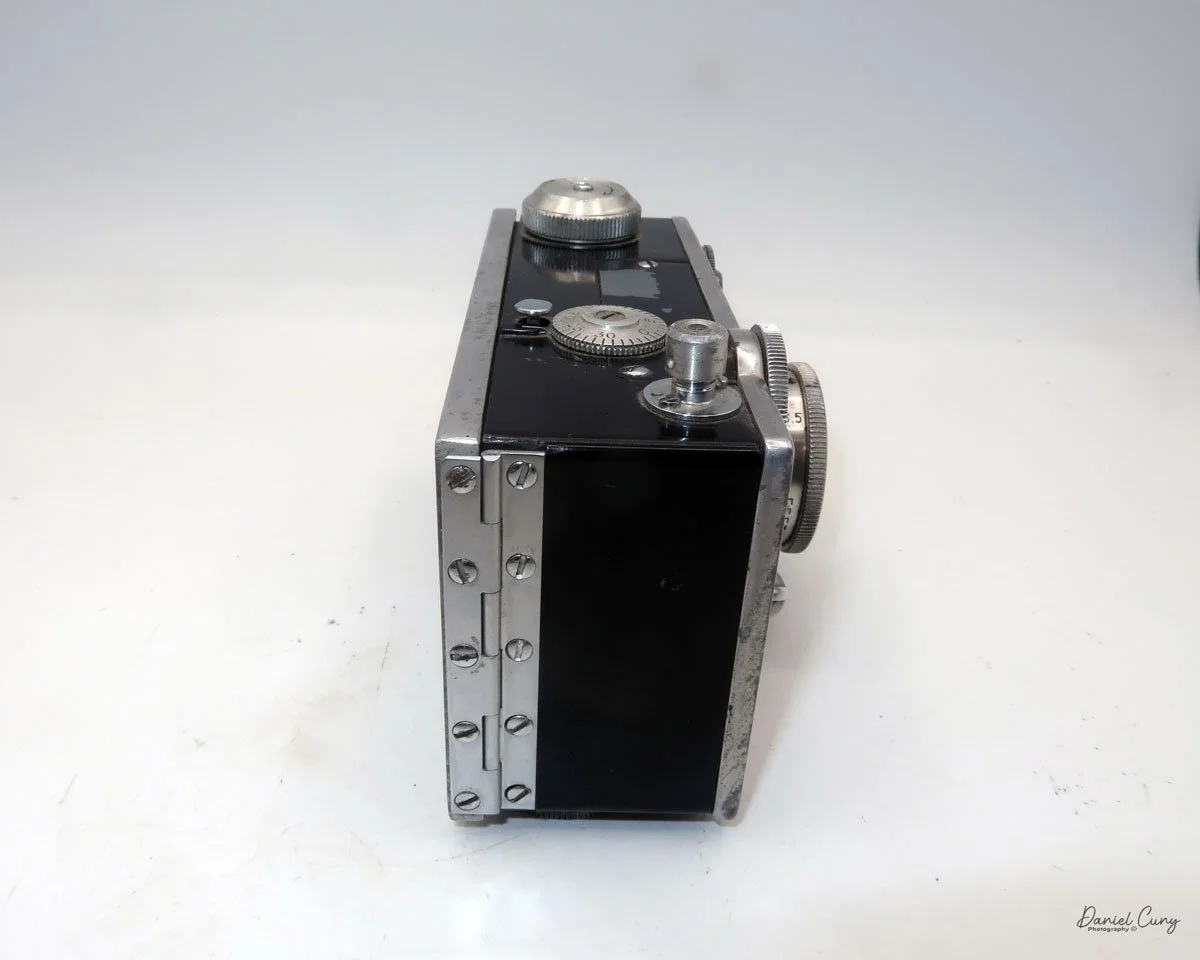
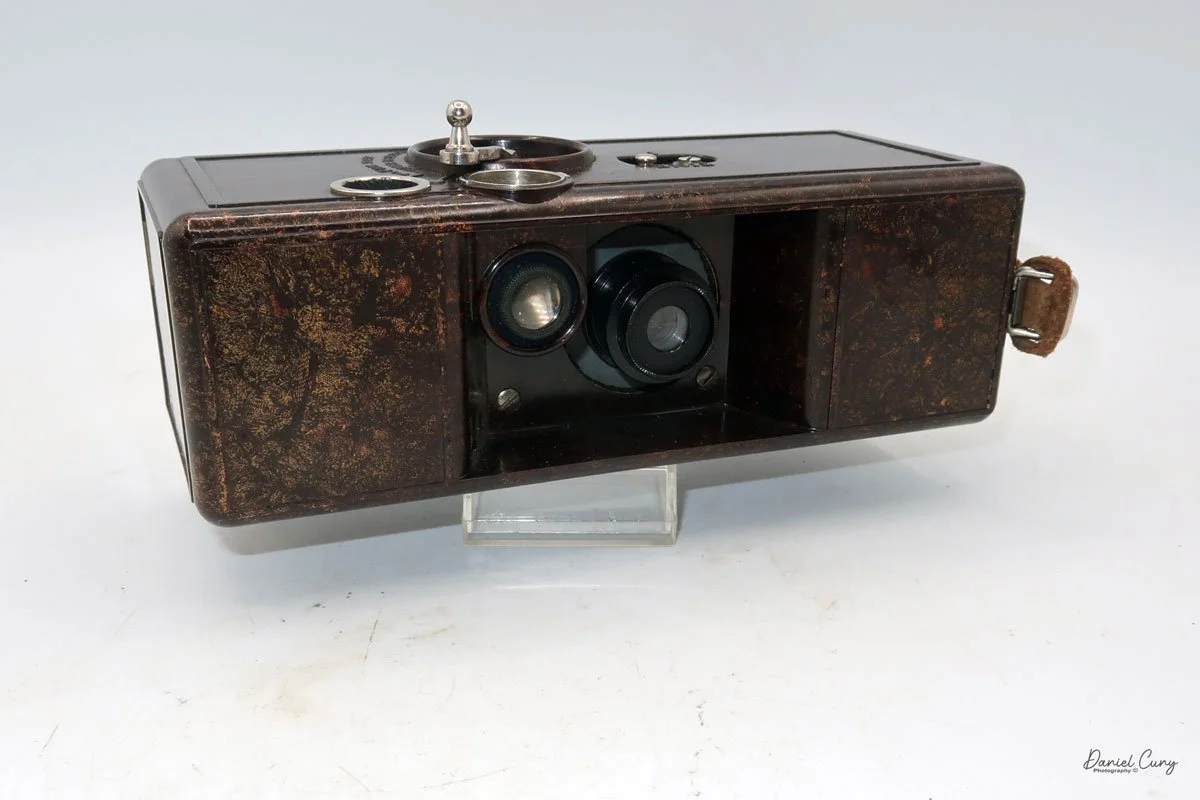
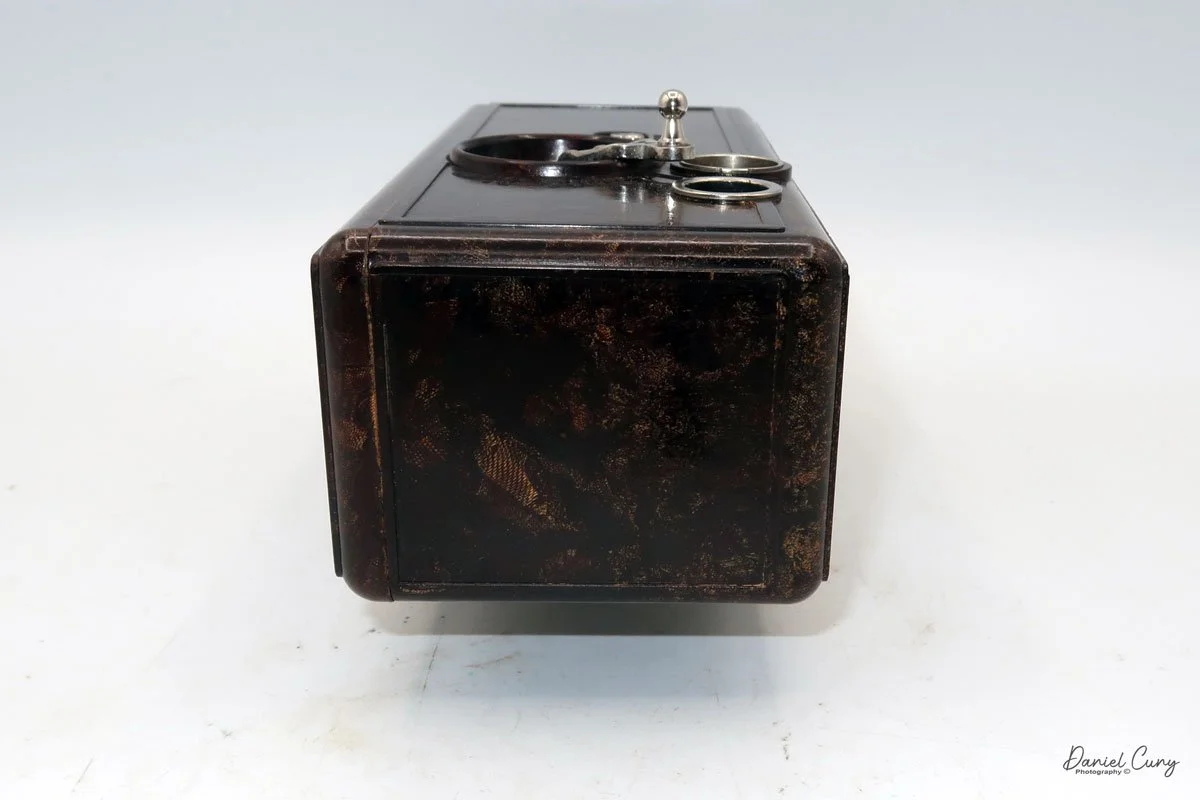
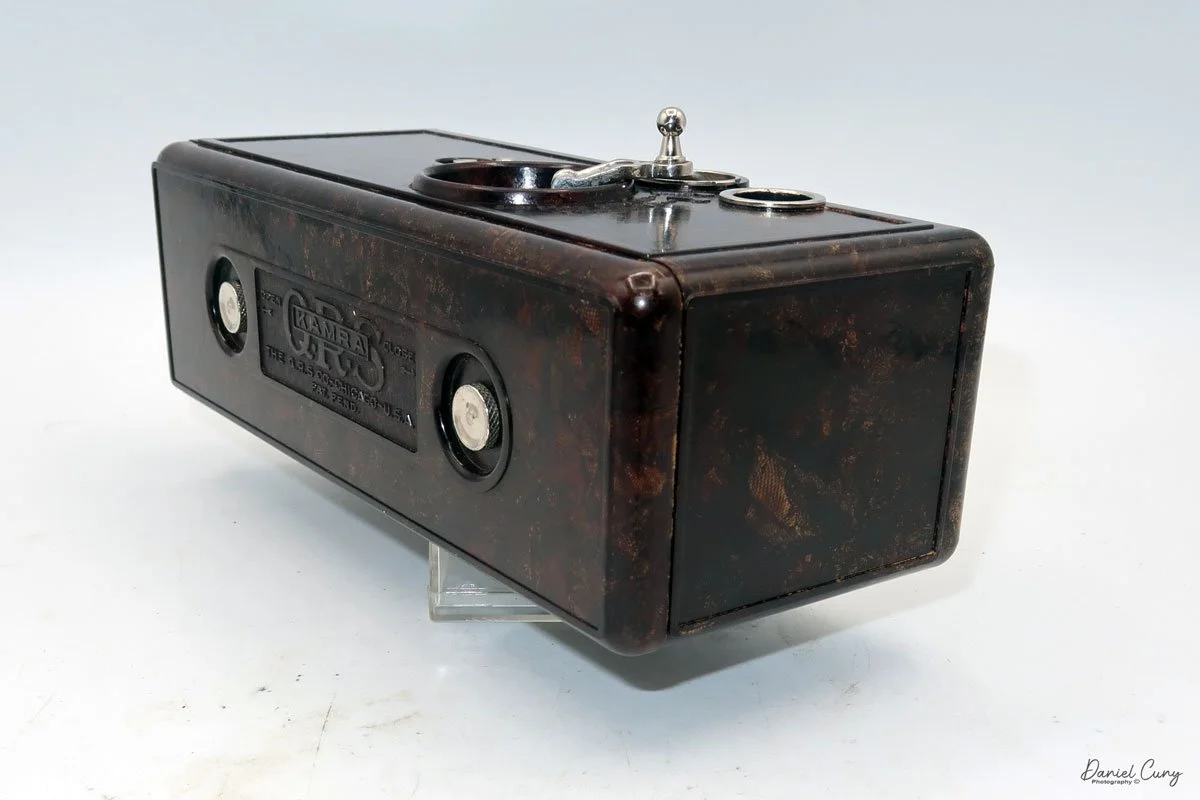
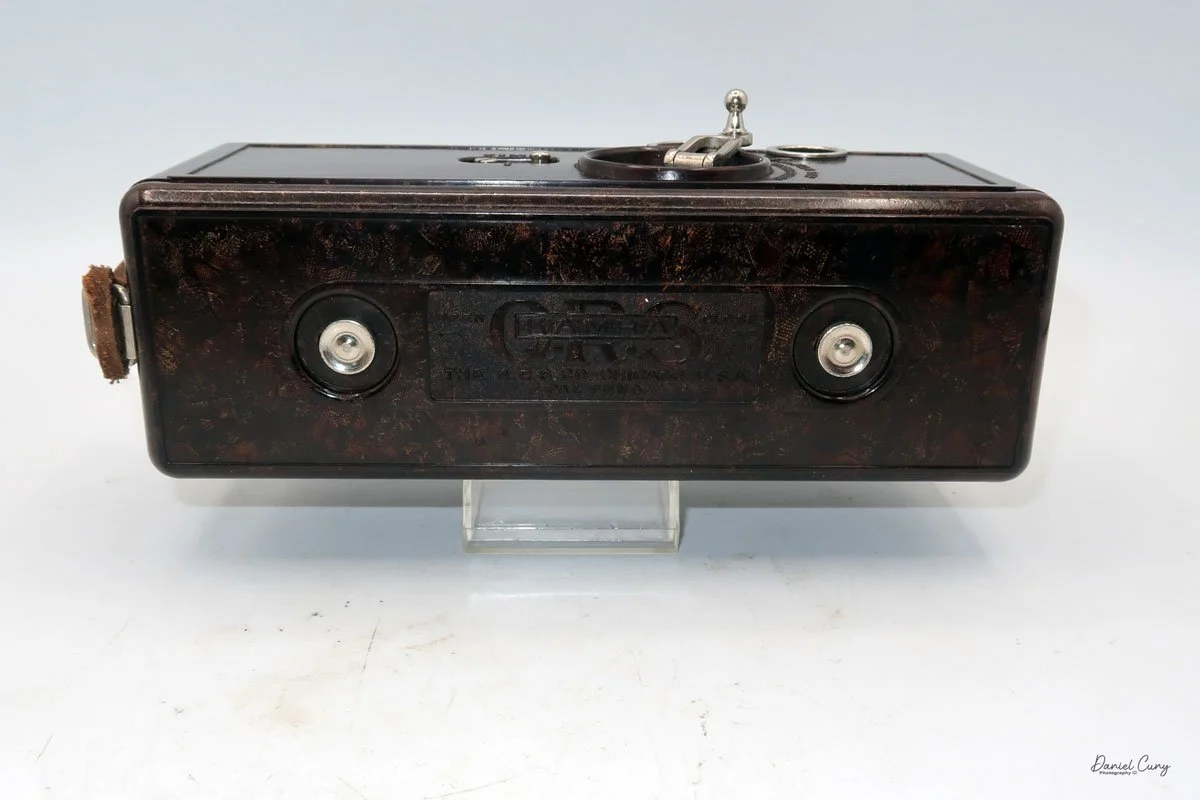
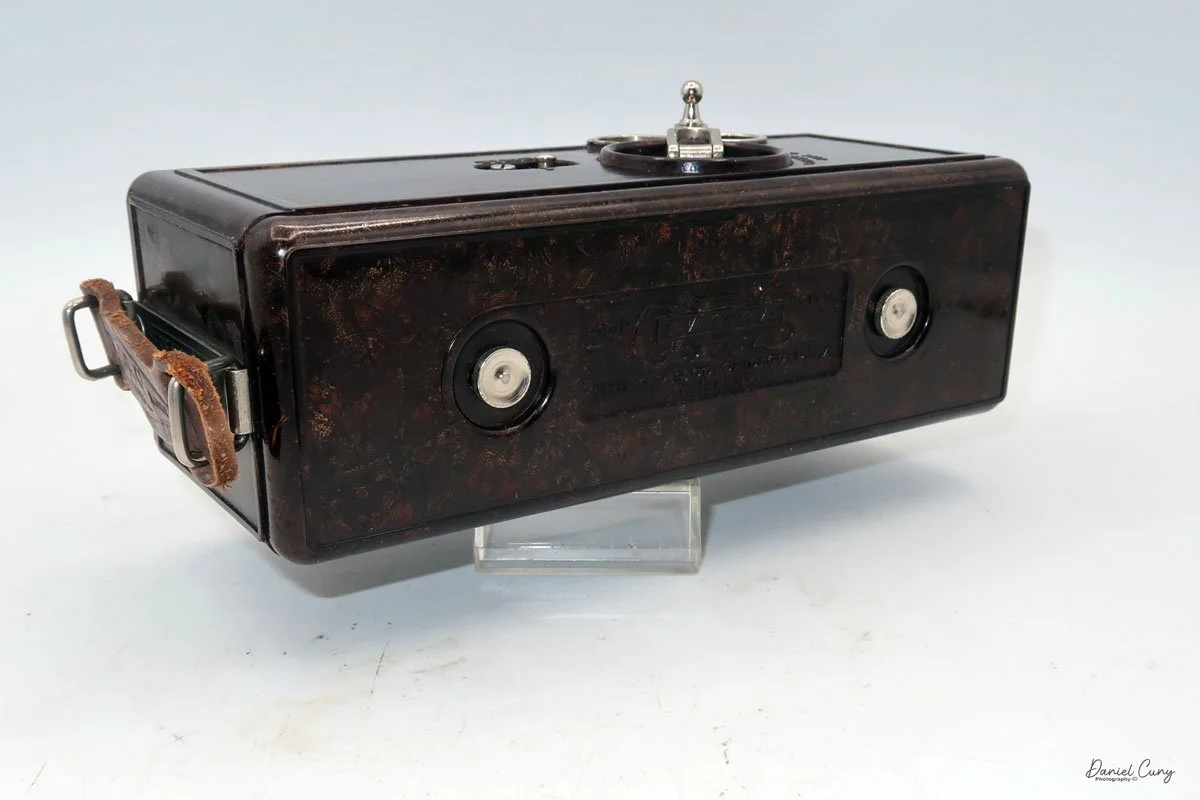
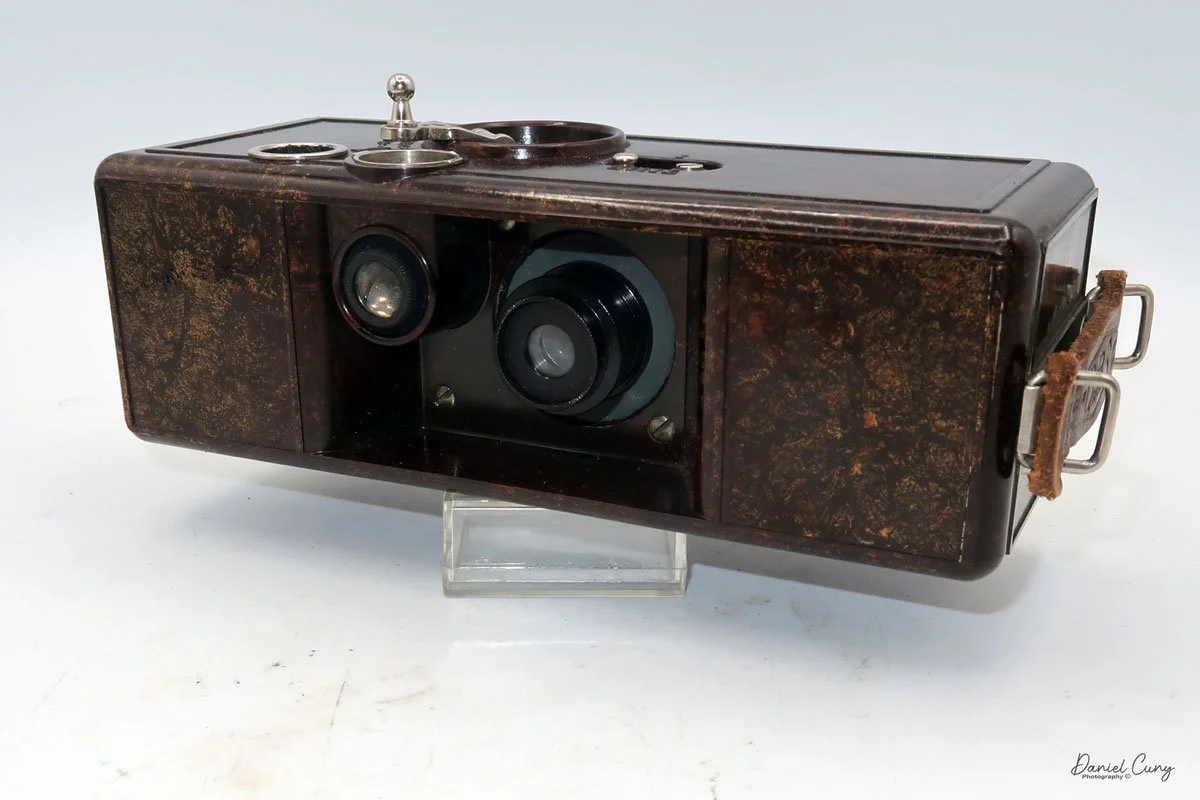
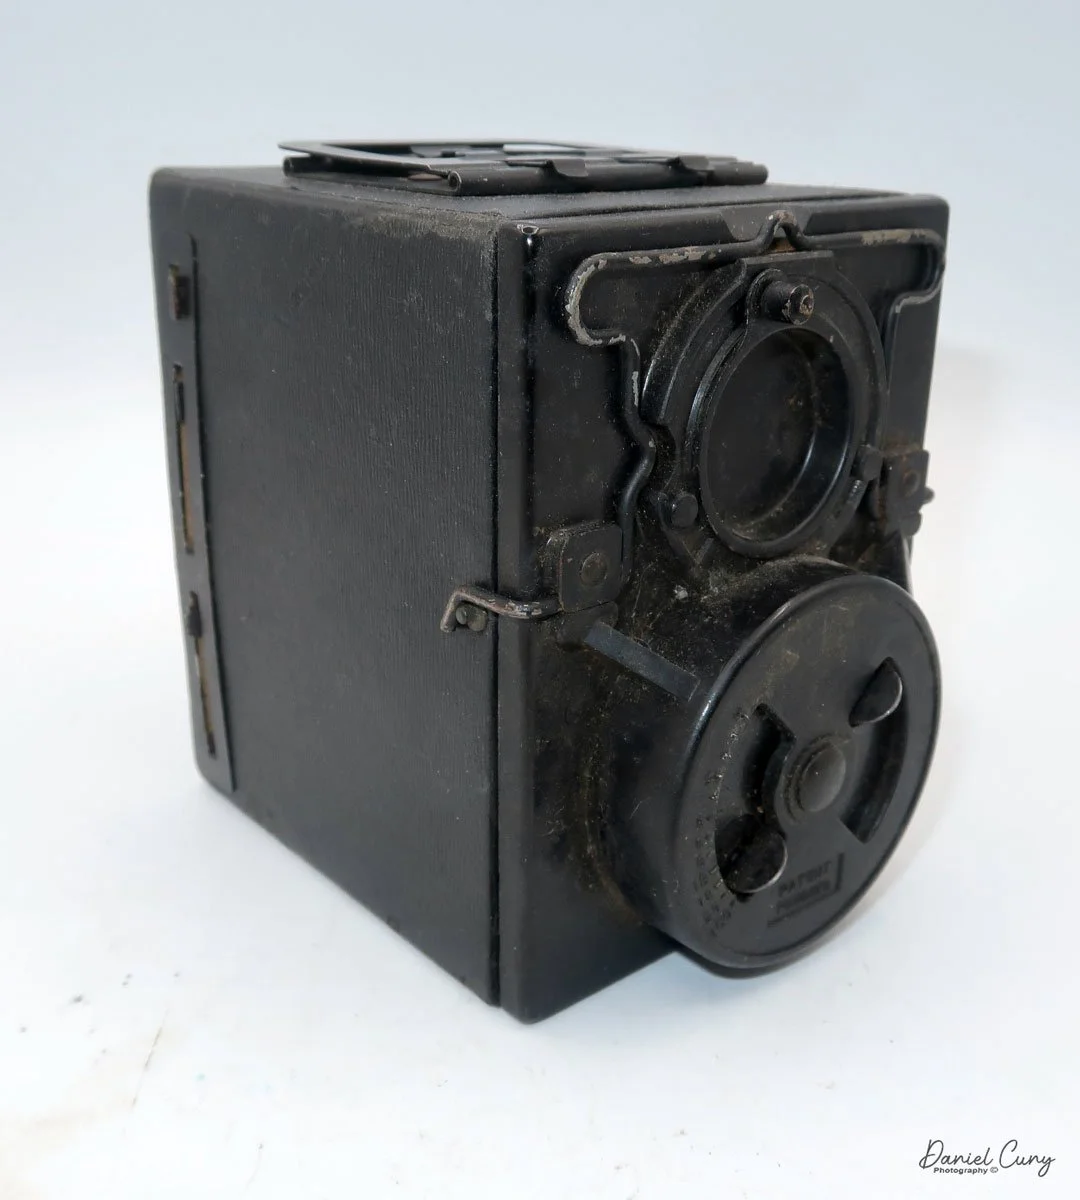
 My QRS Kamra is 7.5" wide by 3" deep by 2.5" tall, and weighs 1 pound, 14.1 ounces. The serial number on my Kamra is Series No. A 3008, so it is a relatively early version of the camera. The camera is made of a brown Bakelite material with cotton filler, which gives the camera a mottled look. The camera has a fixed focus 40mm f7.7 lens and a bright viewfinder.

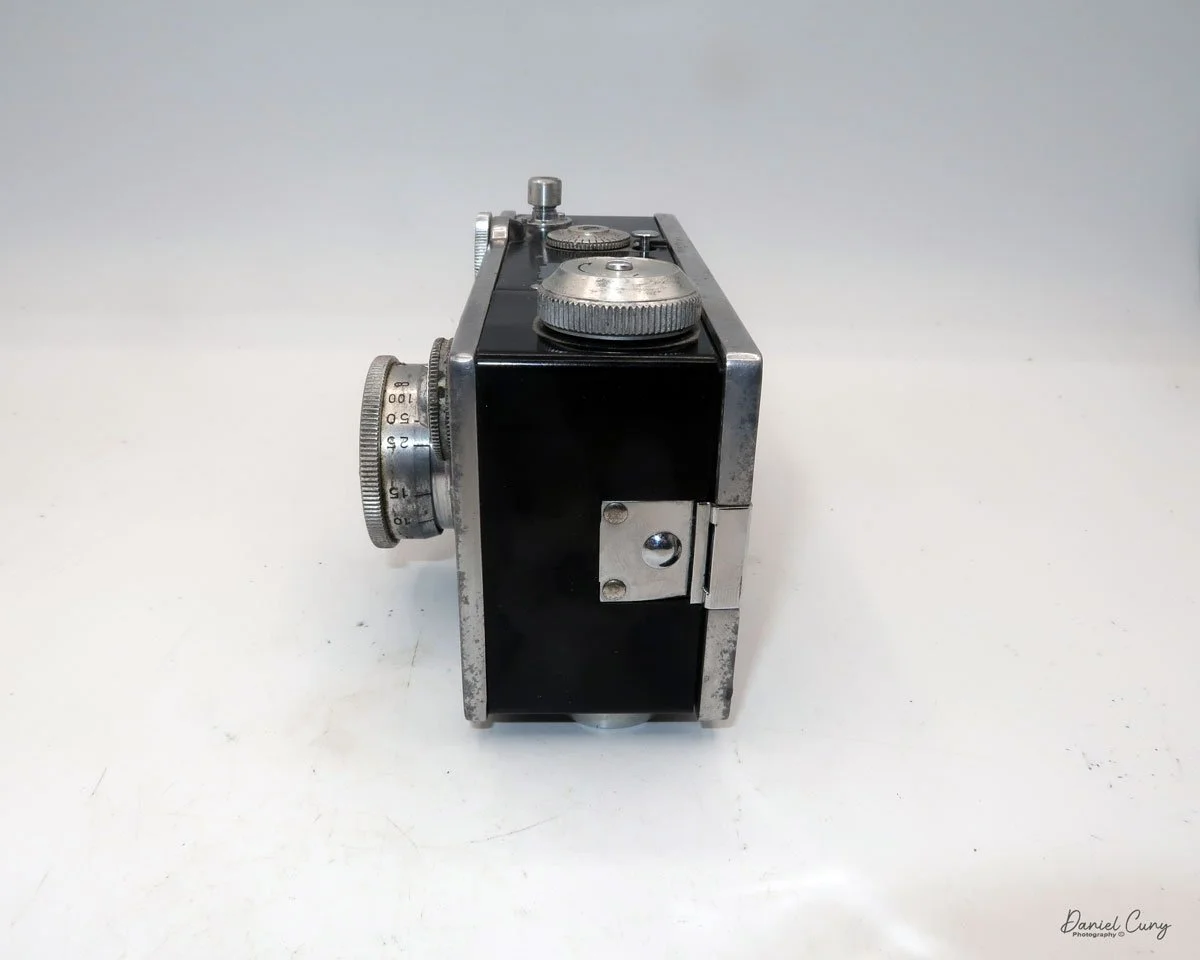
On top of the camera, all the controls are located. There are really only two controls on the camera. On the far left, you'll find the shutter setting options: "time" for long exposures and "I" for instant. Just to the right of the shutter settings is the fold-up crank. This crank is turned in the clockwise direction to advance the film, or to the counterclockwise direction to snap the photo.

Just above the shutter release and film advance crank is the bright viewfinder, and to the right of that is the frame counter. This QRS Kamra allows for up to 40 photos to be loaded into their special film cassettes.

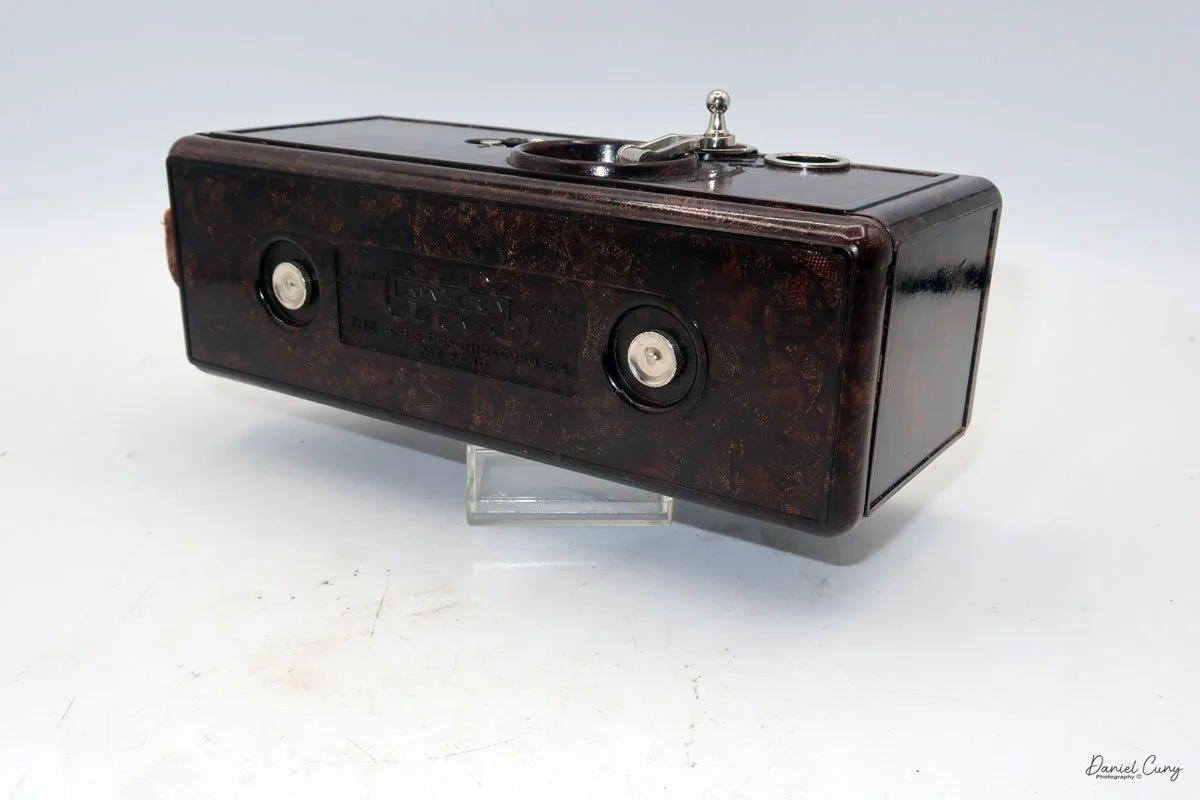
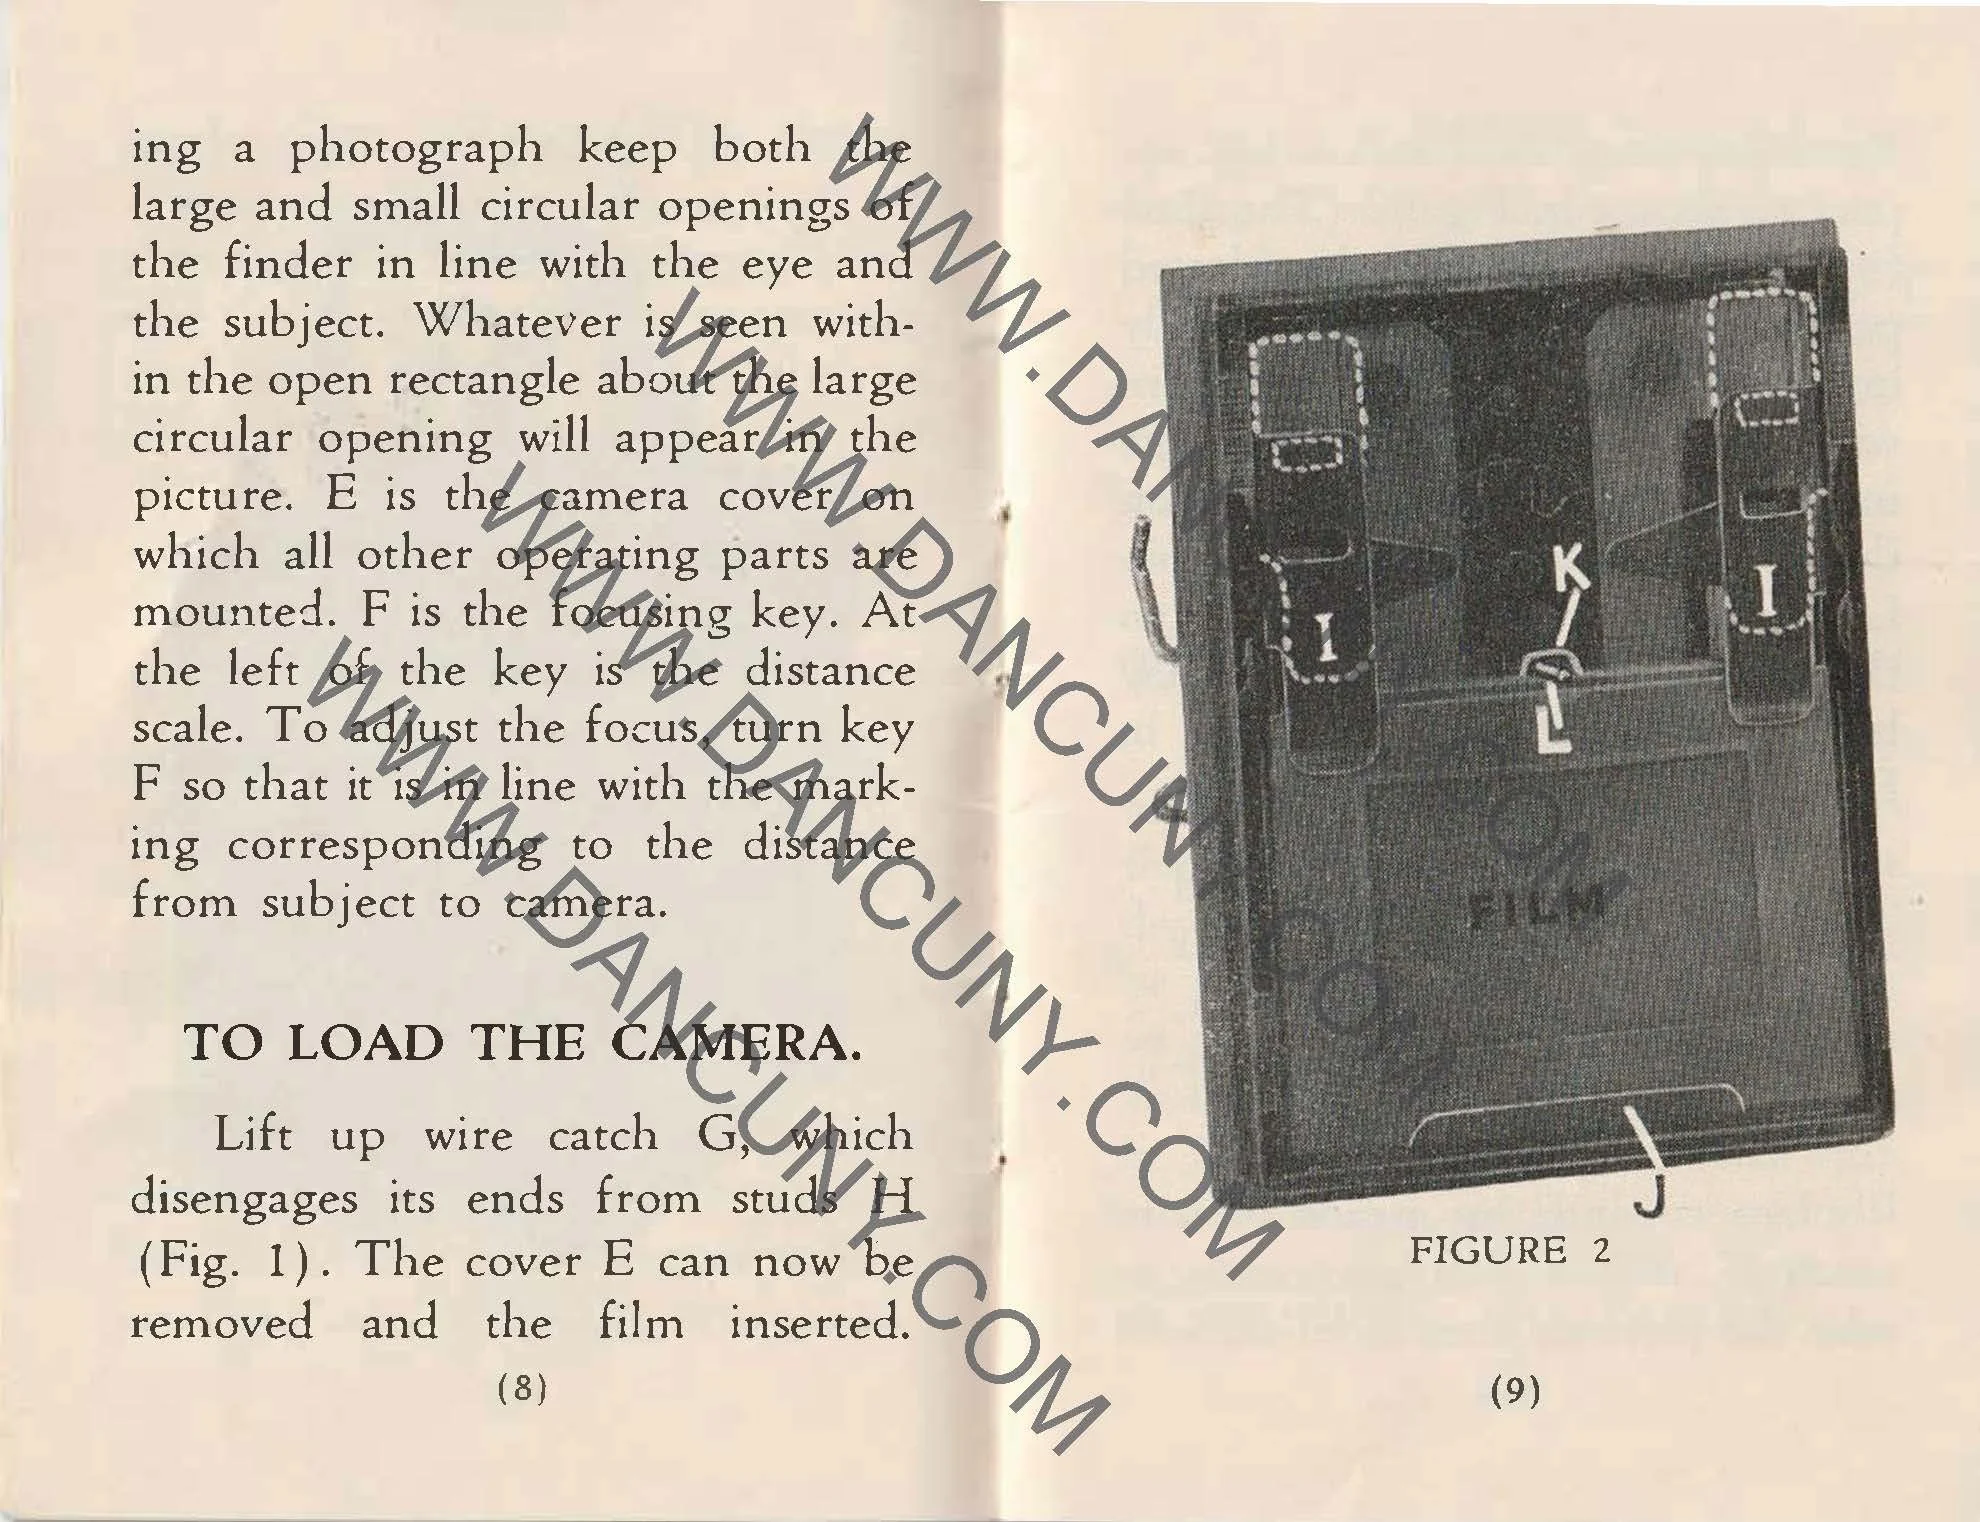
To open the back to load film, slide the two knobs on the back of the camera to the left, which allows the back to come off. Once the back is off, you can see two metal cassettes inside the camera. The cassettes take 35mm film, which you'd load into the cassette on the left, and the exposed film would travel into the cassette on the right. There is no inner spool in the cassettes; the film slides into the cassette, very similar to how the Ansco memo cameras operate.

When you turn the crank on top of the camera to advance the film, the drive gears on top and bottom transport the film from the supply cassette into the exposed cassette. The advanced gears are attached to the frame counter, which would move to the next frame. Once all the images were taken, you take the cassette on the right to be processed. Then load the camera with more film and take more photos. 

 The camera is straightforward and basic, without a lot of bells and whistles. The cameras were only made for a few years, first as the QRS Kamra, then, after QRS was purchased, the camera became the DeVry Kamra. Unfortunately, due to a few factors, the cameras were only made for a few years. One factor was the emergence of 35mm cameras, and the second was the poor quality of the advance and shutter release wheel, which broke on many of the QRS and later the DeVry Kamras.

Conclusion:

 I'm glad to have the odd and unusual camera in my collection. The more I think about the connection between the Ellison camera and the QRS Kamra, the more I realize its significance. The QRS company was looking for an inexpensive and straightforward camera. With the new two-blade shutter the Ellison company had, I'm sure they were anxious to get it onto other cameras, and they made the connection somehow.

 Like many of these cameras, mine is operational, but I discovered a fascinating individual in the UK who rebuilt the shutter and created a more reliable crank for the top of the camera. Here is his article on Restoring a QRS Kamra. Once he got the camera operational, he mentions towards the end that the quality of the images is pretty poor. Please take a look at his article; it's very well done.

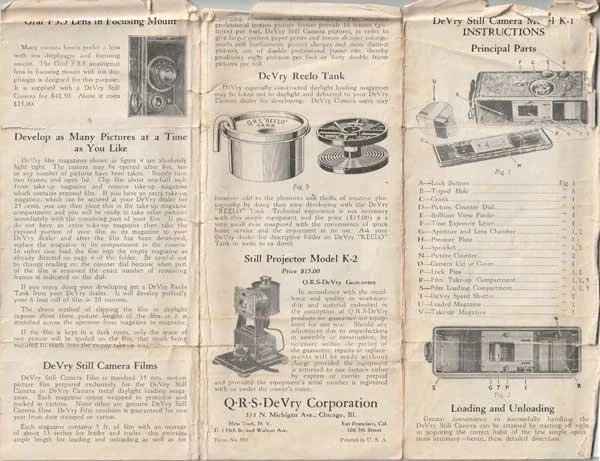
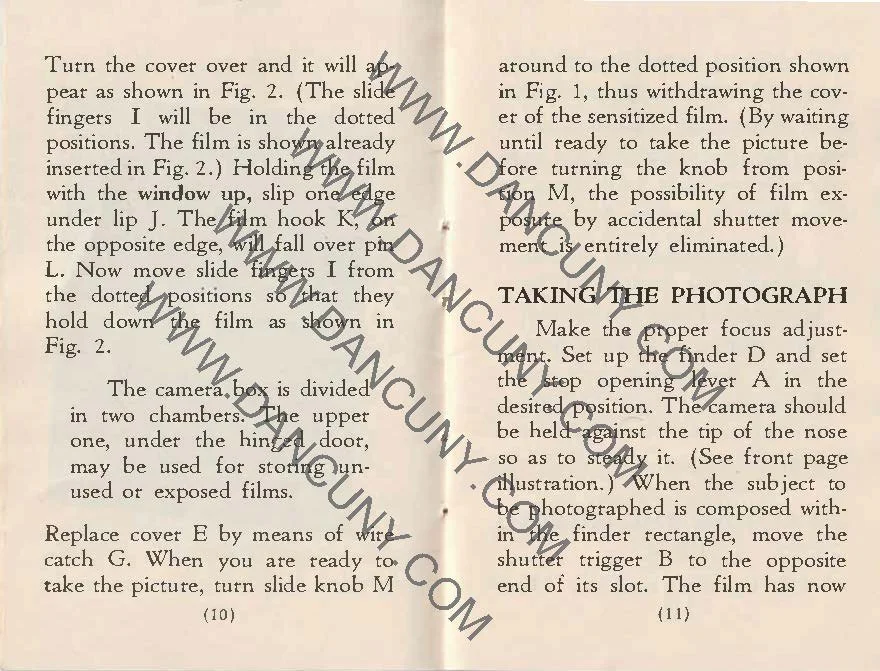
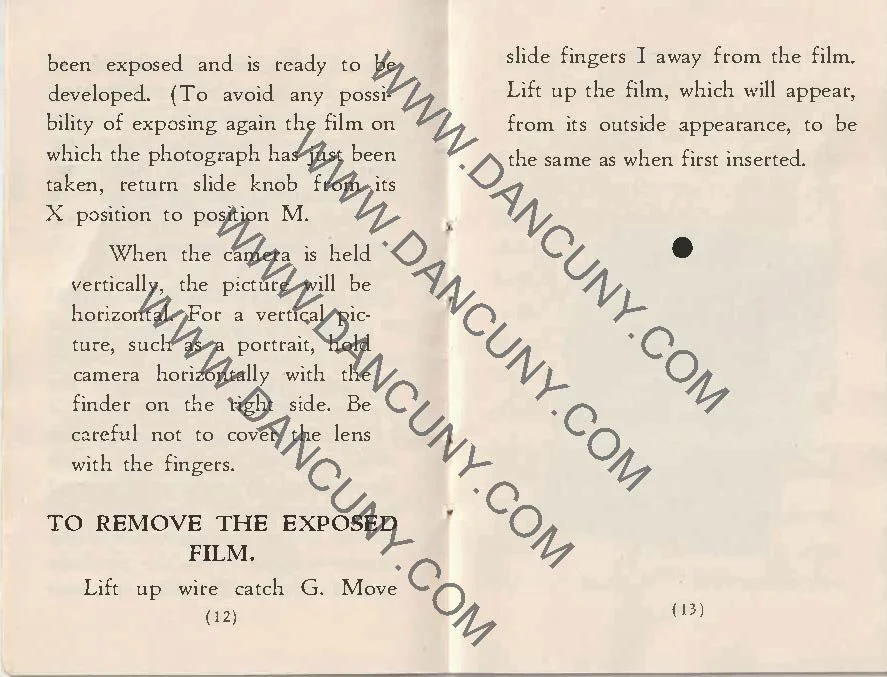
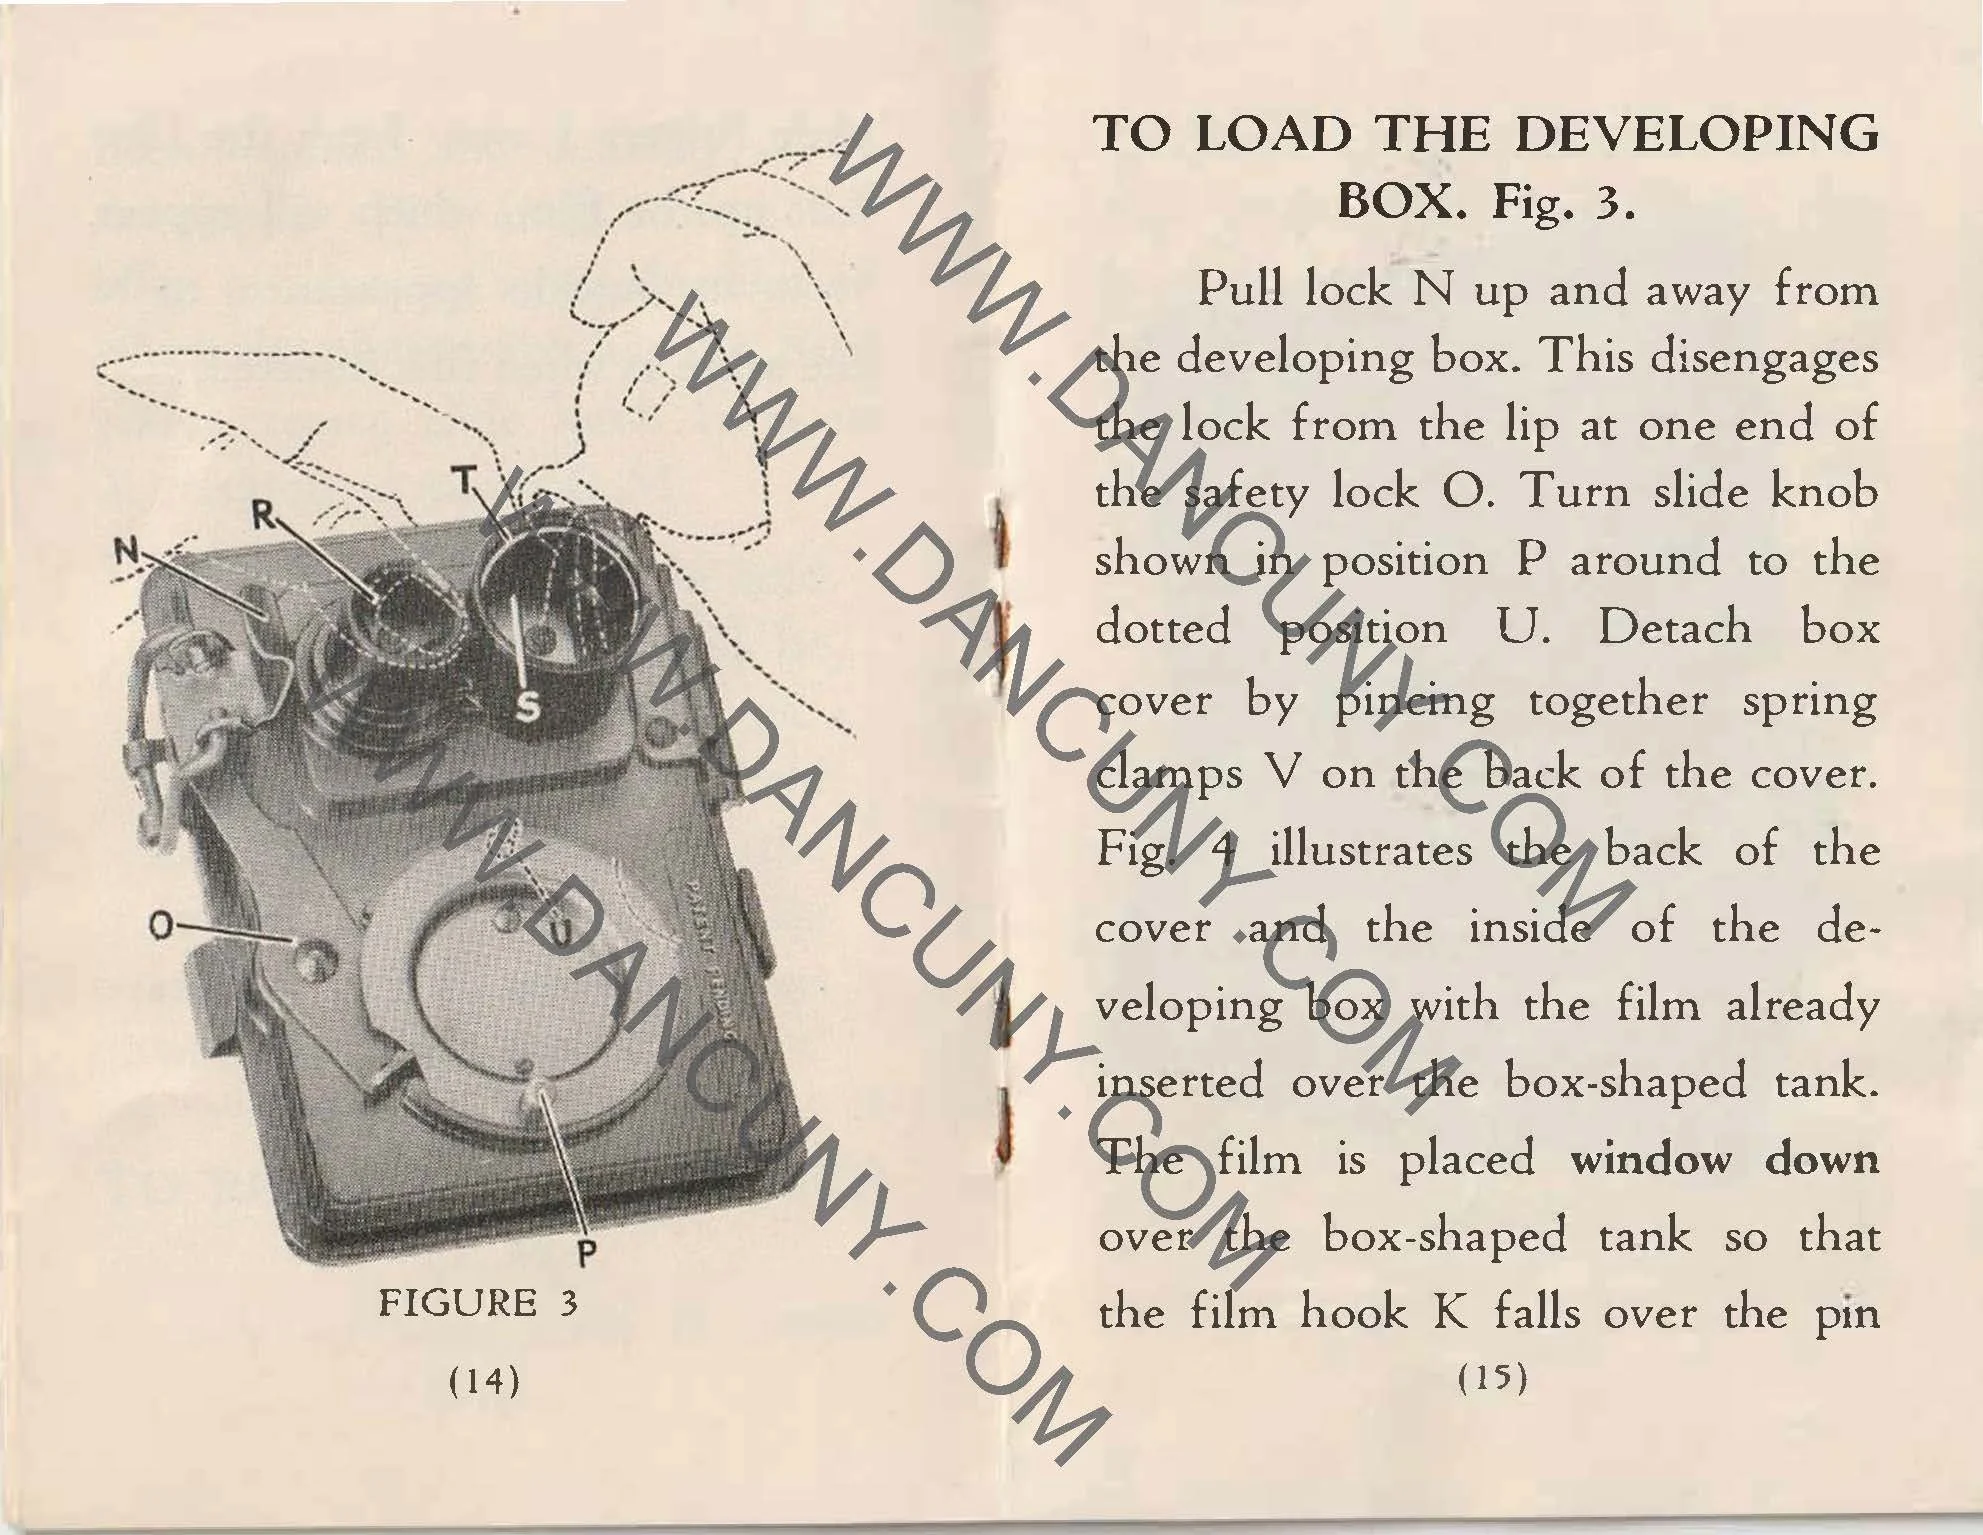
Here’s a copy of the QRS Kamra manual I found stuck to the top of the camera box.

QRS Kamra manual Pg. 1

QRS Kamra manual Pg. 2

 Thank you for taking a few minutes to read about this odd bird of a camera (Kamra).

 Here's a link to my other camera reviews.

 I also have an eBay store, Cuny's Camera and Photo, where I sell some of the cameras I've reviewed, along with many other photo odds and ends.

 Until next week, please be safe.

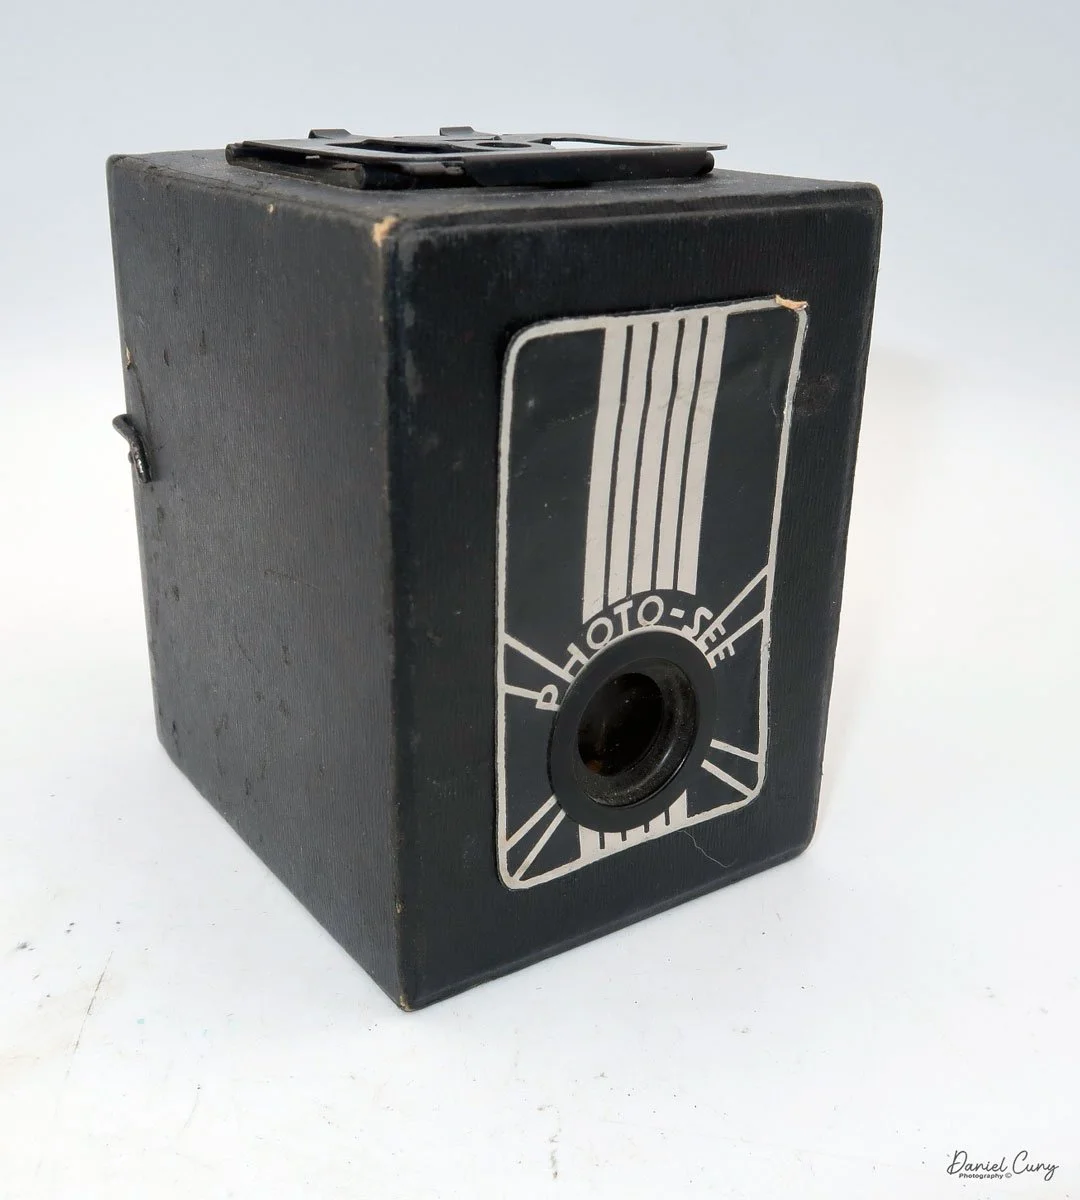
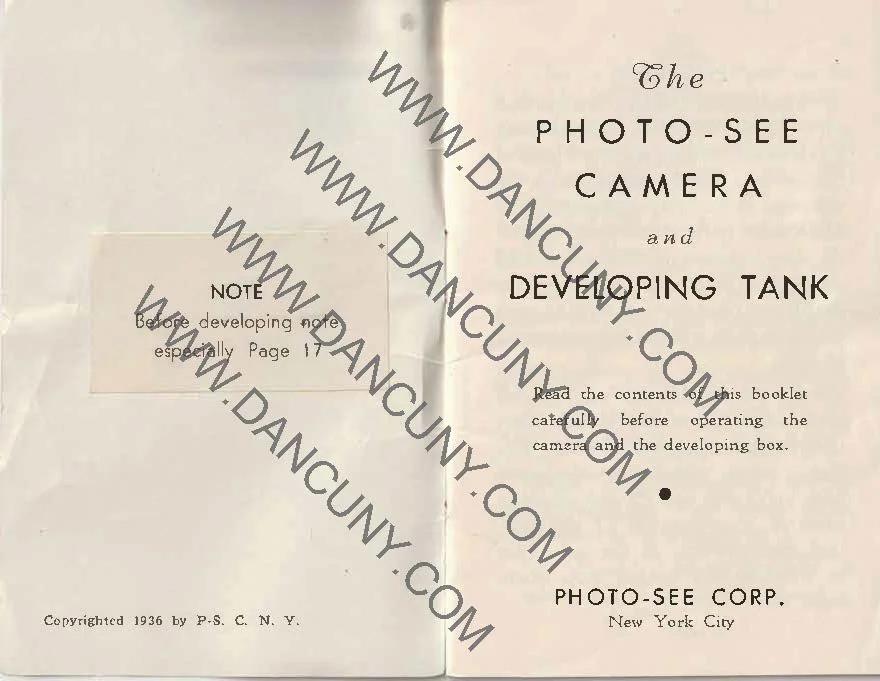
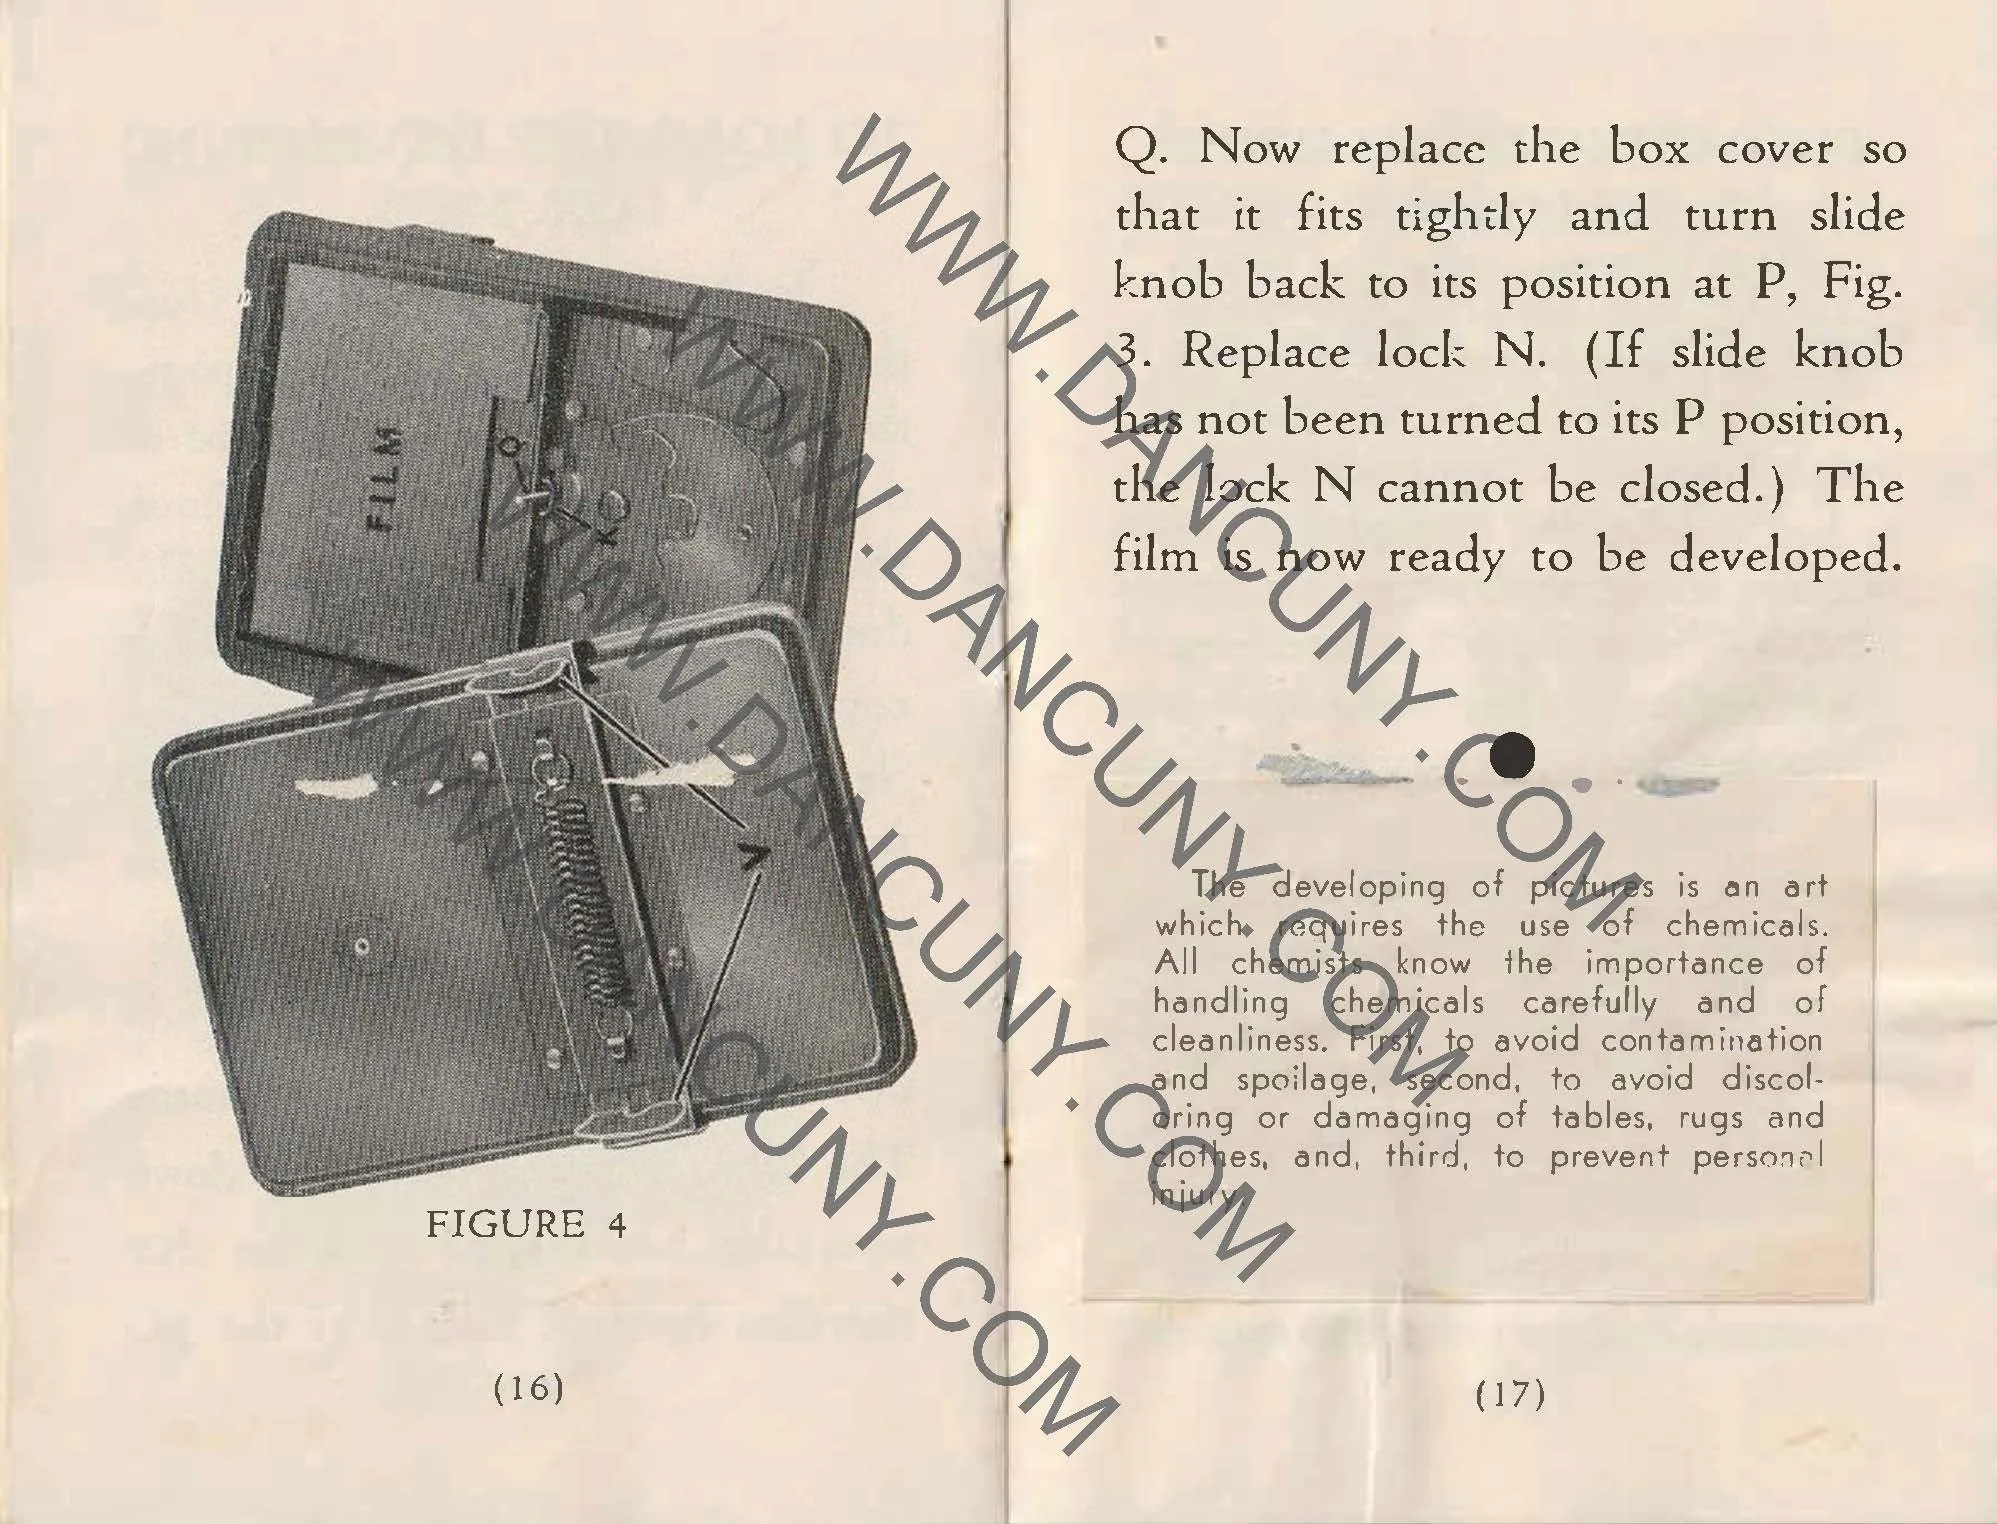
Photo-See Camera Outfit

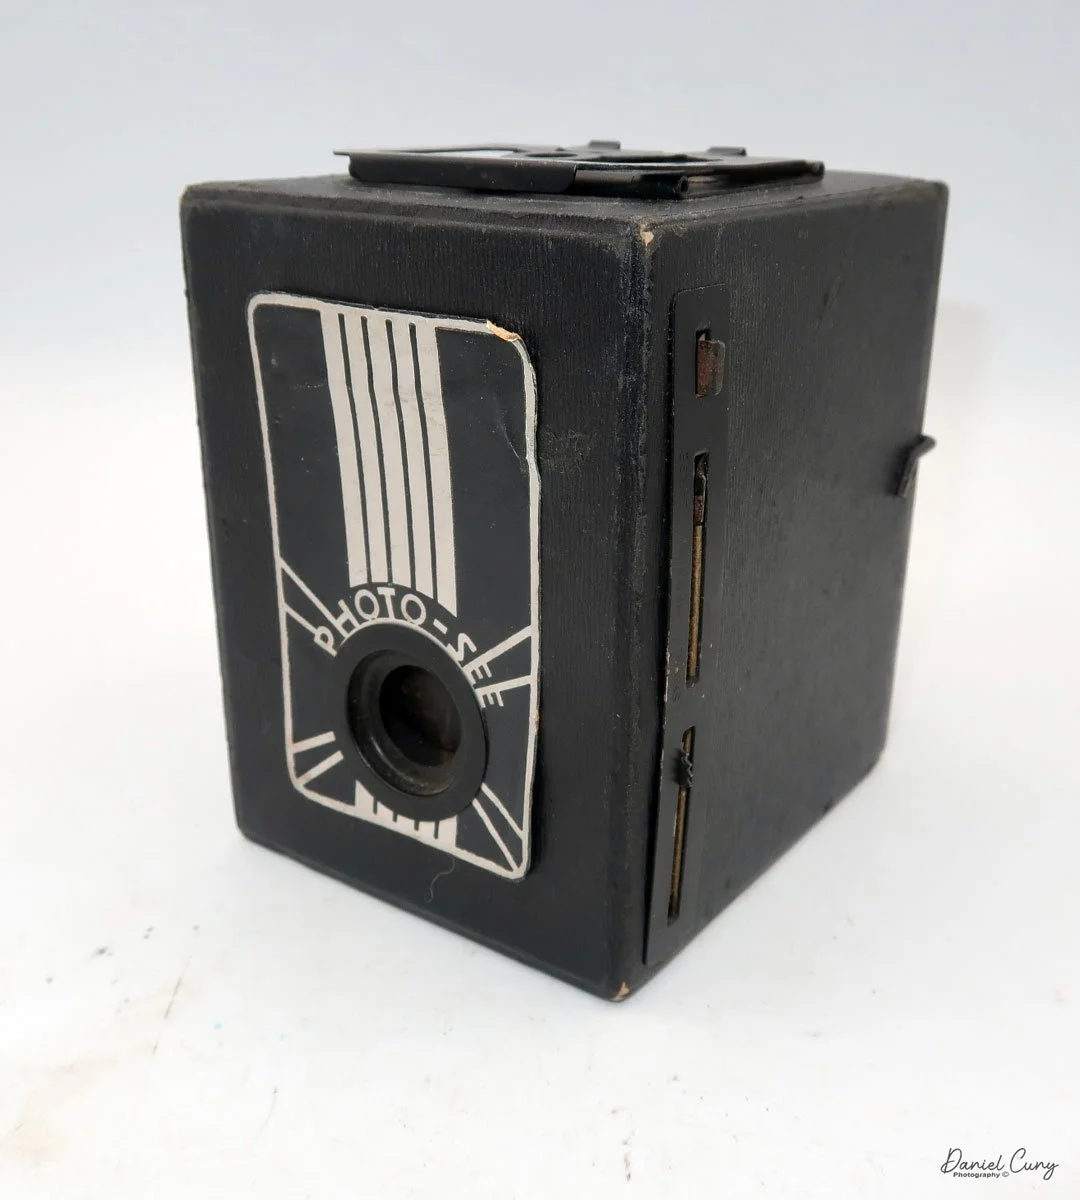
My Photo-See camera, developing tank and instruction manual.

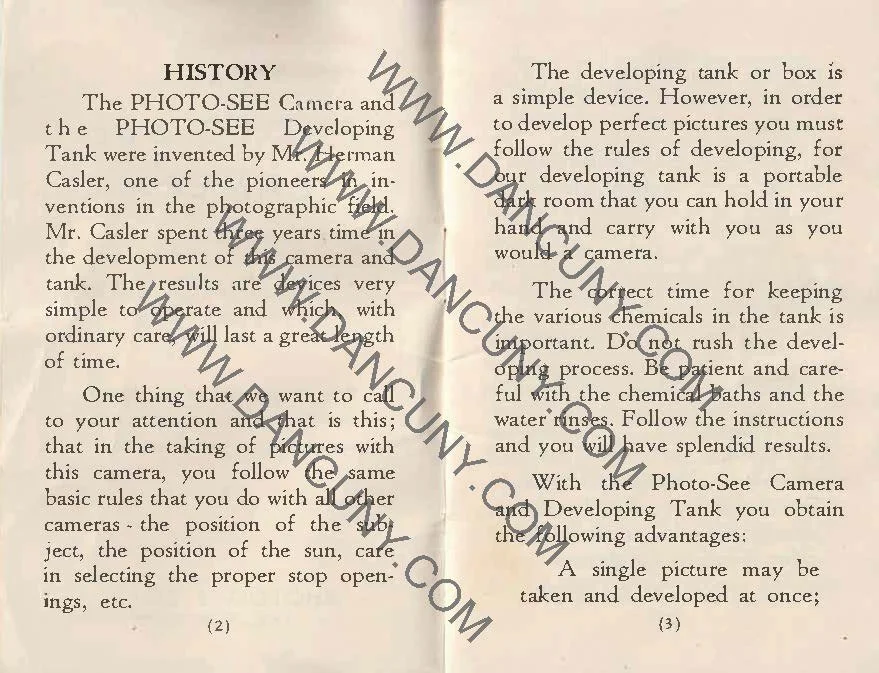
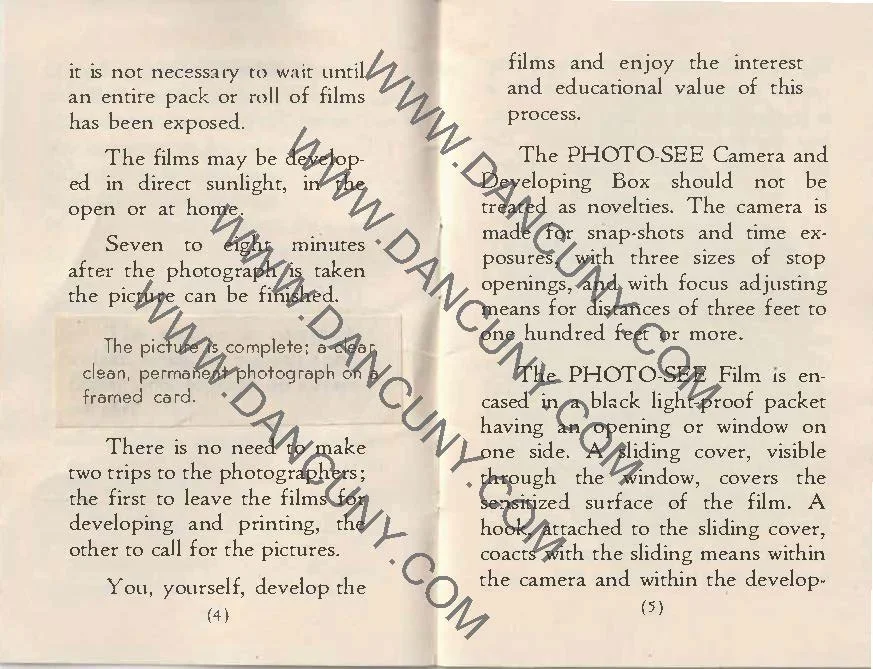
Almost 20 years before Dr. Land and Polaroid made instant photography world famous, a camera called the Photo-See was introduced in 1936. This company brought a very short-lived and straightforward box camera, along with a pocket-sized developing tank, to the market. These two items enable the photographer to take a photo and develop it without needing to send the film to be processed and printed.

 I don't remember when I purchased the Photo-See camera. I know it was well over 20 years ago. When I bought the photo see cameras, there were at least two, possibly three, of the same camera purchased in a lot of cameras purchased. 

 Several years ago, I recall selling one or two of the cameras on eBay. It wasn't until recently that I understood that there are two parts to this camera. The camera itself, and the developing tank in which the film for the camera was placed and processed.

 Initially, I thought the developing tank fit onto the back of the camera, but I was wrong. The developing tank is actually a separate part that the film from the photo camera fits into, allowing the photographer to process the film at any time they want to. The idea was that the photographer could take the photo, then have the print ready within a few minutes.


The History:

The Photo-See camera was the brainchild of Herman Casler, who was born in 1867 in Sandwich, IL, and raised in Fort Plain, NY. Over his lifetime, Casler invented and patented several different products and was also a partner in K.M.C.D. Syndicate, this was along with W.K.-L. Dickson, Elias Koopman, and Henry N. "Harry" Marvin. 

American Mutoscope and Biograph Founders, 1895. Casler upper right.

 Casler, Dickson, and Marvin collaborated in 1893 on a detective camera, the size of a watch, called the Photoret. The Photoret was a watch based on a pocket watch, similar to the Expo camera.

 Casler started his career as a Draftsman for General Electric Co., designing electric rock drills. He became the superintendent of Marvin Drill Company in 1895, which Harry Marvin owned.

 Casler, following Dickson's proposal, invented the Mutoscope, which displayed short films through flip-cards rotated by a hand crank that could be slowed down or sped up at the operator's will by turning the crank faster or slower. The prototype of the Mutograph camera was completed in November 1894, first tested with film in June 1895, and the first official Mutoscope films were made in August 1895.

Patent for Photo-See camera

 Marvin & Casler Co. was formed in 1896, where they manufactured the Mutoscope, which was very popular in nickelodeons during this time. The Mutoscope and Thomas Edison's Kinetoscope are the beginning of the motion picture business as we know it.

 His work in inventing motion picture cameras, projectors, and other motion picture equipment extended well beyond the 1920s, where he helped develop a more miniature hand-cranked motion picture camera and a three-pronged shutter that helped reduce flicker during projection.

 Herman Casler is also the inventor of the Photo-See camera, which was patented in 1937. The company was short-lived, as Casler passed away in 1939, and I don't see production of the camera continuing much after his death.

The Camera & Developing Tank:

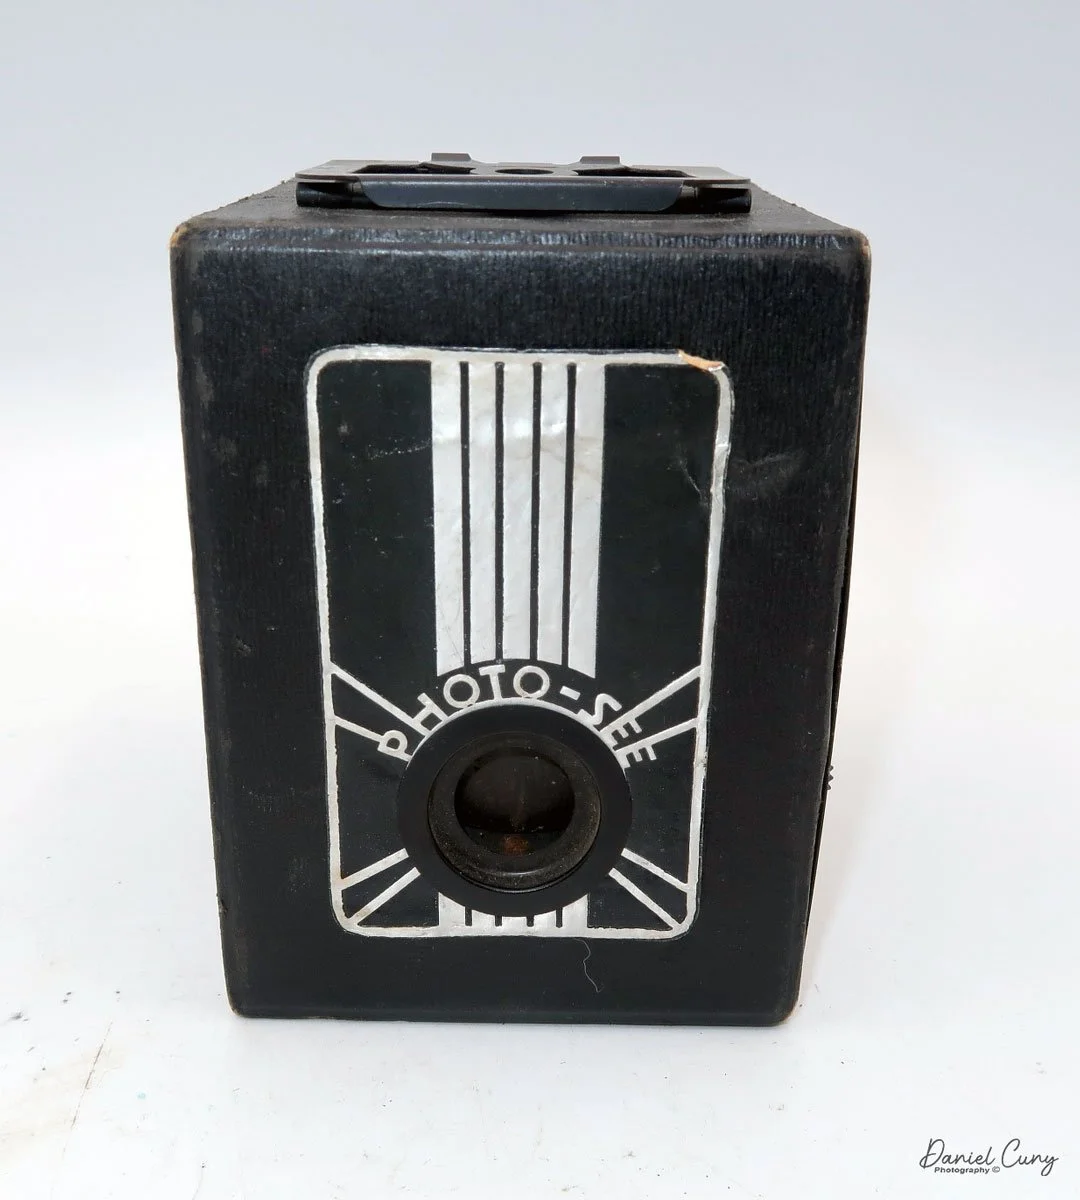
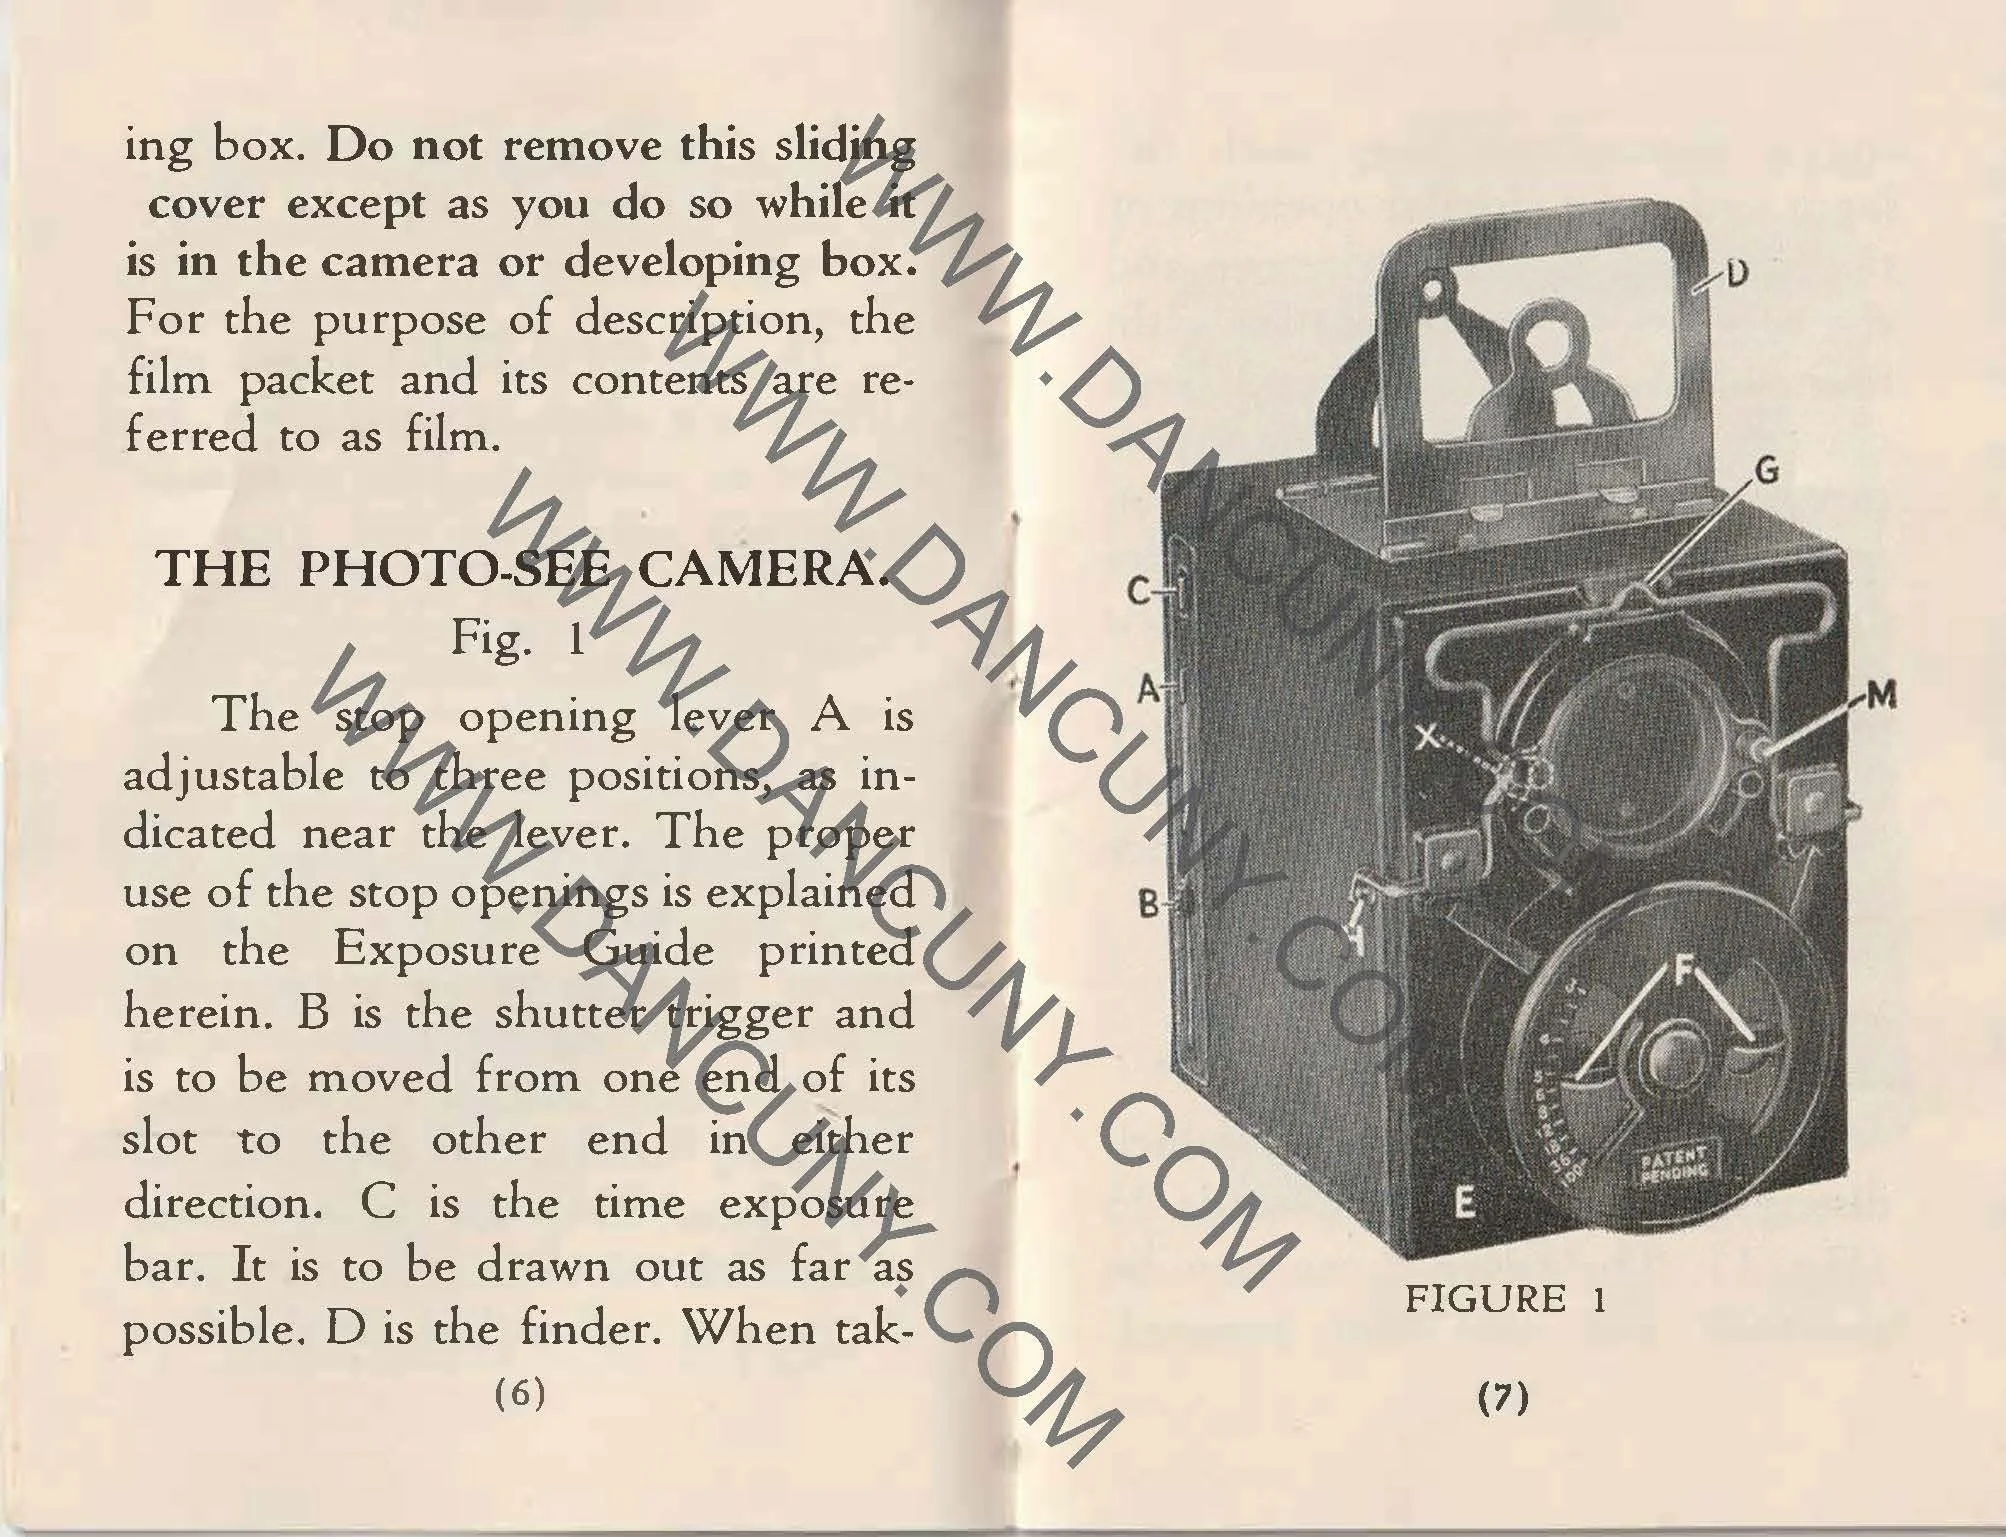
 The Photo-See camera is a straightforward box camera design with a few differences, which I'll explain. The camera is 4" tall by 3 "wide by 4.5" deep, including the focusing device, and weighs 12.3 ounces.

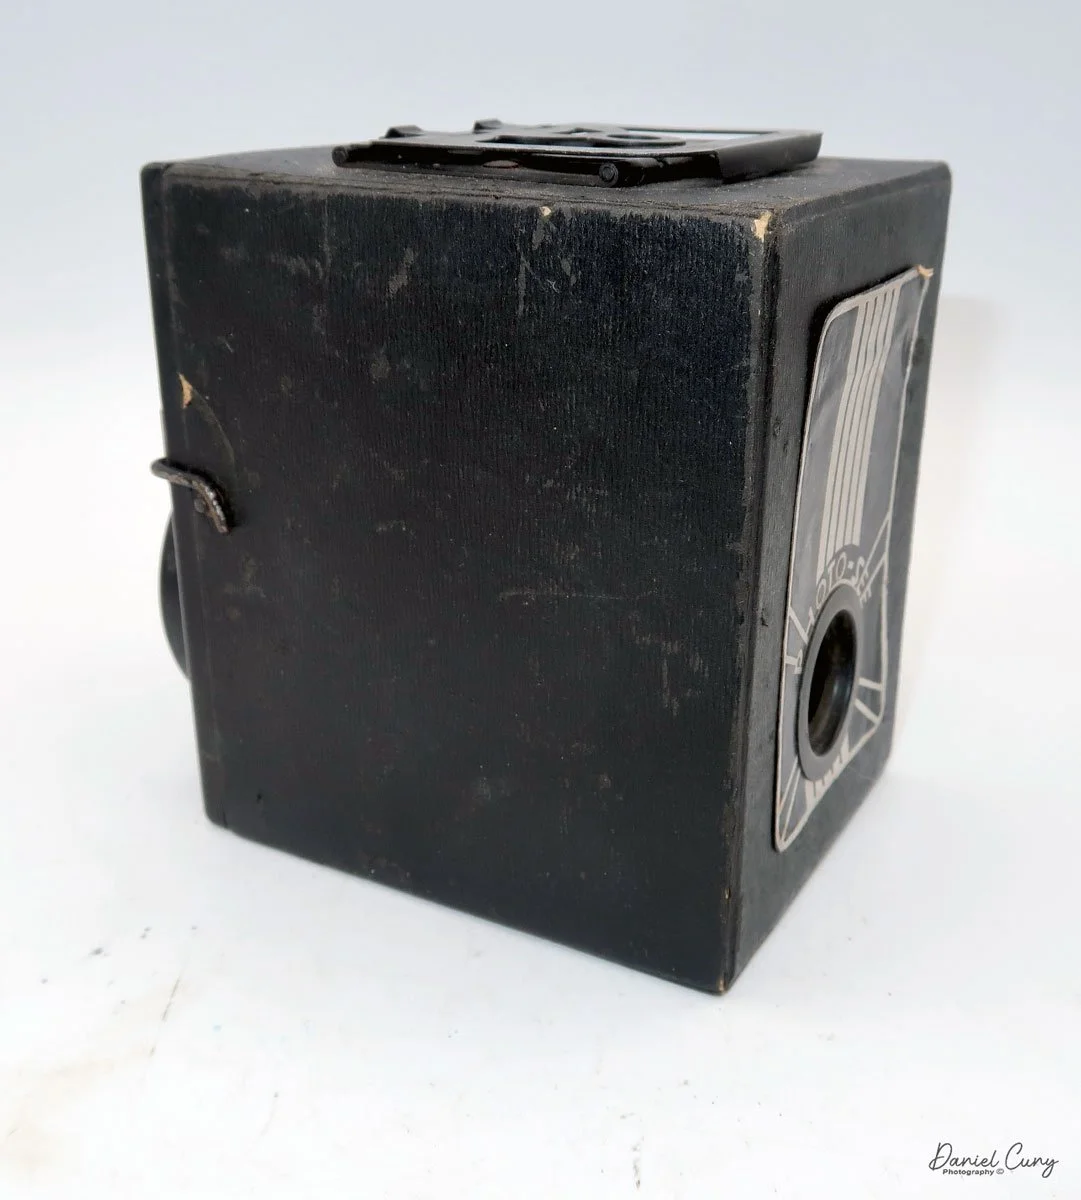
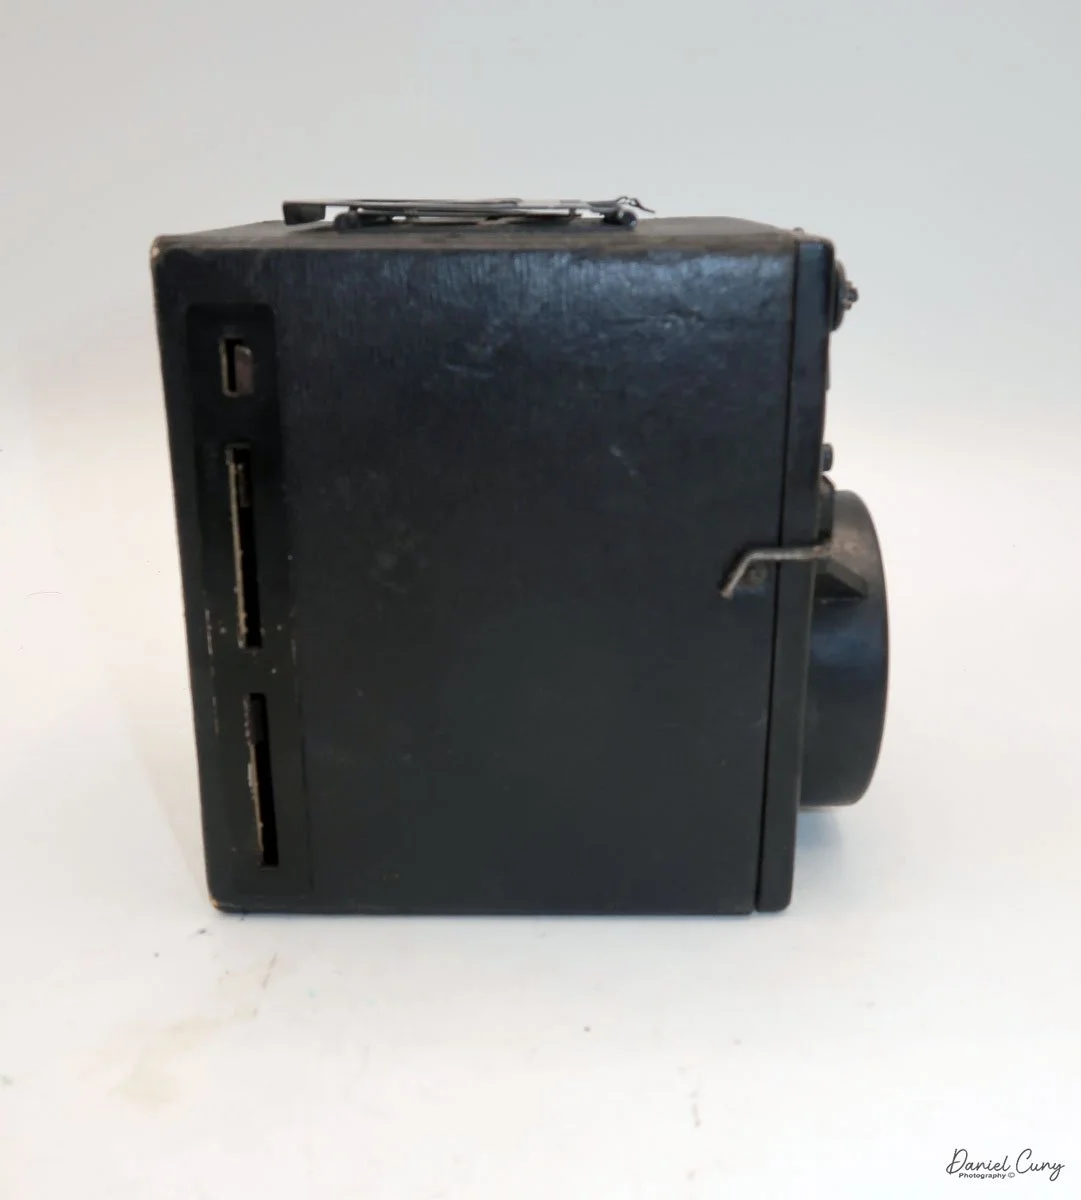
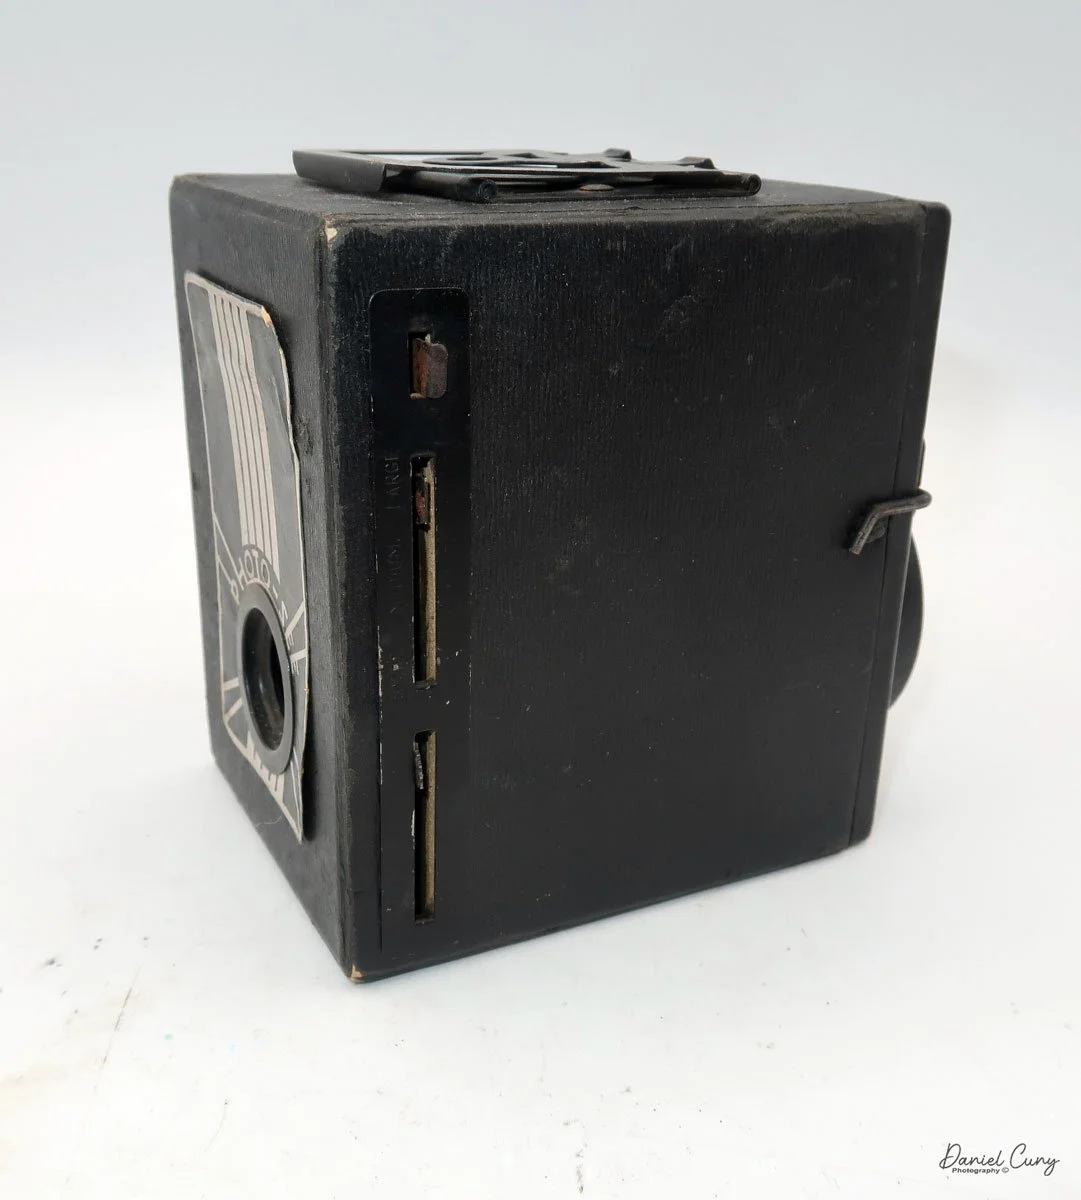
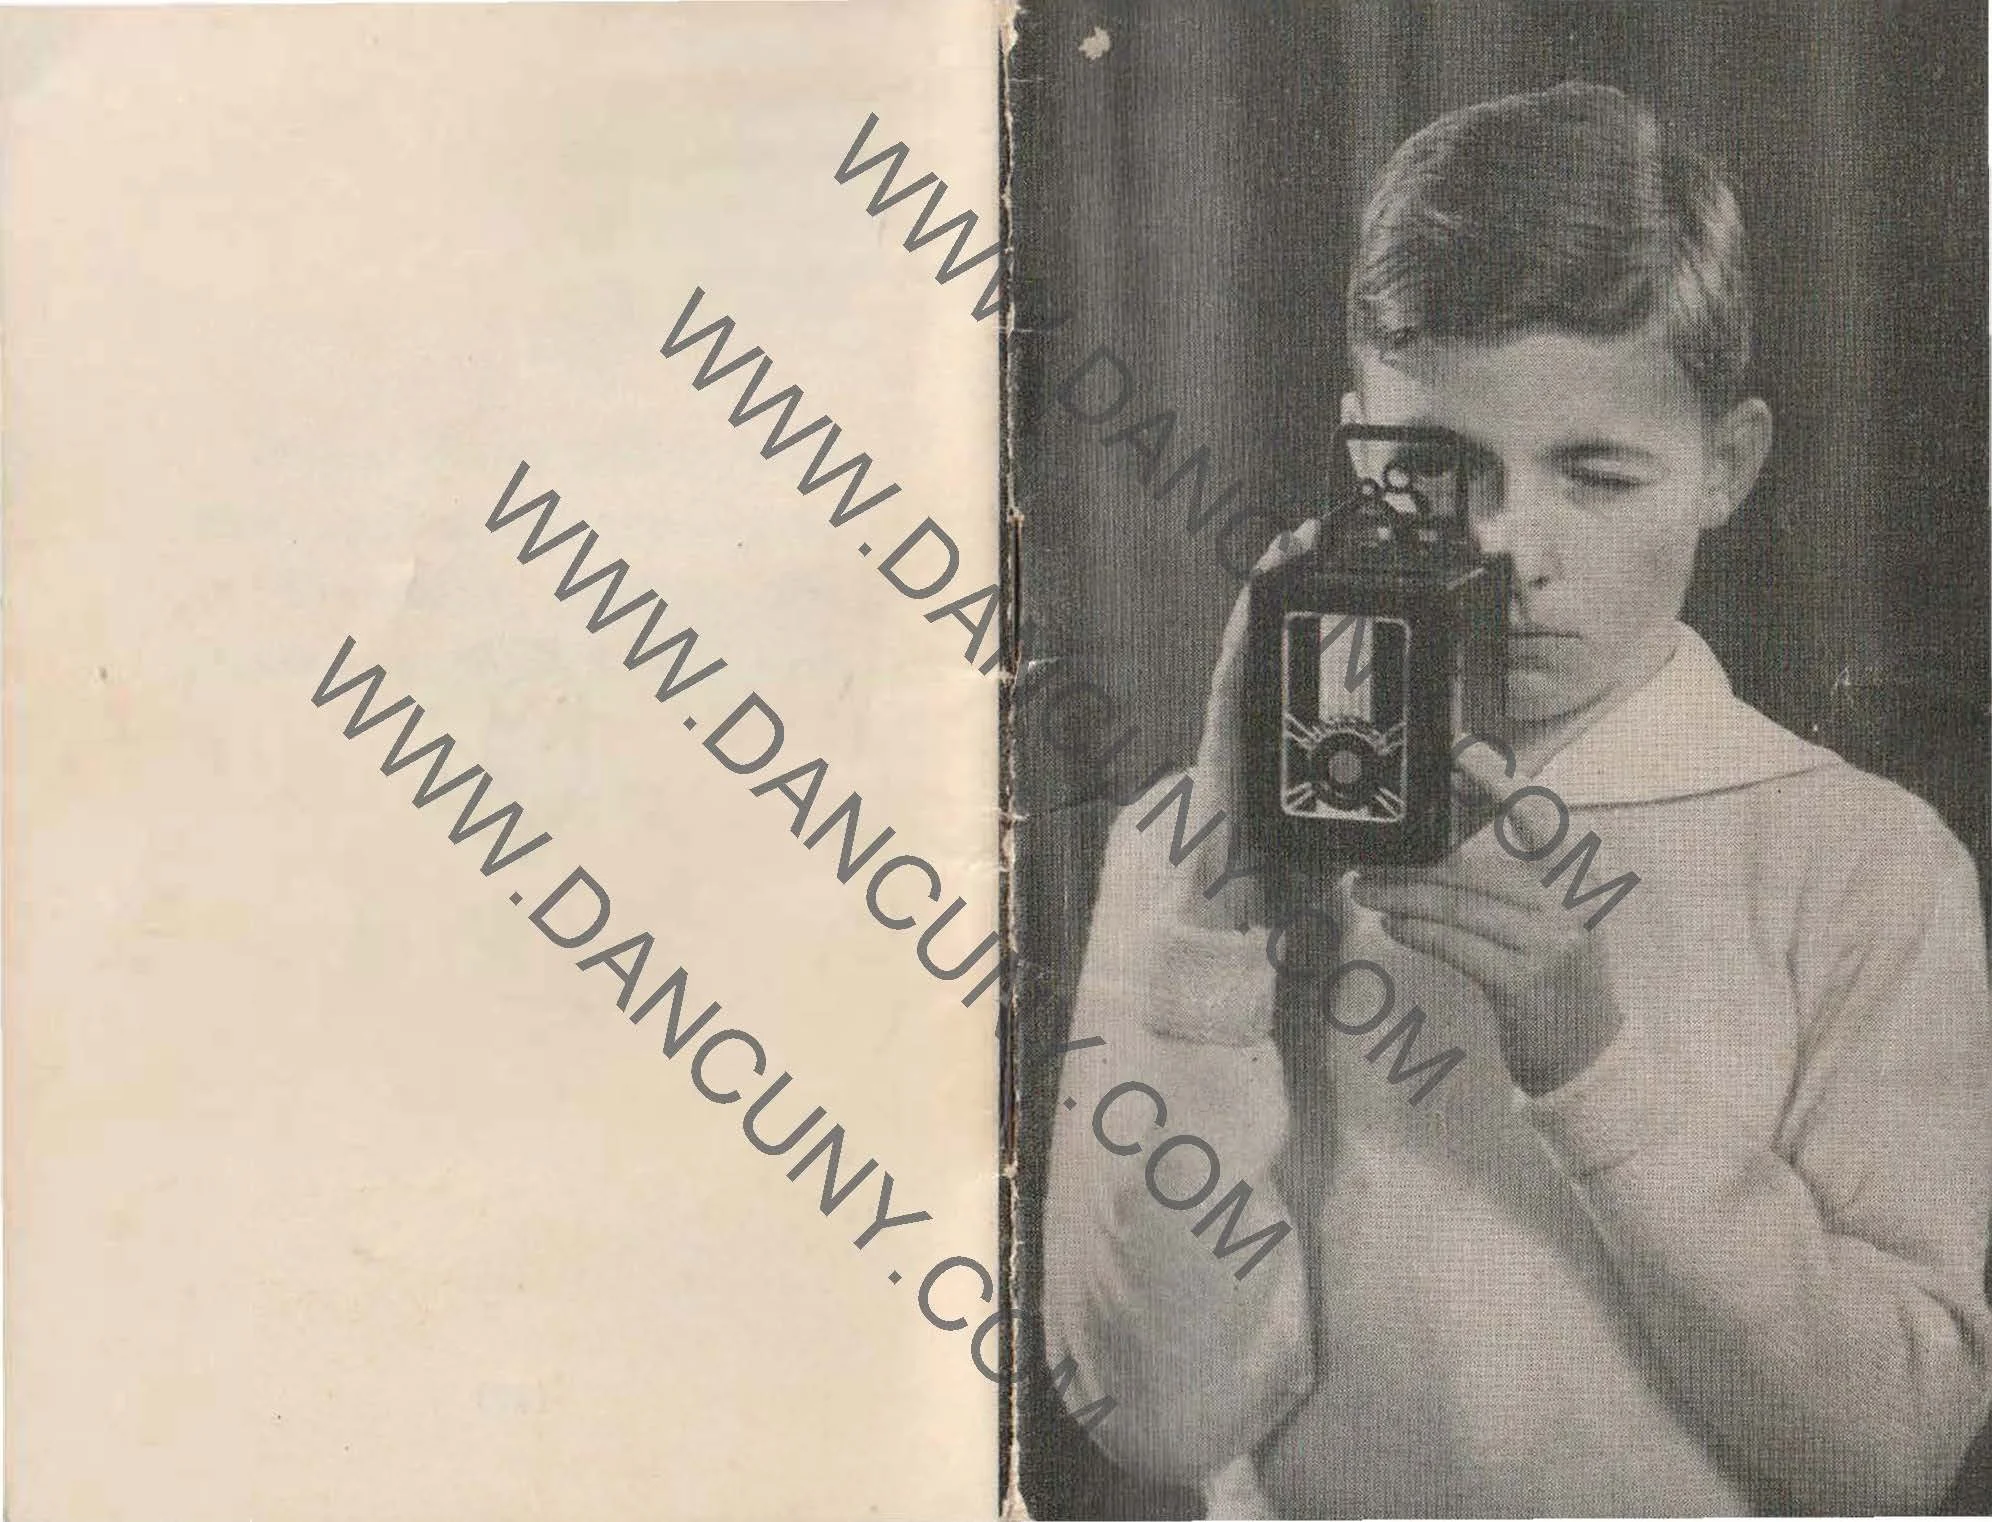
 The front of the camera features a distinctive Art Deco design, which is enhanced by a sticker applied to the front of the camera. The camera is made from a thicker cardboard material, featuring a two-part, fold-up viewfinder on top. It's said the viewfinder is put on backwards, but that's not the case, as I find it to work better than the other way.

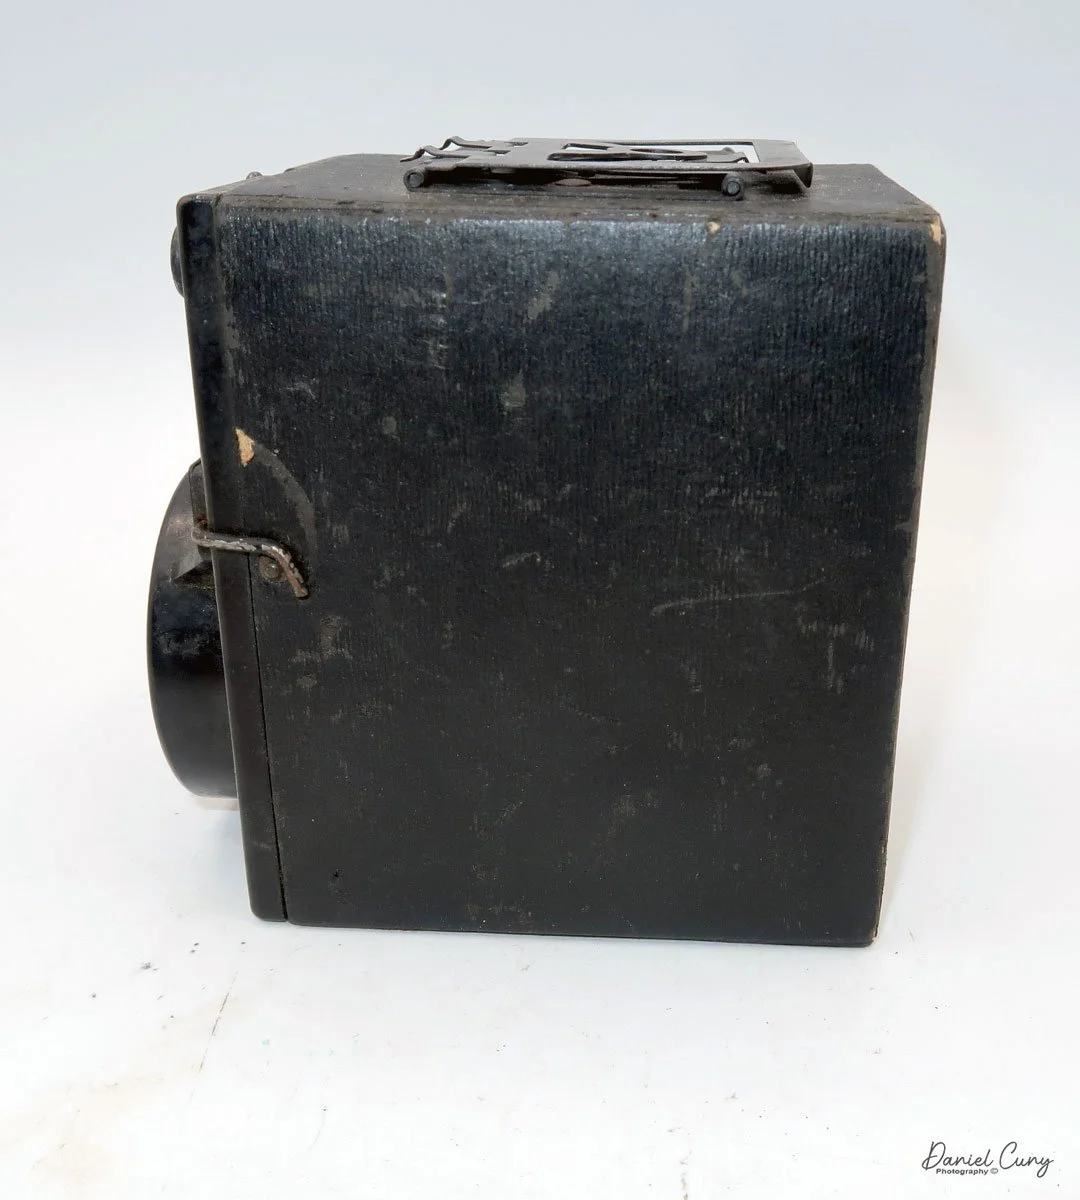
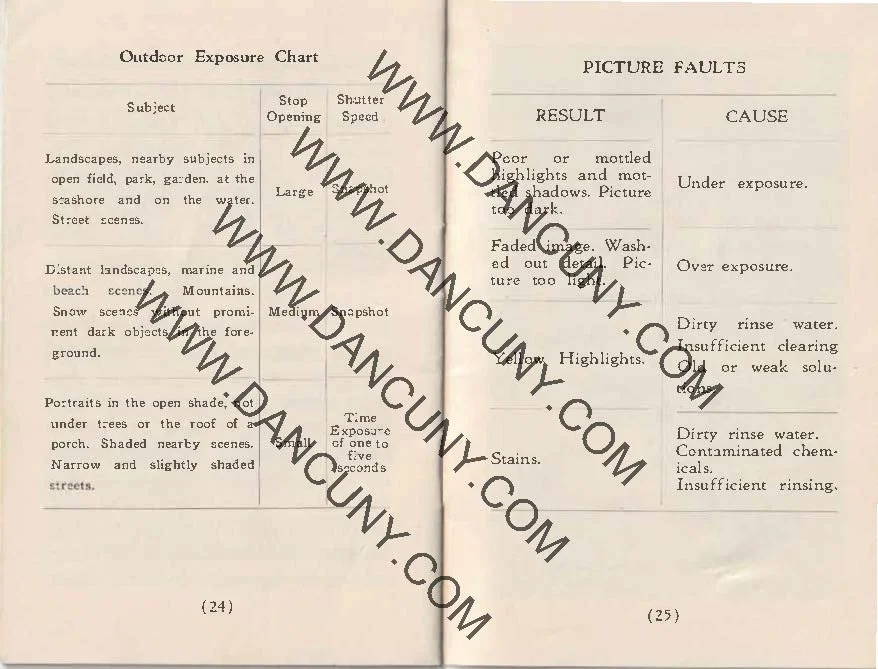
 On the left side of the camera are three controls; on top is the shutter control. When the bar is "in," the camera takes a regular snapshot, and when it's "out", the shutter stays open for a more prolonged exposure. This is similar to other box cameras from the same time period. The middle slider controls the aperture setting. They are Small, Medium, and Large. The bottom lever is the shutter release.

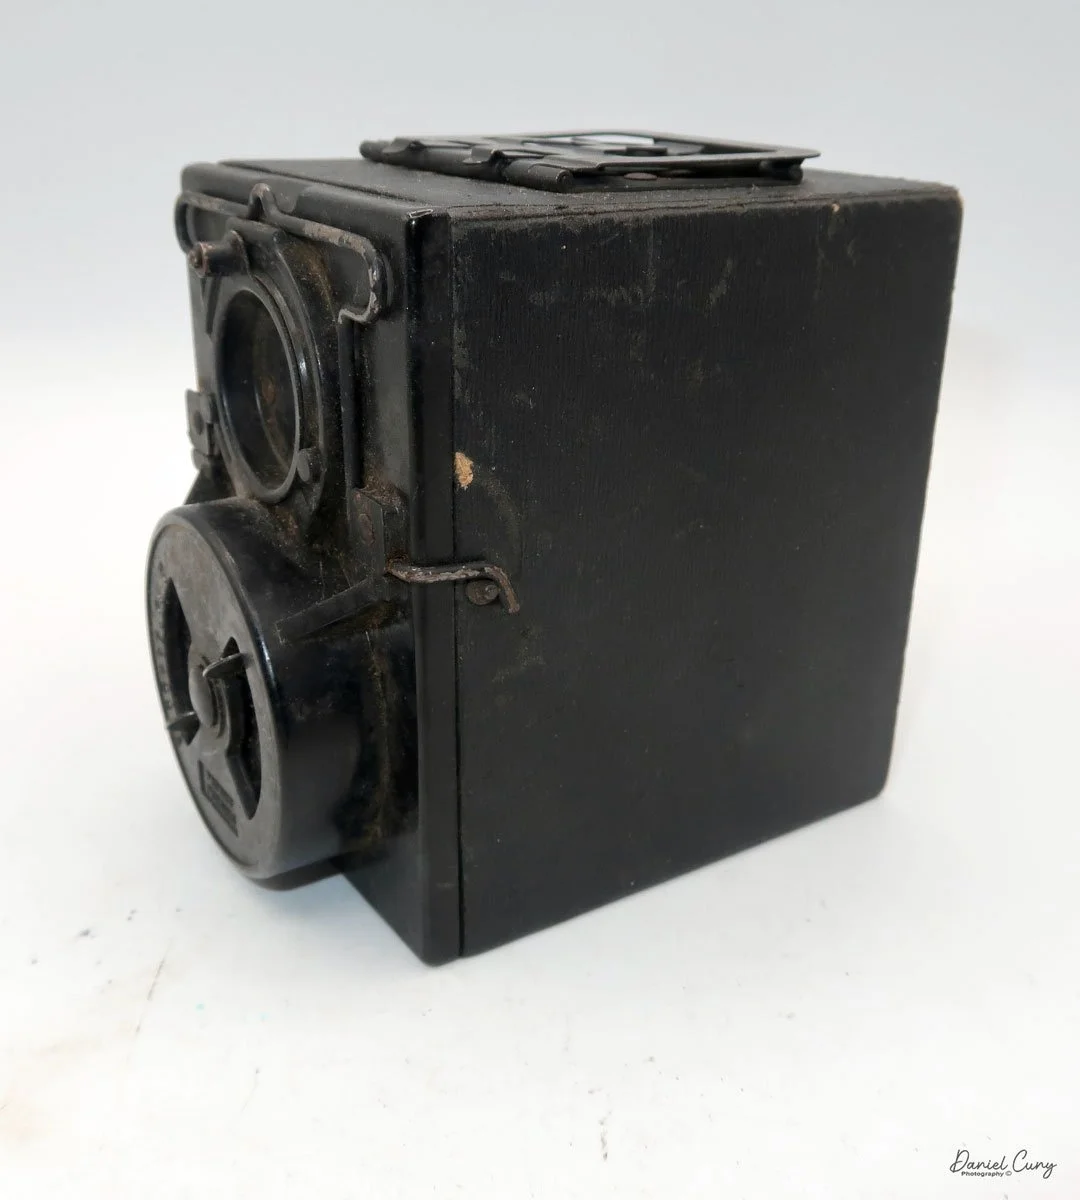
On the back of the camera, there are three main controls. The bar at the top is pulled down to remove the film from the camera. The smaller round disk on top is turned from the 3:00 to the 9:00 position to expose the film when you're ready to take a photograph. Then the disk is in the 9:00 position, which also locks the top bar, so you cannot take the back off when the film is ready to be exposed. Under the small disk is a larger disk, known as the focusing disk, which is turned to the desired distance from your subject. This is achieved by adjusting the internal focus of the film, moving it back, in, or out, which enables the film to shift its focus from 3 feet to infinity.

When you remove the film back and look inside, you'll see that it's spring-loaded, where you would load the film pack into the camera. The motion of the smaller disk on the outside of the back moved a pin on the inside up and down, which would open a dark slide, allowing light to hit the film once the shutter release was flipped. Moving the disk back to the original position closes the dark slide.

The Photo-See camera, when used in the vertical position, takes a horizontal image, and to take a vertical photo, you turn the camera to the horizontal position. Very similar to how half-frame cameras work.

 The Developing tank is 4.5" long by 3.75" wide by 2.5" deep, and weighs 9.4 ounces. The tank is composed of two parts and held together by a locking arm and a clip that wraps around the tank. Unlocking the arm swings the bar out of the way. On the back side are two spring-loaded clips that need to be squeezed to disassemble the tank. 

Once apart, you slide the locking lever away and turn the disk on the tank to the "up" position. This allows the film to be loaded into the tank. Put the back onto the tank, and turn the disk to the "down position, which exposes the film to the chemicals. Once the film is in the tank, you assemble the two pieces and lock them together to initiate the processing. 

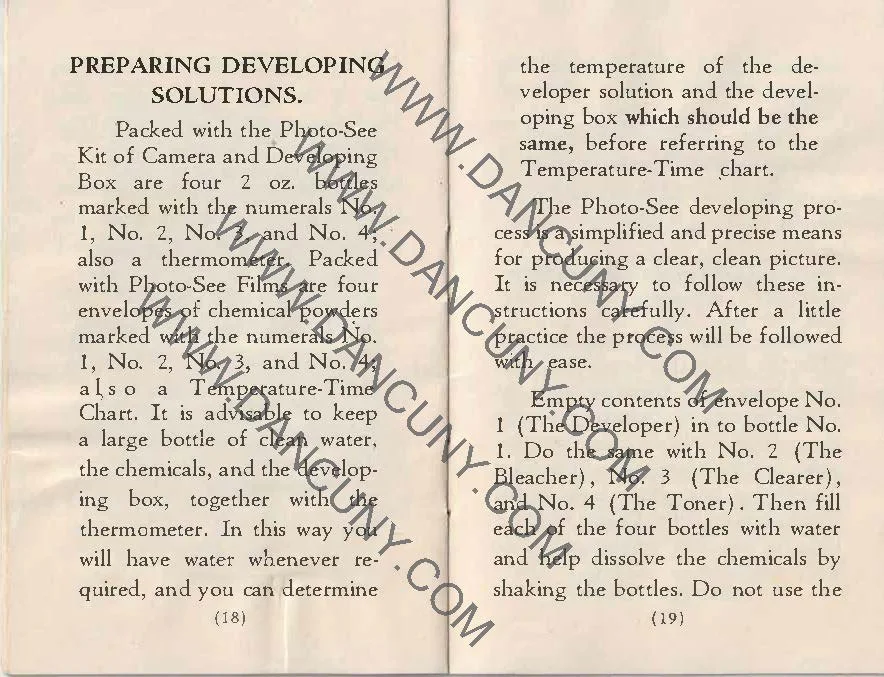
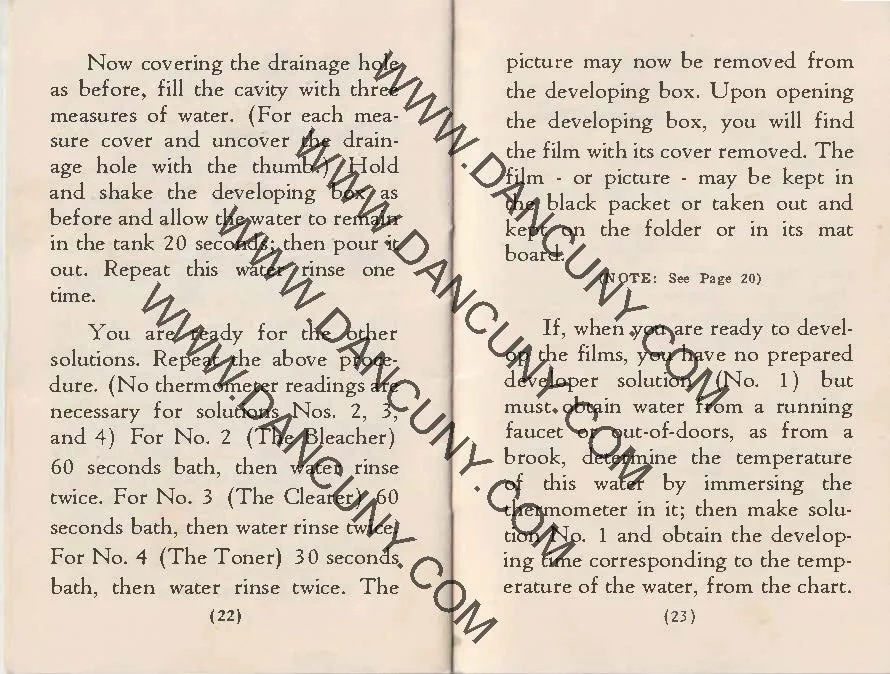
 According to the manual, four bottles and four packets of chemicals are needed for developing your image. #1 is the developer, #2 is the bleacher, #3 is the clearer, and #4 is the toner. Pour the packets into the numbered bottles, fill them with water, and mix. Pour the contents into the larger opening for developing. This camera produces photos and not negatives. Once developed, the final image size is 1 11/16 x 1 1/8 inches.


Results:

Unfortunately, the film for this camera isn't available, so I have no images to show from it. Heck, I've been looking for film for this for many years and have not seen one for sale anywhere.


Conclusion:

This camera is such an oddball, I couldn't resist writing about it, especially since it was many years ahead of its time. I understand that the process is lengthy, that you need to carry chemicals, and that the image size is small. These factors were the reason why this didn't gain popularity.

 It's nice to have an almost complete system in the collection. A film pack and the box would be nice, but having the camera, developing tank, and manual is good.

 Thank you for taking a few minutes to read about this odd and unusual camera from almost 90 years ago.

 Click on the link to see my other camera reviews.

 Cuny's Camera & Photo is my eBay store, where I sell some of the cameras I've reviewed, along with other camera-related items.

 Until next week, please be safe. 

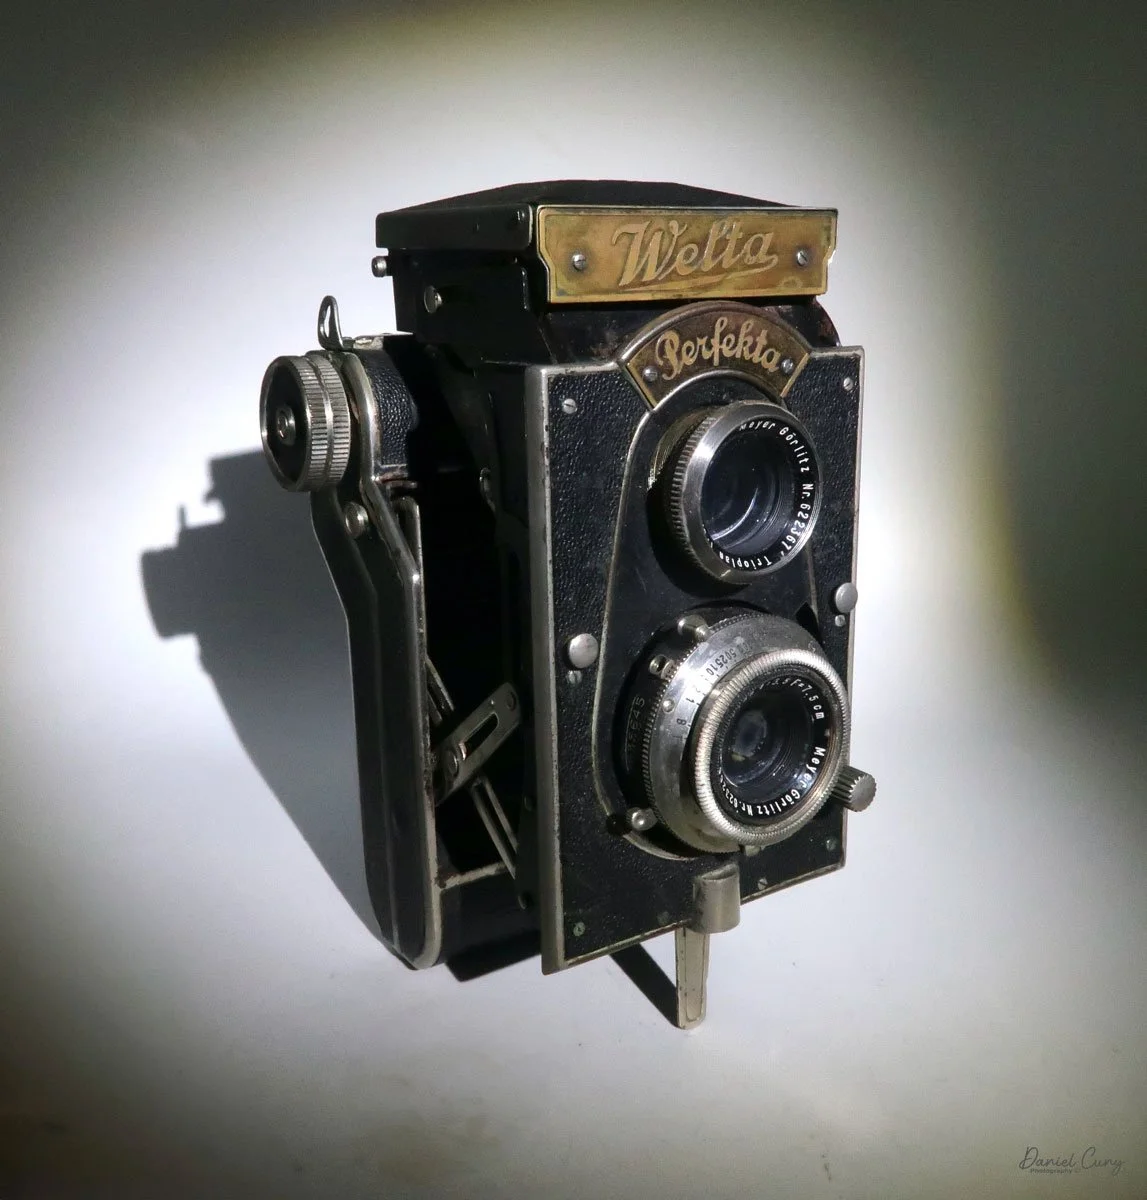
Welta Perfekta

My Welta Perfekta camera

As I've mentioned in the past, I'm always drawn to the colorful, or odd and unusual cameras. As a camera collector for over 50 years, and having spent countless hours poring over many of McKeown's price guides to cameras, there are cameras that I'm always intrigued by and would love to own. Cameras like an original daguerreotype camera, the Rectaflex Rotor, a three-lens camera, or a beautiful Compass camera made by Swiss watchmakers Le Coultre et Cie for Compass Cameras Ltd., London, England. All of these cameras are out of my league in terms of pricing, unless I win the lottery and have a few hundred dollars burning a hole in my pocket.

 To me, the most enjoyable aspect of collecting cameras is the hunt to find a rare or somewhat rare camera, lens, or other photographic item. Every once in a while in this collecting game, you come across a hidden bargain.  It could be something at the bottom of a box, or just that the person selling the item isn't fully aware of the value of items, and (to me), that is a highly satisfying feeling.

 Having had that same feeling about a year ago when I was at a garage sale in one of the neighboring towns, and I saw a Welta Perfekta camera. As I picked up the camera, it appeared to be in good condition. The shutter worked, the viewfinder seemed clean for being nearly 100 years old, and all the leather was intact. It was a nice camera, and one I'd love to have in my collection. When I asked about the price for the camera, the person selling it said it was her grandfather's. 

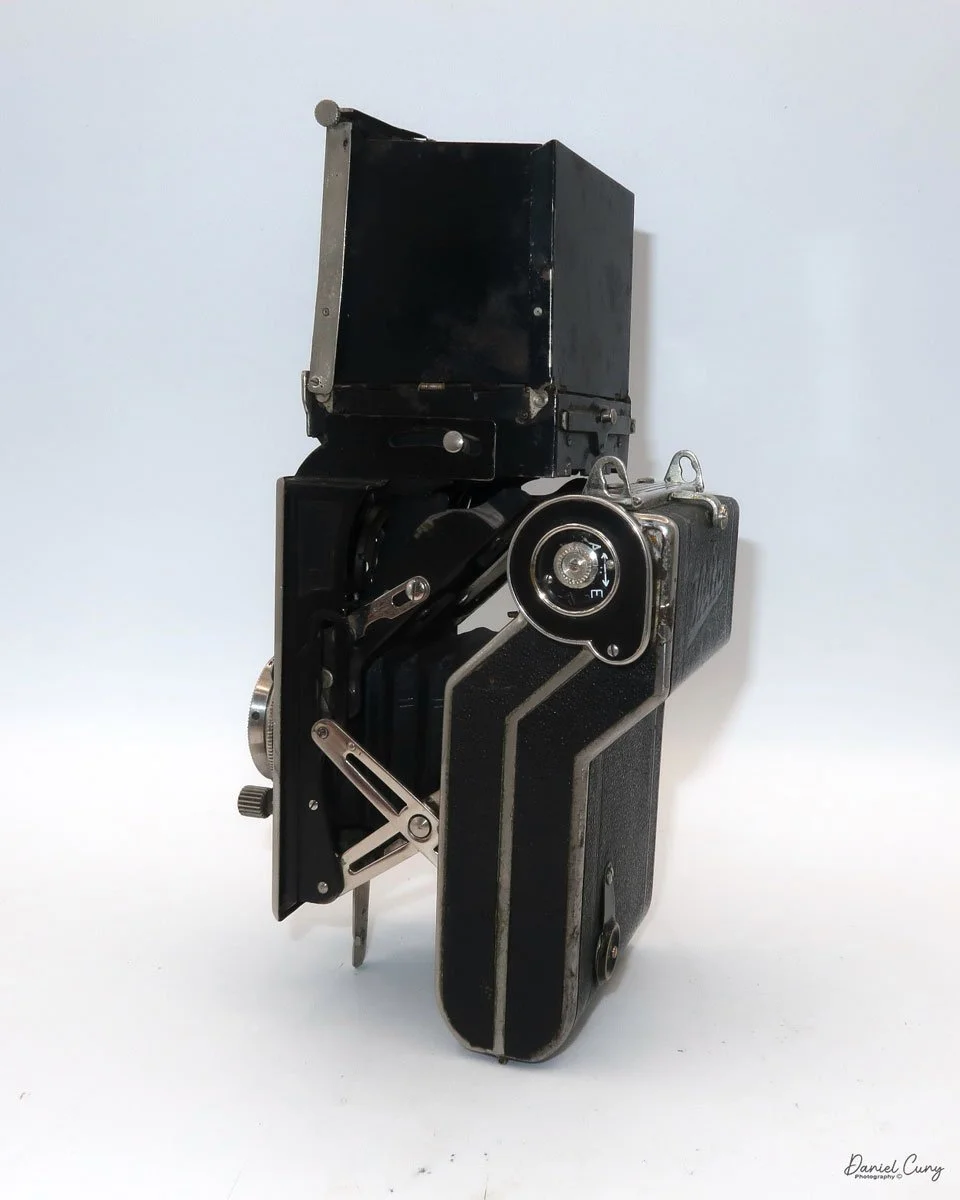
Odd shaped camera body

 Letting the seller know that the camera was in good condition and nice shape. I provided the seller with some information on the camera's age and a brief overview of the company. I let them know that I had collected the camera, written a weekly blog about it, and would love to have it in my collection. The seller said that, since I was a collector, it was important to them that the camera go to a good home, and they offered me the price of $50.00. I was happy to pay that price for such a nice example, and at that point, we were both pleased that the camera had a new home.

 I was familiar with the camera because I had written about the Zeca-Flex camera a while ago, and its shape had intrigued me. The Perfekta has a very similar shape to the Zeca-Flex as they are both folding Twin Lens cameras. These are twin-lens cameras with a large viewfinder that opens and closes, comparable to other twin-lens reflex cameras. The body of the camera folds into the film area, making the camera much smaller and more portable. 

History:

Since I just wrote about the history of Welta in last week's review of their Penti camera, I thought I would spend this review focusing on the history of the Reflekta camera, along with its older brother, the Superflekta camera.

 Both the Superflekta and Reflekta cameras are folding twin-lens cameras. As I previously mentioned, they are considered pocket cameras, which means they are smaller cameras intended to be easily transported in your coat pocket. They are a mix of pocket cameras introduced by Kodak in 1912 with their Vest Pocket cameras, and a Twin Lens Reflex camera introduced by Rolleiflex in 1929.

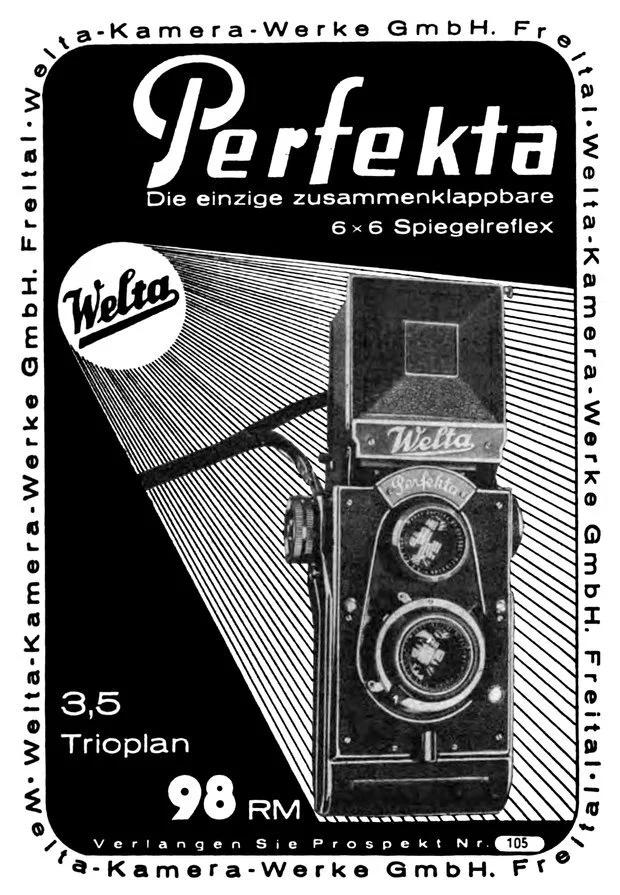
 The Perfekta camera was introduced in 1934. It's a medium-format camera that takes 6x6cm images on 120mm film. It features a large viewfinder that opens like the Rolleiflex and other Twin Lens Reflex cameras of its time. The body of the camera pops away from the film chamber, utilizing a bellows system that separates the lens from the film chamber, and forms an oddly shaped camera. There is a tripod socket and arm on the bottom of the lens area that allows the camera to stand upright on a flat surface, such as a table, if needed.

 The Perfekta could be purchased with one of three different lenses they sold. You had your choice of either a Meyer Trioplan 75mm f/3.5, Schneider Xenar, or Carl Zeiss Tessar 75mm f/3.8 lenses.

 The Superflekta was the first of this style of camera introduced by Welta in 1932. It's a larger camera that takes 6x9cm images on 120 film. The most intriguing feature of the Superflekta camera is that the film chamber rotates from a vertical position to a horizontal one for landscape-style images. This is very similar to how the Cornu Ontoflex operates. The photographer doesn't rotate the camera; instead, they rotate the film to achieve a horizontal image. 

 Rotating the film's back makes sense, as the camera features a ground-glass viewfinder to focus on the image. If you rotated the whole camera, the viewfinder would be on the side, which would affect composition. Turning the film chamber is a remarkable achievement in that camera. I can see where the Perfekta came into play as it's a bit smaller than the Superfekta. With the square format, Welta could cut down the size of the camera and make it even more "pocketable".

 The difference between the Zeca-Flex and both the Superfekta and Perfekta cameras is that the Zeca-Flex is more linear in design, and doesn't have the almost "S" shape that the Welta cameras incorporate. Only the bottom portion of the Zeca-Flex pops out to take the photo, then can be slid back into the camera's body for transport. 

 While Welta wasn't the first to introduce this style of camera, that honor goes to the Pilot 34 or Pilot Reflex camera made by Kamera-Werkstätten Guthe & Thorsch, another great camera manufacturer in Dresden. This camera was introduced in 1931 and was also a twin-lens camera with a bellows system.

 Both the Welta Superflekta and Perfekta cameras were only produced for a few years due to the complexity of their manufacturing. Another factor that contributed to the downfall of the Superfekta and Perfekta was the larger size of the viewfinder, which prevented it from folding into the camera body, thereby making the camera less compact.

My Camera:

My Welta Perfekta camera is 6.5" tall, by 4" wide including the film advance knob and frame counter, by 3.5" deep. These measurements are with the camera completely closed and in it's most compact state. When the camera is fully open, the camera measures 8.5" tall by 4" wide by  5" deep, and the camera weighs 2 lbs—2.2 oz. My camera has the Meyer Trioplan 7.5cm F/3.5 lens.

 To open the camera and pop the lens area from the film area., There is a round button on the right side of the camera, under the film advance knob, that you press. Once pressed, the body pops away from the film area, exposing the camera's bellows, along with the angled mirror area of the viewfinder system.

On the back, to the right of the viewfinder, is a small button that you slide to the left to open the light chimney of the viewfinder. The light chimney should pop up, exposing the ground glass for focusing. On the inside of the front wall of the light chimney is a magnifying glass that helps with focusing, a feature common in twin lens reflex cameras. On the left side of the chimney is a knurled knob that flips up the magnifying glass when turned, and flips down when turned in the opposite direction. 

Closing the light chimney, fold the sides in first, then the back, and finally, fold the chimney down into the camera's body. It will then lock into place.

 To focus the camera, a knob located just to the left of the lens/shutter assembly slides up and down, allowing you to adjust the focus on your subject. The lens moves in and out on a helicoid from the camera's faceplate. There is no focus distance written on the side of the camera, so you can't set the distance and shoot. All the focusing is done through the viewfinder, which I find somewhat dark and difficult to view on darker days.

 To close the body of the camera for transport, press the two buttons located on either side of the front plate. Once pressed, the body will push into the film chamber area and click into place. Just be sure to flip up the leg under the camera; otherwise, the leg keeps the camera from fully closing. I learned that when I tried to close the camera, I noticed the lever sticking out, ops!!

Taking the photo is pretty basic. The shutter speeds on my camera go from 1/300 to 1 sec. along with "B" and "T" for timed exposures and are set via a ring around the lens. The aperture ranges from F/3.5 to F/22 and is set by a slider arm located under the lens. The shutter cocking lever is located at the top of the lens, and the shutter release is positioned on the right side of the lens.

Loading the film is similar to that of many other medium-format cameras. On the back of the film door is a button that you slide to the left and pull down; the film's back will then open. I first noticed that where you put the fresh roll of film, along with the take-up spool, are hinged guards that both of these items fit into. The winding knob pulls out to make it easier to insert the empty spool into the chamber. Then, flip the small guard down to keep the spool in place. Similar to where you insert the fresh roll of film, once the film is in place, flip the guard down to keep it in position.

While the camera features a covered red window on the back, it also has a unique frame counter. On the inside of the film's door is a slotted rod that rolls on the film's paper backing, and it is equipped with a gearing system attached to a round frame counter, which tells the photographer which frame they are on. 

Here's how it works. Once you load the film, use the red window to access frame number one. On the inside of the frame counter, you slide the knurled wheel from A (Aus=Off) to E (Ein=On). Doing this sets the frame counter to number one, and after you take a photo, the ribbed wheel advances the frame counter every time you advance the film from one frame to the next.


Results:

I loaded the camera with an older roll of T-Max 100, the fastest 120 film I had available, and went for a walk with my sister, Laura, and her dog, Sally, taking photos along the way.

 Unfortunately, the day was overcast, and I had forgotten to bring my light meter with me, so I was forced to use a light meter app on my phone, which I dislike doing, as it always seems to get it wrong. However, it didn't fail me again, and the negatives I processed were underexposed.

 Here are some of the better ones from the walk.

Conclusion:

I must say that this camera was delightful to shoot with, and for the price paid, it was well worth every penny. The only drawback would be the darker viewfinder and difficulty I had focusing on the subject.

 I liked the size of the camera; I enjoyed how compact the camera is to use. The shutter and aperture worked well, and the odd shape of the camera was certainly a conversation piece when I talked to some of the neighbors I met along the walk to take photos. The camera is less bulky to transport and carry around than a traditional twin-lens camera, and the optics are excellent—an enjoyable camera that I plan on using regularly.

 Thank you for taking a few minutes from your day to read about this unusual, yet jewel-like, camera. 

 Click on the link for some of the other cameras reviewed.

 I also run an online eBay store, Cuny's Camera and Photo. If you're interested in older cameras and other camera oddities, I have for sale.

 Until next week, please be safe.

Bolsey 8 Camera

My Bolsey 8 camera

Being a big fan of Bolsey cameras, I was thrilled when a Bolsey 8 camera showed up unexpectedly with a "lot" of cameras purchased online. It was buried in the photo, and all you could see was part of the case, so to my surprise, I picked up the camera and unzipped the case to find a somewhat rare Bolsey 8.

 I've owned several different Bolsey cameras and even written about a couple in my weekly camera blogs. One is the Bolsey Flex-Trio, which I had in the original box with the flash. Just a year or so ago, I wrote about the unusual Boley Model C twin-lens camera. Both cameras are very well made, and I've always enjoyed shooting with them and having them in my collection.

 In 1956, the Bolsey 8 camera was marketed and sold as the only miniature 8mm movie and still camera made. There was even a "Lady Bolsey 8" camera sold in the United Kingdom, which I'll need to keep my eye out for a possible future purchase.

 There are many movie cameras that have single-frame capability, which is used in animation. Still, none of them that I'm aware of can change to different shutter speeds when using the camera in the single frame mode. The Bolsey 8 has just that capability and is extremely small and compact. There's an excellent website for subminiature cameras at www.submini.com, and if interested, they have a copy of the Bolsey Manual.

History:

The Bolsey Camera Company was established in 1947 in the United States by Jacques Bolsey, born Yakov Bogopolsky in Kyiv, Ukraine, in 1895. Bolsey's journey into camera design began in Switzerland, where he initially studied medicine but soon shifted to mechanical engineering and photography. 

 In the 1920s, he designed the Cinegraphe Bol, a 35mm cine camera, and later developed the renowned Bolex line of movie cameras, which became highly regarded for their precision and durability. After selling the rights to Bolex to Paillard in Switzerland, Bolsey contributed to developing the Alpa camera before immigrating to the United States in 1939.

 In America, Bolsey worked for the government during World War II, designing aerial and ground photography cameras. He then founded the Bolsey Camera Company to produce user-friendly, affordable, and durable cameras for the consumer market. The company's most iconic products were compact 35mm rangefinder cameras, such as the Bolsey B series (B, B2, B22, Jubilee), which featured cast aluminum bodies, coupled rangefinders, and built-in flash synchronization—a rare feature at the time. 

 The Bolsey C series combined twin-lens reflex (TLR) and rangefinder designs. The company also produced subminiature cameras using 8mm film and pseudo-TLR models like the Bolsey-Flex.

 Bolsey cameras gained popularity in postwar America for their accessibility and portability, appealing to amateur photographers and families. However, by the late 1950s, the company struggled to compete with the influx of advanced, competitively priced cameras from Japanese manufacturers. 

 Although the Bolsey Camera Company ceased operations in the early 1960s, its innovative designs and commitment to democratizing photography left a lasting legacy. Today, Bolsey cameras are prized by collectors for their unique blend of engineering, aesthetics, and historical significance.

My Camera

My Bolsey 8 camera is 3.25" tall by 2.5" deep by 1.25" wide and weighs 12.3oz. The camera is tiny yet easy to hold and extremely well-built. The Bolsey 8 has a clock drive spring motor that advances the film cartridge in the camera. My Bolsey 8 camera has a Bolsey Elgeet Navitar 10mm f1.8 lens. A wide-angle lens (6.5mm) and a telephoto lens (20mm) were also available for the camera. The serial number on my camera is 08823, stamped on the back of the camera just under the viewfinder.

The Bolsey 8 camera has variable shutter speeds, which include 1/600, 1/300, 1/200, 1/100 & 1/50. These are set on a small dial just above the lens. The Bolsey 8 also has an aperture range from F1.8 to F22. A large wheel sets the aperture on the side of the camera body, showing what aperture the user has the camera's lens set to. In between the lens and the aperture settings are the focus marks for the distance you are from your subject. The focus on the lens needs to be set from one foot to infinity, with another setting in between, for landscape, group, or portrait. You cannot miss this in front of the camera. 

Also, on the front of the camera, below the lens, is a wheel that turns with "M" on the top, "L" in the middle, and "S" on the bottom. To use the camera as a movie camera, turn the wheel to "M," and for still photography, turn the wheel to "S." Press the button to activate the shutter on the camera in either the "M" or "S" modes. "L" locks the camera's shutter so you can't accidentally run the camera while the camera is in your pocket or fitted camera case.

 On the right side of the camera is the large winding key, which you turn clockwise to wind the motor. In the back, in the top corner, is the footage counter, which tells you how many feet of film are still available to use on the roll.

On the left side of the camera is nothing more than the Bolsey logo on a metal label on the top left front of the camera, and on the bottom right back of the camera is a window that allows you to see the recommended exposure settings information imprinted on the special Bolsey 8 film cartridge. To take the side of the camera to load the film, you pull the side off the camera by pulling from the small knob on the top of the camera. The back will come off, and you can insert the film magazine into the camera body. Then, just snap back on the side of the camera for shooting.

 The film used in the Bolsey 8 camera is a single 8mm magazine of 25 feet. The roll of film that was still in my camera was Kodachrome 25, which is a fantastic still film and one used extensively in the late 1950s and early 1960s. I can remember it's a film my dad used in our family movie cameras.

Results:

The camera wasn't used because the film in it is very old and Kodachrome, a type of film for which processing is no longer available, is not available. 


Conclusion:

I can tell you the camera was in good working condition. All the shutter speeds worked, and the lens was clean, so it would have been fun to try it out and see what results you could expect.

 Thank you for taking a few minutes from your day to read about this two-in-one camera. It is an excellent still and movie camera built into one small, dynamic package.

 I'd love to hear from you about this or any other cameras I've written about. Click on the link to read other camera reviews I've done.

 I also have an online store called Cuny's Camera, where I sell old, vintage cameras, lenses, and other knickknacks.

 Until next week, please be safe.

Olympus O-Product Camera

My Olympus O-Product Camera

In high school, my good friend Greg Copeland introduced me to the Olympus camera system in the early 1970s. He was the first person I knew who bought into the Olympus OM system with the OM-1, which I believe was in 1973. At that time, Olympus was very innovative, making the most miniature SLR camera system, which included a complete line of small, compact lenses with very nice optics. I can still remember Greg telling me how much he enjoyed how nice the camera was made. He would take the camera with him all the time. At the time, I was using either the Topcon Super D or, possibly, I had moved on to shooting with a Nikon Nikkormat.

 I started working in the photo industry in late 1973 when I was hired as a seasonal employee in the camera department at my local K-Mart. That position didn't last long, but it led me to work at the local camera store chain about a year later. I was hired to work in the warehouse and handle all the camera and lens repairs.

 When I started working at the local camera store, the Olympus OM system had a decent hold on the market. However, it was still lagging behind the big kids in the marketplace. Olympus was continually pushing the envelope with many new and exciting products like the terrific XA camera line, which, to this day, is one of my favorite cameras. Olympus introduced new additions to its system yearly, which always had customers in the store talking about its products.

Olympus O camera & Flash

 I tell you this because I have seen many odd and unusual cameras introduced by camera companies over the years, and many of them came out in the 1980s to the mid-1990s. The Minolta Prod 20, the Yashica Samurai, and Canon had the Epoca series of cameras. There's a great blog on some of these cameras on the Kosmo Foto Blog.

 One of the cameras that greatly impacted me when it was introduced in 1988 was the Olympus O-Product camera. It was a limited edition, and only 20,000 cameras were made. The Olympus O-Product camera had a very unusual, art deco look of a circle in a square and was made of brushed aluminum. At the time, the cost was prohibitive for me to purchase, but I remember thinking that someday, I'd really like to have one in my collection. Its unique design always intrigued me.

The Company:

The history of Olympus cameras is a story of innovation, precision engineering, and a relentless pursuit of compact, high-quality imaging tools. Founded 1919 in Japan as Takachiho Seisakusho, the company initially specialized in microscopes and thermometers. In 1949, it was renamed Olympus Optical Co., Ltd., and it soon began making a name for itself in photography.

 Olympus entered the camera market in 1936 with the launch of the Semi-Olympus I. This bellows camera used the German-made Zuiko lens, setting the stage for a signature brand name synonymous with Olympus Optics. However, it was not until the post-war period that Olympus truly revolutionized the photography industry.

 One of the most pivotal moments came in 1959 with the release of the Olympus Pen. Designed by the legendary Yoshihisa Maitani, the Pen was a half-frame 35mm camera, meaning it could shoot twice as many exposures per roll of film. It was compact and affordable and helped democratize photography for a wider audience. The Pen series enjoyed massive popularity and marked Olympus as a leader in miniaturization without sacrificing quality.

 The next major innovation came in 1972 with the OM system. Again spearheaded by Maitani, the Olympus OM-1 was a compact, lightweight SLR (single-lens reflex) camera that offered full functionality in a significantly smaller body than its contemporaries. This system appealed to professionals and enthusiasts alike, reshaping expectations for what an SLR could be.

 In the digital age, Olympus continued to push boundaries. In 1996, they released their first digital camera, the Camedia C-800L. However, the Four Thirds system, introduced in collaboration with Kodak in 2003, made a lasting mark. This was followed by the Micro Four Thirds system in 2008, which eliminated the mirror box of traditional DSLRs, allowing for even more compact and lightweight cameras. The Olympus PEN E-P1, released in 2009, revived the classic Pen design in a digital form and was among the first mirrorless cameras to gain traction in the market.

 In 2020, Olympus exited the camera business, selling its imaging division to Japan Industrial Partners, which rebranded the line as OM SYSTEM. Despite the transition, Olympus's legacy lives on through continued innovation and the enduring influence of its designs on modern photography.

The Camera.

I've always thought of the Olympus O-Product camera as more of an art piece rather than a functioning camera, but it is fully functional. In its simplest form, the Olympus O-Product is a "point-and-shoot" camera. There are no settings on the camera that the photographer needs or can really set, which makes it incredibly simple and straightforward to use.

Camera’s number from production lot.

 The camera is relatively small, measuring 4" wide by 3.5" tall and 2" deep. These measurements are for the camera alone and not with the flash attached. If I add the detachable flash, the camera is 5.75" wide by 4" tall. The camera weighs just under 1 lbs. at 15.2 oz. with the flash attached. My camera is number 11289 out of 20,000. The camera also features a unique circular viewfinder and a distinctive shutter button, adding to its charm and functionality.

 The Olympus O-Product camera is powered by 2-AAA batteries that fit into the camera's bottom. The 2-AAA batteries also power the detachable flash. The camera is very simple and basic. Once the batteries are in the camera, you can load film, which is autoloading. There is no need to set the film's ISO because the camera has DX coding for the film loaded. Once you put the leader on the take-up spool and close the back of the camera, the camera automatically winds the film to frame number one.

 To turn on the camera, a lever you pull down on the front opens the front door, exposing the 35mm f3.5 Olympus lens. To turn the camera off, close the front door. There are no shutter speeds to set as the camera has a programmed electronic shutter. The camera is also autofocusing. In the center of the viewfinder,  you'll see a white circle when you depress the shutter button halfway on the front of the camera. In that case, a light will light up next to the "AF" in the upper right-hand corner, letting you know the camera has focused on the subject, and you can press the button to take the photo. Once you take the picture, the camera automatically advances to the next frame. Once you've taken all the photos on the roll of film, the camera will automatically rewind the film into the film cassette.

 The flash for the camera is detachable, so if you don't need it, you can take it off. To take the flash off, you need to unscrew the mounting screw, and the flash will come off the camera. You still need to unplug the cord from the flash to the camera, which pulls out, so it's very simple. To attach the flash, you screw it onto the camera and plug in the cord. If the camera needs the flash, a red ready light on top of it lights up when the flash is ready and will fire if it determines it needs the extra light to make a proper exposure.

 There are two buttons on the camera's top next to the flash attachment that allows the photographer to make adjustments when shooting.  One of the buttons is a self-timer. If you want to get into the photo, press the self-timer, giving you 10 seconds to get into it. The other button is a rewind button. Suppose, for some reason, you want to change to a different type of film. In that case, you can depress the rewind button. The camera will automatically rewind the film back, leaving a little bit of the leader exposed so you can re-load it when you want to finish that roll of film.

My Results.

I put batteries in the camera and flash, loaded it with a roll of Ilford Plus 50 black and white film, walked through the house, and strolled around the block taking photos. The camera determined if the flash was needed, which was pretty fun. It was too simple for my taste as sometimes I like to use fill flash, but this camera didn't allow me to do so. I could trick the meter by putting my finger over the meter area, but for this blog post, I wanted to be free and let the camera do all the work.

 Here are a few of the photos taken on my walk.

Conclusion.

Using such a simple but beautifully made camera was a lot of fun. The camera produces very sharp images and is extremely easy to use. When I was working at the camera store, we used the term PHD cameras, which always meant "push here dear," meaning the camera was very simple for either men or women. Put the camera to your eye, point it at your subject and "push here dear".

 As I mentioned earlier, the Olympus O-Product camera is more of a work of art or statement camera that looks terrific in the collection. It's not really made to be used on a daily basis, but using it every once in a while is good. I wouldn't want the camera to get more scuffed than it already is, but taking the camera out was fun, as was running film through it.

 Thank you for taking a few minutes from your day to read about this art piece that can also be used as a camera.

 Until next week, please be safe.

Alpa Rotocamera 6070

My Alpa Rotocamera 6070

As I've mentioned in previous blog posts, I am fond of panoramic cameras and the odd and unusual cameras that most people wouldn't guess are cameras, so I always have my eyes open for these oddball items to add to my collection. The Alpa Rotocamera is just one of these items. Not only is it an odd-looking item that resembles a miniature robot-looking item, but it's also a 360-degree panoramic camera that shoots on 120 or 70-mm film.

 I've owned lenses that shoot 360-degree images and have even written posts on them. The first lens I had that shot 360-degree images was a Be Here Portal S1 lens, which fit onto my Nikon DSLR camera, and with software, it produced a tremendous 360-degree photo. That lens got damaged, and to this day, I'm continually searching for another one of these lenses. In my mind, I kept telling myself that there's something different between shooting with a 360-degree lens and having a camera that can produce a 360-degree negative.

 I found an Alpa Rotocamera on an online auction. When I saw it shot 360-degree images on 120 or 70mm film, I was immediately hooked and wanted to get it. Not knowing much about the camera other than a few tidbits I quickly found online, I bid on the camera lot. To my surprise, I won the camera. I was excited to get the camera and load film into it and start to make some tremendous images that were a view that is mind-boggling when you see them.

 This blog will be different from my other posts because I've spent tens of hours on this specific camera because of its condition. I want to give you a brief overview of the camera, then explain how I received it and what I've done to get it back into working condition.

The Camera:

This camera is a Beast!!!! I didn't realize until I received it, but the camera and film back weigh just under 17 lbs. and are 16 lbs. 15.6 oz. That does not include the power source and cables. It’s built from cast metal with a pebble finish and, it’s 12” tall, 9” wide, and 8” deep and was built in the early 1980s.

 As mentioned, the Alpa RotoCamera produces a 360-degree image on either 120/220 or 70mm film. The camera is powered by a 12v rechargeable battery that powers motors in the camera's base, which rotate the head around a cylinder. According to the manual, you can produce either 90, 180, 270 or 360-degree views with the camera. On the front of the camera is a Rodenstock Grandagon-N 75mm f6.8 lens. Just to the right of the front lens is a lever used for vertical adjustment. If you want to shoot higher or lower, you can slide the lever up or down to adjust the vertical height to avoid getting too much foreground in the photos. There is also a viewer on the side that can be used to see the camera's vertical adjustment.

 The camera has two speeds, and the head rotates around the cylinder. The speed is set on the center column by a switch with an "A" for the faster speeds and "B" for the slower speeds. There also are a series of slits in the head that allows for the camera to shoot at different shutter speeds depending on the motor speed and slit width. Switches on the top of the camera head control the slits. One series of switches is for the slit width, and there is another that allows for the slit angle if you're in a situation where you'll want to control excessive brightness in the sky or ground. The camera can shoot anywhere from 1/20 to 1/250 shutter speed depending on the motor speed and slit width. On the rear of the film's back is a chart showing where to put the different switches should you want faster or slower speeds, along with a controlling light on top or bottom.

 The camera also has a removable film back, and 70mm or 120/220 film can be loaded into it. There is a small hard wheel just below the take-up spool on the film back, which is connected to the film advance cog and fits into the film reel. Just below the slits on the head is a rubber band that goes all around the cylinder. As the head rotates around the cylinder, the hard wheel runs along the rubber under the slit advancing the film as the head spins around the cylinder.

There are two settings on the camera remote control. One is a switch for "Auto" or "Manual," and the other setting is "Rotation." The Auto setting works in conjunction with the angle set on the column for 90, 180, 270, or 360 pans. The manual setting allows you to press as long as you want the camera to pan for. The "rotate" button is pressed to open the shutter and start the camera rotation. The remote and power cable are joined; one end fits into the power pack, and the other fits into the bottom of the camera's center column. There is also an on/off switch for the camera close to where the power and remote cable fit into the camera.

 In theory, you load film into the film back, making sure the take-up spool is engaged into the drive gear on the back. Put the back onto the camera. Plug the cables into the power supply and the camera. Turn the camera on, set the aperture on the lens, and check the height adjustment. Meter your scene, then set the appropriate shutter combination by the series of switches on top of the camera and the speed adjustment on the column. Set the rotation distance, and press "Auto" to start the camera rotation. According to the manual, on a roll of 120 film, you'll get 1- 360-degree or 270-degree images, 2-180-degree images or 4-90-degree images.

The Restoration:

The one thing I didn't realize and wasn't shown in the images at the online auction was the mechanical and physical condition of the Alpa Rotocamera internally because when I received the camera, it wasn't in "good working order." On the outside, the camera looked good. Everything seemed to be there, but when I went to take the back off the camera to view the inside of the camera body, the wheels came off the bus. My heart sank as the excitement of having a working camera came to a crashing halt.  

 The film back still had two 70mm film cassettes inside, but it looked like someone had packed the back of the camera with grease. For what reason, I wasn't immediately aware of it, and the rubber wheel that the film rotates on to advance the film had deteriorated into a yellow mass of goop that looked worse than it was. Another item that was missing was the power supply for the camera. I had the cables for the power supply that led to the camera and the remote control on it. I also had the instruction manual along with a car inverter to charge the battery when in your car. Still, there was no power supply, so I couldn't check whether the camera operated.

I let the camera sit for a few hours as I started thinking about how to get the camera into a somewhat presentable condition. My mind wasn't even on getting the camera, but on starting to clean up all the goop that was not only in visible areas but in areas of the camera I wasn't even sure I could get to. I did another more exhausting internet search when I came across someone who had done a restoration on the camera itself. Bayless Projects has a tremendous video on YouTube that is very comprehensive. He lives in London, so I started an email chain with him, letting him know I, too, had a camera I needed to restore. He helped me with the power supply and with many other questions I had about the camera.

 It was time to get the camera back in (hopefully) working condition. I spent the next couple of days cleaning up the goop on the film back, which got into places I needed to disassemble to clean out. With many Q-tips, Isopropyl alcohol, and lightly soapy water, I cleaned the film back up nicely. The film holders moved well, and the film drive gear turned as I rotated the hard wheel, which wasn't moving smoothly previously. 

 Now, to move onto the camera head. I removed some of the stickers that someone placed with film data from the previous owner. Something was rattling in the head, so I needed to take the top off to see what was rattling around. Once I removed the top, I could see a ground glass still intact and not broken that went where the viewer went. This was used to check the vertical adjustment for the images. Once I got the ground glass in place, it was time to tackle the back of the camera, which had the remnants of the previous rubber band that goes around the cylinder. Luckily, this came off very easily, and I didn't need much cleaning.

Now, to move onto the camera head. I removed some of the stickers that someone placed with film data from the previous owner. Something was rattling in the head, so I needed to take the top off to see what was rattling around. Once I removed the top, I could see a ground glass still intact and not broken that went where the viewer went. This was used to check the vertical adjustment for the images. Once I got the ground glass in place, it was time to tackle the back of the camera, which had the remnants of the previous rubber band that goes around the cylinder. Luckily, this came off very easily, and I didn't need much cleaning.

 Thomas (Bayless Projects) helped me with the power supply, which I purchased from him, and he made it for me and sent it over from the UK. I bought a battery to put in the housing. Once I got the battery in the power supply and connected it to see if the camera was working, my heart sank aging…..nothing. With the power on and the battery connected, I turned the head a bit, and luckily, the head on the Rotocamera started to spin. At that point, I was so happy to see the camera spinning. Was that a fluke? I unplugged the battery and let it sit for a few minutes before I tried it again. The camera started to spin without any help from me, so at this point, I knew the camera was functional. You could also hear the shutter open and close as I pressed the rotation button. What a relief. Now, I had a camera that "could" make images (hopefully). The one thing I couldn't figure out was the "Auto" setting. Nothing in the column needs to be pressed to set the camera at different angles for shooting. Thomas said his camera does the same thing, so I can only use the camera in the "manual" position, where I set the angle of view by pressing the rotation button.

 I needed to replace the rubber band around the cylinder to get the film to rotate when the film was back on the camera. I purchased a replacement that had the same specs that Thomas recommended. He also said it's not perfect, but I wanted to try it. When I received the rubber, it was horrible. The glue backing didn't hold at all. It was so bad that the paper they put on the product to protect the glue didn't stick on. It was also rolled in the opposite direction, so the end of the rubber kept popping out. I tried two-sided tape to hold it in, but that didn't work either.

 Then, I had the idea to turn the rubber around so the curve was going around the cylinder instead of against it. The tape on the back side of the rubber would give more friction as the film wheel rotated. I put a roll of film into the camera and gave the camera a try. Unfortunately, the camera rotated about 90-100 degrees, then stopped as one of the ends of the rubber came off and jammed in the camera. In theory, it made sense, but the rubber was too thick, and the end didn't fit together and kept coming apart. 

 The rubber needed to be a little thinner and without the crappy glue. I rubbed the glue off the rubber, and to get it to be a bit thinner, I stretched the rubber when I put the two-sided tape on the curved side to make it thinner. To keep the ends together, I added some two-sided tape to one side of the rubber so that when it went around the cylinder. There was extra tape to hold the second end in place. I put it back into the cylinder, and it worked well. It's time to put another roll of film into the camera for another test.

 I took the camera to the front of my house, set up the tripod, and crossed my fingers to see if it would work. I put a roll of B&W film into the back, set the camera to the settings the light meter said, and pressed the rotate button. The camera worked!!!! I could hear the shutter open, the camera rotated, and the film come off the spool and wrap around the take-up spool. SUCCESS.

Thrid test worked to perfection.

 With such success on the test roll, I decided to take the camera into Portland near the river with bridges and see what I could get there. Knowing the Cherry trees were recently blooming, I even packed some color film to see the river's edge and beautiful cherry blossoms in the photo. Having lugged the camera to the river's edge, setting the camera up, plugging in the power supply, and pressing the rotation button, I could hear the shutter open, but the head didn't start to turn. So I gave it a gentle push, and it began to turn. Unfortunately, I could also see it wasn't moving smoothly, which would cause banding. 

 The one thing I did notice is that when you have the film in the back of the camera, the camera has a little harder time doing the rotation because of the extra tension the film brings to the camera. Pulling the film out of the spool and running it across the shutter, I'm still trying to figure out if it's the rubber around the cylinder or the power to the motor. I'll continually work on how this works together to make the film move correctly.

 The first roll was B&W, which I processed when I got home and has banding. I also picked up the color film and noticed. At the same time, the camera did a somewhat better job at rotating; the drive wheel that moves the film from one spool to the other didn't have as much pull as it did with the test in front of my house. For the 2-3 rolls I did away from home, the camera film transport didn't pull the film off the spool. It left the tail end of the film exposed to light. Something is going on here, whether the rubber band around the cylinder or the drive wheel needs lubrication. I also agree with the film I did on location; portions of the film look like motion blur, so the film is not transporting, causing slight banding and blur.

My Results:

Here is the image taken in front of my house during the test. I didn't change the vertical adjustment, and I had the lens pretty high, so there's no foreground or yards in the houses on my block.

 These next images were taken down by the river in Portland, Or.

Conclusion:

 This camera is still a work in progress. I did order a slightly thinner rubber to try on the cylinder, so I'm crossing my fingers that it will work well on the camera.

Thank you for taking a few minutes from your day to read about an odd and unusual camera that hopefully will be as rewarding in the images it creates as it is frustrating to get it back in good working order.

 Until next week, please be safe.