Photo-See Camera Outfit

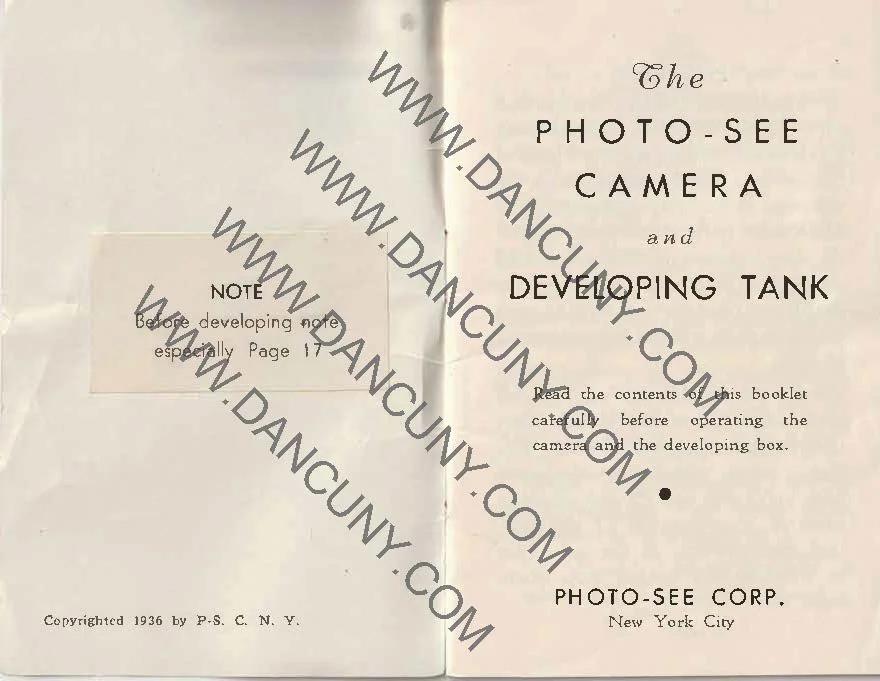
My Photo-See camera, developing tank and instruction manual.

Almost 20 years before Dr. Land and Polaroid made instant photography world famous, a camera called the Photo-See was introduced in 1936. This company brought a very short-lived and straightforward box camera, along with a pocket-sized developing tank, to the market. These two items enable the photographer to take a photo and develop it without needing to send the film to be processed and printed.

 I don't remember when I purchased the Photo-See camera. I know it was well over 20 years ago. When I bought the photo see cameras, there were at least two, possibly three, of the same camera purchased in a lot of cameras purchased. 

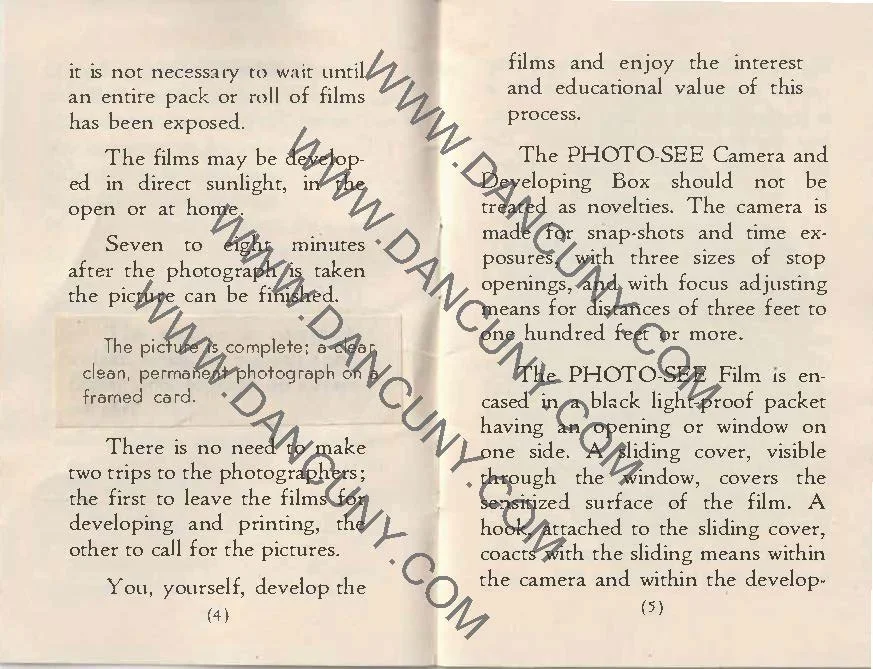
 Several years ago, I recall selling one or two of the cameras on eBay. It wasn't until recently that I understood that there are two parts to this camera. The camera itself, and the developing tank in which the film for the camera was placed and processed.

 Initially, I thought the developing tank fit onto the back of the camera, but I was wrong. The developing tank is actually a separate part that the film from the photo camera fits into, allowing the photographer to process the film at any time they want to. The idea was that the photographer could take the photo, then have the print ready within a few minutes.
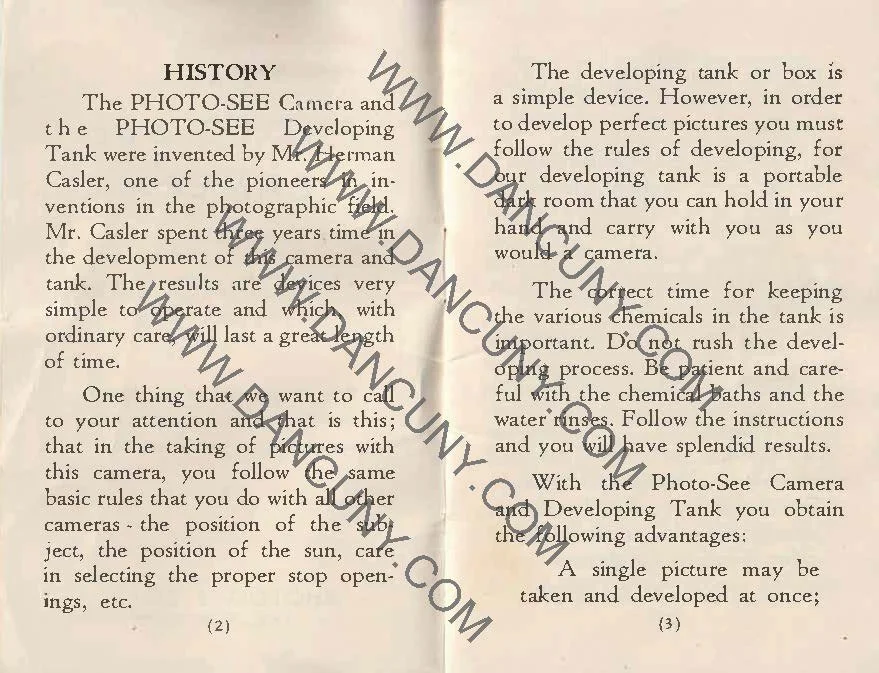
 

The History:

The Photo-See camera was the brainchild of Herman Casler, who was born in 1867 in Sandwich, IL, and raised in Fort Plain, NY. Over his lifetime, Casler invented and patented several different products and was also a partner in K.M.C.D. Syndicate, this was along with W.K.-L. Dickson, Elias Koopman, and Henry N. "Harry" Marvin. 

American Mutoscope and Biograph Founders, 1895. Casler upper right.

 Casler, Dickson, and Marvin collaborated in 1893 on a detective camera, the size of a watch, called the Photoret. The Photoret was a watch based on a pocket watch, similar to the Expo camera.

 Casler started his career as a Draftsman for General Electric Co., designing electric rock drills. He became the superintendent of Marvin Drill Company in 1895, which Harry Marvin owned.

 Casler, following Dickson's proposal, invented the Mutoscope, which displayed short films through flip-cards rotated by a hand crank that could be slowed down or sped up at the operator's will by turning the crank faster or slower. The prototype of the Mutograph camera was completed in November 1894, first tested with film in June 1895, and the first official Mutoscope films were made in August 1895.

Patent for Photo-See camera

 Marvin & Casler Co. was formed in 1896, where they manufactured the Mutoscope, which was very popular in nickelodeons during this time. The Mutoscope and Thomas Edison's Kinetoscope are the beginning of the motion picture business as we know it.

 His work in inventing motion picture cameras, projectors, and other motion picture equipment extended well beyond the 1920s, where he helped develop a more miniature hand-cranked motion picture camera and a three-pronged shutter that helped reduce flicker during projection.

 Herman Casler is also the inventor of the Photo-See camera, which was patented in 1937. The company was short-lived, as Casler passed away in 1939, and I don't see production of the camera continuing much after his death.

The Camera & Developing Tank:

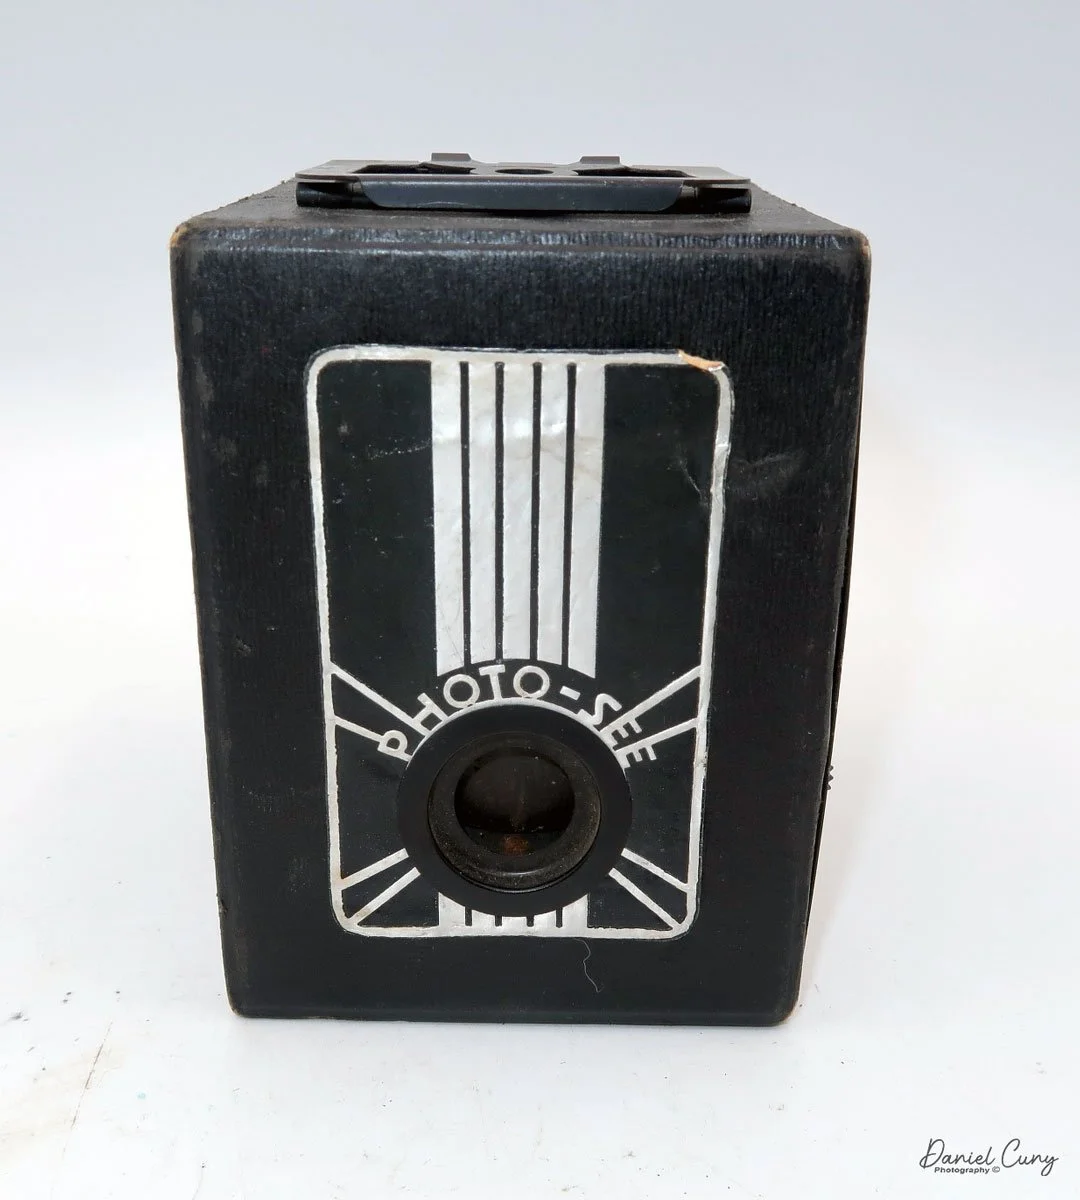
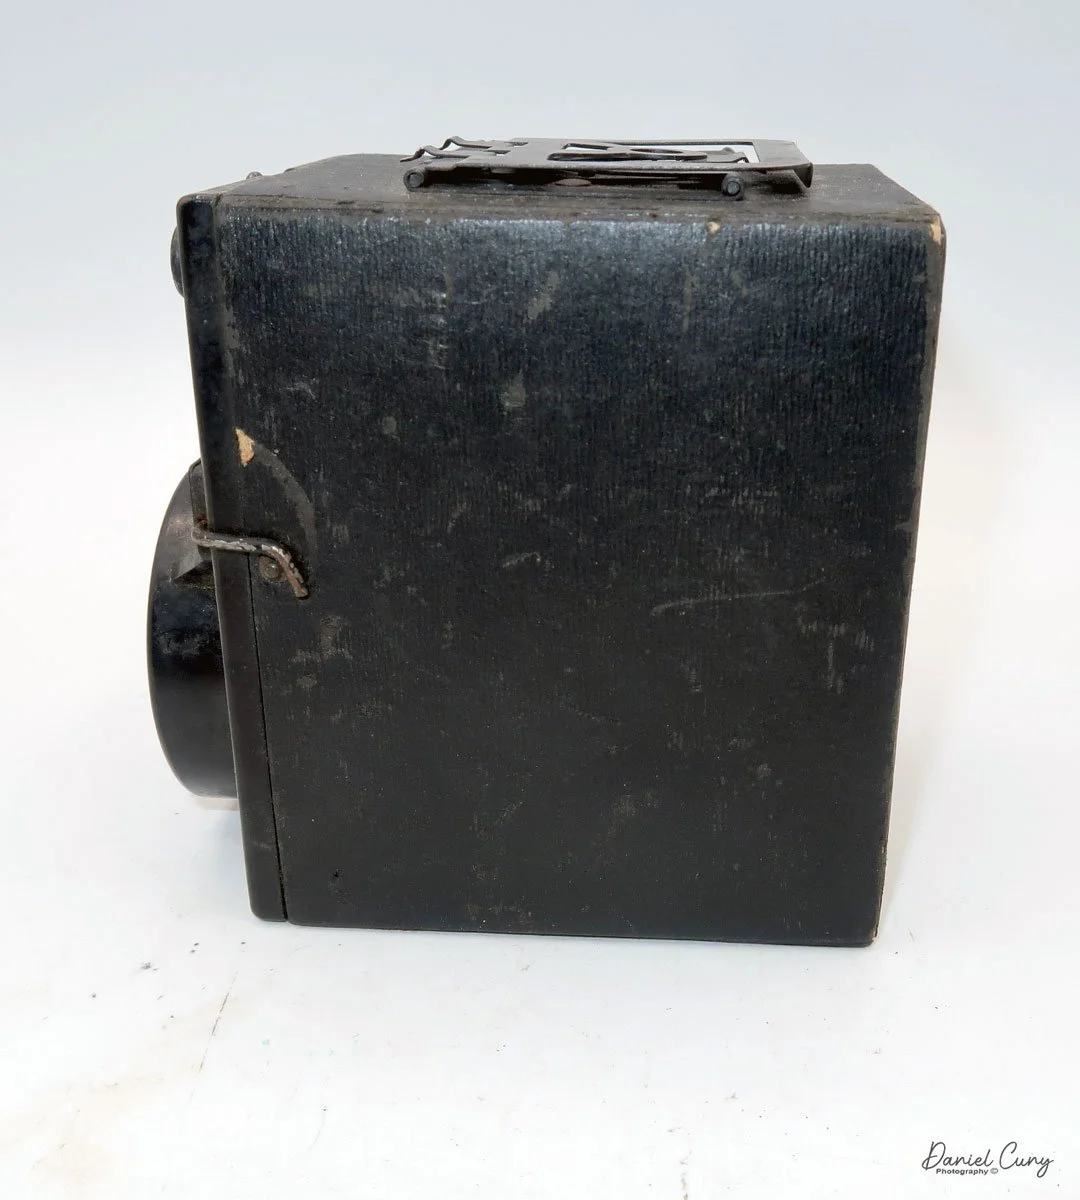
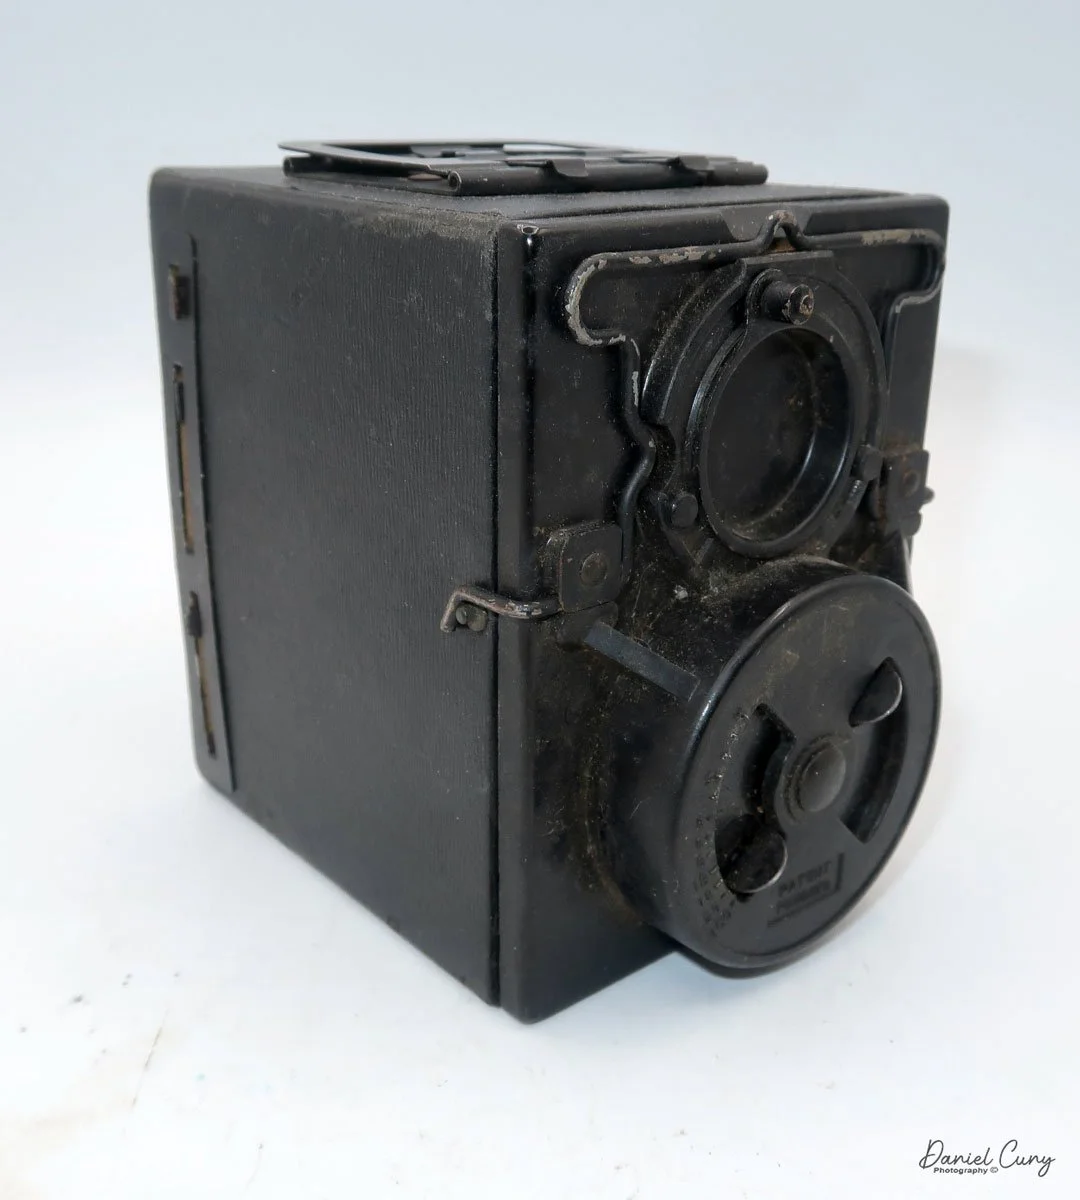
 The Photo-See camera is a straightforward box camera design with a few differences, which I'll explain. The camera is 4" tall by 3 "wide by 4.5" deep, including the focusing device, and weighs 12.3 ounces.

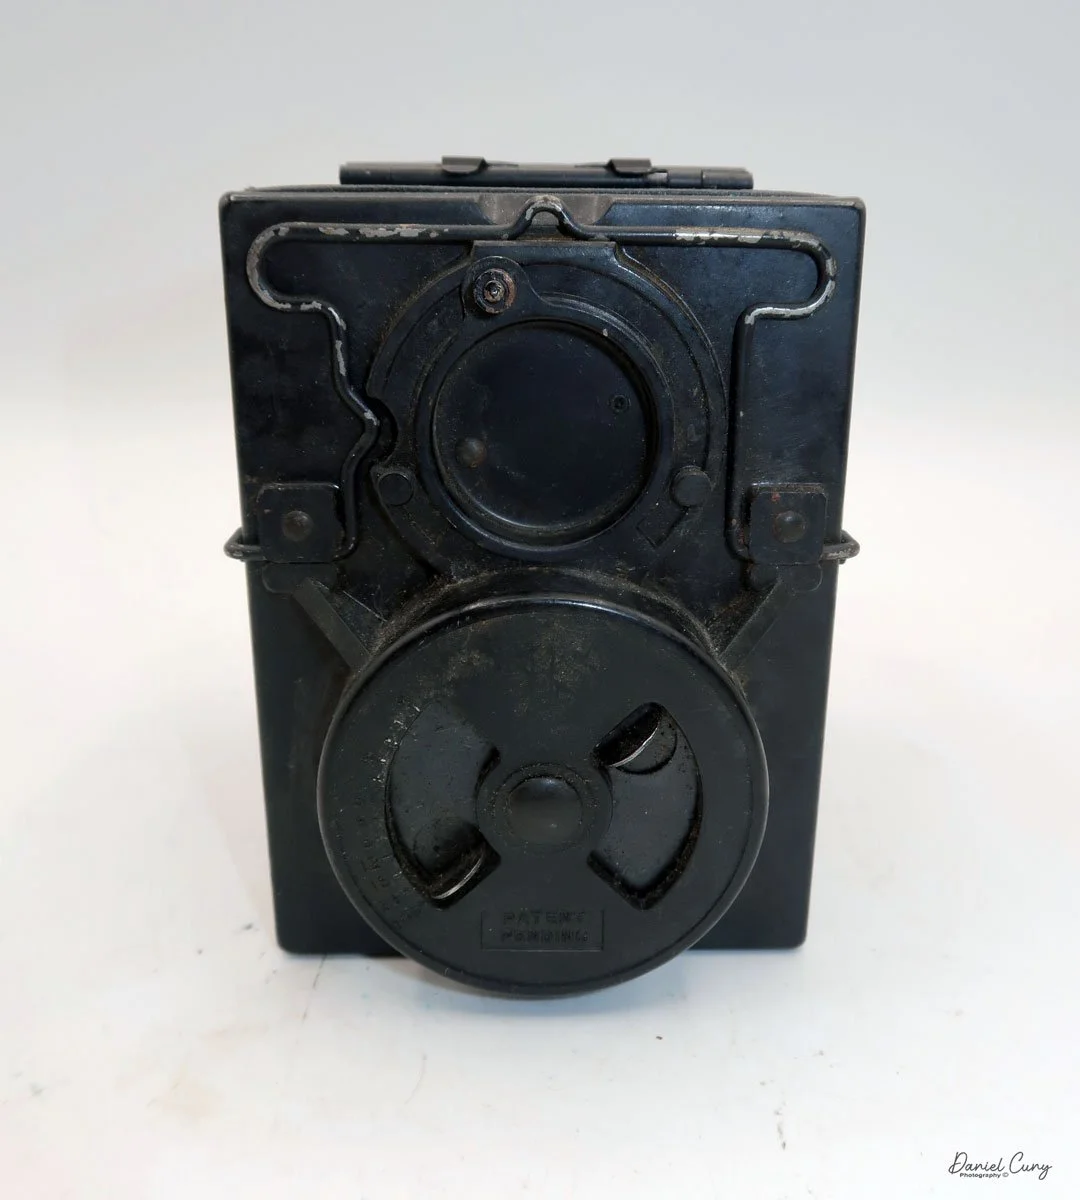
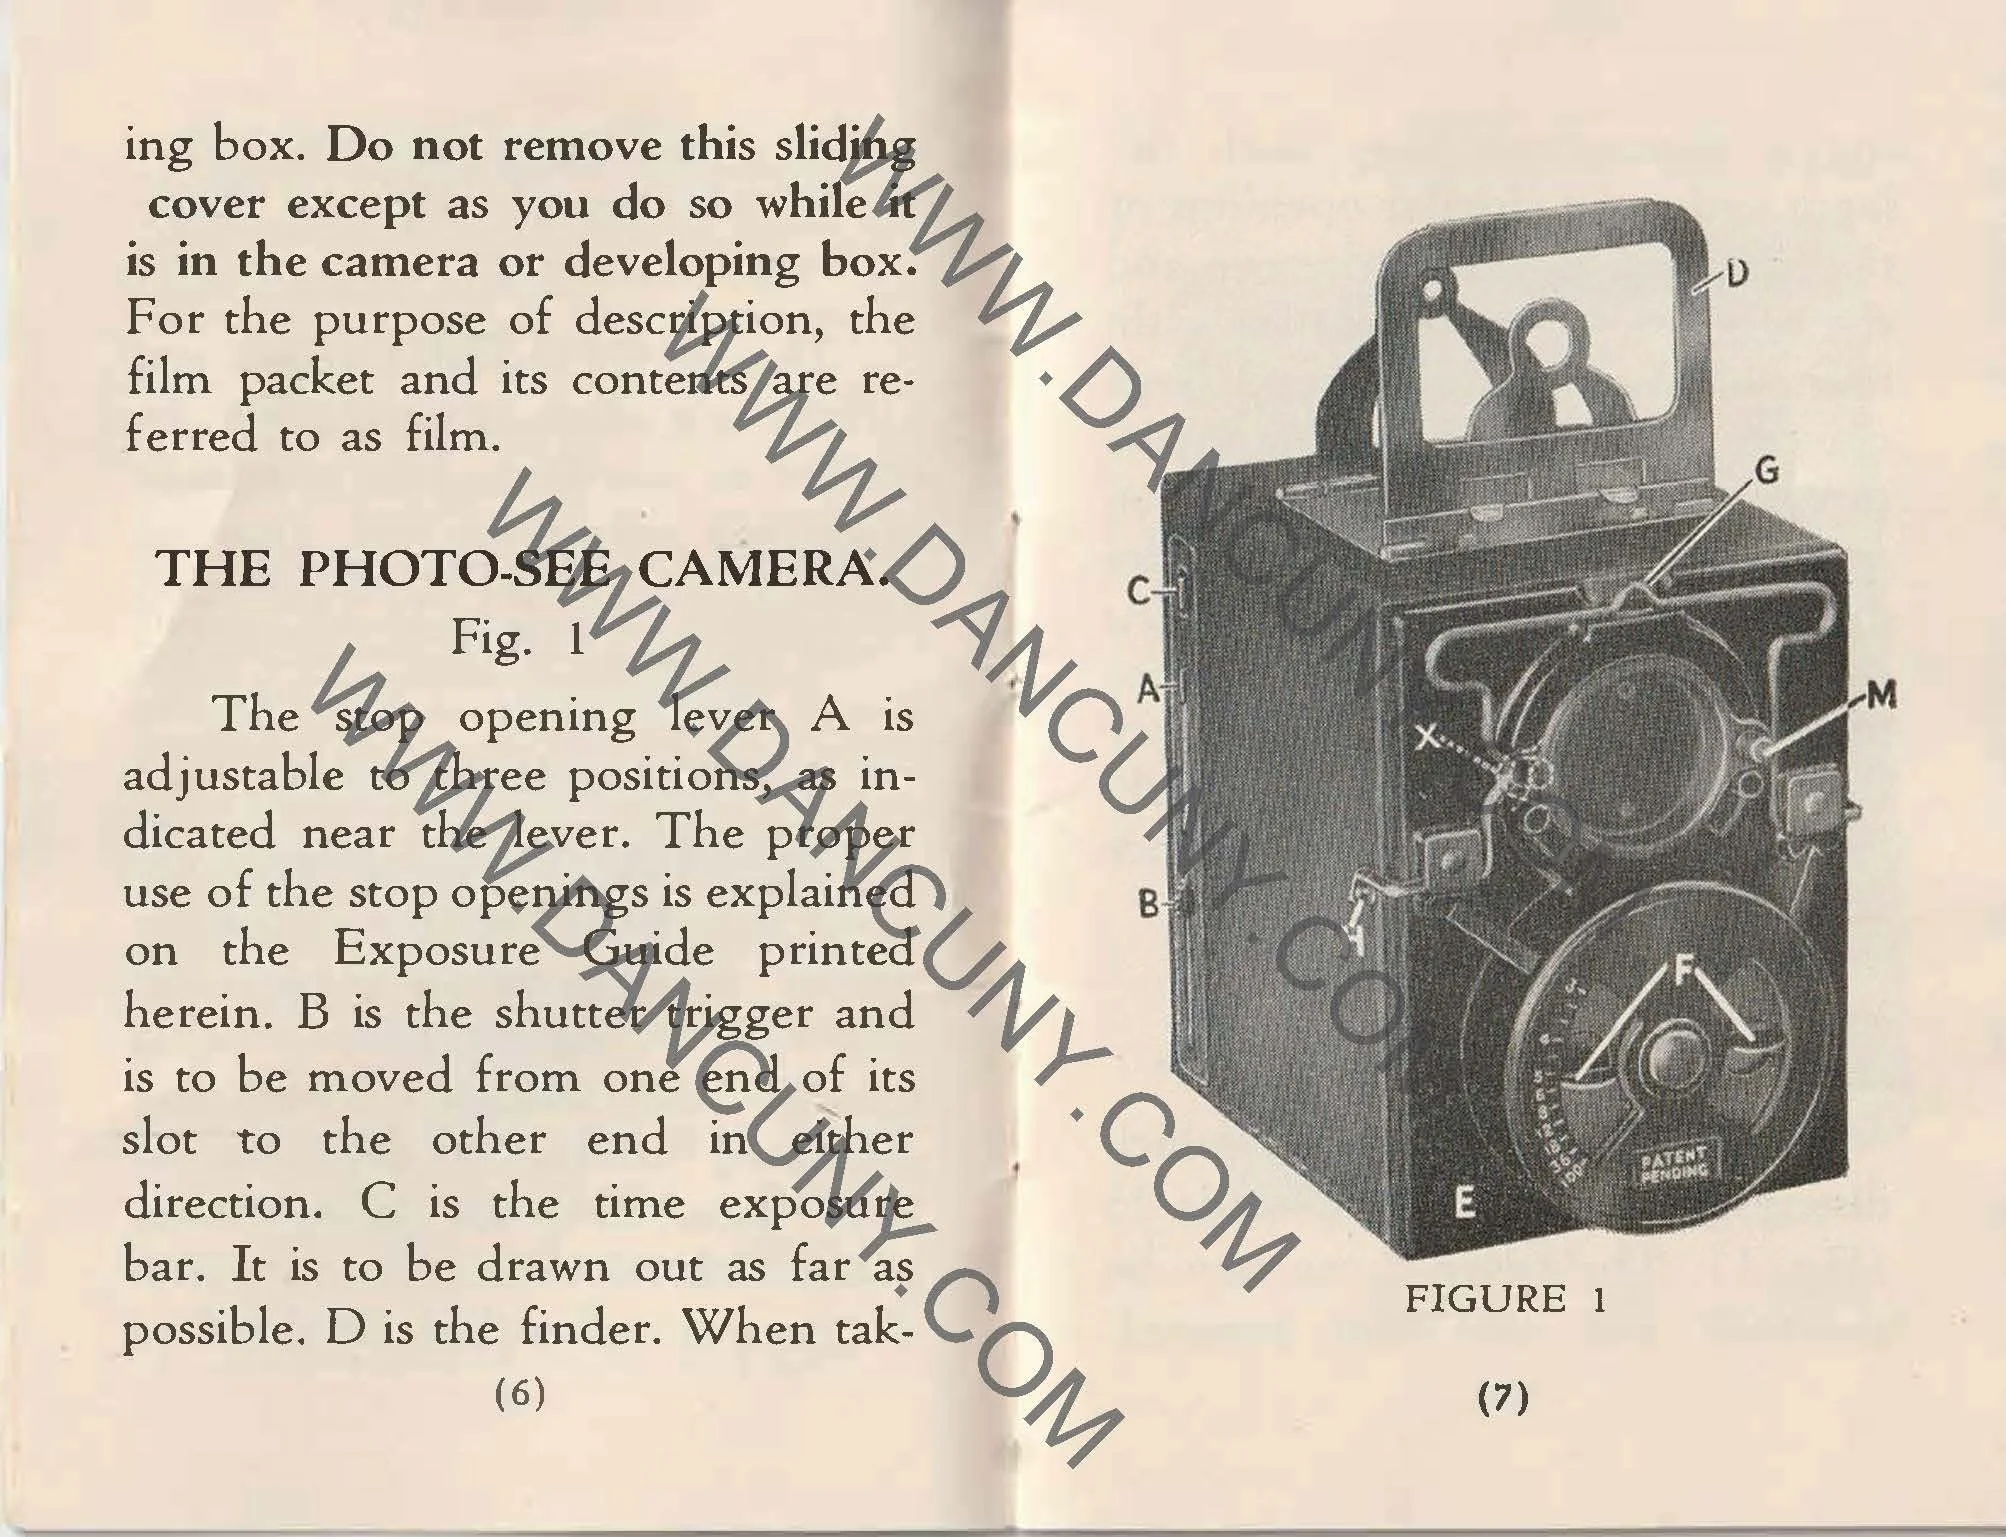
 The front of the camera features a distinctive Art Deco design, which is enhanced by a sticker applied to the front of the camera. The camera is made from a thicker cardboard material, featuring a two-part, fold-up viewfinder on top. It's said the viewfinder is put on backwards, but that's not the case, as I find it to work better than the other way.

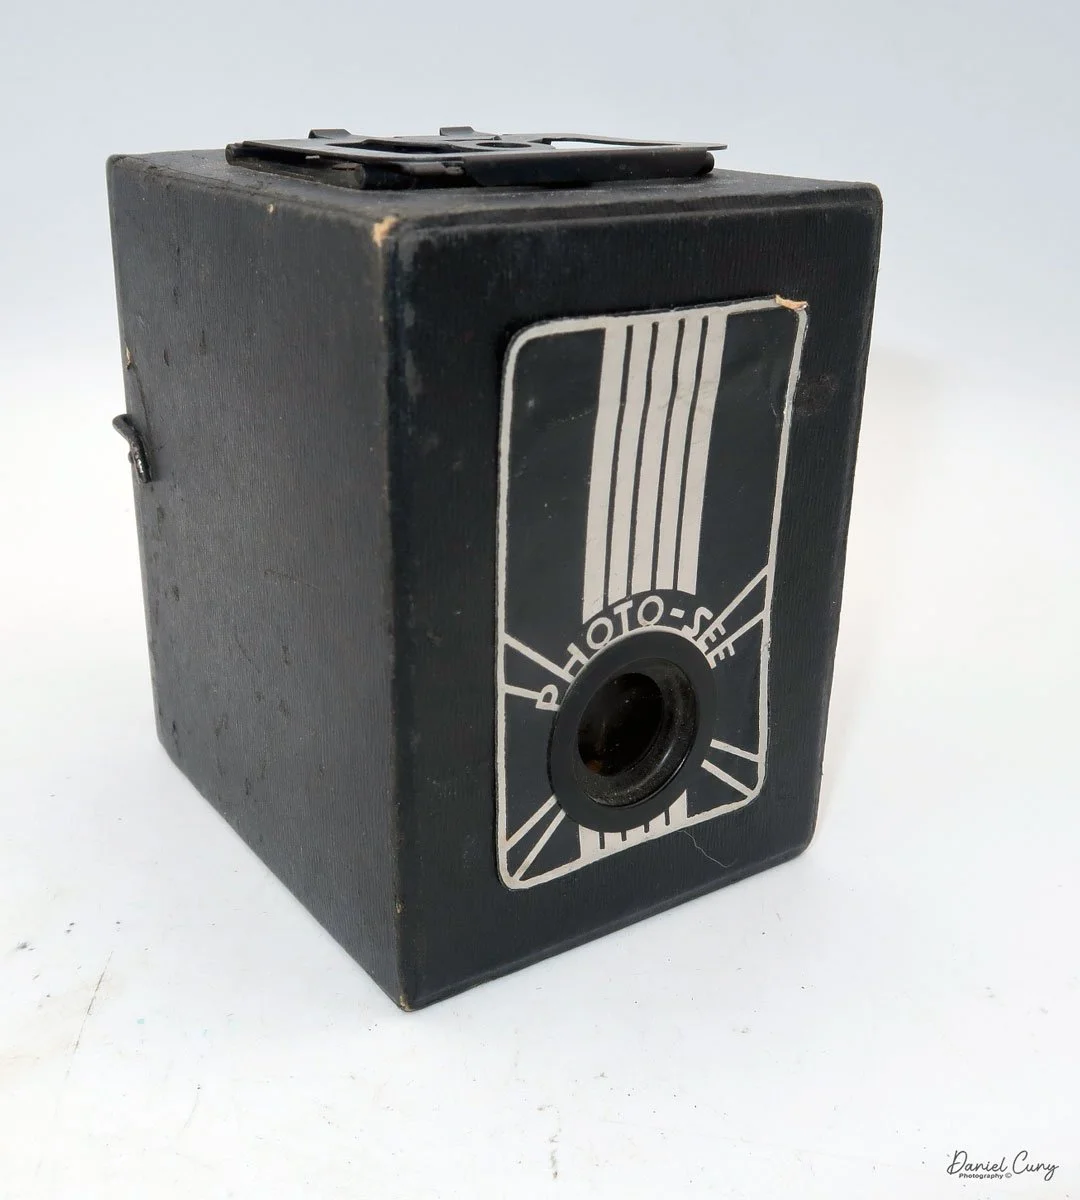
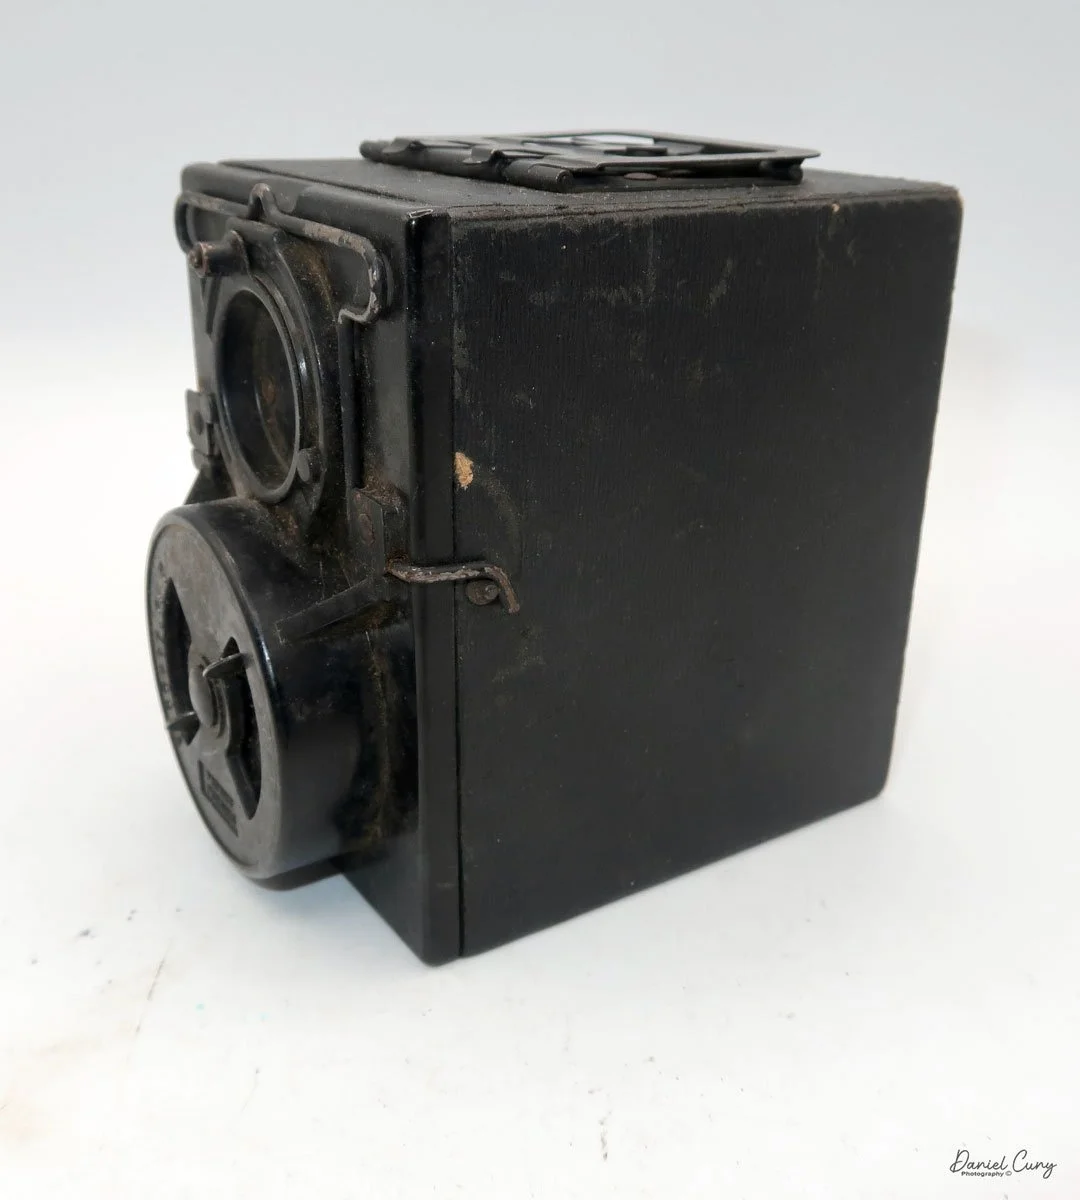
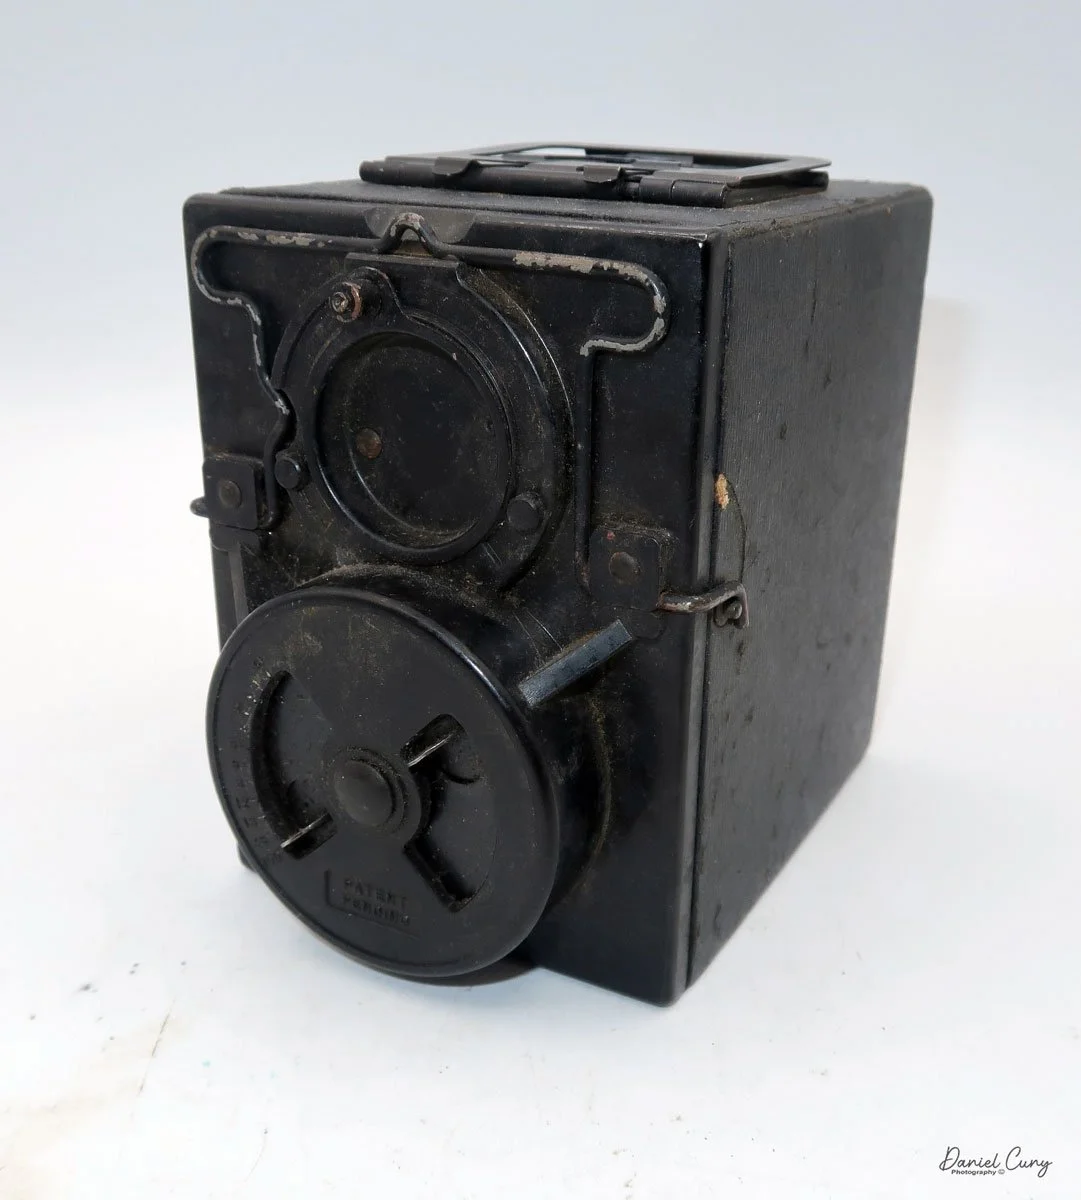
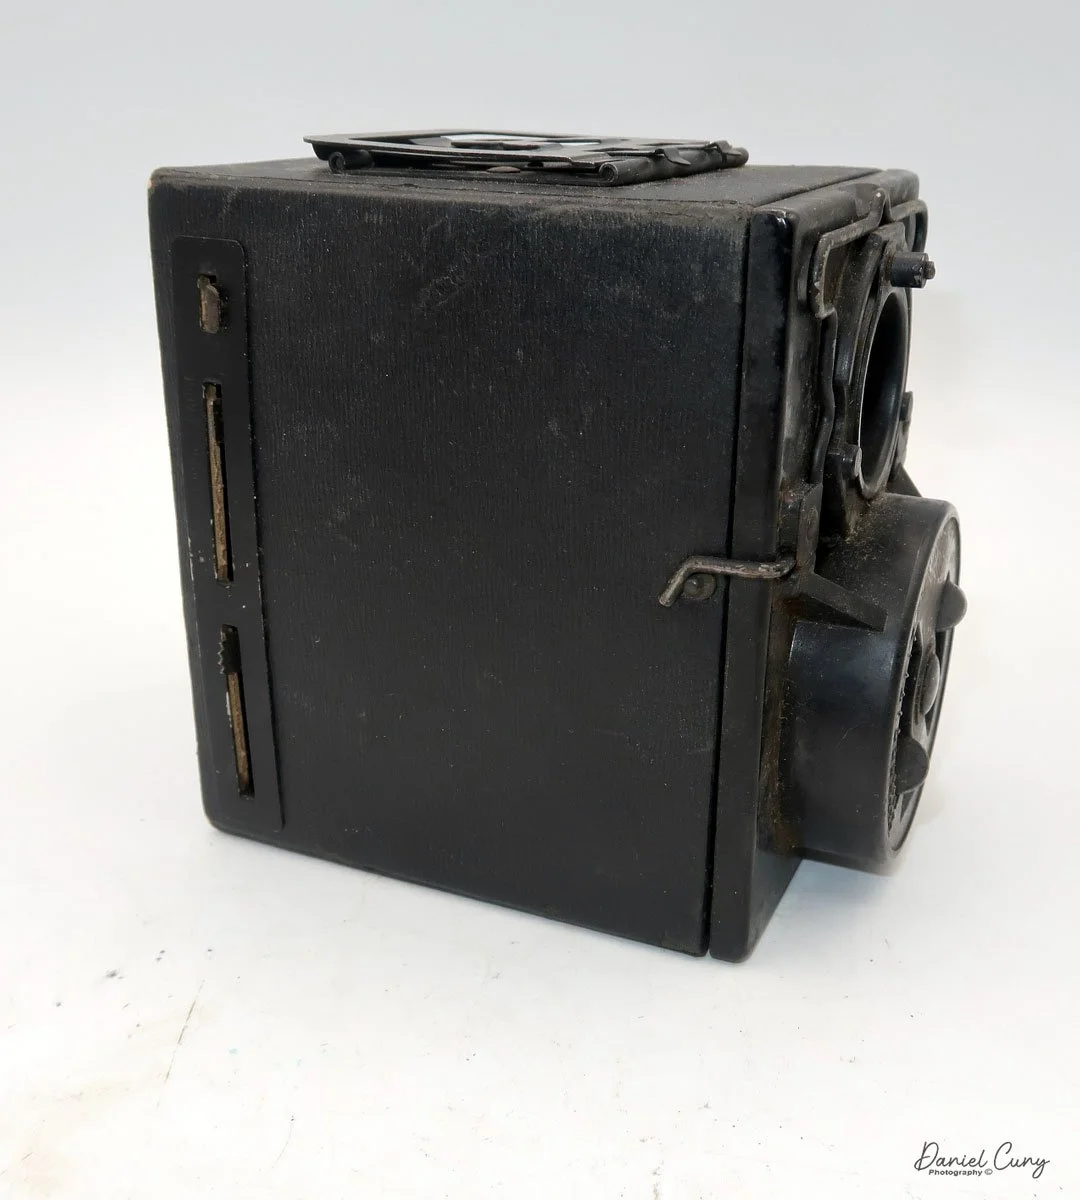
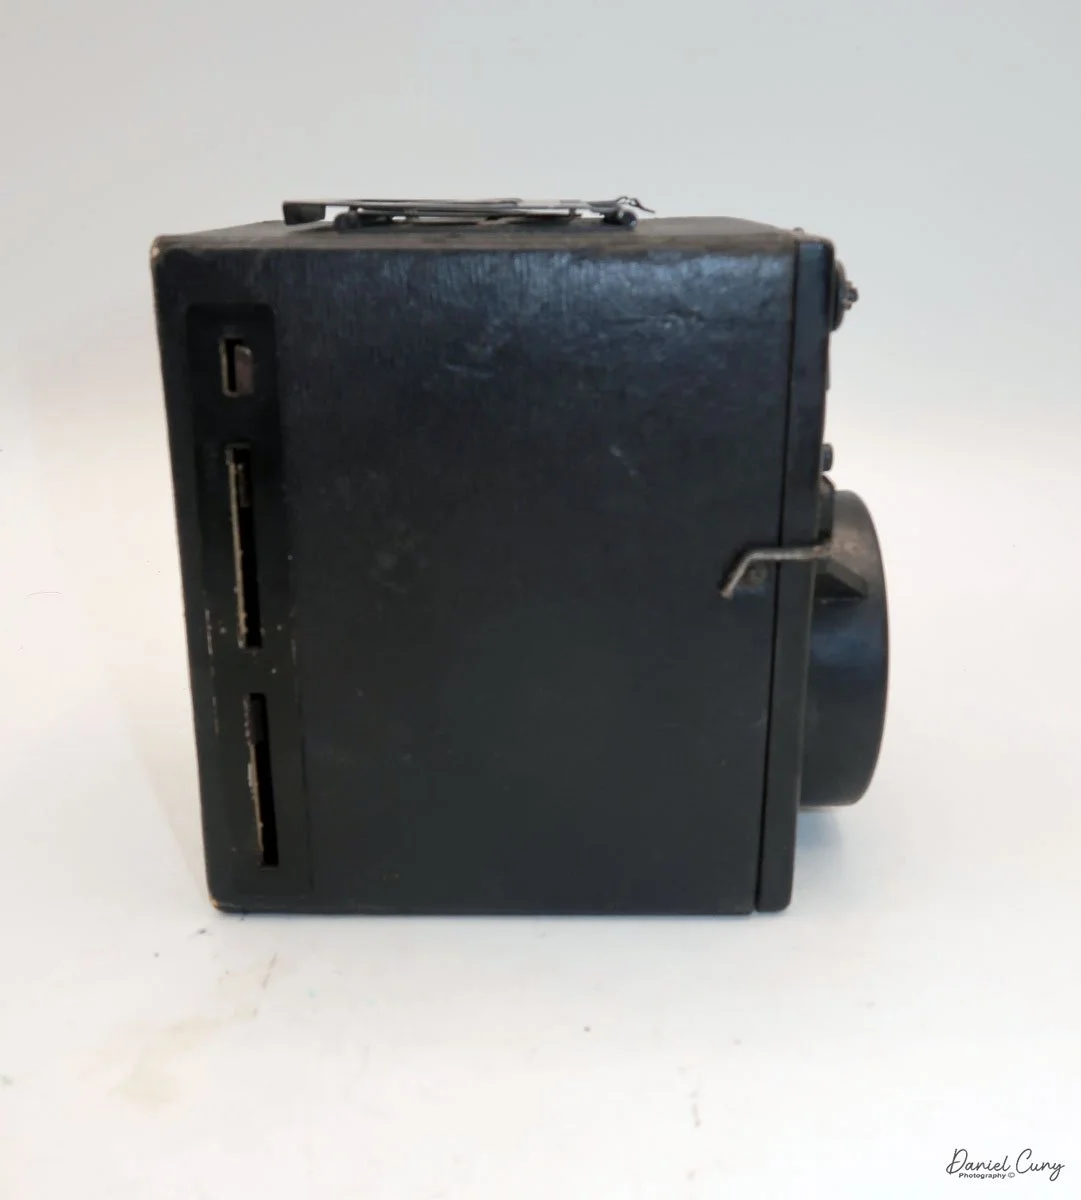
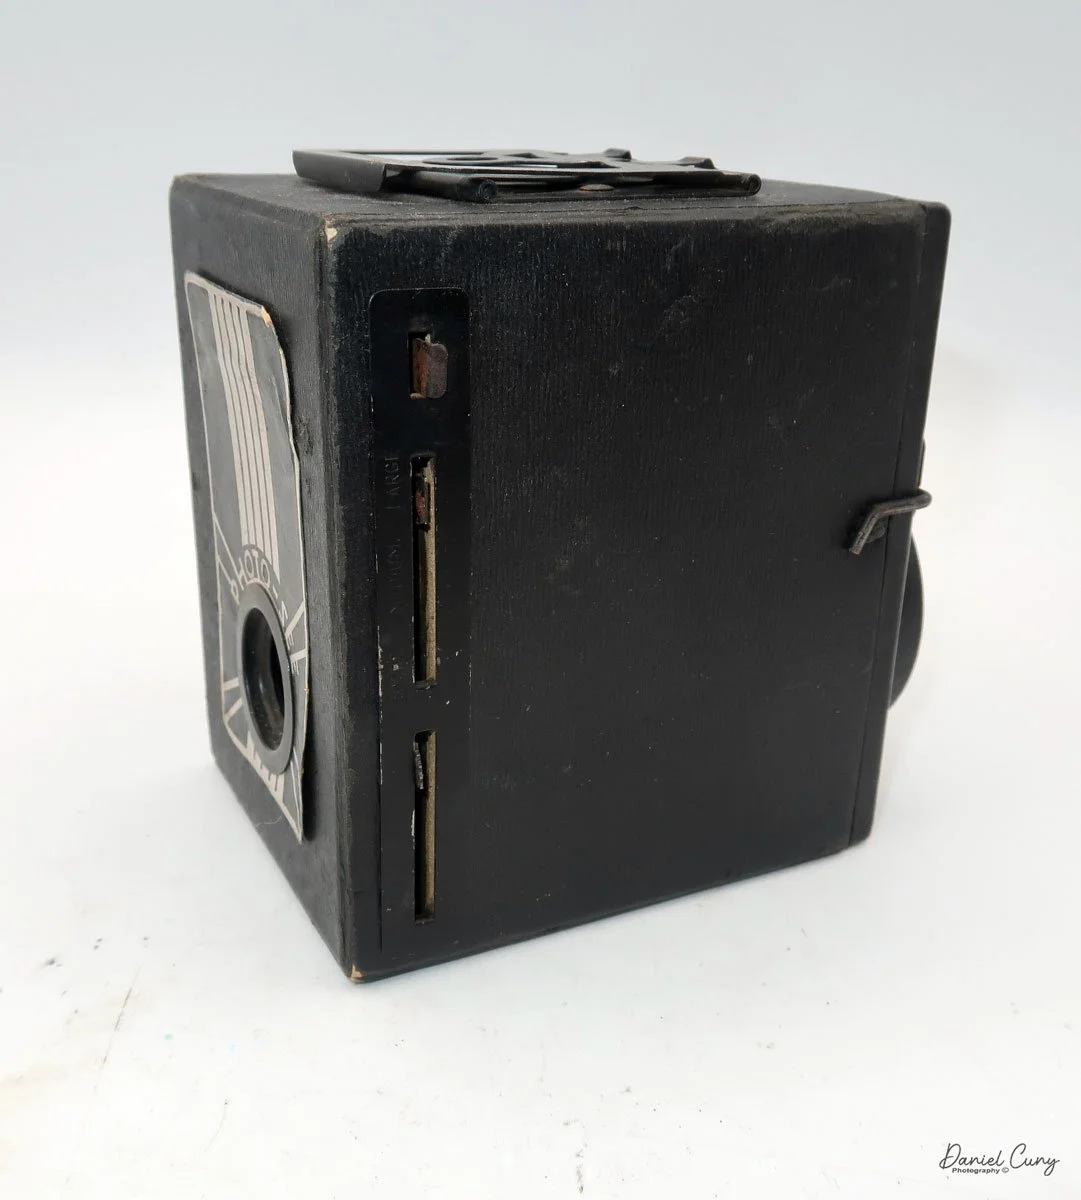
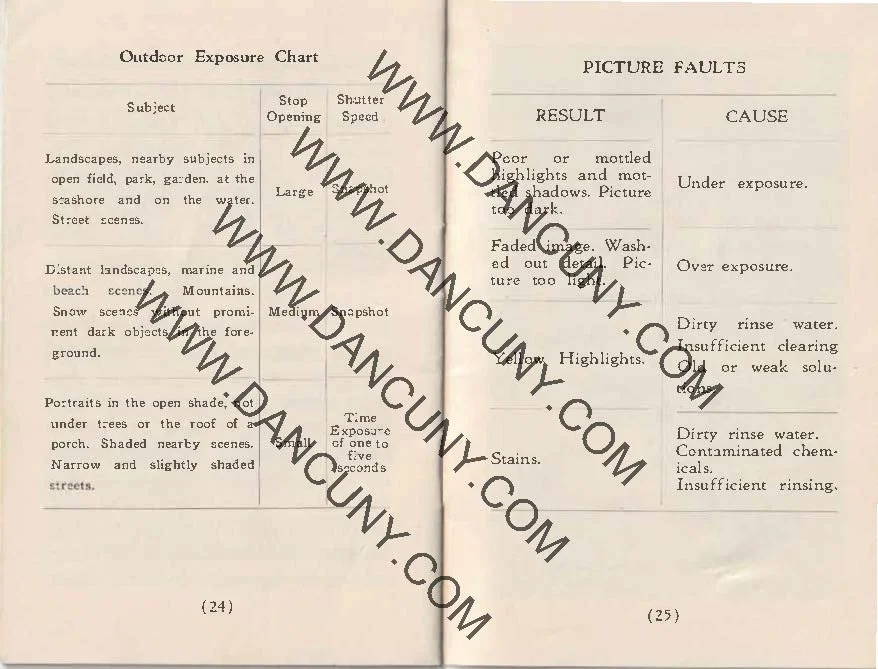
 On the left side of the camera are three controls; on top is the shutter control. When the bar is "in," the camera takes a regular snapshot, and when it's "out", the shutter stays open for a more prolonged exposure. This is similar to other box cameras from the same time period. The middle slider controls the aperture setting. They are Small, Medium, and Large. The bottom lever is the shutter release.

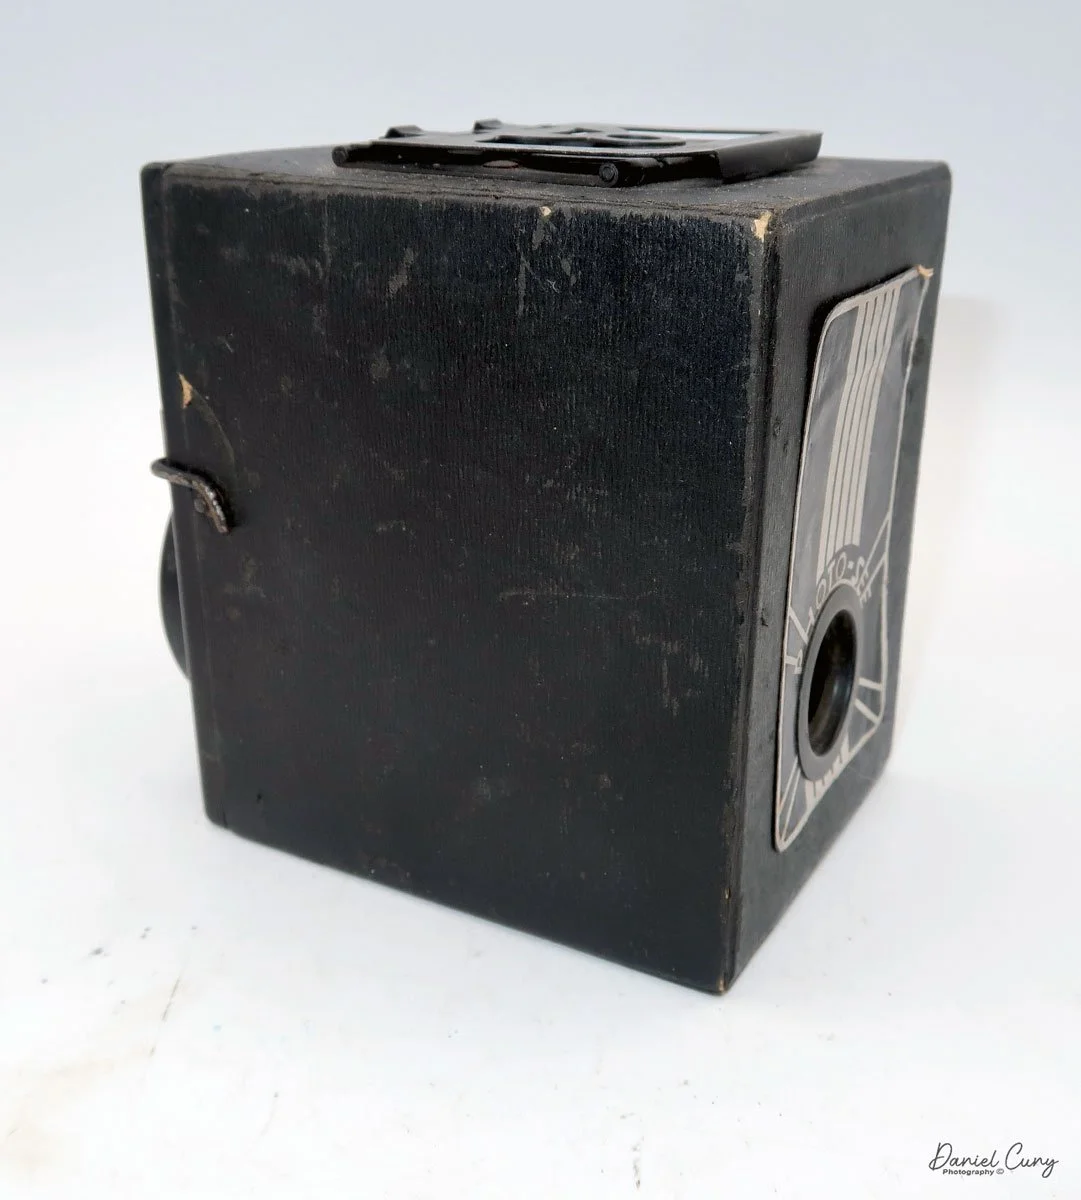
On the back of the camera, there are three main controls. The bar at the top is pulled down to remove the film from the camera. The smaller round disk on top is turned from the 3:00 to the 9:00 position to expose the film when you're ready to take a photograph. Then the disk is in the 9:00 position, which also locks the top bar, so you cannot take the back off when the film is ready to be exposed. Under the small disk is a larger disk, known as the focusing disk, which is turned to the desired distance from your subject. This is achieved by adjusting the internal focus of the film, moving it back, in, or out, which enables the film to shift its focus from 3 feet to infinity.

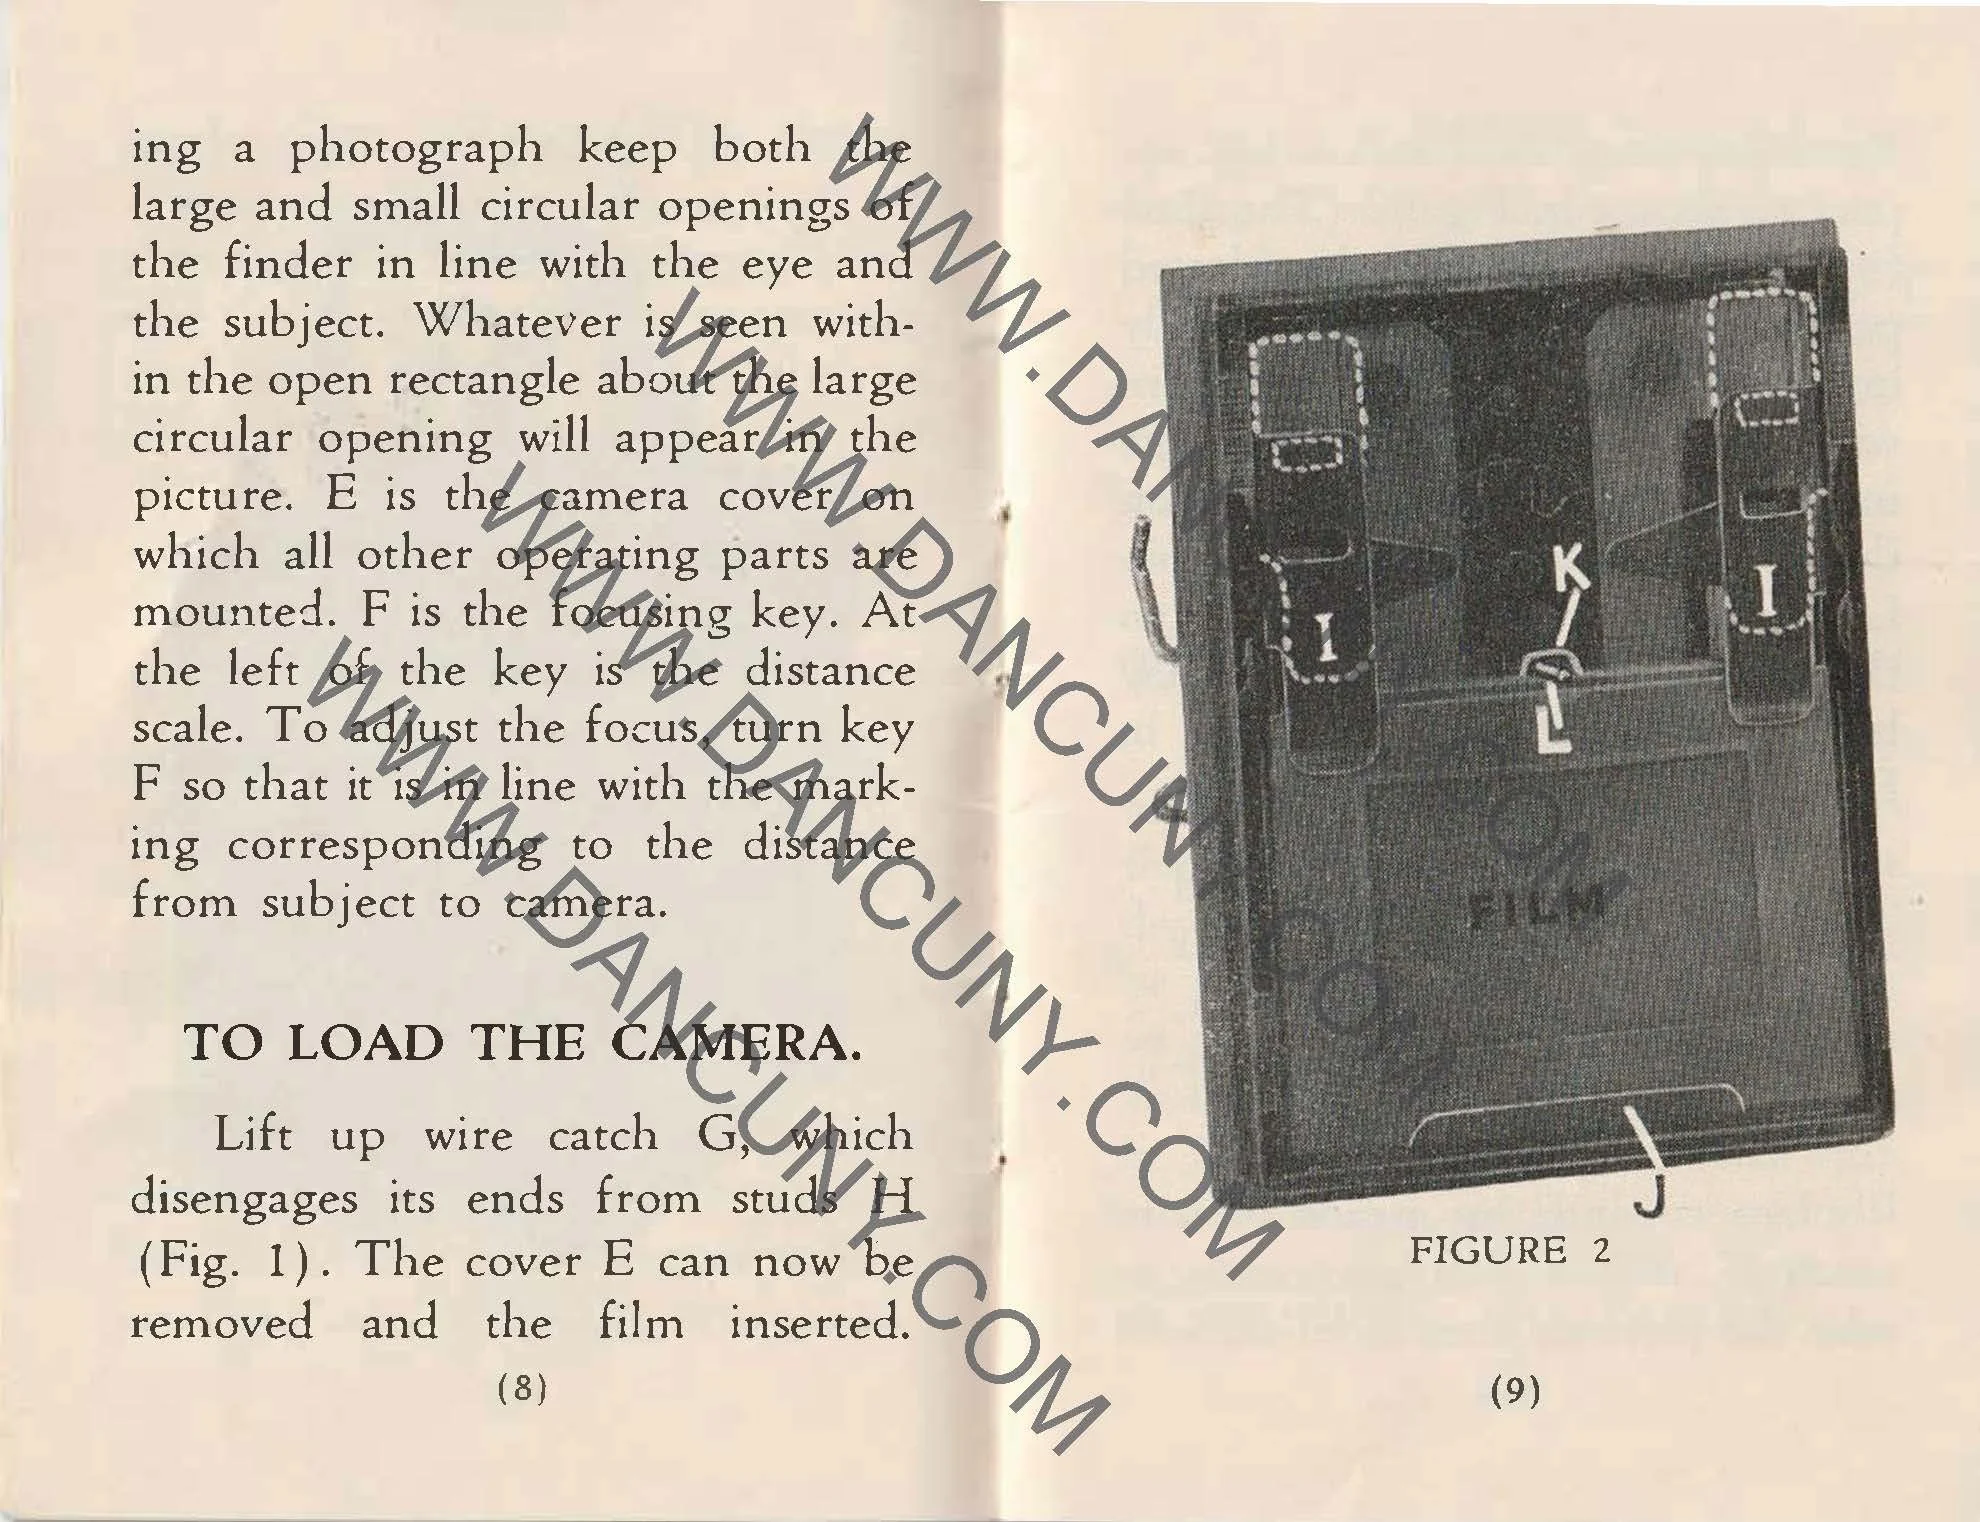
When you remove the film back and look inside, you'll see that it's spring-loaded, where you would load the film pack into the camera. The motion of the smaller disk on the outside of the back moved a pin on the inside up and down, which would open a dark slide, allowing light to hit the film once the shutter release was flipped. Moving the disk back to the original position closes the dark slide.

The Photo-See camera, when used in the vertical position, takes a horizontal image, and to take a vertical photo, you turn the camera to the horizontal position. Very similar to how half-frame cameras work.

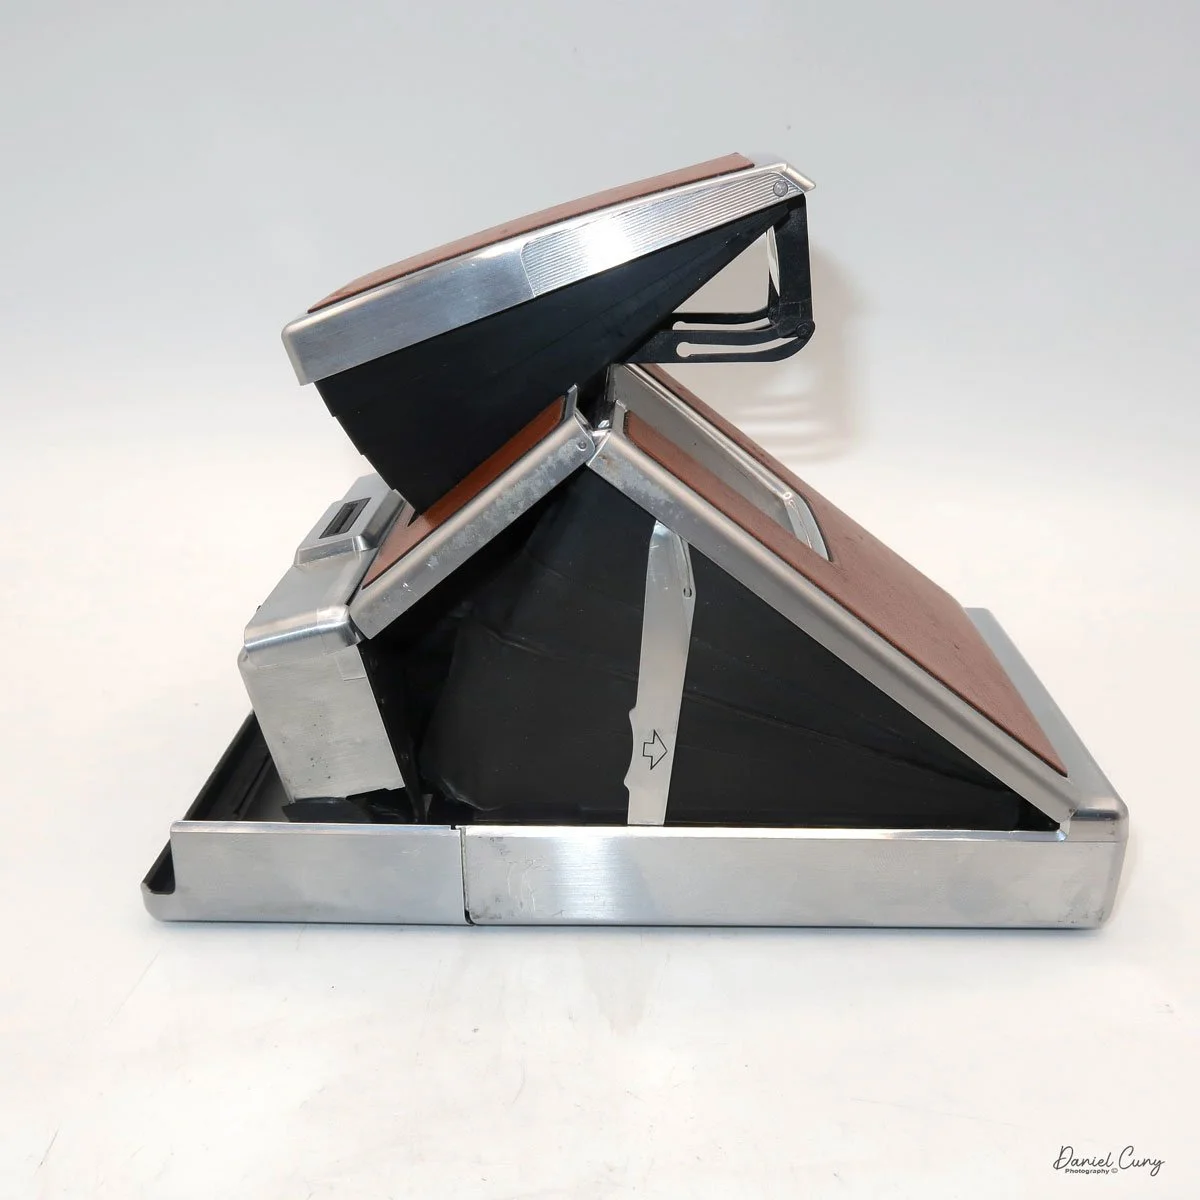
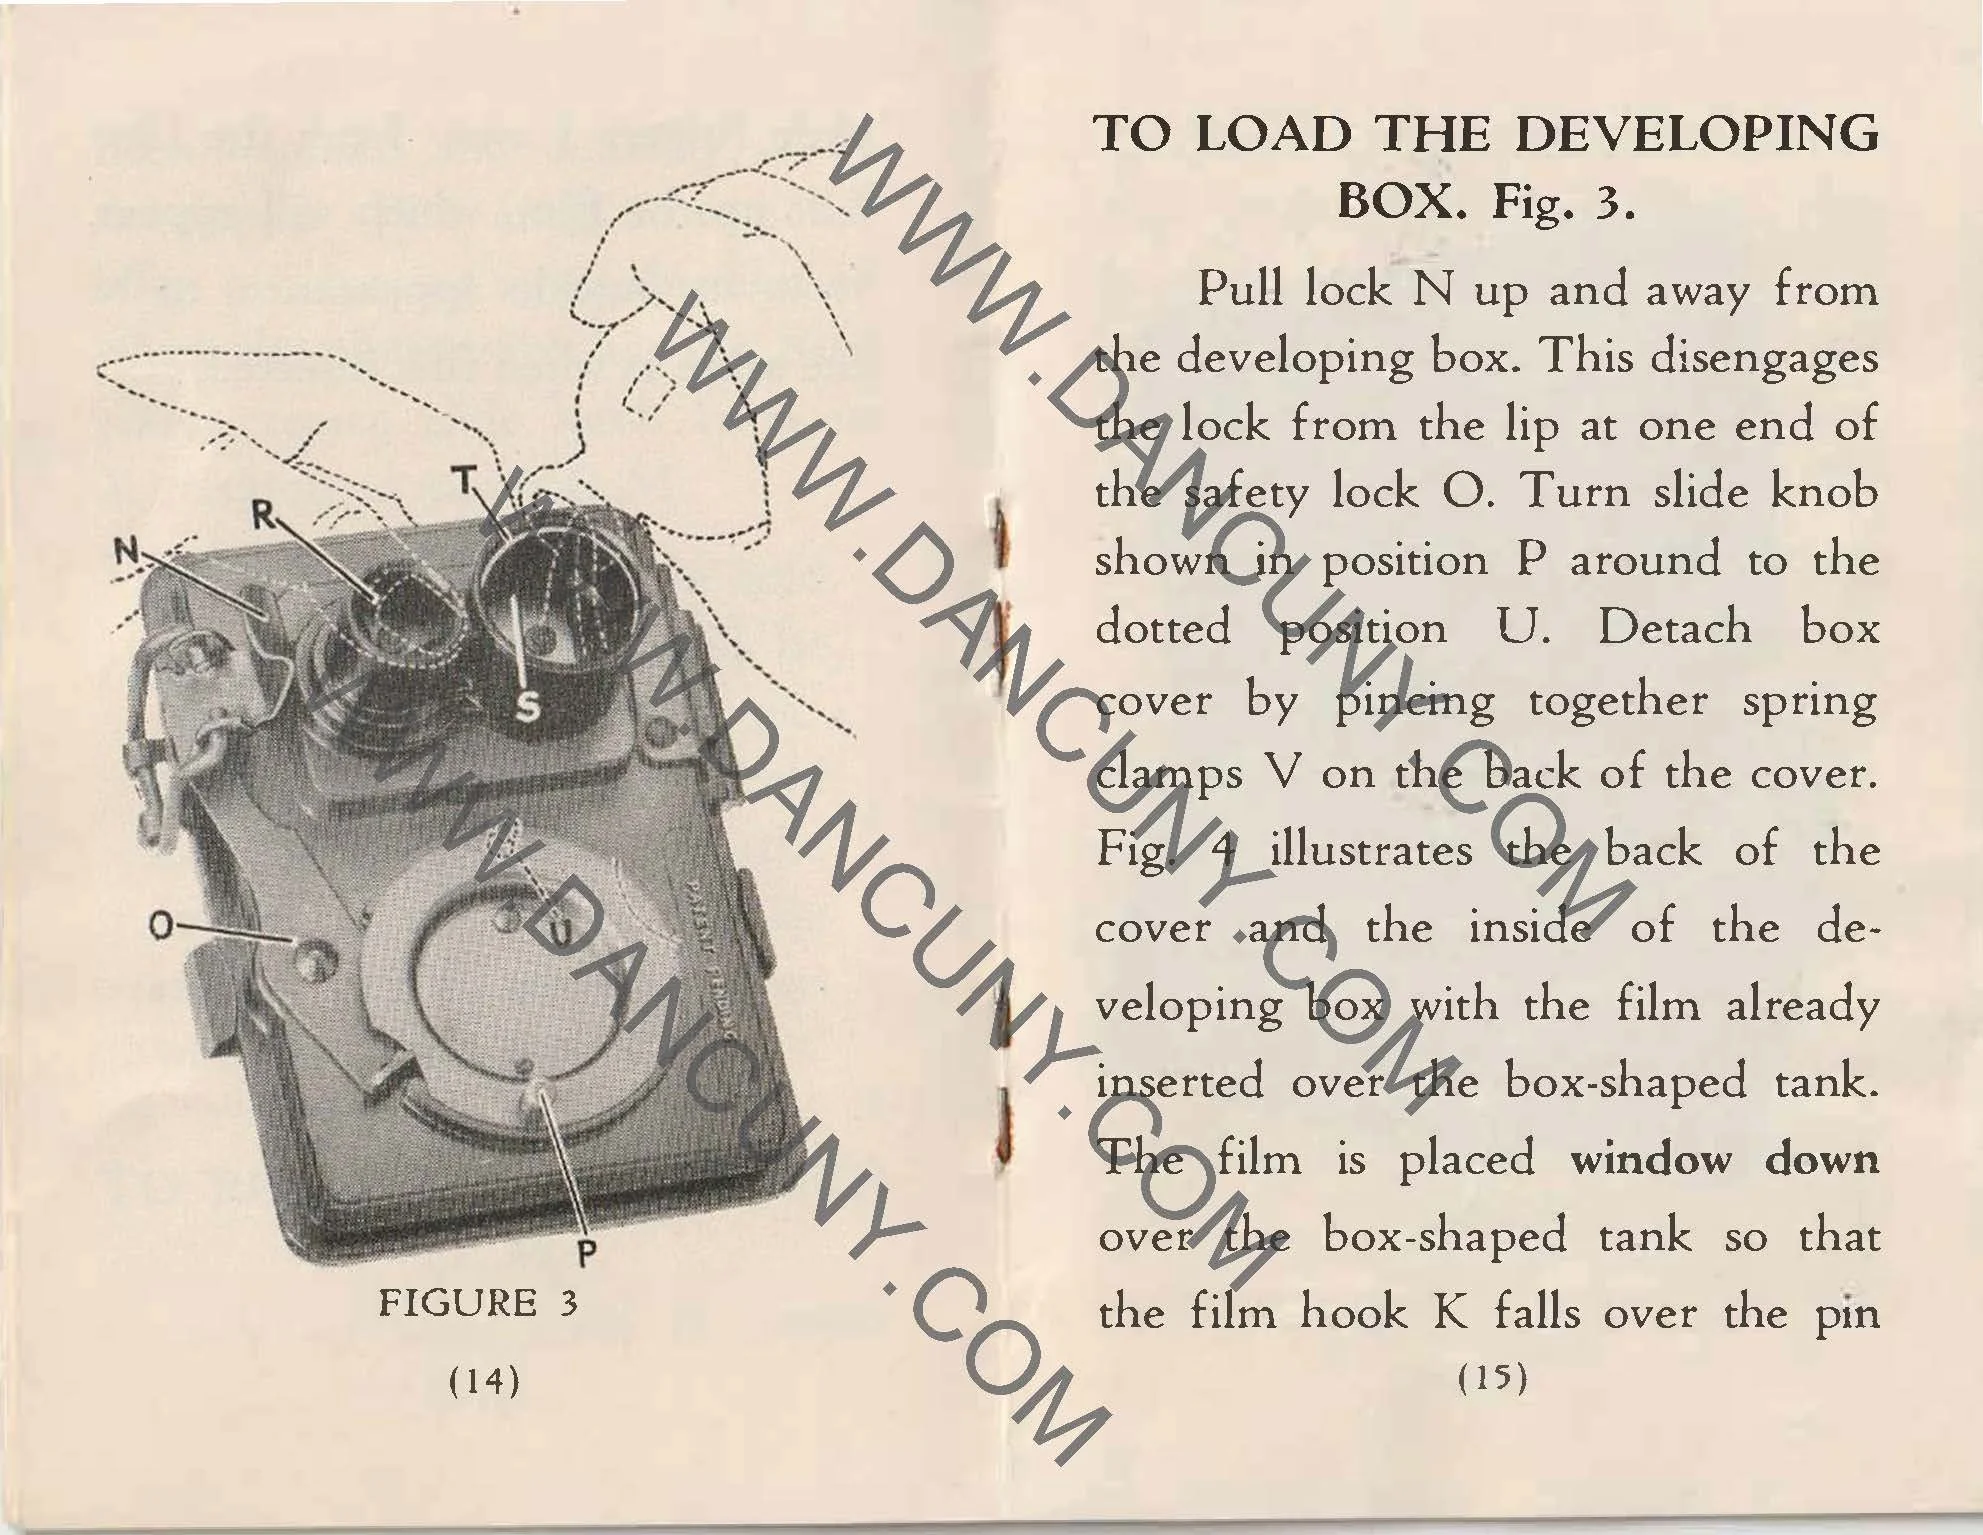
 The Developing tank is 4.5" long by 3.75" wide by 2.5" deep, and weighs 9.4 ounces. The tank is composed of two parts and held together by a locking arm and a clip that wraps around the tank. Unlocking the arm swings the bar out of the way. On the back side are two spring-loaded clips that need to be squeezed to disassemble the tank. 

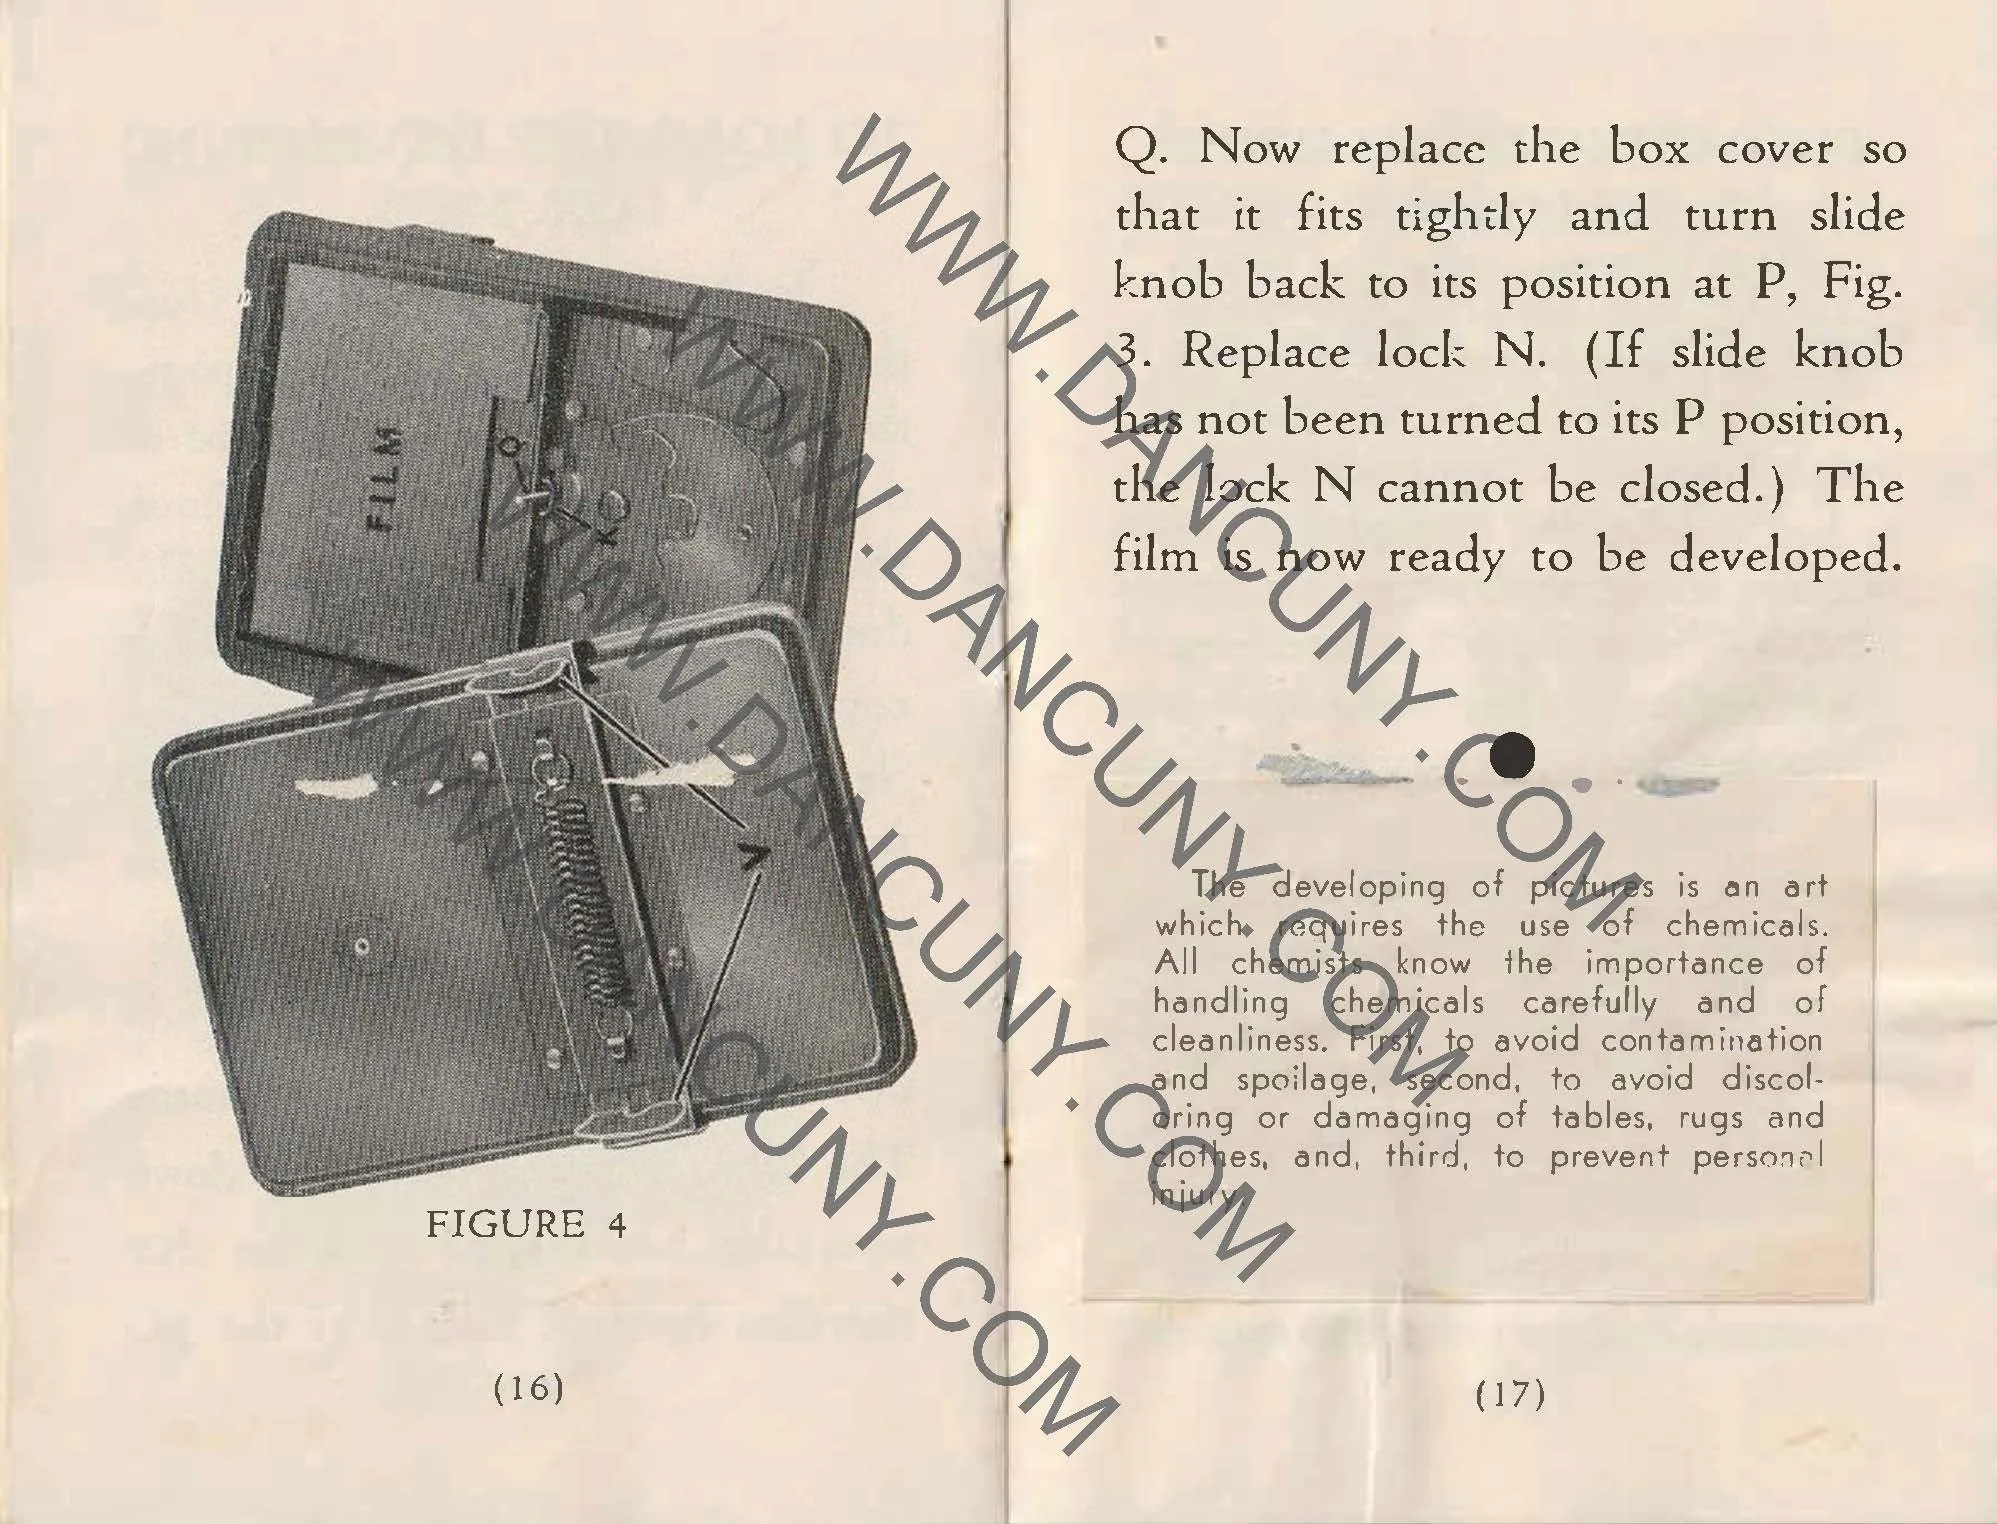
Once apart, you slide the locking lever away and turn the disk on the tank to the "up" position. This allows the film to be loaded into the tank. Put the back onto the tank, and turn the disk to the "down position, which exposes the film to the chemicals. Once the film is in the tank, you assemble the two pieces and lock them together to initiate the processing. 

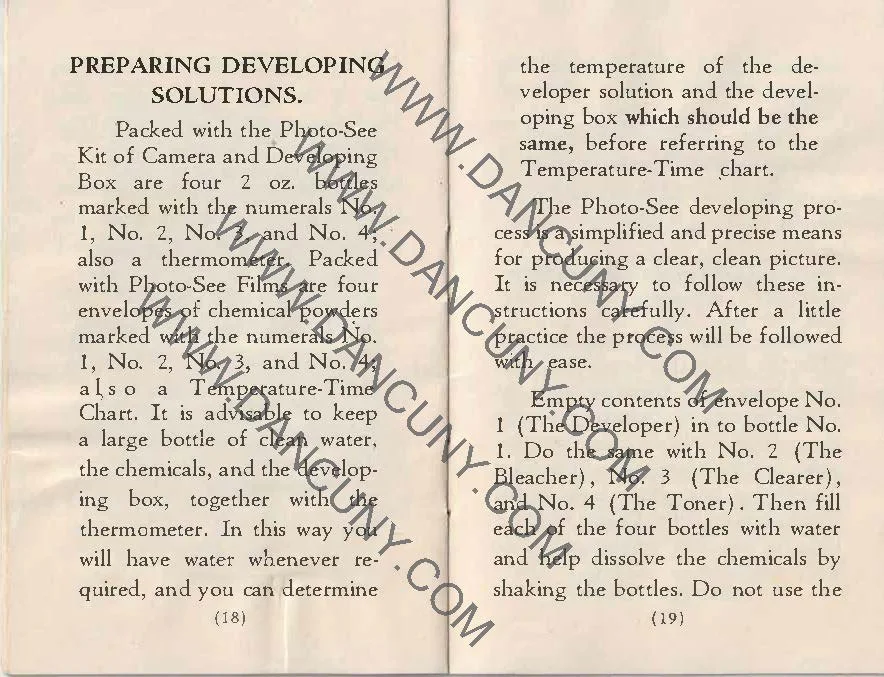
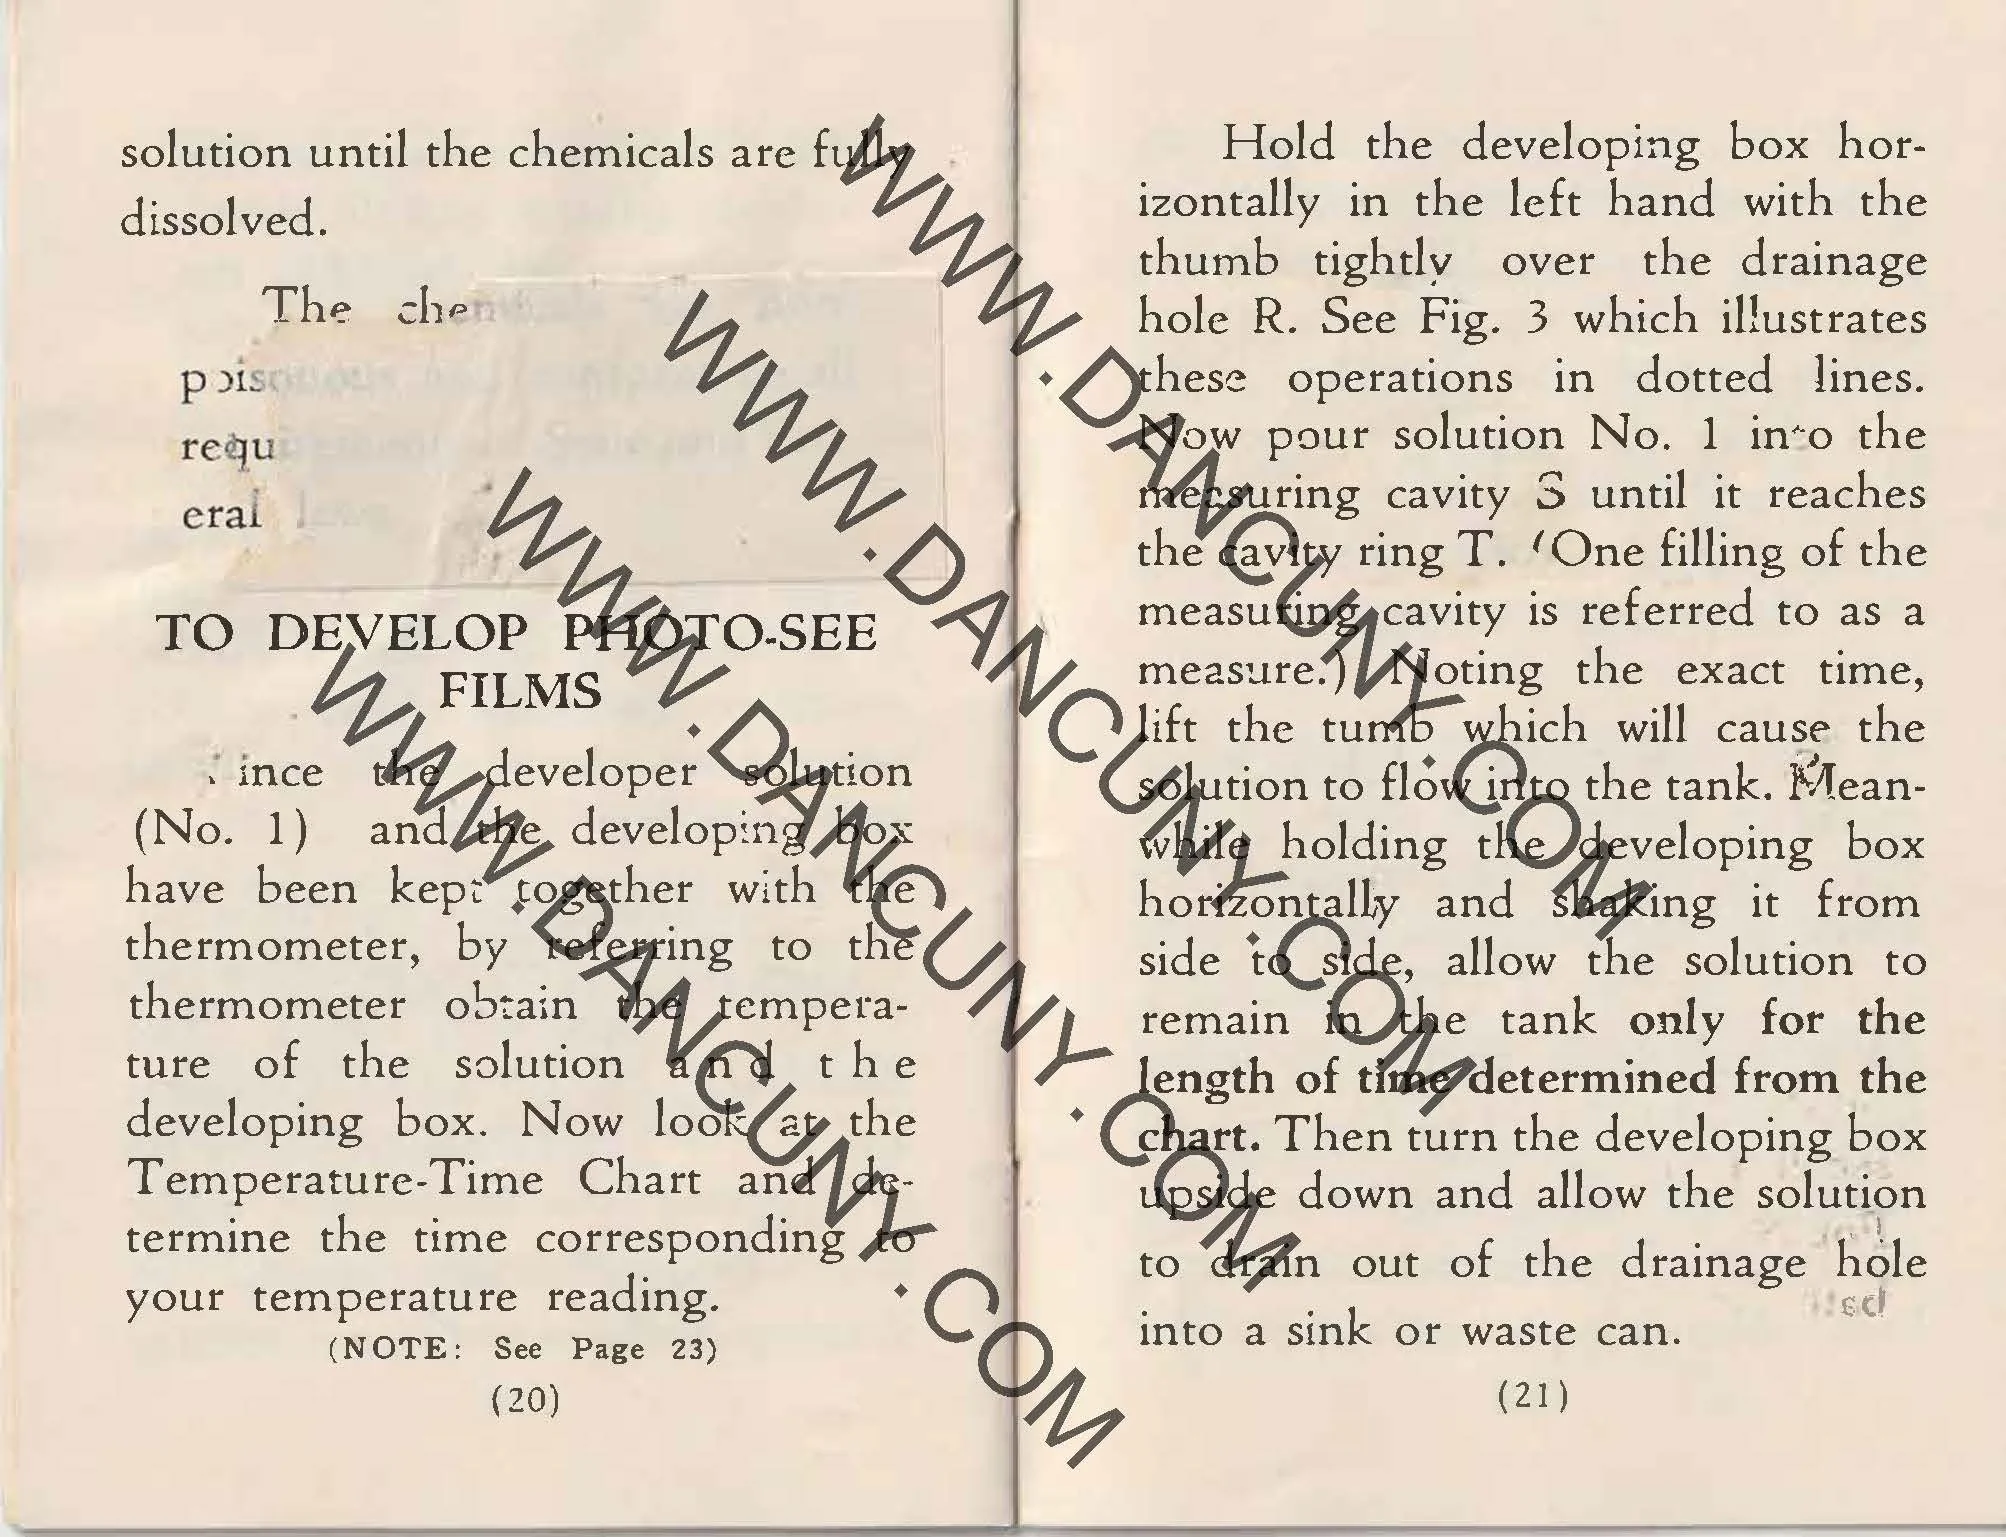
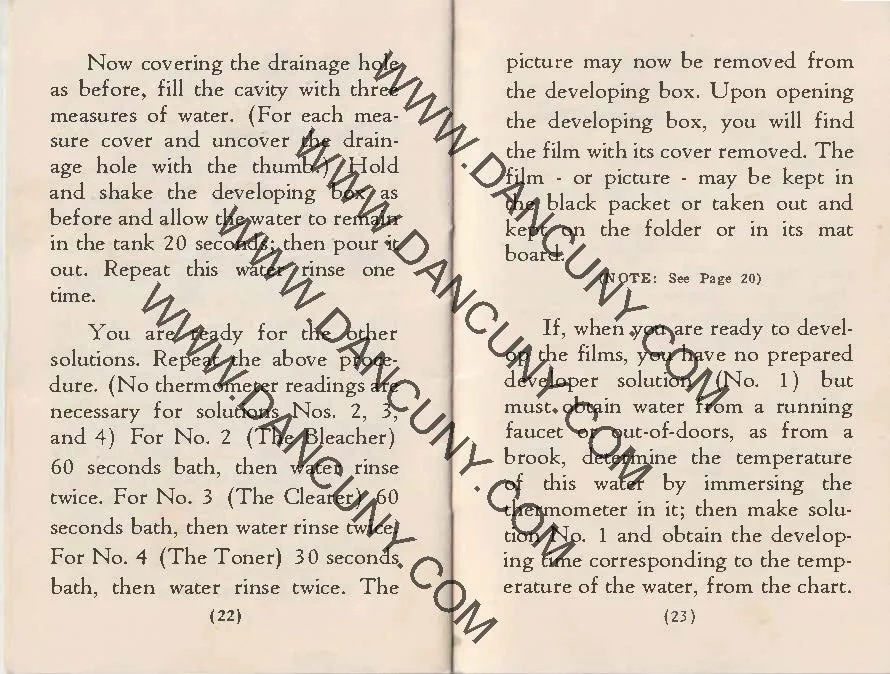
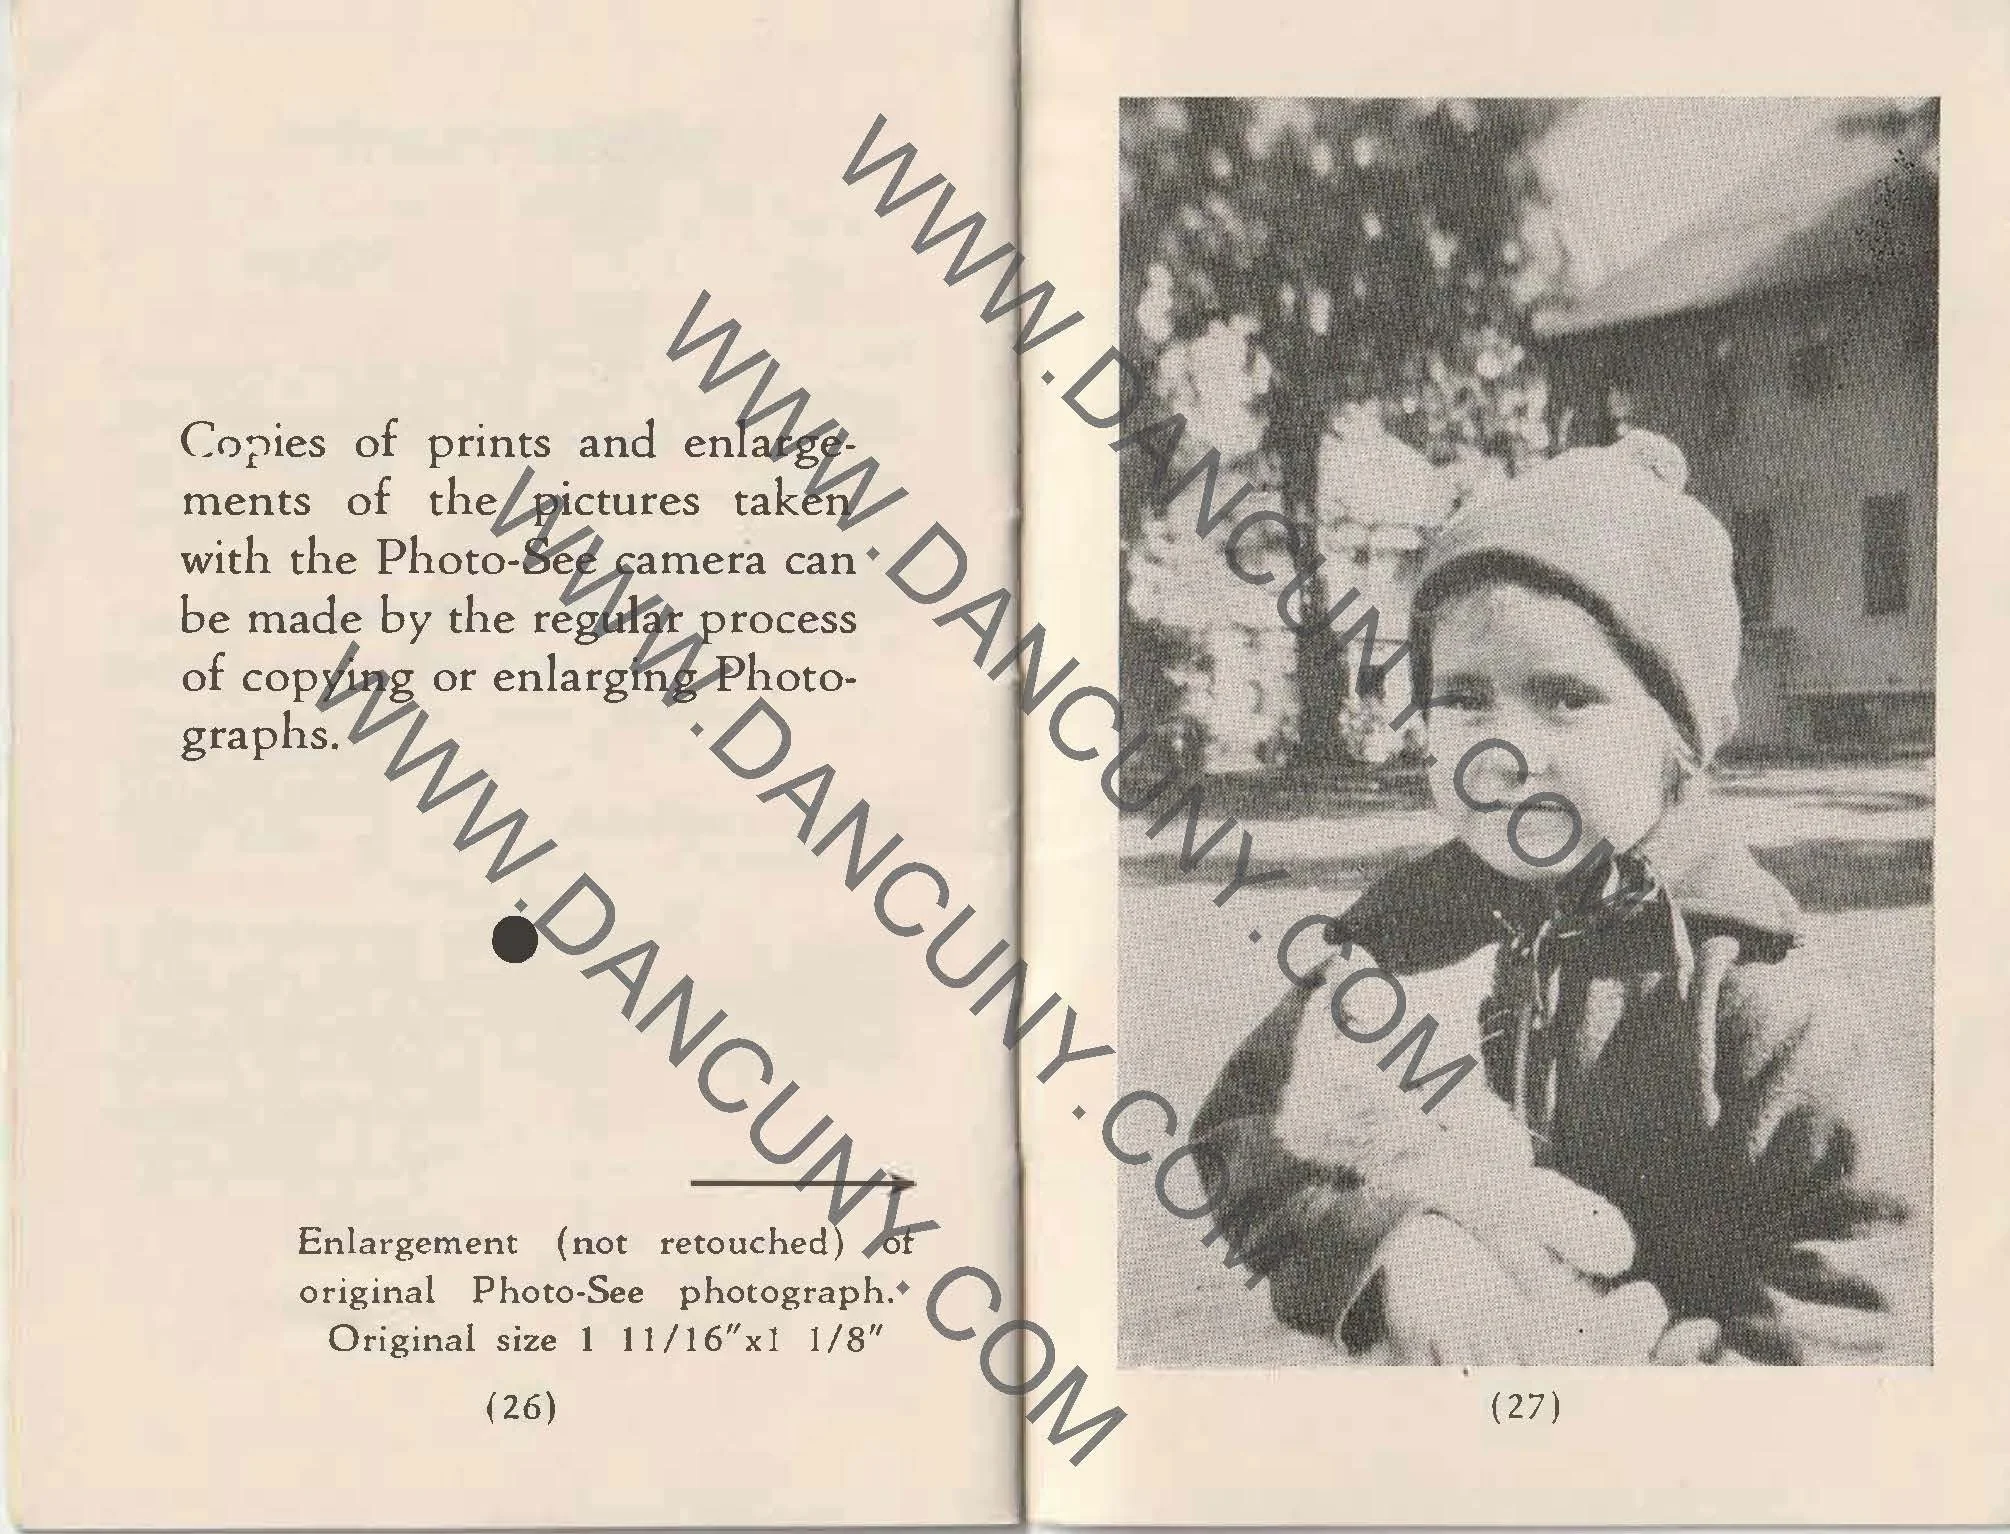
 According to the manual, four bottles and four packets of chemicals are needed for developing your image. #1 is the developer, #2 is the bleacher, #3 is the clearer, and #4 is the toner. Pour the packets into the numbered bottles, fill them with water, and mix. Pour the contents into the larger opening for developing. This camera produces photos and not negatives. Once developed, the final image size is 1 11/16 x 1 1/8 inches.


Results:

Unfortunately, the film for this camera isn't available, so I have no images to show from it. Heck, I've been looking for film for this for many years and have not seen one for sale anywhere.


Conclusion:

This camera is such an oddball, I couldn't resist writing about it, especially since it was many years ahead of its time. I understand that the process is lengthy, that you need to carry chemicals, and that the image size is small. These factors were the reason why this didn't gain popularity.

 It's nice to have an almost complete system in the collection. A film pack and the box would be nice, but having the camera, developing tank, and manual is good.

 Thank you for taking a few minutes to read about this odd and unusual camera from almost 90 years ago.

 Click on the link to see my other camera reviews.

 Cuny's Camera & Photo is my eBay store, where I sell some of the cameras I've reviewed, along with other camera-related items.

 Until next week, please be safe. 

Polaroid SX-70 Camera

My Polaroid SX-70 camera.

When I was looking over the cameras in my collection and thinking about which camera to write about this week, the Polaroid SX-70, which I have right over my desk, seemed to jump up and say, "My turn this week." I thought about it for a moment and thought, "It's not that old of a camera, but it is." 

 The Polaroid SX-70 was introduced in 1972, during the era of many "modern" inventions, like the home VCR, floppy discs, and email. It was not too far after the music and pop revolution in the late 1960s, which brought interesting and new designs. Currently, the SX-70 is a 52-year-old camera and, in my opinion, the last camera introduced with a genuinely different and unusual design.

 Being a fan of Polaroid from an early age, I remember getting a Polaroid Swinger for Christmas of 1965, just a few months after the camera was introduced. To focus the Swinger, you'd squeeze the focus dial until a "YES" would show up in the viewfinder, telling the photographer the camera was focused and ready to take a photo. That was tremendous and, to this day, a fun innovation of its time.

 When the SX-70 was introduced, there was much fanfare, magazine covers, and writing about this revolutionary camera from Polaroid. The SX-70 was officially sold in the Miami area in late 1972 and became nationally available in 1973. It was sold for $180.00 for the camera and $6.90 for the film, with ten photos in each pack.

 The interesting thing about the Polaroid SX-70 film was that the batteries that powered the camera were in the film packs, so every time you put a fresh roll of film into the SX-70, you were also putting fresh batteries in the camera. Batteries in the film pack were good unless you tried a pack with depleted batteries or tried out-of-date film where the batteries were dead. At that point, the camera was unusable.

Polaroid Acecssory Kit

 What made this camera unique was its odd and different design and its very slim design. It was an SLR camera with through-the-lens focusing, exposure control, and accessories that would enhance the photo experience, such as a remote shutter cable, tripod mount, close-up lens and diffuser, lens hood, self-timer, and accessory holder. Other companies soon came out with accessory lenses and electronic flash units.

 In 1974, due to the success of the original SX-70, with its chrome and tan-colored leather covering, Polaroid introduced lesser-expensive models and kept introducing other models soon after that. 

 The SX-70 camera was a massive success for Polaroid and gave instant photography a shot in the arm like few I've seen in the photo industry. Kodak would create their version of an instant camera in 1976. Still, Polaroid sued them for patent infringement, which led to Kodak discontinuing production of their line of instant cameras in 1985.

Company History:

The Polaroid Company, founded by Edwin H. Land in 1937, pioneered light-polarizing technology. Originally called the Polaroid Corporation, the company first made waves by producing polarized sunglasses and optical devices. However, its true innovation came in 1947 when Land introduced the first instant camera—an invention that would forever change photography.

Polaroid SX-70 ad from 1970s

 Land unveiled the instant camera at a meeting of the Optical Society of America, demonstrating how it could develop photos within minutes. This breakthrough led to the Polaroid Land Camera Model 95 commercial release in 1948. The camera's unique ability to produce finished photographs quickly became a cultural phenomenon, redefining personal photography for decades.

 Throughout the 1950s and 60s, Polaroid expanded its product line and refined its instant photography technology. It gained popularity among both amateur photographers and professionals. The introduction of color film in 1963 further solidified Polaroid's position as a dominant force in the camera industry.

 Polaroid also became known for its iconic camera designs, such as the SX-70 in 1972—a folding single-lens reflex camera that was both portable and innovative. During this golden era, Polaroid enjoyed tremendous commercial success and was often seen as a symbol of American ingenuity.

Cutaway view of Polaroid SX-70.

 However, the rise of digital photography in the late 1990s and early 2000s caused Polaroid to struggle. Despite attempts to adapt, including digital products and partnerships, the company couldn't maintain its market dominance. In 2001, Polaroid filed for bankruptcy and began selling off assets.

 The brand saw several changes in ownership over the following years. Yet, in a surprising turn, Polaroid experienced a revival in the late 2000s and 2010s, fueled by nostalgia and a renewed interest in analog photography. The Impossible Project, a group of former Polaroid enthusiasts, acquired the brand's last factory and began producing new instant film. Eventually, this effort led to the relaunch of Polaroid as Polaroid Originals in 2017, and later simply Polaroid.

 Today, Polaroid continues to produce instant cameras and film, embracing its vintage roots while appealing to new generations of photographers drawn to the charm and simplicity of instant photography.

My Camera:

My SX-70 camera measures 7" long by 4" wide by 5.5" tall when it is opened and only 1.5" tall when it is collapsed. It weighs only 1 lb. 7.6 oz. and has a 4-element 116mm f8 glass lens. My camera is one of the earlier models because it has the embossed serial number on top of the film chamber. The serial number on my camera is FE3028170DK.

 To open the SX-70 camera, place it in the palm of your hand, grip the top ribbed section of the viewfinder, and pull up. This will open the camera and lock it into place. The locking bar is on the left side of the camera. If the camera isn't locked when you pull up on the viewfinder, you can slide the locking bar forward to lock the camera open. 

Once the camera is open, it exposes the black rubber bellows built into it. It also exposes the rear viewfinder for focusing, and on the front of the camera, the red shutter release button and the exposure control the camera. I was taught to hold the camera in the palm of my left hand, and with my right hand, I can focus on the camera. 

 Putting the camera up to your eye and looking through the camera, you'll see a split-image focusing screen. A small black wheel controls the camera's focus on the camera's right side. Turn the black wheel back and forth until the subject looks sharp. The split image focusing allows the photographer to find a vertical item, and when out of focus, the line will be split and together in one line when in focus. The camera can focus as close as 10.4" from the subject.

On the other side of the camera is the exposure control wheel. The camera is auto-metering, which is metered by the opening just below the lighten/darken wheel. Generally, you leave this wheel in the center position with half the white or black portion in the middle. 

 If you want the following image to be lighter, move the wheel so more of the white is showing. If you want it darker, turn the wheel so that more black is showing. There is no rule of how much to move the wheel for a lighter or darker image. It's all just a guess. The camera shutter can shoot from 1/175 to longer than 10 seconds.

To open the camera to load the film pack, on the right side of the camera is a button with a yellow sticker, and inside that yellow sticker is a "down arrow." Push that button down, and the front door opens to reveal where the film pack fits. The original film packs were color-coded, so you would line up the yellow, black, and blue sections of the film back to the colors on the film chamber and slide the film pack into the camera. You must press it all the way in so the film door can close. Closing the film door with a fresh film pack in the camera will eject the dark slide from the film pack through a small slot in the film door. The camera is ready to take its first photo when the dark slide or cover is ejected. There is a small window on the back of the camera, the frame counter.

When you take a photo and light hits the film, the camera ejects the film through a pair of rollers on the film chamber door. When the film passes through the rollers, they squeeze the chemicals onto the film, and the photo starts to process.  These need to be cleaned; otherwise, the photo won't be processed correctly after you take a photo. Another issue that dirty rollers can cause is dots on the photo. The dots are caused by dirt on the rollers, and they press into the photo, and the chemicals can't reach that area, causing white dots throughout the photo.

 If you're indoors and there's not enough light to take a photo, a flashbar fits into the slot just above the lens and takes five electronically timed flashes per side of each flashbar. They worked well. All you needed to do was snap the flashbar in the slot, and everything was done for you, except for turning the flashbar after five flash photos.

Flashbar on Polaroid SX-70 camera.

The electronic cable release attaches to two small holes on the camera's right side. The accessory tripod mount would fit on the bottom of the camera, and the accessory holder and close-up lenses would fit into the flashbar holder. 

 To close the camera, slide the locking bar back toward its arrow. The camera will start to close. Press the top down into the body, and the camera will click into the closed position.

A common issue with the SX-70 is the mirror gets locked in the up position, and the camera won't close all the way. You can also tell when this happens when you look through the viewfinder; there is nothing to look at, and the finder is black. The lock-up can be caused by a lack of power from the battery or the film not getting ejected properly, but there's not enough power to cycle the camera. Something you can do to correct this is a bit tricky and not too difficult, but it means taking a small and fragile piece of plastic off the camera to expose the gearing system of the camera. If you're nervous or think you'll break the piece of plastic, DON'T try it.

 On the right side, by the film release button, is a small and thin piece of plastic that you can CAREFULLY pull up at the front of the plastic piece. Some are easy to come off, and some are very tight, so please be careful. Once the piece is off, you can see the gears in the camera's body. The front gear can be turned, which will bring down the mirror system allowing you to view through the camera and cocking the camera. Many videos on YouTube show this process if you are interested. Once the camera's mirror comes down, you can put the piece of plastic back and snap it into place. You'll need a new and fresh film pack to ensure the camera is in good working condition.

My images:

Unfortunately, I didn't buy film before I wanted to write about this camera, and when I looked to purchase some, they were out of stock, so I'm forced to show photos from the late 1970s or early 80s. 

 Here are some of the family photos from the SX-70 camera.


Conclusion:

The SX-70 brings back many fond memories we had with family and co-workers. It's one of the classic cameras made in the 20th century, and I am thrilled to have a good early model in my collection.

 One of the real advantages of the original SX-70 film was the ability to manipulate the images during the processing, which took a minute or so. We'd take different thicknesses of knitting needles and swirl the chemicals around, which would cause a flow in the photo, which was very artistic. The new film doesn't allow for this creativity.

 Thank you for taking a few minutes from your schedule to read about this wonder camera from the 1970s.

 Please feel free to email me if you have questions or concerns. Until next week, please be safe.

 Click on the link to read about the cameras reviewed