Sony Mavica MVC-FD5

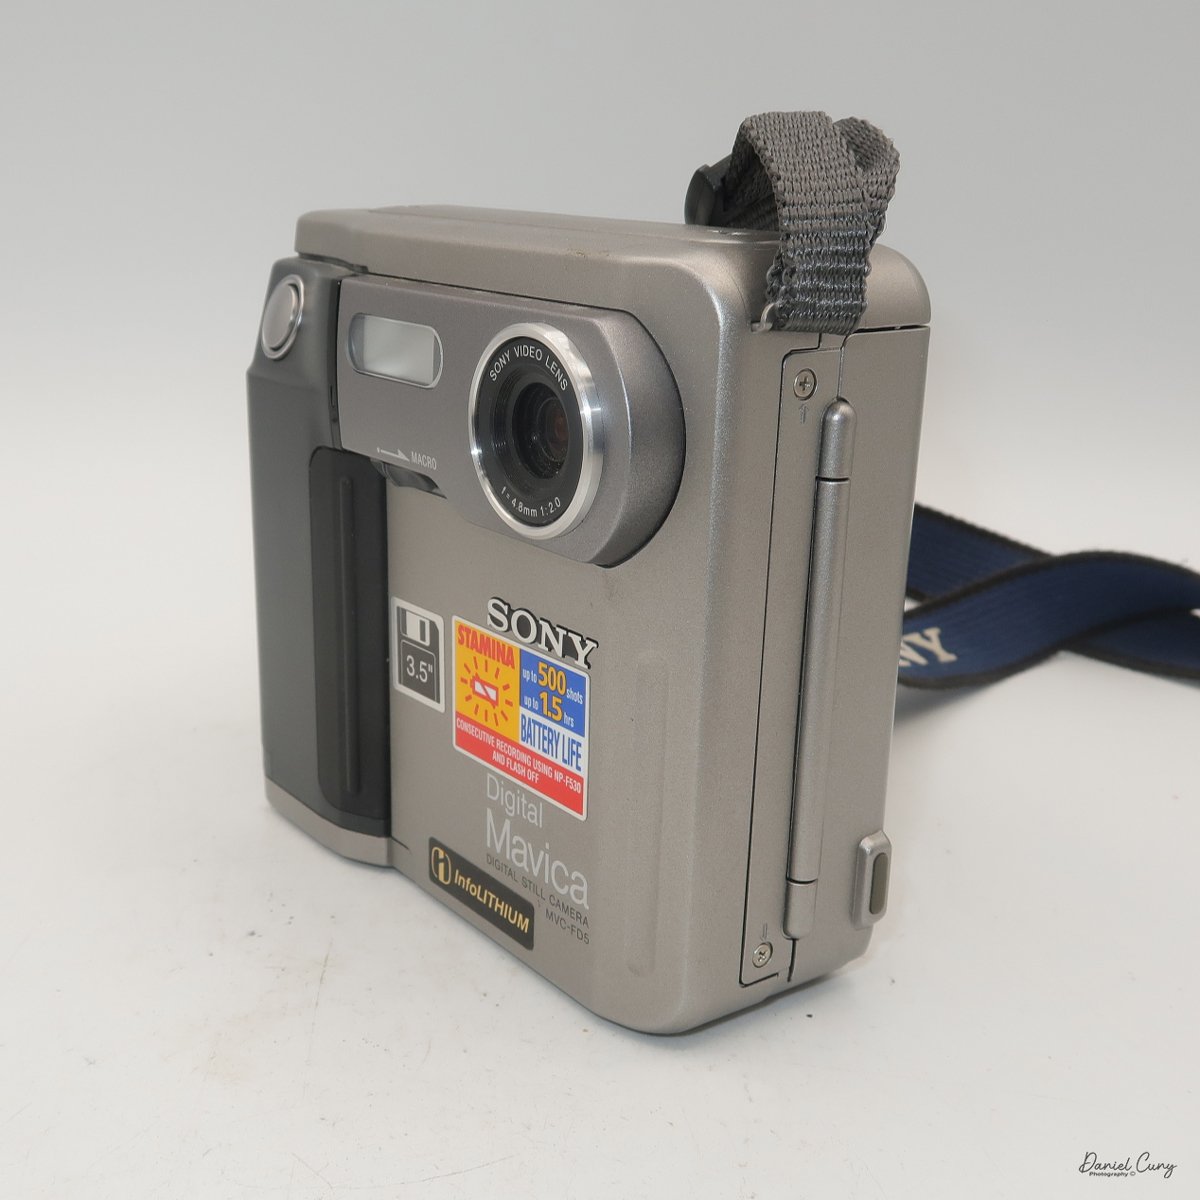
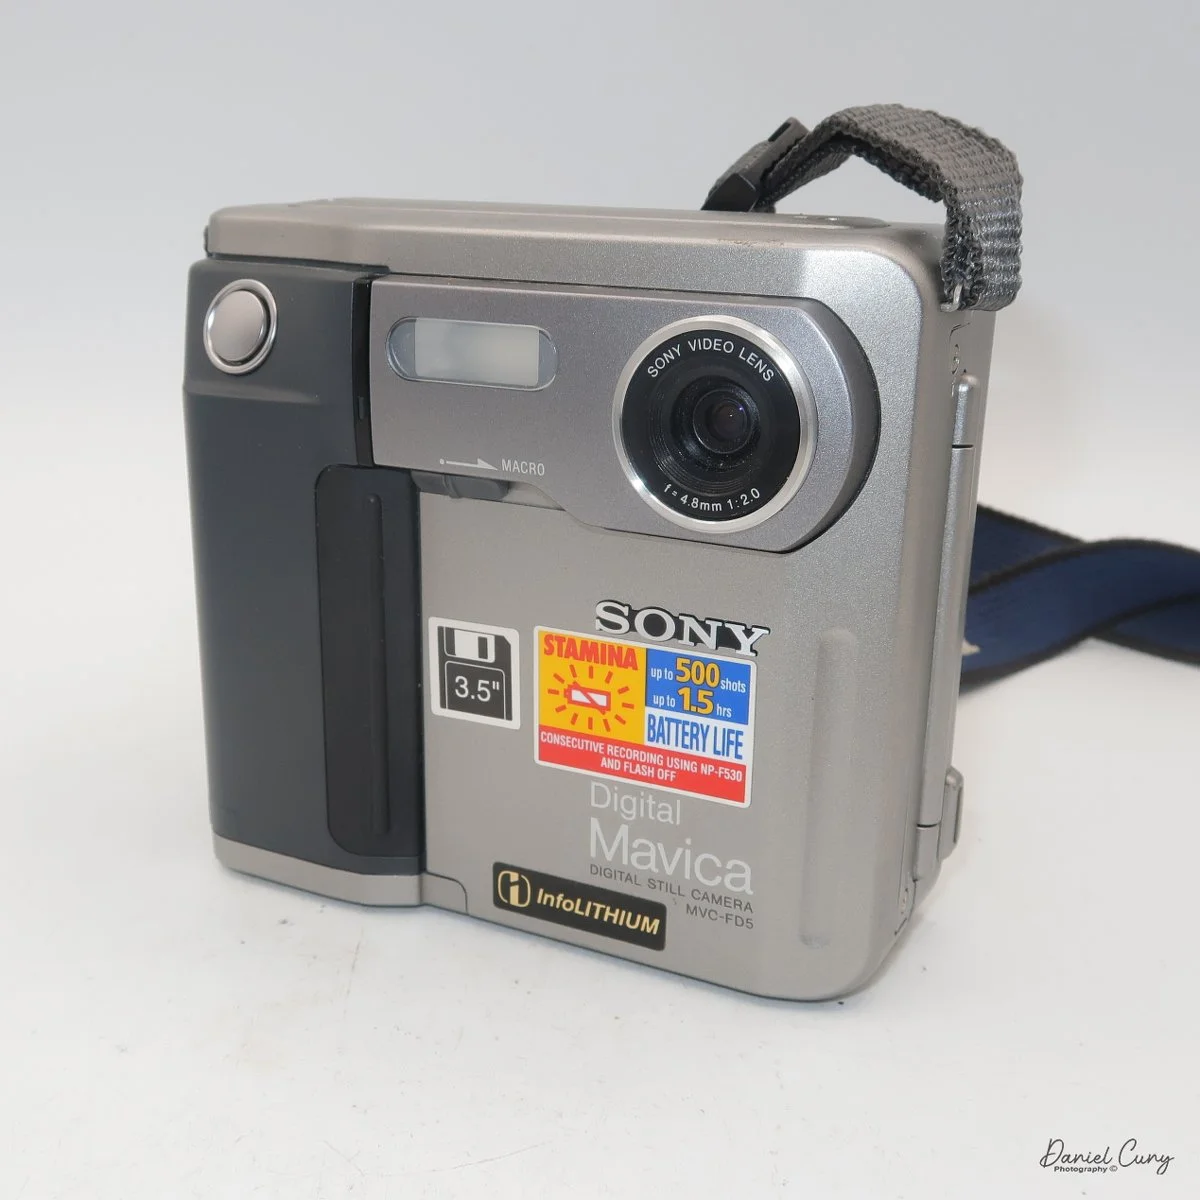
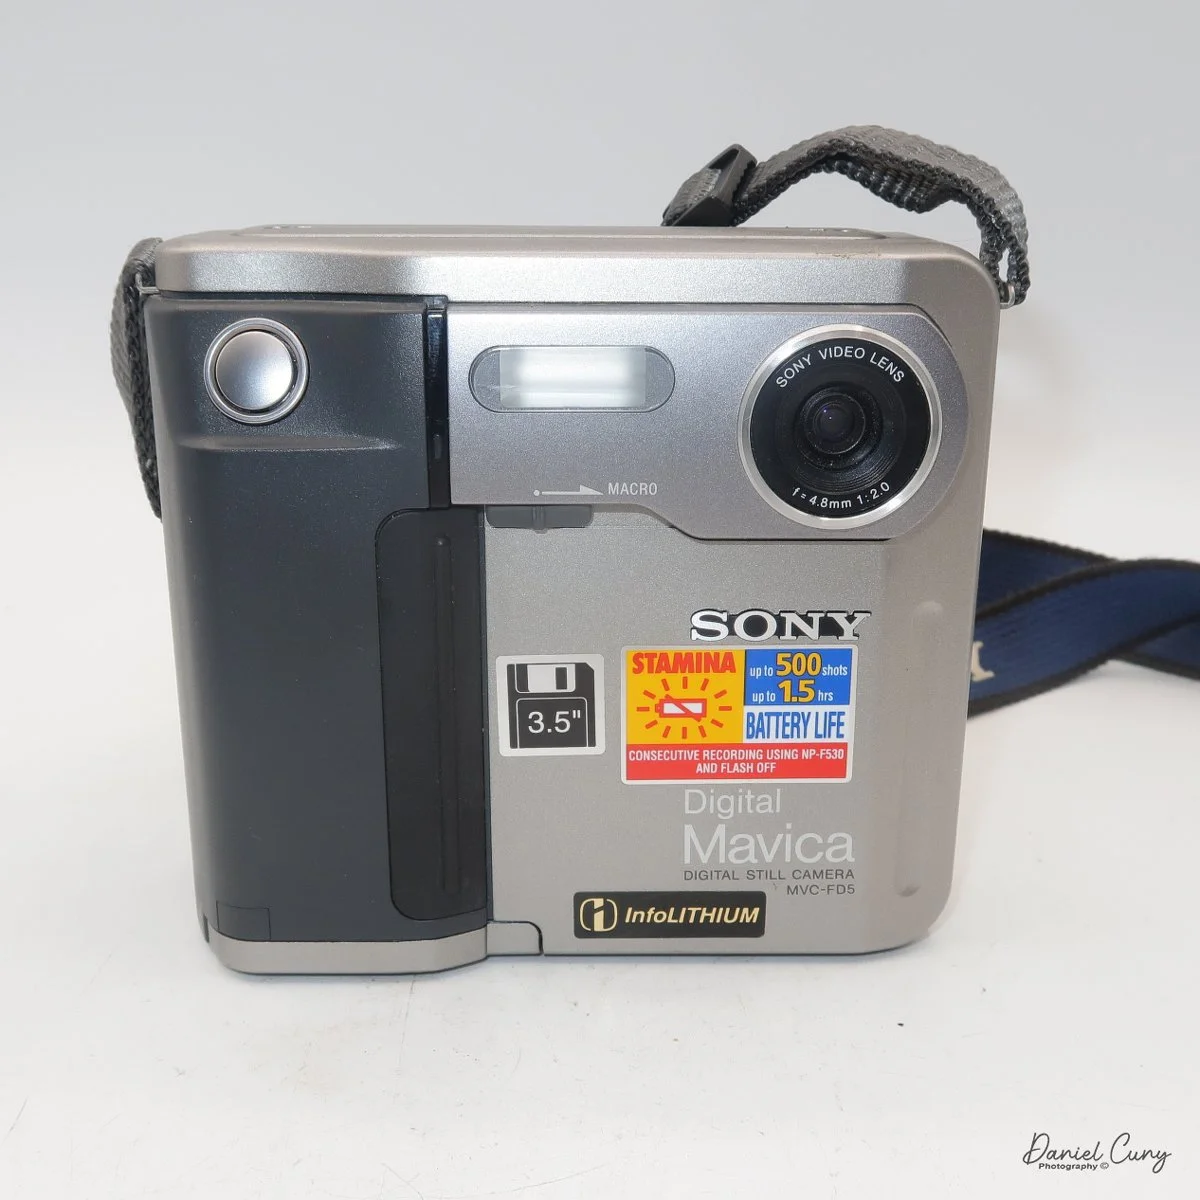
My Sony Maniac MVC-FD5 camera.

I started working in a retail camera shop way back in 1975. The store where I worked was dominated by non-professional photographers, with more of a consumer-based customer base. We sold a lot of film and processed a lot of film. At that time, the store where I worked had a good mix of simple cameras, such as the Kodak Instamatic, and some of the more basic Polaroid models of pack cameras. 

 But if you wandered over to the more professional side of the store, the cameras on that side of the store had Nikon F and Nikkormat, Minolta SRT series, Canon FTb, Pentax Spotmatic, mainly single-lens reflex and simpler rangefinder cameras were available. The market in our store didn't offer higher-end brands such as Leica, Hasselblad, or large-format brands like Sinar or Toyo.

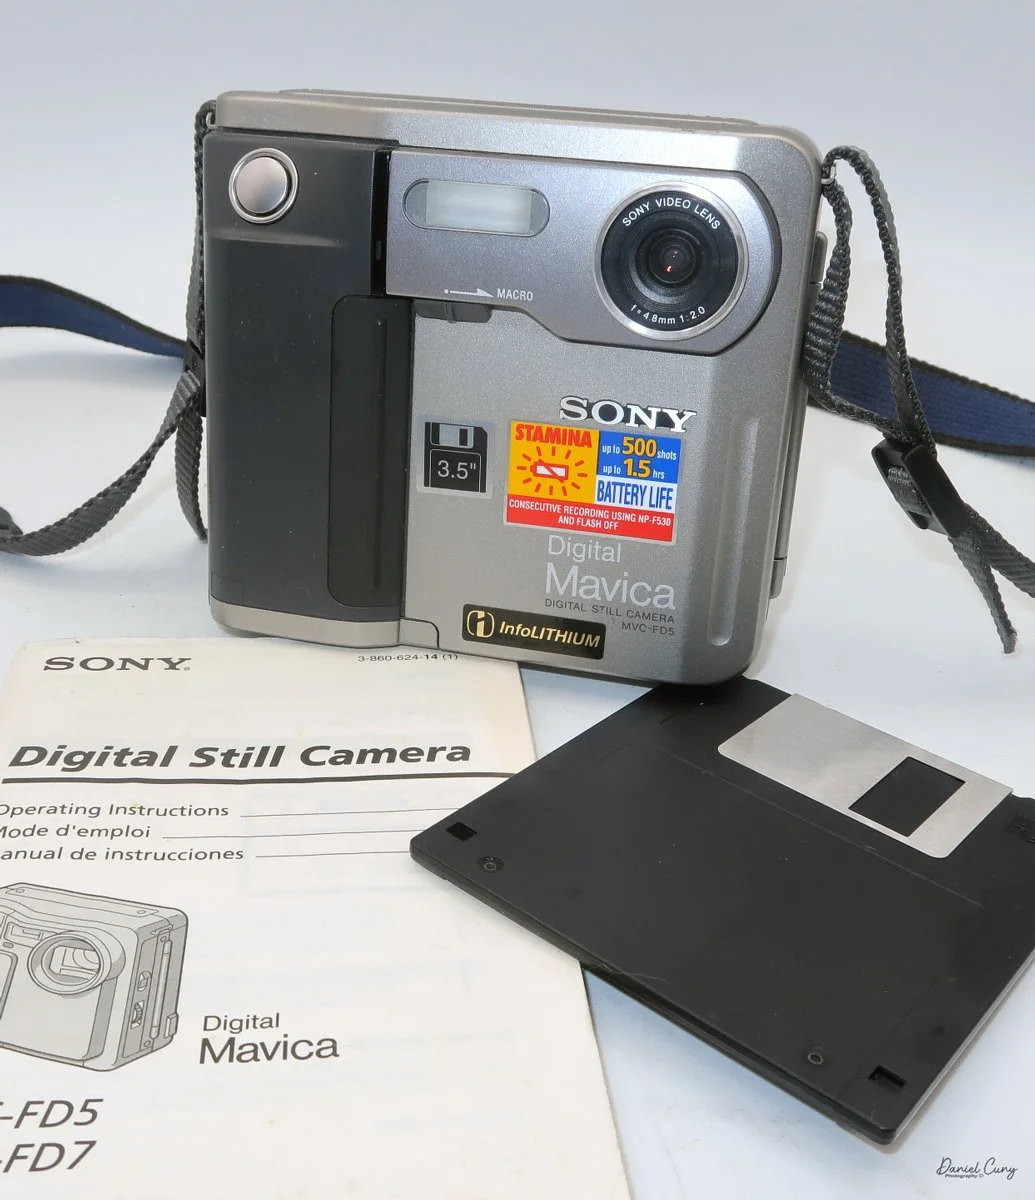
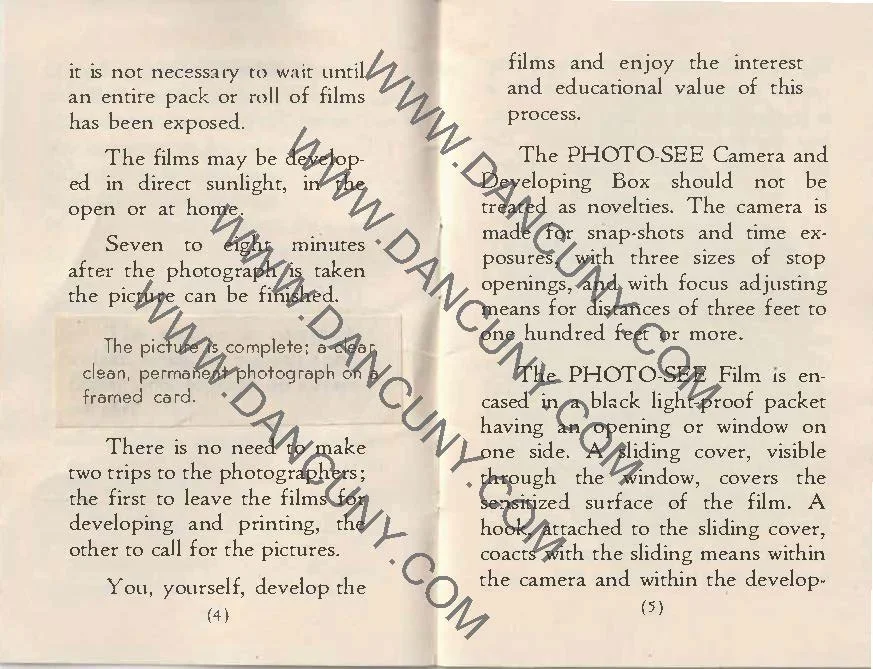
My camera with floppy disk, and manual

 The owner of the camera shop was always looking at new technology and ways to set us apart from the other local camera stores. I still remember back in 1988, when we were introduced to "new technology" that didn't capture images on film. Still, it was a rather small 2" floppy disk. The odd thing about this new revolutionary camera was that it didn't come from a "regular" camera company, but from the major consumer electronics firm from Japan, Sony. At that time, Sony was known to most Americans for their radios, televisions, and other electronics.

 The camera was named the Mavica (magnetic video camera) MVC-C1 which was a consumer based camera which was flat shaped, that fit well in your hand, and held a 2" floppy disk called the Mavipak. At the time, these were what we consider "digital images", but rather Still Video Images recorded onto the floppy disk, and intended to be played back on your television. You could record up to fifty images on the Mavipak. Once the images were taken, you'd connect the camera to your television using the MAP-T1 adapter and display the images on the television screen.

 In December 1988, Canon introduced a similar camera, the XapShop. It too was a similar-shaped camera that captured still video images on a 2" floppy disk. While both cameras were making a splash in the market, it wasn't until early 1989 that the Sony MVC-C1 became readily available to consumers.

 At the time, the idea of capturing images on a floppy disk was odd, and the image quality was poor. Also, when the camera was introduced, it had a hefty price of $650.00 for the Sony and a similar price for the Canon XapShot kit, which, for our consumer-based market, was a steep purchase.

 Still, the owner of the camera stores thought well enough of the cameras that we picked up a few of both the Sony and Canon lines of still video cameras, and for a while, we did well selling them to the early adopters in the community. These were the same people who had early Motorola mobile phones.

Sony Digital History:

 Sony's ascent to the top of the digital imaging world didn't happen overnight; it was the result of decades of transition from analog video heritage to high-resolution silicon. While many associate the "digital revolution" with the late 90s, Sony's groundwork began much earlier with a device that wasn't technically digital, but fundamentally changed how we perceived photography.

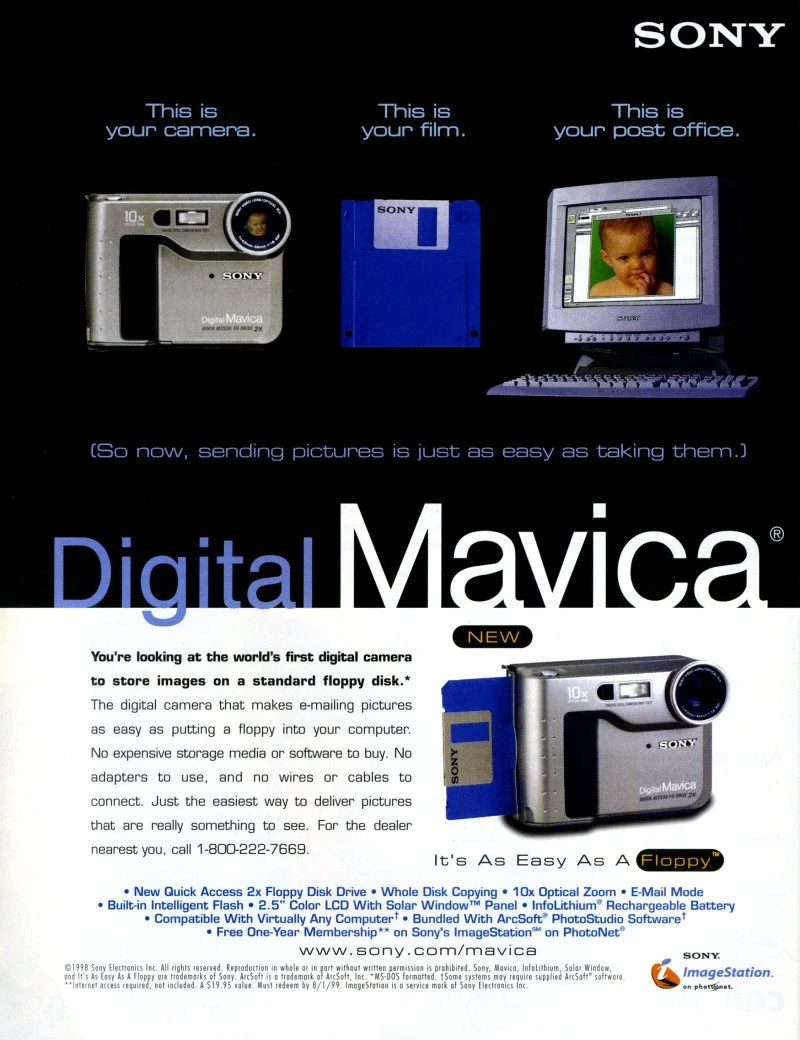
Sony Mavica advertisement.

 In 1981, Sony unveiled the Mavica (Magnetic Video Camera). It is often cited as the spark for the digital revolution, though it was actually a "still video" camera. Instead of film, it recorded analog signals onto a proprietary 2-inch floppy disk called the "Mavipak." While the resolution was equivalent to just 0.28 megapixels and intended for television viewing, it proved that the industry could move away from chemical processing toward instant gratification.

 It wasn't until the late 1980s and early 1990s that Sony moved into fully digital territory. In 1988, they introduced the MVC-C1, the first Mavica aimed at consumers. However, the real breakthrough for the masses arrived in 1996 with the Cyber-shot DSC-F1. This camera featured a distinctive swiveling lens, a built-in flash, and a 1.8-inch color LCD screen—a luxury at the time. It utilized a 0.35-megapixel CCD sensor and marked the birth of the "Cyber-shot" brand, which would dominate the point-and-shoot market for the next two decades.

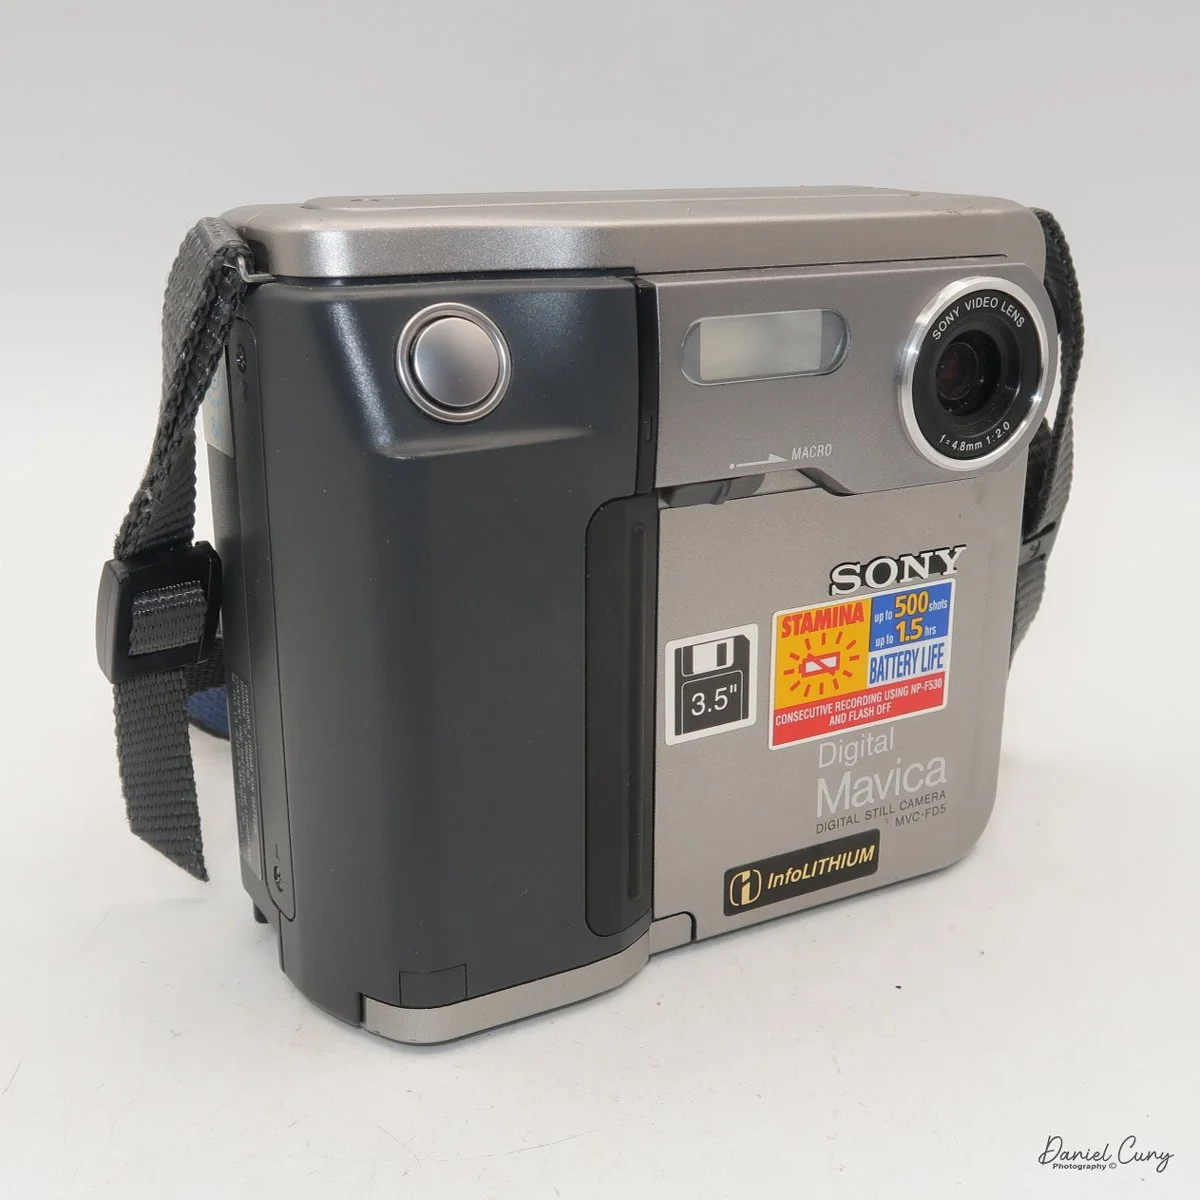
 In 1997, Sony released the Digital Mavica MVC-FD5 and FD7. These were iconic because they used standard 3.5-inch floppy disks as storage media. While competitors were struggling with expensive, proprietary cables and software, Sony users could pop their disk into any PC and view their photos instantly. This ease of use allowed Sony to capture roughly 40% of the digital camera market by the end of the 1990s.

 As the 2000s began, Sony pivoted from a gadget manufacturer to a serious contender in the optics market. By acquiring Konica Minolta's camera business in 2006, Sony gained the mechanical "know-how" of traditional SLR systems. This led to the birth of the Alpha series.

From the experimental Mavica to the launch of the first full-frame mirrorless systems, Sony's beginning was defined by a willingness to abandon tradition in favor of electronic innovation. They didn't just join the camera industry; they forced it to go digital.

My Camera:

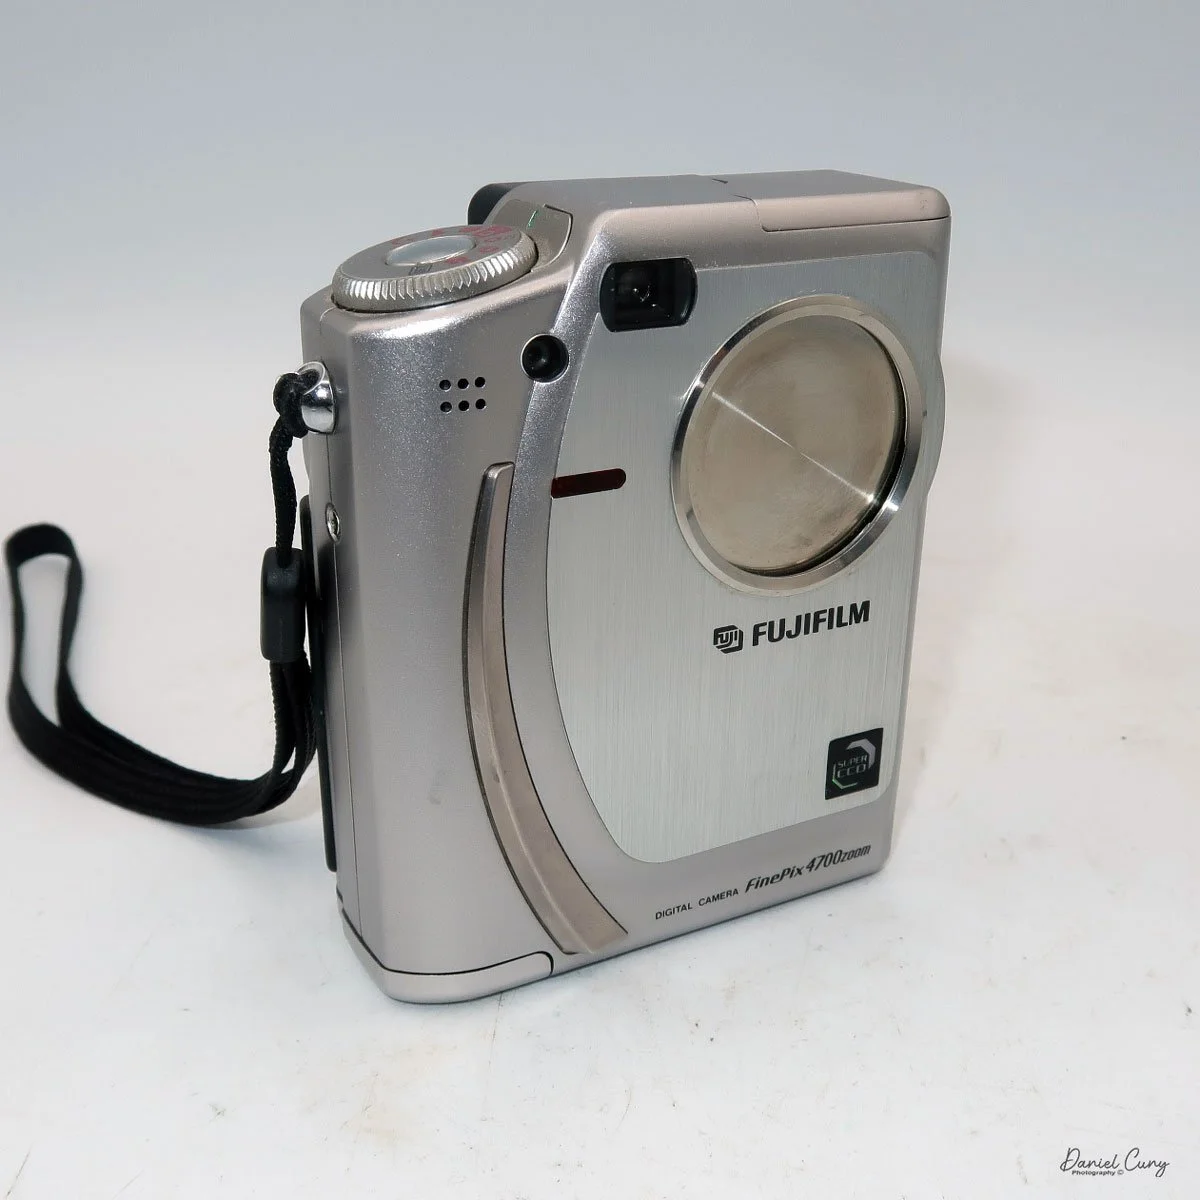
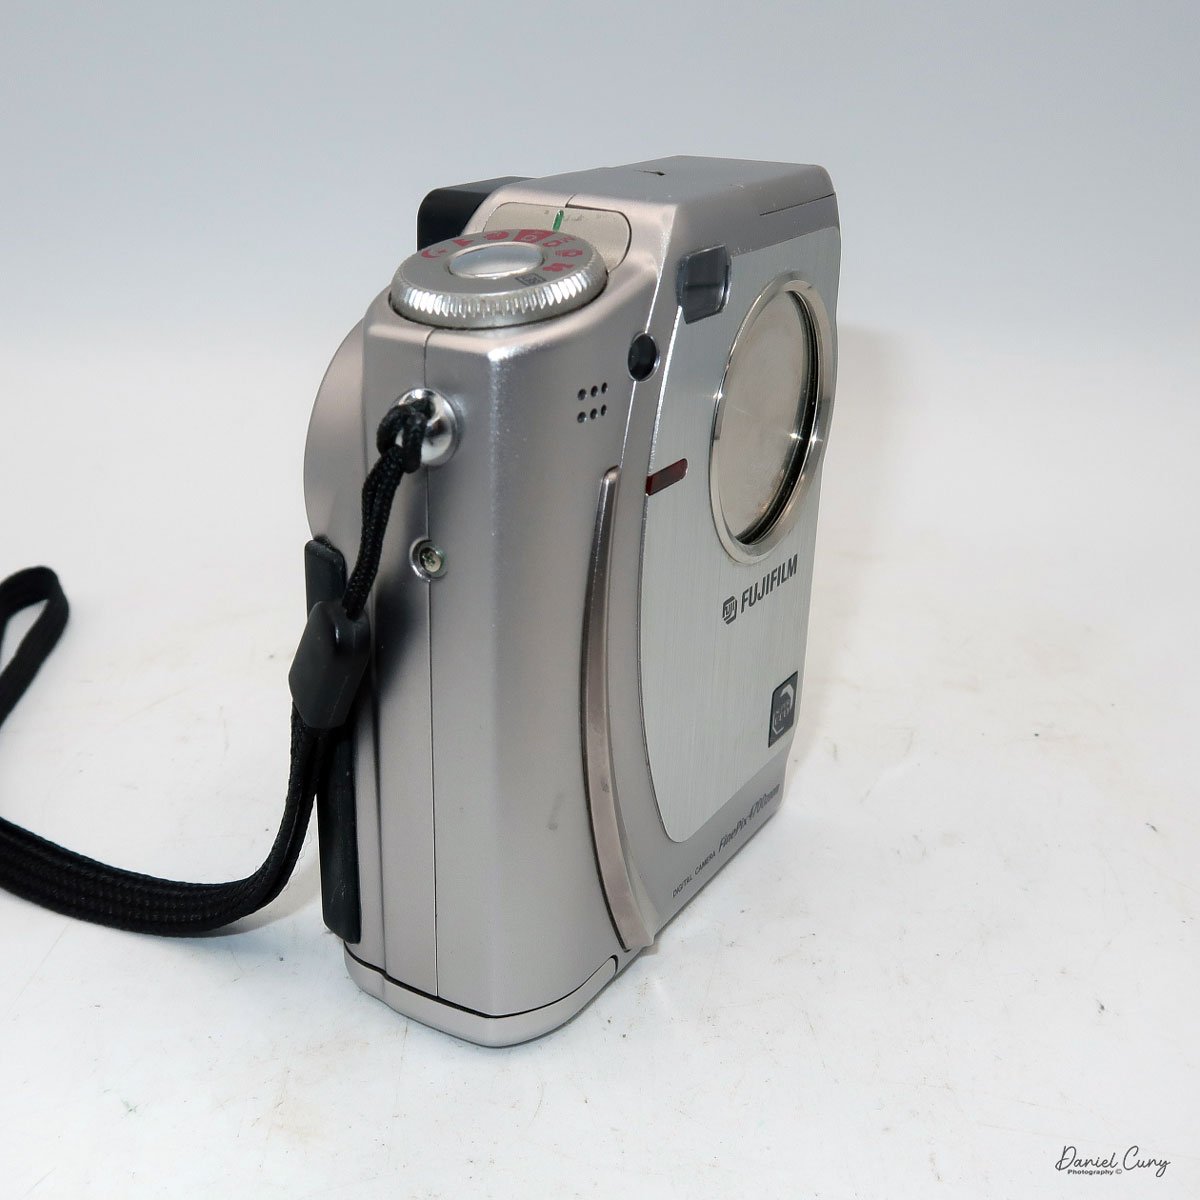
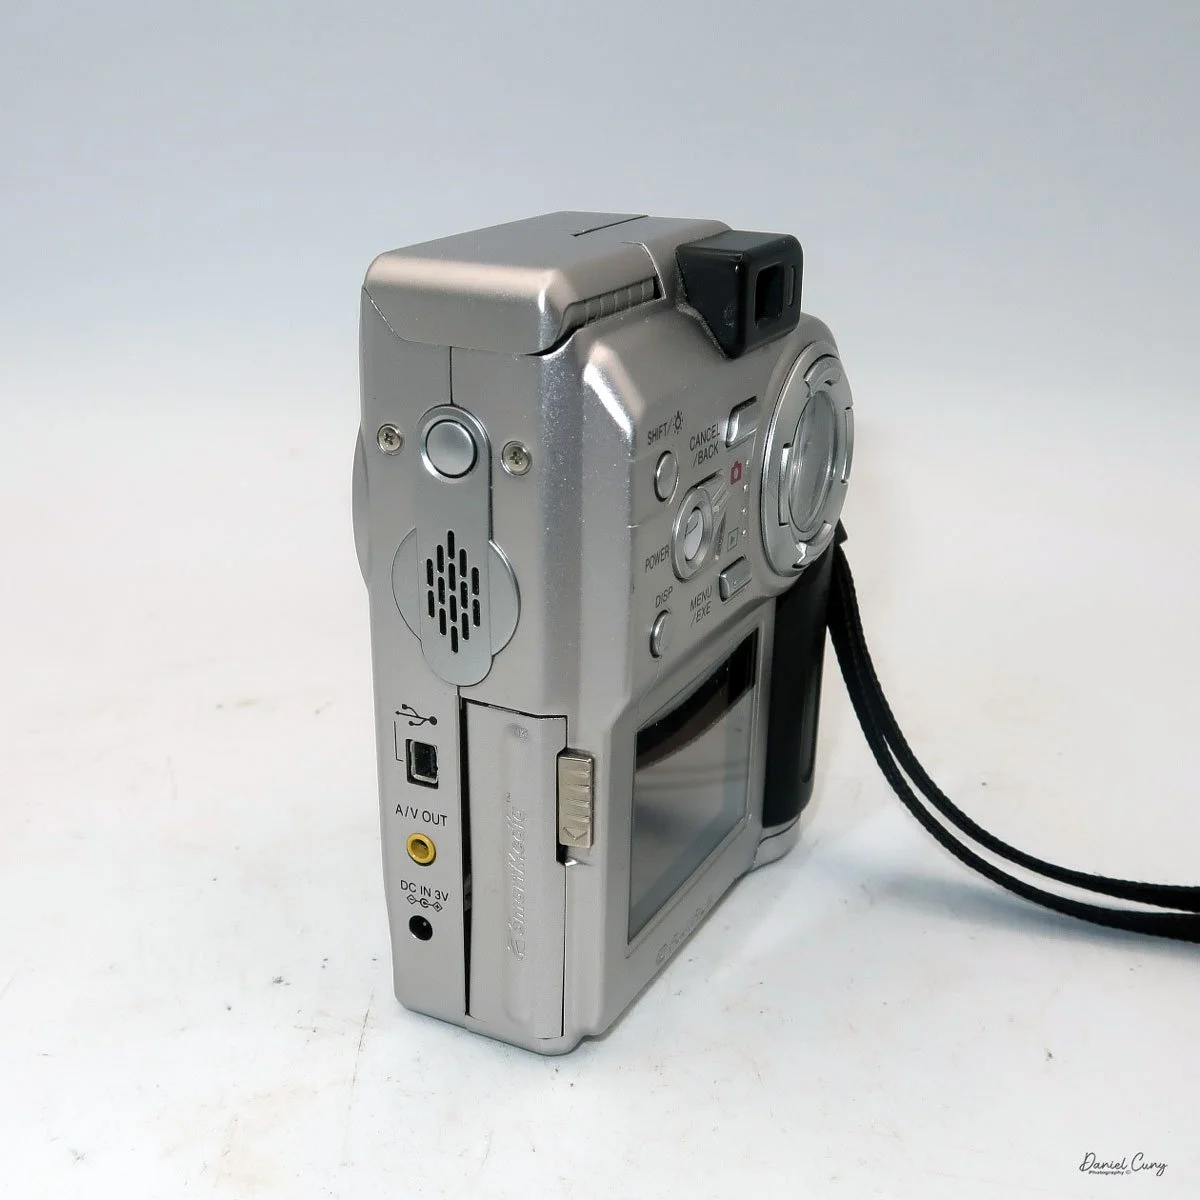
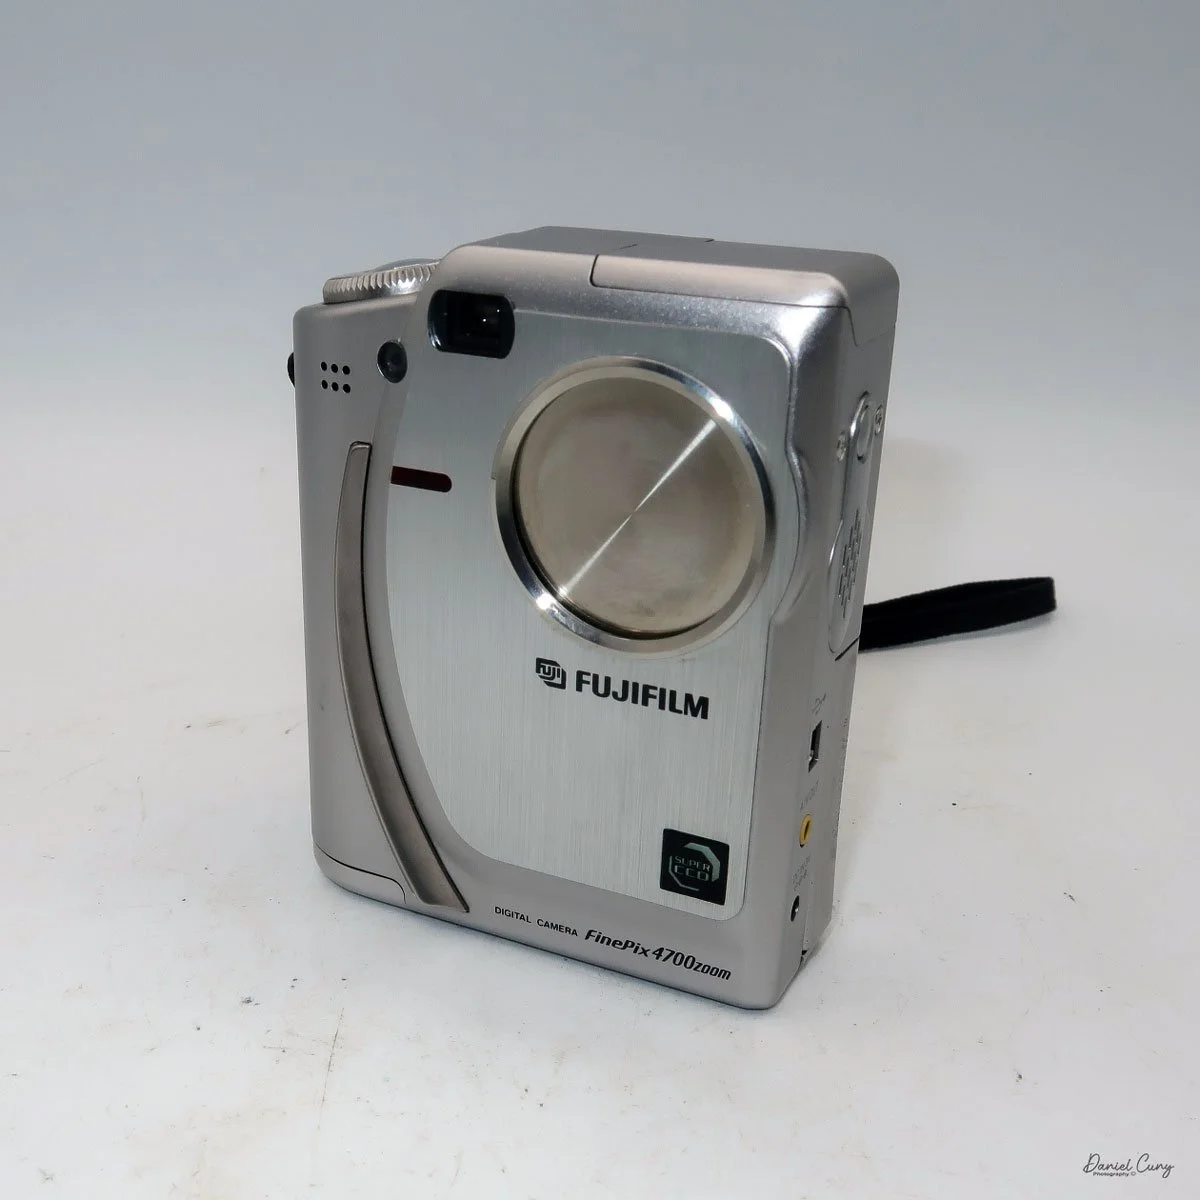
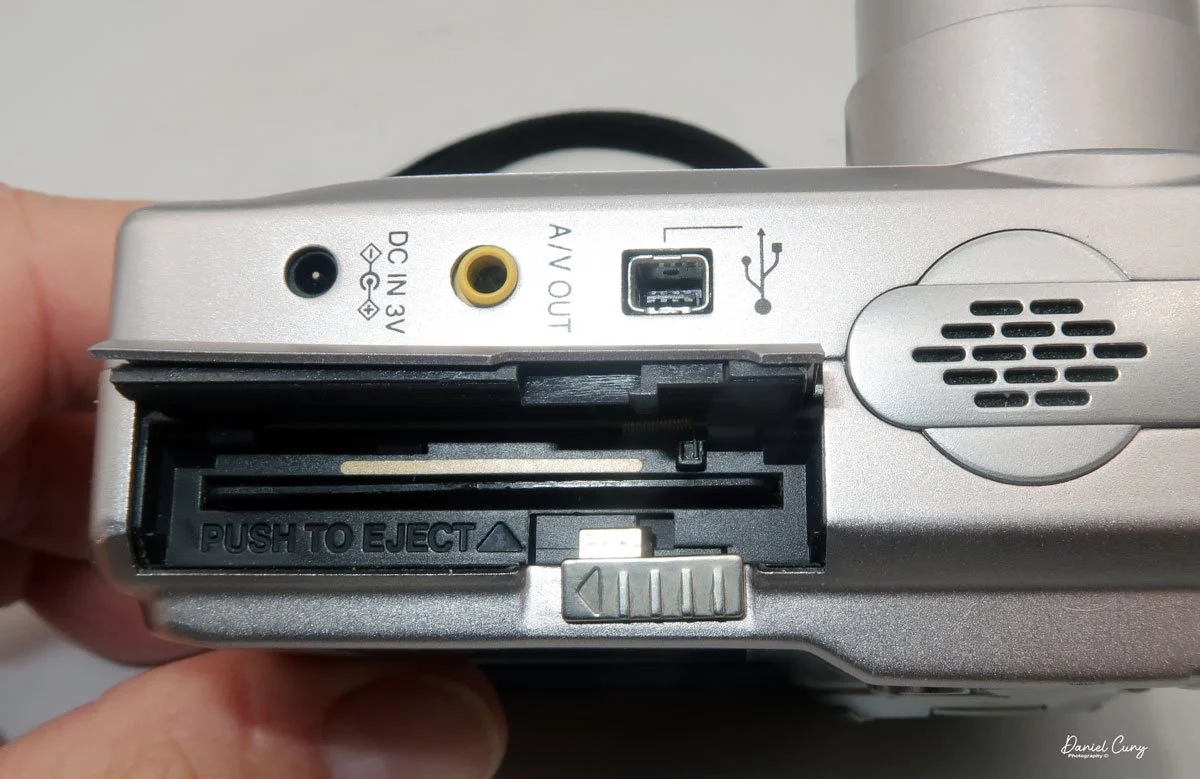
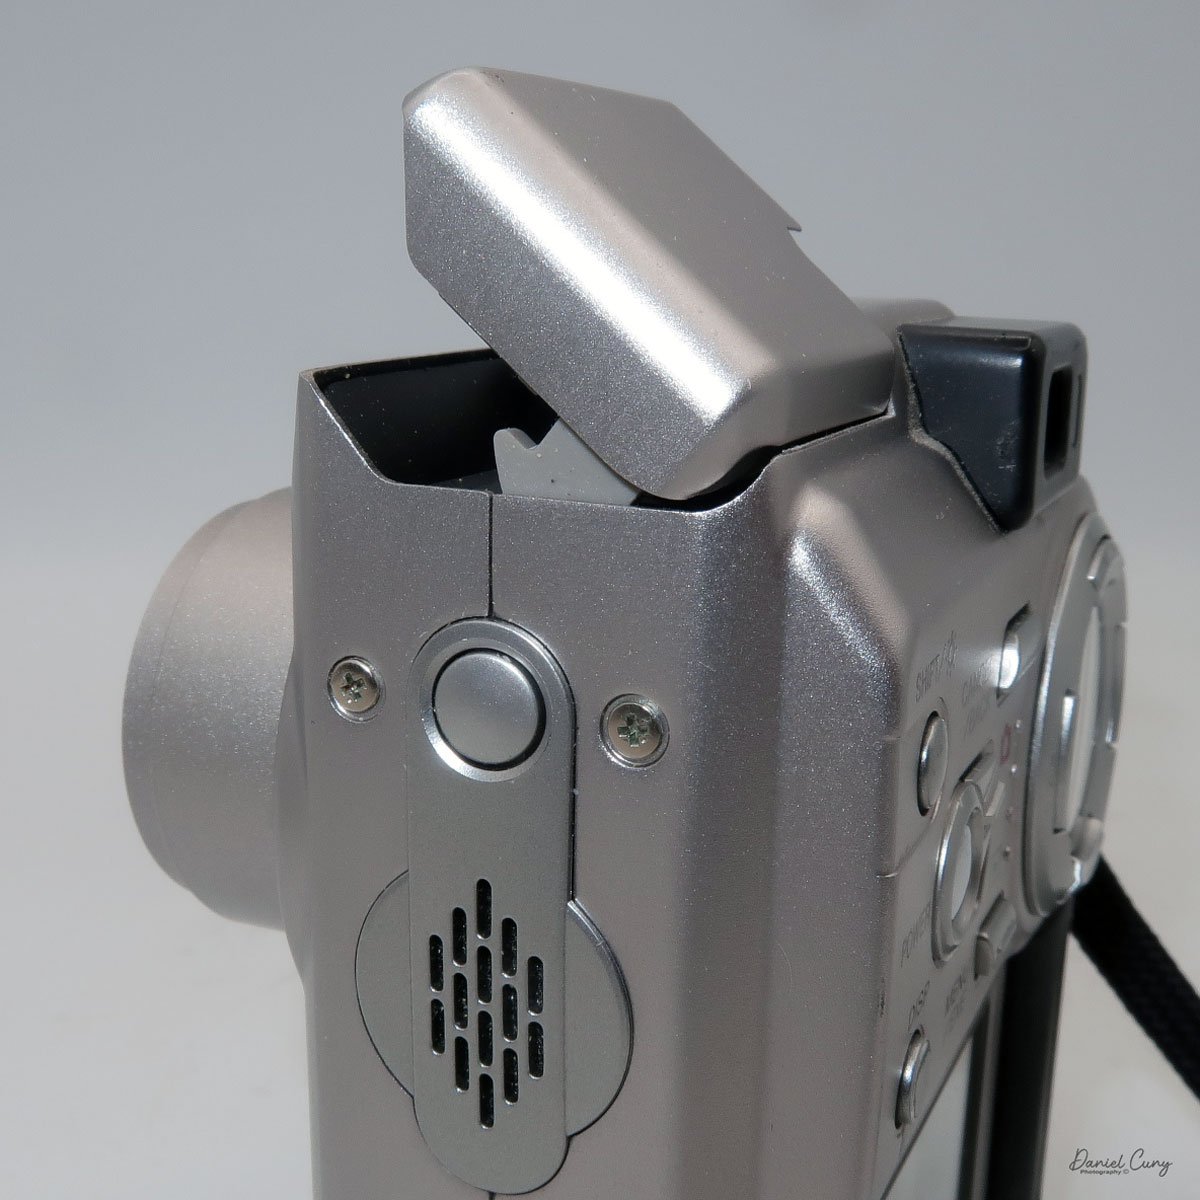
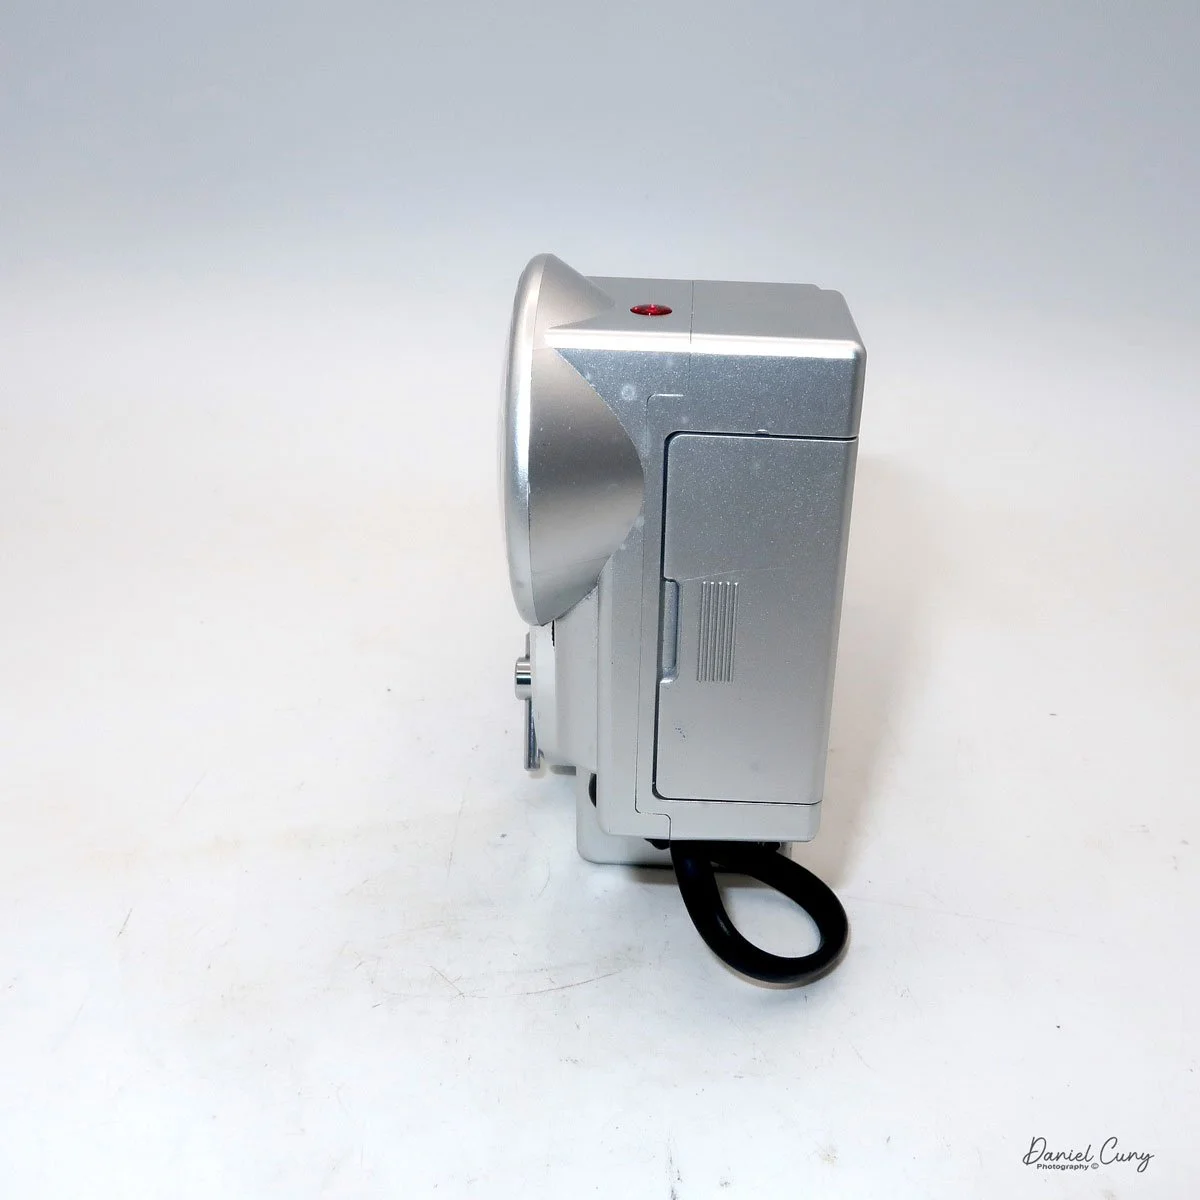
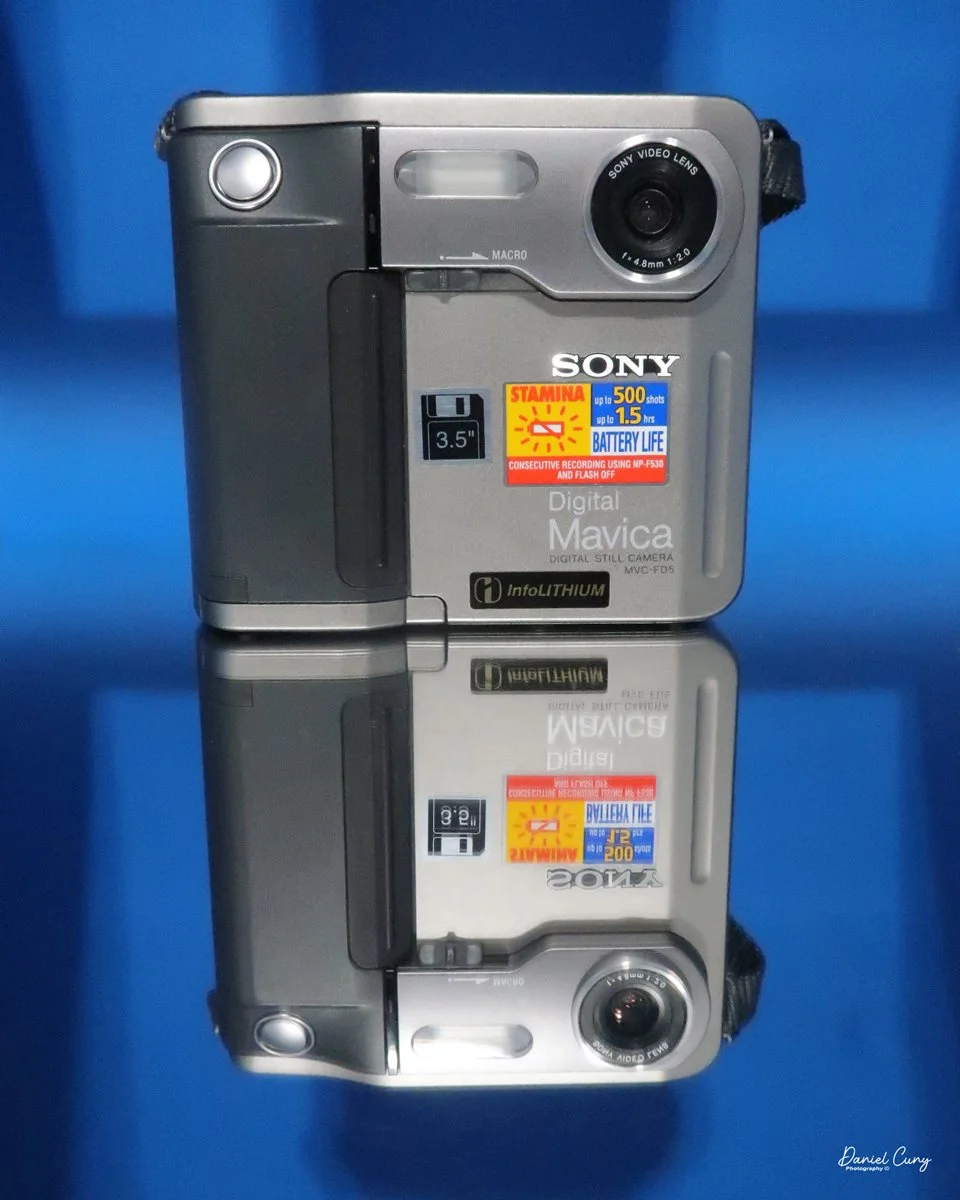
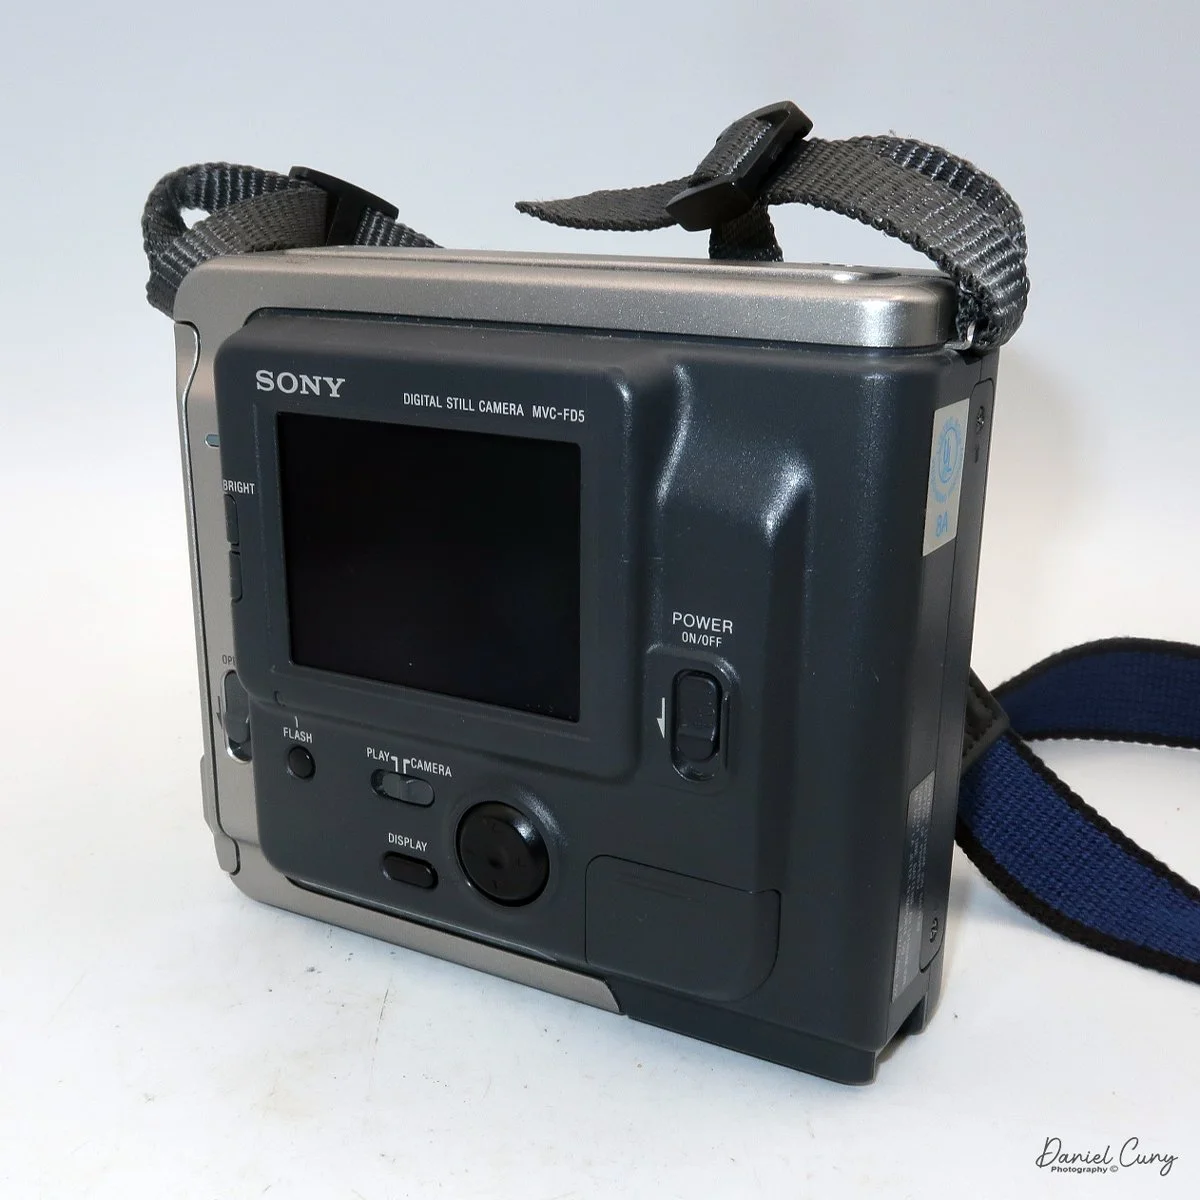
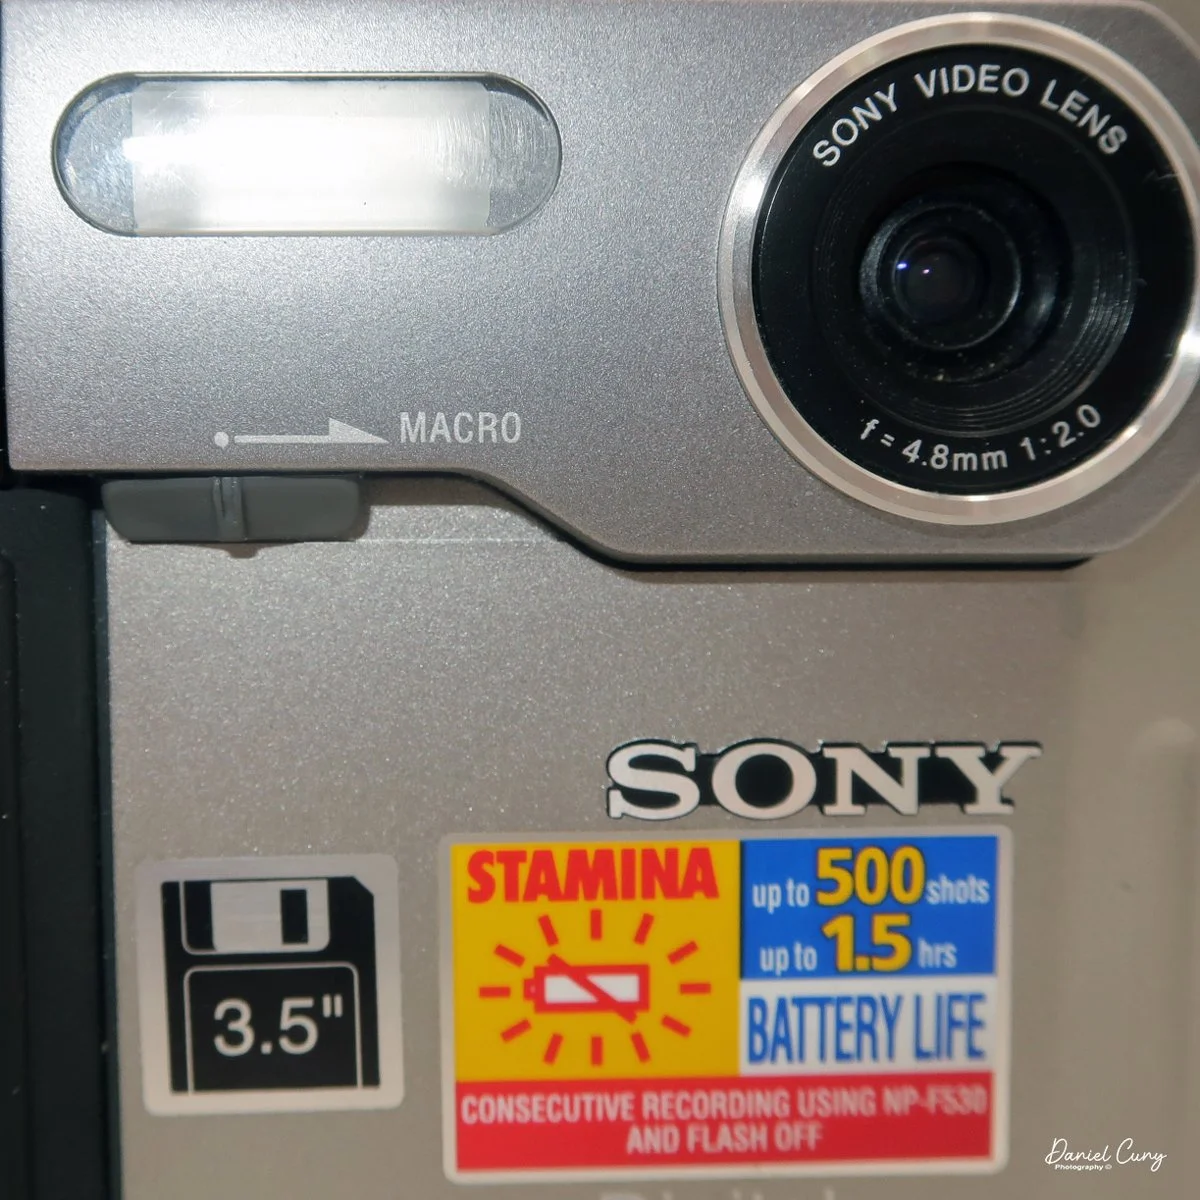
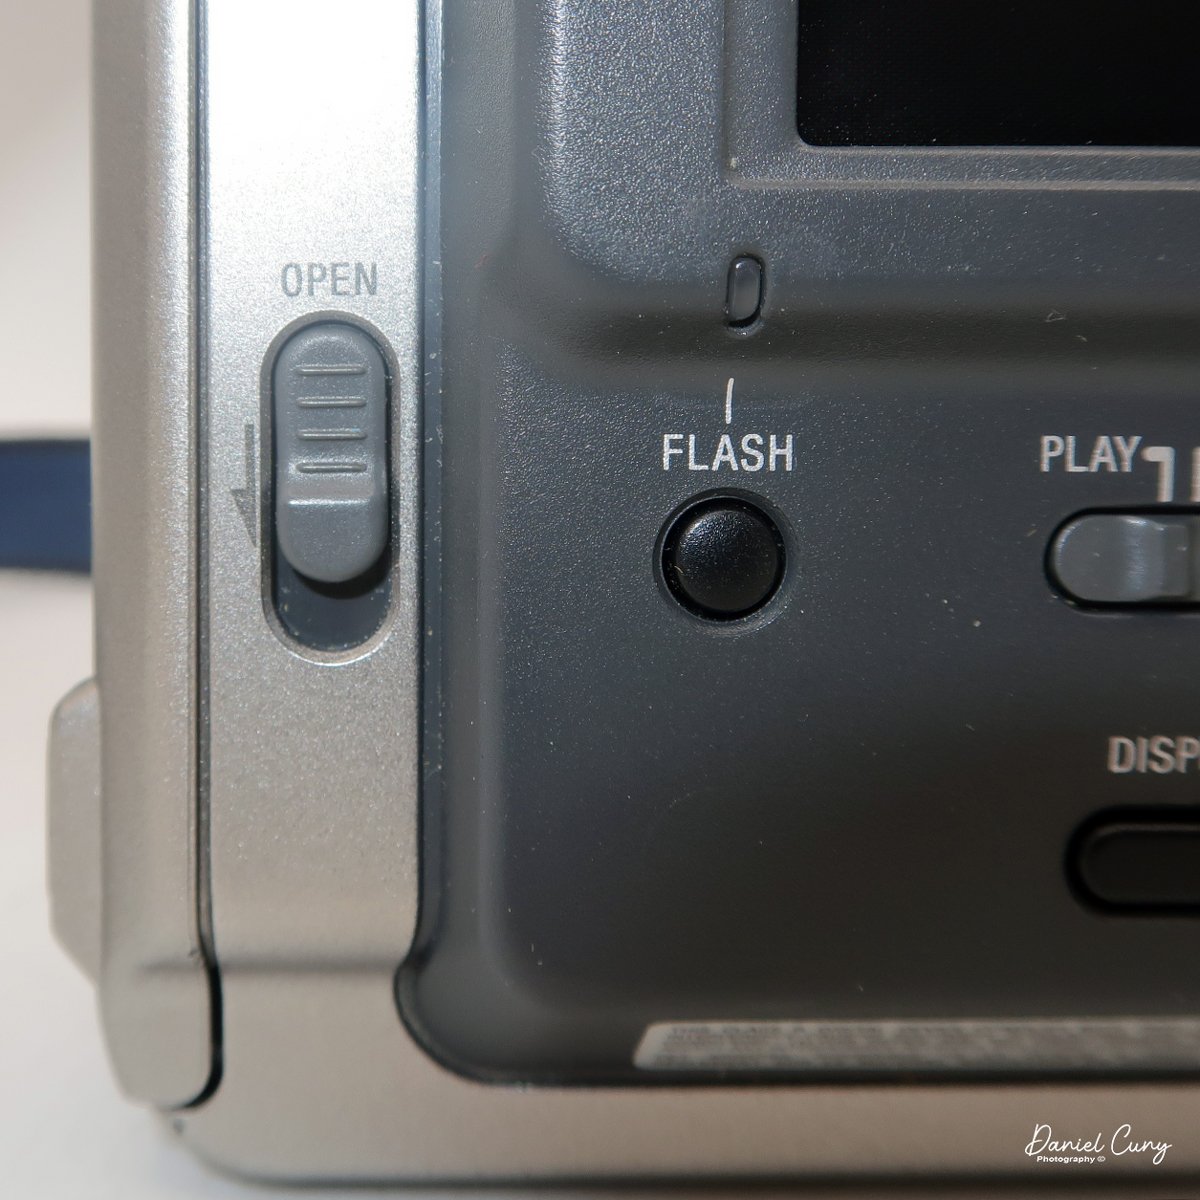
 My Sony Mavica MVC-FD5 was introduced in late 1997 or early 1998. It's a fairly large camera, measuring 5" wide by 4.25" tall by 2" deep, and it weighs 1 pound, 5.7 ounces with the battery, strap, and a 3.5" floppy disk installed. The camera has a 4.8mm F/2.0 lens, equivalent to a 47mm lens on a 35mm camera. The camera is a fixed focus camera and in normal mode will focus to approximately 4' from the lens. The camera does have a macro lens. Under the flash, there is a sliding bar you slide to put the camera in macro mode; then the focus distance is 3"-9" from the lens surface. 

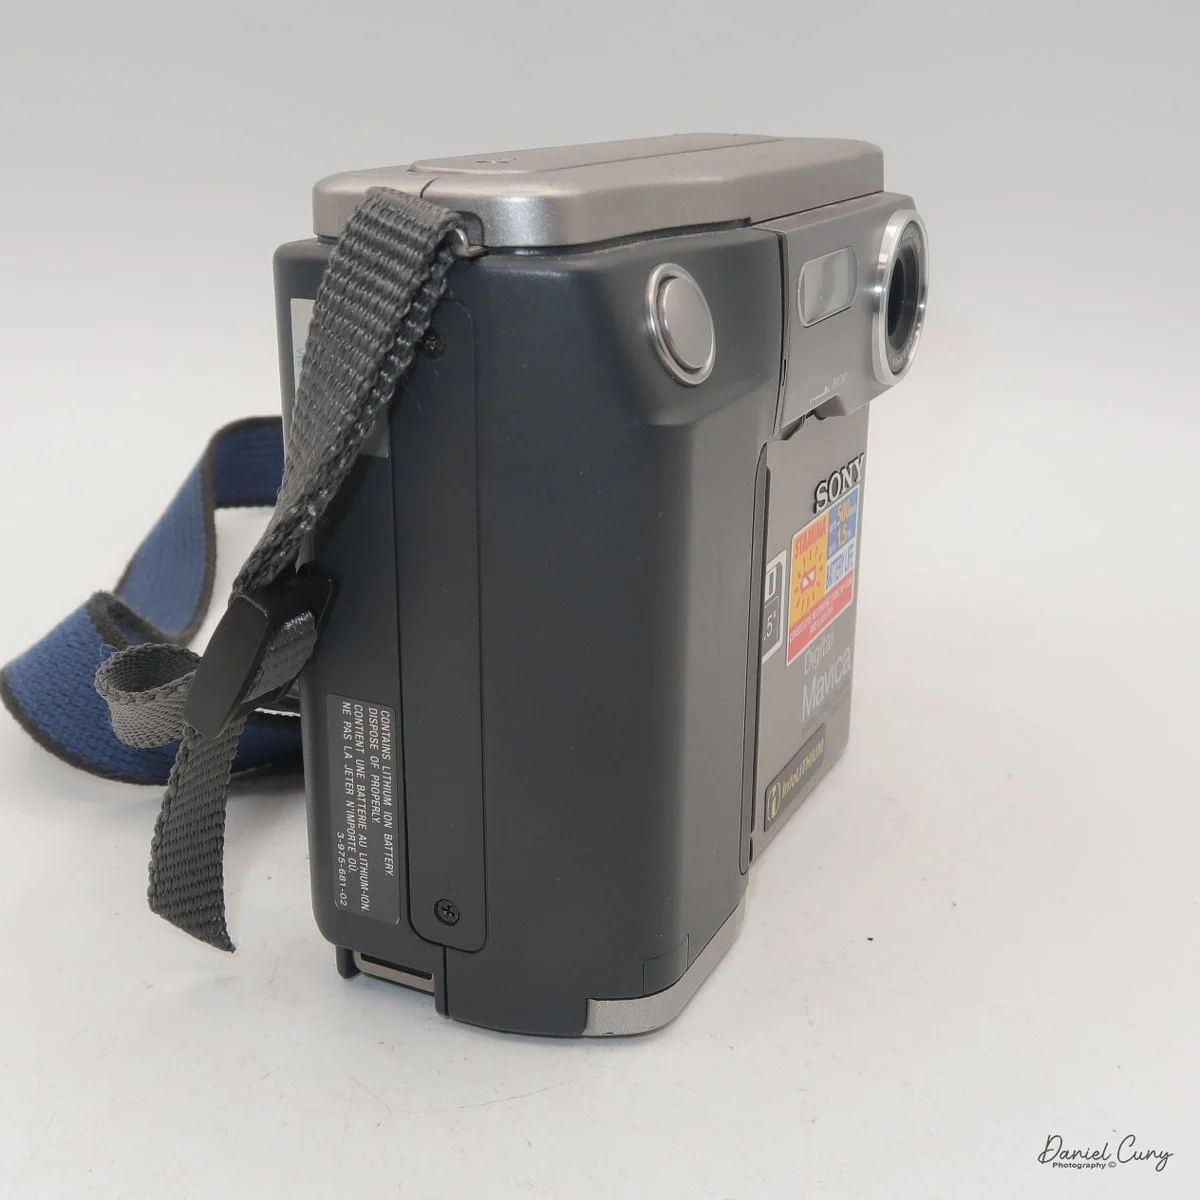
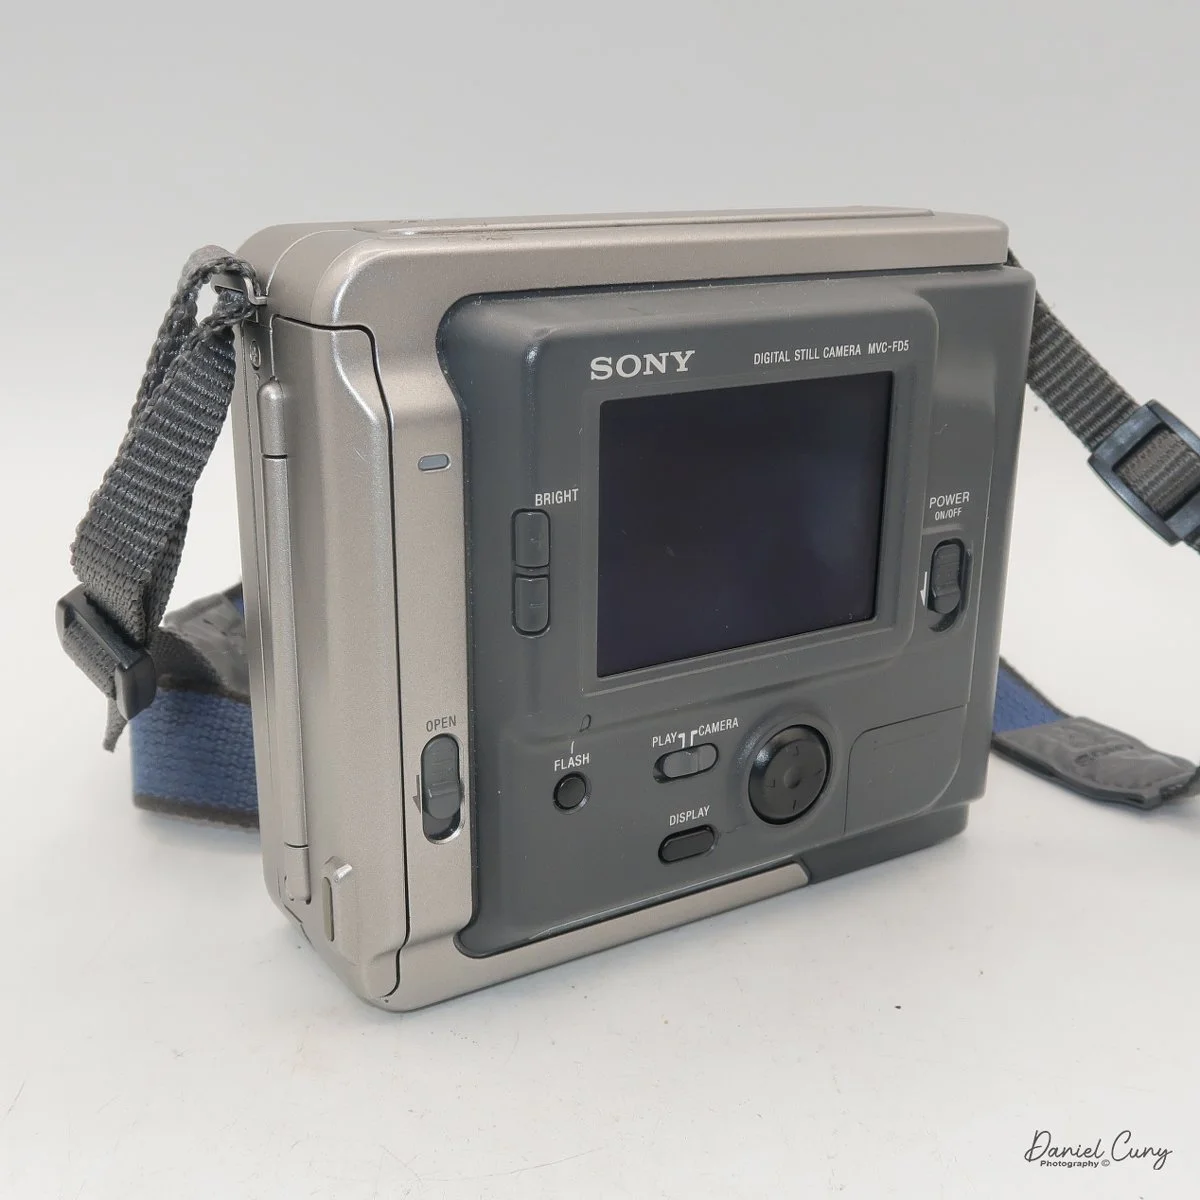
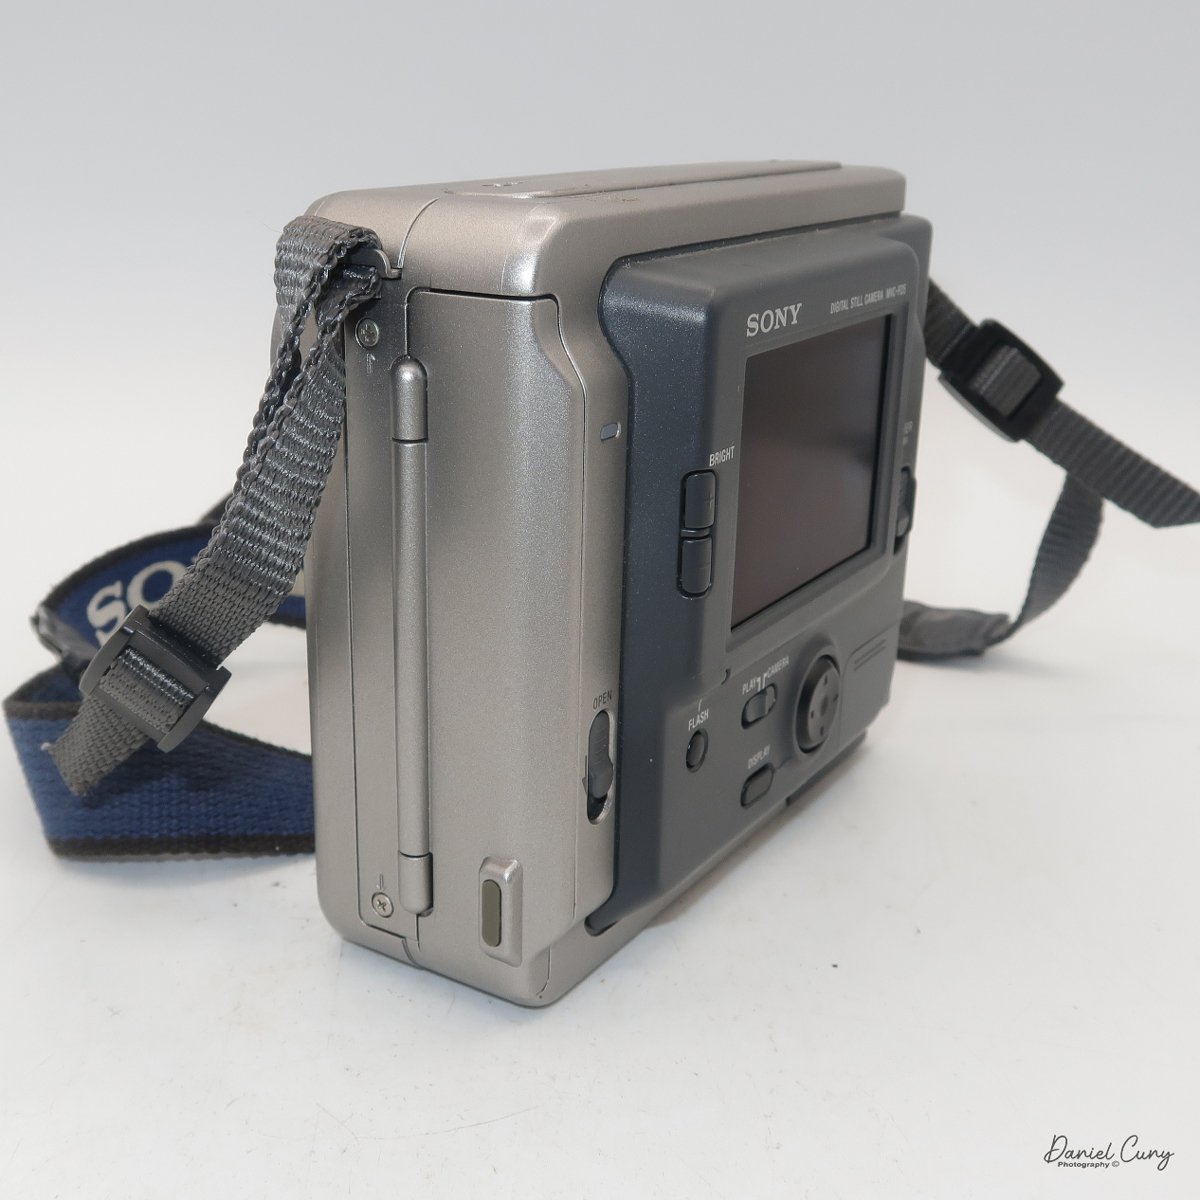
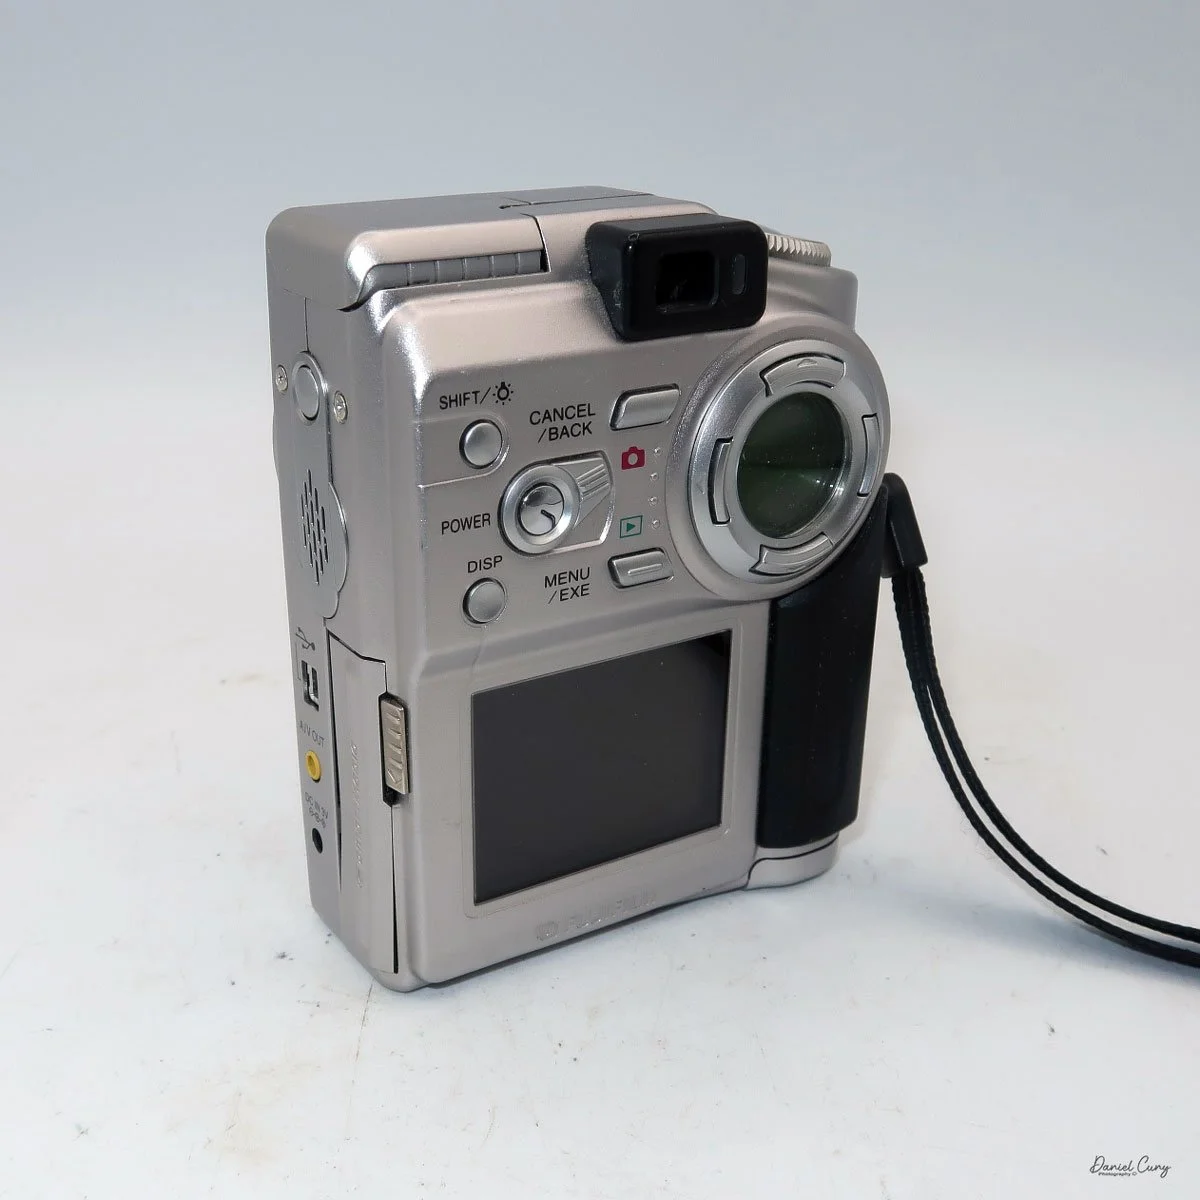
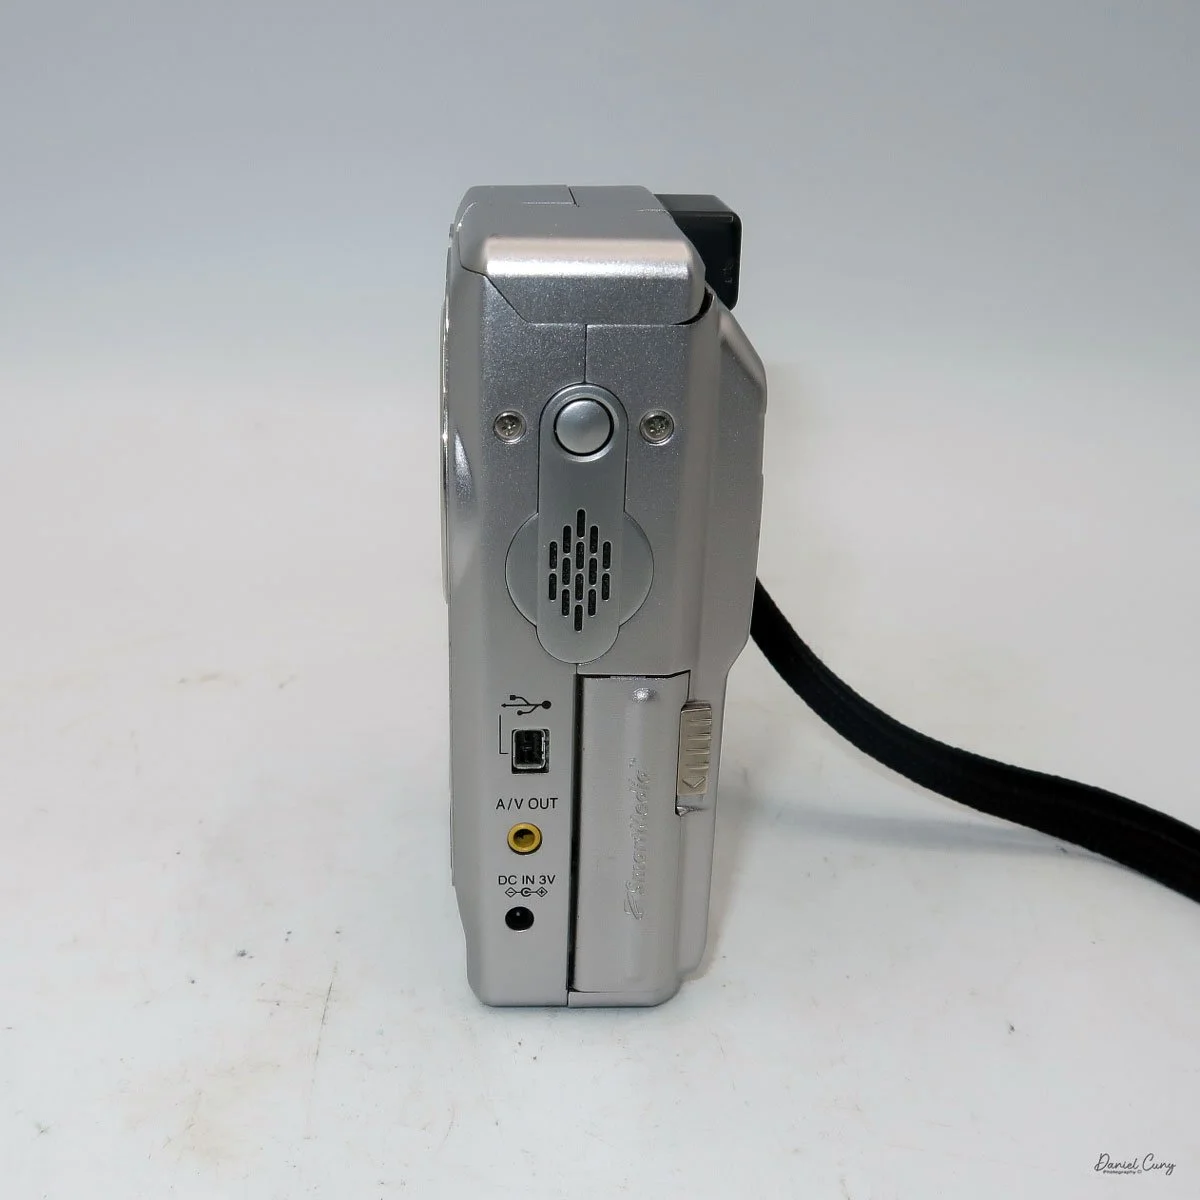
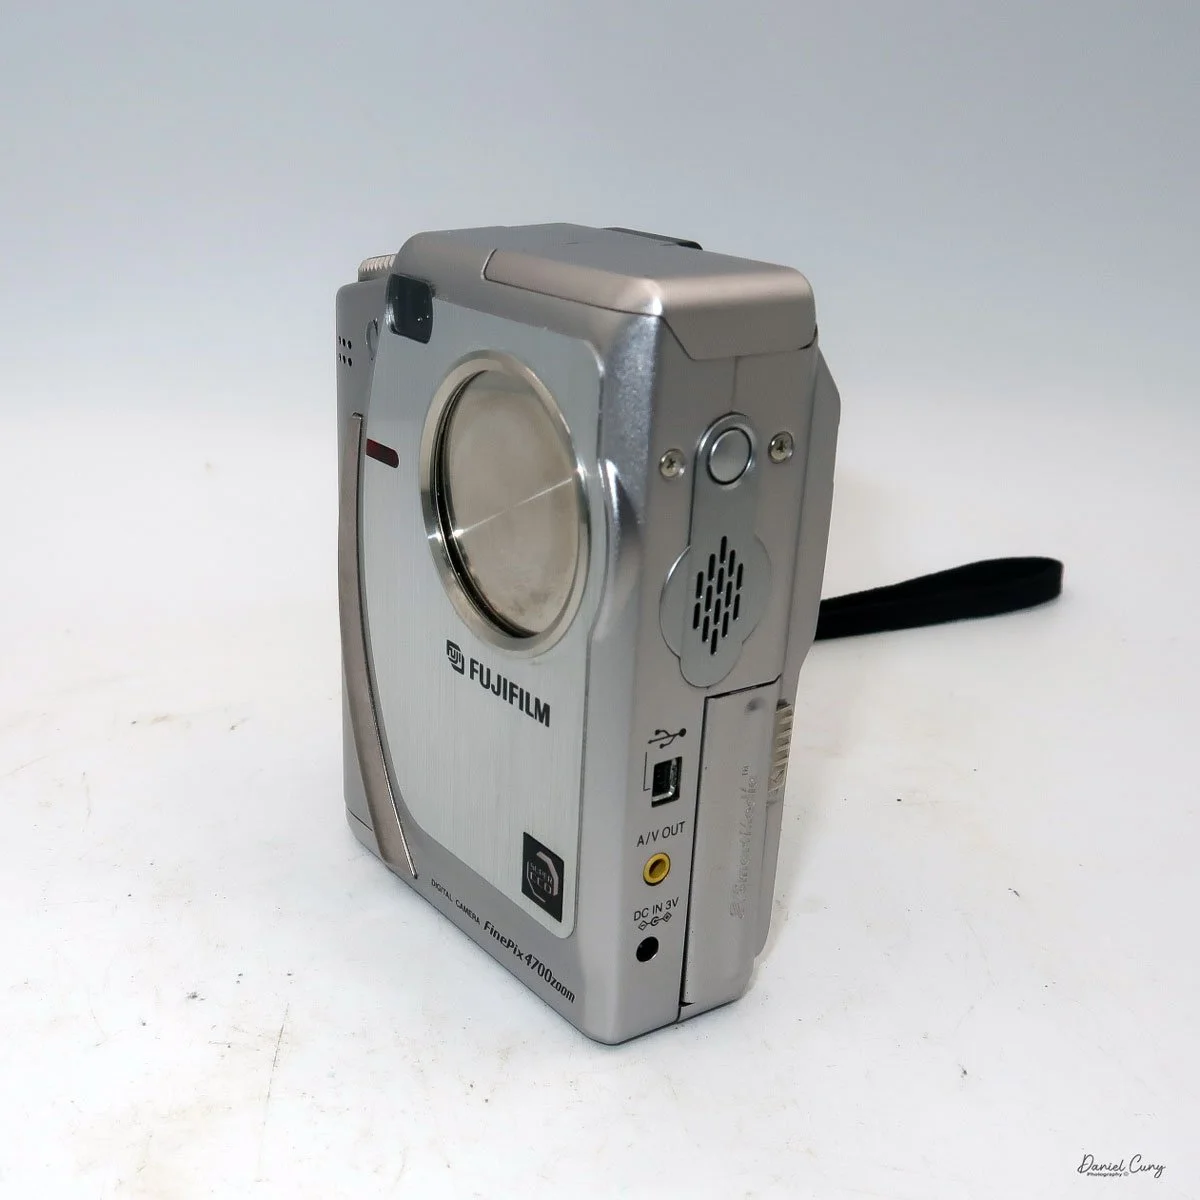
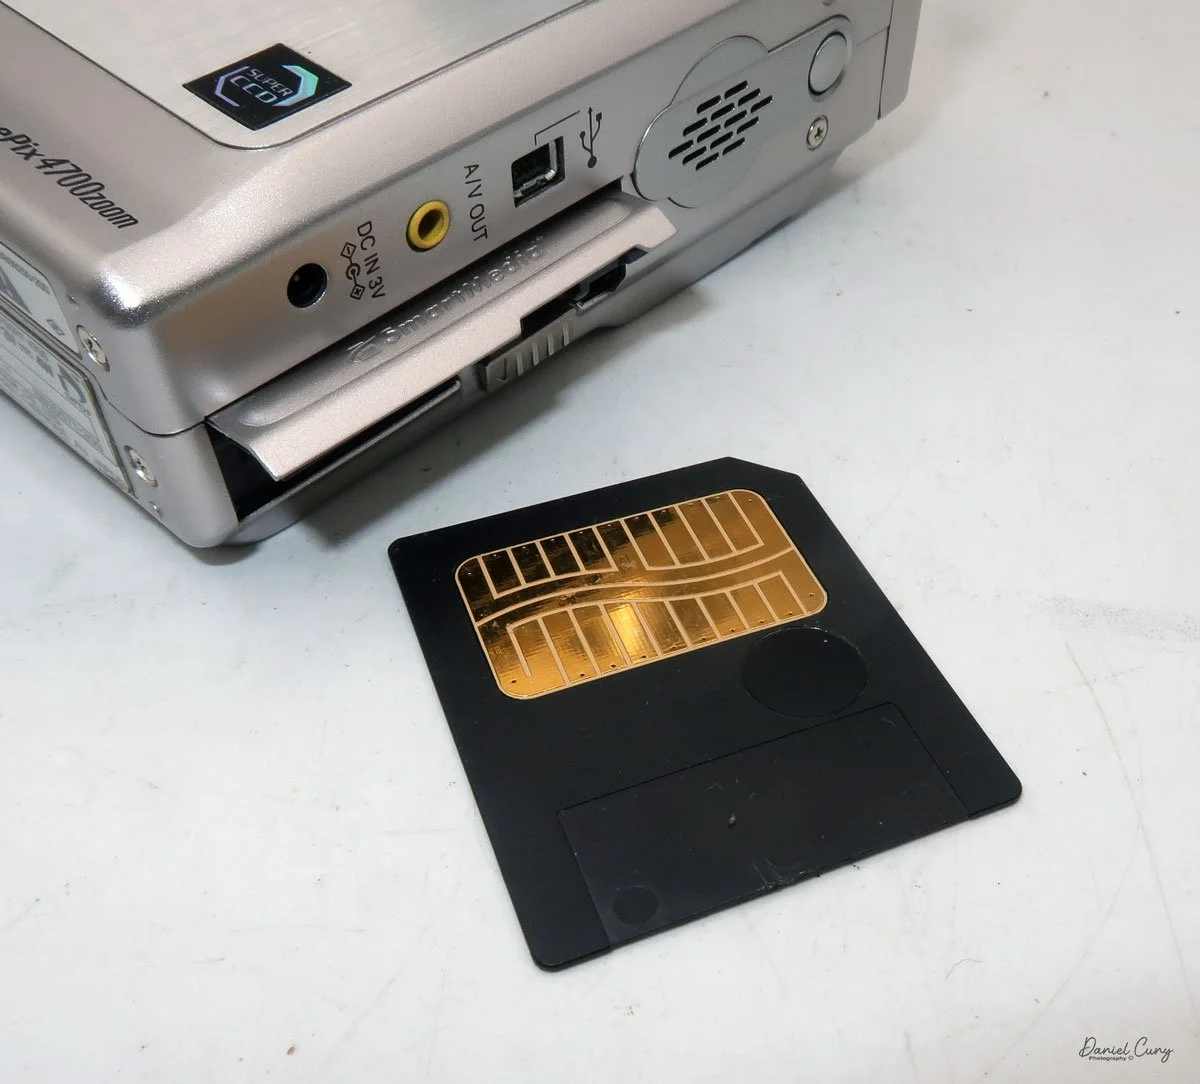
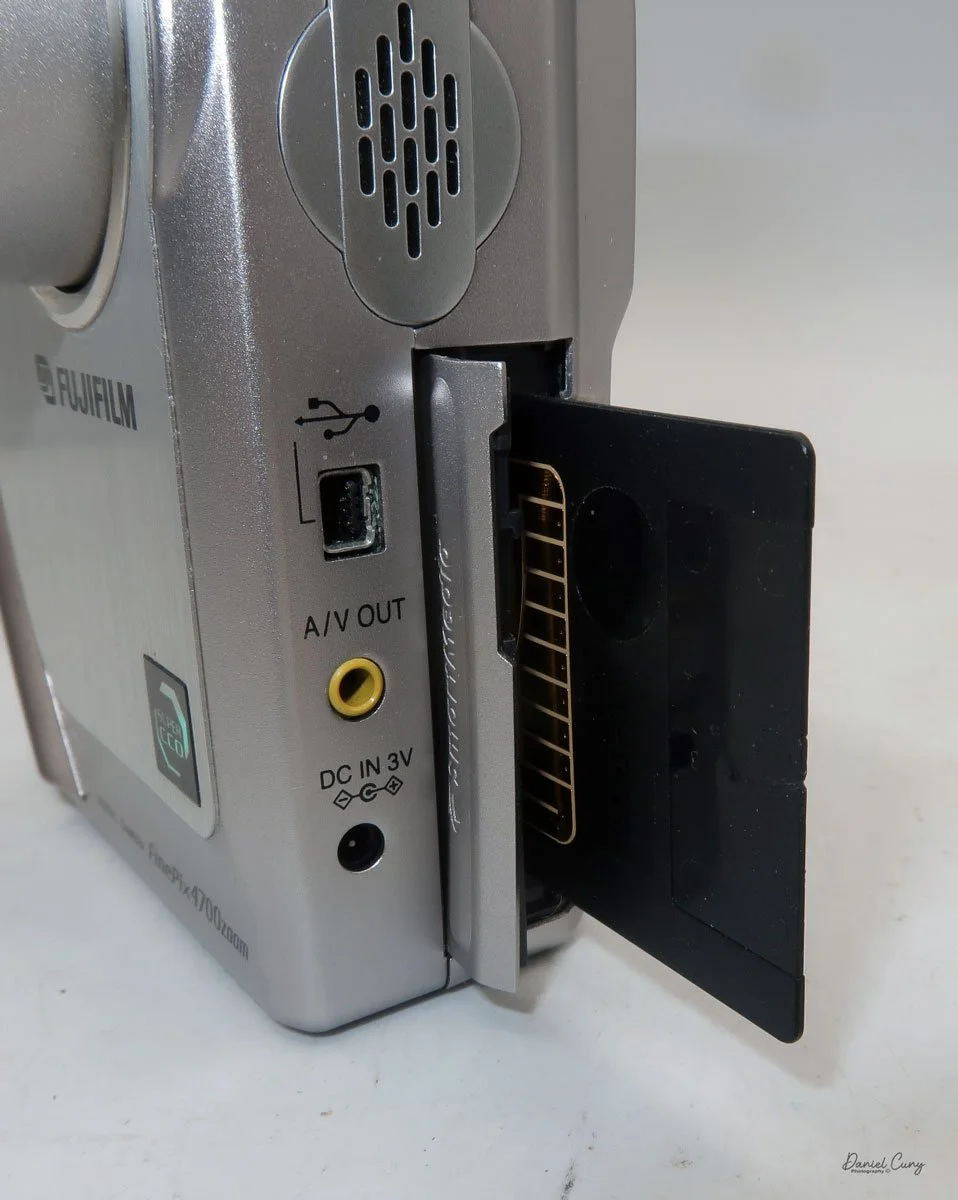
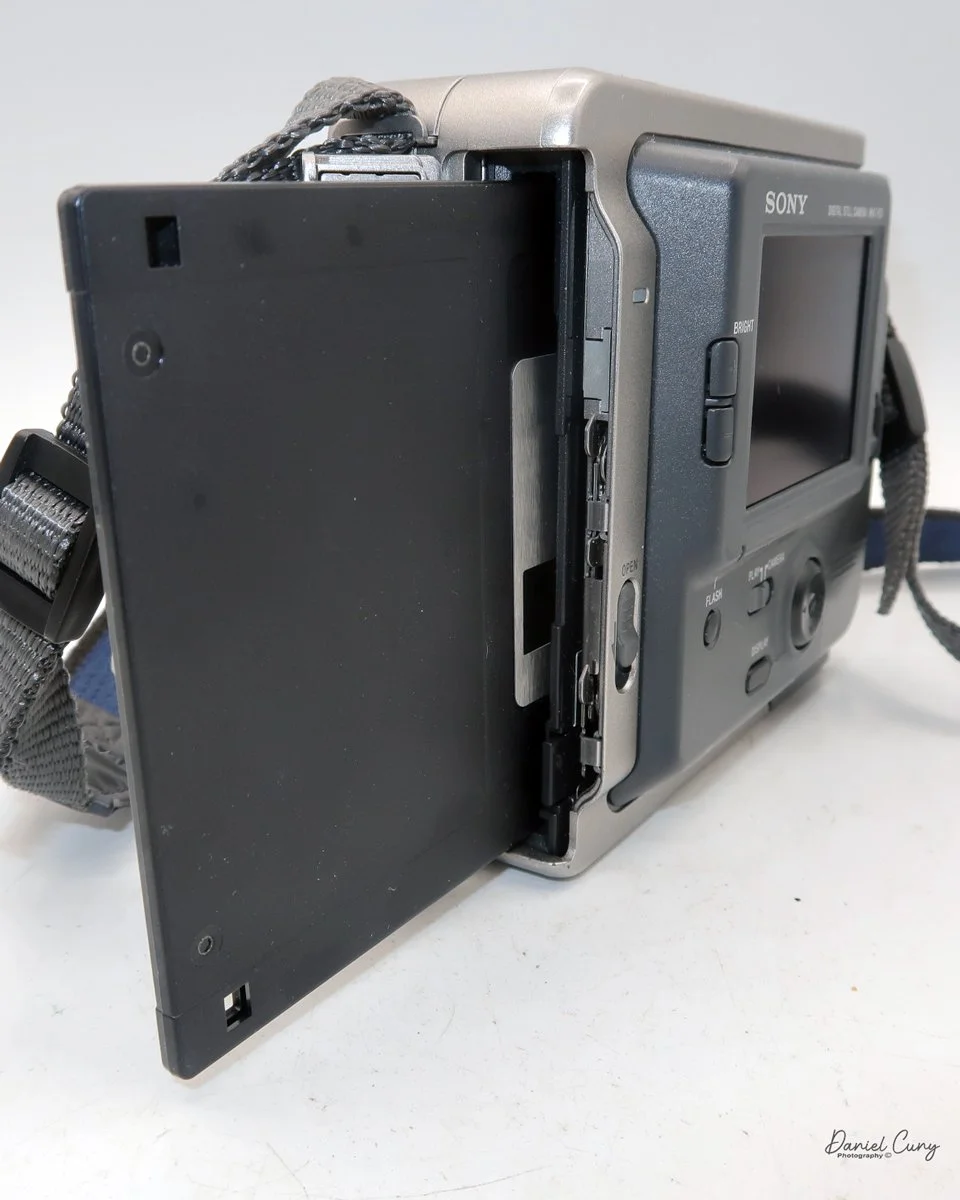
The images are recorded onto a standard 3.5" floppy disk (1.44mb) which is inserted into the camera through a door on the left side of the camera. On the back of the camera, in the lower left corner is a switch which says, "open". Sliding the button down, opens the door where you insert the 3.5" floppy disk. To remove the disk, press the button inside the disk's door, and the floppy will be ejected. 

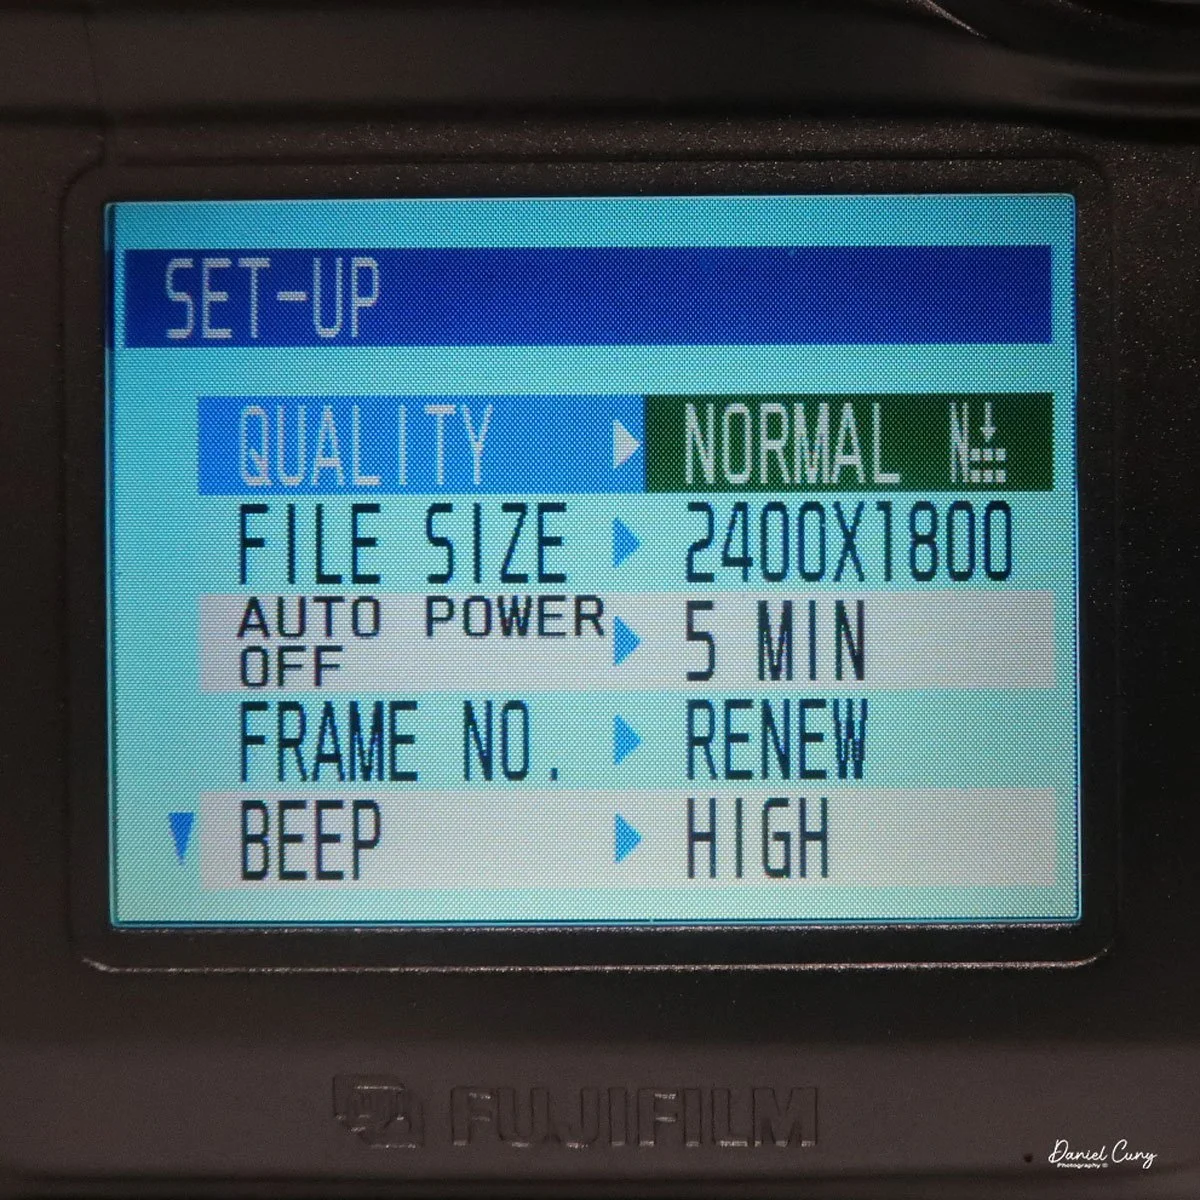
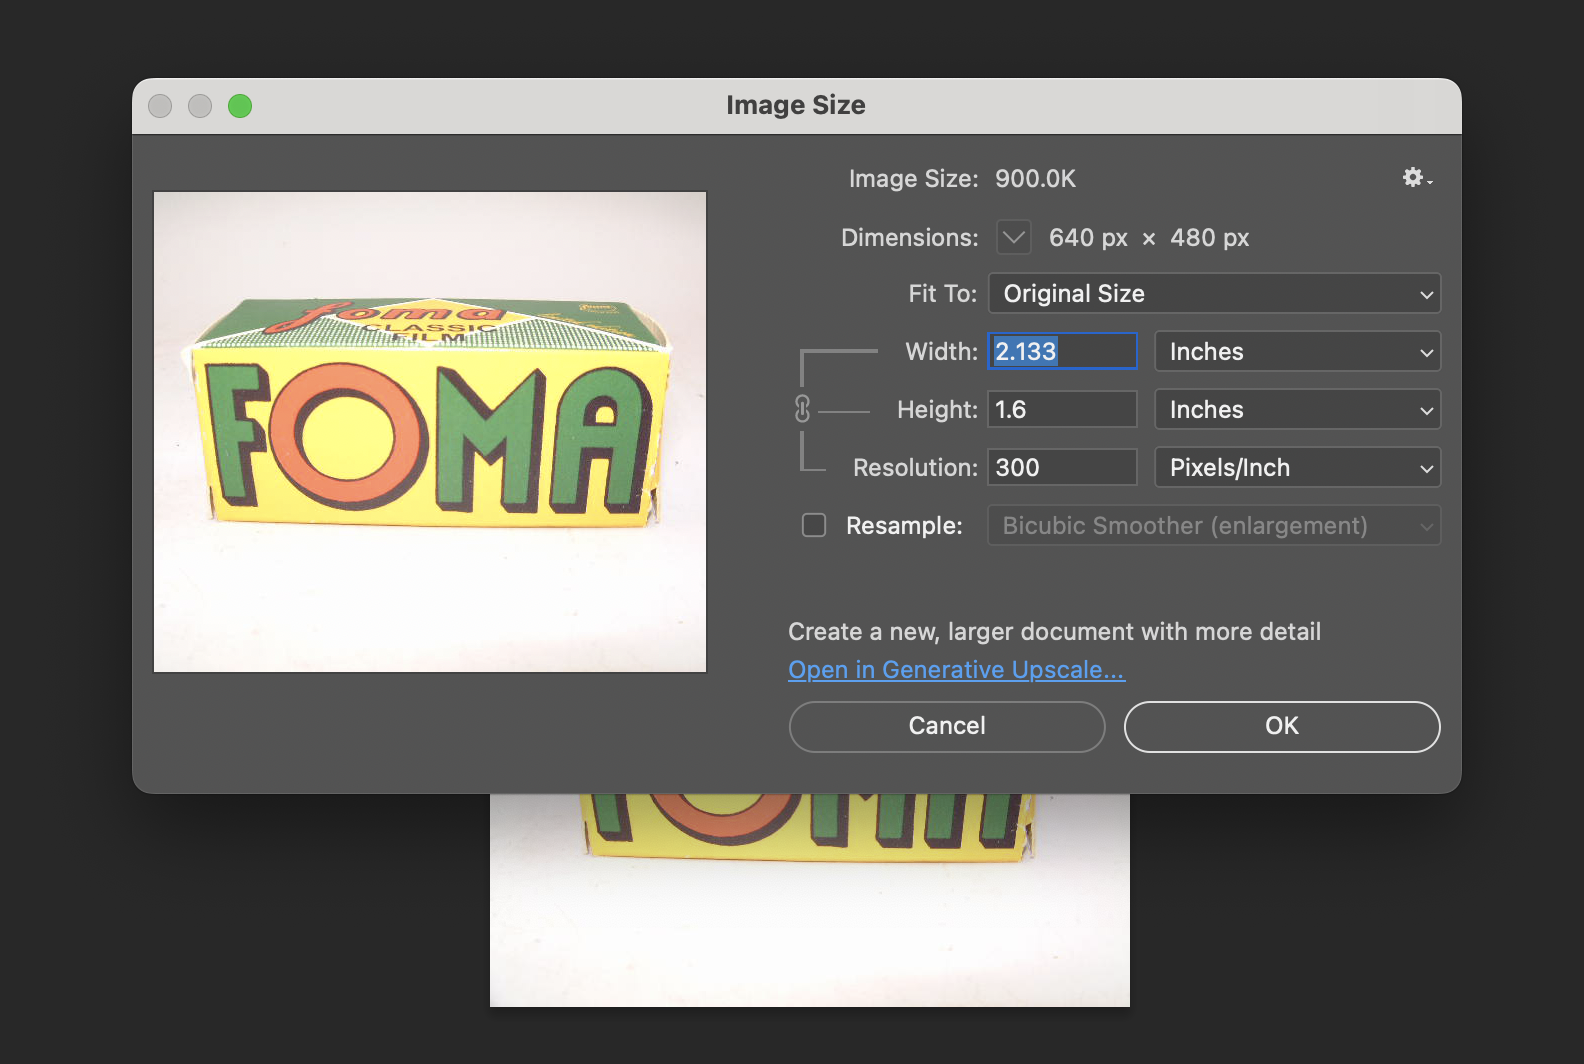
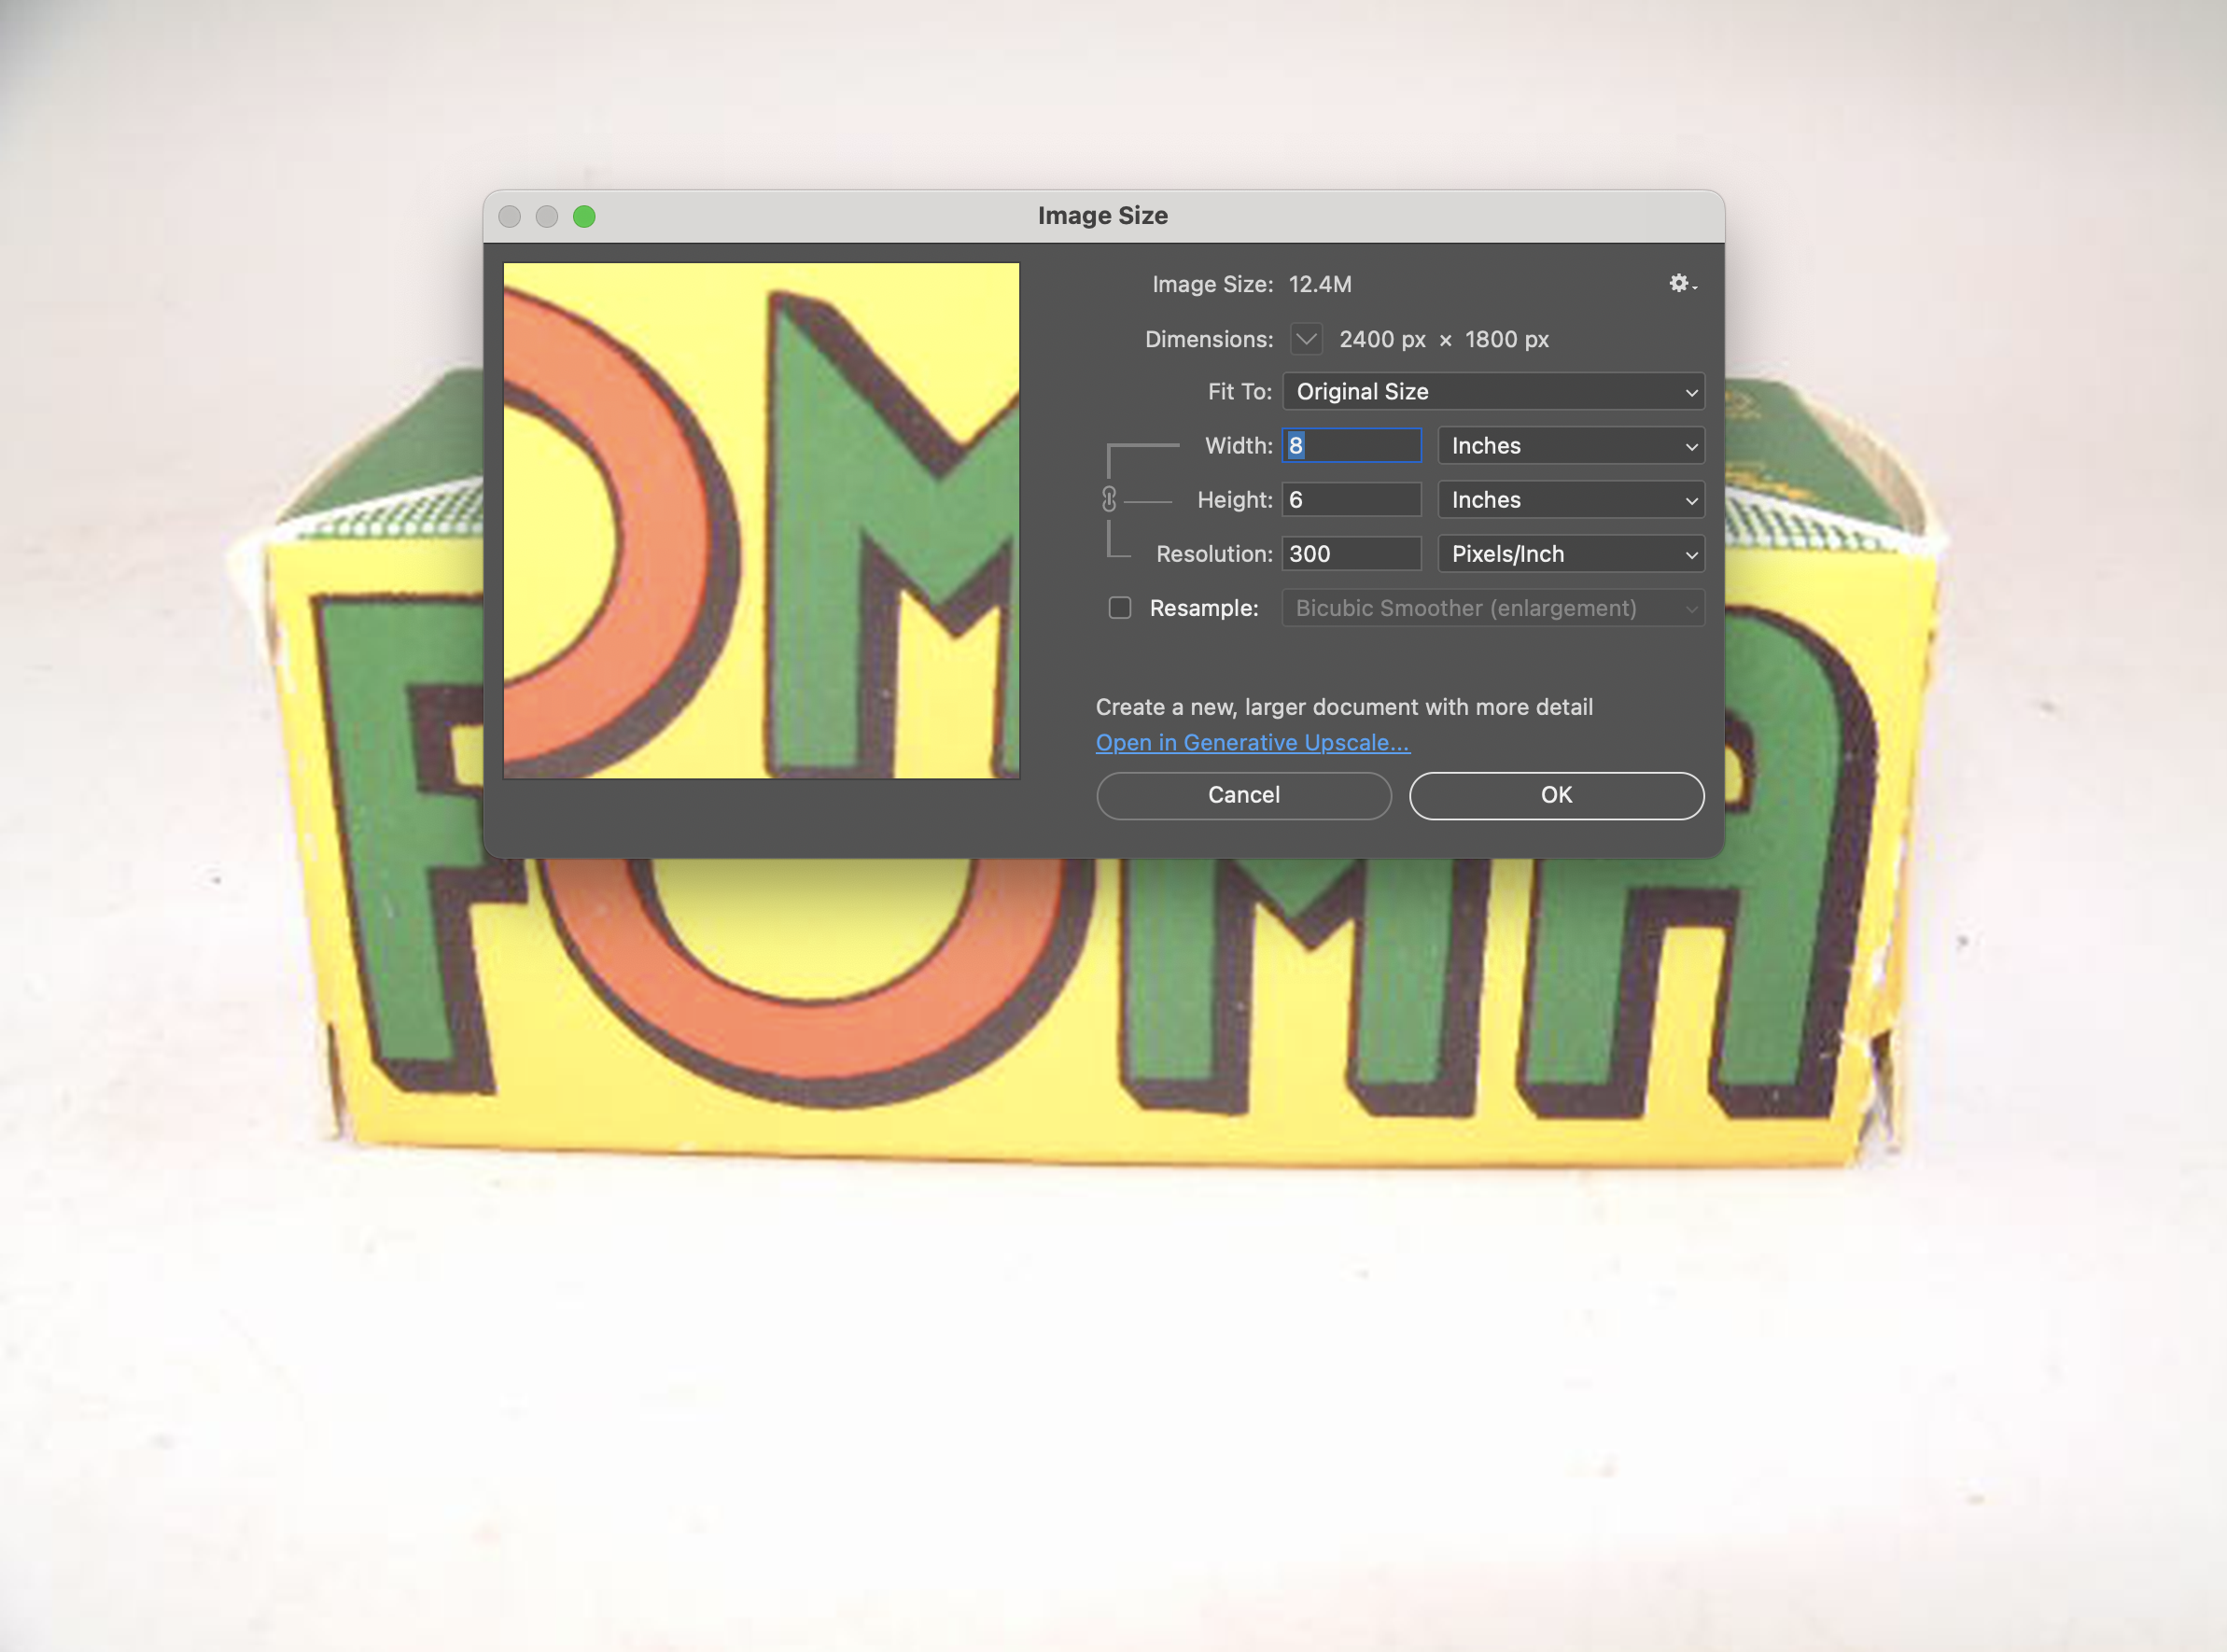
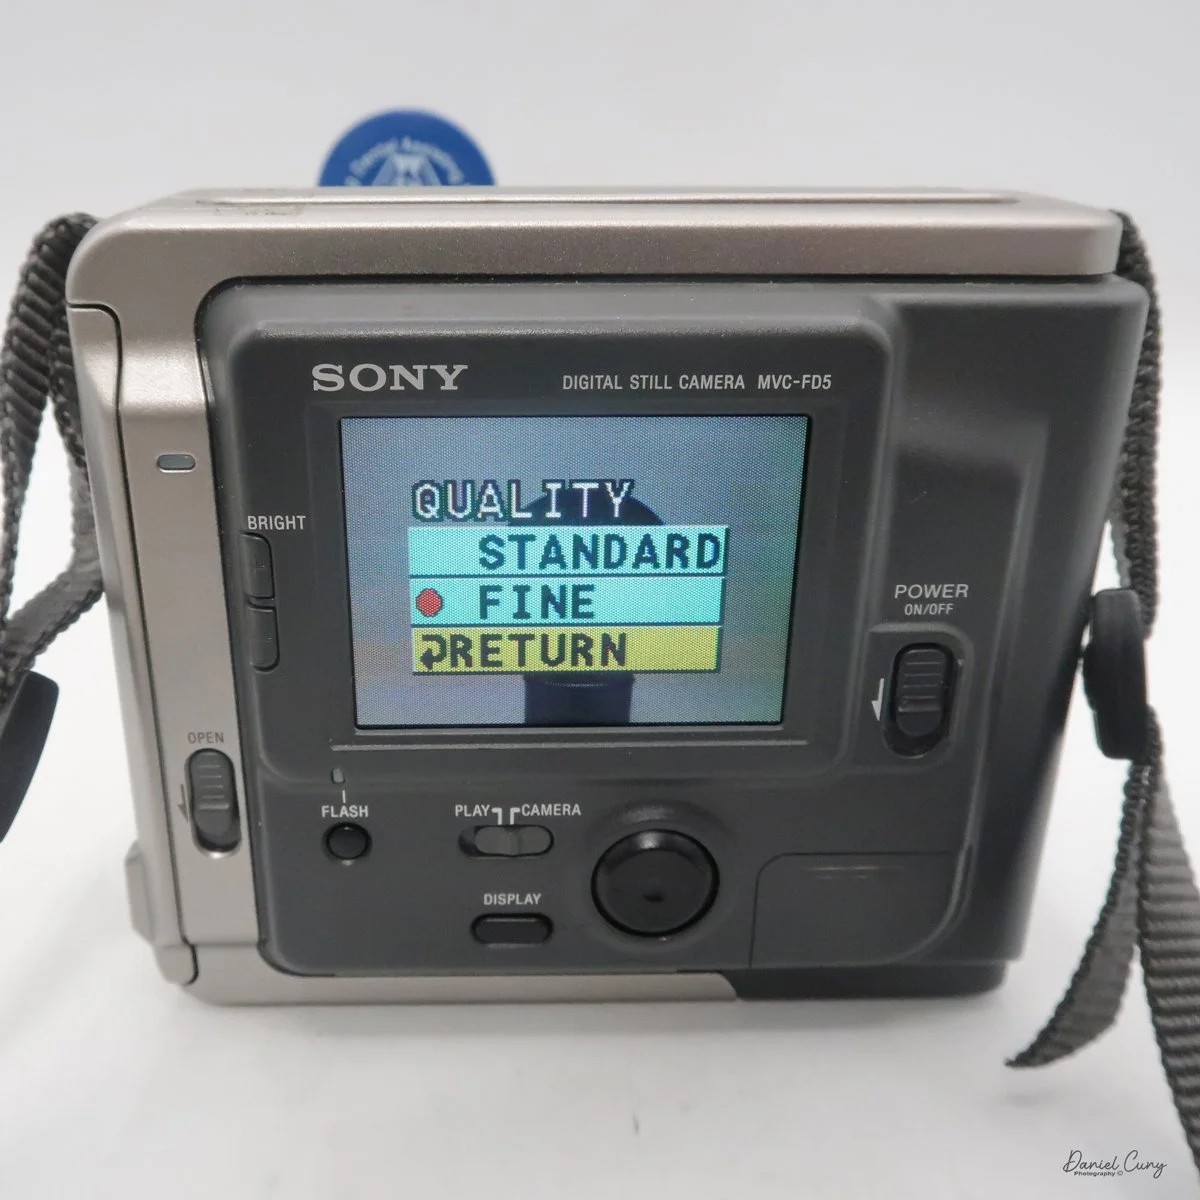
 The camera records images at 640 x 480 resolution in JPEG format and has two shooting modes: Standard and Fine. Each floppy disk will hold 30-40 standard images or 15-20 fine images.

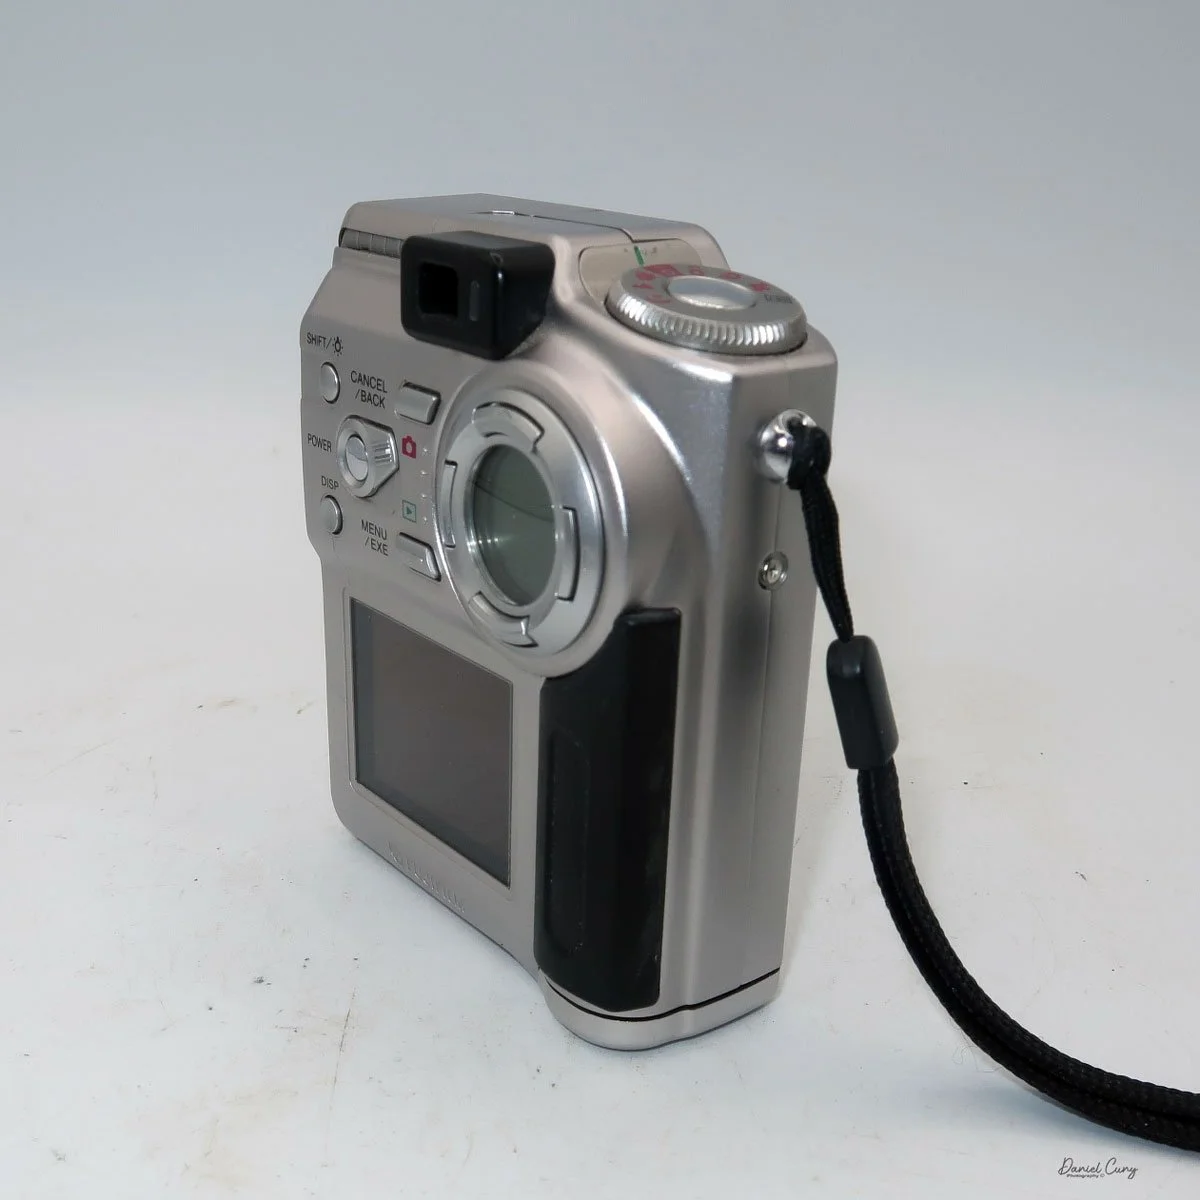
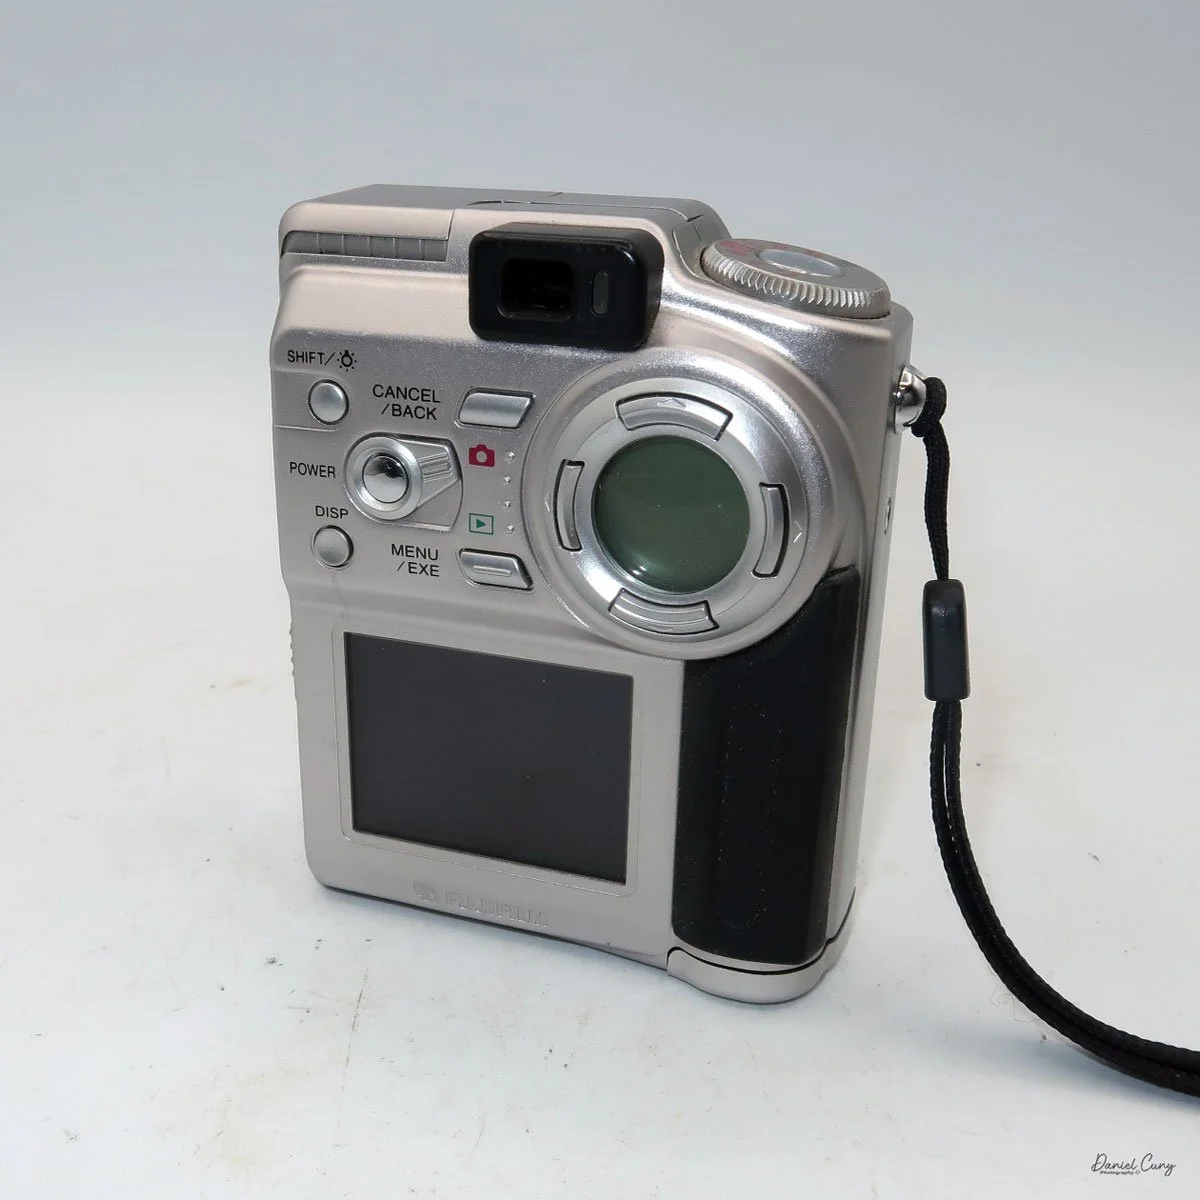
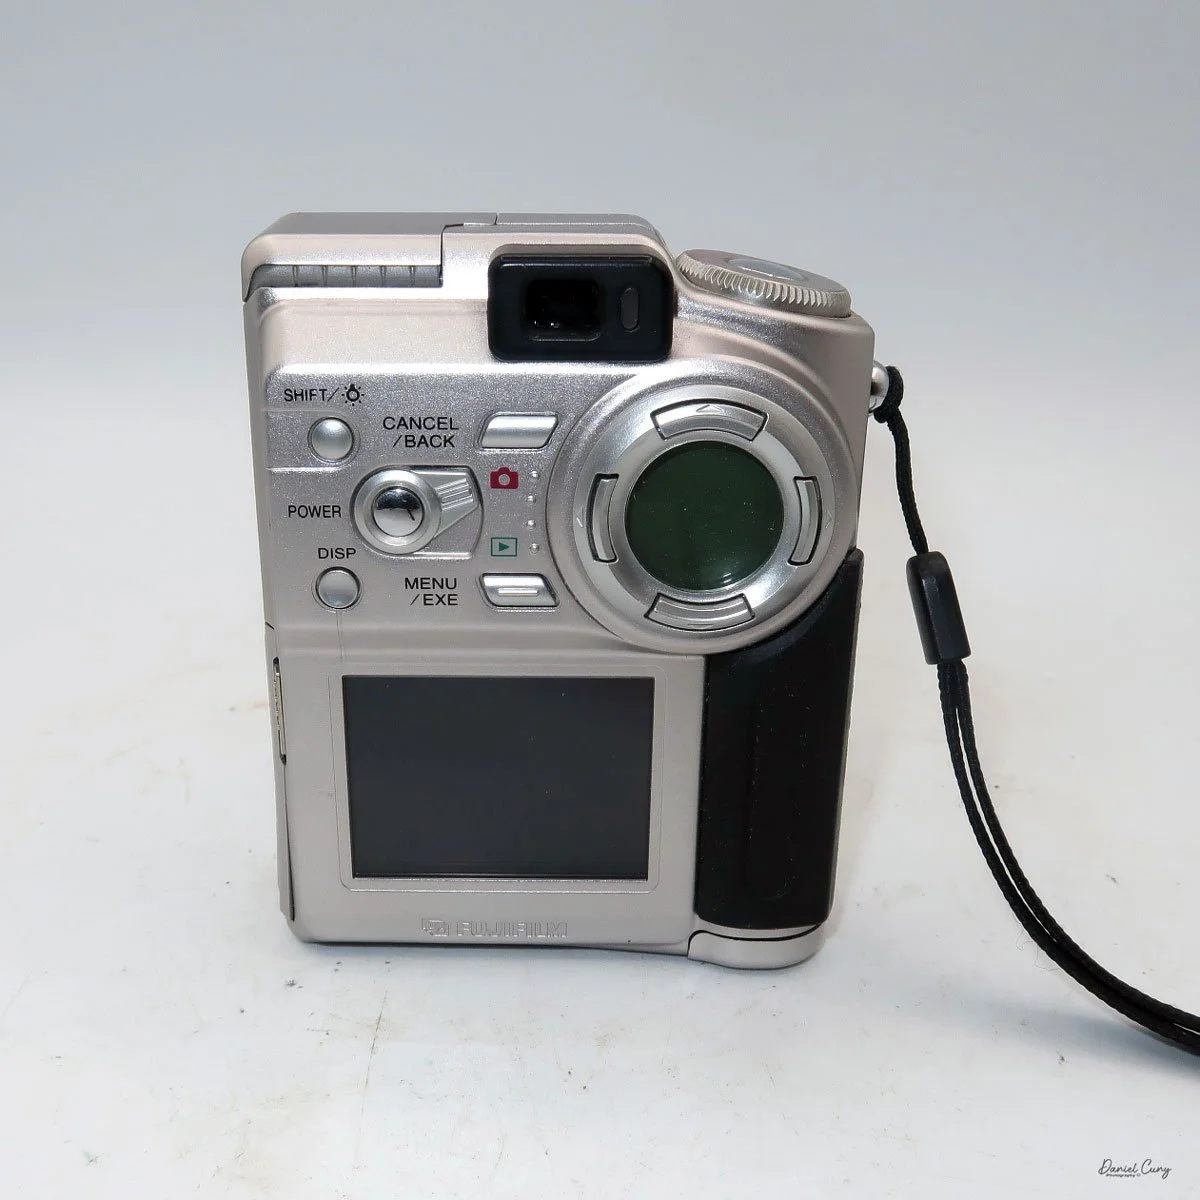
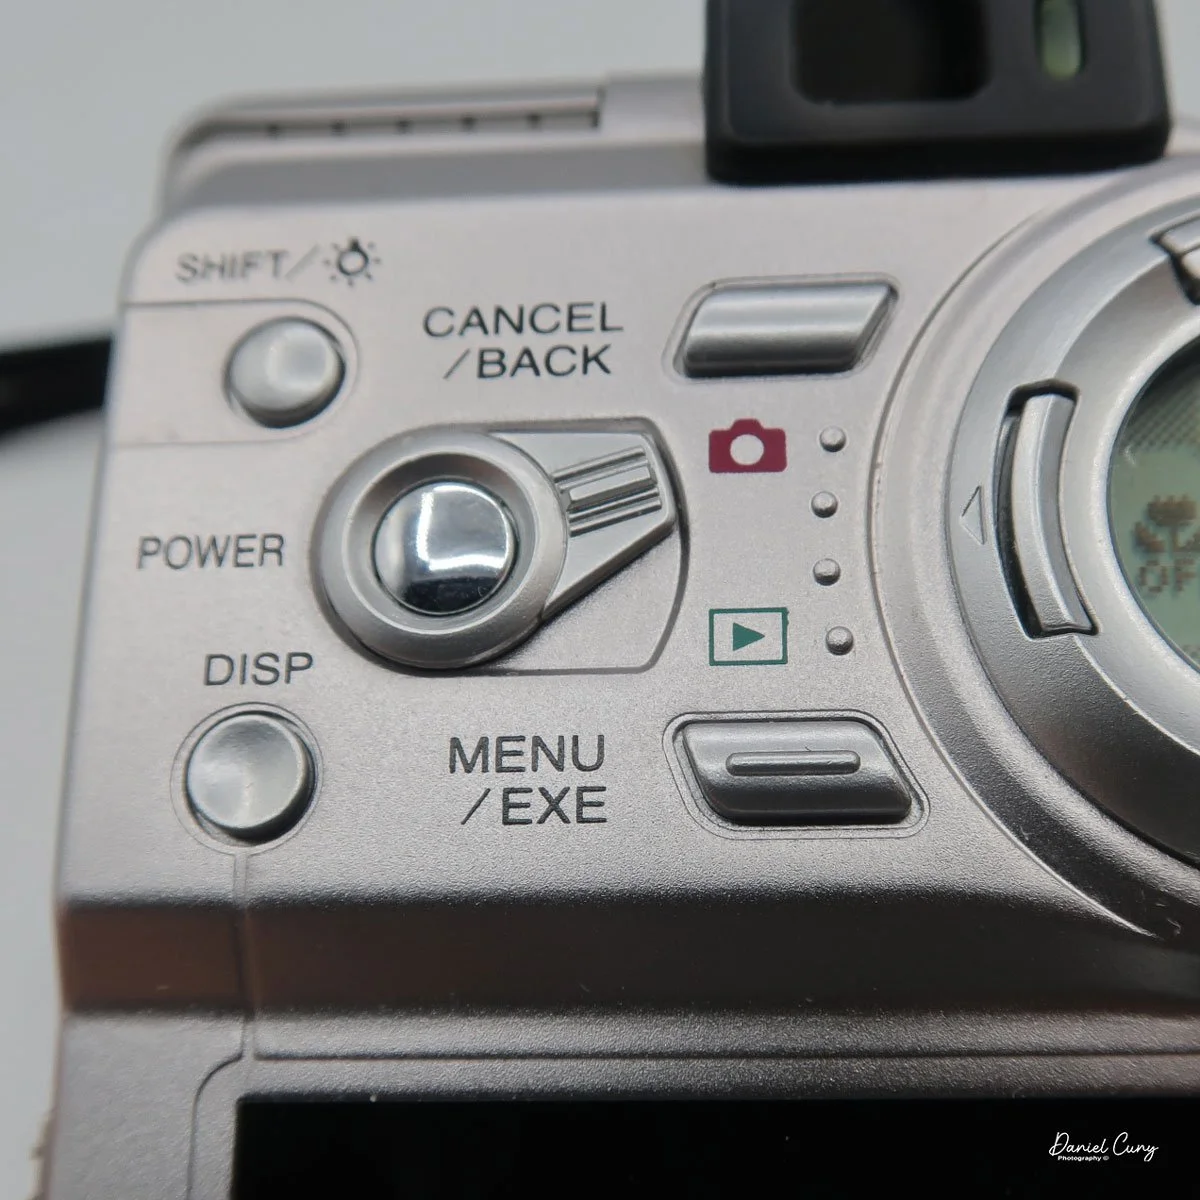
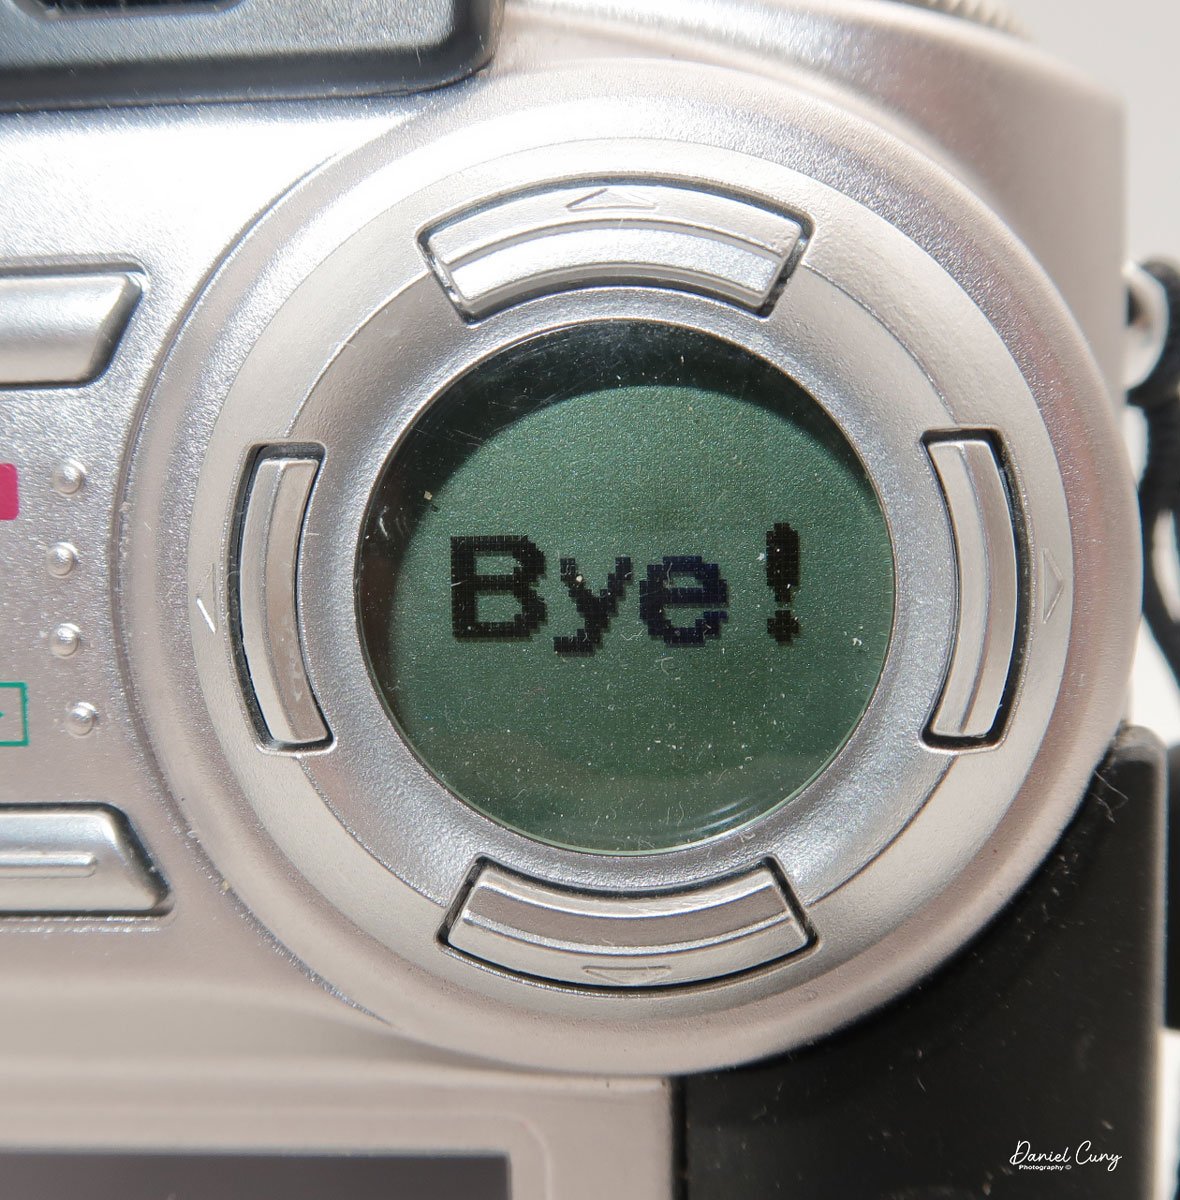
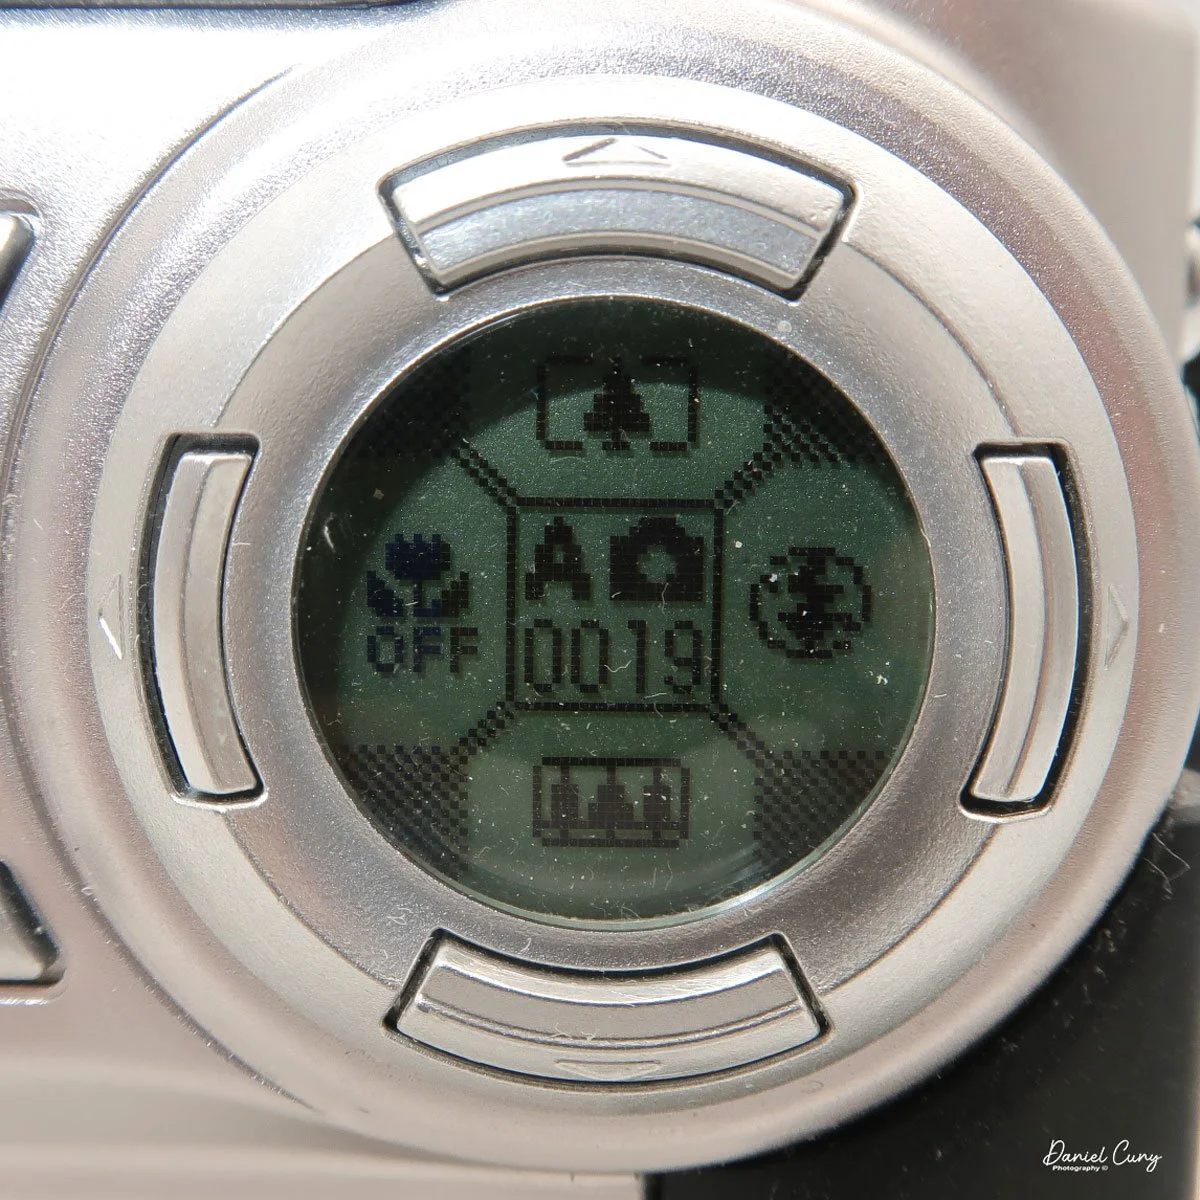
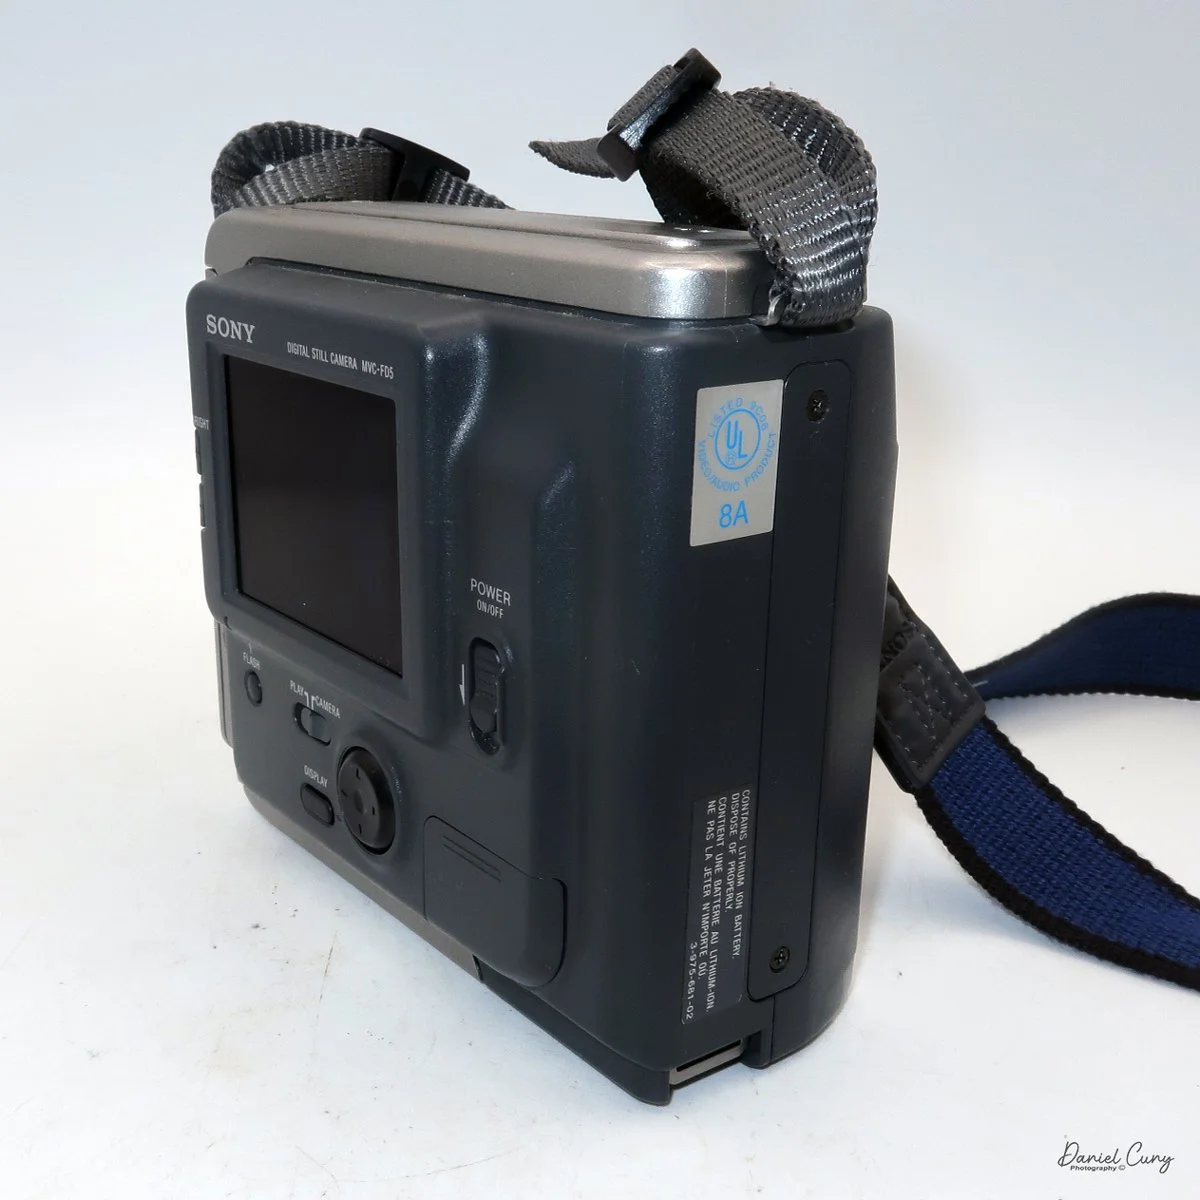
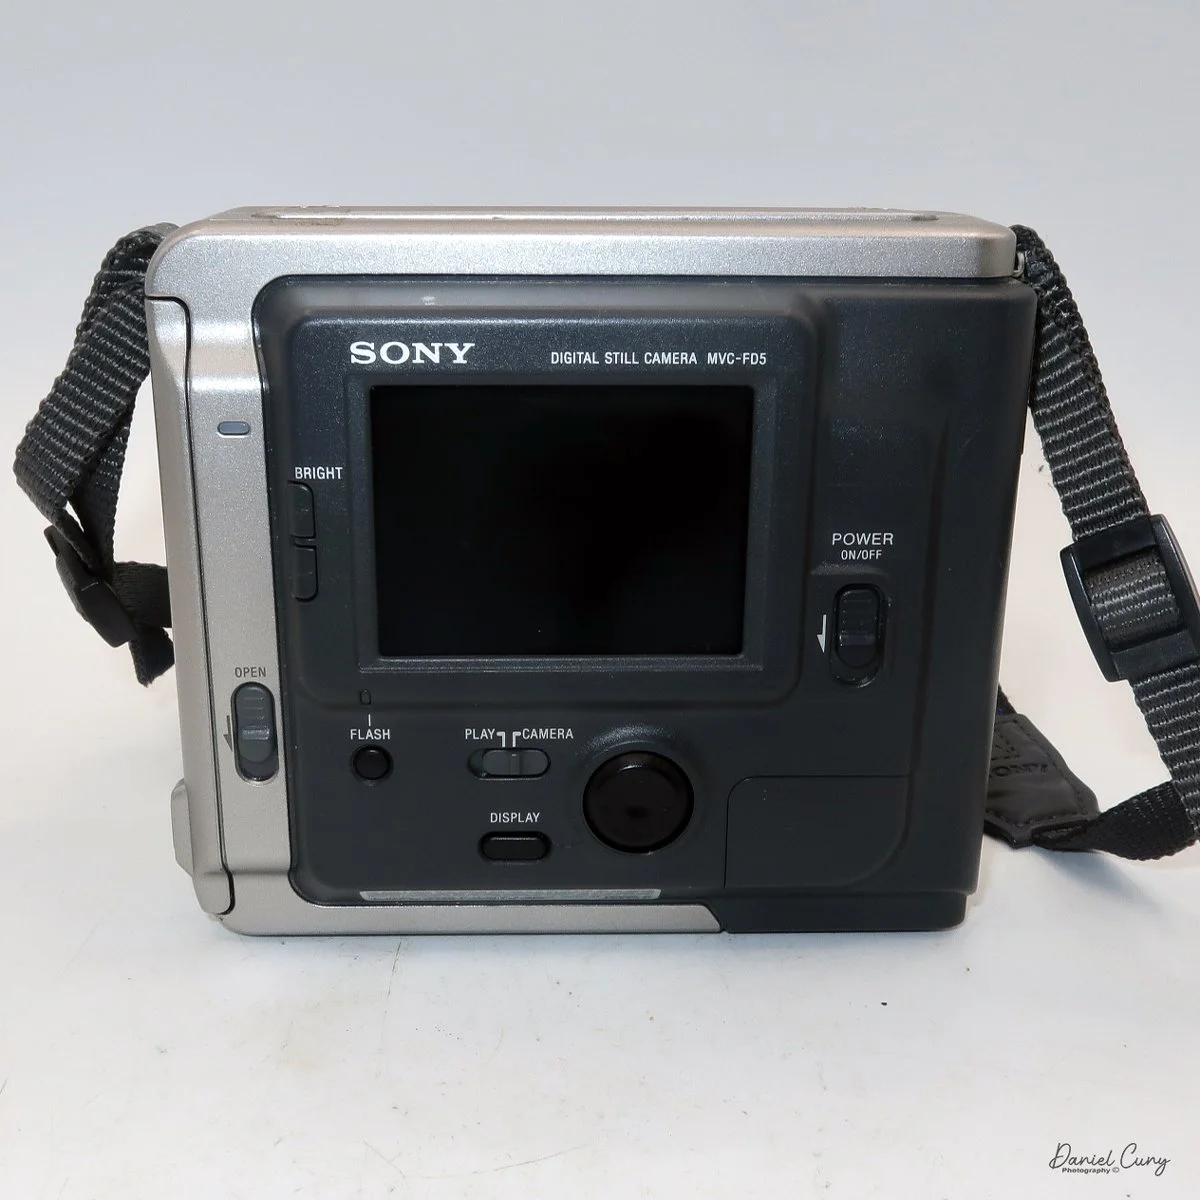
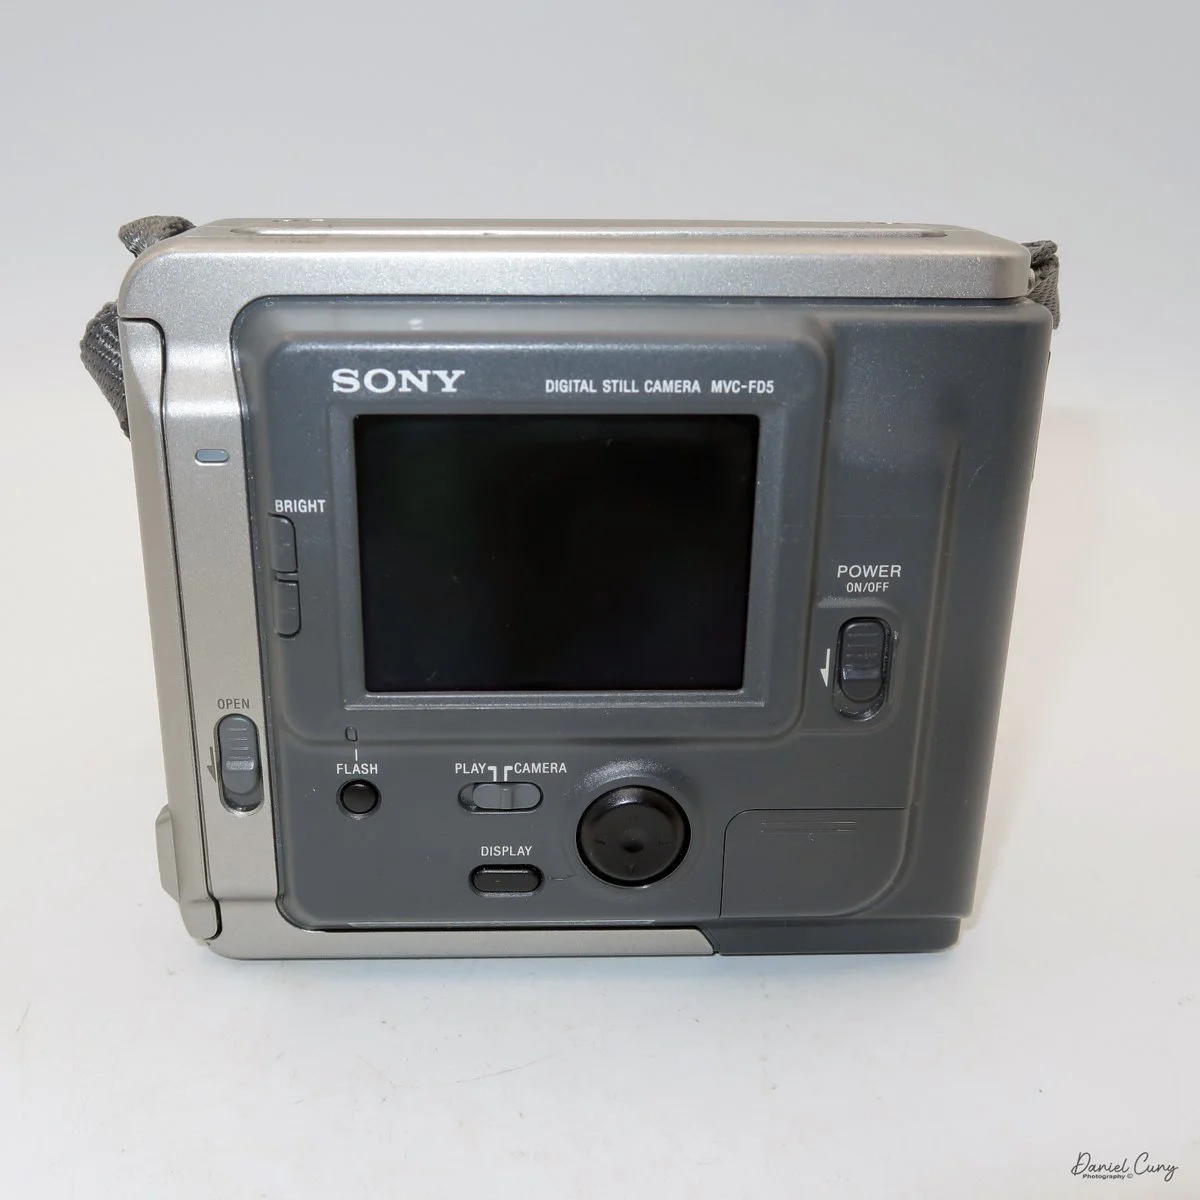
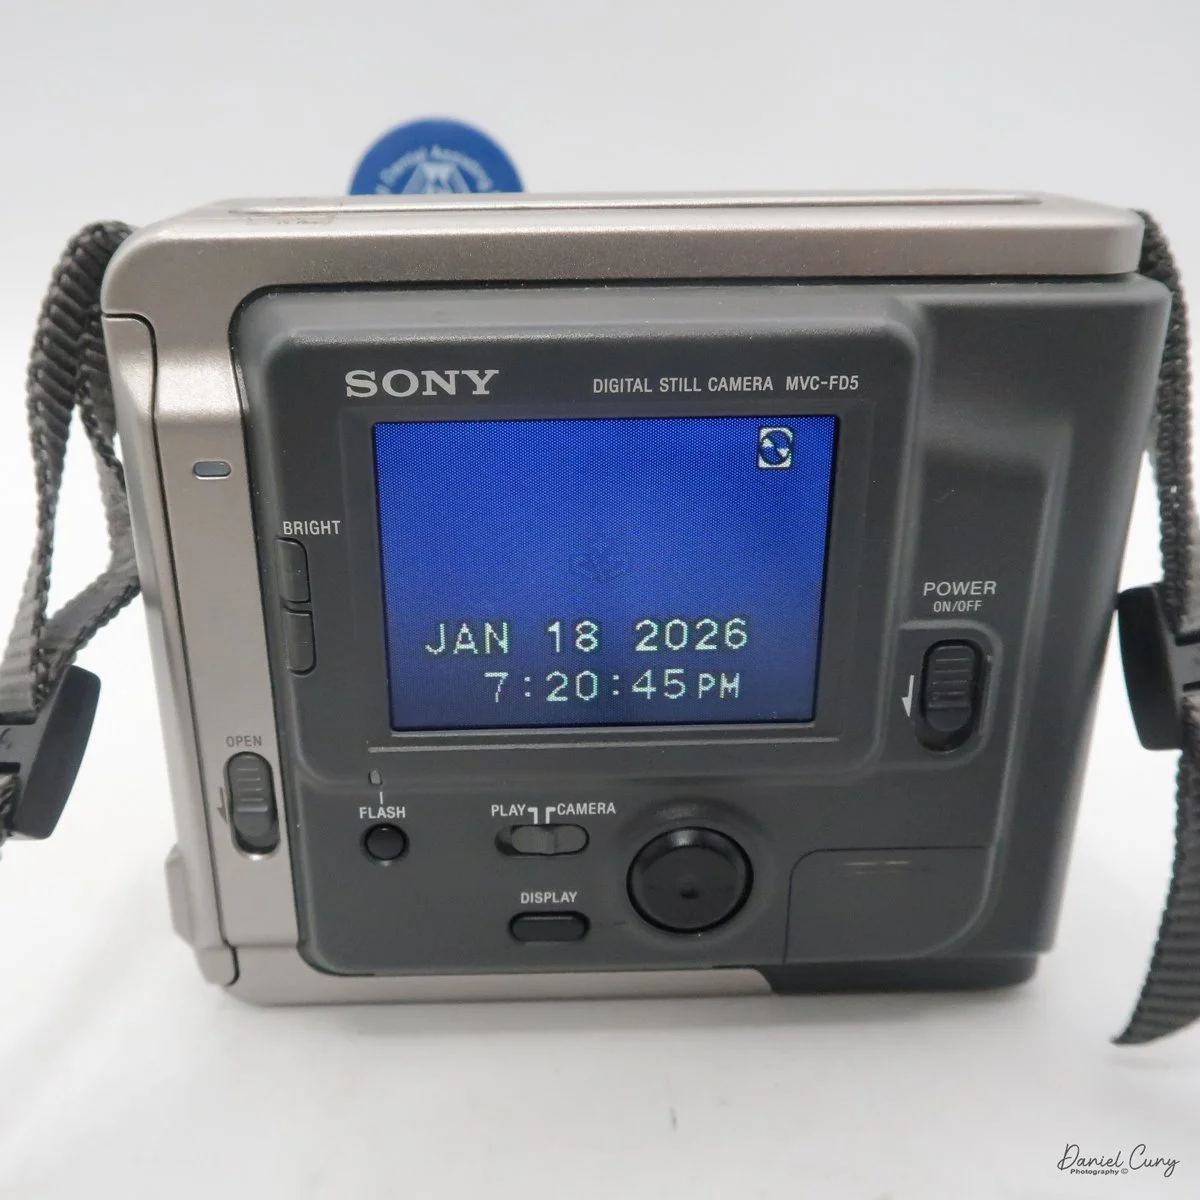
All the controls on the Sony Mavica MVC-FD5 camera are located on the back. The controls are around the main 2.5" screen, which has a total of 61380 dots. Once the camera is turned on, which is done by a sliding switch to the right of the screen, named "power on/off". Slide the switch down to turn the camera on, and to shut it off, slide it down again.

It's very interesting, and something I didn't remember from owning this camera soon after it came out in the late 1990s. Still, once you turn the camera "on, and there's a floppy disk in the camera, you'll hear a noise of the internal disk drive spinning and making sounds because the camera is checking the disk, making sure it's seated correctly and can write to it. It's also the sound you hear when you switch the button on the back of the camera from "play" to "camera," or vice versa, as the camera spins the disk to read images or prepare to accept them. It also makes a sound when in "play" mode, as you go from one image to another. Here's a short video of turning on the camera and taking a photo.

Video showing the camera being powered on and the time to record an image with camera sounds.

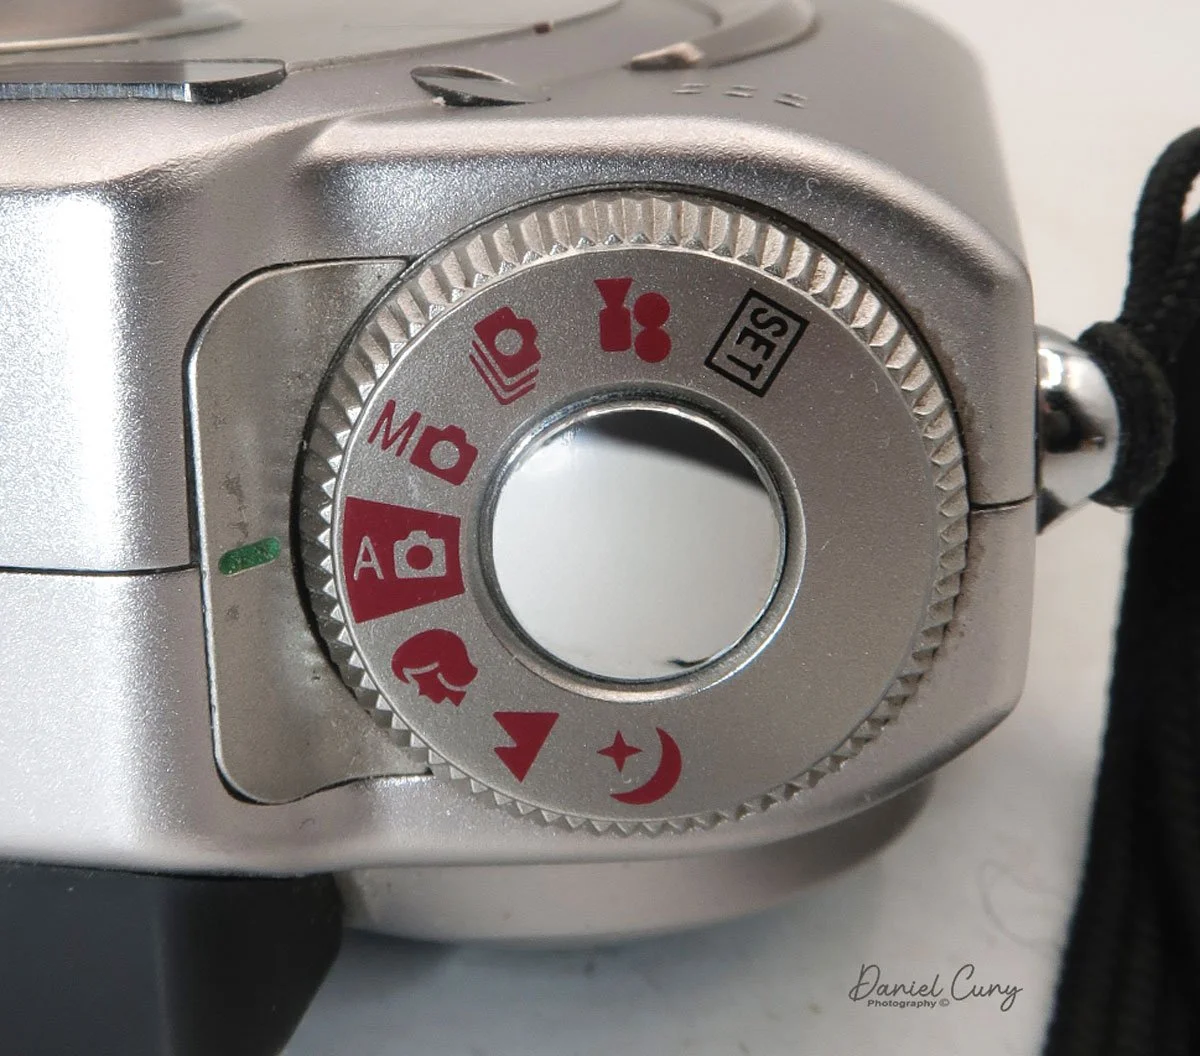
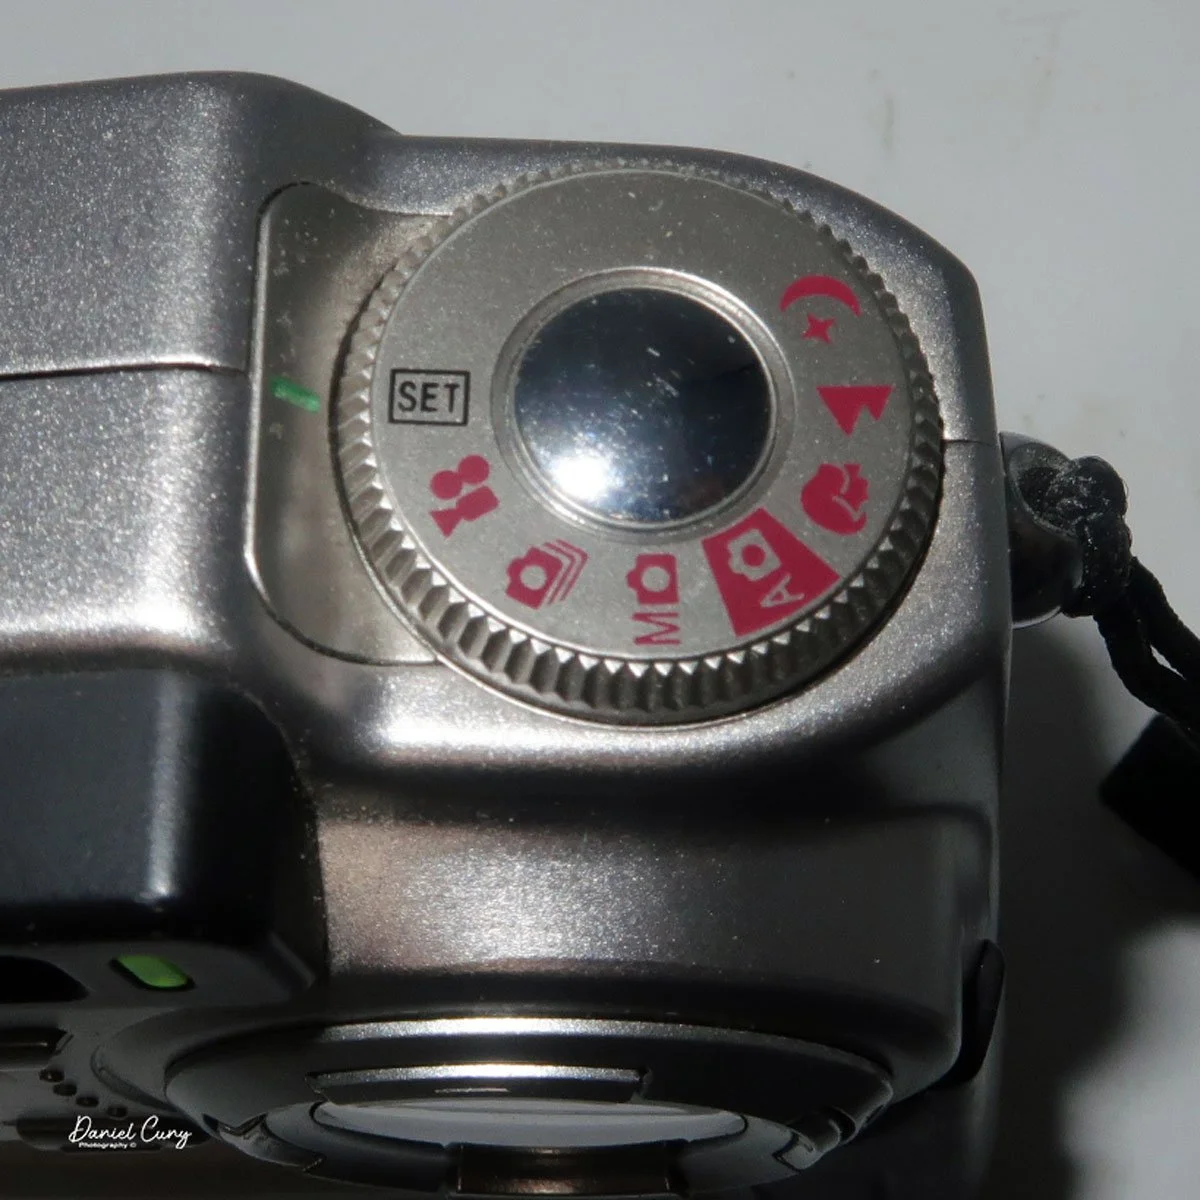
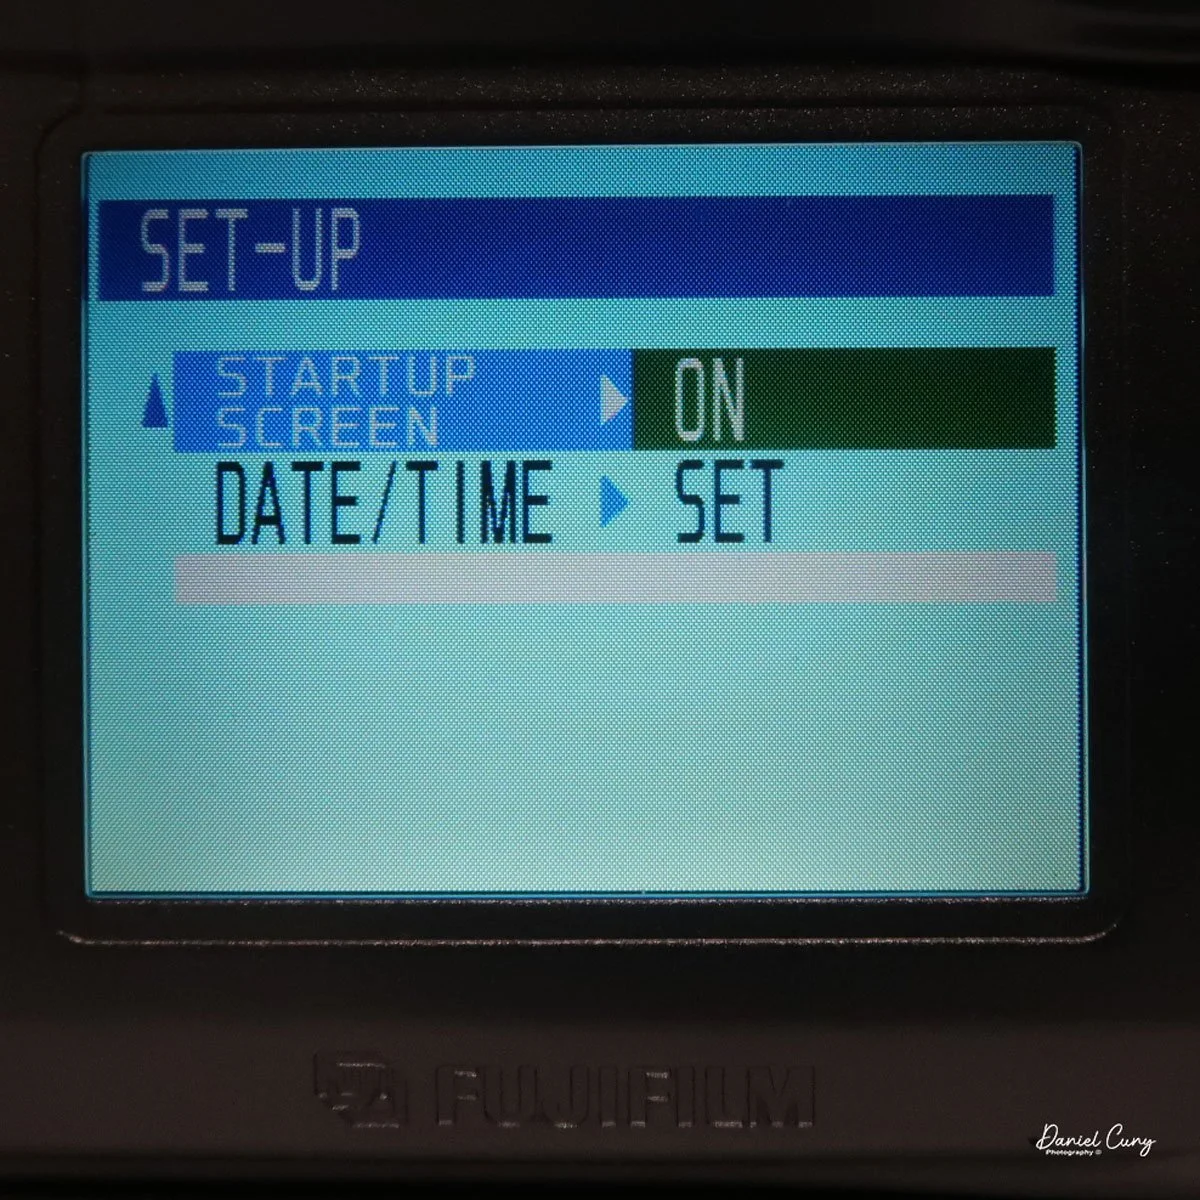
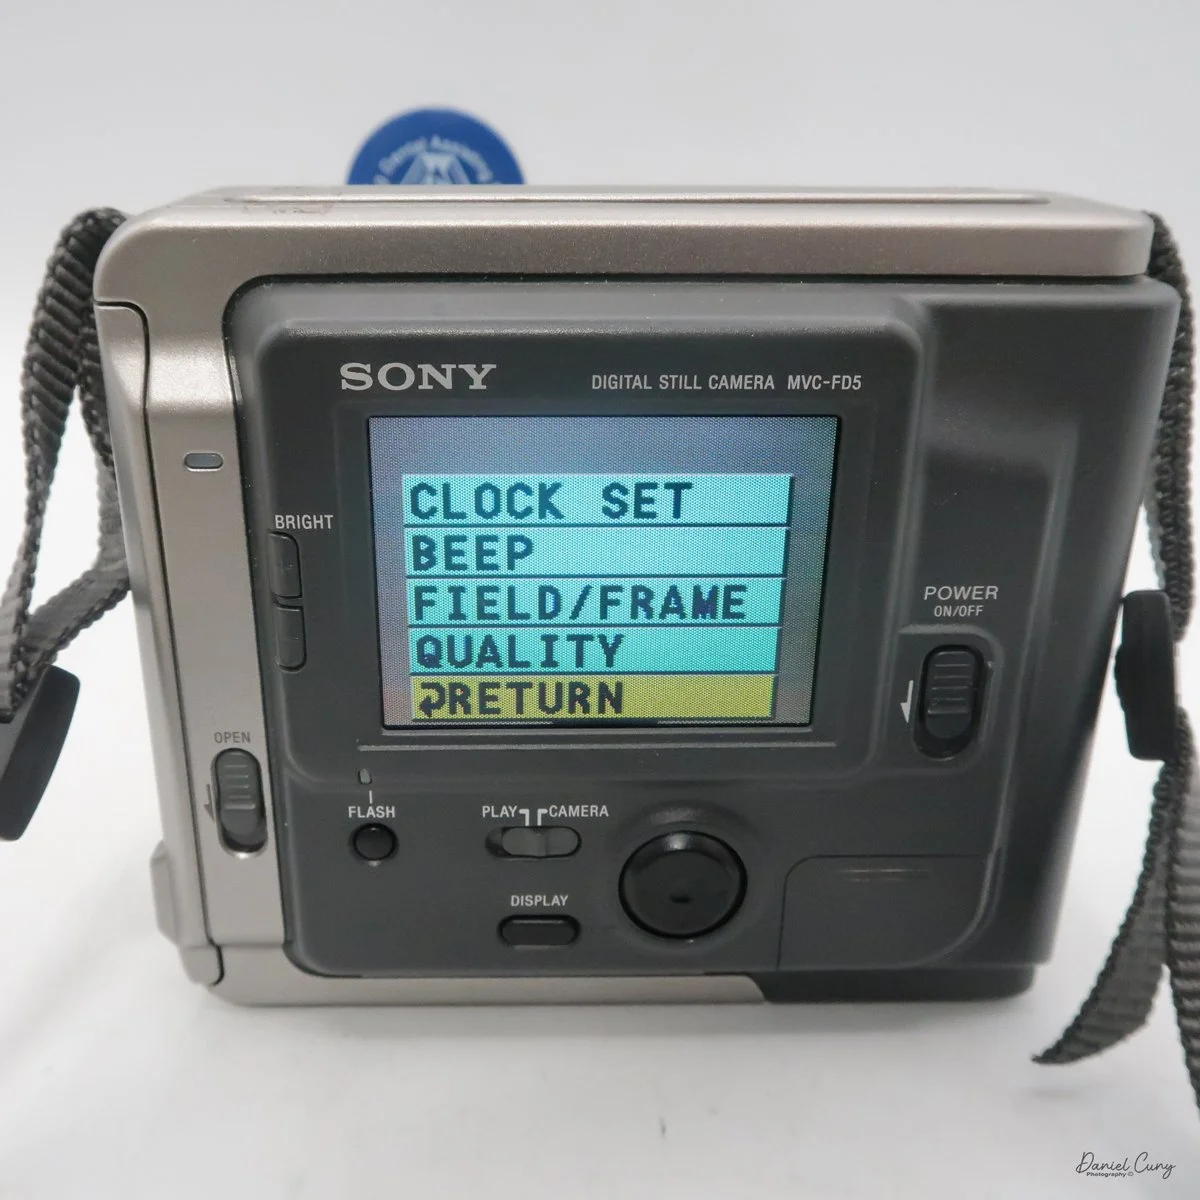
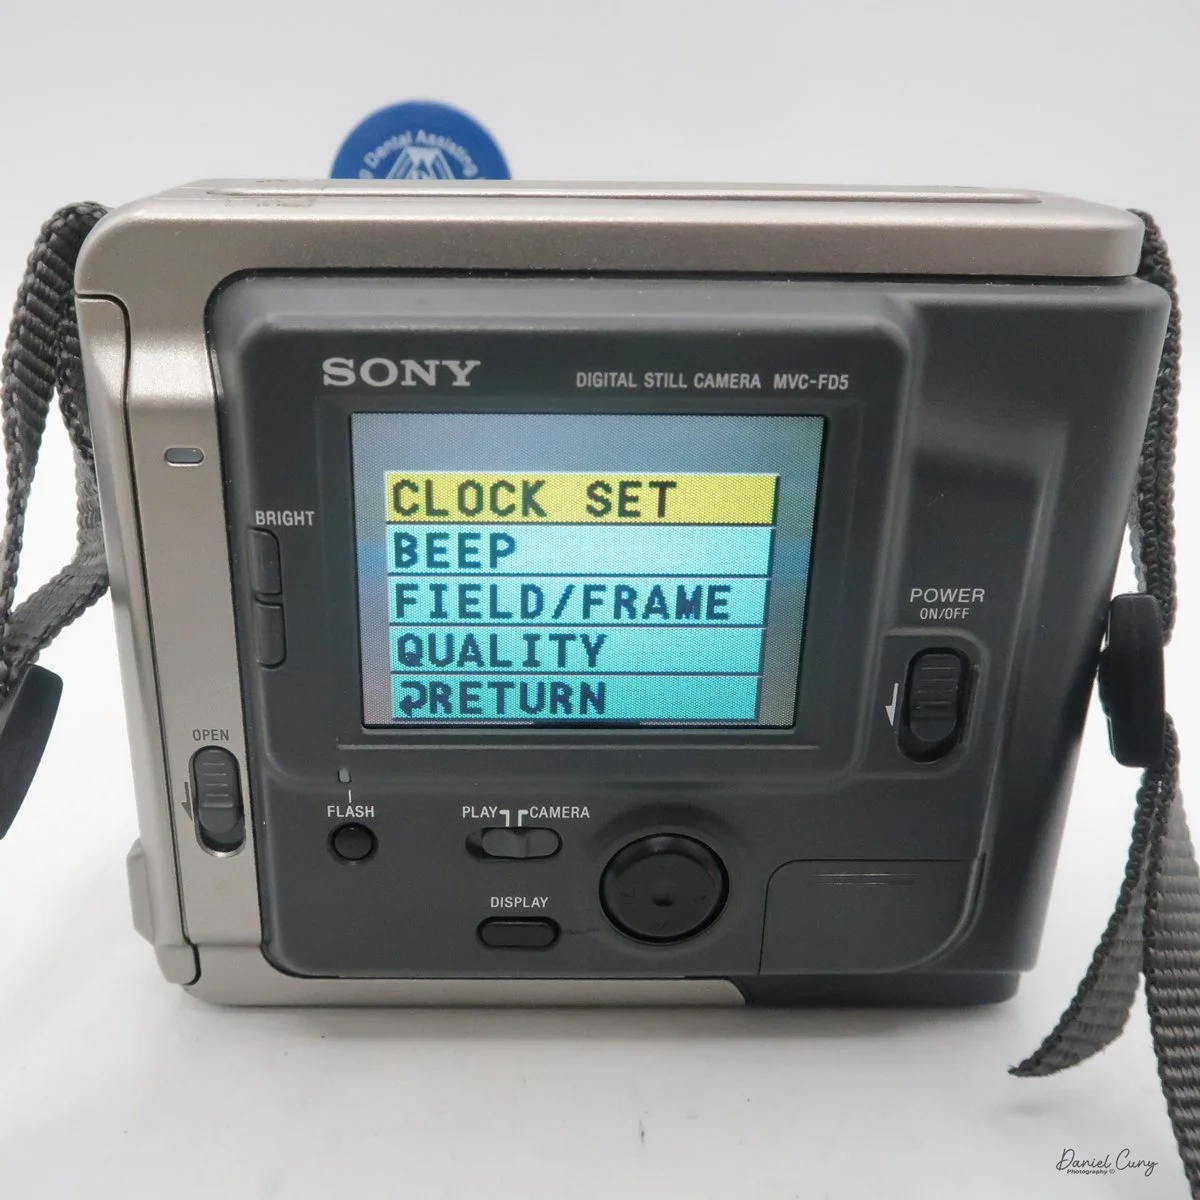
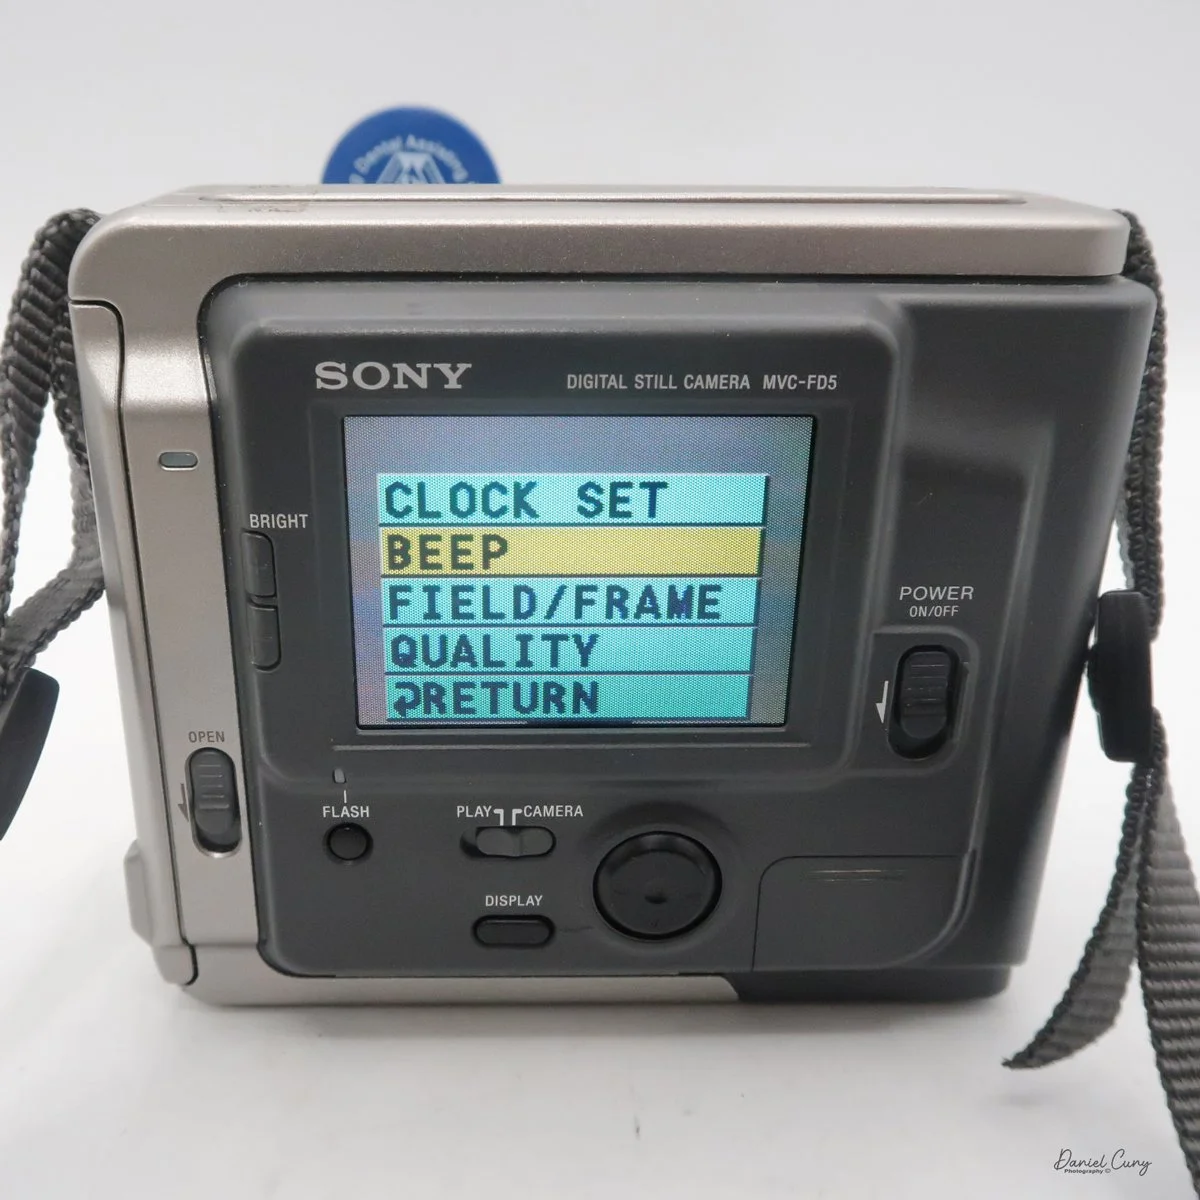
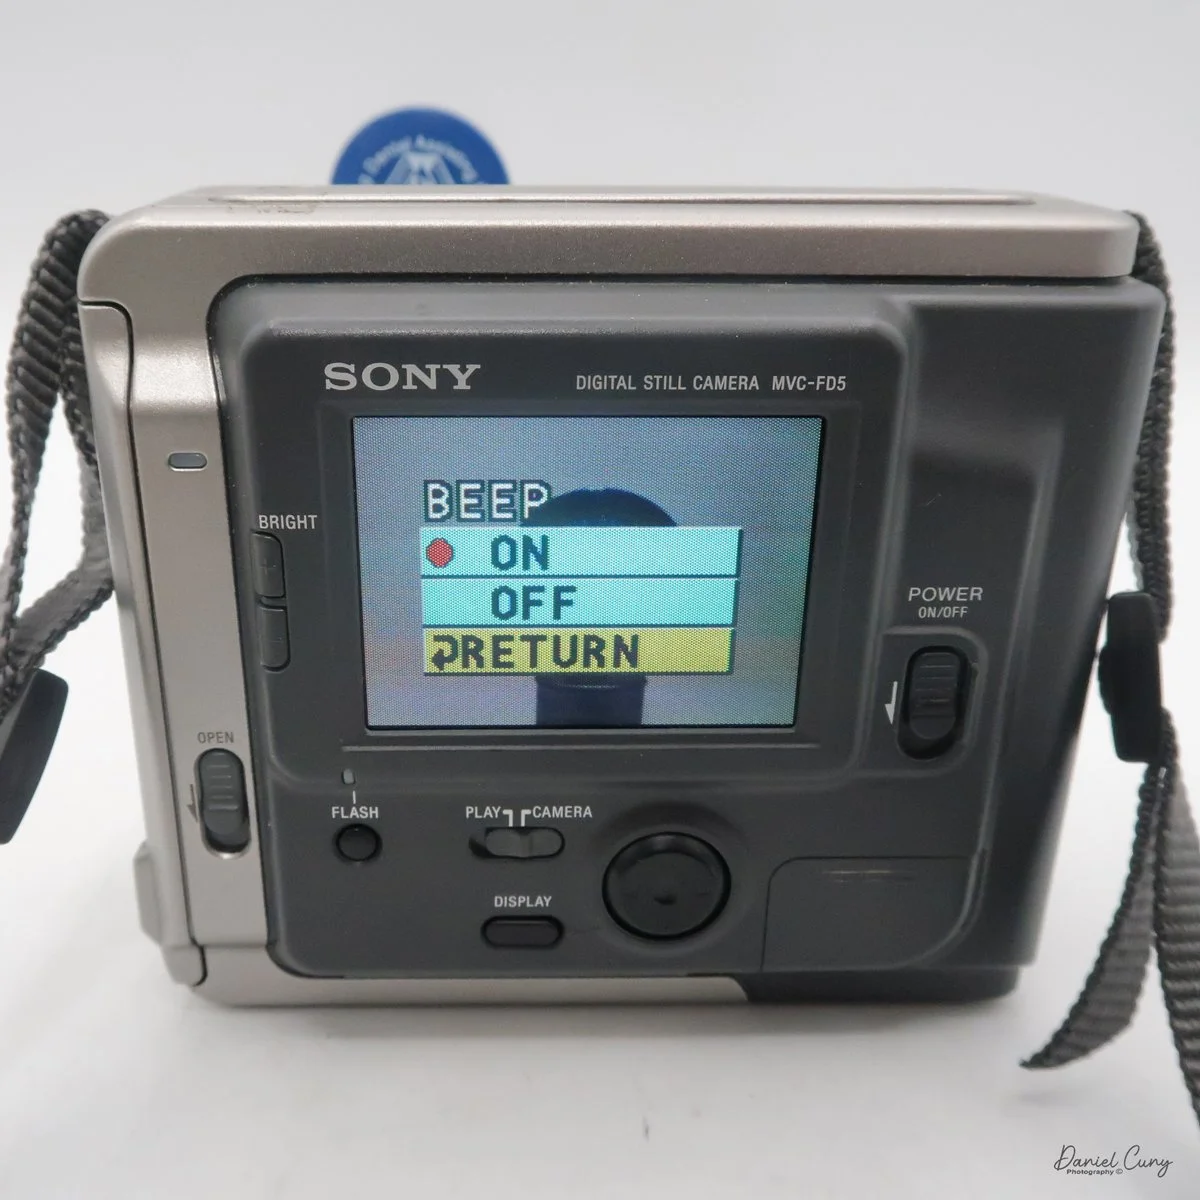
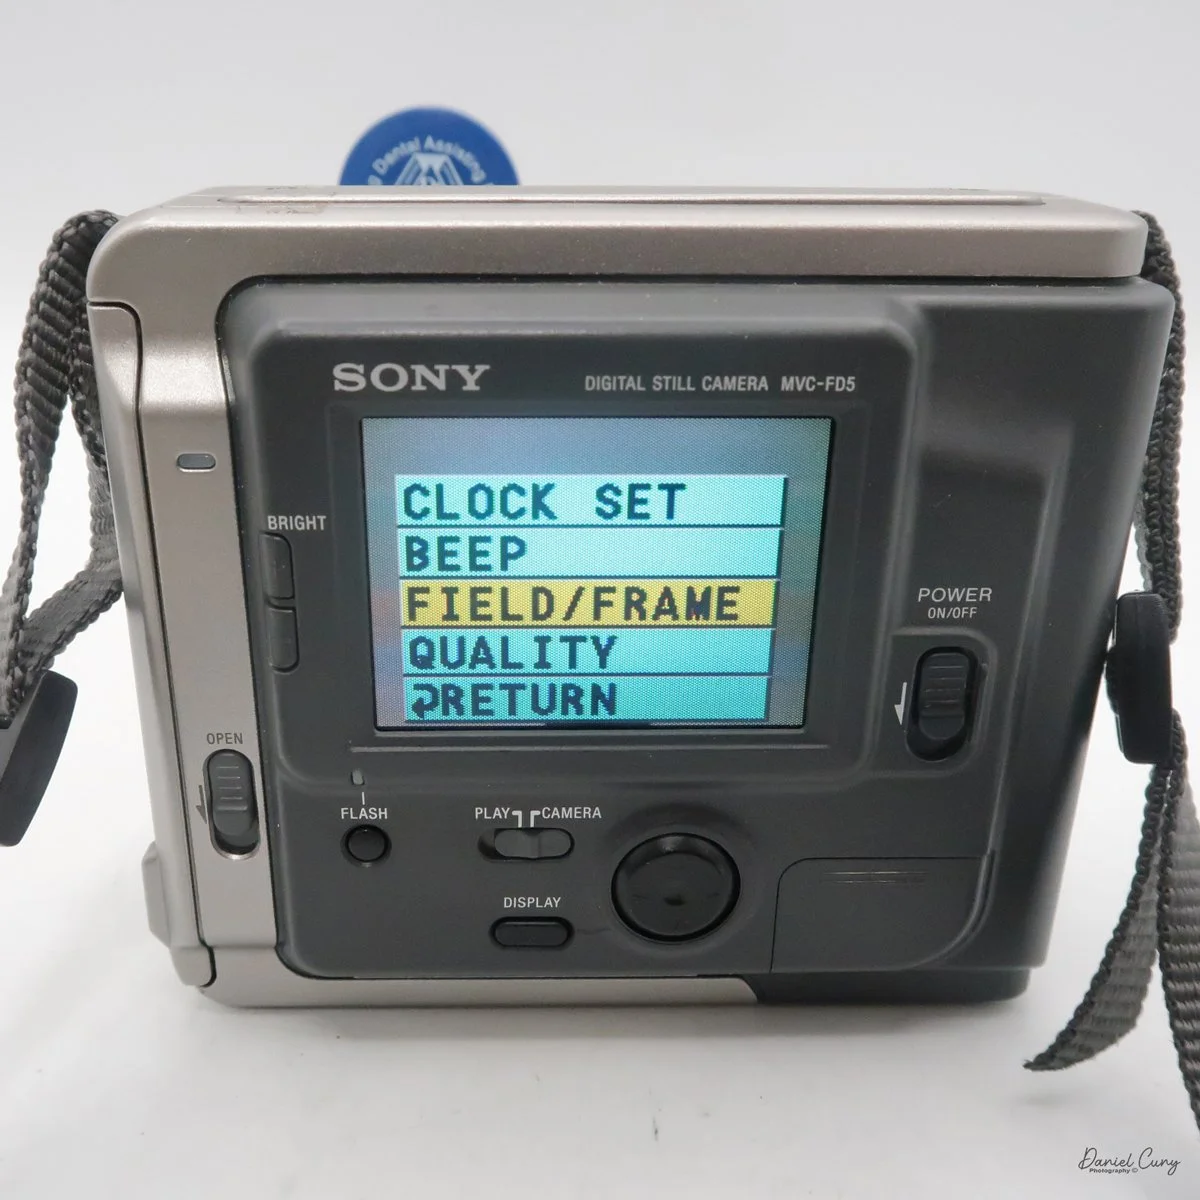
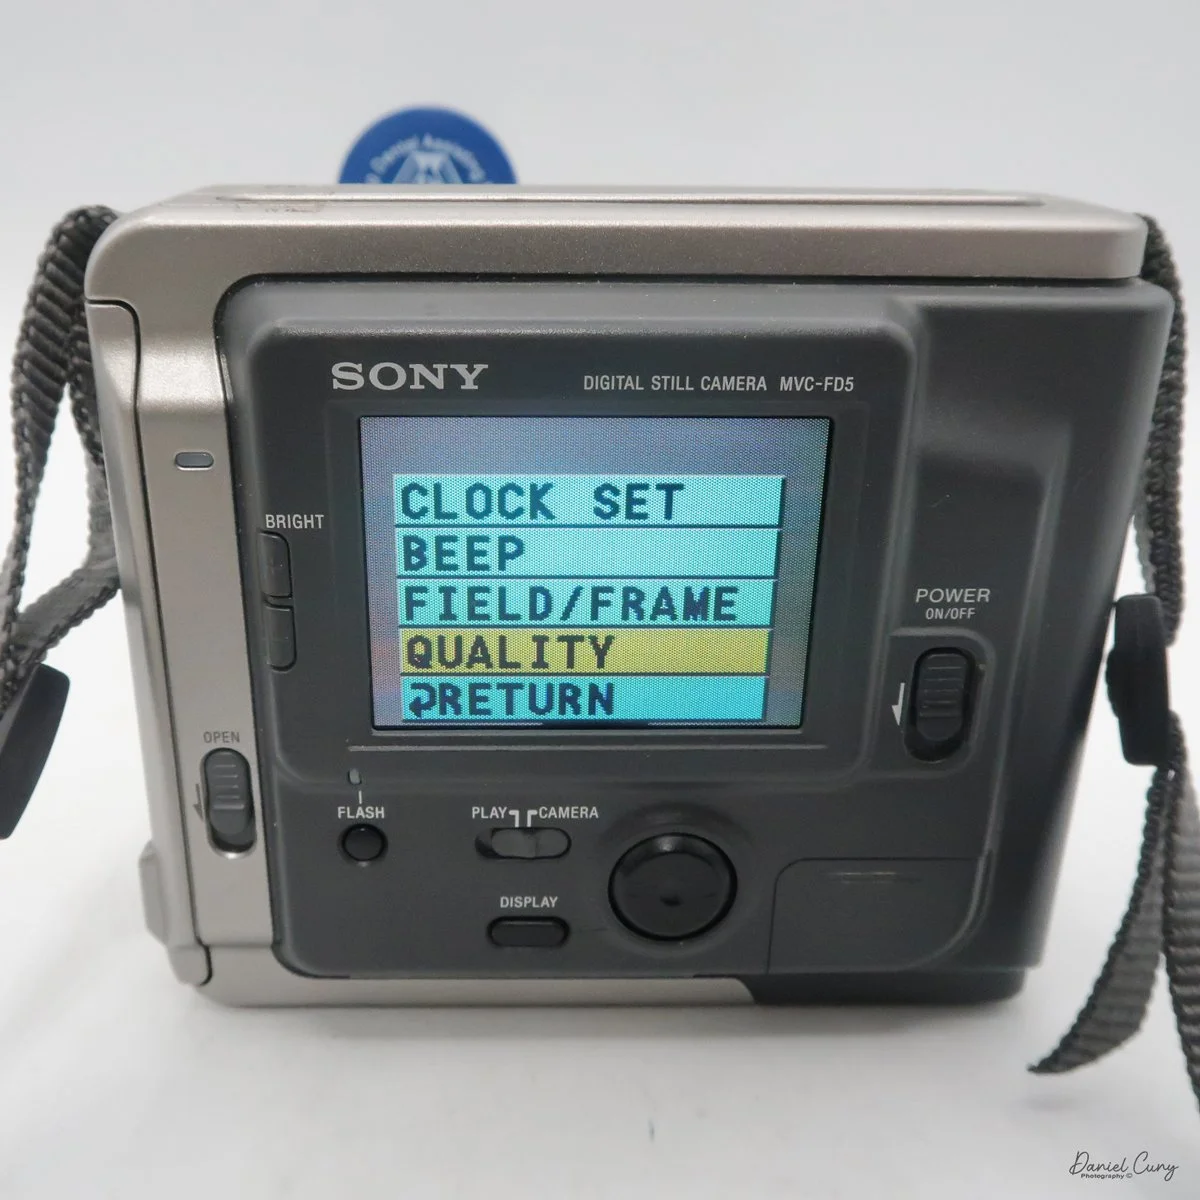
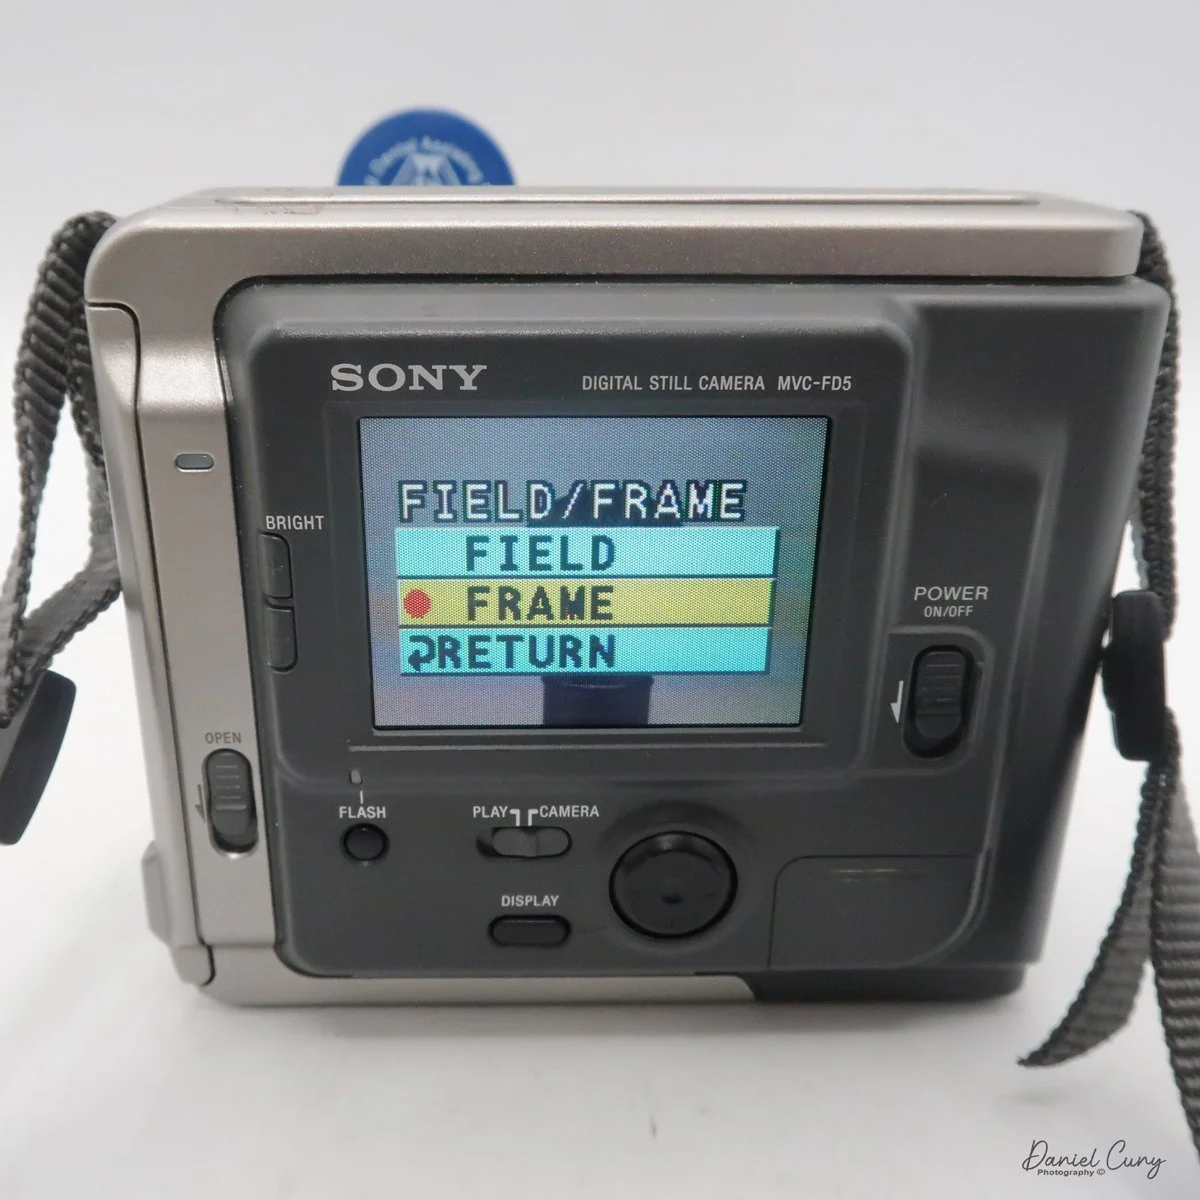
Once the camera is powered "on", most controls are set via a rocker switch and a button to the lower right of the camera's screen. As mentioned previously, there is also a switch for "camera" or "play" which allows the camera's settings to be set in each mode. If you press the rocker switch when it's in the "camera" mode, a menu will pop up with options for Clock Set, Beep, Field/Frame, Quality, and Return.

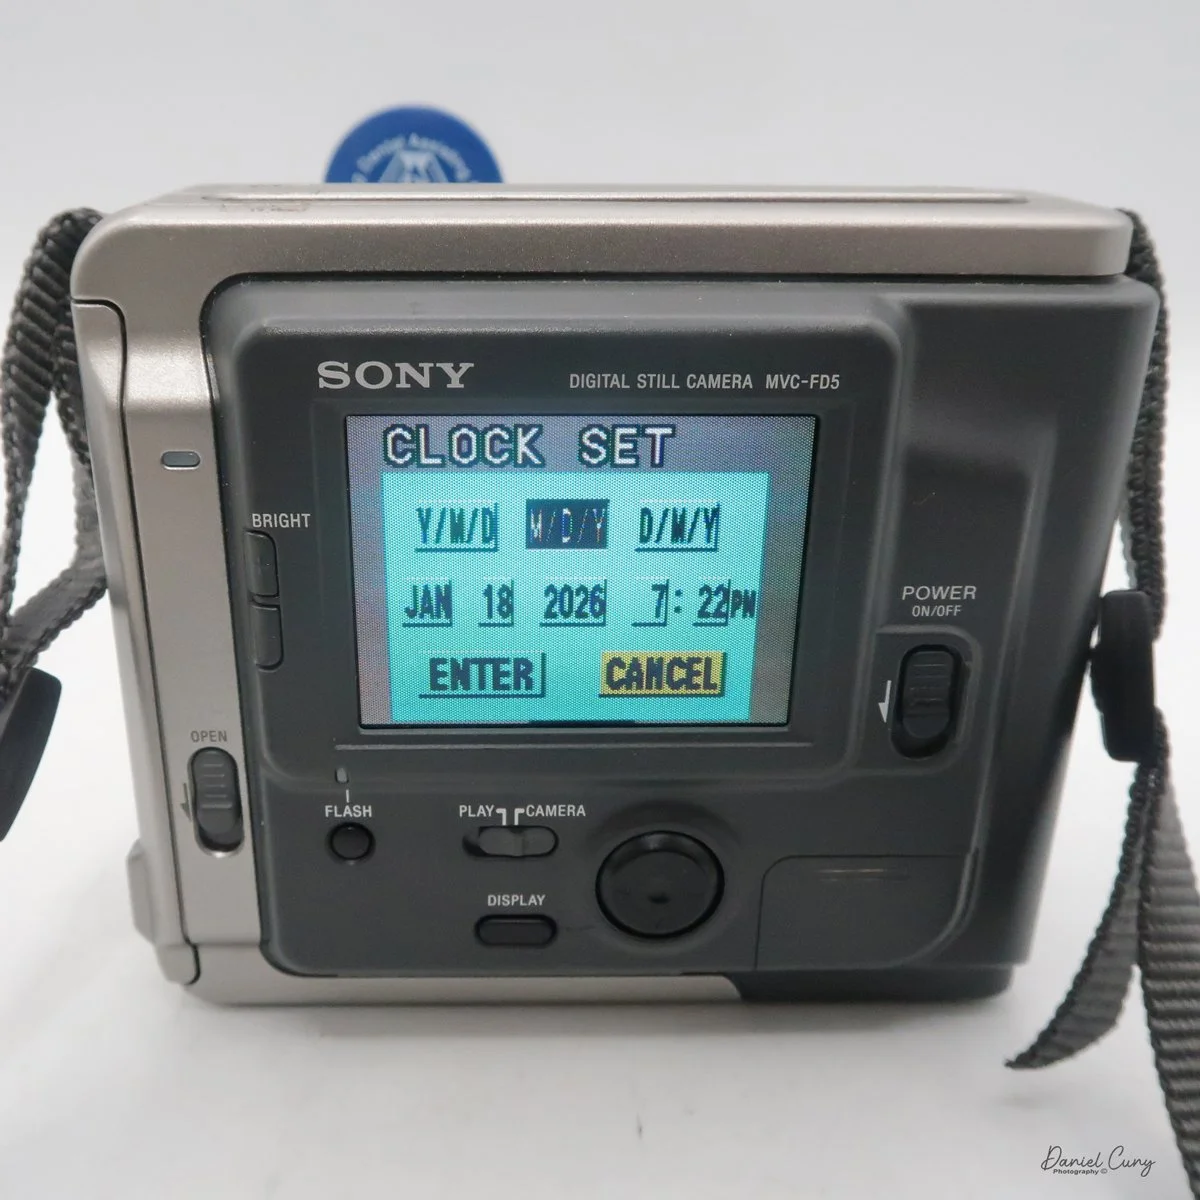
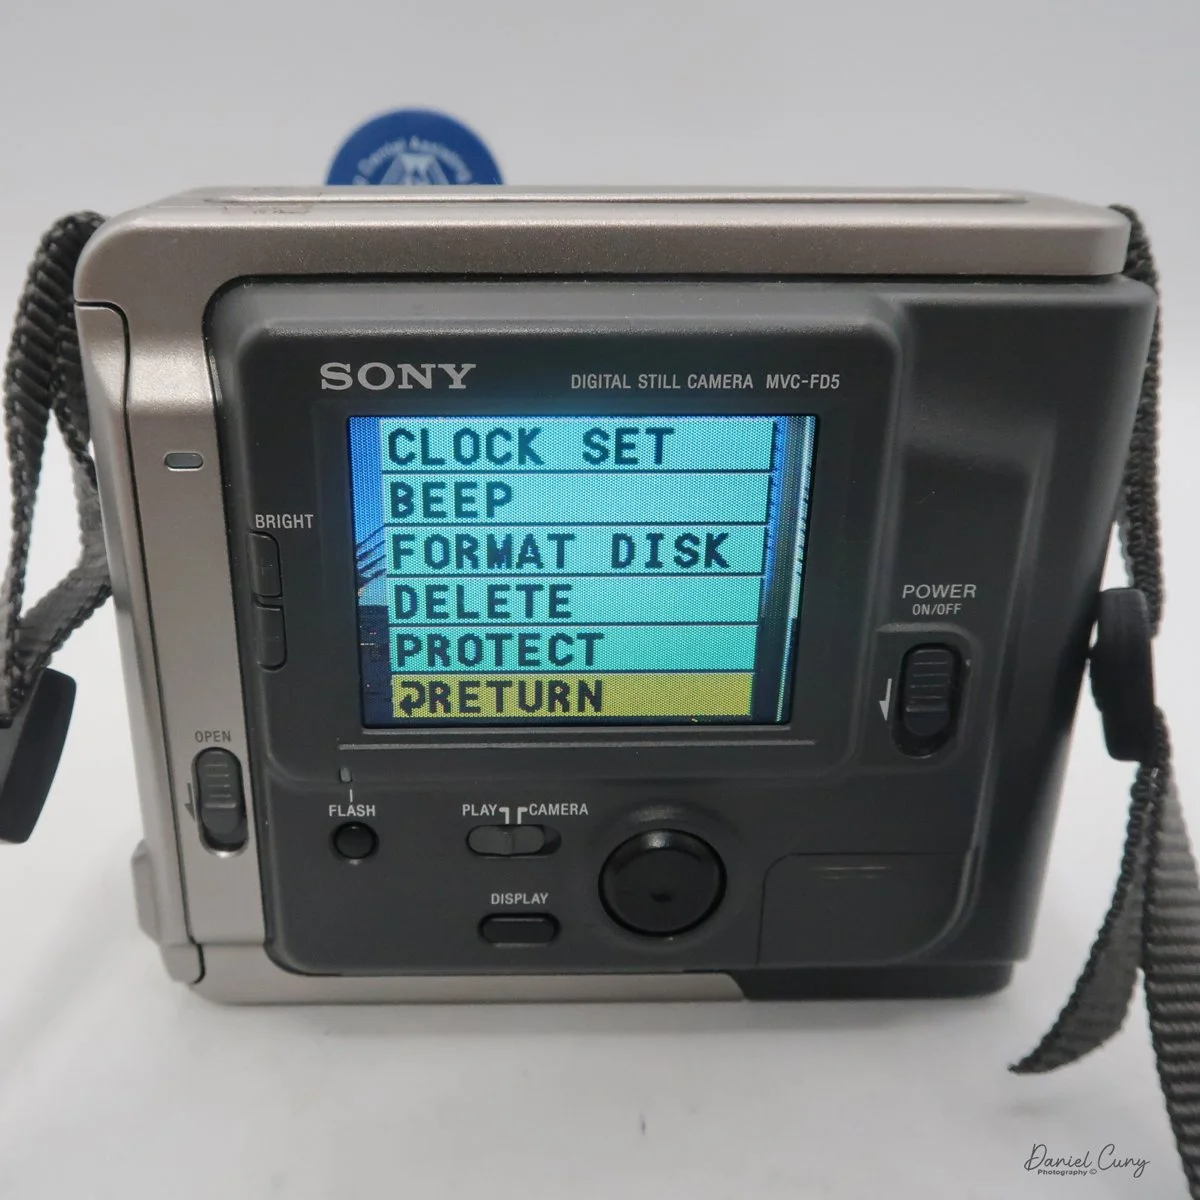
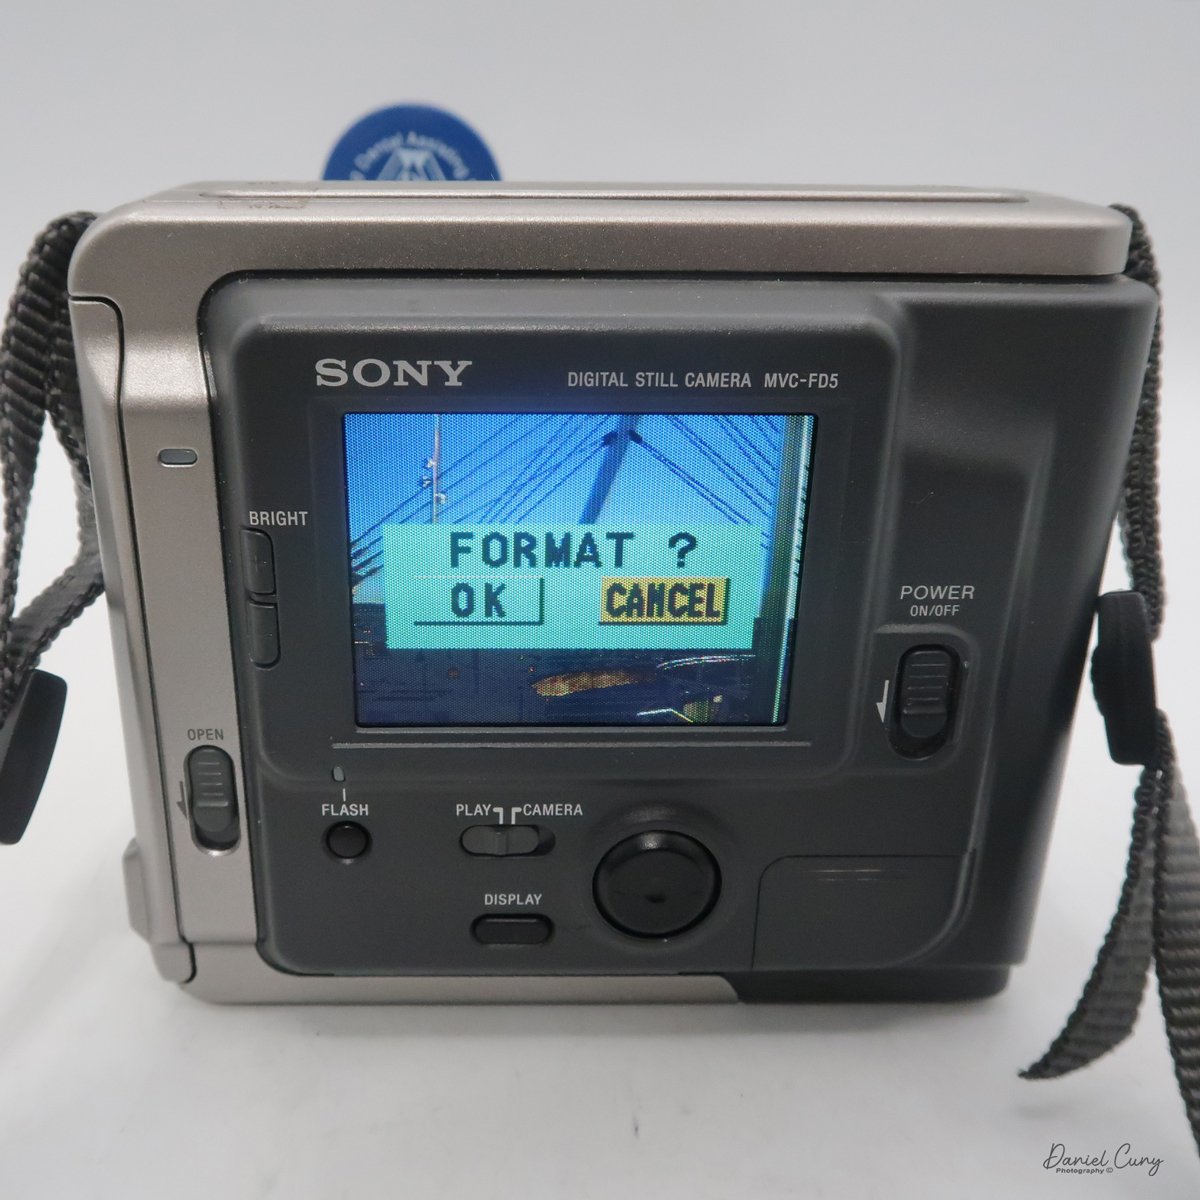
In the "play" mode, the menu settings are Clock Set, Beep, Format Disk, Delete, Protect, and Return. Interestingly, Clock Set and Beep are in both the camera and play menu. 

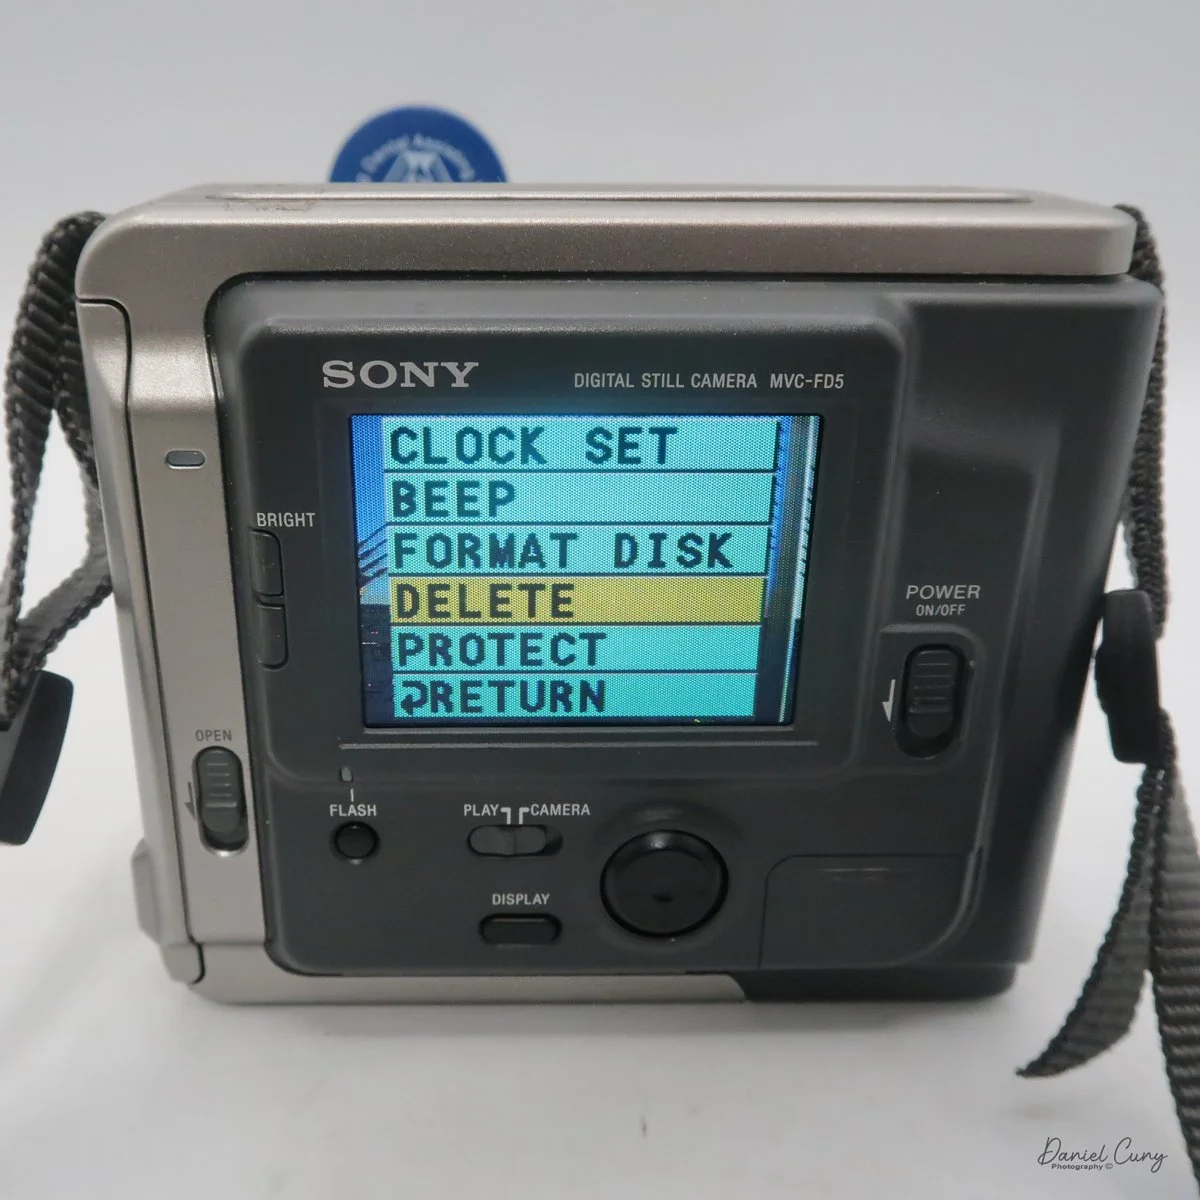
One other button on the back of the camera is "display," which turns the menu on or off on the camera or in play settings. It lets you focus on the images on the screen without being distracted by menu settings that can cover parts of the screen.

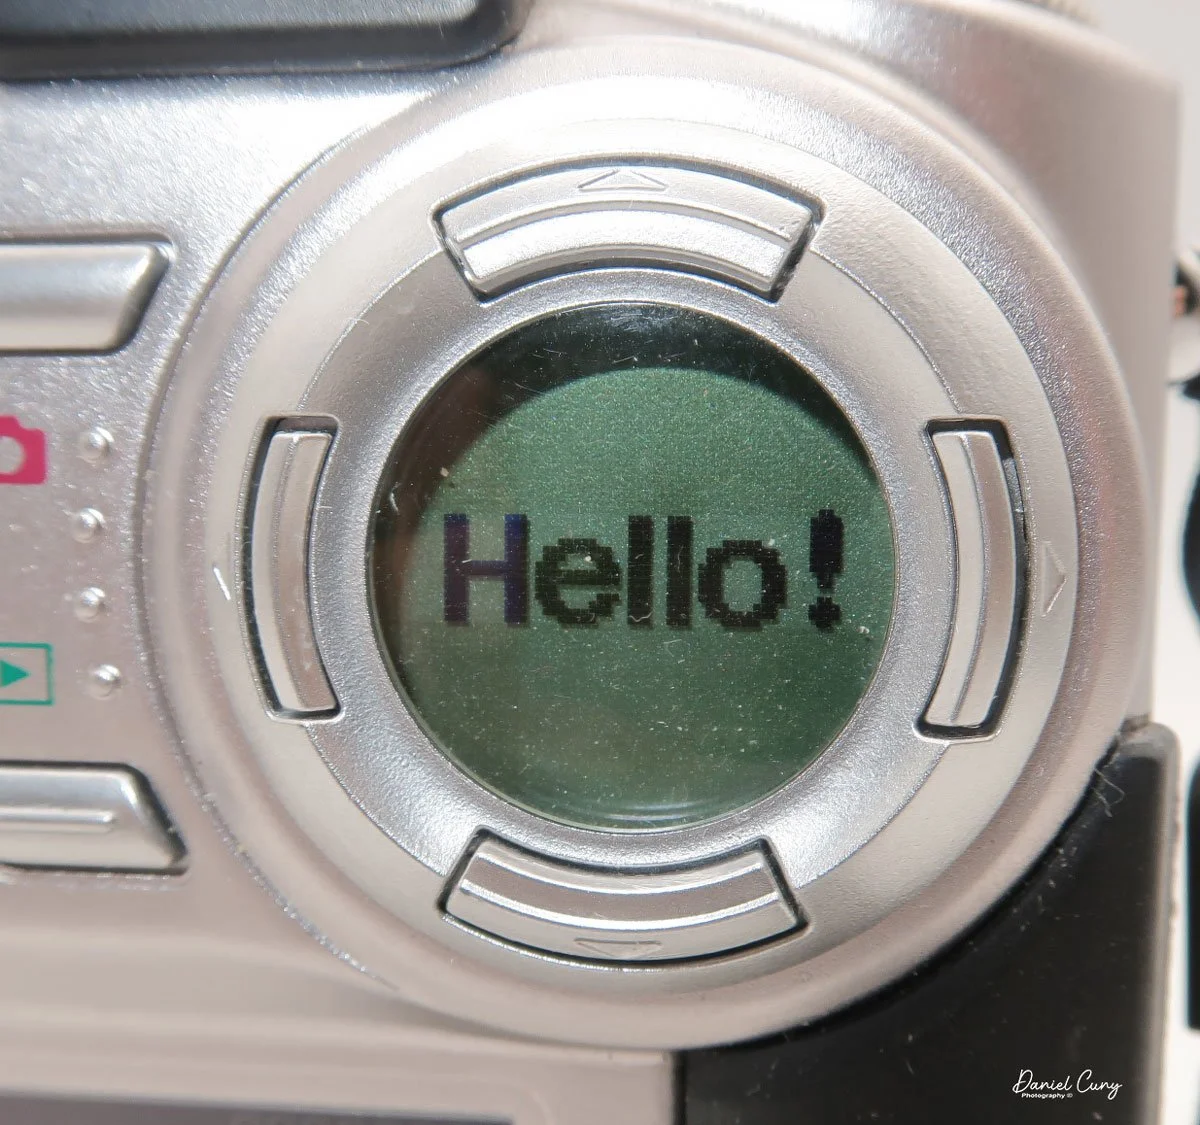
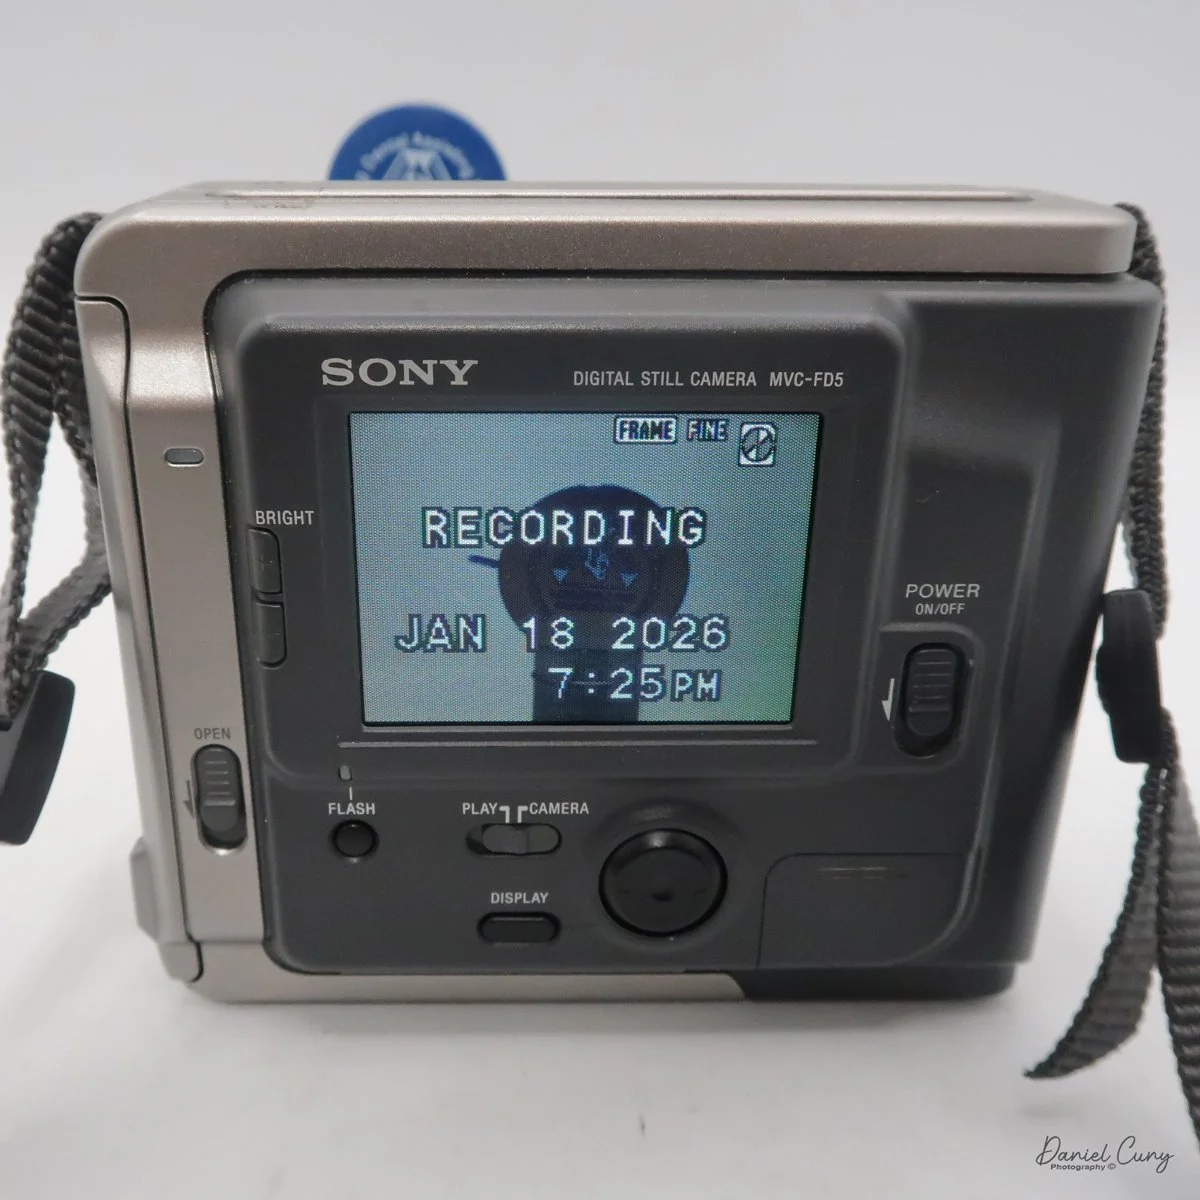
 Once the clock settings are set, you've turned on/off the beep sound, and you have the floppy disk in the camera. You're ready to power on the camera to take a photo. When you turn on the camera, you'll hear disk noises, see the date pop up on the back, and, in the upper right corner, see a spinning circle indicating the disk is turning inside the camera. Now you're ready to take photos.

 The camera doesn't have a viewfinder, so once the camera is powered on, and the screen has gotten past the time function, you've seen the spinning disk, the camera will go into "live" mode, where you'll see the images you're pointing the camera at on the back screen. Like many cameras from this era, the screen is dark, and you can barely see an image on a bright, sunny day. You can brighten or darken the screen with two switches to the left of the screen, named "bright" with a "+" on the top button, and a "-" on the bottom.

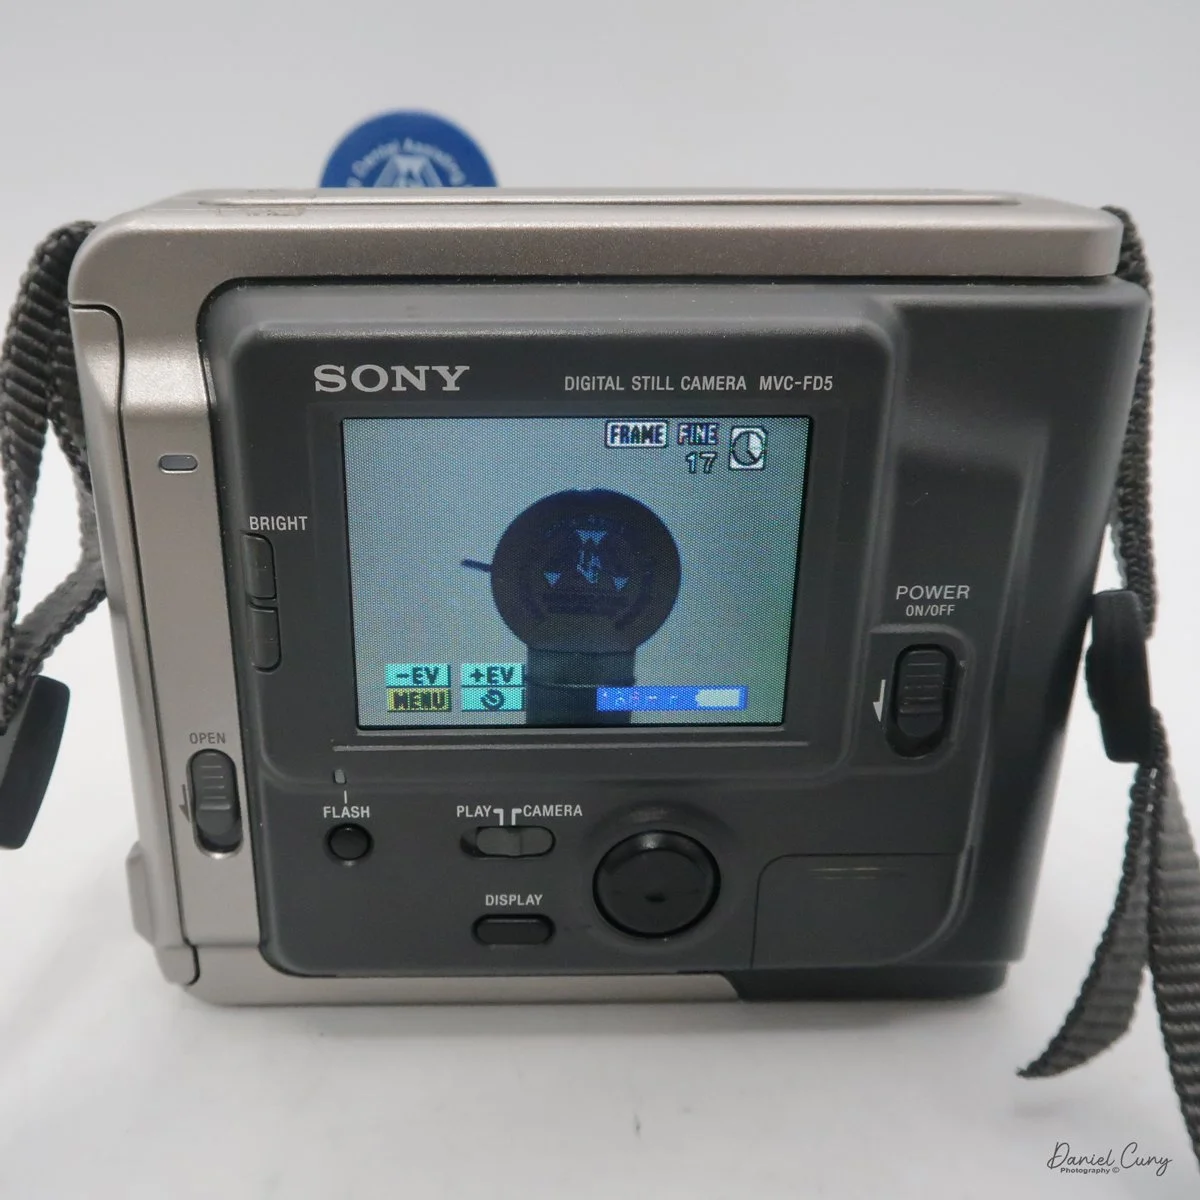
There is no shutter or aperture control on the camera, as exposure is automatically controlled. You can make the images brighter or darker by up to 1.5 stops by changing the EV setting on the camera's screen once the camera is turned on and in "camera" mode.

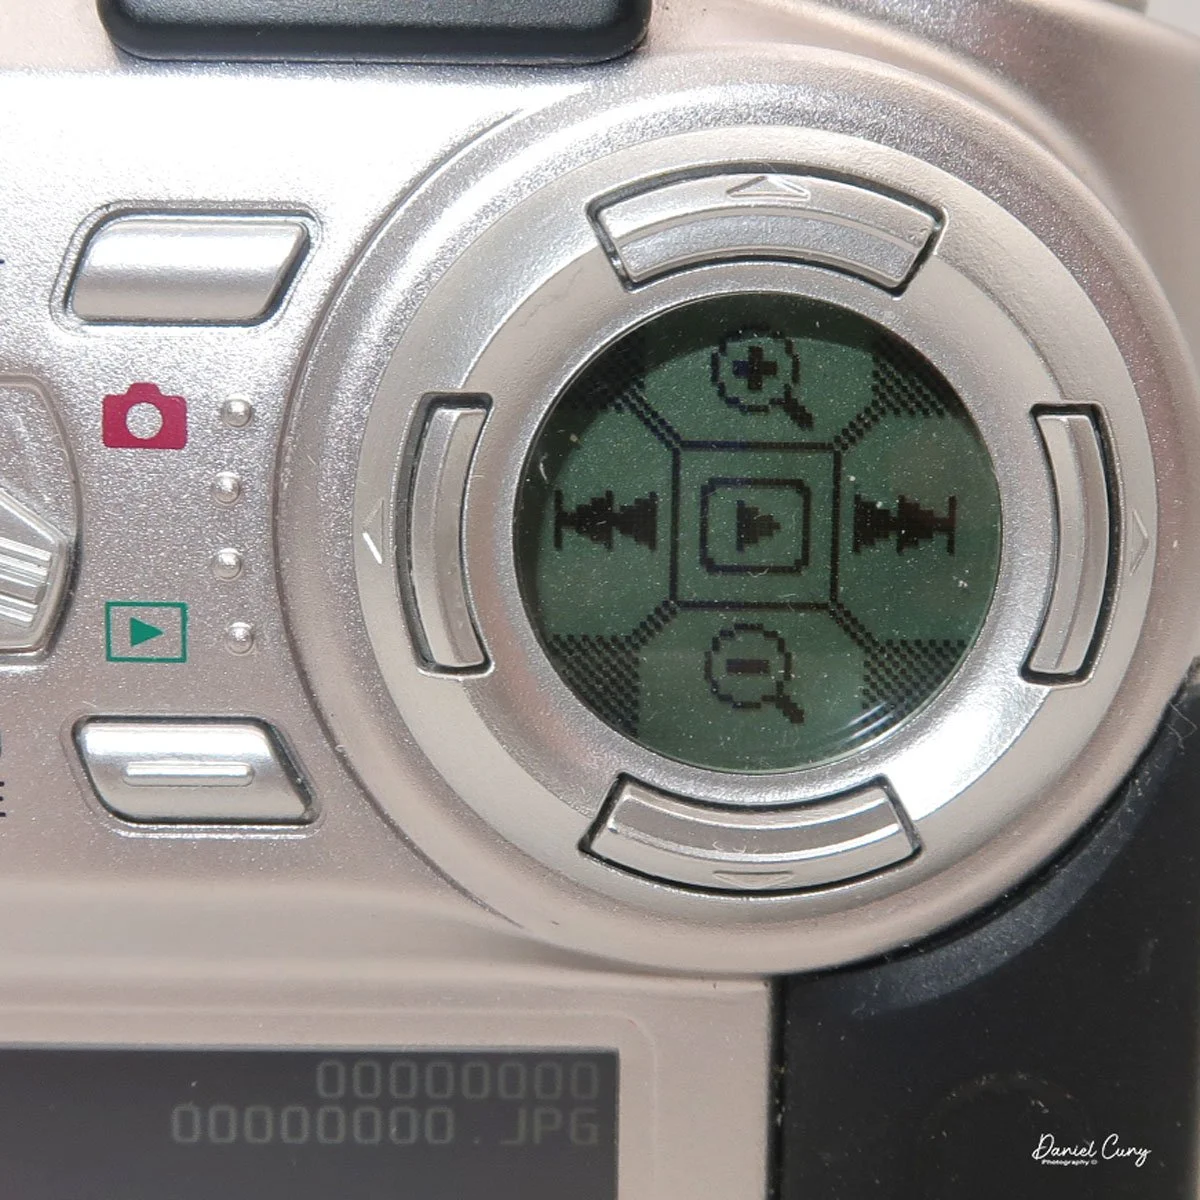
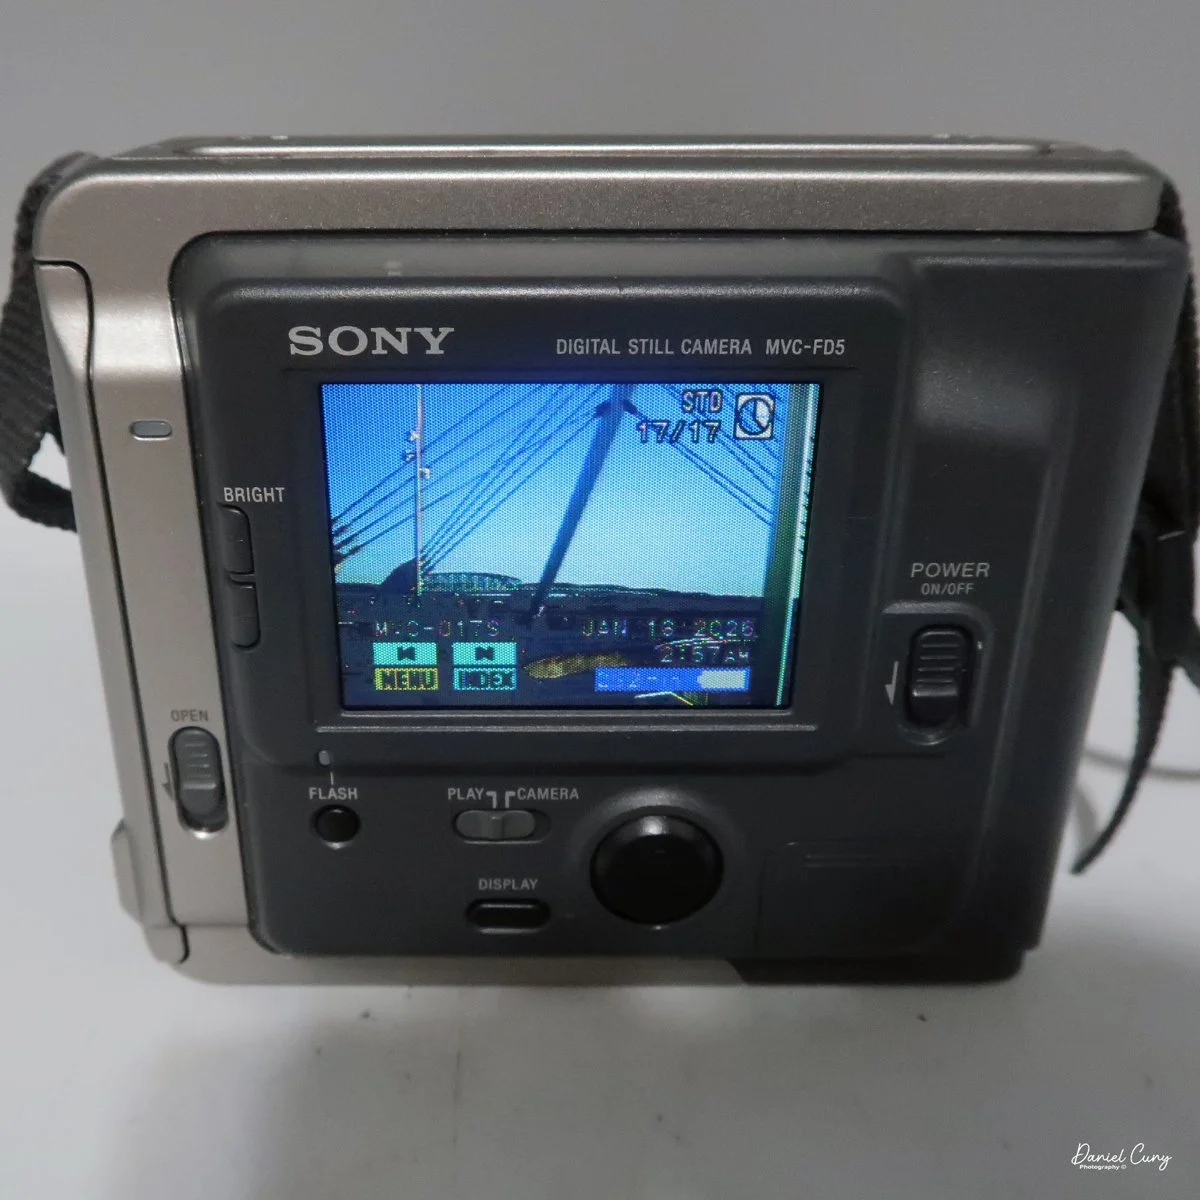
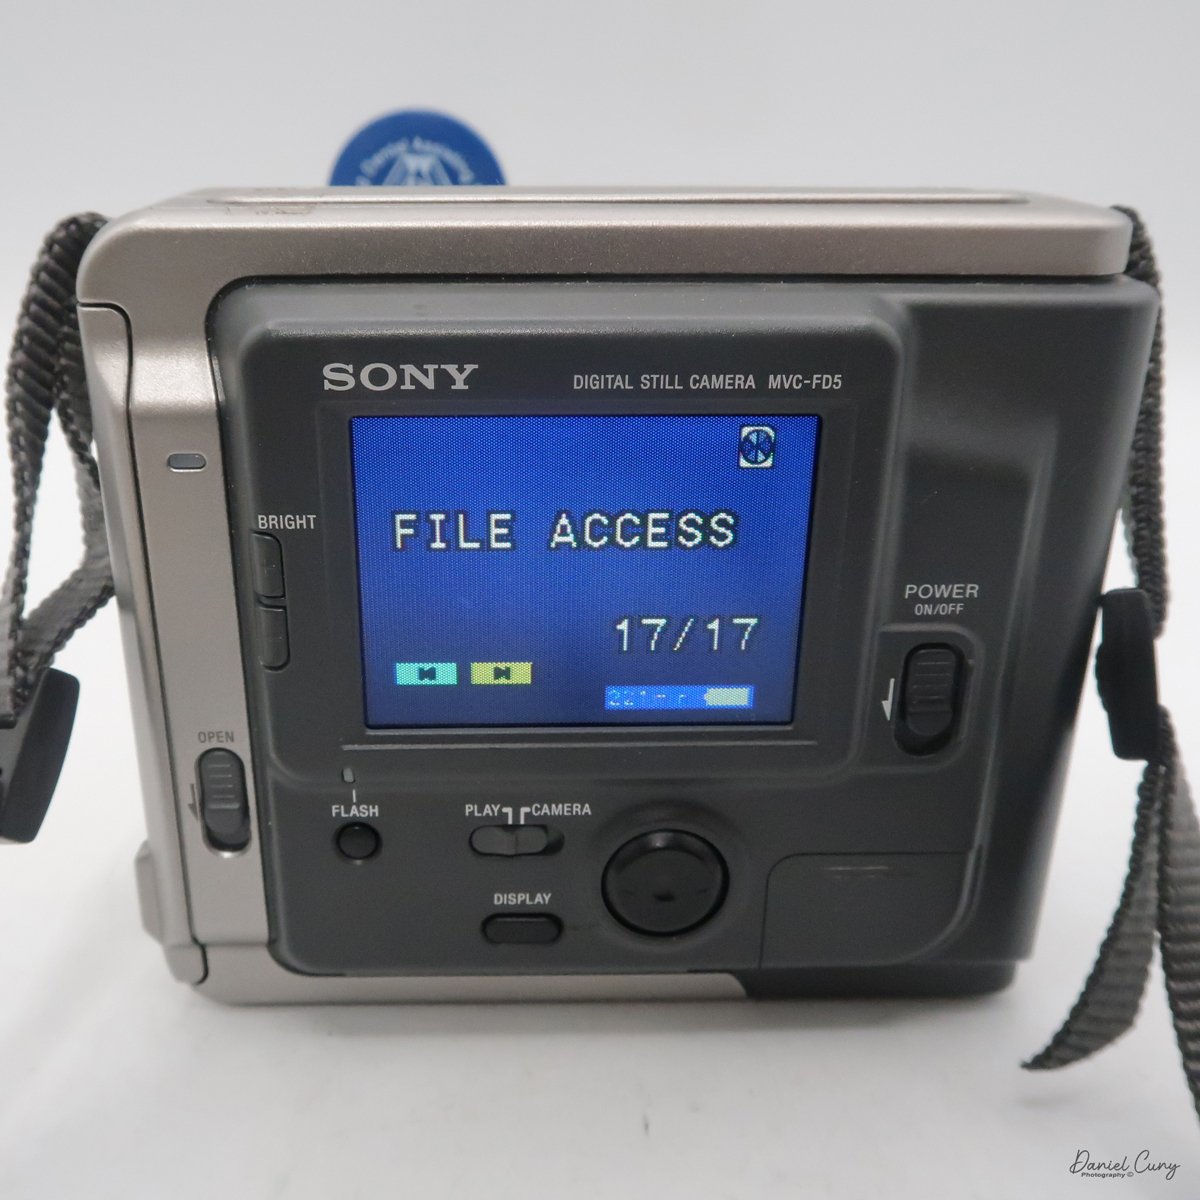
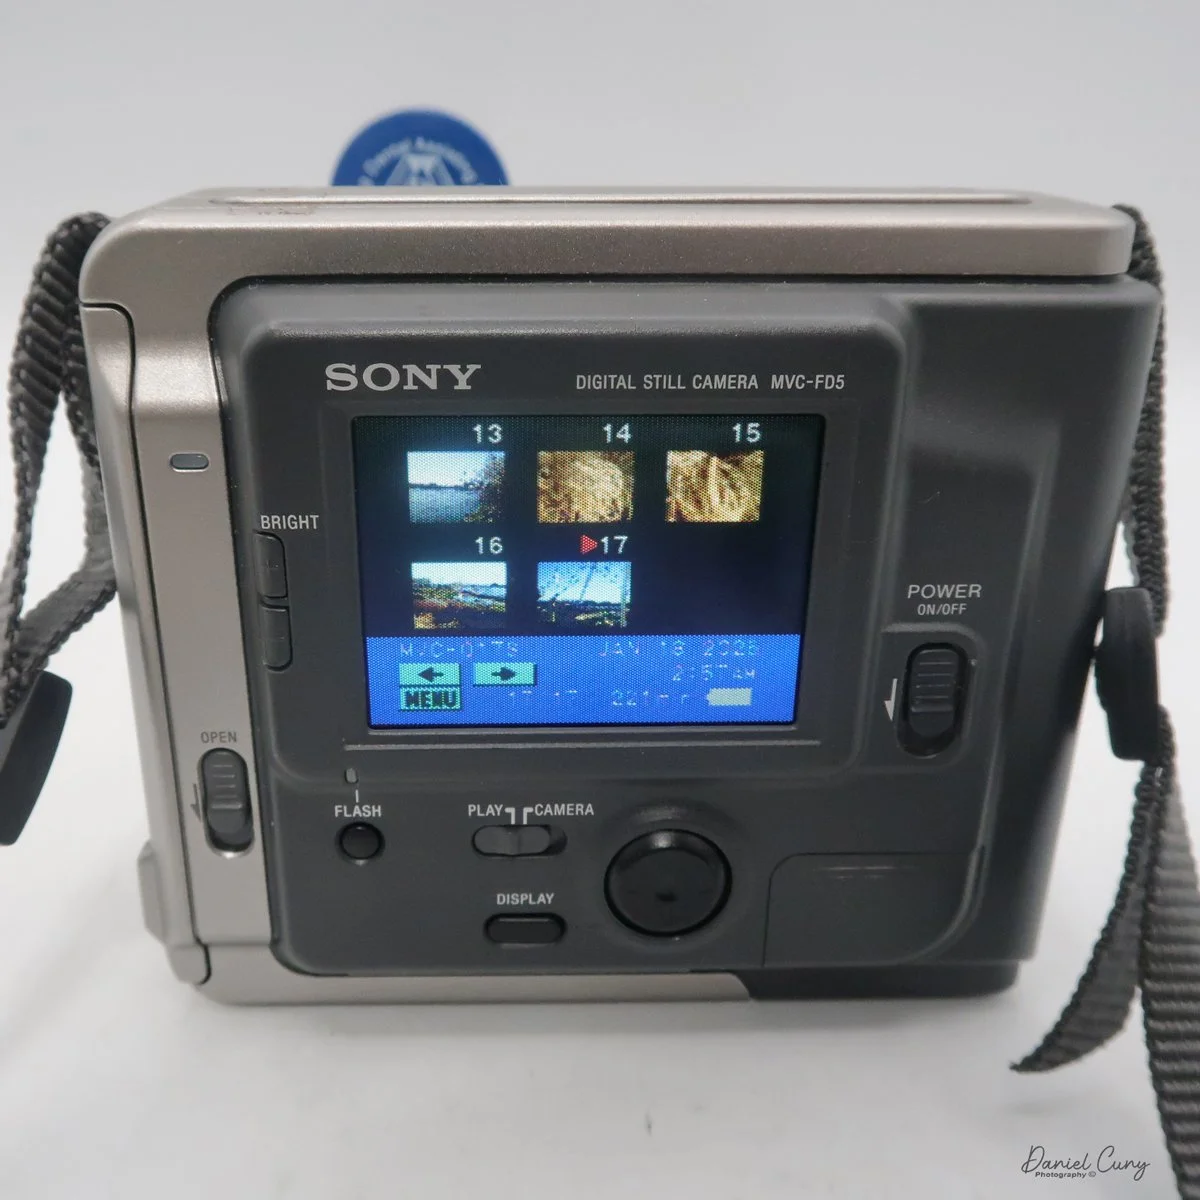
 Another oddity of this camera, as with more modern cameras, is that the Sony Mavica MVC FD5 doesn't display the "just taken" photo on the screen once it's captured. To see that image, you'll need to switch from "camera" to "play" mode. The camera will whizz the floppy disk, and you can preview the previously taken image. In the "play" mode, you can view either single images by pressing the arrows forward to backwards, or you can press "index" so you can display a series of six images at a time and scroll to the image you want to see, and press the rocker button to display. PLEASE REMEMBER: every time you switch from one image to the other, the camera displays a message on the back screen that says "accessing file," and it takes a few seconds to show the image.

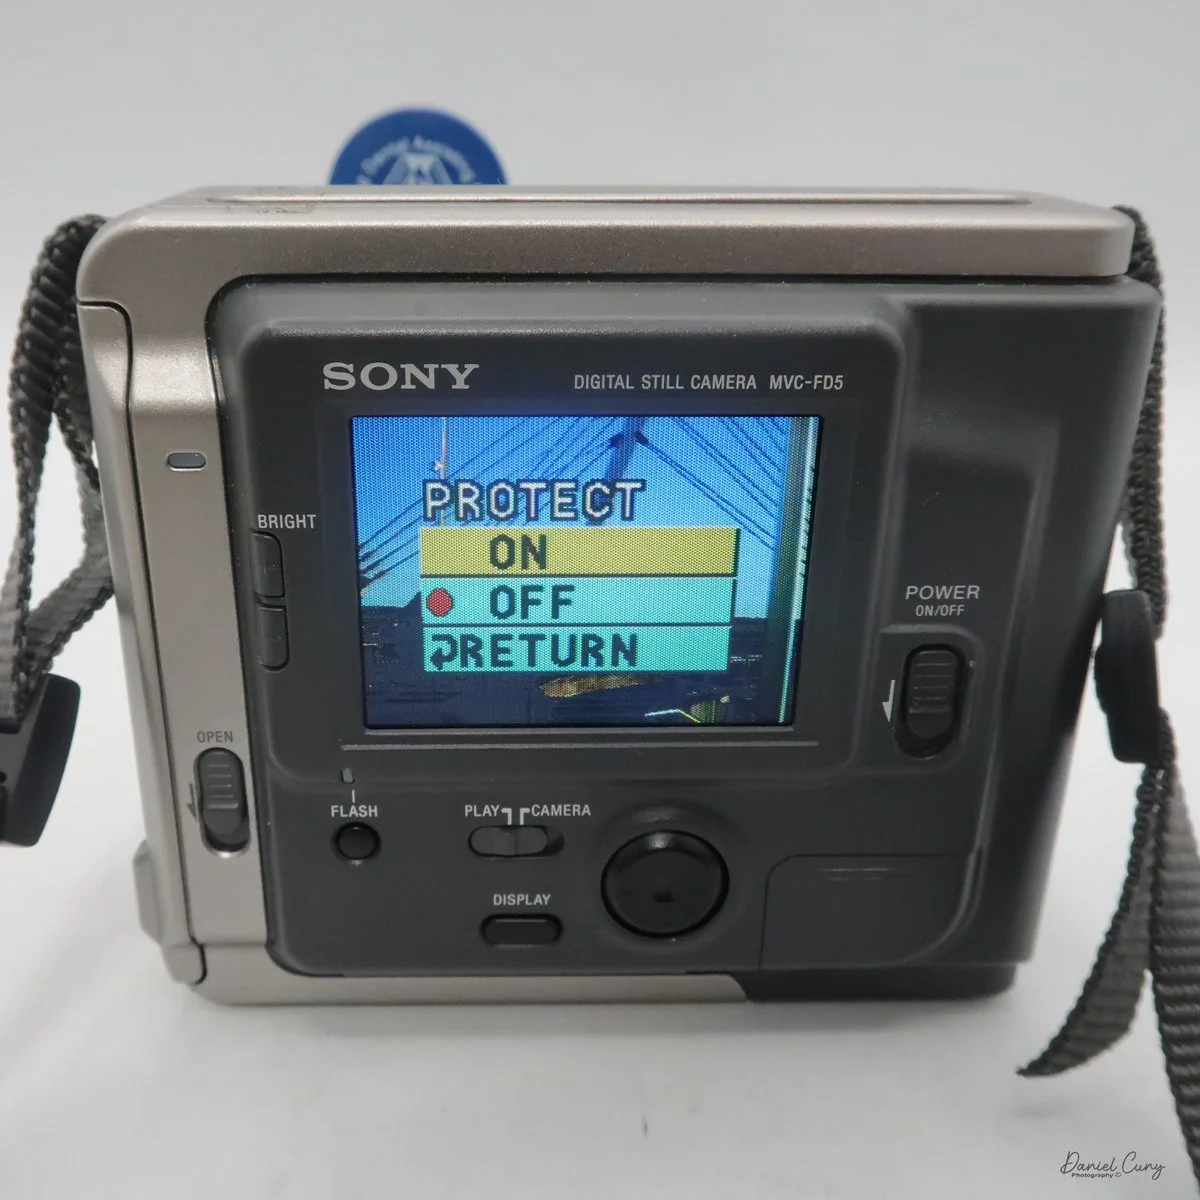
 In the "play" menu, you can also "protect" or "delete" images. Still, like the other settings, it takes a few seconds for the camera to complete the request, since it's basically a small computer with a built-in floppy disk and has to find, access, and complete the request you're making.

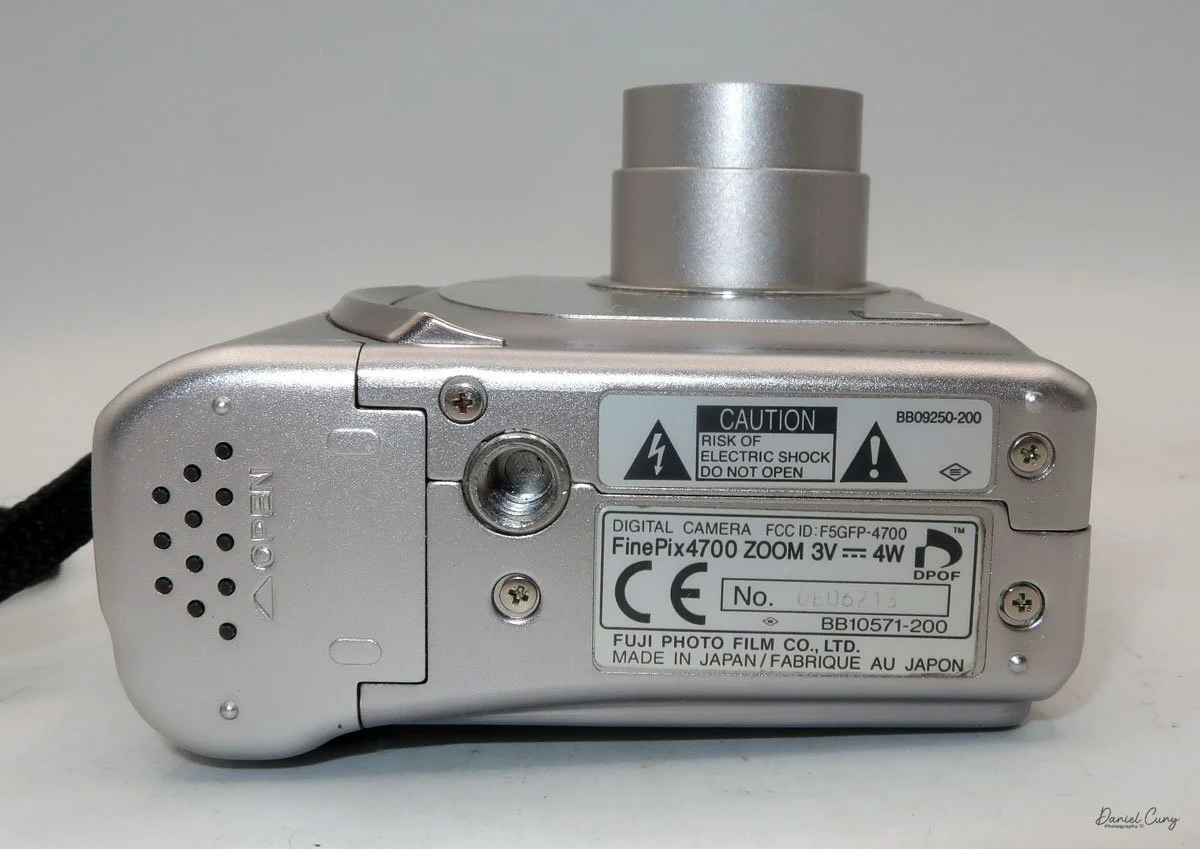
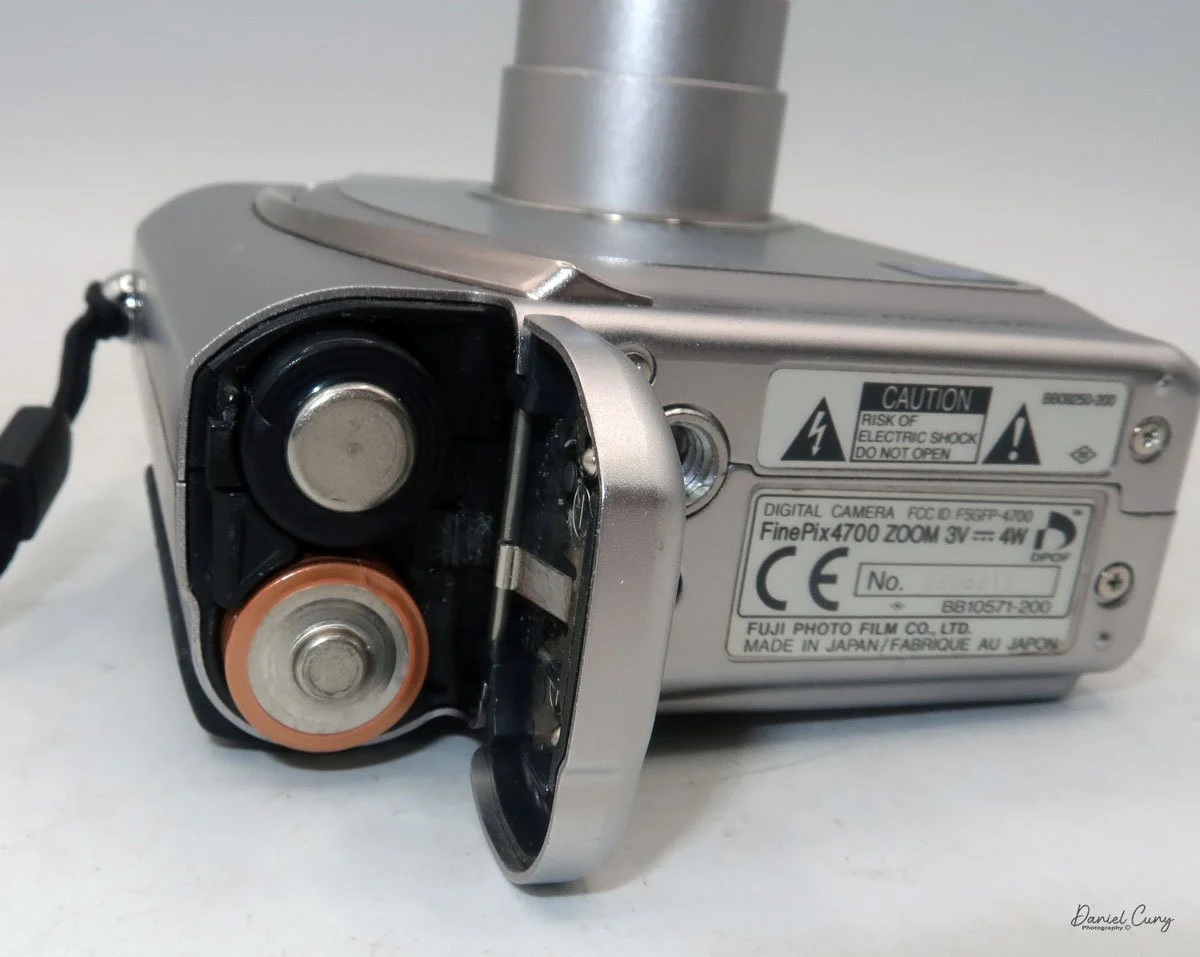
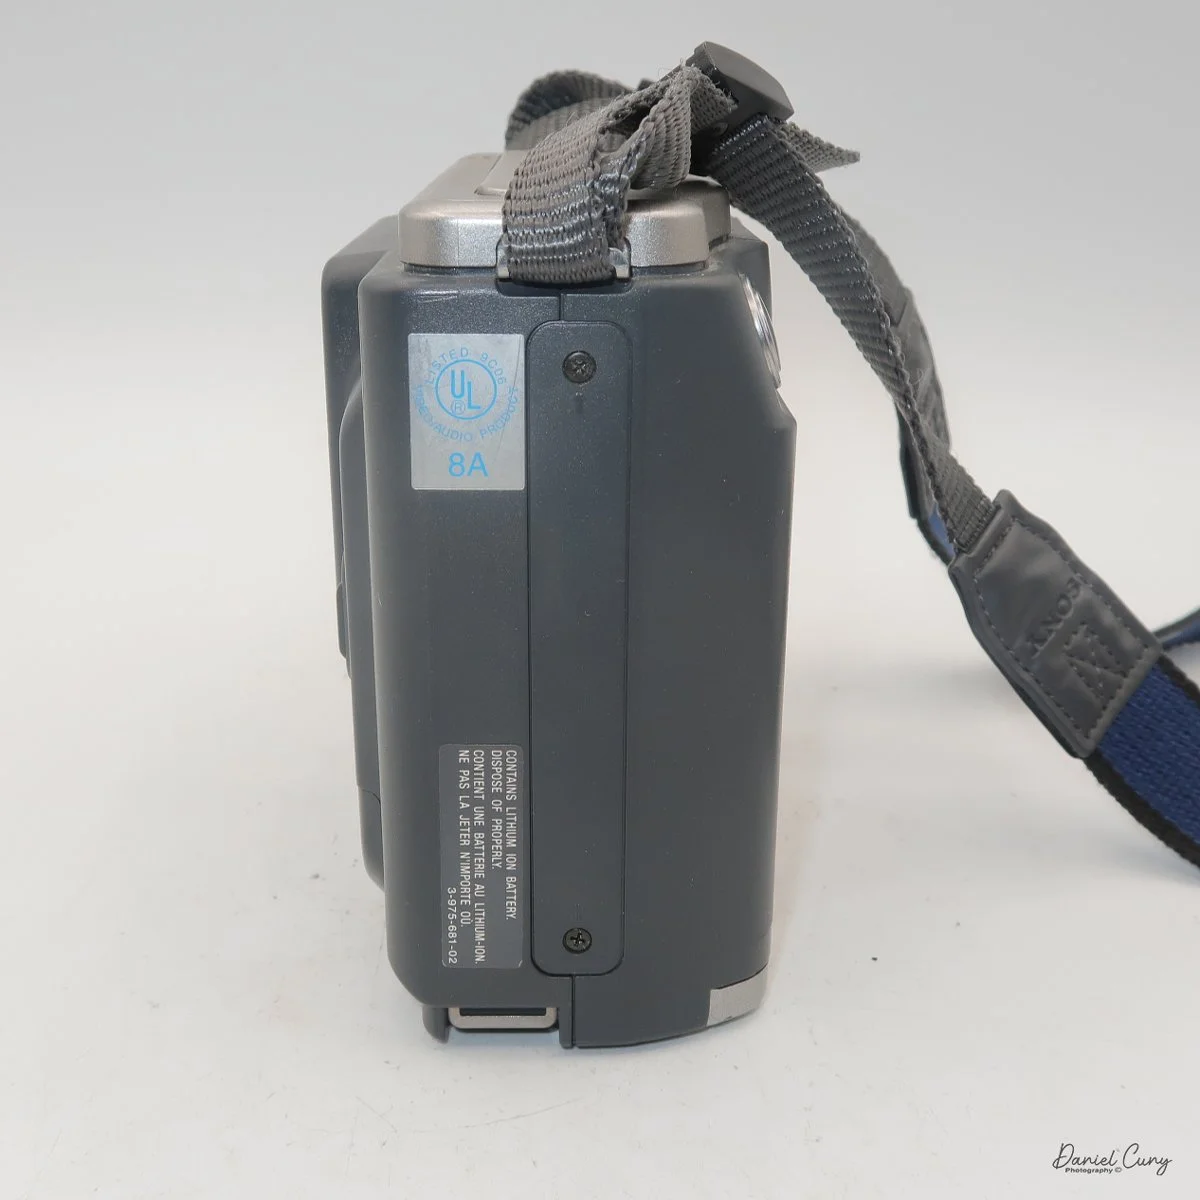
 At the bottom of the camera is the door, which you open and insert the charged battery to power the camera. The camera's battery isn't rated in shots, but in time. Once you power the camera "on", in the lower right-hand corner of the screen, you see the time in minutes remaining on the battery before recharging is needed.

My Images:

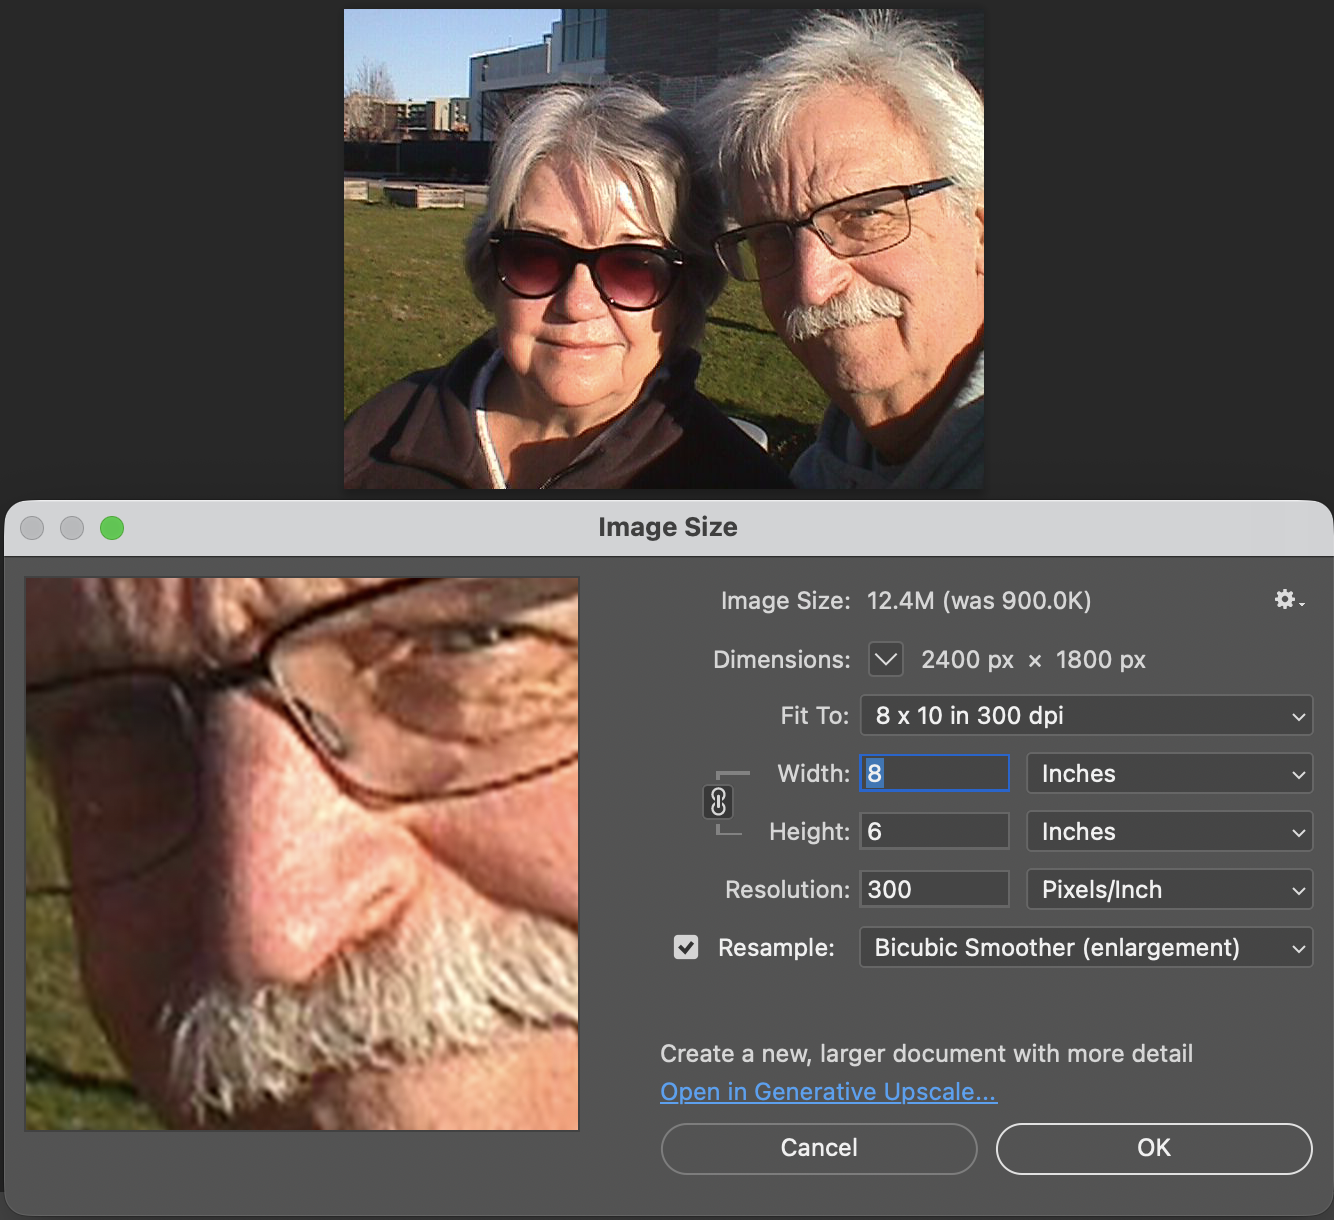
 My wife, daughter, daughter's dog, Bean, and I went for a walk on the town's downtown walkway on the Columbia River. It's a relatively new section of town with shops, restaurants, and housing. It was a sunny and somewhat warm January day in the Portland, OR area, so I took the camera on our trip.

 Since it was a bright sunny day, the rear screen was difficult to see, especially when you're trying to have the sun on the subject, meaning the sun is also hitting the screen as you're taking the images.

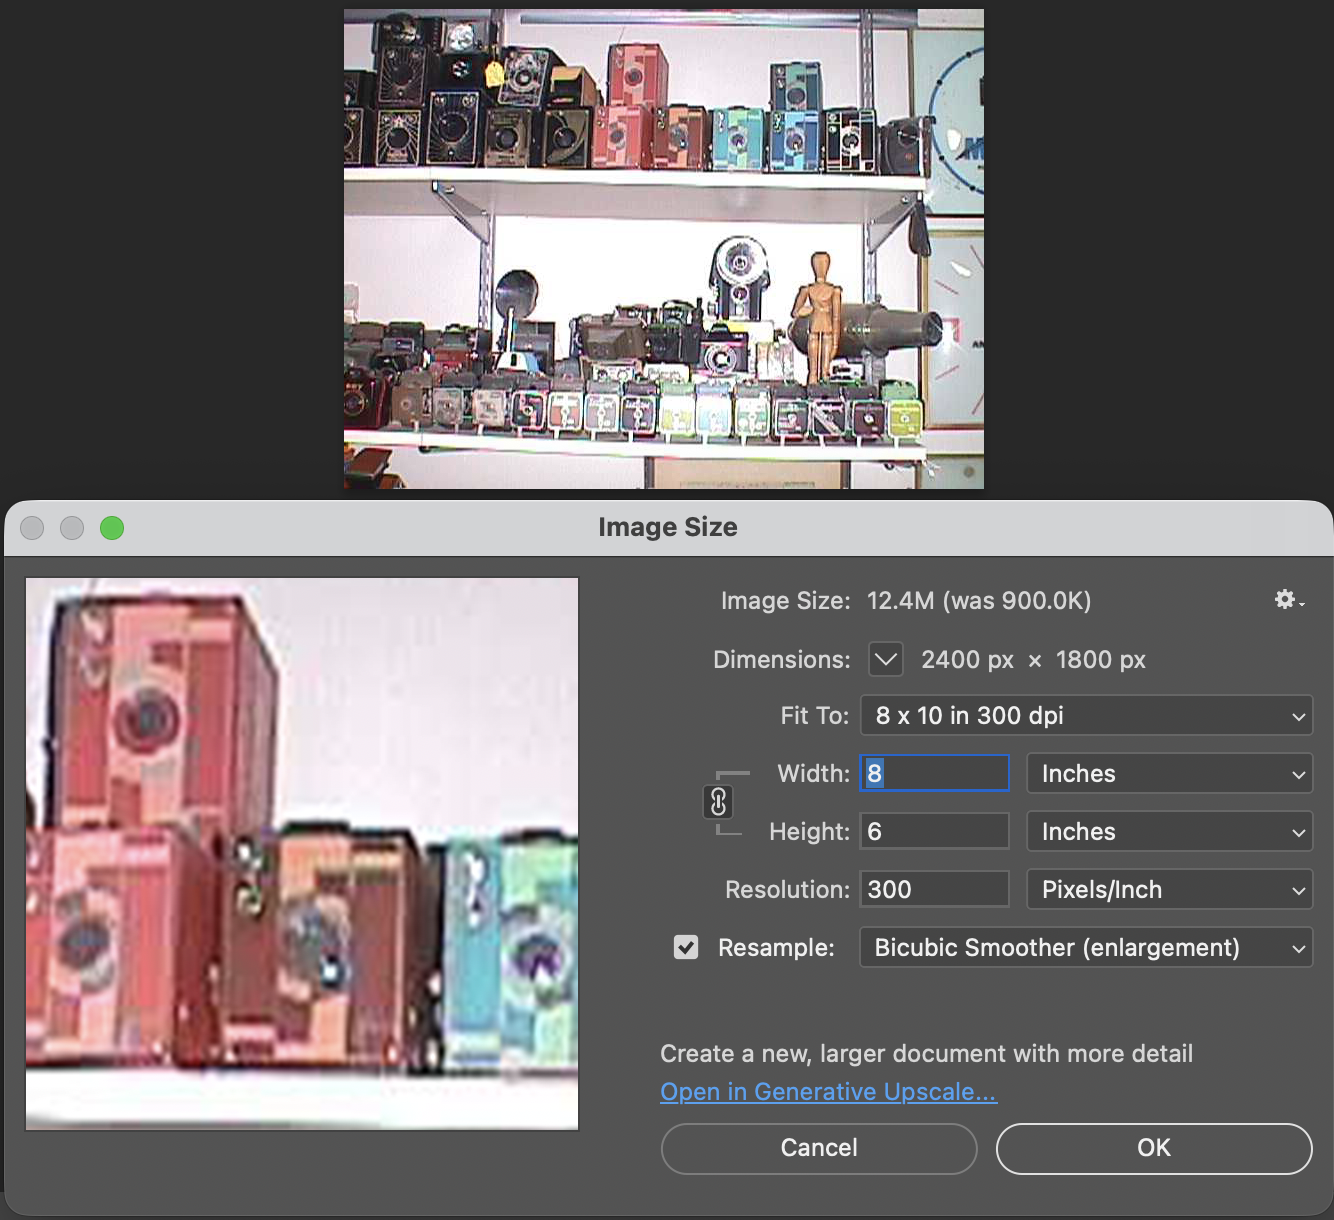
 Another interesting fact is that these files are small. Even the largest files the camera produced were only 70kb for Fine and 34kb for Standard images. These were specifically made for viewing on your computer or television, and are not really intended to be printed, especially not anything larger than the standard 3x5 photo.

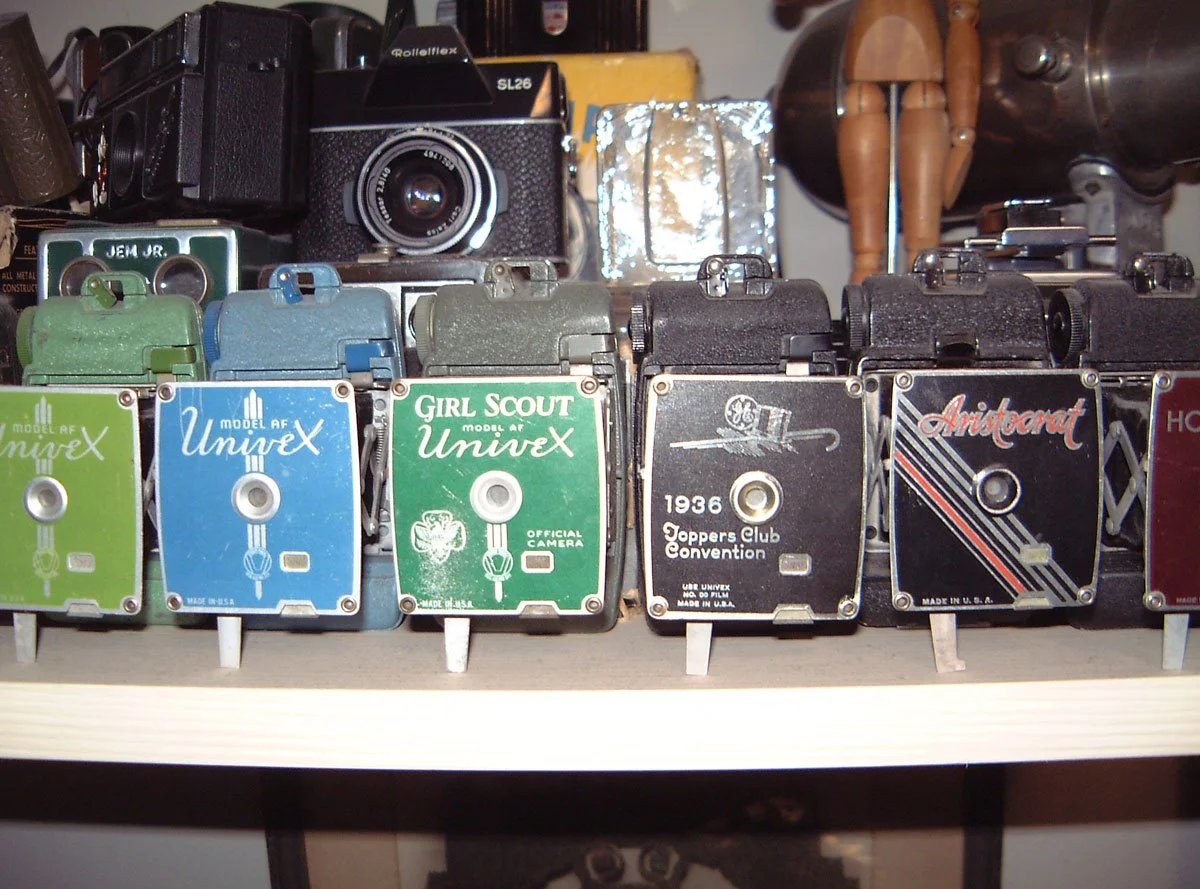
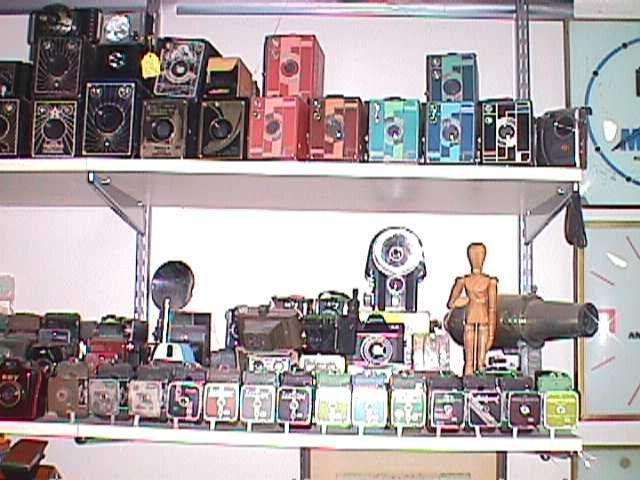
 Here are some images from our walk.

Conclusion:

 I never would have guessed that a 2-inch floppy disk would eventually bring the Nikon F's reign to an end. The MVC-FD5 wasn't a 'pro' tool—it couldn't compete with a Hasselblad for clarity—but it offered something those giants couldn't: the end of the waiting period. It traded resolution for time, a trade-off that eventually redefined the entire industry.

 It's interesting for the young photographers of today to compare this camera to what's available on our phones; it's an eye-opening comparison:

Camera: Sony Mavica MVC-FD5 (1997) Modern Smartphone (Approx.)

Resolution: 0.3 Megapixels (640 x 480) 12 - 48 Megapixels

Storage Media: 3.5" Floppy Disk (1.44 MB) Internal Flash (128 GB+)

Photo Capacity: ~20 "Fine" Image 30,000+ Images

Write Speed: ~4-6 Seconds per photo Instant

 I had owned this camera sometime in the late 1990s. It wasn't long after it was introduced that I purchased a used one. It was in 1999 when I had one. 

 Thinking back, this was a pretty fun camera to shoot with, and now that I have it again, it's fun to hear it make the different noises as it accesses the files to show on the screen. The images are very small and, as mentioned, made for screen viewing, not much resolution to make prints from. Even by today's computer standards, the images look very pixilated due to the higher resolution of today's screens.

 I'm happy to have this camera back in my collection, more as a marker of digital photography's growth than something I'm going to use daily. It is, just like with older film cameras, fun to see how these image-making machines have progressed over time.

 Thank you for taking the time to read a bit about this older digital camera from my collection. Next week will be the final installment of January's Early Digital month, and I have a rare and good one for you. Please remember to keep an eye out for it.

 Here are some of my other Camera Reviews.

 I also have a store on eBay, Cuny's Cameras and Photo, where I sell some of the cameras reviewed, along with many other camera odds and ends. If there's something that interests you, drop me a line, and I'll offer a discount.

 Until next week, please be safe,


Fujifilm FinePix 4700 Zoom

My Fujifilm FinePix 4700 Zoom and Leica Digilux 4.3 cameras

Sometime in late October or early November 2025, I was sitting back at my desk, looking at some of the cameras around me and thinking about cameras to write about for this blog. There was one camera on the top shelf above my desk that has always piqued my interest, and one that I've had for 15 years or so, but it wasn't a film camera; it was a relatively early digital camera. I hadn't included a digital camera in my blog, but that's going to change.

 To start 2026, it would be a nice change of pace if we went away from traditional film cameras and focused on some of the early digital cameras in my collection. With that said, for January, I'm picking four early digital cameras and writing about them. 

 Focusing on the early digital camera in my collection brought me unexpected challenges that were difficult to navigate at times. For many of the cameras I'm reviewing this month, I had to get my mind, and even more challenging, a computer, the computer's hardware, and software back into the late 1990s to early 2000s. Sharing these experiences can make readers feel connected and motivated to explore vintage digital cameras themselves, especially potential buyers interested in the history behind these devices.

Rear view of Fujifilm FinePix 4700 zoom & Leica Digilux 4.3

 The first camera I'm going to discuss isn't as challenging as some of the cameras I'll be writing about later this month. My difficulties are mainly because I'm still working out some hardware issues with the computer, which I'll discuss in my write-up about the cameras. 

 All of the cameras are in good working condition. Aside from their specific camera menus, which are very basic compared to what we have now, the computer issues have been considerably more challenging and, at times, very frustrating, especially when finding a computer from that timeframe that functions. Still, I'll discuss that when the camera comes into play.

 It is also interesting that Fujifilm makes cameras for other brands. The two most well-known camera companies, Hasselblad and Leica, have had cameras made for them by Fujifilm. The Hasselblad XPan was produced in partnership with Fujifilm. Also, their "H" series lenses and viewfinder were developed with Fujifilm's involvement. 

 As you can see in the photos of the cameras above, the Fujifilm FinePix 4700 zoom is rebranded as the Leica Digilux 4.3. This was the third camera that Leica rebranded. The first was the original Digilux, Digilux Zoom, and  Digilux 4.3

The Company:

 Fujifilm's history in Japan mirrors the country's own journey through modernization, war, recovery, and technological reinvention. The company was founded in 1934 as Fuji Photo Film Co., Ltd., established by the Japanese government to create a domestic photographic film industry and reduce reliance on imports, particularly from Germany and the United States. Its first factory opened in Minami-Ashigara, near Mount Fuji, which inspired the company's name and enduring brand identity.

 In its early years, Fujifilm focused on mastering the complex chemistry of photographic film, producing black-and-white film, photographic paper, and motion picture film. During World War II, like many Japanese industrial firms, it was drawn into wartime production, supplying optical and imaging materials for military use. The war left Japan's economy devastated, but Fujifilm survived and quickly pivoted back to civilian products during the postwar recovery.

Fujifilm FinePix 4700 zoom advertisment

 The 1950s and 1960s marked a period of rapid growth. As Japan rebuilt and consumer culture expanded, photography became increasingly popular. Fujifilm introduced color film to the domestic market and steadily improved its quality, competing both domestically and internationally with companies such as Kodak. At the same time, the firm diversified into related fields, including magnetic tape, optical lenses, and X-ray film, laying the groundwork for its future resilience.

 During Japan's high-growth era of the 1970s and 1980s, Fujifilm became a global brand. It invested heavily in research and development, embracing advanced chemical engineering and precision manufacturing. These capabilities allowed the company to move beyond consumer photography into medical imaging, printing systems, and industrial materials. Fujifilm's strong export orientation also reflected Japan's emergence as a significant technological power.

 The late 1990s and early 2000s posed an existential challenge: the rapid decline of photographic film amid the rise of digital imaging. While many traditional film companies struggled, Fujifilm undertook one of the most notable corporate transformations in modern Japanese business history. Drawing on its expertise in chemistry and materials science, it diversified aggressively into healthcare, pharmaceuticals, cosmetics, electronic materials, and data storage. The company officially changed its name to Fujifilm Holdings Corporation in 2006 to reflect this broader mission.

 Today, Fujifilm remains a symbol of Japanese adaptability and long-term thinking. While it still honors its photographic heritage, its core businesses now lie in healthcare, imaging, and advanced materials. From its origins near Mount Fuji to its global presence, Fujifilm's history illustrates how a Japanese company can evolve with changing times while preserving technical excellence and cultural identity.

My Camera:

 The Fujifilm FinePix 4700 zoom may be the highest resolution digital camera I'll be writing about this month, coming in at a whopping 2mp, with a 1/1.7" SuperCCD imaging sensor which can produce a maximum resolution of 2400 x 1800-sized JPEGs on a Smart Media Card. The Fujifilm FinePix 4700 zoom has a Super Fujinon 8.3-24.9mm lens with a maximum aperture of f/2.8 to f/4.5. This 3x zoom lens is the 35mm equivalent of a 36-108mm lens.

 While the Fujifilm FinePix 4700 zoom is an unconventional vertical-format camera in stature, it is very easy to hold and use. The dimensions of the camera are 4" tall by just a bit over 3" wide by 1.5" thick, and it weighs in at 10.8 ounces with the two "AA" batteries that power the camera.

I don't want to get into the full minutia of everything the camera has to offer and go into each specific button and control, but instead talk about the basic controls of the camera and how I generally use this style of camera, which is similar to probably 95% of the intended users. If you want to look at specifics and know what each button does, you can go online and find a copy of the Fujifilm FinePix 4700 instruction manual.

 Let's start at the beginning. To put in the 2 "AA" batteries, on the bottom of the camera is the battery door. Slide the cover outward, and the door will swing open. Insert the 2 "AA" batteries as shown on the battery lid, then close the lid and slide it back to close the battery door. 

On the left side of the camera is the door where you put in the Smart Media card. Flip the small button downwards to open the memory card door. Insert the memory card so the brass portion faces the front of the camera, and press it in all the way until it stays in the camera. To release the memory card, push it in a bit, as it's spring-loaded, and it will pop out, so you can grab it and pull it out of the camera. Once the memory card is inserted in the camera, you can close the memory card door.

 Above the memory card door is a small speaker; above that is a small button to turn on the flash, which will pop up after the button is pressed. Also on the left side are ports for a charging device, A/V out, and a USB port.

Two main areas control the camera: the selector on top of the camera, which surrounds the shutter release button, and the back of the camera, which is the main control center.

 The top controls the camera's shooting mode. Looking around the dial, from top to bottom, is Set (some of the main camera settings are set here, with controls from the camera's back). The next is Video Mode, then Multi Mode  (continuous shooting), Manual Mode, Auto Mode (the primary setting in red), Portrait Mode, Landscape Mode, and Night Mode. Initially, you'll want to put the camera into "set" mode so you can adjust basic settings.

On the back of the camera are many different buttons, along with two separate screens. One circular screen in the upper right of the camera with directional controls that control certain items once the camera is on and the mode is selected. Located on the lower portion of the camera's backside is a larger 2" rectangular screen with a resolution of 130,000 pixels, which is also used in the "set up" process, along with displaying the image after it is taken.

 Above the 2" screen is a series of five buttons along with a sliding pointer to a red camera or an arrow within a box. Making sure the camera is in the "Set" mode on the top wheel, put the slider to the "red camera", and press the power button inside the slider. One of my favorite things about this camera happens at this point. Inside the circular window you'll see "Hello!" illuminated inside the circular window, and the 2" screen is now in the "setup" mode. When you turn off the camera, "Bye" will appear in the window.

Here is where you'll set the image quality to Basic, Normal, or Fine by moving the directional buttons around the circular window. Next is file size, 640x480, 1280x960, or 2400x1800. Within each file size, you can choose to shoot in Basic, Normal, or Fine, giving you file sizes anywhere from 44kb in Basic and in 640x480 resolution, to 1.9mb shooting in 2400x1800 resolution and in Fine.

 Next is the "auto-off" setting, which is either 5 or 2 minutes, or No. Then moving down to "Frame No." with either Renew or Cont., then below that is "Beep" which can be High, Low, or Off, onto the second page and to "start up scree" either On or Off, and last on the setup screen is setting the Date. Once you make any of these choices, the button on the back of the camera, which has "Menu/Exe", is the button to press to make the changes desired.

With the camera still in "red camera" mode, when you move the top dial to a specific shooting mode, like Portrait or Auto, the lens door slides over and the lens extends from the camera. Now you're in shooting mode, with the camera actually recording images to the memory card. When you're in the "shooting" mode, you'll see information inside the round directional window with details on the zoom function with the buttons pointing up or down, the macro setting on the left side of the window, and the flash setting on the right, and in the center is what "mode" you're in and the frame count.

 Just above the control buttons on the back of the camera is an optical viewfinder to look through to frame your image. You can also click on the "display" button, which will activate the "live video" feed on the 2" monitor on the back of the camera. Also on the back of the camera is a button for the Menu/Exe functions. This button sets the menu item you want to control. In the upper-left corner is a button labeled Shift and a light bulb. It allows you to light up the round window while also seeing other settings within the camera.

These are the basics for using the camera, since it is a sophisticated little camera. You have the option of manual focus, over/under exposure, flash over/under exposure, focus lock, rear screen brightness, white balance settings, image sharpening, and metering types like spot, average, and multi metering, which is the most common for this camera.  I didn't even touch on the video capabilities of this camera, which were relatively plentiful for a small digital camera from this era.


My Results:

 To look at the different resolutions and shooting modes, I photographed a film box in my portable studio to compare image quality. I'm sure there's going to be a vast difference since the smallest file is only 44kb and the largest is 1.9mb.

Here are some screenshots in Photoshop showing the image size of the smallest and largest files taken with the Fujifilm FinePix 4700 zoom.

I also took a regular and macro shot, which you can see here.

Then I used the camera at our New Year's Eve get-together with some neighbors. I'll have to admit, I haven't made it to Midnight for many years.

Conclusion:

 It's nice to pull out some of the older digital cameras and run them through their paces every once in a while. The camera is compact, easy to use, and fun to shoot with. While there are many drawbacks to cameras from this era, such as file size, and in many cases the phone you have takes better photos, it often lacks many of the controls a real camera has (yet).

 Thank you for taking the time to travel back in time about 25 years, when digital cameras were coming into their own and putting film companies out of business, except for Fujifilm, which diversified and actually embraced digital.

 Feel free to look through my other Camera Reviews.

 I also have an online eBay store, Cuny's Cameras and Photo, where I sell many of the cameras I've reviewed, along with other cameras, lenses, and camera accessories. If you find something there, please let me know, and I'll offer a nice discount.

 Until next week, please be safe.

Photo-See Camera Outfit

My Photo-See camera, developing tank and instruction manual.

Almost 20 years before Dr. Land and Polaroid made instant photography world famous, a camera called the Photo-See was introduced in 1936. This company brought a very short-lived and straightforward box camera, along with a pocket-sized developing tank, to the market. These two items enable the photographer to take a photo and develop it without needing to send the film to be processed and printed.

 I don't remember when I purchased the Photo-See camera. I know it was well over 20 years ago. When I bought the photo see cameras, there were at least two, possibly three, of the same camera purchased in a lot of cameras purchased. 

 Several years ago, I recall selling one or two of the cameras on eBay. It wasn't until recently that I understood that there are two parts to this camera. The camera itself, and the developing tank in which the film for the camera was placed and processed.

 Initially, I thought the developing tank fit onto the back of the camera, but I was wrong. The developing tank is actually a separate part that the film from the photo camera fits into, allowing the photographer to process the film at any time they want to. The idea was that the photographer could take the photo, then have the print ready within a few minutes.


The History:

The Photo-See camera was the brainchild of Herman Casler, who was born in 1867 in Sandwich, IL, and raised in Fort Plain, NY. Over his lifetime, Casler invented and patented several different products and was also a partner in K.M.C.D. Syndicate, this was along with W.K.-L. Dickson, Elias Koopman, and Henry N. "Harry" Marvin. 

American Mutoscope and Biograph Founders, 1895. Casler upper right.

 Casler, Dickson, and Marvin collaborated in 1893 on a detective camera, the size of a watch, called the Photoret. The Photoret was a watch based on a pocket watch, similar to the Expo camera.

 Casler started his career as a Draftsman for General Electric Co., designing electric rock drills. He became the superintendent of Marvin Drill Company in 1895, which Harry Marvin owned.

 Casler, following Dickson's proposal, invented the Mutoscope, which displayed short films through flip-cards rotated by a hand crank that could be slowed down or sped up at the operator's will by turning the crank faster or slower. The prototype of the Mutograph camera was completed in November 1894, first tested with film in June 1895, and the first official Mutoscope films were made in August 1895.

Patent for Photo-See camera

 Marvin & Casler Co. was formed in 1896, where they manufactured the Mutoscope, which was very popular in nickelodeons during this time. The Mutoscope and Thomas Edison's Kinetoscope are the beginning of the motion picture business as we know it.

 His work in inventing motion picture cameras, projectors, and other motion picture equipment extended well beyond the 1920s, where he helped develop a more miniature hand-cranked motion picture camera and a three-pronged shutter that helped reduce flicker during projection.

 Herman Casler is also the inventor of the Photo-See camera, which was patented in 1937. The company was short-lived, as Casler passed away in 1939, and I don't see production of the camera continuing much after his death.

The Camera & Developing Tank:

 The Photo-See camera is a straightforward box camera design with a few differences, which I'll explain. The camera is 4" tall by 3 "wide by 4.5" deep, including the focusing device, and weighs 12.3 ounces.

 The front of the camera features a distinctive Art Deco design, which is enhanced by a sticker applied to the front of the camera. The camera is made from a thicker cardboard material, featuring a two-part, fold-up viewfinder on top. It's said the viewfinder is put on backwards, but that's not the case, as I find it to work better than the other way.

 On the left side of the camera are three controls; on top is the shutter control. When the bar is "in," the camera takes a regular snapshot, and when it's "out", the shutter stays open for a more prolonged exposure. This is similar to other box cameras from the same time period. The middle slider controls the aperture setting. They are Small, Medium, and Large. The bottom lever is the shutter release.

On the back of the camera, there are three main controls. The bar at the top is pulled down to remove the film from the camera. The smaller round disk on top is turned from the 3:00 to the 9:00 position to expose the film when you're ready to take a photograph. Then the disk is in the 9:00 position, which also locks the top bar, so you cannot take the back off when the film is ready to be exposed. Under the small disk is a larger disk, known as the focusing disk, which is turned to the desired distance from your subject. This is achieved by adjusting the internal focus of the film, moving it back, in, or out, which enables the film to shift its focus from 3 feet to infinity.

When you remove the film back and look inside, you'll see that it's spring-loaded, where you would load the film pack into the camera. The motion of the smaller disk on the outside of the back moved a pin on the inside up and down, which would open a dark slide, allowing light to hit the film once the shutter release was flipped. Moving the disk back to the original position closes the dark slide.

The Photo-See camera, when used in the vertical position, takes a horizontal image, and to take a vertical photo, you turn the camera to the horizontal position. Very similar to how half-frame cameras work.

 The Developing tank is 4.5" long by 3.75" wide by 2.5" deep, and weighs 9.4 ounces. The tank is composed of two parts and held together by a locking arm and a clip that wraps around the tank. Unlocking the arm swings the bar out of the way. On the back side are two spring-loaded clips that need to be squeezed to disassemble the tank. 

Once apart, you slide the locking lever away and turn the disk on the tank to the "up" position. This allows the film to be loaded into the tank. Put the back onto the tank, and turn the disk to the "down position, which exposes the film to the chemicals. Once the film is in the tank, you assemble the two pieces and lock them together to initiate the processing. 

 According to the manual, four bottles and four packets of chemicals are needed for developing your image. #1 is the developer, #2 is the bleacher, #3 is the clearer, and #4 is the toner. Pour the packets into the numbered bottles, fill them with water, and mix. Pour the contents into the larger opening for developing. This camera produces photos and not negatives. Once developed, the final image size is 1 11/16 x 1 1/8 inches.


Results:

Unfortunately, the film for this camera isn't available, so I have no images to show from it. Heck, I've been looking for film for this for many years and have not seen one for sale anywhere.


Conclusion:

This camera is such an oddball, I couldn't resist writing about it, especially since it was many years ahead of its time. I understand that the process is lengthy, that you need to carry chemicals, and that the image size is small. These factors were the reason why this didn't gain popularity.

 It's nice to have an almost complete system in the collection. A film pack and the box would be nice, but having the camera, developing tank, and manual is good.

 Thank you for taking a few minutes to read about this odd and unusual camera from almost 90 years ago.

 Click on the link to see my other camera reviews.

 Cuny's Camera & Photo is my eBay store, where I sell some of the cameras I've reviewed, along with other camera-related items.

 Until next week, please be safe. 

Capta Camera

My Capta camera

When visiting another country, I research to find out if there are cameras made in that country that I'm unaware of. If I'm fortunate enough to find one, I can add it to my collection. We were fortunate enough to plan a trip to Barcelona last month, as my wife had a conference to attend and participate in, so I planned on tagging along on the journey to Spain.

 I had a few objectives for this trip, as I'd have time on my own. These objectives were to use my new Fujifilm camera, shoot black and white with my Widelux F7 camera, and attend local flea markets to find Spanish cameras that I wasn't aware of. All three objectives were accomplished. 

 At the local flea market in Barcelona, I stumbled upon a hidden gem-a relatively unknown Spanish Bakelite camera, a Capta camera in a tattered case. The thrill of this discovery was palpable. The camera was in good working condition, took 120 film, and had a 6x4.5 format. I didn't see any chips in the Bakelite. For a decent price, I eagerly made the purchase, already envisioning the stories I would share about this Spanish wonder.

 Upon returning home, I eagerly unpacked the Capta camera. Despite its better-than-expected condition, it was covered in a layer of grime, likely from the leather dust of the case. I  cleaned the camera with a soft cloth, Q-Tips, and lightly soapy water, restoring its original charm. With the camera now sparkling, I was ready to delve into its history and put it to use.

History:

Julio Matutano Benedito

Capta was the brainchild of Valencian pictorialism photographer, Julio Matutano Benedito. Born into a modest family in 1892, he had a passion for art from an early age. At the age of 12, he began his apprenticeship with a local sculptor. Between the ages of 14 and 20, he attended evening classes for artistic drawing at the School of Craftsmen in Valencia. 

 He was an accomplished engraver with his shop in Valencia until he took up photography in 1923, where he honed his craft by taking photos of his family. In 1928, Julio Matutano and a group of his friends formed Foto Club Valencia. Between 1928 and 1936, Julio Matutano won several national and international awards for his photography.

 In 1935, Julio Matutano changed careers. He embarked on designing and manufacturing a new camera company in Spain. His first creation, the Nerva, was a testament to his innovative spirit. This camera, made from stamped aluminum, used 127 film with a 3x4cm format and featured a German Rodenstock lens. It was a true pioneer in its time, selling for 13 pesetas, equivalent to approximately $35.00 in today's dollars.

 In 1942, he designed a wooden camera with a SACO (Sociedad Anónima de Cristales Ópticos) lens, which took 127 film in a 6x4.5 format, named PERFECTA. I couldn't find this camera anywhere, except for the German Perfecta. If you have any information on it, please let me know.

 Julio Matutano registered the CAPTA trademark in 1944. That year, he also designed and introduced the Capta I, a Bakelite camera manufactured by Industrias Sintéticas Abril in Barcelona. The camera featured an optical viewfinder on top and used 120 film with a 6x4.5 format. At this time, the Capta sold for 101 pesetas. Later in 1944, Capta introduced the Baby Capta. I created a smaller version of the Capta, which I named the Baby Capta, featuring a metal face and capable of taking 127 film in a 6x4.4 format. This camera was marketed for a younger audience.

 The Captaflex was designed in 1947. The Captaflex was a Bakelite camera that took 120-size film with an unusual 52.5 x 52.5 cm image area (6x6) format. The camera had a 90mm f/8.5 lens and a helical screw, variable focus lens capable of focusing from 1.5 meters to infinity. The camera bears a strong resemblance to the British-made Ensign Ful-Vue camera. Unfortunately, Julio Matutano died in 1947 before the camera came to market, but his two sons, Julio and Vincente, who had been working in the company since they were 12 and 13. Both sons were artists when they took over the company and moved it to Valencia. From then on, the company's logo was JVM, and the Captaflex was released in 1948 for 375 pesetas.

 The brothers expanded the business during the 1950s, as the resurgence of photography following World War II gained momentum. In 1952, the Capta II was introduced, featuring a coated lens, a focusable lens, and an accessory close-up lens.

 Capta's first 35mm camera, the Capta 35, was introduced in 1953. A 24x24 format camera made of injected aluminum alloy with three shutter speeds and a rectilinear lens. In 1955, the company expanded into other areas and introduced the Capta-Movie. In 1956, Capta introduced the Universal Tank, a film developing tank compatible with 35mm, 127, and 120 films.

 After 1959, the collaboration with Gaspar Mampel ended, and Capta started selling all its products directly to the public. During this time, Capta introduces a microscope, an enlarger, and several other photo-related products. In 1966, the company ceased all production and closed due to extreme financial difficulties.

My Camera:

My Capta camera is 5" wide by 4" tall by 2.75" deep and weighs 10.2 oz without the fitted leather case. The Capta is a straightforward camera with a fixed focus, meniscus lens, and a basic optical viewfinder on top. The camera is a 6x4.5 vertical format camera, and it also has a tripod socket on the bottom.

For shutter speeds, the Capta camera has either "I" for instant, or "P" for timed exposures. These are set by pulling out or pressing in a metal bar that sets the shutter's capability, which is on the right side, below the lens. According to my shutter tester, the shutter speed is 1/40 for instant exposures. The shutter release is above the lens at an approximate 11:00 position, and above the "CAPTA" name on the front of the camera. A shutter release cable can be connected to the shutter release for timed exposures.

To load the camera with film, the back is held to the body with friction. There is no locking mechanism on the camera that secures the back onto the body. On the side of the camera are two small tabs. Push these two tabs apart, and the back separates from the camera body, exposing the area where you load the film. When the camera back is off the body, and you're ready to load film into it. There are three "wings" that can be pulled up to insert the film. These wings make it easier to load the film as opposed to trying to jam the film roll into one of the sides of the camera. There was an interesting empty spool in the camera from a film manufacturer I wasn't aware of. The spool is from Infonal, a Spanish film manufacturer in Barcelona.

The side with the take up spool and winding knob only has one wing that lifts to help load the film. Loading the empty spool is a bit more challenging, as the winding knob doesn't lift to assist with loading the empty spool. After a bit of wiggling, the take-up spool fit into the correct position. Once the film is in the camera, all you need to do is press the back onto the body, and friction hold the back in position.

 The red window on the back of the camera seemed low for the numbers on my roll of film. Still, I was able to see the numbers as they passed and stopped at the appropriate places to capture the whole roll of images on the film.


My Results:

I loaded a roll of T-Max 100 film into the camera and took it for a walk through the neighborhood. I should have given the camera one more Spanish experience by purchasing a roll of 120 film at Casanova Camera in Barcelona and trying it out there; unfortunately, I didn't think of it, so I was forced to use the camera in my neighborhood.

 After developing the negatives, I was pleasantly surprised by the results. While the images were relatively sharp in the center, the fall-off of sharpness is rapid as you move to the outer portions of the image, making this a wonderful Lomography camera. It almost has a very dreamy effect on the outer edges which I personally like.

Conclusion:

The camera was enjoyable to photograph with. Using the camera was really applying photography's basic rules, which include ensuring the sun is behind you, framing the image in the viewfinder, pressing the shutter release, and winding to the next frame. In today's world, we'd call this a "point and shoot" camera, as it has no settings. Am I taking photographs or snapshots? Does this make it better or worse? That could be a topic for discussion on another day.

 My trip to Barcelona was a successful one. I photographed many beautiful areas of the town, uploaded my favorite Widelux Images of Barcelona, and purchased a relatively unknown and simple Spanish camera to add to my collection.

 Click on the link to see other cameras I've reviewed from my collection.

 If you're interested in older and collectible cameras, I do have a store on eBay, Cuny's Camera and Photo, where I sell cameras, lenses, and other camera items.

 I'd love to hear from you. If you have a question, comment, or concern, please don't hesitate to contact me.

 Thank you for taking the time to read about this little known Spanish camera.

 Until next week, please be safe.

Olympus O-Product Camera

My Olympus O-Product Camera

In high school, my good friend Greg Copeland introduced me to the Olympus camera system in the early 1970s. He was the first person I knew who bought into the Olympus OM system with the OM-1, which I believe was in 1973. At that time, Olympus was very innovative, making the most miniature SLR camera system, which included a complete line of small, compact lenses with very nice optics. I can still remember Greg telling me how much he enjoyed how nice the camera was made. He would take the camera with him all the time. At the time, I was using either the Topcon Super D or, possibly, I had moved on to shooting with a Nikon Nikkormat.

 I started working in the photo industry in late 1973 when I was hired as a seasonal employee in the camera department at my local K-Mart. That position didn't last long, but it led me to work at the local camera store chain about a year later. I was hired to work in the warehouse and handle all the camera and lens repairs.

 When I started working at the local camera store, the Olympus OM system had a decent hold on the market. However, it was still lagging behind the big kids in the marketplace. Olympus was continually pushing the envelope with many new and exciting products like the terrific XA camera line, which, to this day, is one of my favorite cameras. Olympus introduced new additions to its system yearly, which always had customers in the store talking about its products.

Olympus O camera & Flash

 I tell you this because I have seen many odd and unusual cameras introduced by camera companies over the years, and many of them came out in the 1980s to the mid-1990s. The Minolta Prod 20, the Yashica Samurai, and Canon had the Epoca series of cameras. There's a great blog on some of these cameras on the Kosmo Foto Blog.

 One of the cameras that greatly impacted me when it was introduced in 1988 was the Olympus O-Product camera. It was a limited edition, and only 20,000 cameras were made. The Olympus O-Product camera had a very unusual, art deco look of a circle in a square and was made of brushed aluminum. At the time, the cost was prohibitive for me to purchase, but I remember thinking that someday, I'd really like to have one in my collection. Its unique design always intrigued me.

The Company:

The history of Olympus cameras is a story of innovation, precision engineering, and a relentless pursuit of compact, high-quality imaging tools. Founded 1919 in Japan as Takachiho Seisakusho, the company initially specialized in microscopes and thermometers. In 1949, it was renamed Olympus Optical Co., Ltd., and it soon began making a name for itself in photography.

 Olympus entered the camera market in 1936 with the launch of the Semi-Olympus I. This bellows camera used the German-made Zuiko lens, setting the stage for a signature brand name synonymous with Olympus Optics. However, it was not until the post-war period that Olympus truly revolutionized the photography industry.

 One of the most pivotal moments came in 1959 with the release of the Olympus Pen. Designed by the legendary Yoshihisa Maitani, the Pen was a half-frame 35mm camera, meaning it could shoot twice as many exposures per roll of film. It was compact and affordable and helped democratize photography for a wider audience. The Pen series enjoyed massive popularity and marked Olympus as a leader in miniaturization without sacrificing quality.

 The next major innovation came in 1972 with the OM system. Again spearheaded by Maitani, the Olympus OM-1 was a compact, lightweight SLR (single-lens reflex) camera that offered full functionality in a significantly smaller body than its contemporaries. This system appealed to professionals and enthusiasts alike, reshaping expectations for what an SLR could be.

 In the digital age, Olympus continued to push boundaries. In 1996, they released their first digital camera, the Camedia C-800L. However, the Four Thirds system, introduced in collaboration with Kodak in 2003, made a lasting mark. This was followed by the Micro Four Thirds system in 2008, which eliminated the mirror box of traditional DSLRs, allowing for even more compact and lightweight cameras. The Olympus PEN E-P1, released in 2009, revived the classic Pen design in a digital form and was among the first mirrorless cameras to gain traction in the market.

 In 2020, Olympus exited the camera business, selling its imaging division to Japan Industrial Partners, which rebranded the line as OM SYSTEM. Despite the transition, Olympus's legacy lives on through continued innovation and the enduring influence of its designs on modern photography.

The Camera.

I've always thought of the Olympus O-Product camera as more of an art piece rather than a functioning camera, but it is fully functional. In its simplest form, the Olympus O-Product is a "point-and-shoot" camera. There are no settings on the camera that the photographer needs or can really set, which makes it incredibly simple and straightforward to use.

Camera’s number from production lot.

 The camera is relatively small, measuring 4" wide by 3.5" tall and 2" deep. These measurements are for the camera alone and not with the flash attached. If I add the detachable flash, the camera is 5.75" wide by 4" tall. The camera weighs just under 1 lbs. at 15.2 oz. with the flash attached. My camera is number 11289 out of 20,000. The camera also features a unique circular viewfinder and a distinctive shutter button, adding to its charm and functionality.

 The Olympus O-Product camera is powered by 2-AAA batteries that fit into the camera's bottom. The 2-AAA batteries also power the detachable flash. The camera is very simple and basic. Once the batteries are in the camera, you can load film, which is autoloading. There is no need to set the film's ISO because the camera has DX coding for the film loaded. Once you put the leader on the take-up spool and close the back of the camera, the camera automatically winds the film to frame number one.

 To turn on the camera, a lever you pull down on the front opens the front door, exposing the 35mm f3.5 Olympus lens. To turn the camera off, close the front door. There are no shutter speeds to set as the camera has a programmed electronic shutter. The camera is also autofocusing. In the center of the viewfinder,  you'll see a white circle when you depress the shutter button halfway on the front of the camera. In that case, a light will light up next to the "AF" in the upper right-hand corner, letting you know the camera has focused on the subject, and you can press the button to take the photo. Once you take the picture, the camera automatically advances to the next frame. Once you've taken all the photos on the roll of film, the camera will automatically rewind the film into the film cassette.

 The flash for the camera is detachable, so if you don't need it, you can take it off. To take the flash off, you need to unscrew the mounting screw, and the flash will come off the camera. You still need to unplug the cord from the flash to the camera, which pulls out, so it's very simple. To attach the flash, you screw it onto the camera and plug in the cord. If the camera needs the flash, a red ready light on top of it lights up when the flash is ready and will fire if it determines it needs the extra light to make a proper exposure.

 There are two buttons on the camera's top next to the flash attachment that allows the photographer to make adjustments when shooting.  One of the buttons is a self-timer. If you want to get into the photo, press the self-timer, giving you 10 seconds to get into it. The other button is a rewind button. Suppose, for some reason, you want to change to a different type of film. In that case, you can depress the rewind button. The camera will automatically rewind the film back, leaving a little bit of the leader exposed so you can re-load it when you want to finish that roll of film.

My Results.

I put batteries in the camera and flash, loaded it with a roll of Ilford Plus 50 black and white film, walked through the house, and strolled around the block taking photos. The camera determined if the flash was needed, which was pretty fun. It was too simple for my taste as sometimes I like to use fill flash, but this camera didn't allow me to do so. I could trick the meter by putting my finger over the meter area, but for this blog post, I wanted to be free and let the camera do all the work.

 Here are a few of the photos taken on my walk.

Conclusion.

Using such a simple but beautifully made camera was a lot of fun. The camera produces very sharp images and is extremely easy to use. When I was working at the camera store, we used the term PHD cameras, which always meant "push here dear," meaning the camera was very simple for either men or women. Put the camera to your eye, point it at your subject and "push here dear".

 As I mentioned earlier, the Olympus O-Product camera is more of a work of art or statement camera that looks terrific in the collection. It's not really made to be used on a daily basis, but using it every once in a while is good. I wouldn't want the camera to get more scuffed than it already is, but taking the camera out was fun, as was running film through it.

 Thank you for taking a few minutes from your day to read about this art piece that can also be used as a camera.

 Until next week, please be safe.

Marchand Fischer Baby Camera

Whenever my wife and I visit a foreign city, I check to see if the town or a surrounding city has a Flea Market to check out the local market of used and collectible cameras. This spring, my wife and I returned to Paris, which has a robust and large Flea Market area that thrives on the weekends. 


The Flea Market, which comprises smallish stalls selling goods from carpets to antiques and almost anything imaginable, was a used camera store. It was not in the flea market but on one of the main roads surrounding the markets. Looking around the camera store, I noticed that the shop owner had many great cameras, but one that caught my eye was the Fischer Baby camera made by Marchand.


The Company:

I don't have much to say here, as I've searched the Internet and cannot find out much about this company. It's most likely because they were a small French company in Charbonnieres, France, after WWII. They produced a minimal amount of toyish cameras in the 1950s sold in toy stores. Due to their build quality, which I'll get into more when I explain the camera below, they were poorly received and, therefore, went out of business.

 If you or anyone who reads this post knows anything about Marchand Co., which produced these cameras, I'd love to know, and I will update the blog post with that information.

The Camera:

There are a few items that drew me to this camera. The faceplate is typical, but it does have a 6 on one side of the lens and 9 on the other. My first thought was that it was a fascinating film format. I'm a real enthusiast of anything panoramic, so this was the first light bulb in my head. Then, when I got closer to the camera and picked it up, the bulbous size and extremely light weight of the camera were pretty fascinating. It has almost a circular look and feel to the camera. Being someone who enjoys panoramic cameras and images, the 6x9 format made this very intriguing.


The camera is straightforward and similar to a Box-style camera but even simpler as there is no aperture setting and only two shutter speeds. The Fischer Baby has a very simple shutter with a bulb setting  "P" for time exposures and an "I" setting for instant. The camera's shutter, at least on my camera, "clicks" when you press the shutter button down, which exposes the film, but it does the same thing when you pull the shutter button up to what most people would think it to be the starting position. The shutter speed is about 1/80th sec, and possibly even slower.

Another fascinating point about the camera is how thin the plastic is. It doesn't have a lot of "heft" to it, and it's pretty light—the camera loads like any other simple point-and-shoot style camera from the late 1940s to mid-1950s. There's a red window on the back of the camera so you know when you're at the next frame to take a photo. The transport continues, but you can wind past the next frame if you're not careful.

 The Baby Fischer has no frills in its design. Two clips on the side of the camera keep the front of the camera attached to the back of the camera. There is no locking mechanism, and the clips could open easily, exposing the photos already taken. My camera is missing its strap because one of the eyelets has broken off, which I'd guess is pretty standard due to its build quality.

The Results:

My first impression was that this camera takes 120 film. When I went to load the film, the 120 roll was too big, so I thought this must be a 620 film camera. Its re-spooling capability allows you to re-spool 120 films onto a 620 reel. I found an empty 620 film spool and a 120 roll of T-Max film, put them into my dark bag, and re-spooled the film.

 I had never done this before, and when I took the film out of the dark bag, it looked OK. It was not professionally done, but it was my first time doing so. After loading the film into the camera, I took photos with my second spare 620 spool.

 The results showed that my re-spooling wasn't perfect. In fact, it was poor, as there was some light leakage coming from the end of the spool where the film wasn't tight enough. Other than the light leaks, the results were pretty good.

The Conclusion:

After walking around my backyard and in front, too, the camera could have been better to work with. The viewfinder was challenging to look through and not precisely in its proportions. The winding was OK; you can see the film advance and frame numbers in the red window on the back. Since there wasn't a strap on my camera, I had to carry it, which wasn't uncomfortable, but I was always thinking about not dropping it. I'm glad I did a post on this camera and have already picked the camera for my next post, which will be on the Exakta 66 camera.

 Thank you for reading this post. I appreciate your time. Until the next post, please be safe and well.