My Eho Baby Box camera
During my search for cameras, I found many of the very common black folding or box Kodak cameras, as well as the plentiful Argus C3 and Polaroid cameras. However, it's rare to come across something that sparks an interest. I can't define the feeling very well, but when you attend a Flea market or Garage sale and walk up to a table to see something you like or haven't seen before. It's a surprise, and you get a tiny rush from it.
That's what happened when I first saw the Eho Baby Box camera. I was at a Flea market probably 20 years ago, and a person had a cloth on the ground with several cameras on it. I visually scanned through the lot and found the regular Kodak box, folding and Polaroid cameras, but something didn't make sense when I peeked behind one of the cameras.
I could see the top of the camera, which had a small handle on it. I thought it was part of another camera, but as I moved a bit, I could see it was a separate camera itself. Thinking, that's interesting, I went in to have a closer look, and that's when I saw the Eho Baby Box camera.

It really piqued my interest, as I hadn't seen this manufacturer's baby camera before. I've seen and owned the Baby Zeiss box camera, but the squareness and manufacturer were new to me at the time. Picking it up and playing with it, the camera was in clean condition, and the shutter was working, at least most of the time. The camera even had an intact strap with the maker's name on it, which I always prefer.
Since the camera had a strap and a somewhat working shutter, I wanted to know what the seller wanted for it, so when I asked, the seller said $5.00. Being a person who likes to haggle on price, I had to ask if he would take $3.00, which he did. I paid the seller the money for the camera, and I was thrilled to have a new addition to my camera family, especially since I discovered a camera manufacturer I wasn't aware of, and for such a small and cute camera.
History:
Eho-Altissa was a German camera manufacturer with a rich history tied to the evolution of photographic technology in the 20th century. The company originated in 1892 in Leipzig under Richard Knoll as "Photo Spezialhaus" and began repairing and building its own photography equipment from 1904 onwards. In 1910, the operation relocated to Dresden, a hub for Germany's camera production. By 1927, ownership was transferred to Emil Hofert, who renamed it "Eho" after his initials.
By the early 1930s, the company was manufacturing box cameras, known for their simplicity and reliability, and often rebranded for warehouse and supplier stores under various names. The mechanician Karl Heinrich Altmann designed the notable Altissa Box camera line, which featured an eye-level viewer, differentiating it from other box cameras of the era. Several stereo and twin-lens reflex (TLR) models followed, including the Altiflex in 1937, a notable reflex camera of its time.
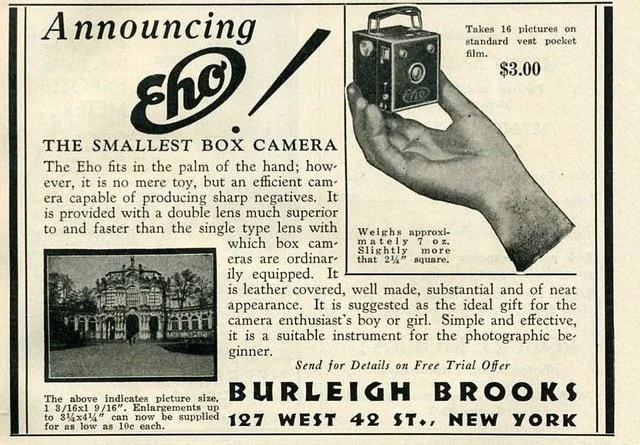
Ad for Eho Baby Box camera
In 1939, the company introduced its Altix series of compact 35mm viewfinder cameras, marking the beginning of a legacy that lasted nearly two decades. The Altix models were key innovations for Eho-Altissa, and their popularity solidified the company's reputation for offering affordable, high-quality cameras with reliable mechanics.
Throughout its development, the company underwent several renamings. In 1931, it became EHO-Kamerafabrik GmbH. During and after World War II, it transitioned to Amca Werk Berthold Altmann (1940). Altissa Camera Werk (1941), and finally, in 1952, VEB Altissa Camera Werk was nationalized under the East German state.
World War II severely affected Eho-Altissa; its Dresden factory was destroyed during Allied bombing raids. Nevertheless, the company was revived post-war, with camera production resuming by 1947. The firm remained small enough to avoid early state intervention but was eventually nationalized in 1959, merging with VEB Kamera- und Kinowerke, which was later incorporated into VEB Pentacon.
Camera output ceased in 1961. Notably, the Altix VI model continued to be produced briefly under license in Sarajevo, Yugoslavia, using equipment from the shuttered factory.
Eho-Altissa produced renowned models such as the Altissa Box series, Altiflex, and Altix, and supplied rebranded products to European photo retailers. Its story reflects the broader turmoil and adaptability of the German camera industry in the wake of economic and political change throughout the 20th century.
My Camera:
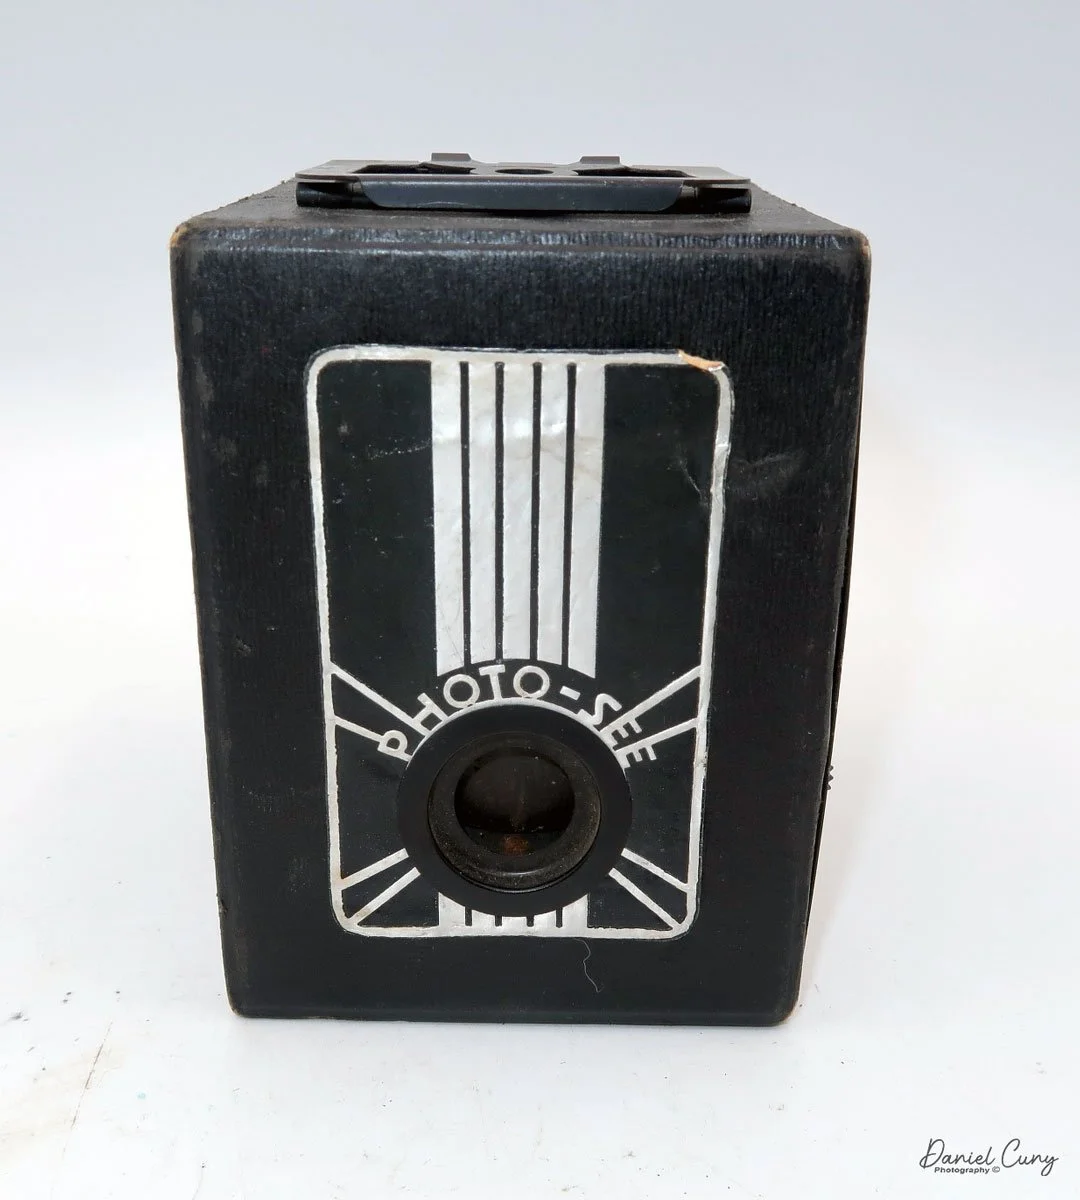
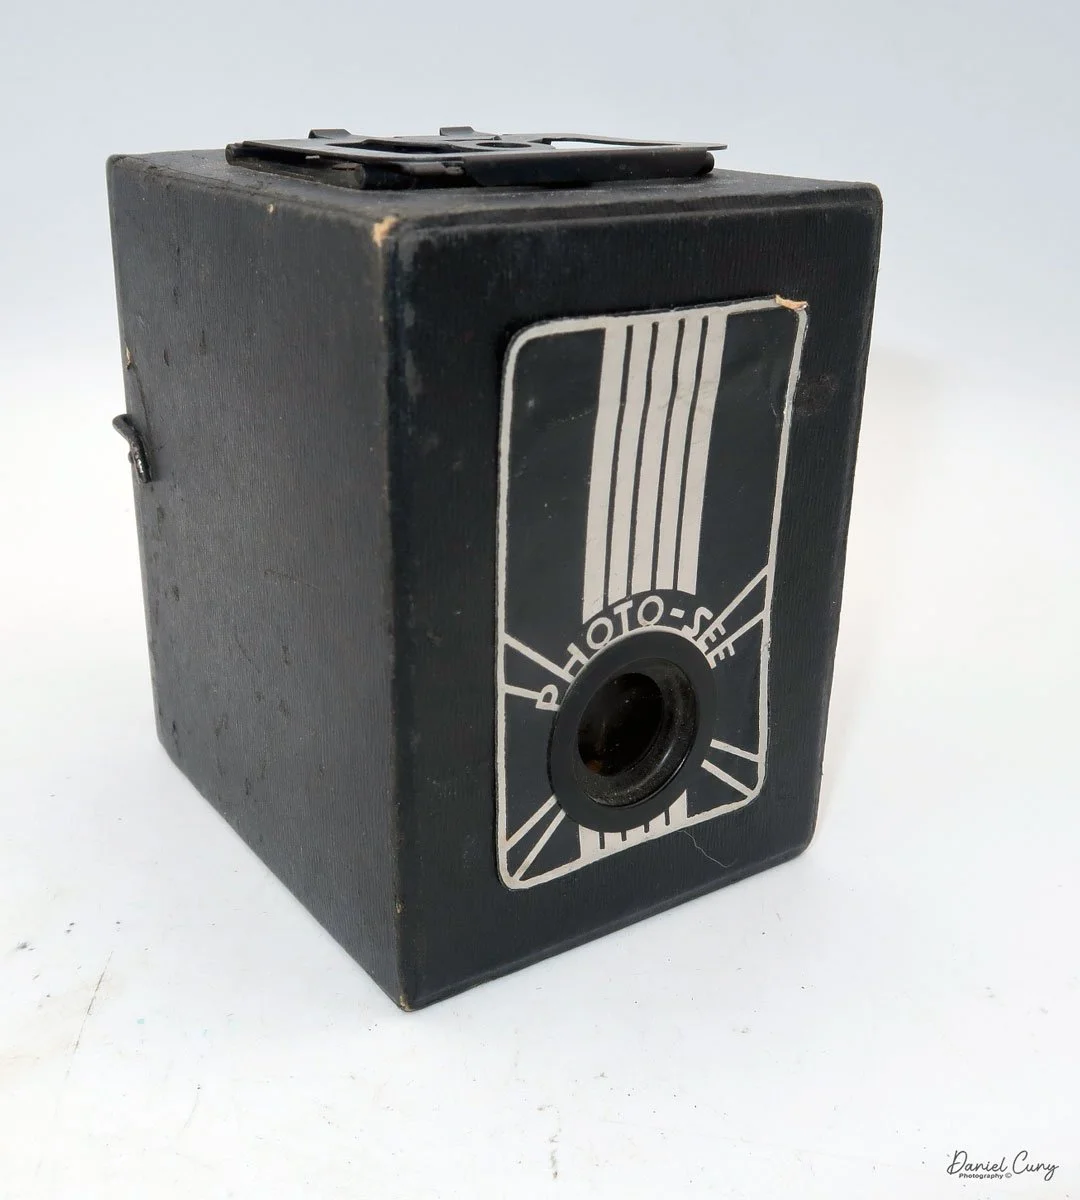
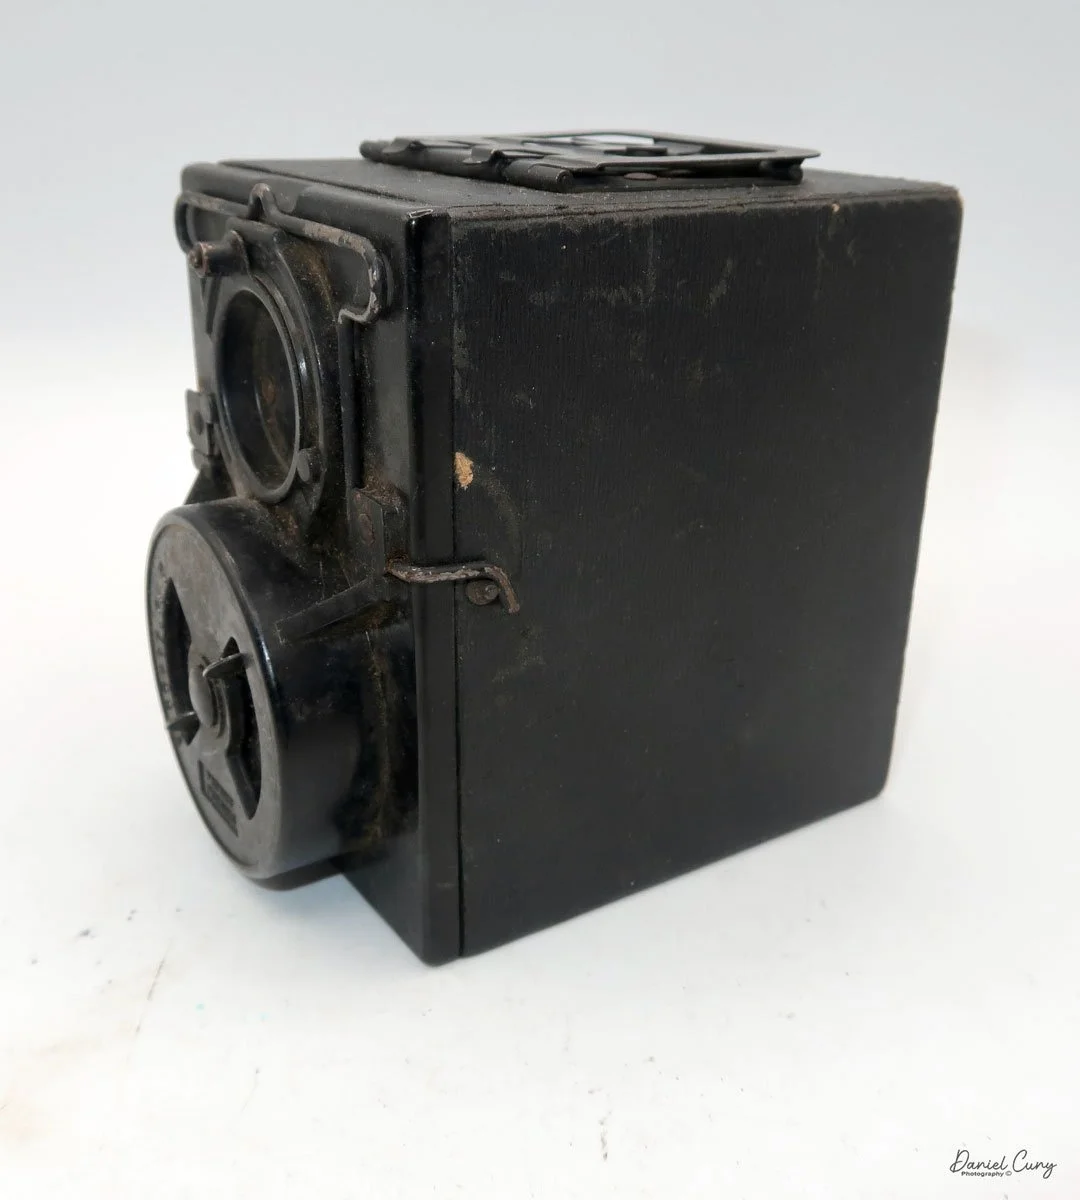
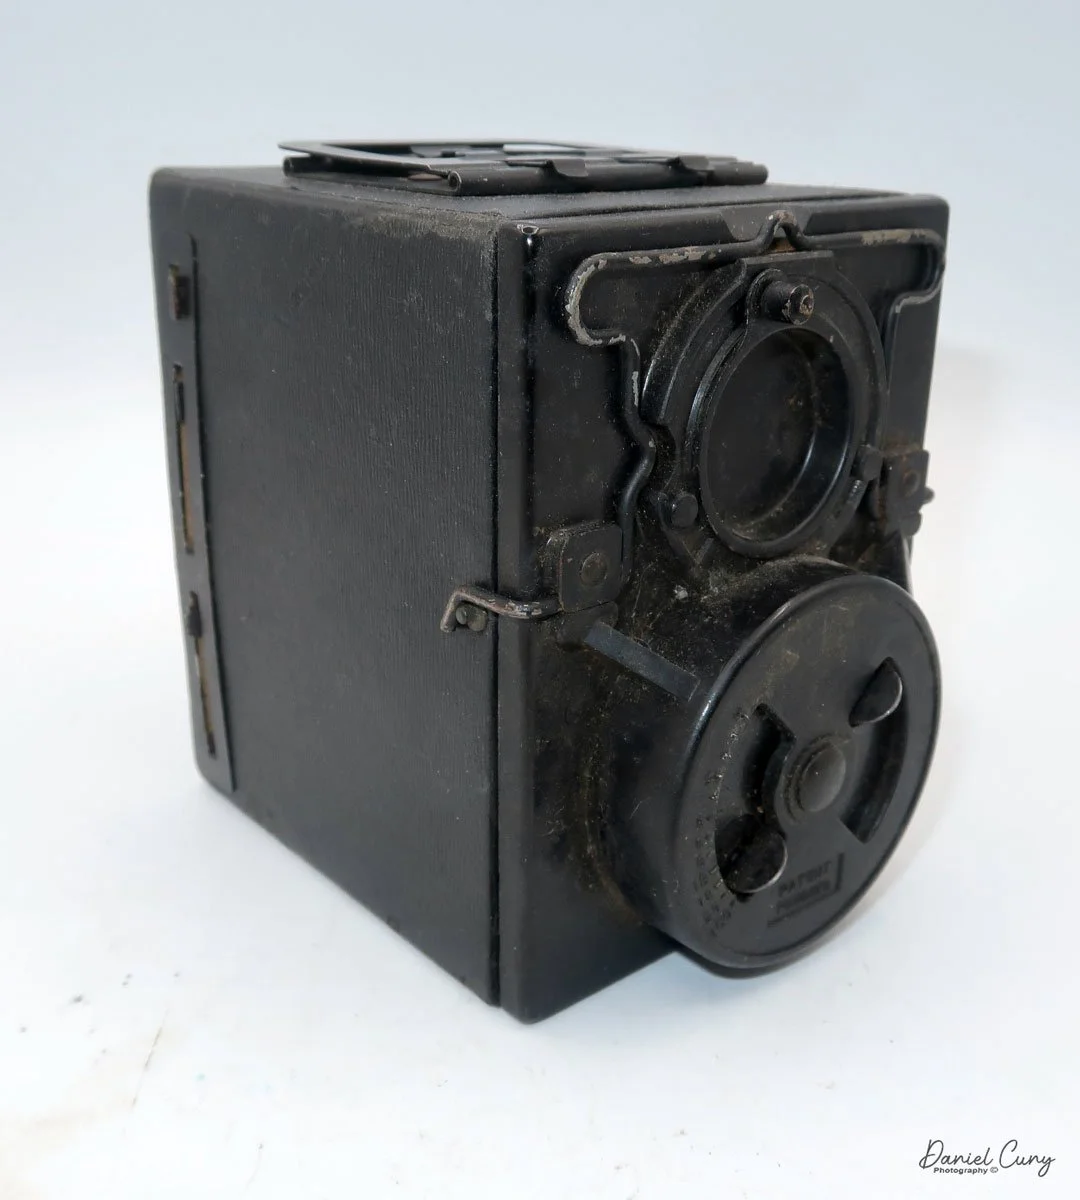
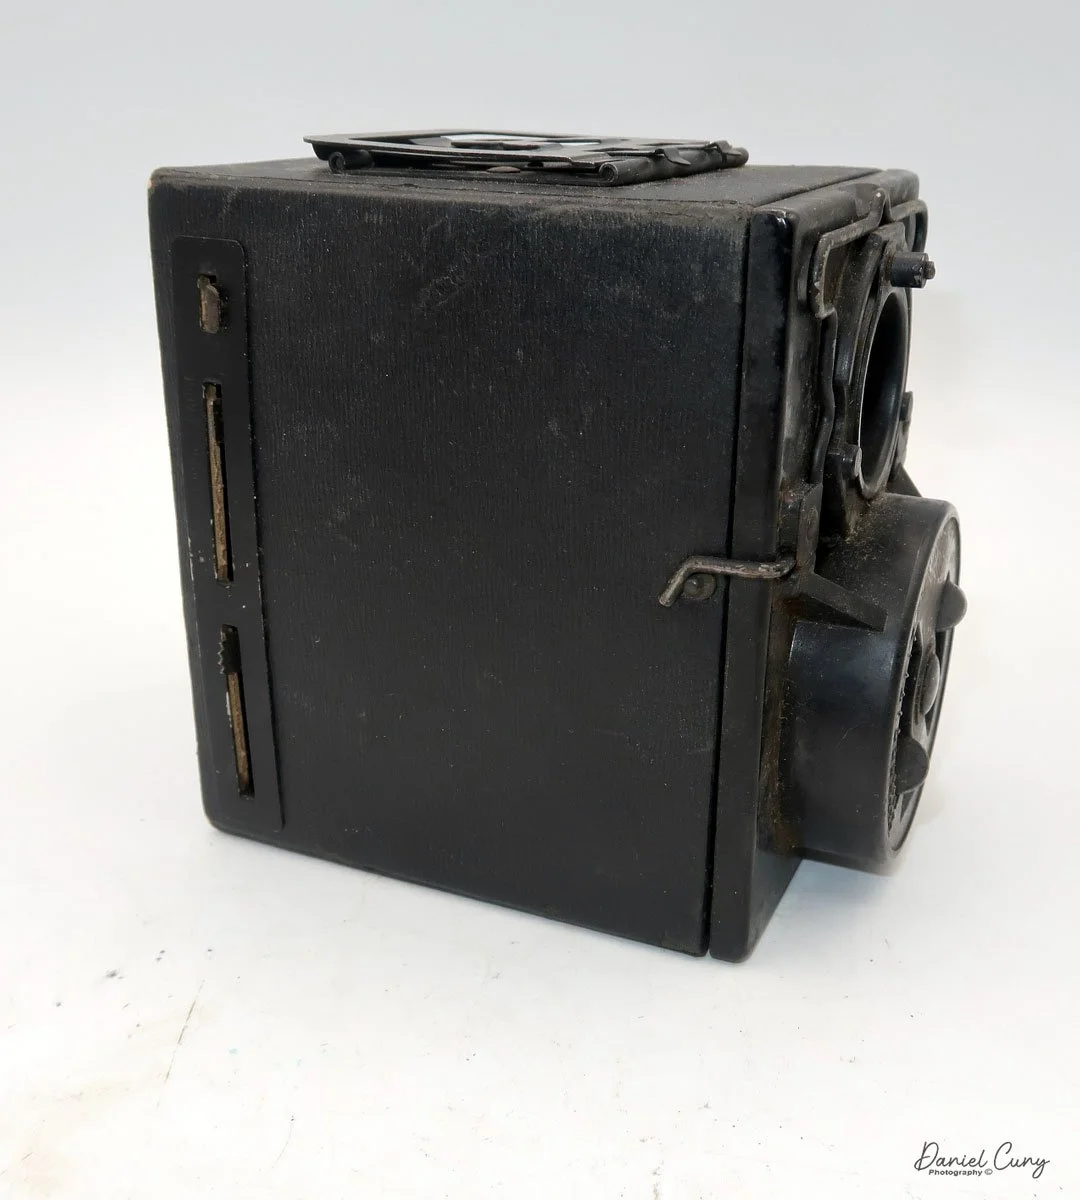
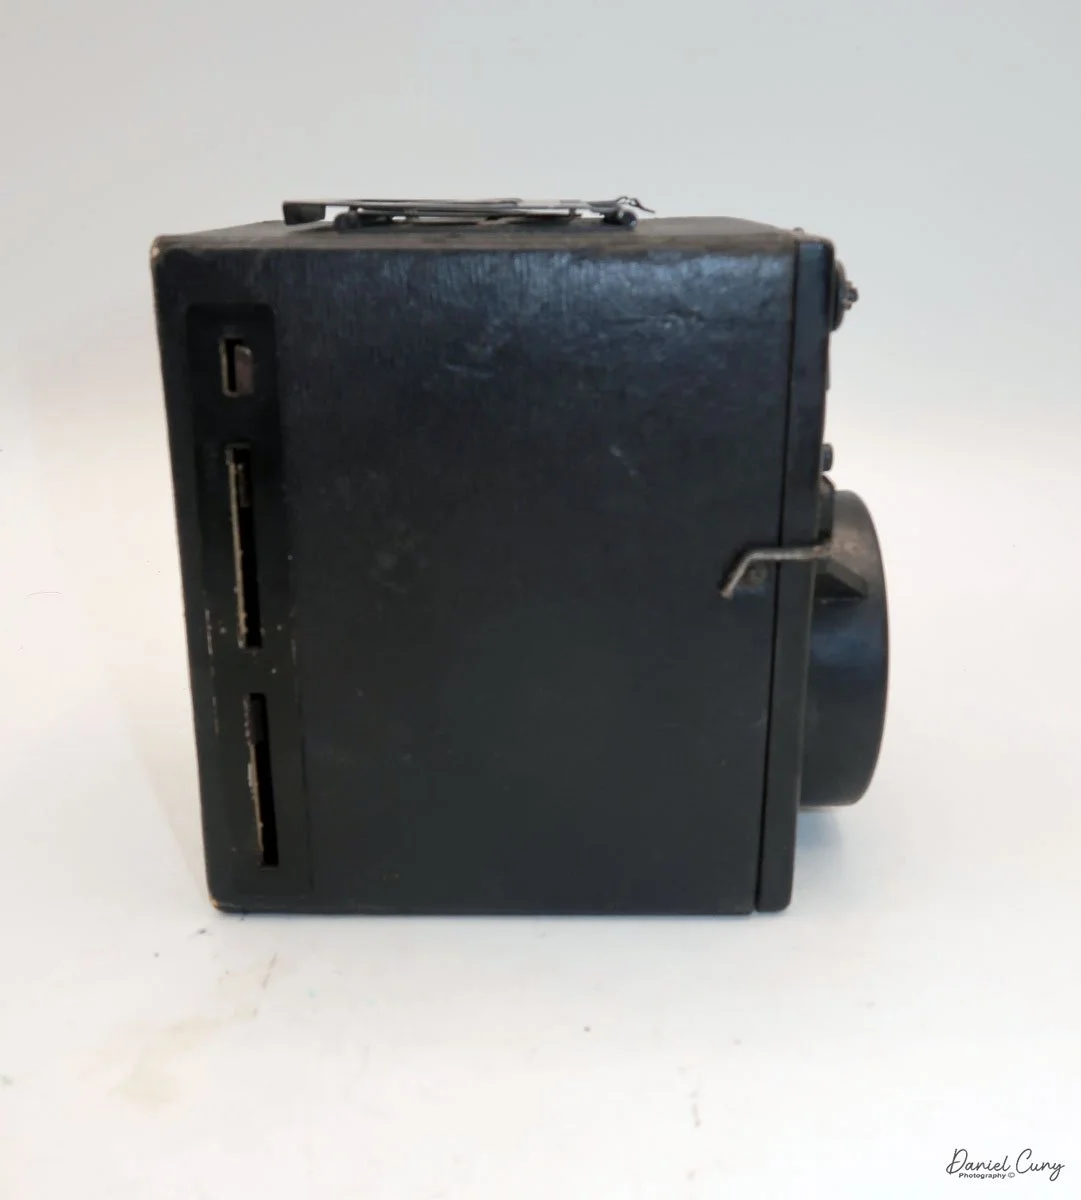
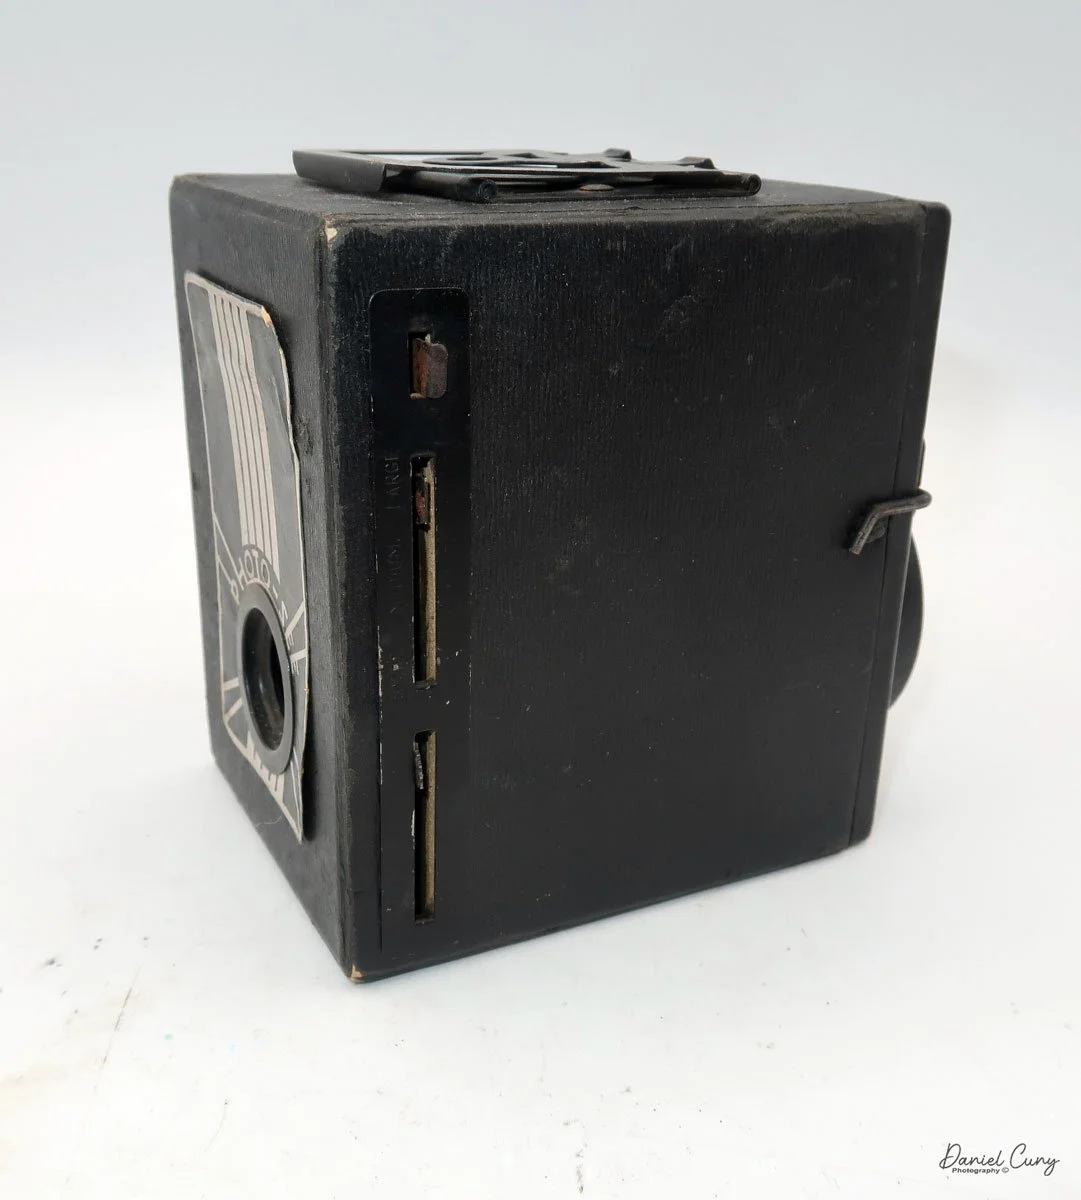
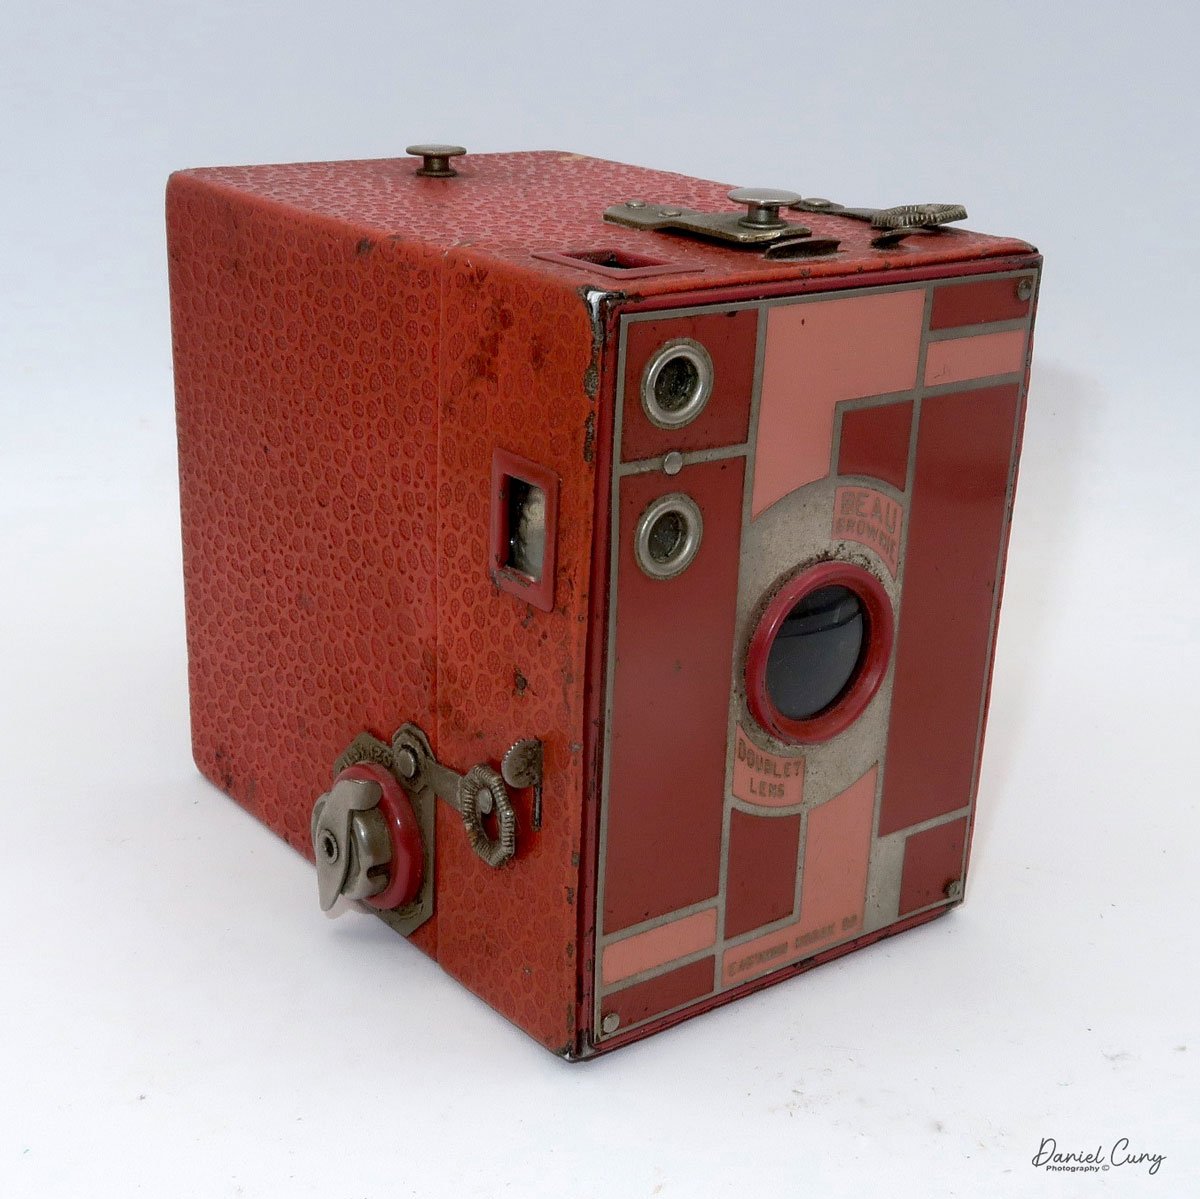
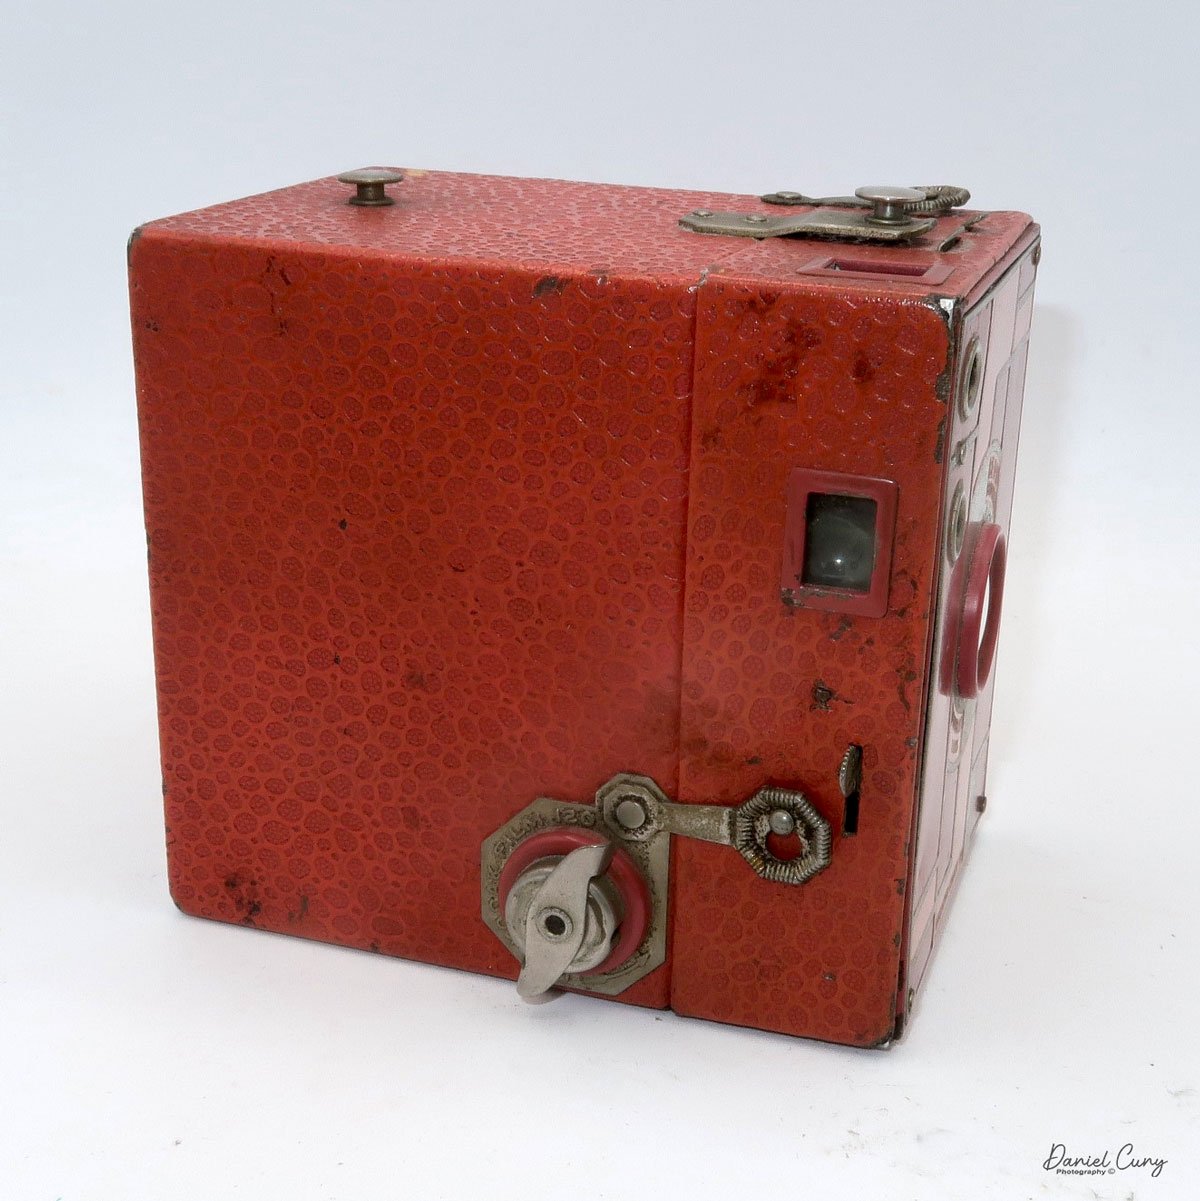
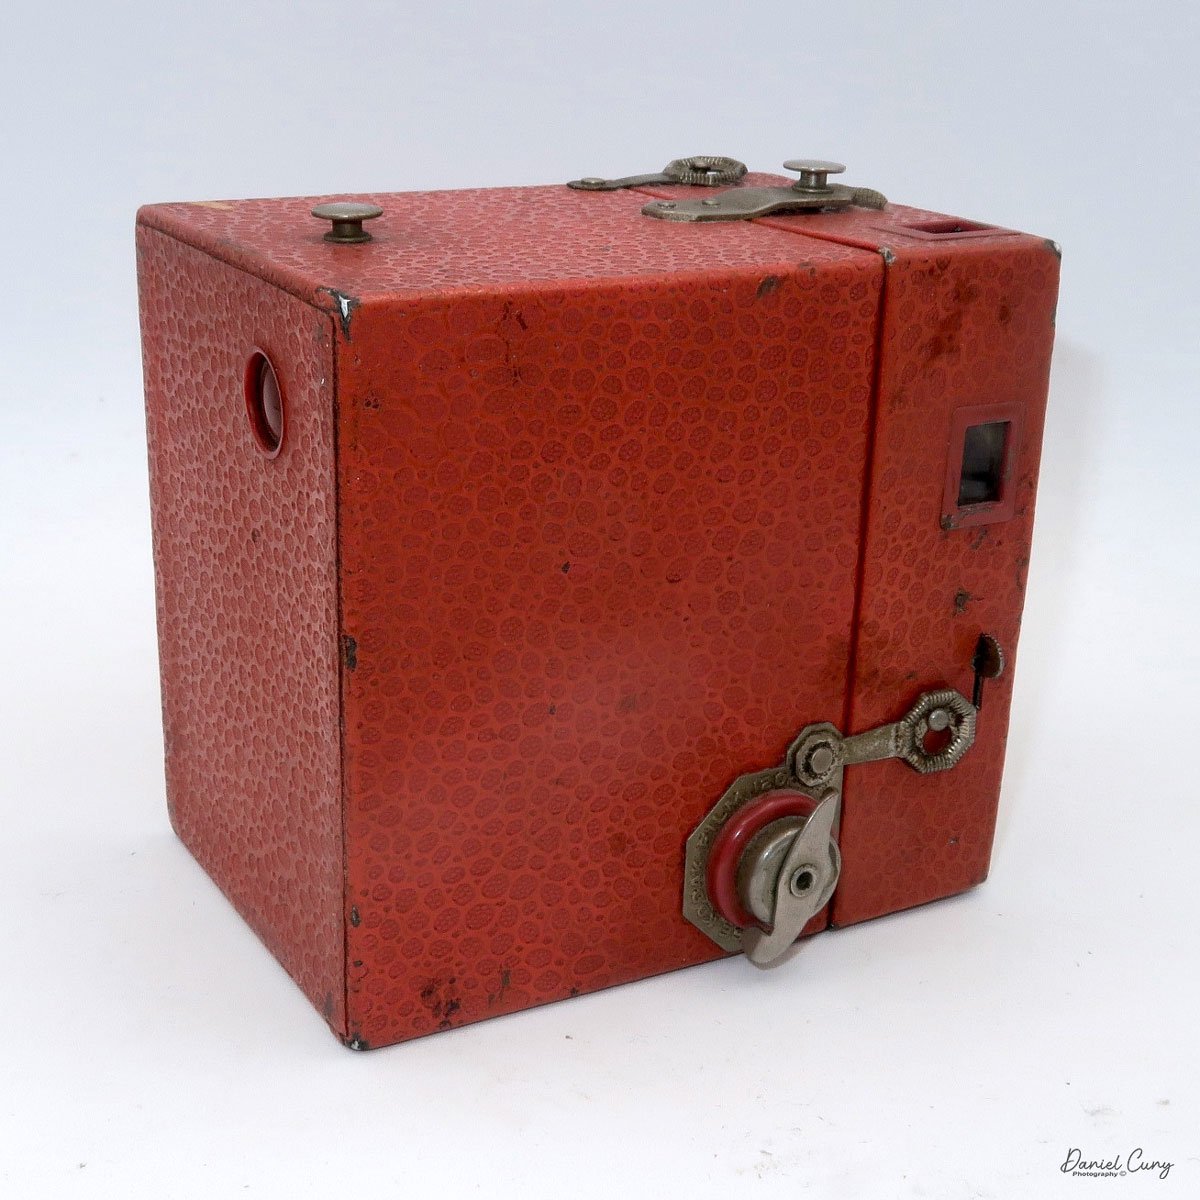
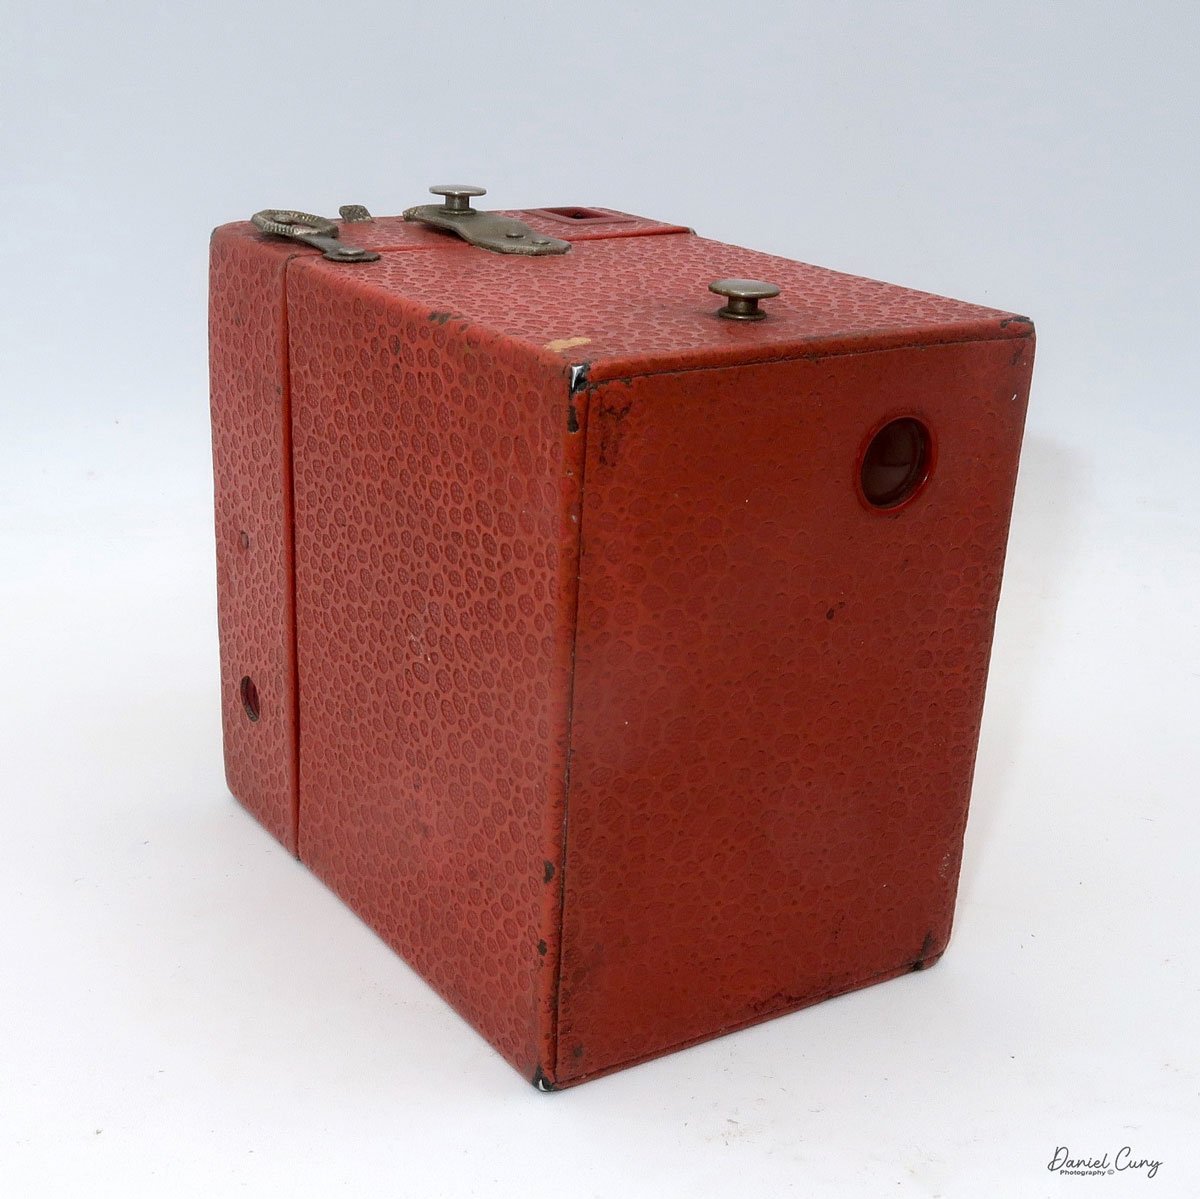
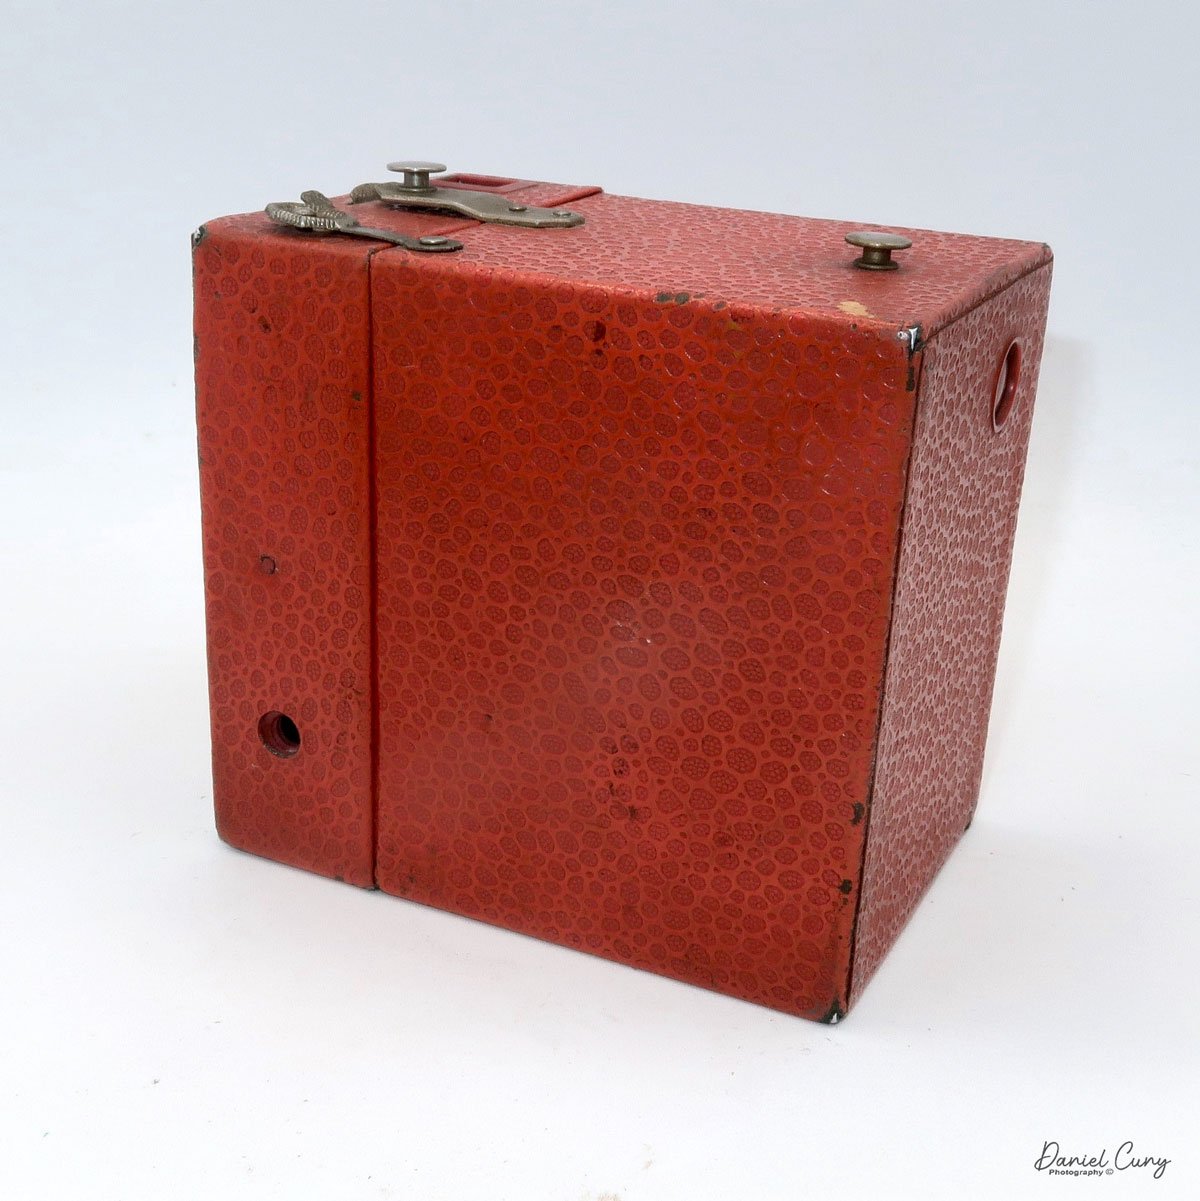
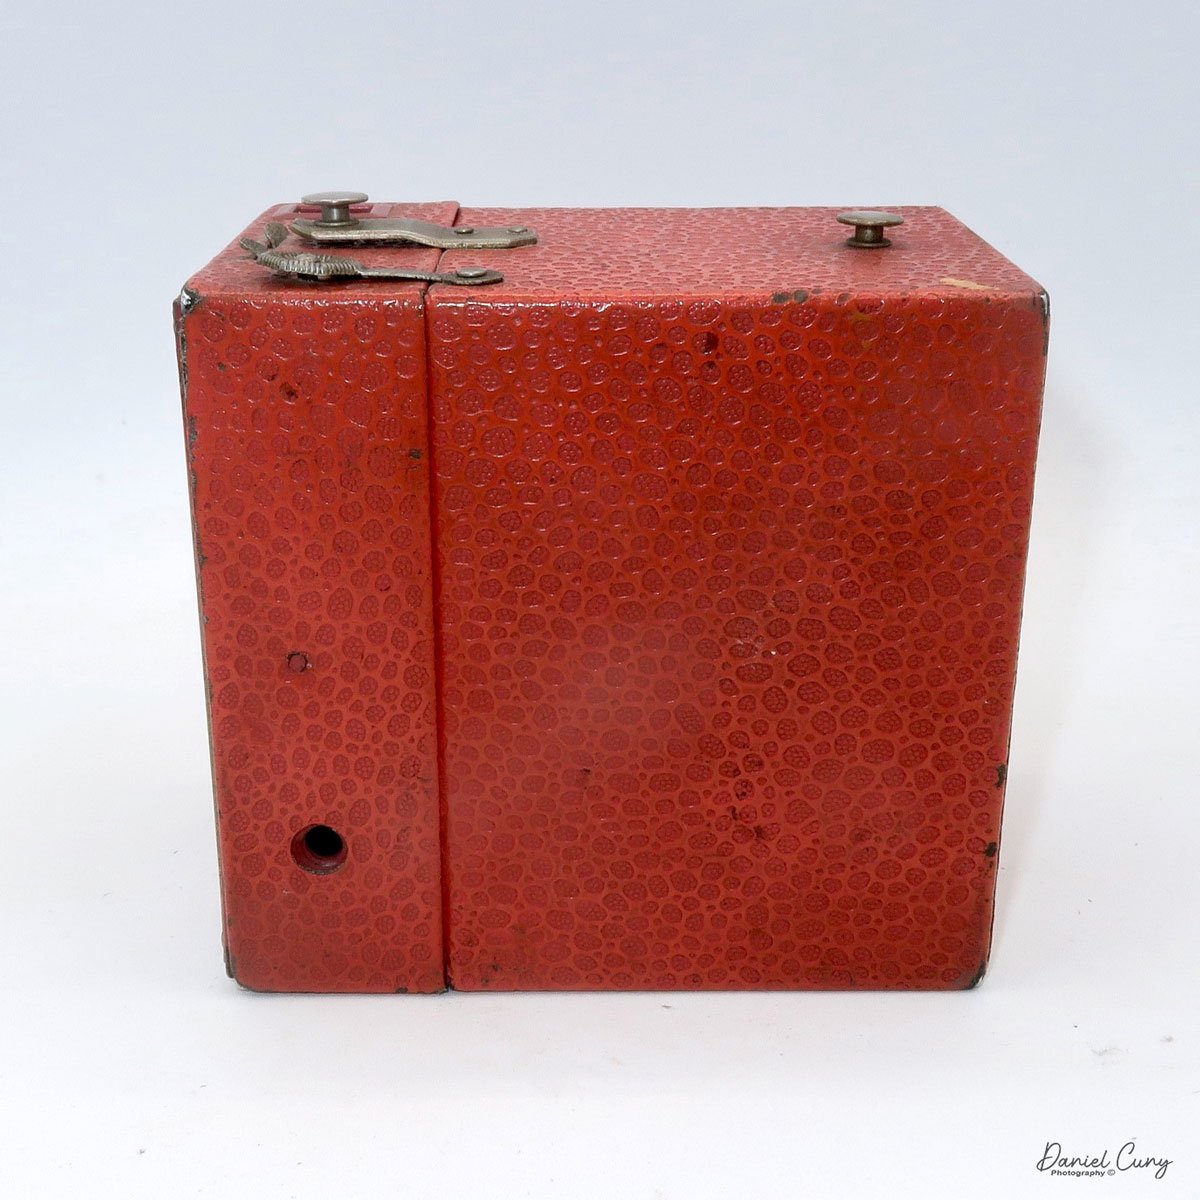
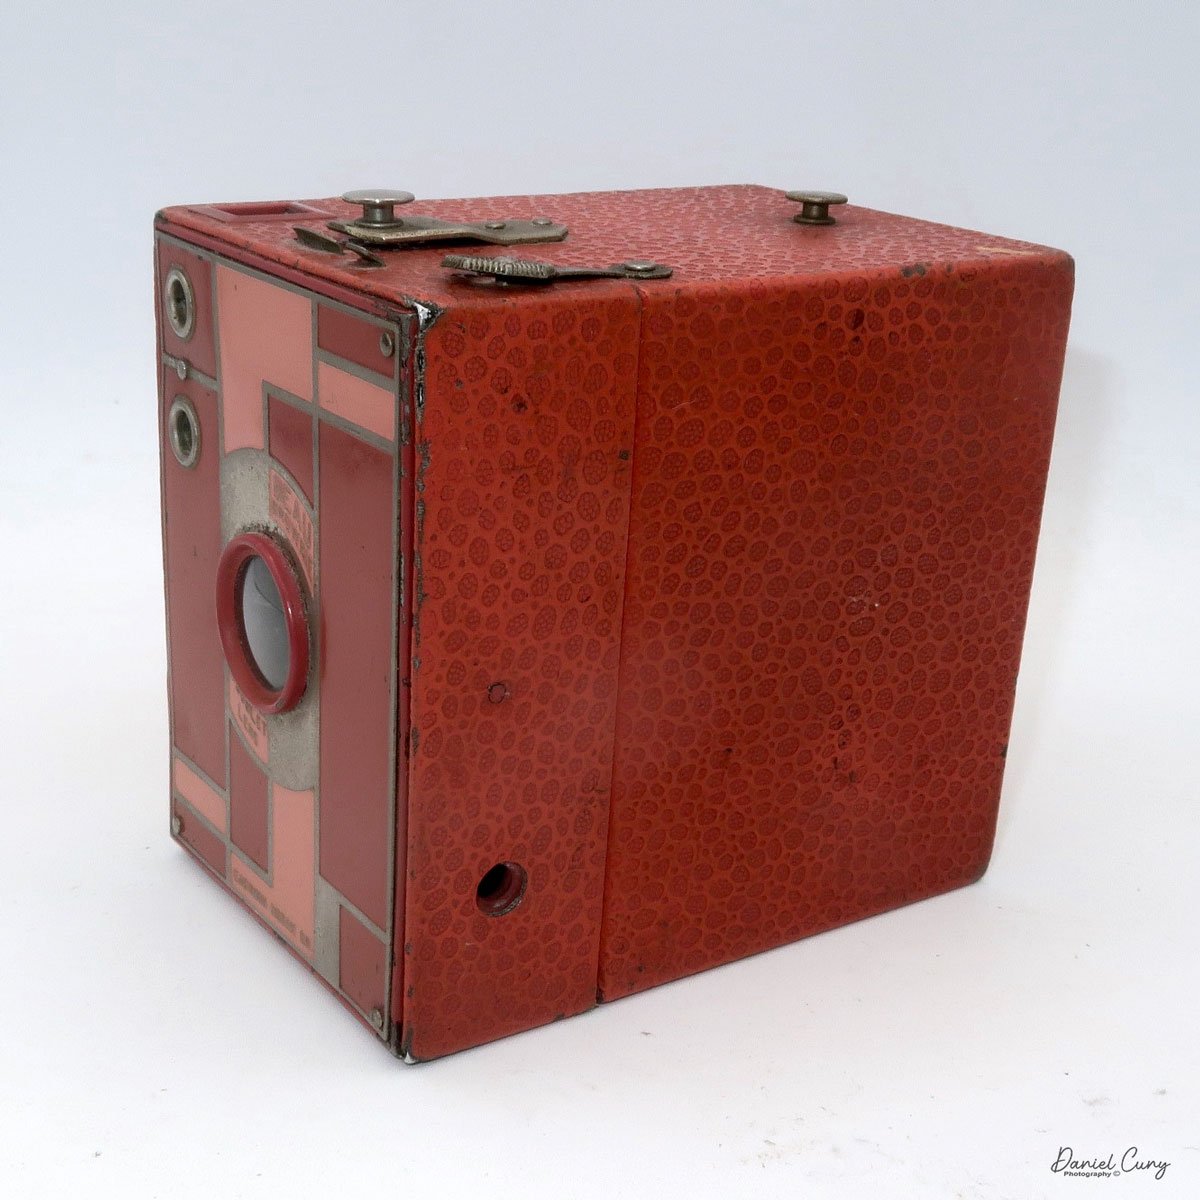
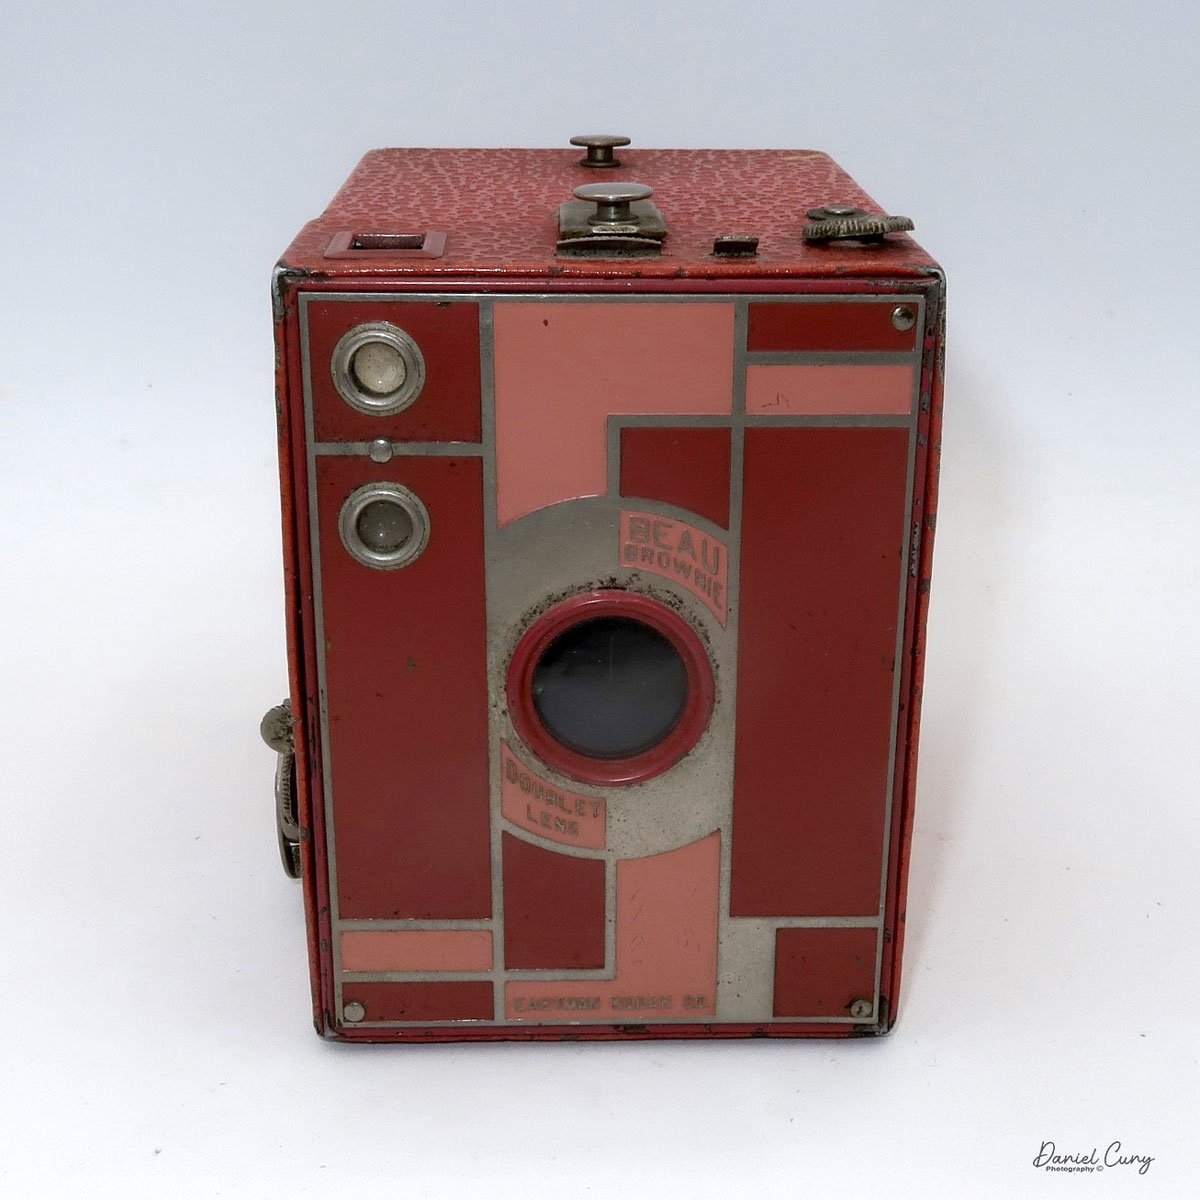
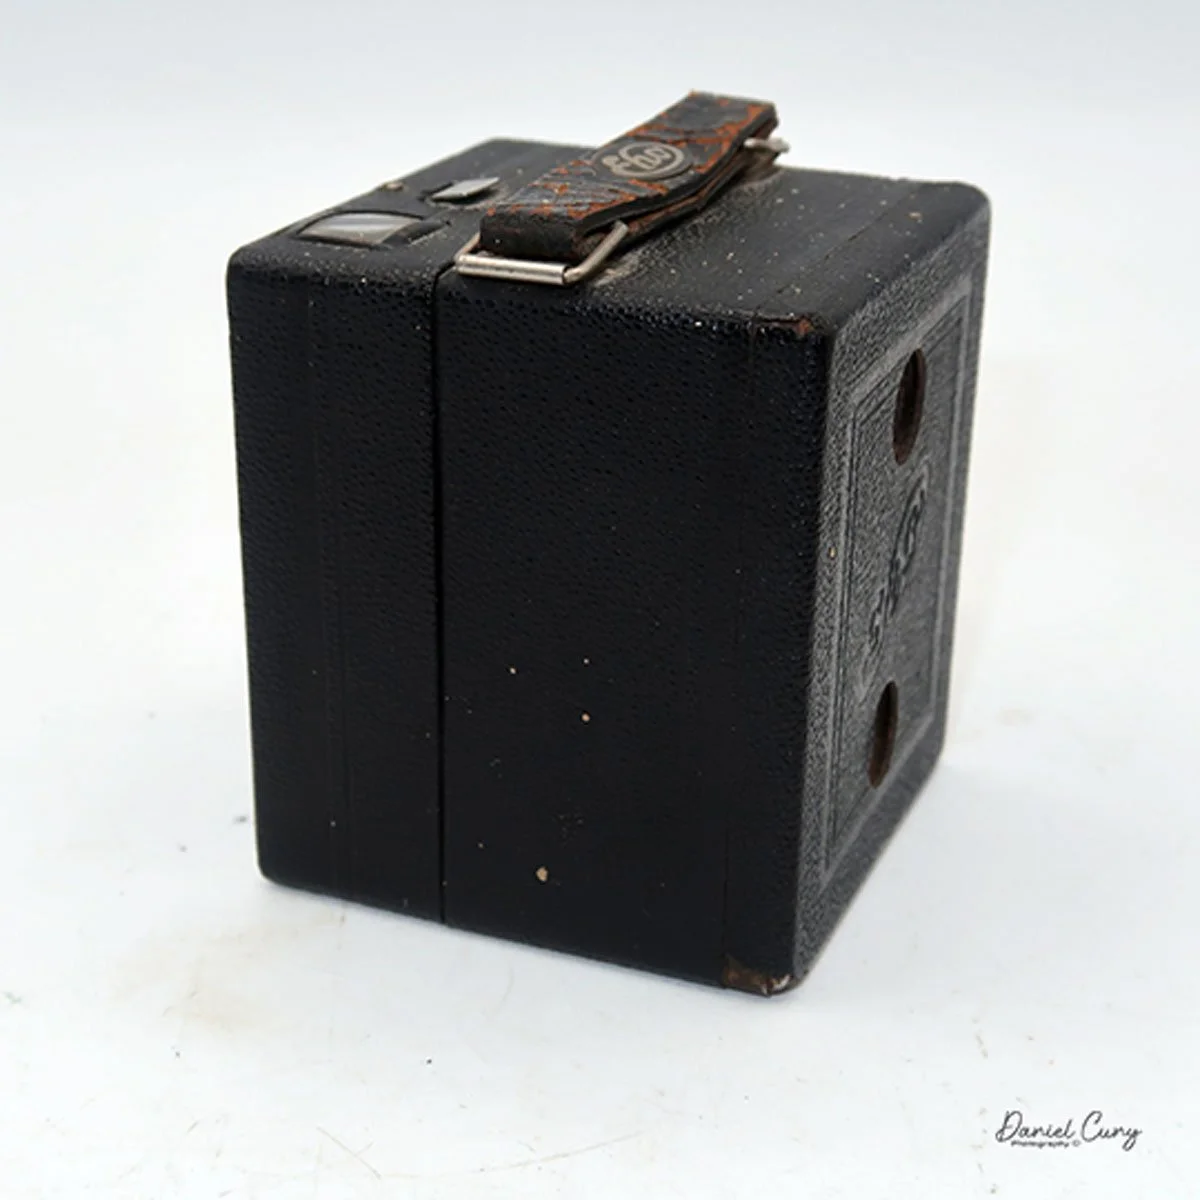
The Eho Baby Box camera is very small, measuring 2 5/8" tall by 2 3/8" wide and 2 3/8" deep, so almost a perfect cube, and weighing only 6.8 ounces. This is one of the smallest, if not the smallest, box cameras I have that still accepts a standard 127-sized roll film, which was common for the time the camera was manufactured. The camera features dual red windows on the back, allowing it to produce 16 3x4cm-sized negatives on a roll of film.
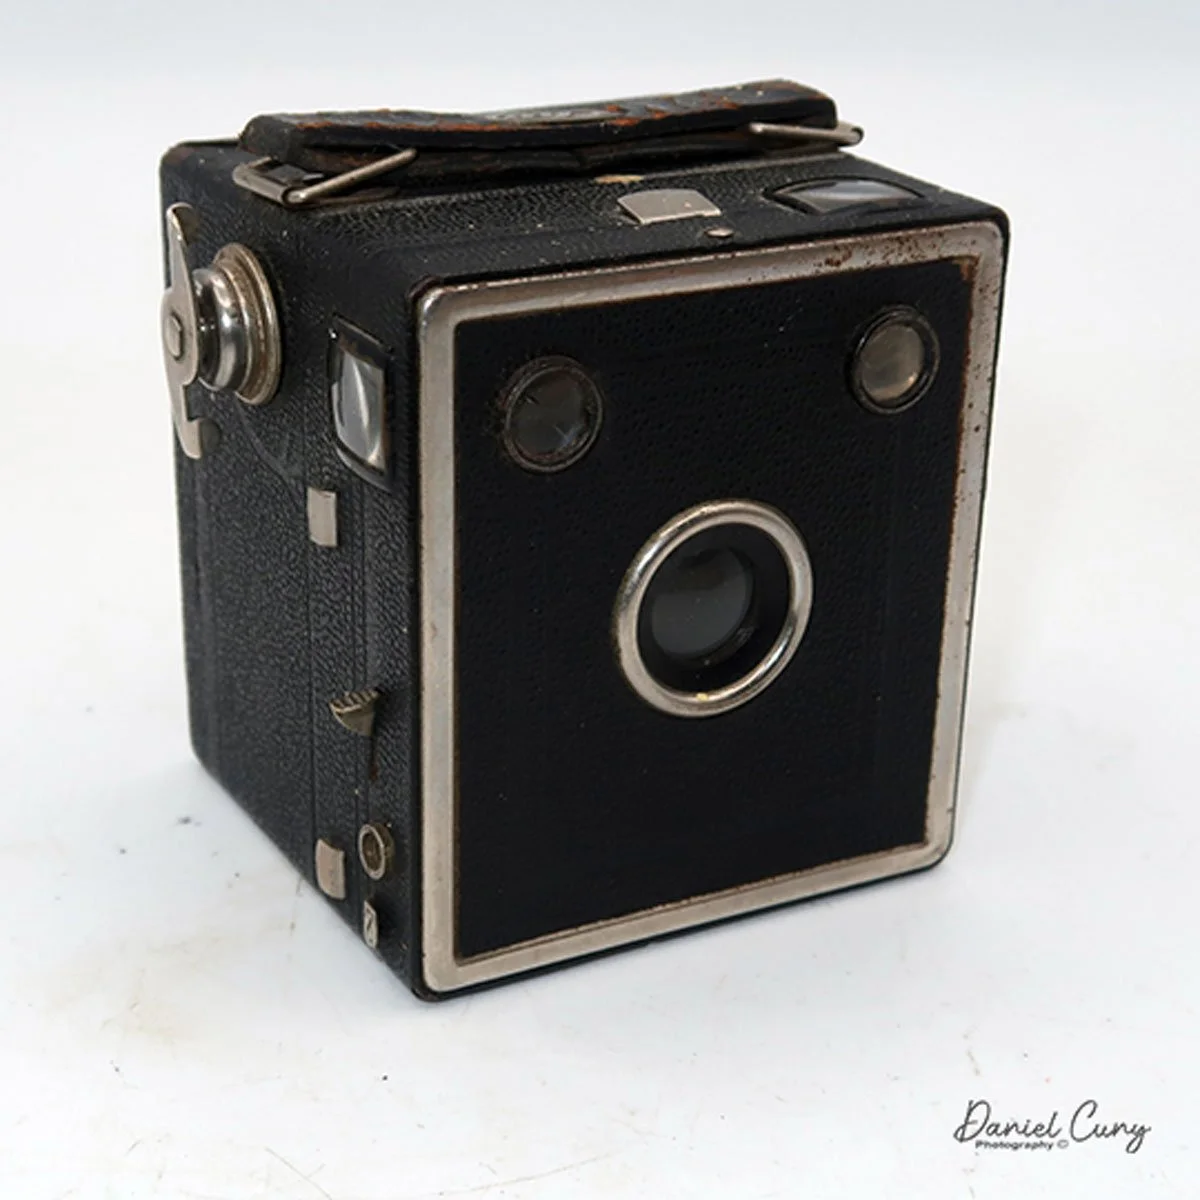
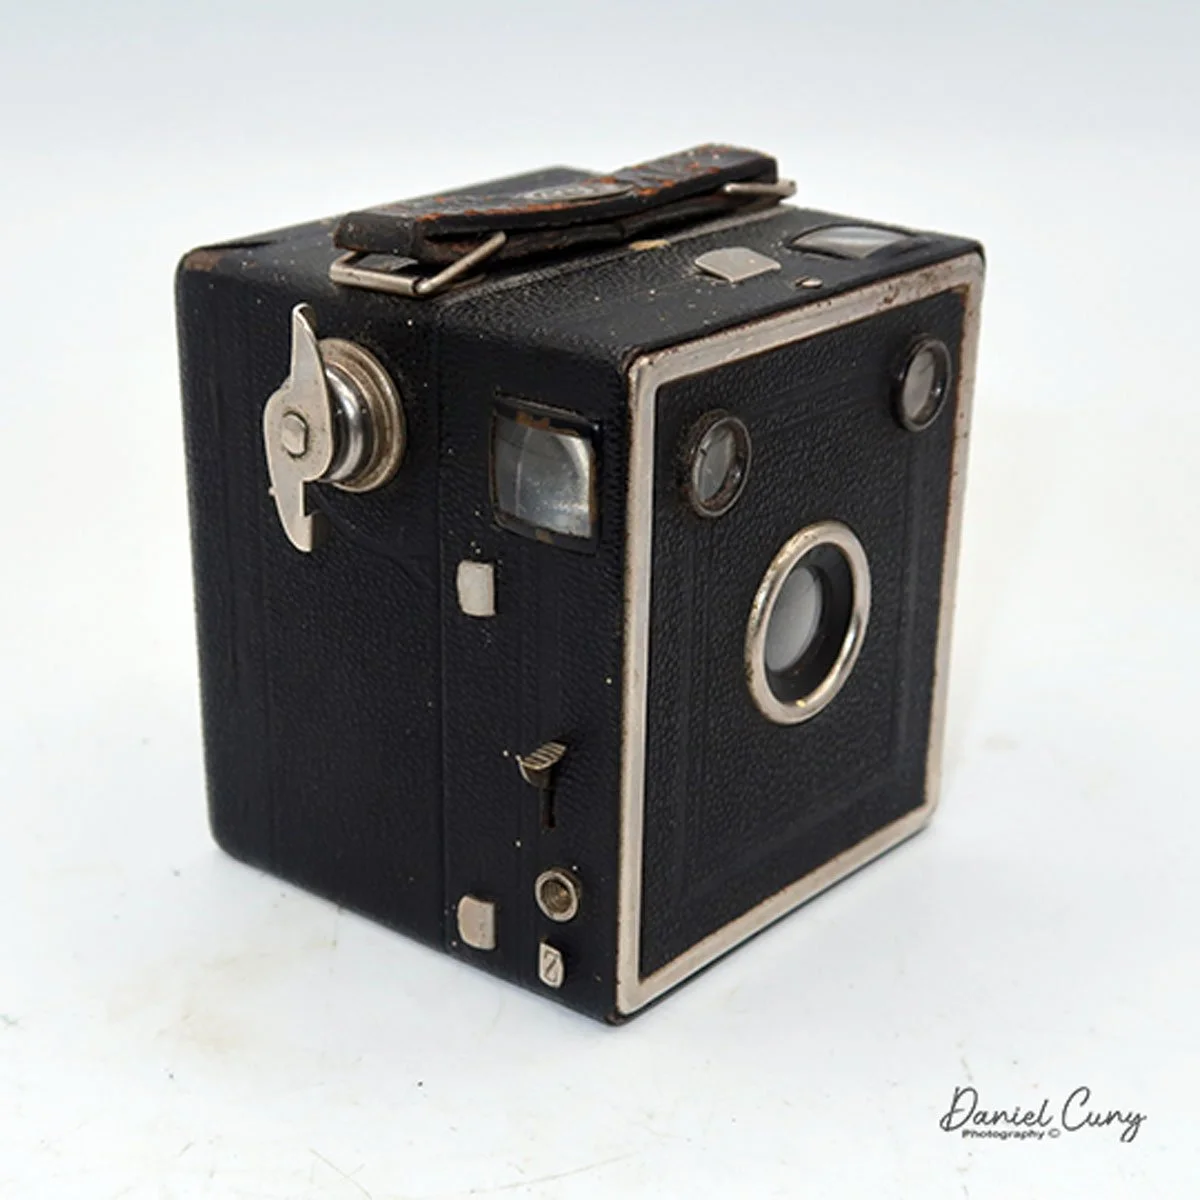
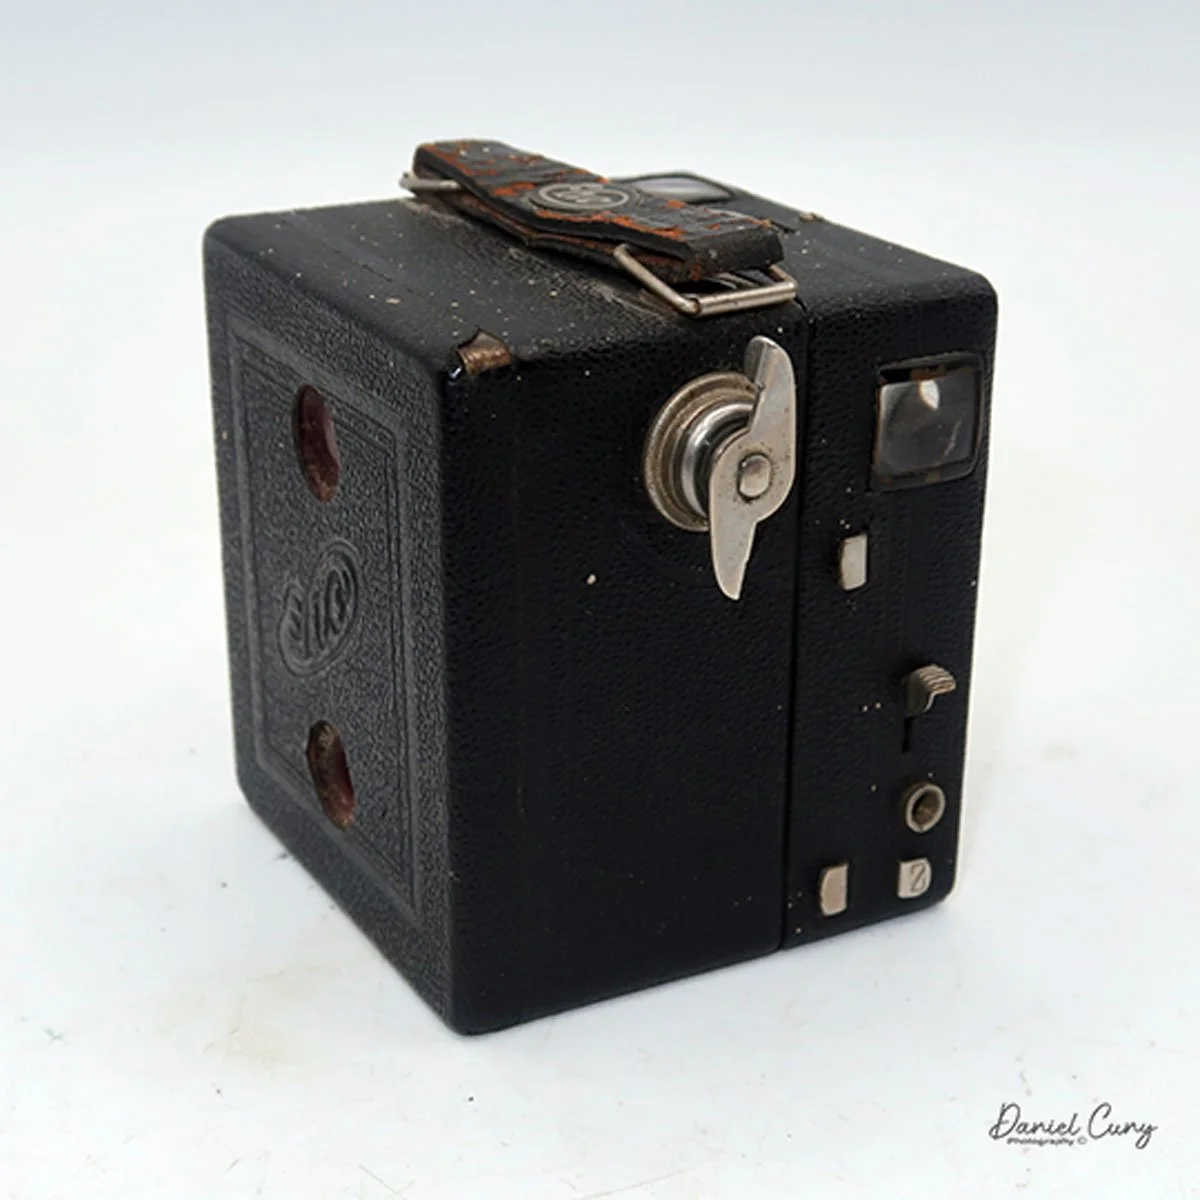
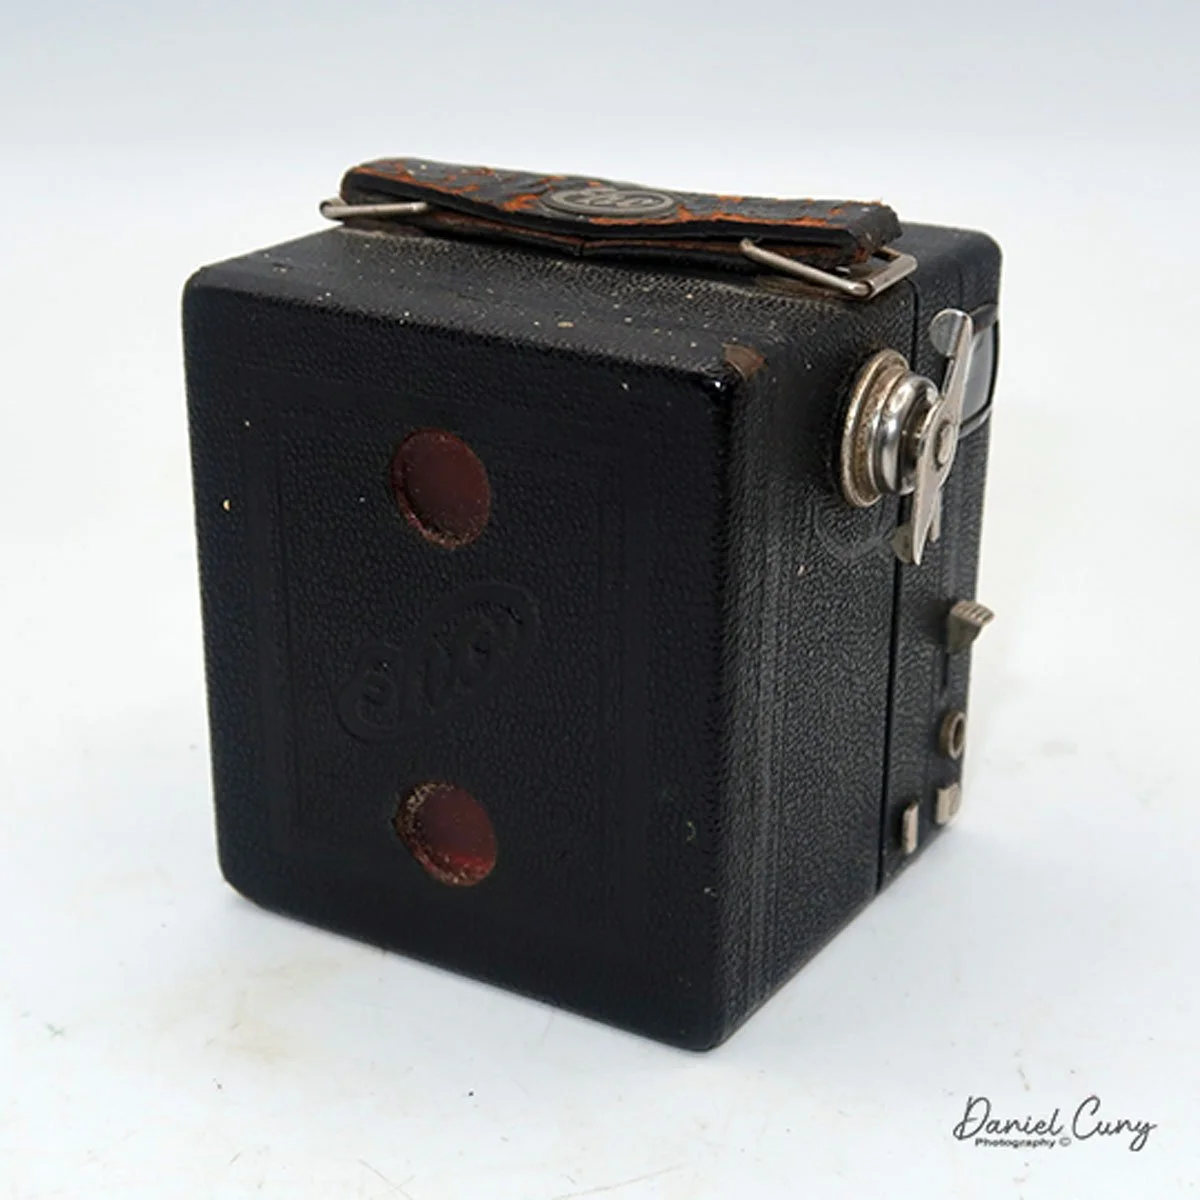
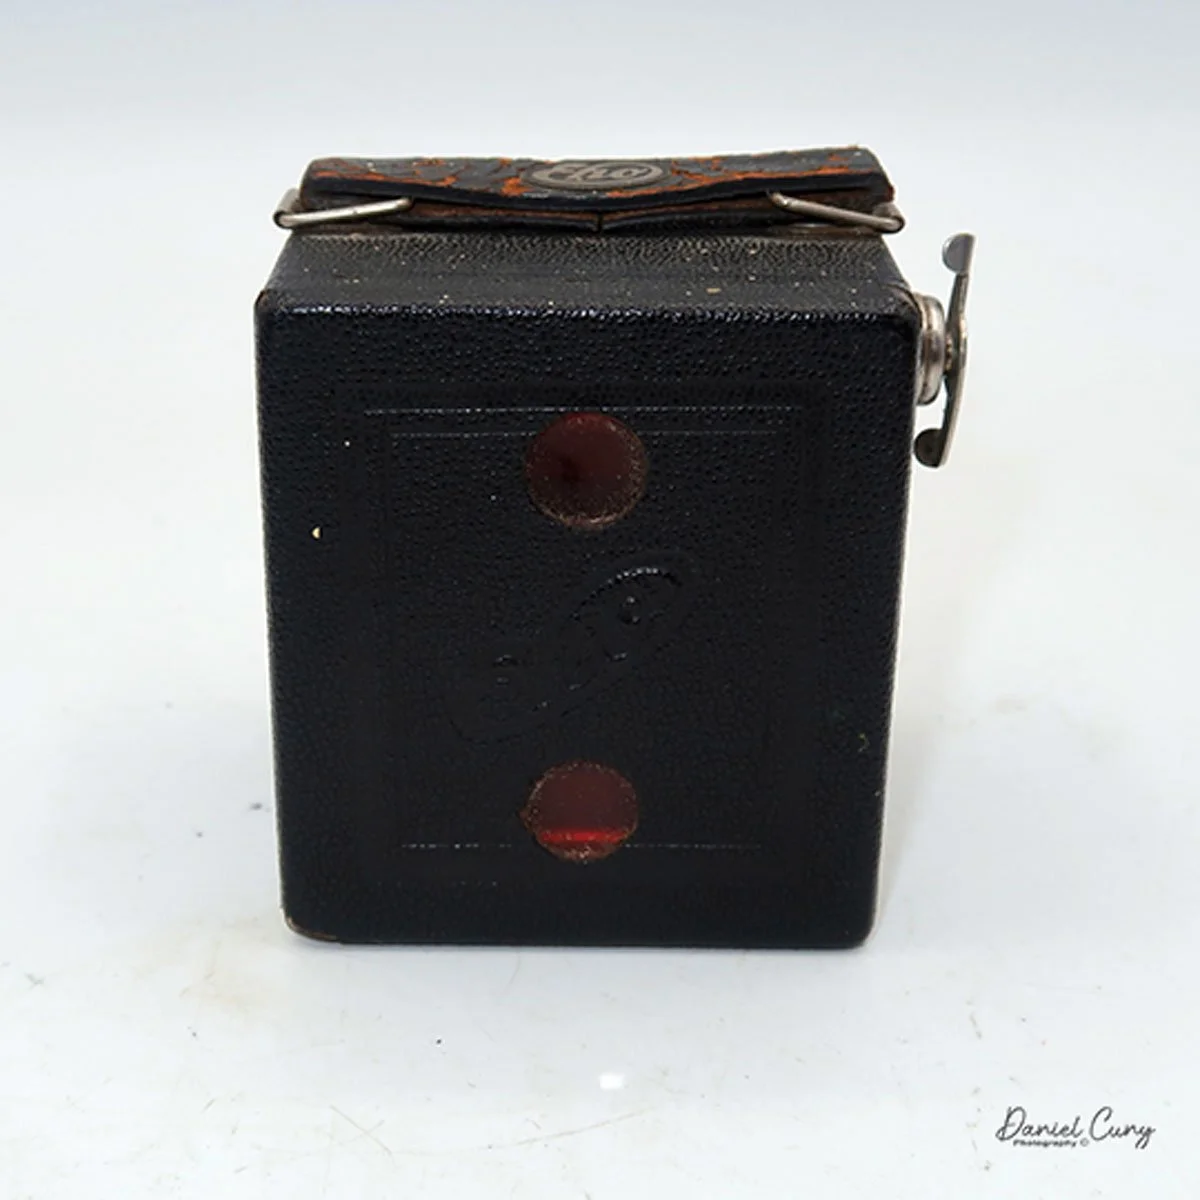
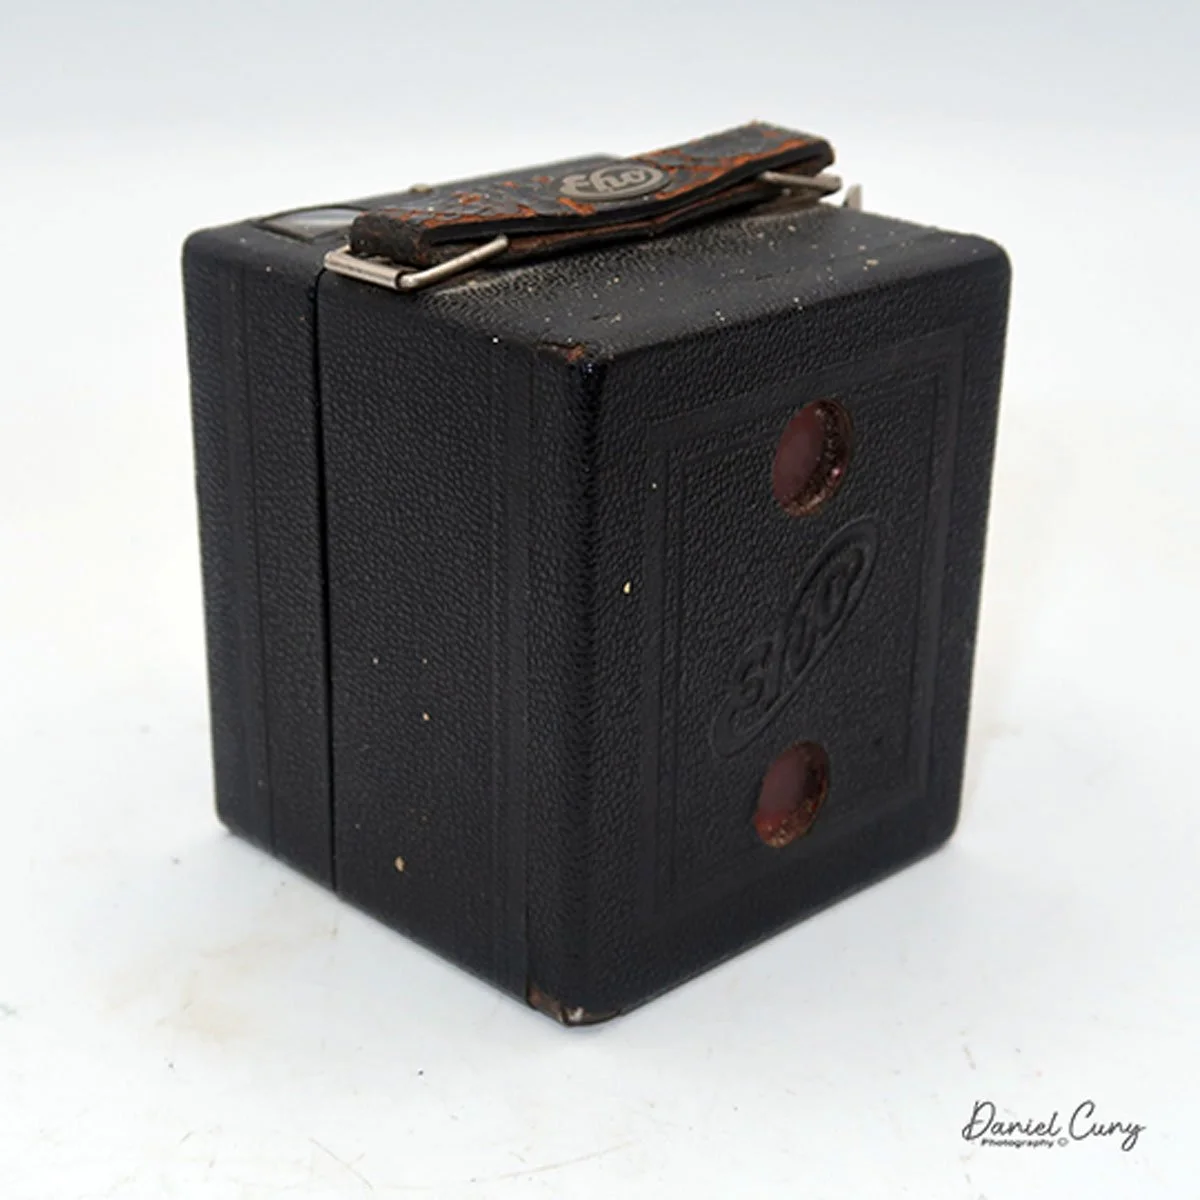
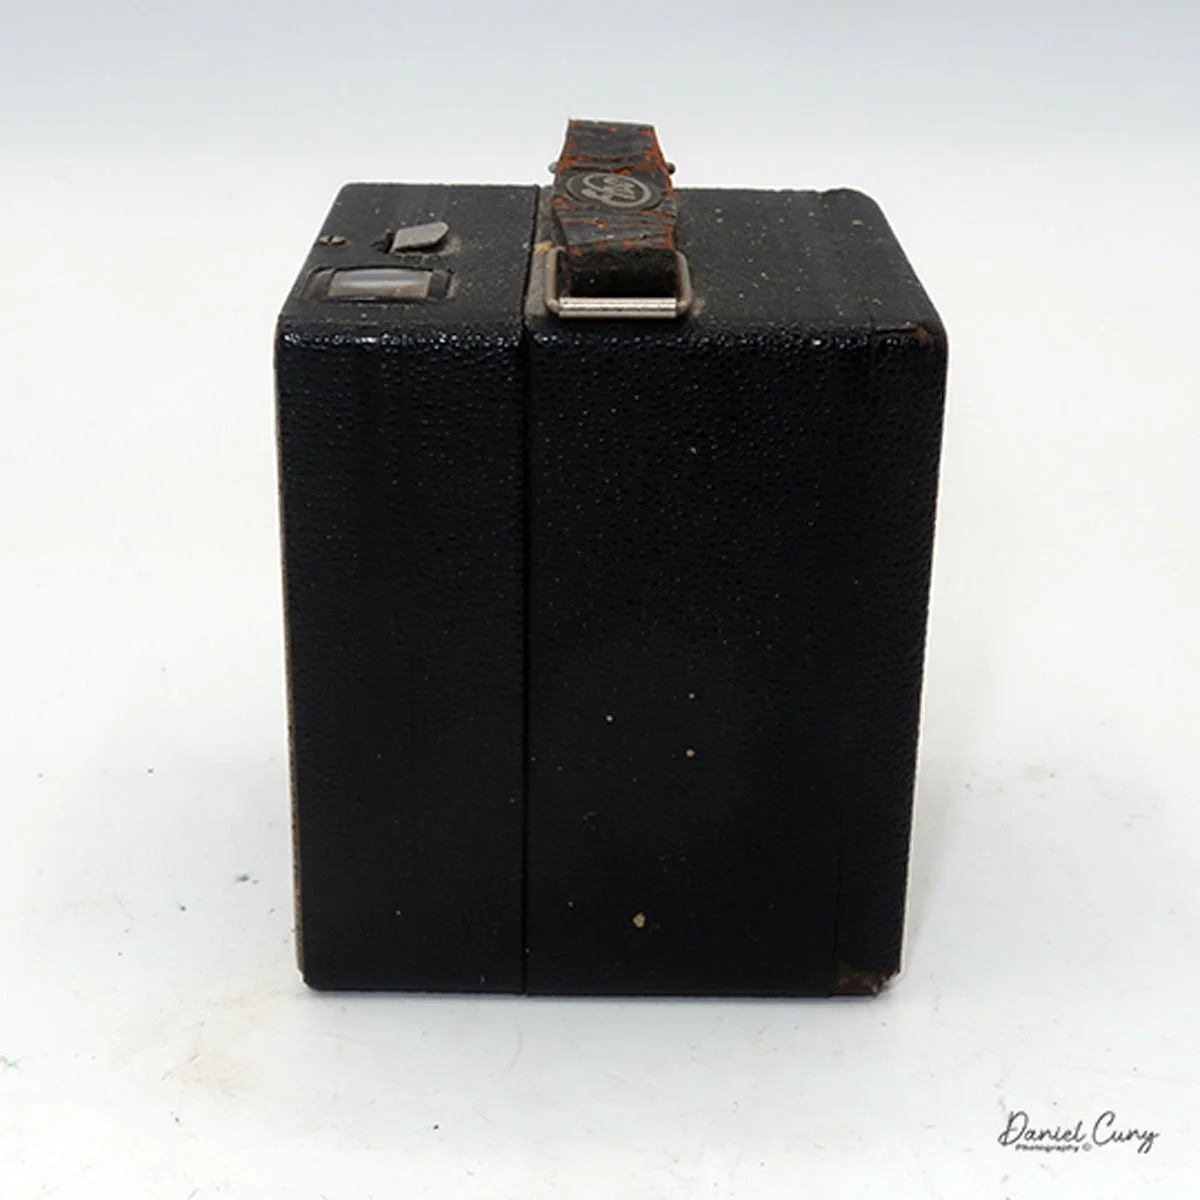
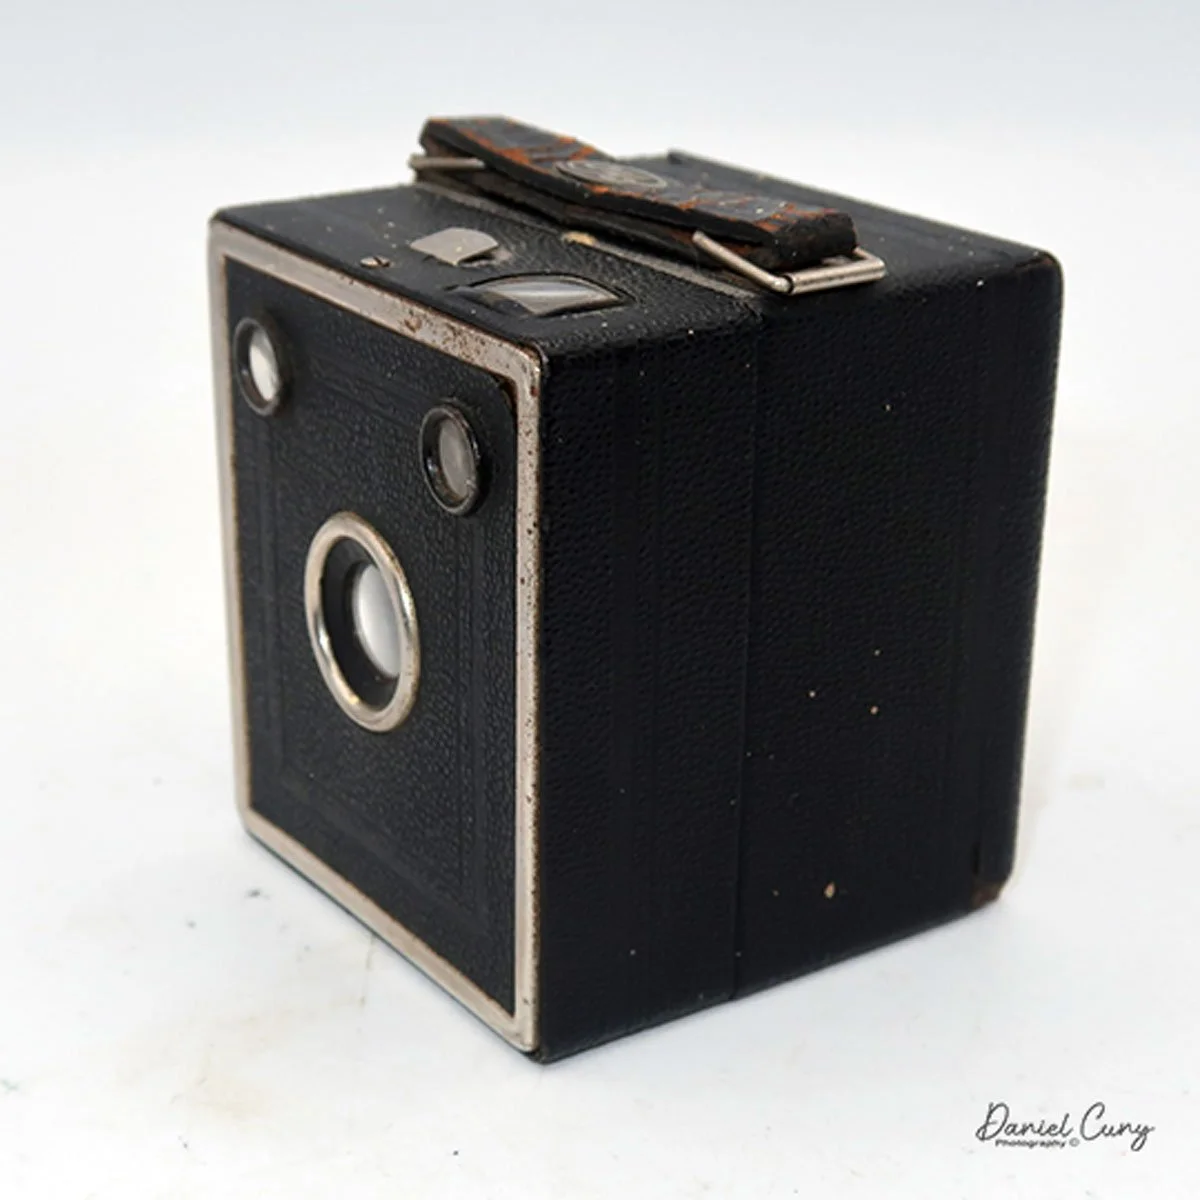
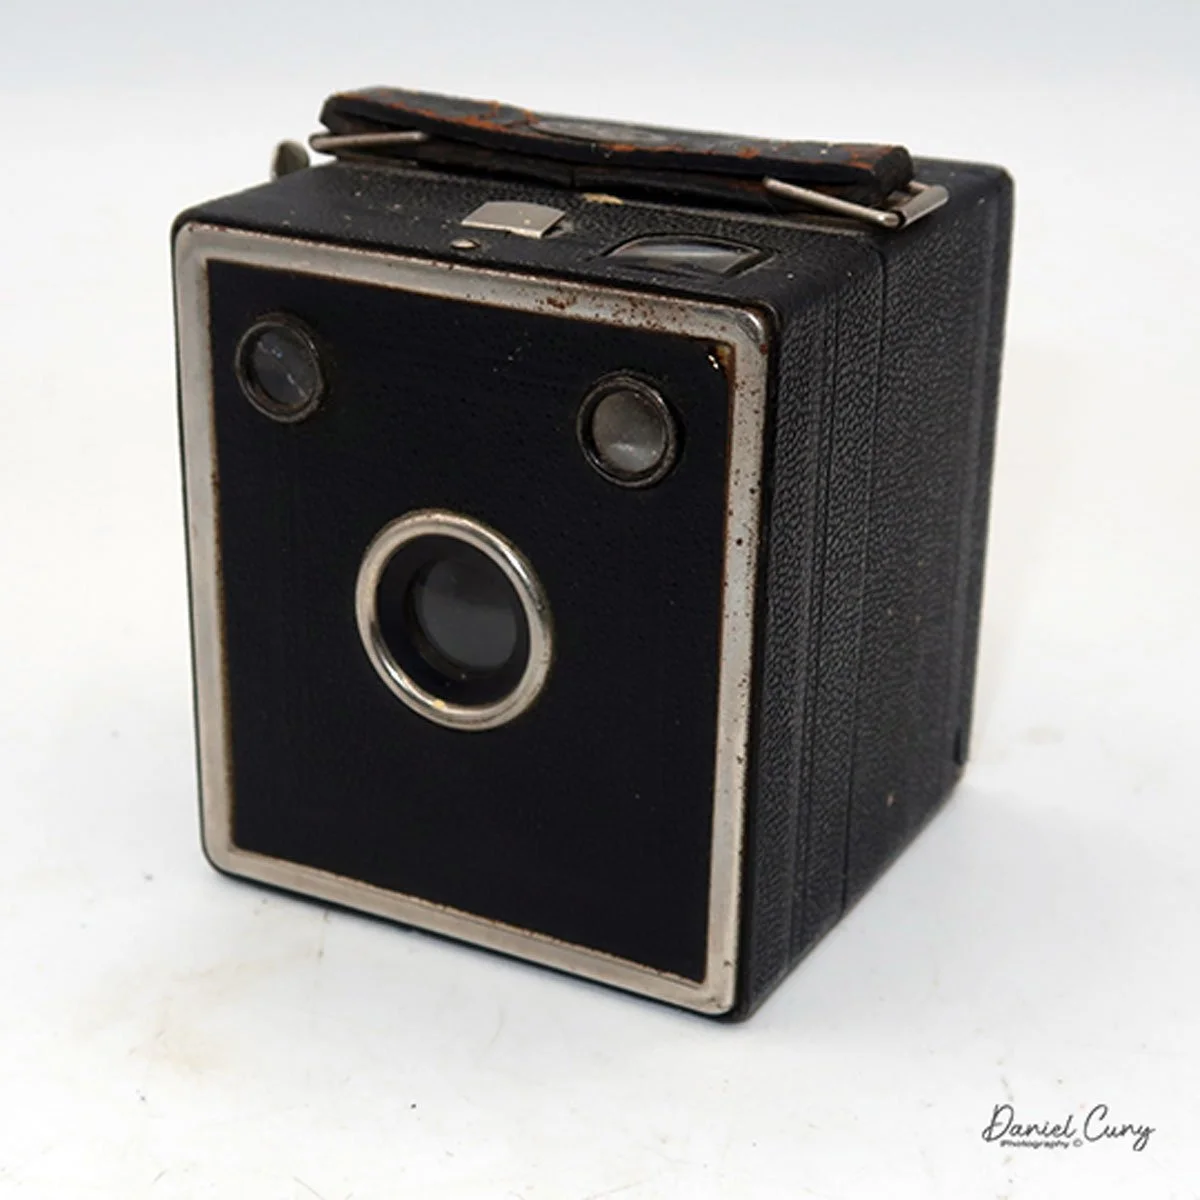
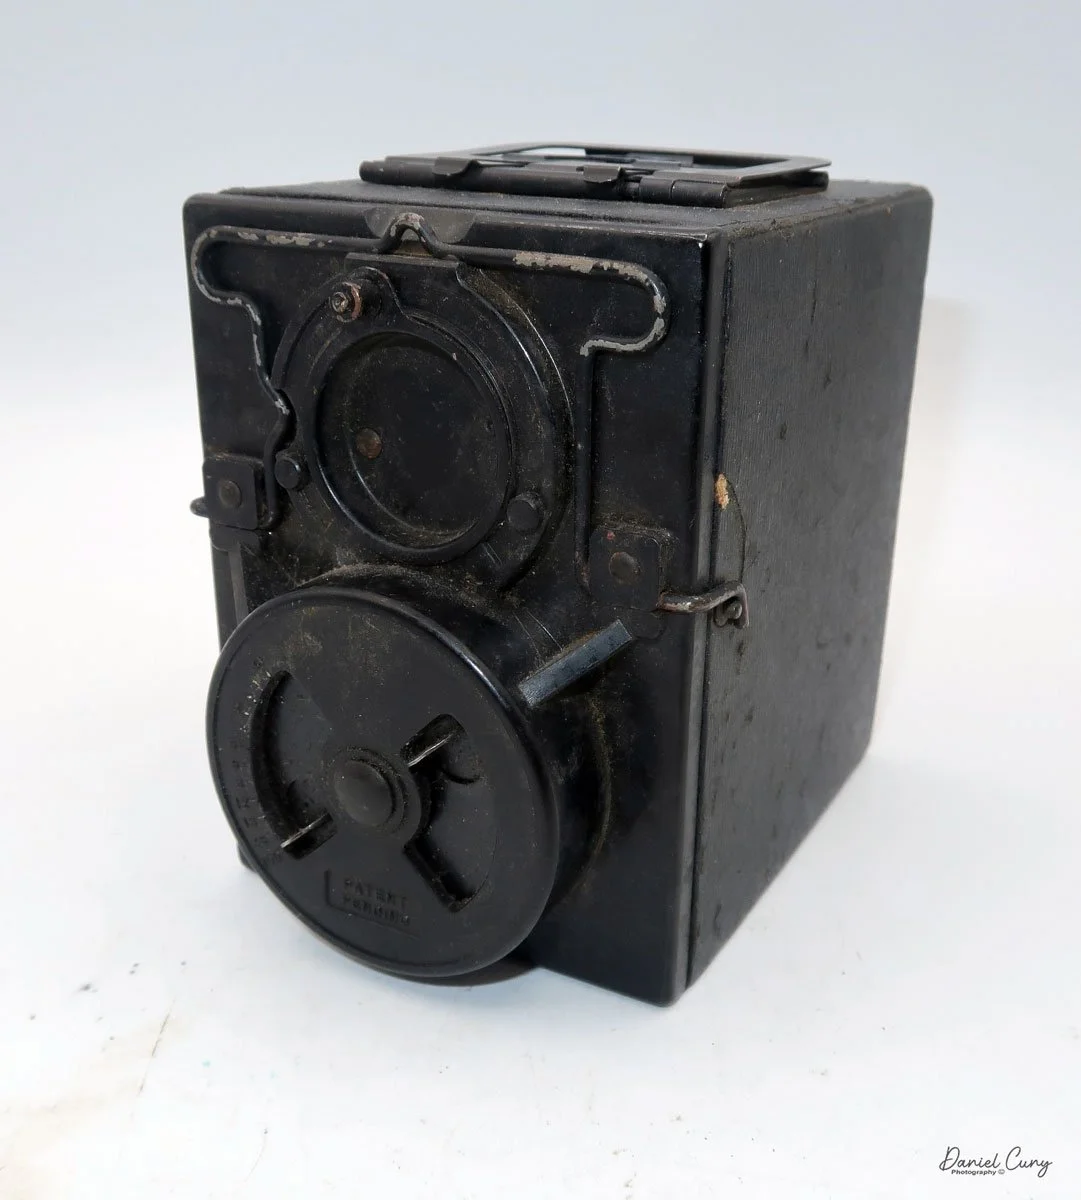
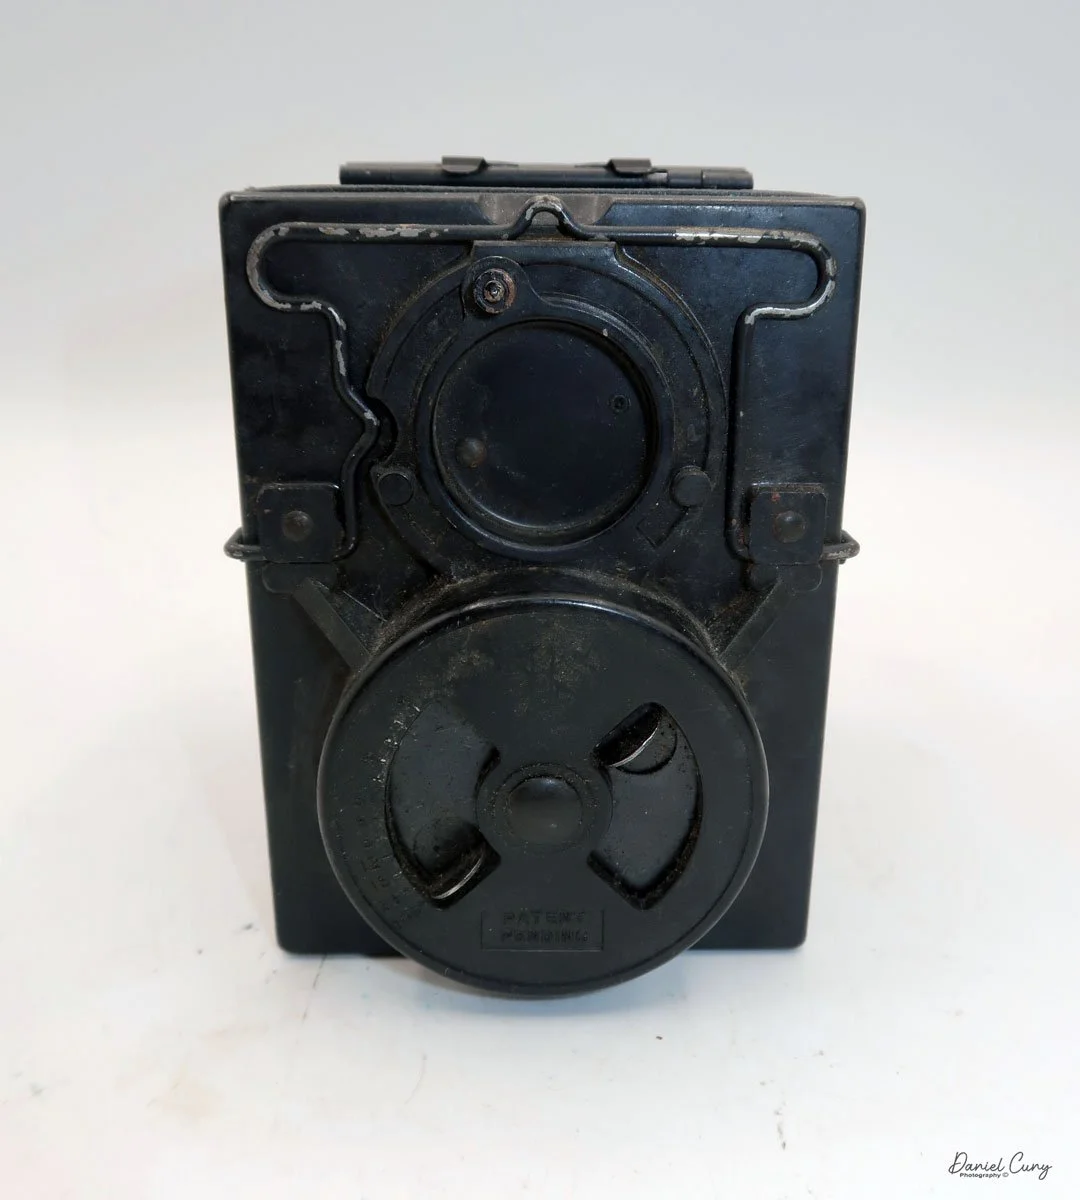
The camera was made between 1932 and 1939 and comes with a fixed-focus Eho Doplar lens that's fixed at F/11. The Eho Baby Box camera is made of metal with a leatherette covering and features a classic chrome ring around its face. The camera has a chrome lever on top that allows you to change the aperture from F/11 to F/22, based on the size of the aperture's opening.


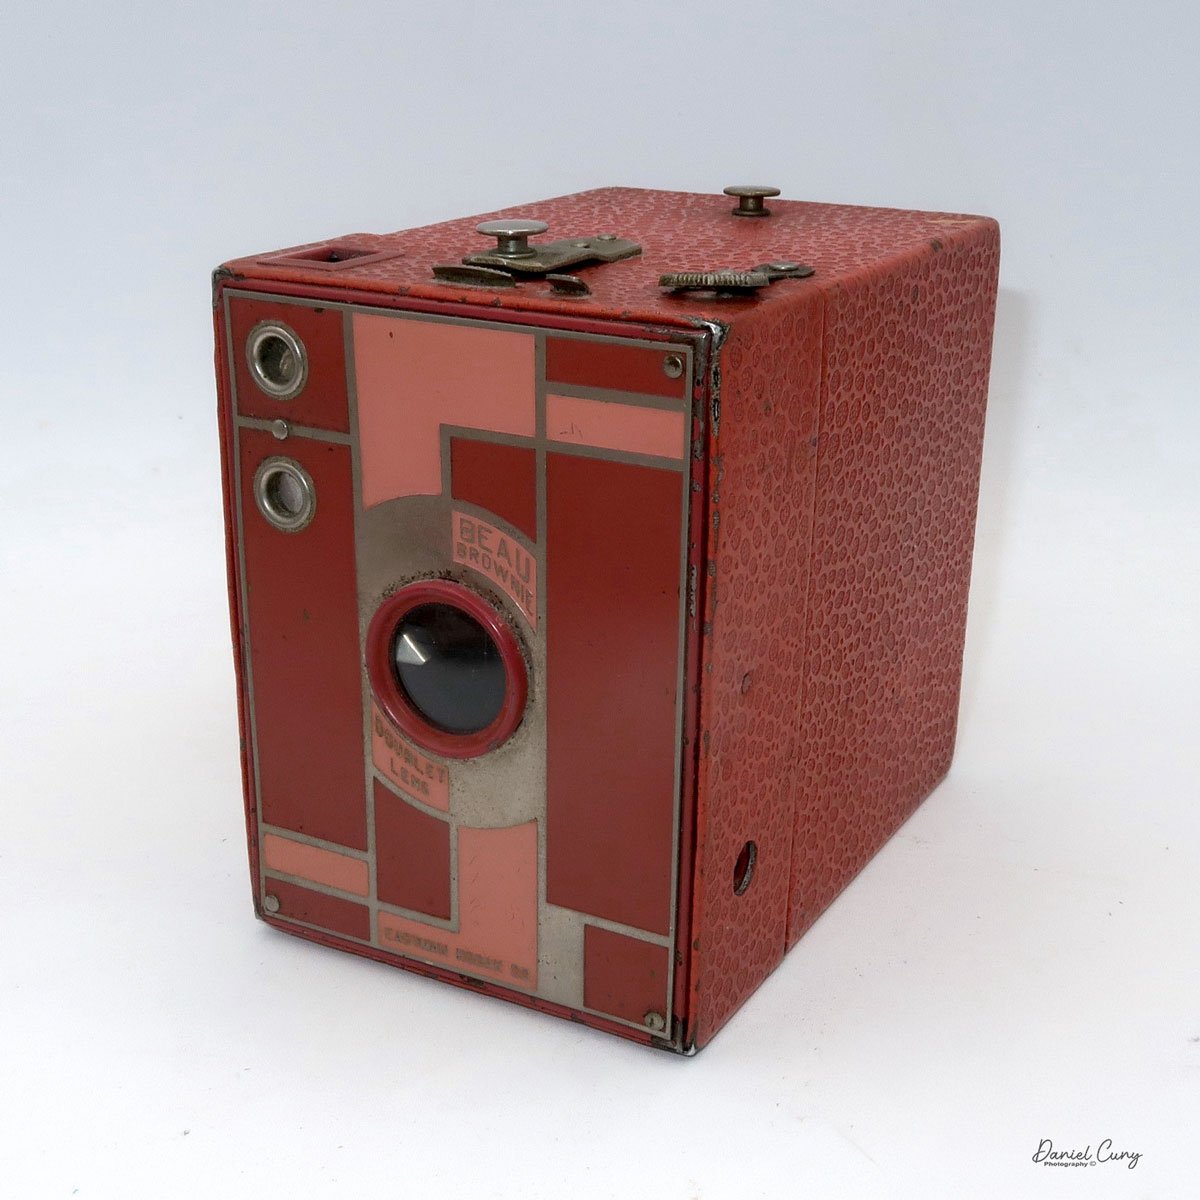
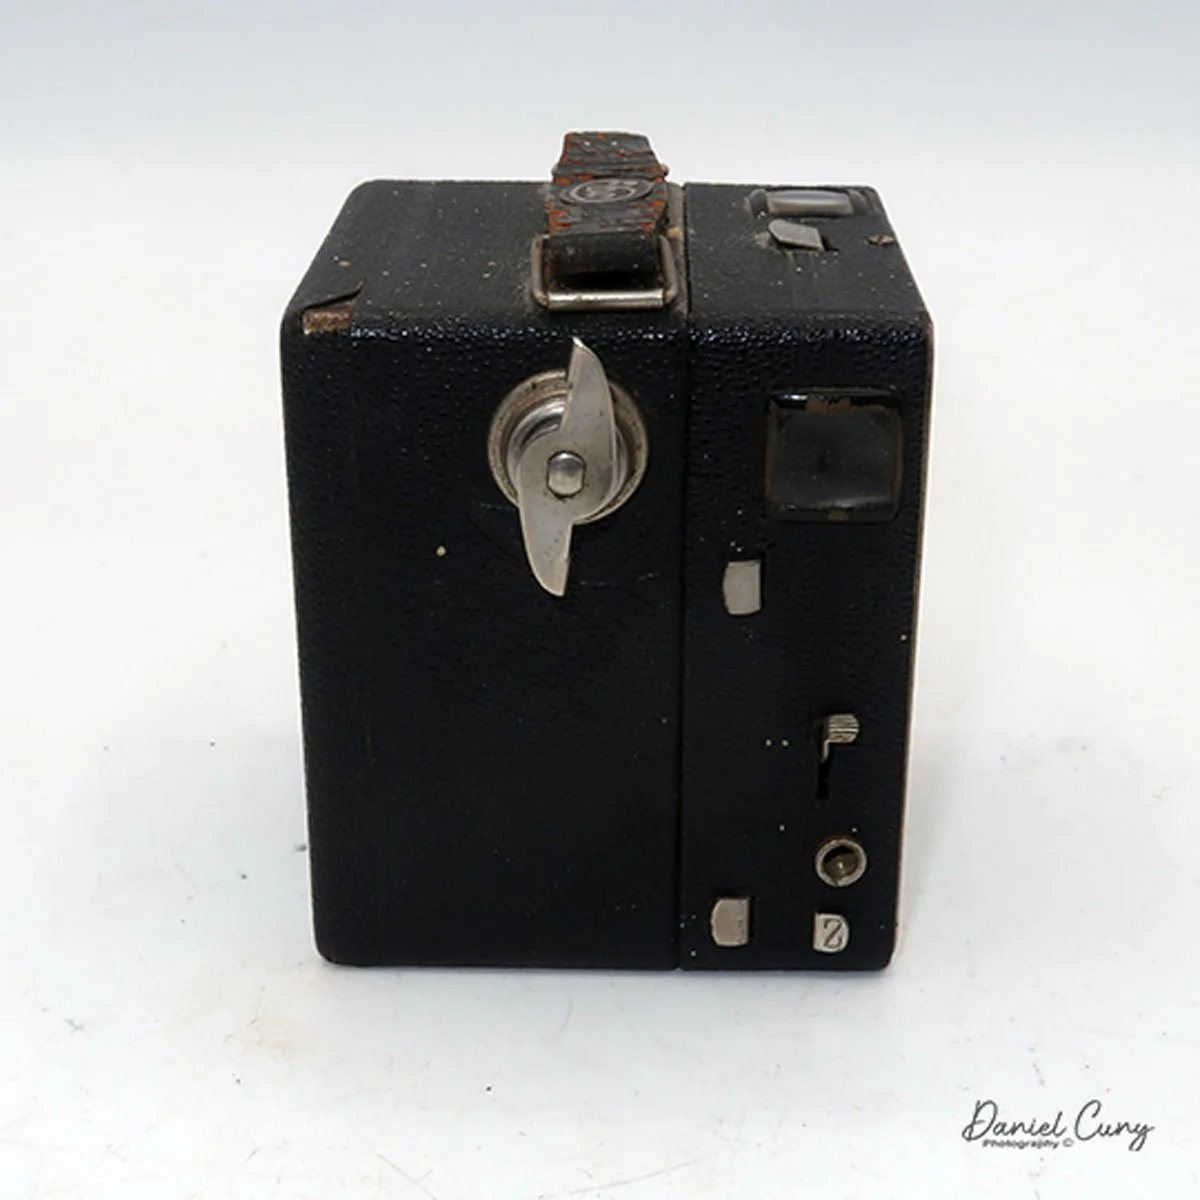
Shutter speed “Z” slide, Cable release socket and shutter release
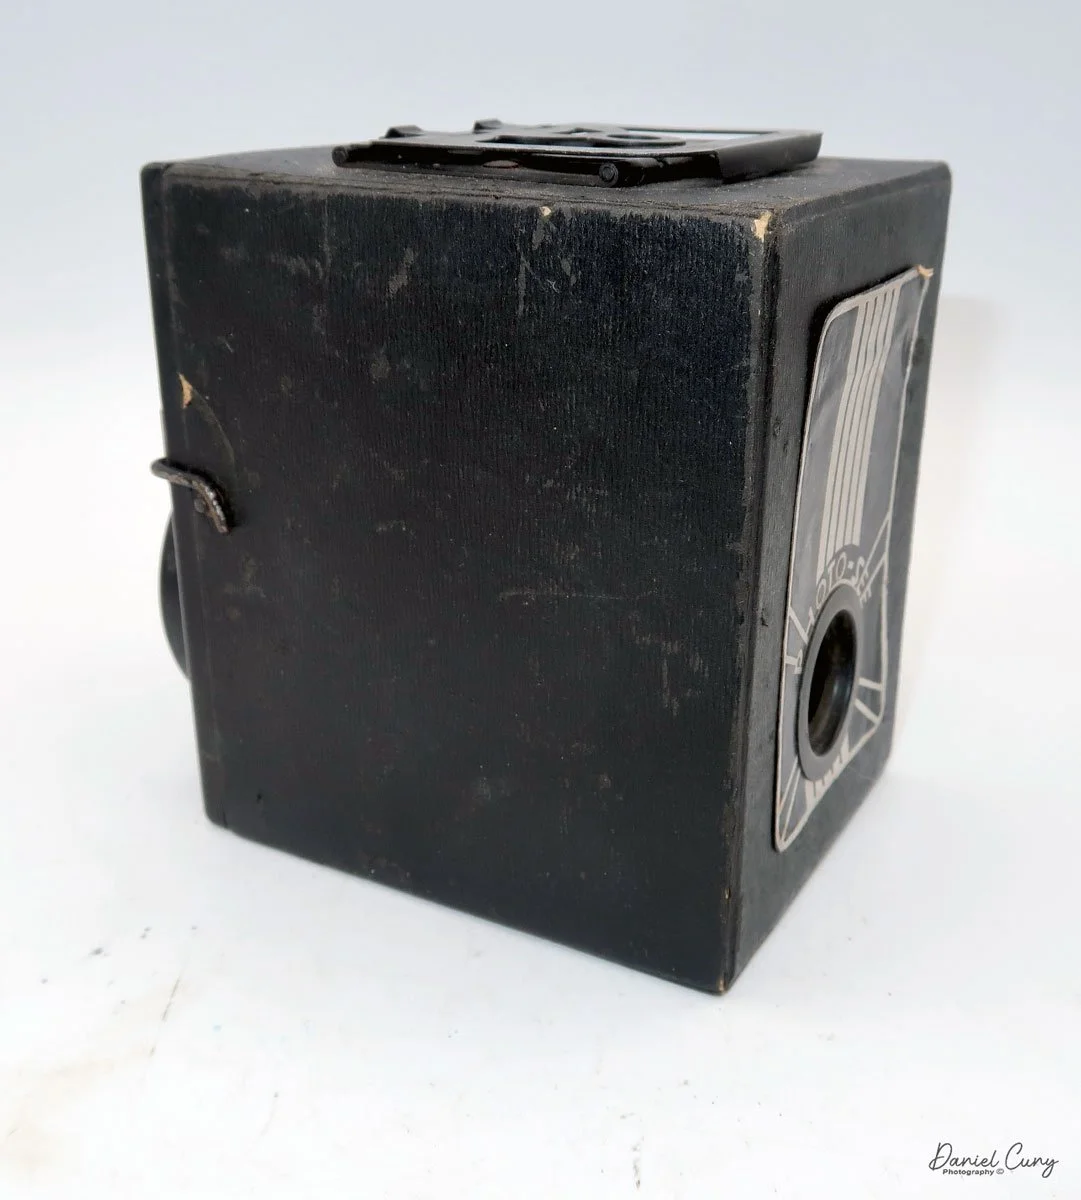
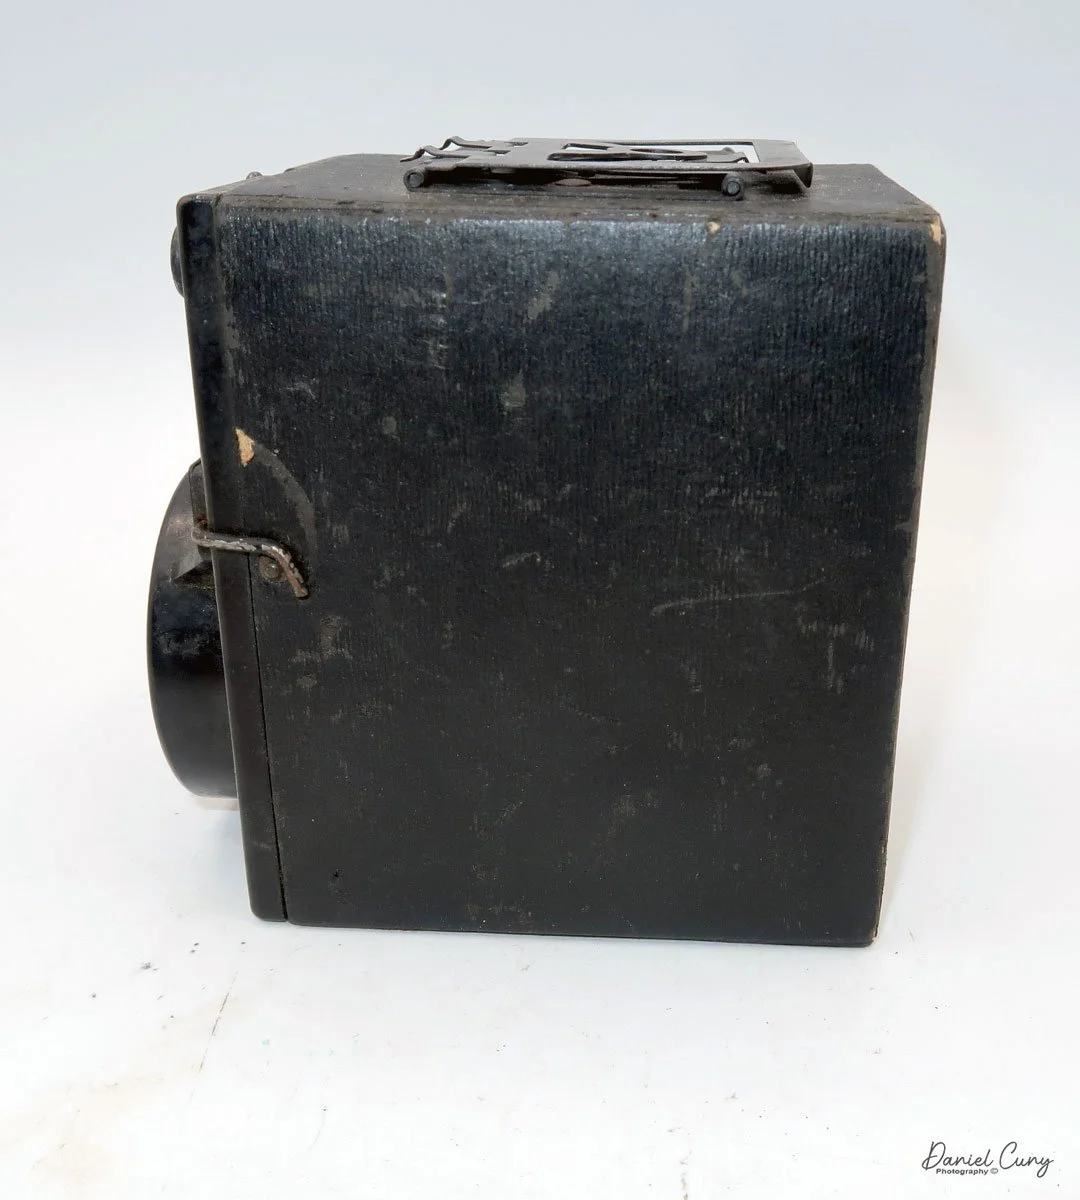
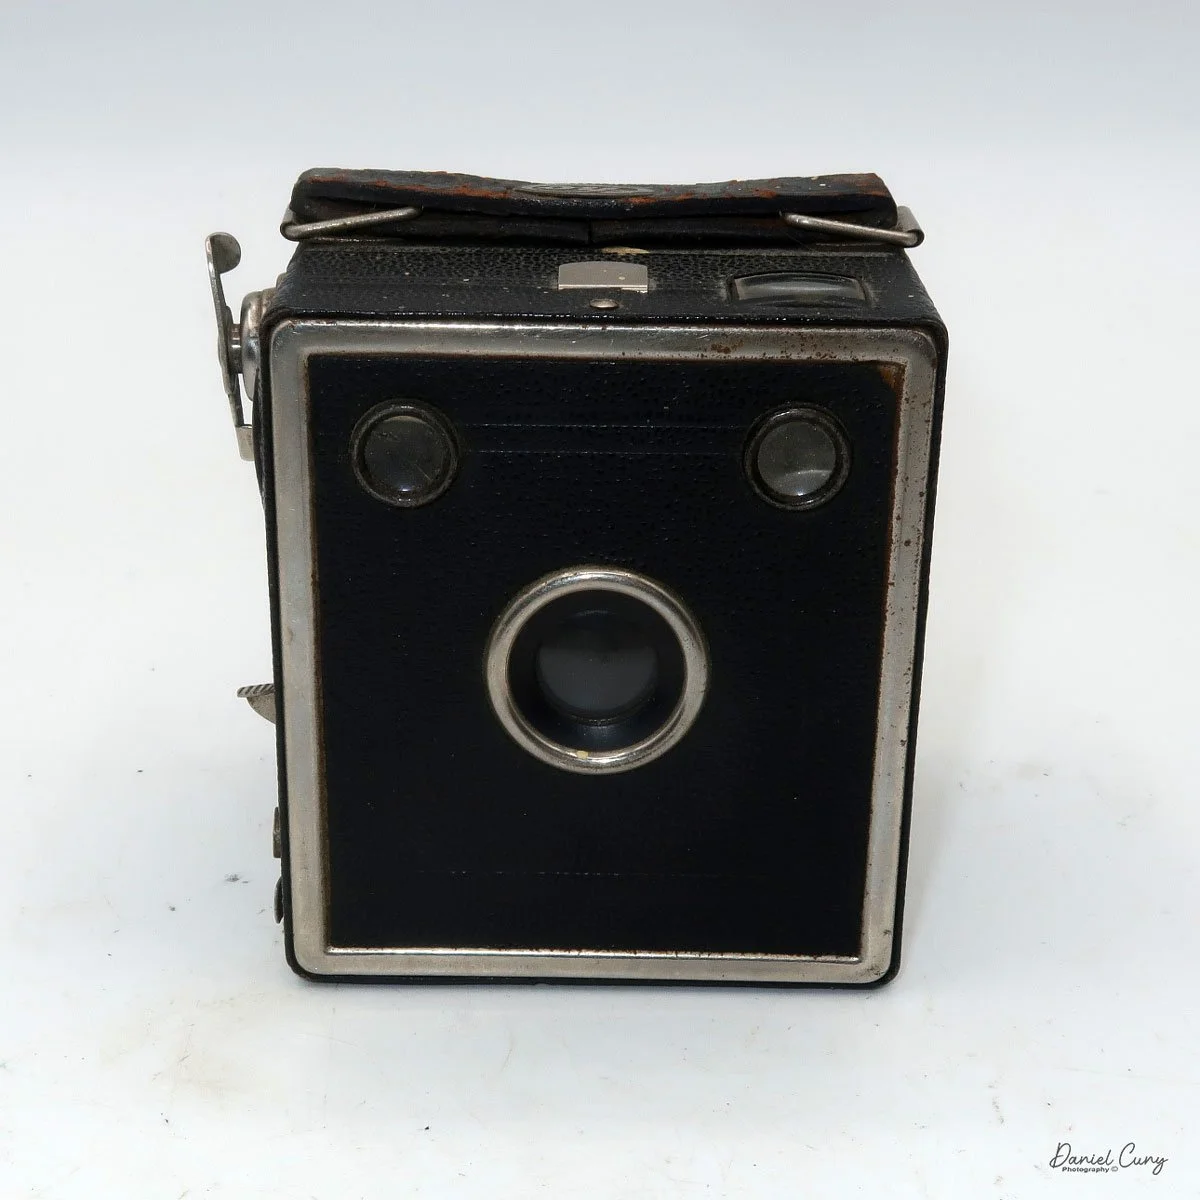
All of the other camera controls are on the right side of the Eho Baby Box camera. On the bottom right of the camera is a lever with a "Z". This is the shutter speed control. If the lever is pressed in, the shutter clicks at its normal speed. However, if pulled out, the camera can perform a timed exposure for as long as the shutter is depressed. Just above the "Z" lever is a cable release socket. If you plan to take a timed exposure, place the camera on a stable surface, as there is no tripod mount on the bottom, and hold the cable release in for the required exposure time.
It is odd to have a camera with a cable release socket, but no way to secure the camera on a tripod. Then again, the camera is tiny, and adding a tripod socket to the bottom would increase its size.
Just above the cable release socket is the shutter release, which has a lined grip on the metal, making it easier to grip, especially when needed, as the lever is relatively small. Above the shutter release is one of the two waist-level viewfinder windows. The one on this side of the camera is for vertical, or portrait, images, and the one at the top of the camera is for horizontal, or landscape, images.


To open the camera to load film into it, you'll need to pull out two levers on the right side of the camera. Both levers are located closest to the separation between the front and rear of the camera. Pulling out the two tabs unlocks the front of the camera from the rear, exposing the area where you load the 127-size film. Take the empty spool from the bottom of the camera and place it in the top, which is now the take-up spool. Load the fresh roll on the bottom and pull the leader over the shutter area. Then, place the leader in the slot of the take-up spool.
Put the back on the camera, and press the two clips to lock the front to the back. Wind the film until you see arrows or some indication that you're approaching the first frame. Wind slowly until you see the number 1 appear in the bottom red window. At this point, you're ready to take your first image. After taking the first picture, wind the film slowly until you see the number 1 in the top red window. This is when you're ready to take your second photo. Follow the same process with the number that first appears in the bottom red window, then in the top one, through number 8. After you take your last frame with the number 8 at the top of the window, wind the film to the end. The film should then be ready to be taped closed and processed.
My Results:
Before inserting a roll of 127-size film into my Eho Baby Box camera, I tested the shutter. It clicked 9 out of 10 times, so I was confident that even though the camera would miss a frame or two, I'd have enough images from a roll of film to pick four or five to put in the blog post.
After taking my first image, which required me to click the shutter release twice to capture a photo, the camera refused to cooperate for most of the roll. On the times the shutter didn't fire, I did notice that the shutter would partially open, but not fully, so the film was only getting a small sliver of light through a portion of the lens. This happened for the majority of the roll of film, and I managed to capture only 2-3 fairly good images from it.
Here are the results of the better images taken:


Conclusion:
To say I was a bit disappointed is an understatement. I'm more upset that the camera's shutter messed up during the shoot, and when I see how nice the two good images are, it would have been great to have 12-13 more to choose from for the article.
Overall, the good images are pretty good, so if the shutter were in good working order, the camera would have been enjoyable to carry around or put in your pocket and travel with. It's small, a pocketable camera, and produces nice images; you don't have to worry about a tear in the bellows like with other pocket cameras.
It's certainly a great camera to have in the collection, and a good step from the subminiature style of cameras and the folding pocket cameras. I like the camera and am happy to have it, although I'm frustrated by the timing issue with the shutter not working.
Click on the link to see my other Cameras Reviews.
If you'd like to browse some of the cameras, lenses, and accessories I have for sale, please visit my eBay store at Cuny's Camera and Photo.
Thank you for taking the time to read about this tiny gem of a camera.
Until next week, please be safe.