Futura-S Camera

My Futura-S camera.

As a camera collector for over 50 years, I was unaware of the Futura cameras for almost 45 years. It wasn't until a friend and fellow collector mentioned the Futura camera that it stuck in the back of my mind, as I haven't come across one in all these years of collecting.

 After hearing about the Futura cameras, I did some research and had many questions: How well were they built? How many lenses were available? How many different models did they offer? What lens mount did the camera offer? So I pulled out my trusty camera bible, McKeown's camera guide, and started to learn about the little-known (to me) brand of Futura cameras.

Futura Logo on the camera

Having purchased my Futura-S camera in a "lot" of cameras purchased, and it wasn't until I received the box of cameras that I noticed one of the cameras was the Futura-S. The only thing in the photo of the camera "lot" was the back of the brown case. The top of the case was missing, so I figured it was some random or very common camera that I've owned in the past, but when I took the camera out of the case, the Futura was in surprisingly good condition and seemed to be working, too.

 Picking up the camera, I set the shutter speeds to higher speeds to see if the shutter fired, and it did. The transport moved and cocked the shutter. The lens looked clean, and then I tried some of the slower speeds on the camera. That's where I ran into some difficulty. The slower speeds locked up the shutter, and it wasn't until I reset the shutter speeds to a higher speed that the shutter closed, and I was able to cock the shutter again.

 One of my first thoughts was I wanted to run some film through the camera to see how it handled it. Then, I felt compelled to write about my experience with the camera and how it was handled, knowing I couldn't use any shutter speed lower than 1/50 in my testing experience.

History:

Fritz Kuhnert founded Optische Anstalt in Freiburg, Germany in 1942. The company initially manufactured optical equipment for the German military during World War II. The factory was bombed and destroyed during the war. In 1946, Fritz rebuilt the company in Gundelfingen, a nearby town, and concentrated his efforts on producing consumer cameras due to the growing photography market.

 1947, the company introduced its first camera at Photokina, the Efka 24. It was a simple scale-focus camera that used 35mm film to produce 24x24mm images. The name "Efka" was derived from the phonetic spelling of Kuhnert's initials, "FK." In 1950, the company introduced the Futura, a more advanced 35mm rangefinder camera with interchangeable lenses and a proprietary screw mount. The lenses were named after Kuhnert's family members: Elor (his wife Elenore), Evar (his daughter Eva), and Petar (his son Peter). 

 In 1951, due to financial difficulties, Kuhnert sold the company Hamburg ship-line owners Ernst and Eduard Komorowski, who renamed it Futura Kamerawerk GmbH. Under their ownership, the company produced four different 35mm rangefinder cameras, including the Futura S, which was introduced in 1952. This model featured a Synchro-Compur shutter and maintained its predecessor's distinctive design and lens mount. They also produced two of the fastest standard 50mm and portrait 70mm lenses of the time with a maximum aperture of F1.5, named Futura Frilon.

 Futura Kamerawerk struggled to compete with established German brands like Leica and the emerging Japanese camera industry despite producing high-quality cameras. The company ceased operations in 1957 and closed the factory in 1958. Today, Futura cameras are valued by collectors for their unique design and historical significance.

My Camera:

My Futura-S is 5" wide by 3" tall by 2.5" deep with my Futura Elor 50mm f2.8 lens. Without the fitted leather case, my camera weighs 1 lb. 9.4 oz. The Futura-S is a very well-made camera but a bit heavy due to its solid cast metal body. I prefer heavier cameras because they fit my hands better. Cameras like the Nikon F body, the Robot Royal, and now the Futura cameras feel comfortable.

The "S" in the Futura line stands for Syncro-Compur, or the shutter system used on this camera. All of the exposure controls are located around or on the lens. The shutter speed dial is located on the outside of the lens area and is moved by two knobs on opposite ends of the dial. The shutter speeds go from 1/500 to 1 sec. along with "B". Also, on the bottom of the shutter speed ring is "Futura Freiburg."

 The focus is controlled by the ring just inside the shutter speed control. This ring has a larger knob sticking out to change the focus as needed to create a sharp focus. The aperture ring is on the lens barrel itself. The aperture range is f/2.8 to f/22. There is an even larger knob located on the outside of the shutter speed ring, which sets the flash sync for "X," electronic flash, or "M," bulb flash.

To remove the lens, you unthread it from the body. The lens has a proprietary thread mount of 33.8mm, so it's not your usual Leica or Pentax thread mount system. I must say, the lens has a very fluid and lean look to it. On the back of the camera is the rangefinder viewing eyepiece. The rangefinder on my camera is exceptionally bright and accurate. We'll see when I test the camera with film in it.

On top of the camera going from left to right, is the rewind knob, which has an arrow on top to show the direction to turn to rewind the film into the cassette. Next is a cold shoe used for a mounted meter or flash attachment.  Behind the cold shoe is a pointer switch, which you can point to either  SW, 'Schwartz/Weiss' (Black & White); C, 'Color'; CN, 'Color Negative.', which is a reminder to the photographer to the film in the camera. Thank you, David Babsky and Mike Eckman, for this information. 

 Next to the cold shoe is a lever which on my camera is a non working on my camera self-timer. Above that and slightly to the right is an additive frame counter. Twist the dial to "0" when you load the film, and the frame counter increases. Just below the frame counter is the cable release threaded shutter release. An interesting item about the shutter release is you can "lock" it down for longer exposures by turning it to the right after depressing it, which locks it in the open position until you turn it to the left to release it. 

Having the locking shutter release is good if you don't have a cable release, but the bad thing is you're still moving the camera a bit during exposure, which might create blur in the image. On the far right is the film advance knob. This turns counterclockwise to advance the film.

 Four nubs on the bottom of the camera lift it and give it stability when placed on a flat surface. Also, there are two knurled buttons, one on the left, to release the drive gear and allow the film to be rewound into the film cassette. The larger one in the center of the camera opens the back of the camera to load film. Slide the larger button toward the arrow pointing to "O," and the back will come off by pulling it down.

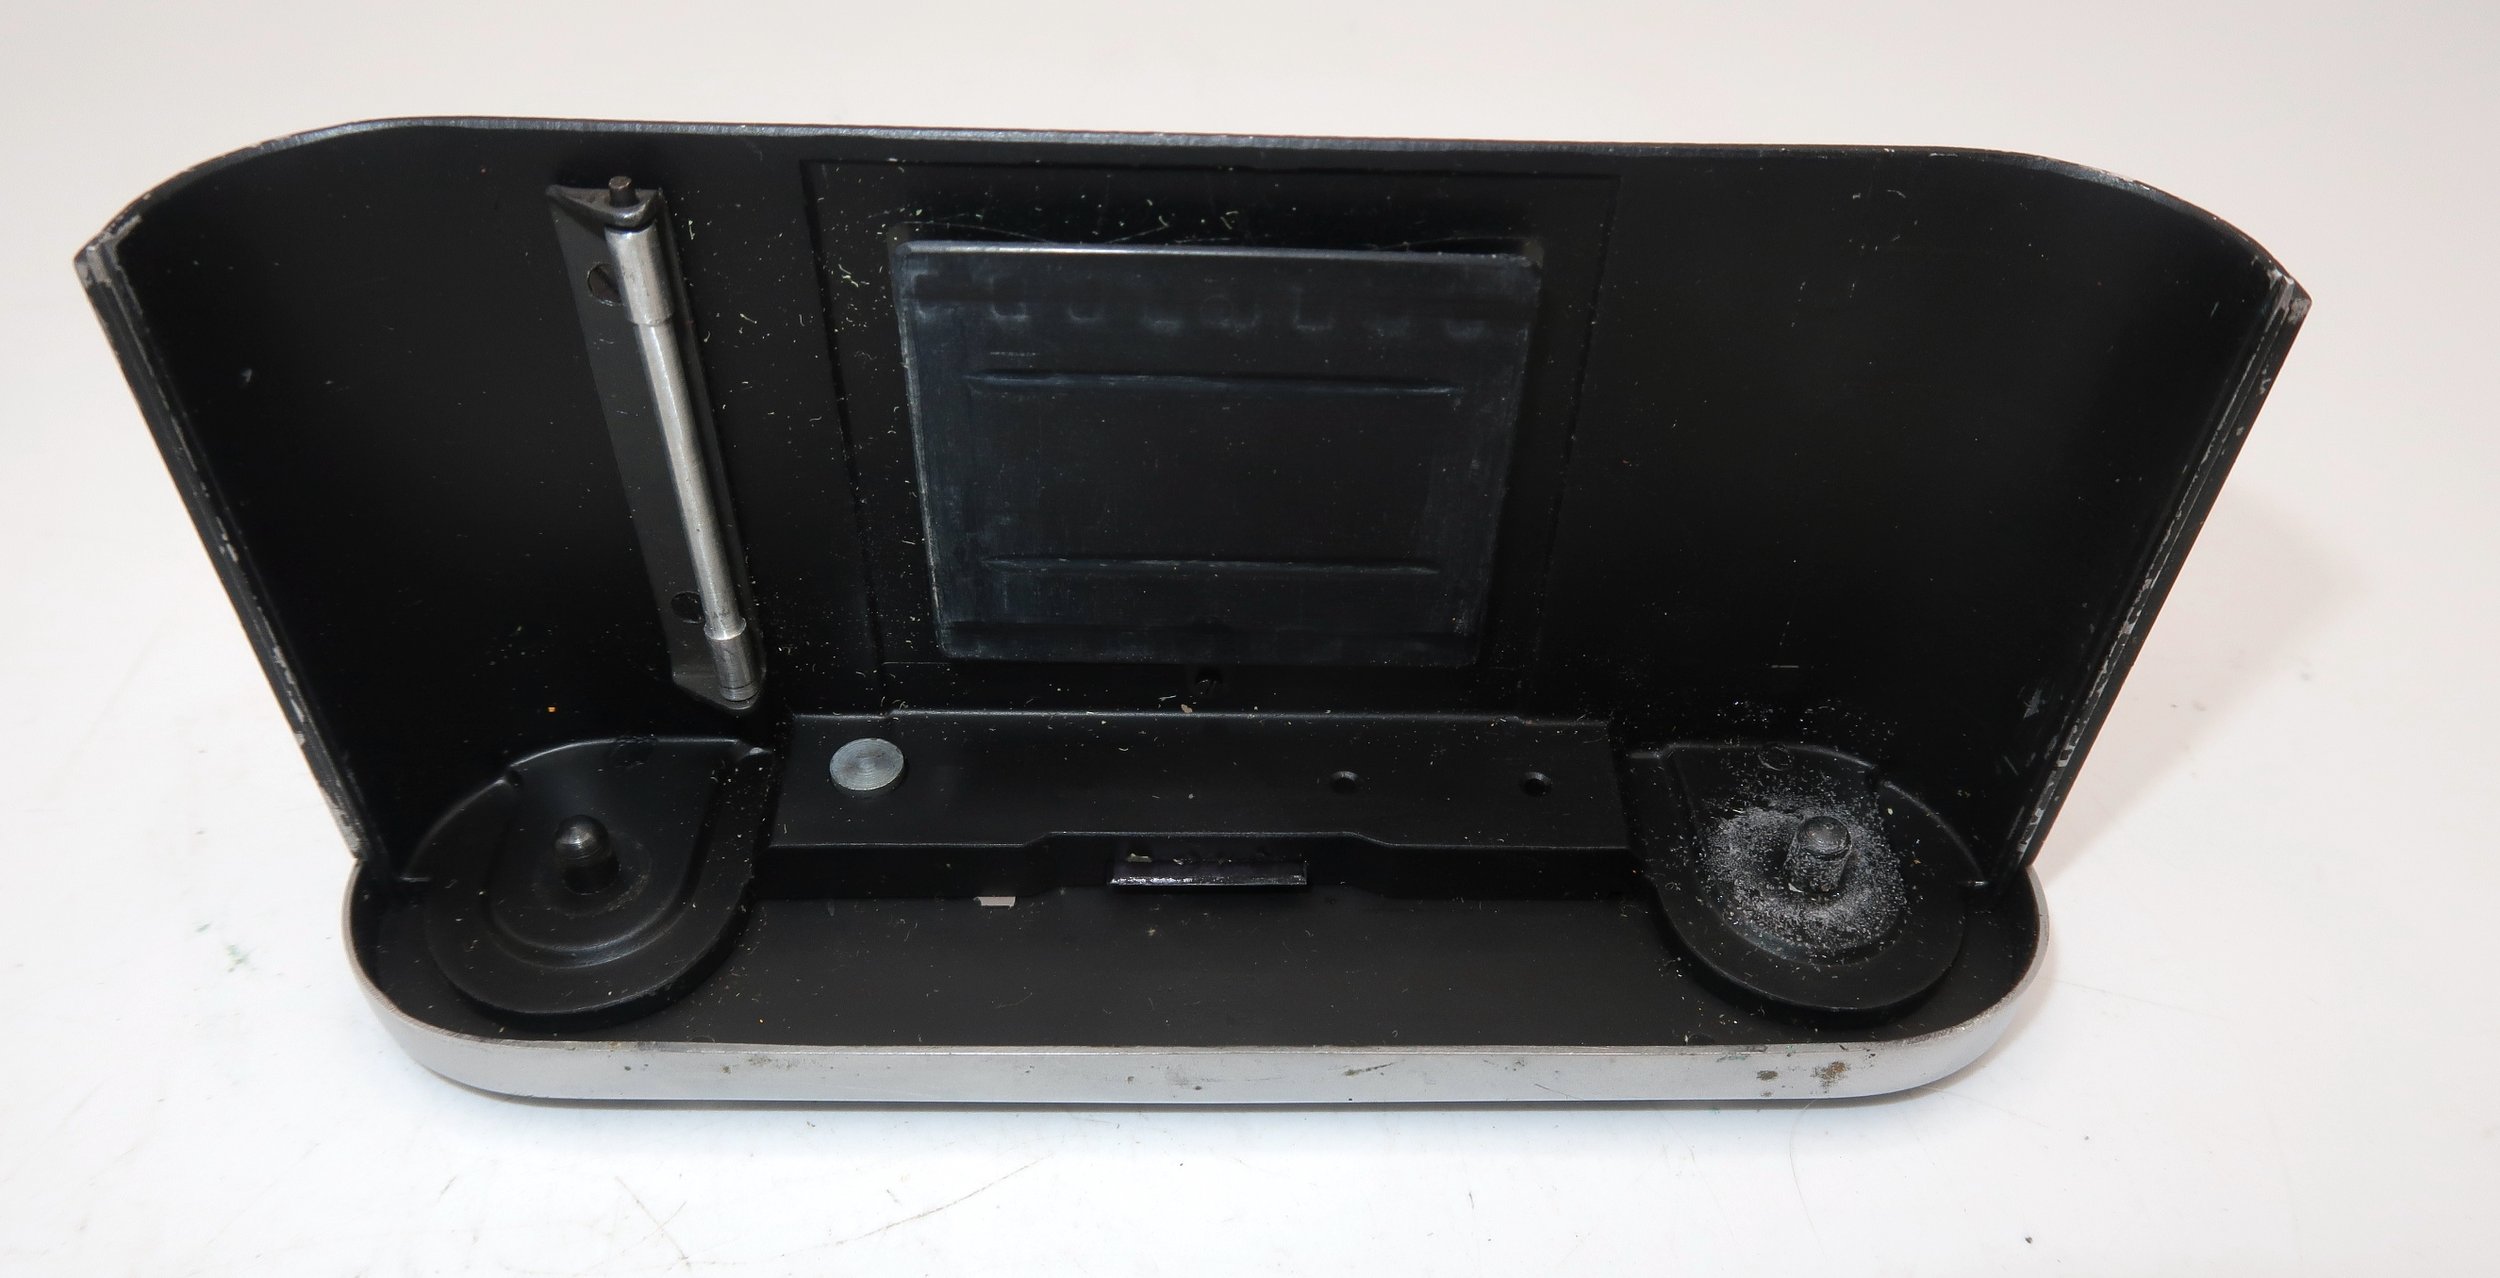
Once the back is off the camera, the take-up spool comes out for more effortless film loading. The camera's serial number is imprinted on the metal plate under the frame window. My serial number is S11244. When you put the back onto the camera and slide it up, it automatically locks onto the camera.

 My Results:

Now that I have put a roll of T-Max 400, 24-exposure film into the camera, which I purchased out of date a few months back, I want to walk around the neighborhood to take photos. Unfortunately, my wife was taking a nap, so I needed to keep my eye on our two dogs, who have a tendency to bark when out of sight. So, I just stayed mainly in my backyard to take the photos.

 I have to say the camera was extremely fun to shoot with, but the one thing that kept bugging me was the camera advance knob. I'm just not used to turning the knob counterclockwise to advance the film. It's not that big of a deal, but I kept turning it clockwise for the first few frames to advance the frame. Once I had it in my head that the winding knob was "backward," it went smoothly, and the camera did a fantastic job. 

 Here are a few of the frames from my backyard.

Conclusion:

I don't know how I didn't know about the Futura-S for so many years. It's a fantastic German rangefinder camera with excellent optics. While my camera could use a complete CLA to bring it up to excellent condition, I have to say that for its condition, it did great.

 I can see why this is a desirable camera, especially for the discounted price from top brands like Leica or Alpa. The camera is compact and easy to use, and the rangefinder produces fantastic results.

 Thank you for taking a few minutes from your day to read about this underappreciated German rangefinder built in the 1950s.

 I'd love to hear from you if you have any questions or comments about this camera.

 Until next week, please be safe. 

Rajar No. 6 Camera

My Rajar No. 6 camera

I don't know what it is about the Rajar No. 6 camera, but ever since I purchased my first McKeown's camera guide more than 40 years ago and spent hours leafing through the pages learning about all the different styles and shapes of cameras, I've always desired to have one in my collection.

 It wasn't until just a few months ago that I pulled the trigger and purchased one from a great reseller in the U.K. It was listed for parts that were not working. The seller was selling the camera for a friend and wasn't sure if it was in good working condition. They mentioned the shutter fired but couldn't guarantee the other working parts of the camera, so I took a chance and purchased it. I don't know why it took so long to get one.

 The shape of the face and the crosshatching on the camera's face drew me to it. It has a very classy and classic look, which is something I find on many cameras made during this timeframe.

 It took a while for the camera to arrive from the U.K., but it arrived last week, and I was anxious to see its physical condition. To my surprise, the camera was not only in excellent physical condition with no chips in the Bakelite, but the shutter was firing, and there was a roll of film still in the camera, which the seller failed to mention, so I was doubly happy.

 I took hold of the film advance knob to see if the film was advancing, and it was so at this point, I didn't see anything wrong with the camera. Not knowing how old the film was, I went outside to take the last few frames on the included old roll of film, and it wasn't until I got to the final frame I found out what was wrong with the camera. 

 I wasn't aware of what was so different in the film spool until I took the film out of the camera, which I needed to do in a dark bag since the camera stopped winding right after I took the final photo on the roll of film included with the camera.

 The Rajar No.6 camera has a special take-up spool written right there on the back of the camera, "only the Rajar No. 6 spool will fit this camera". I saw that when the camera arrived and at first I thought I couldn't shoot with it because it took a different or special size of film. Nope, it's the take-up spool. At least in my camera, the take-up spool is special and has a square tip that fits into the take-up spool instead of a slot that fits into most 120 spools. 

 It appears the Rajar No.6 has a brass item attached to the metal take-up spool that had become loose, making it impossible for the camera to wind the film to the next frame. The drive portion came loose, and the film wouldn't advance anymore. The disconnect of the brass piece and the take-up spool must have happened during the winding of the film, as it was working for a few frames. Another explanation is that the brass portion was stuck to the take-up spool and became loose after the film was with a few frames.

The Company:

Rajar No. 6 nameplate

Rajar Ltd. was established in 1901 as an offshoot of Brooks-Watson Daylight Camera Company Ltd., which had a facility in Liverpool. The company produced camera film, paper, and Rajar film backs for daylight loading film. In 1904, it moved to Moberly and was renamed Rajar Ltd.

 In 1921, Rajar Ltd. They merged with six other companies to form APM, Amalgamated Photographic Manufacturers Ltd. In London, in 1928, four companies involved in film manufacturing formed APeM, Amalgamated Photographic Equipment Manufacturers Ltd. APeM, which would eventually be rolled into Ilford, which is still one of the major film companies today.

 The Rajar No. 6 camera was introduced in 1929, just a year after APeM started. APeM also produced box camera as well.

The one thing that makes the Rajar No.6 camera unique is that the camera body, faceplate, and back are all made from Bakelite. The Rajar No. 6  was the first camera to have the majority of the camera built with the new material. As I mentioned earlier, it's incredible that after almost 100 years, the Bakelite is still in fabulous condition. There are no chips to be found, and the camera still has the gorgeous shine of the new camera.

My Camera:

My Rajar camera measures 6.5" tall by 4" wide, including the winding key, by 4.5" deep when the camera is extended. My camera weighs 1 lb. 0,6 oz., so the camera is very light. The camera is extremely simple as it has a meniscus lens, and an "Everest" shutter, meaning it doesn't cock. When you move the shutter release from one side to the other, the shutter fires, and then when you move it back, the shutter fires again, so you'll need to wind the film right after taking the photo to avoid double exposures.

There is no aperture setting, as the lens aperture is set to what I'm guessing at F8. The only shutter speed setting is for instant or timed exposures. The Rajar No.6 camera is a strut-style folding camera, which means the camera body pulls away from the body on four chrome rigid arms, as opposed to the traditional folding bed style.

 It took me a few minutes to figure out how to pull the faceplate away from the body, but when I held the camera upside down, the faceplate dropped, and it was easy to pull it away from the body and lock it into position. To close the camera, you only need to pull outward on the four strut corners, and the faceplate folds back into the camera body. There is a small viewfinder on the top of the camera, but this only works for vertical photos. There is no viewfinder for horizontal images unless you tilt your head, which is very uncomfortable.

To open the back of the camera to load film, two clips hold the back onto the camera's body. Just flip back the clips, and the back can be lifted off easily. The Rajar No. 6 camera is a 6x9 format camera and takes eight exposures on a roll of 120 film. Yes, the only difference between the No. 6 spool is the take-up spool. It's not a different film size, as 120 film fits the camera well. I've even seen that Rajar made an adapter to fit onto its square proprietary film take-up end to fit into 120 film spools. I don't have one of the adapters, so I'll need to keep my special take-up spool and reuse it with each roll of film.

My Photos:

Since the take-up spool appeared to be broken and I couldn't pull the film from it, I glued the special square drive area directly onto the metal spool that it was spinning freely on. After waiting an hour or so for the glue to dry, I loaded a roll of 120 film into the camera and onto the special take-up reel. The take-up spool worked wonderfully, and I got through the roll of film without a hitch. In fact, the film transport was extremely smooth.

 Here are some results from walking through my neighborhood with the Rajar No. 6 camera.

Conclusion.

The images have a softness that I find appealing. They are very similar to Lomography-style cameras like the Diana. They seem a bit sharper than a Diana, but the lens has a creamy effect on the images (in my opinion). I enjoy that the corners are rounded on the negatives. I also see that the images extend into the rebate portion of the film's border, as I can see the film name and other information in the image area.

 The camera worked great. The shutter was smooth, and the film transport was even smoother. Once I glued the two pieces together and dropped the film into the camera, the photo-taking experience went flawlessly.

 The camera is compact, rugged, and a real "point-and-shoot" style camera. I aimed the camera for horizontal images and figured the lens on the camera was most likely for wide images, which proved to be true.

 Thank you for taking a few minutes to read about this fun and easy camera to shoot with.

 I'd love to hear from you, so if you have any experience with this camera or any of the others I've written about, please email me.

 Until next week, please be safe.

Original Model K1 Rolleiflex

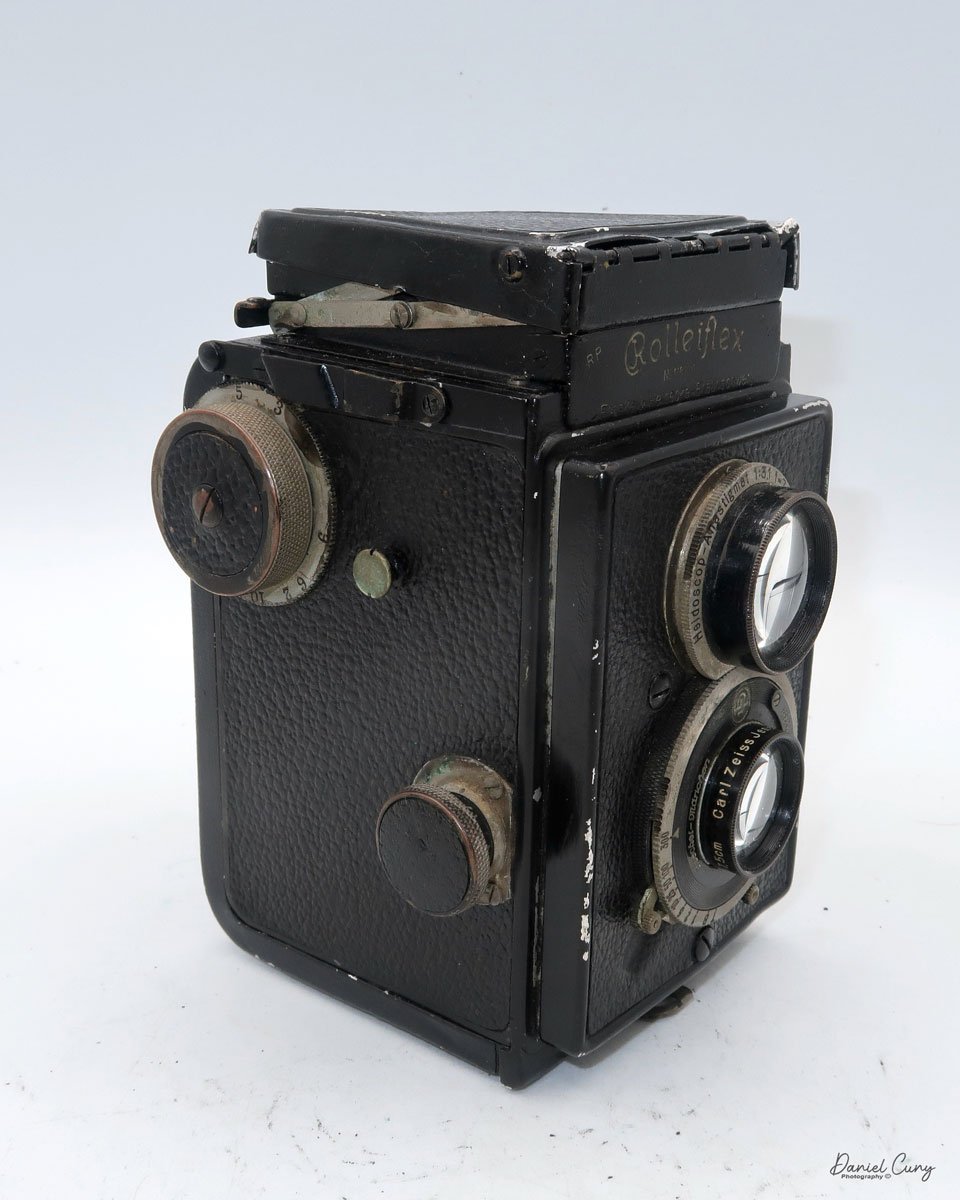
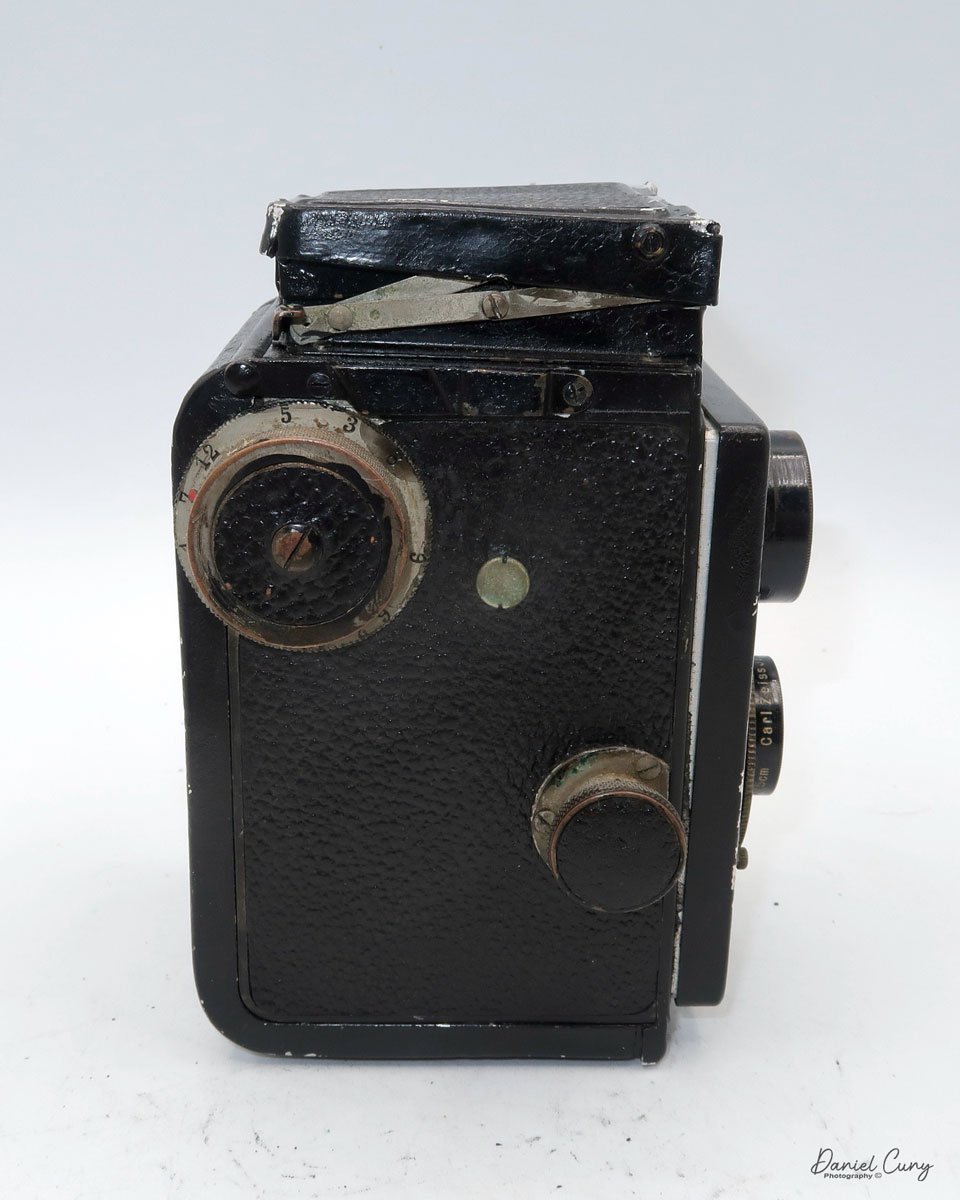
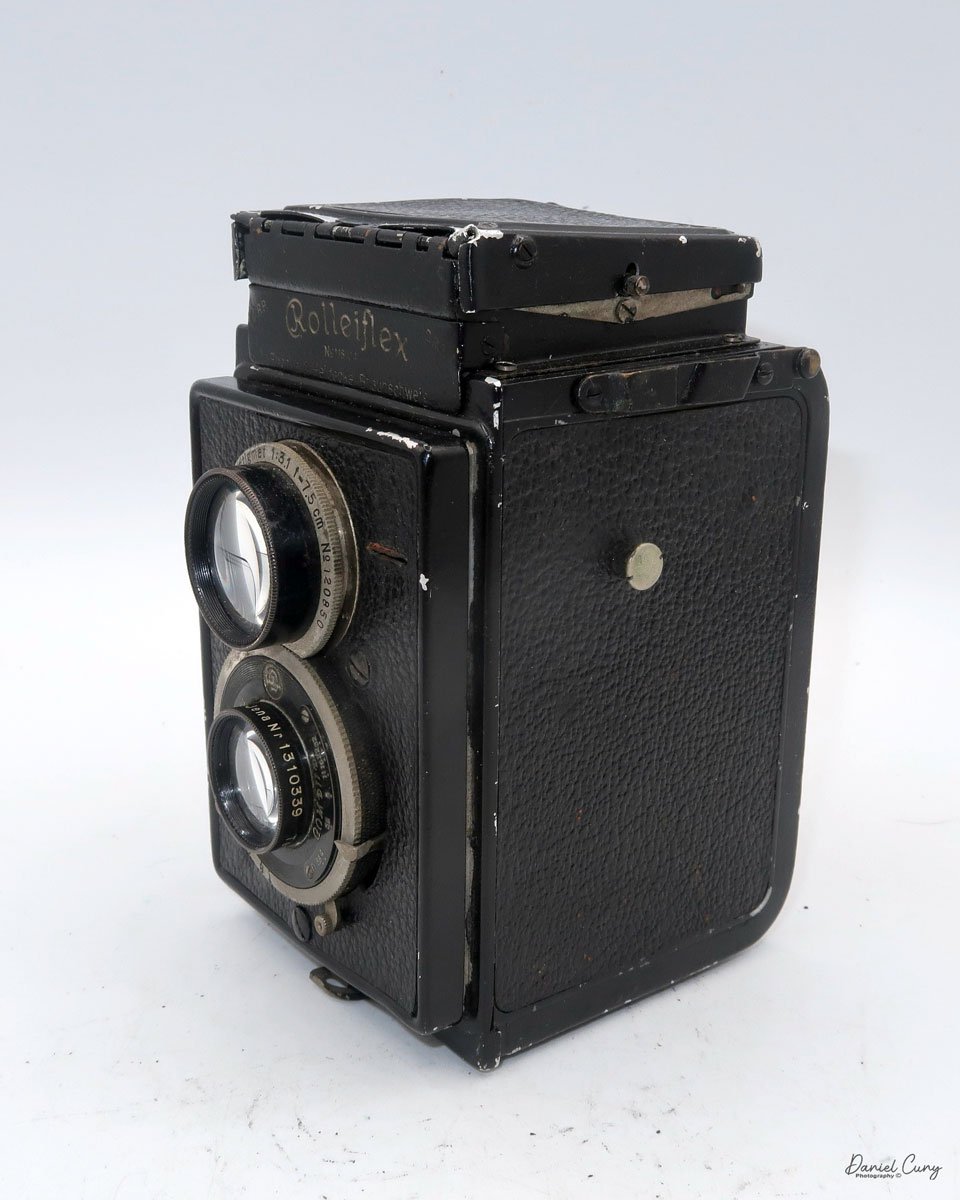
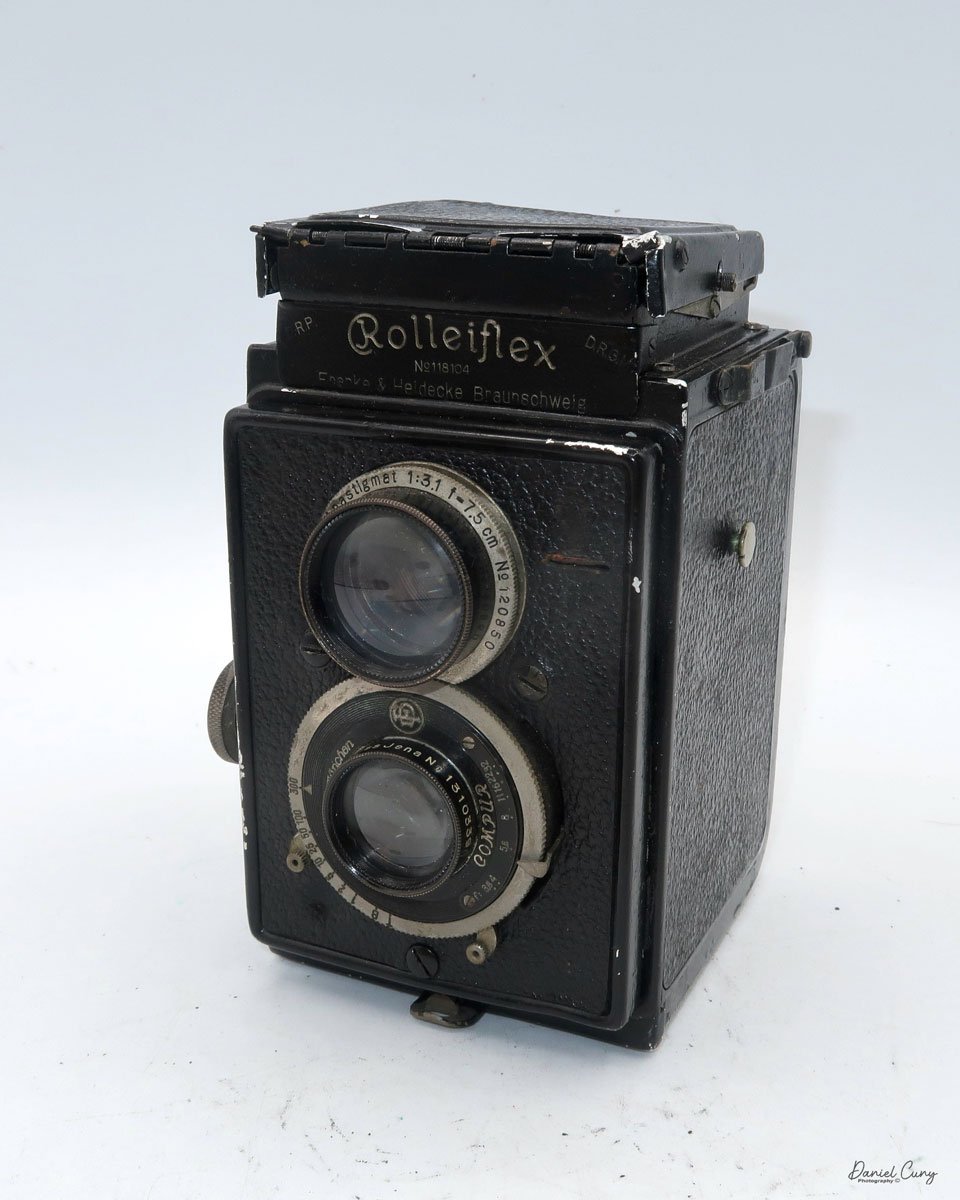
My Rolleiflex K1 Camera

As is common for me, I purchased this original Rolleiflex model with many cameras, which included some other items I was more interested in. In the photo of the camera lot, I could see the Rolleiflex name, but the image was so small that I couldn't tell what model it was or even if it was in working condition. I took a shot; as I mentioned earlier, I was more interested in some items, and the Rolleiflex was more of the icing on the cake regarding the importance.

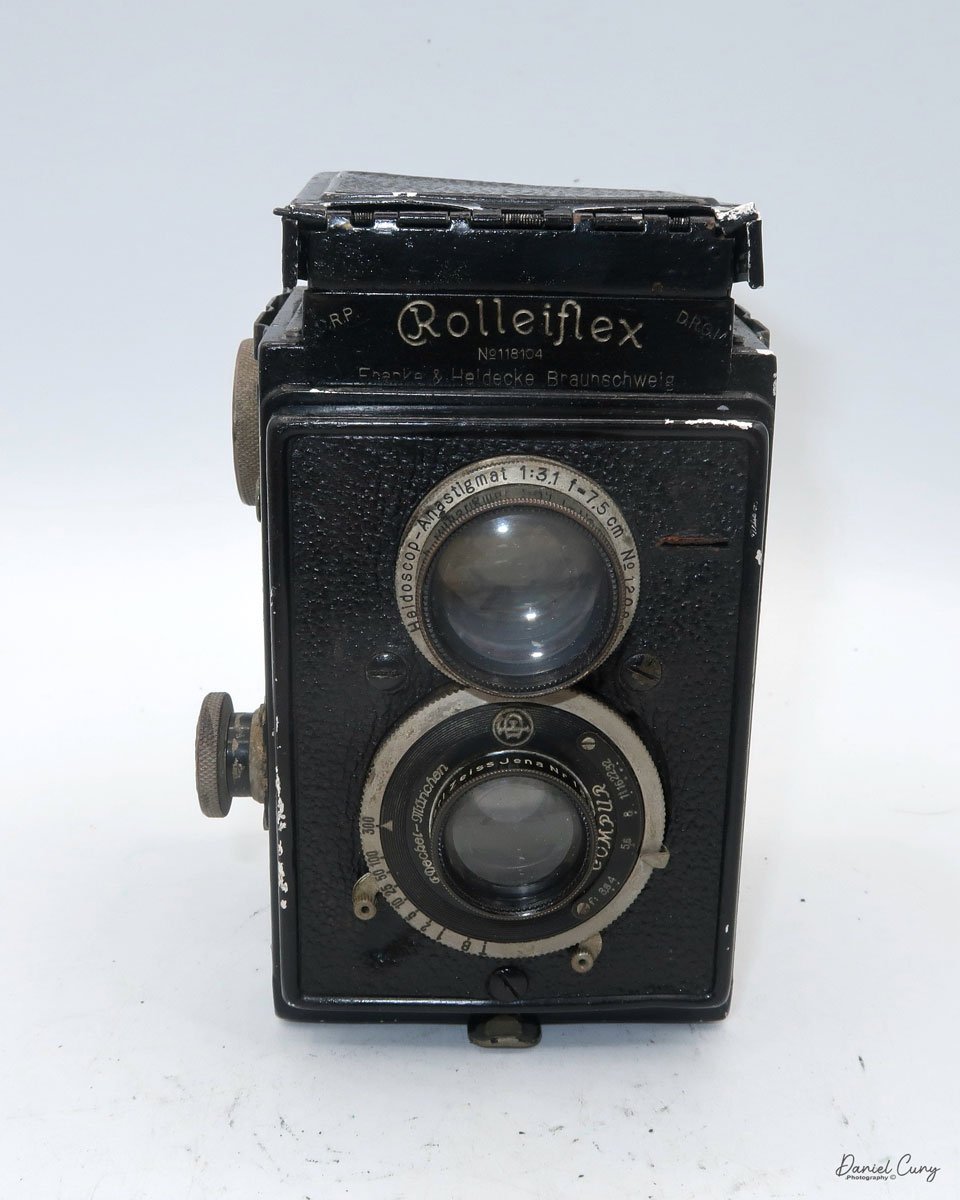
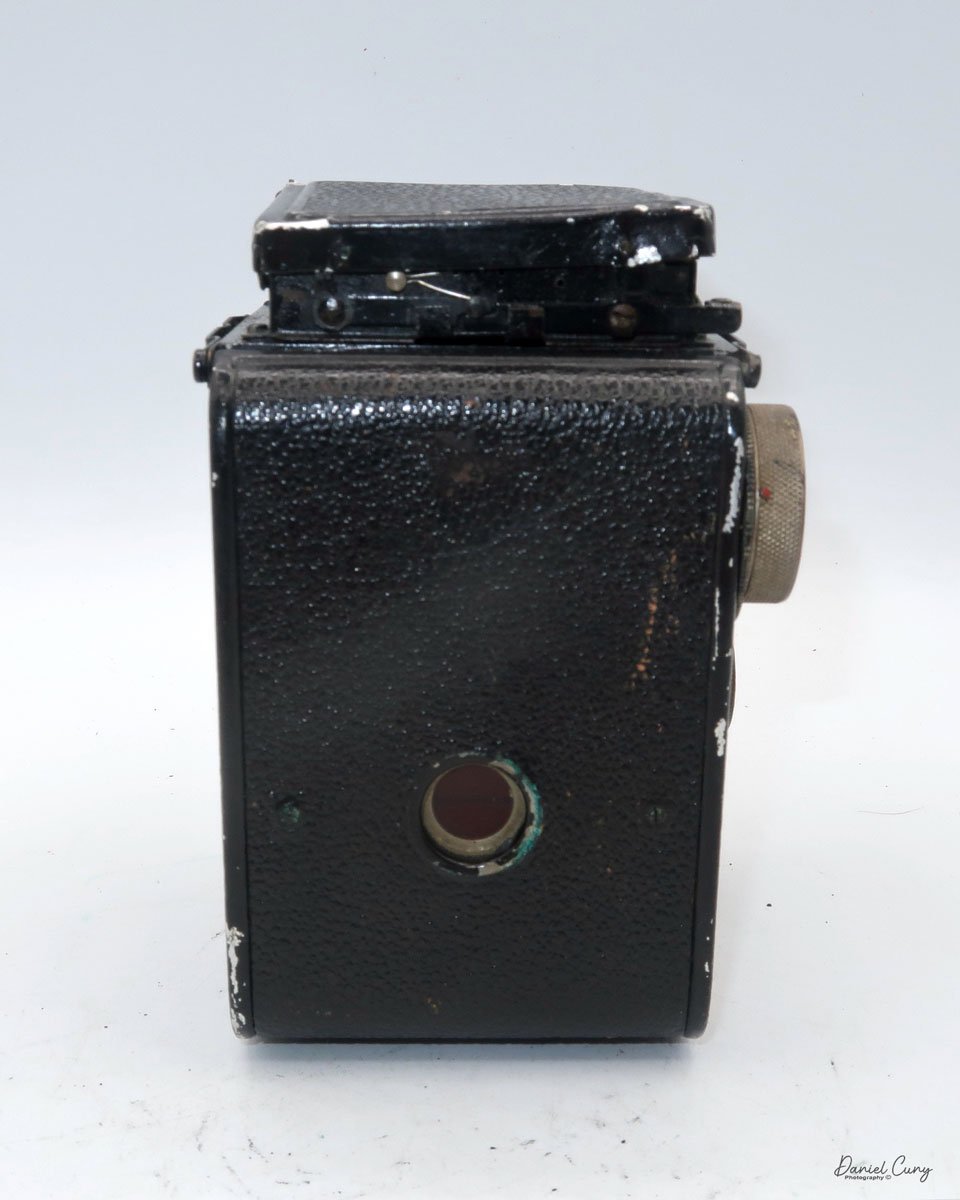
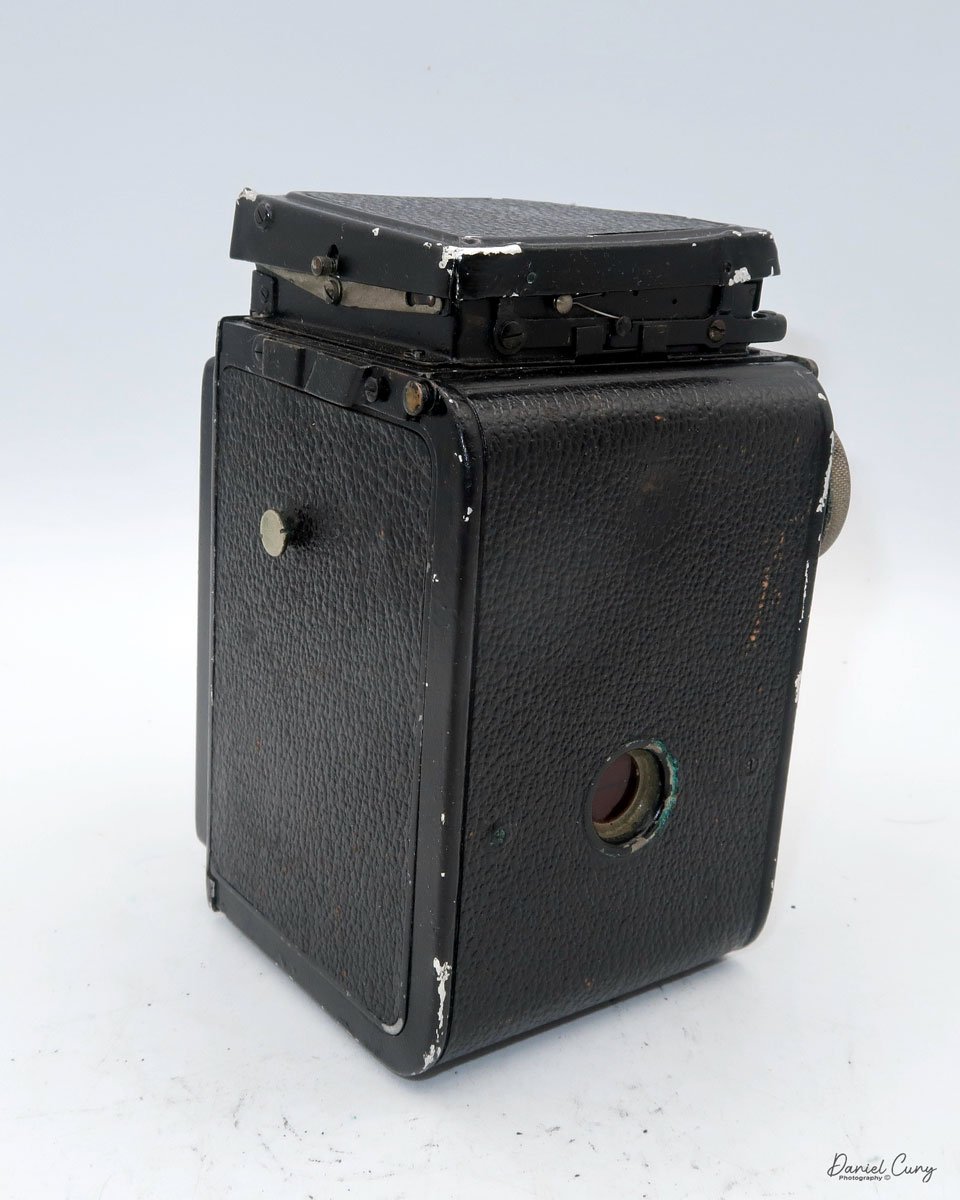
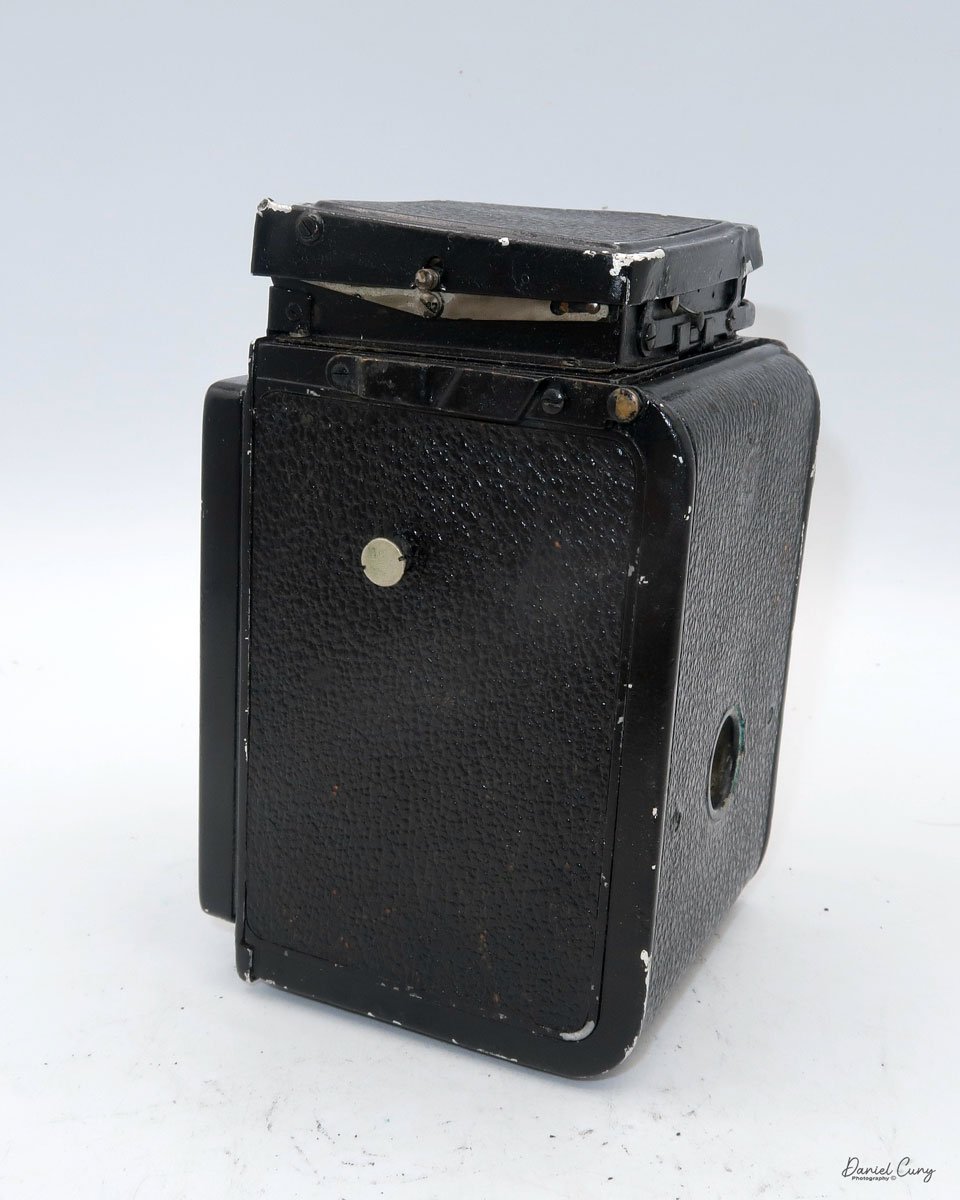
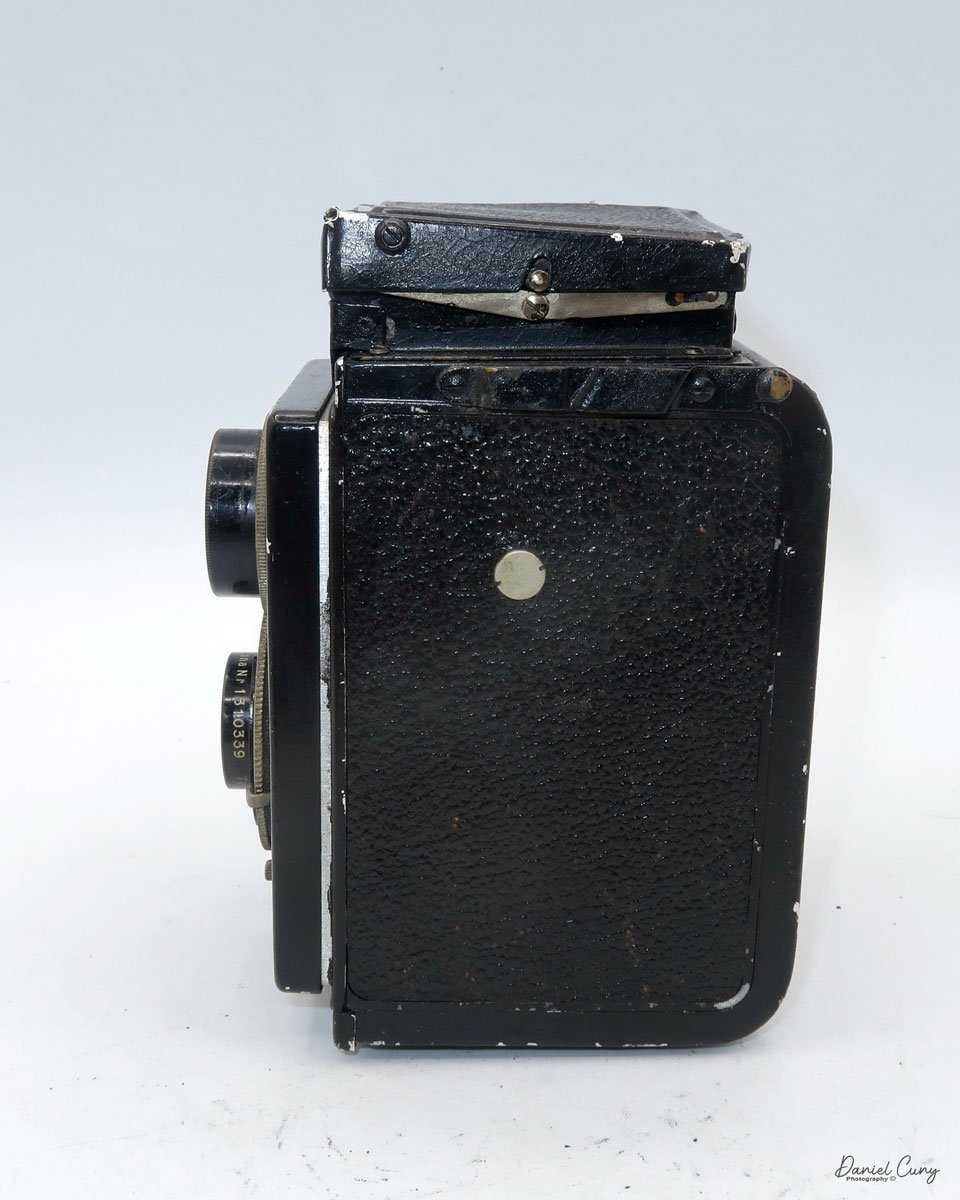
 Once I received the items in the lot and looked them over, the main items were great, and I was happy to have them. I picked up the Rolleiflex and checked on the camera's serial number, which was a low number. I have serial number 118104. From what I can see online, this is one of the first batches of cameras made. While the original Rolleiflex camera was only made from 1929 to 1932, a few modifications were made.

 In the photo, the Rolleiflex looked well used, and the top light chimney looked a bit wonky, which it was and still is today. When I tried to open the top, one of the side wings was jammed closed and wrapped under one of the other side wings, and I couldn't look down the chimney to see if the focusing screen was there. I took out my set of small screwdrivers and unscrewed the top 4 screws to remove the light chimney to fix it and bend the sides out a bit to make the chimney more usable.

Early Rolleiflex name and serial number

 Once I took the top off, I noticed the focusing screen was in good condition and still had the bubble level. It was a very clever idea to put in the camera when it was manufactured almost 100 years ago. 

The Company:

I reviewed the original Art Deco-style Rolleicord a few months ago, and here's what I wrote about the company's history then.

 Rollei holds a significant place in photographic history. Founded in 1920 in Braunschweig, Germany, by Paul Franke and Reinhold Heidecke, the company originally bore the name "Franke & Heidecke." Initially, it focused on precision mechanical devices, but by the mid-1920s, Rollei began producing cameras that would revolutionize photography.

 Rollei gained international recognition in 1929 with the launch of the Rolleiflex, the first twin-lens reflex (TLR) camera. The Rolleiflex was compact, robust, and designed for medium-format photography. Its unique twin-lens system featured one lens for viewing and focusing and another for capturing the image on film. This innovative design allowed photographers to frame shots at waist level, making candid photography more discreet and practical. The Rolleiflex quickly became a favorite among professionals and enthusiasts, particularly for portrait and documentary work.

The success of the Rolleiflex led to the introduction of the Rolleicord, a more affordable version aimed at amateur photographers. Both models showcased Rollei's commitment to precision engineering and optical excellence, which became hallmarks of the brand.

 During the 1930s and 1940s, Rollei continued to innovate, refining the Rolleiflex and Rolleicord lines with features such as automatic film winding and improved optics. Despite the challenges of World War II, the company maintained its reputation for high-quality cameras. In the post-war era, Rollei played a significant role in the resurgence of the German camera industry.

The 1950s and 1960s marked a golden age for Rollei. The Rolleiflex TLR became synonymous with professional photography and was used by renowned photographers such as Richard Avedon, Diane Arbus, and Vivian Maier. Rollei also ventured into other formats and technologies. The Rolleiflex 35mm SLR, introduced in the late 1950s, showcased the company's adaptability to the changing market demands.

 By the 1970s, the rise of Japanese camera manufacturers like Nikon, Canon, and Minolta introduced intense competition. These companies offered high-quality single-lens reflex (SLR) cameras at more affordable prices, challenging Rollei's dominance in medium-format and professional photography. However, Rollei's resilience and ability to adapt to changing market conditions inspired by its history.

In response, Rollei diversified its product line, introducing the Rolleiflex SL66, a medium-format SLR, and the compact Rollei 35, which became one of its most miniature 35mm cameras. Despite these innovations, Rollei struggled to maintain its market share due to its higher production costs and its competitors' rapidly advancing technology.

 In the 1980s and 1990s, Rollei faced financial difficulties, leading to changes in ownership and restructuring. The company shifted focus to digital imaging and niche markets, including high-end studio cameras and digital backs for medium-format systems.

The Rollei legacy endures as a symbol of German engineering and innovation, reflecting a century of dedication to the art and science of photography. This enduring legacy evokes a sense of respect and admiration for the brand's contribution to the field of photography.

My Camera:

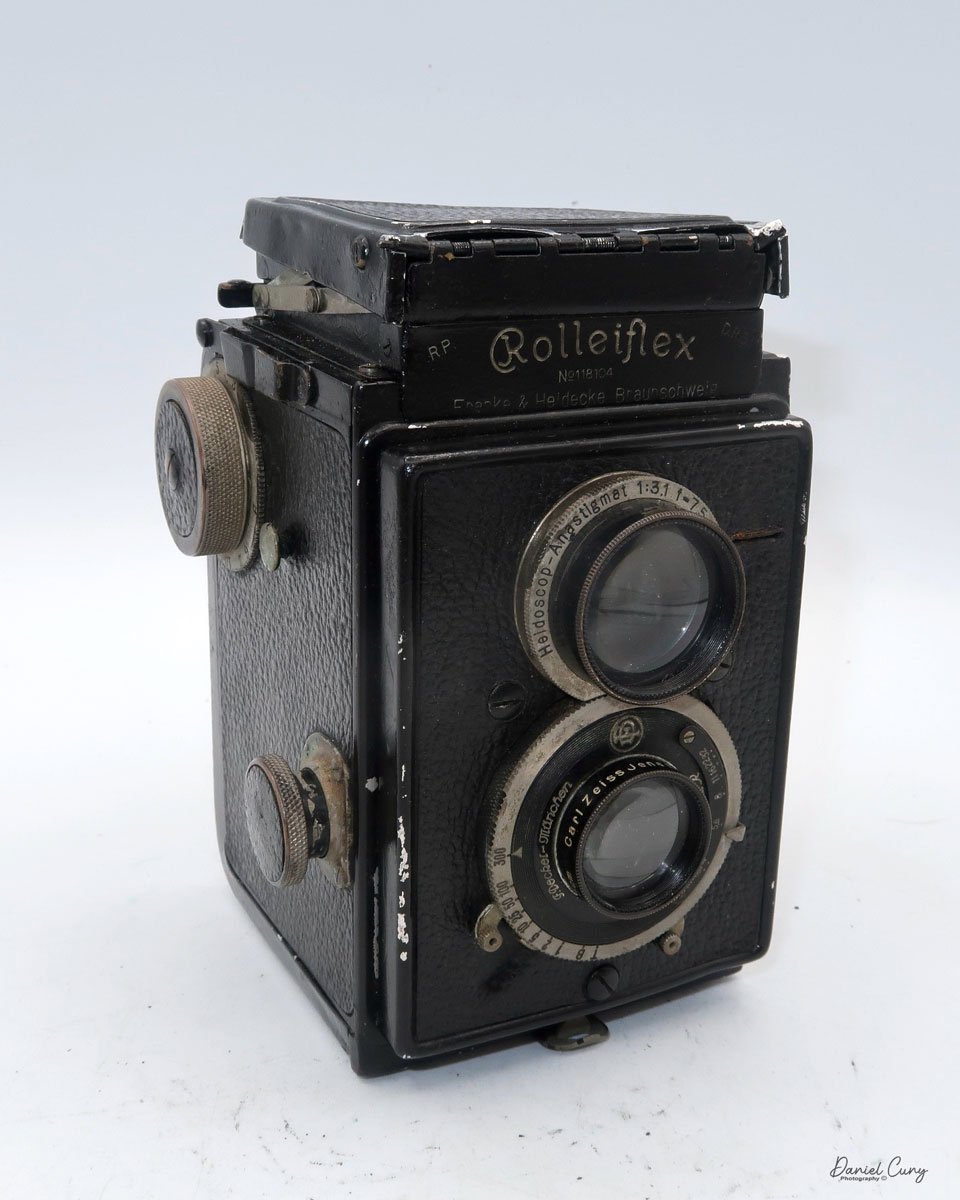
My early Model K Rolleiflex is 5.25" tall and 3.5" wide by 3.75" deep. These measurements are with the light chimney closed. If I open the light chimney, the camera is 7.5" tall and weighs 1 lb. 9.7 oz. with the original lens cap and without film loaded into the camera. My camera has a Carl Zeiss Jena Tessar 7.5cm f3.8 lens, serial #1310339, for the taking lens, and for the viewing lens is a Heidoscope Anastigmat 75mm f3.1 lens, serial #120850. 

The lens is in an F.Deckel-Munchen Compur shutter with speeds from 1/300 to 1 sec. along with "B" & "T". The shutter speeds are set by turning a chrome ring on the outside of the shutter ring. The shutter cocking lever is on the left side of the camera as you view it from the front, and the shutter release is on the right side. The aperture ring goes from F3.8 to F32 and is set by a sliding ring just outside the shutter ring.

Taking lens, and shutter-aperture settings on my original K1 Rolleiflex

The light chimney or light hood is the most interesting thing about the camera. To open the light chimney, on the back of the camera, there is a small lever you need to press down to unlock the chimney. The front and sides will spring open if the chimney is in good working order. Since mine is not in perfect condition, the front opens, but I need to coax the sides to open correctly. Once the chimney is open, you can view the focus screen.

 On the back of the chimney is a magnifying glass on a spring. It can be flipped over and locked into the front part of the chimney, where it can be used for critical focus. Pressing the front part of the chimney releases the magnifying glass, and it returns to its normal position. 

 On the backside of the front wing of the chimney was a mirror, or a highly polished metal piece that flips down with a lever on the left side of the chimney. When the magnifying glass is in the "up" position, and you flip the lever down, the mirror will be at an angle that you can use the back as a level finder and focus the camera while viewing the image through the back opening of the chimney. I really liked this feature as it gives the camera a lot of flexibility when shooting. To close the chimney, fold down the sides first; the back and the front will close, covering the camera.

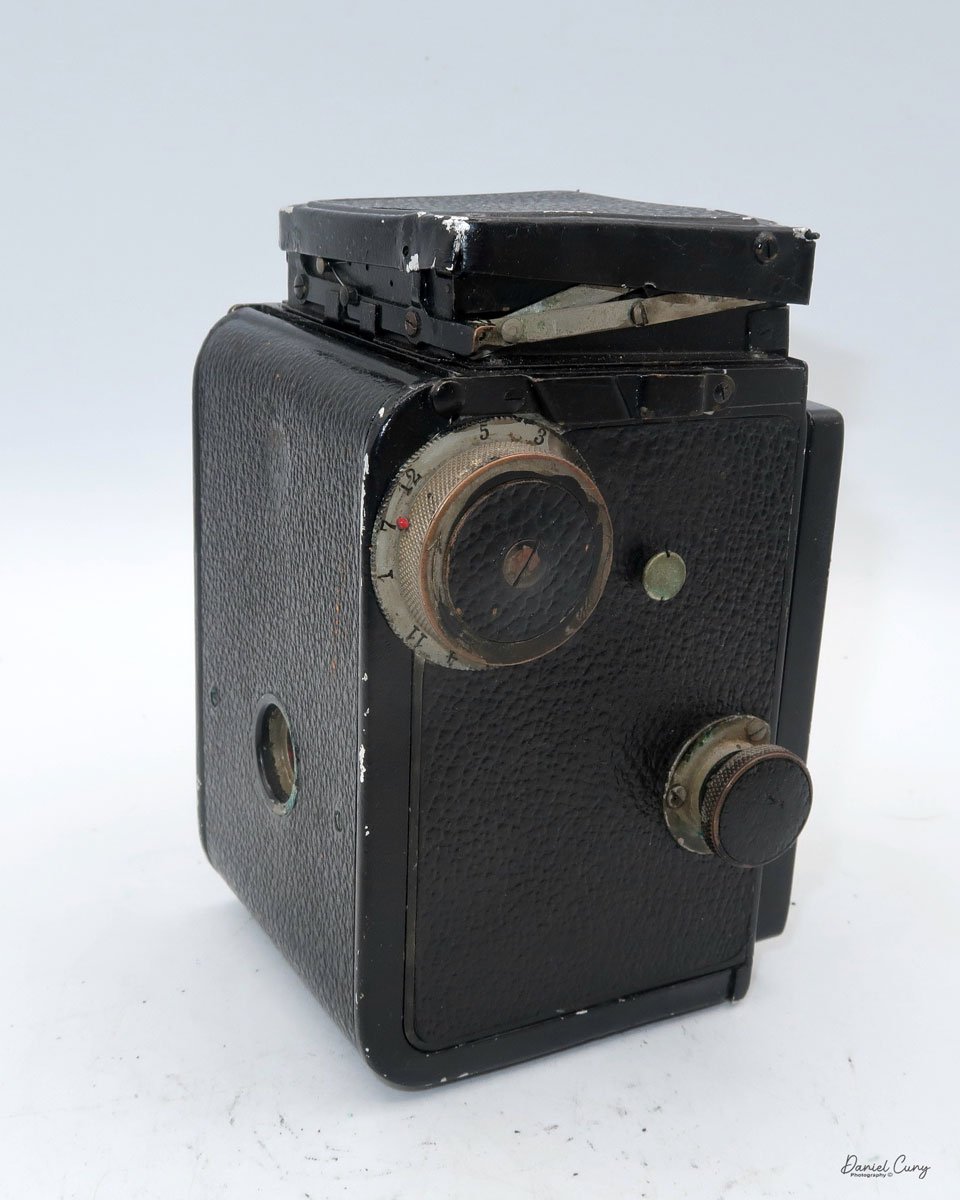
On the right side of the camera are two knobs. The larger knob on the top is the film advance knob. Around the knob are numbered from 1-12, but the numbers aren't in order; they go 1,7,12, small space, then 5,3,8, small space, 9, small space, and 6,2,10,1,11. At first, I thought these were frame numbers, but the sequences are so off. I know the first camera models were made for film size 117, and the camera only took six exposures with larger gaps between frames. There is also a red arrow pointing towards the number, but it didn't change when I put the film in the camera and advanced it to the next photo. Maybe someone can explain this sequence to me.

 The lower and smaller knob is the focus knob. On the inside are distance numbers, but there is no feet or meter setting. On the camera's left side is a lug, which was used to connect the strap.

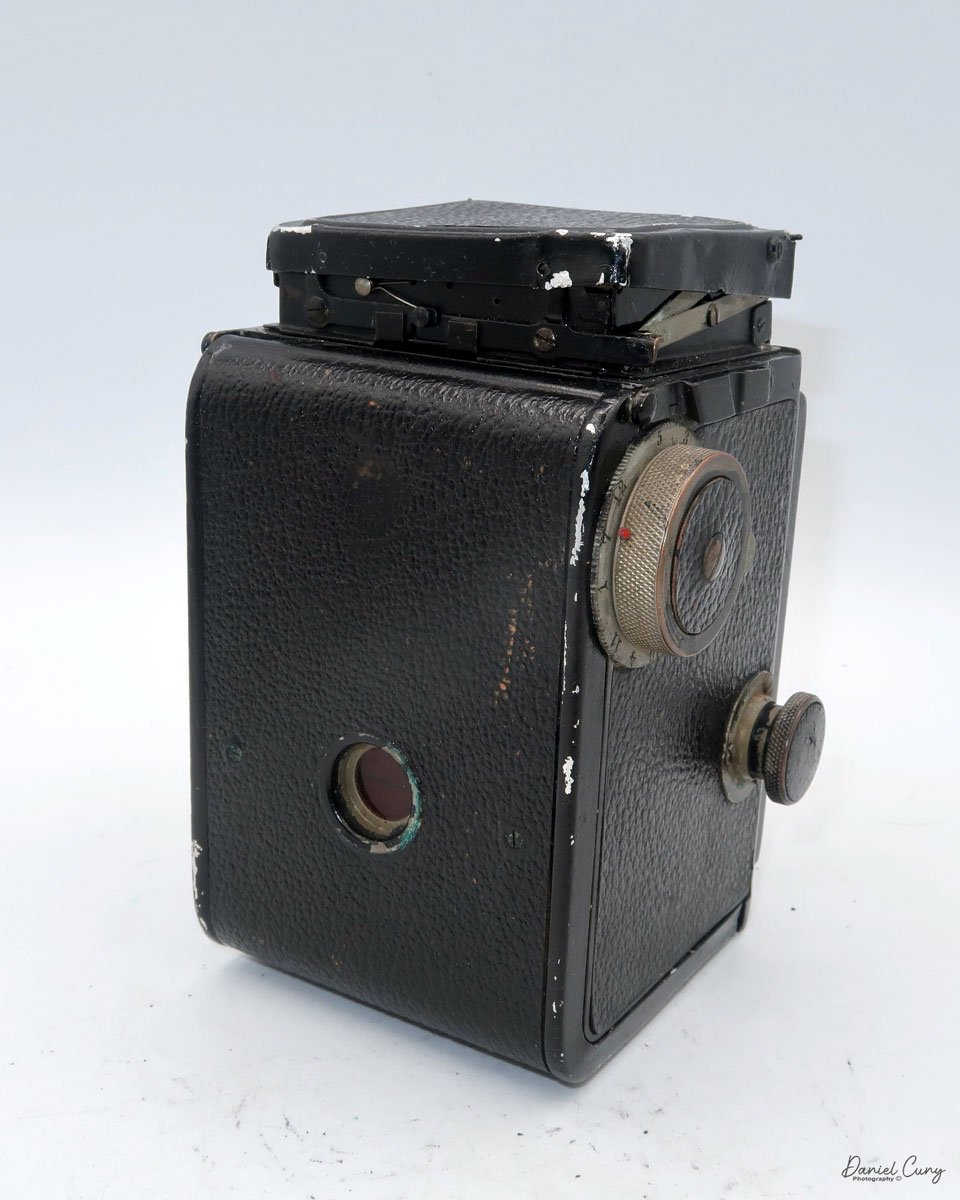
The back door locking mechanism is on the bottom of the camera, and there is a tripod socket and a second red window with a cover. I didn't use that frame counting window, as I used the one on the back of the camera as I would for most cameras. To open the back door to load film, you lift the silver-hinged locking mechanism, which opens the back door. After doing some research on the camera, I found that this model doesn't take 120 film like all the other Rolleiflex models. 

I tried anyway, and it's too wide and didn't fit into the film chamber. Luckily, I have some outdated Agfa 620 films that fit correctly. I put the empty spool on the top. You can pull out the larger knob to load film into the camera, then press it in to lock the reel into place. I put the outdated Agfa roll into the camera, fed the leader into the empty spool, wound the film to start, closed the back of the camera, and wound the film to frame number 1. Now, I'm ready to take the camera out on an adventure to see how the camera performs.


My Results:

My wife and I planned a trip to Lake Quinault in the Olympic National Forest, so I wandered the lake's hotel grounds with a fantastic camera loaded with film and took some photos. Here are a few of the images from this trip.

Conclusion:

The camera performed very well, and the images were nice and sharp. The focusing screen was dark compared to the newer cameras. Still, it did an excellent job for a camera almost 100 years old and was extremely fun to shoot with. Due to the age of the film, the images have a mottled appearance when looking at something without detail, like the sky or lake. But that doesn't affect the camera's usability, which was overall very good.

 I'd love to hear from you. If you have one of these cameras and have questions or want to let me know what you think of the camera, please leave a comment, and I'll get back to you soon.

 Thank you for taking a few minutes from your day to read about this fantastic camera.

 Until next week, please be safe.

Polaroid SX-70 Camera

My Polaroid SX-70 camera.

When I was looking over the cameras in my collection and thinking about which camera to write about this week, the Polaroid SX-70, which I have right over my desk, seemed to jump up and say, "My turn this week." I thought about it for a moment and thought, "It's not that old of a camera, but it is." 

 The Polaroid SX-70 was introduced in 1972, during the era of many "modern" inventions, like the home VCR, floppy discs, and email. It was not too far after the music and pop revolution in the late 1960s, which brought interesting and new designs. Currently, the SX-70 is a 52-year-old camera and, in my opinion, the last camera introduced with a genuinely different and unusual design.

 Being a fan of Polaroid from an early age, I remember getting a Polaroid Swinger for Christmas of 1965, just a few months after the camera was introduced. To focus the Swinger, you'd squeeze the focus dial until a "YES" would show up in the viewfinder, telling the photographer the camera was focused and ready to take a photo. That was tremendous and, to this day, a fun innovation of its time.

 When the SX-70 was introduced, there was much fanfare, magazine covers, and writing about this revolutionary camera from Polaroid. The SX-70 was officially sold in the Miami area in late 1972 and became nationally available in 1973. It was sold for $180.00 for the camera and $6.90 for the film, with ten photos in each pack.

 The interesting thing about the Polaroid SX-70 film was that the batteries that powered the camera were in the film packs, so every time you put a fresh roll of film into the SX-70, you were also putting fresh batteries in the camera. Batteries in the film pack were good unless you tried a pack with depleted batteries or tried out-of-date film where the batteries were dead. At that point, the camera was unusable.

Polaroid Acecssory Kit

 What made this camera unique was its odd and different design and its very slim design. It was an SLR camera with through-the-lens focusing, exposure control, and accessories that would enhance the photo experience, such as a remote shutter cable, tripod mount, close-up lens and diffuser, lens hood, self-timer, and accessory holder. Other companies soon came out with accessory lenses and electronic flash units.

 In 1974, due to the success of the original SX-70, with its chrome and tan-colored leather covering, Polaroid introduced lesser-expensive models and kept introducing other models soon after that. 

 The SX-70 camera was a massive success for Polaroid and gave instant photography a shot in the arm like few I've seen in the photo industry. Kodak would create their version of an instant camera in 1976. Still, Polaroid sued them for patent infringement, which led to Kodak discontinuing production of their line of instant cameras in 1985.

Company History:

The Polaroid Company, founded by Edwin H. Land in 1937, pioneered light-polarizing technology. Originally called the Polaroid Corporation, the company first made waves by producing polarized sunglasses and optical devices. However, its true innovation came in 1947 when Land introduced the first instant camera—an invention that would forever change photography.

Polaroid SX-70 ad from 1970s

 Land unveiled the instant camera at a meeting of the Optical Society of America, demonstrating how it could develop photos within minutes. This breakthrough led to the Polaroid Land Camera Model 95 commercial release in 1948. The camera's unique ability to produce finished photographs quickly became a cultural phenomenon, redefining personal photography for decades.

 Throughout the 1950s and 60s, Polaroid expanded its product line and refined its instant photography technology. It gained popularity among both amateur photographers and professionals. The introduction of color film in 1963 further solidified Polaroid's position as a dominant force in the camera industry.

 Polaroid also became known for its iconic camera designs, such as the SX-70 in 1972—a folding single-lens reflex camera that was both portable and innovative. During this golden era, Polaroid enjoyed tremendous commercial success and was often seen as a symbol of American ingenuity.

Cutaway view of Polaroid SX-70.

 However, the rise of digital photography in the late 1990s and early 2000s caused Polaroid to struggle. Despite attempts to adapt, including digital products and partnerships, the company couldn't maintain its market dominance. In 2001, Polaroid filed for bankruptcy and began selling off assets.

 The brand saw several changes in ownership over the following years. Yet, in a surprising turn, Polaroid experienced a revival in the late 2000s and 2010s, fueled by nostalgia and a renewed interest in analog photography. The Impossible Project, a group of former Polaroid enthusiasts, acquired the brand's last factory and began producing new instant film. Eventually, this effort led to the relaunch of Polaroid as Polaroid Originals in 2017, and later simply Polaroid.

 Today, Polaroid continues to produce instant cameras and film, embracing its vintage roots while appealing to new generations of photographers drawn to the charm and simplicity of instant photography.

My Camera:

My SX-70 camera measures 7" long by 4" wide by 5.5" tall when it is opened and only 1.5" tall when it is collapsed. It weighs only 1 lb. 7.6 oz. and has a 4-element 116mm f8 glass lens. My camera is one of the earlier models because it has the embossed serial number on top of the film chamber. The serial number on my camera is FE3028170DK.

 To open the SX-70 camera, place it in the palm of your hand, grip the top ribbed section of the viewfinder, and pull up. This will open the camera and lock it into place. The locking bar is on the left side of the camera. If the camera isn't locked when you pull up on the viewfinder, you can slide the locking bar forward to lock the camera open. 

Once the camera is open, it exposes the black rubber bellows built into it. It also exposes the rear viewfinder for focusing, and on the front of the camera, the red shutter release button and the exposure control the camera. I was taught to hold the camera in the palm of my left hand, and with my right hand, I can focus on the camera. 

 Putting the camera up to your eye and looking through the camera, you'll see a split-image focusing screen. A small black wheel controls the camera's focus on the camera's right side. Turn the black wheel back and forth until the subject looks sharp. The split image focusing allows the photographer to find a vertical item, and when out of focus, the line will be split and together in one line when in focus. The camera can focus as close as 10.4" from the subject.

On the other side of the camera is the exposure control wheel. The camera is auto-metering, which is metered by the opening just below the lighten/darken wheel. Generally, you leave this wheel in the center position with half the white or black portion in the middle. 

 If you want the following image to be lighter, move the wheel so more of the white is showing. If you want it darker, turn the wheel so that more black is showing. There is no rule of how much to move the wheel for a lighter or darker image. It's all just a guess. The camera shutter can shoot from 1/175 to longer than 10 seconds.

To open the camera to load the film pack, on the right side of the camera is a button with a yellow sticker, and inside that yellow sticker is a "down arrow." Push that button down, and the front door opens to reveal where the film pack fits. The original film packs were color-coded, so you would line up the yellow, black, and blue sections of the film back to the colors on the film chamber and slide the film pack into the camera. You must press it all the way in so the film door can close. Closing the film door with a fresh film pack in the camera will eject the dark slide from the film pack through a small slot in the film door. The camera is ready to take its first photo when the dark slide or cover is ejected. There is a small window on the back of the camera, the frame counter.

When you take a photo and light hits the film, the camera ejects the film through a pair of rollers on the film chamber door. When the film passes through the rollers, they squeeze the chemicals onto the film, and the photo starts to process.  These need to be cleaned; otherwise, the photo won't be processed correctly after you take a photo. Another issue that dirty rollers can cause is dots on the photo. The dots are caused by dirt on the rollers, and they press into the photo, and the chemicals can't reach that area, causing white dots throughout the photo.

 If you're indoors and there's not enough light to take a photo, a flashbar fits into the slot just above the lens and takes five electronically timed flashes per side of each flashbar. They worked well. All you needed to do was snap the flashbar in the slot, and everything was done for you, except for turning the flashbar after five flash photos.

Flashbar on Polaroid SX-70 camera.

The electronic cable release attaches to two small holes on the camera's right side. The accessory tripod mount would fit on the bottom of the camera, and the accessory holder and close-up lenses would fit into the flashbar holder. 

 To close the camera, slide the locking bar back toward its arrow. The camera will start to close. Press the top down into the body, and the camera will click into the closed position.

A common issue with the SX-70 is the mirror gets locked in the up position, and the camera won't close all the way. You can also tell when this happens when you look through the viewfinder; there is nothing to look at, and the finder is black. The lock-up can be caused by a lack of power from the battery or the film not getting ejected properly, but there's not enough power to cycle the camera. Something you can do to correct this is a bit tricky and not too difficult, but it means taking a small and fragile piece of plastic off the camera to expose the gearing system of the camera. If you're nervous or think you'll break the piece of plastic, DON'T try it.

 On the right side, by the film release button, is a small and thin piece of plastic that you can CAREFULLY pull up at the front of the plastic piece. Some are easy to come off, and some are very tight, so please be careful. Once the piece is off, you can see the gears in the camera's body. The front gear can be turned, which will bring down the mirror system allowing you to view through the camera and cocking the camera. Many videos on YouTube show this process if you are interested. Once the camera's mirror comes down, you can put the piece of plastic back and snap it into place. You'll need a new and fresh film pack to ensure the camera is in good working condition.

My images:

Unfortunately, I didn't buy film before I wanted to write about this camera, and when I looked to purchase some, they were out of stock, so I'm forced to show photos from the late 1970s or early 80s. 

 Here are some of the family photos from the SX-70 camera.


Conclusion:

The SX-70 brings back many fond memories we had with family and co-workers. It's one of the classic cameras made in the 20th century, and I am thrilled to have a good early model in my collection.

 One of the real advantages of the original SX-70 film was the ability to manipulate the images during the processing, which took a minute or so. We'd take different thicknesses of knitting needles and swirl the chemicals around, which would cause a flow in the photo, which was very artistic. The new film doesn't allow for this creativity.

 Thank you for taking a few minutes from your schedule to read about this wonder camera from the 1970s.

 Please feel free to email me if you have questions or concerns. Until next week, please be safe.

 Click on the link to read about the cameras reviewed