GOMZ Malyutka Camera

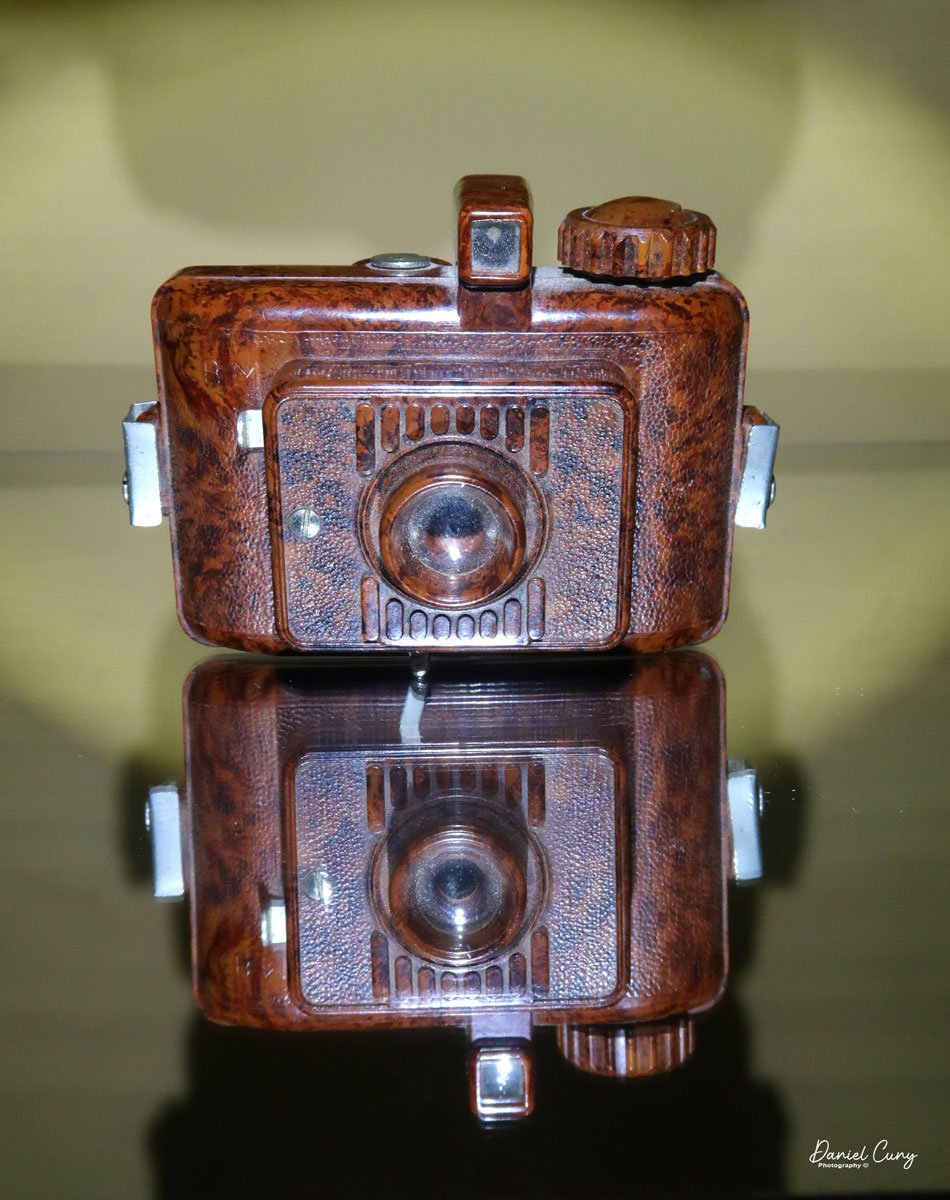
My GOMZ Malyutka camera

It wasn't until later in my camera-collecting career that I developed an interest in miniature and subminiature cameras. It was the more unusual or the odder looking camera items like the pen-shaped Stylophot,  or the round Petal camera, the Twin Lens style miniature cameras like the Gemflex camera, or the miniature cameras which resemble small rangefinder or SLR cameras like the Golden Ricoh 16, where I really enjoyed having them in my collection. They are very unique cameras and items that stand out because they are so different from the larger box, folding, or view cameras. A real advantage of having miniature and subminiature cameras in your collection is the amount of display space they save. You can display many more items and accessories in a much smaller area.

 The GOMZ Malyutka is a camera I purchased around 10 years ago, and I didn't start researching it until about a year ago, when I found out it was pretty rare. I didn't even have it in my display of miniature or subminiature cameras until that time.

 This is another camera I purchase in a group or "lot" of camera in a fairly unknown auction of camera. My real prize and the main item I was bidding on was an early Nikon F body, and tucked in the background was an early Nikon 5cm f2 tick mark lens, which, due to the angle of the lens and the low visibility of people looking, not many people bid on the "Lot", so luckily it was one that I won. There were also other items within the "lot" that I had minimal interest in, but the Tick Mark lens and early Nikon F body were the prize.

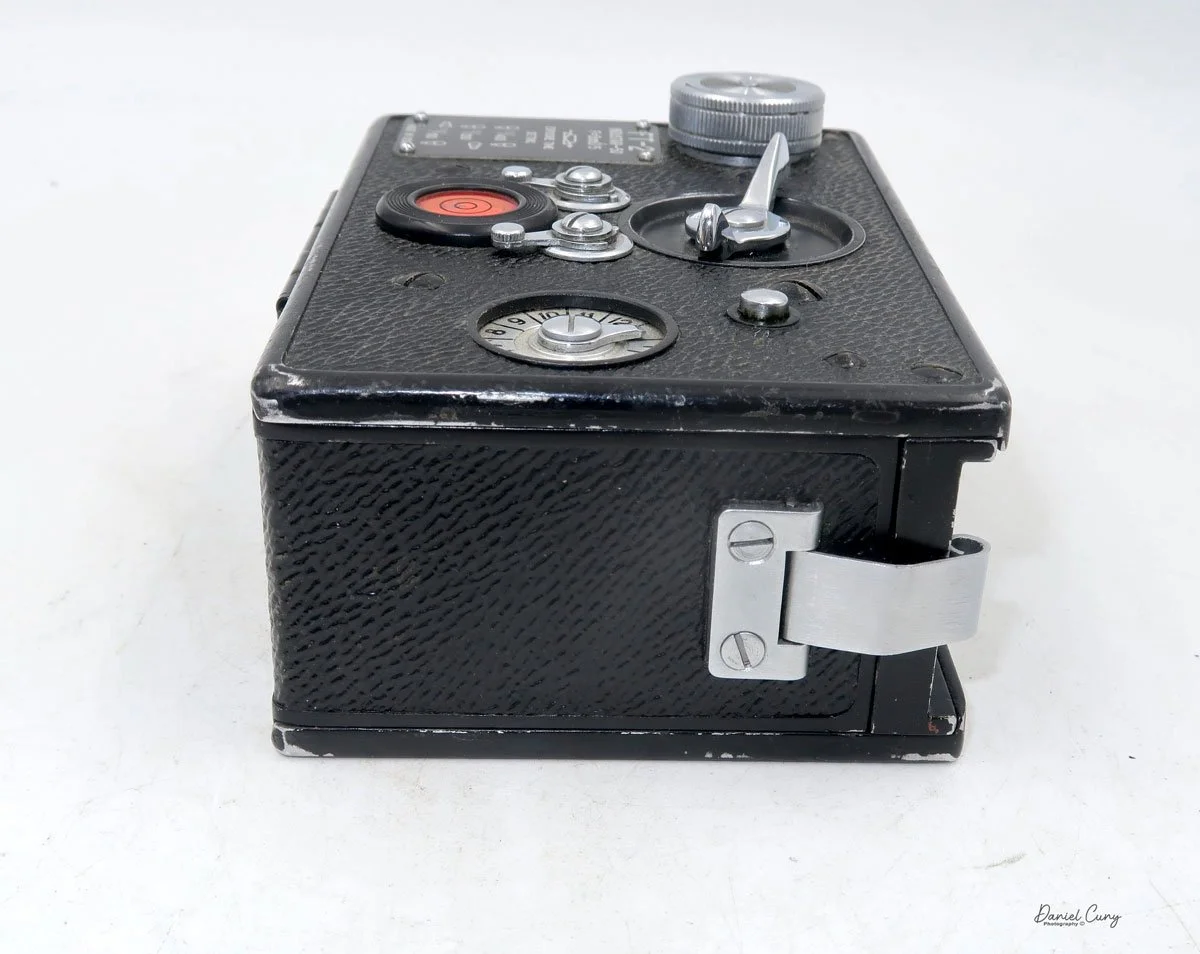
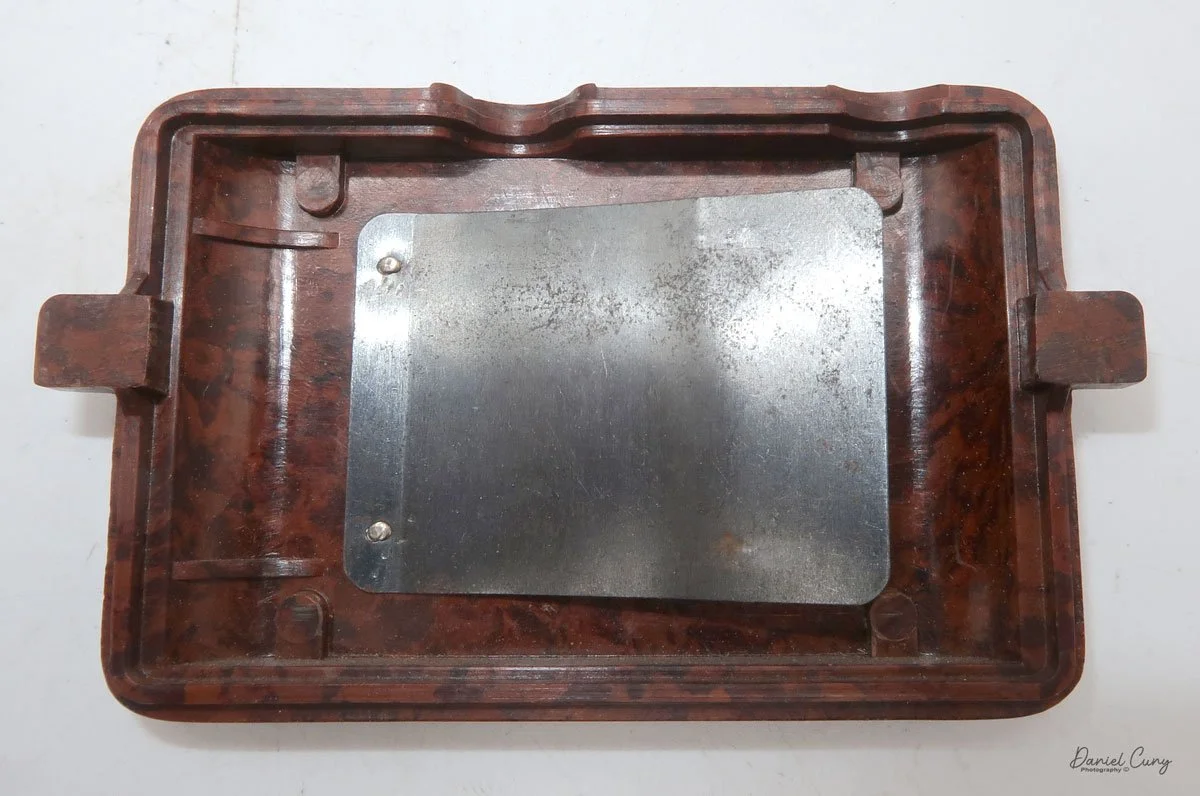
Back side of GOMZ Malyutka camera

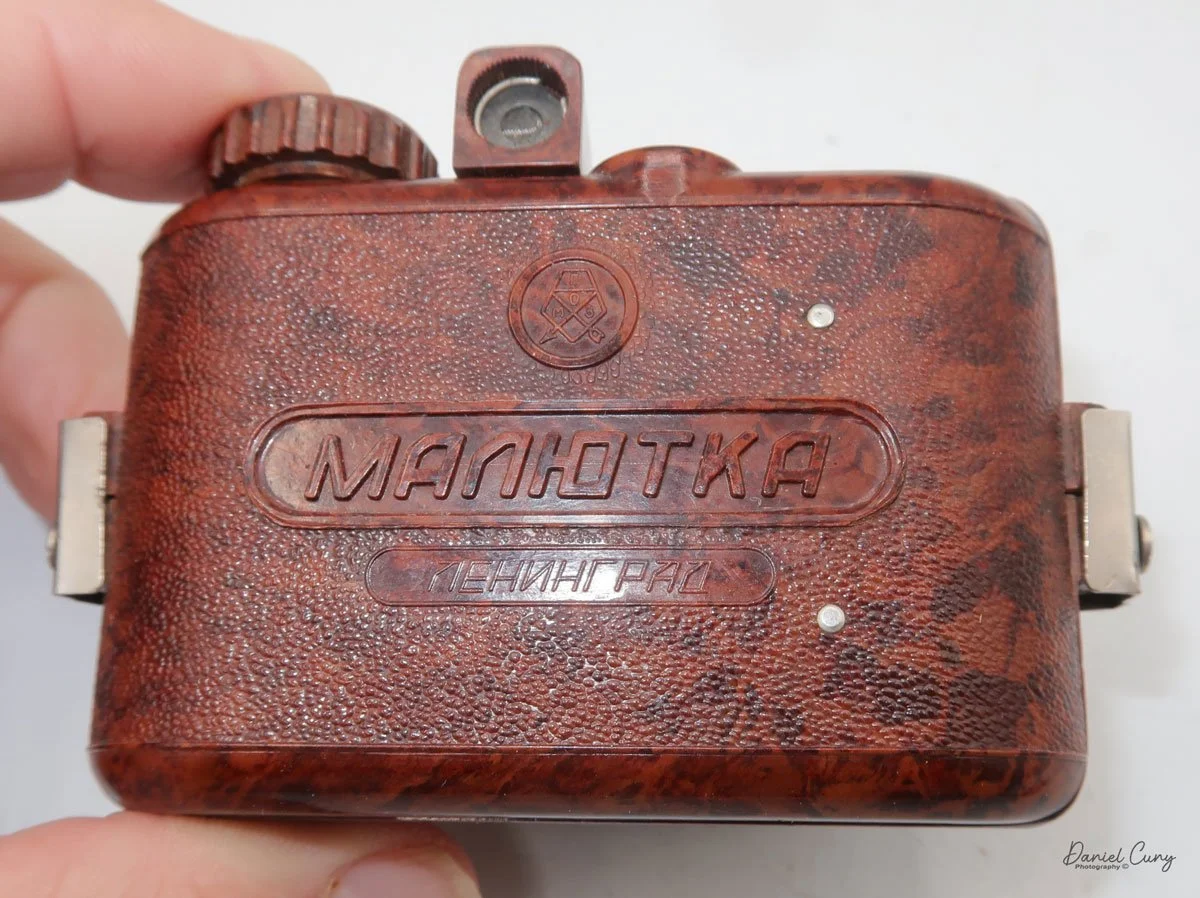
 Once I received the items from the auction, I noticed this really nice brown bakelite camera with Russian Cyrillic writing on the back. As I've mentioned before, I have a love for colored cameras, so when I saw this Gomz Malutka, I thought it was a nice little camera. I put it away, not really giving the camera much thought until about a year ago when I was going through a box of photo items for a local camera show that was selling at. I pulled the Gomz Malutka from the box, and was ready to add it to the items for the sale. Then, as I was inspecting the camera again, I thought it might be a fun camera to write about sometime in the future. I set the camera aside.

 After the camera show, as I returned to my office, I noticed the Gomz Malutka on my desk and started making some basic inquiries about the camera. At this point, I began to see that the camera is indeed somewhat rare, so let's write about it for my blog.

History:

 The history of GOMZ (Gosudarstvennyi Optiko-Mekhanicheskii Zavod), the State Optical-Mechanical Plant, reflects Russia's tumultuous and innovative 20th-century history. Located in Leningrad (now St. Petersburg), the factory was the cradle of the Soviet optical industry, responsible for producing the nation's first mass-market cameras and pioneering designs that predated Western equivalents.

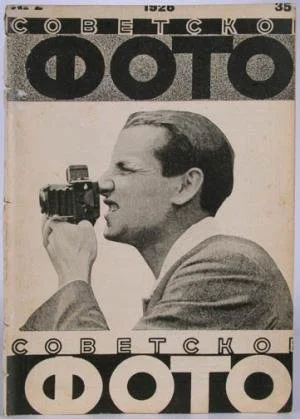
Cover of Sovetskoe Foto (Soviet Photo) Magazine

 The facility began life in 1914 as a French-Russian joint venture to produce optical sights for the military during World War I. Following the 1917 Revolution, the factory was nationalized and underwent several reorganizations before officially adopting the GOMZ acronym in 1932. While it continued to produce military optics, the Soviet leadership demanded a domestic photographic industry to reduce reliance on German imports, pushing GOMZ toward consumer cameras.

 The 1930s marked GOMZ's golden era of innovation. Its first major success was the Fotokor-1 (1930–1941), a 9x12cm folding plate camera. Based on German designs, the Fotokor-1 became the first mass-produced Soviet camera, with over one million units manufactured. It effectively democratized photography in the USSR, serving as the primary tool for documenting the Soviet state's industrialization.

Even more technically significant was the Sport (1937), a 35mm single-lens reflex (SLR) camera. Historians often debate whether the GOMZ Sport or the German Kine Exakta was the world's first proper 35mm SLR. Regardless of the title, the Sport was a marvel of engineering for its time, featuring a vertical metal shutter and a reflex viewfinder that allowed photographers to see exactly what the lens saw—a standard feature today, but revolutionary in the 1930s.
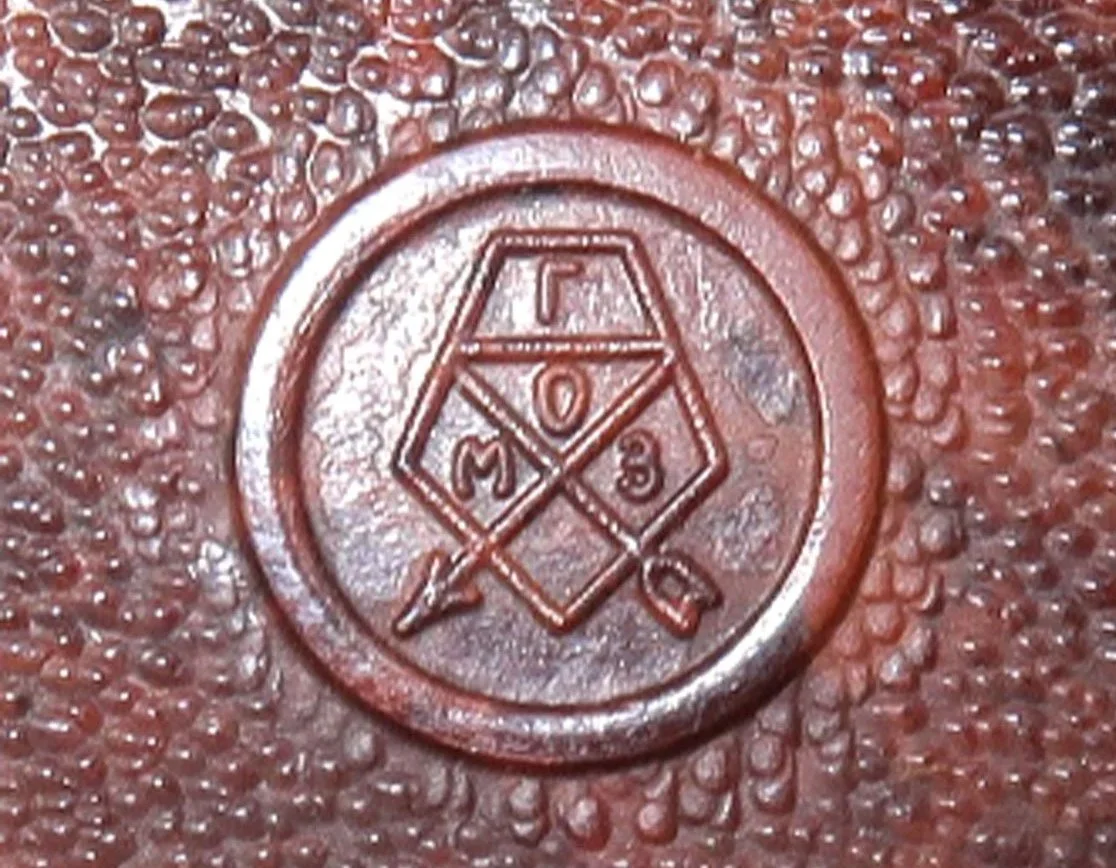
Logo of Gomz camera

 During World War II, the factory suffered heavily during the Siege of Leningrad. Production shifted entirely to military needs, such as sights for tanks and artillery. After the war, GOMZ pivoted back to consumer goods, focusing on affordable, simple cameras for the recovering population.

This post-war period gave rise to the legendary Lubitel series (starting in 1949). Based on the German Voigtländer Brilliant, the Lubitel was a twin-lens reflex (TLR) camera made of Bakelite and later plastic. It was cheap, durable, and capable of producing excellent medium-format images, introducing millions of amateurs to photography. Similarly, the Smena series provided a simple, viewfinder alternative that became a staple in Soviet households.

 In 1965, GOMZ underwent a final restructuring, becoming the Leningrad Optical-Mechanical Association (LOMO). Under this new name, the factory would later produce the LOMO LC-A, the camera that accidentally sparked the global "Lomography" art movement in the 1990s. However, the foundation of this success was laid during the GOMZ era, which transformed a military optics plant into a titan of Soviet creativity and engineering.

My Camera:

 My GOMZ Malyutka is small, measuring  2" wide, by 1.5" tall and 1.5" deep from the front of the lens to the rear of the camera, and it weighs only 2.3 ounces without film. The Gomz Malutka is based on the SIDA camera from Sida GmbH, Berlin, Germany, which was made in the mid-1930s and came in both metal and Bakelite. "Malyutka" (малютка) is a Russian word that means "baby," "little one," or "tiny thing". It is also very similar to a camera made by Gomz,  Liliput camera.

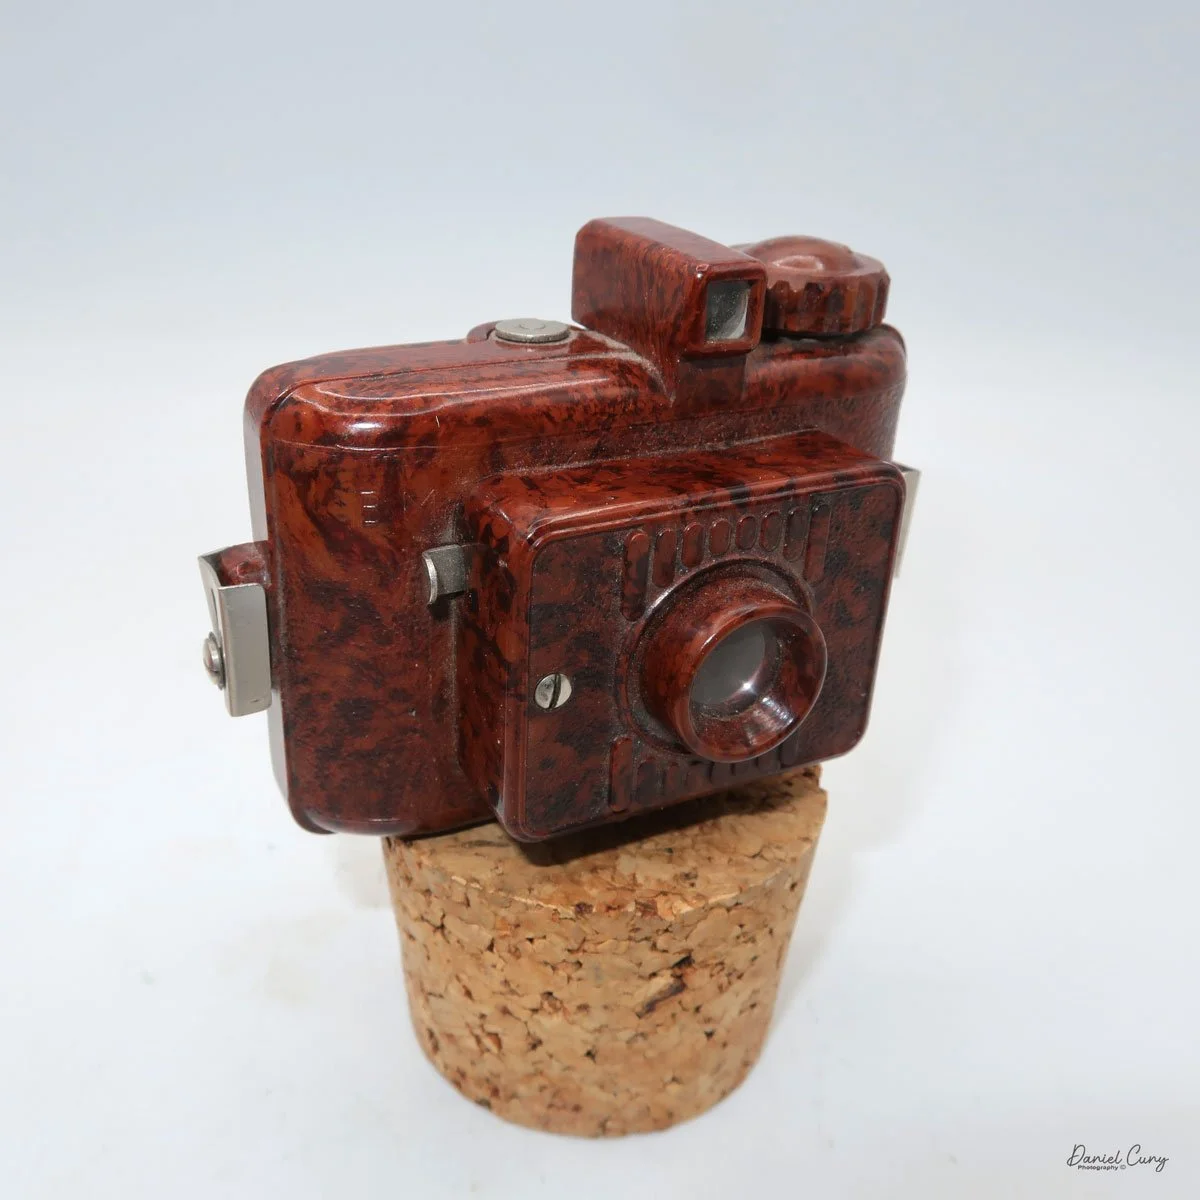
 The camera's controls are very straightforward. There is only the shutter release at the bottom of the camera, along with the shutter control on the right side next to the lens. The shutter control consists of two settings: "M" (moment) for normal shutter speed, generally around 1/50 sec, and "B" for time exposures. Sliding a bar out from the side of the camera makes these settings. Sliding the shutter release under the lens takes the photo. 

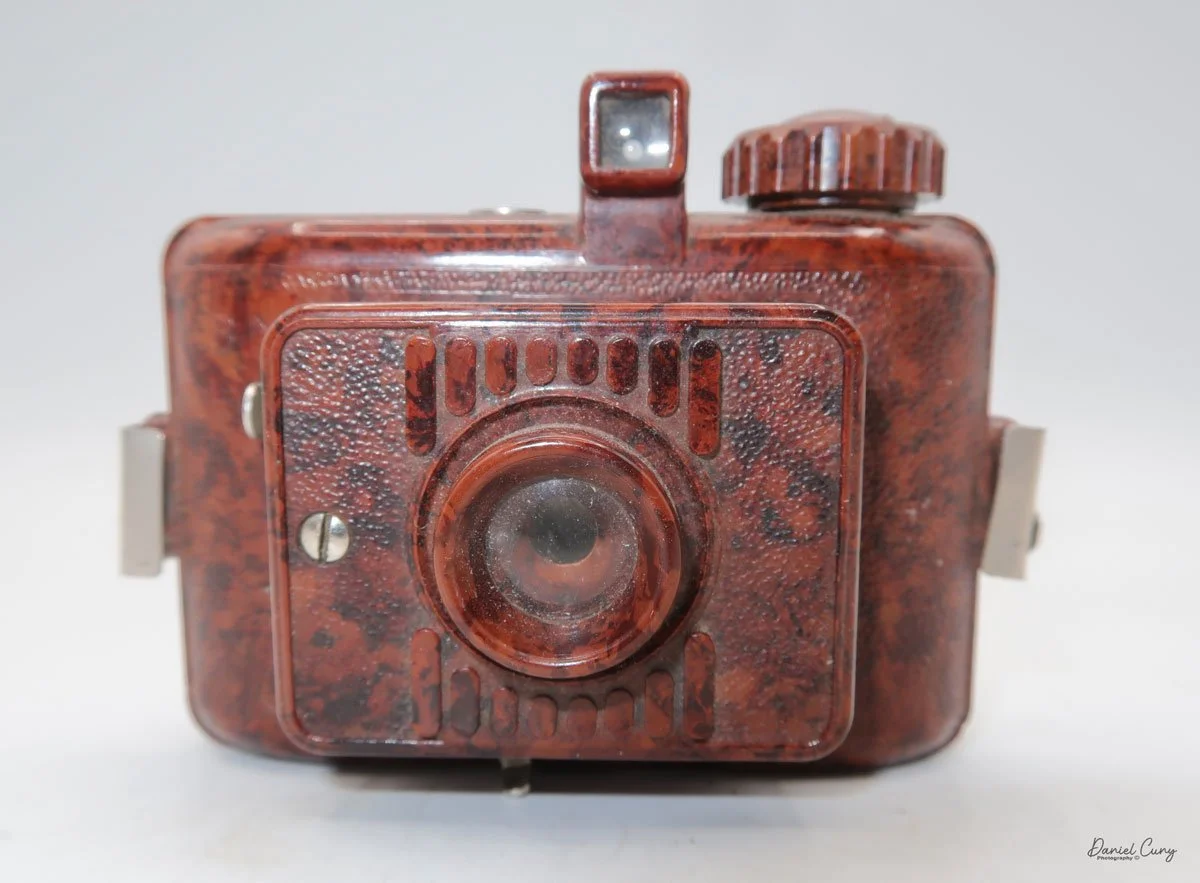
 To open the back of the camera to load film, there are clips on either side that you move to the down position to remove the back. The camera takes Boltax film, a special 35mm film that produces a 24 mm x 24 mm negative. You load the camera similarly to any roll film camera: put the empty spool on the take-up reel side and the fresh film on the opposite side. Bring the leader to the slot on the take-up spool and start winding. Put the back on the camera and slide up the clips to lock it in place. Wind the film and advance it to the first frame.

 There is a small viewfinder at the top of the camera to frame your photo, and a tripod socket at the bottom to steady the camera during long exposures. Also at the top is a small, round metal disk that rotates as the film moves within the camera. Since the camera doesn’t have a red window on the back of the film door, you need to watch the disk rotate a few times to make sure the film is moving inside the camera.

Results:

 Since I don't have any Boltax film, I wasn't able to take photos with the Malutka camera, but possibly in the future, I'll try and use some paper backing I have from a few rolls of 828 film and run some film through it using 35mm to see how the camera performs.


Conclusion:

 The Gomz Malyutka is an excellent small camera that I enjoy having in my collection. It's in fantastic condition and is another color camera that sits proudly amongst the other miniature and subminiature cameras on my shelf.

 Thank you for taking the time to learn about this small, odd Russian camera. 

 I'd love to hear from you. Please get in touch with me if you have questions, concerns, or comments.

 Here's a link to my other Camera Reviews.

 Cuny's Camera and Photo has many cameras I've reviewed for sale, along with other camera and photo oddities. If interested in any items, email me, and I'll offer a nice discount as a friend of the family.

 Until next week, please be safe.


KMZ FT-2 Panoramic Camera

Since I got into photography, I have been a fan of panoramic cameras and images. The ability to see wide views of subjects similar to what you see in person seems very natural, so it's not unrealistic for me to have a variety of cameras to use during trips and other photographic jaunts I take to make images.

My KMZ FT-2 Camera

I came across a Russian-made KMZ FT-2 camera many years ago when I was a sales representative for one of the companies I worked for. I remember visiting EP Levine in Waltham, MA, and seeing the FT-2 and a Spinshot they had. I asked about the Spinshot because, at the time, I knew the Spinshot was something out of my price range. One of the owners gave me a reasonable price on the camera and case because, like many of these cameras, they take a unique film cassette, which this camera didn't have. I knew at that time I was buying it more for my collection rather than using it, but always in the back of my mind, it was something I wanted to put a roll of film into and shoot with. 

The Company:

KMZ (Krasnogorsky Zavod), also known as the Krasnogorsk Mechanical Works, is a prominent camera and optical equipment manufacturer based in Russia. Founded in 1942 in the city of Krasnogorsk, near Moscow, KMZ played a significant role in the Soviet Union's photographic and optical industries. Initially established to support wartime needs, the company shifted its focus to producing civilian products, becoming a key player in developing photographic technology in the Soviet era.

FT-2 camera, leather case and 2 different 3D printed cassettes

 KMZ became widely known for producing cameras and optical devices for civilian and military use. One of its most famous products is the Zenit series of single-lens reflex cameras, which gained a strong reputation for their durability and affordability. First introduced in the late 1940s, the Zenit cameras became popular among amateur photographers and professionals worldwide, especially during the mid-20th century. These cameras were equipped with reliable optics, often branded under the Helios or Jupiter trademarks, known for their exceptional image quality.

Another well-known KMZ product is the Zorki rangefinder cameras, which were modeled after early Leica designs. The Zorki cameras, like the Zenit series, were affordable and accessible, making photography more attainable for the average user. These cameras are now considered collector's items, valued for their vintage appeal and craftsmanship.

 KMZ also contributed to advancements in optical engineering. The company developed lenses for photography, cinema, and scientific applications, as well as optical sights and instruments for military use. The Helios-44 lens, often paired with Zenit cameras, became legendary for its unique bokeh effect and remains highly sought after by enthusiasts.

 Following the dissolution of the Soviet Union in 1991, KMZ faced challenges adapting to a market economy. While the demand for traditional film cameras declined with the rise of digital photography, KMZ continued producing optical devices and exploring new markets. The Zenit brand was revived by introducing modern digital cameras like the Zenit M, which combines vintage aesthetics with contemporary technology.

KMZ's contributions to the photographic and optical fields testify to its innovation and resilience. Despite economic and technological shifts, the company remains a symbol of Soviet ingenuity, with its cameras and lenses appreciated by photographers and collectors worldwide.

The Camera:

The KMZ FT-2, one of the first 35mm panoramic cameras, is a model of simplicity in design. Its bare-bones appearance, resembling a small black brick, belies its robust mechanical construction. The camera measures 4.75" wide by 3.25" deep by 2.25" tall, including the winding knob, and weighs 1 lb. 7oz. The FT-5 boasts a 50mm fixed F5 lens that swings across the curved film plane to produce 110mm long images on your 35mm film. This unique design eliminates barrel distortion, ensuring your horizontal lines remain straight when holding the camera level. However, due to the extended negative size, 24mm x 110mm rather than the typical 24mm x 36mm, you only get 12 images on a roll of 36 exposures, a testament to the camera's straightforward and uncomplicated nature.

 The FT-2 only has 3 shutter speeds: 1/400, 1/200, and 1/100 second. The shutter speeds are set by changing two levers on top of the camera and located just below the shutter cocking lever. The shutter cocking lever is a larger finger and thumb knob, which you turn clockwise to cock the shutter, and it swings back to the starting position at approximately 11:00 when the exposure is finished. A mechanical braking system slows the shutter to these speeds when shooting at the two slower speeds. When shooting at the maximum speed, the camera jolts when the exposure ends and has a reasonably noisy snap when the shutter spins on its axis and comes to a vibrating finish of the exposure. The shutter release is to the right of the shutter cocking knob and just above the frame counter.

Since the camera produces such a long negative, the manual states that you need to turn the winding lever so that the frame counter does three full revolutions around, then add one number to get to the next frame. So, if you were on frame number 5, after taking the photo, you'd turn the winding lever, watch the frame counter go three revolutions around, and then stop at number 6 to be ready for that photo.

Top view of KMZ FT-2 camera where all the controls are located.

 There is no optical viewfinder, but rather a flip-up mask that you put your eye up to and guess that that's the approximate area that will be in your photo. There is a bubble level on top of the camera, so it's easy to level out the photos. This is not so helpful when looking through the viewfinder, but if you use the camera on a tripod or hold it more at waist level, then it makes sense.

 To open the back of the camera to load film, the front of the camera, in both corners, are silver clips holding the back close to the front. Snap these clips out, and holding the back with one hand and the body with the other, you slide the back off the camera. To put the back onto the camera, there are small channels on the body that the back fits into to slide back onto the camera. Make sure the back fits into the channel slide, then back onto the camera, and snap the clips into position.

Using the Camera:

Fast forward about 25 years, and I pulled the FT-2 out of my shelf and started to play with it. The camera is in excellent mechanical shape, so I wondered if there's a way to adapt a regular 35mm film cassette into the camera for shooting with it. Doing my usual looking on the internet to see what advancements have been made, I came across Roger Hyam's website discussing how he had the same camera and  1 set of cassettes. To make the camera more enjoyable, having multiple cassettes would make shooting with the camera more manageable. Since loading the cassettes is time-consuming, he made film cassettes for his FT-2 with a 3D printer. In that article, he has a CAD design and explains the process.

 At this point, seeing that there is a somewhat easy way to get cassettes made for the camera, I looked into buying a 3D printer for this and possibly other projects down the road. While I still may do that, I found a local company close to my house that does 3d printing, Rex Plastics in Vancouver, WA., and Harvey, one of the engineers who does the 3D printing for the company. I called on a Friday to see if they could do this and sent them the CAD file. While Harvey was off that day, I received a call from him early Monday to say that this could be done fairly easily, and they had produced a Minolta 16 cassette and a 126 film cassette someone else needed, so he was familiar with working with film. 

 On Thursday or Friday, I stopped by Rex Plastics to pick up the cassettes I had ordered, which looked tremendous. They fit into the camera and looked like the items I saw online. I took them home and started to load film into the cassettes, only to find that the design I sent had a minor flaw. Once there was film in the cassettes, the amount of film pushed the knob of the spool through the top of the cassette, making it impossible to fit back into the camera. 

 I told Harvey what the issue was and brought it back to him with film inside to show him the issue. Rex Plastics is such a good company that Harvey said it wasn't a big issue and went back and made the spool smaller to accommodate the film capacity and changed the cassette top to accommodate a different spool that fits into the cassette. This took just a few days, and now I had cassettes I could take home and shoot with the FT-2 camera. One thing I did to the 3D-printed cassettes was to add some felt to the inside cassette to avoid any scratches that may happen when transporting the film from one cassette to the other. I took some old 35mm canisters, pulled the felt off them, and taped them into the 3D-printed cassettes with double-sided tape.

Loading the Cassettes:

Here's the process I used to load the new 3D-printed cassettes with film to put into the FT-2 camera. Most of this process has to be done in complete darkness. I used my light-tight changing bag, which I use to load film onto reels for processing, but this time, here are the items I needed to keep in the changing bag.

 2-3D printed cassettes

1 roll of 35mm film (unexposed)

1 piece of tape taped to one of the spools

1-pencil used to wind film

1-FT-2 camera with the back partially off

 I'll break this down into the steps I used. You may find an easier way, but this process went much quicker than I thought and seemed manageable.


  1. Out in the daylight, I took the leader from the unexposed 35mm film and taped it onto the take-up spool. I then took up some of the slack and put it into one of the 3D-printed cassettes. This is what you can do in the light; all the other steps are done in the changing bag.

  2. Put all the items from the above list into the changing bag.

  3. At this point, I wound all the film from the unexposed film into the take-up spool until I reached the end of the roll. To make the winding easier, I put a pencil into the end of the spool and turned the pencil. Do this for step 7, too.

  4. Tear the end of the film of the unexposed film from its cartridge.

  5. Open the second cassette and tape the end of the unexposed film to the spool of the second 3D-printed cassette.

  6. Slide the spool into the second 3D-printed cassette and put it on the cover.

  7. Rewind the exposed film from the first cassette into the second cassette.

  8. Once you feel the leader, stop winding. Now, you have all your unexposed film into the second cassette.

  9. Put both cassettes into the back of the camera. 

  10. Make sure the winding knob is engaged into the first 3D printed cassette and starts to wind, making sure the film is moving across the film path.

  11. You don't need to wind much, just enough to ensure the film is transporting.

  12. Put the back of the camera on the loaded camera and snap closed.


Now, you can open the changing bag, remove the film-loaded camera, and wind it to the first frame, which should only take a few turns.

 PLEASE REMEMBER: When you're at the end of the roll, you don't rewind it back into the cassette like a standard 35mm camera. You take the camera and load it back into the changing bag so you can load it onto your developing tank for processing. If you wanted to wind hard enough to pull the tape off one spool onto the other, you could do that, but that risks exposing the film if you don't tape the cassettes closed.

My Results:

With the camera loaded into my newly made 3D printed film cassettes and the sun shining on a typically overcast November afternoon, there was a chill in the air and a panoramic camera in my hands. I walked through my neighborhood to see what the camera would produce. After taking the photos, I was excited to see the results, so I loaded the camera, developing tank, and reels into the changing bag. I took the film out of the camera, loaded it onto the developing reel, put it in my developing tank, and processed the negatives. 

The overexposed area on the left of the images must have caused a slight light leak. Here's what I produced.

Conclusion:

What a fun camera! I really enjoyed using it. Loading the cassettes wasn't as big of an issue as others I've read about make it out to be if you think about the process. If you have one and need technical or repair information, I found this very informative website, The FT-2 Panoramic Camera Guide.

If you have one and need cassettes, don't hesitate to get in touch with Harvey at Rex Plastics. I'm confident he can print some for you, and they can ship them to you.

Thank you for taking some time from your day to read about this fun panoramic camera that produces excellent images. 

Until next week, please be safe.

References:

The FT-2 Panoramic Camera Guide: https://lens-club.ru/public/files/pdfs/4e9b2081c1c77ede9e70d985d6bacc5d.pdf

FT-2 Camera Manual: https://cameramanuals.org/russian_pdf/russian_ft-2_panaromic.pdf

Roger Hyam’s Website: https://www.hyam.net/blog/archives/10727

Rex Plastics: https://rexplastics.com/3d-printing-and-plastic-product-design