Whitehouse Beacon Cameras

My Whitehouse Beacon cameras

When I was starting to collect cameras, I would collect anything —from straightforward box cameras and point-and-shoot cameras to fundamental bakelite cameras. As you begin to refine your interest in collecting a particular item, the focus becomes a bit more narrow, and the items that you see so often, like Kodak Brownies and bakelite holiday cameras, become less and less interesting. 

 I'm sure that's true with collecting anything. You're always on the hunt for odd, unusual, rare, or exotic items, whether it's cameras, firearms, cars, or sports memorabilia. Once I got over the initial phase of buying "any camera", I started collecting cameras with color to them. Kodak Rainbow box and folding camera, some of the bakelite Imperial camera, Boy and Girl Scout cameras, or even a box camera with odd and unusual faces on them, like the Bear Photo camera, or the Century of Progress cameras. To this day, it's difficult for me not to pick up and look at any colored camera, and I will most likely purchase one if the price is right.

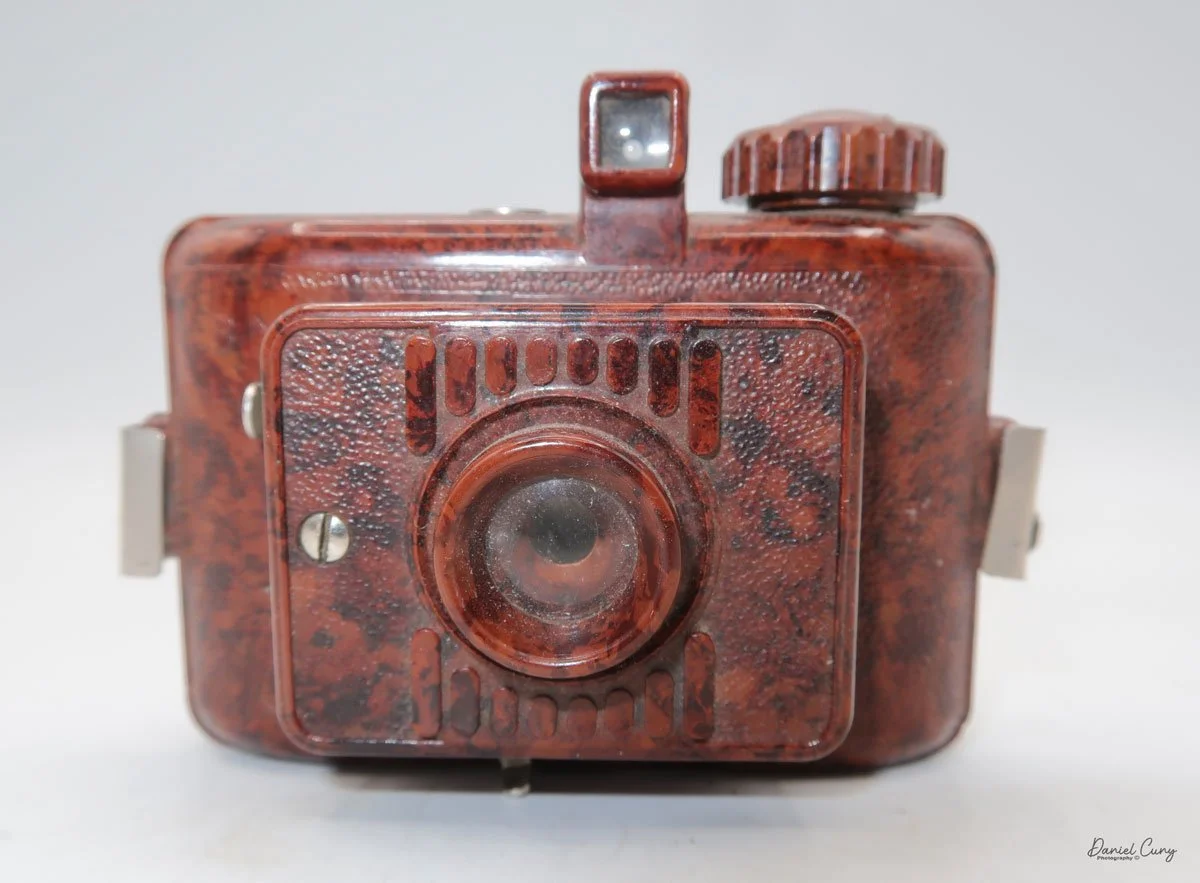
 The Beacon camera was one of the cameras that started in my initial phase of collecting and continued into the next phase of collecting cameras with color. To this day, I can remember walking through a local flea market and seeing a familiar shape of the Beacon camera, but this one was in a different color. I had only owned the black version before, but this one was greenish-turquoise. When the seller quoted a few dollars, I snatched it up right away. The Beacon camera came in traditional black, as well as white, red, and green.

My three Beacons

 I purchased the red Beacon camera well over 35 years ago, when there was no internet, and the only places you could see items like this were at camera shows, camera collecting books, which usually weren't in color, or people selling things at garage sales or flea markets. I remember thumbing through the McKeown's Camera guide, which I had back then. It was considerably smaller, but it did mention whether cameras came in different color versions.

 When eBay launched in the late 1990s, I was an early adopter and joined in 1997. At that time, there were no product photos; only descriptions. It was more of a message board of people buying and selling items. My first number was 1034, this was even before you had a name on eBay. eBay changed the way people collect so many items. The market became flooded with items that were difficult to get before eBay, and their prices dropped. So many antique stores and other retailers were affected by them until they started selling on the marketplace, and it has now become such a vast entity.

 I can even remember starting a similar auction site aimed at the photo marketplace in the early 2000s, and I was going to call it Photo Flea Market, where people could buy and sell cameras, lenses, vintage gear, and even images like prints, Daguerreotypes, Ambrotypes, etc. Try to keep it more focused on one particular industry, but like many ideas, it went by the wayside.

Camera History:

Patent Drawing for Beacon camera

 The Beacon camera was manufactured by Whitehouse Products Inc. of Brooklyn, NY, starting in the late 1940s. My friend, podcaster, and excellent camera blogger Mike Eckman has a tremendous post on the History of Whitehouse Products where he deep dives into a famous woman named Vira Boarman Whitehouse, (Mrs. Norman De R. Whitehouse) who was mainly know as a suffragette leader in the 1920 that had a leather company who employed many women, and who also championed company's to go from a 48 hour work week to a 40 hour week. It's truly a fantastic read.

 Whitehouse Products produced the Beacon line of cameras, along with another simple camera in the 1960s, the Beacon Reflex camera, Automatic 705, and the Autoflash WH 127-A, which Ansco also sold. My favorite Whitehouse camera was the 1970s novelty Charlie Tuna Camera, which I also have in my collection.

 The one thing I can be sure of is that William L Lawson was the designer and inventor of the Beacon camera. I conducted a patent search and identified the initial design of the camera, produced in 1948. It's for the original Beacon camera, which also included two shutter speed settings. The two speeds were either "I" for instant or "B" for bulb, or timed exposures. The later Beacon II model removed the ability to set the shutter speed, as shown on my camera. The original Beacon and later Beacon II models took 16 images on 127-size film, producing a 3x4cm negative. 

 Later in the 1950s, Whitehouse produced the Beacon Two-twenty Five. A larger version of the Beacon and Beacon II, which took 12, 6x6cm images on 620 film. This is the camera I used to produce the images included in the post.

My Camera:

 My Beacon Two-Twenty Five is 4" tall by 5.5" wide by 3.5" deep with the lens extended, and 2.25" deep with the lens compressed into the camera body. It weighs 13.7 ounces. The camera has a 70mm Doublet lens with an aperture of F/8, which would be my best guess, possibly a bit faster. To say this camera has no bells or whistles is an understatement, and there are only a few things you need to do to take a photo.

To load the film, on the right side of the camera is the latch to open the back door. Slide the button down to open the back, and swing the door open to reveal where to load the film. This camera takes 620 film, but there is nothing to help load or unload the film roll from the film chamber. Since I had some 620 film, I needed to force the roll of film into place before I tore the tape off and slid the paper backing across the film plane to put the leader into the take-up spool. It wasn't very easy, but I got it done.

Once the film is on the take-up spool, I wound it until I saw the "start" arrows, then closed the back of the camera. I wound the take-up knob until I saw the number 1 in the viewfinder. The camera is now ready to take the first photo.

 Before taking the photos, you'll need to pull the lens area out of the camera body using the two grips on either side of the lens. Once the lens is pulled out, it snaps or locks into place with two wide silver bars located behind the grip. If you don't pull the lens out, your photos won't be blurry. To take the picture, the chrome shutter release is located on the top of the lens chamber. My guess is the shutter speed is around 1/60 of a second.

Once the photos have been taken, press in the two chrome bars that lock the lens into place at the rear of the camera body, and the lens chamber will slide back into the camera body.

 If you'll be using the Beacon flash attachment, attach the flash once the lens is extended. First, the flash takes two penlight batteries, which fit into the back of the flash attachment. On the back, under the reflector, is a small clip that needs to be pulled back to expose the battery compartment. Close the battery cover, slide the front of the flash unit under the lens chamber, then slide the flash over the top of the camera until it's in place, then screw it into the camera body using the small screw on the back of the flash.

The flash units take either size 5, 11, or 22 flashbulbs. Here's a link to Mike Butkus manual for the Beacon camera and the Beacon flash.

 The camera is fundamental to its functions, but let's take a look at the images it produces.


My results:

 I loaded up a roll of 620 film I keep for camera testing, and took a walk through the neighborhood. Since the day was cloudy, I had to wait for the sun to come out so I'd get better results.

 Here are a few of the images I took.

Conclusion:

 The Beacon did a better job than I anticipated, especially given its simple camera. No focus, shutter, or aperture settings. It's truly a "point and shoot" style camera, specifically designed for family snapshots. The edges are soft, as expected, but overall not too bad.

 I doubt I'll be taking the camera on an important vacation, but my curiosity got the better of me. I wanted to see how it would perform, and it wasn't horrible.

 Thank you for taking time from your day to read about this snapshot camera from the late 1940s, for the original Beacon, to the 1950s, for the Beacon Two-Twenty Five, which I used for the post.

 Here's a link to my other Camera Reviews.

 If you are looking for an odd or unusual photo item, be sure to stop by Cuny's Camera and Photo, my eBay store.

 Until next week, please be safe.

Ensign Ful-Vue camera

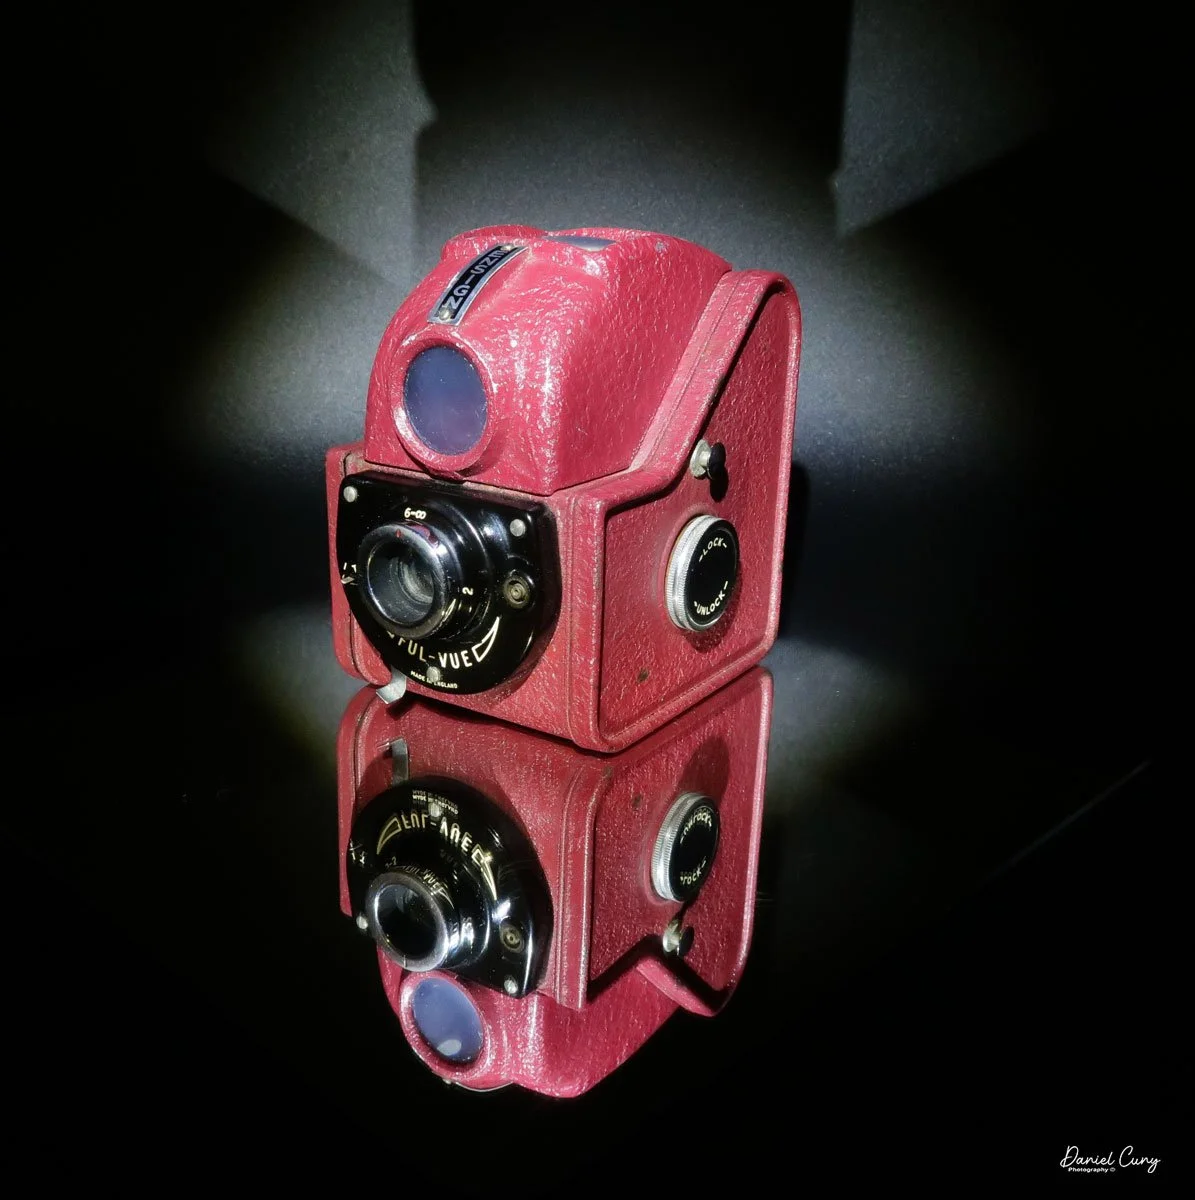
My Ensign Ful-Vue camera

My wife and I were planning a trip back to California, visiting one of my favorite places on earth, Yosemite, and then heading to San Francisco to visit a friend whom we had moved away from nine years ago. We had been going to Yosemite together since before we were married in the mid-1970s, and there are just so many beautiful and memorable events that have happened there. It doesn't matter what time of year you go; there are things to see and photograph that make it a magical place for us to visit.

 As I was browsing through the many cameras on my shelves, I must have had a subconscious desire for the Ensign Ful-Vue camera. As I looked at the camera and thought about Yosemite, I noticed that the shape of the top of the camera's viewfinder resembles the shape of Half Dome in Yosemite Valley. 

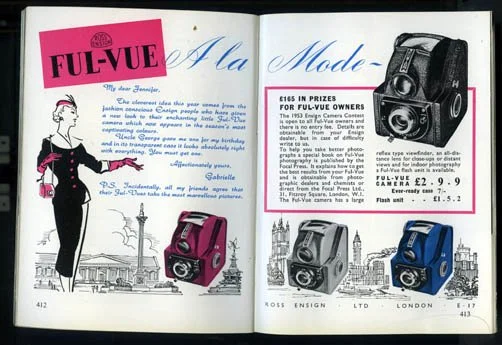
 As I've mentioned in several blogs, I have a passion for colored cameras, so I have two different Ful-Vue cameras in my collection. I have an Ensign Ful-Vue camera that's red in color. Why have a black camera when there are cameras in various colors? This camera was also sold in Black, White, and Blue colors. The other Ful-Vue camera I have is a Ross Ensign Ful-Vue Super in burgundy. The Ross Ensign Ful-Vue Super is a later and more refined camera than the earlier Ful-Vue I took to Yosemite.

The two Ful-Vue cameras in my collection

 It might be fun to put a roll of film into the camera and take it with me to Yosemite. It doesn't take much room in my bag, and I have plenty of 120-size film in my refrigerator, so that's the plan. As I was packing for the trip, I threw a roll of 120 T-Max 400 film, along with the Ensign Ful-Vue camera (a Half Dome lookalike), into my bag and took it with me on the trip.

 Another thought about taking the Ensign Ful-Vue to Yosemite was that the camera is straightforward, and it would be fun to take snapshots of Yosemite as my wife and I walked around the park, taking in all the natural wonders. It would be like I was 8 years old, and I would take my Kodak Holiday camera on summer vacations, taking random photos of the family and other interesting views. 

 That's where my love for photography began, wandering through summer vacation spots with my family, taking photos of the interesting things I enjoyed, and looking back at them to remember the time spent with my family or friends. To this day, I look back at photos with friends that we took when we were younger, and many bring a smile to my face as I recall these memorable times.

History:

 Houghton and Ensign were pivotal names in the history of British photography and camera manufacturing, known for innovation, extensive product lines, and significant contributions to photographic technology from the 19th to the mid-20th century.

French ad for the Ensign Fun-Vue camera

 The roots of Houghton trace back to 1834, when George Houghton, together with Frenchman Antoine Claudet, managed a glass warehouse in London known as Claudet & Houghton. The company initially focused on optical and sheet glass products, but the rise of photography in the late 1830s opened new avenues, with Houghton quickly supplying materials for Daguerreotypes.

 After Claudet died in 1867, the firm became George Houghton & Son, as George Houghton's son joined the business. The family firm steadily expanded, becoming George Houghton & Sons by 1892, and deepened its involvement in the photographic equipment industry.

 By the late 19th century, Houghton was producing a wider range of photographic supplies and had become a full-fledged manufacturer of cameras. Among their early notable products was the Sanderson camera, produced from 1895 to about 1910, which became renowned for its quality. In 1901, they launched the Ensign brand of photographic film, marking the rise of a name that would soon become synonymous with the company's signature camera line.

 In 1903, Houghton introduced Ensign Daylight Loading Film, a crucial development that broadened consumer access to photography. This innovation was followed by the absorption of several other camera firms in 1904, including Holmes Bros. (makers of the Sanderson), A.C. Jackson, Spratt Bros., and Joseph Levi & Co., which formed Houghtons Ltd. This move enabled large-scale production and a wider range of camera selections.

Ad with different colors available

 With their expansion and absorption of other brands, Houghton established the Ensign Works in Walthamstow around 1905. By 1908, it was the largest British camera factory, employing over 700 people. Houghton's reputation was further cemented with magazine cameras such as the Klito and the innovative folding Ensignette.

 In 1915, Houghton's Ltd. partnered with W. Butcher & Sons to form the Houghton-Butcher Manufacturing Company. The merger strengthened their manufacturing and distribution during turbulent times.

 In 1930, Ensign Ltd. was formally established, representing the heritage of both Houghton's and Butcher's. The Ensign Ful-Vue, introduced in 1939, became iconic for its simplicity and bright viewfinder, attracting amateur photographers and children. Throughout the 1930s and 1940s, Ensign was renowned for its box cameras and advanced folding models, such as the Multex.

 World War II brought massive challenges. The company's London headquarters suffered severe bomb damage in 1940. While Ensign continued to manufacture at Walthamstow, the brand's prominence waned in the post-war years.

 From its origins in optical glass to producing some of Britain's finest and most popular cameras, Houghton and Ensign chart a history of adaptability, invention, and a lasting impact on the UK photographic market.

My Camera:

 My Ensign Ful-Vue is 4" tall by 4.25" deep and 3.25" wide, and weighs 14.2 ounces, so not even a pound. It's viewfinder on top is one of the dominate features of the camera. The size of the viewfinder itself is 1.5" square on the top of the camera, and with the camera being the small stature it is, makes the viewfinder seem huge when looking at the camera.

The Ensign Ful-Vue camera is the epitome of the classic snapshot camera, as there are really only a few settings on the camera that you need to make before snapping the photo. There is a shutter setting for either "I" for instant or "T" for time, allowing for a longer exposure. There is a tripod socket on the bottom of the camera, but there is no cable release socket available for use if you want to make a timed exposure with the camera.

 The other setting in the Ensign Ful-Vue camera is focus. The lens is set to three different focus distances: 2 meters, 3-5 meters, and 6 meters to infinity. Turn the chrome rig and point the red dot on the front of the ring to the desired distance to set your focus distance. There is a separate flash PC outlet to connect an external flash, ideal for low-light photography. The flash would have to be screwed into the tripod socket, and it would be located on the left side of the camera, I guess.

To take a photo, the shutter release is located below the black nameplate, where the lens is positioned, and is pulled up to activate the shutter in the camera.

 Loading the film is pretty straightforward on the Ensign Ful-Vue. On the left side of the camera is a locking lever that you turn clockwise to unlock the film chamber from the camera body. Once the film back is unlocked, the film chamber slides out of the camera body. Once the film chamber is removed from the camera body, you load the camera like any other roll film camera. Just ensure the film covers the larger area, rather than the thinner area closer to the lens.

 Once the film is loaded into the film chamber, slide the chamber back into the camera body and secure it in place by turning the locking ring counterclockwise to lock it into position. On the right side of the camera is the camera's film advance knob. Turn the knob until you see the arrows inside the red window on the back of the camera. 

Just above the red window on the back of the camera is a small knob that opens and closes the curtain, preventing light from coming through the red window. Make sure the curtain is open so you can see the film advancing. If you don't, you'll wonder when it will get to number one and go through the entire roll of film before noticing something is wrong. Once you see the arrows, slow down because you're coming to number one and your first exposure.


My Results:

 The Ensign Ful-Vue was a great camera to take to Yosemite, although looking back, the one thing I wish I had taken was a comparison photo of the Ensign Ful-Vue and Half Dome. I should have taken a picture with my phone of me holding the camera up with Half Dome in the background to show the comparison between the two. Like they say, hindsight is 20/20.

 The camera actually did pretty well. The photos are relatively sharp, the viewfinder was HUGH and bright to look through. 

 Here are a few examples of the photos in Yosemite and San Francisco.

Conclusion:

 The camera was what I expected. The viewfinder was very easy to work with and made centering the image easy. The only thing I wish the camera had that I was surprised it didn't have was the ability to use different aperture settings. Generally, even the most basic of cameras offer the option of two different apertures. Not on the Ensign Ful-Vue, though.

 Thank you for taking the time to read about this very basic, but oddly shaped camera. It was fun to throw it in my camera bag and have something fundamental to use at times.

 Here's a link to some of my other Camera Reviews.

 Stop by Cuny's Camera and Photo if you're interested in purchasing some of the cameras I've reviewed. I also have many other photo odds and ends that interest you.

 Until next week, please be safe.

Ricoh Auto Half Camera

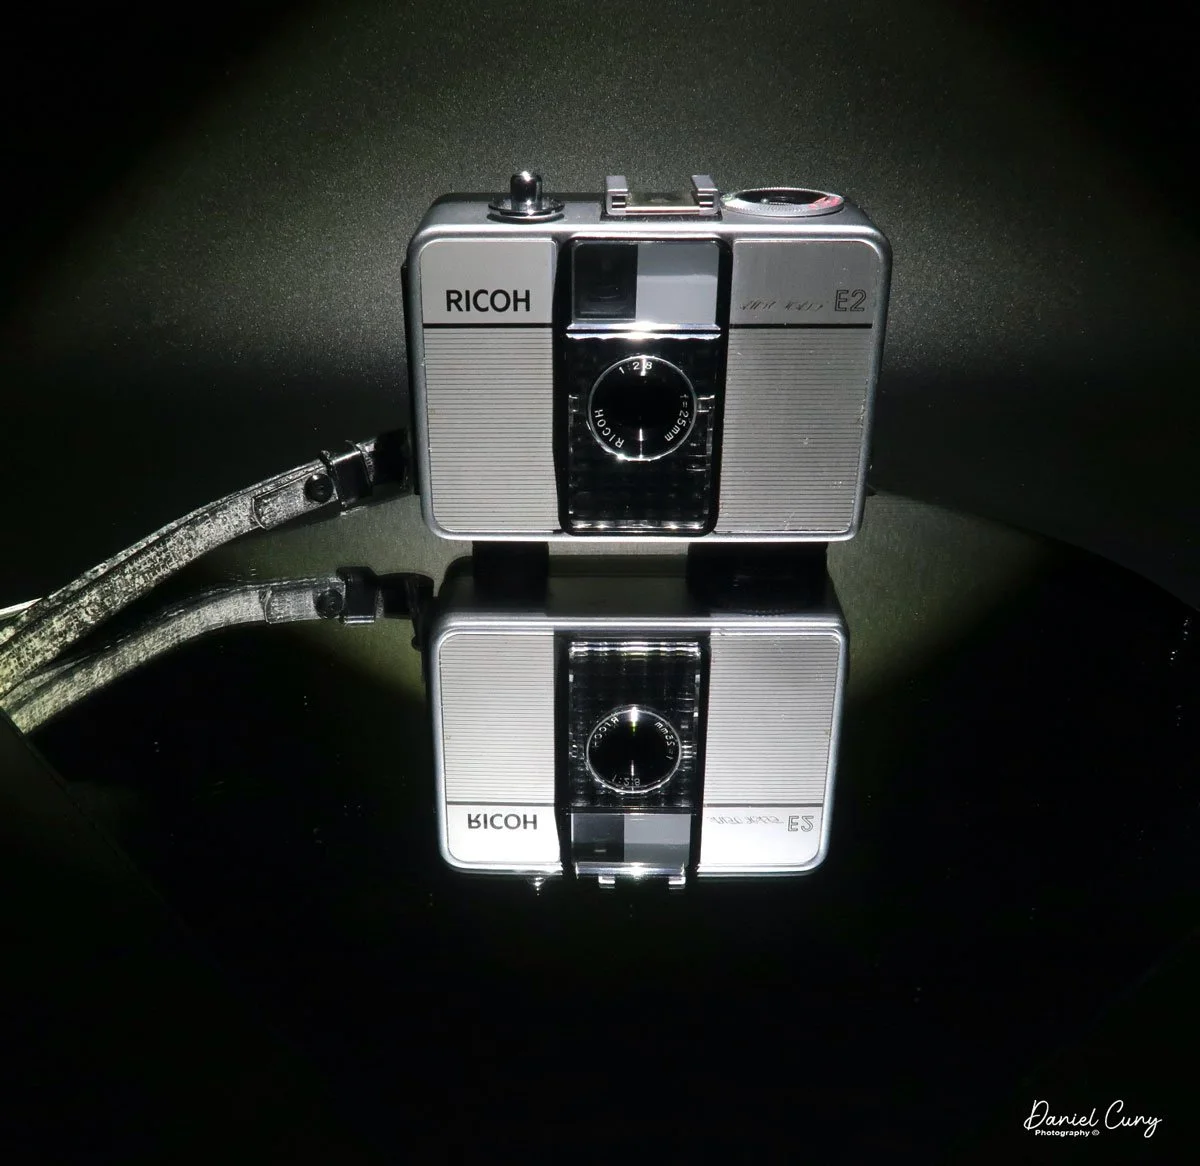
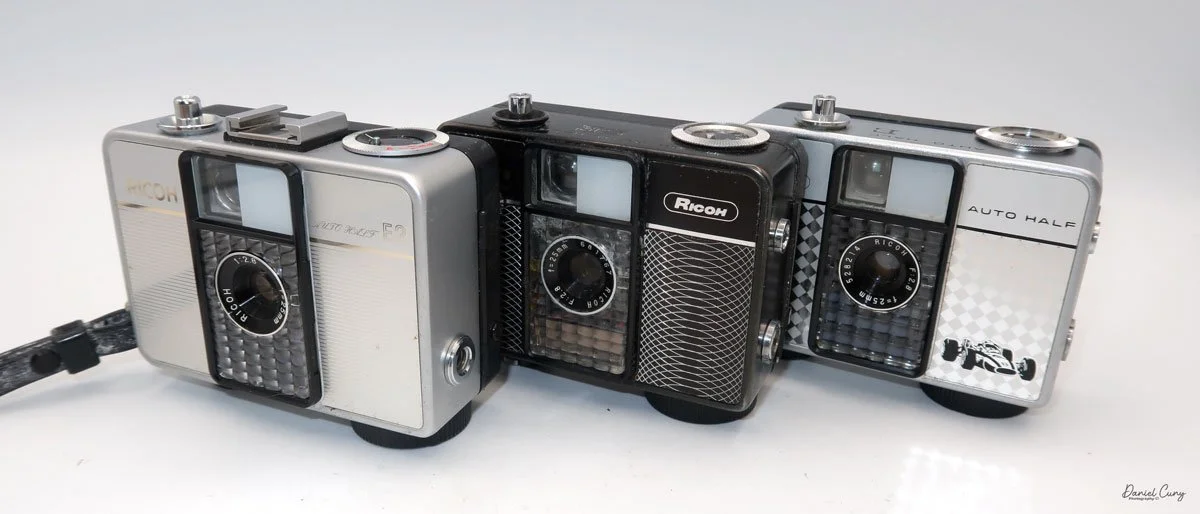
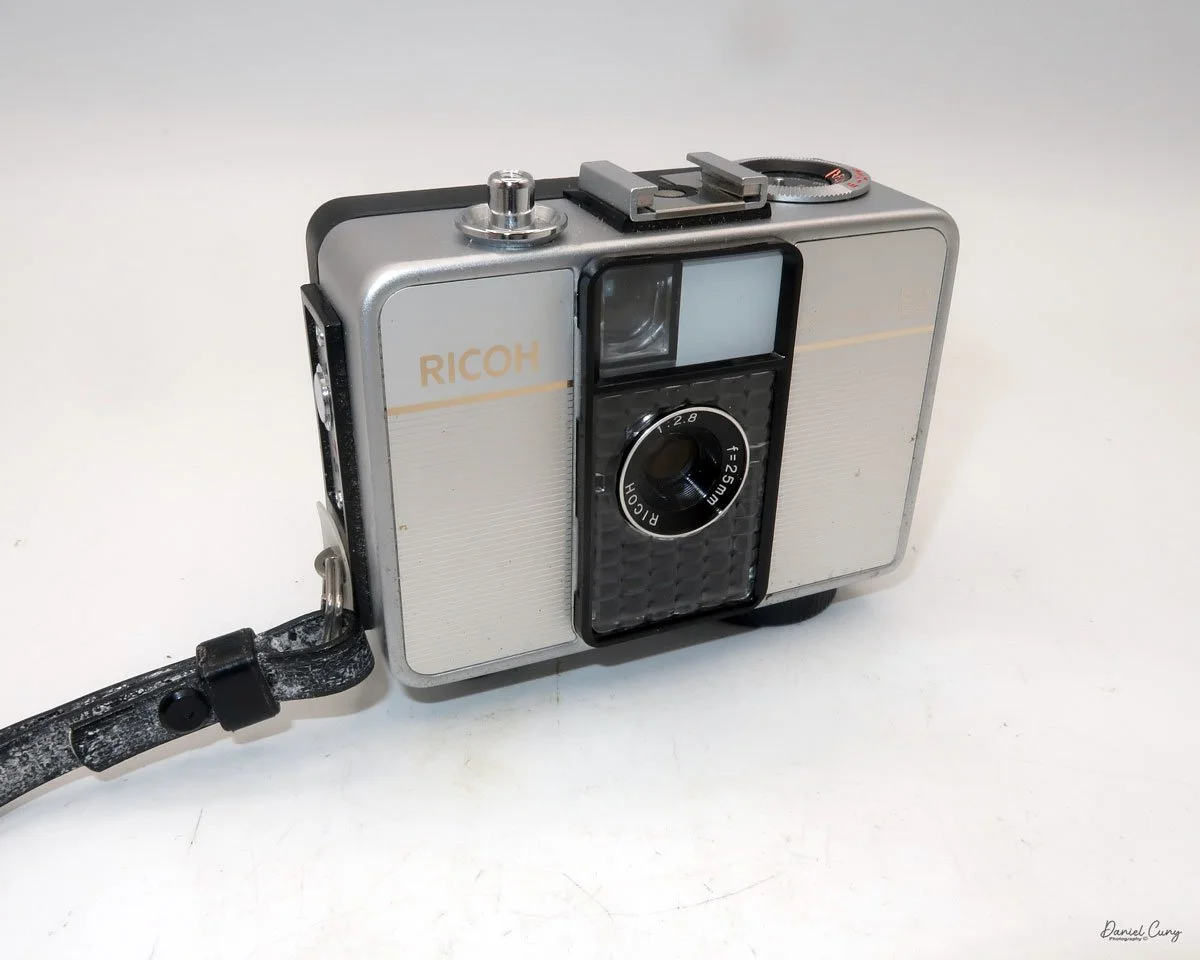
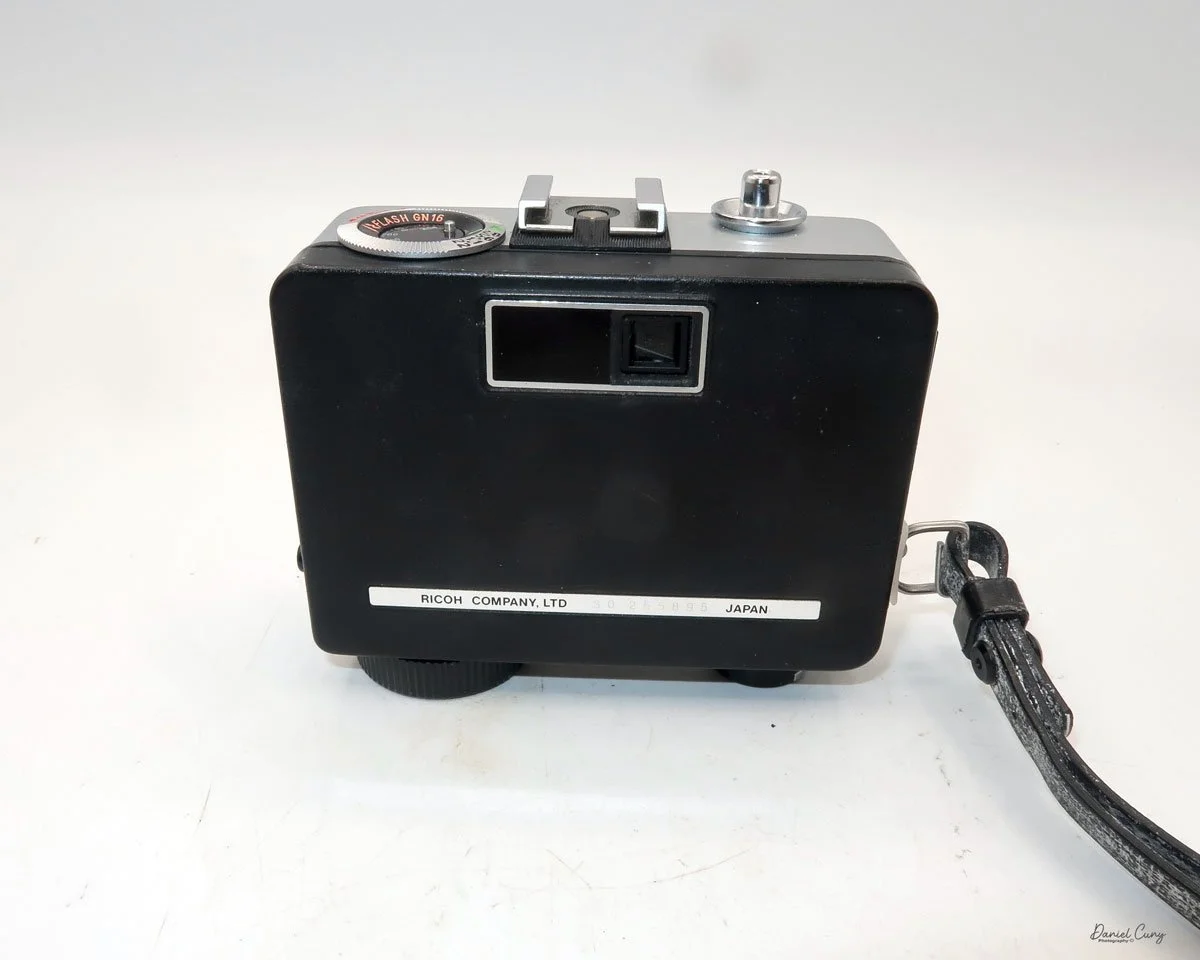
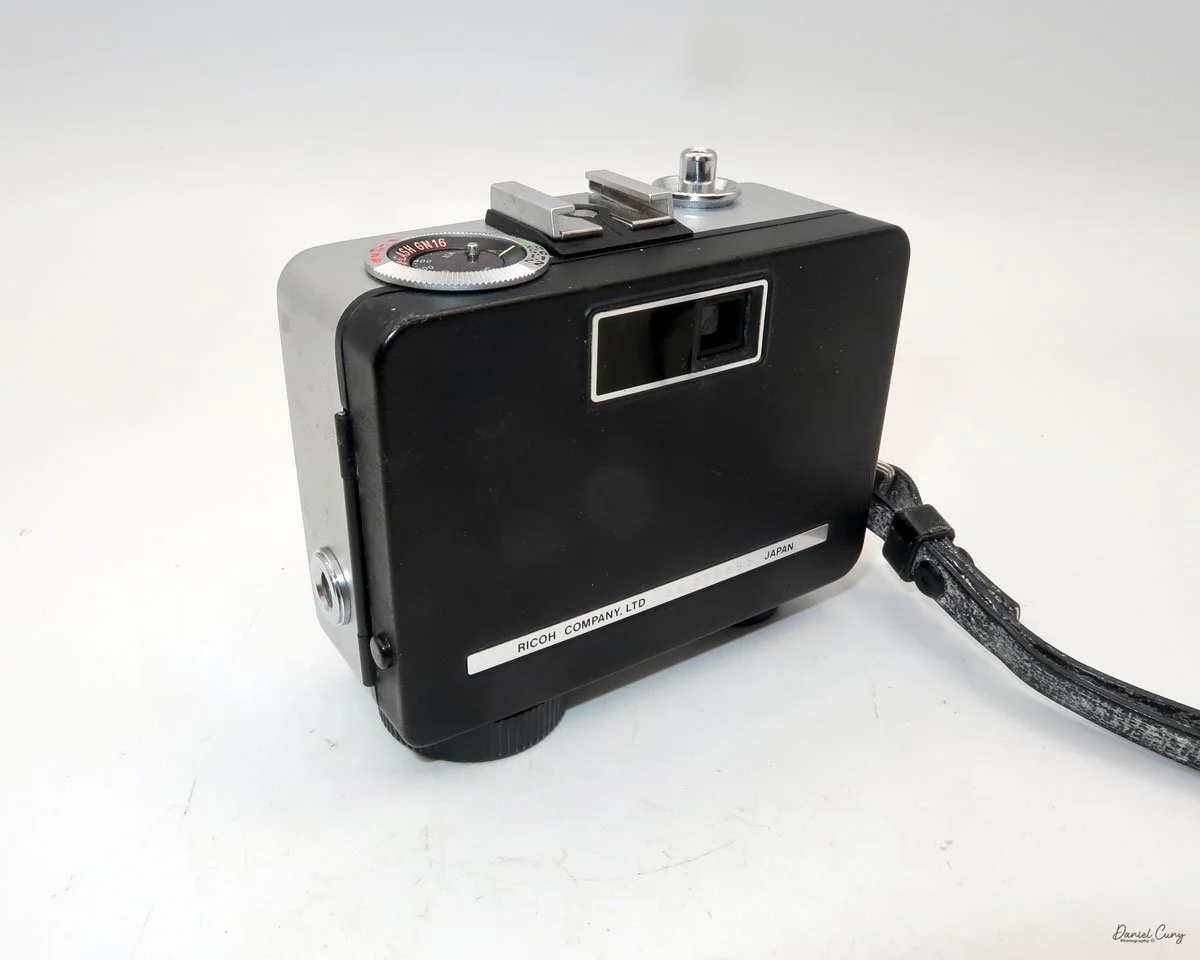
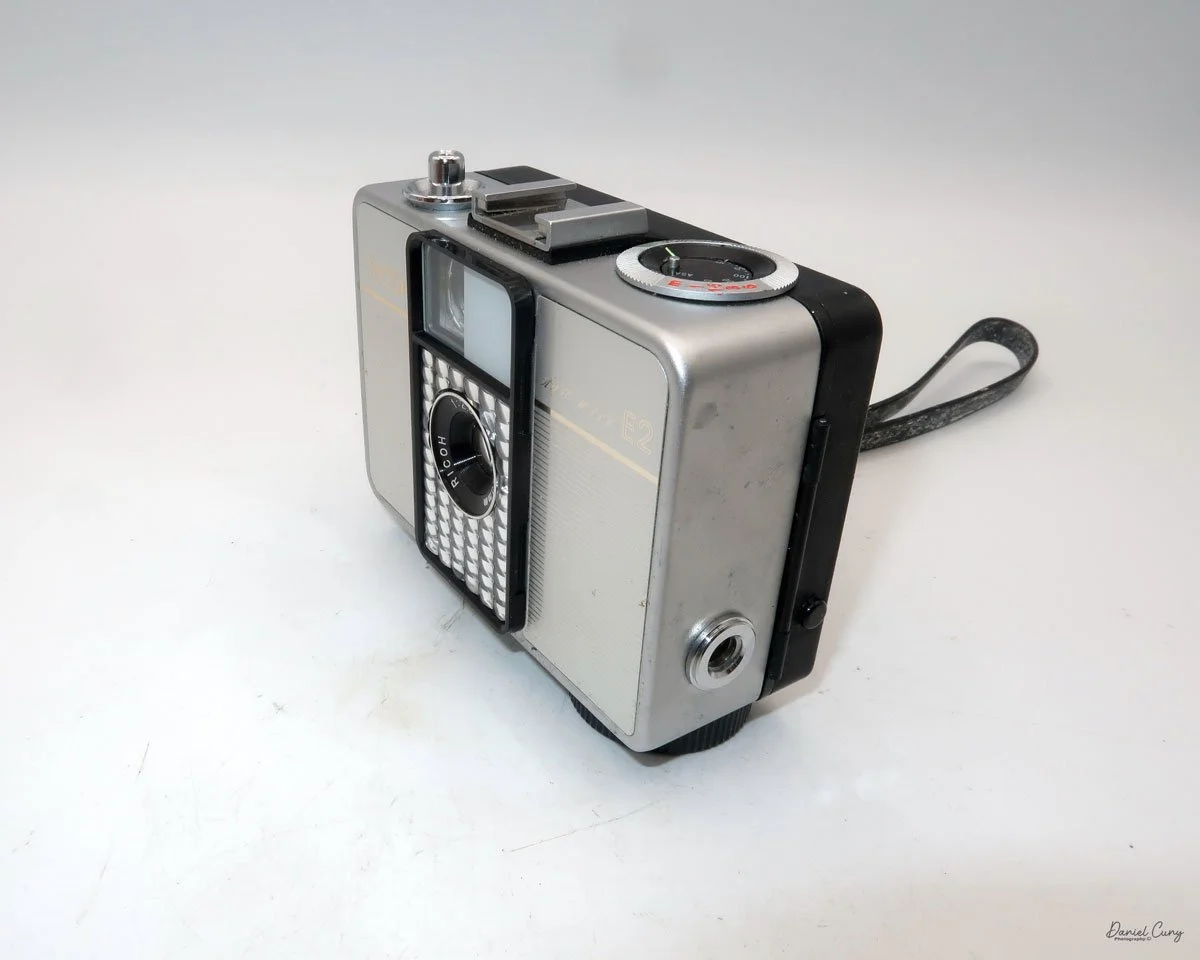
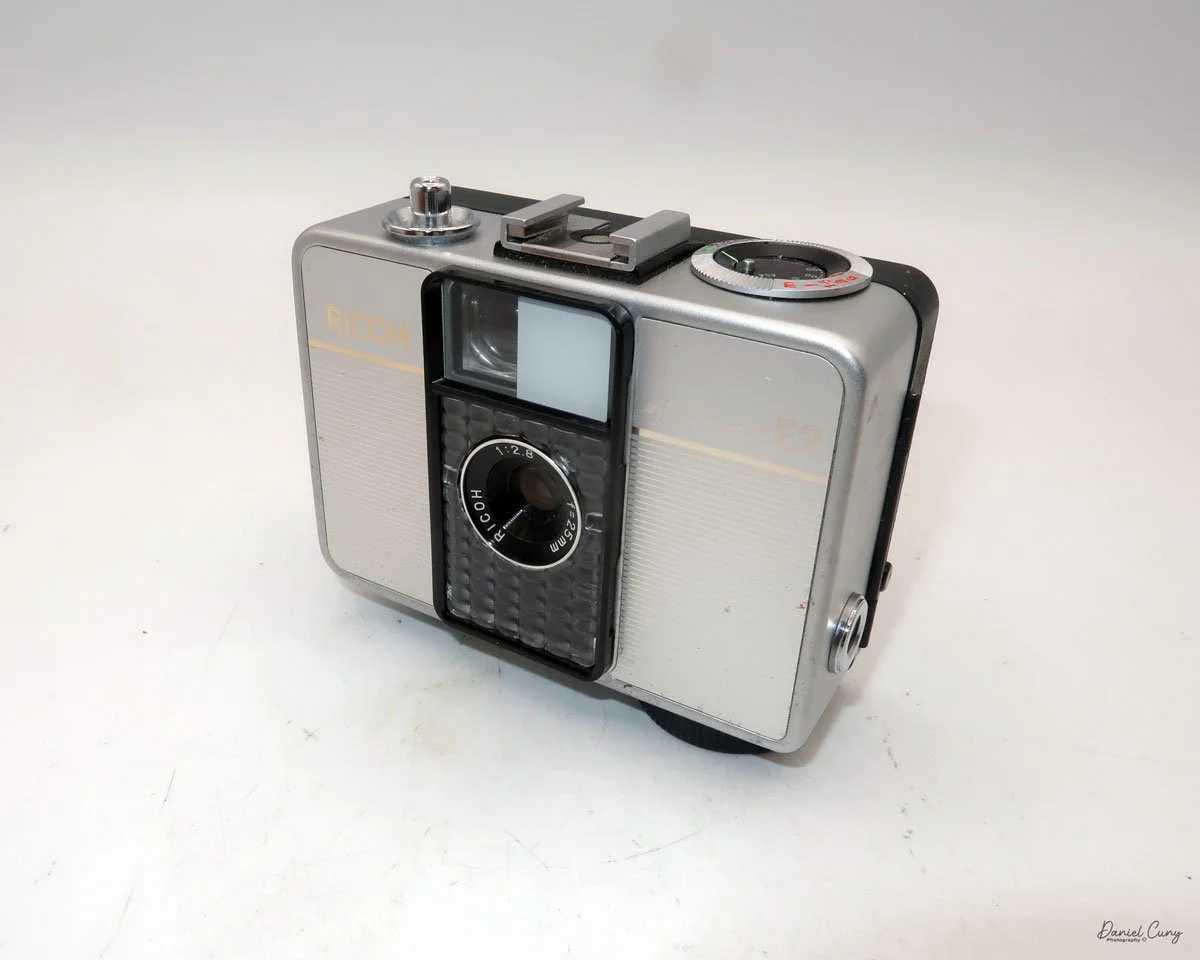
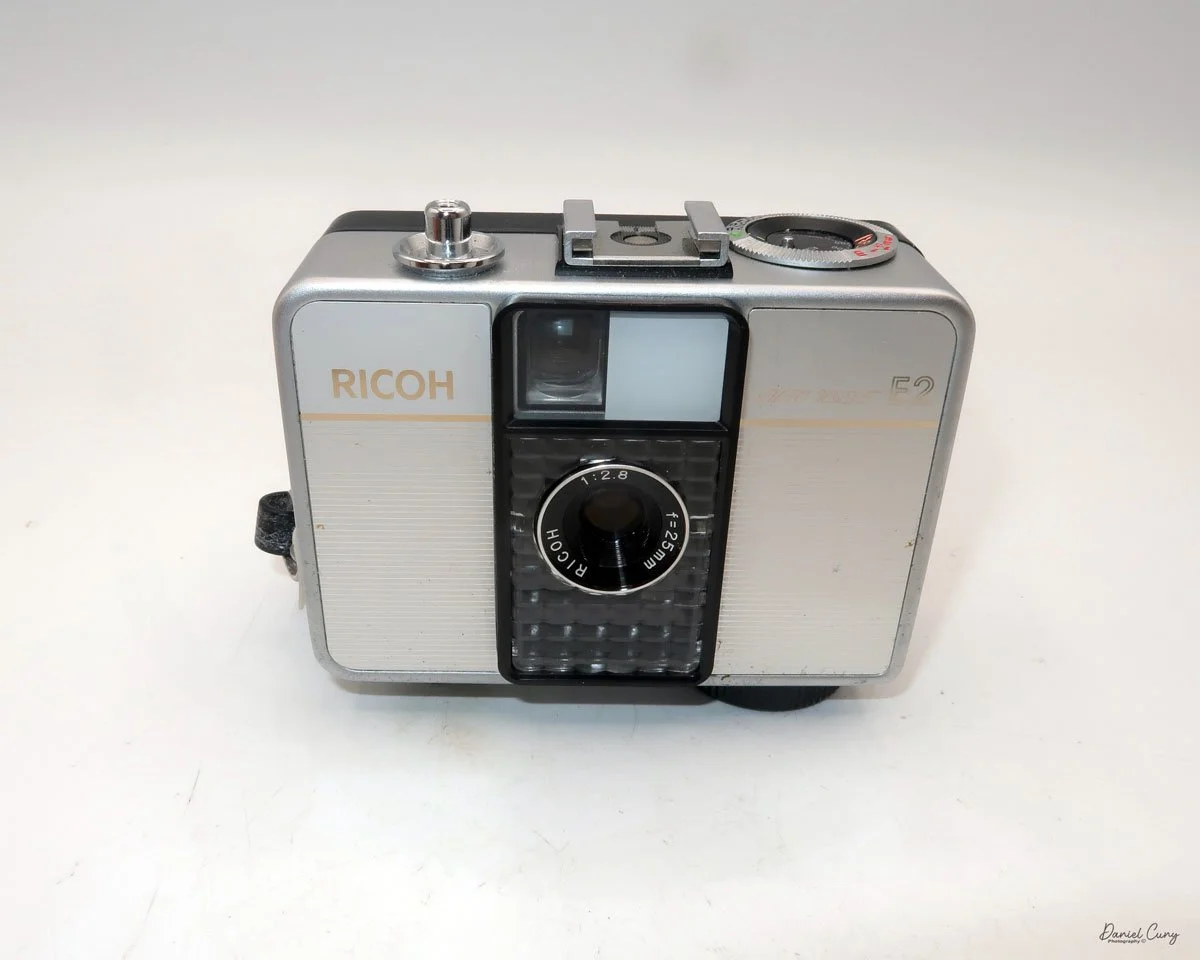
My Ricoh Auto Half E2 camera

The 1960s were a tumultuous time—a wild era—for politics, art, social change, music, and design. Having spent my early and informative years during this time, I was witness to some remarkable events that shaped the world, which I'm happy to say I lived through.

 There were the Beatles, who upended the music world; marches and protests against the war in Vietnam and civil rights; and Jackson Pollock and Andy Warhol, who were taking the art world by storm. It seemed like every month, there were issues and events in the news that shaped the world.

 In the photographic and camera design fields, in my opinion, one of the more artistic and interesting products to emerge from the 1960s was the Ricoh Auto-Half camera—a straightforward camera that underwent several model changes, keeping the design fresh for almost 20 years.

 The Ricoh Auto Half camera was introduced in December 1960. For the period, the camera was very compact and lightweight, a half-frame 35mm camera with automatic exposure, no manual focusing, and automatic winding. The size of the camera was compared to a pack of cigarettes.

 Not only were there several different model changes and improvements, but the design style, to me, was the item that kept the camera fresh. The original Ricoh Auto Half camera was available in a bright silver color and featured a wrist strap. However, later in the 1960s and well into the 1970s, the camera took on many different colors and geometric designs, which were very popular during this timeframe.

My three Ricoh Auto Half cameras

 Some of the cameras were black with a white geometric pattern on the front, like one of the models I have. Later in the production cycle of the cameras, the production became bolder and more intricate, which kept pace with the signs of the times.

 There was a yellowish-green checkerboard pattern, or some cameras had brown vertical stripes or a wavy pattern, while others had outlandish red and blue colors that appeared to create a dome pattern on the front of the camera. One of the models I saw was named "King Gold," which is a gold color camera with an interesting pattern on the front. Some have a filigree around the border, or a train or race car on the front. All of these models are just fascinating to me, and one of the main reasons I wanted to write about them.

 I own three different models of the Auto Half cameras. I have an Auto Half E model with a diamond pattern and a Formula 1 race car on the front. I have a Black Auto Half SE model with a swirly pattern on the front, and the camera I used for the post was an Auto Half E2 in superb working condition.

I own three different models of the Auto Half cameras. I have an Auto Half E model with a diamond pattern and a Formula 1 race car on the front. I have a Black Auto Half SE model with a swirly pattern on the front, and the camera I used for the post was an Auto Half E2 in superb working condition.

History:

Ricoh's journey into the world of photography began not with cameras, but with sensitized paper. Established in 1936 as Riken Kankoshi Co., Ltd., the company quickly leveraged its expertise in optics, venturing into camera production just a year later in 1937. This early period laid the groundwork for a legacy of innovation and accessibility in the photographic industry. The company, which would be renamed Riken Optical Co., Ltd. in 1938, introduced its first camera, the Olympic Four, in 1939. This simple folding camera marked its entry into a competitive market.

Japanese ad for Ricoh Auto Half camera

 The post-war era proved to be a transformative period for Ricoh. A pivotal moment arrived in 1950 with the launch of the Ricohflex Model III. This twin-lens reflex (TLR) camera was a game-changer. By implementing a revolutionary belt-conveyor system for mass production—a first in Japan's camera industry—Ricoh was able to produce the Ricohflex III at a remarkably affordable price. This move single-handedly democratized photography for the Japanese public, transforming cameras from a luxury item into an accessible consumer good. The Ricohflex III became a massive commercial success, reportedly capturing over half of the domestic market share at its peak and cementing Ricoh's reputation.
 Building on this momentum, Ricoh continued to innovate throughout the 1950s and early 1960s. The company introduced the Ricoh 500 in 1957, a popular 35mm camera notable for its user-friendly features. However, it was the Ricoh Auto Half in 1962 that truly showcased the company's forward-thinking design philosophy. This remarkably compact and lightweight half-frame camera was fully automatic, with automated exposure, focusing, and film winding. Its purse-sized dimensions and ease of use made it a massive hit, particularly with female consumers, and it became a global success.

 These formative years were crucial in shaping Ricoh's identity. From the mass-produced Ricohflex that brought photography to the masses to the stylishly simple Auto Half, Ricoh's early history is a story of creating high-quality, innovative cameras that were not only technologically proficient but also thoughtfully designed for everyday users. This foundation of accessibility and user-centric innovation would continue to define the company for decades to come.

My Camera:

My Auto Half E2 model camera is 3.5: wide, by 3" tall, by 1.5" deep, and weighs 11.9 ounces. The camera is a 35mm half-frame camera that takes a vertical image of  24x17cm on 35mm film. The camera features a fixed focus 25mm F/2.8 lens, which is typical for half-frame cameras.

The Auto Half camera incorporates a selenium cell metering system, which on many of these cameras isn't working due to the age of the selenium cell. It can no longer meter the light, but fortunately, I have one in excellent working condition. The selenium cell is located around the lens. The aperture has a range from F/2.8 to F/22. 

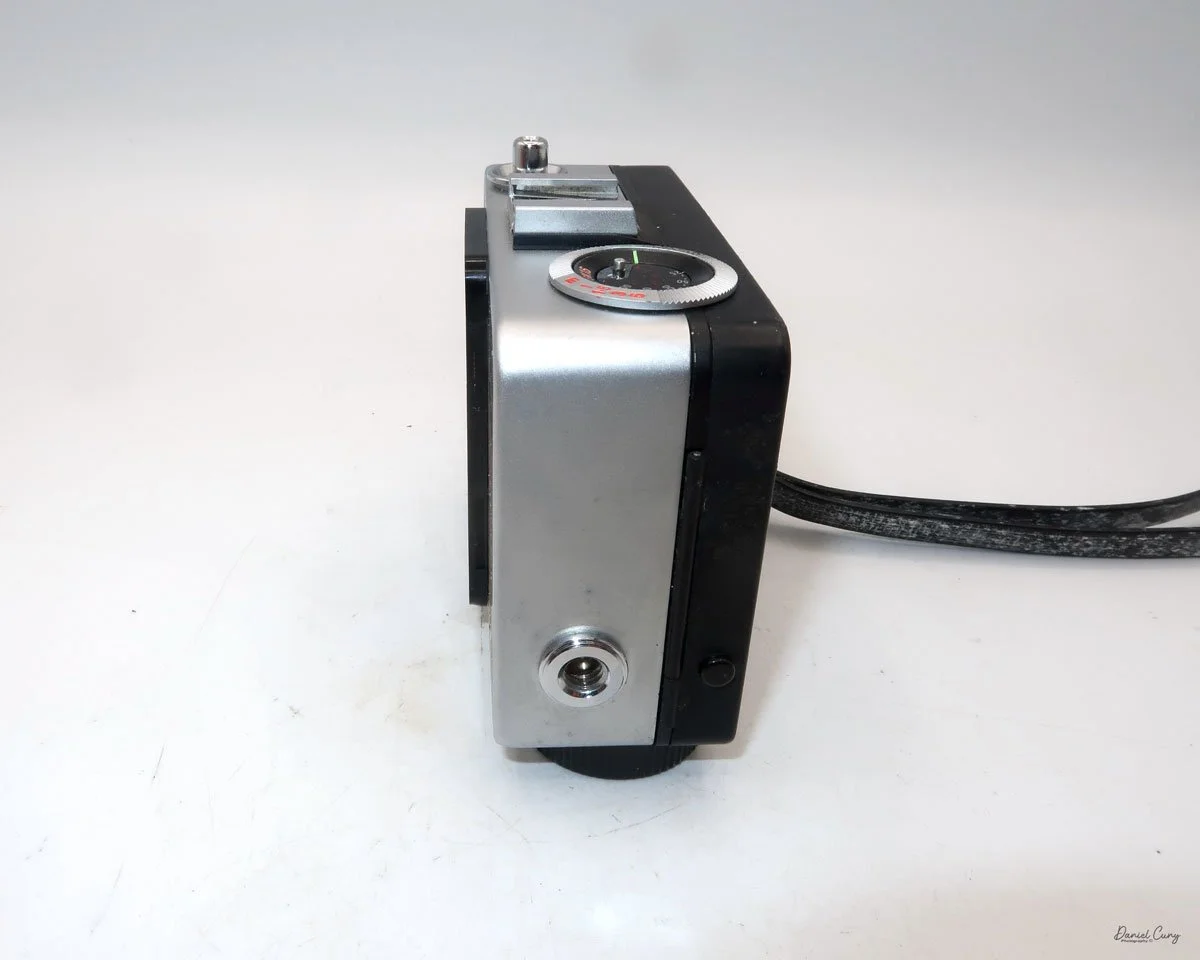
 The ASA (ISO) range for the film speed on the Auto Half camera goes from 25 to 400. The ASA is set on a dial located on the top of the camera.  The other setting on the dial is for "A" or automatic aperture. There are aperture settings on the dial, but these are for flash settings.

The metering is done automatically and sets the aperture to achieve the proper lighting for the subject you're pointing the camera at. When in the "A" or automatic mode, the camera sets the shutter speed to 1/125th and sets the aperture. When you use a flash, the shutter is set to 1/30th of a second, and then you manually set the aperture depending on the distance to your subject.

 According to the Auto Half manual, the only indication that the camera's lighting will be set automatically is a yellow dot appearing in the center of the viewfinder. If the yellow dot doesn't appear, then the camera will not set the proper aperture, and the image will be either too light or too dark. 

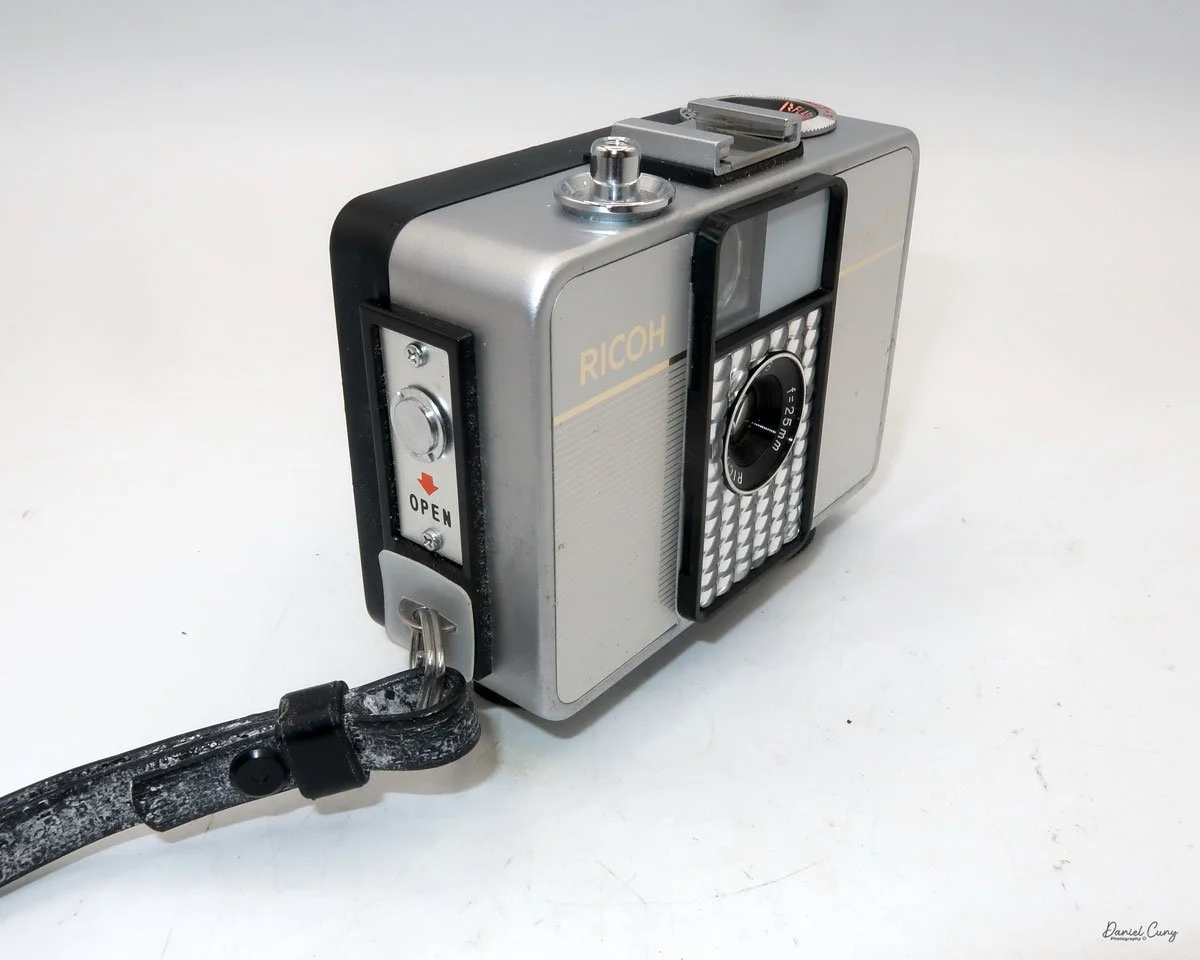
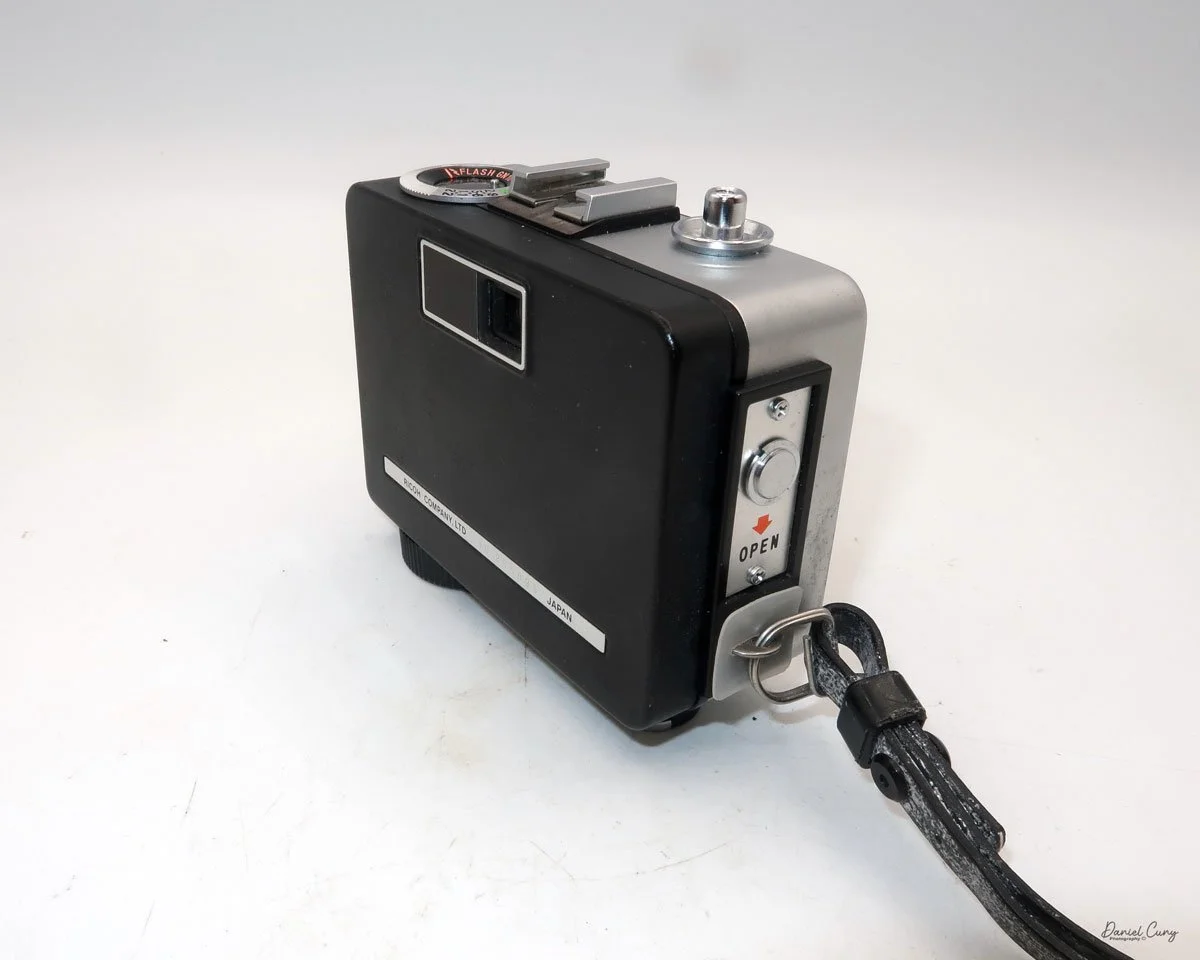
To load film into the camera, there is a lever on the side of the camera that slides down to open the back of the camera. Once open, load the camera as you would any 35mm camera, putting the film cartridge on the right side and slipping the leader under one of the silver tabs on the left. Close the back of the camera, and wind the clock drive winding lever located at the bottom of the camera in a clockwise direction. Continue winding until you can no longer wind. Click the shutter a couple of times to get to your first exposure. You're all set to take photos. The winding motor will last approximately 25 frames before it needs to be wound again.

 The frame counter is right next to the rewind lever. To rewind the film into the cartridge. The rewind release button is in the middle of the winding motor. Press the rewind button, and rewind the film into the 35mm cassette. Once that's done, you can open the back of the camera, remove the film, and have it processed.

My Results:

I loaded the camera with a roll of film and took it with me for a walk around the block with our 15-year-old Pug, Ernie. These walks are getting a bit slower every week, so I had time to snap photos of some of the houses in the neighborhood, as well as many of the flowers in people's yards.

 I wanted to push the limits of the camera and see just how close I could get to capturing a reasonably sharp image. It appears that the minimum focus distance is right around 3-4 feet, even with 200 ISO film in the camera and on a very bright summer day, around noon.

 Here are some of the images I took.

Conclusion:

I think I'm more impressed with this camera than the Canon Demi I did a couple of weeks ago. There was a bright yellow dot in the center of the viewfinder, so I trusted the meter's exposure, which was pretty accurate.

 The focus was pushed, and I received a few blurry images, which I had anticipated, but overall, the camera did a fantastic job. The transport worked flawlessly, the exposures were accurate, the camera fit nicely into my pocket, and all I needed to do was put the camera to my eye, frame the photo, and press the shutter button…Fantastic!!!!

 I'll be using this more often, since it's a small, compact, lightweight, and accurate meter. A real treasure to have in my collection. Now all I need to do is find other models and designs. I think this may be the start of something fun.

 Thank you for taking the time to read about this compact bundle of photographic bliss—a real underappreciated camera from the 1960s.

 If you're interested, you can read more of my camera reviews by clicking on the link.

 I have a store on eBay where I sell some of the cameras featured in my camera reviews, as well as a variety of photo odds and ends. Take a look at Cuny's Camera and Photo.

 Until next week, please be safe.