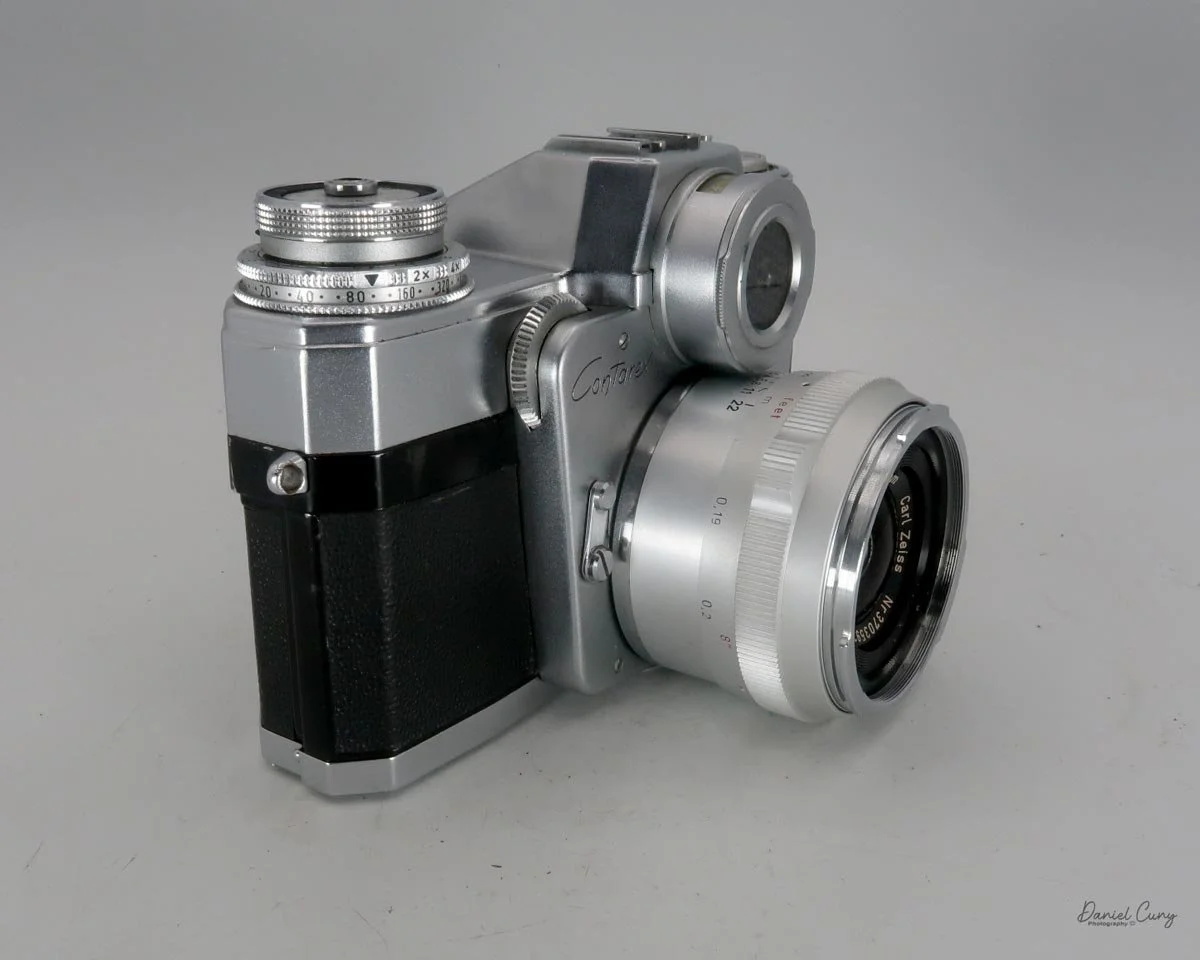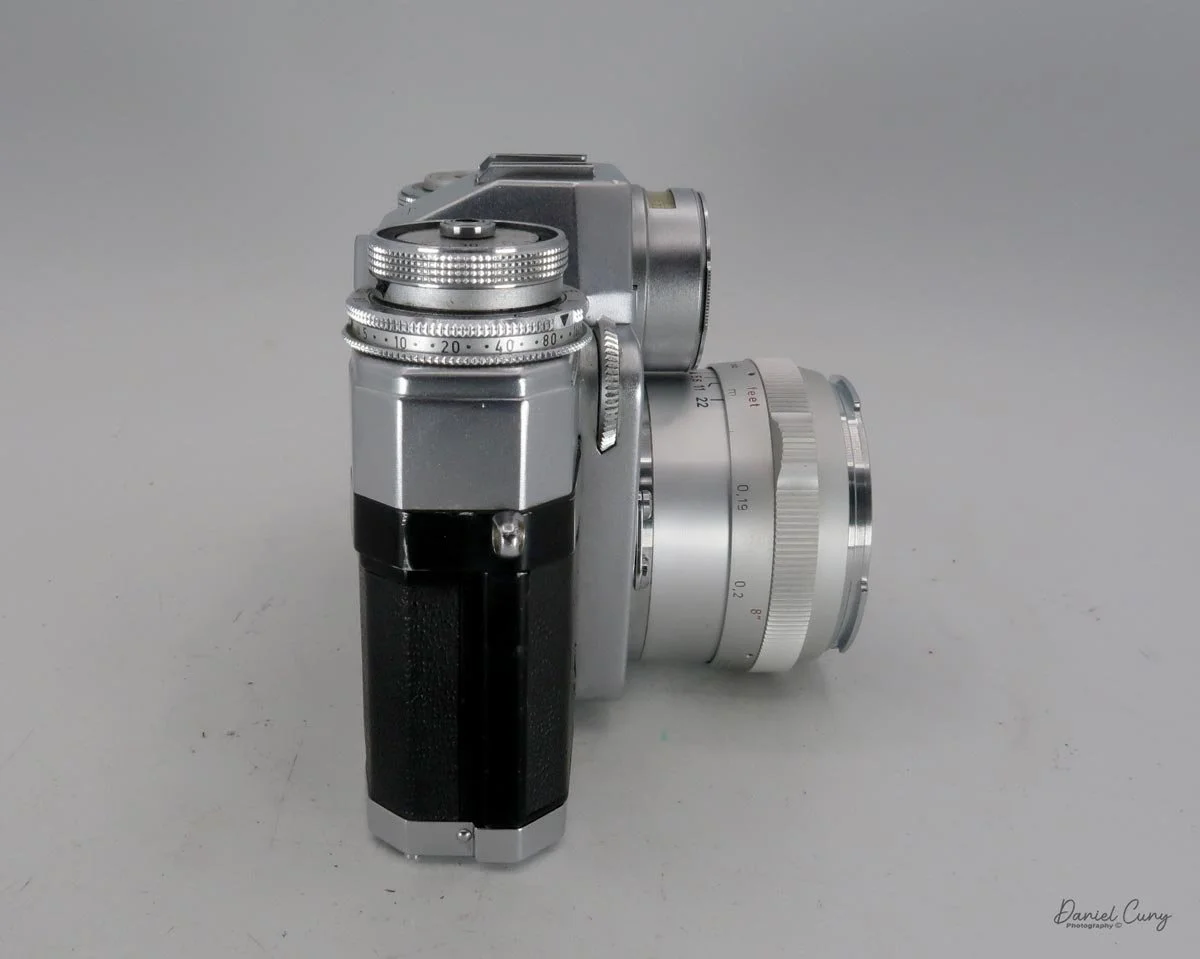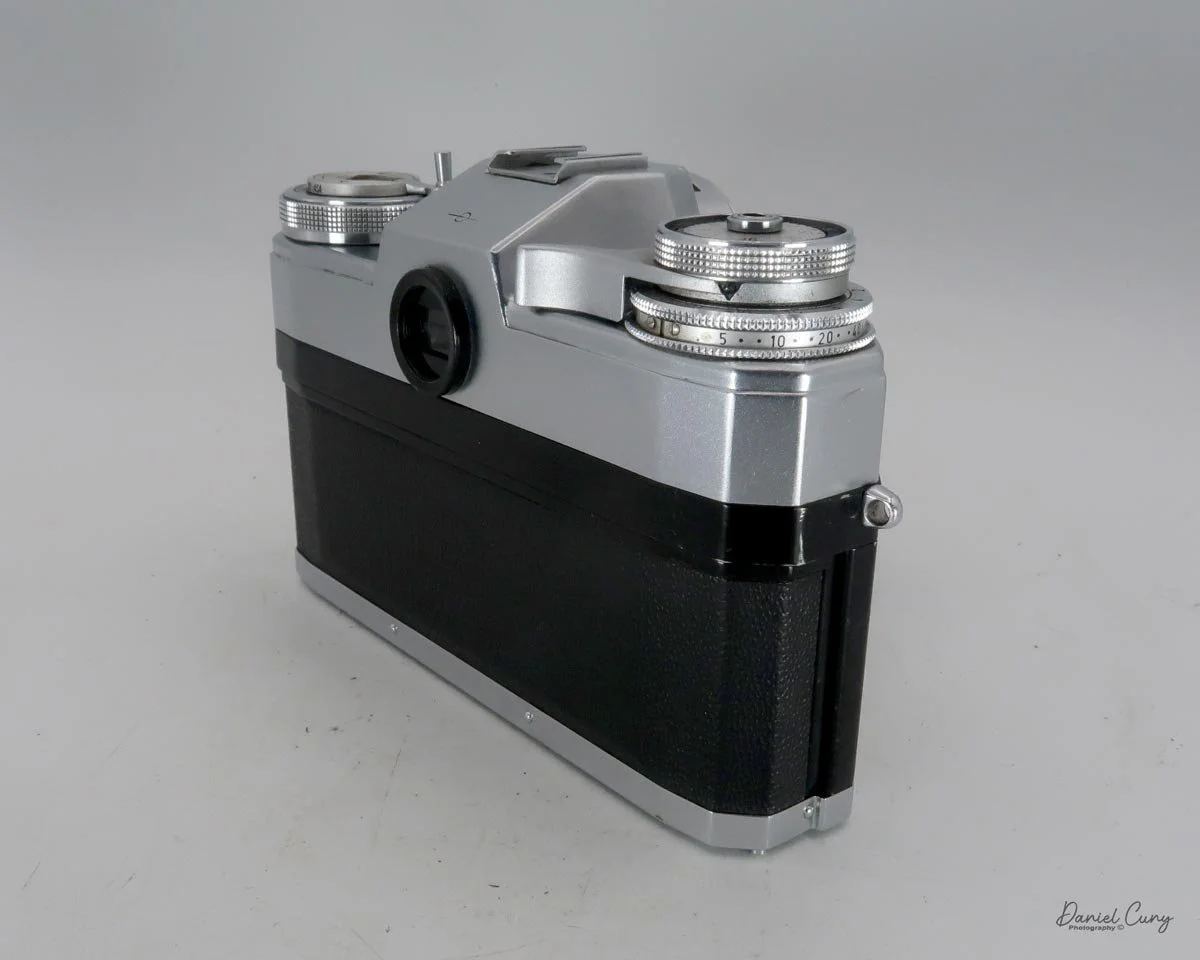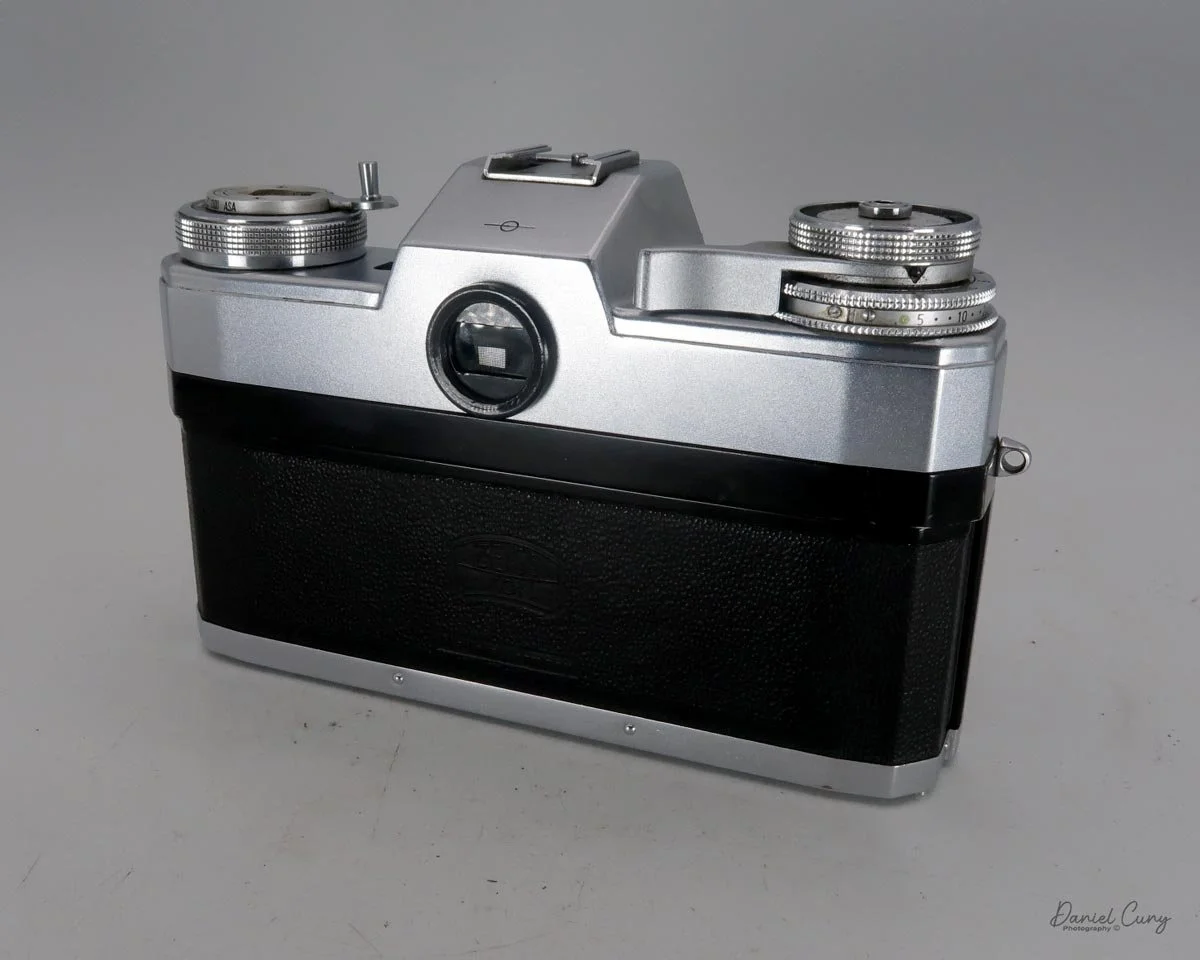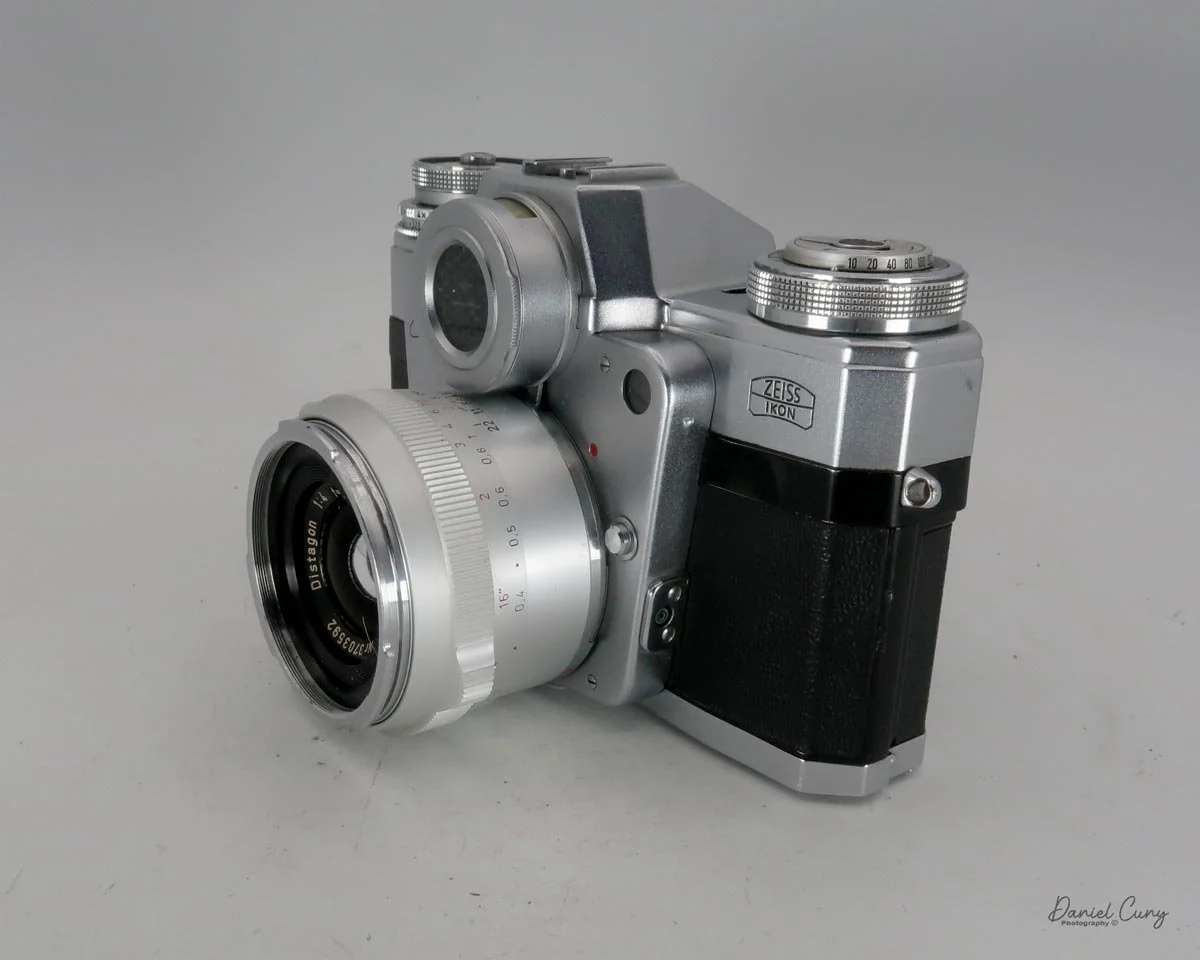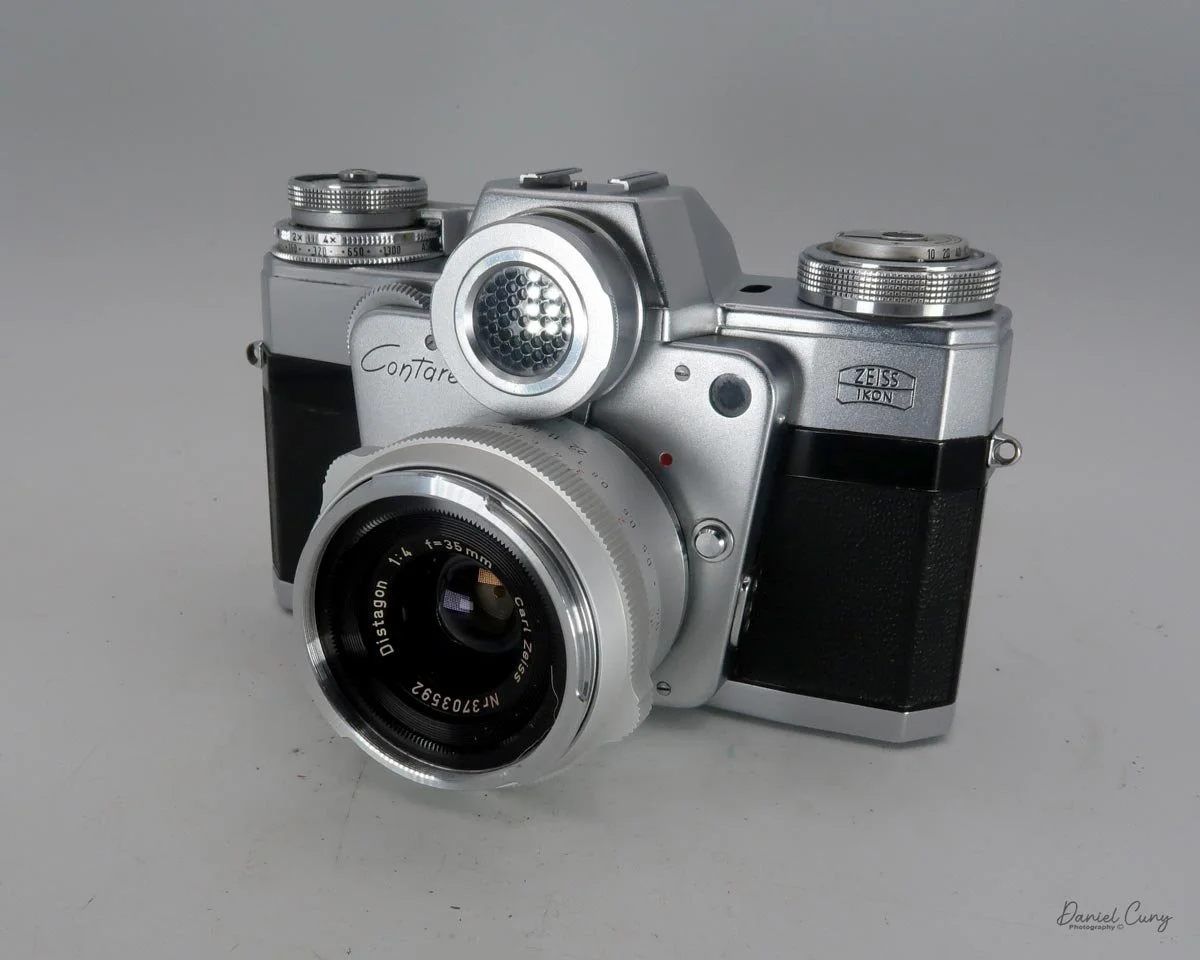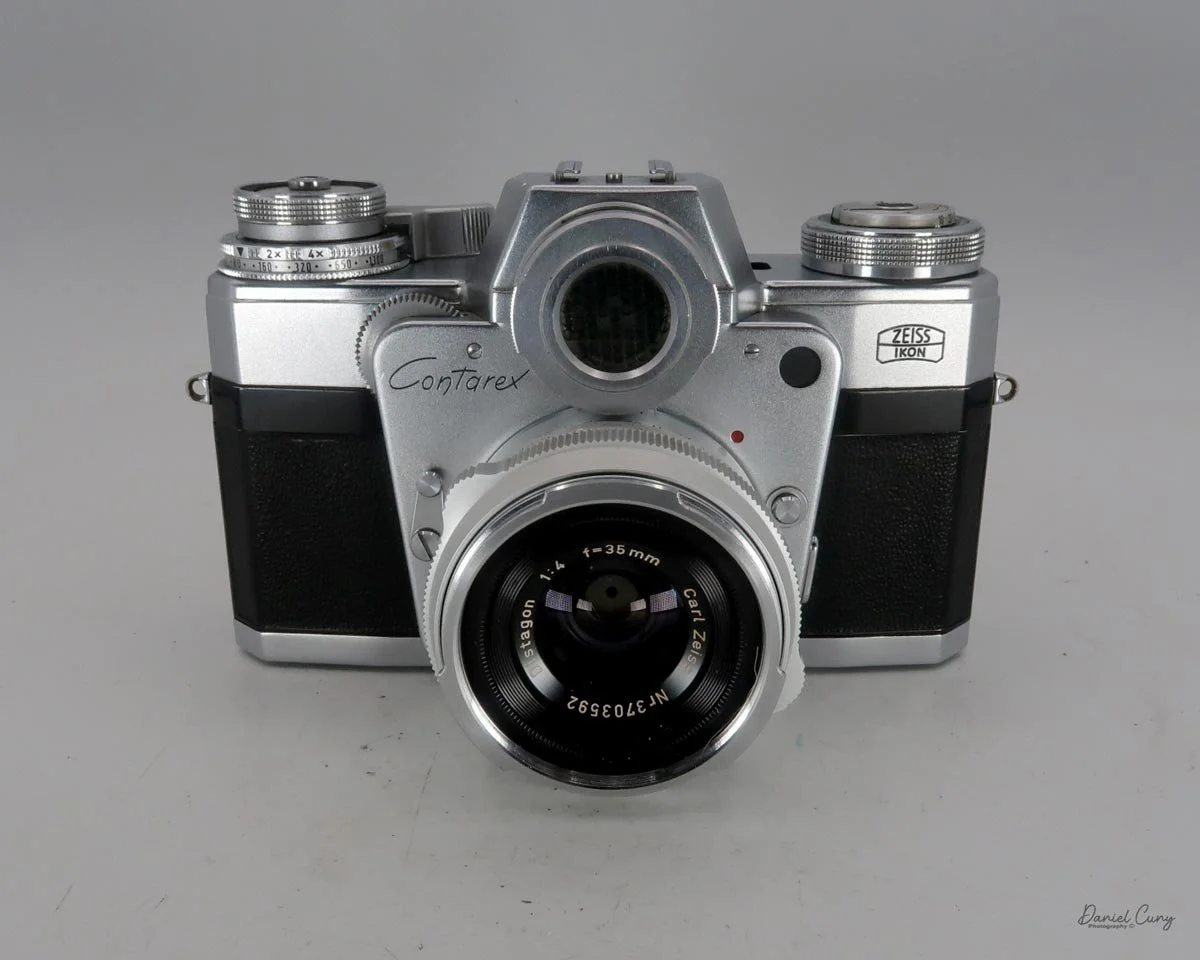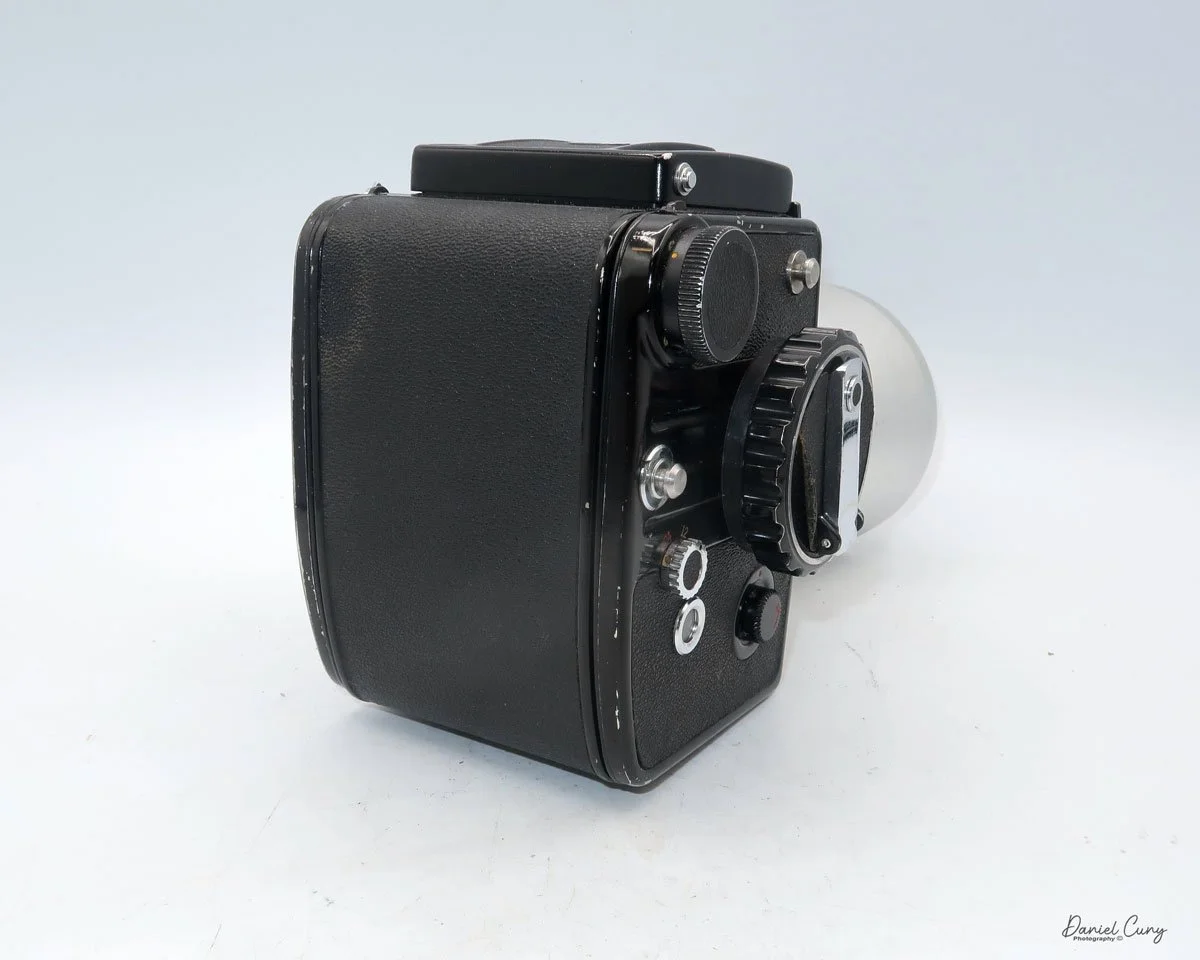
Zeiss Ikon Contarex "Bullseye" camera

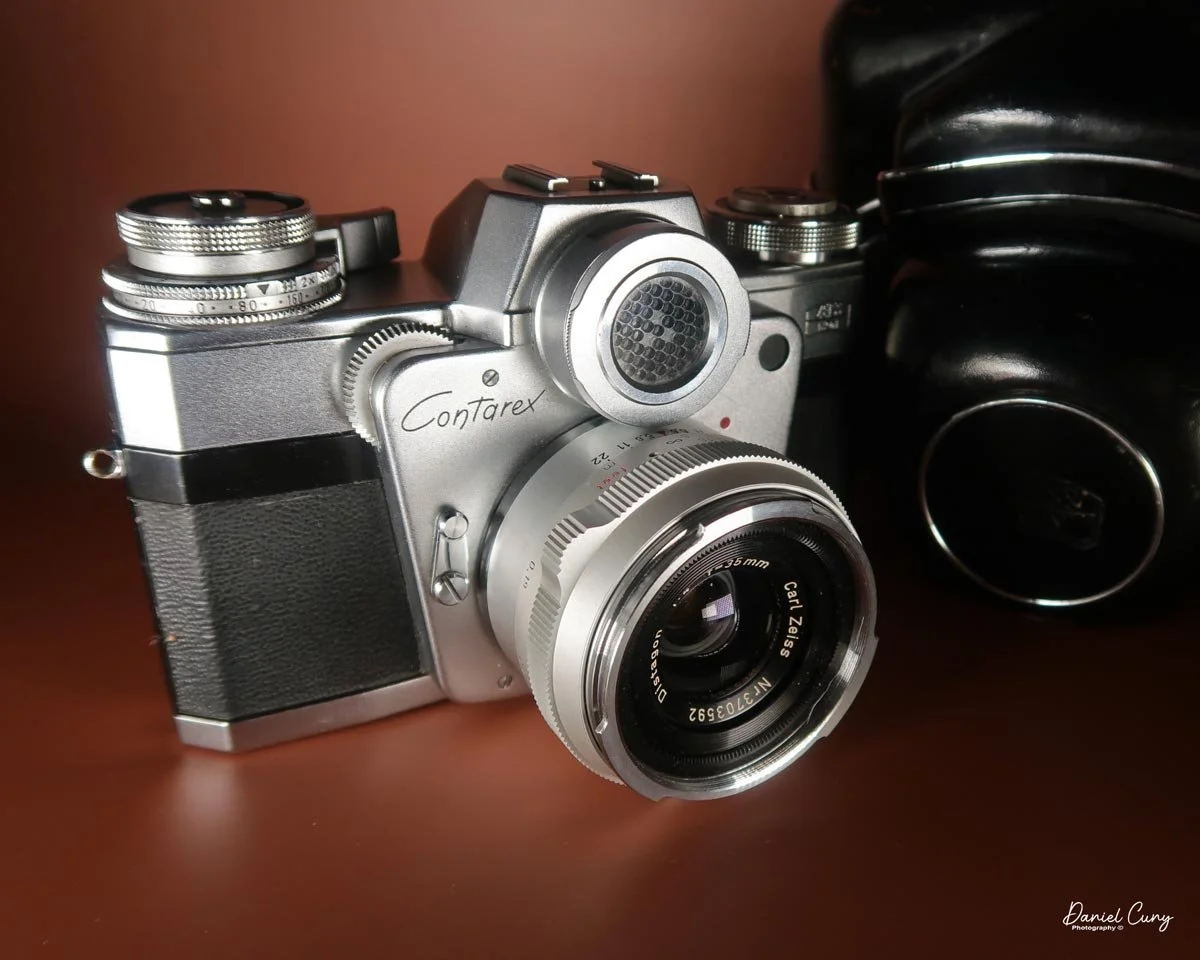
My Zeiss Ikon Contarex “Bullseye” camera

Ever since I started collecting cameras, way back in the late 1970s, maybe even the early 1980s, the Zeiss Ikon Contarex, "Bullseye" or "Cyclops" camera has been on my radar to hopefully someday have in my collection. These were the times when my wife and I were newly married, and money was always tight—living paycheck to paycheck.

I can remember seeing the Contarex camera in magazines and other collecting or historical publications. Always in the back of my mind, I thought this was one of the most beautiful cameras ever made. The bulging "eye" over the lens made the camera seem otherworldly, futuristic, and more like an art piece than a camera.

Seeing it many times in McKeown's Cameras price book, which I would devour constantly, soaking in the information on the different camera designs and companies from around the world that produced odd and unique cameras, it was the Contarex that always stood out as an icon for camera collectors.

Fast forward 35 years. It was sometime in the early to mid-2010s when I had the opportunity to purchase one of these wonders of a camera. With extra income to spend on expanding my collection and selling off some cameras, I pulled the trigger at a camera show in the San Francisco Bay Area, where we lived at the time, on a wonderful, working Contarex with the fitted case.
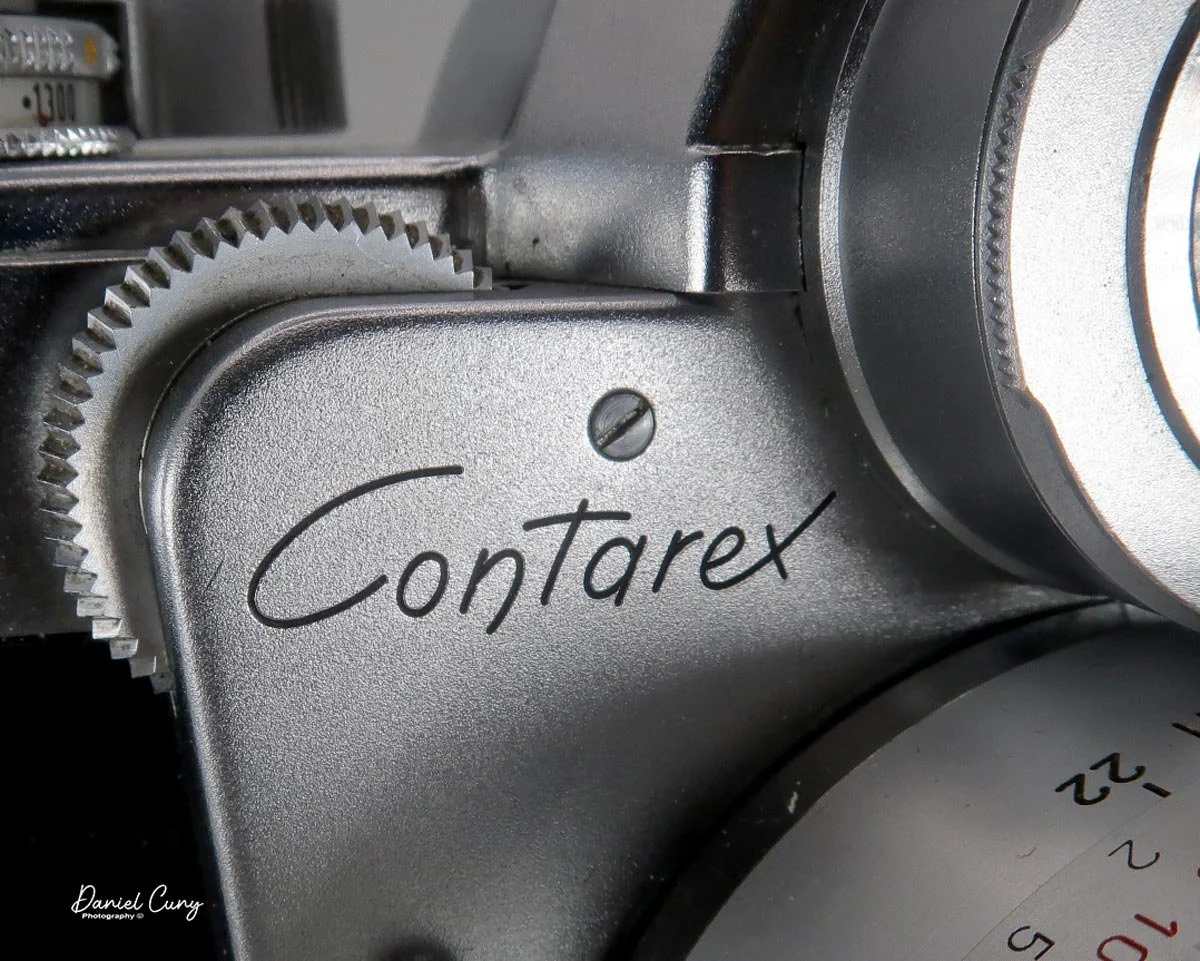
Contarex nameplate

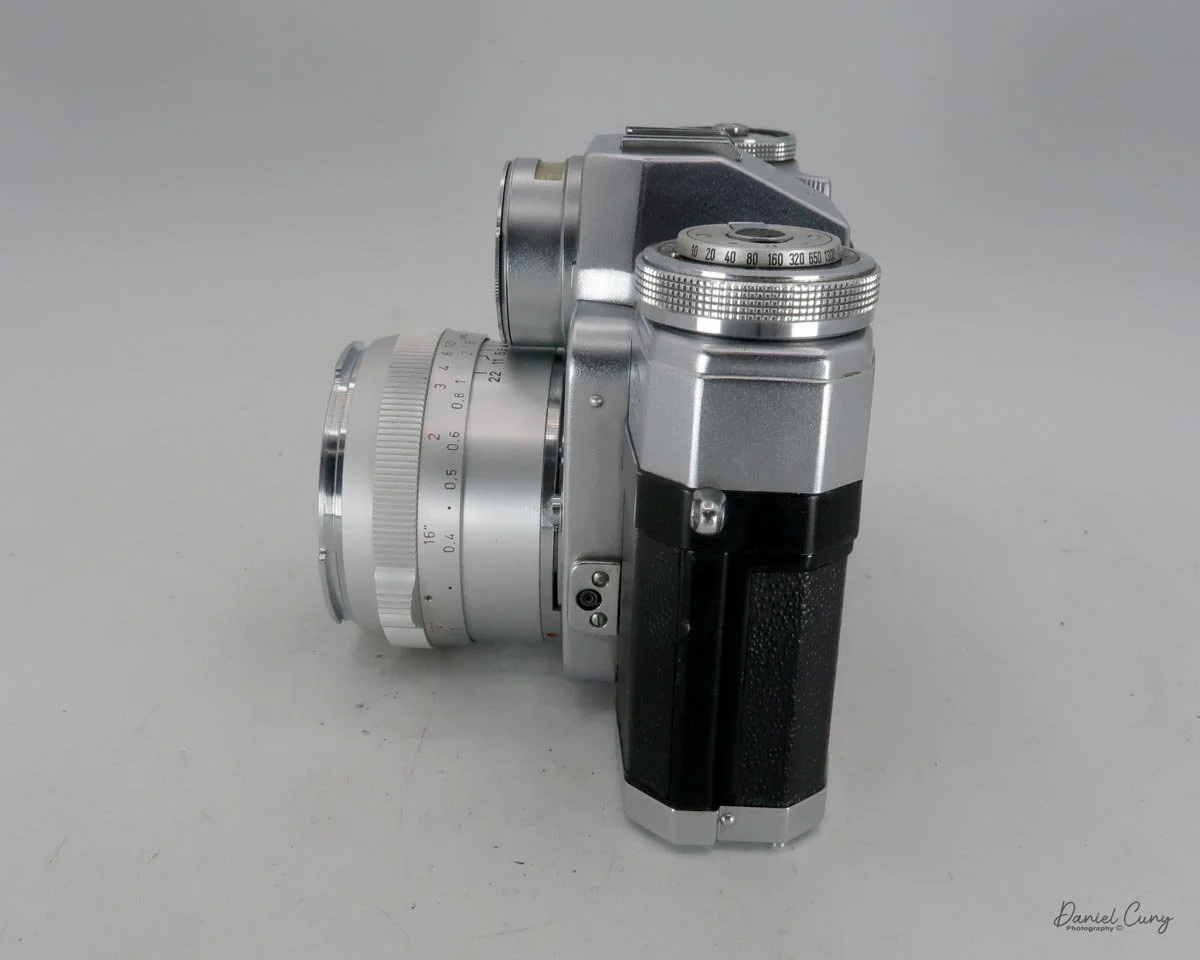
The camera came with the slightly wide Zeiss Distagon 35mm f/4 lens, which was fairly slow, but there are two items I liked about this lens. It's wide—not as wide as I'd like, but it also focuses closer than most lenses. The lens can focus down to 7.5 inches from the subject, almost making it a macro lens. Not quite, but much closer than the standard lens.

The Contarex also has a working meter, which is somewhat rare for a selenium meter system on a camera made in the late 1950s to early 1960s. I also enjoy a more "hefty" camera, since I was mainly raised using the older Nikon F system. Along with having larger hands, these cameras feel more comfortable to me.

I remember when the Olympus OM system camera hit the market in the 1970s. I'd wrap my hands around the smaller body and lenses, and it always made me feel like I was suffocating the camera as my hand enveloped them. Same with the Pentax ME system when they came out, so having a larger camera body and lens has always seemed right to me.

The Contarex camera is extremely solid, well-built, over-engineered, and somewhat weighty. The Contarex has some real heft to it. One thing I wasn't aware of was the camera's build quality, which I discuss below in the history section.


History of the Contarex Cameras

The Zeiss Ikon Contarex, introduced at Photokina in 1958 and hitting the market in 1960, stands as one of the most ambitious and notoriously over-engineered 35mm single-lens reflex (SLR) cameras ever manufactured. Conceived in 1954 under the internal designation "Contax IV," the Contarex was designed by Edgar Sauer as Zeiss Ikon's definitive professional 35mm SLR, intended to replace the Contax IIa and IIIa and, in the company's words, cater to "any photographic task whatsoever."

With rising Japanese powerhouses, the Contarex system was Zeiss Ikon's no-holds-barred flagship—a mechanical tour de force that commands immense respect (and sometimes frustration) in the vintage collecting community today.
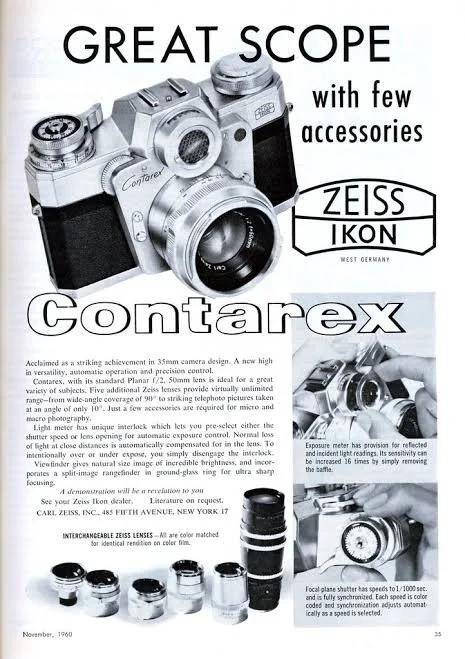
Zeiss Ikon Contarex camera advertisment

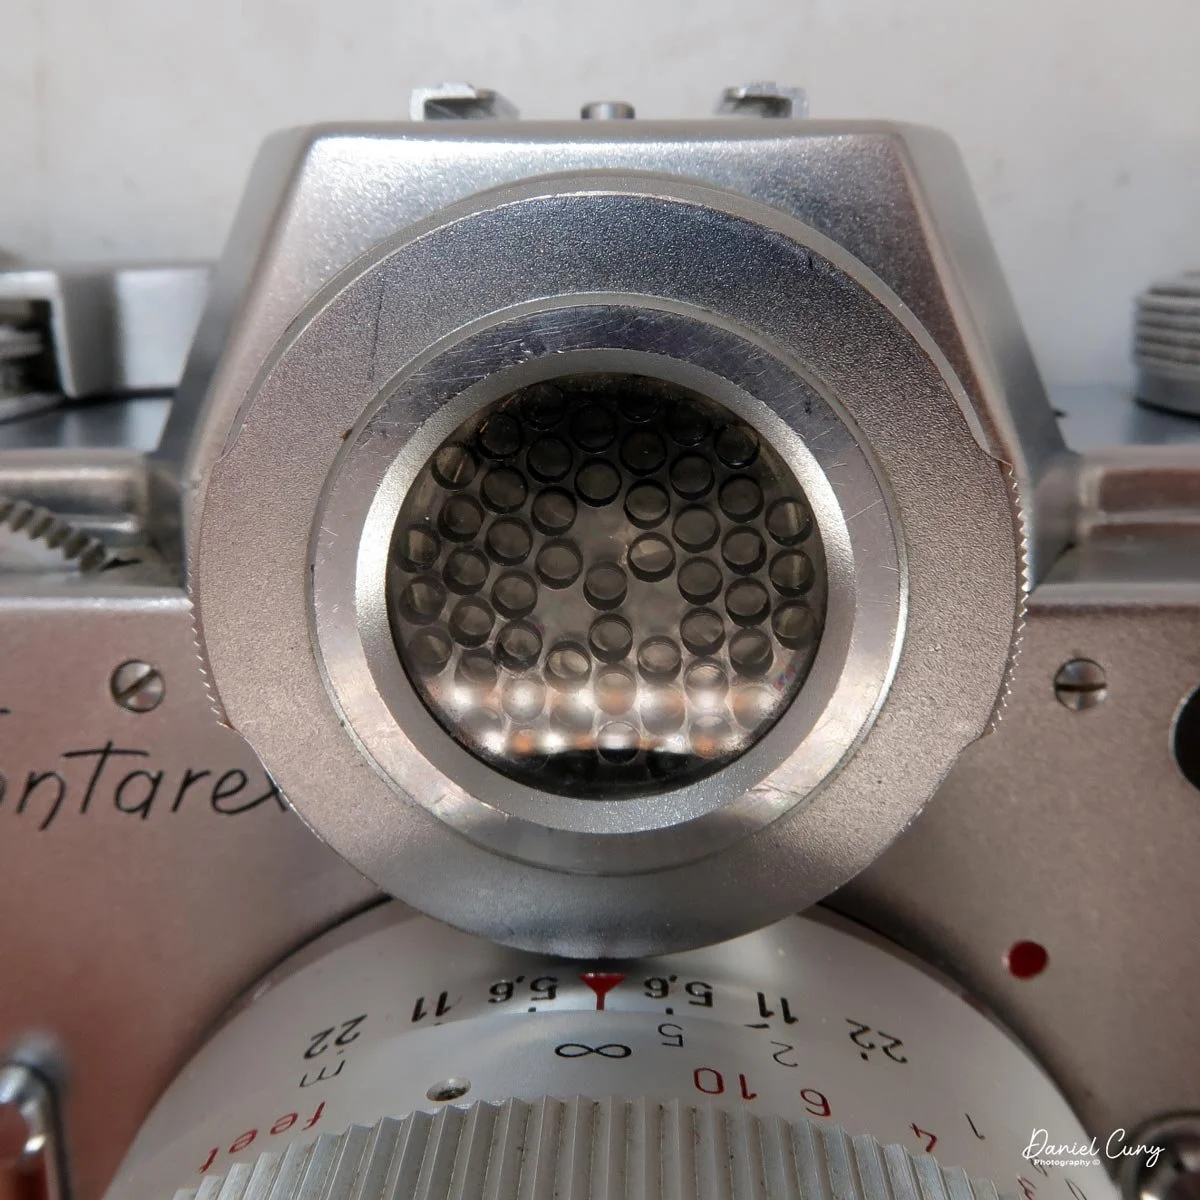
The first model in the lineup earned the nicknames "Bullseye" and "Cyclops" due to the prominent, circular selenium light meter window mounted directly in front of the pentaprism. This meter wasn't just cosmetic; it represented a massive mechanical achievement. The Contarex I was the first 35mm SLR to feature a focal-plane shutter with direct light meter coupling. The camera mechanically linked the shutter speed, aperture, and film speed settings via a highly complex system of internal cords and pulleys.

While the interchangeable Carl Zeiss lenses produced for the Contarex are still legendary for their sharpness, contrast, and uncompromising build quality, the camera bodies themselves are incredibly intricate. The original Bullseye contains nearly 1,100 individual parts, including roller bearings in the aperture mechanism. Interestingly, the lenses lack traditional aperture rings; instead, the aperture is controlled by a milled wheel on the camera body itself, which directly interfaces with the bayonet mount.

Because of their sheer mechanical complexity, they require highly specialized technicians for servicing—simply removing the top plate requires dismantling 43 separate components. A working selenium meter is often a strong indicator that a specific body hasn't been abused over the decades. For anyone running an online shop or writing historical reviews, finding a fully functional Contarex at a global market is a massive victory, offering rich material for a blog deep-dive or video overview.

Another notoriously delicate quirk is the rewind mechanism. Instead of a direct shaft, it uses a series of tiny gears, making it smooth but highly vulnerable to impact damage. Additionally, interchangeable magazine backs allowed mid-roll film swapping, cementing its status as a true professional system camera.

Despite its brilliance, the sheer cost ($499 in 1961), heavy weight, and complicated nature of the Contarex meant it never dominated the market quite like the simpler Japanese alternatives. Zeiss Ikon eventually produced several variations, including the Contarex Special, Professional, and the electronic Super, before ceasing production in the early 1970s. Today, these chrome behemoths remain a fascinating pinnacle of mid-century German engineering—heavy, beautiful, and incredibly rewarding to study and restore.

My Camera

My Zeiss Ikon Contarex camera is 4" tall by 6" wide by 4" deep with the Zeiss Distagon 35mm f/4 lens, and weighs in at 2 pounds, 8.8 ounces. My camera body serial number is T89707, and the lens serial number is 3703592. You can find the instruction manual for the Zeiss Contarex at Mike Butkus's website, www.CameraManuals.org.
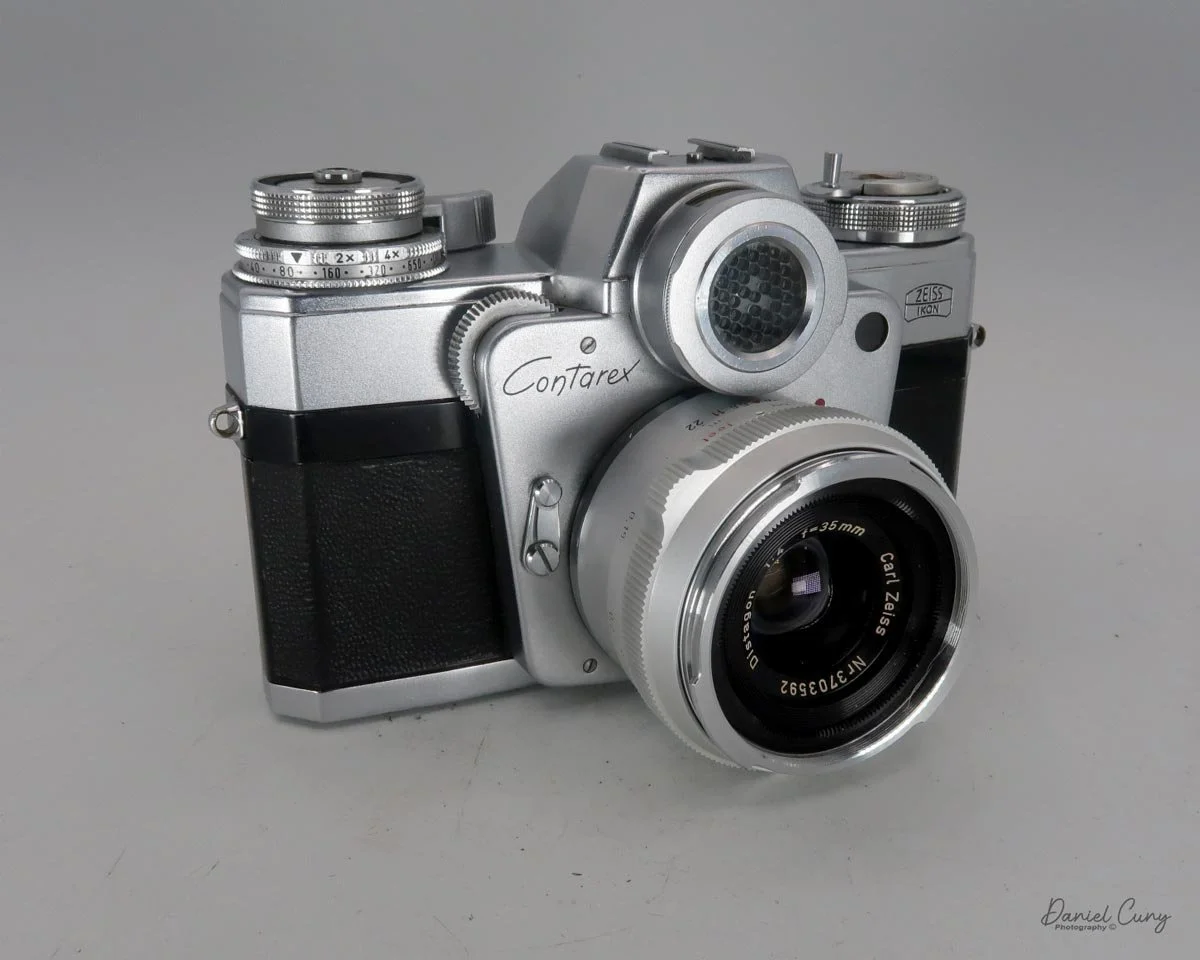
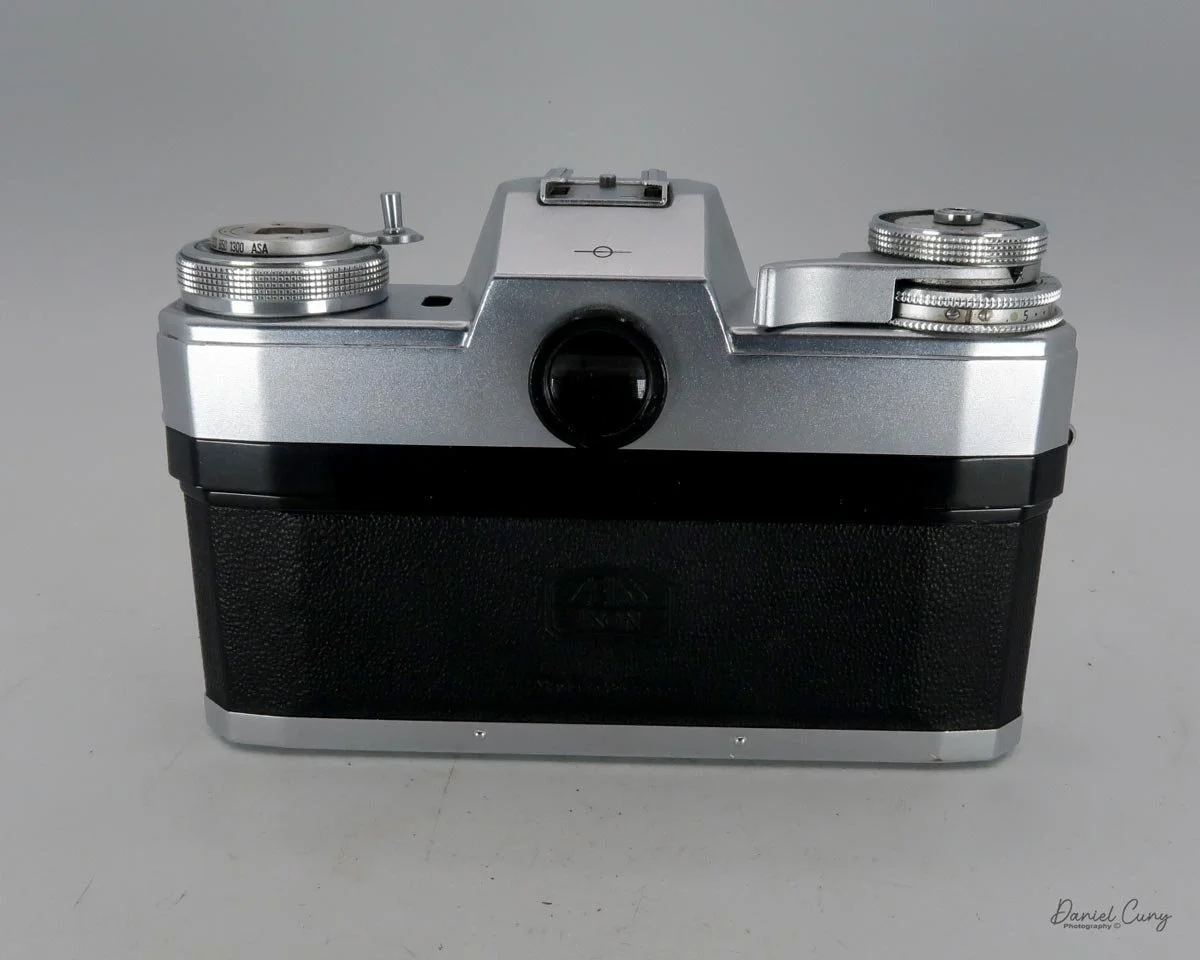
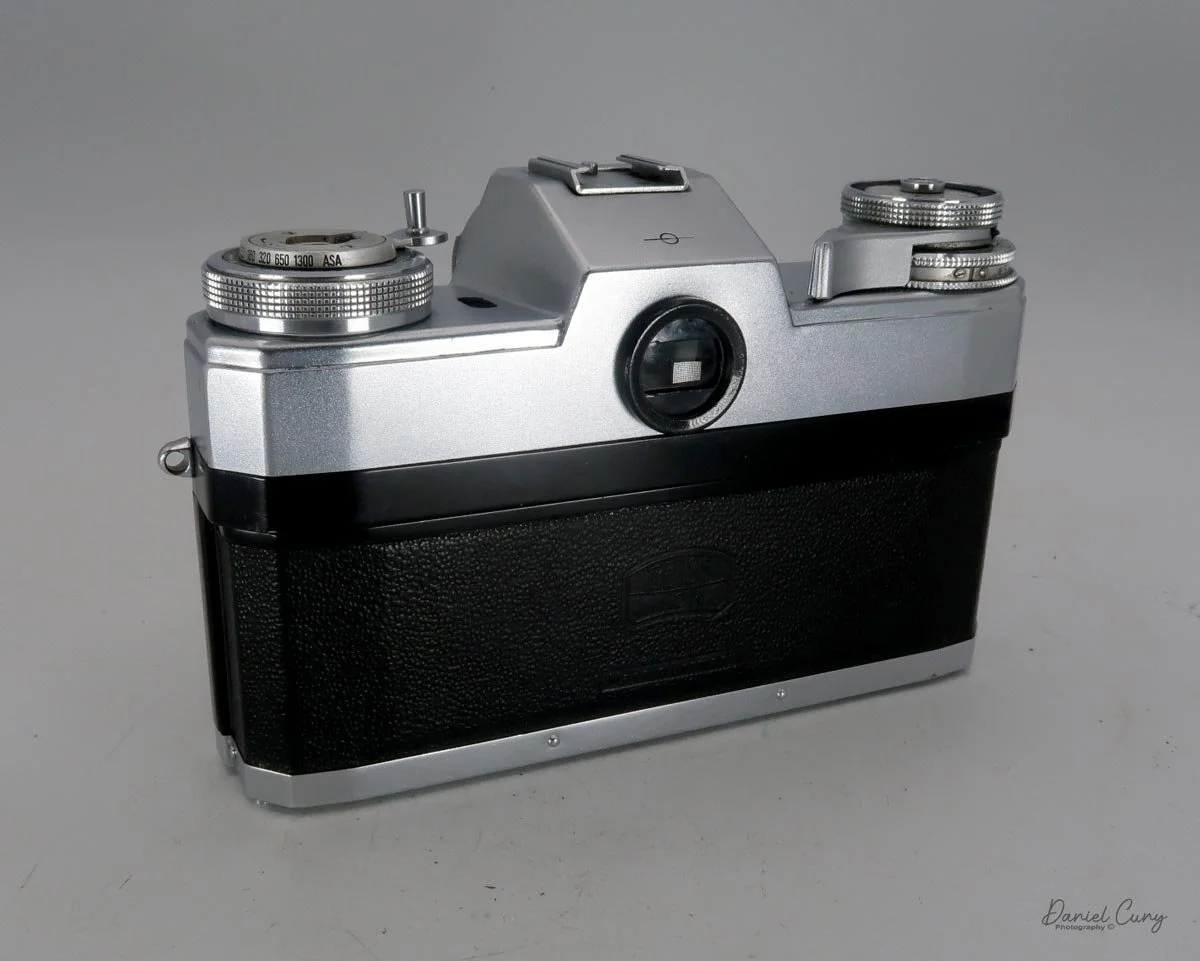
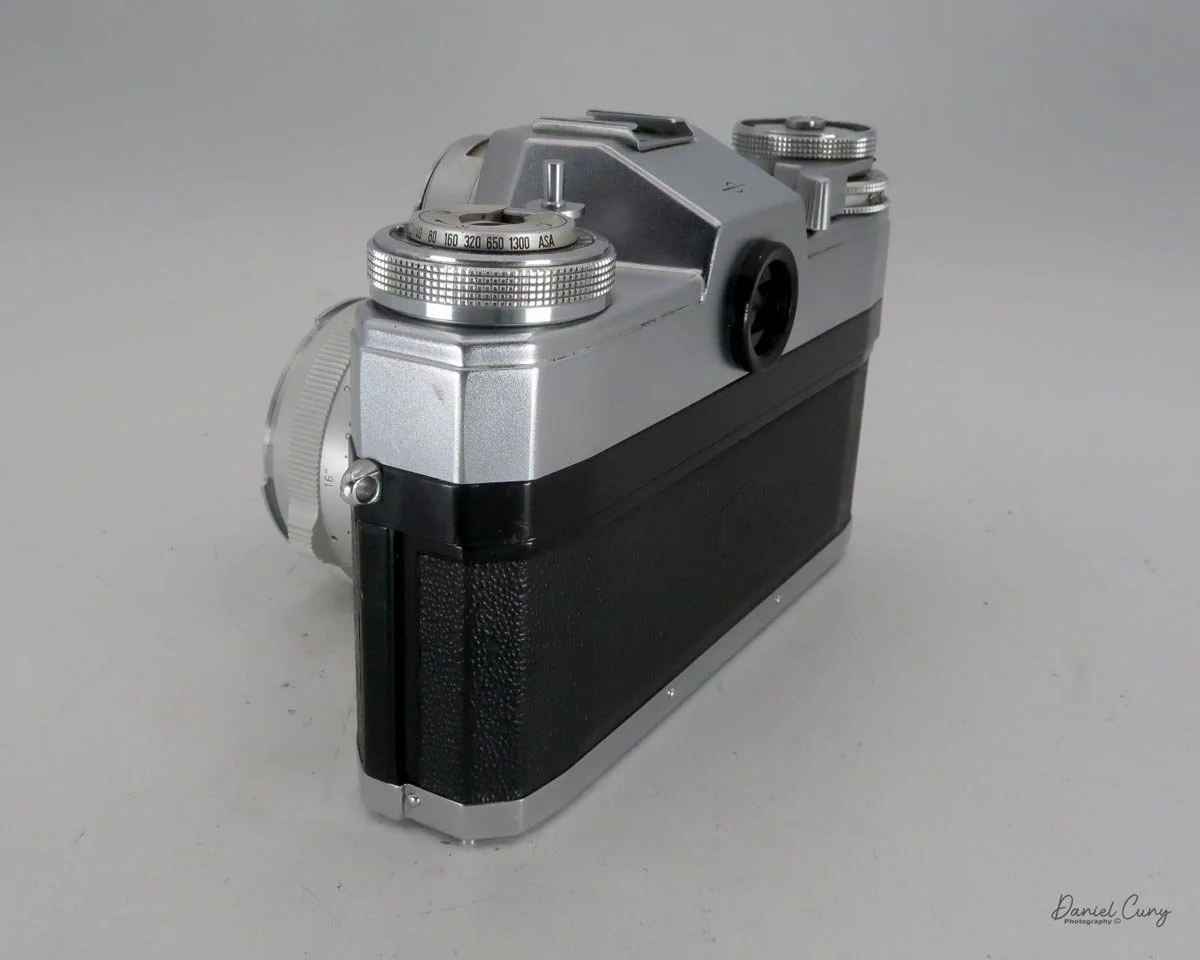
Looking at the top of the camera, going from left to right, is the camera's rewind knob with a flip-up lever, along with a directional arrow indicating which way to turn the wheel when it's time to rewind your film. There is also an indicator or reminder of what ASA (ISO) you have in the camera.
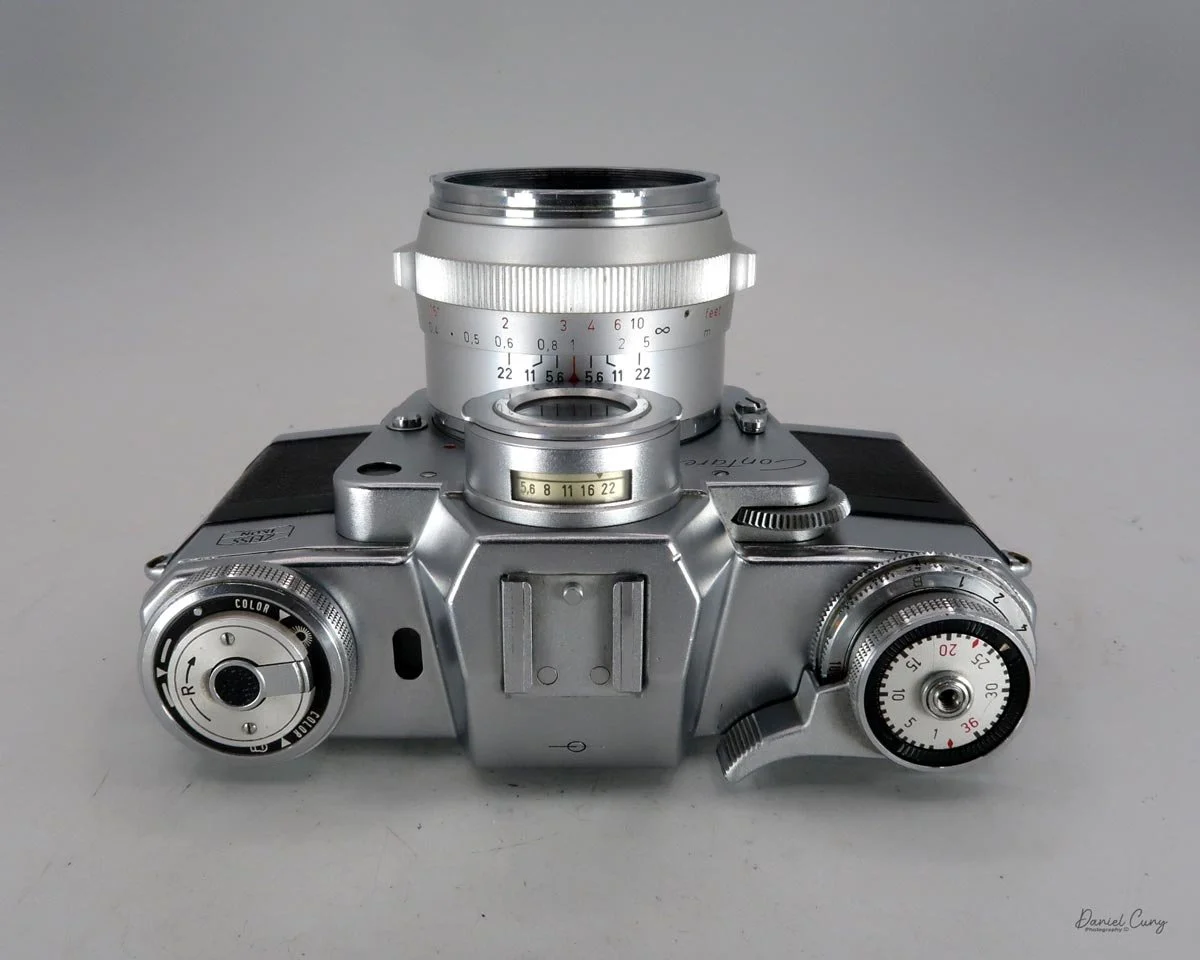
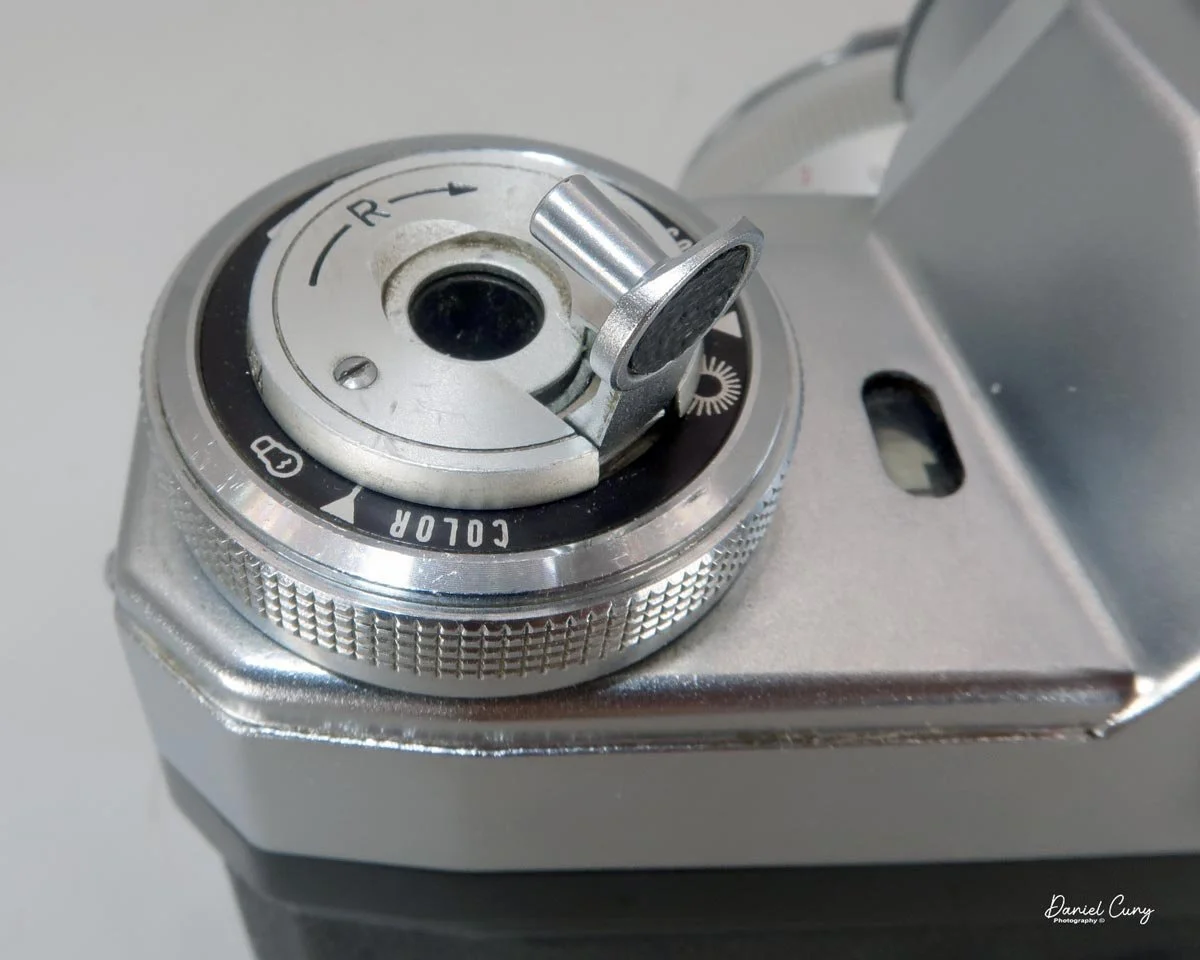
To the right of the rewind knob is an external light meter window. This is the same as you'll see in the viewfinder, only it's to be used if you're setting up from your waist and want to get the meter settings before you put the camera to your eye.

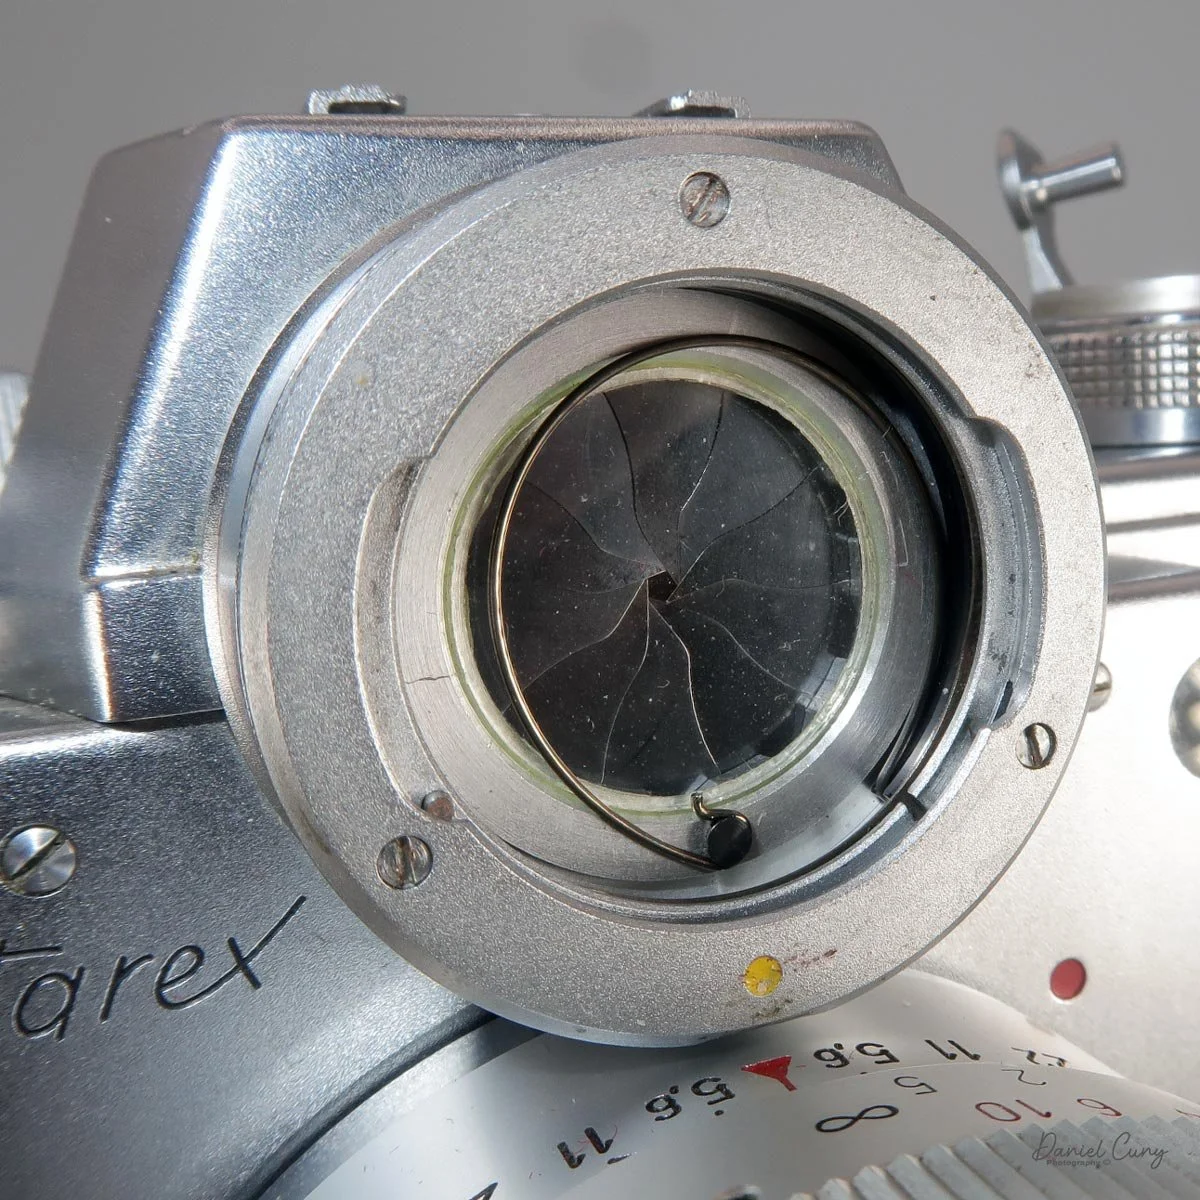
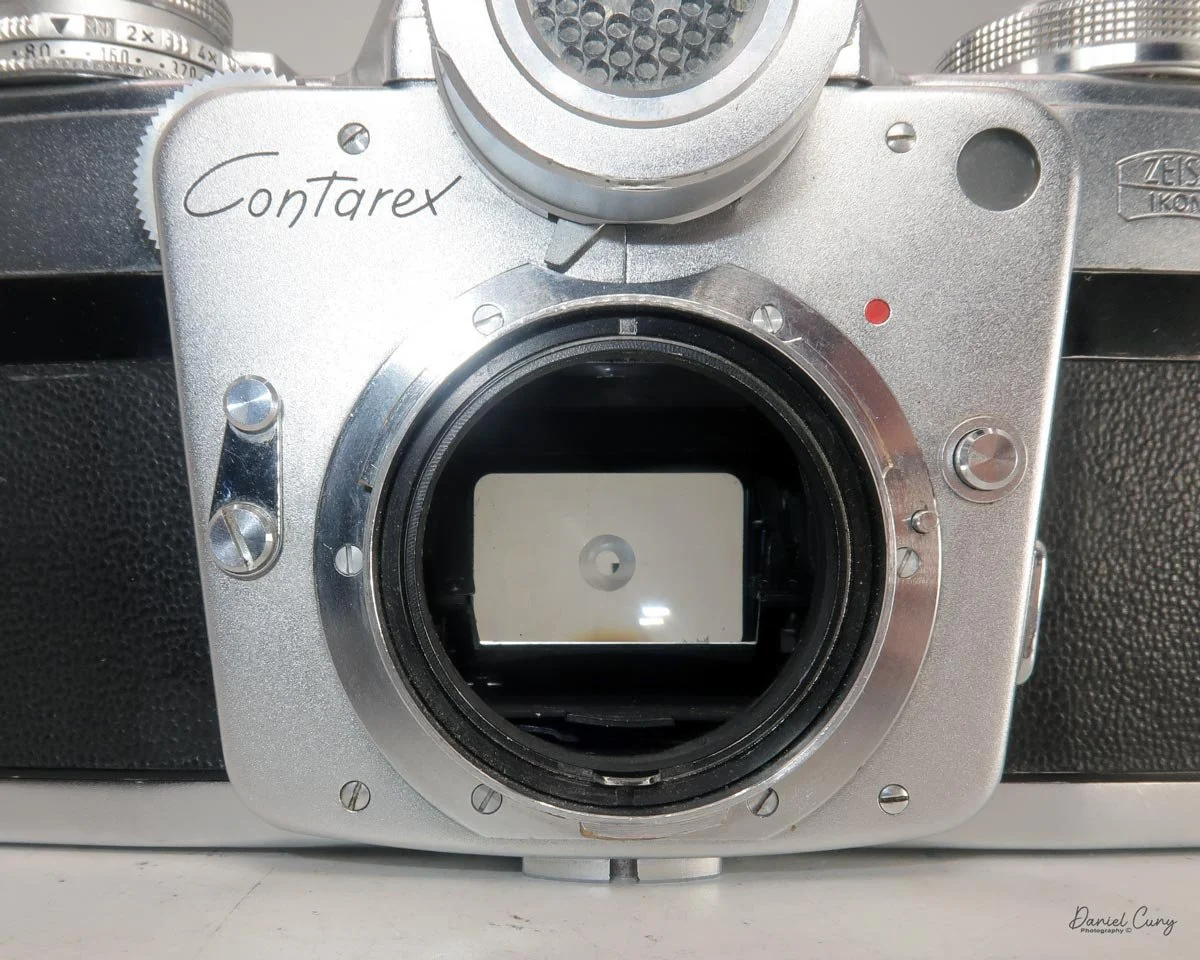
On the very top of the camera is the accessory shoe, used for a flash unit or for an accessory viewfinder which would be used for the widest 21mm lens available. Just in front of the accessory shoe is the "Bullseye" or "Cyclops" meter. Inside the meter are the aperture settings, which are controlled by a knurled ring just to the right of the meter and on the front of the camera body.
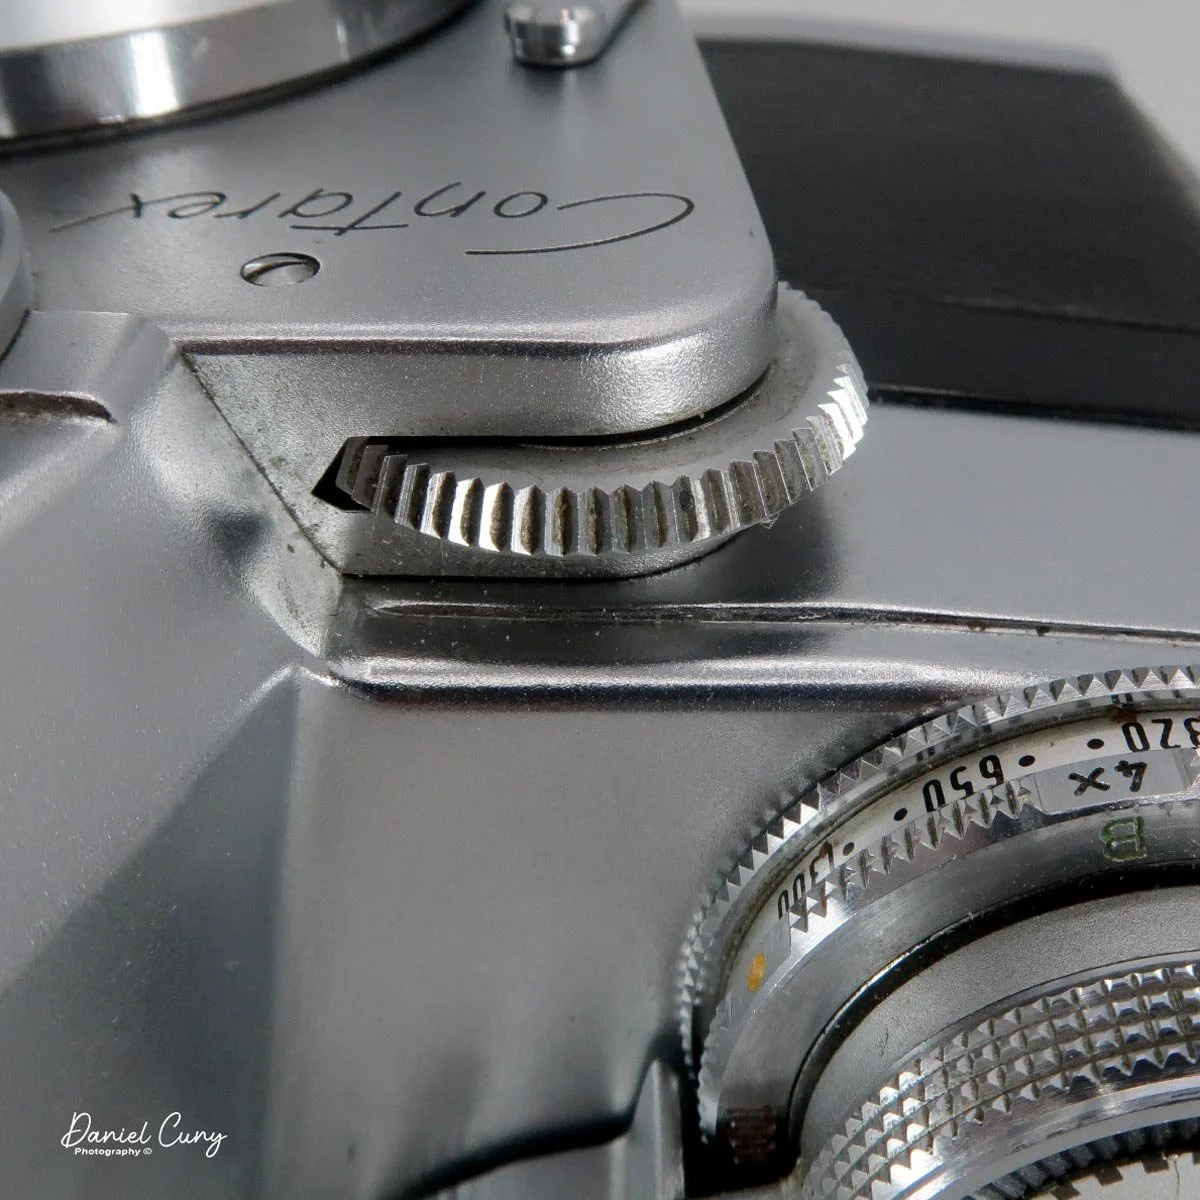
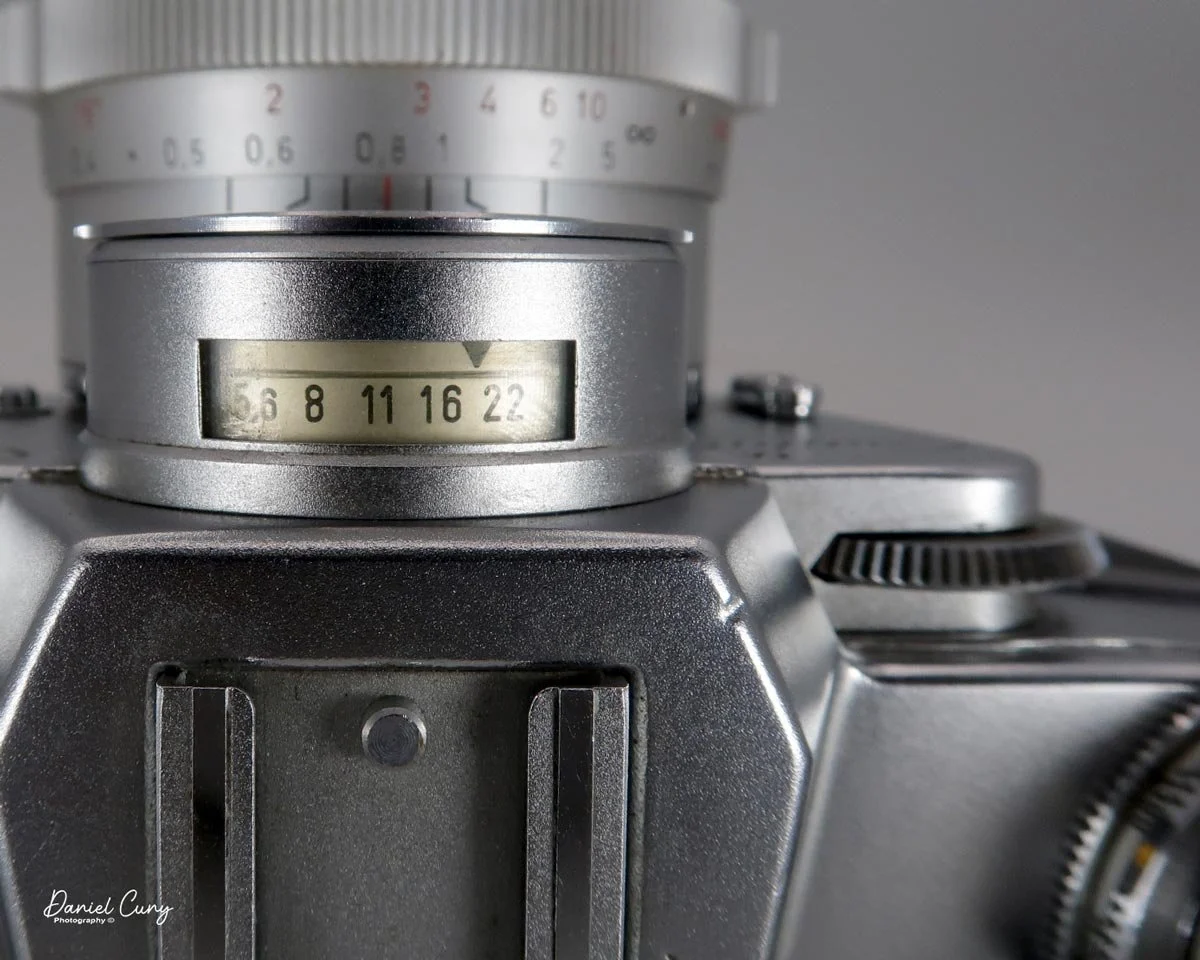
Turning this wheel sets the aperture setting, and it will also set the internal aperture needed to make the exposure. This will be transferred through the camera body, setting the proper aperture on the lens through its internal pulley system. You can remove the front of the meter housing, which has a honeycomb appearance, to expose the meter aperture, along with the pulley that activates it.

Just behind the aperture wheel on the front of the camera is the film winding lever, which sits on top of the shutter speed selector. Inside the winding lever is the camera's shutter release, which can accept a cable release for longer exposures. The shutter speed selector has a range of shutter speeds from 1/1000–1 sec, including "B" for timed exposures.

Just under the shutter speed selector is the ISO (ASA) settings. To set the ISO, lift on the shutter speed wheel and turn the dial to set the meter to the proper ISO. The ASA range is from 50–1300. There are also 2x and 4x settings if you want to overexpose in low-light situations purposely.
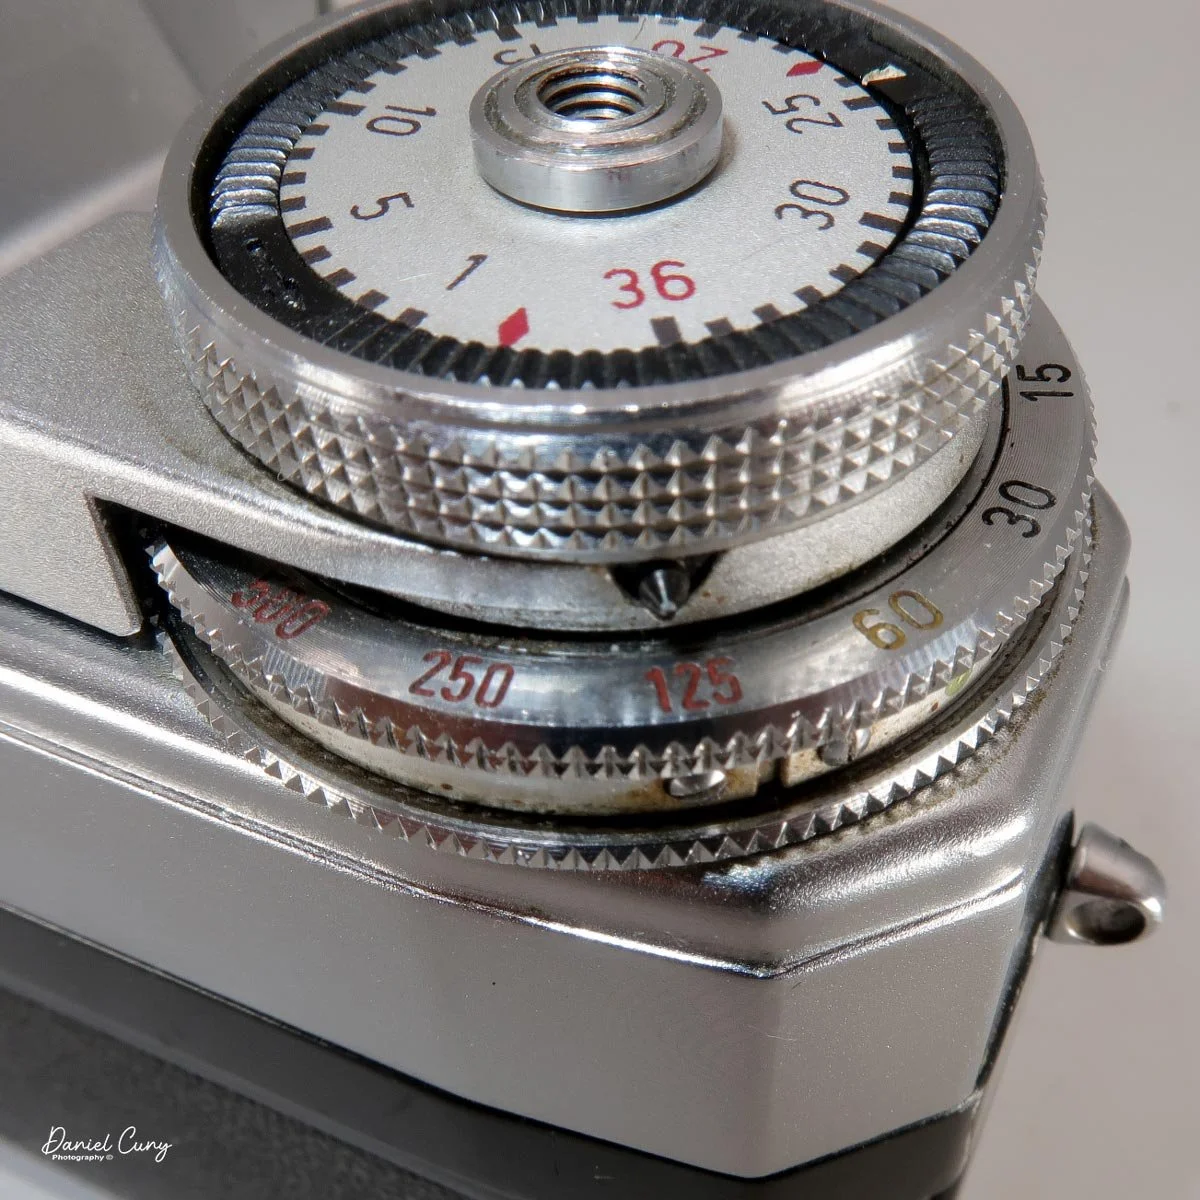
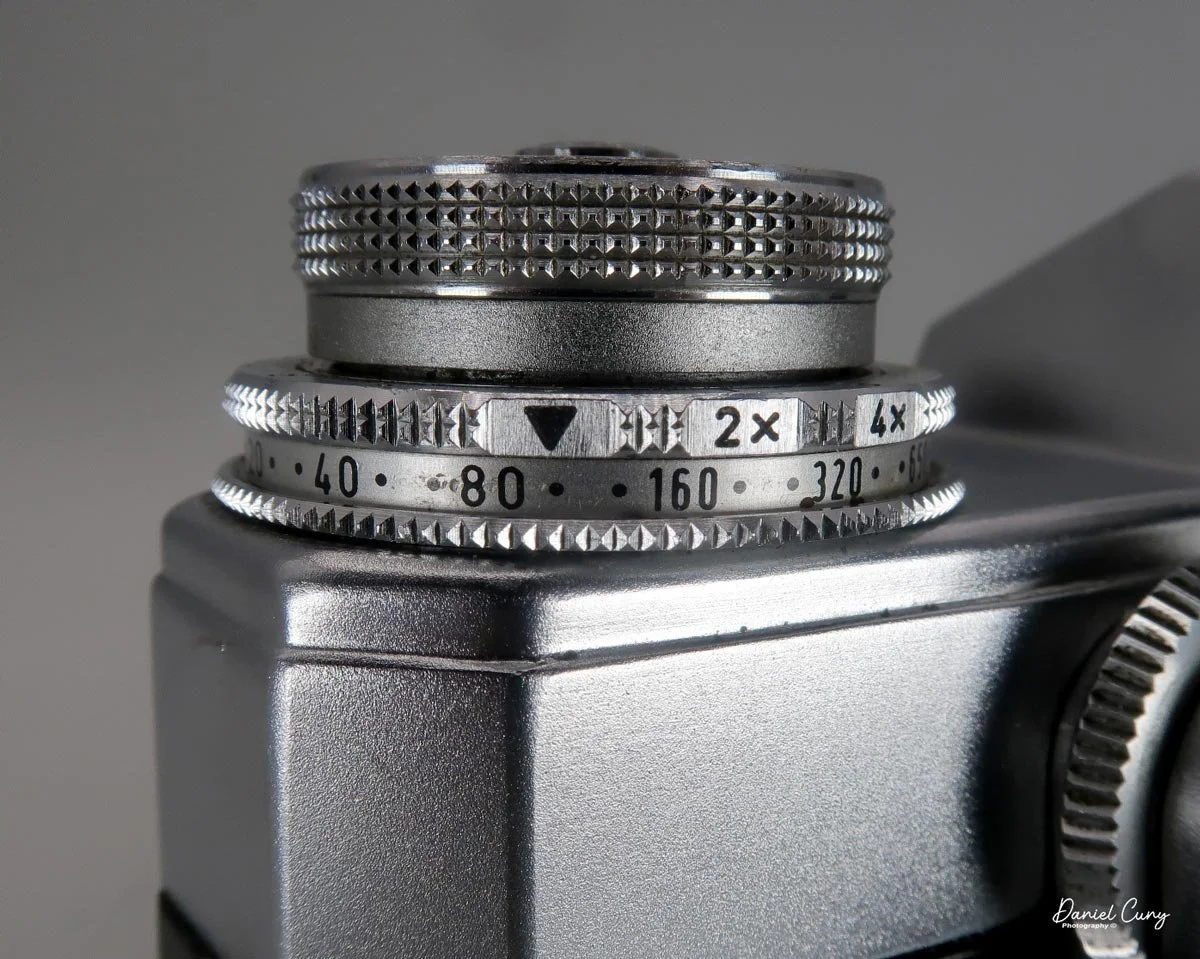
On the front of the camera, just under the aperture control wheel, is the camera's self-timer, which has a maximum delay of 12 seconds. It can be shorter, provided you don't pull the lever all the way to the maximum amount. On the other side of the lens, on top, is a light window for the internal meter.

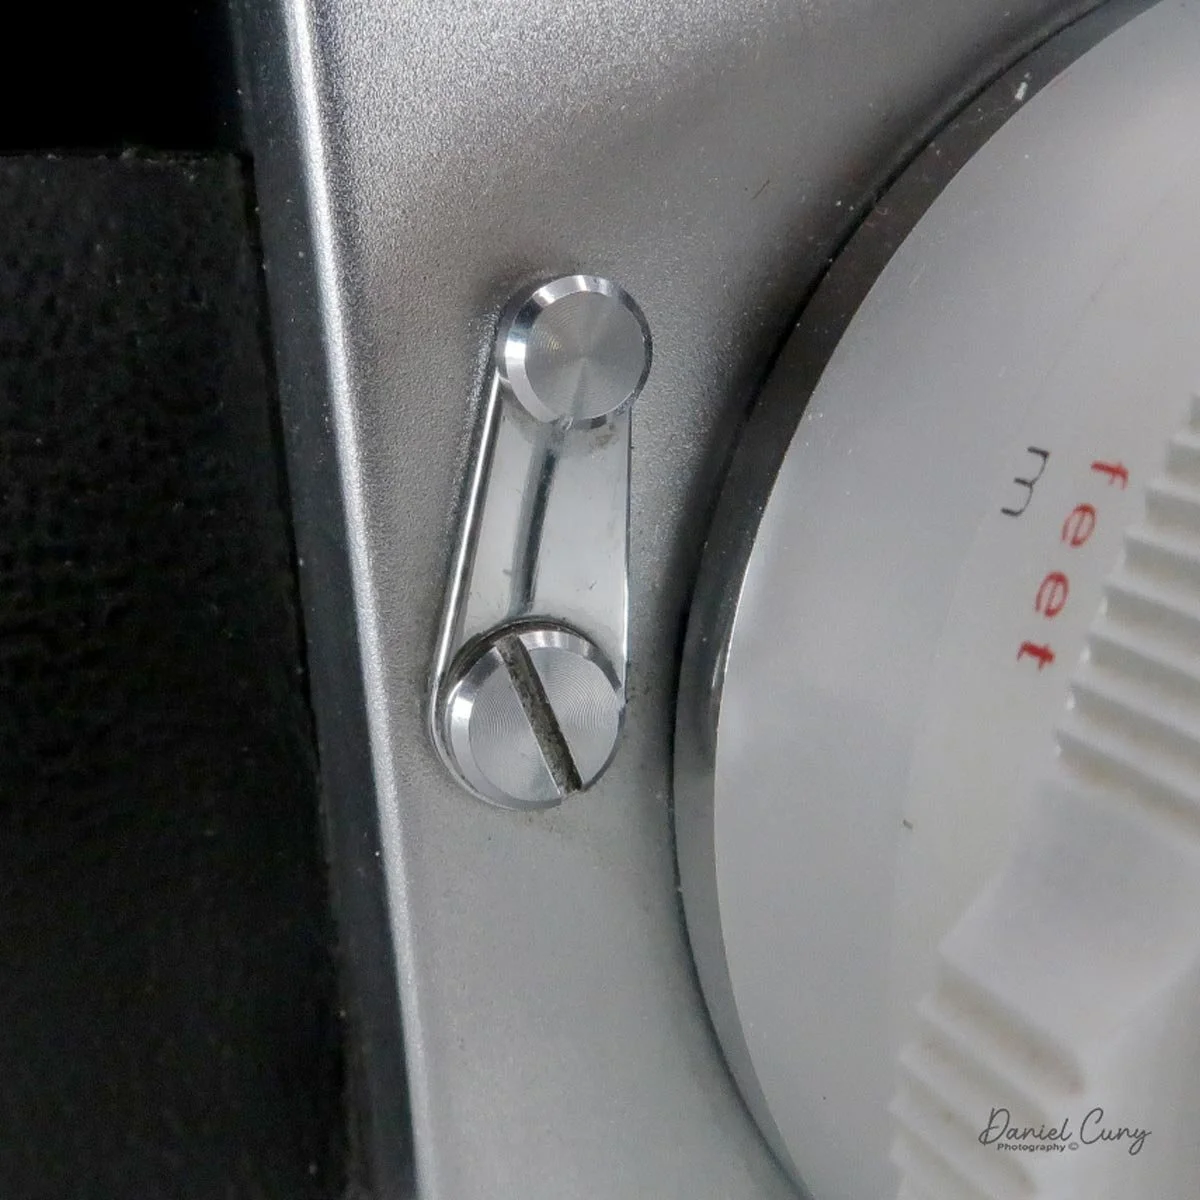
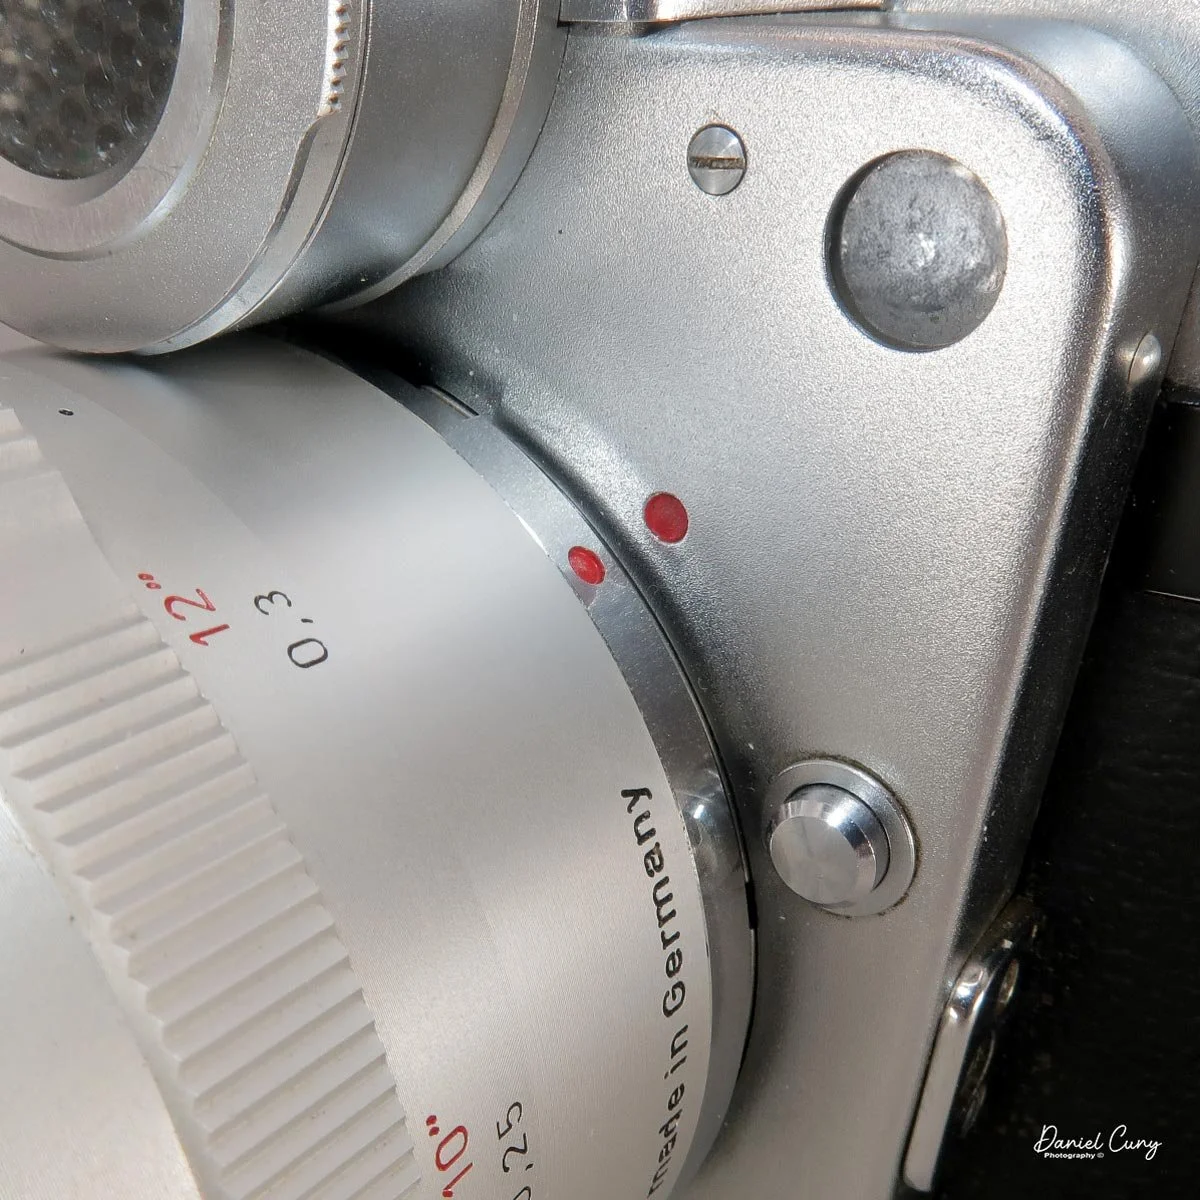
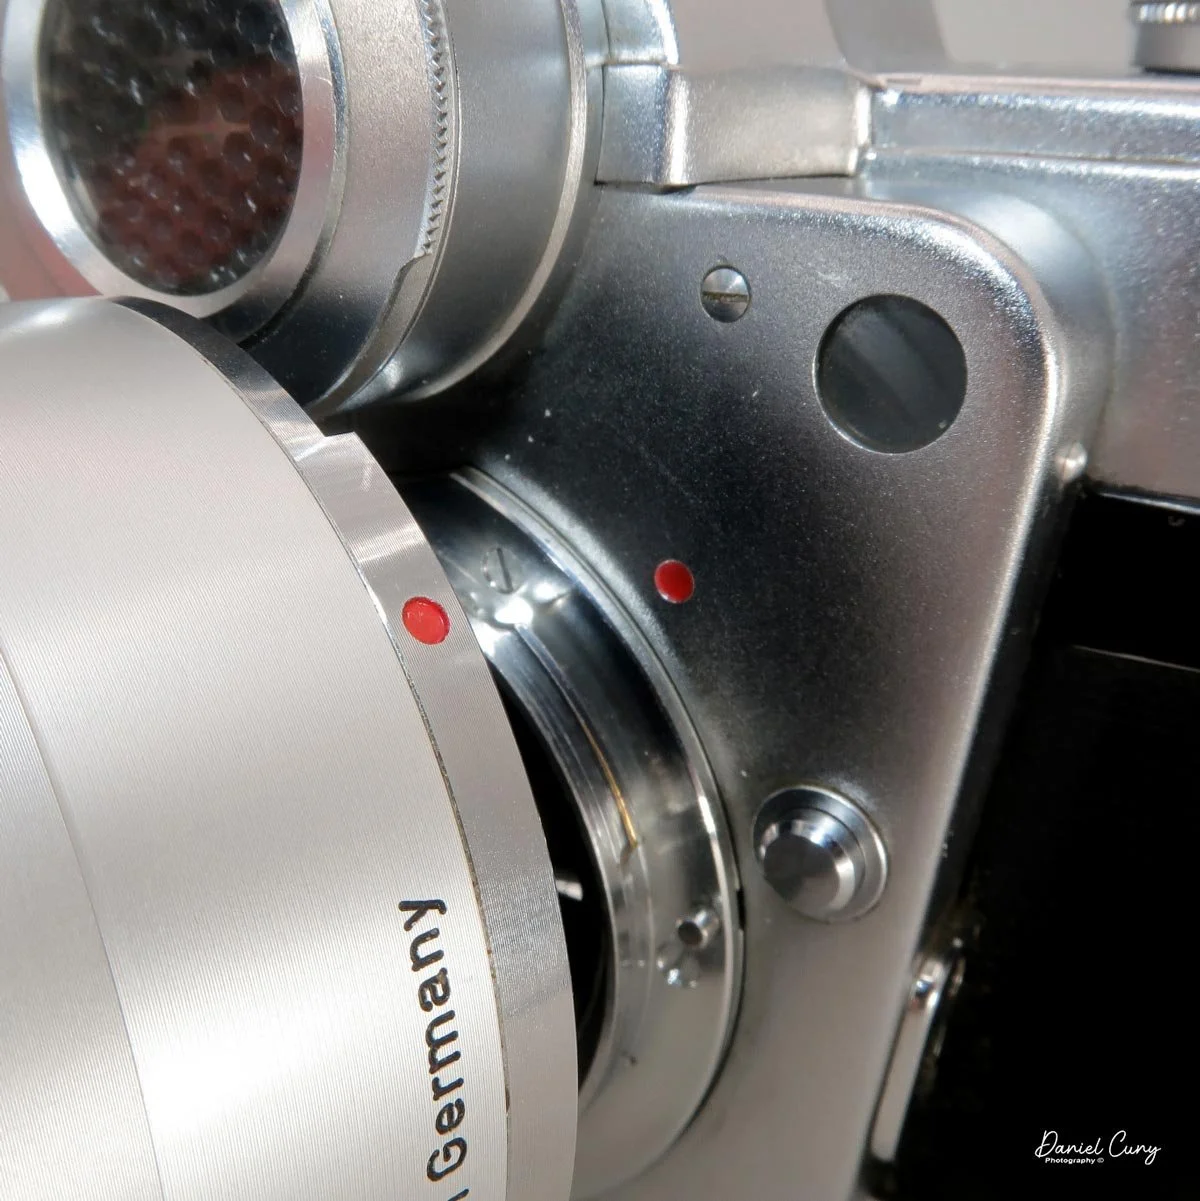
Under the light window is the button to remove the lenses. Press in and turn the lens counterclockwise to remove the lens. To mount the lens, match up the two red dots and turn clockwise until the lens clicks into place. On the side, next to the lens release button, is the flash sync terminal, which is where you'll connect the flash cable, since the camera doesn't have a hot shoe for the flash.
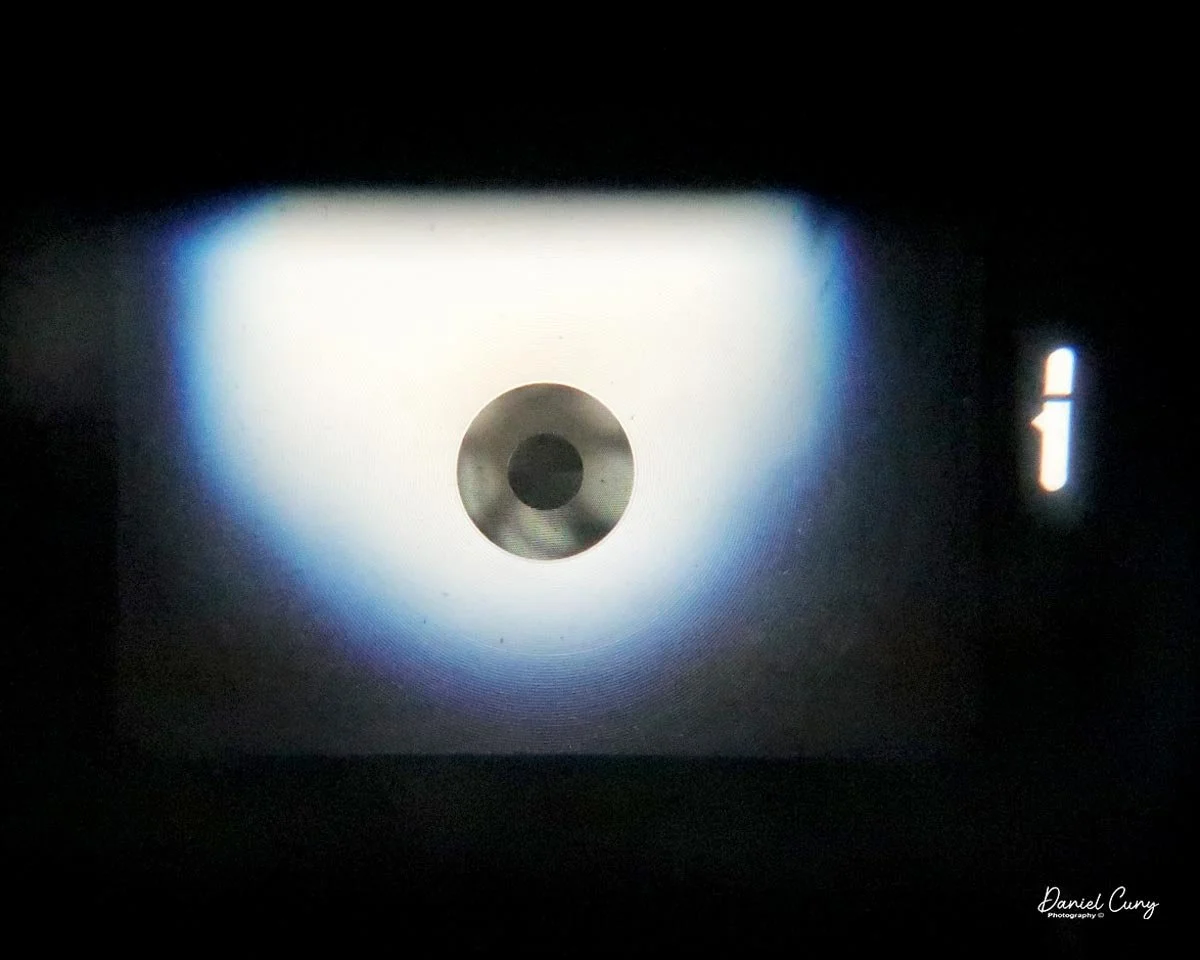
Looking through the camera's viewfinder on the rear of the camera, you'll see the three different focusing types incorporated into the focusing screen. On the outer portion is ground glass, in the very middle is the split image, and circling the split image is a microprism focusing area. Some people have difficulty with the split image, especially with slower lenses, where one of the halves blacks out and they cannot find the vertical or horizontal line to bring together. That's caused by the pupil of your eye not being centered in the focusing screen. If you move the camera up or down, you'll notice this changes from top to bottom, but once centered, the split image becomes whole, and you'll be able to focus more easily.

On the right side of the focus screen is the meter window. Inside the meter window is a line. The goal of proper metering is to get the line in the middle for a properly exposed image. When the line is above the cutout area on the left, you're overexposing, and when below, you're underexposing. The meter allows you to set either the shutter speed, then move the aperture wheel to line up the exposure, or you can set the aperture and move the shutter speed to get the meter needle in the center. It all depends on whether you want to stop action (shutter speed) or get more/less depth of field (aperture).
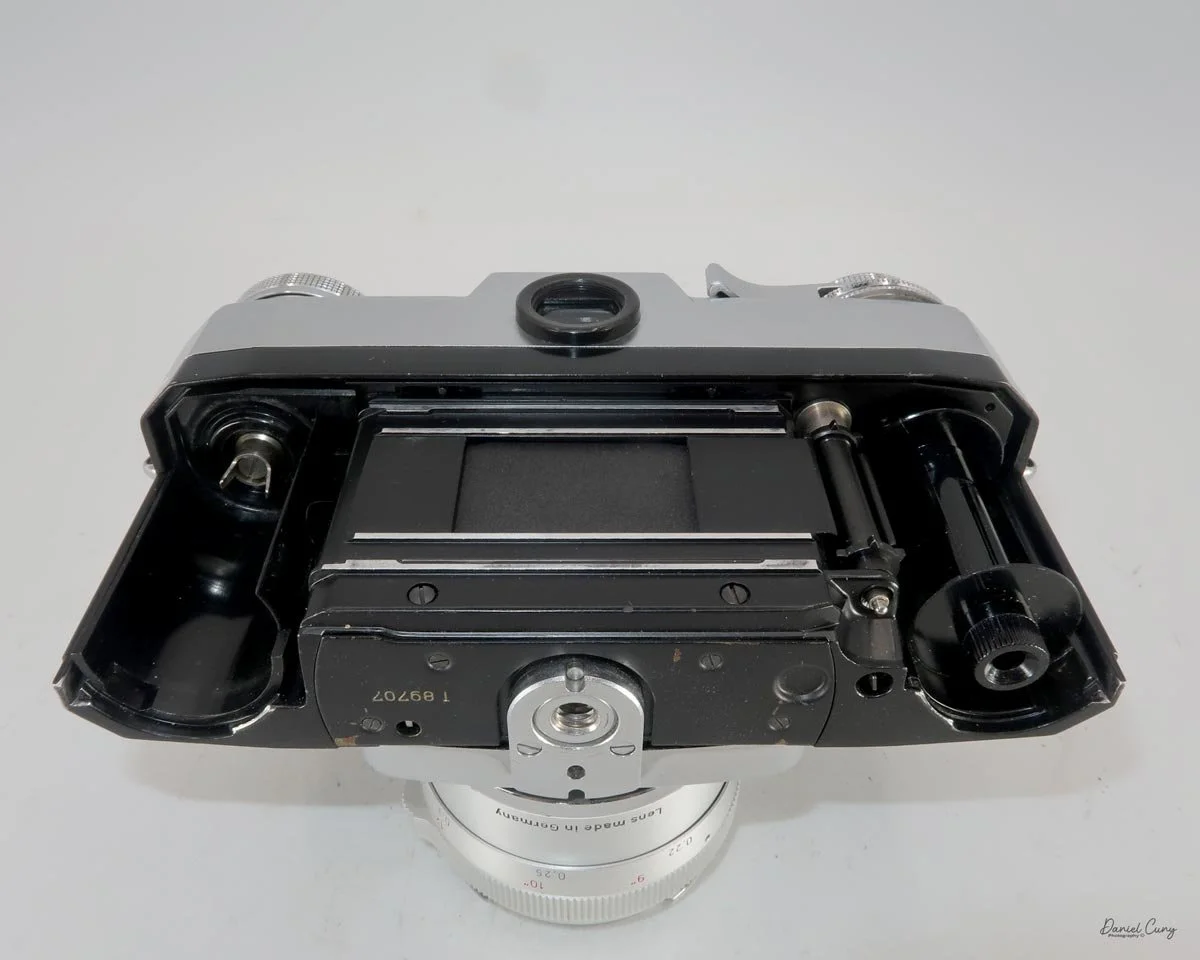
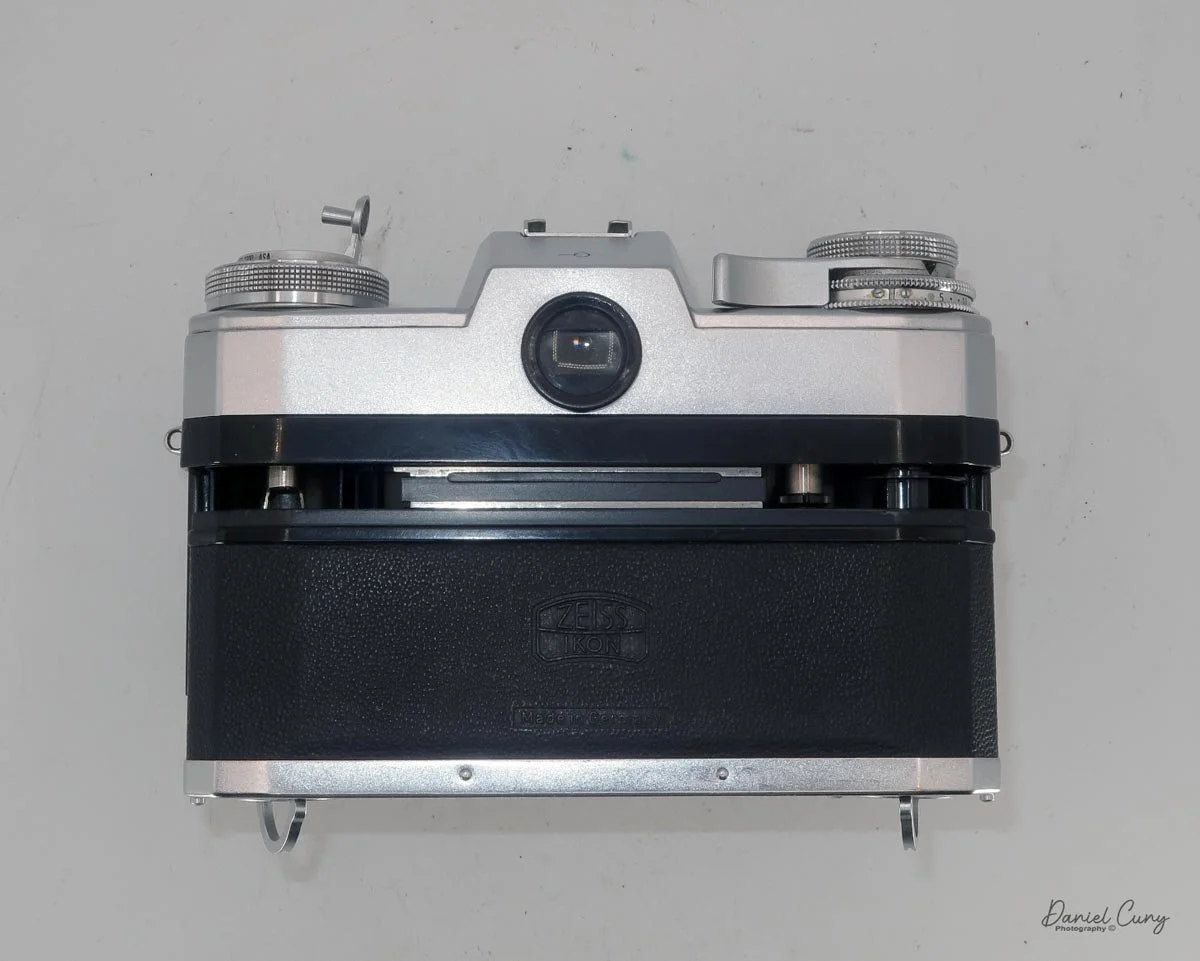
To open the camera to load film, there are two latches on the bottom of the camera that need to be turned, which allow you to slide the back off the camera and expose the film chamber. Once the back is removed, you'll load the 35mm film like you would any other 35mm camera. Once the film is loaded, put the film back into the grooves in the camera body, and slide the back up and into position on the back of the camera. Once it's on, lock the two latches and flip down the handles so the camera sits flush.

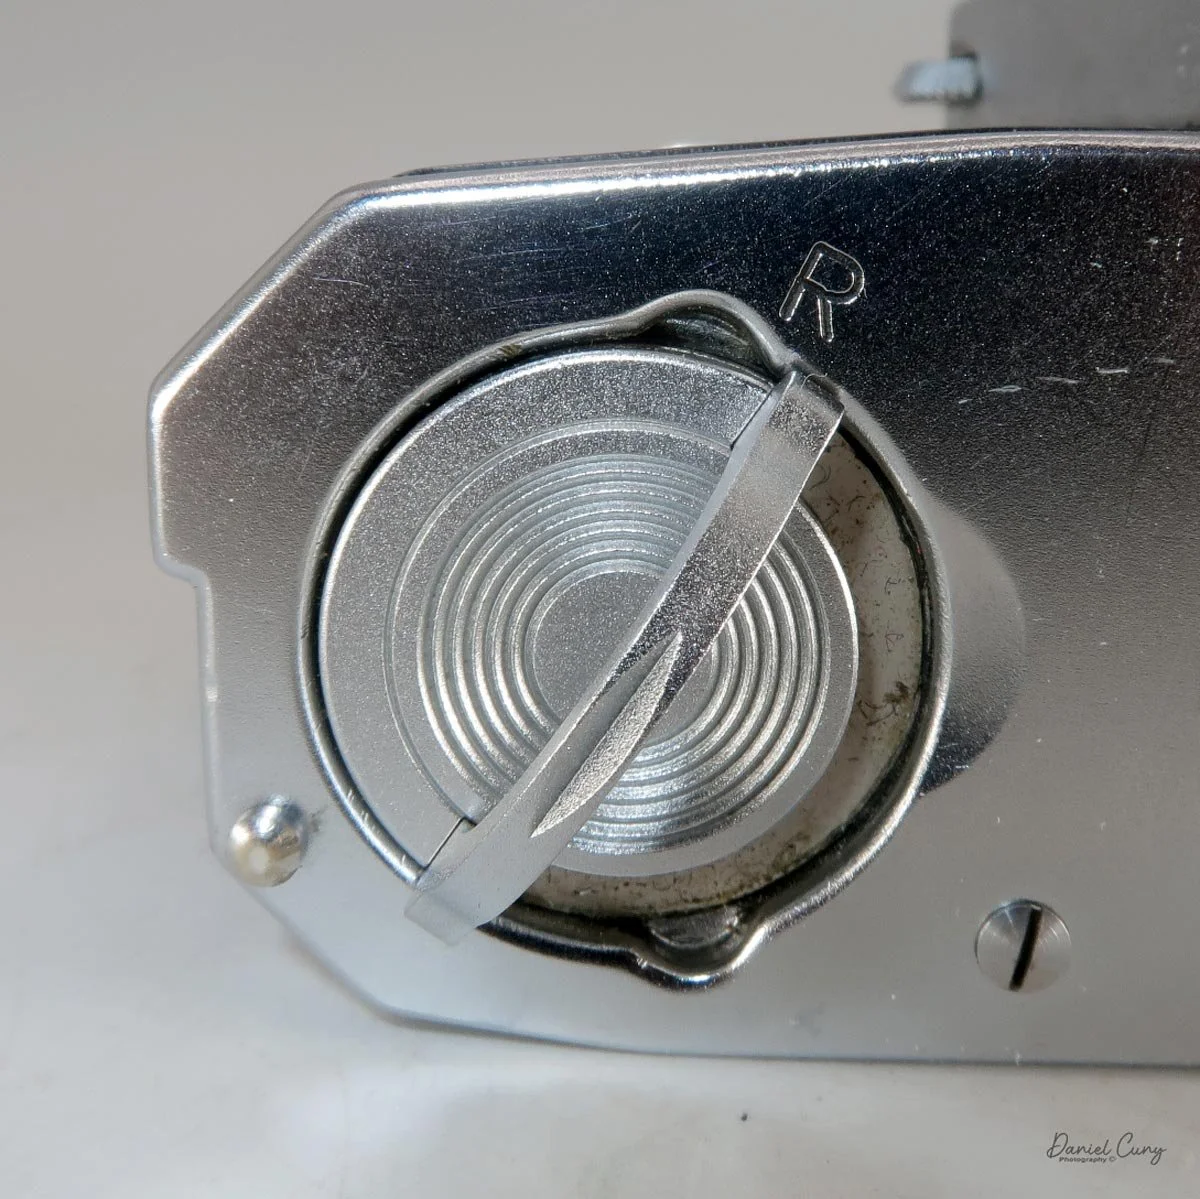
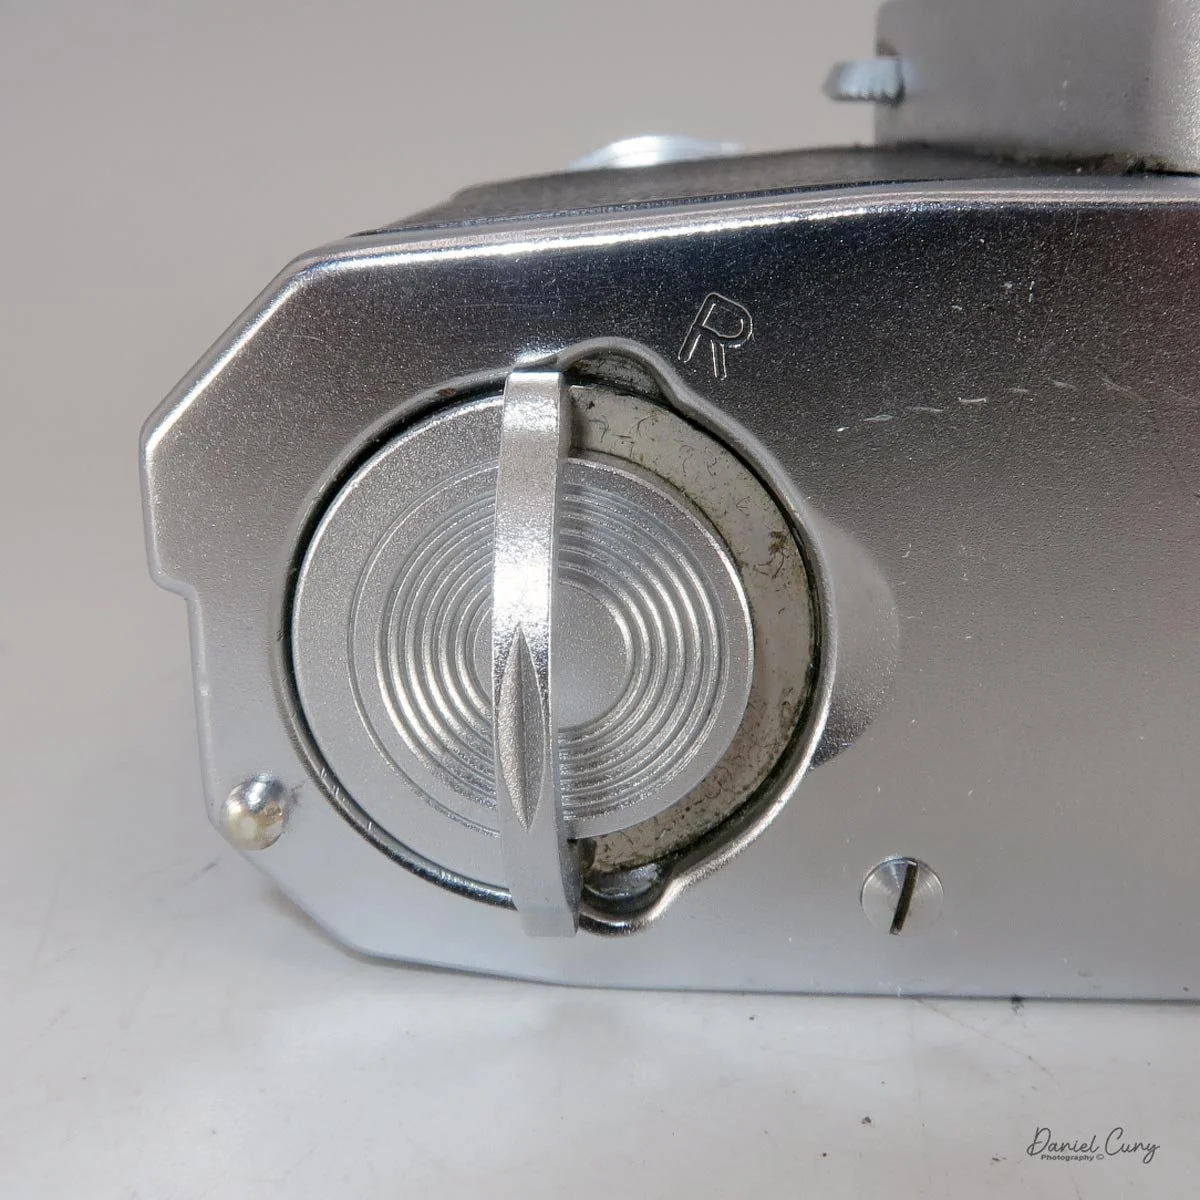
When you get to the end of the roll, and it's time to rewind the film back into the cassette, one of the latches on the bottom of the camera has an "R" for rewind. Lift the handle of this latch only, and turn the lever until the handle is pointing at the "R" (for rewind). Flip up the handle on the rewind knob and rewind the film back into the 35mm cassette. Once the film is rewound, turn both levers to the open position, take the back off the camera, and remove the film for processing.
Now that we have film loaded into the camera, let's take it for a walk around the neighborhood and see how the camera performs.
My Results

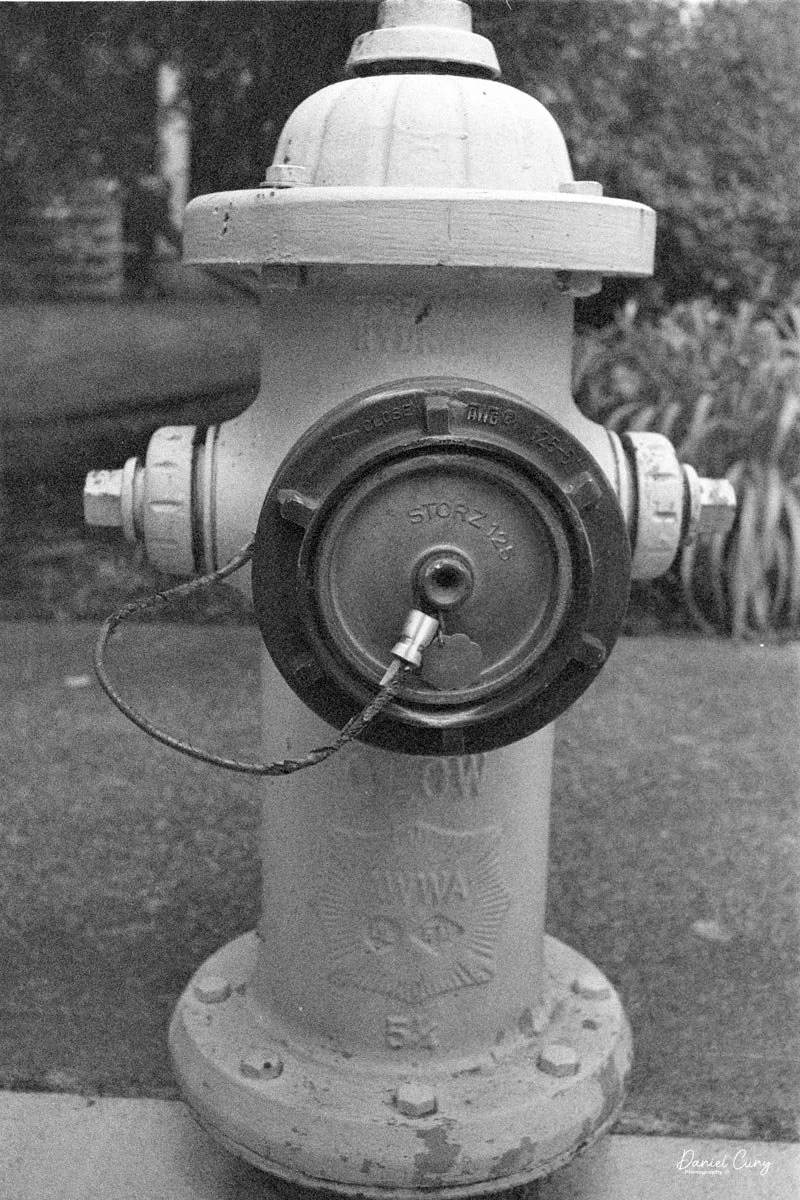
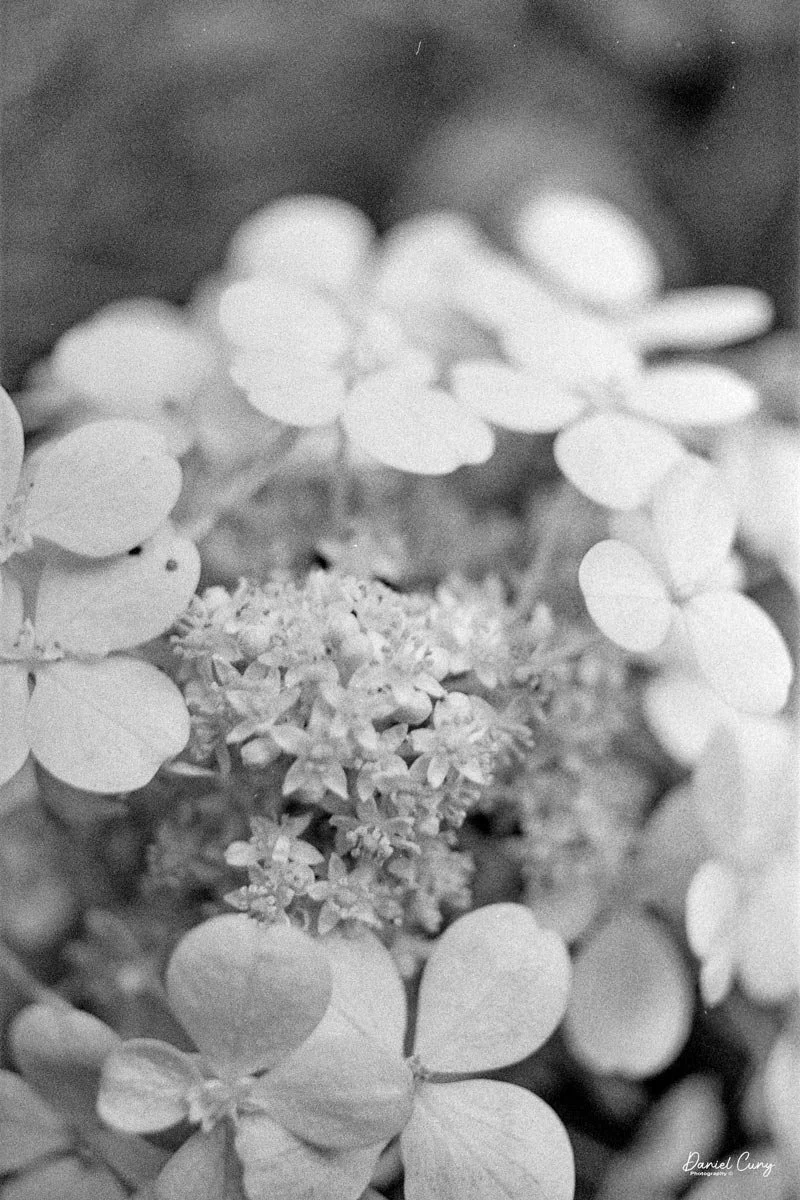
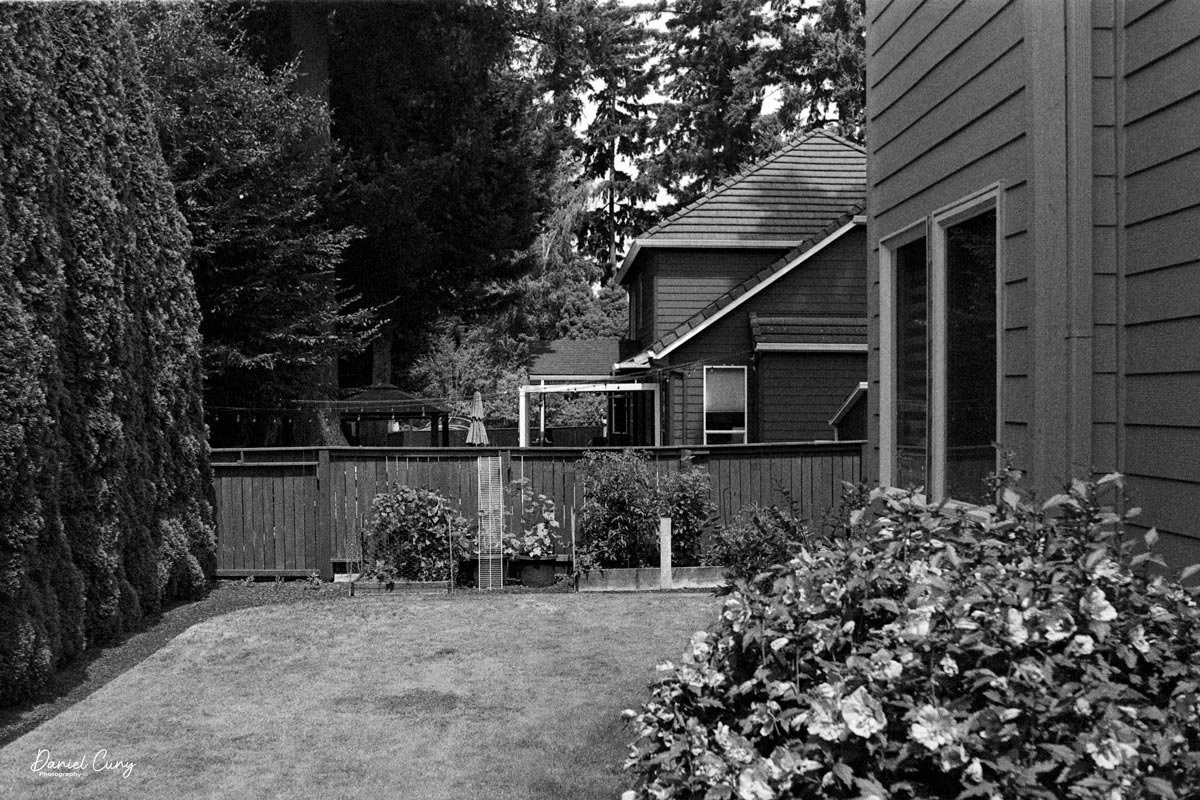
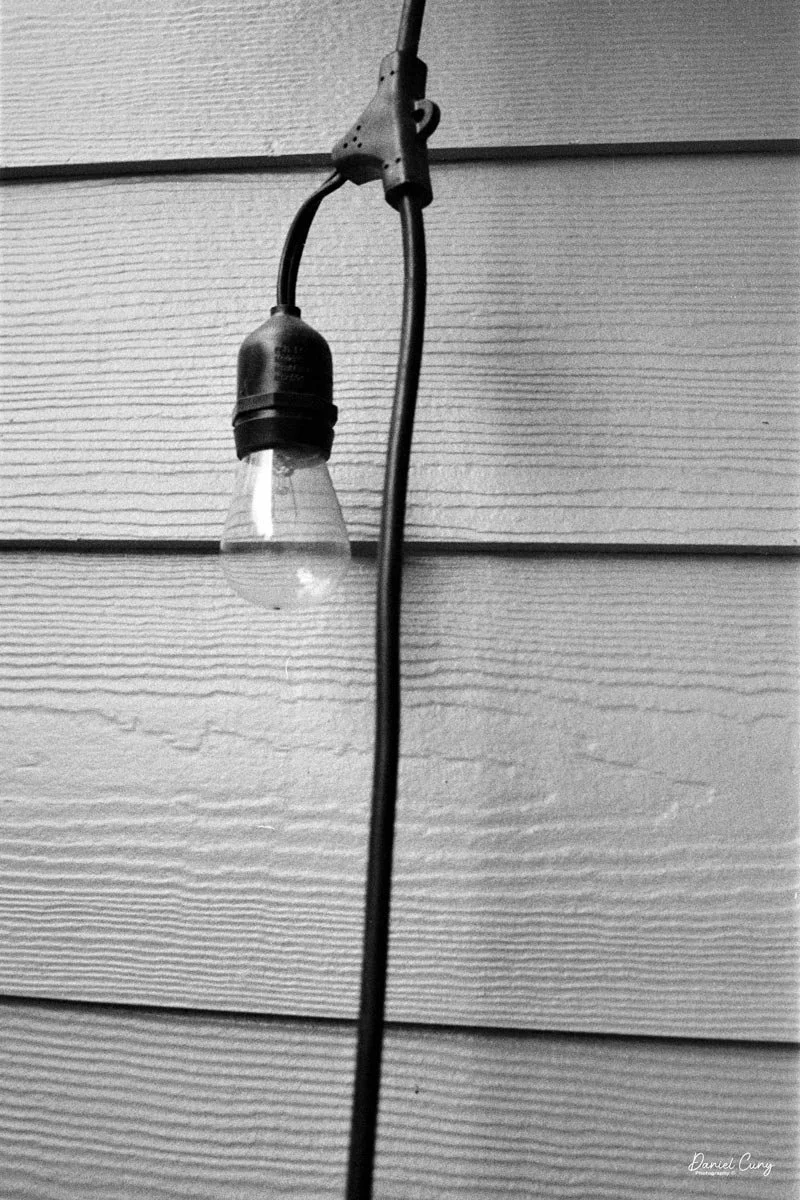
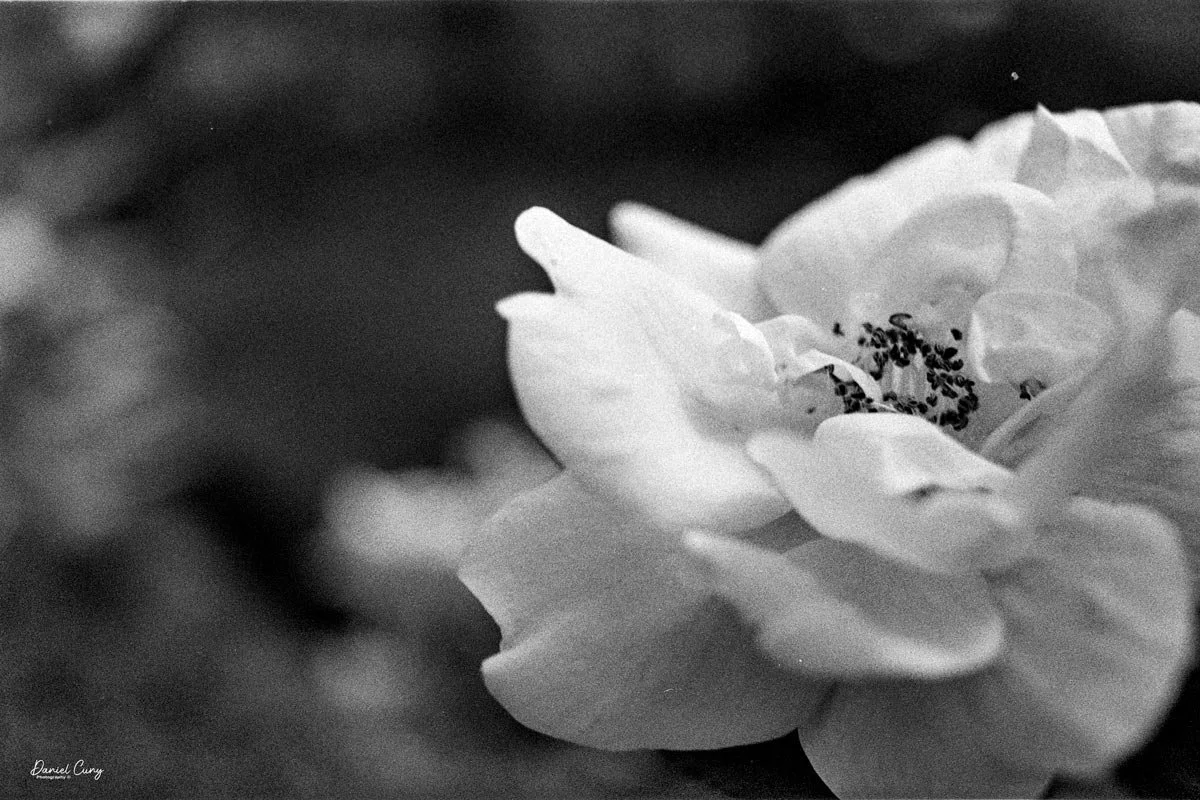
I didn't have any fresh film to shoot through the Zeiss Ikon Contarex camera, but I did—and still do—have some outdated film from 1976, Plus-X 135 film, which I took from the inventory I have from my online store.

 Shooting the film at approximately ISO 50 and processing the film in Rodinal at 1:25, here are the results I achieved with the camera.
Conclusion

The camera performed flawlessly. While this was the first time actually shooting with the Contarex camera, I was surprised at how close you could focus with the lens. All of the images were handheld, and the day was somewhat overcast so that the images would be a bit flat in the lighting, but overall, the camera and lens were fantastic.

 The aperture wheel and light meter worked as they should, and the lens's sharpness is incredible. While the camera is big and heavy for many, it felt very comfortable in my hands.

I now understand why so many people enjoyed using this camera, as it is over-engineered and almost impossible to get serviced. While mine is working well, I'll definitely be taking the camera for many more walks shooting film with it.

 Here are some of my other Camera Reviews.

 Check out my Cuny's Camera Collection YouTube channel, where I am putting together video overviews of the cameras I write about. Be sure to subscribe and like the channel, too!

 Cuny's Cameras and Photos is my online eBay store, where you will find some of the cameras I have reviewed, along with a wide range of other cameras, lenses, and items from my collection that I am thinning out.

 Until next week, please be safe.


Kowa Six MM Camera

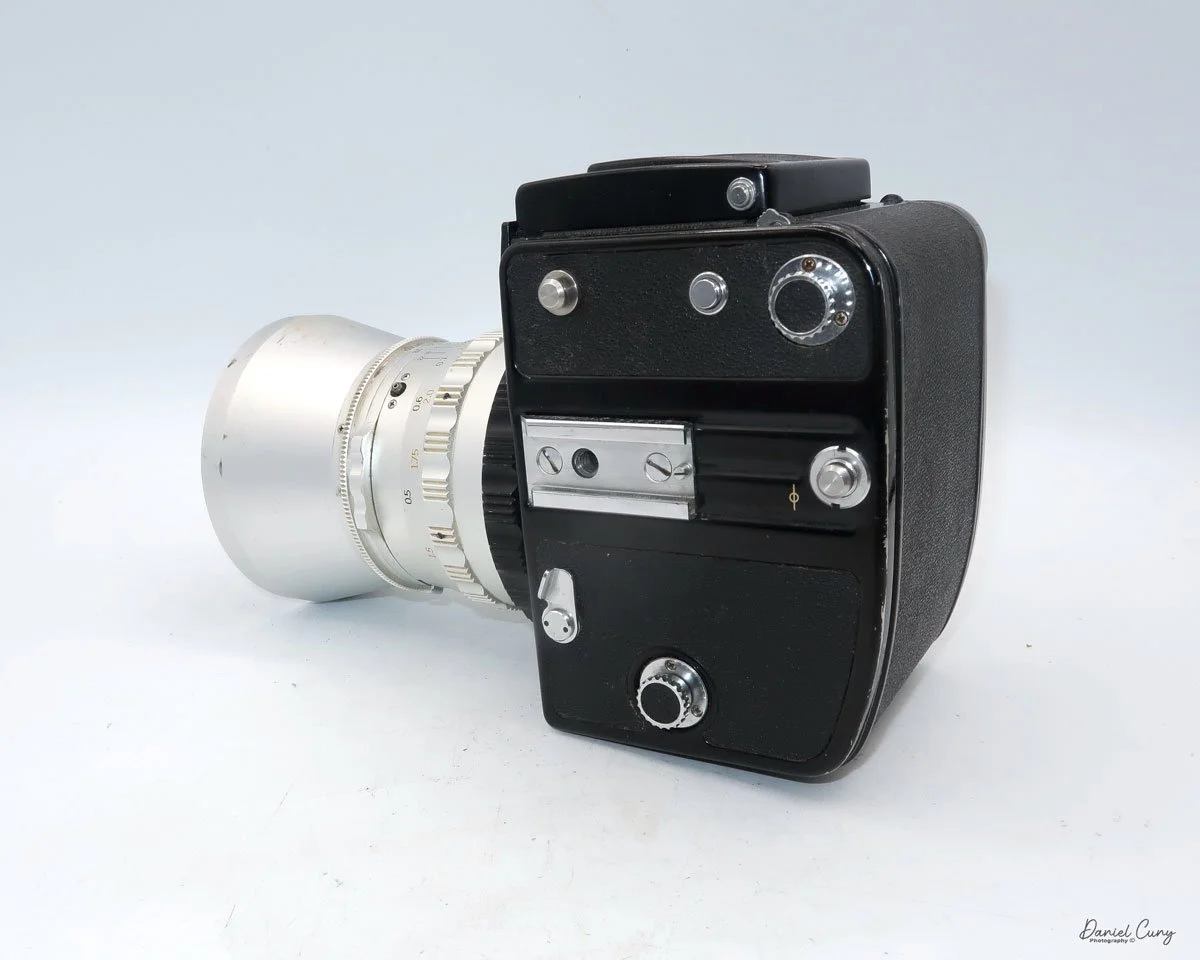
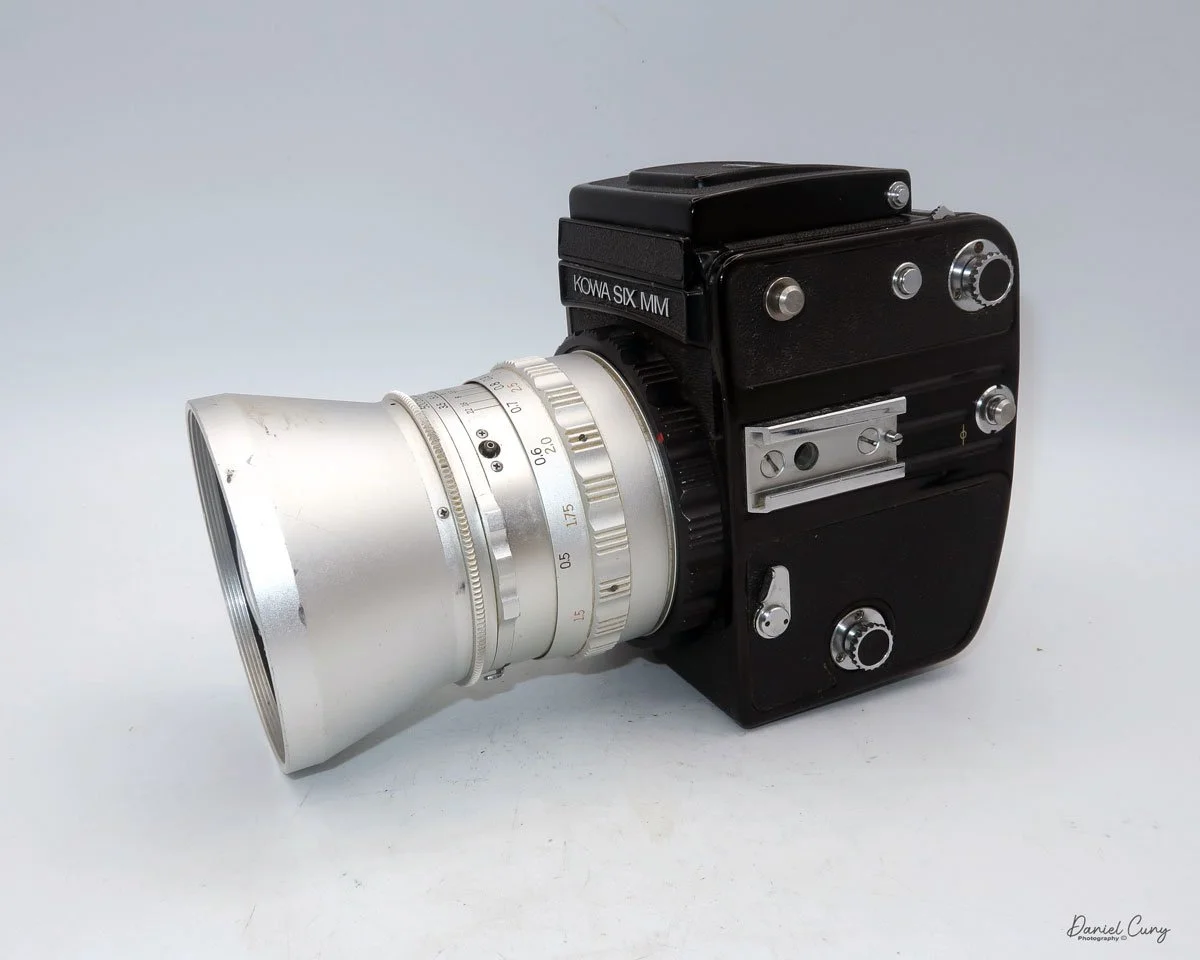
My Kowa Six MM camera.

For some odd reason, I've always felt negative about Kowa cameras. It goes back to when I worked in a camera store in the mid- to late 1970s. The first job I had was handling camera repairs for the shop, which meant packing up the cameras, shipping them to the manufacturer or independent repair facilities, handling the repair estimates, pricing them when they came back from repairs, and calling the customers to let them know their camera was back and ready to be picked up. 

 I can remember when I received notices from many of the camera repair facilities that Kowa cameras were no longer serviceable due to a lack of parts, and that still sticks in my mind to this day. There was always a thought in the back of my mind that if you had a Kowa camera and something happened to it, it was not repairable. 

 It wasn't until many years later, and when I say many, probably 40 years later, that I visited a repair facility in Los Angeles. This person had many Kowa cameras and said he could repair them. He liked the quality of the camera. These weren't the 35mm Kowa camera but the Kowa Six medium-format camera. At that moment, my thought process switched, and the negative stigma of a horrible camera turned to something somewhat positive.

Kowa Six MM with grip.

 Fast-forward about five years, and I had the opportunity to pick up a Kowa Six MM camera for a reasonable price. I didn't know if the camera was in good working condition, but I knew where to get it fixed if it wasn't working.

 When the camera arrived, I started to fiddle with it for a bit, and my negative thoughts faded when the camera was in good working condition. The Kowa Six had a 55mm f3.5 lens, which I like, and a grip for the camera, which gave the purchase more value. As I was playing with the camera, I went from a negative feeling about the camera from many years ago, to WOW, this is a nice and well-built camera. It was time to put some film in the camera and see what this camera can do.

Company History:

Kowa, a Japanese company, has a long and fascinating history in optics, including producing high-quality cameras and lenses. Founded in 1894 as a trading company, Kowa Co., Ltd. initially focused on textiles and later expanded into various industries, including pharmaceuticals and electronics. Its entrance into the optical and photographic industry began in the mid-20th century, marking a significant era for the company.

Ad for Kowa Six camera.

 Kowa began producing photographic equipment in the 1950s, when Japan's camera industry flourished. One of its earliest camera lines was the Kowa Six, a medium-format 6x6 cm single-lens reflex (SLR) camera introduced in the early 1960s. The Kowa Six and its successors—the Kowa 6 MM and Kowa Super 66—became particularly popular among professional and serious amateur photographers due to their solid construction, sharp lenses, and competitive pricing. These cameras were often praised for their simplicity and reliability. They offered interchangeable lenses and accessories similar to more expensive competitors like Hasselblad.

 In addition to medium-format cameras, Kowa produced a range of 35mm film cameras. The Kowa SW, a fixed-lens wide-angle camera introduced in 1964, was particularly notable for its ultra-wide 28mm lens. Other models, like the Kowa SER and Kowa H series, featured leaf shutters and high-quality fixed lenses, catering to various photographic needs. Despite strong optical performance, Kowa's 35mm cameras struggled to gain significant market share, especially against major players like Canon, Nikon, and Minolta.

 Kowa eventually withdrew from the still camera market in the 1970s, focusing instead on its core strengths in optics and electronics. However, the company remained in the optical field, becoming well-known for producing spotting scopes, binoculars, and lenses for industrial and medical applications. Today, Kowa lenses are used in various professional contexts, from wildlife observation to television broadcasting.

 Though Kowa's time in the consumer camera market was relatively brief, its medium-format cameras have left a lasting impression. Collectors and film photography enthusiasts who value their durability, sharp optics, and mechanical precision still seek them out. While sometimes overlooked, Kowa's contribution to photographic history represents a unique chapter in Japan's post-war camera industry boom.

My Camera:

 My Kowa Six MM camera is 5" tall when the light chimney is closed and 7.5" tall with it open, 4.5" wide including the winding lever, and 4" deep without the lens attached. The serial number on my Kowa Six MM is 325240. The lens on my camera is the first of three generations and is a  55mm f3.5 lens. The serial number on my lens is 153507. One of the great things about the Kowa Six system is that all the lenses have leaf shutters built into them, which is very similar to the Hasselblad system. My Kowa Six MM with 55mm F3.5 lens weighs 4lb. 9.7oz without the side grip.

The shutter speed built into the lens goes from 1/500 to 1 sec. Along with "T" for timed exposure, the aperture ranges from F3.5 to F22. One of the advantages I found about the Kowa Six MM was how easy it is to set the focus, shutter speed, and aperture, which are all located on the lens barrel. Each setting has its ring and is easily moved and marked. The focus ring moves smoothly, and the shutter speed and aperture rings click into the desired setting. The lens also has the flash PC socket, along with a switch to set the 10-second self-timer (V), along with the flash settings for bulb (M), electronic flash (X). The shutter release is on the front and bottom right of the camera body. There is also a locking collar around the shutter release to prevent releasing the shutter when you don't want to.

 When reading about the camera, a few things were mentioned. One of the items mentioned was that the camera tends to move the focus slightly due to the mirror movement, causing the image to lose sharpness. I'm unsure if the focus or the camera is moving, which causes the image to be a bit soft, but I'll be aware of that when I shoot the camera.

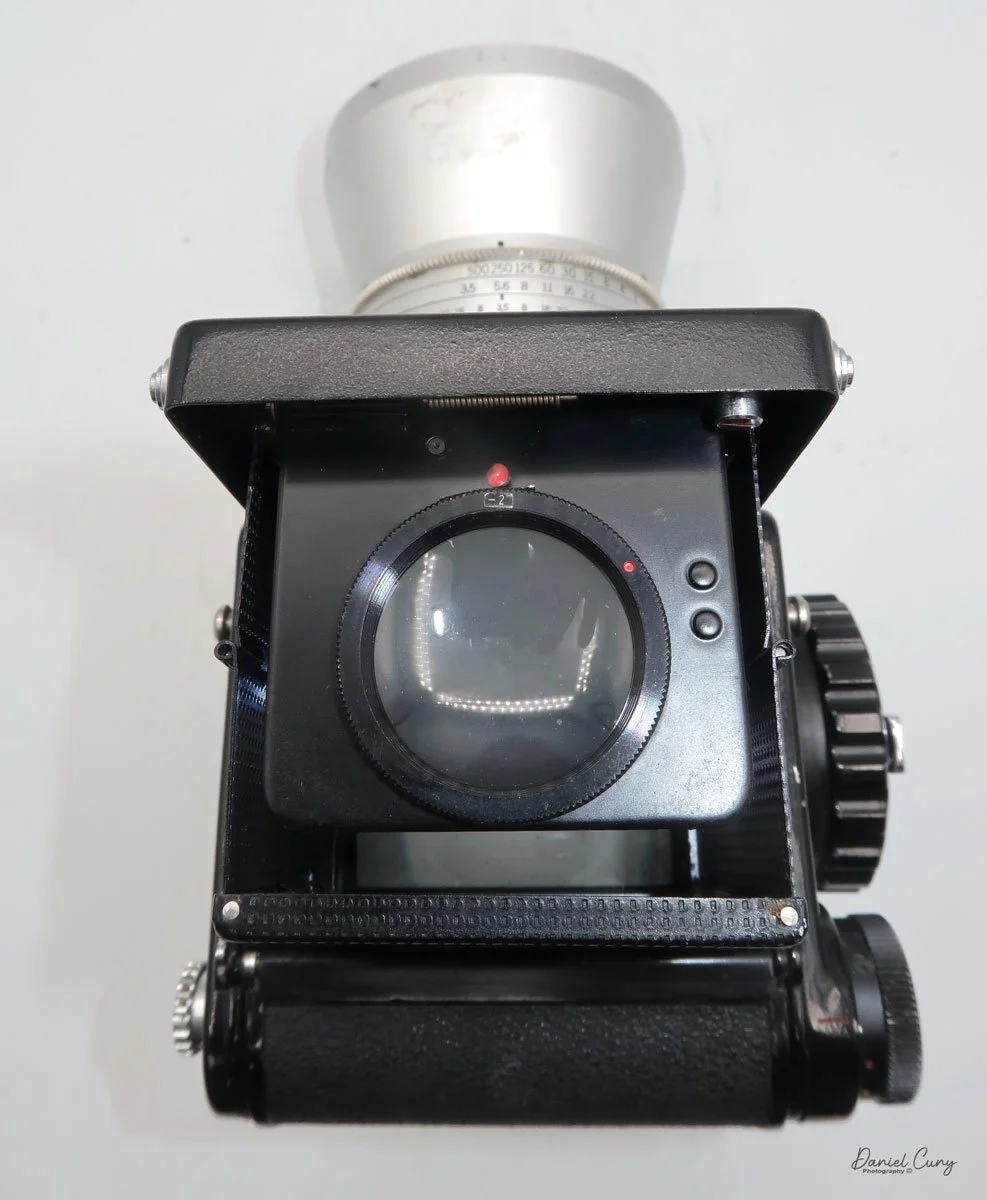
 To view your subject, open the light chimney. Pull up on either side of the light chimney, and the viewfinder opens easily. There is a magnifier for critical focus, which you can activate by sliding a button along the back of the front. Sliding the button to the right pops up the magnifying lens. Pushing it down will lock it out of position. The light chimney has hinges on the side that must be squeezed together to close the viewfinder.

You can change to a different viewfinder by pressing a chrome button between the strap lug and film locking lug. Once the button is pressed, slide the viewfinder forward to remove it. You can also remove and change the focus screen by pressing the same chrome button and lifting the focusing screen. Put the focus screen back, line up the red dot on the camera with the red dot on the focusing screen, and drop the screen back into place. Pressing the chrome button to seat the focusing screen into position. You can slide the viewfinder back on, and it will lock into position once it's pushed back onto the camera.

The collar on the body must be turned counterclockwise to remove the lens. Before moving the collar, you'll need to wind the camera so the camera is in the "cocked" position and the mirror is down. You can move the collar somewhat, but until you slide the lens locking button back, the collar won't move the entire way to remove the lens. To put the lens back onto the camera, you'll line up the red mark on the lens to the red mark on the camera body, and turn the collar clockwise to lock the lens back onto the camera body.

To open the back to load film, turn the lever on the bottom of the camera to the "O" position, and the back of the camera unlocks. Lift the back door, which exposes the film chamber. Bring the empty reel from the bottom of the chamber to the top, which will now be your take-up spool. Pull out the film locking knobs on the side of the camera to put in the empty spool and the new roll of film you're loading into the camera. Bring the leader up to the empty spool and thread the lead into the slot and turn the winding knob on the right side of the camera to take up the loose film. There ia a handle built into the winding knob to make the turning of the knob easier. Keep winding until the "start" arrow points to the red dots on the sides of the shutter, close the back, and continue to wind until the winding lever stops. At this point, the frame counter will be on number one, and you're ready to start taking photos.

 The Kowa Six MM will take either 120 or 220 film. If you plan on shooting 220 film, be sure to change the pressure plate to the proper position, and on the side of the camera, make sure you've selected "24" on the selector between the strap lug and frame counter on the right side of the camera. Selecting 24 tells the camera you're shooting 24 images on 220 film instead of 12 exposures on 120 film.

You can also lock the mirror "up" by turning the knob on the right side of the camera to the "up" position. This function reduced camera vibration. You can also do double or multiple exposures on the Kowa Six MM. To do so, after your fist image, turn the knob on the top of right side of the camera from the orange dot and orange line which is for normal film advance to the red dot and red line. This is disengaging the film advance so you can do multiple exposures. Once you're done, turn the dial back to the orange dot and line position, and the film will advance.

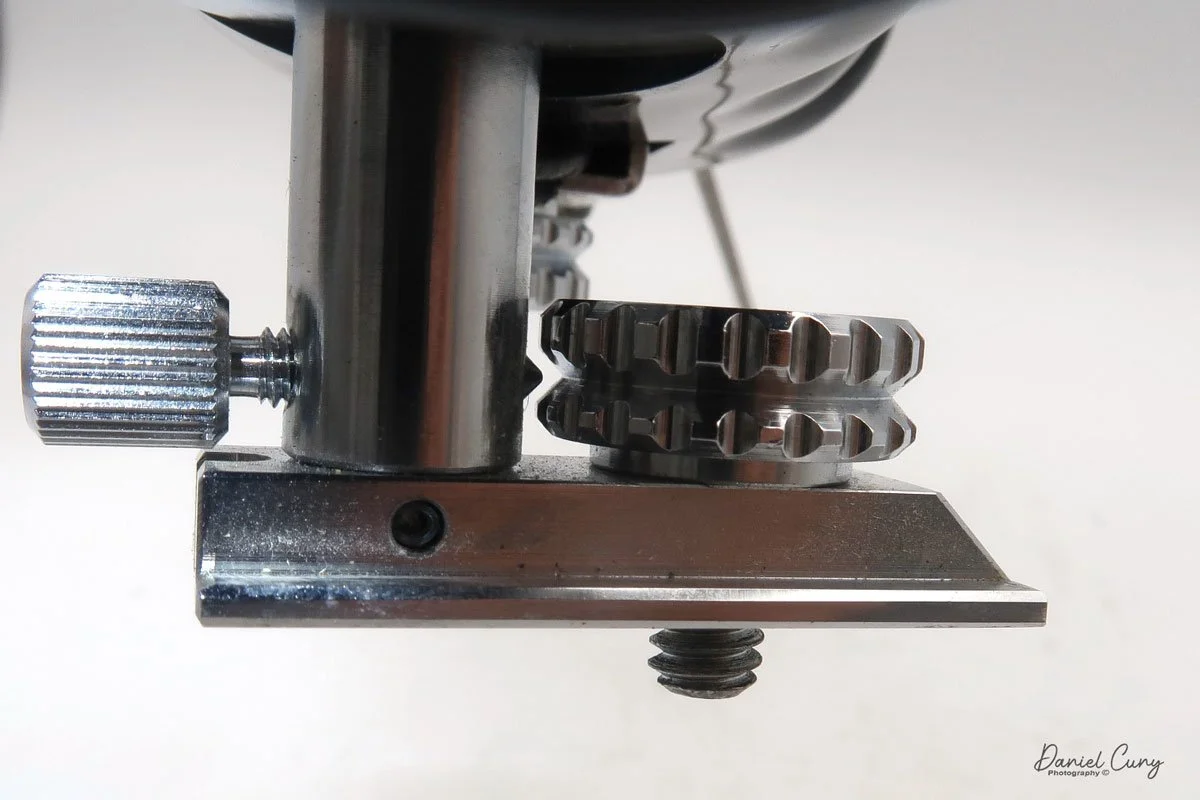
As I mentioned, my Kowa Six MM camera has a side bracket, making it easy to hold and handle. Still, I didn't realize how nice this grip was when I went to take it off. Not only is there a nut that hold the bracket onto the camera, but there also a screw that locks the nut into place so it doesn't accidentally get unscrewed and have the camera fall off the grip.

My Results:

Since the clouds were moving in and out, I didn't want to shoot a slow-speed film, so I loaded the Kowa Six MM with a roll of Ilford 125 ISO film and proceeded to walk through the neighborhood, focusing on many of the spring flowers that have been blooming this time of year. After walking around, I went home and processed the film. Here are the results from my walk through the neighborhood.

My Conclusion.

WOW!!! Was I wrong for so many years? This camera worked fantastically and was fun to use. The viewfinder was bright, the magnifier was easy to use, the shutter speeds sounded accurate, and having the shutter speed, aperture ring, and focus all in the same spot was fantastic.

 The film advance was smooth, and carrying the camera with the grip made it very comfortable. I understand why the technician who coveted the Kowa liked the camera so much. The system offers nine lenses from 19mm to 500mm, different viewfinders and focusing screens, so it's complete. The price of these cameras is less than half of Hasselblad's, and they are smaller and easier to handle. I'll keep this camera for a while and see if I can expand the lenses I have for it. While I like the wide-angle lenses, getting an 85mm standard lens would be nice and slightly cut down on the weight.

 I love to hear from the people who read my posts. If you have a question or comment, please let me know. I'm always looking for ways to improve this experience.

 Until next week, please be safe.

Finetta 88 Camera

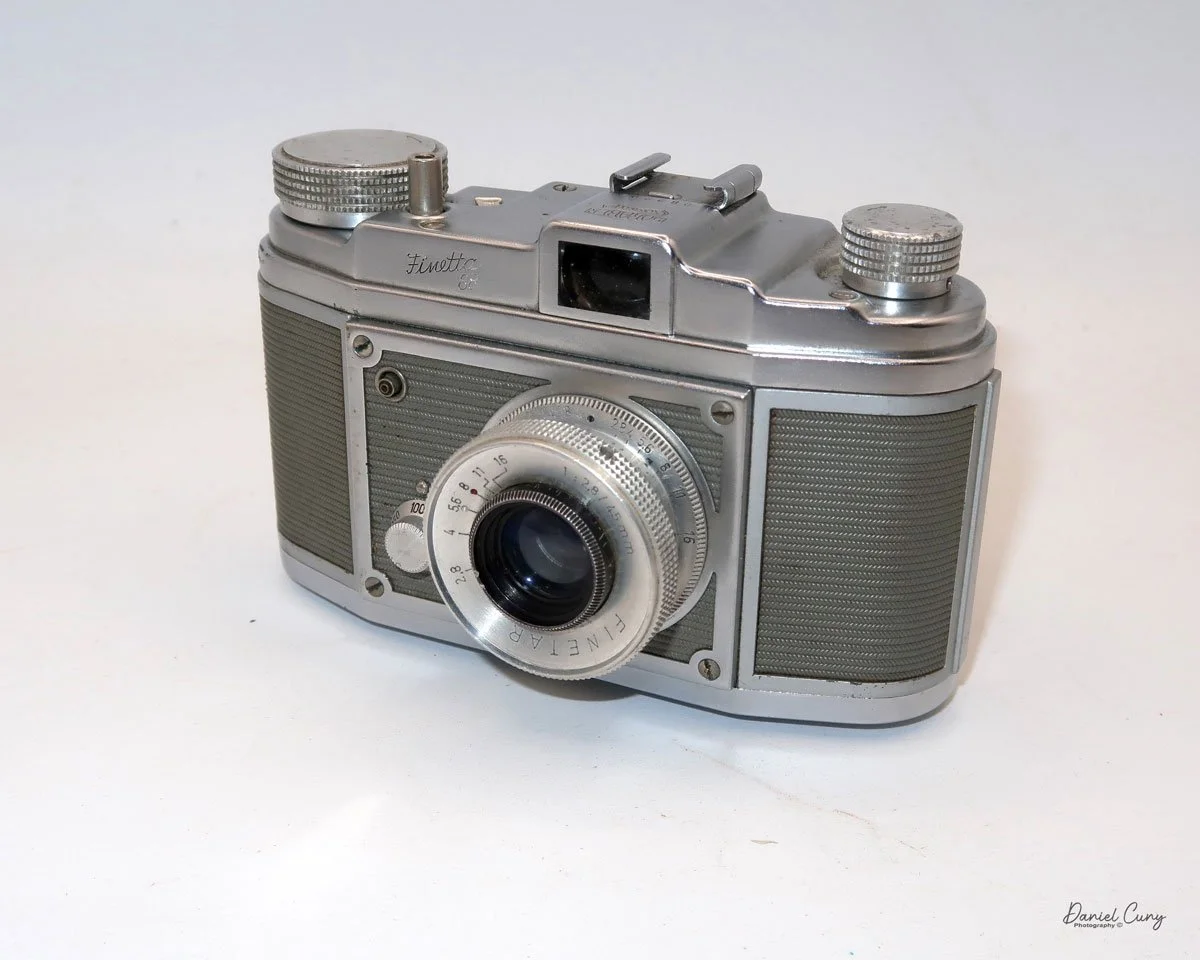
My Finetta 88 camera

The Finetta 88 camera caught my eye on a visit to London a year or so ago when I had about an hour during a walk down Portabello Road. I met with Juliano, the owner of Cameras London, who was still in the process of setting up. As I was looking over his extensive items on the multiple tables he has, I saw the grey body of the Finetta 88 camera. 

 If you are a camera enthusiast and can go to Portabello Road during the weekends, I highly recommend seeing Juliano. He has an incredible selection of older wood cameras with brass lenses and many of the more common 35mm point-and-shoot cameras that seem to be all the rage now.

 As I've mentioned a few times, I'm always drawn to the camera with either a different color or if there is something odd or unusual about the item. Not only is the Finetta that I saw covered in a gray covering on the camera, but the lens is somewhat off-center, giving the camera an "out of the ordinary" look. I put the Finetta 88 camera aside and looked over many other cameras I wanted to purchase. As we discussed the price, I picked up the Finetta again and added it to the few items I purchased that day, and I'm glad I did.

The Company

Finetta-Werk was a German camera manufacturer with roots tracing back to Kamerawerk Peter Saraber, a company founded by Peter Saraber in 1945 in Goslar, Germany. Saraber, a Dutch engineer, initially focused on producing precision optical equipment in the post-war era during heightened demand for affordable and efficient photographic devices. Saraber teamed up with a Voigtlander engineer, Helmet Finke, around 1947 to design and develop a new camera.

 "Finetta" was introduced in the late 1940s, marking the company's transition toward a more consumer-friendly image. The Finetta cameras, characterized by their simplicity, durability, and relatively low cost, appealed to post-war Europe's growing middle class. Early models, such as the Finetta 88, showcased Saraber's dedication to compactness and practicality, featuring a straightforward mechanism for capturing 35mm images, including a new two-leaf shutter system, which they applied for a patent. They also invented a new film advance system with double exposure prevention.

Ad for Finetta 88 camera taken from Mike Eckman website.

 By the 1950s, the company rebranded as Finetta-Werk and expanded its product lineup. The Finetta 99 was notable for its interchangeable lenses, which had a new three-prong lens mount and included a series of four different lenses. The lenses included a Colorfinar 70mm f/5.3, a Telec 90mm f/4.5, a wide-angle 35mm Berthiot lens, and the normal Finetar 45mm f2.8 lens. Along with the lenses, Finetta improved design quality, reflecting a shift toward competing with established brands like Kodak and Agfa. 

 Another interesting fact is that in 1954, Finetta started working with Jacques Bolesy of the Bolsey camera company to help with the design and production of their small, compact Bolsey 8 subminiature still and movie camera. Unfortunately, Finetta went out of business soon after and closed their factory in 1957.

 Finetta cameras were often praised for their ergonomic designs and mechanical reliability, offering a stepping stone for amateur photographers transitioning into more serious photographic endeavors.

My Camera:

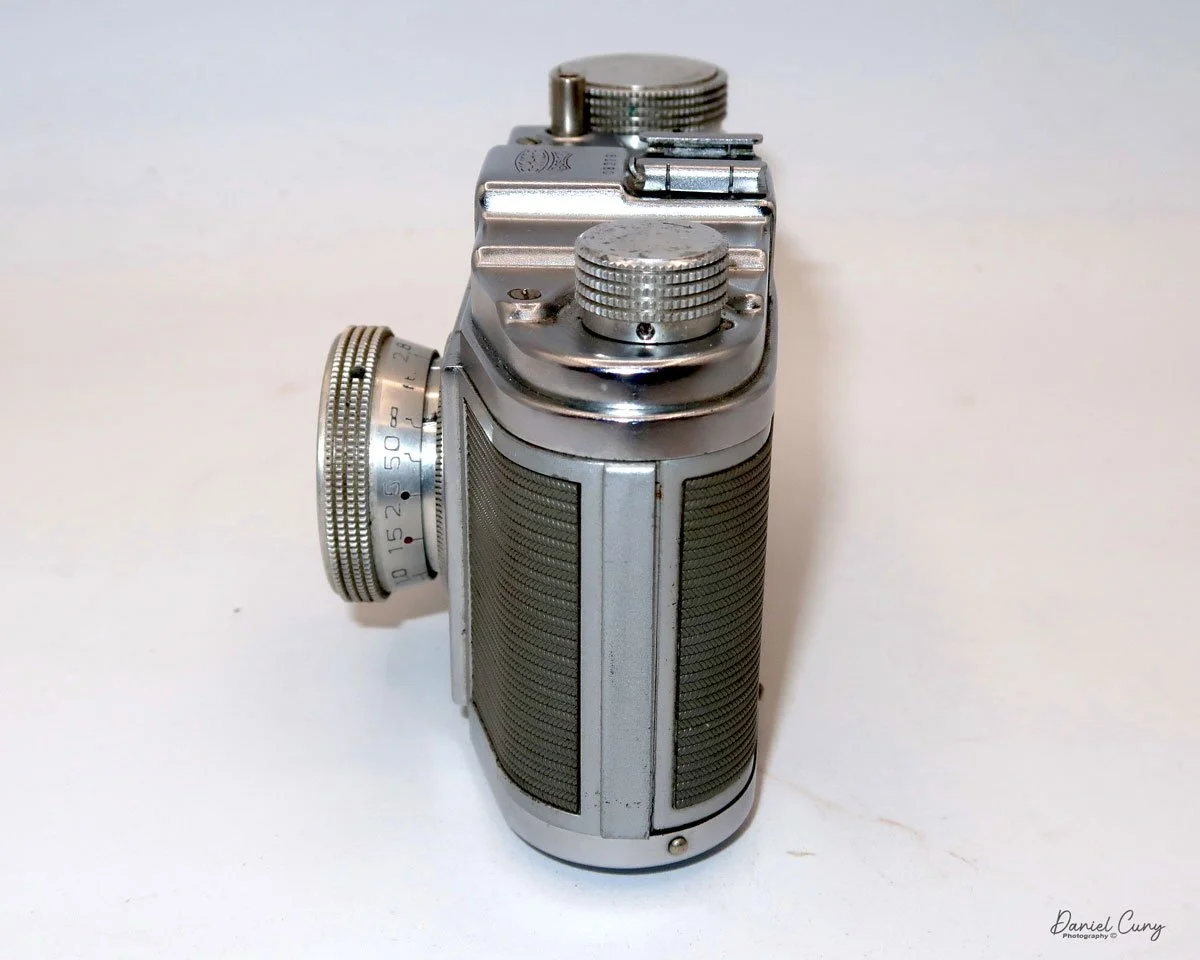
My Finetta 88 camera is covered in an odd fabric. It has a herringbone-style pattern and is not the normal leather or leatherette covered in most cameras. It is more of a fabric material, but it does have a great feel to it, and I like the greyish color, which gives the camera an elegant appearance. 


The Finetta is 3" tall by 5 1/8" wide by 2.5" deep from the front of the lens to the back of the camera, and weighs 1lb, and .7 ozs, and comes with a Finetar 45mm f2.8 lens which has a three-prong bayonet. There is no locking mechanism on the lens mount, so you must be careful when focusing on the camera. If you turn the lens too far, the mount will start to move, and the lens will pop off, which is pretty small. The lens does "click" into place, but it can somewhat easily come off without the locking pin.

My lens focuses from 2.8 feet to infinity. It may focus closer as the lens rotates past the 2.8-foot mark on the lens. The aperture settings are on the inside of the focus ring. The camera doesn't have an internal focus system, so all the focus is guesswork, judging the distance, and setting focus. The aperture range is from f2.8 to f16 and is indicated by a small notch on the setting ring.

 With the lens removed, you can easily see the two-leaf shutter system. The camera only has a few different shutter speeds, ranging from 1/250, 1/100, 1/50, 1/25, and "B" for timed exposures. The shutter speeds are set on a very small and challenging knob next to the lens. 

One thing I noticed about the camera when I first picked it up and started to play with it was that things seemed backward from what I am used to. I'm used to filming advanced turning in a clockwise movement, but this camera goes counterclockwise. It's the same as taking the back off the camera to load the film. To open the back, you turn the knob on the bottom in a clockwise motion. The back is held onto the camera with none other than a bolt-style fastener which is held onto the camera with a larger circular nut that screws on to keep the back onto the camera body. To me, that is the motion to tighten, but on this camera, it's the motion to untighten and remove the back to load the film.

 When I removed the back from the camera, I noticed a couple of things right away. My Finetta 88 had a film cassette in the camera. I'm not 100% sure who makes this cassette. Still, it's very similar to the Leica cassettes in design, with two outer compartments and an inner spool. The cassette is also held into the camera with a locking lever that slides over the end of the cassette to keep it in place. The second item I noticed was a bright and shiny pressure plate over the shutter area to keep the film flat as it's transported across the chamber. The pressure plate needs to be lifted when loading the 35mm film. The third item noticed was a larger, thicker take-up spool on the camera's right side. This one is similar to what I wrote about with the Corfield Periflex camera. There is a slot to put the 35mm leader into, which is needed to load the camera.

A built-in, double exposure prevention system is within the camera's transport. Once you trip the shutter, under the take-up spool is a small piece of metal that pushes out and stays out until you wind the camera, which cocks the shutter and flattens that piece of metal, allowing you to take the next photo. I guess there's a pin that pushes out the metal piece, and when the film is advanced, it will enable the pin to fall back into place for the next photo.

On top of the camera is nothing more than the film advance knob on the right side, which turns counterclockwise to advance to the next frame. The frame counter, accessory/flash shoe, and rewind knob are on the far left.


My Results:

The camera is very straightforward and somewhat basic in its operations. I didn't use the 35mm cassette that came with the camera; I just used a regular 35mm roll of film. I put in a roll of T-Max 125 film and walked through the neighborhood to see what kind of results the camera could produce. After I got back from my walk through the neighborhood, I processed the film, and here are a few of the shots I took.

My Conclusion:

The Finetta 88 camera took a bit to get used to. I kept on trying to turn the advance knob in the wrong direction; the shutter speed dial was small and difficult to turn. That may be more of a camera cleaning issue, but I changed to other speeds. The lens did start to unmount a couple of times, but nothing disastrous to the point where the lens fell off the camera. The focus is smooth on my camera; it was more operator malfunction than anything, but overall, the camera was enjoyable to shoot with, and I think the lens I have on this camera is sharp.

 I'll definitely want to shoot with this camera in the future. It was fun and a pleasant experience overall.

 Thank you for taking a few minutes from your day to learn about this interesting mid-century camera I have in my collection.

 Until next week, please be safe.