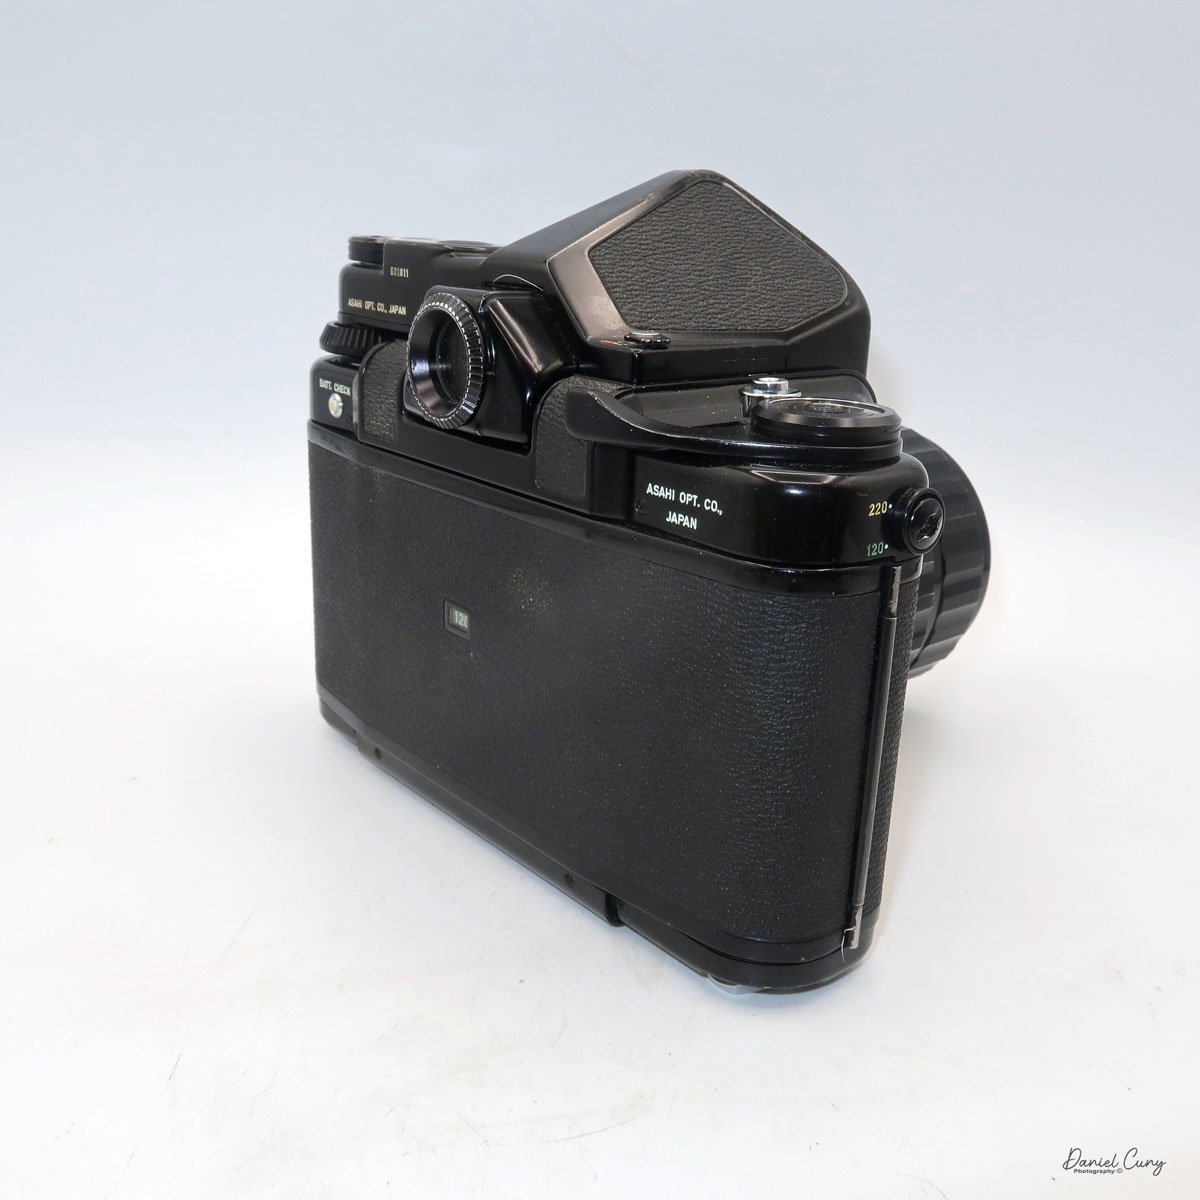
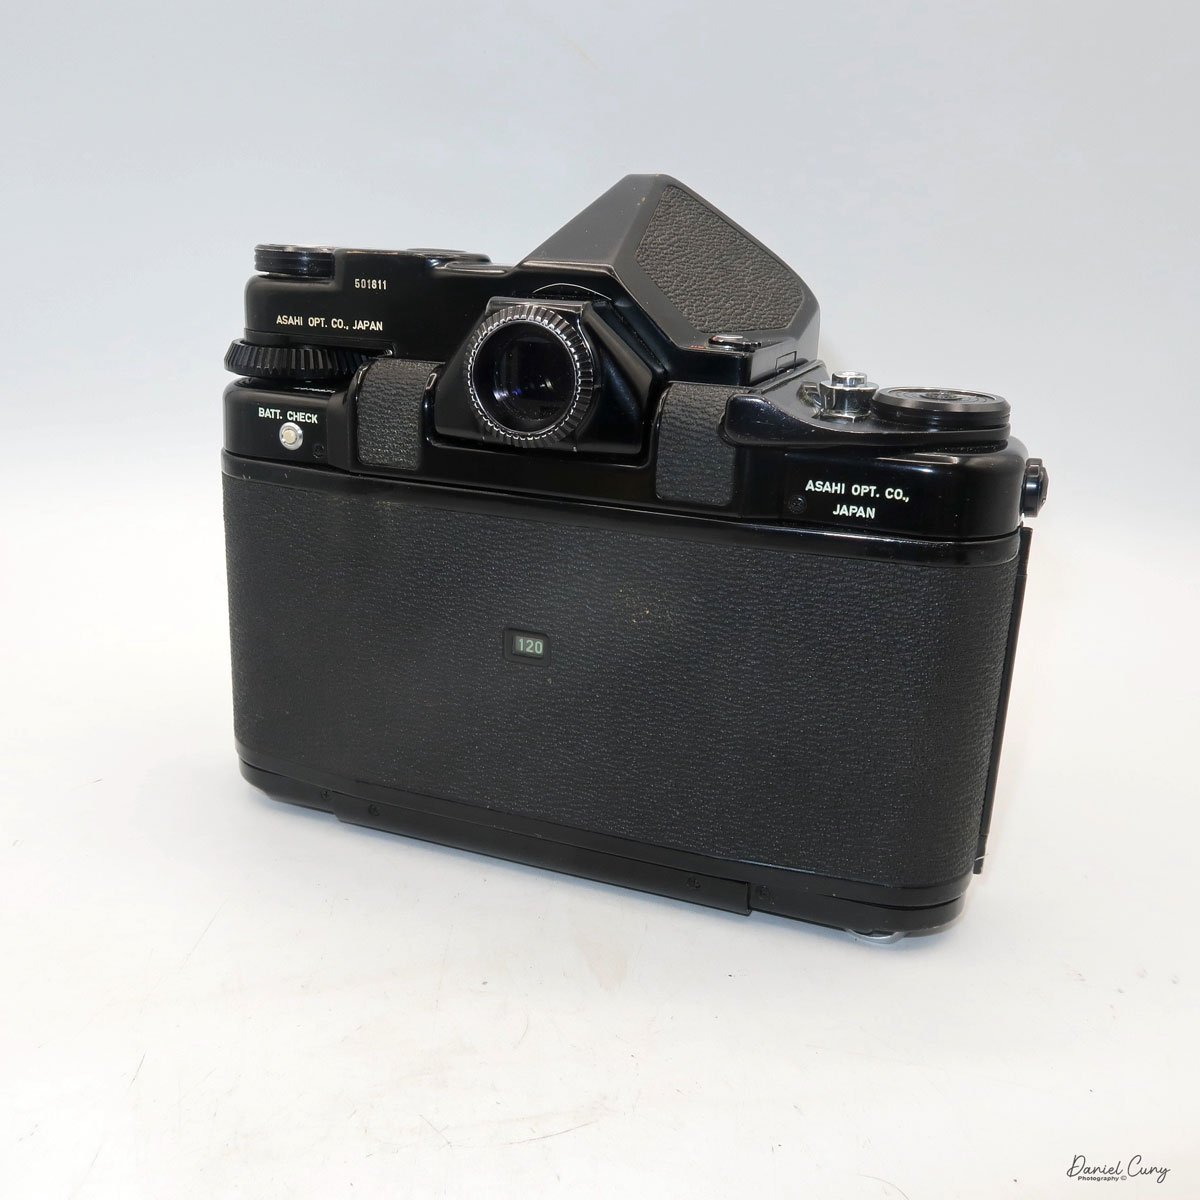
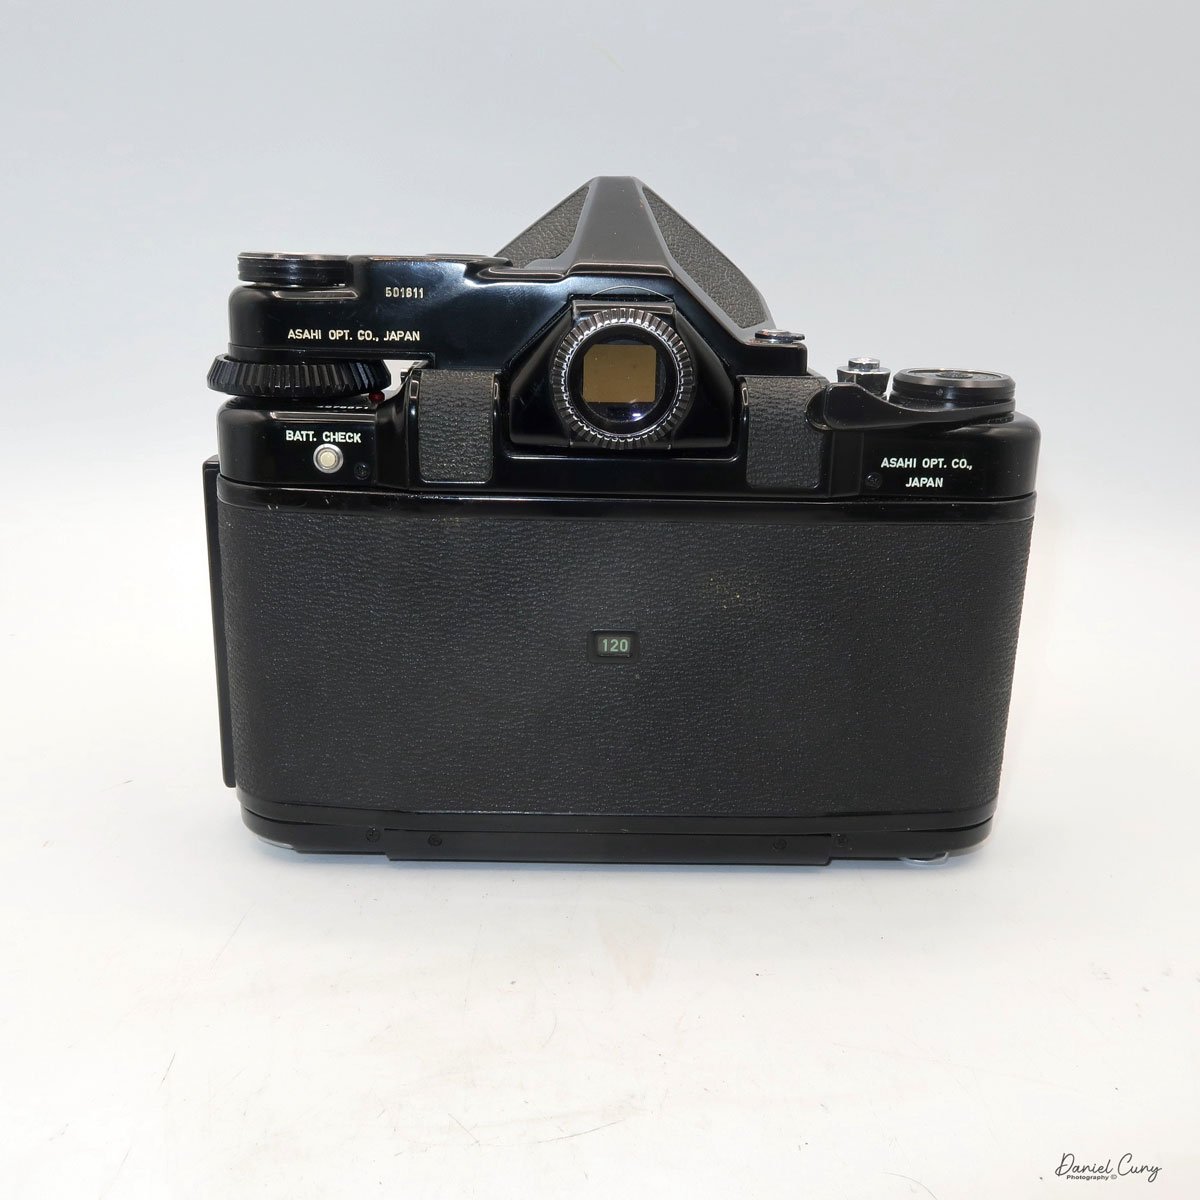
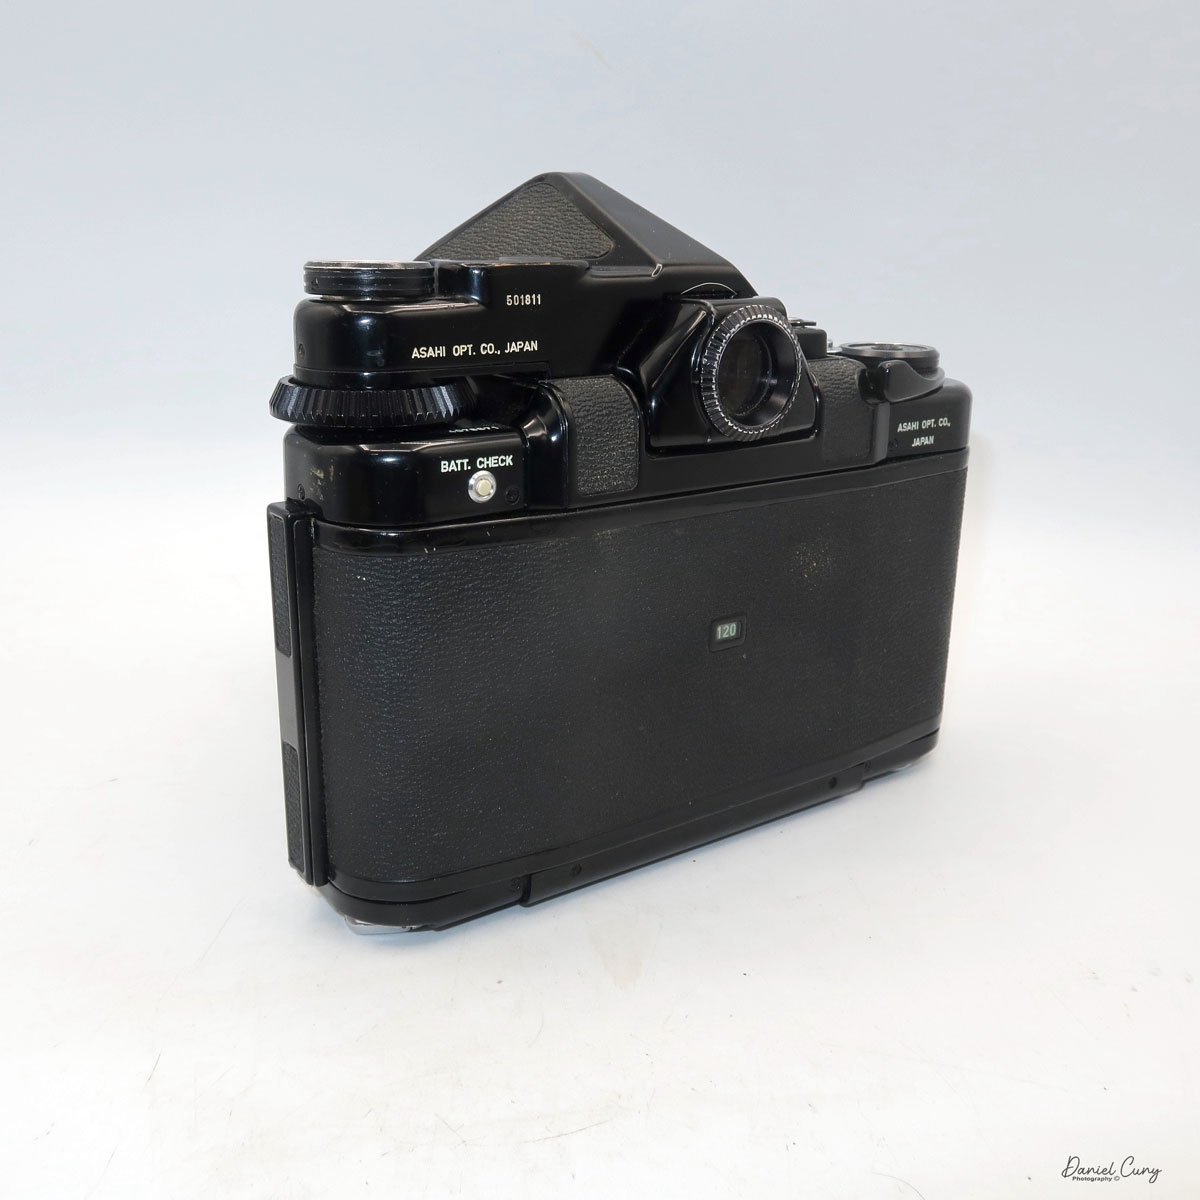
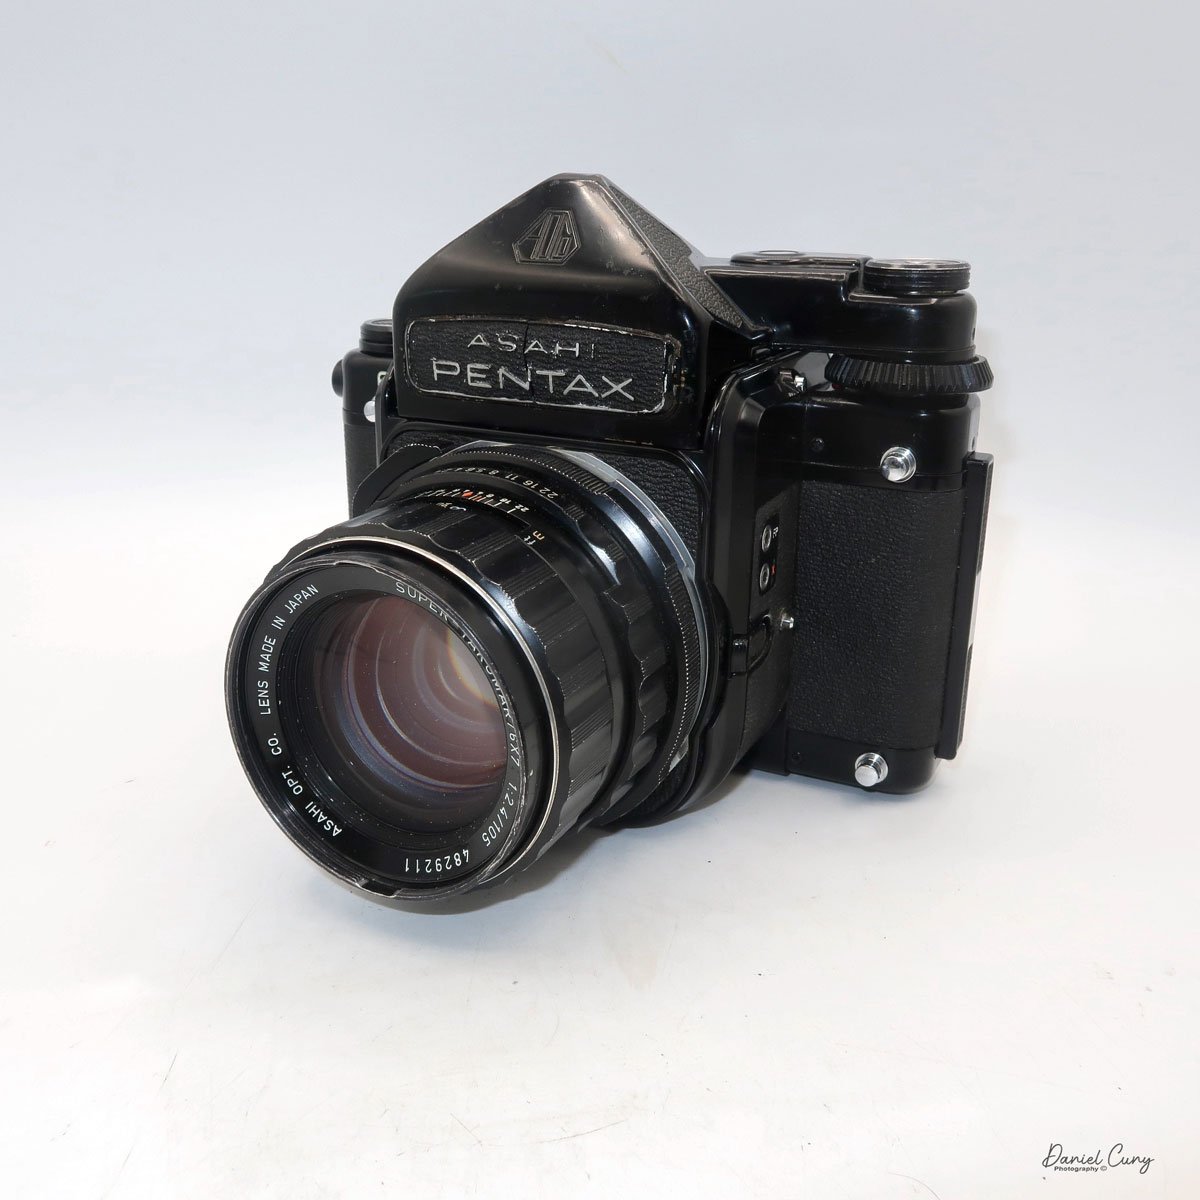
Asahi Pentax 6x7 Camera

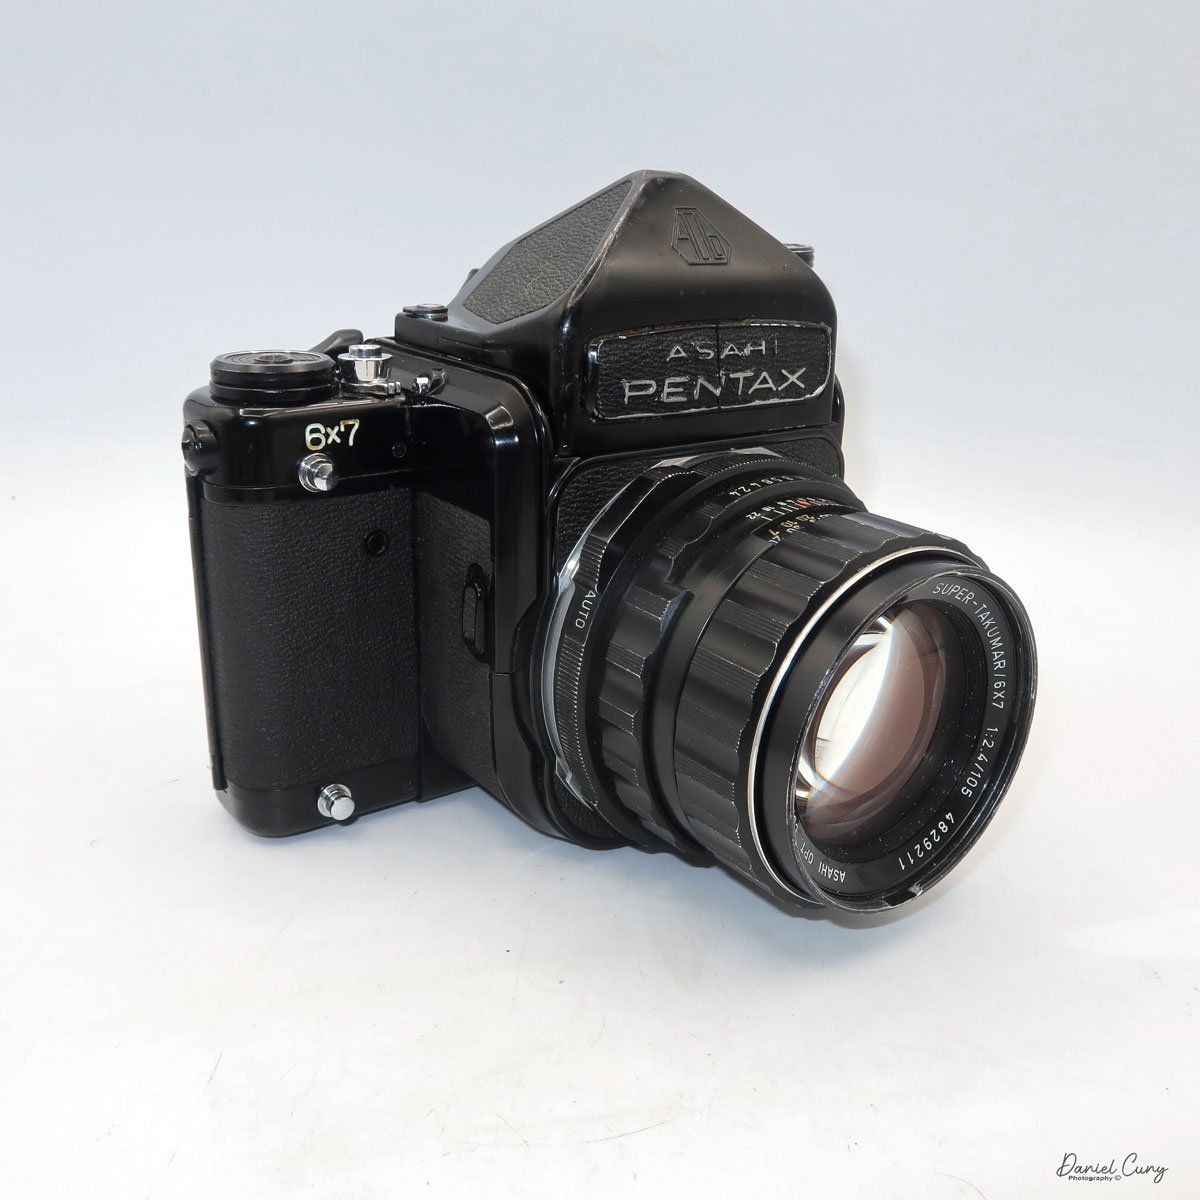
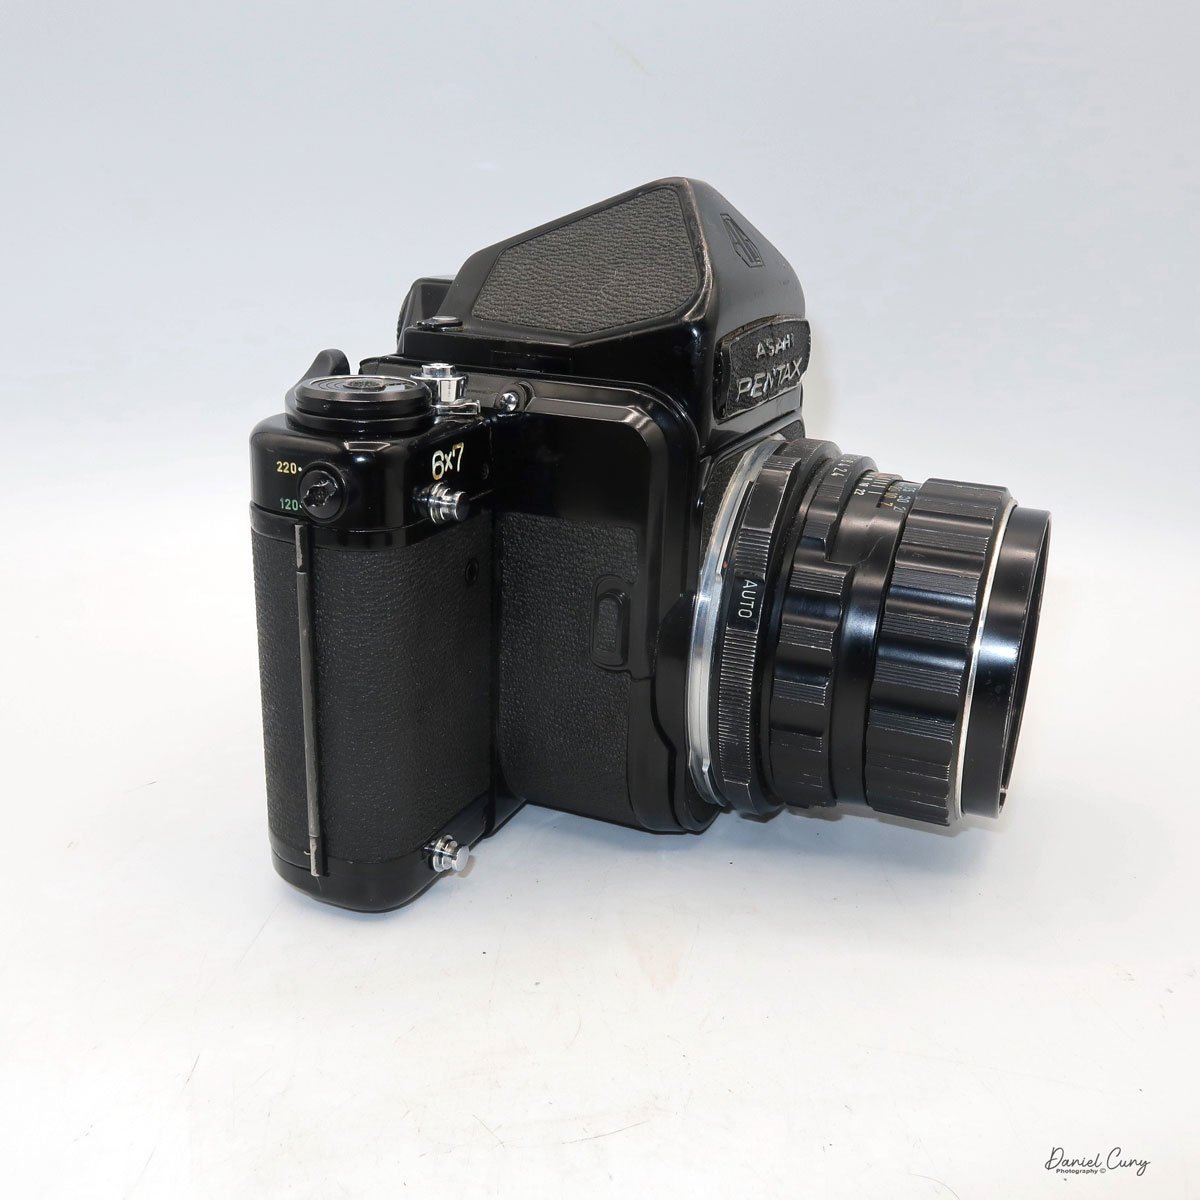
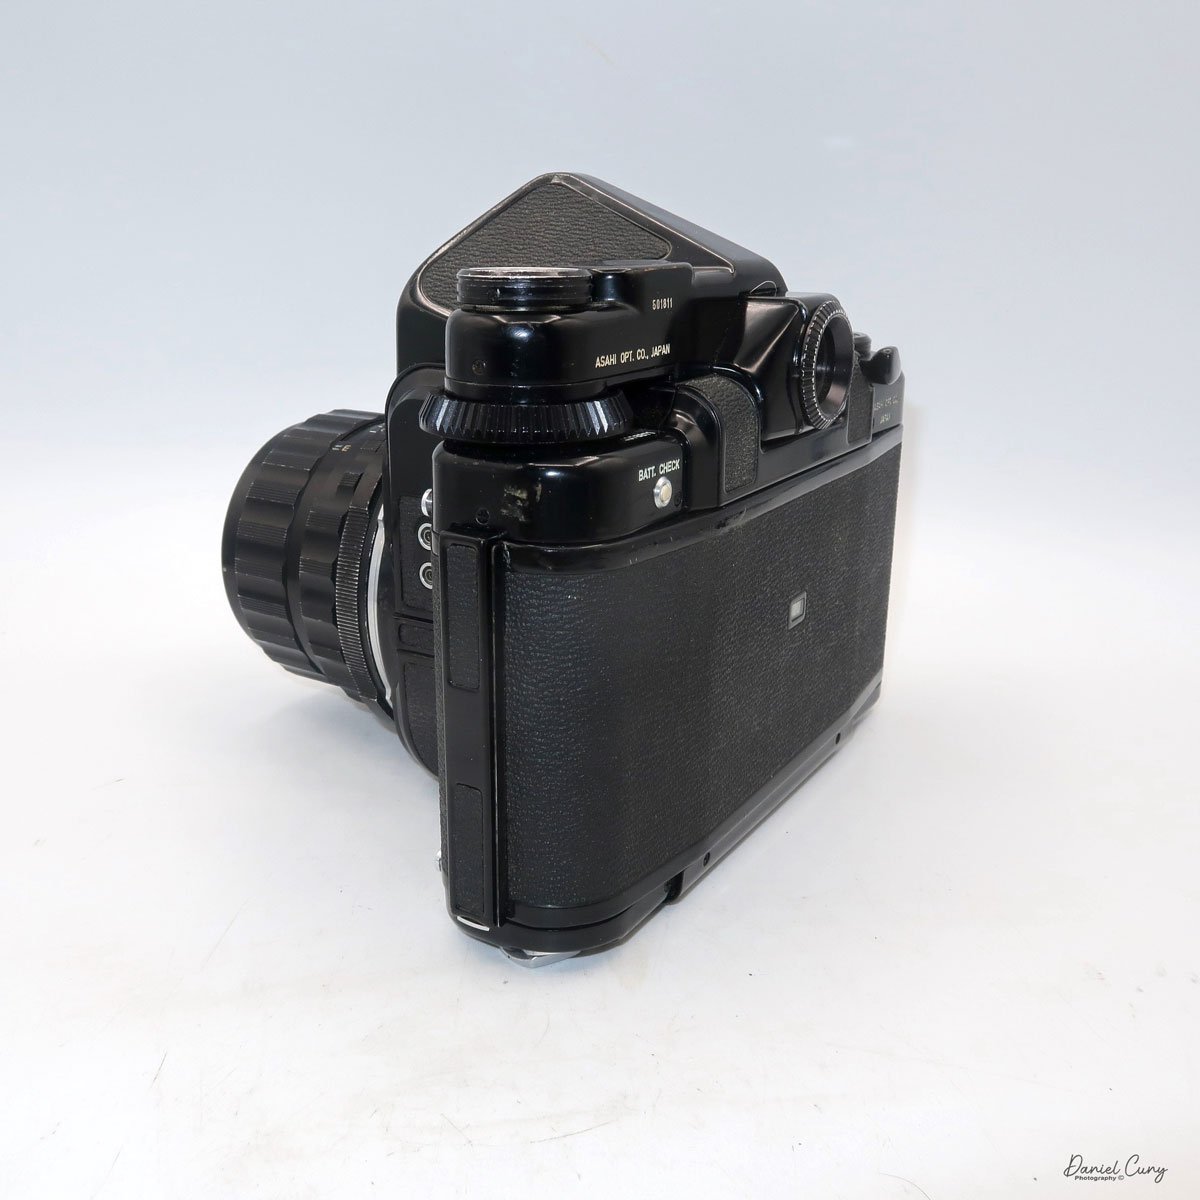
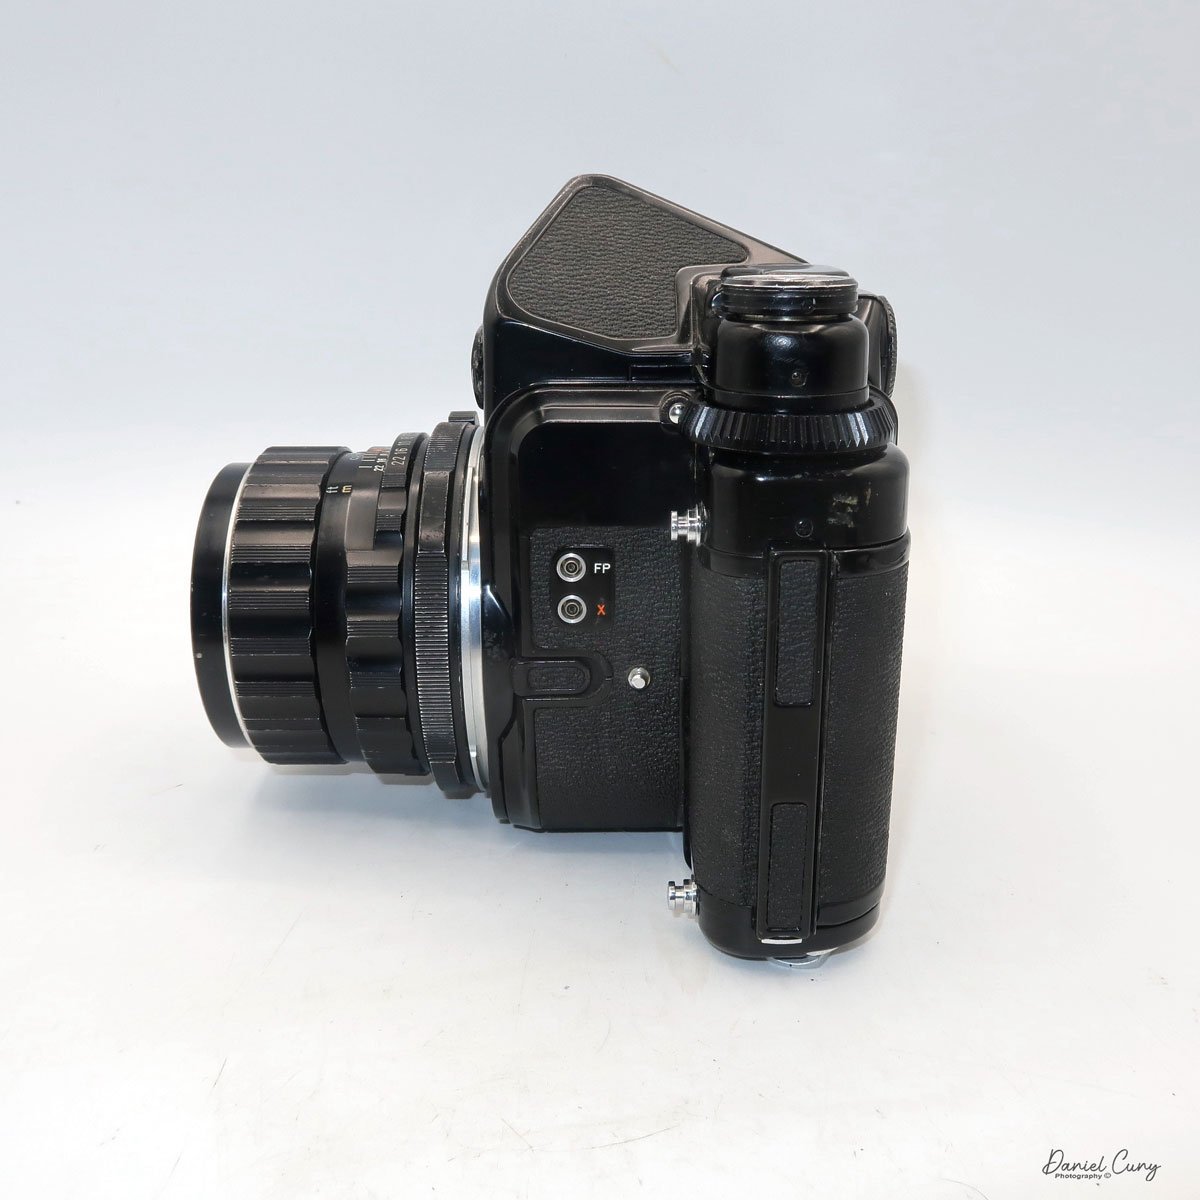
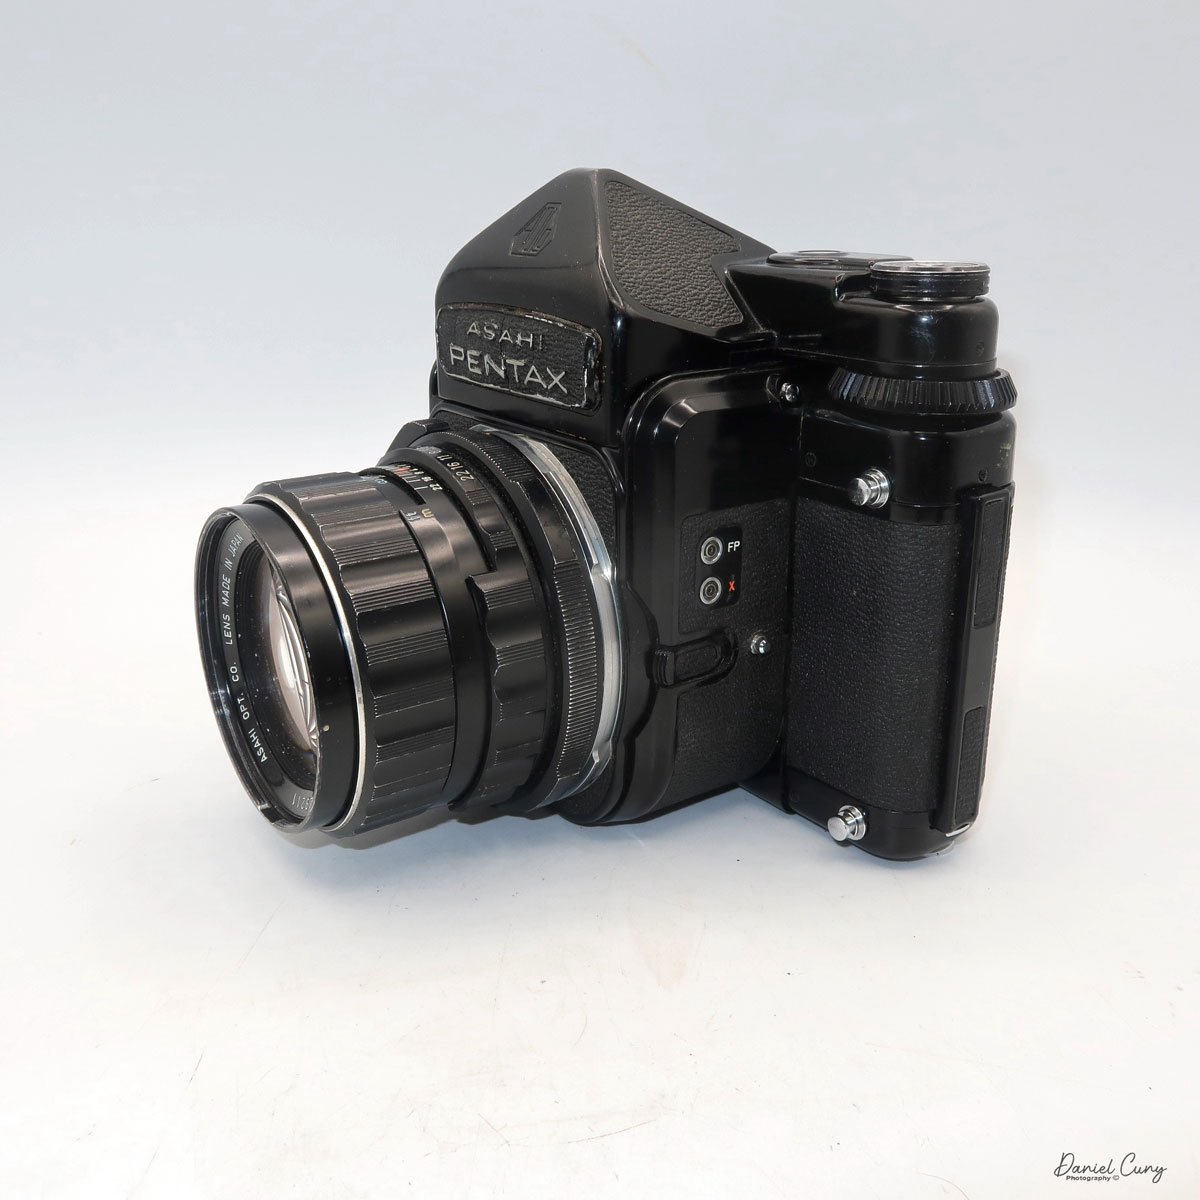
My Pentax 6x7 camera with 105mm f2.4 lens, TTL Finder and wood grip.

When I started photography, I used an older Univex Twin Lens Reflex-style camera that my uncle gave me when I was around 8-9 years old. From there, palling around with my buddies, that camera was too big and bulky to bring around with us. So, I opted for the smaller, more compact 35mm camera, which I could keep around my neck and under my coat when it was colder outside. 

 The Pentax 6x7 cameras have always held a special place in my heart, perhaps due to their unique blend of size and resemblance to a larger 35mm camera. While I still cherished the Twin Lens Reflex style, there was an undeniable elegance and familiarity about the Pentax 6x7 cameras. The interchangeable lenses and finders were reminiscent of the Nikon system I had grown to love in my later teen years.

 I purchased my Pentax 6x7 camera a few years ago at an online auction. It appeared to be in good condition, and its camera is complete with the TTL finder, standard 105mm lens, wood handle, and Pentax-branded strap, all wrapped up in a wonderful cube-shaped case that it all fits nicely into. I noticed a pouch on the top portion of the case. There were a few accessories in it that the seller didn't show, so when I received the camera, an external battery holder, and covers for the finder, A focus grip was included in the kit. Now it's time to look at the Pentax 6x7 manual to double-check all the ins and outs of the camera.

The Company:

The history of Pentax cameras is deeply rooted in the evolution of photographic technology, with a legacy that spans over a century. Pentax began as Asahi Optical Joint Stock Co., founded in 1919 in Tokyo, Japan. Initially, the company produced lenses for eyeglasses and later expanded into camera lenses and optical equipment. Not until after World War II did Asahi make its mark in photography.

Ads for the Pentax 6x7 camera system

 In 1952, Asahi released its first camera, the Asahiflex, the first Japanese 35mm single-lens reflex (SLR) camera. This launch marked a significant milestone for the company and Japan's emerging camera industry. Asahiflex featured innovative mirror-return mechanisms that set the stage for modern SLR design.

 The turning point came in 1957 with the release of the Asahi Pentax, which gave birth to the Pentax brand name. The camera combined the best features of previous SLRs. It introduced a pentaprism viewfinder, allowing photographers to see their subject right-side up and laterally correct. It also standardized the use of the M42 screw mount, which would become a popular lens mount for decades. The success of the Asahi Pentax was so profound that the company eventually adopted "Pentax" as its corporate name.

 Throughout the 1960s and 1970s, Pentax established itself as a leading manufacturer of SLR cameras, competing with brands like Nikon and Canon. They moved into the medium format by introducing the Pentax 6x7 camera. Iconic models like the Spotmatic series (launched in 1964) introduced TTL (through-the-lens) metering, significantly improving exposure accuracy. Pentax cameras became known for their durability, reliability, and affordability, making them popular among professionals and amateurs.

 In 1980, Pentax expanded the medium format market with the Pentax 645, which offered larger film sizes for high-resolution photography. These systems were found to favor studio and landscape photographers.

 Pentax transitioned to digital imaging in the early 2000s with models like the Pentax istD. It later gained attention for its weather-sealed DSLRs and in-body image stabilization. In 2011, Ricoh acquired the brand, becoming Pentax Ricoh Imaging Company.

 Today, Pentax focuses on traditional photography experiences, emphasizing optical viewfinders and rugged build quality in an era dominated by mirrorless technology. Their commitment to DSLR development and legacy lens compatibility maintains a loyal following, preserving the Pentax name as a significant part of photographic history.

My Camera:

Researching the Pentax 6x7 camera for the article revealed three upgrades to the original Pentax 6x7 camera when it was introduced in 1969. The Pentax 6x7 camera was shown at the 1966 Photokina as a prototype camera, and it was called the Pentax 220 and had chrome and black bodies. The official introduction was in 1969, with the name Pentax 6x7, and only black bodies were available. The Honeywell Pentax 6x7 was available for the US market, but here in the US, I rarely see the Honeywell Pentax 6x7 around; the vast majority were Asahi Pentax 6x7.

Dual Bayonet mount for longer or shorter focal length lenses.

 In 1976, the Pentax 6x7 (MLU) camera added a mirror lock-up mechanism, and in 1990, with their third modification, they made a few minor cosmetic changes to the camera. Now, the camera is named Pentax 67. No more 6x7. The fourth change camera in 1999 was when Pentax launched the Pentax 67II camera, which offers a built-in right-hand grip, a brighter viewfinder with interchangeable focusing screens, a more advanced AE metering system with three different modes, a dedicated time mode switch, a self-timer, and multiple exposure capabilities. 

 I own the Asahi Pentax 6x7, so mine is the second-generation camera with the mirror lock-up capability. The camera weighs a whopping 5 lbs. 5 oz without the wood grip. The camera is 7.5" wide by 6" tall by 6.75" deep, measuring from the back of the camera to the front of my 105mm f2.4 lens. The Pentax 6x7 cameras have a dual bayonet lens mounting system, with lenses from 35mm to 300mm fitting inside the body, similar to many 35mm cameras and lenses from 400mm to 1000mm mounting on the outer bayonet. Even the front lens cap has a bayonet mount on my camera, so it's not a clip or press-on style of a lens cap.

The Pentax 6x7 camera is a fully electronic camera system. The entire camera is dependent on the PX28, 6v battery. The meter, or the shutter, won't work without the camera battery. After putting in the battery, I discovered the metered finder was working, which was good news. At first, I thought it wasn't working, but after reading the manual, I learned that you need to remount the lens once the meter is removed so the lens will couple with the meter.  I didn't think it would work because there is a crack on the front running across the nameplate, but you never truly know until you try. With the fresh battery in the camera, I still wasn't sure the camera was working because there needed to be film in the camera for the shutter to fire. 

 Looking online, I did find a video showing a way to trick the camera into thinking there was film in the camera, which is by opening the back of the camera and, before closing the back, turning the frame counter to just past the first frame while holding the frame counter there and closing the back of the camera allows you to wind and fire the camera. The only issue is that there is no way to honestly tell if the shutter is opening or closing when you depress the shutter. You can tell at slower speeds by taking the lens off and looking into the mirror chamber to fire the camera. If you can see the film's pressure plate, you can tell if the shutter is opening and closing. What do you do to achieve faster shutter speeds?

Looking online, I did find a way to trick the camera into thinking there was film in the camera, which is by opening the back of the camera and, before closing the back, turning the frame counter to just past the first frame while holding the frame counter there and closing the back of the camera allows you to wind and fire the camera. The only issue is there is no way to honestly tell if the shutter is opening or closing when you depress the shutter. You can tell at slower speeds by taking the lens off and looking into the mirror chamber to fire the camera. If you can see the film's pressure plate, you can tell if the shutter is opening and closing. What do you do for the faster shutter speeds?

 One thing I did was use my cell phone in video mode and use the "slow motion" setting. I started the video and then tripped the shutter. I could then go back to the video and look at a few of the frames of the video tell if I could see the slit from the shutter move across the film plane. It did, so I knew the shutter was working on all shutter speeds. That's fantastic, so now I was good to go. I prefer to use my Sekonic meter for all my metering needs as they are always more accurate than most camera meters.

 Shutter speeds on the Pentax 67 camera range from 1/1000 to 1 sec. Along with "B" for timed exposures and "X" for flash sync, the shutter speed dial is on the far left side of the camera body and is turned with a large ring that is easy to grip and move. Just below the shutter speed dial is a battery check button, with a red light lighting up just to the right of the shutter speed dial if the battery is good.

Moving around the camera, on the front and the left side of the camera body are the flash sync terminals for both FP and X, and just below the flash terminals is the lens release knob, which needs to be pressed towards the camera's body to unmount the lens. To unmount the lens, press the lens release button and twist the lens counterclockwise. To mount the lens onto the camera body, line up the red dot on the lens to the red dot on the camera body and turn clockwise until the lens clicks into place.

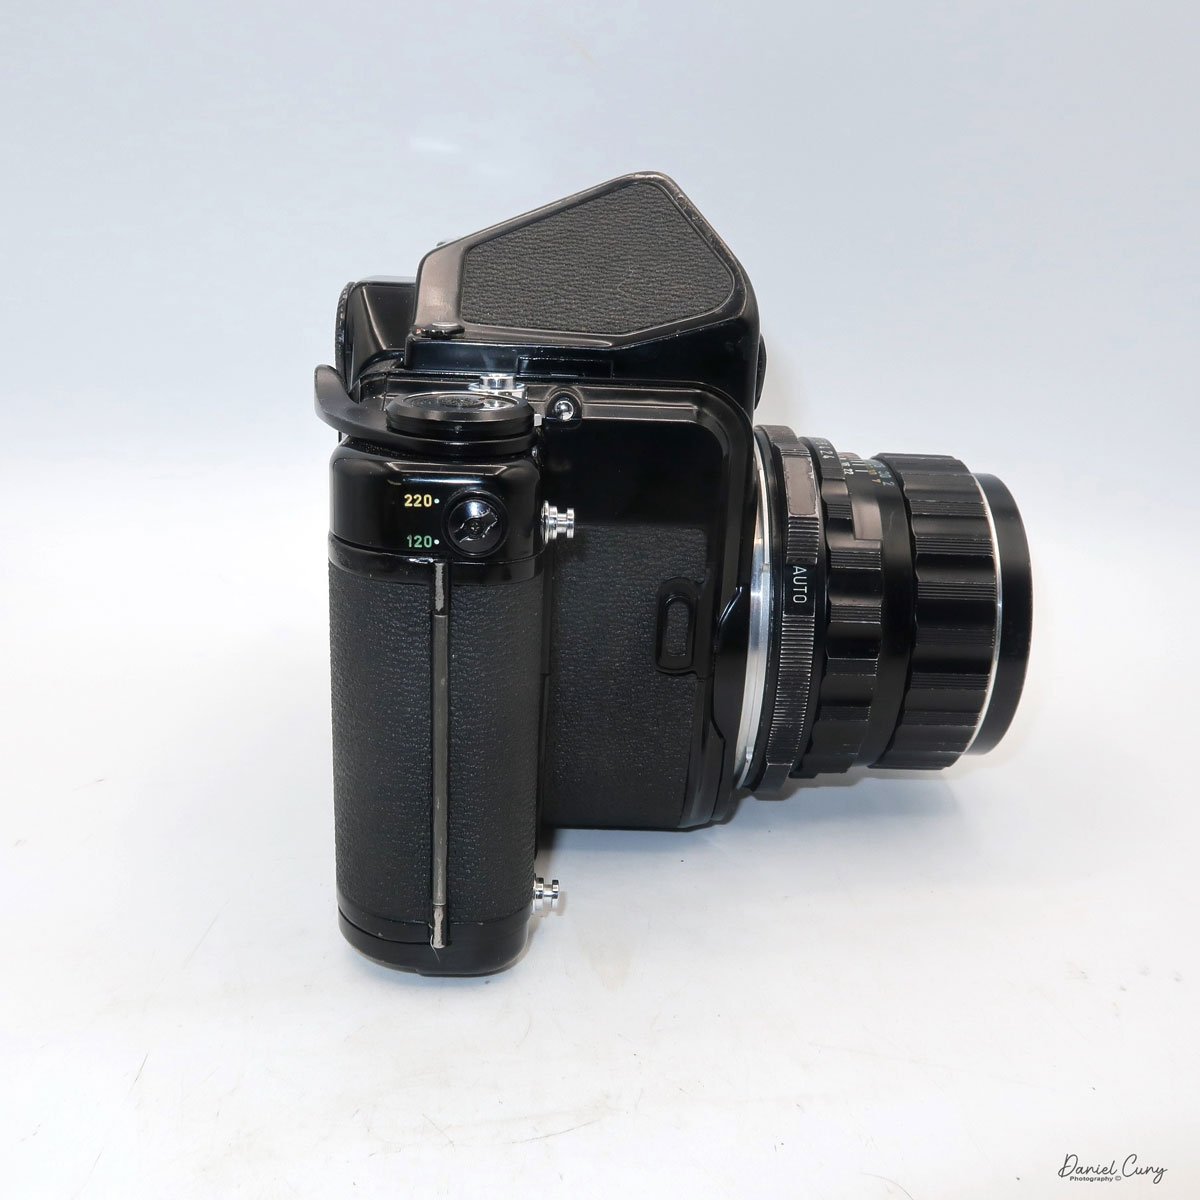
 The mirror lock-up switch is on the other side of the camera body, still on the front. Pressing this switch locks the mirror up to reduce vibration in the camera, which is good for longer exposures or using longer lenses that are more sensitive to camera movement. On the far right side of the camera body is a switch for using either 120 or 220 film.

The film advance lever is on the top, far right side of the camera, with the frame counter inside the center of the winding lever. There is a serrated dial that you can turn to change the frame counter if needed. This is also the knob that I turn to trick the camera, as mentioned previously. Right next to the film advance lever is the shutter release button, which can be locked by turning the outer ring from the white dot to the orange dot to "locked."  

 On top of the meter, a finder is an on/off switch used to turn the meter on. Two silver buttons must be pressed on either side of the camera body to remove the finder and put on a different finder. You can lift the finder off the camera body to replace it with a few different viewfinders available for the camera. The metered finder extends over the shutter speed dial, so when metering, you can change shutter speeds to adjust the meter settings. You should remove the lens before taking the viewfinders off the Pentax 6x7 cameras, then put the lens back on the body once the viewfinder has been reattached.

To load film into the camera, pull down on the silver tab on the left side to open the back door. Two locking switches are on the bottom of the camera, just under where the film reels go. These need to be unlocked, allowing you to pull them down to load the take-up and fresh roll of film into the camera body. Once the film is in the camera, turn them to the locked position to keep them in place. Bring the leader to the take-up spool, thread it into the slot,  and advance the film to start the film advance. Bring the arrow on the film leader to the arrow next to the 120 at the top of the shutter curtain, close the back, and wind until the camera stops. You're now at frame 1 and ready to take 10 photos on a roll of 120 film.

I wanted to put the wood handle on the camera before I took the camera out for a spin and tried it out. I always thought it was odd to have a grip on the camera's left side, as it's the left hand that I cradle under the lens for focus and setting the aperture. Let's give it a try because so many people think it's a great selling point for the camera.  The wood handle also has a cold shoe for a flash attachment or other items you might want to put, like an external meter.

 To put the handle on the camera, you need to unscrew the locking screw, which is located in the middle between the two areas that fit onto the camera lugs, which are on the top and bottom of the left side of the camera. Snap the handle into position and screw down the locking screw to lock the handle into position, which also presses a small knob on the camera in. To take it off, unscrew the knob and pull out the knob and slide the handle up to take the handle off. The handle won't fit on the right side.

 The camera has four lugs located on the front and in each corner. These can be used for the camera strap to carry the camera vertically or horizontally or to put the wood handle on one side and the strap on the other. There are many ways to carry the camera comfortably while lugging 5 pounds around.

My Results:

This time, I walked through the neighborhood, taking a few photos. While I was taking my normal photos, I ran into a good neighbor who is an artist. He was showing me his studio, so I took a picture or two around his studio, then proceeded to take some of the regular photos I do when trying a new camera. 

 Here are the results of my walk through the neighborhood.

Conclusion:

I had a lot of fun shooting with this camera, considerably more than anticipated. I used the wood handle more as a tool to walk around with the camera than to shoot with it because it made transporting a 5-pound camera easy. I had the strap on the camera, but found the handle easier.

 My lens is very sharp, and the camera felt comfortable in my hand. The focus was smooth and accurate, the transport was soft, and all the camera operations seemed effortless. 

 I'll need to look into other lenses for the camera and possibly a few other accessories, as this is a keeper camera for now.

 Thank you for taking a few minutes from your day to read about a fun and extensive camera system to use.

 Until next week, please be safe.

 Here's a link to my other camera reviews if you want to see some of the other cameras in my collection.

 If you're interested in some of the vintage cameras and accessory items I have for sale, please look at my online store: 

Olympus O-Product Camera

My Olympus O-Product Camera

In high school, my good friend Greg Copeland introduced me to the Olympus camera system in the early 1970s. He was the first person I knew who bought into the Olympus OM system with the OM-1, which I believe was in 1973. At that time, Olympus was very innovative, making the most miniature SLR camera system, which included a complete line of small, compact lenses with very nice optics. I can still remember Greg telling me how much he enjoyed how nice the camera was made. He would take the camera with him all the time. At the time, I was using either the Topcon Super D or, possibly, I had moved on to shooting with a Nikon Nikkormat.

 I started working in the photo industry in late 1973 when I was hired as a seasonal employee in the camera department at my local K-Mart. That position didn't last long, but it led me to work at the local camera store chain about a year later. I was hired to work in the warehouse and handle all the camera and lens repairs.

 When I started working at the local camera store, the Olympus OM system had a decent hold on the market. However, it was still lagging behind the big kids in the marketplace. Olympus was continually pushing the envelope with many new and exciting products like the terrific XA camera line, which, to this day, is one of my favorite cameras. Olympus introduced new additions to its system yearly, which always had customers in the store talking about its products.

Olympus O camera & Flash

 I tell you this because I have seen many odd and unusual cameras introduced by camera companies over the years, and many of them came out in the 1980s to the mid-1990s. The Minolta Prod 20, the Yashica Samurai, and Canon had the Epoca series of cameras. There's a great blog on some of these cameras on the Kosmo Foto Blog.

 One of the cameras that greatly impacted me when it was introduced in 1988 was the Olympus O-Product camera. It was a limited edition, and only 20,000 cameras were made. The Olympus O-Product camera had a very unusual, art deco look of a circle in a square and was made of brushed aluminum. At the time, the cost was prohibitive for me to purchase, but I remember thinking that someday, I'd really like to have one in my collection. Its unique design always intrigued me.

The Company:

The history of Olympus cameras is a story of innovation, precision engineering, and a relentless pursuit of compact, high-quality imaging tools. Founded 1919 in Japan as Takachiho Seisakusho, the company initially specialized in microscopes and thermometers. In 1949, it was renamed Olympus Optical Co., Ltd., and it soon began making a name for itself in photography.

 Olympus entered the camera market in 1936 with the launch of the Semi-Olympus I. This bellows camera used the German-made Zuiko lens, setting the stage for a signature brand name synonymous with Olympus Optics. However, it was not until the post-war period that Olympus truly revolutionized the photography industry.

 One of the most pivotal moments came in 1959 with the release of the Olympus Pen. Designed by the legendary Yoshihisa Maitani, the Pen was a half-frame 35mm camera, meaning it could shoot twice as many exposures per roll of film. It was compact and affordable and helped democratize photography for a wider audience. The Pen series enjoyed massive popularity and marked Olympus as a leader in miniaturization without sacrificing quality.

 The next major innovation came in 1972 with the OM system. Again spearheaded by Maitani, the Olympus OM-1 was a compact, lightweight SLR (single-lens reflex) camera that offered full functionality in a significantly smaller body than its contemporaries. This system appealed to professionals and enthusiasts alike, reshaping expectations for what an SLR could be.

 In the digital age, Olympus continued to push boundaries. In 1996, they released their first digital camera, the Camedia C-800L. However, the Four Thirds system, introduced in collaboration with Kodak in 2003, made a lasting mark. This was followed by the Micro Four Thirds system in 2008, which eliminated the mirror box of traditional DSLRs, allowing for even more compact and lightweight cameras. The Olympus PEN E-P1, released in 2009, revived the classic Pen design in a digital form and was among the first mirrorless cameras to gain traction in the market.

 In 2020, Olympus exited the camera business, selling its imaging division to Japan Industrial Partners, which rebranded the line as OM SYSTEM. Despite the transition, Olympus's legacy lives on through continued innovation and the enduring influence of its designs on modern photography.

The Camera.

I've always thought of the Olympus O-Product camera as more of an art piece rather than a functioning camera, but it is fully functional. In its simplest form, the Olympus O-Product is a "point-and-shoot" camera. There are no settings on the camera that the photographer needs or can really set, which makes it incredibly simple and straightforward to use.

Camera’s number from production lot.

 The camera is relatively small, measuring 4" wide by 3.5" tall and 2" deep. These measurements are for the camera alone and not with the flash attached. If I add the detachable flash, the camera is 5.75" wide by 4" tall. The camera weighs just under 1 lbs. at 15.2 oz. with the flash attached. My camera is number 11289 out of 20,000. The camera also features a unique circular viewfinder and a distinctive shutter button, adding to its charm and functionality.

 The Olympus O-Product camera is powered by 2-AAA batteries that fit into the camera's bottom. The 2-AAA batteries also power the detachable flash. The camera is very simple and basic. Once the batteries are in the camera, you can load film, which is autoloading. There is no need to set the film's ISO because the camera has DX coding for the film loaded. Once you put the leader on the take-up spool and close the back of the camera, the camera automatically winds the film to frame number one.

 To turn on the camera, a lever you pull down on the front opens the front door, exposing the 35mm f3.5 Olympus lens. To turn the camera off, close the front door. There are no shutter speeds to set as the camera has a programmed electronic shutter. The camera is also autofocusing. In the center of the viewfinder,  you'll see a white circle when you depress the shutter button halfway on the front of the camera. In that case, a light will light up next to the "AF" in the upper right-hand corner, letting you know the camera has focused on the subject, and you can press the button to take the photo. Once you take the picture, the camera automatically advances to the next frame. Once you've taken all the photos on the roll of film, the camera will automatically rewind the film into the film cassette.

 The flash for the camera is detachable, so if you don't need it, you can take it off. To take the flash off, you need to unscrew the mounting screw, and the flash will come off the camera. You still need to unplug the cord from the flash to the camera, which pulls out, so it's very simple. To attach the flash, you screw it onto the camera and plug in the cord. If the camera needs the flash, a red ready light on top of it lights up when the flash is ready and will fire if it determines it needs the extra light to make a proper exposure.

 There are two buttons on the camera's top next to the flash attachment that allows the photographer to make adjustments when shooting.  One of the buttons is a self-timer. If you want to get into the photo, press the self-timer, giving you 10 seconds to get into it. The other button is a rewind button. Suppose, for some reason, you want to change to a different type of film. In that case, you can depress the rewind button. The camera will automatically rewind the film back, leaving a little bit of the leader exposed so you can re-load it when you want to finish that roll of film.

My Results.

I put batteries in the camera and flash, loaded it with a roll of Ilford Plus 50 black and white film, walked through the house, and strolled around the block taking photos. The camera determined if the flash was needed, which was pretty fun. It was too simple for my taste as sometimes I like to use fill flash, but this camera didn't allow me to do so. I could trick the meter by putting my finger over the meter area, but for this blog post, I wanted to be free and let the camera do all the work.

 Here are a few of the photos taken on my walk.

Conclusion.

Using such a simple but beautifully made camera was a lot of fun. The camera produces very sharp images and is extremely easy to use. When I was working at the camera store, we used the term PHD cameras, which always meant "push here dear," meaning the camera was very simple for either men or women. Put the camera to your eye, point it at your subject and "push here dear".

 As I mentioned earlier, the Olympus O-Product camera is more of a work of art or statement camera that looks terrific in the collection. It's not really made to be used on a daily basis, but using it every once in a while is good. I wouldn't want the camera to get more scuffed than it already is, but taking the camera out was fun, as was running film through it.

 Thank you for taking a few minutes from your day to read about this art piece that can also be used as a camera.

 Until next week, please be safe.

Minolta-35 Model II

My Minolta-35, Model II

The Minolta-35 Model II camera I have was an unexpected discovery, purchased with several other cameras through an online auction. It wasn't the camera I was originally after in the lot, but the only thing that distinguished it in the photo was the fitted case, with 'Minolta' proudly displayed on the face.

 There were so many different models of camera from Minolta during this timeframe that I wasn't sure what was actually in the fitted case. Still, when I received the "lot" of cameras and uncased the Minolta-35, someone had painted the camera black. And whoever painted it did an abysmal job of it. I only wish I had photos of the camera in that state, but I didn't think of it then. The camera was painted black, and the shutter wasn't working. The good news is that the camera had a good and clean lens.

 Over the years, I have brought the camera to a few different collectible camera shows in hopes of selling it, but no sales have been made. 

 One day, a few months ago, I was browsing the cameras on my shelf, looking for one to write about, when I picked up the Minolta. I felt a personal connection to it, and determined to do a blog post, I sent it off to my trusty camera technician, Allen, at CameraWerks in NY to have it CLA'd. Despite its modest value, the fact that it's from the early 1950s and a very respectable Leica thread mount 'clone' made it worth the investment for me.

My Minolta-35, Model II with case.

 Before I sent the camera to Allen, I wanted to get the black paint off the camera and bring it back to the original chrome camera it was. I had bought some Acetone to see if I could gently get rid of the paint and not ruin any of the other parts of the camera. Unfortunately, the Acetone didn't work well and didn't take much of the paint off. Then, I noticed that if I used my fingernail, the paint would chip off reasonably easily. I also noticed that in our kitchen, we had some bamboo skewers, which seemed to work OK, so to get into some of the tighter spots, I used the bamboo skewer, and to get into the very tight areas, I used the tip of some of the metal tweezers I have for some very minor repairs.

 The camera still has some very minor spotting of black paint, as you'll see in the photos in the article, but 99.8% of the paint is gone. The camera looks considerably better than it did before. It's in great working condition, and even the rangefinder is clean and accurate, so it was time to do my blog on this early Minolta 35mm rangefinder camera.

The Company:

Minolta was a pioneering Japanese camera manufacturer known for its innovative contributions to photography. Founded in 1928 as Nichi-Doku Shashinki Shōten (which translates to "Japanese-German Camera Company"), the company was renamed Minolta in 1933. The name Minolta is derived from "Mechanismus, Instrumente, Optik und Linsen von Tashima," reflecting its German-Japanese technological collaboration.

Ad for Minolta 35 camera.

 Minolta's early cameras were heavily influenced by German designs, particularly Leica and Contax rangefinders. The company released its first camera, the Nifcarette, in 1929, followed by various medium-format folding cameras in the 1930s. After World War II, Minolta resumed camera production, releasing the Minolta-35 in 1947, which became Japan's first 35mm camera with a coupled rangefinder.

 Minolta's breakthrough came in 1958 with the Minolta SR-2, its first single-lens reflex (SLR) camera. Throughout the 1960s, the company expanded its SLR lineup, introducing the Minolta SR-T 101 in 1966, which featured an innovative through-the-lens (TTL) metering system. The 1970s saw Minolta partner with Leica, resulting in co-developed cameras like the Leica R3 and Minolta XE-7.

 One of Minolta's most revolutionary releases was the Minolta XD-7 (XD-11 in North America) in 1977, the world's first camera with aperture-priority and shutter-priority automatic exposure modes. This technological advancement set the stage for further automation in cameras.

 In 1985, Minolta changed the photography world with the Minolta Maxxum 7000 ( Alpha 7000 in Japan and Dynax 7000in Europe). This was the first SLR camera with fully integrated autofocus, making it far easier for photographers to achieve sharp images quickly. The Maxxum series gained popularity, pushing competitors like Canon and Nikon to accelerate their autofocus developments.

During the 1990s, Minolta expanded into digital imaging and compact cameras while maintaining its SLR dominance with the Dynax (Maxxum) series. The Minolta RD-175, released in 1995, was one of the earliest digital SLRs, marking Minolta's transition into the digital era.

 In 2003, Minolta merged with Konica, another Japanese camera giant, to form Konica Minolta. However, due to declining camera sales, Konica Minolta exited the camera business in 2006, selling its assets, including the popular A-mount system, to Sony. This acquisition helped Sony establish itself in the DSLR market, leading to the Alpha series that continues today.

Though Minolta as a brand no longer produces cameras, its legacy lives on through Sony's Alpha series, which traces its roots back to Minolta's innovative technologies.

My Camera:

My Minolta-35, Model II is 5 3/8" wide by 3" tall by 3" deep, which includes the Chiyoko Super Rokkor 5cm (50mm) F2.8 lens. If I take the lens off, the body only is 1.5" deep. The camera weighs 1 lb. 10.9 oz is a very comfortable camera size and weight, and it fits into my hands nicely. The Minolta-35 Model II has shutter speeds ranging from 1/500 down to 1 second, with "T" for timed exposures and "B" for bulb. 

 The Minolta-35 Model II also splits the shutter speeds into two different dials on the camera with the higher speeds on the top dial, which go from 1/500 to 1/25 and "B" and from 1/25 to 1 sec, and "T" on the secondary shutter speed dial on the front of the camera just above the self-timer. To set the shutter speed, you'll need to lift up the dial and turn it to the desired speed for the exposure. Changing the shutter speeds should only be done once you cock the shutter.

To use the secondary or lower shutter speeds, the top dial needs to be set to 1/25, and the lower speed dial needs to be set at whatever of the slower speeds you'll be shooting. This method is prevalent for Leica copy cameras from this era. 

 The Chiyoko Super Rokkor lens on my Minolta-35 is smooth and in excellent condition. To focus, similar to other Leica thread mount lenses, a locking pin is used to lock the lens to the infinity position. To release the lock and focus to a closer range, press the release button and turn the lens to the desired focus distance. Inside the camera is a built-in rangefinder, which will aid the photographer in the distance needed to take a sharp photo. Along the outer rim of the lens is the lens's aperture ring, which goes from F2.8 to F22.

The shutter release is on the top of the camera, just to the right of the shutter speed dial. A small crown-shaped piece surrounds it, which can be removed to use a cable release for the timed or longer exposure times built into the camera.

 Just above the shutter release is the rewind switch, which you slide to the "R" position to release the camera's drive gear so you can rewind the film back into the film canister when you complete the roll of film. Just to the right of the rewind switch is the film winding knob which has an arrow on top to show the user which direction to turn to advance the film to the next frame. At the bottom of the film winding knob is the frame counter which you need to zero out when you load a new roll of film into the camera so you'll know how many photos you've taken on the roll you loaded into the camera.

On the far left of the camera is the film rewind knob. Lift the knob up to make the rewinding of the film back into the film canisters easier. Once the back of the camera is open, you can lift the rewind knob even higher to remove or load the film canister in or out of the camera.

 Right in the middle of the camera, on the top plate, is the Minolta-35 name along with the serial number, which on my camera is 90899, and Chiyoda Kogaku. I enjoy the modernistic font used on the older Minolta camera, which is very elegant.

Top plate with name on the Minolta-35, Model II camera.

 On the back of the camera is the viewfinder window for focus, and on the outside is a dioptric adjustment. This is for people who wear glasses. Turning the dial around the finder window allows you to adjust your glasses prescription to correct vision issues. You can put the camera to your eye without wearing your glasses and still get a sharp photo. In the center of the back of the camera is the flash sync plug, which is just below the accessory shoe used for a flash attachment.

To open the camera to load film, there is a small knob on the bottom of the Minolta-35 that you'll need to turn counterclockwise until the "open" dot is lining up with the arrow. When this happens, the back of the camera springs open, and you load the camera just like you would any standard 35mm camera. 

Lift the rewind knob to load the film cassette into the camera. Pull the leader across the drive gears and put the film leader into the slot on the take-up spool. Take the tension of the film up by turning the rewind knob clockwise to take the slack up on the film. Close the back turn the open/close knob to the "closed" position to lock the camera's back, and wind to your first frame. Watch that the rewind knob is turning when you advance the film so you know the film is transporting in the camera, and set the frame counter to number one.


My Results:

I loaded my Minolta-35 camera with a roll of Ilford Pan F Plus 50 ISO black-and-white film. I wanted to use a slow speed to see how the camera would perform in lower-light situations. I also had my trusty Sekonic L-308 meter with me to achieve accurate exposures. I knew I could always count on Sekonic to give precise light readings. 

 Now that I had film loaded into the newly serviced camera, I walked through my yard and neighborhood to take photos with the Minolta-35 camera. Here are a few of the images I took on my walk.

My Conclusion:

The camera was enjoyable to photograph with. The rangefinder was bright and accurate. I tried many slow shutter speeds to see how the camera performed under these low-light circumstances. I had a great time using this camera and want to continue using it. The overhaul made a tremendous difference; without the black paint on the camera, it also looks terrific.

 Thank you for taking a few minutes from your busy schedule to read about this excellent rangefinder camera from Minolta

 Until next week, please be safe.

Dan 35 I Camera

My Dan 35 Model I camera

I need to start this post back in time. I first started collecting cameras and other photo items in the late 1970s or early 1980s. I can remember purchasing one of McKeown's Camera Price Guides and spending hours combing through each camera manufacturer, looking at the cameras they had made in the past. There were so many odd and unusual like very rare original Leica; the very first bullet-shaped brass Voigtlander camera, the Compass camera or Photosphere that I could only dream of owning, and many were so far from the price budget that I knew there were only a pipedream.

 Many large companies, like Eastman Kodak, Polaroid, and Zeiss, made hundreds of different model cameras, which were abundant. Then, there were the smaller camera companies that produced unique cameras, like Univex, which was the first camera I owned. It was a Uniflex that was given to me by my uncle Bud, who, to this day, along with my brother Tim, I owe my love of photography.

 Then, I can remember thumbing through the price guide and finding a tiny company that produced a camera near and dear to me, the Dan camera. I immediately thought I needed to find one of these to put into my collection. My initial search was hopeless, as many of the local flea markets and antique stores I'd frequent only had the very common Kodak, Polaroid, Zeiss, and other companies like Herbert George and other American brands.

Online Auctions:

It would help to remember that this was before eBay, which didn't exist before the mid-1990s. I was an early adopter of buying and selling on eBay in 1997. At that time, there were no photos, and it was mainly just a buy/sell board with an auction element so you could post a camera or item for sale, but you only had the description from the seller to go by. When I first joined eBay, there was no name to have but a number. My original number was 1034; you had to do everything through DOS.

 EBay made a massive difference as it gained popularity. It changed how people bought and sold items. Adding photos gave the buyer more confidence in their purchase, and rarer items could hit higher pricing due to the inability to find them.

 For many years, the Dan Camera was very elusive, and since the camera was from a smaller company, the scarcity and pricing made the purchase of it next to impossible up until a couple of years ago when I was looking through a different online auction website, and I found a grouping of cameras which piqued my interest. As I zoomed in to look at this lot, there was a portion of a lens I could see.   I could barely read "Dan" on the ring around the lens as I looked closer. Here was my chance to finally own the elusive Dan 35 camera.
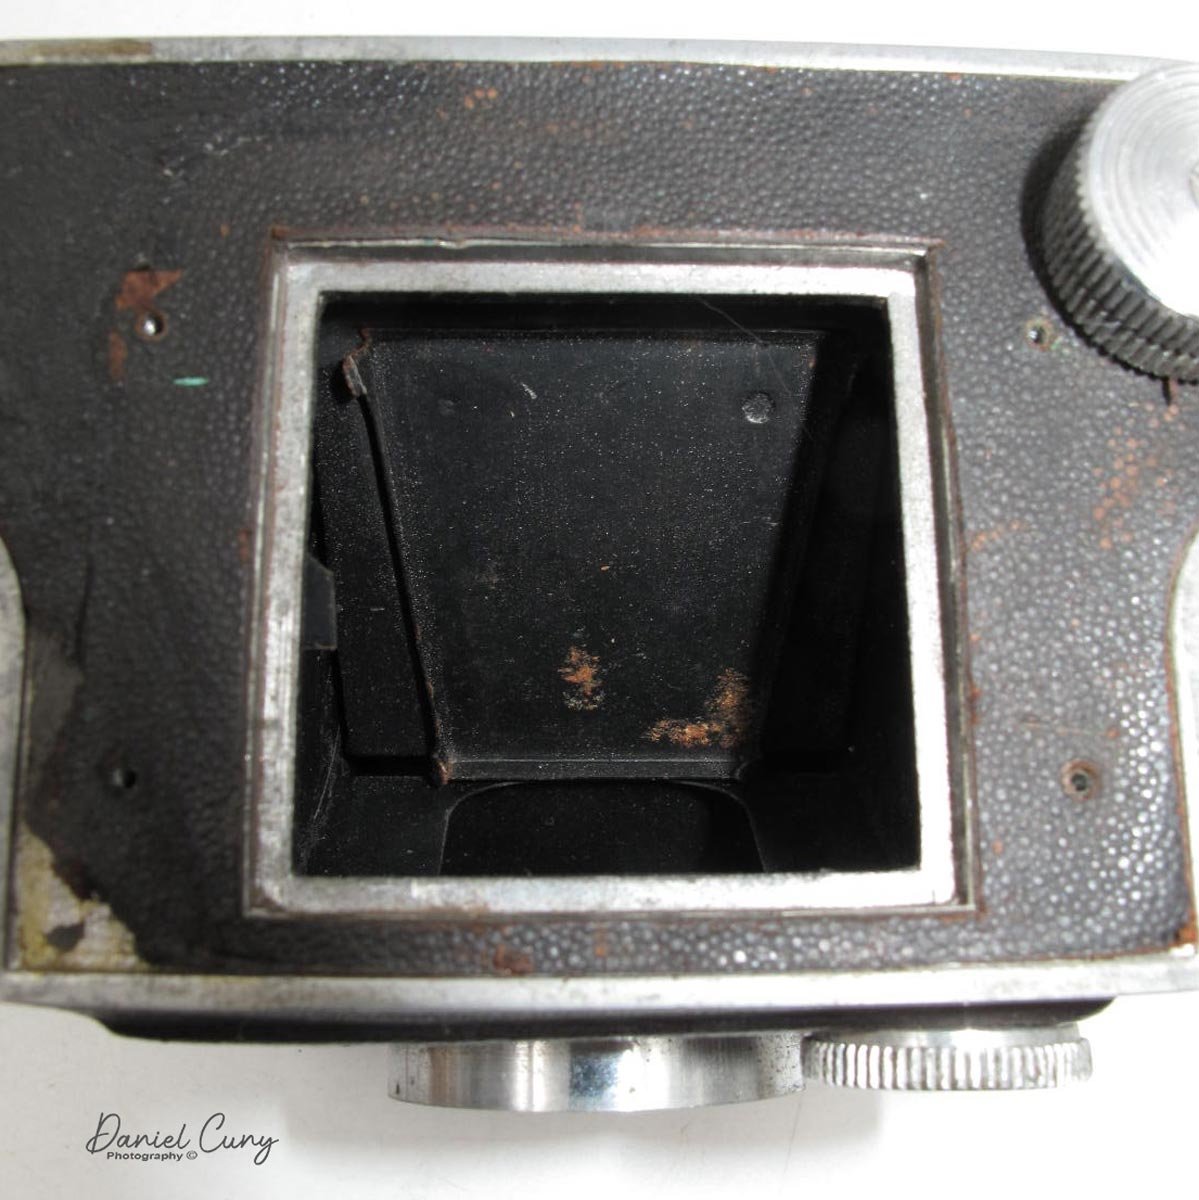
Name embossed on the back of the camera.

 The auction happened, and there was minimal interest in this group of cameras as many of them were very common items. However, these are the groups that I really enjoy because tucked away in the corner "could" have a gem hidden, and in this case, there was. I won the camera lot, got the items shipped to me, and there it was as I unwrapped it: the Dan 35 camera. To my amazement, it was the first model.

History:

The Dan 35 is a simple Bolta film camera made in Japan after WWII. Bolta film was invented by Johann Bolten, who founded Bolta-Werks in Nuremberg, Germany, in 1936. The film was to go into his smaller, more compact cameras named the Boltavit. Bolta Werk later produced the Photovit line of cameras from 1936 to the 1950s. Bolta film was incorporated into many different cameras during this period and was a nonperforated 35mm film with a paper backing loaded into special cassettes. Later models of film were spooled similar to films like 828 and 127.

Stetch of Dan 35 Camera by Hagimoto Danji.

 The Dan 35 camera was made by Hagimoto Danji. He built a small plant in Suwa to manufacture the Dan 35 camera, which he sold in his camera shop in Ginza after WWII in 1945. After the moderate success of the Dan 35, there were three different distributors for the camera between 1945 and 1950, when the camera company went bankrupt. The logo on the camera coincides with the company's name, which is H for Hagimoto above Dan for Danji on the far right of the camera.

 Here's where it gets a bit fuzzy. Yamato Koki Seisakusho was a camera company that started in Tokyo in 1943. It made shutters for Japanese camera companies like Gelto and Leotax. The first cameras produced by Yamato were the Minon 35, Minon Six, and Pax 35.

 Yamato, known to produce the Minon 35, a copy of the Dan 35 III and later the Pax 35, is a camera that is a copy of the Super Dan 35. Some sources say Yamato made the Dan 35 and Dan 35 II, but others say they took over producing the Dan 35 after Hagimoto went bankrupt in 1950. Yamato produced the Pax line in the 1960s.

My Camera:

The Dan 35 is a very simple camera with a torpedo-shaped viewfinder on top. It measures 3.25" wide by 2.25" tall from the base to the top of the finder and is 2" deep from the front of the lens to the back of the camera. The camera weighs a whopping 5.2oz and is considered a miniature camera. The Dan 35 has a Dan Anastigmat 40mm f4.5 lens with a Silver-B shutter.

Around the lens is the focus ring, a helicoid focus measuring from 1 meter to infinity. Just behind the aperture numbers on the lens is a knurled ring that sets the aperture. In front of the aperture numbers is another knurled ring that sets the shutter speeds on the camera. There are only shutter speeds, 1/25, 1/50, and 1/100 sec, along with B. On the left of the knurled ring is a cocking lever to cock the shutter, and the shutter release is on the right side to expose the film.

Logo and Torpedo viewfinder

 To load the film, on the top of the camera is a locking lever with "L" for lock and "O" for open. Switch the lever to "O," and the top comes off to load the film. The base comes off to load in later models like the Dan 35 Model II. My camera has no spools to load the film, and the shutter doesn't work. On the back of the camera is a red window with an open/close lever to see the numbers on the paper backing of the film so you know where to stop for your next exposure. Also, Dan 35 is embossed on the back of the camera.

Conclusion:

Unfortunately, I don't have film, and the camera's shutter doesn't work, so I couldn't take photos with this camera to share.

 I mainly have this camera for a couple of reasons. One is its rarity; the more important reason is that it has the same name as me, so I get a kick out of that. I have another miniature camera set aside for next week's blog post, which I also find fascinating.

 Thank you for taking a few minutes to review my blog post about the cameras in my collection. Please be safe until next week.


Minolta Six Camera

It seems like I purchase items from camera auctions in "lots," and there is always a treasure hidden in the background that you either didn't notice at first, is hidden within all the photos of the items, or, in this case, the camera wasn't taken out of the case, and the case was obscured, so there was no visual evidence that the camera was.

 As I unwrapped the cameras won from the auction, one brown case caught my eye. It bore a striking resemblance to the Mamiya Six in my collection. But upon closer inspection, the name 'Minolta Six' was revealed. I initially thought it might be similar to the Mamiya Six, but the truth was far more exciting, as I'll reveal when I introduce the camera.

History:

In an earlier post, I did on the Minoltaflex CDS, I did a brief history of the company, which read, 

Kazuo Tashima founded Minolta in Osaka, Japan, in 1928 as Nichi-Doku Shashinki Shōten, which means Japanese-German Camera Shop. In 1931, the company updated its name to Minolta, which stands for Mechanism, Instruments, Optics, and Lenses by Tashima. In 1937, the company was reorganized as Chiyoda Kogaku Seikō, K.K. They are now introducing their first Twin Lens Reflex (TLR) camera, the MinoltaFlex, based on the German Rolleiflex cameras. The MinoltaFlex was only the second TLR introduced from Japan after the Prince Flex by Neumann & Heilemann. In 1947, Minolta introduced rangefinder cameras like the Minolta-35, and in 1959, the Single Lens Reflex (SLR) SR-1 camera. In later years, they signed agreements with Leica and came out with the first autofocus SLR, The Minolta Maxxum 7000, which carried on to several in their autofocus system.

 To expand slightly from the above text, in the early years, there was a big German influence on the Minolta company, which was known as Nichidoku Shashinki Shōten, which means Japanese, German camera shop. In the early years, the company received help from camera technicians Billy Neumann and Willy Heilemann, and the shutters and lenses were supplied from Germany. Their first camera was the Nicarette, which was released in 1929.

In 1931, the company was transformed into a stock corporation named Molta Gōshi-gaisha. Molta is an abbreviation of Mechanism, Optics, and Lenses by Tashima. Neumann and Heilemann left the company in 1932, returning to Germany to start their own company, and the German influence left with them. In 1933, the name Minolta was adopted. In 1937, the company became Chiyoda Kōgaku Seikō K.K anexpanded the production of cameras into TLR and press cameras similar to the Plaubel Makina. 

Minolta Six in the July 1938 catalogue and price list by Asanuma Shōkai. Scan by A. Apra. (Image rights)

 In 1940, the famous Minolta Rokkor lens was produced, but it was only used for the military. Consumer camera production ended in 1943 to concentrate on the war effort. Three of its four plants were destroyed by Allied forces during WWII. Soon after the war, Minolta released the Semi Minolta III, and throughout the 1950s, Minolta expanded its line of cameras to include folding cameras, TLRs, SLRs, and rangefinder cameras.

 In 1958, the SR-2 was released, and it was Minolta's first system camera. This reign of SLR system cameras included partnerships with Leitz in the 1970s, which helped produce CLE cameras. Minolta had a full line of autofocus cameras, the Maxxum line of bodies and lenses, and Minoltas final SLR camera ended in 1995 with their X-370.

 Minolta produced many different 35mm, APS, and DISC cameras and partnered with Konica in 2003, but by 2006, the camera company had discontinued camera production and relied heavily on the copier business.

My Camera:

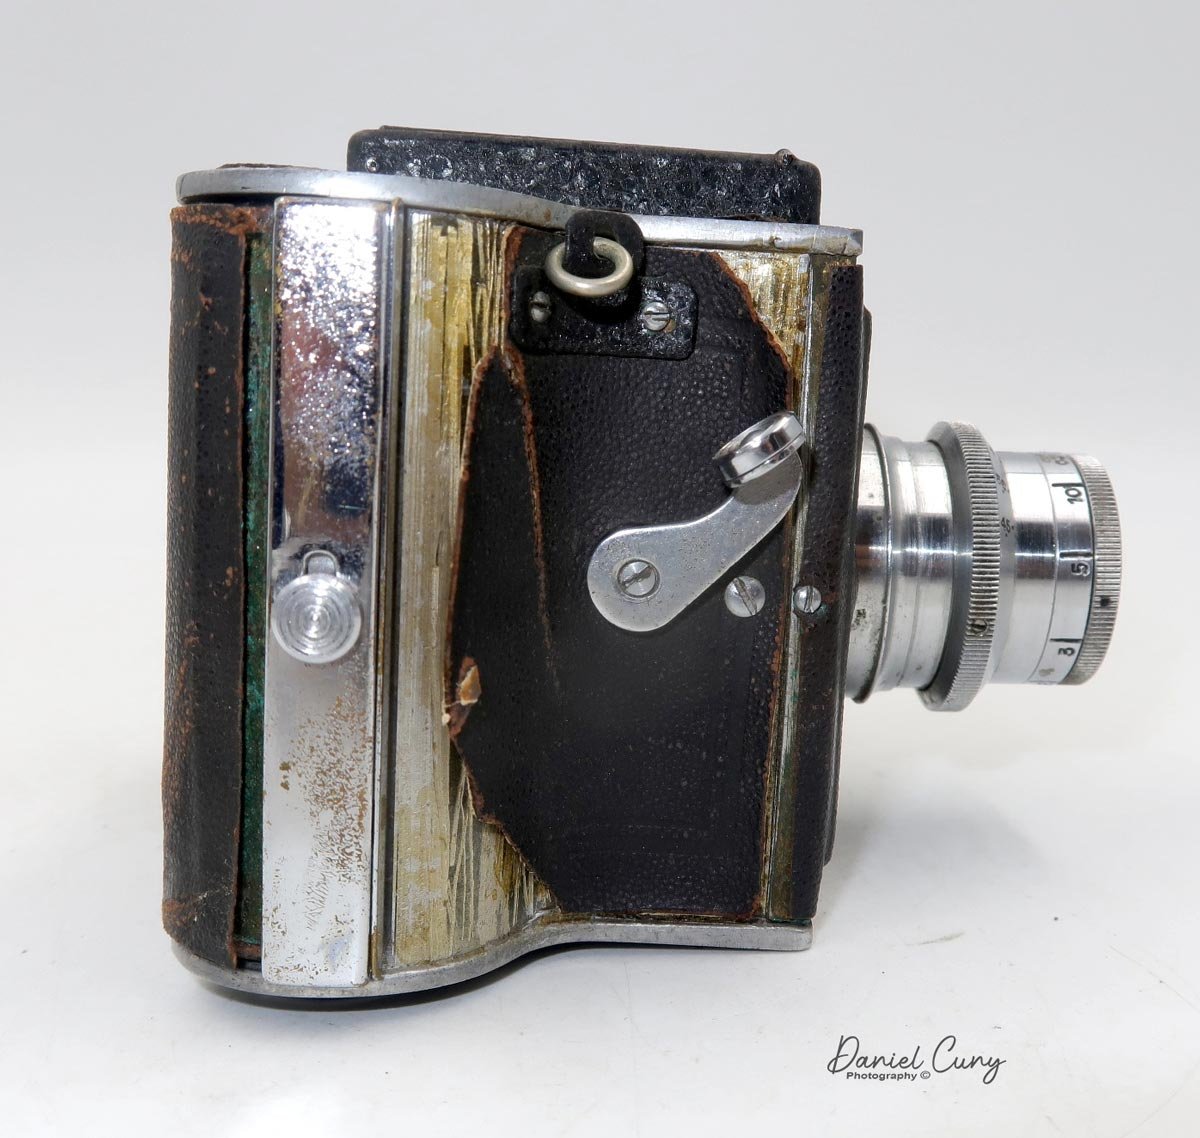
Opening the case and looking at the camera for the first time, I was surprised by the Minolta logo and text on top. Since it was made in 1936, it has a genuine Art Deco design in the look and feel of the camera. My biggest surprise was when I initially pulled the lens out from the body and found the camera didn't have a cloth bellows. Instead, it has a series of stacking cubes that pull away from the camera body, AND these boxes are reinforced with another Art Deco element, metal brackets that resemble an "M" when the camera is laid on its back with the lens pointing up. WOW, Just a fantastic design.

The Minolta Six camera measures 6 inches in width, 4.75 inches in height with the finder up, 3.75 inches with the finder closed, and 4 inches in depth with the lens out, or 2.25 inches with the lens closed. It weighs 1 lb. 5.7oz. without the case or loaded with film. The camera's body is made from a bakelite or plastic material, covered in a high-quality leatherette.

 To pull the lens out to take photos, there are two grips, one on either side of the lens, that you grab onto to pull the lens out and away from the body. You need to expose three stacking cubes before the camera is ready to take the photos. Under the lens are two curved chrome bars you can slide down to prop the camera up so that when the lens is out, it doesn't tip forward and keeps the lens level.

Around the top of the lens is Patents-Nippon, and below is Crown, which is the shutter on the camera. The actual lens is an 80mm f5.6 Coronar Anastigmat Nippon lens. Around the lens is a manual focus ring that focuses from under 1 meter to infinity. The focus line to judge distance is a protruding tab with a line at approximately 10 O'Clock on the lens face. The lens also has a stopping screw that prevents the lens from rotating past the infinity mark on the tab.


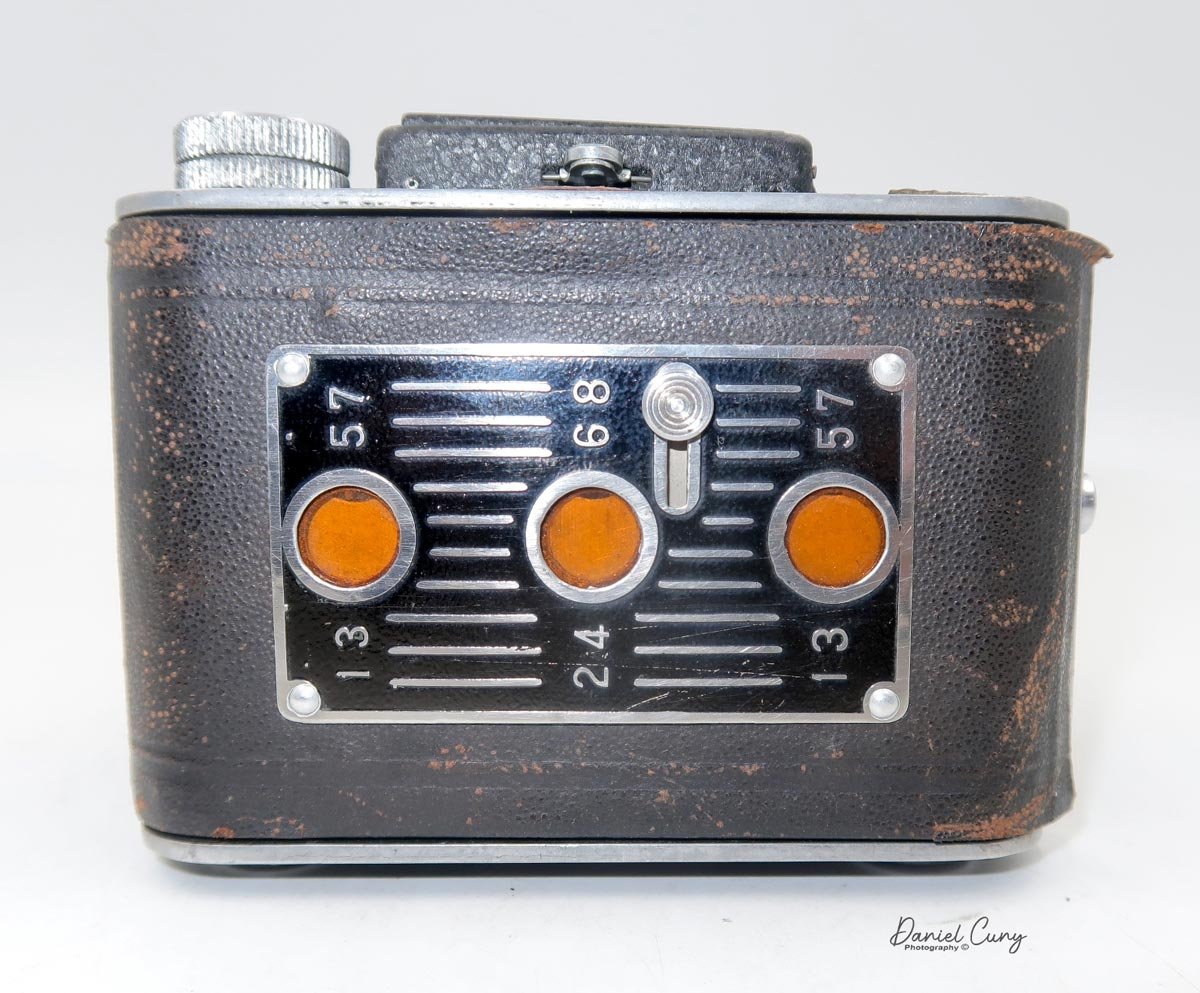
My camera has only four shutter speeds: 1/150, 1/100, 1/50, and 1/25, along with "b" and "T" for timed exposures. On the top of the camera is a pop-up viewfinder with etched or lined crosshairs to line up horizontal or vertical subjects as needed. The back of my camera sports three red windows with different numbers, which are used to line up with the number on the paper backing to get to the proper frame number. In later cameras, they went to a single window system, which is more common with current 6x6 format cameras using 120 film.


To open the back of the camera, there is a latch behind the strap on the left side with an arrow pointing down. Slide the button down, and the camera's back opens. The chrome winding lever was used on the older models. Later they went to a plastic or bakelite knob in the later models. My first thought when I looked at the back of the camera was that it was not a full-frame 6x6 camera, but that was because I was looking at the retracted plastic cubes from the bellows. It is indeed a full 6x6 format camera. Load the film on the right side and bring the leader to the left to take up the spool. The knobs on the bottom of the camera pull out so you can put in the film and take up the reel easily.

 The case for my camera is in great condition. There's a pretty cool instruction tab on the inside of the case, which was made for the three window cameras.

 The crown shutter doesn't have a cocking mechanism. There's just the shutter release to take the photos. I loaded the film. I pulled out the cube below and started to take pictures of the neighborhood with my trusty light meter. Once I reached the end, I unloaded the film and processed the negatives.

My Results:

Here are some of the photos taken with the Minolta Six camera. The photos were a bit flat in exposure and contrast.

Conclusion:

I enjoyed shooting with the camera, but I am still primarily impressed with the innovative and beautiful bellows system in the camera. Not only is it functional, but it is very light and tight and only wears out slowly compared to the style bellows. The flip side is, if something happens to this bellows, the replacement is hard to replace due to the material. I wished there were faster shutter speeds, but I was using 125 iso film, and with the aperture range of the lens, I didn't have an issue.

 I have a great and fun camera for next week's blog post, so I hope you'll stick around to read that one, too. Thank you for your time, and please be safe until then.

Update:

According to Andrea Apra, who corrected and let me know initially, a small cardstock table was provided with this camera. This table was used to calculate the Depth of Field. The card I have in the case with the wrong translation is just instructions for using this table provided with the camera, which I don’t have.

The table has a horizontal scale at the top with the various distances on the focus ring: 7, 5, 3, 2, 1.5, 1 Mtr.

Then, on the vertical column, the diaphragm has various apertures: F 5.6, 6.3, 9, 12.5, 18, 25.

Two pairs of values, the minimum and maximum distance of the DoF, are intersecting at the table's intersection.

This explains how to read the table.

This is the text translated in its original graphic structure of the text.

Super Flex Baby II Camera

When I first got this camera, I initially thought it was from somewhere in Europe, possibly Germany or Eastern Europe, due to its design and feel placement and shutter release, which resembles the Karma-Flex camera from Germany. 

 After doing some research on the camera, I found out that it was made in Japan. It was the first medium-format single-lens reflex (SLR) camera with a leaf shutter.

 The Super Flex II camera is odd and relatively small, too. When I took the camera out of the case, my hands are average size, but the camera seemed lost, and it was only a minute before I held it. It's not a miniature camera, but everything seems much smaller than I'm used to. The light tube or waist level finder, the lens and focus control, and even the winding knob appear to be smaller than what I'm used to. In the back of my mind, this will be a fun camera to test and write a blog post on.

History:

Umemoto Seisakusho manufactured the Super Flex camera between 1938 and 1942. It was started by Umemoto Kinzaburō, who started a small manufacturing plant in Yokokawa in 1931. In 1932, he was asked to open a new camera manufacturing plant in Toyko, which was completed in 1935. Their first cameras were the Super Makinet Six in 1936 and Neure Six in 1937, both 6x6 strut-folding cameras.

 As mentioned above, they took inspiration from the Karma-Flex camera in 1938. They developed the first Japanese medium-format, single-reflex camera, the Super Flex camera, built around the popular 127 film 4x4cm format camera.

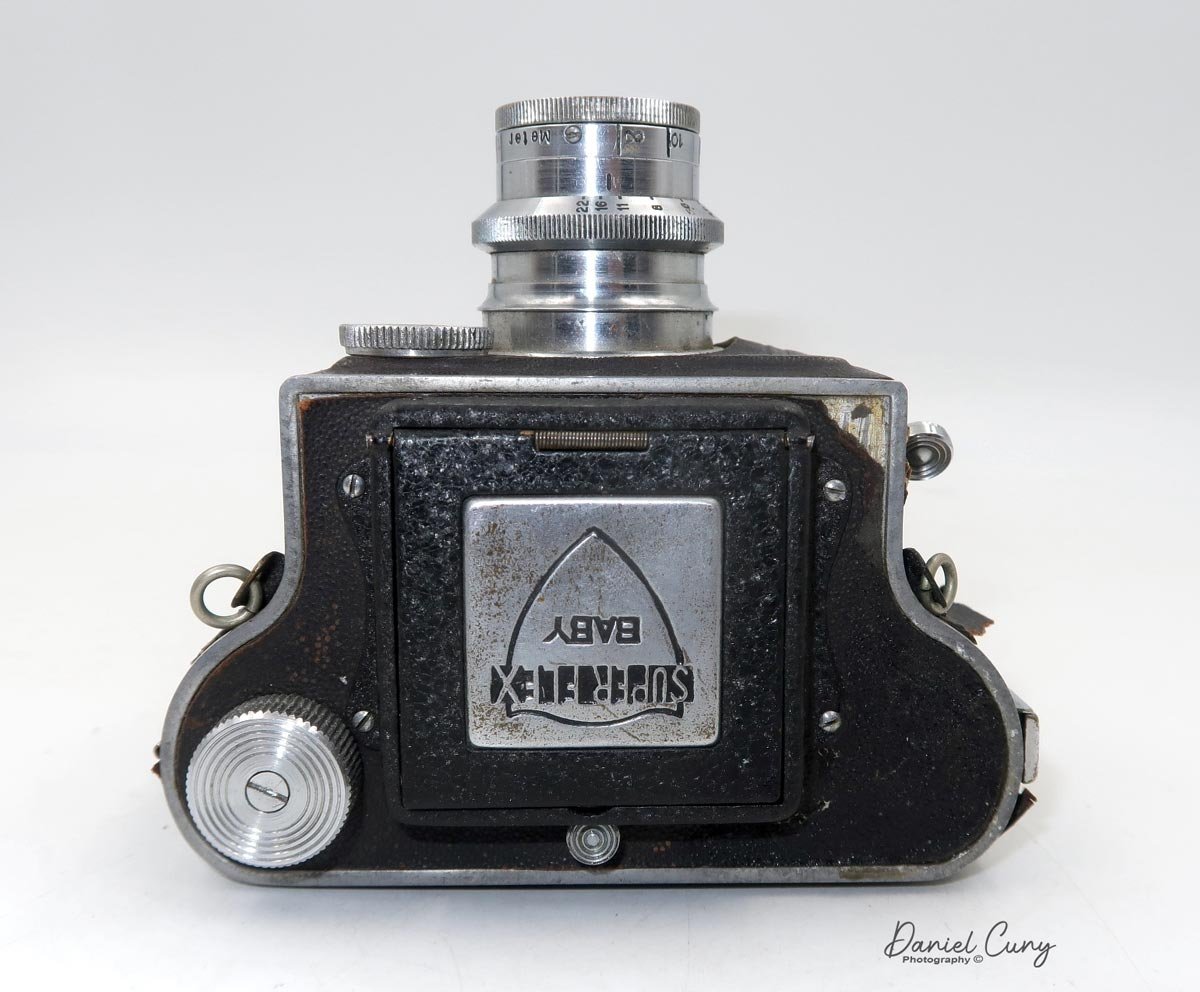
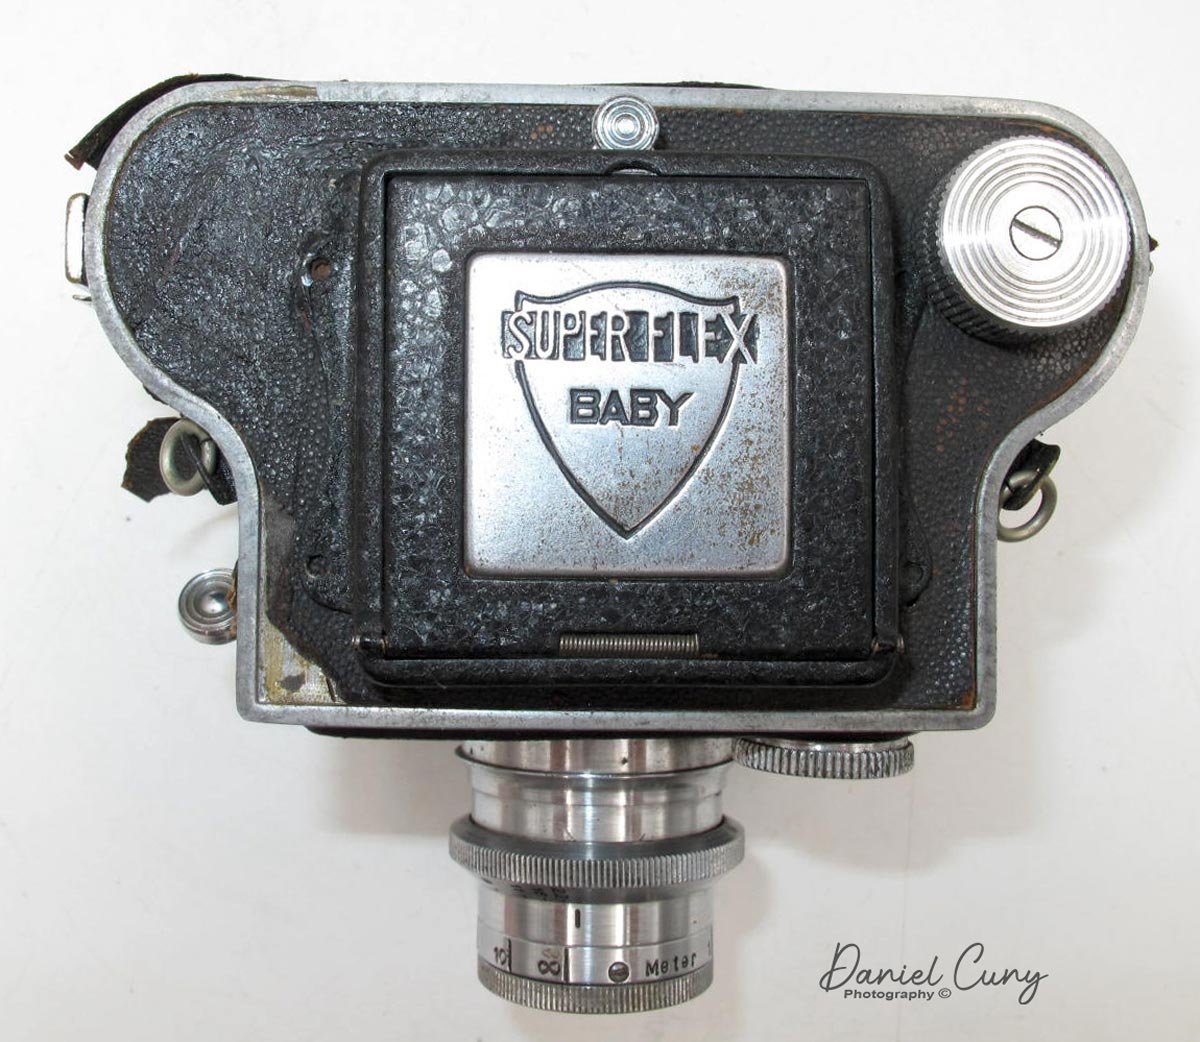
In 1939, they modified the camera's design to what's known as the Super Flex Baby II. The modifications included a fully chrome shutter speed dial as opposed to the chrome and black of the original design. They also came out with a new lens with a full chrome barrel and a focal length of 70mm instead of 7cm on the original lens. They also lost the black and chrome on the viewfinder logo and went all chrome, like the shutter speed dial and lens.

Advertisement of the Super Flex Baby camera from 1942.

 During the tumultuous years of WWII, the company shifted its focus from camera manufacturing to supporting the war effort. Despite the challenges, they produced the Semi-Makinet camera, a 6x4.5 folding camera, between 1941 and 1943. The factory was tragically destroyed during the Allied bombing of Tokyo in 1945. However, the company's spirit remained unbroken. They relocated the plant to Yamagata in 1945 and rebuilt the plant in Tokyo in 1948, which was a remarkable display of resilience.

 After the war, the company briefly took the name Umemoto Kōki Seisakusho and produced the Rocky Semi in 1953. This camera didn't do well, and in 1962, it became Y.K. Umemoto Seisakusho, which still produces photo-related parts for Kenko today.

 Here is a wonderful Japanese website with a lot of insight on the company Umemoto . I used Google Translate so I hope it comes through properly.

My Camera:

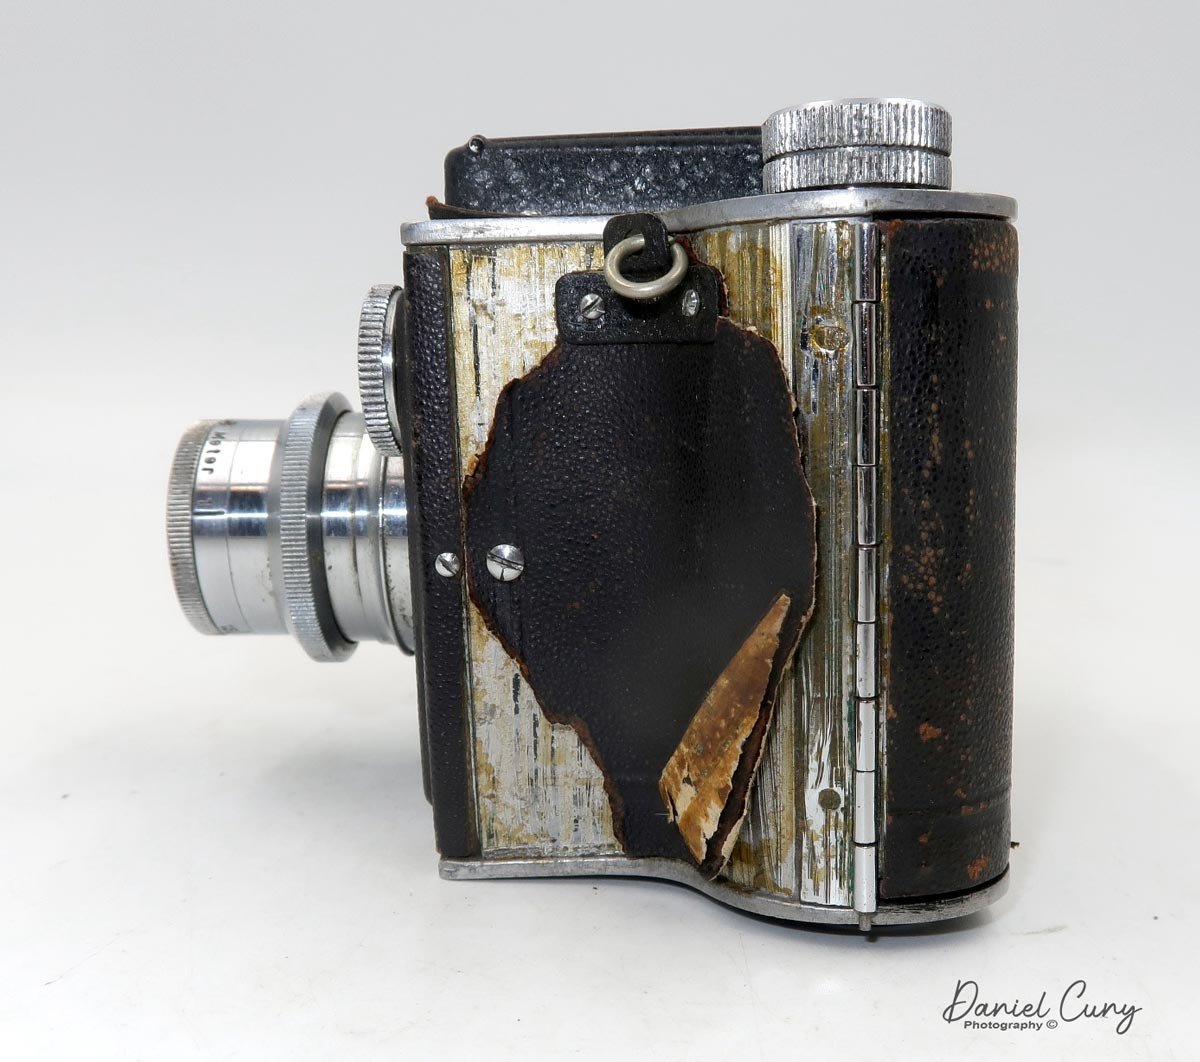
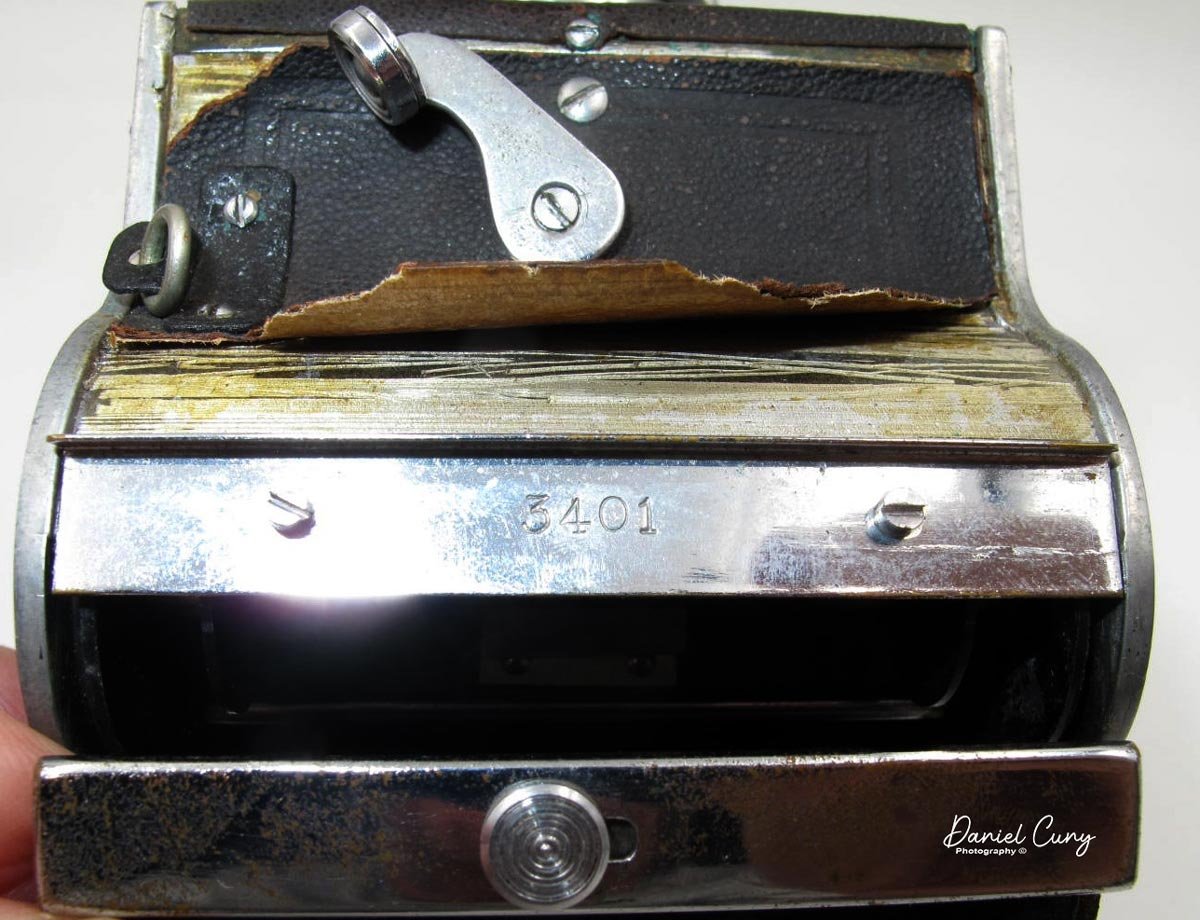
My camera, with its serial number 3401, is a fascinating blend of the original Super Flex Baby and the model II version. It features the original chrome and black viewfinder, a Model II shutter speed dial and lens, both in chrome, and a lens measured in 'mm' rather than 'cm.' This unique combination, a result of the transition period, added an element of surprise and excitement to my discovery of the camera.

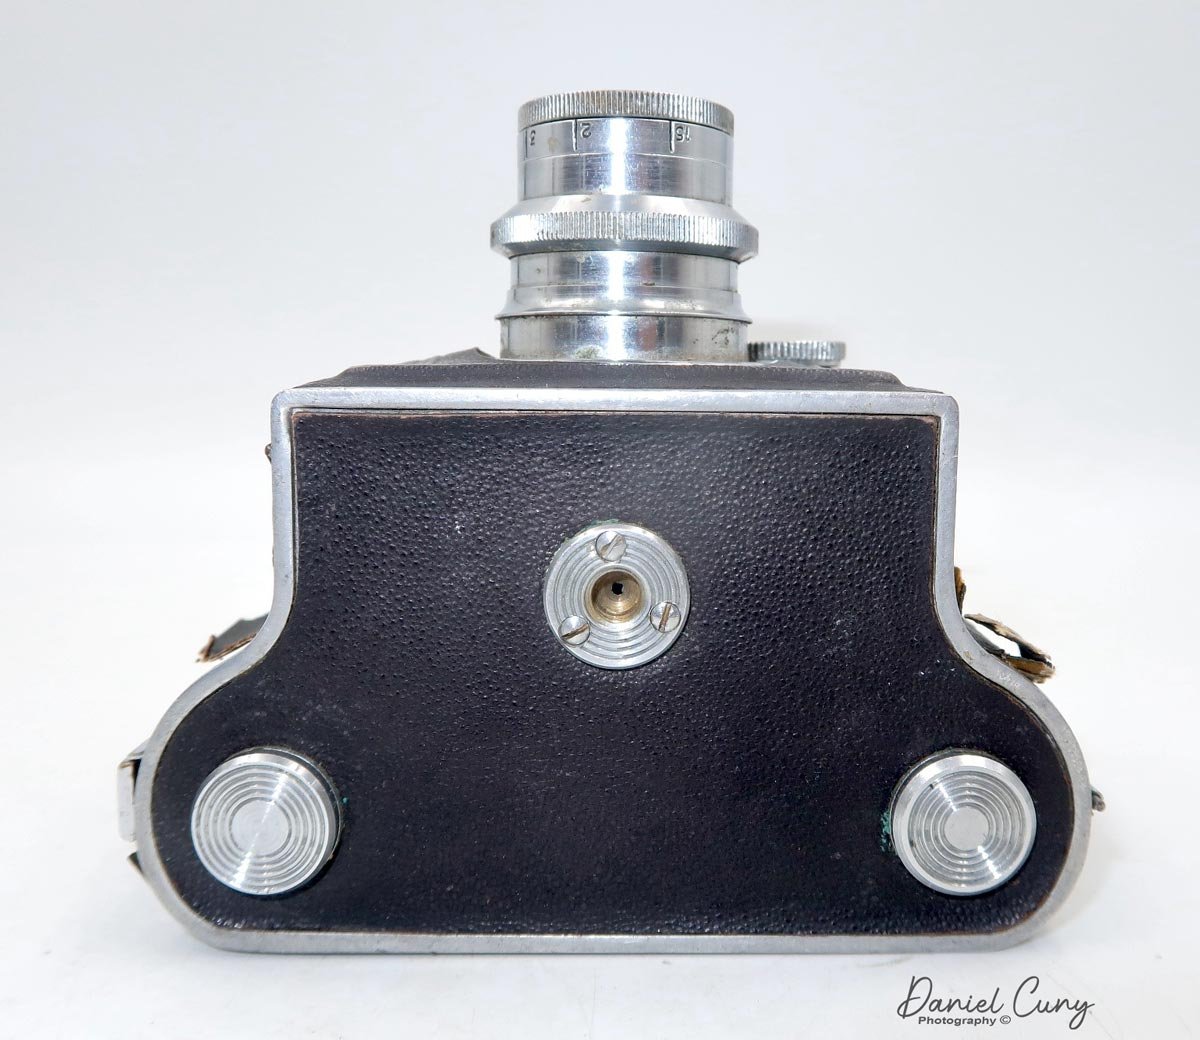
 The serial number on my camera is 3401, which you can find on the inside of the latch that holds the back of the camera. My camera measures 4" from the back to the front of the lens and 2.75" from the back to the lens mount on the camera. It measures 4.25" wide and 3.25" tall if the viewfinder is closed and 4.75" tall with the light hood opened. My camera weighs 1 lb. 3.2oz without the case.

Using the camera is pretty straightforward. There is a latch on the camera's right side, and you slide up to open the back door. You take the empty spool from the right of the camera and put it on the left side where the winding knob is. To take out the spool and put in the roll of film, you'll need to pull out the knob that holds the film into place. Once you have loaded the empty spool and film, pull the leader to the empty reel and thread the leader into the spool and wind. Once it's securely on the take-up reel, close the back.

 Here's where it gets exciting, something I learned and did when I looked at the company's website. I have the link to the above in the "history" section. Here's an excerpt from the company history explaining the film numbering sequence and the camera's winding instructions.

 "There are three red windows on the back cover for taking 12 4x4 cm shots. ( It seems that 4x6 cm numbers were used because 127 film did not have numbers for 4x4 cm. ) The left and right windows only accept odd numbers, and the center window only accepts even numbers and is read as follows (ignore the ○ parts). 1st photo) 1○○ 2nd photo) ○○1 3rd photo) ○ 2○ 4th photo) 3○○ 5th photo) ○○3 6th photo) ○4○ ... 11th photo) ○○7 12th photo) ○8○ I think this operation was quite difficult."


Looking at the numbers by the window openings, the text above now makes sense.

I didn't use this method and only got eight photos on my roll.

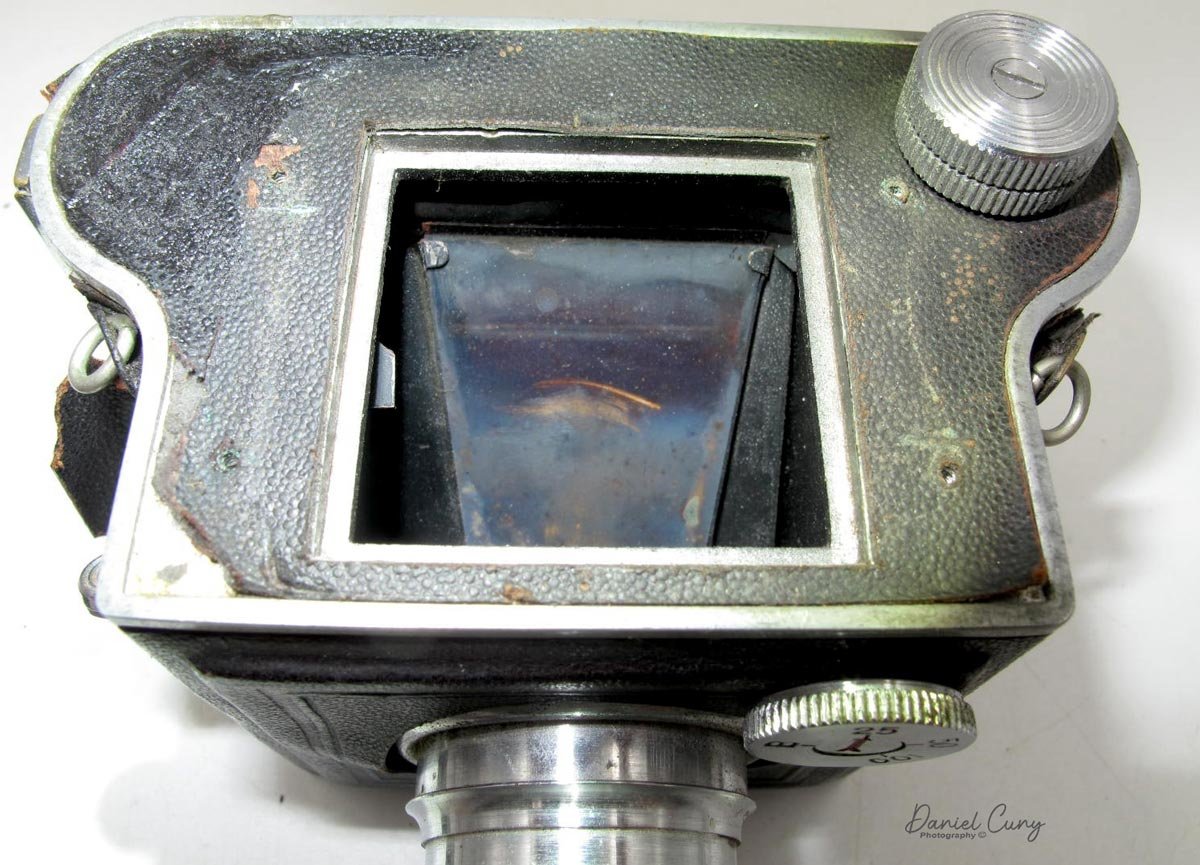
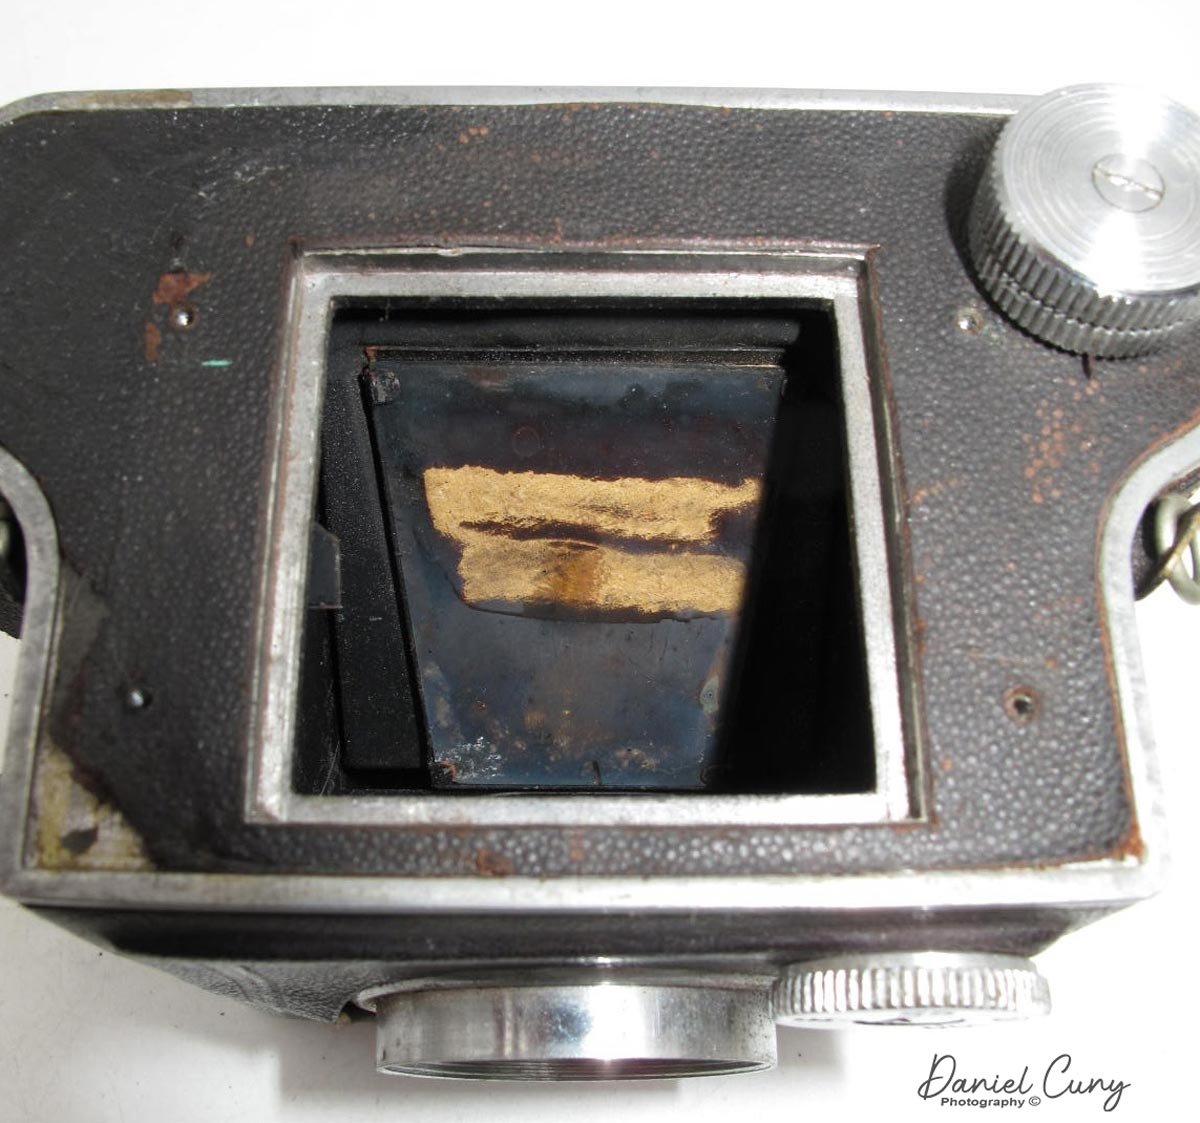
 The mirror in my camera was so bad that I couldn't use it and didn't notice before putting in the roll of film, so I was forced to use the sports finder to frame the photos I took. It worked out OK, so I wasn't too upset.

 I used my trusty light meter to get the needed exposures. I also needed to find a roll of 100 ISO film, as anything faster would have run into issues since the fastest shutter speed on the camera is 1/100, and the lens stopped down to f22. Luckily, I noticed that the lens focusing was in meters instead of feet, which I'm used to with most cameras I use. I needed to keep that in mind when composing my photos.


The camera case I have is in moderately good condition. The strap is intact, and it covers the camera well. The only thing missing is the snap that holds the front and back together but stays closed and protects the camera well.

 The film was used up quickly; now it was time to process it. 


Results:

The film I had was some pretty old and out-of-date 127 film, so I had yet to learn what I would get. It was not as good as I anticipated after I pulled the film from the processing tank. While I'll call the "art" prints, the negatives were very mottled, and I'm unsure what caused it, but the images are somewhat sharp.

 Here are some of the results from the camera.

Conclusion:

The camera was interesting, but the mirror and the focusing, or lack thereof, could have sat better with me. I decided to remove the finder and clean up the mirror to bring the camera back to life and make it more usable.

 Thank you for taking a few minutes to look over this camera blog. I'll have another exciting camera for next week's post, so please be safe until then.

Camera Update:

There were only four screws to hold the light hood on, so I proceeded to take them out. The hood came off quickly enough. Under the hood was a mask on top of the focus screen. I turned the camera upside down slowly, and the focus screen came right out, exposing the dingy mirror.

 They always say to test a small part when cleaning first to see if it's OK to proceed. I didn't hear that little voice say that this time, so I cleaned the mirror, thinking the silver paint was on the backside of the glass, which is normal. I took two swipes with my Q-Tip, and the finish came right off. YIKES!!!!


So, I ordered some silver markers to see if that would suffice to bring back the mirror effect to my new piece of glass. The mirror, or glass, now was easy enough to get out as it was held in the bracket with corner clips, which I slowly bent back to take out the mirror.

I received the silver or what’s called Chrome markers late last night. Early the next morning, I applied a generous amount to the glass I removed and let it dry. The markers produced more of a ripple effect as opposed to a clean glass mirror. It was certainly shiny enough, so I reassembled the focus screen and light hood back onto the camera, and the camera actually did a good job of focusing on a subject when viewing through the camera. It’s considerably better than before I disassembled it and when I took photos so I’m happy with how it turned out.

Here are the results.

Thank you again for reading about this interesting camera. Until next time, please be well and safe.