Original Model K1 Rolleiflex

My Rolleiflex K1 Camera

As is common for me, I purchased this original Rolleiflex model with many cameras, which included some other items I was more interested in. In the photo of the camera lot, I could see the Rolleiflex name, but the image was so small that I couldn't tell what model it was or even if it was in working condition. I took a shot; as I mentioned earlier, I was more interested in some items, and the Rolleiflex was more of the icing on the cake regarding the importance.

 Once I received the items in the lot and looked them over, the main items were great, and I was happy to have them. I picked up the Rolleiflex and checked on the camera's serial number, which was a low number. I have serial number 118104. From what I can see online, this is one of the first batches of cameras made. While the original Rolleiflex camera was only made from 1929 to 1932, a few modifications were made.

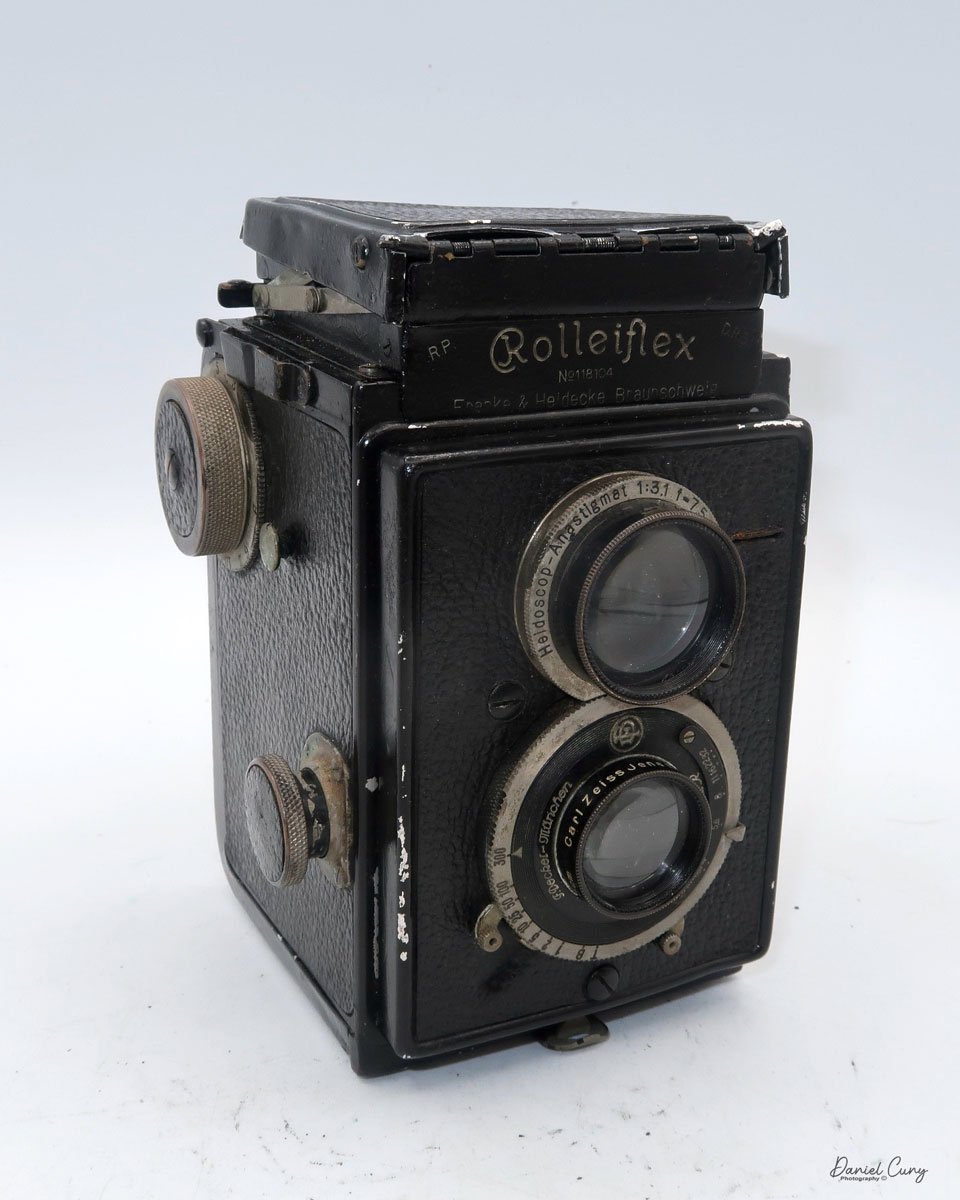
 In the photo, the Rolleiflex looked well used, and the top light chimney looked a bit wonky, which it was and still is today. When I tried to open the top, one of the side wings was jammed closed and wrapped under one of the other side wings, and I couldn't look down the chimney to see if the focusing screen was there. I took out my set of small screwdrivers and unscrewed the top 4 screws to remove the light chimney to fix it and bend the sides out a bit to make the chimney more usable.

Early Rolleiflex name and serial number

 Once I took the top off, I noticed the focusing screen was in good condition and still had the bubble level. It was a very clever idea to put in the camera when it was manufactured almost 100 years ago. 

The Company:

I reviewed the original Art Deco-style Rolleicord a few months ago, and here's what I wrote about the company's history then.

 Rollei holds a significant place in photographic history. Founded in 1920 in Braunschweig, Germany, by Paul Franke and Reinhold Heidecke, the company originally bore the name "Franke & Heidecke." Initially, it focused on precision mechanical devices, but by the mid-1920s, Rollei began producing cameras that would revolutionize photography.

 Rollei gained international recognition in 1929 with the launch of the Rolleiflex, the first twin-lens reflex (TLR) camera. The Rolleiflex was compact, robust, and designed for medium-format photography. Its unique twin-lens system featured one lens for viewing and focusing and another for capturing the image on film. This innovative design allowed photographers to frame shots at waist level, making candid photography more discreet and practical. The Rolleiflex quickly became a favorite among professionals and enthusiasts, particularly for portrait and documentary work.

The success of the Rolleiflex led to the introduction of the Rolleicord, a more affordable version aimed at amateur photographers. Both models showcased Rollei's commitment to precision engineering and optical excellence, which became hallmarks of the brand.

 During the 1930s and 1940s, Rollei continued to innovate, refining the Rolleiflex and Rolleicord lines with features such as automatic film winding and improved optics. Despite the challenges of World War II, the company maintained its reputation for high-quality cameras. In the post-war era, Rollei played a significant role in the resurgence of the German camera industry.

The 1950s and 1960s marked a golden age for Rollei. The Rolleiflex TLR became synonymous with professional photography and was used by renowned photographers such as Richard Avedon, Diane Arbus, and Vivian Maier. Rollei also ventured into other formats and technologies. The Rolleiflex 35mm SLR, introduced in the late 1950s, showcased the company's adaptability to the changing market demands.

 By the 1970s, the rise of Japanese camera manufacturers like Nikon, Canon, and Minolta introduced intense competition. These companies offered high-quality single-lens reflex (SLR) cameras at more affordable prices, challenging Rollei's dominance in medium-format and professional photography. However, Rollei's resilience and ability to adapt to changing market conditions inspired by its history.

In response, Rollei diversified its product line, introducing the Rolleiflex SL66, a medium-format SLR, and the compact Rollei 35, which became one of its most miniature 35mm cameras. Despite these innovations, Rollei struggled to maintain its market share due to its higher production costs and its competitors' rapidly advancing technology.

 In the 1980s and 1990s, Rollei faced financial difficulties, leading to changes in ownership and restructuring. The company shifted focus to digital imaging and niche markets, including high-end studio cameras and digital backs for medium-format systems.

The Rollei legacy endures as a symbol of German engineering and innovation, reflecting a century of dedication to the art and science of photography. This enduring legacy evokes a sense of respect and admiration for the brand's contribution to the field of photography.

My Camera:

My early Model K Rolleiflex is 5.25" tall and 3.5" wide by 3.75" deep. These measurements are with the light chimney closed. If I open the light chimney, the camera is 7.5" tall and weighs 1 lb. 9.7 oz. with the original lens cap and without film loaded into the camera. My camera has a Carl Zeiss Jena Tessar 7.5cm f3.8 lens, serial #1310339, for the taking lens, and for the viewing lens is a Heidoscope Anastigmat 75mm f3.1 lens, serial #120850. 

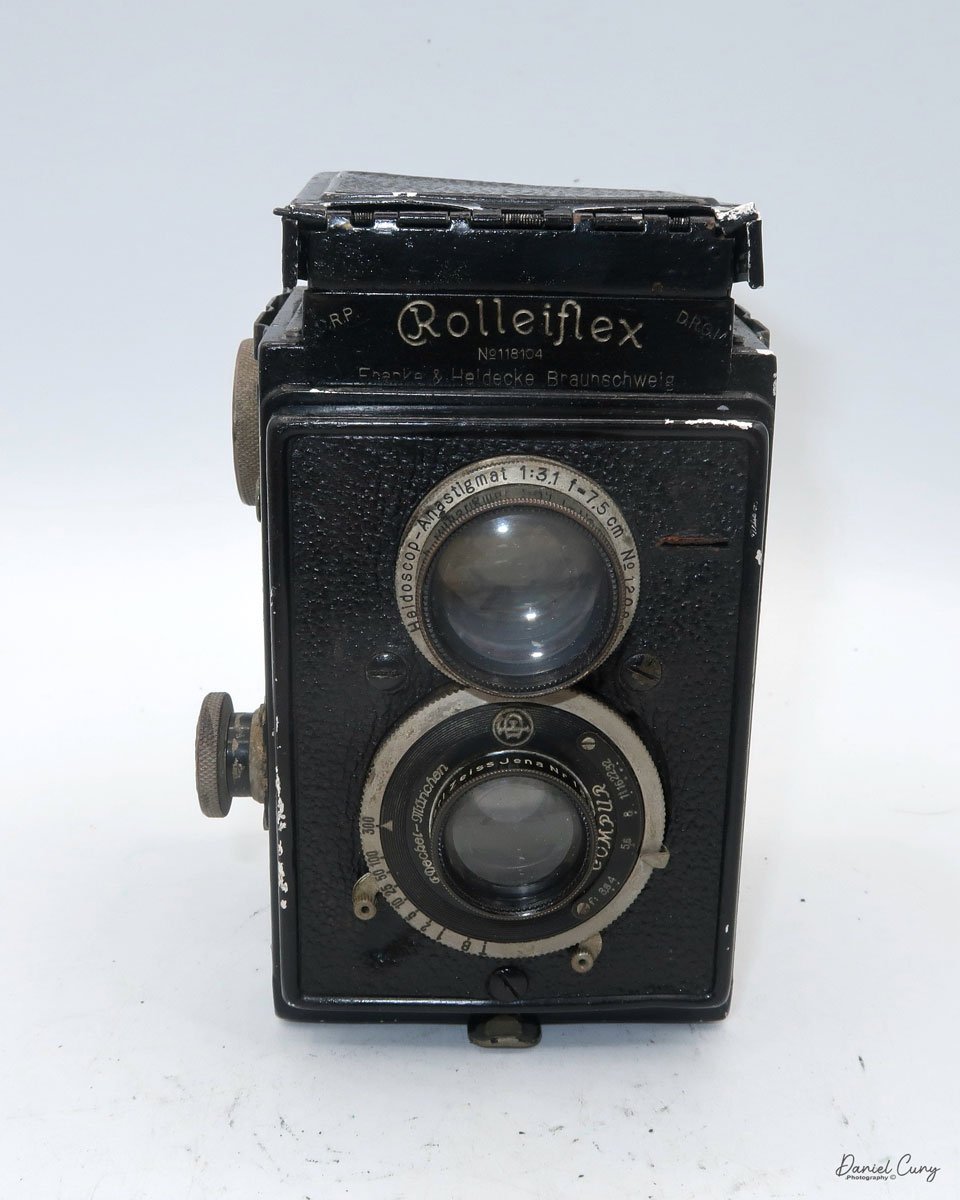
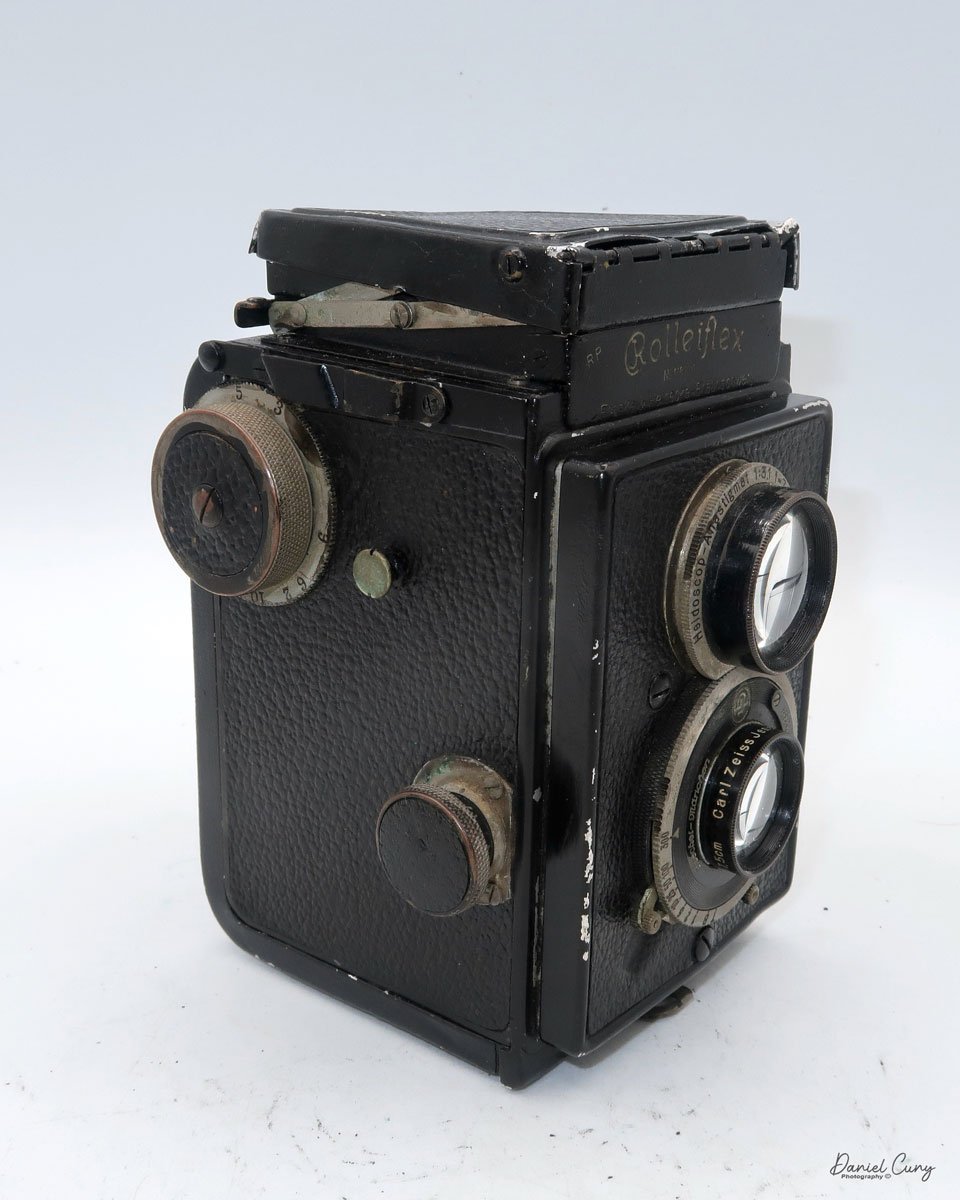
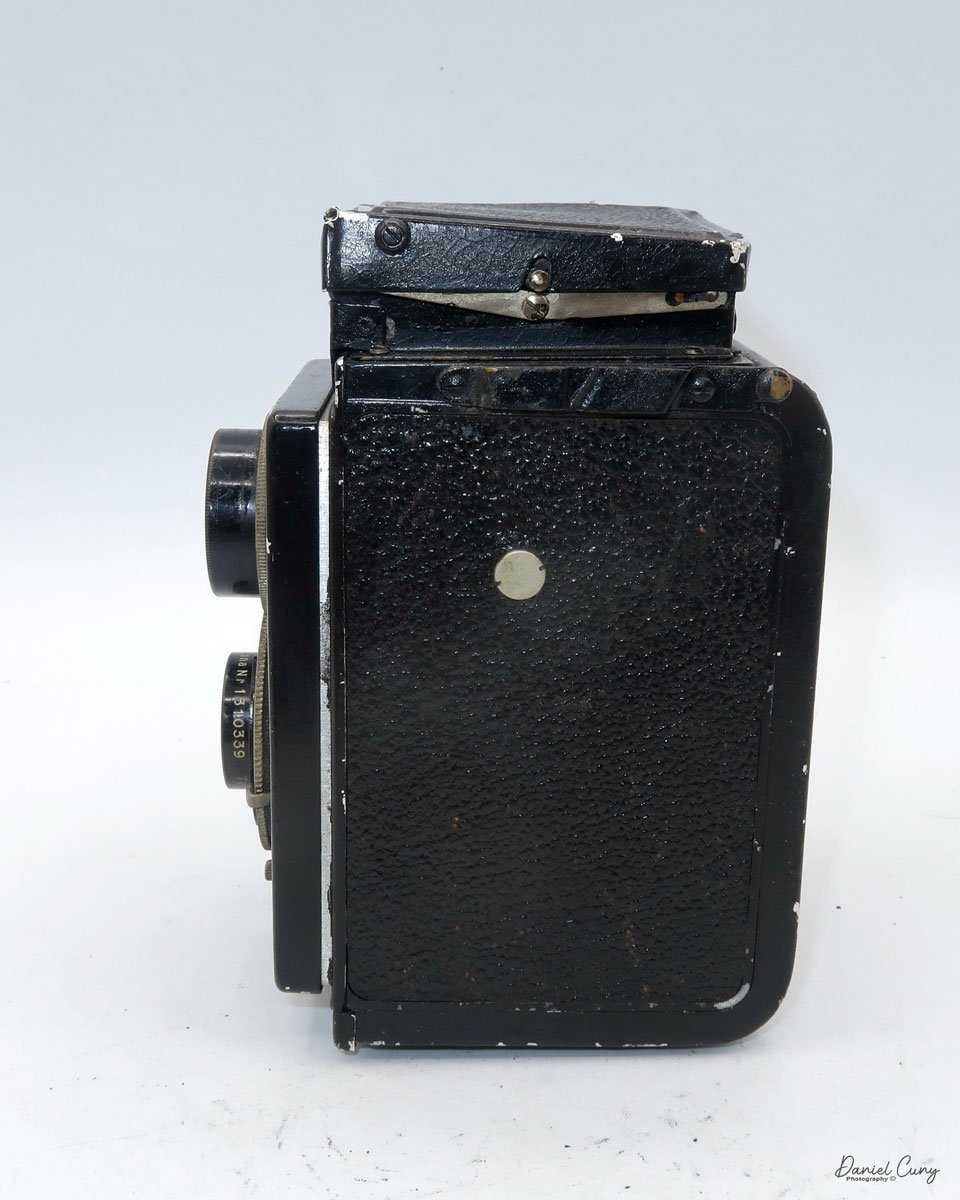
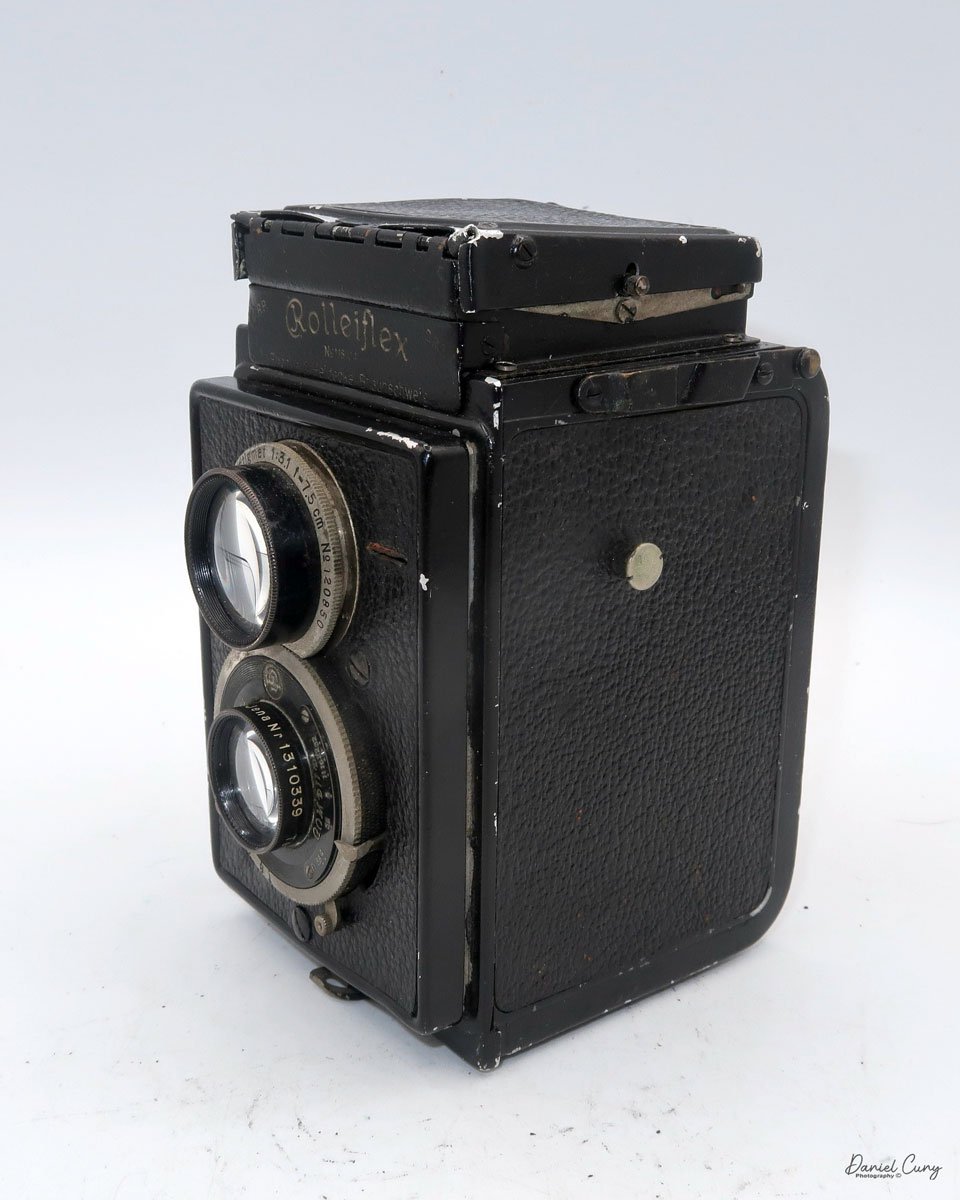
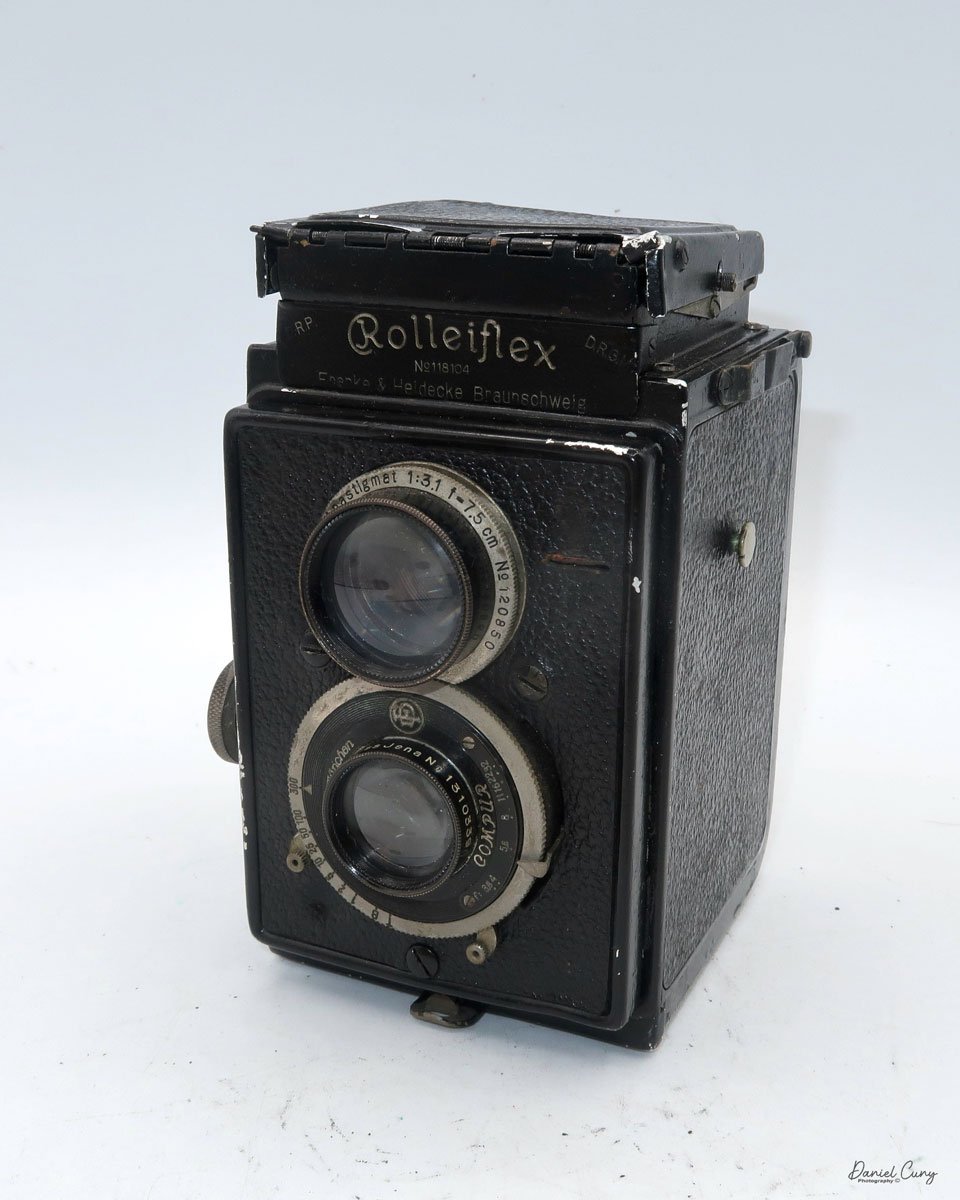
The lens is in an F.Deckel-Munchen Compur shutter with speeds from 1/300 to 1 sec. along with "B" & "T". The shutter speeds are set by turning a chrome ring on the outside of the shutter ring. The shutter cocking lever is on the left side of the camera as you view it from the front, and the shutter release is on the right side. The aperture ring goes from F3.8 to F32 and is set by a sliding ring just outside the shutter ring.

Taking lens, and shutter-aperture settings on my original K1 Rolleiflex

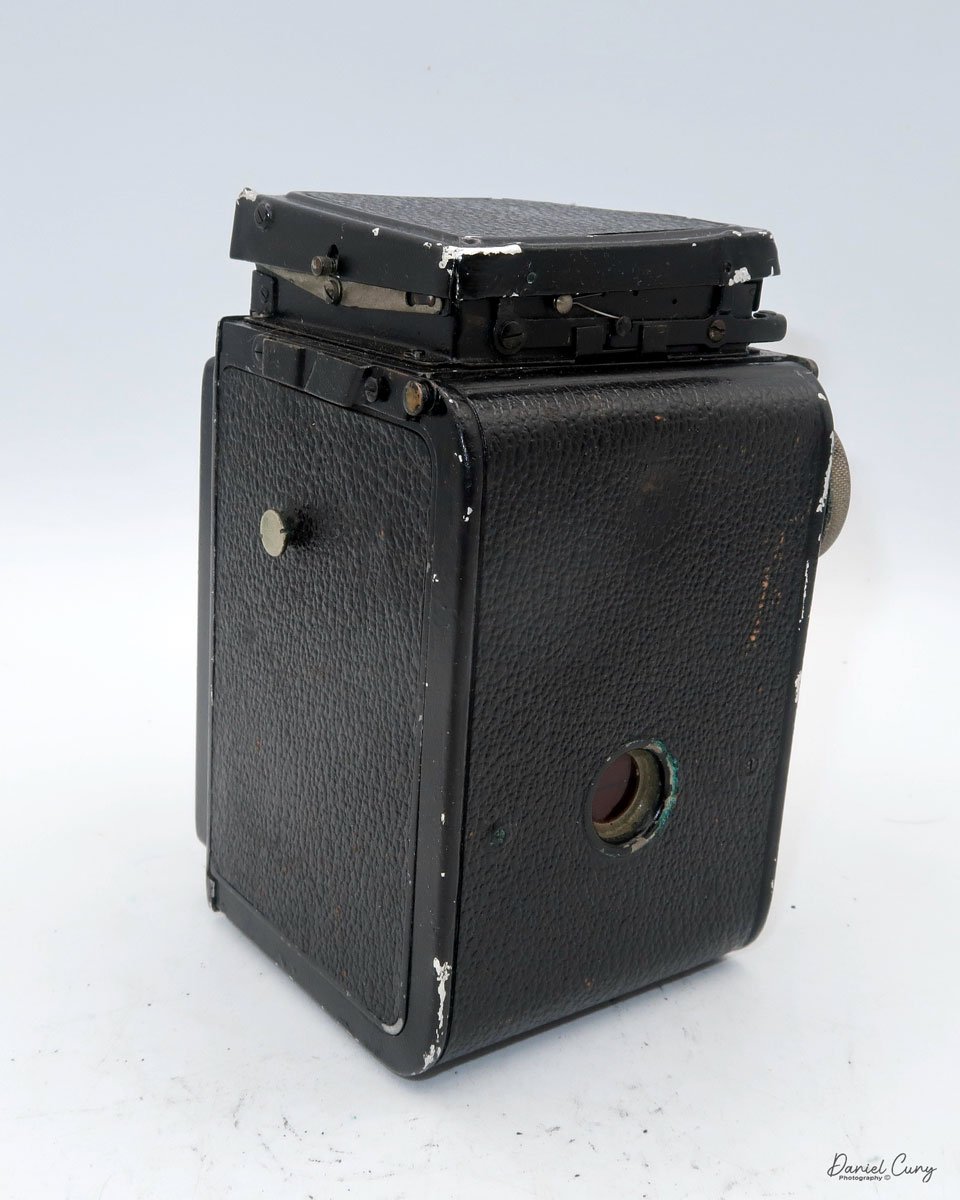
The light chimney or light hood is the most interesting thing about the camera. To open the light chimney, on the back of the camera, there is a small lever you need to press down to unlock the chimney. The front and sides will spring open if the chimney is in good working order. Since mine is not in perfect condition, the front opens, but I need to coax the sides to open correctly. Once the chimney is open, you can view the focus screen.

 On the back of the chimney is a magnifying glass on a spring. It can be flipped over and locked into the front part of the chimney, where it can be used for critical focus. Pressing the front part of the chimney releases the magnifying glass, and it returns to its normal position. 

 On the backside of the front wing of the chimney was a mirror, or a highly polished metal piece that flips down with a lever on the left side of the chimney. When the magnifying glass is in the "up" position, and you flip the lever down, the mirror will be at an angle that you can use the back as a level finder and focus the camera while viewing the image through the back opening of the chimney. I really liked this feature as it gives the camera a lot of flexibility when shooting. To close the chimney, fold down the sides first; the back and the front will close, covering the camera.

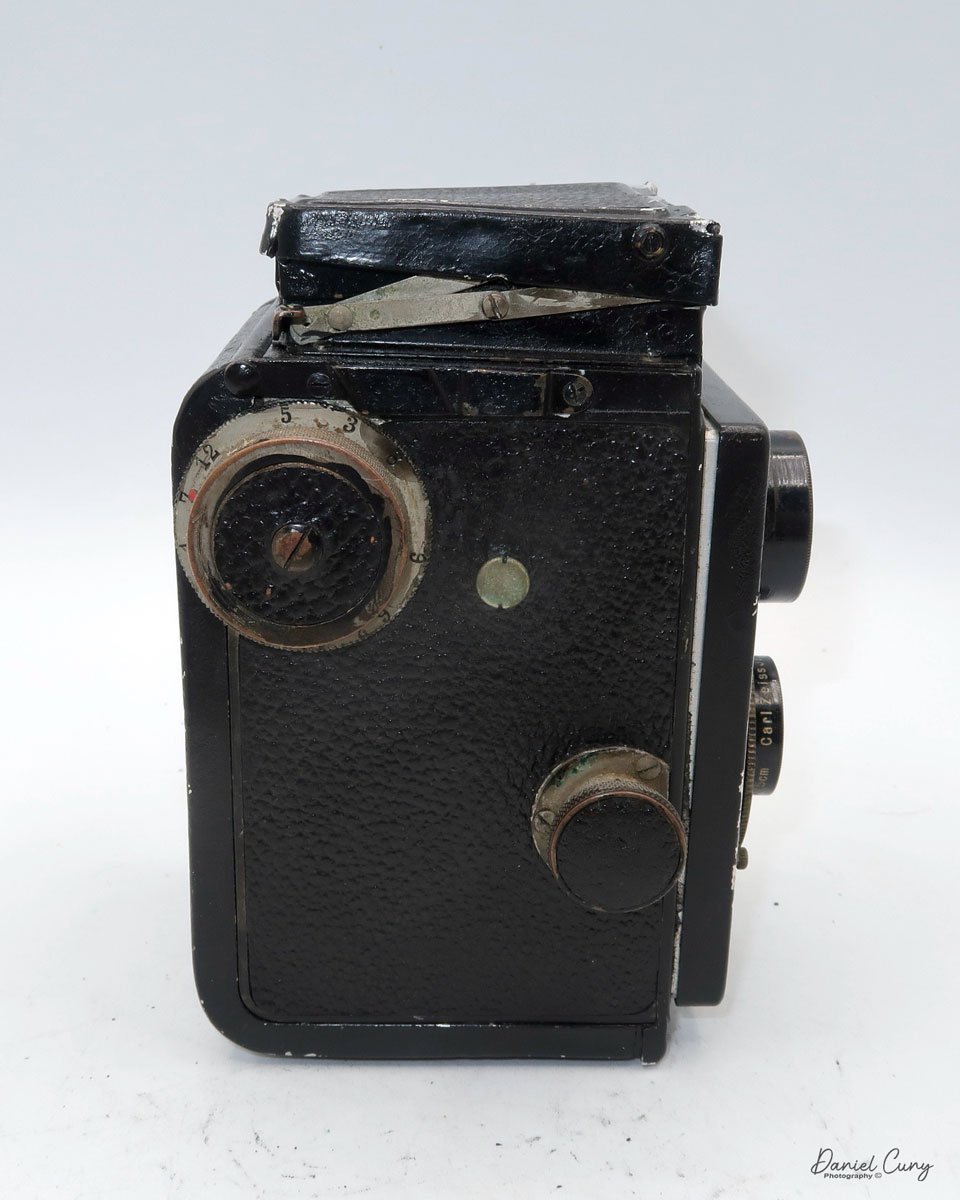
On the right side of the camera are two knobs. The larger knob on the top is the film advance knob. Around the knob are numbered from 1-12, but the numbers aren't in order; they go 1,7,12, small space, then 5,3,8, small space, 9, small space, and 6,2,10,1,11. At first, I thought these were frame numbers, but the sequences are so off. I know the first camera models were made for film size 117, and the camera only took six exposures with larger gaps between frames. There is also a red arrow pointing towards the number, but it didn't change when I put the film in the camera and advanced it to the next photo. Maybe someone can explain this sequence to me.

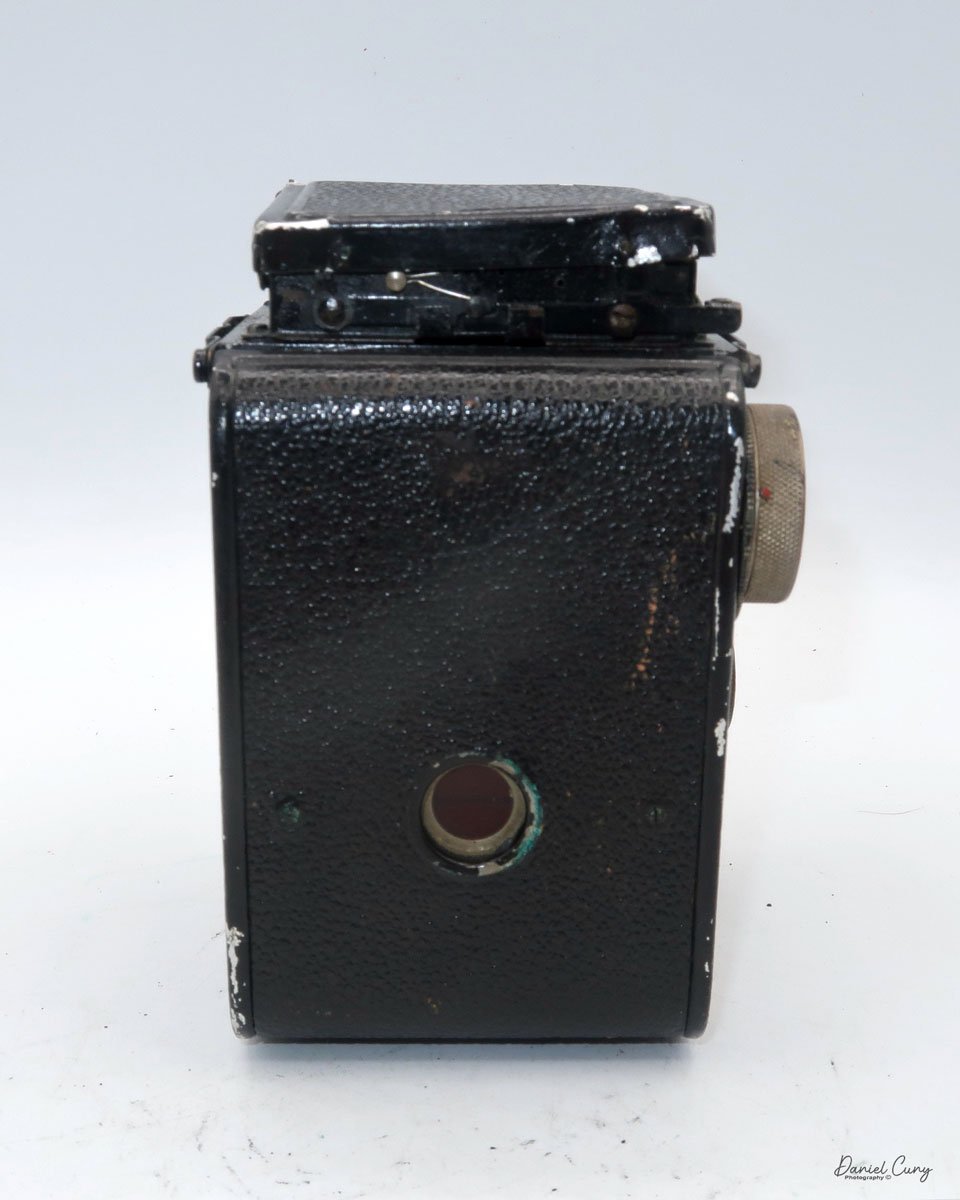
 The lower and smaller knob is the focus knob. On the inside are distance numbers, but there is no feet or meter setting. On the camera's left side is a lug, which was used to connect the strap.

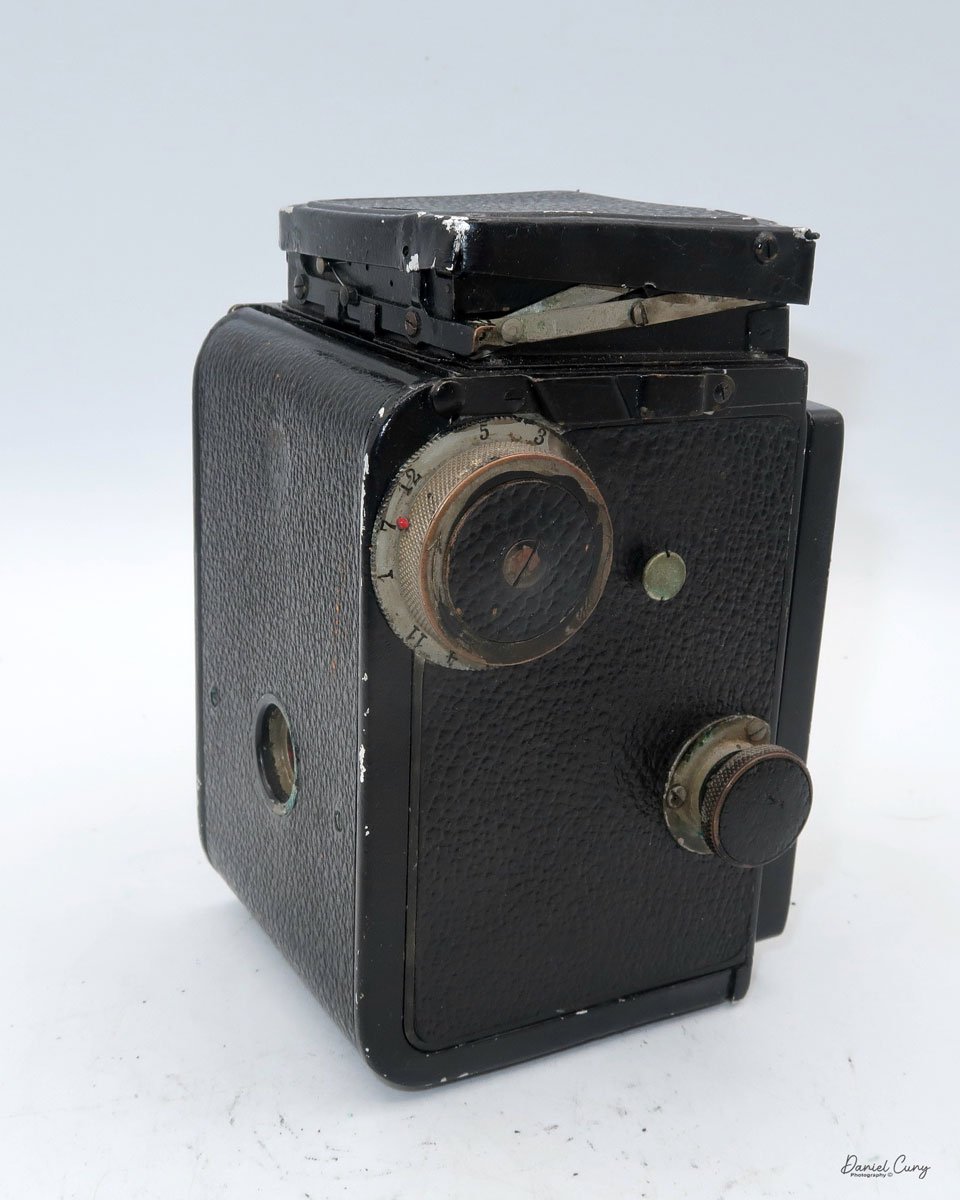
The back door locking mechanism is on the bottom of the camera, and there is a tripod socket and a second red window with a cover. I didn't use that frame counting window, as I used the one on the back of the camera as I would for most cameras. To open the back door to load film, you lift the silver-hinged locking mechanism, which opens the back door. After doing some research on the camera, I found that this model doesn't take 120 film like all the other Rolleiflex models. 

I tried anyway, and it's too wide and didn't fit into the film chamber. Luckily, I have some outdated Agfa 620 films that fit correctly. I put the empty spool on the top. You can pull out the larger knob to load film into the camera, then press it in to lock the reel into place. I put the outdated Agfa roll into the camera, fed the leader into the empty spool, wound the film to start, closed the back of the camera, and wound the film to frame number 1. Now, I'm ready to take the camera out on an adventure to see how the camera performs.


My Results:

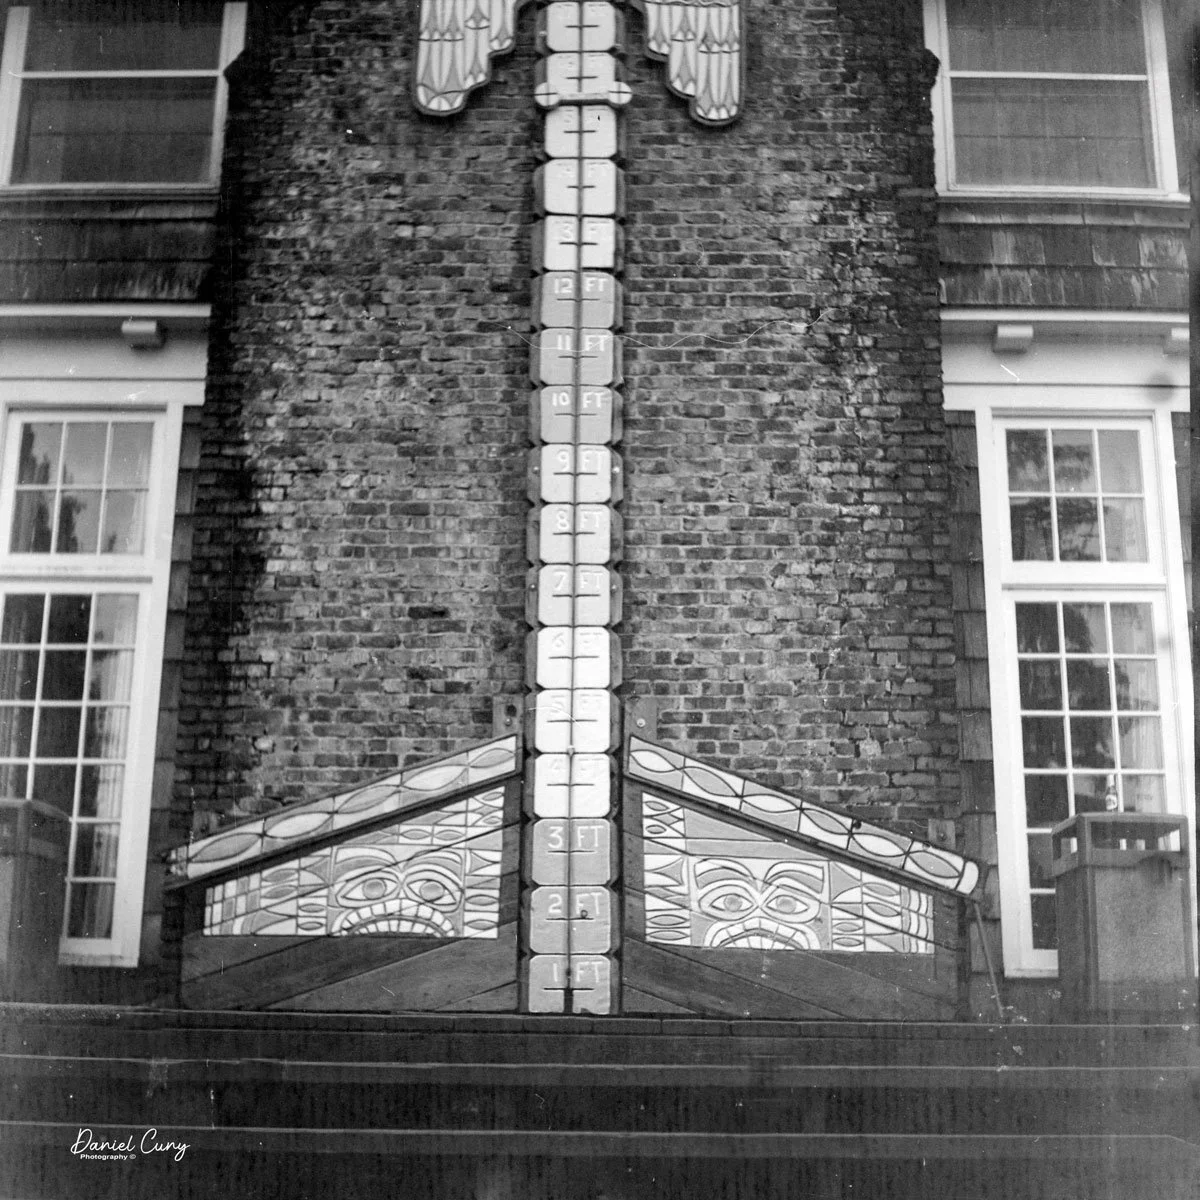
My wife and I planned a trip to Lake Quinault in the Olympic National Forest, so I wandered the lake's hotel grounds with a fantastic camera loaded with film and took some photos. Here are a few of the images from this trip.

Conclusion:

The camera performed very well, and the images were nice and sharp. The focusing screen was dark compared to the newer cameras. Still, it did an excellent job for a camera almost 100 years old and was extremely fun to shoot with. Due to the age of the film, the images have a mottled appearance when looking at something without detail, like the sky or lake. But that doesn't affect the camera's usability, which was overall very good.

 I'd love to hear from you. If you have one of these cameras and have questions or want to let me know what you think of the camera, please leave a comment, and I'll get back to you soon.

 Thank you for taking a few minutes from your day to read about this fantastic camera.

 Until next week, please be safe.

Kodak Retina Model 117

My Kodak Retina 117 camera

I purchased this original Kodak Retina 117 with a group of various Kodak and other branded cameras from the daughter of a Kodak engineer several years ago. She mentioned that the Retina was in his office in Rochester and was one of his favorite cameras, and she could remember him using it to take family photos. She didn't know what this model was other than it was the camera that Dad used to take family photos with.

 These stories bring a human element to purchasing items from family members. The cameras are not just mechanical items, which I happen to enjoy, but they are objects that evoke memories of dad, mom, aunt, or uncle holding the camera and taking photos at family Bar-B-Ques, birthday parties, Christmas morning, and so many other memories families have together.

Kodak Retina 117 Front View

 When the group of cameras arrived, I knew there was an early Retina in the group. Still, I didn't realize that it was the first Retinas model to be made. During the unwrapping of the camera, I first noticed how worn the camera's leatherette was. The was smooth in many locations, which gave the first indication that the camera was well used and most likely loved by the person using it. The front door was a bit sticky to open, but that's not unusual for a camera made 90 years ago. I'm sure the spring has lost some of its pulling power with age. Once opened, I wanted first to check the shutter. That seemed in great shape; even the 1 second seemed accurate to the ear. The transport was working, and I didn't see any real issues with the camera. I put it on my shelf with many of the other cameras I have.

 This week, while thinking about what camera to write about, I started to look over one of the shelves with cameras, and the Retina popped out to me. I know it was in good working condition, at least when I put it on my shelf a year or so ago. Opening the camera was as good as the day I put it on the shelf, so I decided to put a roll of film into the camera and see what a 90-year-old, German-made 35mm camera could offer. 

Retina History

The Kodak Retina series is a fantastic camera design, blending American ingenuity with German precision. Introduced by Kodak in 1934, the Retina cameras were manufactured in Stuttgart, Germany, by Kodak AG, formerly known as Nagel Kamerawerk, which Kodak had acquired in 1931. The Retina line is celebrated for its compact design, quality construction, and innovations in photography, becoming a favorite among amateurs and professionals. The Retina series began with the Kodak Retina I (Type 117), a 35mm folding camera. The Retina was one of the first cameras to use Kodak's new 135 film cartridge, which would become the industry standard. The Retina I was compact, featuring a collapsible lens and a rugged design. The model underwent several iterations, improving lens quality, shutter speeds, and build but always retaining the folding design that defined the early Retinas.

Spanish ad for Kodak Retina 117 camera

 In 1936, Kodak introduced the Retina II (Type 122), which added a coupled rangefinder, making focusing more precise. This feature positioned the Retina as a premium camera for enthusiasts. By the mid-1950s, the Retina line had evolved into non-folding models with the introduction of the Retina Reflex series. These single-lens reflex (SLR) cameras incorporated interchangeable lenses, advanced metering, and a sharp Schneider-Kreuznach or Rodenstock lens, which appealed to serious photographers.

 The post-war years saw significant advancements. The Retina IIc and IIIc, introduced in the 1950s, became icons of the series. They featured interchangeable front lens elements, making the cameras versatile while maintaining their compact, folding design. These models also integrated advancements like exposure meters and faster shutters, ensuring the Retina line kept pace with competitors.

The Retina Reflex series launched in 1957, showcasing Kodak's foray into the SLR market. While innovative, these cameras faced stiff competition from Japanese manufacturers like Nikon and Canon. Despite this, they remain a testament to Kodak's ability to innovate during an era of rapid technological change.

 By the 1960s, the Retina line gradually faded due to the rise of inexpensive, high-quality Japanese cameras. The last Retina camera, the Retina S2, was produced in 1969. Despite their discontinuation, Kodak Retina cameras remain highly collectible, admired for their craftsmanship and role in popularizing 35mm photography. Their legacy remains a reminder of Kodak's golden era in the photography industry.

My Camera:

My Kodak Retina 117 camera is a wonderfully small and compact camera that you can put into your pocket and travel with very easily. One thing I enjoy about the look of the camera is all the knobs on the outside of the camera are nickel as opposed to the shinier chrome, which can give reflections when using the camera.

 The camera is 5" wide, just under 3" tall, and 1.5" deep with the lens closed and 3.5" deep with the front door opened and the lens out, ready to take a photo, and weighs just under a pound at 15.7 oz. My camera has a Schneider-Kreuznach Xenar 5cm f3.5 lens in a Compur-Rapid shutter. The shutter has speeds from 1/500 of a second to 1 second, along with "B" and "T" settings for timed exposures. The aperture of the lens has a range of f3.5 to f16.

 To open the lens on the camera, you press a small button on the bottom of the camera. Once depressed, the front door should usually spring open, and the lens, which is on a very short bellows system, should come out into the erect position. As previously mentioned, my front door doesn't spring open, so I needed to give it a little bit of help and pull it open.

Once opened, the camera is relatively straightforward in the settings. The shutter speeds are set by turning a dial on the top of the camera if you have it in the vertical position. Like many Kodak cameras from this era, or for many folding styles of cameras, the front door has the ability to set the camera upright just by pulling out the "Kodak" logo on the front door, which will make for a leg for the camera to rest on if you want to set it down for display or to take a photo. I always do that when in a store or seeing a folding camera on display. I'll flip down the camera's leg, allowing the camera to stand upright instead of on the platform the lens pulls out onto.

Select shutter speed by turning wheel. The top lever cocks the shutter and the one on the left side trips the shutter.

A small slider sets the aperture on top of the shutter as you hold the camera horizontally. The focus on the camera is by guess only as this camera doesn't incorporate a rangefinder. This function will come in later models. There are two different sets of focus distance numbers, both on the top of the shutter, but it depends on if you have the camera either vertically, in which the numbers are black, or if you're holding the camera horizontally, then the numbers are red. To focus the lens, there is a small knob on the bottom of the lens as you hold the camera horizontally that rotates the focus collar.

To take a photo, you'll need to cock the shutter with the lever on the top of the shutter while holding the camera vertically. Once the shutter is cocked, the other lever releases the shutter making the exposure. I've seen a very small shutter release button that fits into the cable release socket on the Retina camera. Unfortunately, my camera is missing this. I wish it did have it because when I was taking photos with the camera and looking through the viewfinder on top of the camera, my finger would cover some of the viewfinder, obstructing the subject when releasing the shutter. It wasn't too bad, but the small release would have made the experience a bit better. Now, I'm hunting for a small release to put onto the camera for future use.

 To close the front door, the lens must be focused to infinity so it is in the retracted position on the camera. You'll need to depress two small buttons on the lens strut, one on top and one on the bottom, to retract the lens back into the camera body. Once this is done, the front door will click closed.

Loading the camera with film is pretty straightforward. On the side of the camera is a lever you pull down, and the back door unlocks so it can be opened. Loading the film is just like any other 35mm camera. I needed to do a couple of operational things to advance the film to the next frame. Looking on top of the camera going from left to right is the rewind wheel, the frame counter, the viewfinder, a round knurled wheel with an arrow pointing counterclockwise, and the film advance wheel. Inside the advance wheel is a second rotating wheel with a small cutout and arrows pointing in clockwise and counterclockwise directions. This inner wheel can rotate to have either an "A" showing for advancing the film forward or an "R" for rewinding the film into the film canister when all the photos have been taken. 

After making an exposure, keep the inner wheel to "A." To wind to the next frame, the knurled wheel just to the left of the advance wheel needs to be turned slightly until you feel a slight release, then you can use the larger wheel to advance to the next frame. If you don't move the knurled ring slightly, the film won't advance. This wheel is the unlocking lever that allows the camera to advance to the next frame. Also, once you load the film, be sure to set the frame counter to the number 1 to keep track of how many exposures you've taken. Once you've taken the entire roll of photos, turn the inner wheel on the advance wheel to the "R" position to rewind the film back into the film cassette. Open the back of the camera and process your film.


My Results:

I loaded the camera with a roll of T-Max 125 film, and while taking our dog, Ernie, a 15-year-old Pug, through the neighborhood, I took photos of things that caught my eye. Here are some of the results of our walk.

Conclusion:

I must be getting better at guessing distance, which has always been a problem (one of many) of mine. I also understand that the sunny day and smaller aperture helped with some of the focusing distances I would generally have with "guesstimate" focusing. Nonetheless, the camera was small, compact, accurate in the exposures, and fun to shoot.

 As I previously mentioned, if I could find one of the small shutter release items to add to the cable release socket, this would have helped and made the camera easier to use. Besides that small item, I can see why the previous owner enjoyed shooting with this camera.

 While I enjoyed this camera, I have it for sale on my eBay store. If you're interested in this or any other items in my eBay store, please email me to work out a deal.

 Thank you for taking a few minutes from your day to read about this fun and historic Eastman Kodak camera. The Retina line of cameras is often overlooked but highly collectible and usable.

 Until next week, please be safe.


Finetta 88 Camera

My Finetta 88 camera

The Finetta 88 camera caught my eye on a visit to London a year or so ago when I had about an hour during a walk down Portabello Road. I met with Juliano, the owner of Cameras London, who was still in the process of setting up. As I was looking over his extensive items on the multiple tables he has, I saw the grey body of the Finetta 88 camera. 

 If you are a camera enthusiast and can go to Portabello Road during the weekends, I highly recommend seeing Juliano. He has an incredible selection of older wood cameras with brass lenses and many of the more common 35mm point-and-shoot cameras that seem to be all the rage now.

 As I've mentioned a few times, I'm always drawn to the camera with either a different color or if there is something odd or unusual about the item. Not only is the Finetta that I saw covered in a gray covering on the camera, but the lens is somewhat off-center, giving the camera an "out of the ordinary" look. I put the Finetta 88 camera aside and looked over many other cameras I wanted to purchase. As we discussed the price, I picked up the Finetta again and added it to the few items I purchased that day, and I'm glad I did.

The Company

Finetta-Werk was a German camera manufacturer with roots tracing back to Kamerawerk Peter Saraber, a company founded by Peter Saraber in 1945 in Goslar, Germany. Saraber, a Dutch engineer, initially focused on producing precision optical equipment in the post-war era during heightened demand for affordable and efficient photographic devices. Saraber teamed up with a Voigtlander engineer, Helmet Finke, around 1947 to design and develop a new camera.

 "Finetta" was introduced in the late 1940s, marking the company's transition toward a more consumer-friendly image. The Finetta cameras, characterized by their simplicity, durability, and relatively low cost, appealed to post-war Europe's growing middle class. Early models, such as the Finetta 88, showcased Saraber's dedication to compactness and practicality, featuring a straightforward mechanism for capturing 35mm images, including a new two-leaf shutter system, which they applied for a patent. They also invented a new film advance system with double exposure prevention.

Ad for Finetta 88 camera taken from Mike Eckman website.

 By the 1950s, the company rebranded as Finetta-Werk and expanded its product lineup. The Finetta 99 was notable for its interchangeable lenses, which had a new three-prong lens mount and included a series of four different lenses. The lenses included a Colorfinar 70mm f/5.3, a Telec 90mm f/4.5, a wide-angle 35mm Berthiot lens, and the normal Finetar 45mm f2.8 lens. Along with the lenses, Finetta improved design quality, reflecting a shift toward competing with established brands like Kodak and Agfa. 

 Another interesting fact is that in 1954, Finetta started working with Jacques Bolesy of the Bolsey camera company to help with the design and production of their small, compact Bolsey 8 subminiature still and movie camera. Unfortunately, Finetta went out of business soon after and closed their factory in 1957.

 Finetta cameras were often praised for their ergonomic designs and mechanical reliability, offering a stepping stone for amateur photographers transitioning into more serious photographic endeavors.

My Camera:

My Finetta 88 camera is covered in an odd fabric. It has a herringbone-style pattern and is not the normal leather or leatherette covered in most cameras. It is more of a fabric material, but it does have a great feel to it, and I like the greyish color, which gives the camera an elegant appearance. 


The Finetta is 3" tall by 5 1/8" wide by 2.5" deep from the front of the lens to the back of the camera, and weighs 1lb, and .7 ozs, and comes with a Finetar 45mm f2.8 lens which has a three-prong bayonet. There is no locking mechanism on the lens mount, so you must be careful when focusing on the camera. If you turn the lens too far, the mount will start to move, and the lens will pop off, which is pretty small. The lens does "click" into place, but it can somewhat easily come off without the locking pin.

My lens focuses from 2.8 feet to infinity. It may focus closer as the lens rotates past the 2.8-foot mark on the lens. The aperture settings are on the inside of the focus ring. The camera doesn't have an internal focus system, so all the focus is guesswork, judging the distance, and setting focus. The aperture range is from f2.8 to f16 and is indicated by a small notch on the setting ring.

 With the lens removed, you can easily see the two-leaf shutter system. The camera only has a few different shutter speeds, ranging from 1/250, 1/100, 1/50, 1/25, and "B" for timed exposures. The shutter speeds are set on a very small and challenging knob next to the lens. 

One thing I noticed about the camera when I first picked it up and started to play with it was that things seemed backward from what I am used to. I'm used to filming advanced turning in a clockwise movement, but this camera goes counterclockwise. It's the same as taking the back off the camera to load the film. To open the back, you turn the knob on the bottom in a clockwise motion. The back is held onto the camera with none other than a bolt-style fastener which is held onto the camera with a larger circular nut that screws on to keep the back onto the camera body. To me, that is the motion to tighten, but on this camera, it's the motion to untighten and remove the back to load the film.

 When I removed the back from the camera, I noticed a couple of things right away. My Finetta 88 had a film cassette in the camera. I'm not 100% sure who makes this cassette. Still, it's very similar to the Leica cassettes in design, with two outer compartments and an inner spool. The cassette is also held into the camera with a locking lever that slides over the end of the cassette to keep it in place. The second item I noticed was a bright and shiny pressure plate over the shutter area to keep the film flat as it's transported across the chamber. The pressure plate needs to be lifted when loading the 35mm film. The third item noticed was a larger, thicker take-up spool on the camera's right side. This one is similar to what I wrote about with the Corfield Periflex camera. There is a slot to put the 35mm leader into, which is needed to load the camera.

A built-in, double exposure prevention system is within the camera's transport. Once you trip the shutter, under the take-up spool is a small piece of metal that pushes out and stays out until you wind the camera, which cocks the shutter and flattens that piece of metal, allowing you to take the next photo. I guess there's a pin that pushes out the metal piece, and when the film is advanced, it will enable the pin to fall back into place for the next photo.

On top of the camera is nothing more than the film advance knob on the right side, which turns counterclockwise to advance to the next frame. The frame counter, accessory/flash shoe, and rewind knob are on the far left.


My Results:

The camera is very straightforward and somewhat basic in its operations. I didn't use the 35mm cassette that came with the camera; I just used a regular 35mm roll of film. I put in a roll of T-Max 125 film and walked through the neighborhood to see what kind of results the camera could produce. After I got back from my walk through the neighborhood, I processed the film, and here are a few of the shots I took.

My Conclusion:

The Finetta 88 camera took a bit to get used to. I kept on trying to turn the advance knob in the wrong direction; the shutter speed dial was small and difficult to turn. That may be more of a camera cleaning issue, but I changed to other speeds. The lens did start to unmount a couple of times, but nothing disastrous to the point where the lens fell off the camera. The focus is smooth on my camera; it was more operator malfunction than anything, but overall, the camera was enjoyable to shoot with, and I think the lens I have on this camera is sharp.

 I'll definitely want to shoot with this camera in the future. It was fun and a pleasant experience overall.

 Thank you for taking a few minutes from your day to learn about this interesting mid-century camera I have in my collection.

 Until next week, please be safe.