Nagel-Kodak Pupille

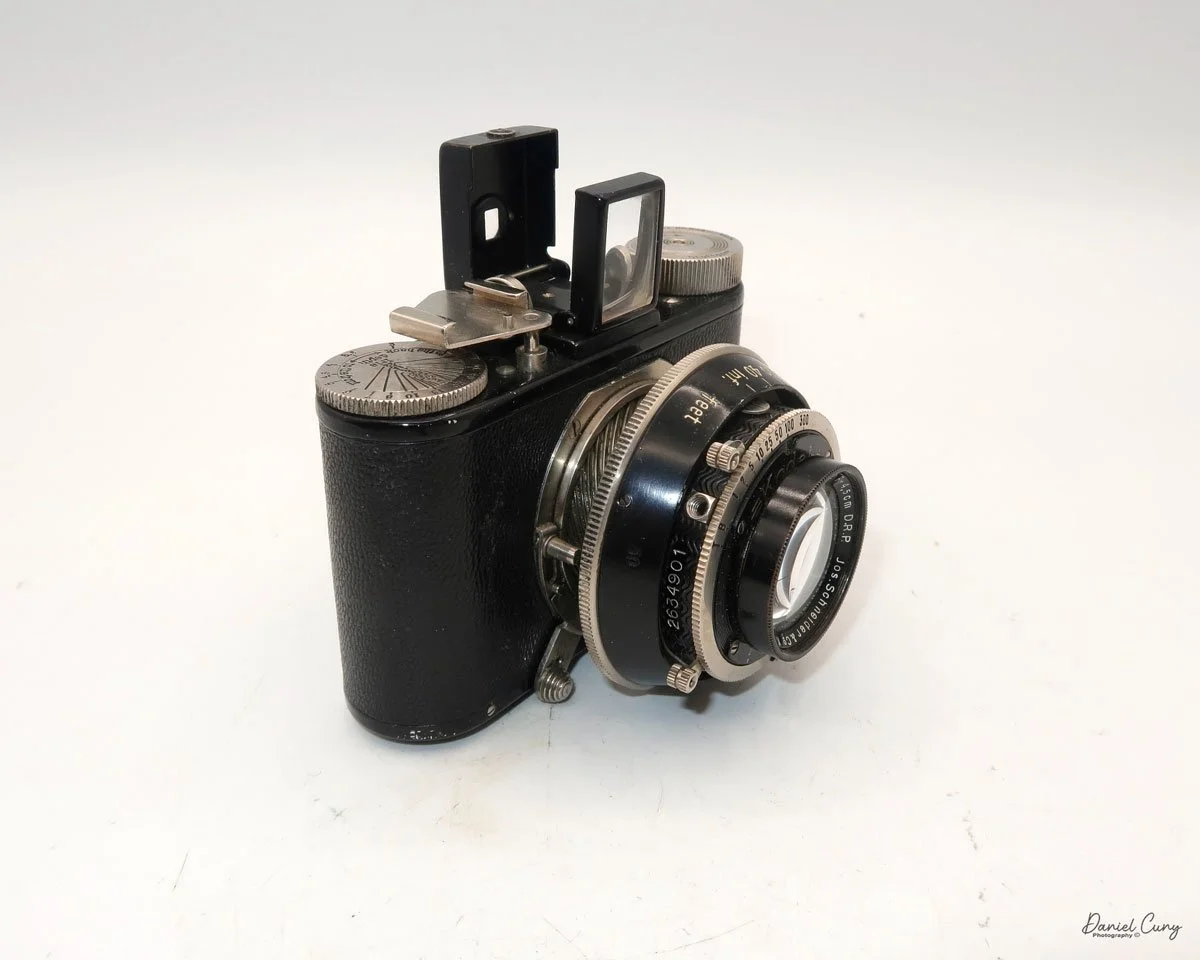
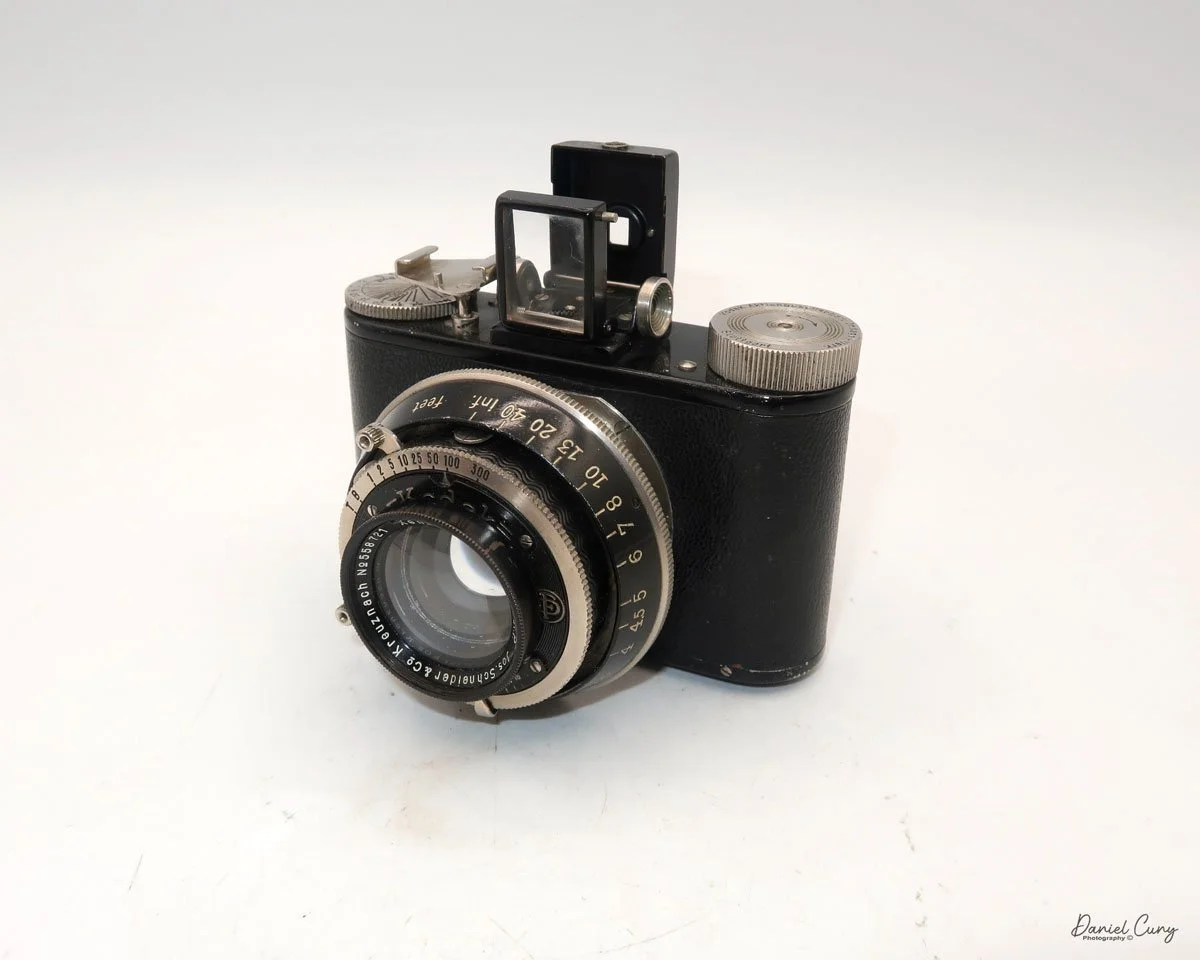
My Nagel-Kodak Pupille camera and case

Just after I finished last week's blog on the Ricoh Auto Half cameras, I was looking around the cameras on my shelf in my office, thinking which camera I'd write about this week. Nothing stood out to me, so I figured I'd let it rest for a day or two and think about it.

 Going to bed that evening, a camera popped into my head out of the blue. Having a thought or remembering something from earlier in the day is something that often happens to me, generally just as I lie down to go to sleep, something pops into my head, and that's just what happened.

 The thought that came into my head was that I remembered having a nice condition Nagel Pupille camera in a box a few months back, which I store with some of my better cameras. That's the camera I wanted to write about for this week's blog post.

 After I woke up, had my morning coffee, I settled into my office and opened the box of cameras to look for the Pupille camera I had. Right on top of other cameras was the case. I pulled out the case, and inside was the Pupille camera. Looking at the camera a bit closer, I say this was the Kodak version of the Pupille, which was introduced a year or so after its release.

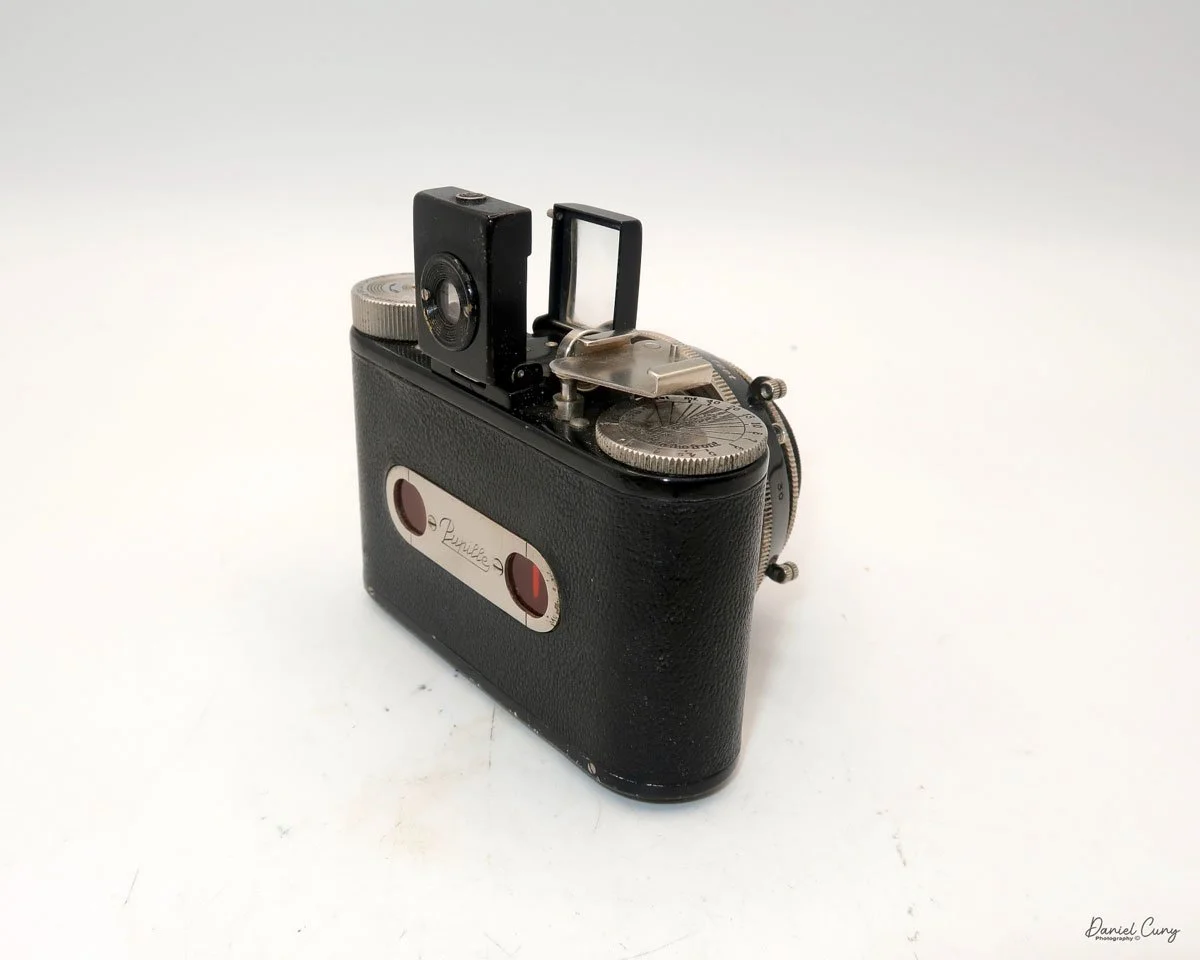
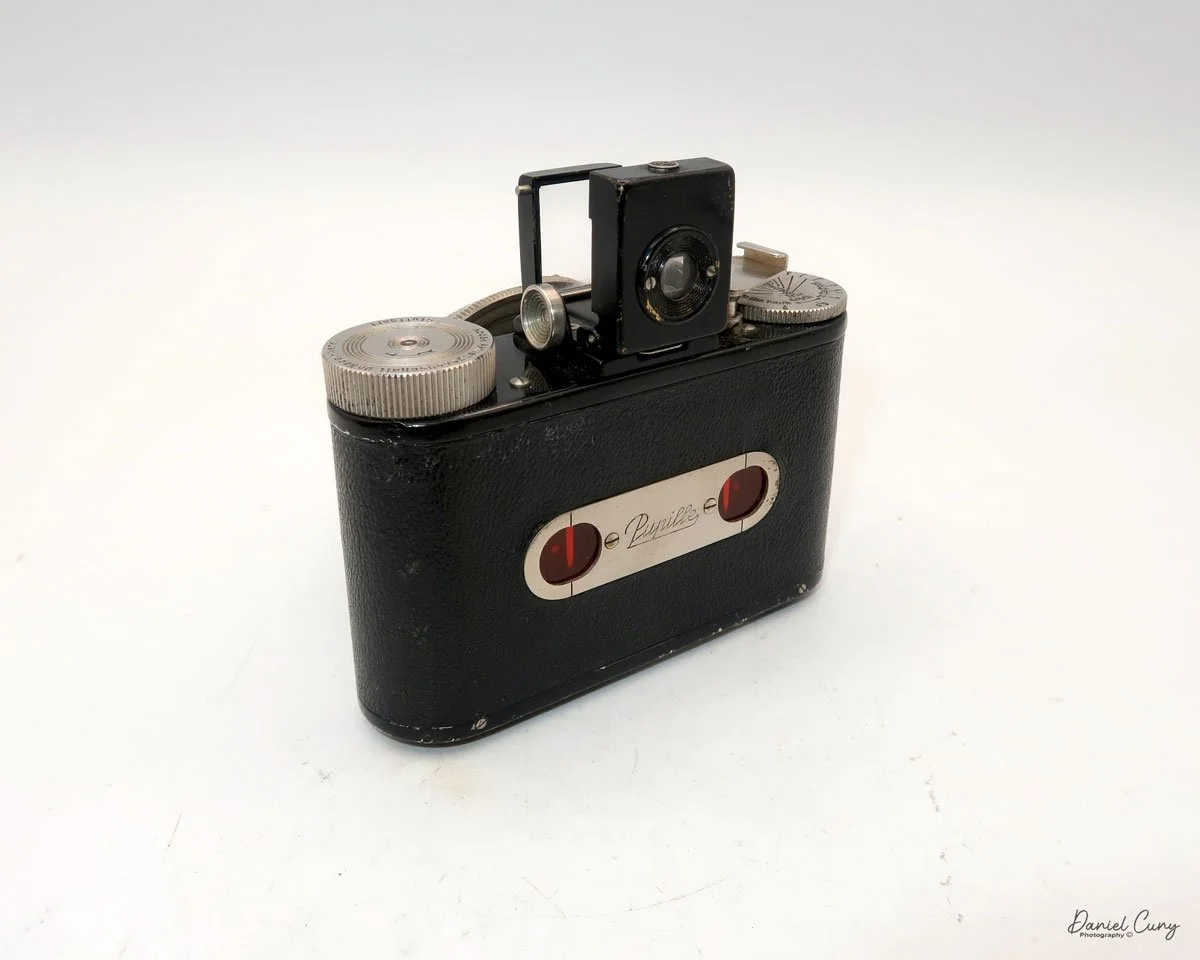
Logo on the camera’s back

 It was just as I remembered it. The camera was in excellent condition with the lens cap. The first thing I did was test the shutter, and most of the speeds seemed accurate to my ear. Some of the slower speeds were not closing, which is somewhat accurate for a shutter almost 100 years old. The upper speeds were working fine, so I figured I'd put a roll of 127 film into the camera and take it to the county fair my wife. I were planning on going to over the weekend.

 I recall purchasing the camera approximately 15 years ago at an auction I bid on. At the time, it was a lovely addition to my collection, especially since it came with the lens cap and a nice, fitted case for the camera. 

 The Nagel-Kodak Pupille was a camera I had intended to write about a few years ago when I started my blog posts, but then forgot about it for a while. When it popped into my head last week, I'm thrilled it did. 

History:

Dr. August Nagel (1882–1943) was a pioneering German camera designer and manufacturer whose innovations profoundly shaped photographic technology in the early 20th century. Born in Pfrondorf, Germany, Nagel displayed an early interest in camera construction. In 1908, at the age of 26, he co-founded his first company, Drexler & Nagel, in Stuttgart. This company quickly evolved into Contessa-Camerawerke, and by 1910, it had produced a broad range of camera models, which were distributed globally. Nagel's innovations during World War I included specialized aerial and balloon cameras, and his achievements earned him an honorary doctorate from the University of Freiburg in 1918.

 Seeking further growth, Nagel's company merged with Nettel Kamera-werke in 1919, becoming Contessa-Nettel, which became one of Germany's most significant camera producers. In 1926, in response to market pressures and Zeiss Stiftung's interest, Contessa-Nettel was merged with other major German camera makers to form Zeiss Ikon, with Nagel as director of manufacturing. However, management frustrations and a loss of control led him to leave Zeiss Ikon in 1928, after which he established his factory, Dr. August Nagel Werke, in Stuttgart.

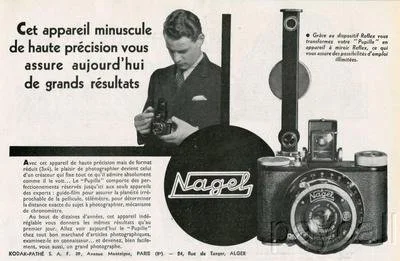
French ad for Nagel Pupille camera

 Nagel Werke quickly gained a reputation for producing affordable, high-quality folding plate and roll film cameras, notably the Vollenda models, introduced in 1929, and the more expensive Pupille, introduced in 1930. This success attracted Eastman Kodak, which sought to compete in the European precision camera market. In 1931, Kodak acquired Nagel Werke, making Dr. Nagel the general manager of the rebranded Kodak AG. 

 With Kodak's backing, Nagel devised the Retina 35mm camera and, critically, introduced the Kodak 135 film cartridge in 1934—a pre-rolled 35mm film format compatible with both Leica and Contax cameras. This cartridge would become the global industry standard for 35mm photography, marking Nagel's most enduring legacy.

 Under Nagel's leadership, Kodak AG's Stuttgart plant became known for its Retina cameras and innovations throughout the 1930s. Almost two million cameras were produced before World War II. Dr. August Nagel died in 1943, but his influence continued; camera production resumed post-war and flourished into the 1960s under his son, Helmut Nagel. Dr. Nagel's career typifies the innovative spirit of early photographic engineering and established many of the standards still recognized in the industry today.

My Camera:

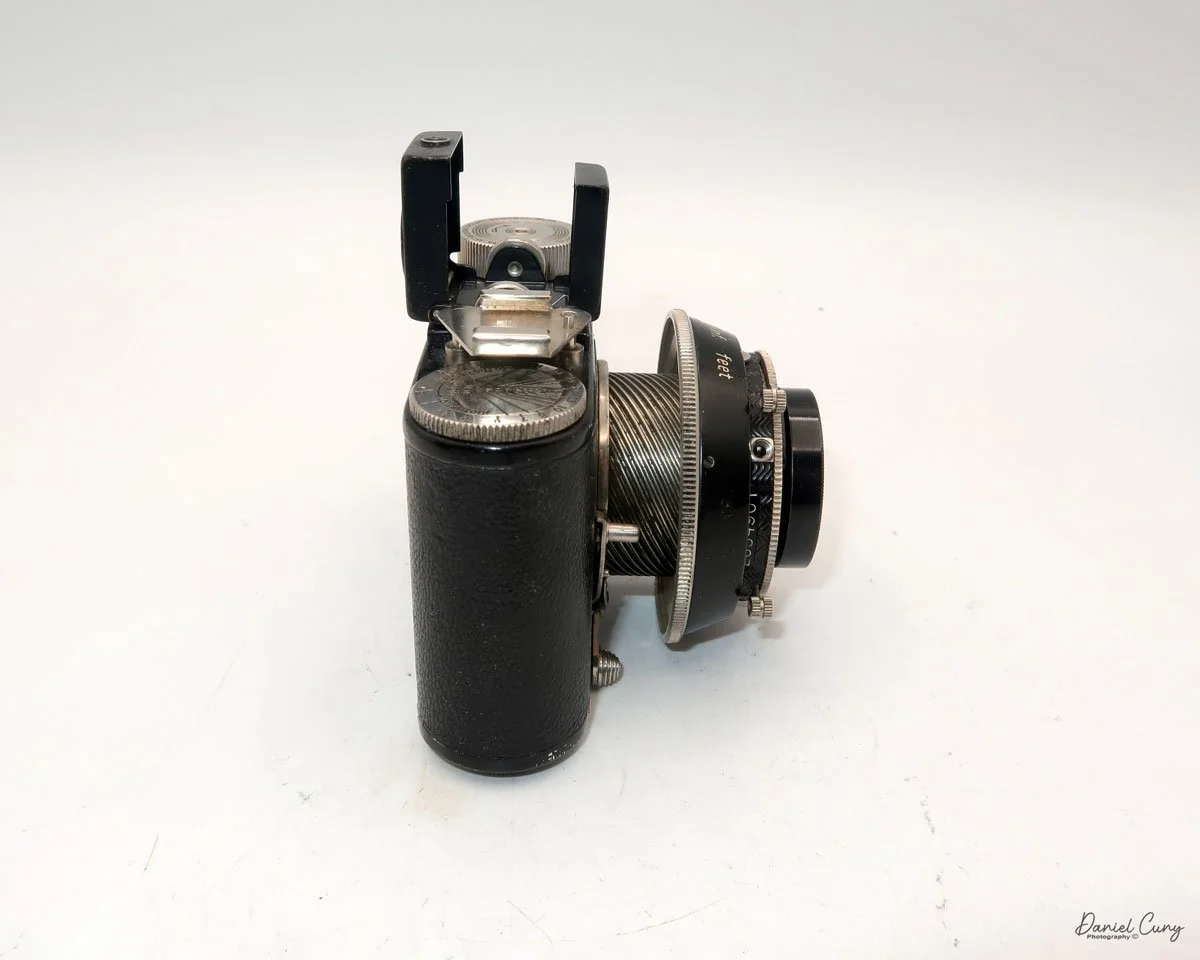
My Kodak Pupille camera is a tiny, compact camera that measures 4" wide, by 2.5" tall with the viewfinder retracted and 3.5" with the viewfinder opened. The camera is 2" deep with the lens retracted and 2.75" deep when the lens is in the regular taking position. The camera weighs 14.5 ounces when empty, excluding film.

The camera captures a 3x4cm image on 127mm film. My Pupille camera has a Jos. Schneider & Co. Xenon 4.5 cm f/2.0 lens. The camera also had the option of Leitz Elmar 5cm F/3.5, a Schneider Xenon 5cm F/3.5, or a Cook Anastigmat 2" F/3.5 lens, all in a Fr. Deckel Compur shutter.

 On top of the camera, there is an optical finder that pops up, displaying a vertical image. If you want to photograph a horizontal subject, you'll need to turn the camera 90 degrees to photograph in landscape mode. Looking from left to right at the top of the camera, there is the film winding knob, the optical pop-up viewfinder, a removable accessory shoe for a separate rangefinder, and under the accessory shoe, the depth of field scale.

To take a photograph, you first need to slide the lens into the "taking" position. This is done by sliding the lever, located under the lens, to the left when facing the camera. Moving the bar slides the lens out from the camera body. The lens is mounted on a beautifully constructed helicoid, which becomes visible once the lever is moved and the lens is in the "taking" position. Around the shutter is a large black ring that focuses the lens. The focus range on the lens goes from approximately 30" or 2.5' to infinity. The numbers on the focusing ring are big and easy to read, and the focusing on this camera is smooth.

When you look at the back of this camera and many other cameras that take 127 size film, you'll notice the camera has two red windows on the back. This will become relevant once you read the loading and winding procedure for this style of camera, which will be explained over the following few paragraphs.

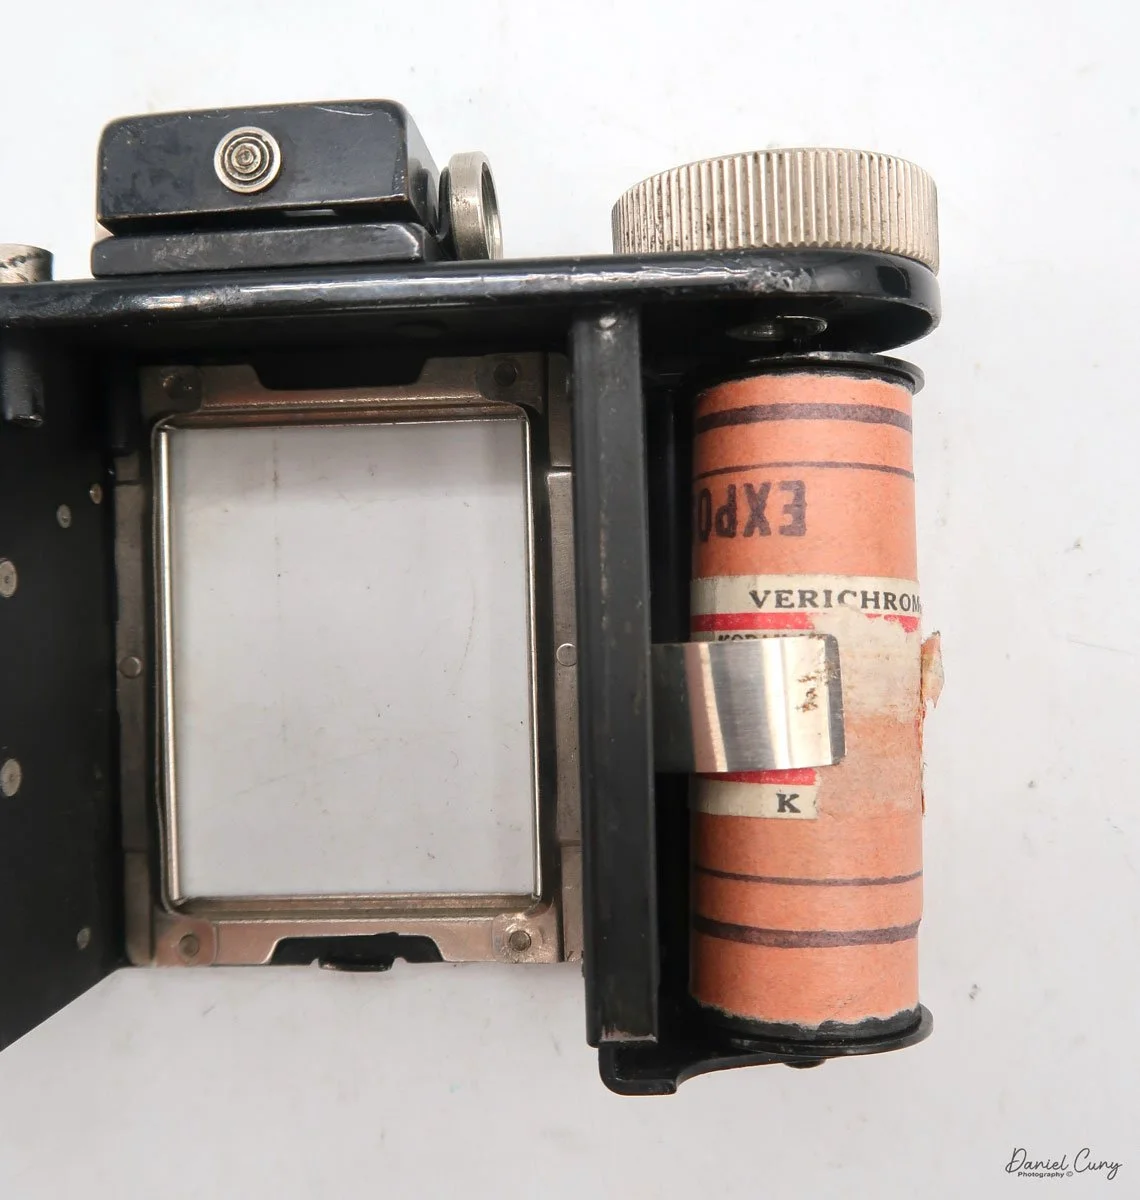
 To load film into the camera, first you need to unlock the body of the camera from the film chamber. You do this on the bottom of the camera by sliding the lever to the "O" position. You'll see a small line on the tripod socket that aligns the "C" (closed) setting with the "O" (open) setting. Once you have the film chamber unlocked, the top portion of the camera slides out of the camera body, exposing the area where the film is loaded into the camera.

 Take the empty spool from the right side by sliding the spool down. The holding mechanism is on a spring, and the spool will come out. Place the empty spool on the left side and ensure it's engaged in the take-up winding knob. Place the fresh roll of film on the right side and tear the tape so that you can bring the film leader over to the take-up spool, ensuring it is positioned over the rollers on either side of the opening where the film is exposed. Insert the film tab into the slot on the take-up spool and wind the winding knob until the word "start" appears on the paper backing. Once you see the word "start", slide the film chamber back into the camera body, ensuring it's fully inserted. Then, slide the lever at the bottom from "O" to "C" for closed.

 Now, look at the back of the camera and start winding the film winding knob in a clockwise direction until you see arrows in the window. This is the indication that you're approaching your first frame, so you should start to slow down on winding the camera. Stop winding when you see the number 1 in the right side window. This is the indication you're at your first image. Once you've taken the first frame, wind the film advance lever until you see the number 1 in the window on the left, and stop. This is the indication you're at your second image. Once that frame is taken, then wind until you see the number 2 in the right window. You follow these steps until you see the number 8 on the left side window, which means you've taken sixteen images on the roll of film. This operation is standard for 127 size film, which takes 3x4cm size negatives on a camera with two windows on the back.

 The standard operating sequence when using this camera is to have the separate rangefinder, which is slid onto the accessory shoe when the camera is in use. 


  1. Meter for your subject with a separate light meter.

  2. Look through the rangefinder and focus on your subject.

  3. Find the distance to your subject and focus the lens to that distance on the camera.

  4. Set the shutter speed and aperture setting on the lens. Shutter speed is located at the top, and aperture is positioned under the lens.

  5. Cock the shutter lever on top of the lens at the 11 o'clock position.

  6. Trip the shutter, which is below at the 7 o'clock position on the lens.

Retracting the lens back into the camera body is a little tricky and something I had to figure out, as I had done it wrong once. The first thing you need to do is focus the lens to infinity. Then, slide the bar at the bottom of the camera from left to right, and the lens retracts into the camera's body. If you don't focus the lens to infinity, the bar won't fit into a small cutout on the focusing ring. The bar will protrude from the bottom of the camera, rather than being tucked away neatly as it should be. Once the bar is back in the camera, you can remove the rangefinder, put the lens cap on, and tuck the camera away in its case, if you have one.


Something I've seen for the camera is an accessory reflex finder, which was made by Kodak, that turned the Pupille into a TLR camera. 

Results:

My wife and I attended our local county fair, where I loaded a roll of 400-speed 127 film into the Pupille and brought it with me to take some photos. I don't have the rangefinder for the camera, so all of the focusing I did was purely by guesstimation.

 Bringing my trusty Sekonic L-308 meter for accurate exposures, we walked around the fair looking for nice images to take.

 Once I got home, I processed the film, and here are some of the results taken at the fair. I generally only do light spotting on the images, so please excuse the excess dust on them.


I posted a video review of this camera. Just click on the image. I’m new to videos, so any constructive feedback is appreciated.

Conclusion:

One of the first things I noticed when using the Pupille was how sturdy the camera felt. It's small and compact, fitting into my pocket, especially when the lens is retracted.

 The camera was easy to use, and the shutter worked well. There were a few frames when I didn't focus properly, but for the most part, the camera did a good job, and it was great fun to shoot with. 

 Thank you for taking a few minutes to read about this almost 100-year-old camera that still works fabulously.

 Here's a link to some of the other camera reviews.

 Visit Cuny's Camera and Photo for some of the items seen on my blog, along with other interesting photo items I have for sale.

 Until next week, please be safe.
Ricoh Auto Half Camera

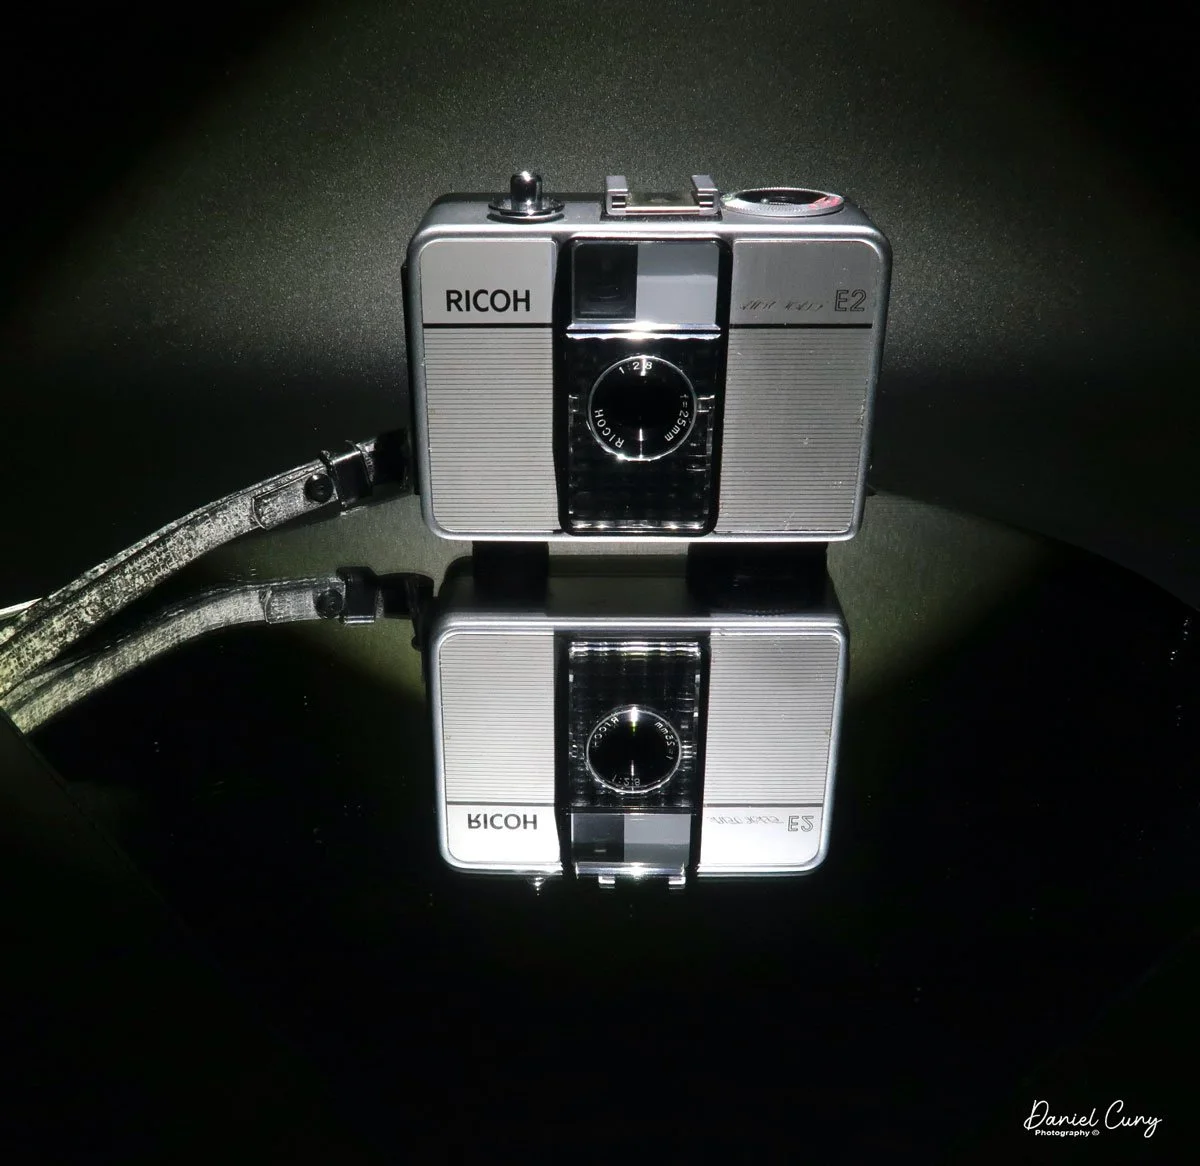
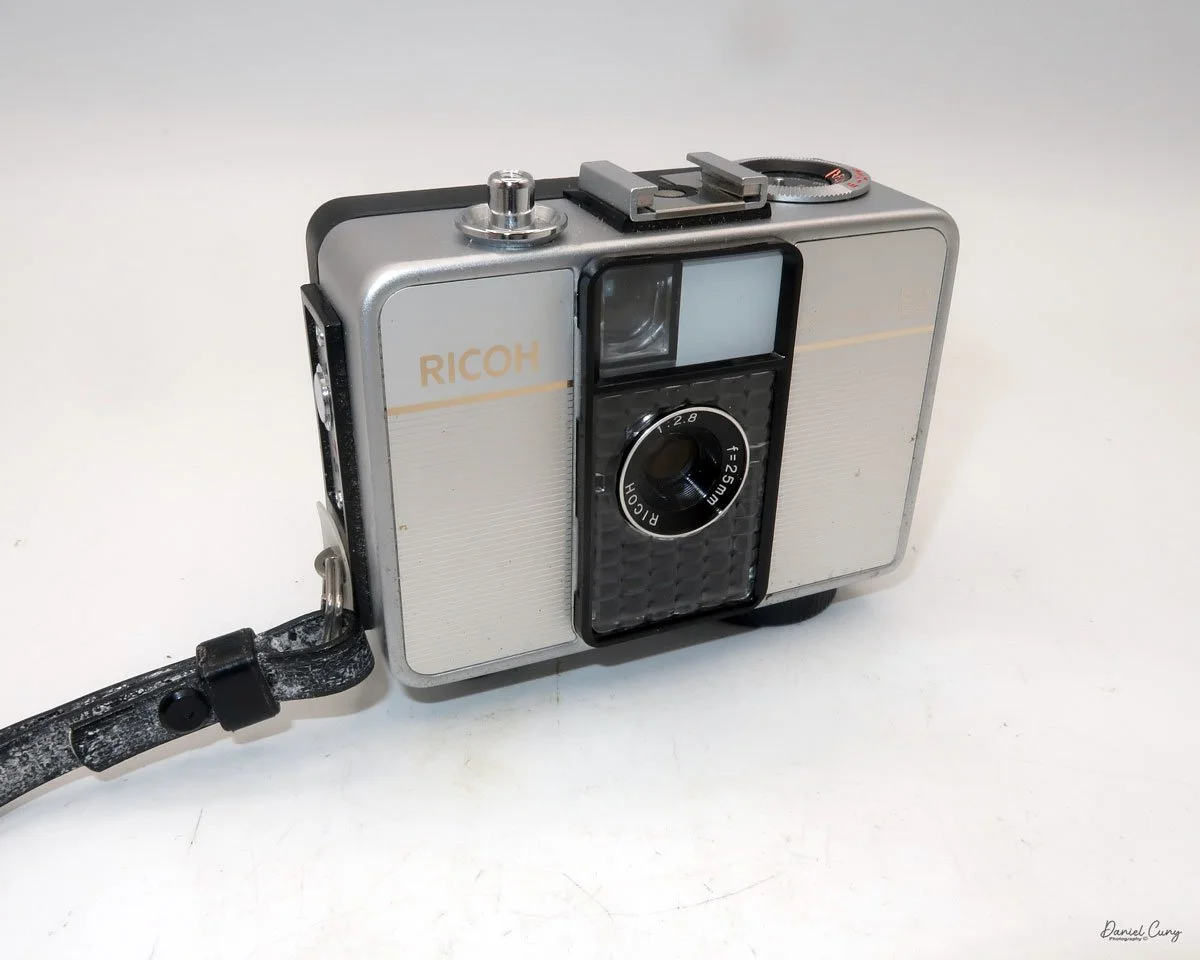
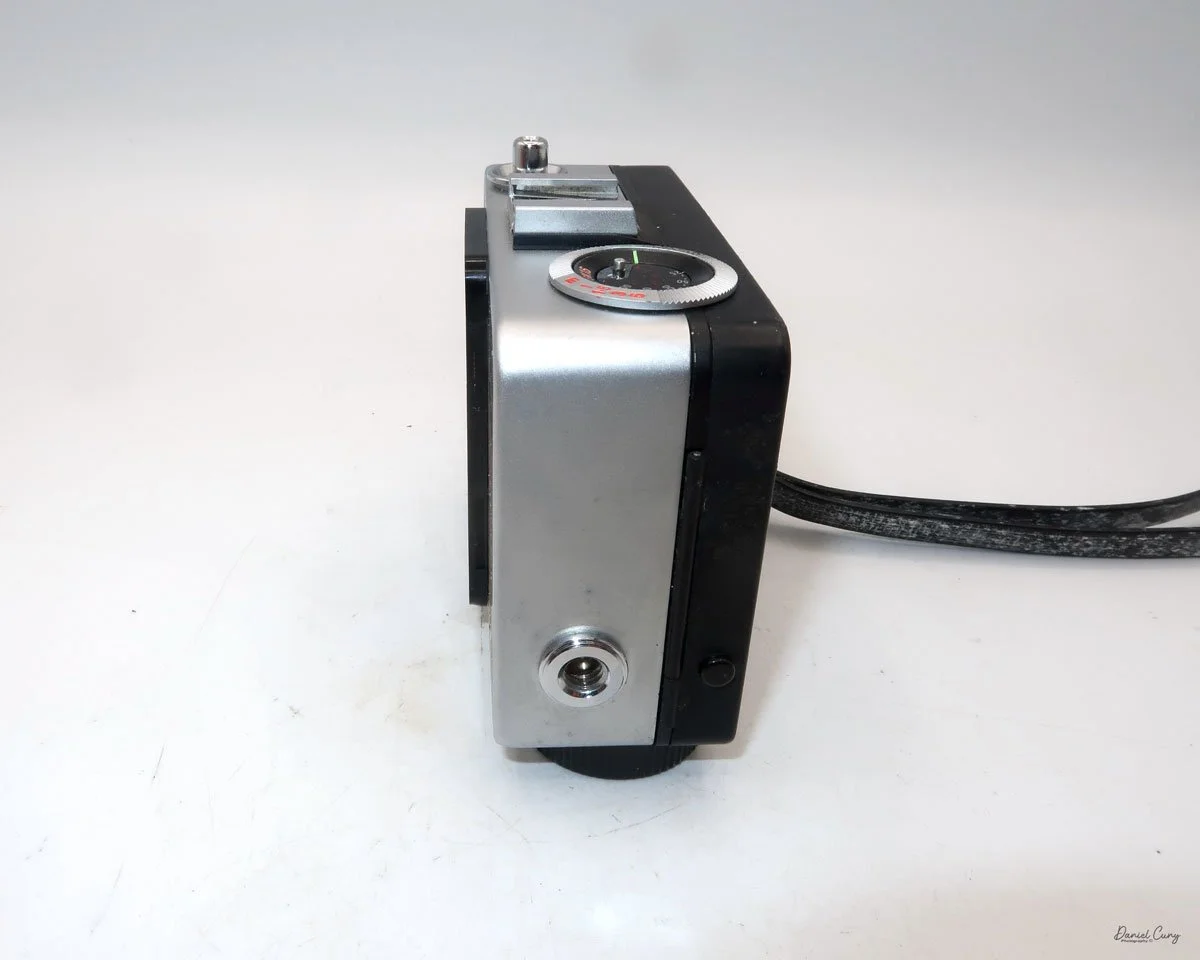
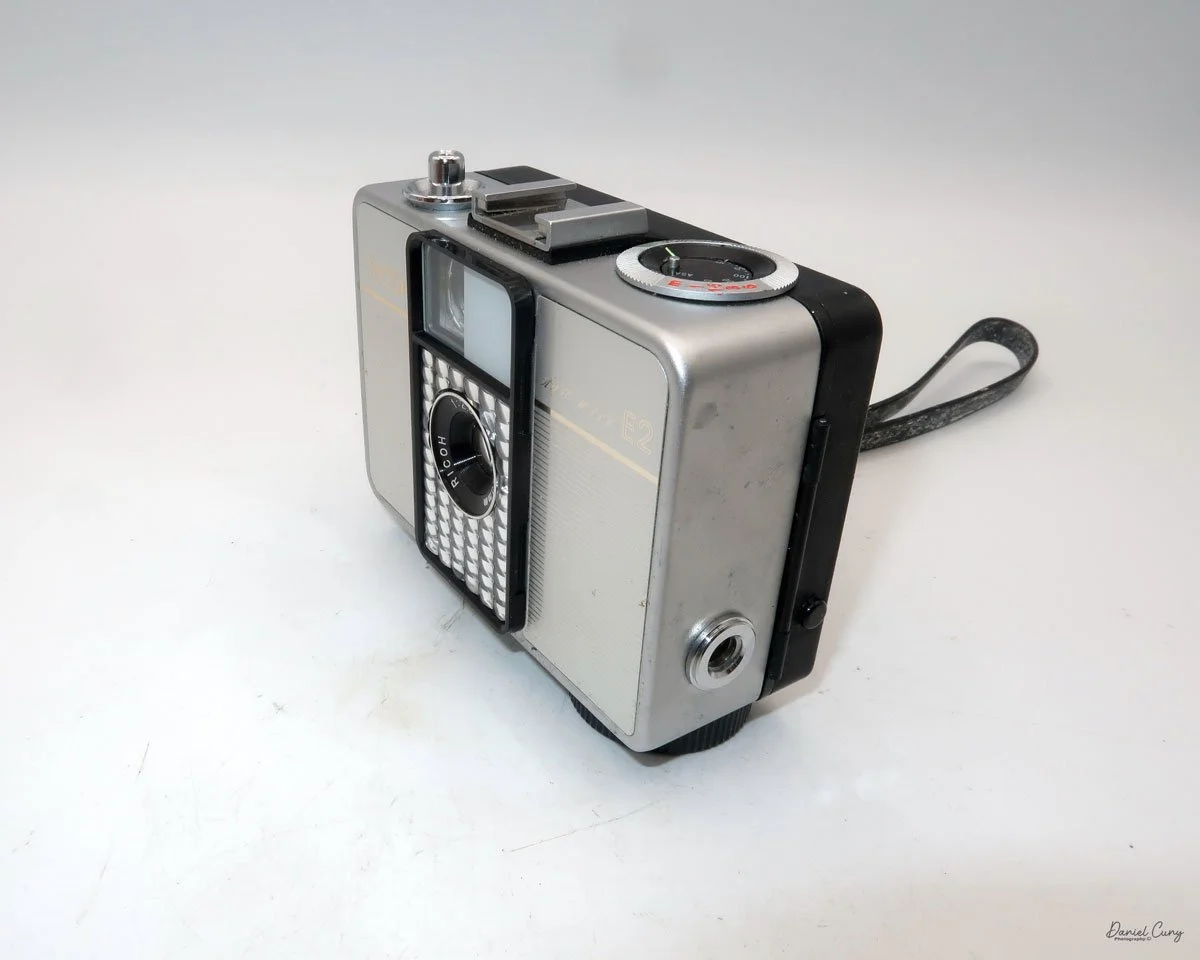
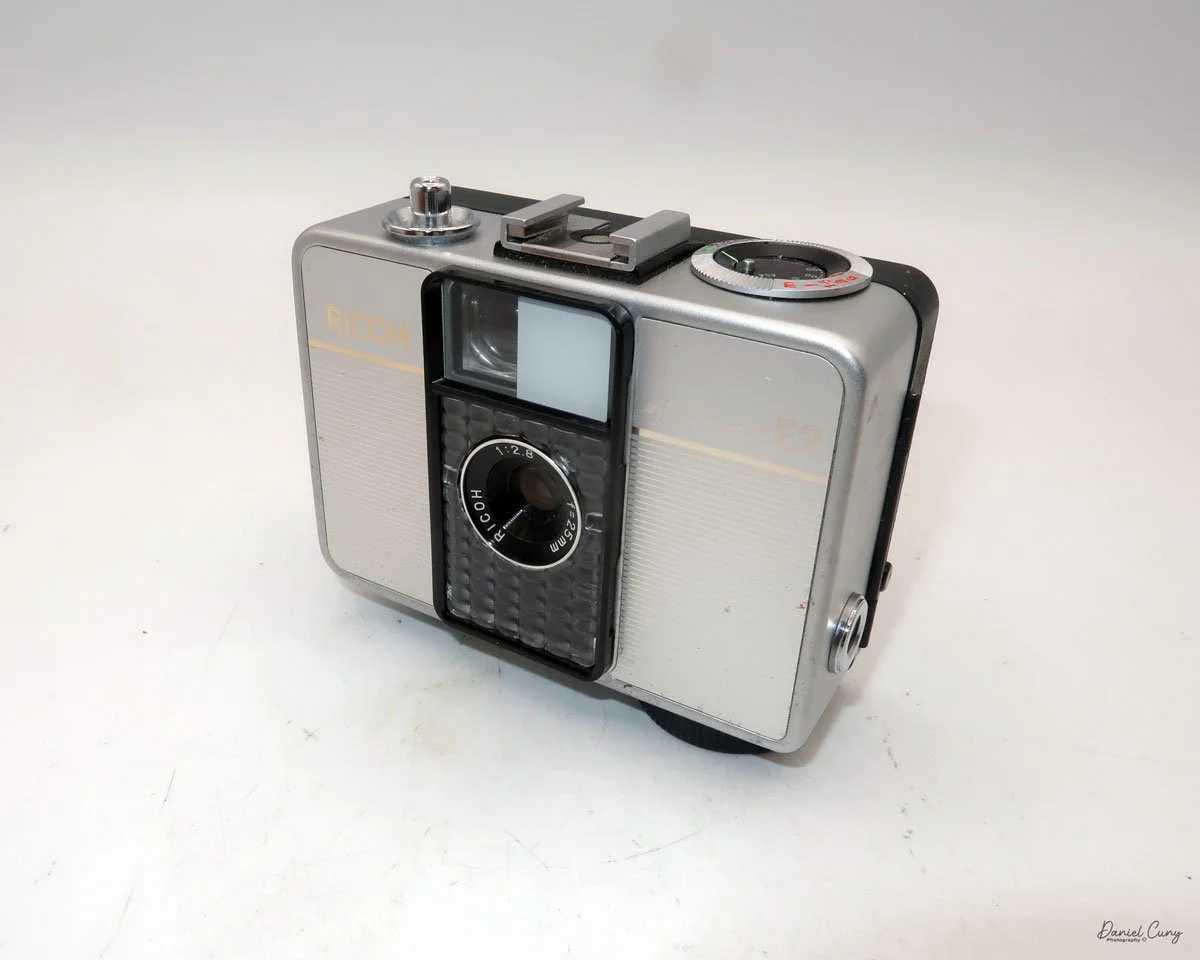
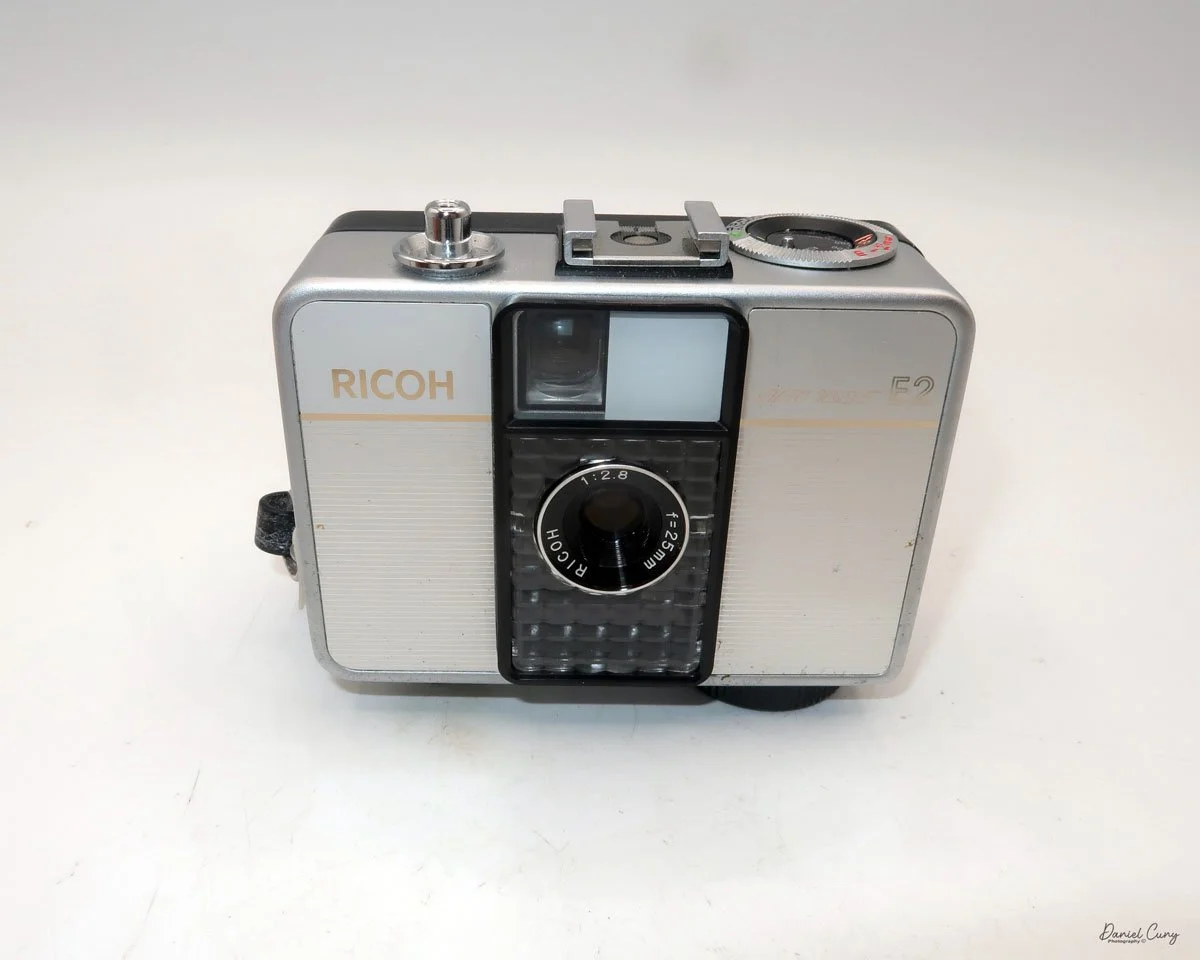
My Ricoh Auto Half E2 camera

The 1960s were a tumultuous time—a wild era—for politics, art, social change, music, and design. Having spent my early and informative years during this time, I was witness to some remarkable events that shaped the world, which I'm happy to say I lived through.

 There were the Beatles, who upended the music world; marches and protests against the war in Vietnam and civil rights; and Jackson Pollock and Andy Warhol, who were taking the art world by storm. It seemed like every month, there were issues and events in the news that shaped the world.

 In the photographic and camera design fields, in my opinion, one of the more artistic and interesting products to emerge from the 1960s was the Ricoh Auto-Half camera—a straightforward camera that underwent several model changes, keeping the design fresh for almost 20 years.

 The Ricoh Auto Half camera was introduced in December 1960. For the period, the camera was very compact and lightweight, a half-frame 35mm camera with automatic exposure, no manual focusing, and automatic winding. The size of the camera was compared to a pack of cigarettes.

 Not only were there several different model changes and improvements, but the design style, to me, was the item that kept the camera fresh. The original Ricoh Auto Half camera was available in a bright silver color and featured a wrist strap. However, later in the 1960s and well into the 1970s, the camera took on many different colors and geometric designs, which were very popular during this timeframe.

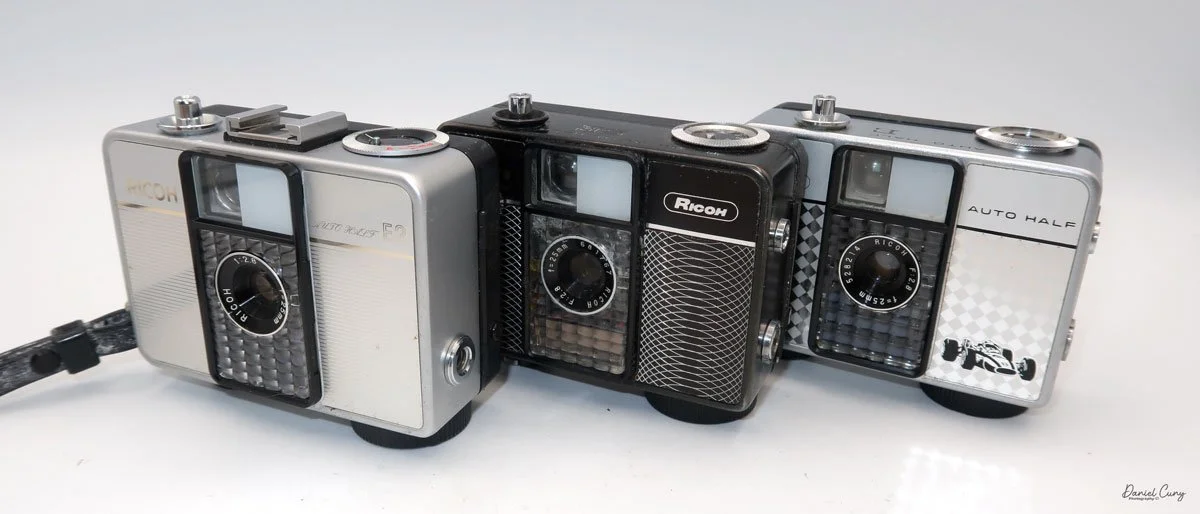
My three Ricoh Auto Half cameras

 Some of the cameras were black with a white geometric pattern on the front, like one of the models I have. Later in the production cycle of the cameras, the production became bolder and more intricate, which kept pace with the signs of the times.

 There was a yellowish-green checkerboard pattern, or some cameras had brown vertical stripes or a wavy pattern, while others had outlandish red and blue colors that appeared to create a dome pattern on the front of the camera. One of the models I saw was named "King Gold," which is a gold color camera with an interesting pattern on the front. Some have a filigree around the border, or a train or race car on the front. All of these models are just fascinating to me, and one of the main reasons I wanted to write about them.

 I own three different models of the Auto Half cameras. I have an Auto Half E model with a diamond pattern and a Formula 1 race car on the front. I have a Black Auto Half SE model with a swirly pattern on the front, and the camera I used for the post was an Auto Half E2 in superb working condition.

I own three different models of the Auto Half cameras. I have an Auto Half E model with a diamond pattern and a Formula 1 race car on the front. I have a Black Auto Half SE model with a swirly pattern on the front, and the camera I used for the post was an Auto Half E2 in superb working condition.

History:

Ricoh's journey into the world of photography began not with cameras, but with sensitized paper. Established in 1936 as Riken Kankoshi Co., Ltd., the company quickly leveraged its expertise in optics, venturing into camera production just a year later in 1937. This early period laid the groundwork for a legacy of innovation and accessibility in the photographic industry. The company, which would be renamed Riken Optical Co., Ltd. in 1938, introduced its first camera, the Olympic Four, in 1939. This simple folding camera marked its entry into a competitive market.

Japanese ad for Ricoh Auto Half camera

 The post-war era proved to be a transformative period for Ricoh. A pivotal moment arrived in 1950 with the launch of the Ricohflex Model III. This twin-lens reflex (TLR) camera was a game-changer. By implementing a revolutionary belt-conveyor system for mass production—a first in Japan's camera industry—Ricoh was able to produce the Ricohflex III at a remarkably affordable price. This move single-handedly democratized photography for the Japanese public, transforming cameras from a luxury item into an accessible consumer good. The Ricohflex III became a massive commercial success, reportedly capturing over half of the domestic market share at its peak and cementing Ricoh's reputation.

 Building on this momentum, Ricoh continued to innovate throughout the 1950s and early 1960s. The company introduced the Ricoh 500 in 1957, a popular 35mm camera notable for its user-friendly features. However, it was the Ricoh Auto Half in 1962 that truly showcased the company's forward-thinking design philosophy. This remarkably compact and lightweight half-frame camera was fully automatic, with automated exposure, focusing, and film winding. Its purse-sized dimensions and ease of use made it a massive hit, particularly with female consumers, and it became a global success.

 These formative years were crucial in shaping Ricoh's identity. From the mass-produced Ricohflex that brought photography to the masses to the stylishly simple Auto Half, Ricoh's early history is a story of creating high-quality, innovative cameras that were not only technologically proficient but also thoughtfully designed for everyday users. This foundation of accessibility and user-centric innovation would continue to define the company for decades to come.

My Camera:

My Auto Half E2 model camera is 3.5: wide, by 3" tall, by 1.5" deep, and weighs 11.9 ounces. The camera is a 35mm half-frame camera that takes a vertical image of  24x17cm on 35mm film. The camera features a fixed focus 25mm F/2.8 lens, which is typical for half-frame cameras.

The Auto Half camera incorporates a selenium cell metering system, which on many of these cameras isn't working due to the age of the selenium cell. It can no longer meter the light, but fortunately, I have one in excellent working condition. The selenium cell is located around the lens. The aperture has a range from F/2.8 to F/22. 

 The ASA (ISO) range for the film speed on the Auto Half camera goes from 25 to 400. The ASA is set on a dial located on the top of the camera.  The other setting on the dial is for "A" or automatic aperture. There are aperture settings on the dial, but these are for flash settings.

The metering is done automatically and sets the aperture to achieve the proper lighting for the subject you're pointing the camera at. When in the "A" or automatic mode, the camera sets the shutter speed to 1/125th and sets the aperture. When you use a flash, the shutter is set to 1/30th of a second, and then you manually set the aperture depending on the distance to your subject.

 According to the Auto Half manual, the only indication that the camera's lighting will be set automatically is a yellow dot appearing in the center of the viewfinder. If the yellow dot doesn't appear, then the camera will not set the proper aperture, and the image will be either too light or too dark. 

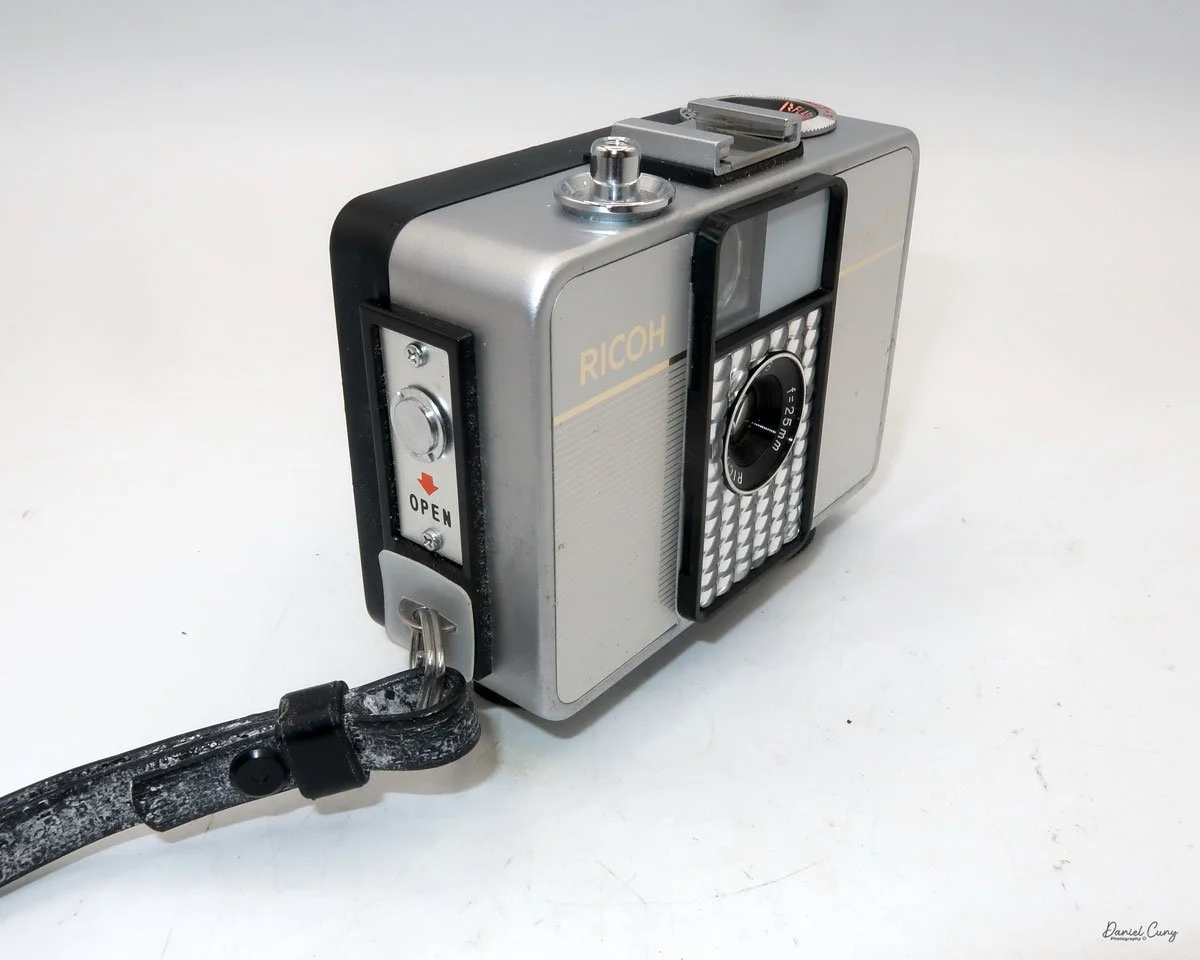
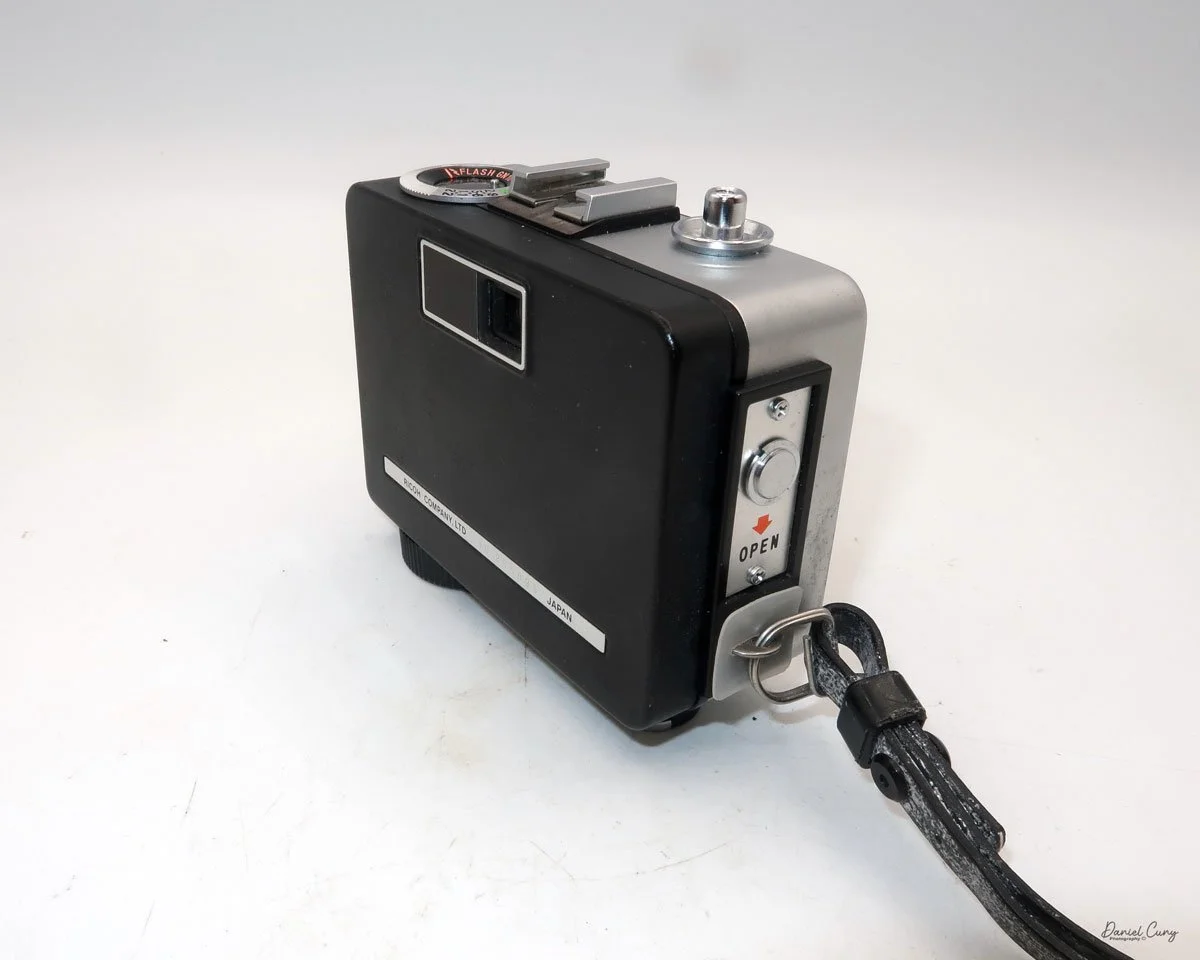
To load film into the camera, there is a lever on the side of the camera that slides down to open the back of the camera. Once open, load the camera as you would any 35mm camera, putting the film cartridge on the right side and slipping the leader under one of the silver tabs on the left. Close the back of the camera, and wind the clock drive winding lever located at the bottom of the camera in a clockwise direction. Continue winding until you can no longer wind. Click the shutter a couple of times to get to your first exposure. You're all set to take photos. The winding motor will last approximately 25 frames before it needs to be wound again.

 The frame counter is right next to the rewind lever. To rewind the film into the cartridge. The rewind release button is in the middle of the winding motor. Press the rewind button, and rewind the film into the 35mm cassette. Once that's done, you can open the back of the camera, remove the film, and have it processed.

My Results:

I loaded the camera with a roll of film and took it with me for a walk around the block with our 15-year-old Pug, Ernie. These walks are getting a bit slower every week, so I had time to snap photos of some of the houses in the neighborhood, as well as many of the flowers in people's yards.

 I wanted to push the limits of the camera and see just how close I could get to capturing a reasonably sharp image. It appears that the minimum focus distance is right around 3-4 feet, even with 200 ISO film in the camera and on a very bright summer day, around noon.

 Here are some of the images I took.

Conclusion:

I think I'm more impressed with this camera than the Canon Demi I did a couple of weeks ago. There was a bright yellow dot in the center of the viewfinder, so I trusted the meter's exposure, which was pretty accurate.

 The focus was pushed, and I received a few blurry images, which I had anticipated, but overall, the camera did a fantastic job. The transport worked flawlessly, the exposures were accurate, the camera fit nicely into my pocket, and all I needed to do was put the camera to my eye, frame the photo, and press the shutter button…Fantastic!!!!

 I'll be using this more often, since it's a small, compact, lightweight, and accurate meter. A real treasure to have in my collection. Now all I need to do is find other models and designs. I think this may be the start of something fun.

 Thank you for taking the time to read about this compact bundle of photographic bliss—a real underappreciated camera from the 1960s.

 If you're interested, you can read more of my camera reviews by clicking on the link.

 I have a store on eBay where I sell some of the cameras featured in my camera reviews, as well as a variety of photo odds and ends. Take a look at Cuny's Camera and Photo.

 Until next week, please be safe.
Riley Rilex camera

My Riley Rilex camera

The first time I saw the Riley Rilex camera was at a camera show in Seattle, WA, about six months ago. I was selling cameras and other photo items at the show. A friend who had driven up from the same area I live in and know well approached me looking to sell the Riley Rilex camera.

 He handed me the camera, and my first impression was that it was an odd and unusual-looking press-style camera. It was a full-sized 4x5 press camera, but It's a more miniature 2 1/4 x 3 1/4 press-style camera. There's a large handle on one side, making it very easy to handle and carry, but what caught my eye was the bright aluminum camera body and how light and compact the camera was. A rangefinder was attached to the side of the camera, and the focusing method seemed sketchy and rudimentary but was in working condition. 

 Playing with the camera, the shutter worked well, the aperture moved as it should, the bellows were intact and seemed in excellent condition, and the focus was smooth. When my friend told me the asking price, I told him I didn't do much with this style of camera and handed it back to him, but then he lowered his price, and my thought was, this seems to be an odd and unusual camera, it would be fun to write about it. I had never heard of a Riley Rilex camera, so it would be fun to research it. I thought I had some holder back home, so I pulled the trigger and purchased the camera from him with the intent to write this article about it.

Nameplate on my Riley Rilex camera

 I've owned several Graflex Baby Graphic cameras, so I'm not unaware of the smaller press cameras made during the 1940s and early 1950s. The Baby Graphic cameras are fully enclosed within the camera body, which is covered in black leatherette. Here is the Riley Rilex camera, which is almost the direct opposite. It is bright and shiny, made from lightweight aluminum, and without a boxy case, the lens and bellows fit into. What an odd and wonderful-looking camera.

The Company:

Several camera companies opened up in Southern California just after World War II. Companies like Printex, which manufactured a 4x5 Press camera in Pasadena, CA; Newton Photo Products in Los Angeles, CA, which made a lightweight view camera; and Brand Camera Company, also of Los Angeles, also made a rail-style view camera. All of these companies opened right after World War II, between 1947 and 1947, giving returning soldiers employment and hoping to build onto the growing photographic industry of the time.

 Curtis Riley was a tinkerer, amateur inventor, and aircraft engineer at Lockheed in Los Angeles, CA, during the 1940s. A photographer friend, frustrated by the weight of press cameras during this time, mentioned to Curtis that the cameras were rugged to carry around. Curtis, at the time, was working with lightweight aluminum for the aircraft industry, so he took up the idea of coming up with a lighter-weight camera for the industry.

Ad for Rilex camera

This was the start of the husband and wife-owned company, Riley Research Company, located at 128 Berkeley Street, Santa Monica, CA. Curtis came up with the design of the Riley Rilex camera, and they started to produce the aluminum body camera. It's unknown how many employees they had or if they did most of the manufacturing themselves. The design is relatively simple, and once the camera pieces were machined, putting them together wouldn't be difficult. It was confirmed that Gay, Curtis's wife, would fold the bellows at the kitchen table, and from what I understand, it wasn't her favorite job.

It's estimated that The Reily Research Company produced around 800 cameras over three years, during which the company was in business. The cameras had the option of a Wollensak Raptar lens in an Alphax shutter. If you wanted the Rapax shutter with speeds up to 1/400 sec., that was an additional $12.00.

 Advertising of the camera started in the fall of 1948 with ads in Popular Photography and local camera stores. The Riley Rilex camera was advertised for $49.50, including a tax-free lens. The rangefinder was "optional Equipment." In the advertisement listing the included Lens and Rangefinder, the camera is listed at $99.80, with a savings of $35.24.

 Unfortunately, the Riley Rilex was only advertised for three years, from 1948 to 1951. Due to the success of this small camera company in filling a requested need, other larger manufacturers began building a similar style of camera. After 1951, Curtis and Gay moved on to other endeavors, and the Riley Rilex camera became a desired collectible camera. 

The Camera:

My Riley Rilex camera measures 7" wide, including the metal handle, by 6" tall, including the eyesight knob, which doubles as a tightening screw on the back of the camera by the rotating back, by 6.5" with the bellows extended or 5.25" with the lens and bellows retracted. My Riley Rilex camera weighs 2 lb. 14.6oz and includes a 101mm f4.5 Wollensak Raptar lens in a Rapax shutter. My camera was an upgrade to the information above. I also have the Model B camera with the serial number 617 

 The Riley Rilex camera was made in three models: A, AB, and B. The first model, the "A," was short-lived, as the recommendation of adding a rangefinder to the side of the camera was made. The first production run was halted to add a rangefinder and the focusing rod to the camera's right side. I've seen some examples of the Rilex camera with a Kalart or Hugo Meyer rangefinder. One of the other modifications was having a rangefinder that supported an external flash.

To use the external rangefinder on the Rilex camera, a focusing rod comes out of the top of the rangefinder and leans up against an aluminum block attached to the focusing rack and pinion rod for focusing capabilities. When you used the rack and pinion focusing on the camera, the focus rod would move, thus focusing on the rangefinder.

 You can also use the traditional ground glass on the back of the camera, which flips down or up depending on the orientation of the camera's back. The back of the camera is highly polished chrome, which adds to its look.

To change the orientation of the cameras back from horizontal to vertical, the eyesight, which can be used with the wire built into the front frame, can be used as an action finder, which can be turned to lock or unlock the back rotation. There is a small line just behind the eyesight knob to show the camera's back is level with the camera.

 The camera offers full swings, tilts, rises (no falls), and horizontal shifts from the front brace of the camera. Like the back, there are centering marks on the front to quickly return the camera to a level and even settings on the camera. One thing on my camera that I'm sure some have already noticed is that I'm missing one of the knurled nuts that hold the 2 3/8"  lens board onto the camera body. That wouldn't affect the clarity or ability to use the camera. It's more of a visual appearance flaw than anything.

Unfortunately, I don't have the film holder for this size of the film, and the back of the camera cannot be easily removed to use a roll film adapter, so I could not use the camera, which would have been fun to try.


Conclusion:

I've had the absolute pleasure of continuing correspondence with Curtis and Gay's granddaughter, Barbara. She has helped me with this article by providing fabulous family photos and advertising for the family company. I want to thank her for all the insight she's offered me, which is tremendously appreciated.

 The camera itself is marvelous. It's small, compact, and visually appealing. The bellows are made from a stronger material than most view or press cameras, and it's terrific to think they were all hand-folded.

 I need to find a small film holder to try out this camera. I know I've had them, but I must have sold them with other cameras or just separately. Once I actually use the camera, I'll be sure to update this post with some images it produces.

 Thank you for reading about this unique family-owned camera company from Los Angeles that filled a niche product people were asking for at the time.

 Are you interested in reading my other camera reviews?

 I also have a store on eBay, Cuny's Camera, which has some odd and unusual products, including cameras and lenses.

 Until next week, please be safe.
Kodak Retina Model 117

My Kodak Retina 117 camera

I purchased this original Kodak Retina 117 with a group of various Kodak and other branded cameras from the daughter of a Kodak engineer several years ago. She mentioned that the Retina was in his office in Rochester and was one of his favorite cameras, and she could remember him using it to take family photos. She didn't know what this model was other than it was the camera that Dad used to take family photos with.

 These stories bring a human element to purchasing items from family members. The cameras are not just mechanical items, which I happen to enjoy, but they are objects that evoke memories of dad, mom, aunt, or uncle holding the camera and taking photos at family Bar-B-Ques, birthday parties, Christmas morning, and so many other memories families have together.

Kodak Retina 117 Front View

 When the group of cameras arrived, I knew there was an early Retina in the group. Still, I didn't realize that it was the first Retinas model to be made. During the unwrapping of the camera, I first noticed how worn the camera's leatherette was. The was smooth in many locations, which gave the first indication that the camera was well used and most likely loved by the person using it. The front door was a bit sticky to open, but that's not unusual for a camera made 90 years ago. I'm sure the spring has lost some of its pulling power with age. Once opened, I wanted first to check the shutter. That seemed in great shape; even the 1 second seemed accurate to the ear. The transport was working, and I didn't see any real issues with the camera. I put it on my shelf with many of the other cameras I have.
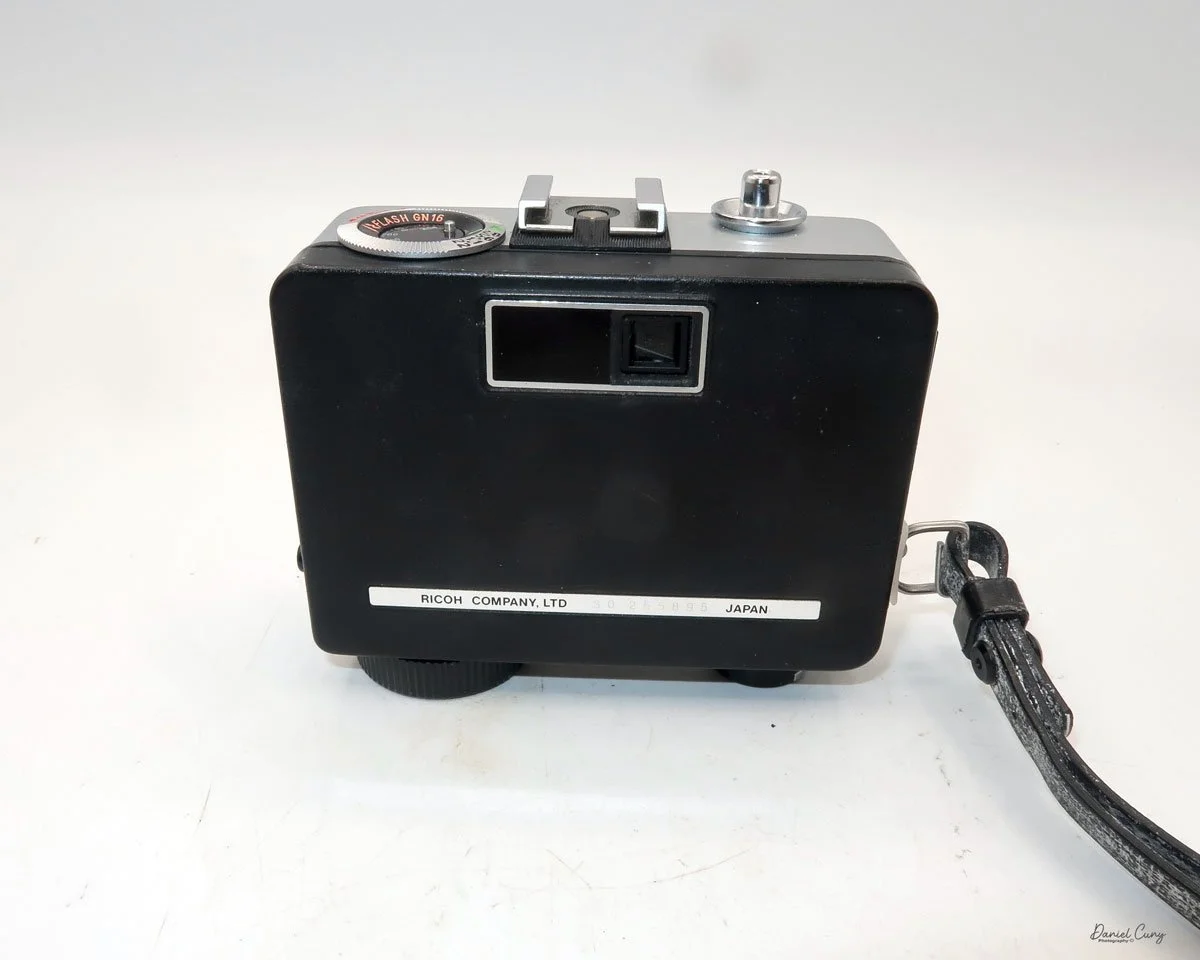
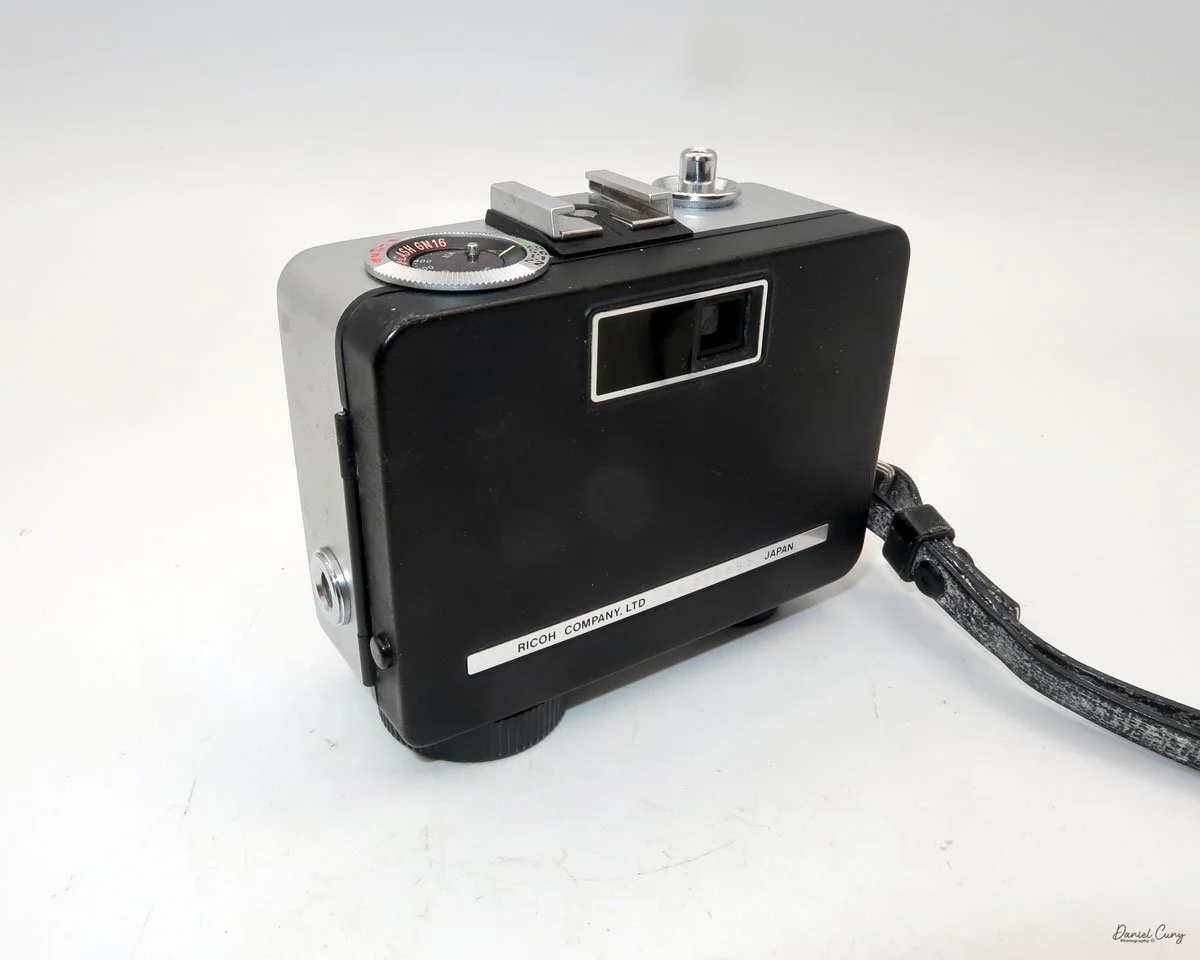
 This week, while thinking about what camera to write about, I started to look over one of the shelves with cameras, and the Retina popped out to me. I know it was in good working condition, at least when I put it on my shelf a year or so ago. Opening the camera was as good as the day I put it on the shelf, so I decided to put a roll of film into the camera and see what a 90-year-old, German-made 35mm camera could offer. 

Retina History

The Kodak Retina series is a fantastic camera design, blending American ingenuity with German precision. Introduced by Kodak in 1934, the Retina cameras were manufactured in Stuttgart, Germany, by Kodak AG, formerly known as Nagel Kamerawerk, which Kodak had acquired in 1931. The Retina line is celebrated for its compact design, quality construction, and innovations in photography, becoming a favorite among amateurs and professionals. The Retina series began with the Kodak Retina I (Type 117), a 35mm folding camera. The Retina was one of the first cameras to use Kodak's new 135 film cartridge, which would become the industry standard. The Retina I was compact, featuring a collapsible lens and a rugged design. The model underwent several iterations, improving lens quality, shutter speeds, and build but always retaining the folding design that defined the early Retinas.

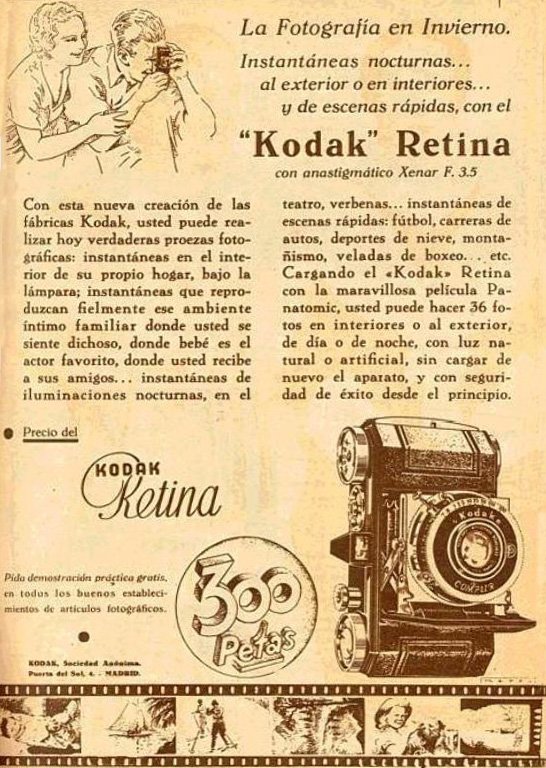
Spanish ad for Kodak Retina 117 camera

 In 1936, Kodak introduced the Retina II (Type 122), which added a coupled rangefinder, making focusing more precise. This feature positioned the Retina as a premium camera for enthusiasts. By the mid-1950s, the Retina line had evolved into non-folding models with the introduction of the Retina Reflex series. These single-lens reflex (SLR) cameras incorporated interchangeable lenses, advanced metering, and a sharp Schneider-Kreuznach or Rodenstock lens, which appealed to serious photographers.

 The post-war years saw significant advancements. The Retina IIc and IIIc, introduced in the 1950s, became icons of the series. They featured interchangeable front lens elements, making the cameras versatile while maintaining their compact, folding design. These models also integrated advancements like exposure meters and faster shutters, ensuring the Retina line kept pace with competitors.

The Retina Reflex series launched in 1957, showcasing Kodak's foray into the SLR market. While innovative, these cameras faced stiff competition from Japanese manufacturers like Nikon and Canon. Despite this, they remain a testament to Kodak's ability to innovate during an era of rapid technological change.

 By the 1960s, the Retina line gradually faded due to the rise of inexpensive, high-quality Japanese cameras. The last Retina camera, the Retina S2, was produced in 1969. Despite their discontinuation, Kodak Retina cameras remain highly collectible, admired for their craftsmanship and role in popularizing 35mm photography. Their legacy remains a reminder of Kodak's golden era in the photography industry.

My Camera:

My Kodak Retina 117 camera is a wonderfully small and compact camera that you can put into your pocket and travel with very easily. One thing I enjoy about the look of the camera is all the knobs on the outside of the camera are nickel as opposed to the shinier chrome, which can give reflections when using the camera.

 The camera is 5" wide, just under 3" tall, and 1.5" deep with the lens closed and 3.5" deep with the front door opened and the lens out, ready to take a photo, and weighs just under a pound at 15.7 oz. My camera has a Schneider-Kreuznach Xenar 5cm f3.5 lens in a Compur-Rapid shutter. The shutter has speeds from 1/500 of a second to 1 second, along with "B" and "T" settings for timed exposures. The aperture of the lens has a range of f3.5 to f16.

 To open the lens on the camera, you press a small button on the bottom of the camera. Once depressed, the front door should usually spring open, and the lens, which is on a very short bellows system, should come out into the erect position. As previously mentioned, my front door doesn't spring open, so I needed to give it a little bit of help and pull it open.

Once opened, the camera is relatively straightforward in the settings. The shutter speeds are set by turning a dial on the top of the camera if you have it in the vertical position. Like many Kodak cameras from this era, or for many folding styles of cameras, the front door has the ability to set the camera upright just by pulling out the "Kodak" logo on the front door, which will make for a leg for the camera to rest on if you want to set it down for display or to take a photo. I always do that when in a store or seeing a folding camera on display. I'll flip down the camera's leg, allowing the camera to stand upright instead of on the platform the lens pulls out onto.

Select shutter speed by turning wheel. The top lever cocks the shutter and the one on the left side trips the shutter.

A small slider sets the aperture on top of the shutter as you hold the camera horizontally. The focus on the camera is by guess only as this camera doesn't incorporate a rangefinder. This function will come in later models. There are two different sets of focus distance numbers, both on the top of the shutter, but it depends on if you have the camera either vertically, in which the numbers are black, or if you're holding the camera horizontally, then the numbers are red. To focus the lens, there is a small knob on the bottom of the lens as you hold the camera horizontally that rotates the focus collar.

To take a photo, you'll need to cock the shutter with the lever on the top of the shutter while holding the camera vertically. Once the shutter is cocked, the other lever releases the shutter making the exposure. I've seen a very small shutter release button that fits into the cable release socket on the Retina camera. Unfortunately, my camera is missing this. I wish it did have it because when I was taking photos with the camera and looking through the viewfinder on top of the camera, my finger would cover some of the viewfinder, obstructing the subject when releasing the shutter. It wasn't too bad, but the small release would have made the experience a bit better. Now, I'm hunting for a small release to put onto the camera for future use.

 To close the front door, the lens must be focused to infinity so it is in the retracted position on the camera. You'll need to depress two small buttons on the lens strut, one on top and one on the bottom, to retract the lens back into the camera body. Once this is done, the front door will click closed.

Loading the camera with film is pretty straightforward. On the side of the camera is a lever you pull down, and the back door unlocks so it can be opened. Loading the film is just like any other 35mm camera. I needed to do a couple of operational things to advance the film to the next frame. Looking on top of the camera going from left to right is the rewind wheel, the frame counter, the viewfinder, a round knurled wheel with an arrow pointing counterclockwise, and the film advance wheel. Inside the advance wheel is a second rotating wheel with a small cutout and arrows pointing in clockwise and counterclockwise directions. This inner wheel can rotate to have either an "A" showing for advancing the film forward or an "R" for rewinding the film into the film canister when all the photos have been taken. 

After making an exposure, keep the inner wheel to "A." To wind to the next frame, the knurled wheel just to the left of the advance wheel needs to be turned slightly until you feel a slight release, then you can use the larger wheel to advance to the next frame. If you don't move the knurled ring slightly, the film won't advance. This wheel is the unlocking lever that allows the camera to advance to the next frame. Also, once you load the film, be sure to set the frame counter to the number 1 to keep track of how many exposures you've taken. Once you've taken the entire roll of photos, turn the inner wheel on the advance wheel to the "R" position to rewind the film back into the film cassette. Open the back of the camera and process your film.


My Results:

I loaded the camera with a roll of T-Max 125 film, and while taking our dog, Ernie, a 15-year-old Pug, through the neighborhood, I took photos of things that caught my eye. Here are some of the results of our walk.

Conclusion:

I must be getting better at guessing distance, which has always been a problem (one of many) of mine. I also understand that the sunny day and smaller aperture helped with some of the focusing distances I would generally have with "guesstimate" focusing. Nonetheless, the camera was small, compact, accurate in the exposures, and fun to shoot.

 As I previously mentioned, if I could find one of the small shutter release items to add to the cable release socket, this would have helped and made the camera easier to use. Besides that small item, I can see why the previous owner enjoyed shooting with this camera.

 While I enjoyed this camera, I have it for sale on my eBay store. If you're interested in this or any other items in my eBay store, please email me to work out a deal.

 Thank you for taking a few minutes from your day to read about this fun and historic Eastman Kodak camera. The Retina line of cameras is often overlooked but highly collectible and usable.

 Until next week, please be safe.