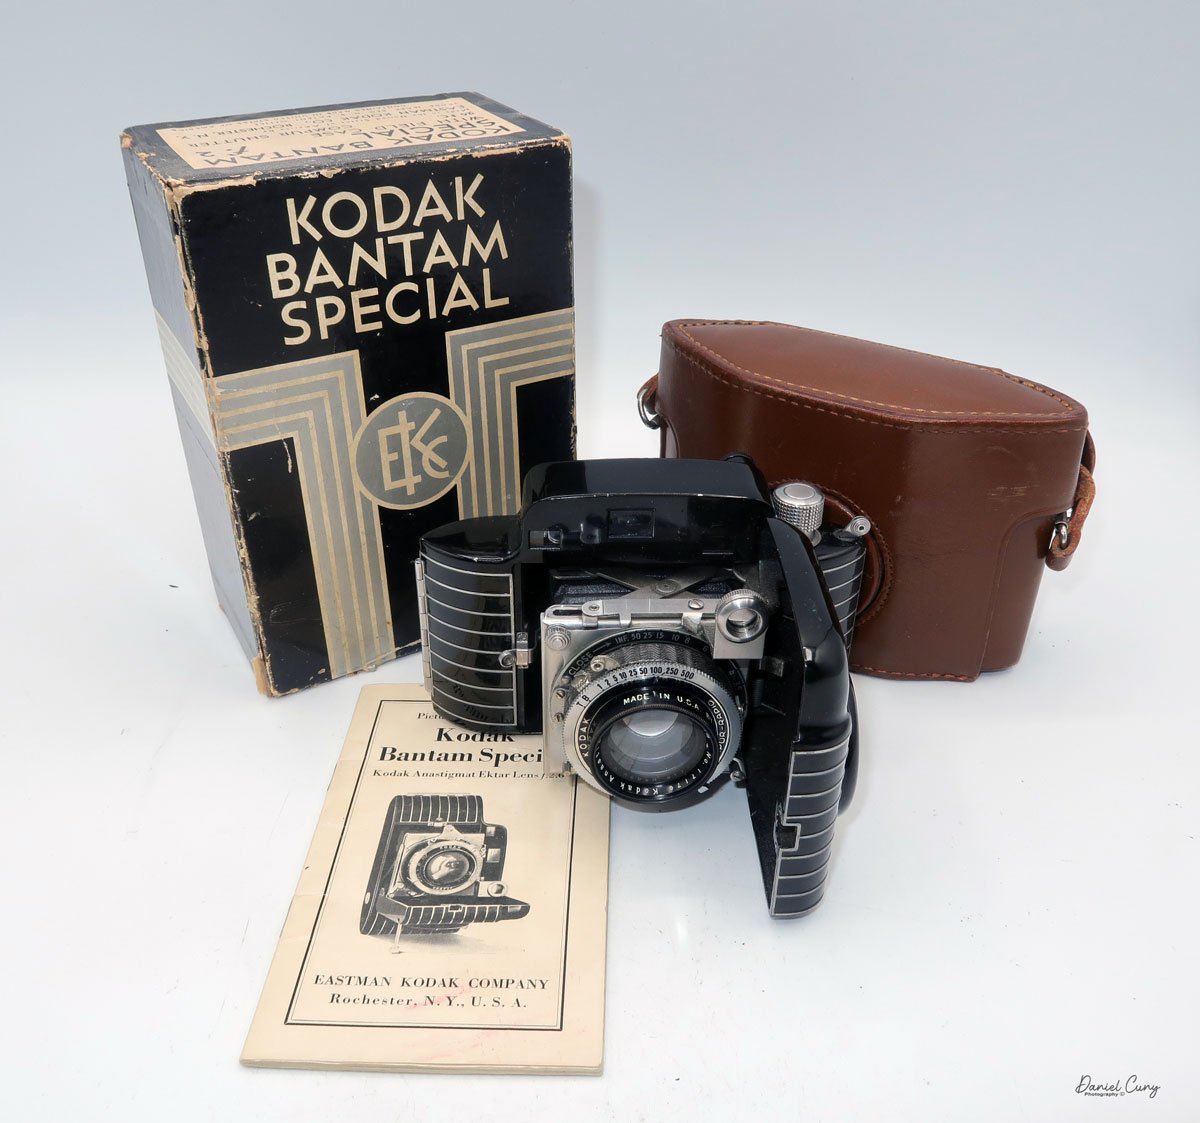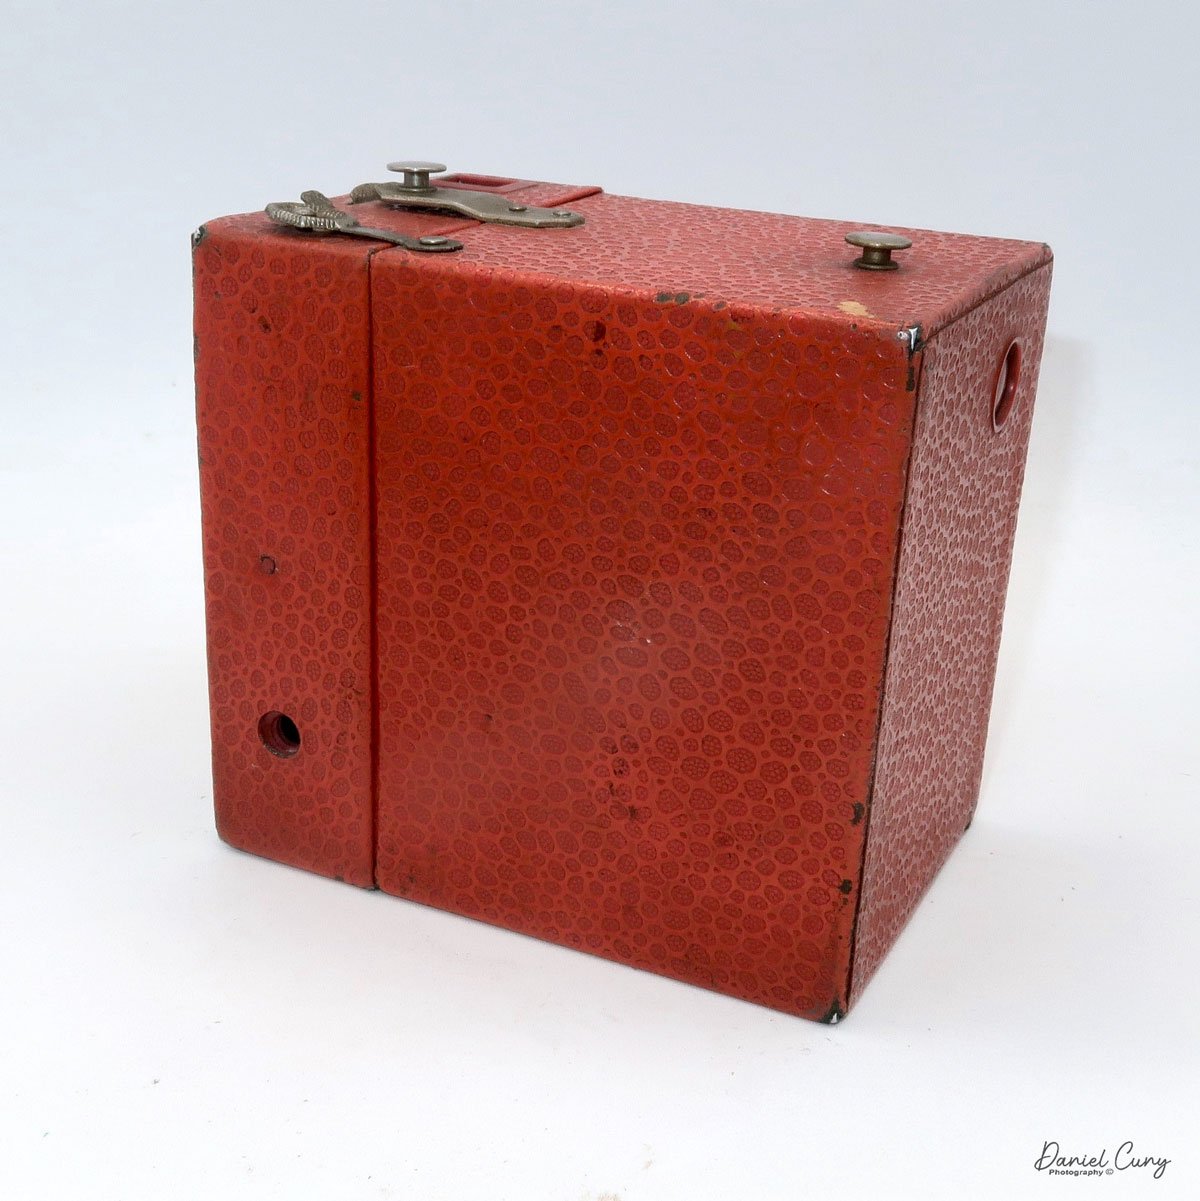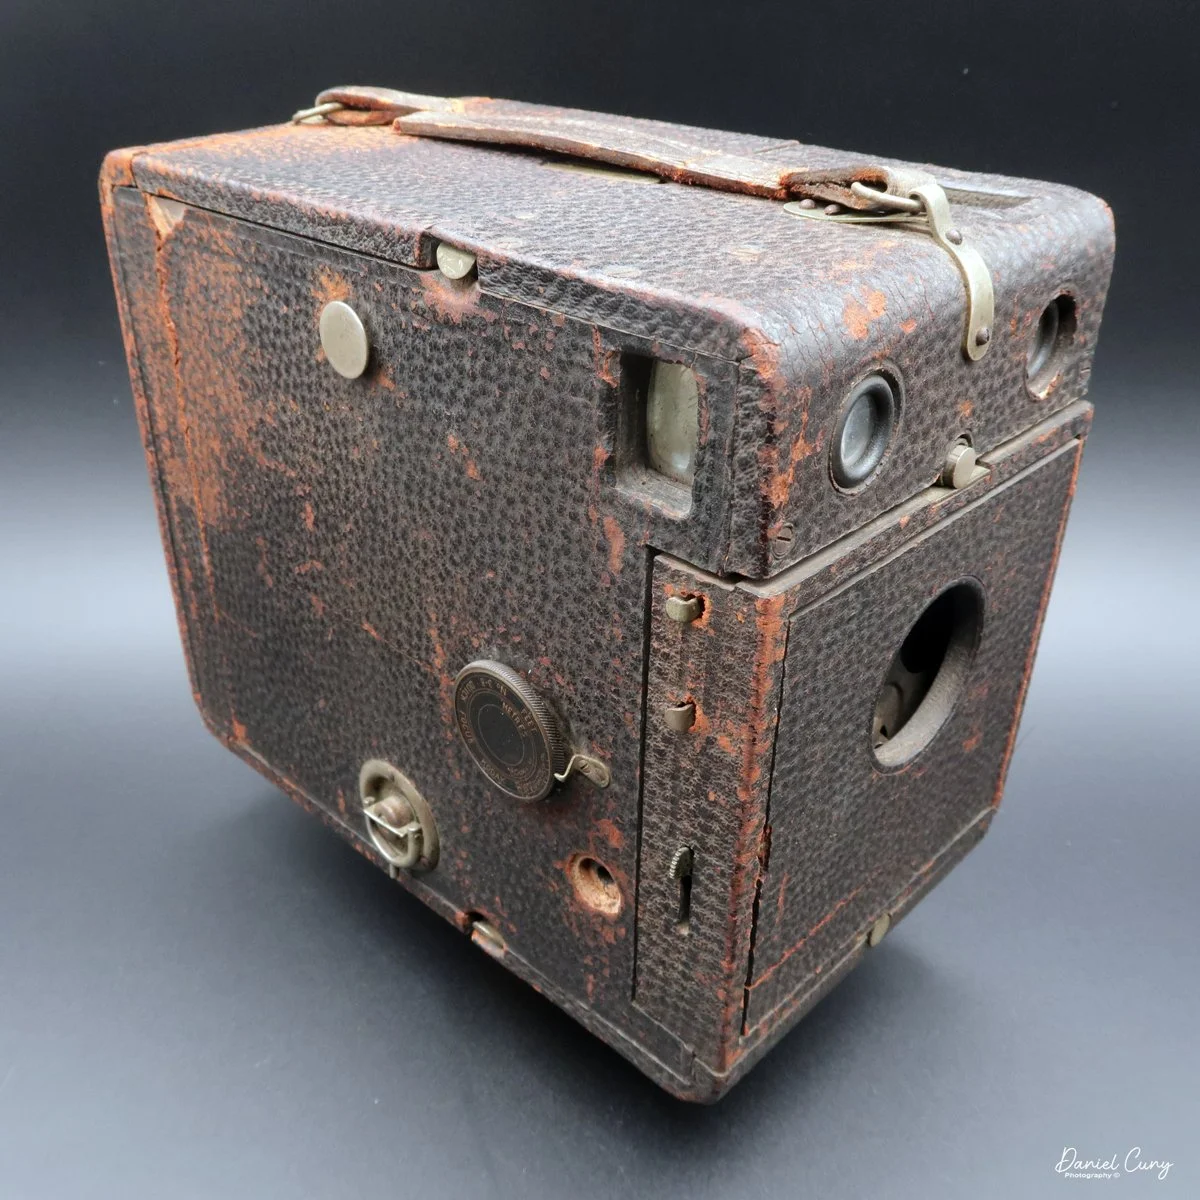
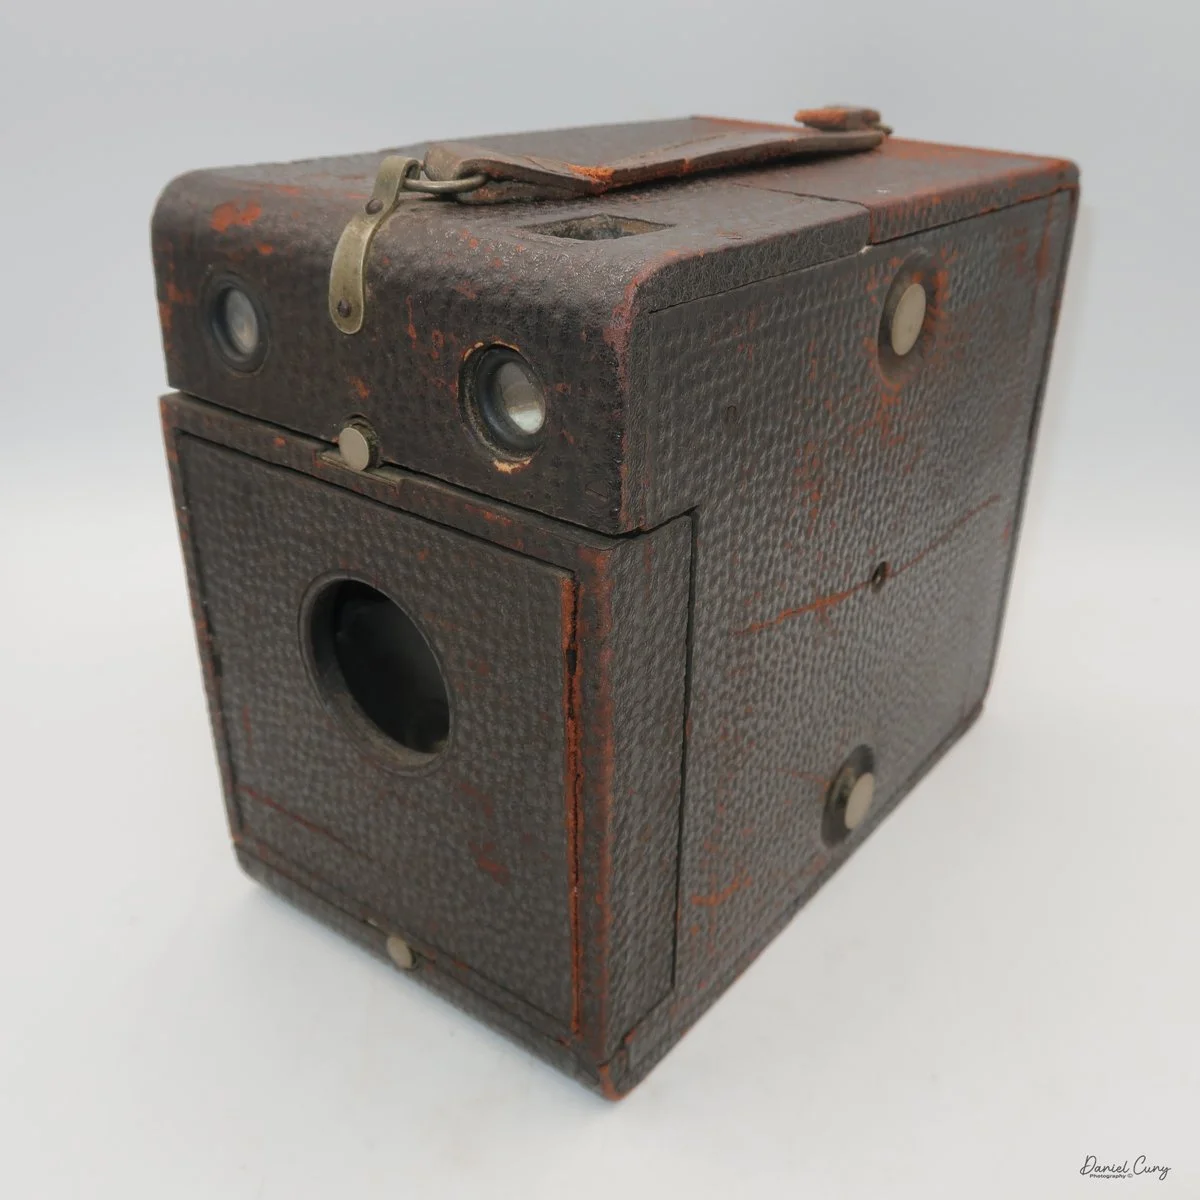
My No. 3B Quick Focus Kodak camera
As I've mentioned in several of my posts, I've always been drawn to the odd, unusual, colored, or panoramic cameras, so when I had the opportunity to purchase a No. 3B Quick Focus Kodak many years ago, I jumped at the chance.
I found this camera while visiting an antique store during a business trip to Philadelphia. During my sales calls, if I had some spare time between appointments, I'd seek out antique malls and stores close to where I was and spend some time looking to see if there was anything interesting. On this particular day, as I was upstairs in the shop's attic, which was musty and smelled of stale air, I found the No. 3B Quick Focus Kodak.
Not knowing much about the camera beyond seeing it in McKeown's Camera Price Guide, it appeared to be in decent condition. I started turning dials and pressing buttons to get a sense of the camera's condition.
It appeared to be pretty solid, but there were a few flaws, but when I looked at the price tag, which was only $25.00, I figured I give it a shot, so I brought it downstairs to talk to the shop owner, and asked if they'd offer a slight discount on the camera, and I offered them $20.00, which they took. The shop owner said the camera's been up in the attic for many years and was happy to give it a new home where it would be appreciated.
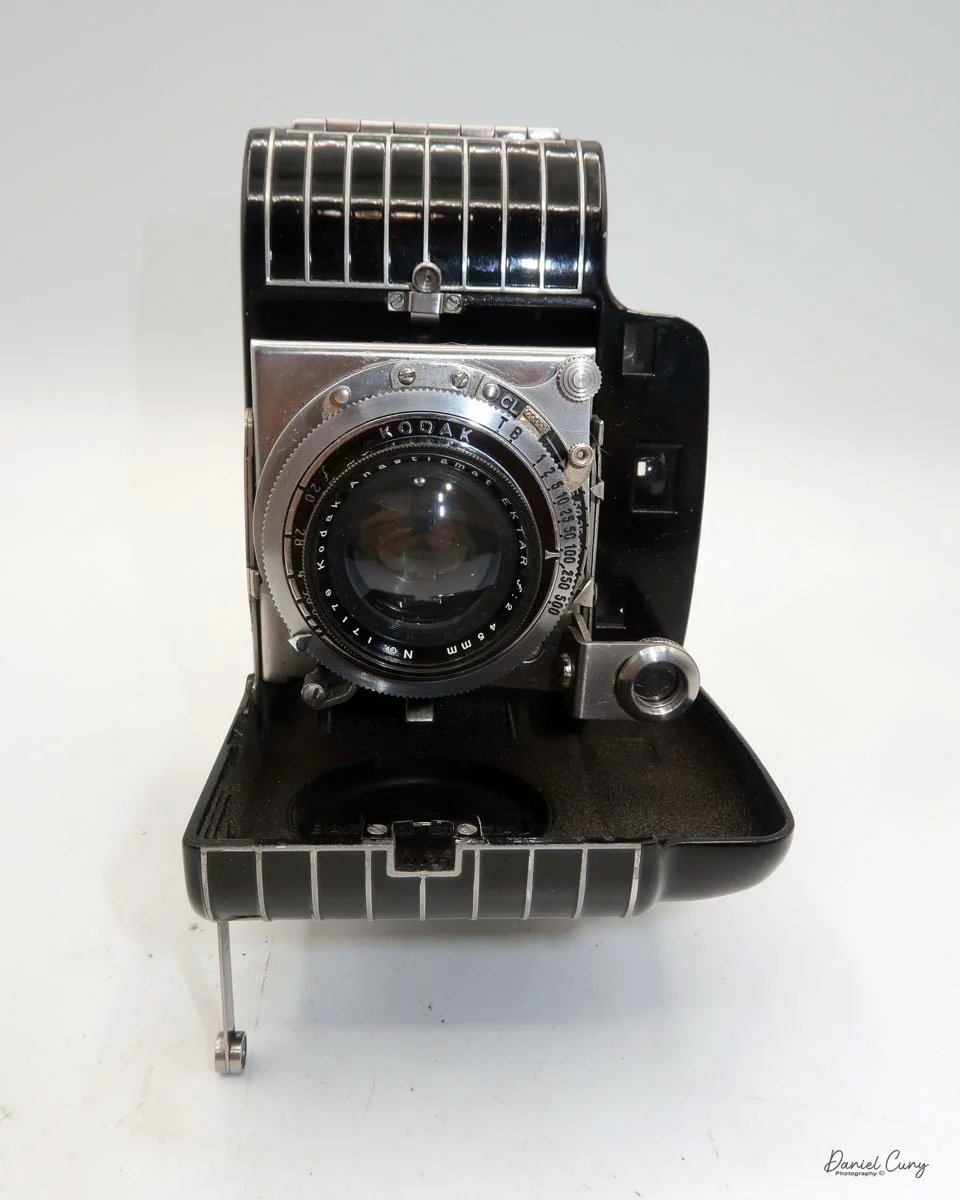
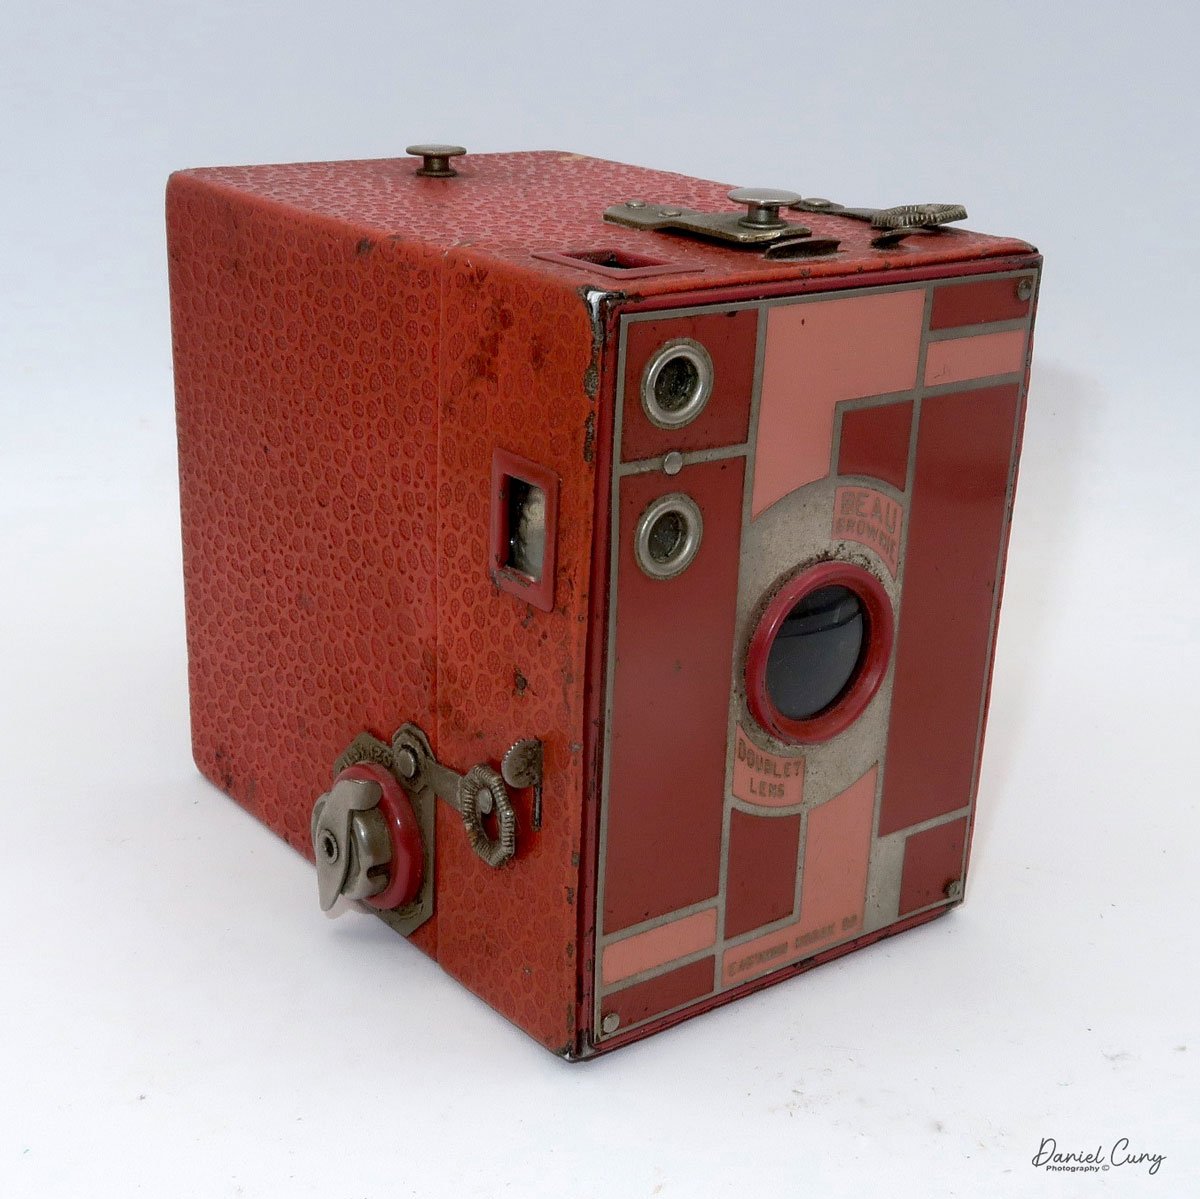
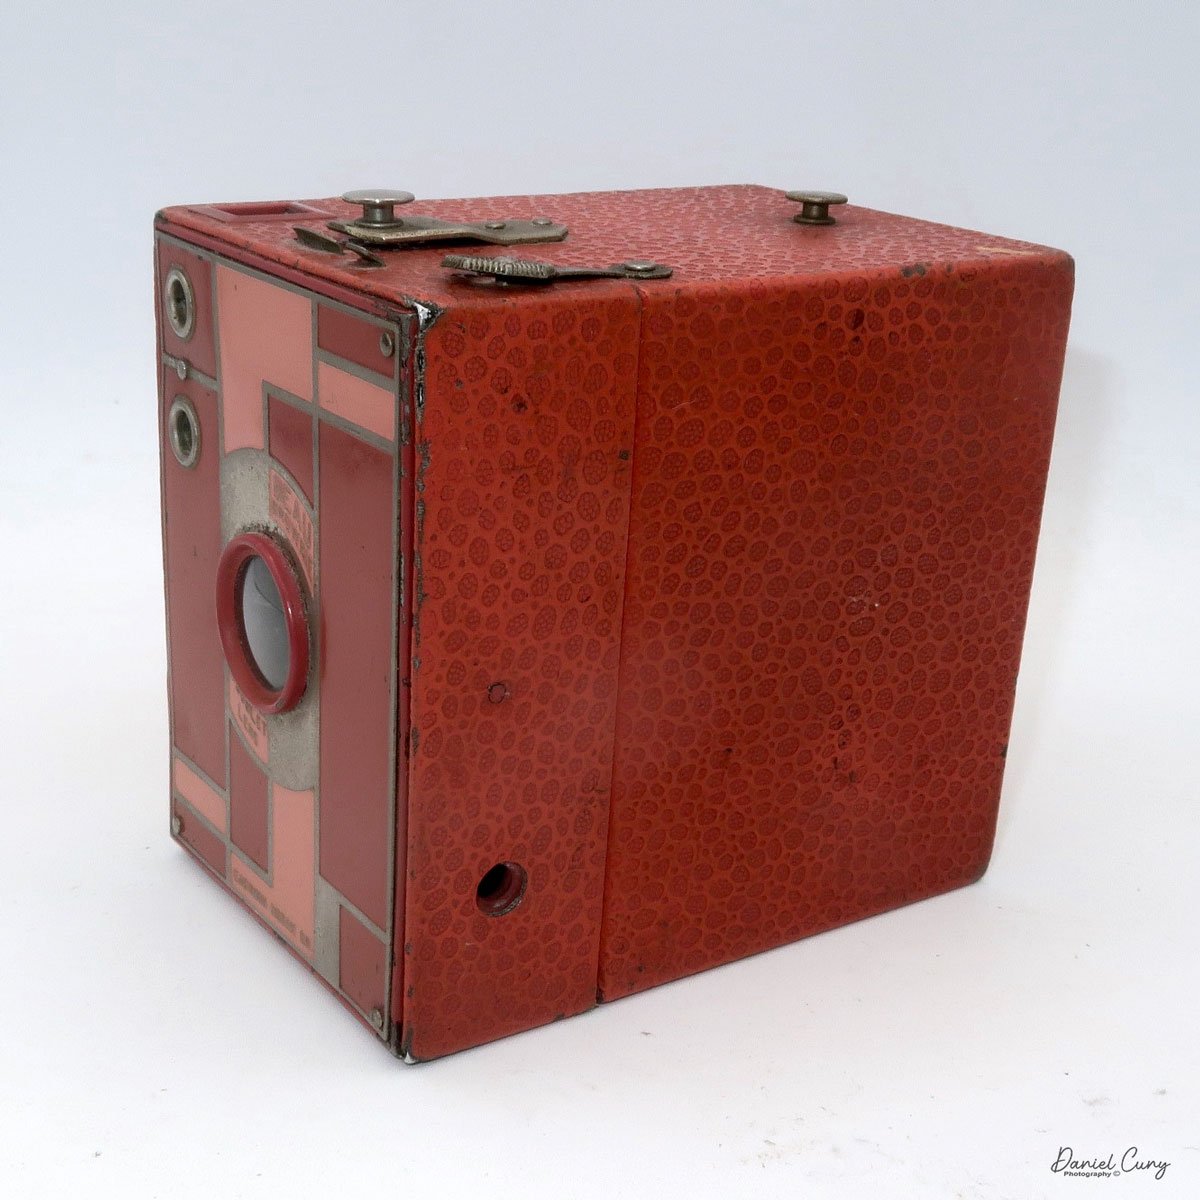
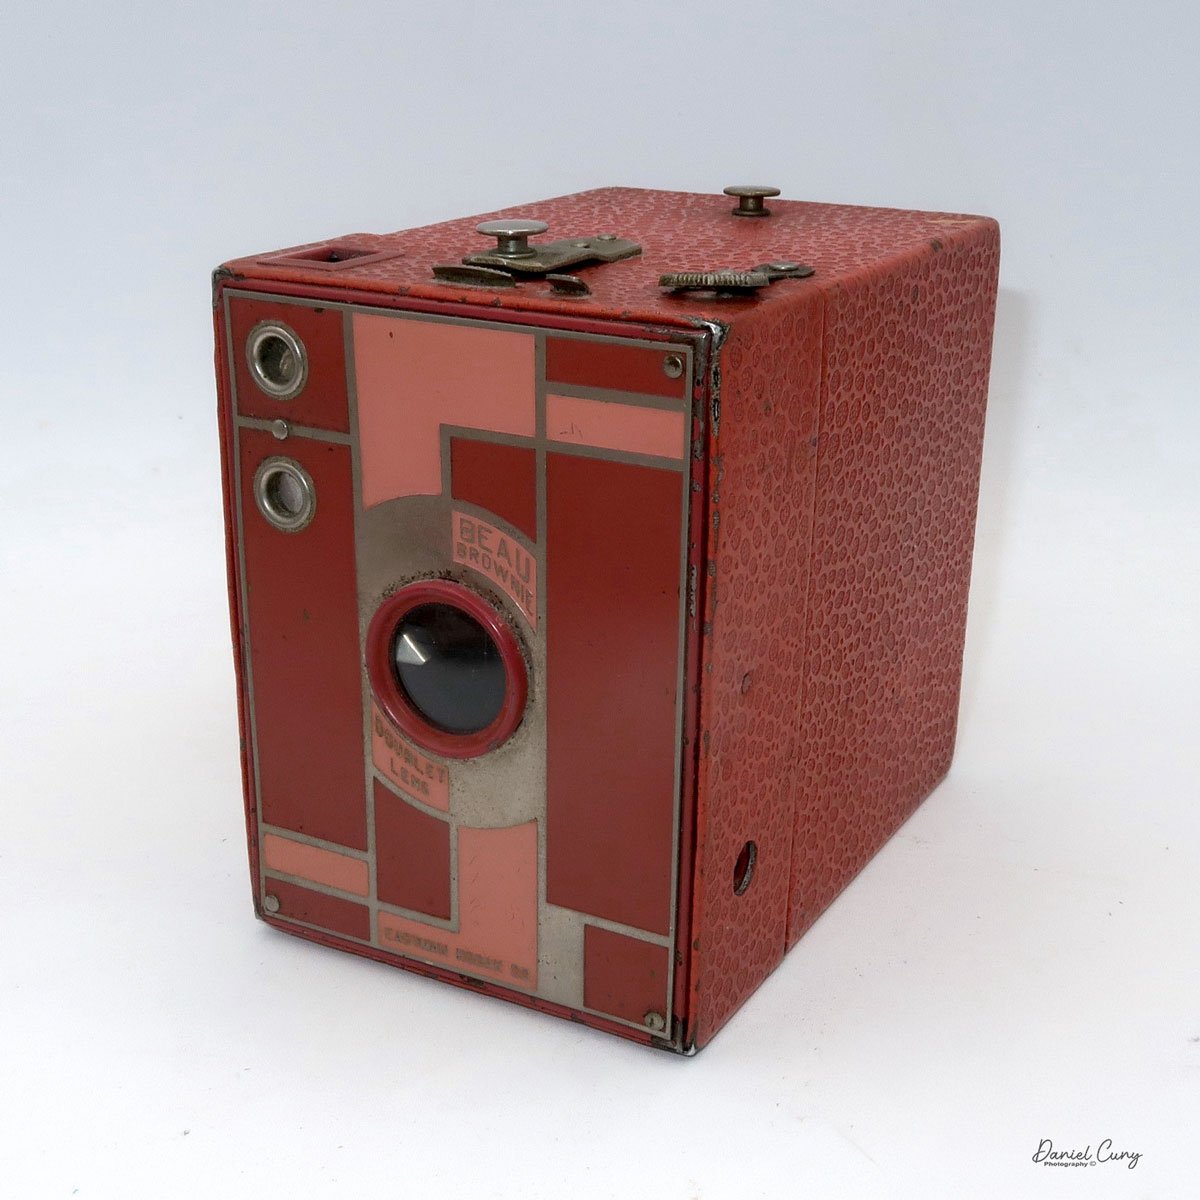
Front view of No. 3B Quick Focus Kodak
Now that I had the camera in hand, I was setting the camera in the car seat next to me, getting ready to go to my next appointment, the thought of how was I going to get the camera home, since all I had was a carry on bag, and my case for my computer, and other office related gear which I brought with me during sales calls.
Luckily for me, this wasn't the first time I've run into this issue. There have been time during my travels, that I've had to cram so many items, mainly cameras or lenses in my suitcase, I'd be afraid that I'd struggle lifting the suitcase over my head due to the weight of it, but I've always managed to move items around in my suitcase, fitting even larger items, like the No. 3B Quick Focus camera in there and safely transporting them home safely tucked securely in my carry-on bag.
While the camera looks very ordinary on the outside, resembling many other box-style cameras, the one thing that sets it apart is its ability, as the name suggests, to focus quickly on the subject. This system is still just a guestimate process as there is no ground glass or focus screen in the camera. Still, rather than setting a wheel in the later versions or sliding a bar to an approximate distance from you to the subject, press a button. The camera springs the lens to an approximate distance from the film plane, replicating the distance required to produce a sharp image on the film.
I've owned the No. 3B Quick Focus camera for more than 20 years, and it wasn't until I was going through some boxes of cameras I have that I came across the camera. Looking at the camera, it's in relatively good condition for a camera made between 1905 and 1911, with only a few modifications. The main difference was that earlier versions had a sliding lever to adjust the focus distance, whereas later versions used a circular wheel.
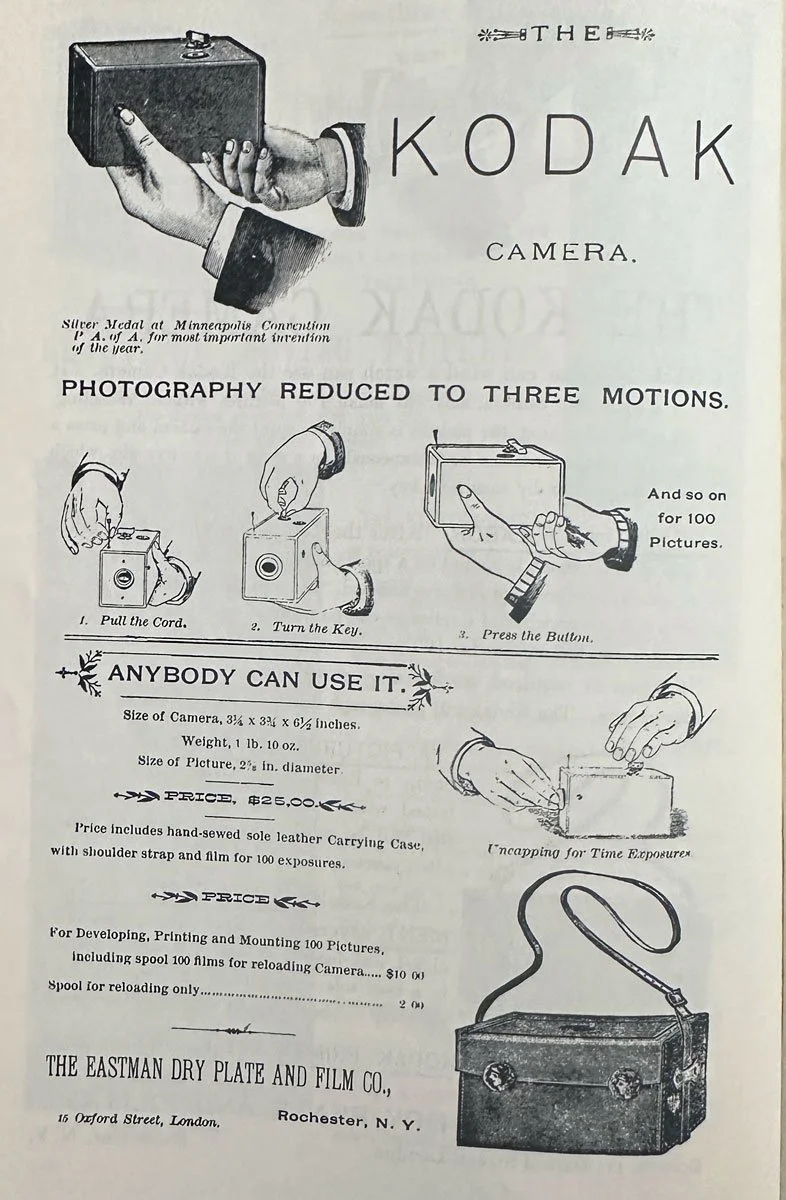
Early Kodak History:
The period between 1880 and 1910 was a time of rapid innovation in industrial history, transforming photography from a complex process into a popular hobby, which makes owning a camera from this era especially meaningful for history buffs and enthusiasts.
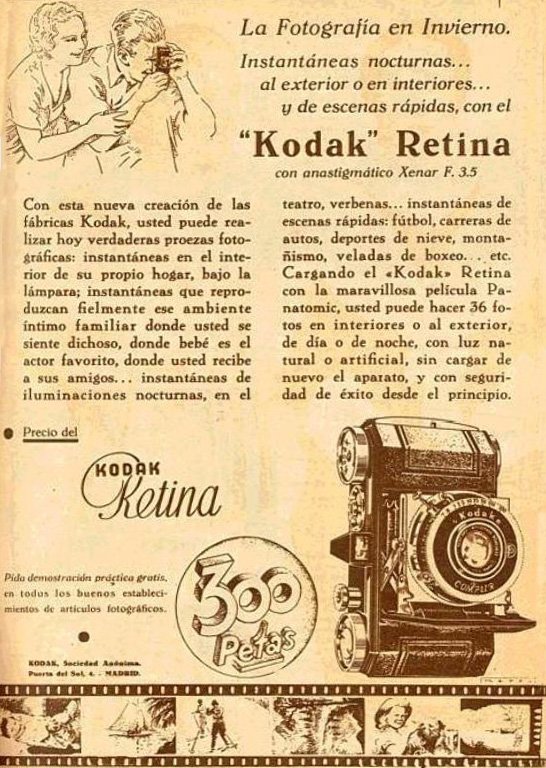
Early Kodak Advertisment
Before 1880, photographers had to use "wet plates," which required coating glass with chemicals and developing them immediately before the emulsion dried. In 1880, George Eastman began manufacturing dry plates in Rochester, New York. These could be stored and sold, effectively decoupling the act of taking a photo from the chemistry of preparing it. In 1884, he transitioned from glass to paper film rolls, a pivot that laid the technical foundation for the modern snapshot.
In 1888, the first Kodak Camera was released. It was a simple box pre-loaded with enough film for 100 exposures. When the roll was finished, the owner sent the entire camera back to the factory. Kodak would develop the film, print the photos, and return the camera reloaded with new film. This "System of Photography" changed the medium's identity from a technical craft to a consumer hobby.
By 1889, Eastman Kodak introduced transparent nitrocellulose film, which was flexible and clear. This wasn't just a win for photographers; it was the catalyst for the motion picture industry, as it provided Thomas Edison with the material needed to create the first movies.
In 1900, the Brownie camera was launched. Selling for just $1 (with 15-cent film rolls), it was marketed specifically to children. It solidified Kodak's "Razor and Blade" business model: sell the hardware at cost to create a permanent market for the consumables (film and chemicals).
By the end of the first decade of the 20th century, Kodak had streamlined its corporate structure and expanded into Europe. The company pioneered the "Folding Pocket Kodak" during this time, making cameras small enough to travel anywhere. By 1910, Eastman Kodak wasn't just a company; it was a monopoly of the "snapshot," having successfully democratized the visual record of human life.
My Camera:
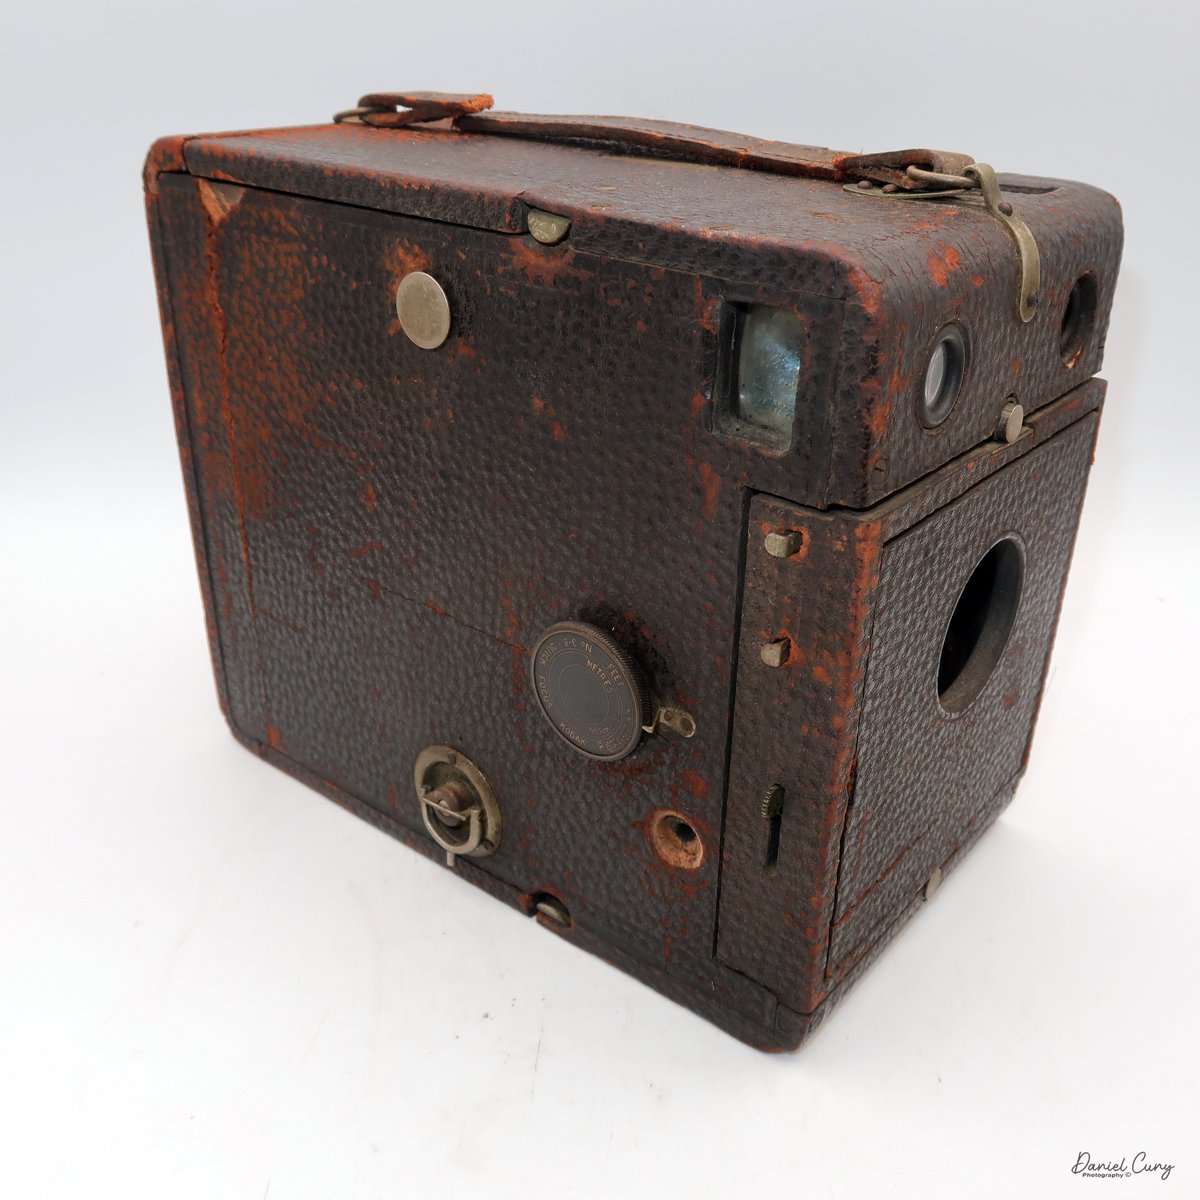
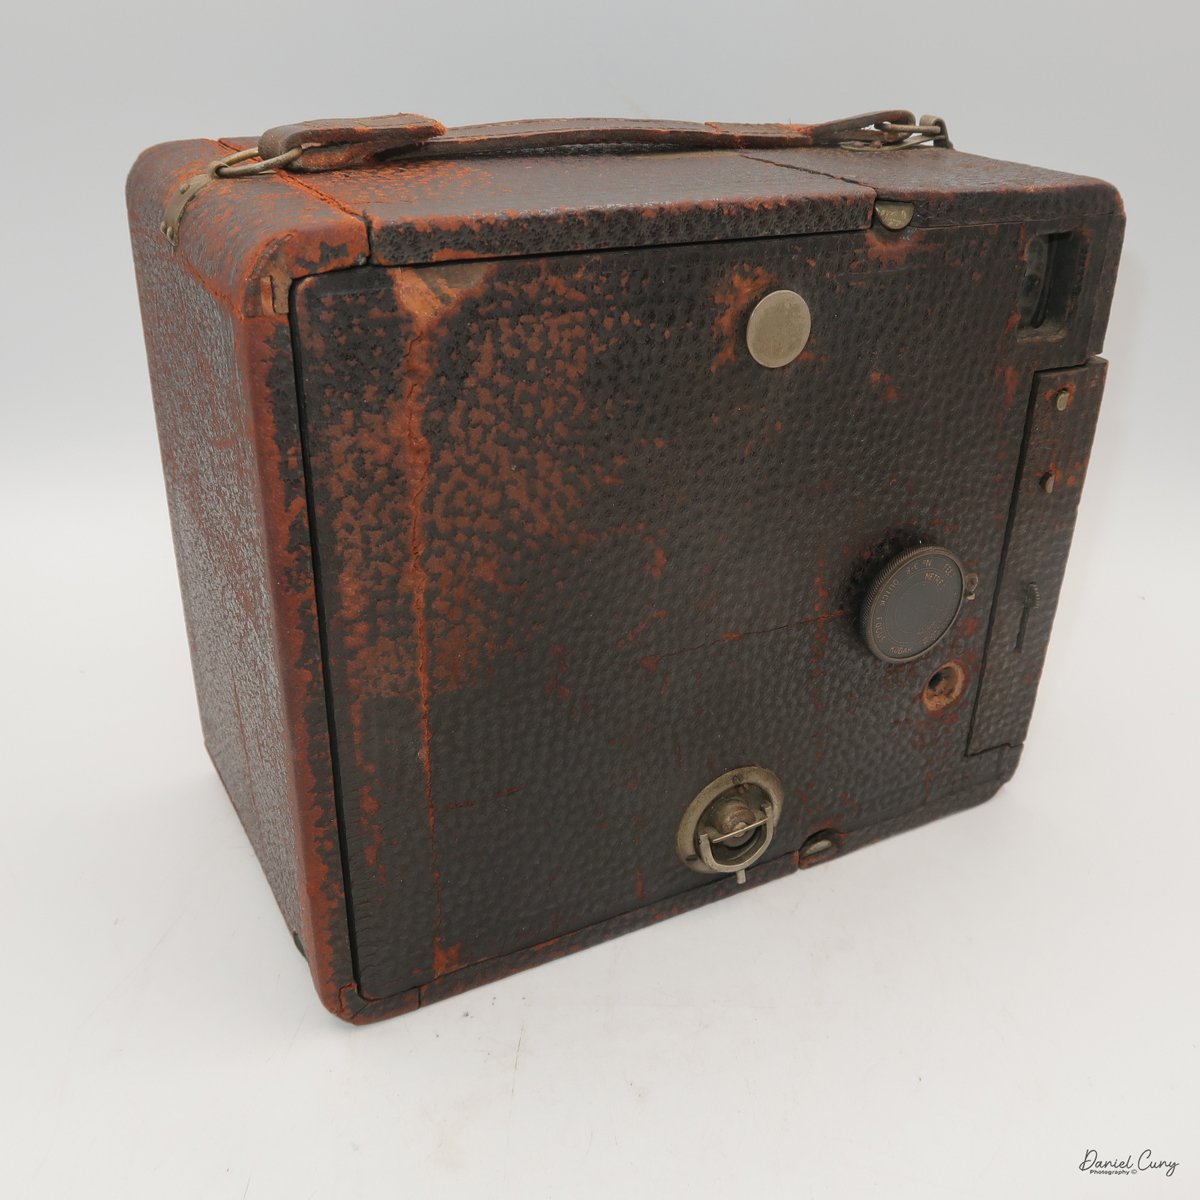
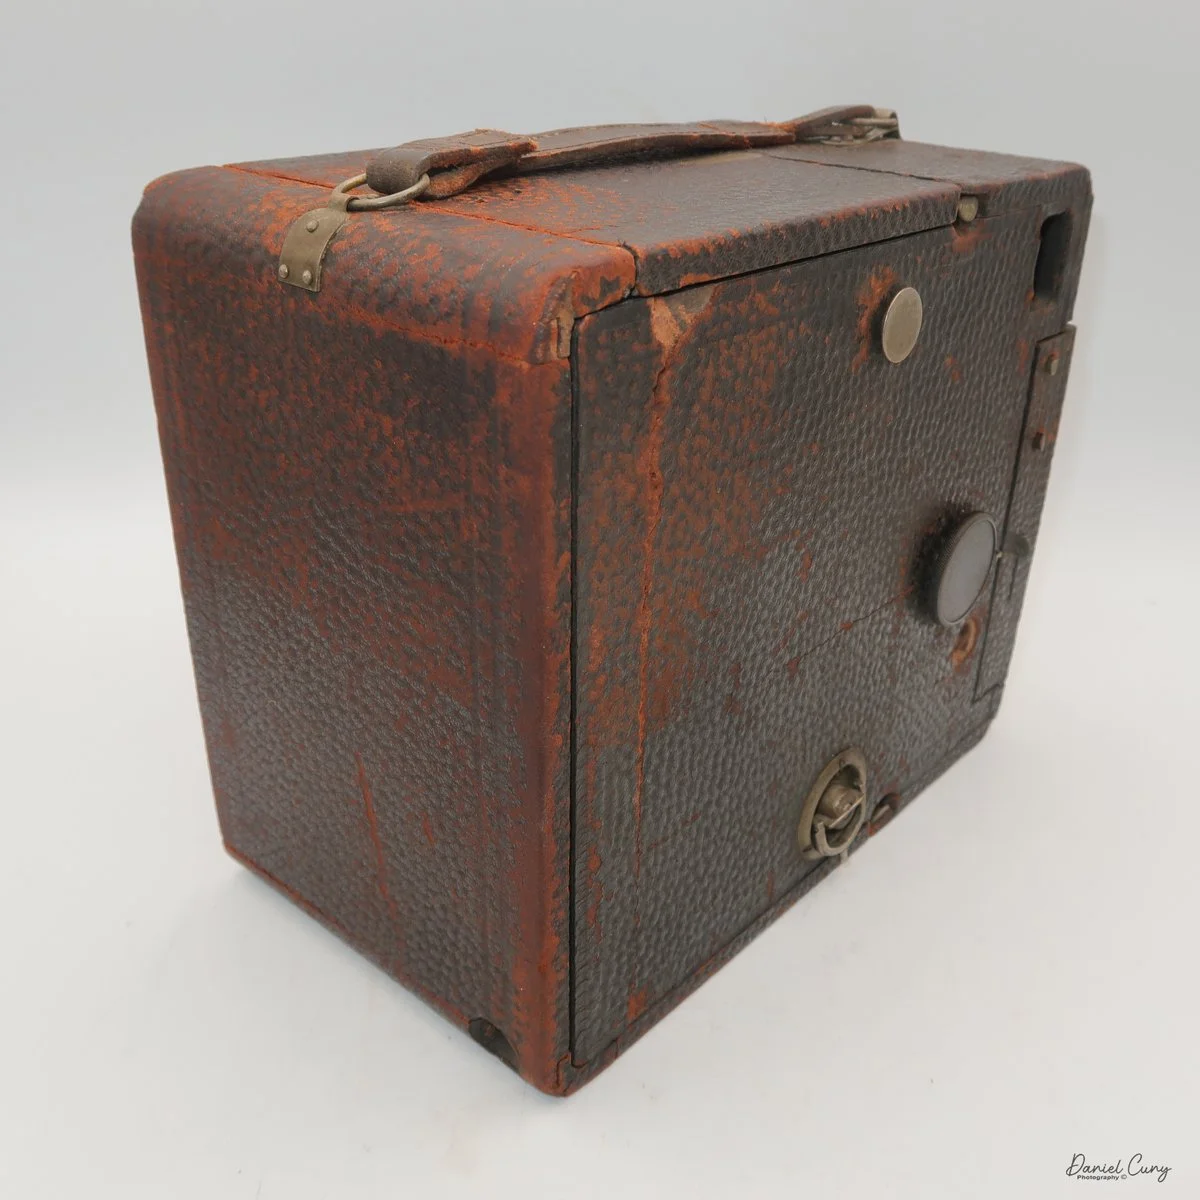
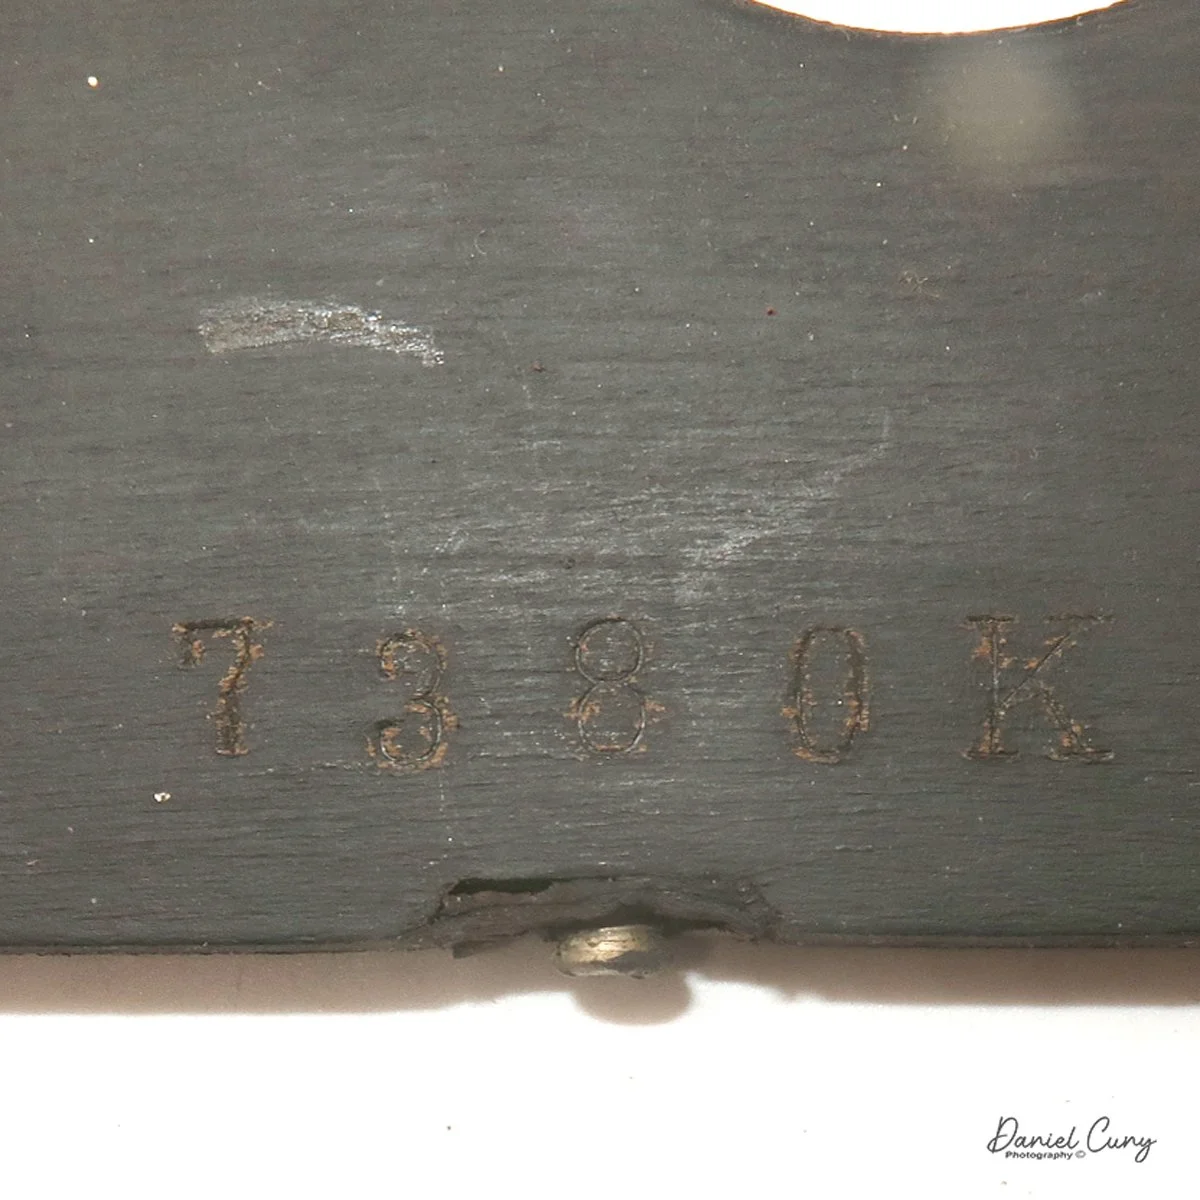
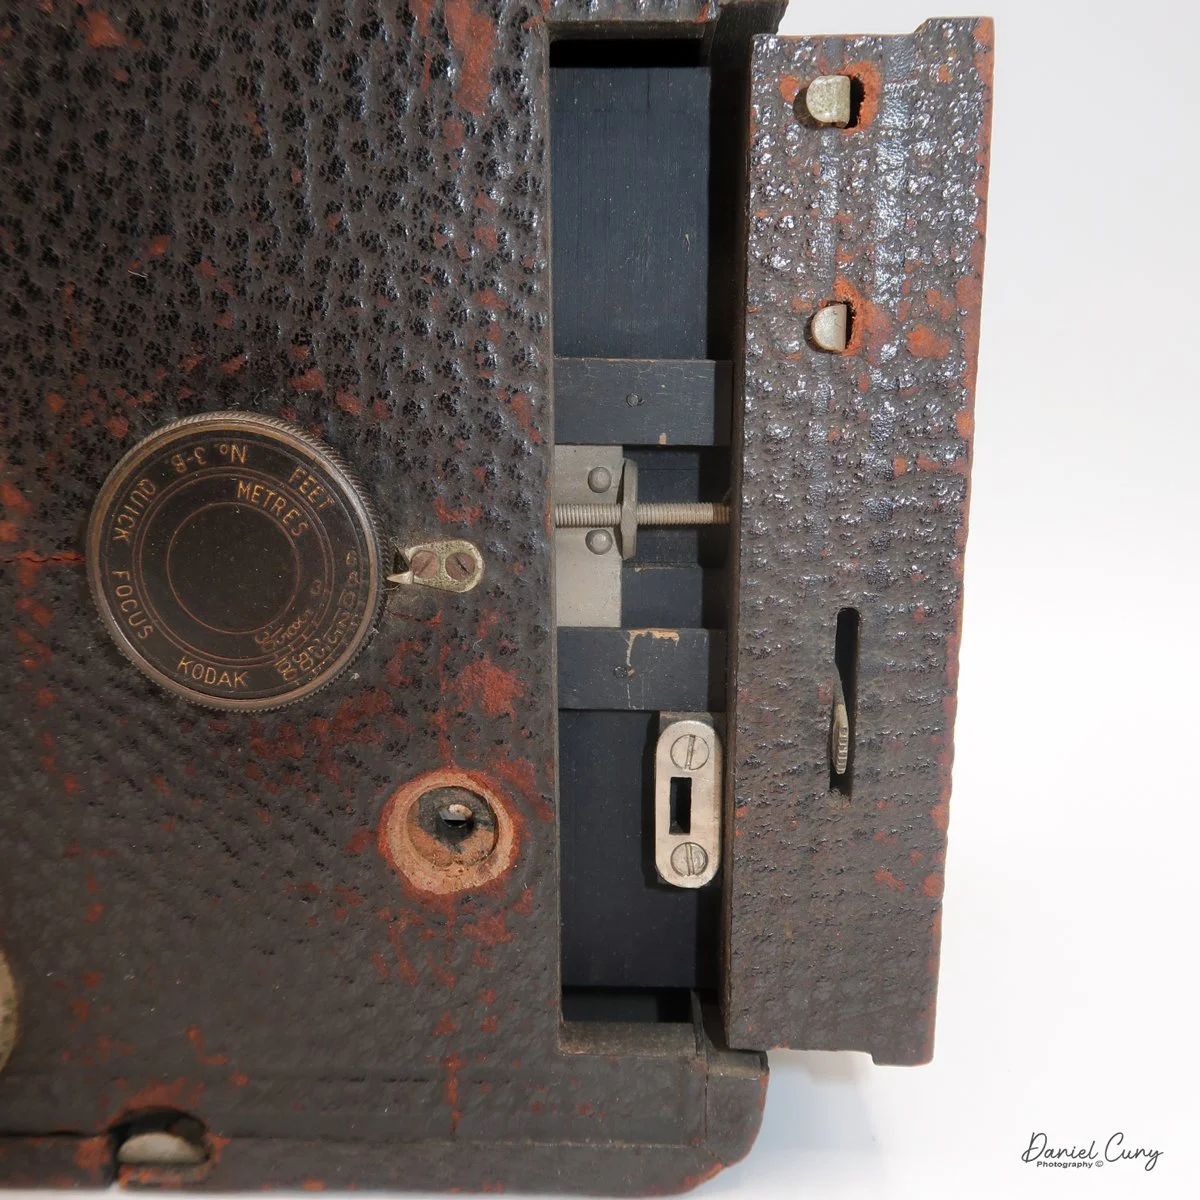
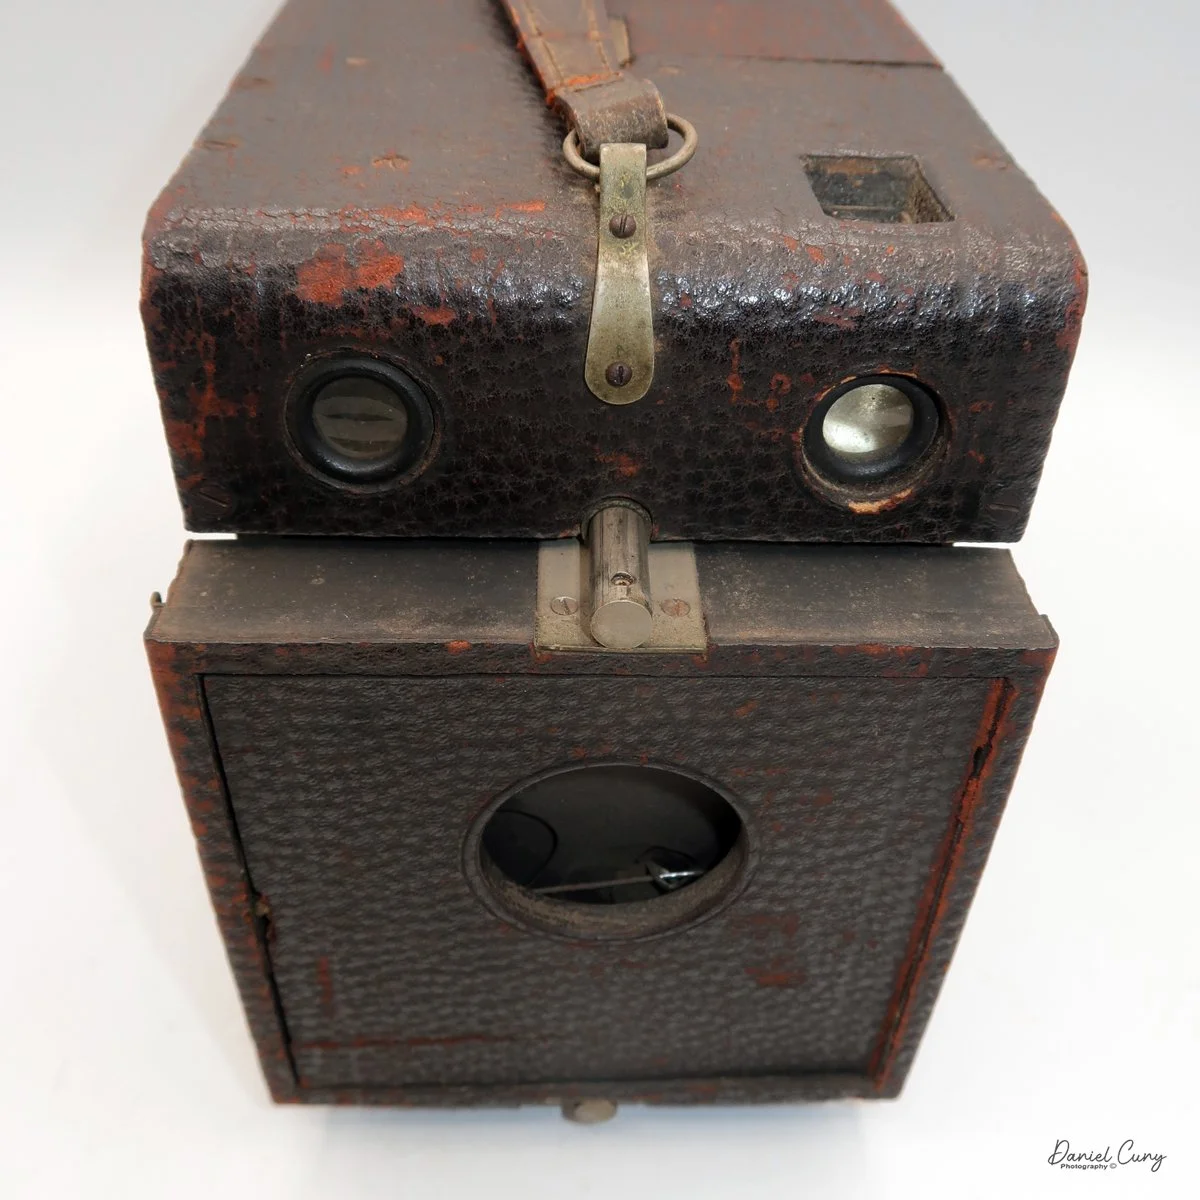
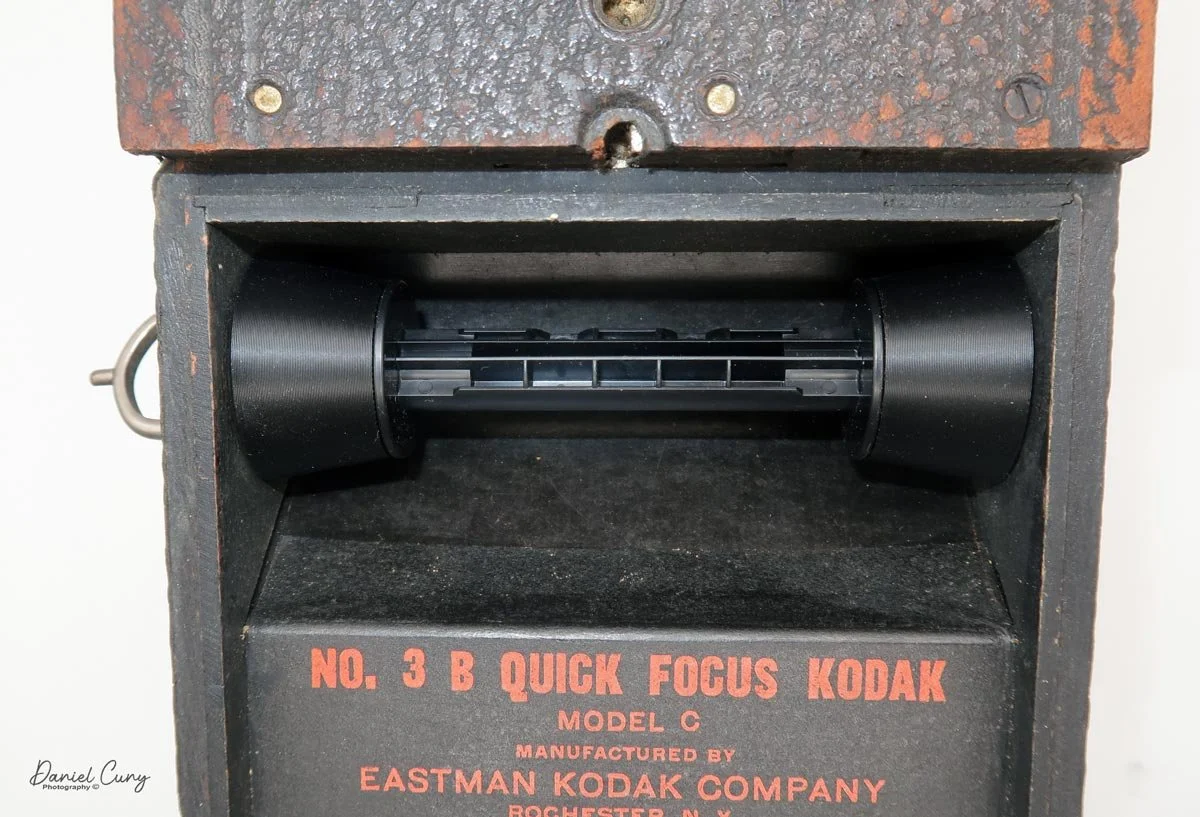
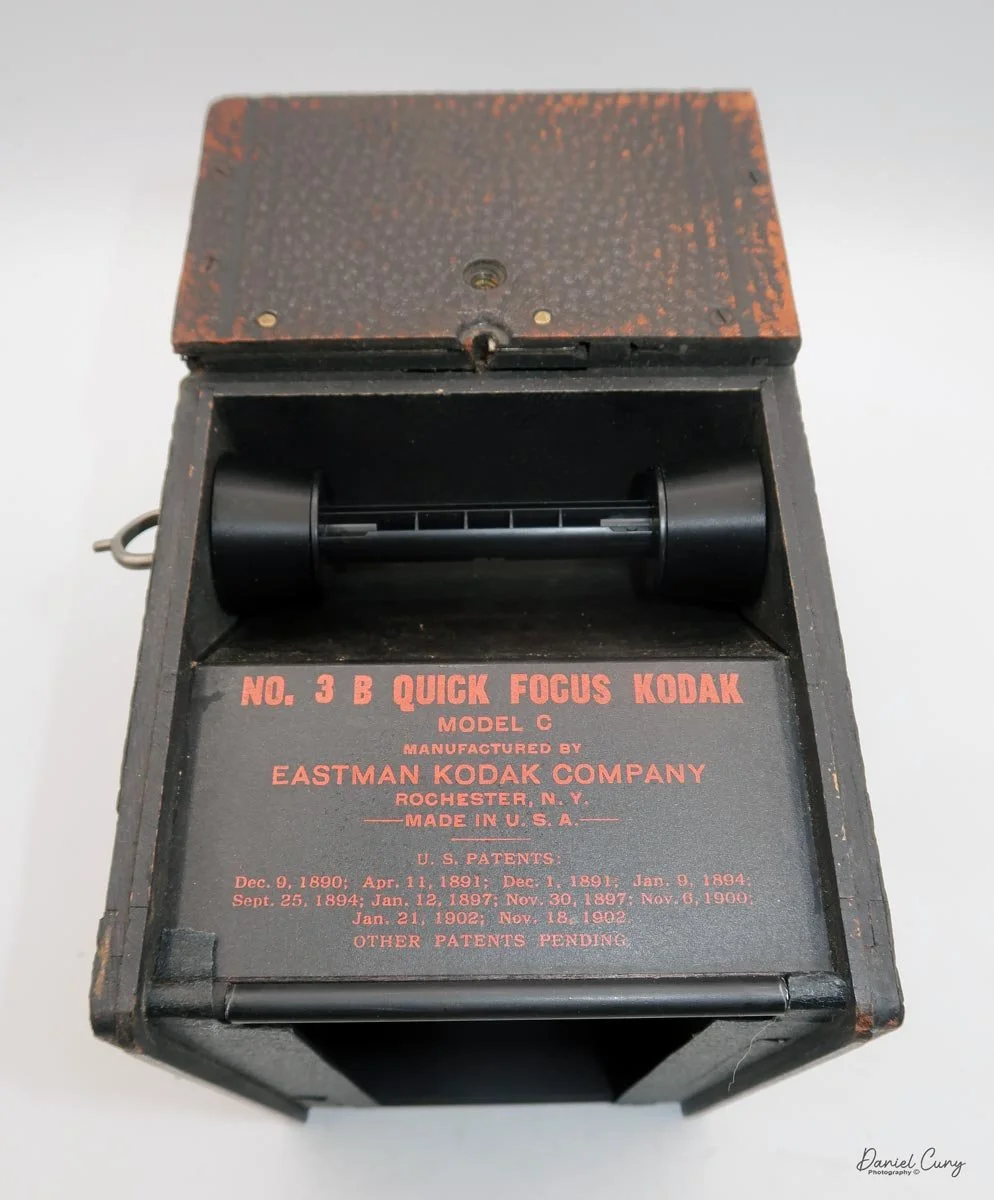
My No. 3B Quick Focus camera is 7" tall by 8.25 " long with the lens retracted, and 4.75" wide, and weighs 2 pounds, 13.4 ounces. The serial number of my camera is 7380K, which you can find on the inside of the plate covering the shutter on the front of the camera. Thank you to Pacific Rim, which has a No. 3B Quick Focus Kodak manual.
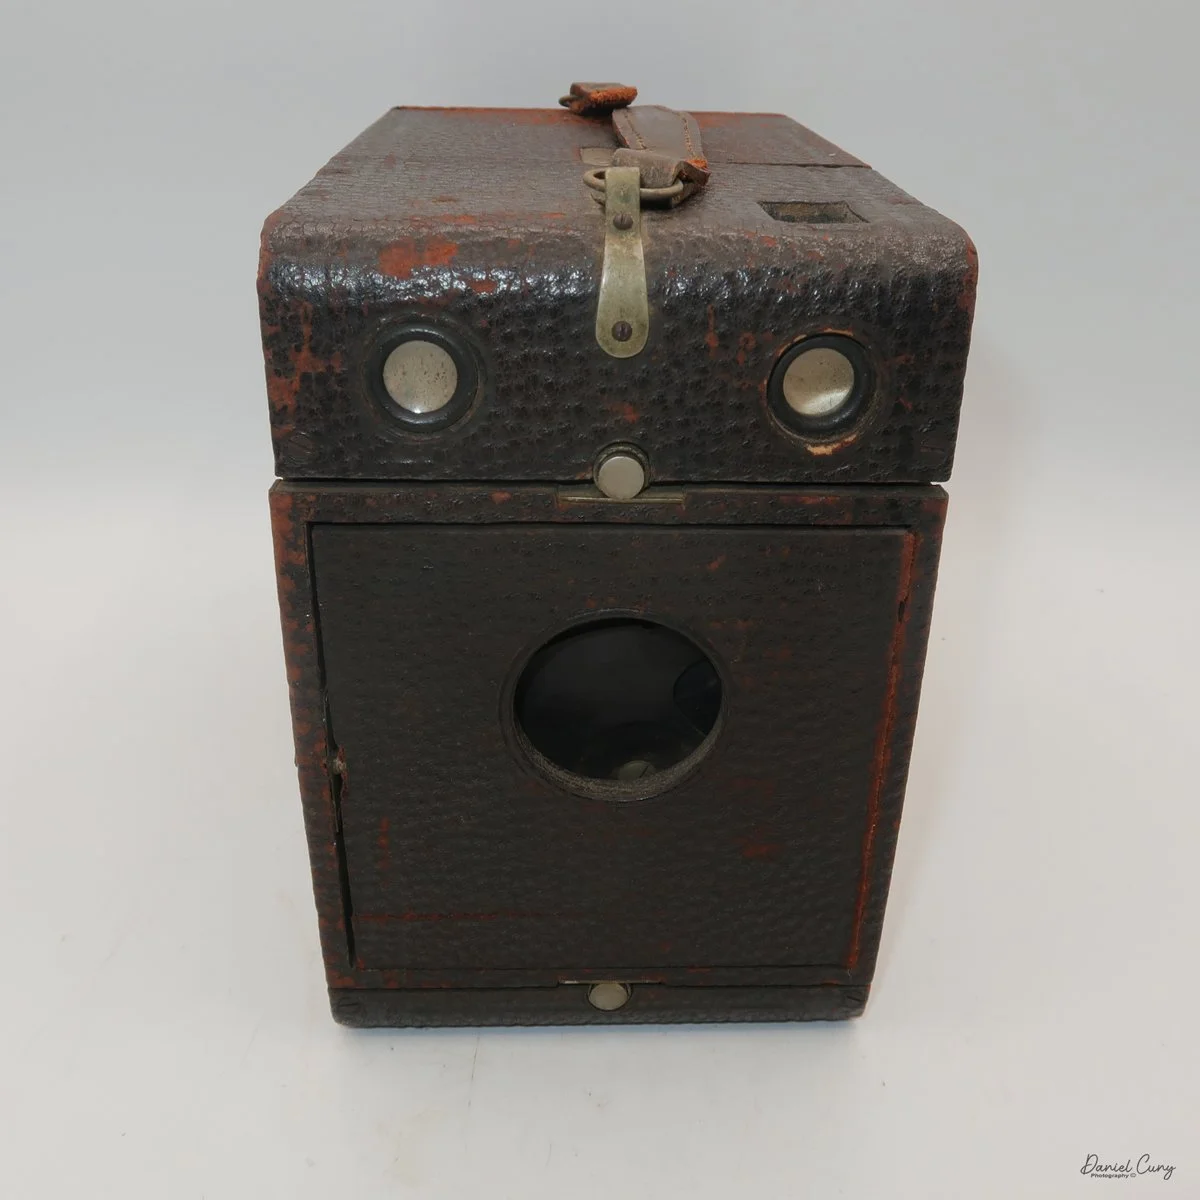
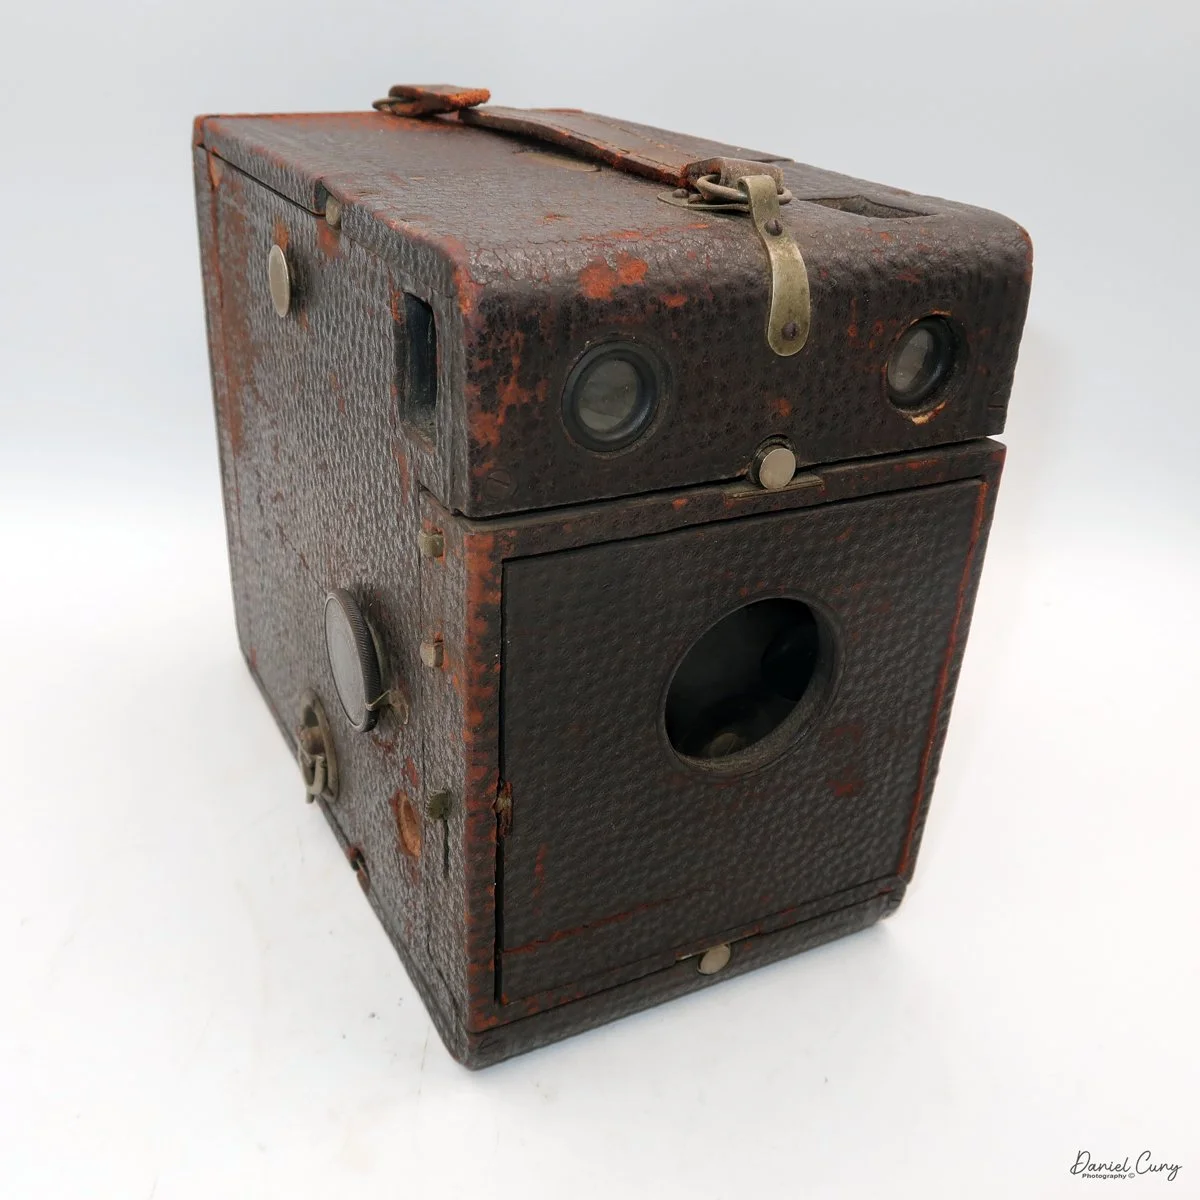
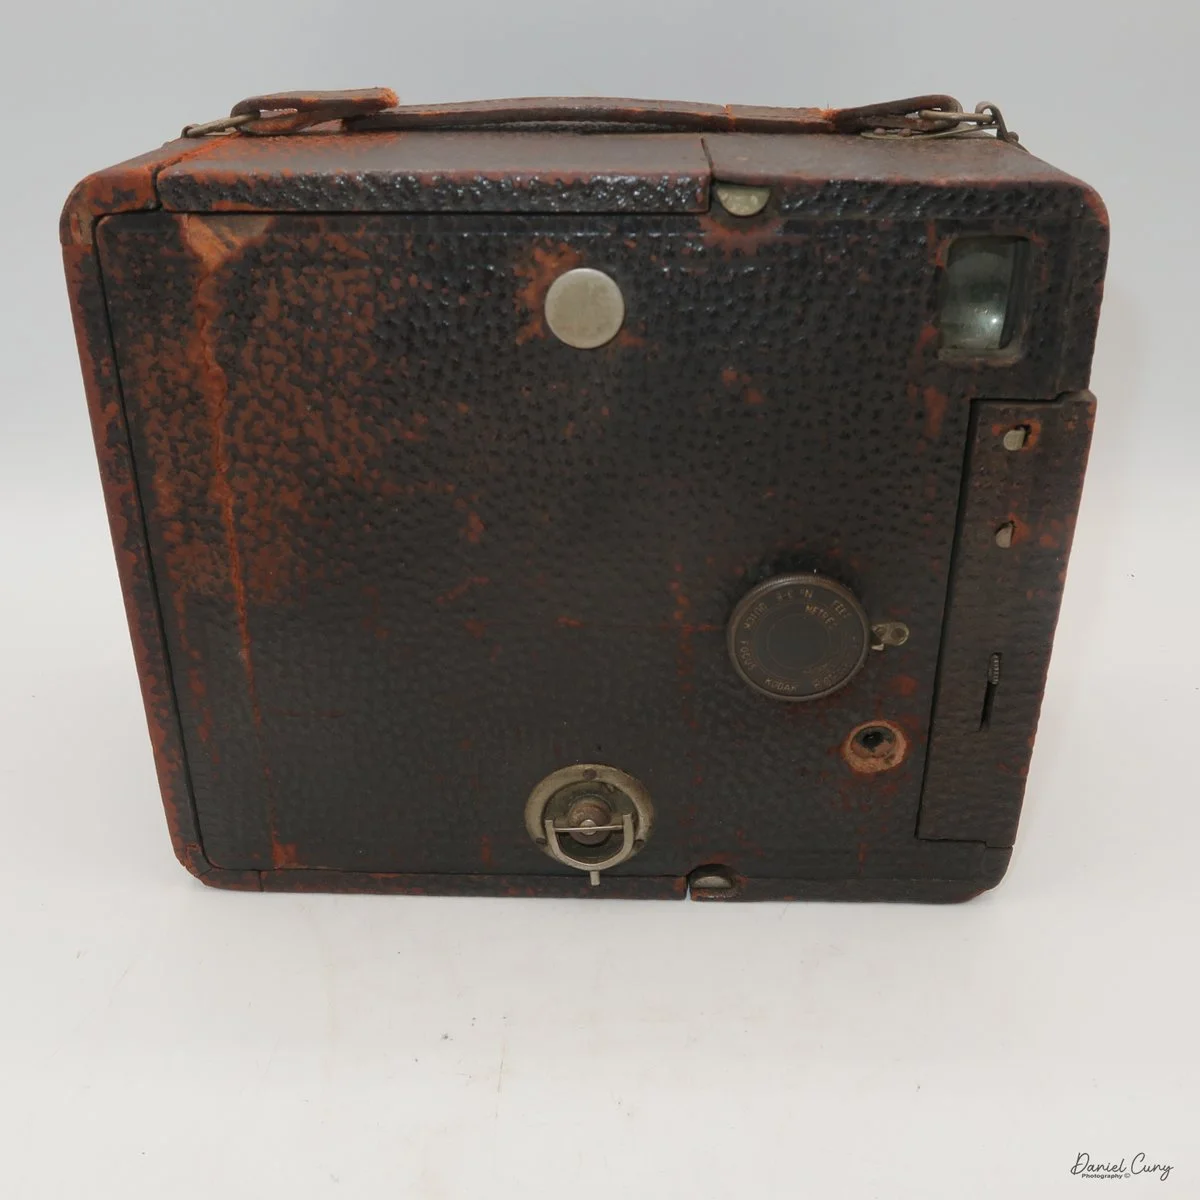
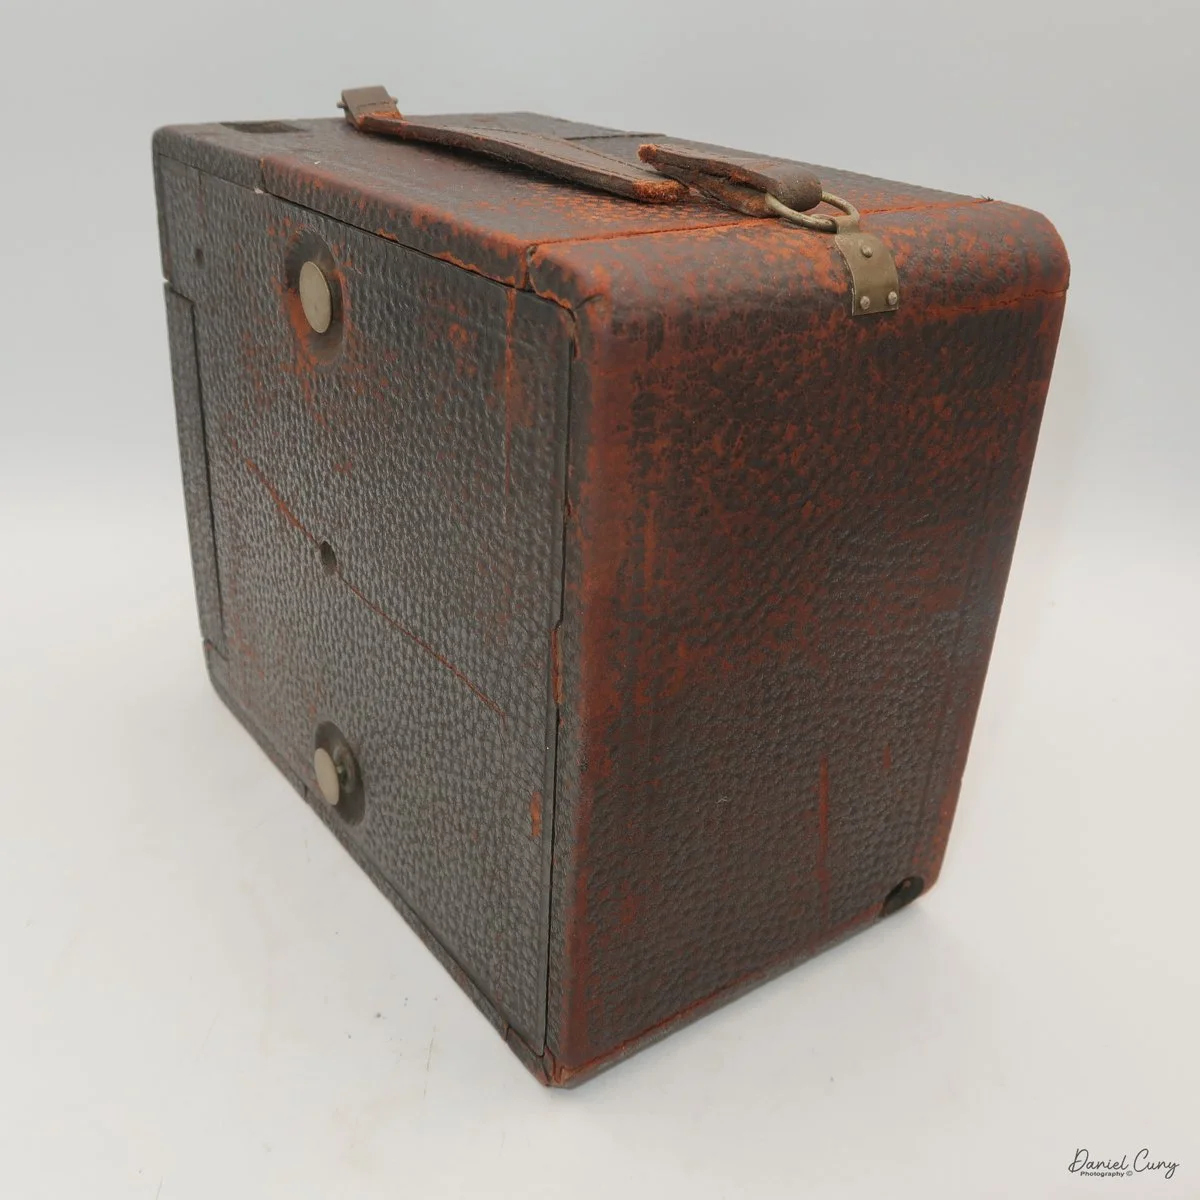
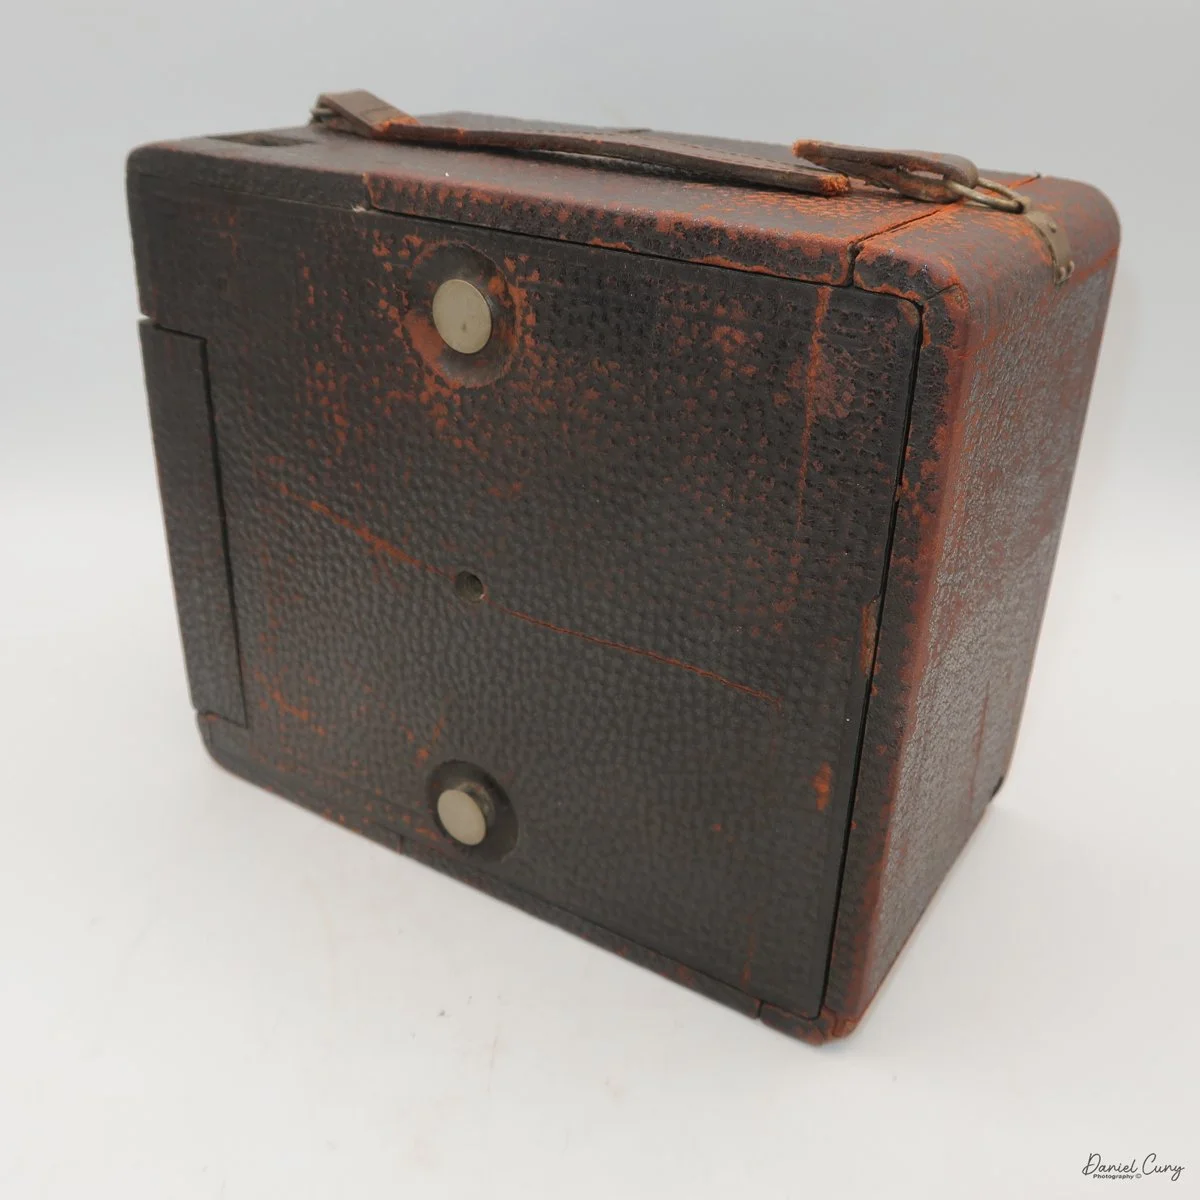
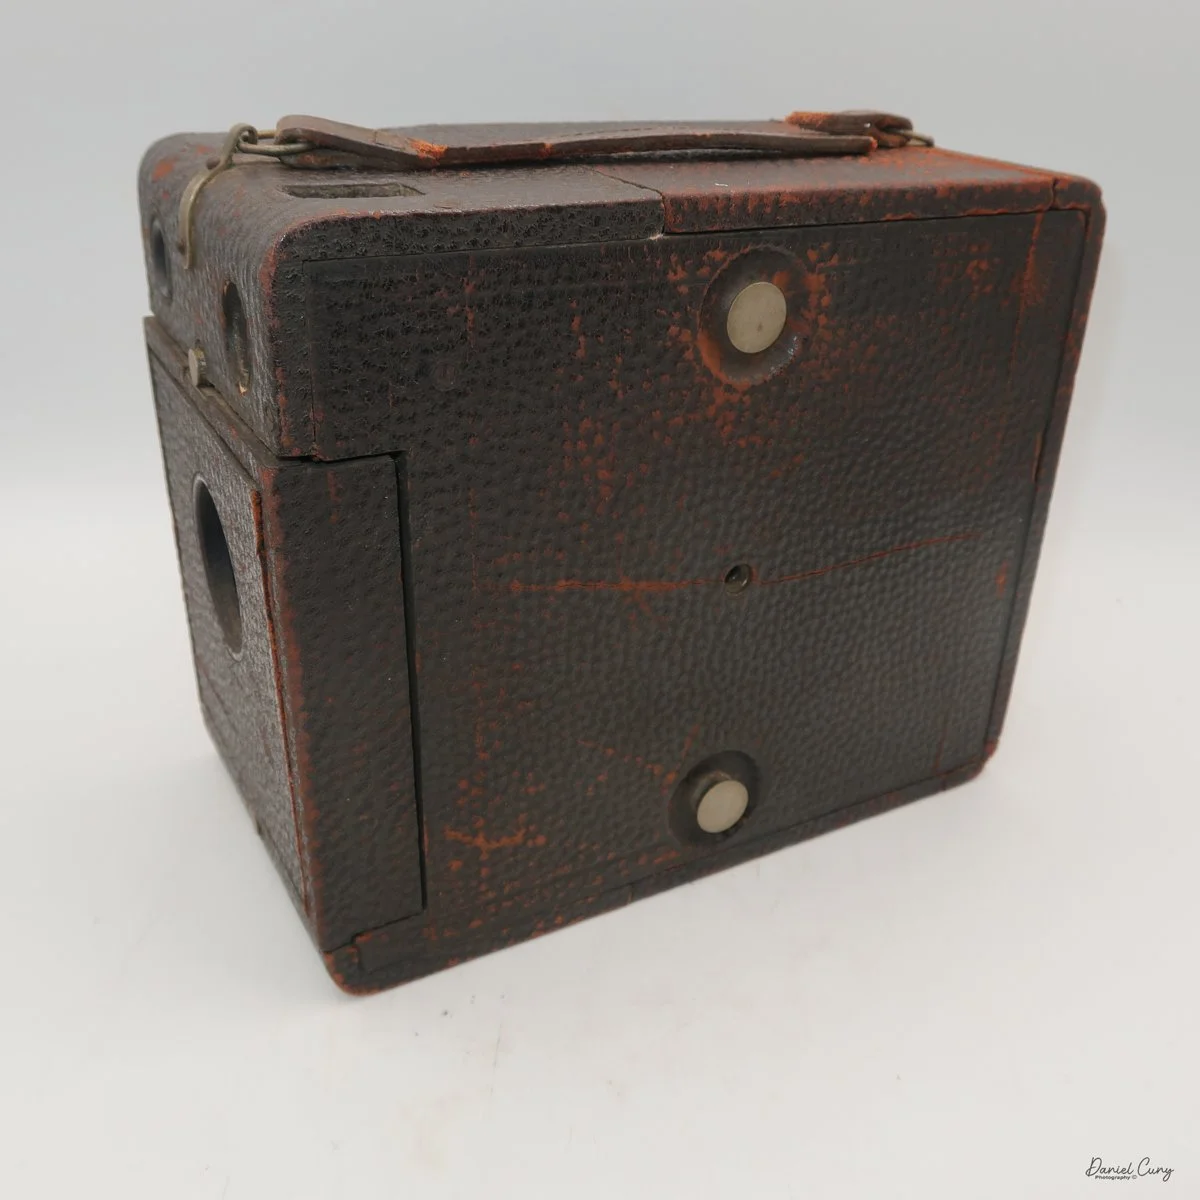
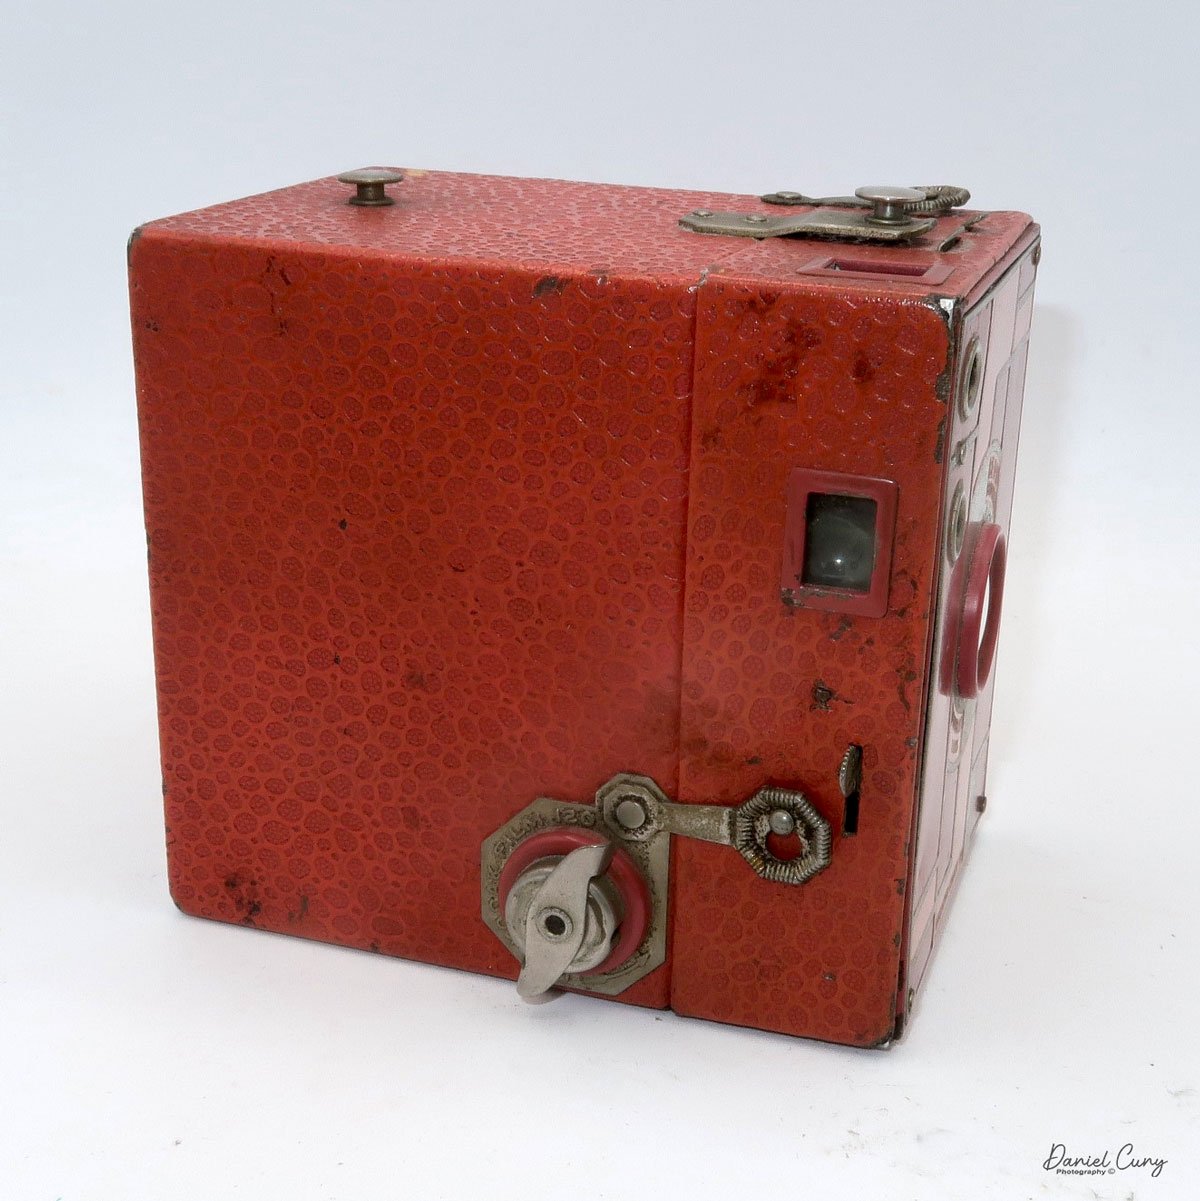
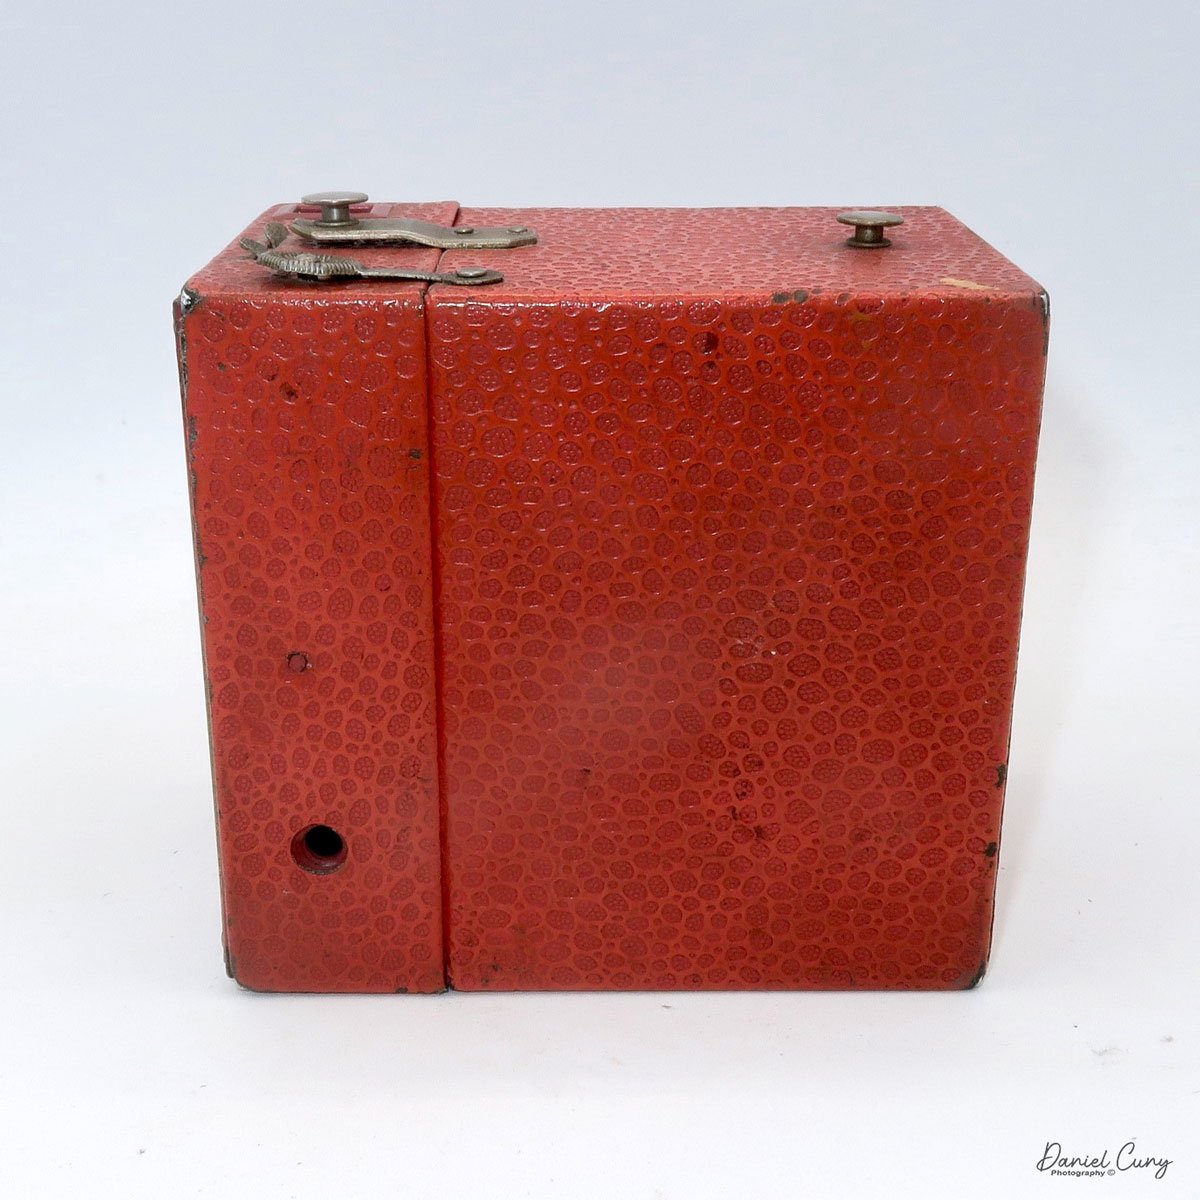
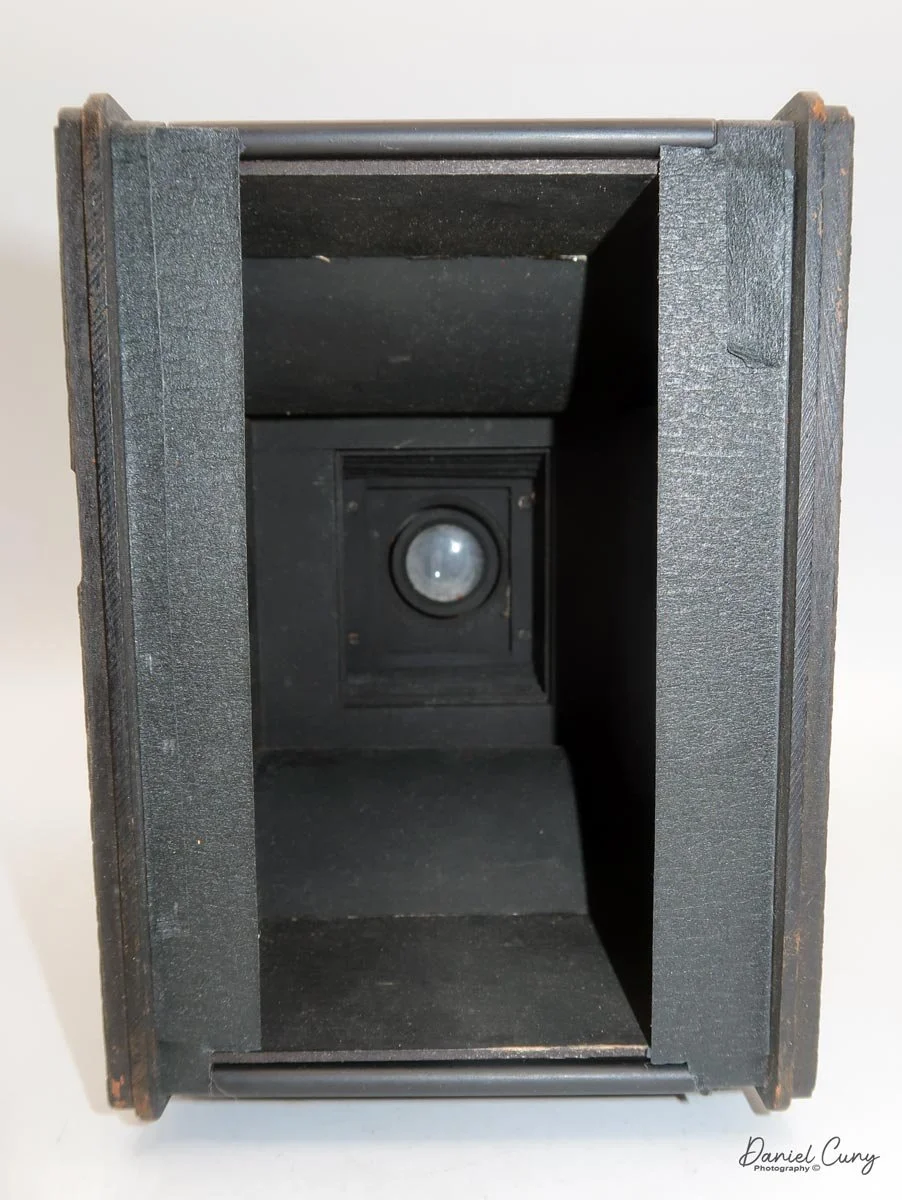
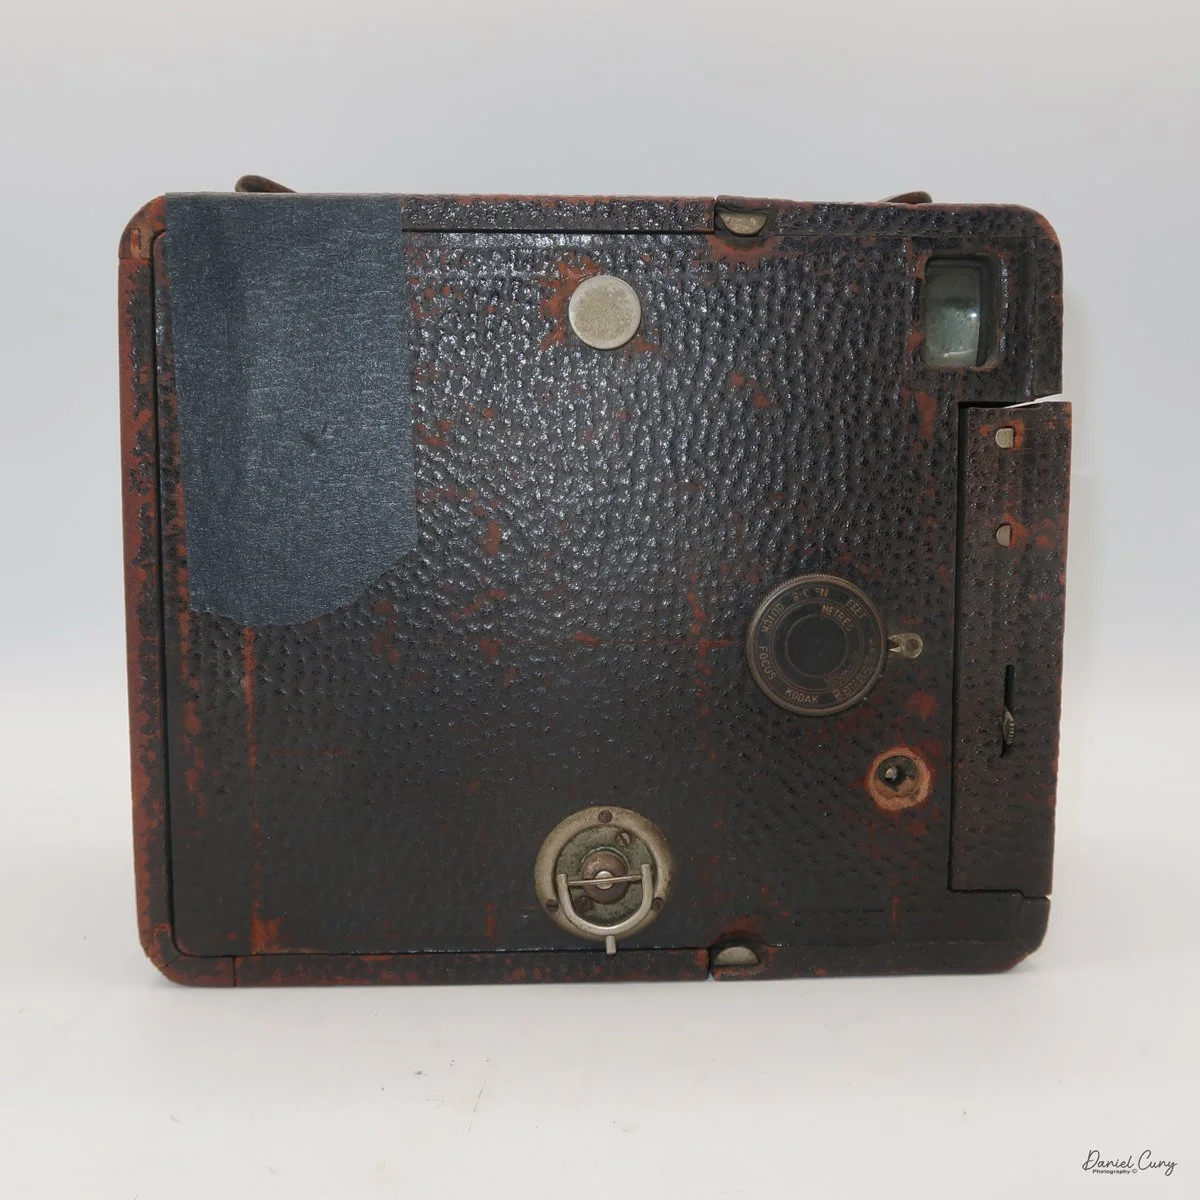
The camera has two viewfinders: one on the top for vertical images, and, when turned on its side, one for horizontal images. The camera's shutter release is on the right side; it's a "one motion" release, meaning you slide it down, and the shutter opens and closes. Then slide the shutter release up, and it repeats the open/close motion.
Also on the right side of the camera is the aperture setting, which is controlled by pulling out a lever to three different positions to set the aperture. Below the aperture settings is another lever you use to set the shutter speed to instant when the lever is in, or to time exposure when you pull it out. In time exposure, you'll need to flip the shutter release up or down to open the shutter, then back to close it.
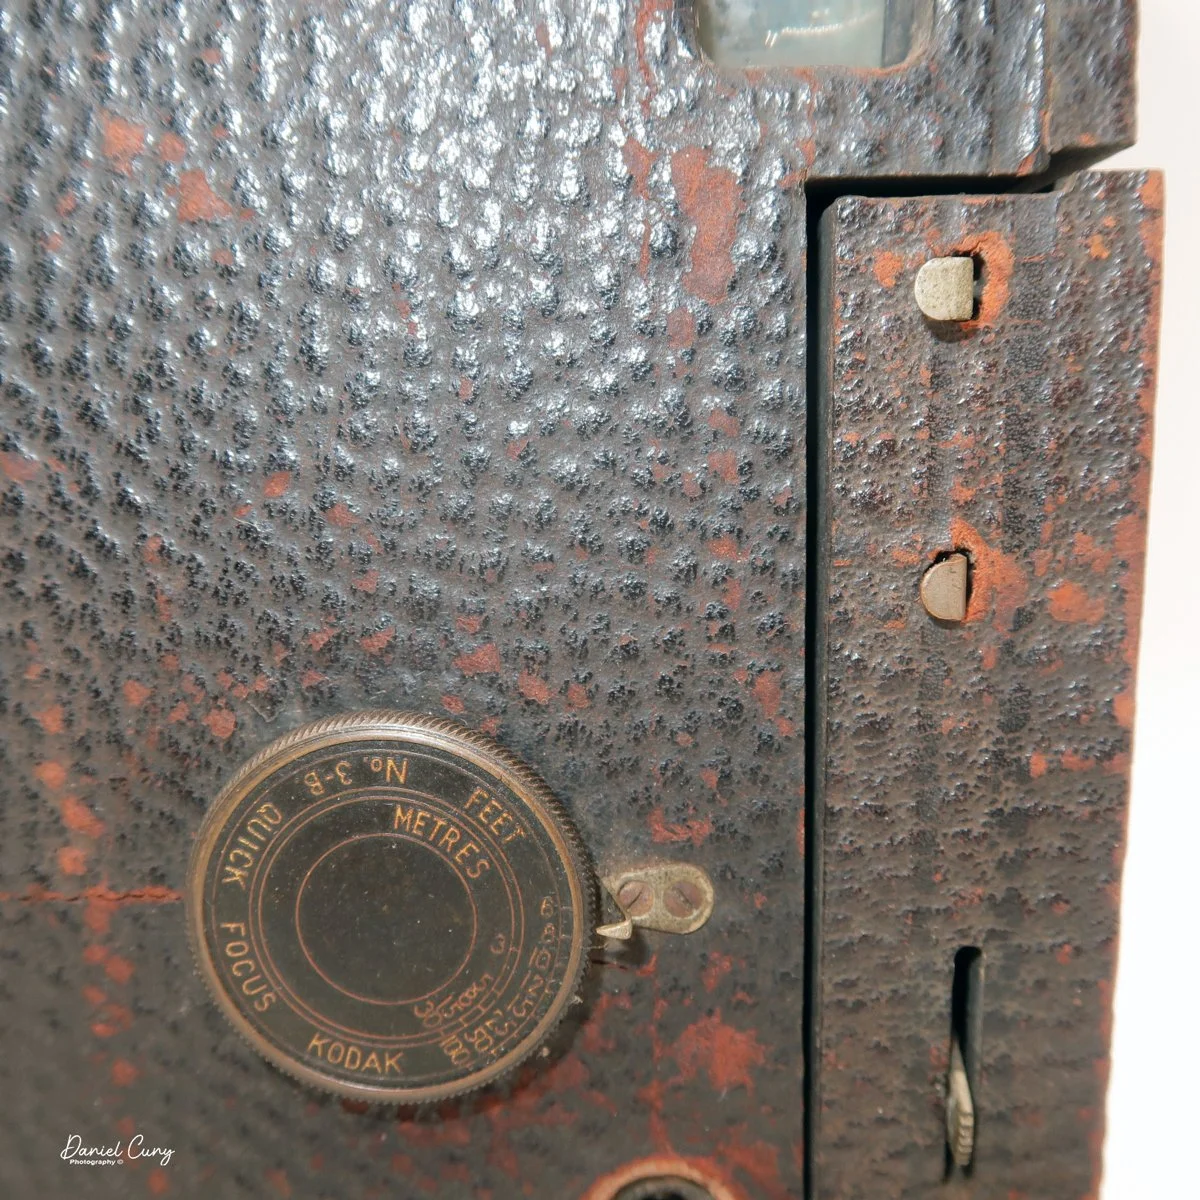
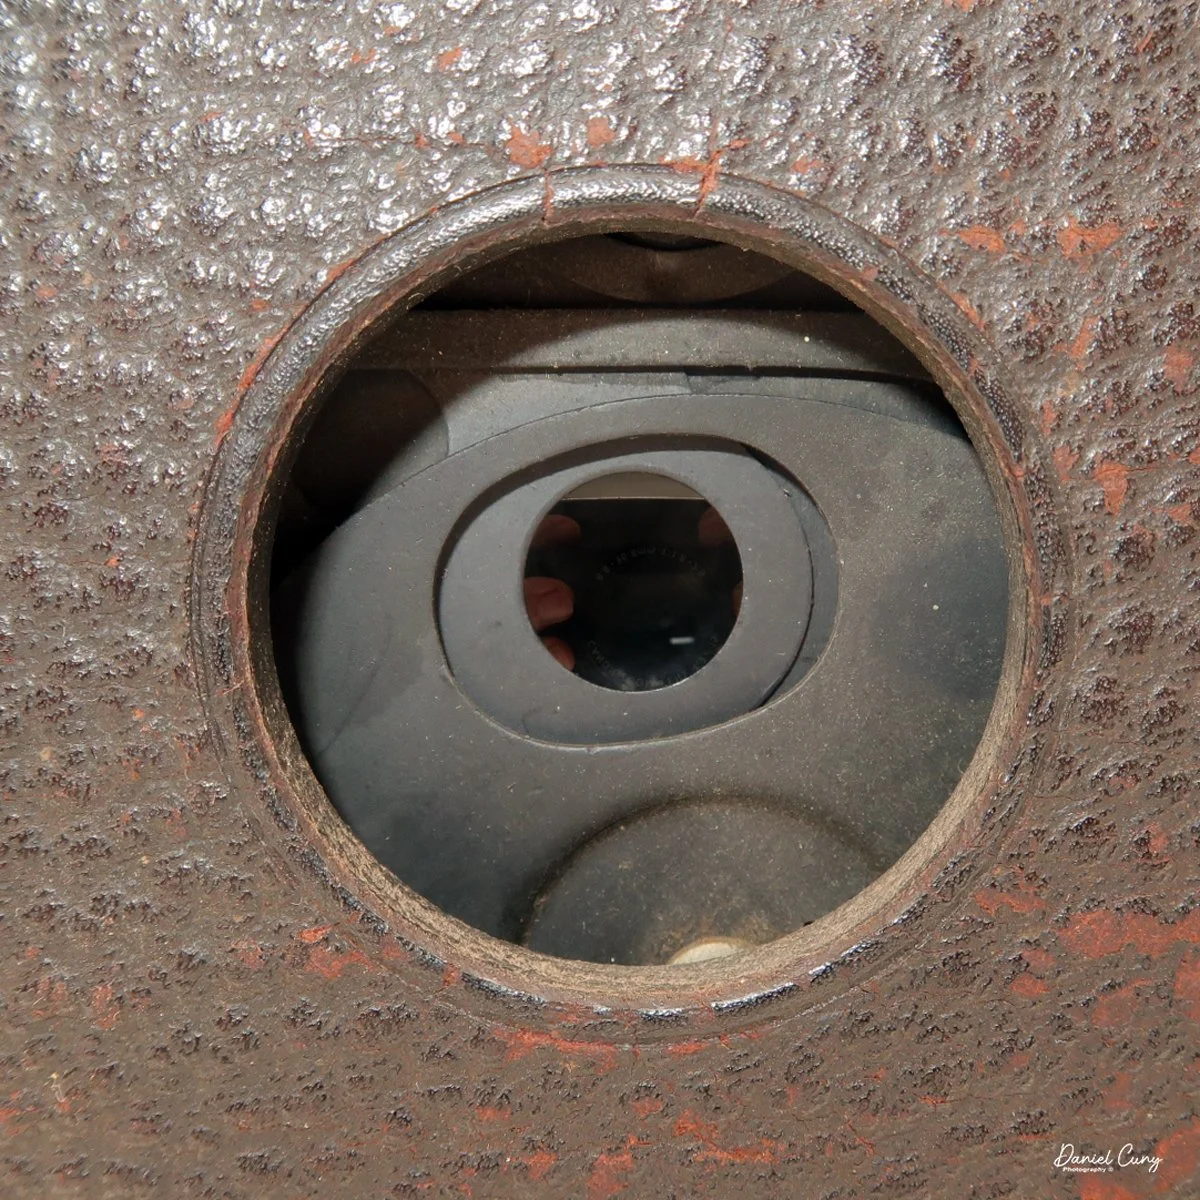
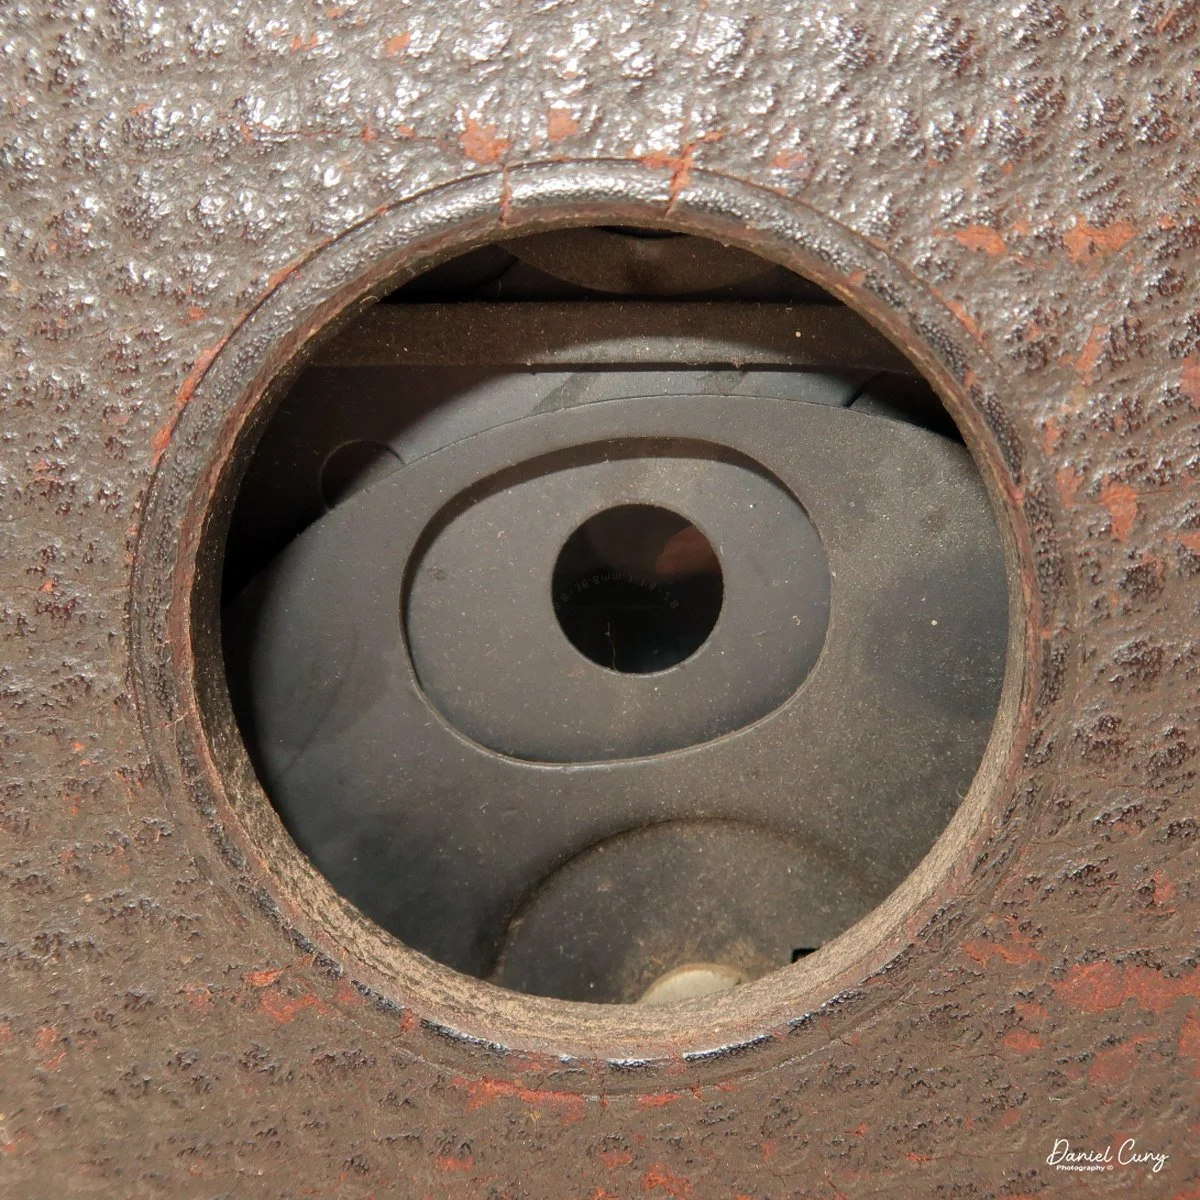
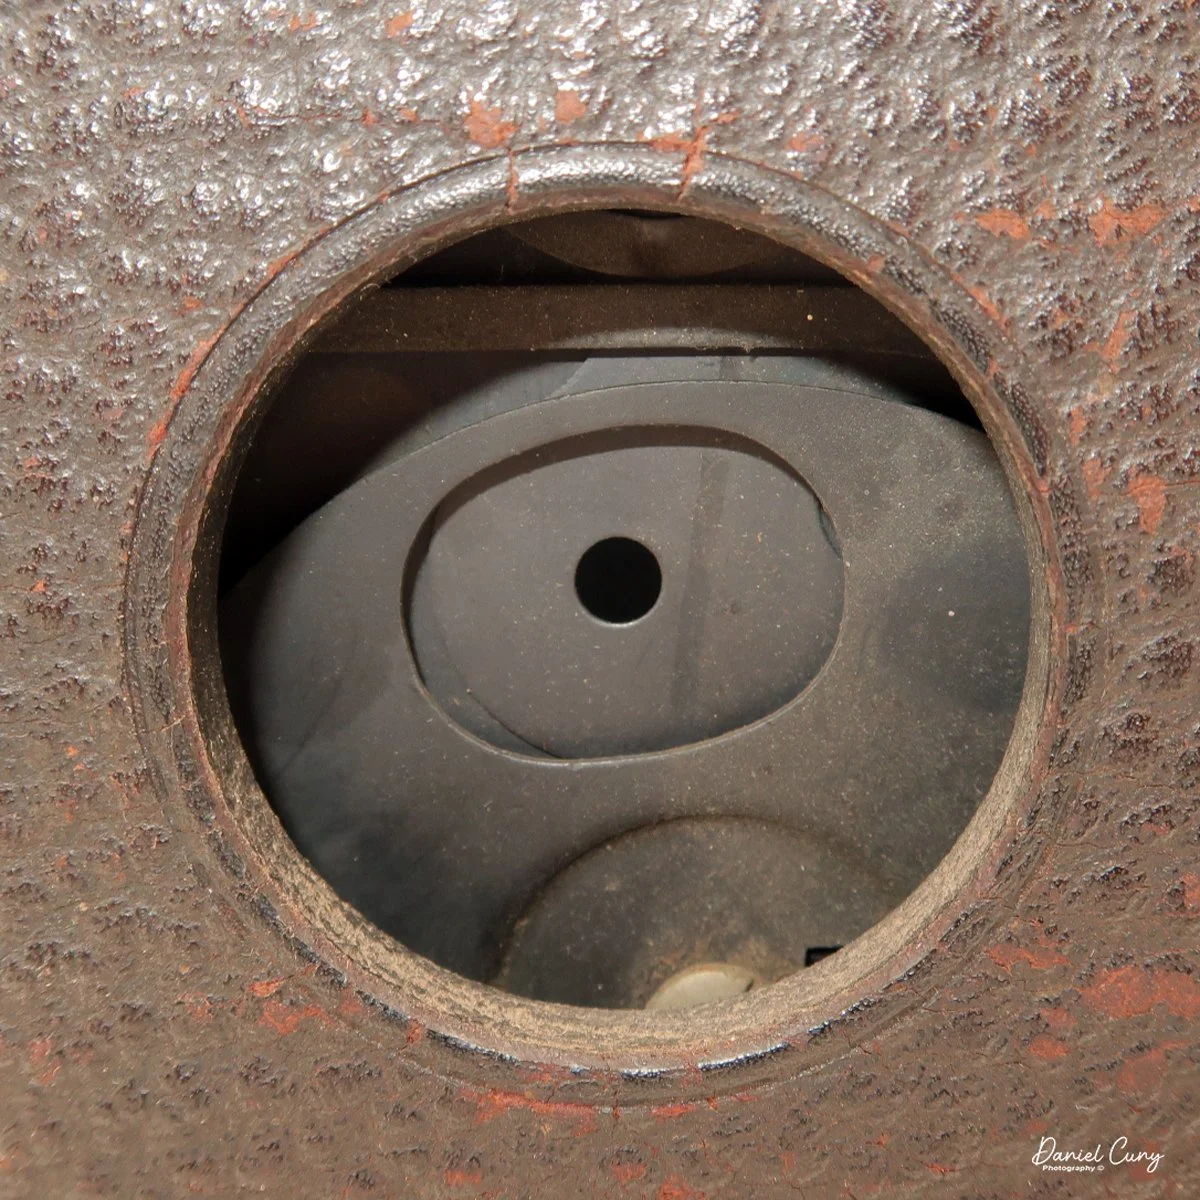
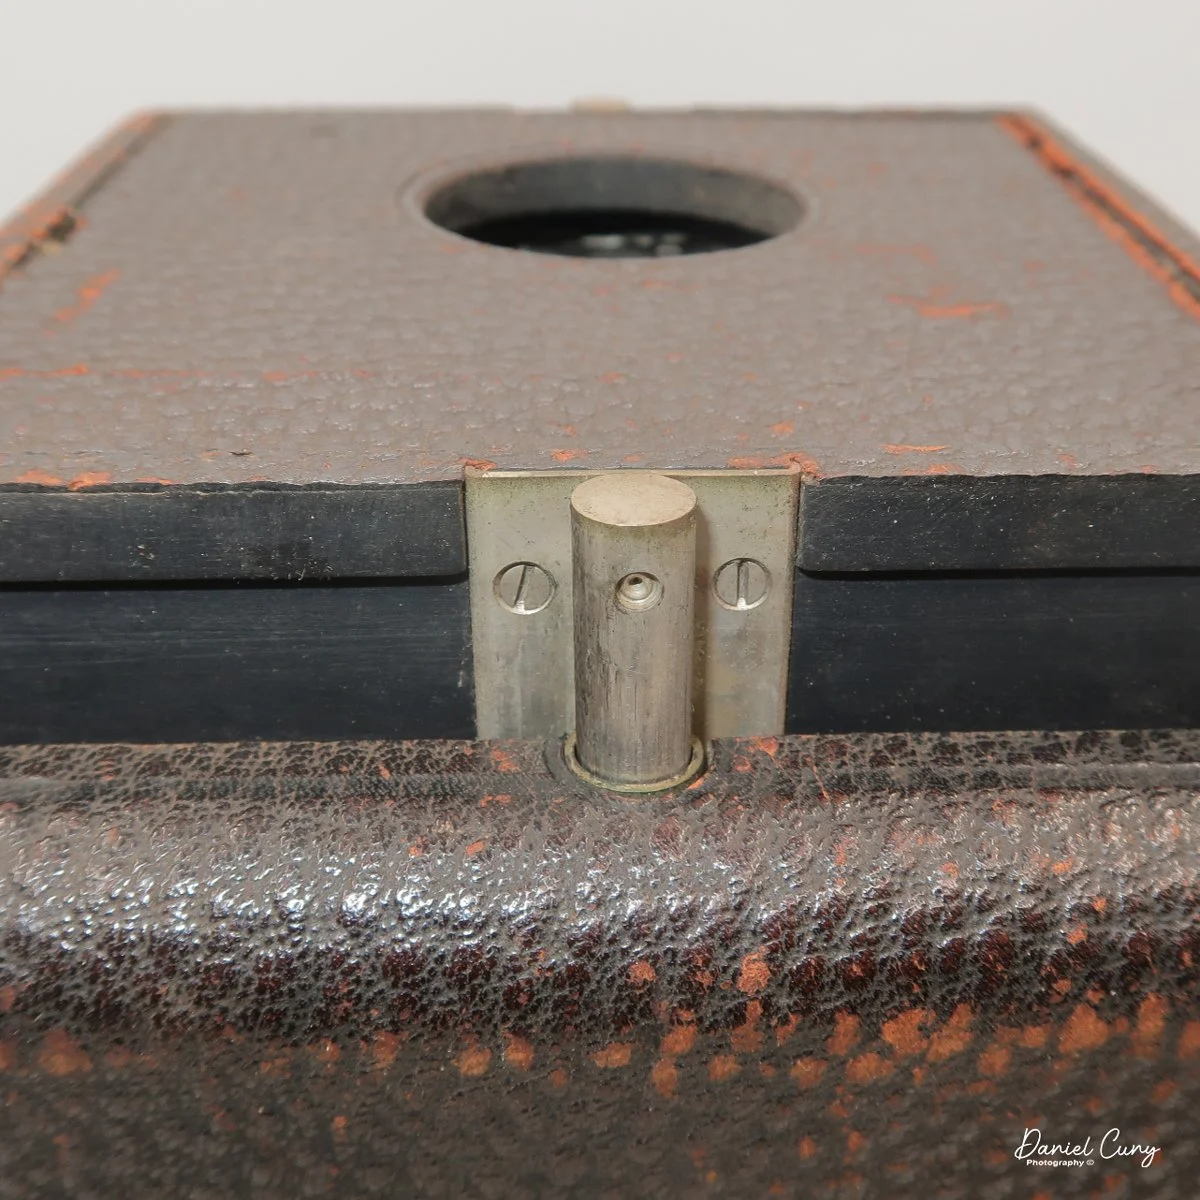
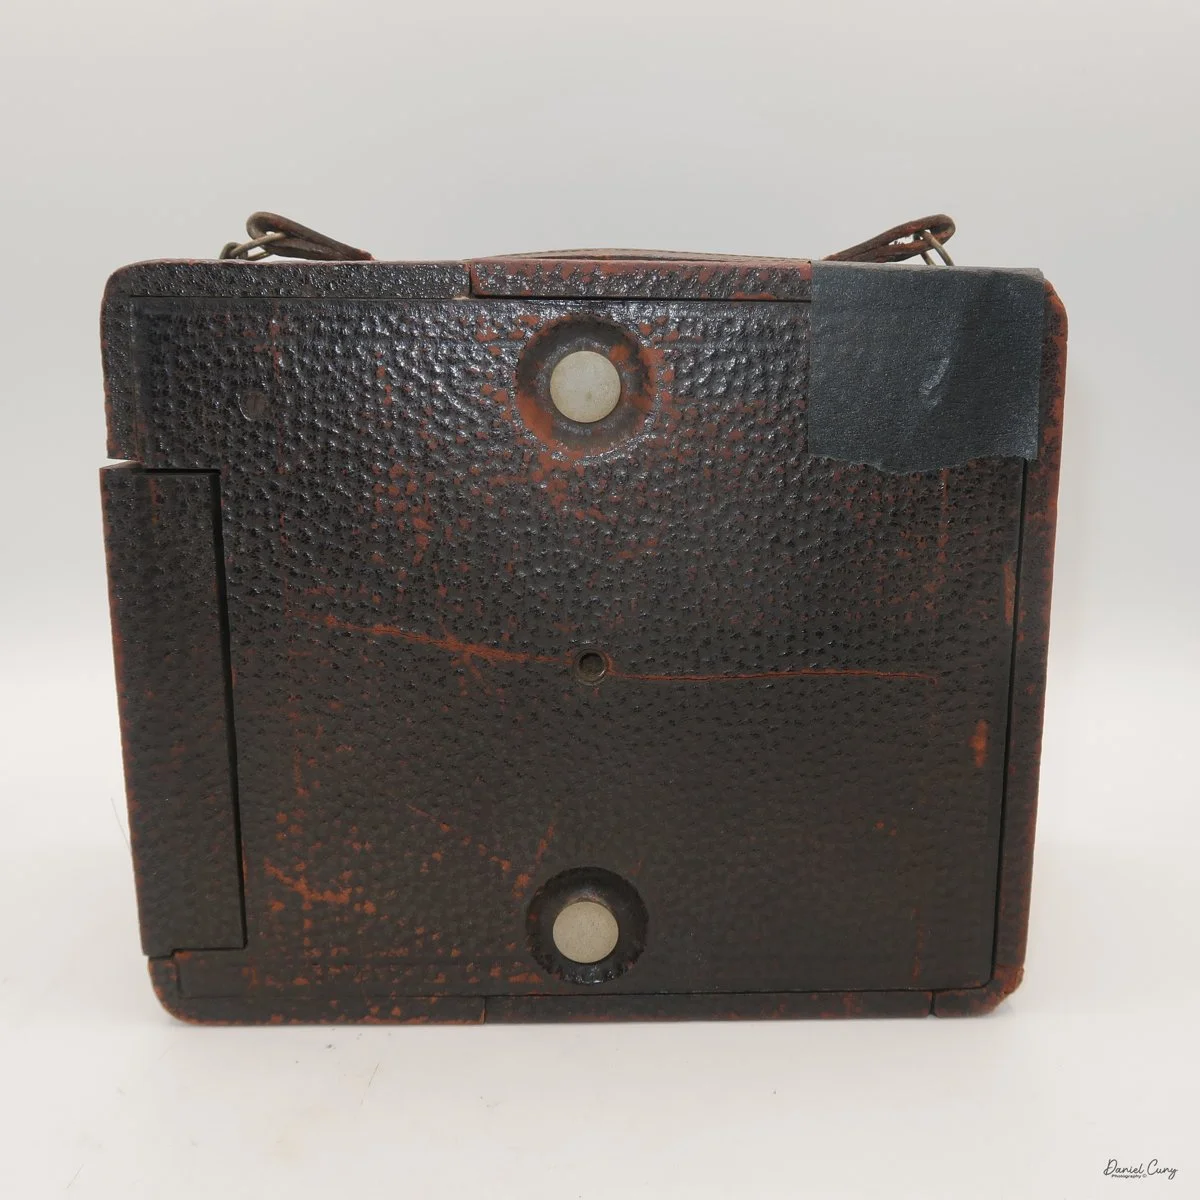
The strap on my camera is broken, and on the right side of the camera is the wheel to set the distance, as you guessed, but unfortunately, the button to focus the camera is missing. I put in a temporary item, similar to a large thumb tack, to activate the "quick focus" mechanism.
Mechanically, the camera focuses quickly when you set the wheel to the proper distance, and the lens springs to the focused position very quickly. At this point, since the camera appeared to be in good working order, I figured it was time to put some film in and write a blog post about it.

It's at this point that I decide to write about a certain camera, only to run into snags that make the process of making images and writing about the camera longer than anticipated. In my younger days, I didn't have the same patience as I do now, as I learned from many similar stories of starting a project: due to unforeseen issues, the process is longer than anticipated.
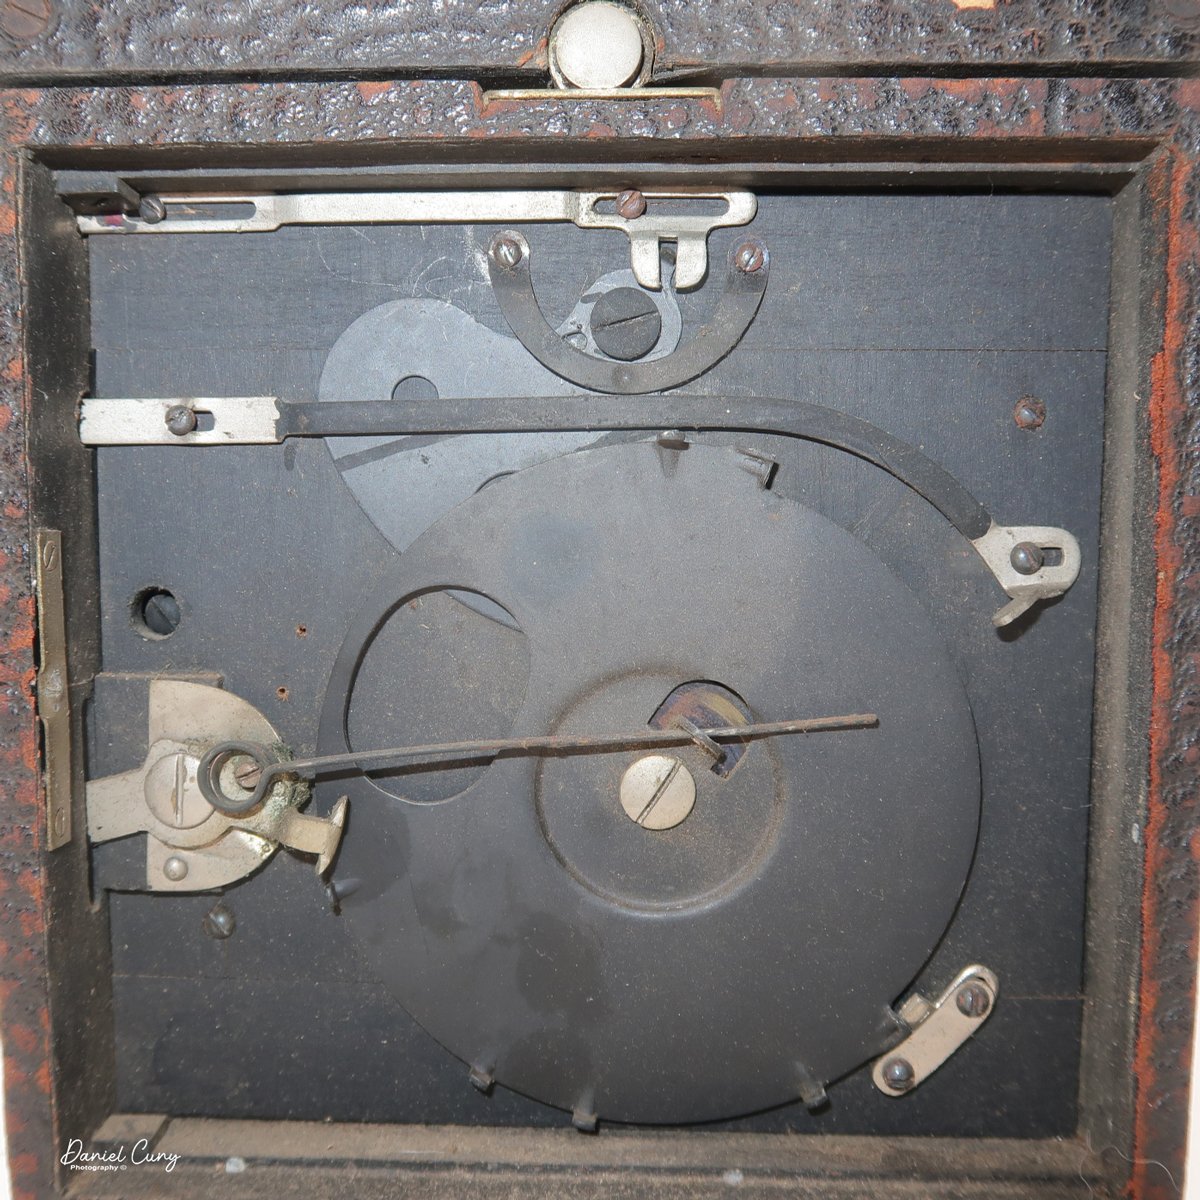
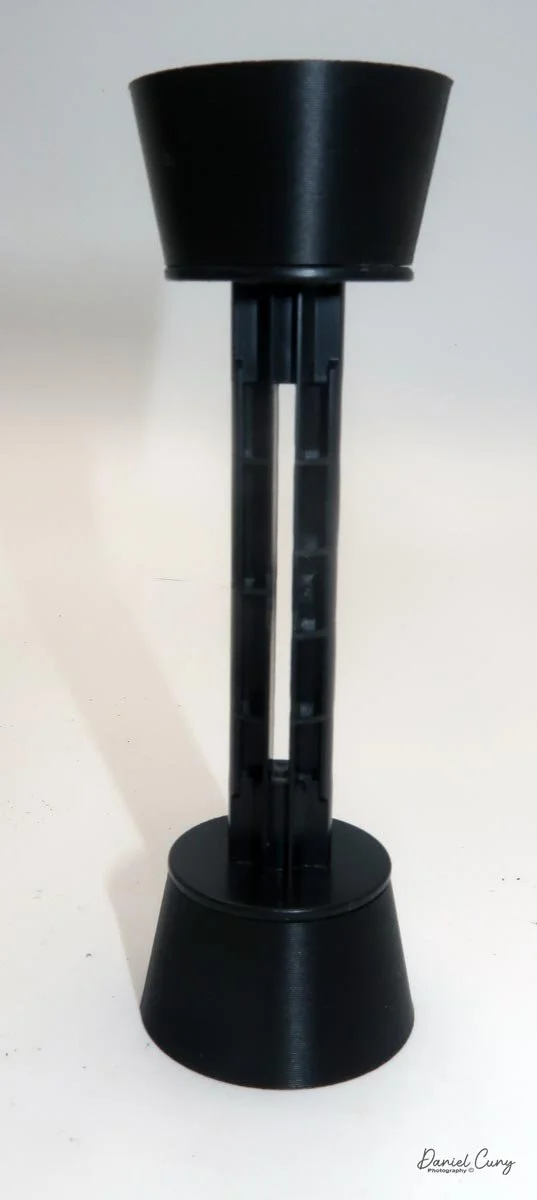
When I took the back off the camera to inspect the film chamber, I noticed the negative size on this camera is enormous. The camera produces a 3 1/4" x 5 1/2" negative, also called "Postcard size," on a roll of daylight-loaded 125 film. On each 125-size film roll, the camera produced 10 images.
Since 125 film is no longer available, I needed to adapt the camera to use a more modern roll film. Online, I found someone who makes adapters for new film to fit into older-style cameras, so I reached out to him, and for a nominal fee, he made me four adapters to fit 120-size film into 125-size cameras. At this point, I will likely purchase a 3D printer so I can do these things myself, but as mentioned earlier, that will pose a whole new set of issues that I'll need to address.

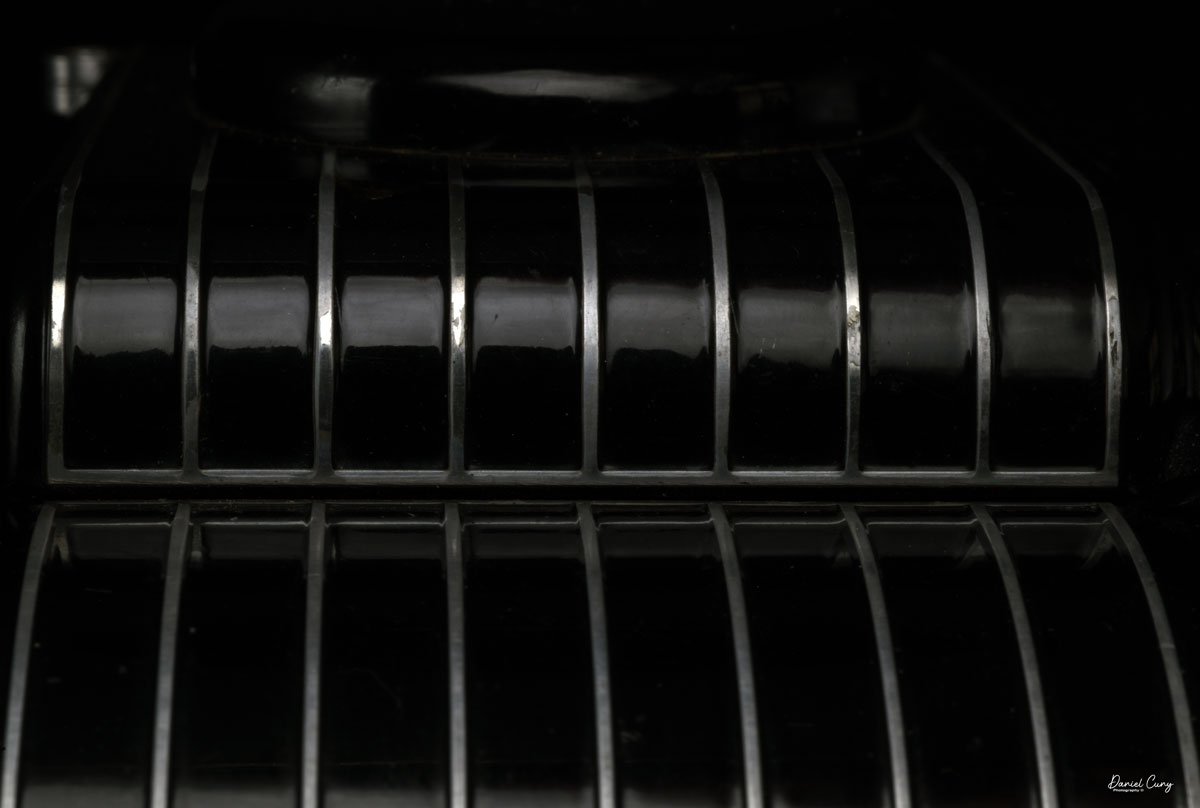
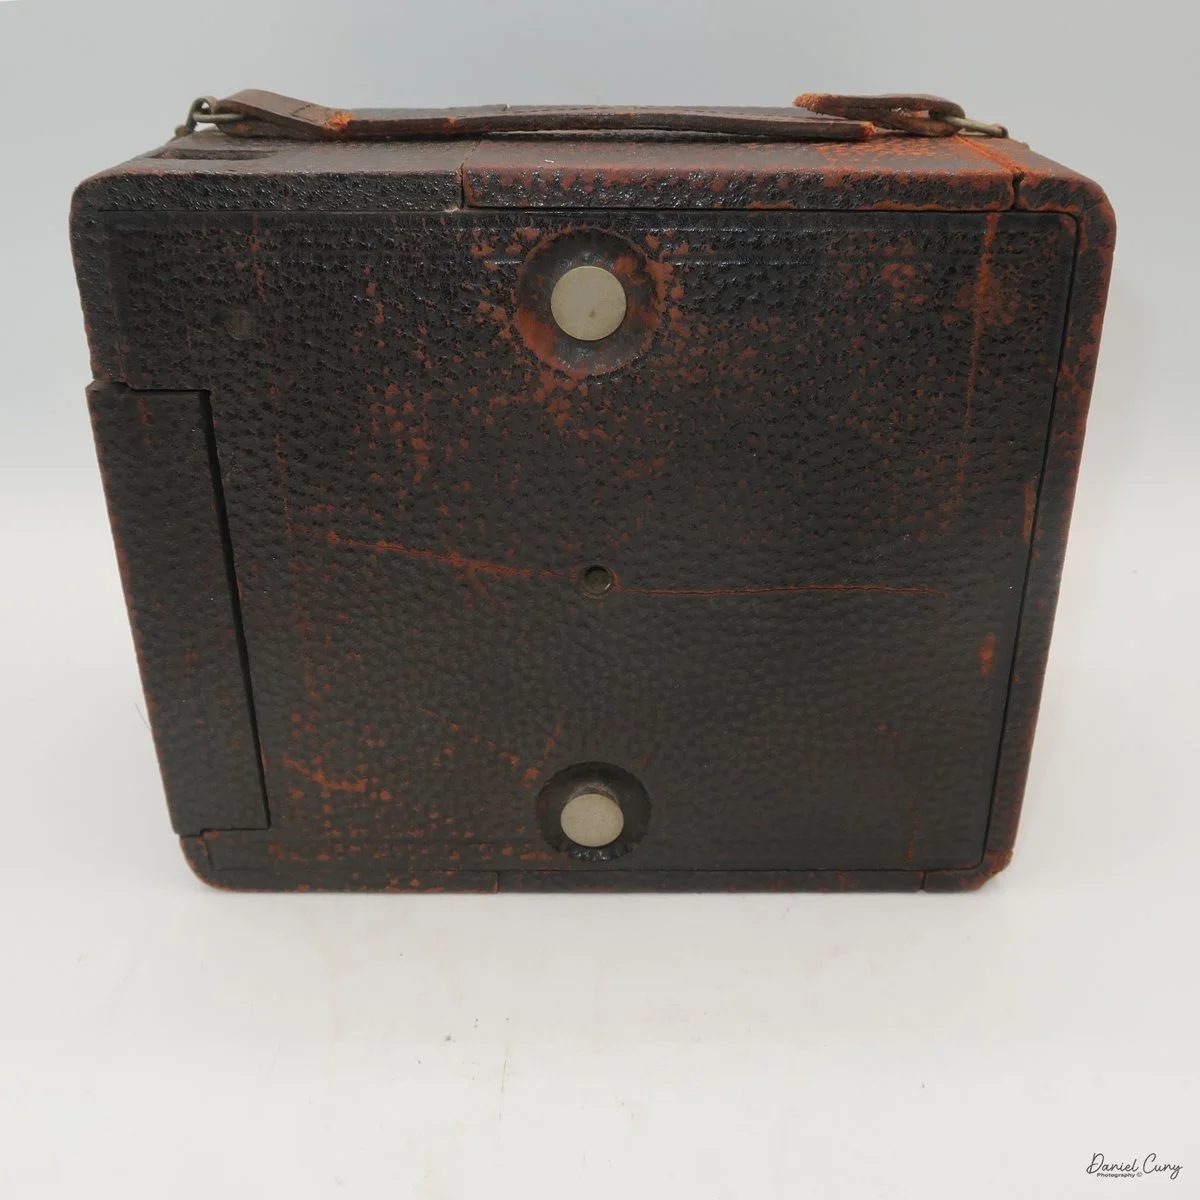
The No. 3B Quick Focus camera has a three-piece hinged back that comes off the camera by pressing in a small button on the top and bottom of the camera, which releases the locking mechanism and allows the camera's back to come off for loading and unloading of film. Due to the age of the camera, one of the hinges is in decent condition, but the other was rather worn, and on one of the times taking the back off, it tore off, and the back was in two pieces, which now needed to be repaired if I wanted to shoot with it.
I purchased some thick, black book-binding tape, a cloth tape that will allow the back to move slightly while staying intact with the other pieces. The tape was applied on the inside and is very flat and non-reflective. With the back fixed, the film adapters made, I needed to mask off the area of the film opening to accommodate 120-size film, so I needed to mask it off to approximately 2.25" across.
At the local hobby shop, I found some black, matte construction paper. I cut the construction paper to the desired length and width, and taped it to the back of the film chamber to mask the excess area needed for the 120 film.
After sitting in a box for more than 20 years, the camera's optics needed a good cleaning, so with Q-tips, lens cleaners, and lens tissues in hand, I gave the viewfinders and lenses a good cleaning, which they desperately needed.
One other thing I needed to figure out was that, since the camera originally used 125-size film, there is a red window on the back so you can tell which frame number you're on. The red window won't work for the adapted 120 film, so I needed to see how much film would be wound per each turn of the advance knob.
I put a piece of paper on the spool and turned it one-half turn, which covered the spool. Then I measured that length and determined that it was approximately 1", so to cover the 5 1/4", I'd turn 3 full turns to get approximately 6" of film across the film area. The one thing I didn't know was how much paper backing there was on each roll before reaching the film itself. This I just guessed at and hoped I'd get 5 images per roll since each negative would be 2.25" x 5.25".
With the camera's back off, I loaded film into the camera, then put the film back on. To guard against any light leaking into the camera through the taped hinge, I put some black painters' tape on the outside as well. Now it was time to go outside and see what the camera could do.
My Results:
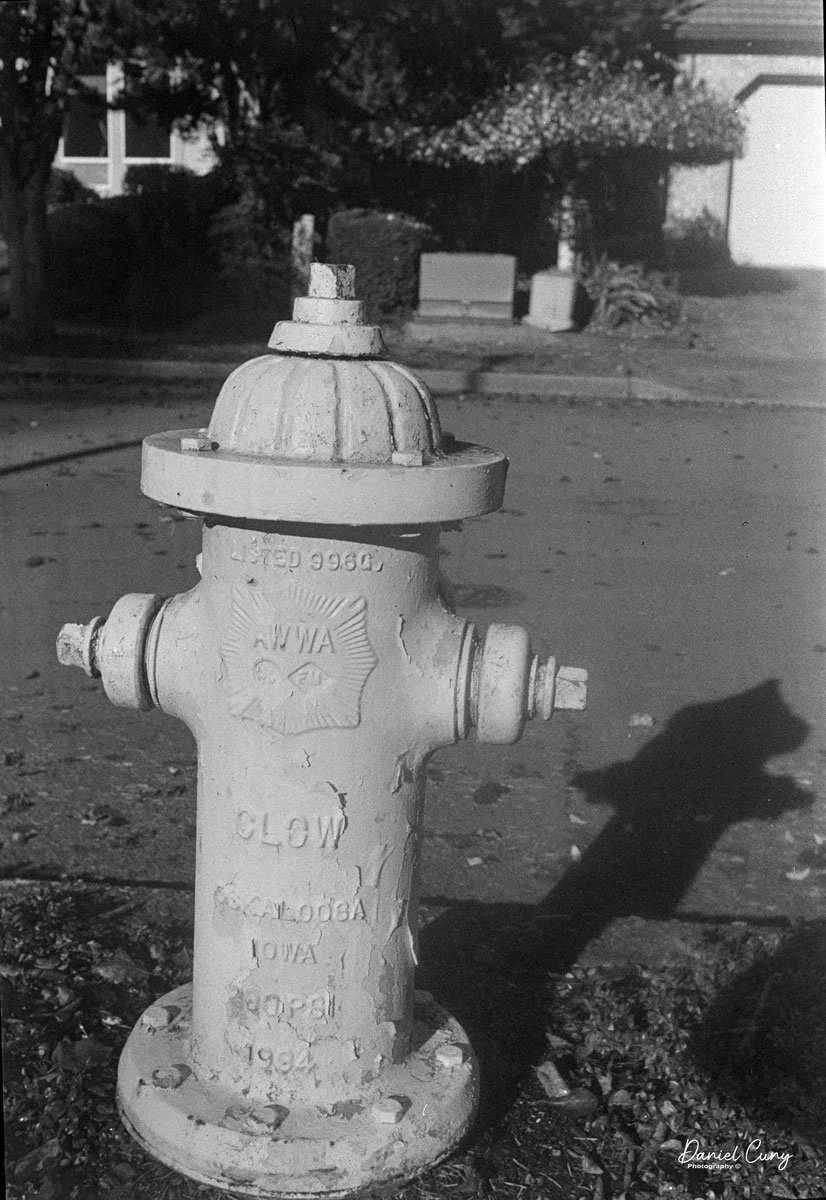
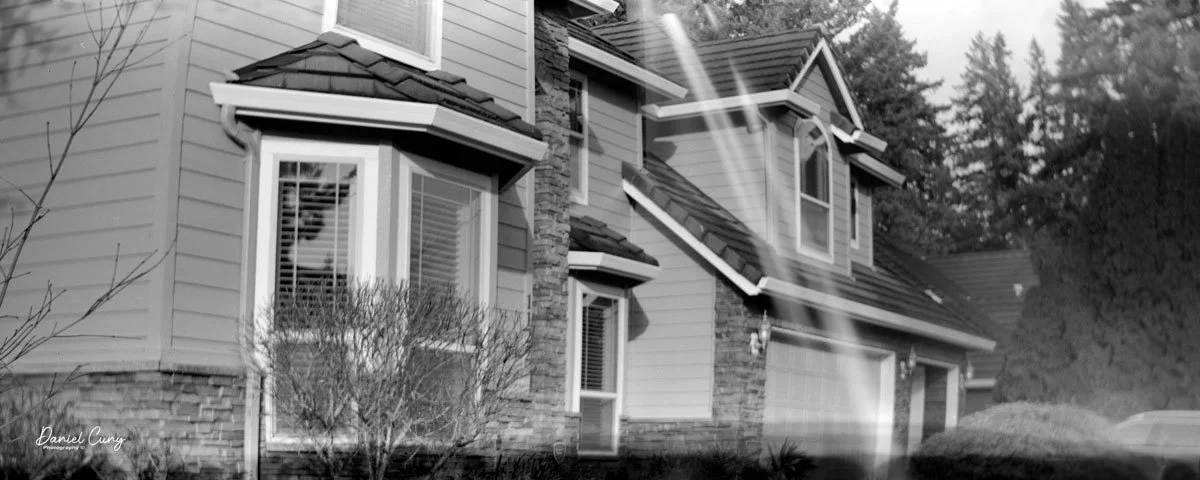
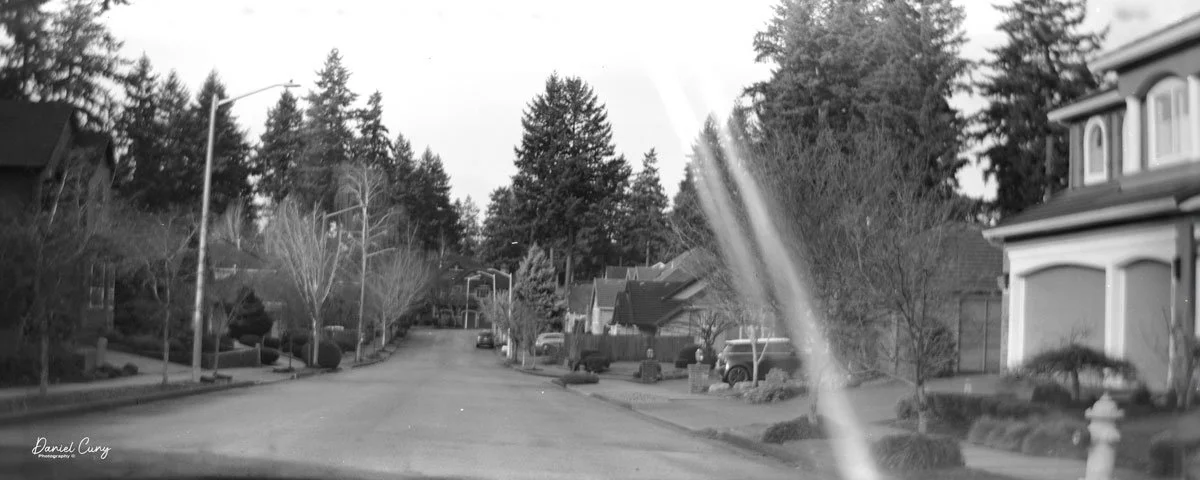
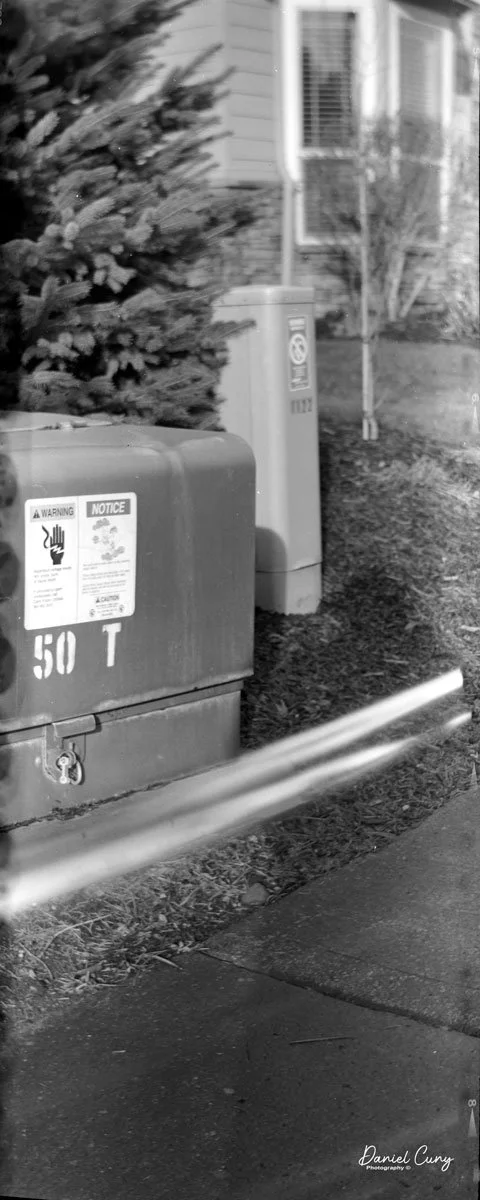
With film loaded in the camera and guessing at the film's approximate starting point, I walked through the neighborhood, estimated the distance to the subject, set the focus wheel of the No. 3B Quick Focus to that distance, and pressed the focus button. The lens sprang to the distance needed, and I took the photos.
Here are the images I took during my walk through the neighborhood, knowing I'd only have 4-5 images to shoot.

Conclusion:
Well, after all that work, I still had light leaks. They are all in the same direction and at the same place, so I didn't plug up any areas with a pinhole that caused the light leak.
Taking the back off the camera and going into a dark room, I shone a light into certain areas around the shutter and the quick focus area. The only spot I saw a light leak was in the top area by the locking mechanism, which the cover itself should have covered.
I'll need to do a bit more poking around to see what I can find, but overall, the images were good, aside from the light leak. I needed to take a few more close-up shots to check focus, but from what I can see, it turned out well, and it's a fun camera to shoot with.
Overall, a fun and very good learning experience working with a 115-year-old camera.
Thank you for taking the time to read about this camera and the issues I had to resolve to get it back to a usable state for shooting.
Here's a link to my other Camera Reviews.
Cuny's Cameras and Photo is my eBay online shop, where I sell cameras I've reviewed, along with other camera and photo oddities I've accumulated over my 50-plus years.
Until next week, please be safe.