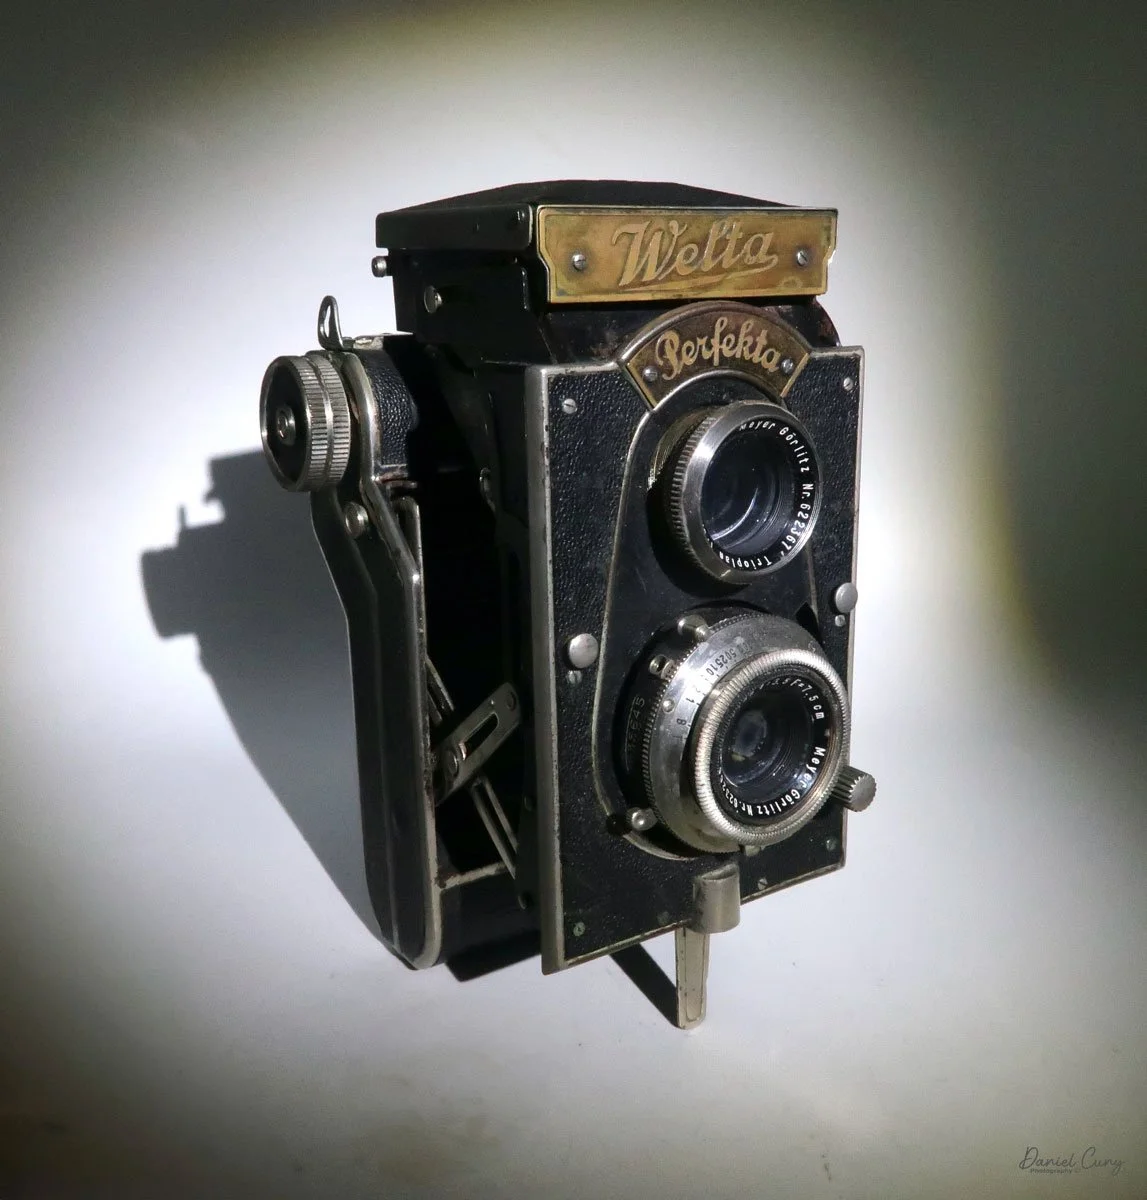
My Zeiss Ikon Ikoflex III camera
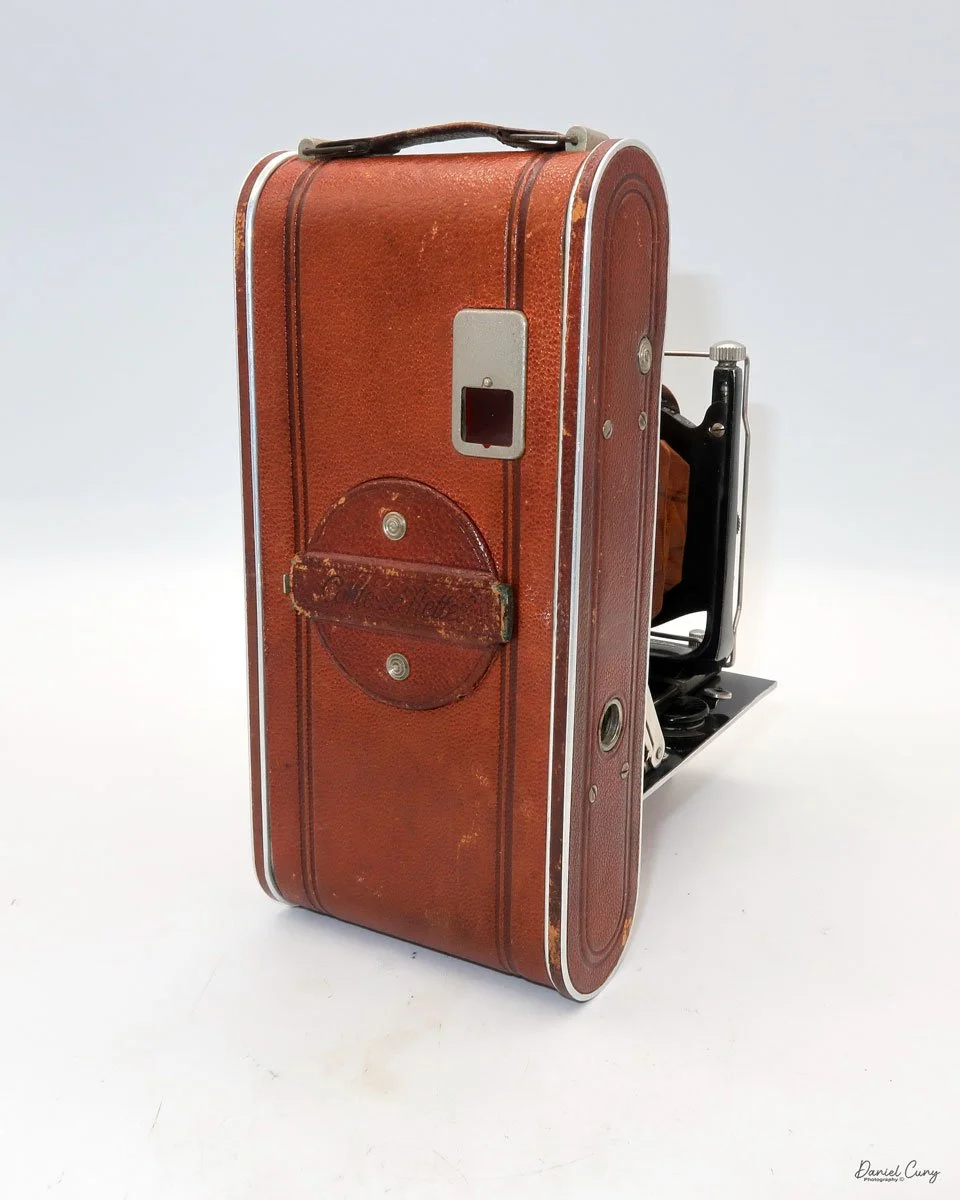
My first real camera, a Univex Uniflex, was a gift from my Uncle Bud, my mother's younger brother. He was a free-spirited soul, living a bohemian lifestyle that left a lasting impression on me and my older brother. This camera, a symbol of his unique spirit, became my gateway to the world of photography.
Uncle Bud was the photographer in the family gatherings, went to art school in Chicago, where he met his wife, made wine, went antiquing, purchased an old school bus, and was converting it into a camper for the family, was health-conscious, all of this in the 1960s, as I was young and impressionable.

I tell you this because the Univex Uniflex was a somewhat inexpensive twin-lens reflex camera that I used for many of my early years taking photos, so the twin-lens reflex style has always felt comfortable to me. I've always enjoyed looking through a larger viewfinder and framing my subject, albeit backward when looking down into the camera. It's similar to looking through a view camera, although the view camera isn't backwards, just upside down.
Last week, as my wife and I were in Yosemite and the San Francisco Bay Area. One of the reasons we went there was that on the first Sunday of the month, there's a large flea market in Alameda, which I miss since moving away from the area about 9 years ago. I planned the trip partly to visit the flea market and look for cameras and other photo items.
I arrived at the flea market early and started looking over the many tables. At one of the tables, I found this fantastic Zeiss Ikoflex III camera I've been looking for for many years. As I picked up the camera, the shutter worked at higher speeds and lagged at lower speeds. The lens was clean and the transport worked well.
After a bit of negotiation, I left the flea market with the Ikoflex III and a few other small items. The joy of this find was so great that I couldn't wait to share it with you, my fellow camera enthusiasts. Even though I had recently written about the Zeiss Contaflex camera, the Ikoflex III was a gem that I couldn't wait to put a roll of film into and share its story on my camera blog.
Ikoflex History:
The Zeiss Ikoflex emerged in 1934 as Zeiss Ikon's direct answer to the burgeoning success of the Franke & Heidecke Rolleiflex. The inaugural model, affectionately nicknamed the "Coffee Can" for its distinctive upright, cylindrical body, marked a departure from the more conventional TLR design. This initial offering was a clear statement of intent from the German optics giant to compete in the professional and enthusiast photographer market.

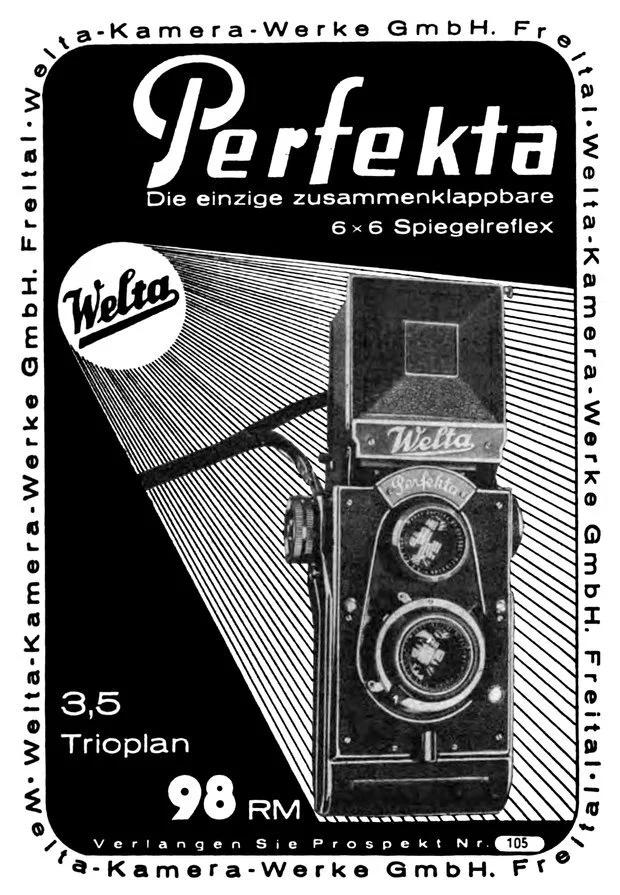
Ad for Zeiss Ikon Ikoflex III camera
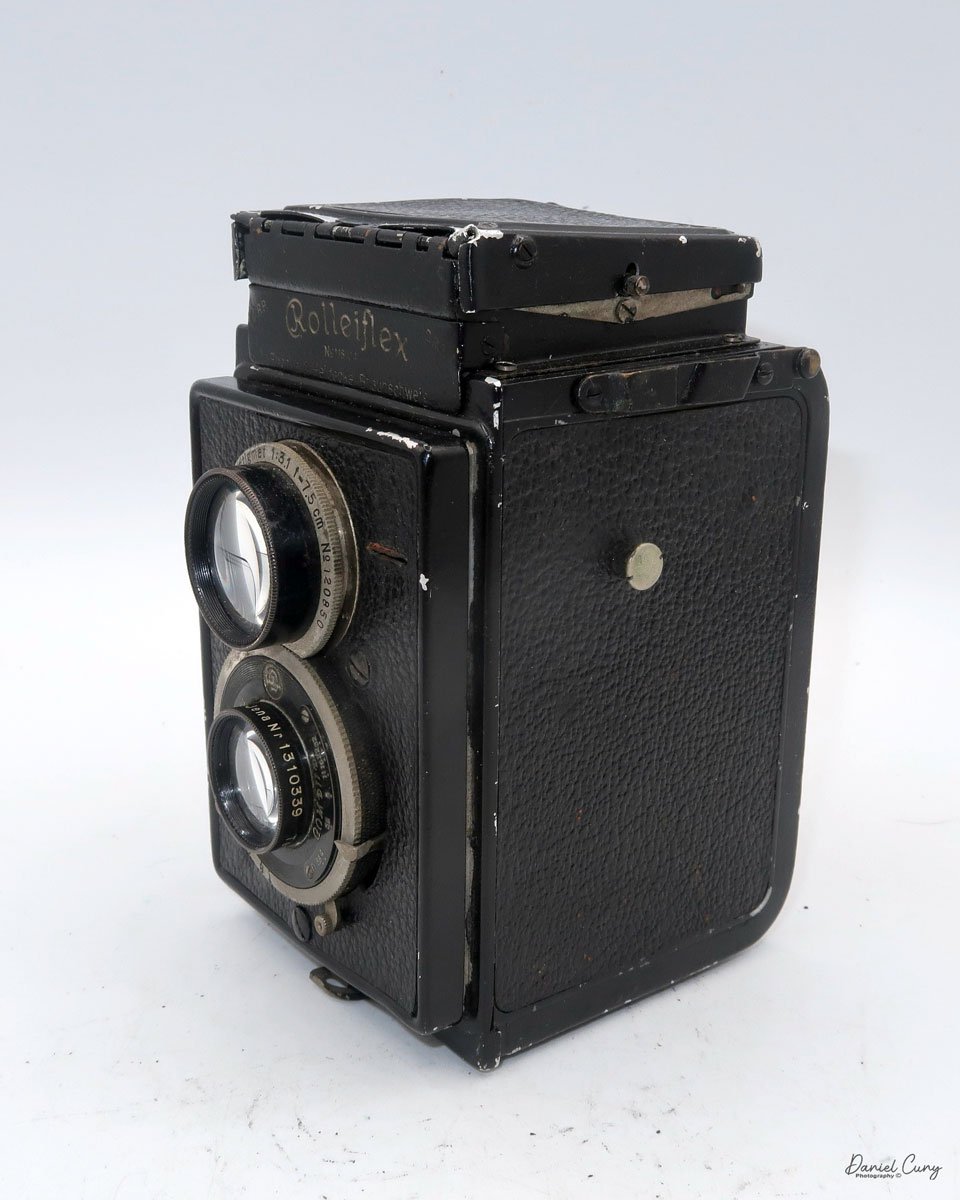
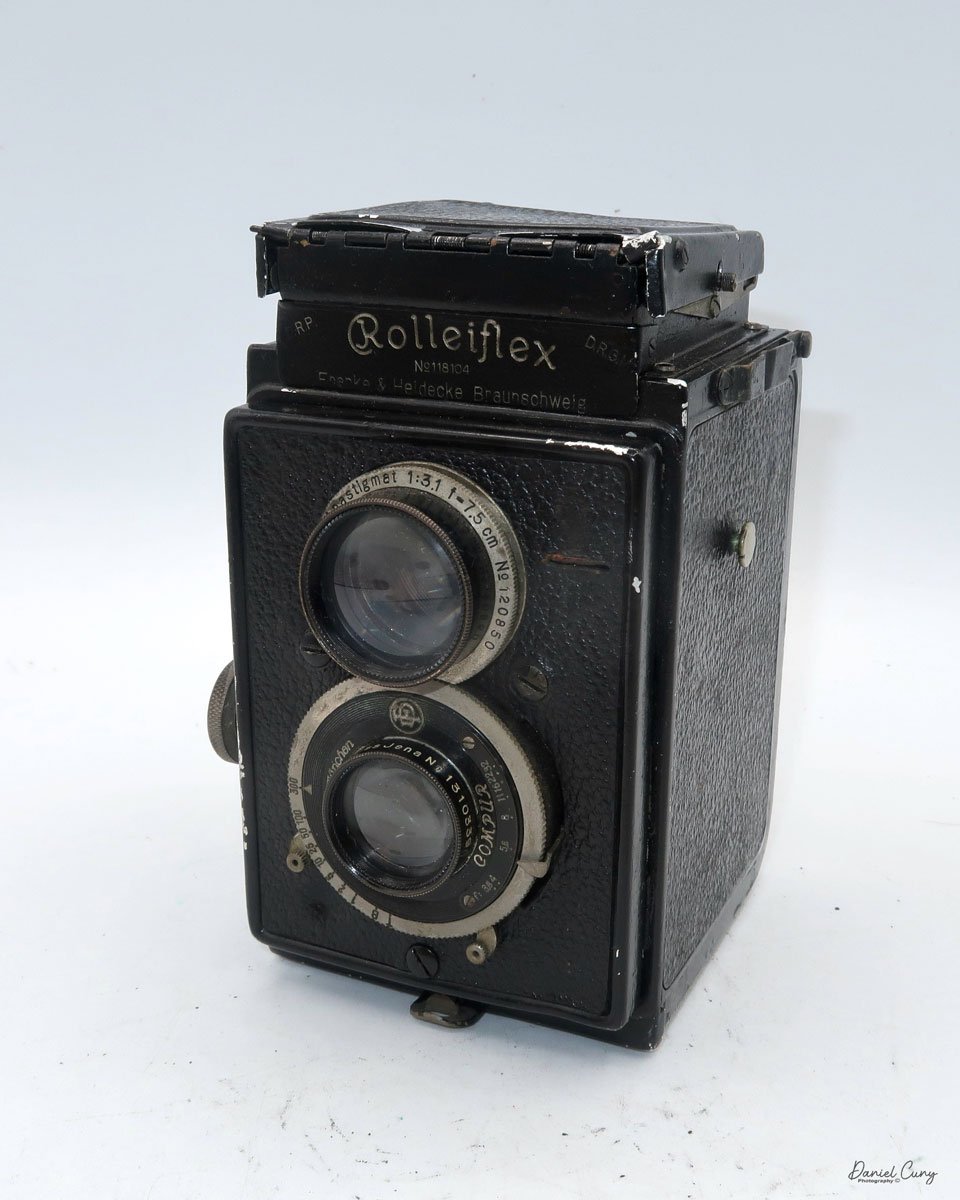
Throughout its production, which spanned until 1960, the Ikoflex series underwent significant evolution, with a clear demarcation between its pre-war and post-war iterations. Before World War II, Zeiss Ikon introduced several models, progressively refining the design and features. The early lever-wind and knob-wind "Coffee Can" models gave way to more streamlined, traditionally styled TLRs. These pre-war cameras often featured high-quality Zeiss lenses, such as the Tessar and Novar. They were equipped with Compur or Klio shutters, offering photographers a range of options in terms of both price and performance. A notable pre-war innovation was the Ikoflex III, introduced in 1939, which boasted a fast f/2.8 Tessar lens and a unique Albada direct-vision viewfinder integrated into the focusing hood, setting it apart from its contemporaries.
Following the end of the war, Zeiss Ikon resumed production in West Germany and continued developing the Ikoflex line. The post-war models, such as the Ikoflex Ia and IIa, reflected the technological advancements of the era. These cameras often featured coated lenses for improved contrast and flare reduction, as well as synchronized flash capabilities. The final models in the series, like the Ikoflex Favorit, even incorporated a built-in, uncoupled light meter, a significant feature for the time.
Despite its innovative features and the esteemed Zeiss pedigree, the Ikoflex line always existed in the shadow of the Rolleiflex. While highly capable and well-regarded for their robust build and excellent optics, the Ikoflex cameras ultimately ceased production in 1960, leaving behind a legacy as a compelling, if not dominant, force in the golden age of twin-lens reflex photography.
My Camera:
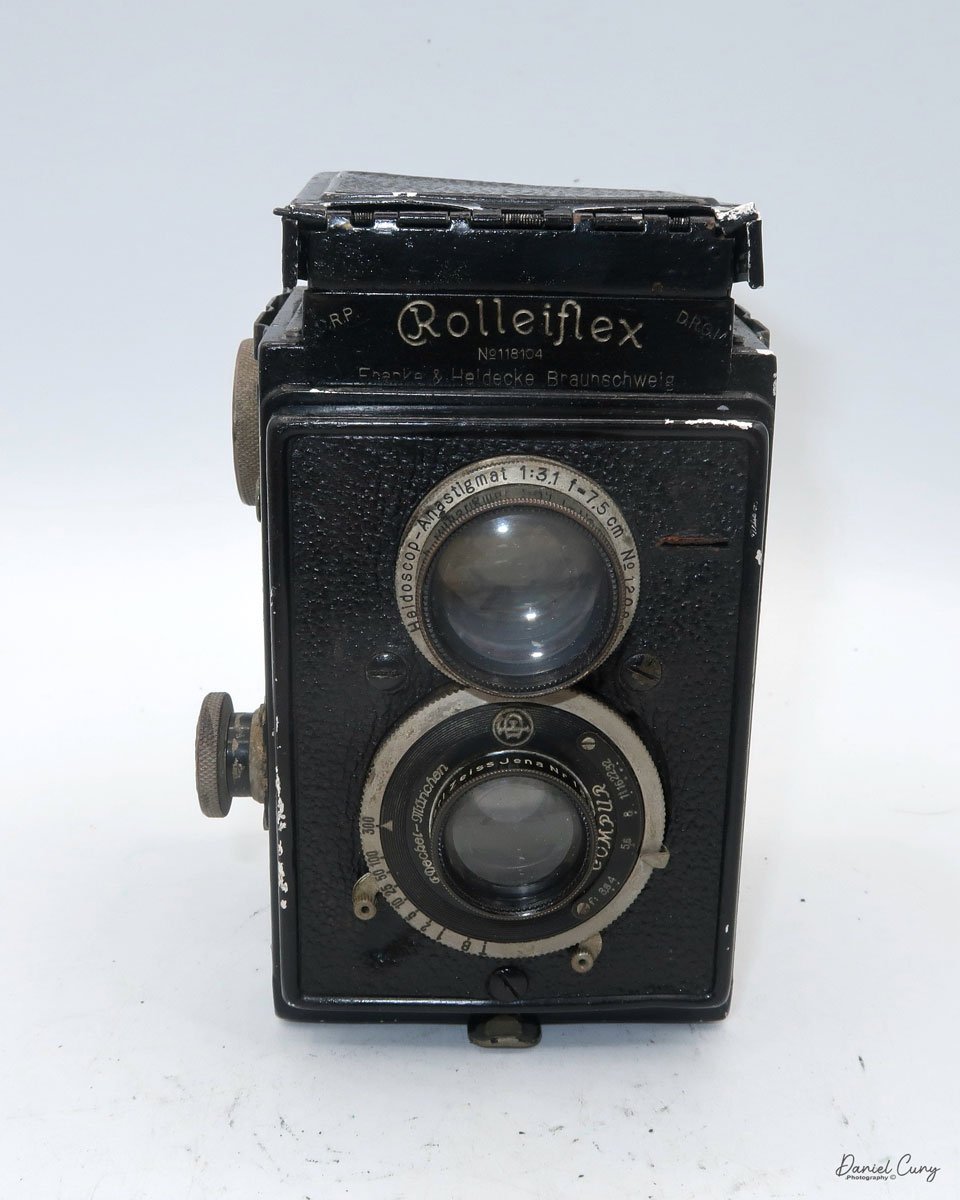
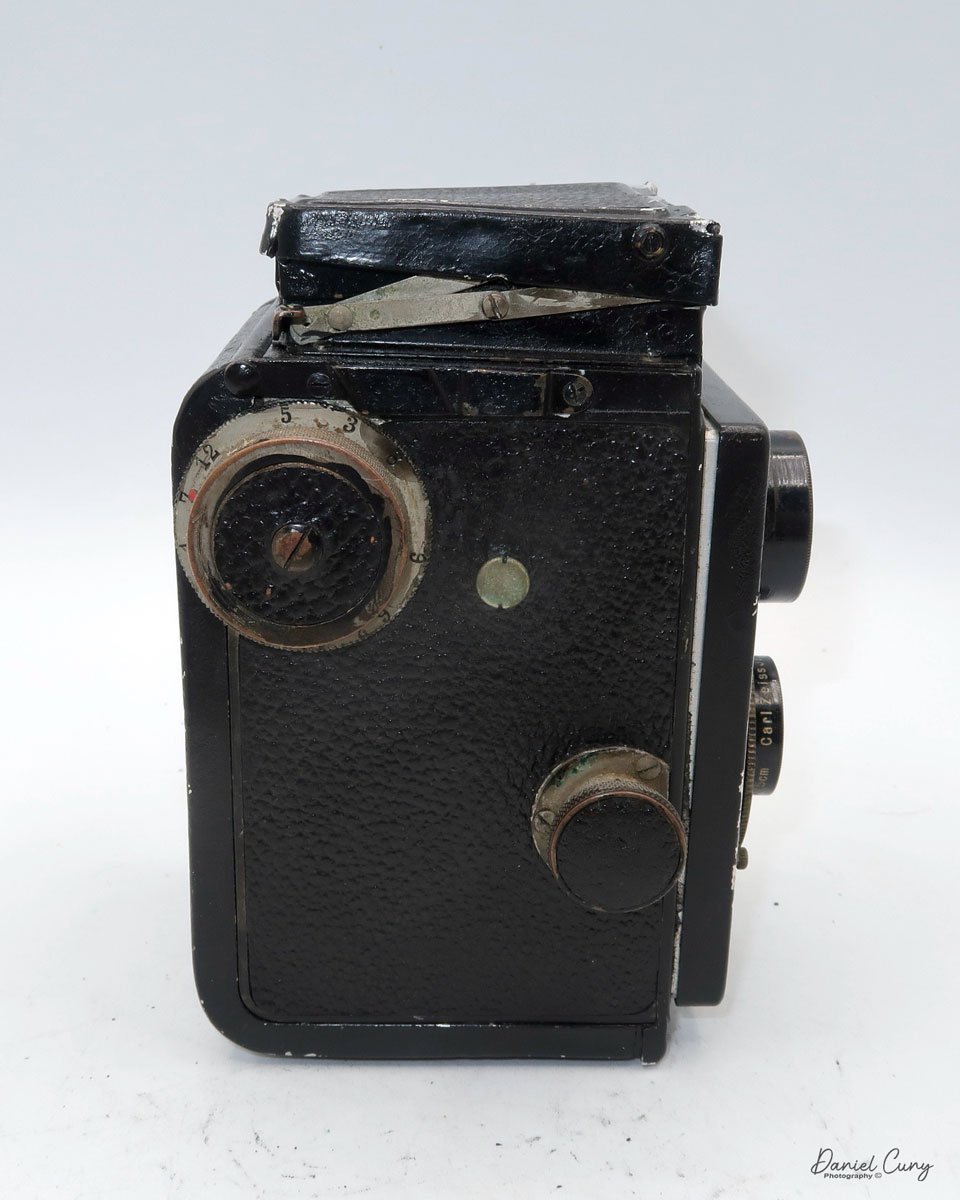
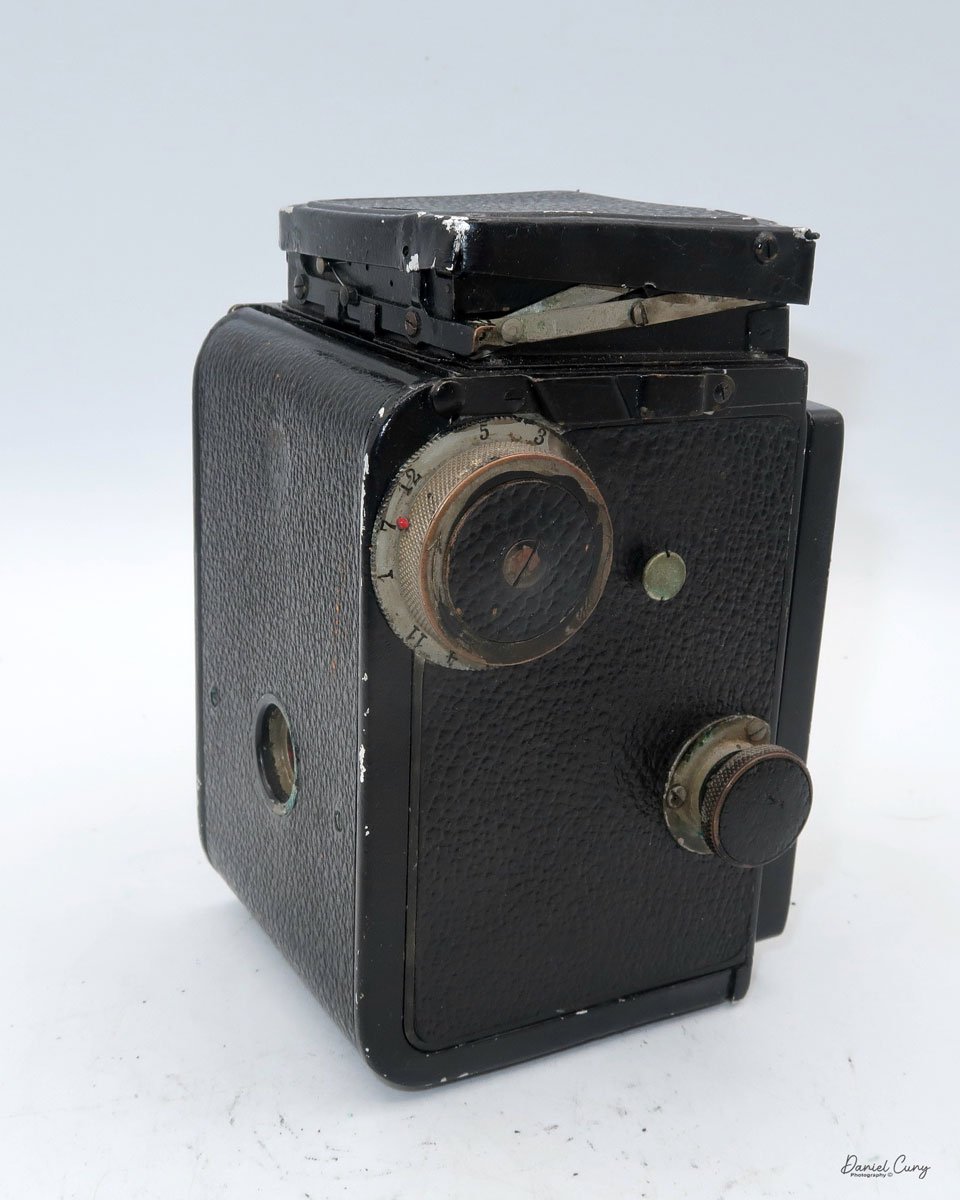
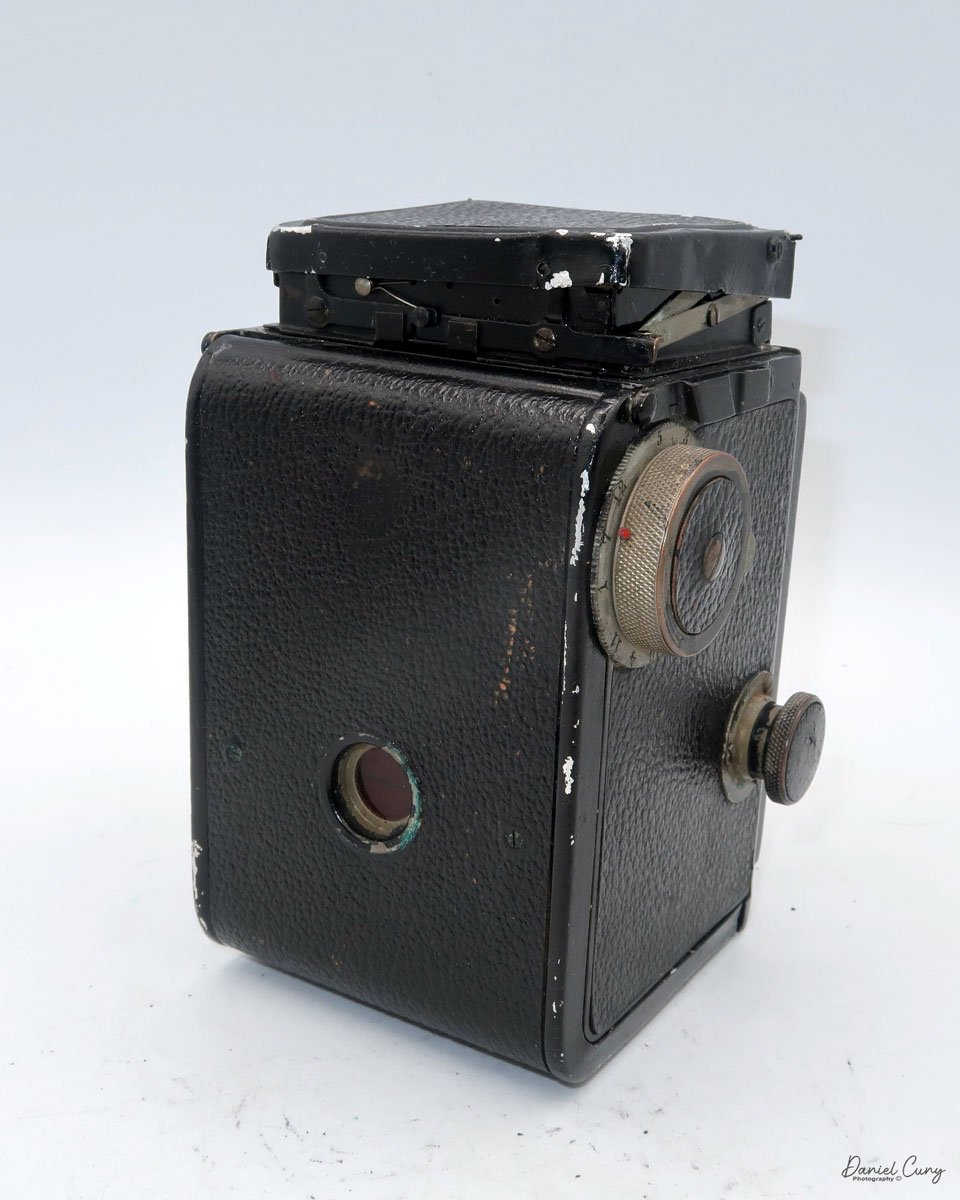
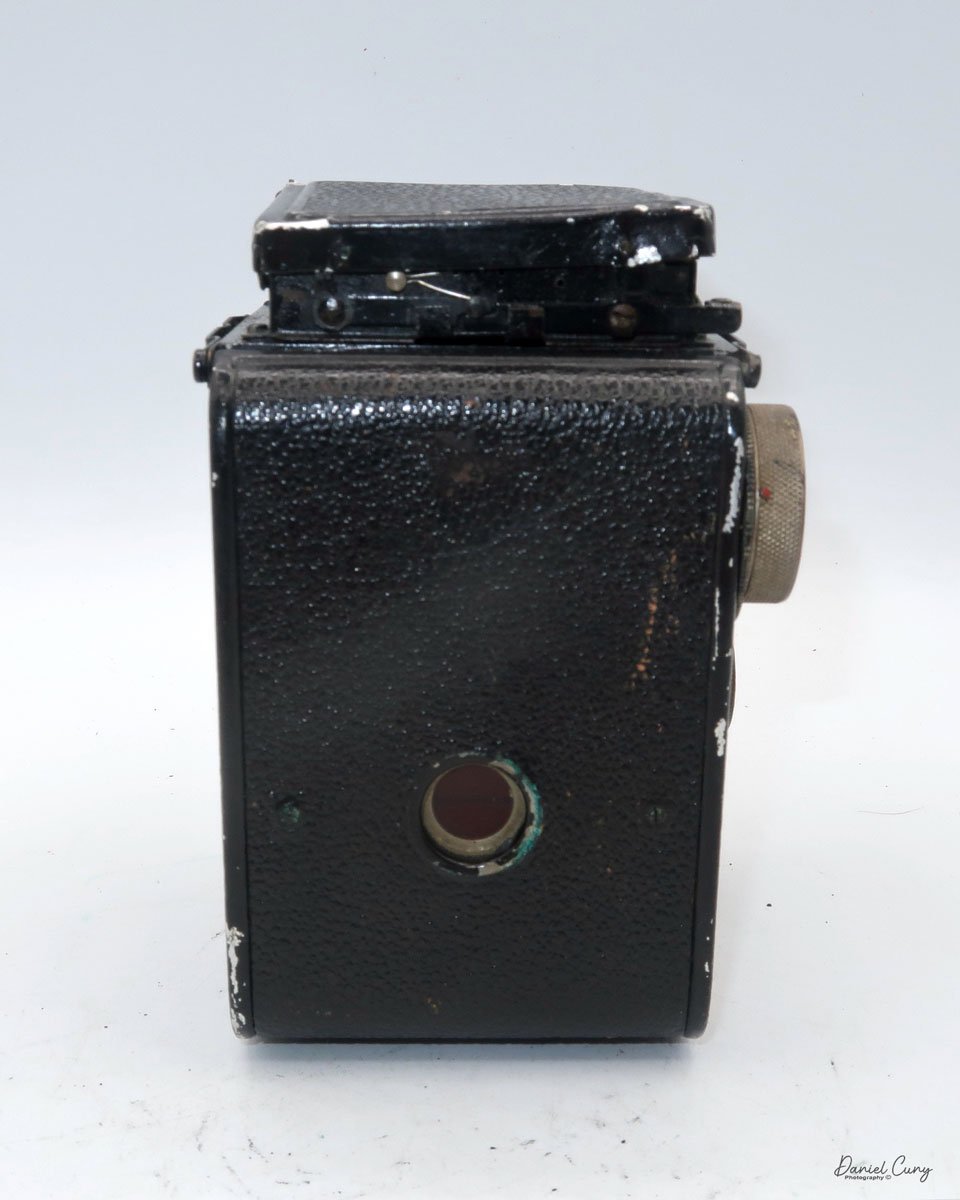
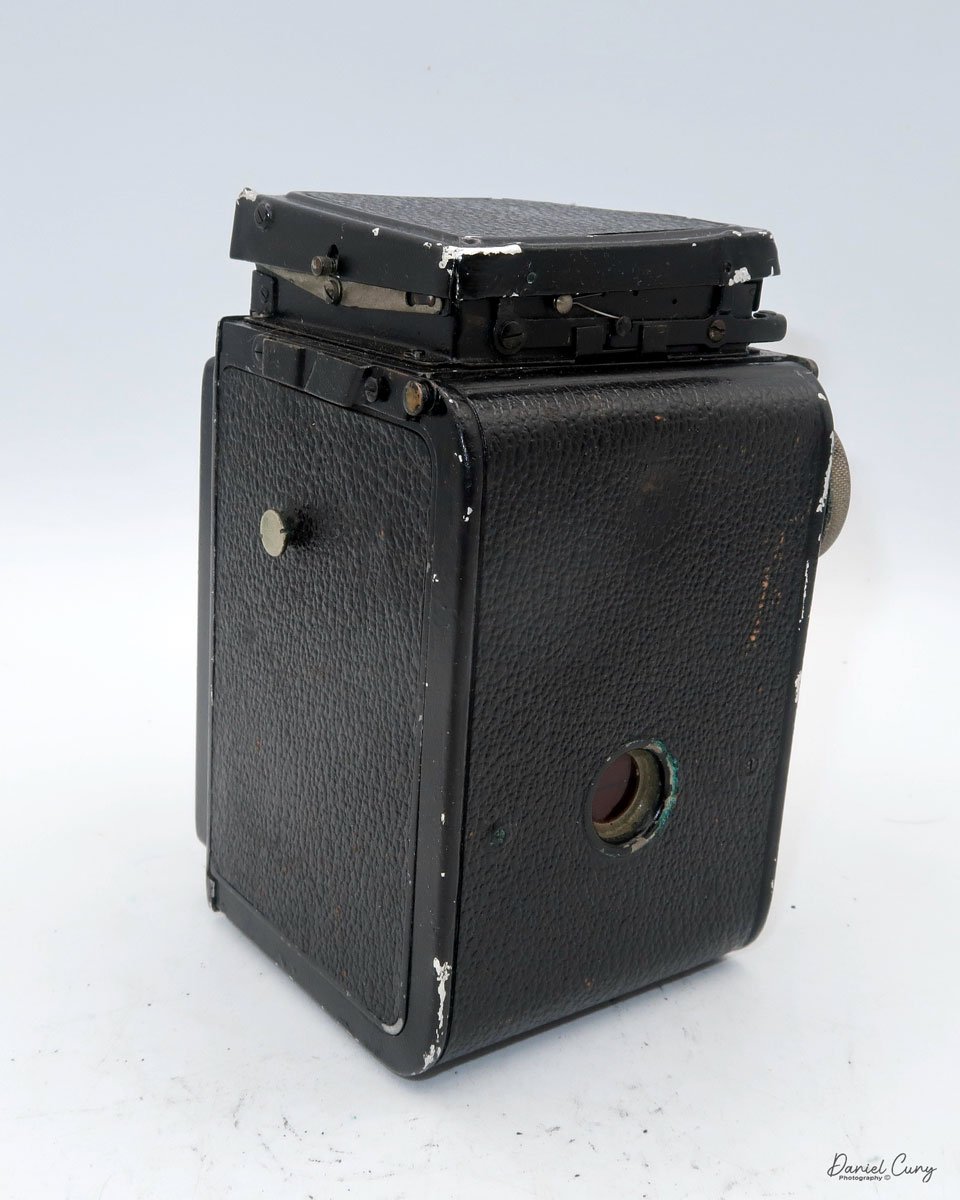
My Zeiss Ikon Ikoflex is in very good condition, except for some of the slower shutter speeds, which I'll exercise and hopefully bring back to life; otherwise, I'll have it CLA'd. The camera's serial number is 836152, and it has a Carl Zeiss Jena Tessar 8cm f/2.8 lens, serial number 1851589. The camera is 6" tall when the light chimney is closed and 8" tall when it is open, by 4" wide, including the focus knob and film winding lever, and by 4.25" deep when the camera is focused at infinity.


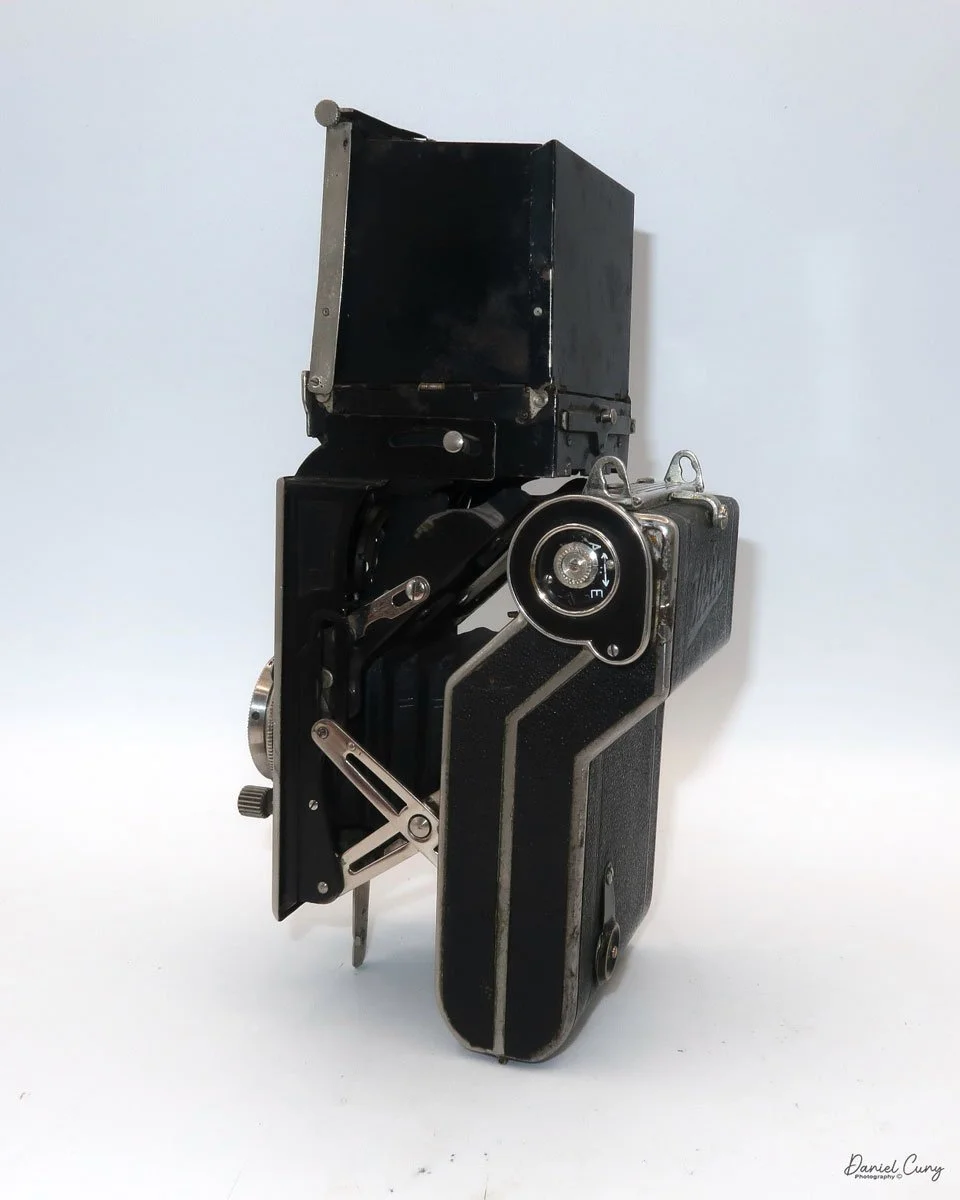
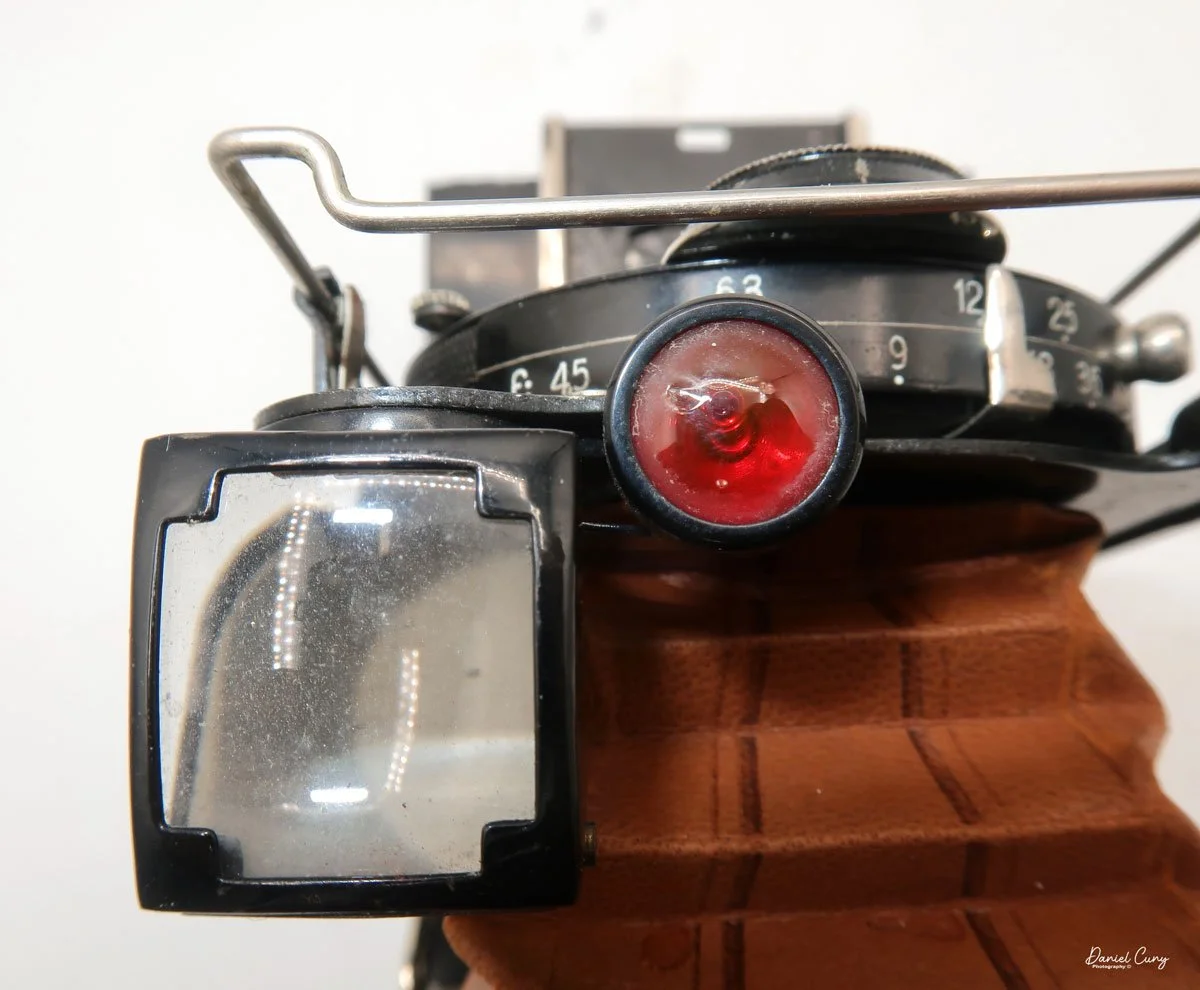
To open the light chimney and look into the viewfinder, on the back of the camera, behind the closed chimney, is a button to press to open it. Unlike many twin-lens reflex cameras, the light chimney opens from the front rather than the rear, which I find interesting. On the right side of the back wall, the small switch locks and unlocks the flip-up magnifying glass for critical focus on the ground glass. On the side walls of the light chimney are "Zeiss Ikon" on one side and an exposure index on the other.
If you want to use the Albada sports finder, it shows bright frame lines as you peer through it, and the front of the light chimney is a very polished, mirror-like surface, very similar to the previously mentioned Zeiss Ikon Contaflex TLR camera. To close the chimney, fold down the sides, then the front, and finally the rear portion.


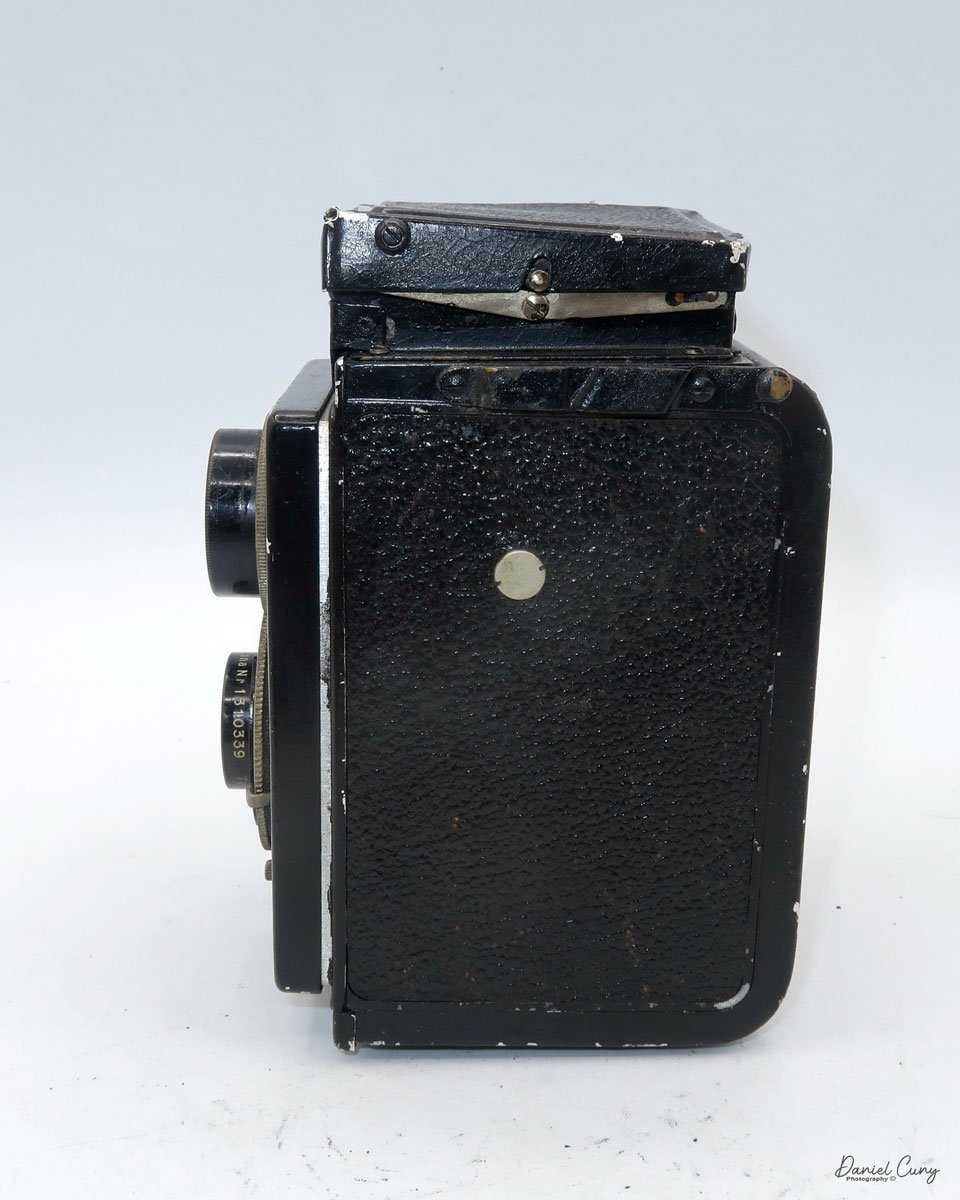
Similar to the Rolleiflex, both the aperture and shutter speed settings can be viewed when peering down the light chimney. Two separate windows show the aperture setting on the left and the shutter speed on the right. To move either setting, there's a lever on each side of the lens; slide it up or down to change the setting. The shutter speeds go from 1/400 to 1 sec, along with "B" for timed exposures. The aperture goes from F/2.8 to F/22. Just behind the shutter-speed slider is the cable release socket. Just to the right of the lens is a small round window that shows black when the shutter is tripped, and red when the shutter is cocked and ready to shoot.


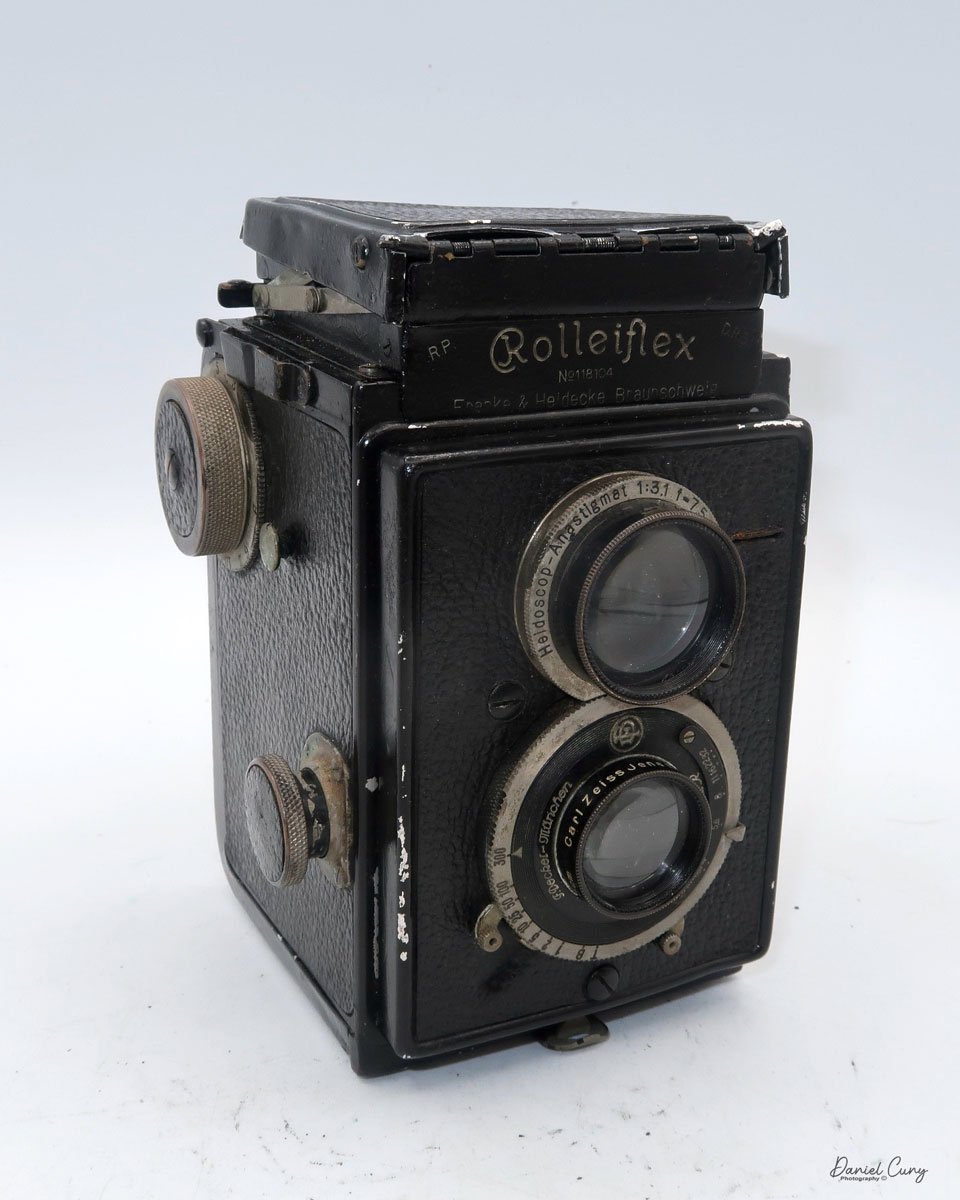
On the right side of the camera, from top to bottom, is the frame counter in a stylized circular window, placed directly behind the shutter release. To activate the shutter, you press down on the shutter release to take the photo, which I prefer to pressing into the camera's body. The main object on the right side of the camera is the transport/winding lever. It is so much more than just a film transport lever; it also cocks the shutter with only about half a rotation.


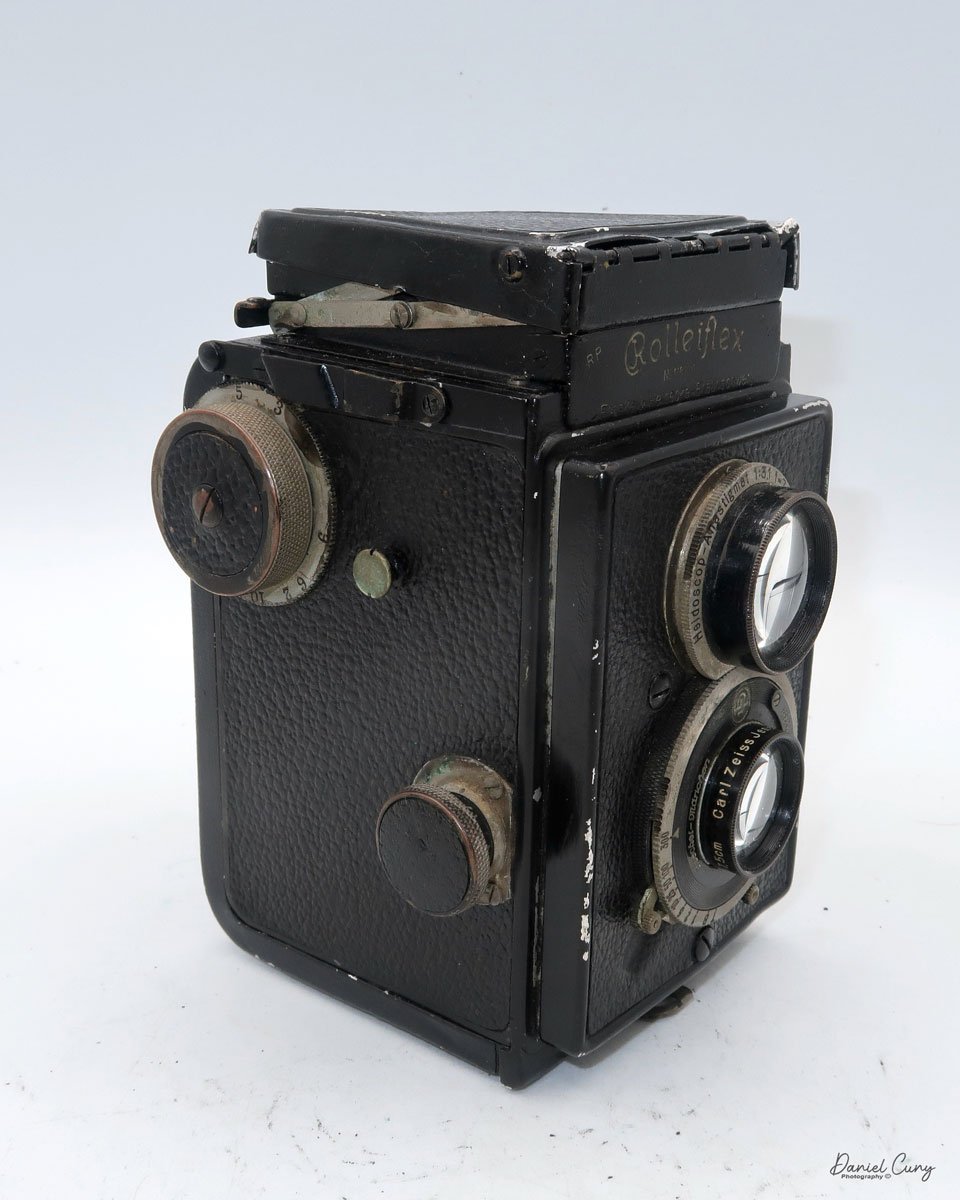
On the left side of the Zeiss Ikon Ikoflex II camera is the focus knob, which has a minimum focus distance of 4' to infinity. Just above the focus knob is the depth-of-field scale for the different apertures. Above and below the focus knob are two knurled knobs that can be pulled out to load and unload the film once the back of the camera is opened.


To open the back of the camera to load the film, there is a small disk on the back that is pulled down to open the back. The back will flip down, unlike Rolleiflex cameras, where the back pulls up. Loading the film is just like any other twin-lens reflex camera. Once the new film is on the bottom, bring the lead to the top spool and thread it into the slot, and wind the transport lever. Do this until the arrows on the paper backing point to two white dots on the side of the film chamber. At this point, close the back and wind until you see frame number 1 in the frame counter. Do not go past the first frame (frame 1) in the film counter, or you'll lose images on the film. This may be a flaw in my camera, but at first it doesn't stop at frame 1.
My Results:
The forecast for the end of last week called for rain, so on Wednesday, I loaded up the camera with film and took a short drive to Duggan Falls in Washougal, WA. It's about a 30-minute drive. While it was overcast, it wasn't raining, and I wanted to try the Ikoflex III before the rain hit.
The camera produced very sharp images. Here are a few photos I took at the falls.


Conclusion:
The Zeiss Ikon Ikoflex III camera was an absolute pleasure to shoot with. It was similar to many other twin-lens reflex cameras. The viewfinder could have been a bit brighter, but the focus knob was smooth and easy to move. The shutter speed and aperture windows seem a tad dark, but the camera is close to 90 years old, so a good CLA would brighten them up nicely.
I really enjoyed the short turn of the transport lever. I was surprised that such a small motion would properly transport the film AND cock the shutter, too. It does a fantastic job, and it's one of the reasons I enjoyed the camera so much. Overall, an excellent camera to have in the collection, and one I'll be taking out more often to shoot with, given how sharp the images are.
Thank you for taking the time out of your day to learn about this fantastic vintage German camera.
Here's a link to my other Camera Reviews.
I also have a store on eBay, Cuny's Camera and Photo. Stop by sometime and see what cameras and other photo oddities I have for sale.
Until next week, please be safe.