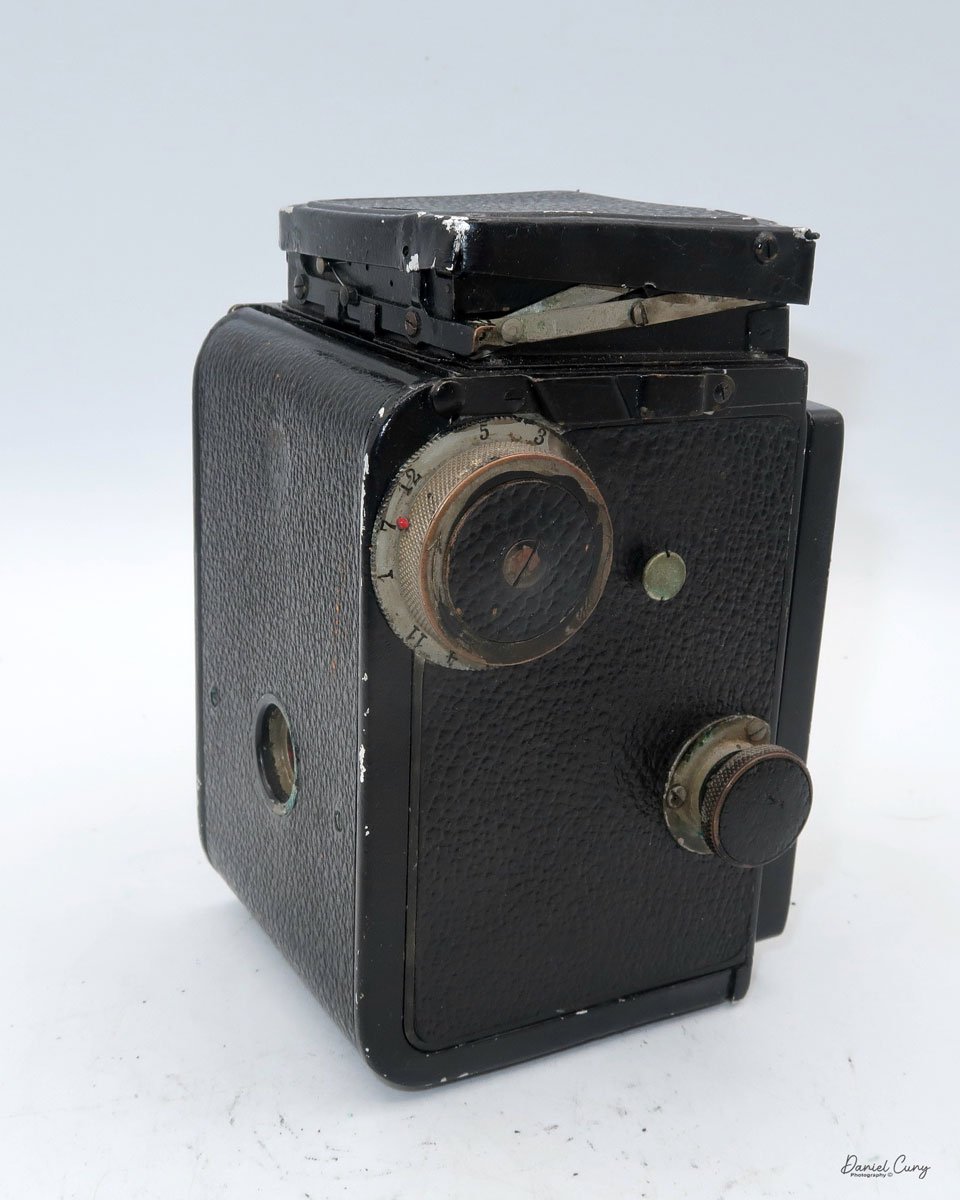
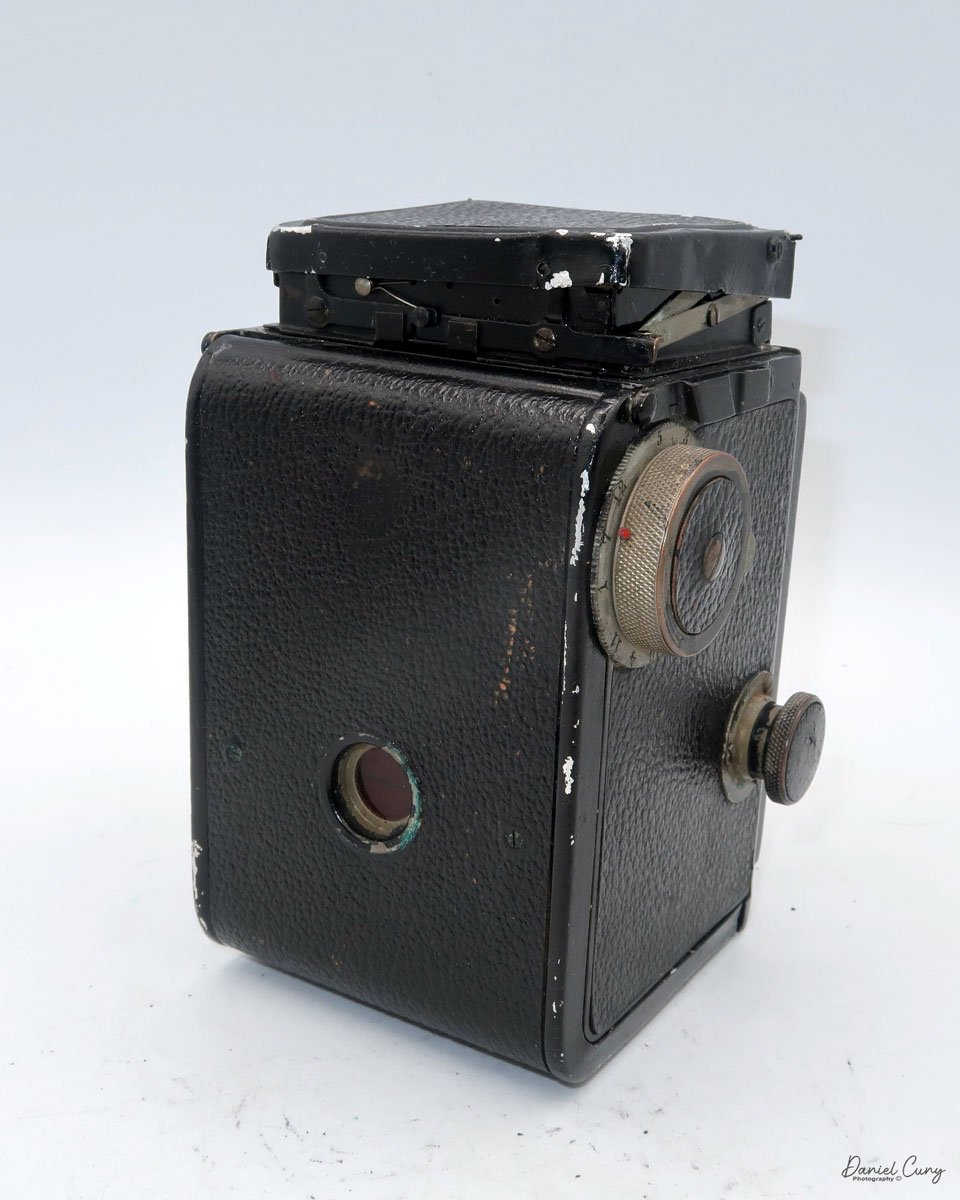
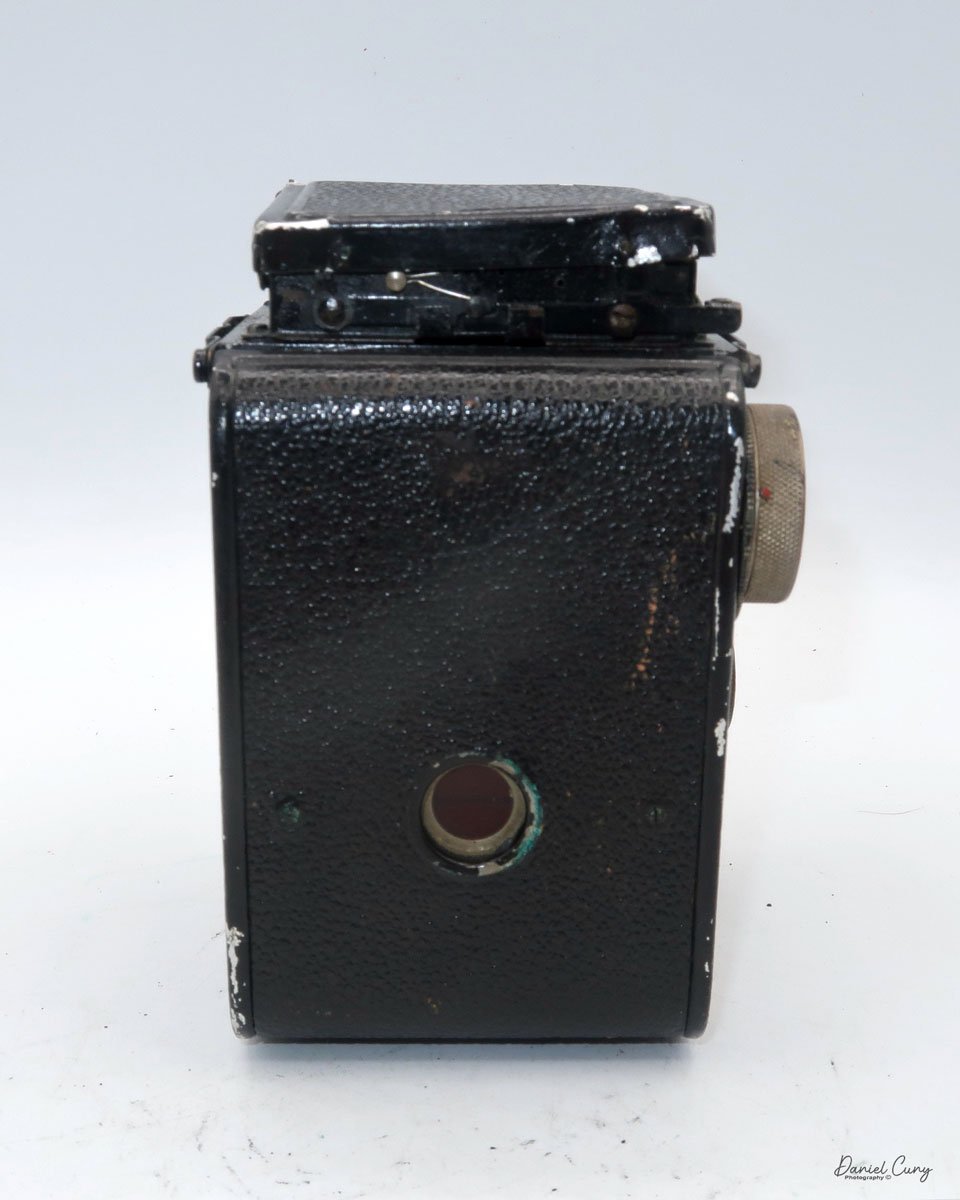
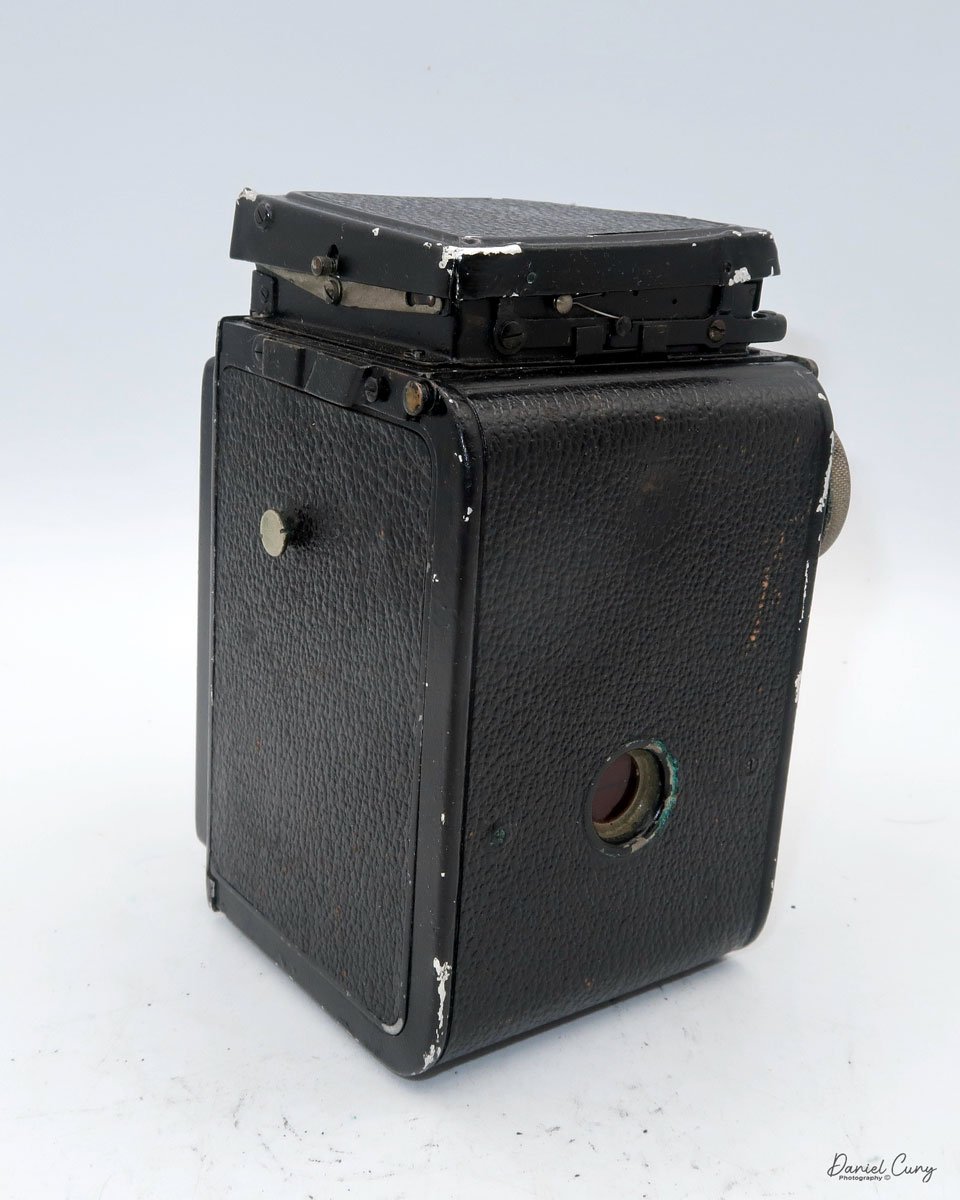
Original Model K1 Rolleiflex

My Rolleiflex K1 Camera

As is common for me, I purchased this original Rolleiflex model with many cameras, which included some other items I was more interested in. In the photo of the camera lot, I could see the Rolleiflex name, but the image was so small that I couldn't tell what model it was or even if it was in working condition. I took a shot; as I mentioned earlier, I was more interested in some items, and the Rolleiflex was more of the icing on the cake regarding the importance.

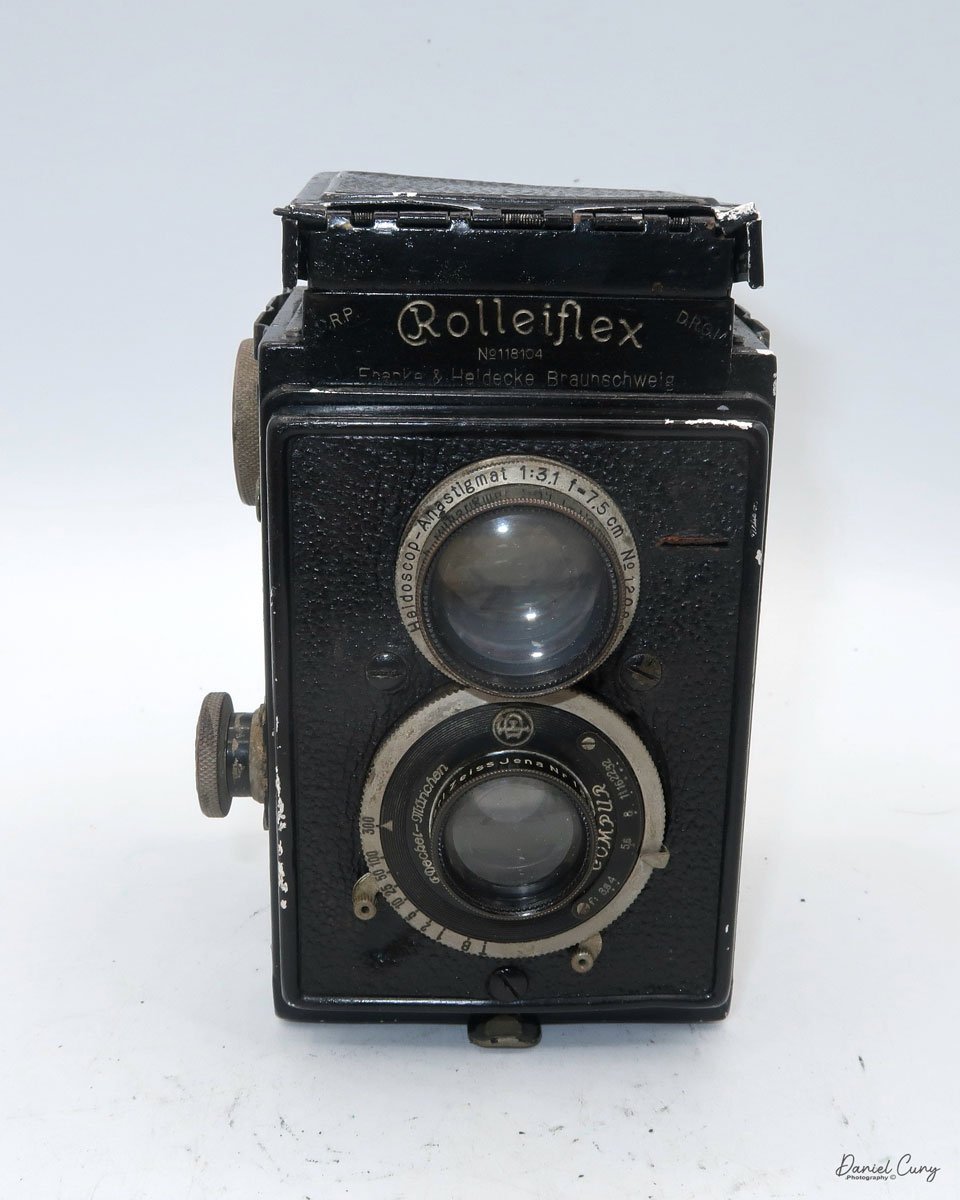
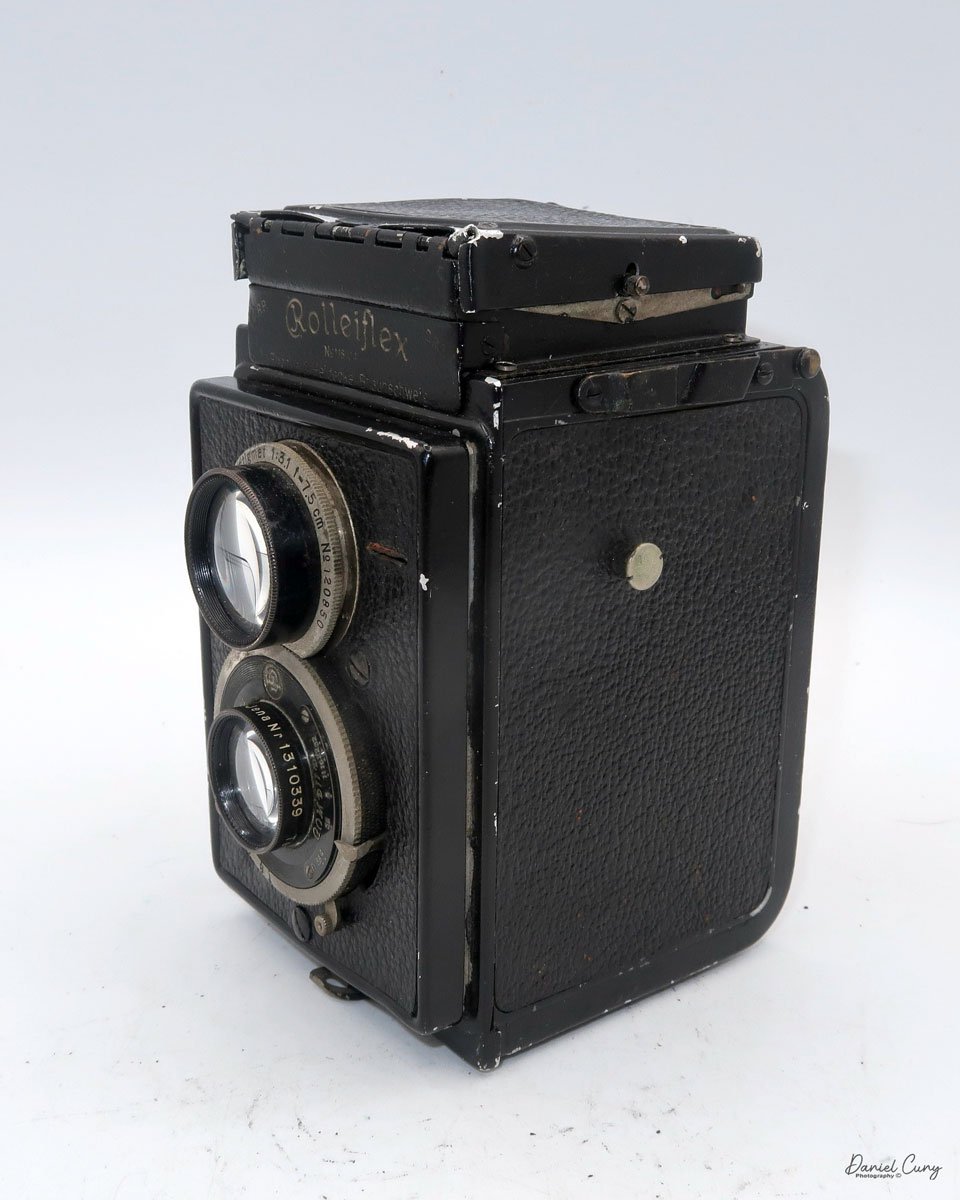
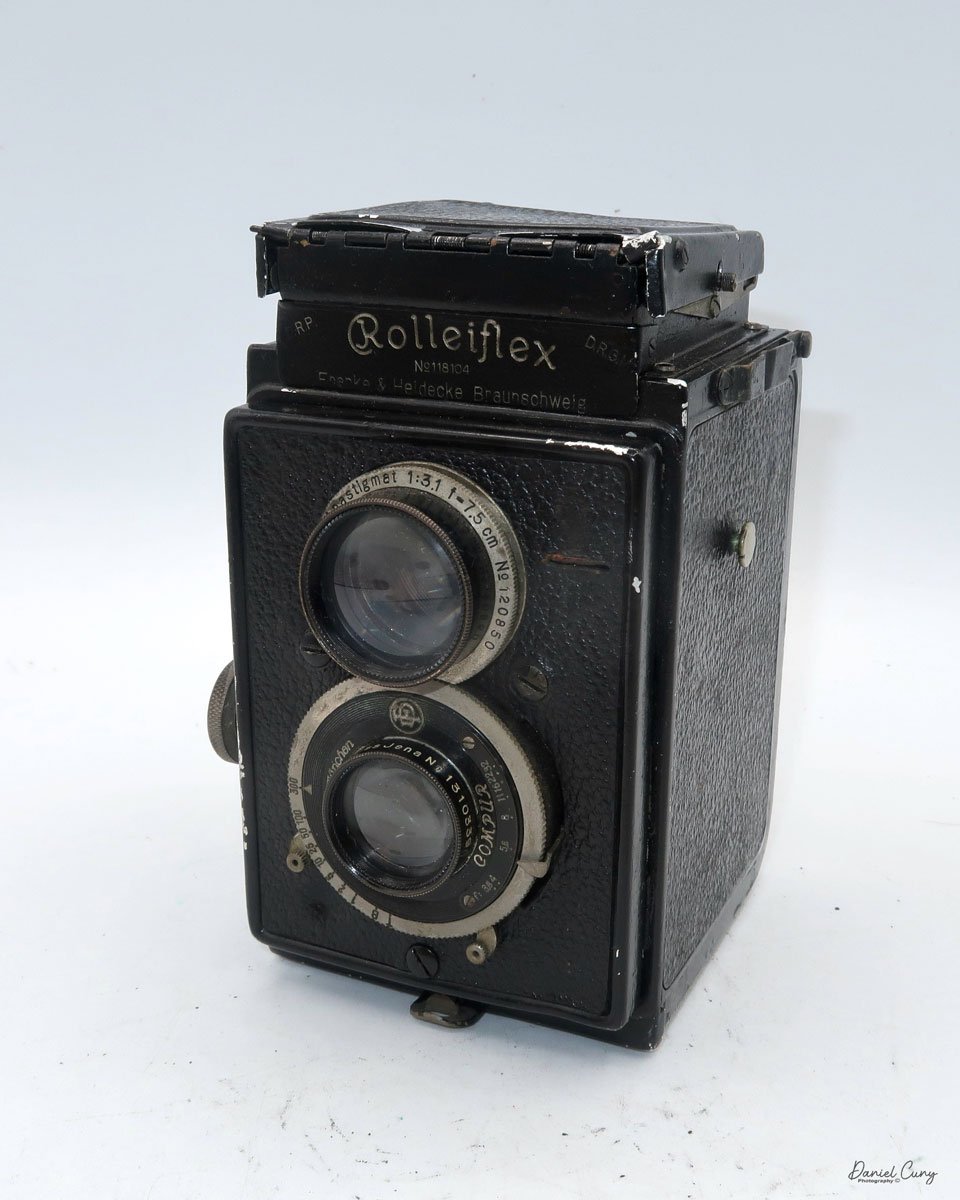
 Once I received the items in the lot and looked them over, the main items were great, and I was happy to have them. I picked up the Rolleiflex and checked on the camera's serial number, which was a low number. I have serial number 118104. From what I can see online, this is one of the first batches of cameras made. While the original Rolleiflex camera was only made from 1929 to 1932, a few modifications were made.

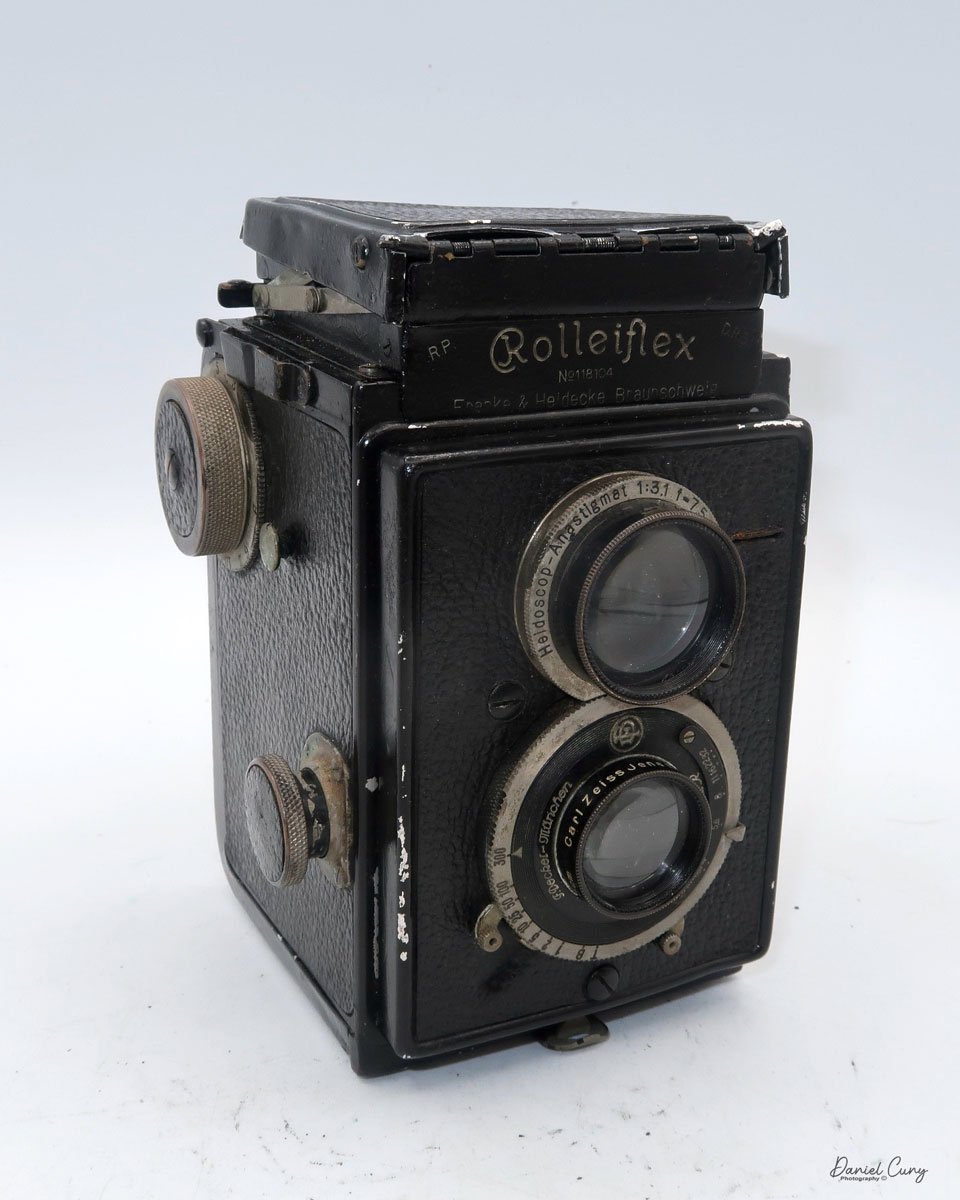
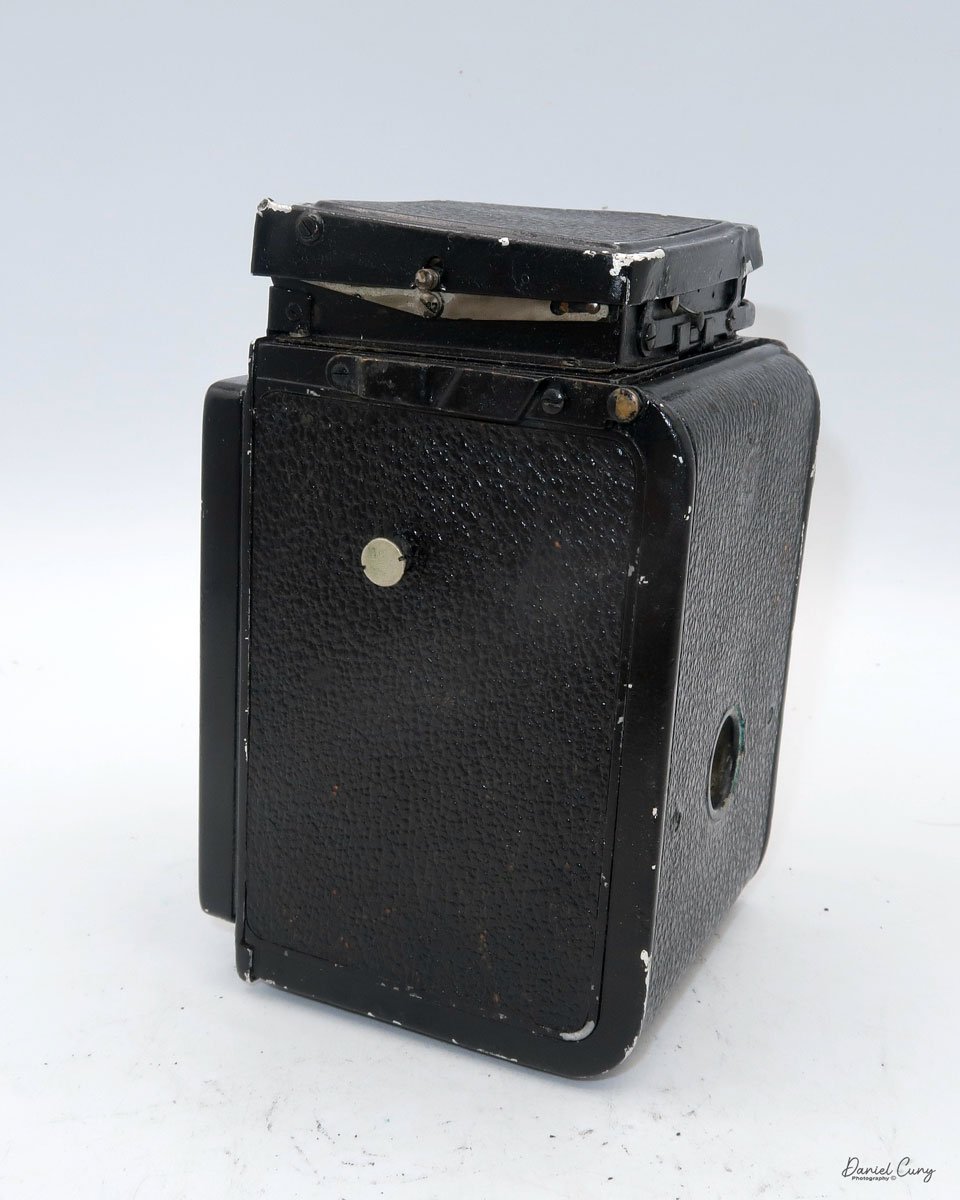
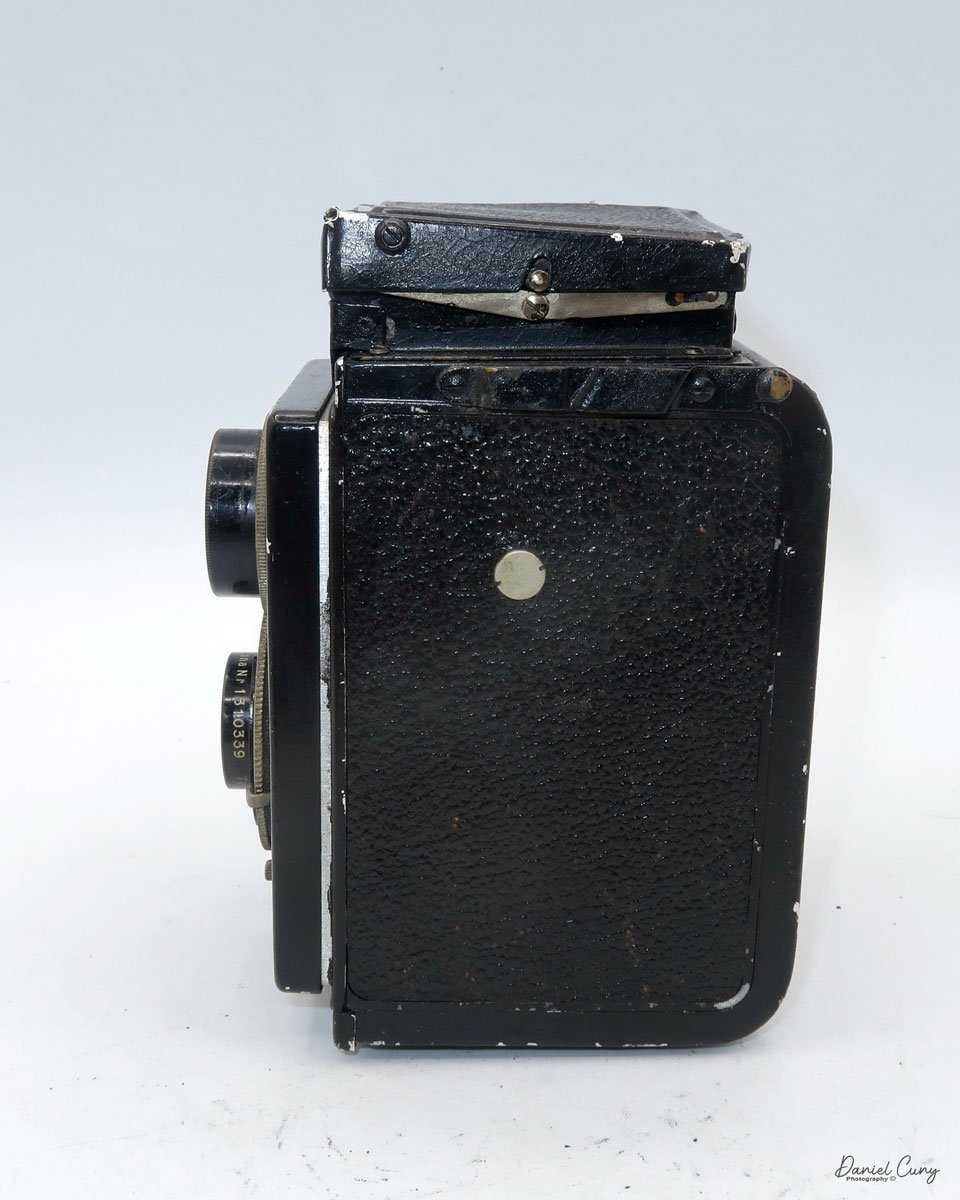
 In the photo, the Rolleiflex looked well used, and the top light chimney looked a bit wonky, which it was and still is today. When I tried to open the top, one of the side wings was jammed closed and wrapped under one of the other side wings, and I couldn't look down the chimney to see if the focusing screen was there. I took out my set of small screwdrivers and unscrewed the top 4 screws to remove the light chimney to fix it and bend the sides out a bit to make the chimney more usable.

Early Rolleiflex name and serial number

 Once I took the top off, I noticed the focusing screen was in good condition and still had the bubble level. It was a very clever idea to put in the camera when it was manufactured almost 100 years ago. 

The Company:

I reviewed the original Art Deco-style Rolleicord a few months ago, and here's what I wrote about the company's history then.

 Rollei holds a significant place in photographic history. Founded in 1920 in Braunschweig, Germany, by Paul Franke and Reinhold Heidecke, the company originally bore the name "Franke & Heidecke." Initially, it focused on precision mechanical devices, but by the mid-1920s, Rollei began producing cameras that would revolutionize photography.

 Rollei gained international recognition in 1929 with the launch of the Rolleiflex, the first twin-lens reflex (TLR) camera. The Rolleiflex was compact, robust, and designed for medium-format photography. Its unique twin-lens system featured one lens for viewing and focusing and another for capturing the image on film. This innovative design allowed photographers to frame shots at waist level, making candid photography more discreet and practical. The Rolleiflex quickly became a favorite among professionals and enthusiasts, particularly for portrait and documentary work.

The success of the Rolleiflex led to the introduction of the Rolleicord, a more affordable version aimed at amateur photographers. Both models showcased Rollei's commitment to precision engineering and optical excellence, which became hallmarks of the brand.

 During the 1930s and 1940s, Rollei continued to innovate, refining the Rolleiflex and Rolleicord lines with features such as automatic film winding and improved optics. Despite the challenges of World War II, the company maintained its reputation for high-quality cameras. In the post-war era, Rollei played a significant role in the resurgence of the German camera industry.

The 1950s and 1960s marked a golden age for Rollei. The Rolleiflex TLR became synonymous with professional photography and was used by renowned photographers such as Richard Avedon, Diane Arbus, and Vivian Maier. Rollei also ventured into other formats and technologies. The Rolleiflex 35mm SLR, introduced in the late 1950s, showcased the company's adaptability to the changing market demands.

 By the 1970s, the rise of Japanese camera manufacturers like Nikon, Canon, and Minolta introduced intense competition. These companies offered high-quality single-lens reflex (SLR) cameras at more affordable prices, challenging Rollei's dominance in medium-format and professional photography. However, Rollei's resilience and ability to adapt to changing market conditions inspired by its history.

In response, Rollei diversified its product line, introducing the Rolleiflex SL66, a medium-format SLR, and the compact Rollei 35, which became one of its most miniature 35mm cameras. Despite these innovations, Rollei struggled to maintain its market share due to its higher production costs and its competitors' rapidly advancing technology.

 In the 1980s and 1990s, Rollei faced financial difficulties, leading to changes in ownership and restructuring. The company shifted focus to digital imaging and niche markets, including high-end studio cameras and digital backs for medium-format systems.

The Rollei legacy endures as a symbol of German engineering and innovation, reflecting a century of dedication to the art and science of photography. This enduring legacy evokes a sense of respect and admiration for the brand's contribution to the field of photography.

My Camera:

My early Model K Rolleiflex is 5.25" tall and 3.5" wide by 3.75" deep. These measurements are with the light chimney closed. If I open the light chimney, the camera is 7.5" tall and weighs 1 lb. 9.7 oz. with the original lens cap and without film loaded into the camera. My camera has a Carl Zeiss Jena Tessar 7.5cm f3.8 lens, serial #1310339, for the taking lens, and for the viewing lens is a Heidoscope Anastigmat 75mm f3.1 lens, serial #120850. 

The lens is in an F.Deckel-Munchen Compur shutter with speeds from 1/300 to 1 sec. along with "B" & "T". The shutter speeds are set by turning a chrome ring on the outside of the shutter ring. The shutter cocking lever is on the left side of the camera as you view it from the front, and the shutter release is on the right side. The aperture ring goes from F3.8 to F32 and is set by a sliding ring just outside the shutter ring.

Taking lens, and shutter-aperture settings on my original K1 Rolleiflex

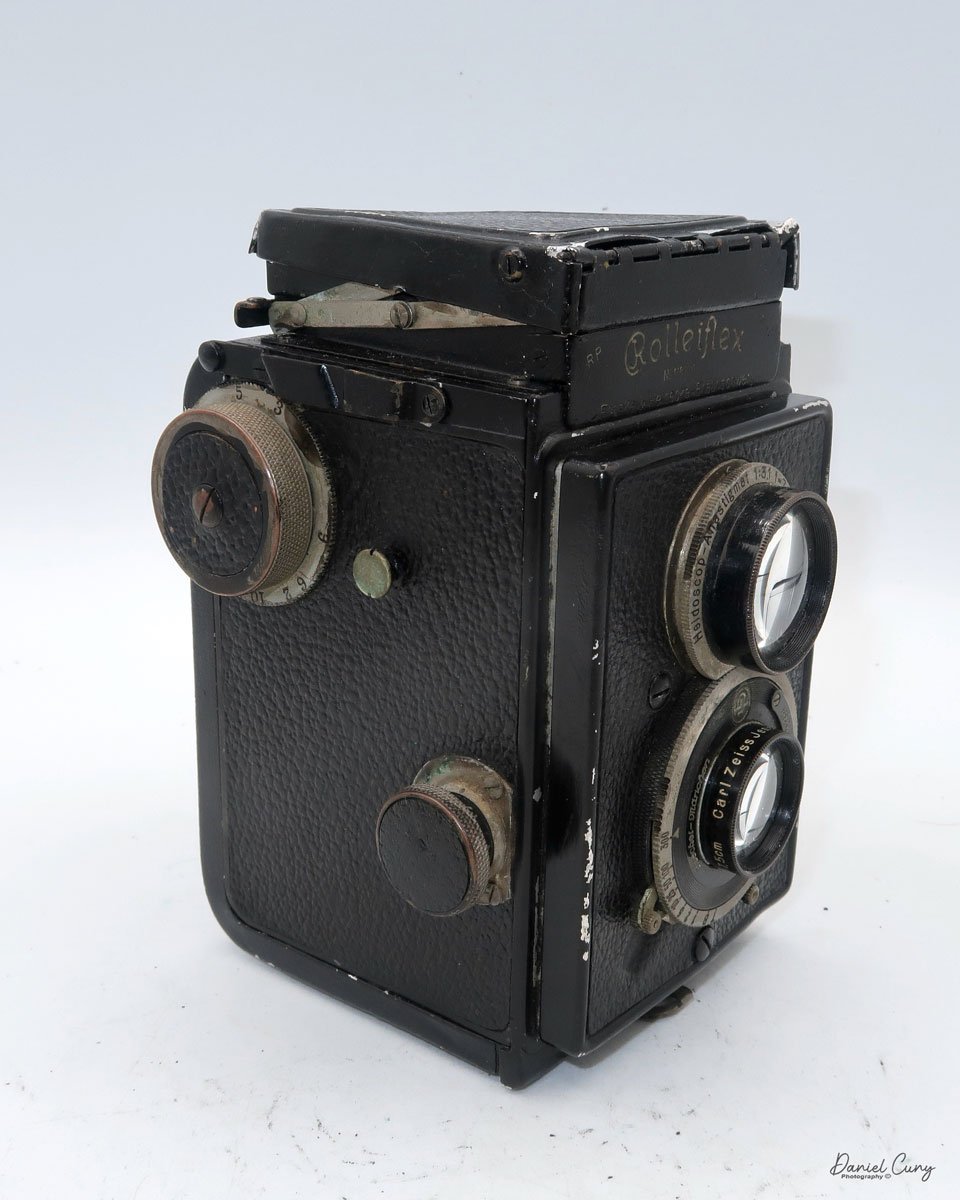
The light chimney or light hood is the most interesting thing about the camera. To open the light chimney, on the back of the camera, there is a small lever you need to press down to unlock the chimney. The front and sides will spring open if the chimney is in good working order. Since mine is not in perfect condition, the front opens, but I need to coax the sides to open correctly. Once the chimney is open, you can view the focus screen.

 On the back of the chimney is a magnifying glass on a spring. It can be flipped over and locked into the front part of the chimney, where it can be used for critical focus. Pressing the front part of the chimney releases the magnifying glass, and it returns to its normal position. 

 On the backside of the front wing of the chimney was a mirror, or a highly polished metal piece that flips down with a lever on the left side of the chimney. When the magnifying glass is in the "up" position, and you flip the lever down, the mirror will be at an angle that you can use the back as a level finder and focus the camera while viewing the image through the back opening of the chimney. I really liked this feature as it gives the camera a lot of flexibility when shooting. To close the chimney, fold down the sides first; the back and the front will close, covering the camera.

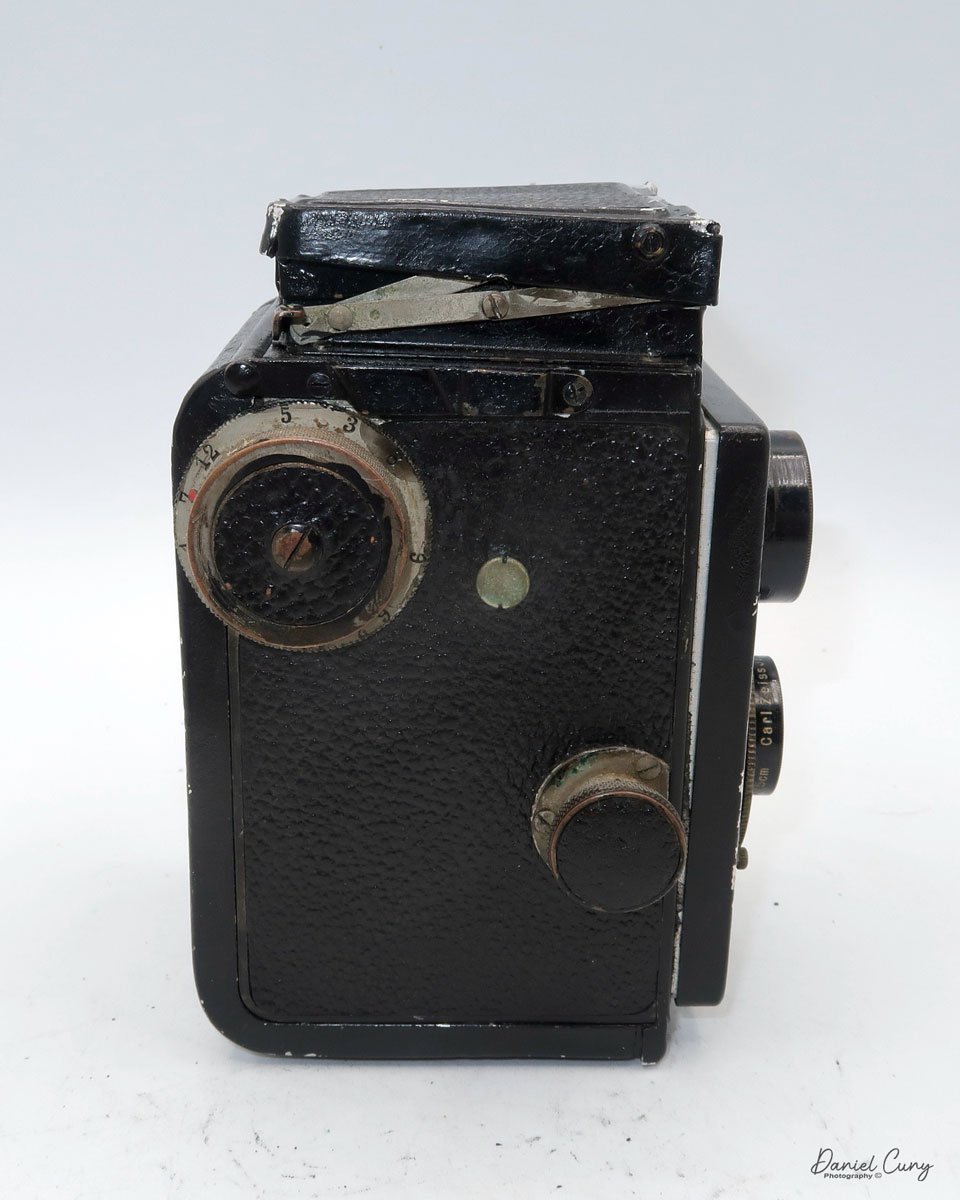
On the right side of the camera are two knobs. The larger knob on the top is the film advance knob. Around the knob are numbered from 1-12, but the numbers aren't in order; they go 1,7,12, small space, then 5,3,8, small space, 9, small space, and 6,2,10,1,11. At first, I thought these were frame numbers, but the sequences are so off. I know the first camera models were made for film size 117, and the camera only took six exposures with larger gaps between frames. There is also a red arrow pointing towards the number, but it didn't change when I put the film in the camera and advanced it to the next photo. Maybe someone can explain this sequence to me.

 The lower and smaller knob is the focus knob. On the inside are distance numbers, but there is no feet or meter setting. On the camera's left side is a lug, which was used to connect the strap.

The back door locking mechanism is on the bottom of the camera, and there is a tripod socket and a second red window with a cover. I didn't use that frame counting window, as I used the one on the back of the camera as I would for most cameras. To open the back door to load film, you lift the silver-hinged locking mechanism, which opens the back door. After doing some research on the camera, I found that this model doesn't take 120 film like all the other Rolleiflex models. 

I tried anyway, and it's too wide and didn't fit into the film chamber. Luckily, I have some outdated Agfa 620 films that fit correctly. I put the empty spool on the top. You can pull out the larger knob to load film into the camera, then press it in to lock the reel into place. I put the outdated Agfa roll into the camera, fed the leader into the empty spool, wound the film to start, closed the back of the camera, and wound the film to frame number 1. Now, I'm ready to take the camera out on an adventure to see how the camera performs.


My Results:

My wife and I planned a trip to Lake Quinault in the Olympic National Forest, so I wandered the lake's hotel grounds with a fantastic camera loaded with film and took some photos. Here are a few of the images from this trip.

Conclusion:

The camera performed very well, and the images were nice and sharp. The focusing screen was dark compared to the newer cameras. Still, it did an excellent job for a camera almost 100 years old and was extremely fun to shoot with. Due to the age of the film, the images have a mottled appearance when looking at something without detail, like the sky or lake. But that doesn't affect the camera's usability, which was overall very good.

 I'd love to hear from you. If you have one of these cameras and have questions or want to let me know what you think of the camera, please leave a comment, and I'll get back to you soon.

 Thank you for taking a few minutes from your day to read about this fantastic camera.

 Until next week, please be safe.

Exakta 66 Vertical Camera

I've been holding onto this camera for a few years now and wanted to do a blog post on it a few years ago when I was asked to come back to work and run a couple of photo companies for a former boss. At the time, the opportunity was too good to pass up, so I put my camera blog on the back burner and dove into my work promoting and selling some top-of-the-line photo equipment.

My Exakta 66 Vertical camera and lens.

Now that I'm formally retiring after spending 52 years in the photo industry, I pulled the Exakta 66 vertical off the shelf, which I had serviced a couple of years ago, shortly after returning to work. I put 120 black-and-white films into it and gave it a whirl to see what a medium-format camera from the early 1950s would feel like.

History:

I previously wrote about the company's history when I posted on the Exakta Vest Pocket Model B camera in December 2020. If you're interested in what I wrote about Ihagee History, click the link.

Early horizontal Exakta 66 model.

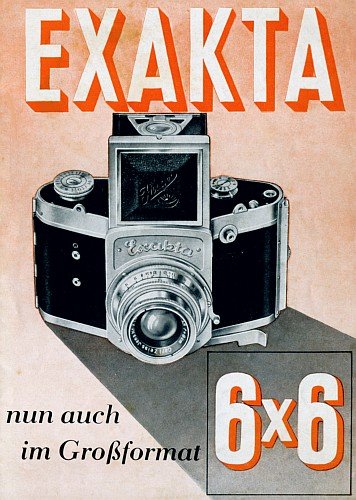
 In this area, I'd like to talk about the history of the Exakta 66. Exakta made an earlier version of the 66, a horizontal version developed just before WWII. Since this model is known as the "Vertical" version, it concerns the film transport on the camera. In this version, the film transports vertically, unlike the previous model, which went horizontally.

The original Exakta 66 was designed in 1938. Ihagee, the manufacturer of Exakta, had even set aside a series of serial numbers for the Exakta 66, which was a first for Ihagee. Until now, the camera model would have consecutive serial numbers when the cameras left the factory, but  552,000 to 556,999 had been reserved for the 6x6.

Due to technical issues with the film transport, Ihagee only produced about 2,000 cameras in the first year. The issues were somewhat common for other Exakta cameras from this time period. Production for the Exakta 66 was stopped after one year. It could have been due to technical issues or the outbreak of WWII. 

In 1951, Ihagee decided to start production on the camera again. They reserved the serial numbers 600,000 to 607,999 for the new Exakta 66. Unfortunately, production was halted due to lackluster interest and low sales numbers. Many of the cameras produced were from old stock produced before WWII, and the cameras again had very poor film transport issues. 

 Introduced in the fall of 1952 with production was the new Vertical Exakta 66 with vertical film transport, which was to compete with Hasselblad for medium format camera. With the Vertical Exakta 66, Ihagee introduced interchangeable light shafts, focusing screens, film cassettes, and a prism finder, which were planned but never introduced. It also had flash synchronization and shutter speeds similar to their 35mm cameras from 12 sec. to 1/1000

Again, the vertical Exakta 66 ran into the same film transport and other issues during production. The problem was so bad that Ihagee recalled cameras delivered to stores to destroy the camera. It's estimated that there are only a few hundred cameras due to poor production and lack of sales.


In 1985, Ihagee's West German company reintroduced the Exakta 66. The camera was very similar to the Pentacon and even had Pentacon mount lenses. It had a current design with a black body and other accessories like finders, focus screens, lenses, etc. This version lasted into the early 1990s.

My Camera:

 The Exakta 66 is a clunky and somewhat awkward camera, especially without a shoulder strap. While I got the camera serviced a few years ago, I'll discuss some issues with the body and film back. 

 My camera has a Carl Zeiss Jena Tessar T 80mm f2.8 lens. It measures 5.5" tall by 4.5" wide by 6" deep, measuring from the back of the film plane to the front of the lens focused at infinity or back into the body. If the light chamber is opened, the camera is just under 8" tall and weighs 3 lbs 7.4 oz without film or a strap.  

The vertical shape made the camera very similar to shooting with a twin-lens reflex camera, just bigger and heavier. As I have fairly large hands, using it wasn't that bad. 

To take the back off, on the camera's left side, as you hold it to take a photo, is a long lever next to the horizontal tripod socket. Slide that lever up to release the lock of the film back, and slide the cack off to the left to load the film. Loading the film is pretty straightforward. Take the empty film spool from behind the hinged door and put it into the top chamber inside where the gears are. Put the new film in the chamber with the hinged door and slide the leader around the wheel and over the pressure plate to the empty spool. Slide the end into the spool and wind it up just a bit so it's not coming loose from the take-up spool.

That's the easy part. I went online to look at the instruction manual on the proper procedure to load the camera, and now I understand the complexity of the camera. Well, the instructions that I read didn't make sense. One of the reasons is that the film back I have isn't 100% functional. The frame counter isn't working on my film back and doesn't go to the "Red F" as stated in the manual (show manual). Here's what I did. I put the back on the camera, advanced the film 5-6 frames, and started to shoot photos. The film advance lever is on the right side of the camera and has a large "wing nut" appearance right in the center of the camera.

The shutter speed dial is in two sections, similar to other cameras. From 1/1000 to 1/25 sec, it is on the top dial along with "T" and "B," closest to the light chamber. A second shutter speed wheel on the bottom of the camera has a dual function. It's the low end of the shutter speeds, from 1/10 sec to 12-second exposure; yep, 12-second exposure is built into the camera. It also serves as the camera's self-timer. The cameras' self-timer numbers are red, and the long exposure numbers are black.

The right side of the Exakta 66 vertical camera shows the shutter speed control dials on top and bottom.

To make a more prolonged exposure with the built-in shutter speeds, you set the SS dial to either T or B, then turn the bottom dial to the desired length of exposure in black. Press the shutter, and the shutter stays open until the end of the exposure, and the focal shutter closes. To use it as a self timer, set the shutter speed at anywhere on the top dial from 1/1000-1/25, then on the bottom dial set the length of self timer to the desired RED number and press the shutter button. This will delay the shutter from open/close function for the desired seconds picked from the red number picked.

You open the light hood, press down on the rear tab on the back of the hood. Mine pops up and is ready for action. Like many other medium format cameras, there is also a magnifying glass that allows for fine focusing. When you press the front of the chamber, the glass pops up. You can also remove the hood to get to the focus screen by pressing the lever between the two 6s on the front of the camera and just below the Exakta nameplate. When the light hood is removed, you can remove the focusing screen by sliding the bar on the right side but not back where the film advance and shutter speed dial is. It's the rod right next to "Ihagee". Slide that lever up, and the focus screen can be removed. To close the light hood, the four pieces that make up the light hood are numbered, 1,2, and 3, so you know which order to close them. If not in that order, the cover doesn't close.

There is a second rod on the right side of the camera between the two shutter buttons and the lock for the shutter button just above the shutter release. In the down position, it'll let you trip the shutter. When the bar is up, the shutter release is locked, and you cannot release the shutter.

 On the left side of the camera is the back release rod. Slide it up to release the lock to take the film back off and down to lock the film back onto the camera. There is a horizontal tripod socket. Also, there is a flash delay wheel that delays the flash sync depending on the flash and bulb used and the lens release button. Sliding the button back will release the bayonet mount lens.

The camera body, film back, light hood, Focus screen, and lens are separated.

The lens has a manual aperture, which doesn't stop the aperture down automatically when you press the shutter button. Focus wide open for the brightest viewing, then stop down the desired aperture. By doing this it also allows the photographer to see the depth of field in the finder before releasing the shutter. There is a red dot that you can move to the desired aperture. This allows the photographer to open and close the aperture quicker, and you cannot go further than the ring with the red dot will allow.

My results:

 Once I loaded the film, put the back onto the camera, and shot photos, here's the result. As you can see from some of the first images, I, too, had issues with the film transport. The technician told me he did his best to fine-tune the back, but the first few images had spacing issues, as seen in these images. After that, the images had spacing between them that grew to more and more spacing between the images.

Thing get better for the rest of the roll.

From the front yard.

Looking down our street.

Conclusion:

 After I played with the camera and finally got past the mumbo jumbo of the loading procedure, the camera was fun to shoot. I really didn't mind the manual aperture, and while I didn't use the self-timer or longer exposures as I was shooting ISO 400 on a somewhat sunny day, setting the shutter speeds and aperture was straightforward.

 Having the large indent on the film back provided extra area to hold the camera, especially when I was carrying the camera without a strap. I think the images turned out pretty good, and I'm looking forward to shooting it again—maybe at dusk with longer exposures this time.

 Thank you for taking the time to read through this post and until my next post, please be well and stay safe.