Bolsey PH-324A Camera, 35 Model B Special & B3

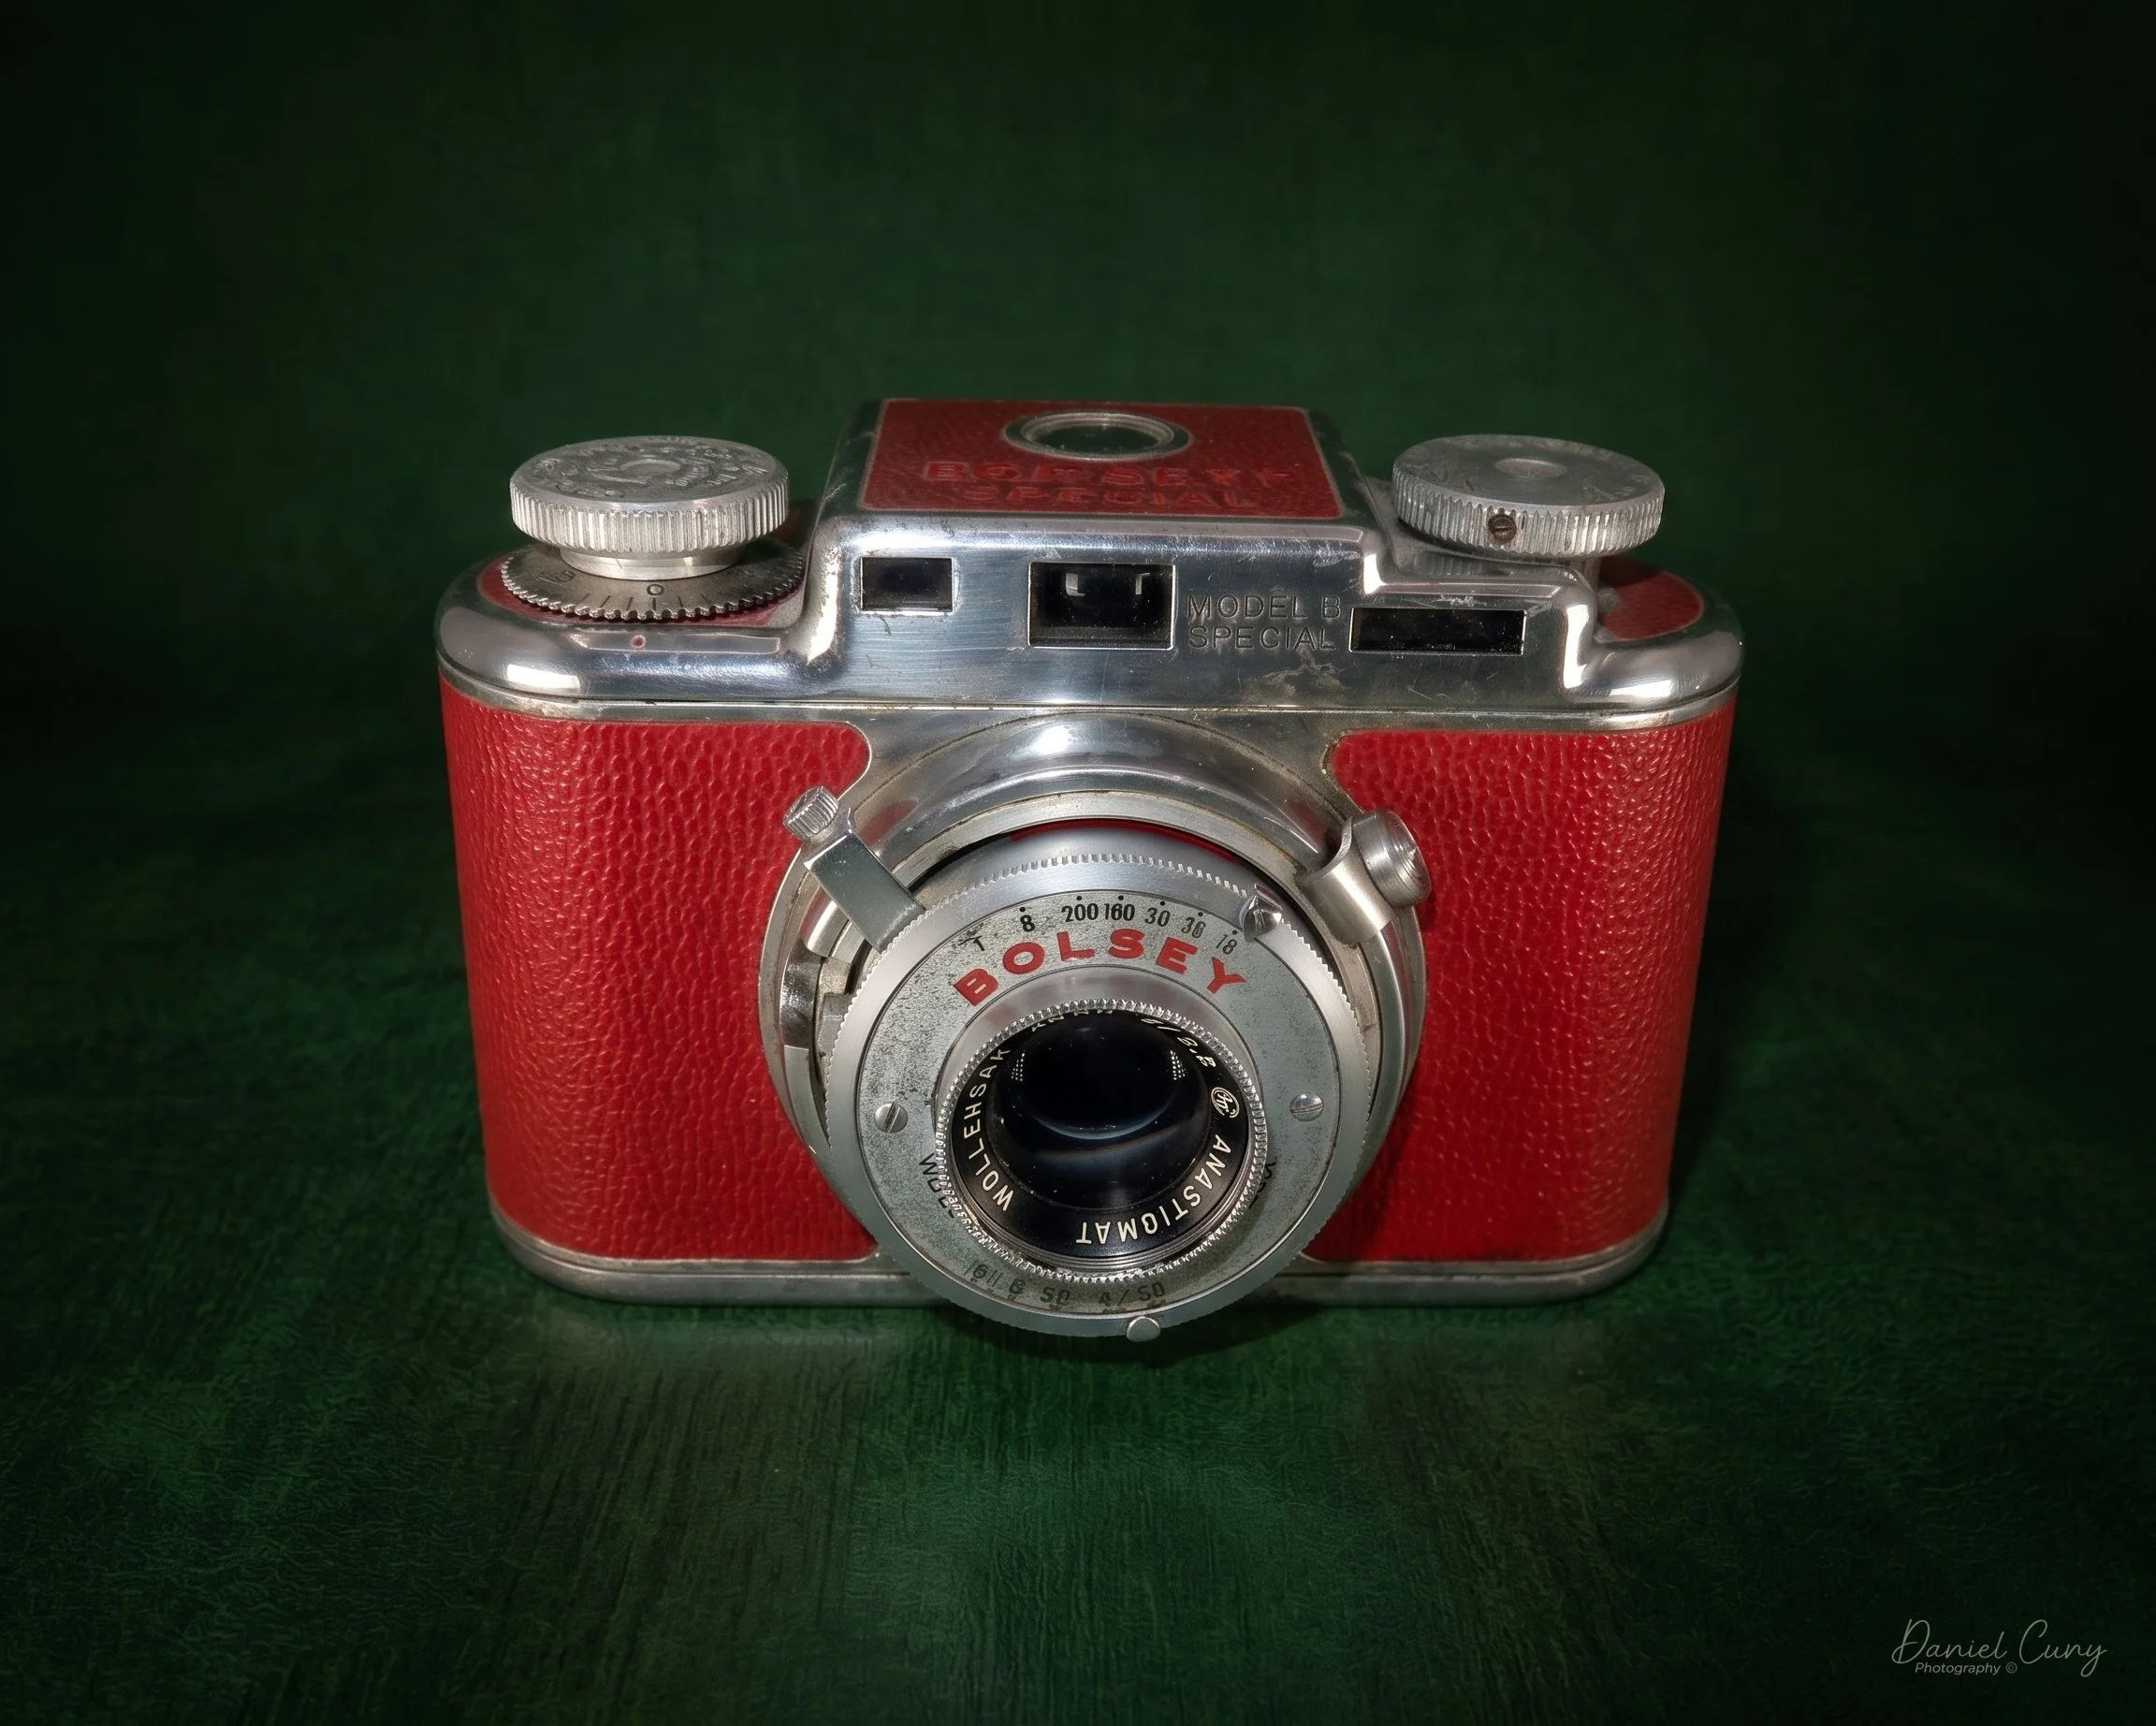
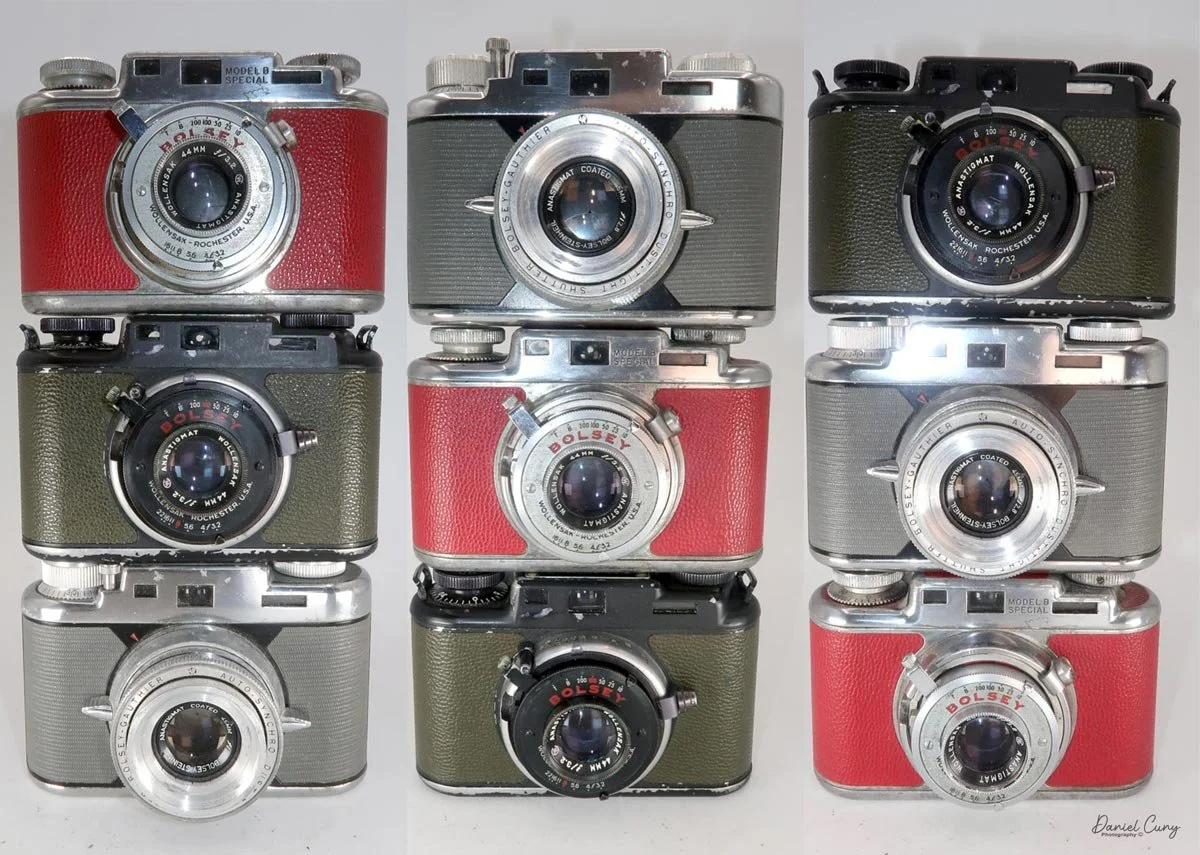
Composition of my Bolsey 35 B Special, PH-324A and B3 cameras

I've always been a fan of Bolsey cameras, as I've written about them in the past. Many of their models have a highly unusual appearance. Their 35mm cameras look somewhat bulbous from the top, with an odd three-sided removable back door. Yet, they seem to fit in the hand nicely thanks to their quirky form factor.

I've owned many Bolsey cameras over my collecting career, from the twin-lens Bolsey-Flex Trio and Bolsey 8 (both still and movie cameras) to the oddly shaped twin-lens 35mm Bolsey C model. But today I'm writing about their more common 35mm rangefinders—with the fun exception that they come in different colors.

One thing I've noticed is that the red logo Bolsey button on top of the camera is usually missing. I'd guess more than half the ones I've seen have lost this red button, likely popping off at some point in the camera's life. I've had some with and some without, so I generally look for and purchase them with the button intact, unless it's a truly "special" camera.

All three cameras I'm looking at today are based on the Bolsey B in terms of shape and most features. Due to my love for colored cameras, I couldn't resist putting this trio together—mainly for the fun of photographing them side-by-side and seeing what I could come up with for my lead photo.

The Bolsey "Special" is the oldest in my collection, and I purchased it online off eBay many years ago. The thought of adding a red Bolsey to the shelf was a huge plus for me. When I received it and saw it was in great physical shape, I was thrilled. Finding out the shutter and transport actually worked was just the frosting on the cake.

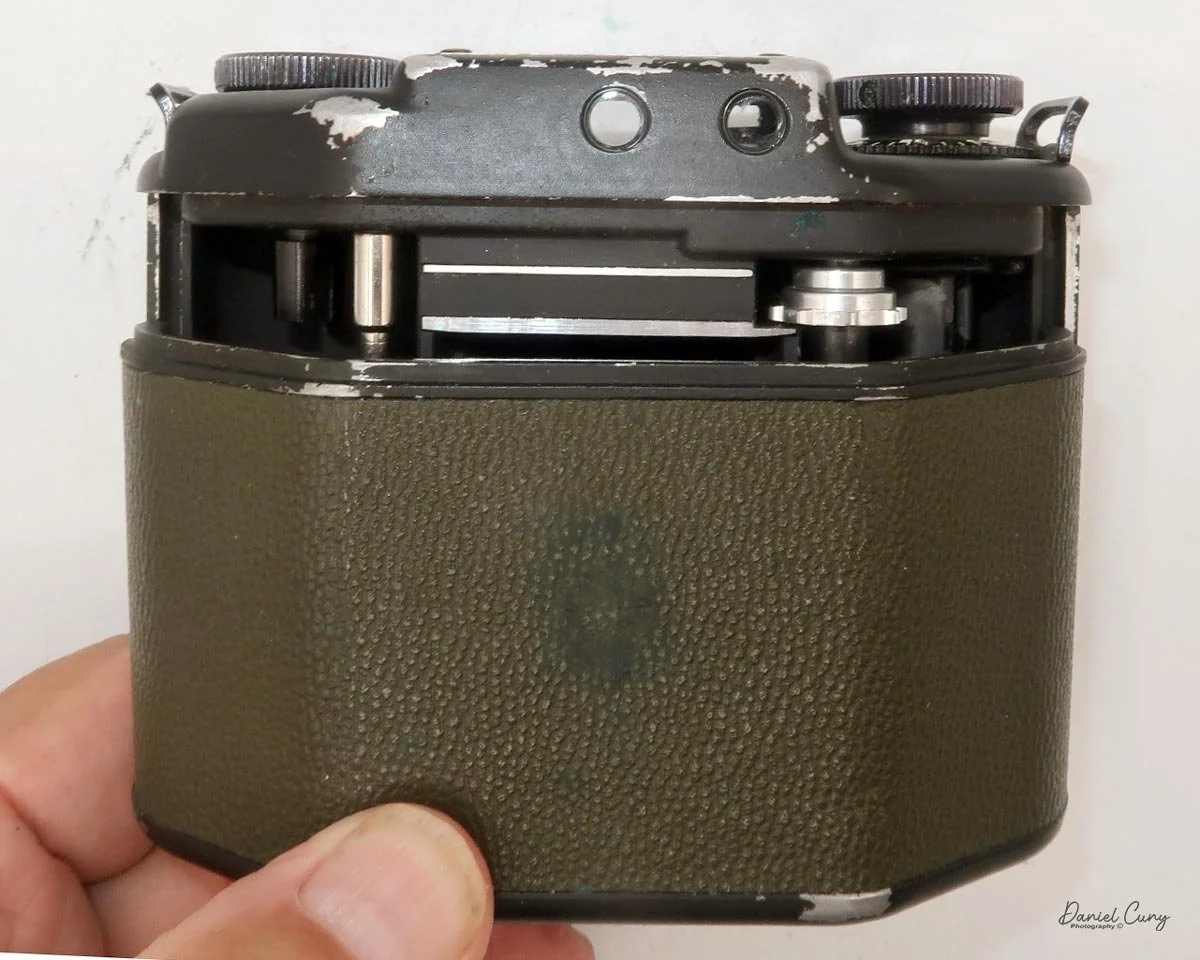
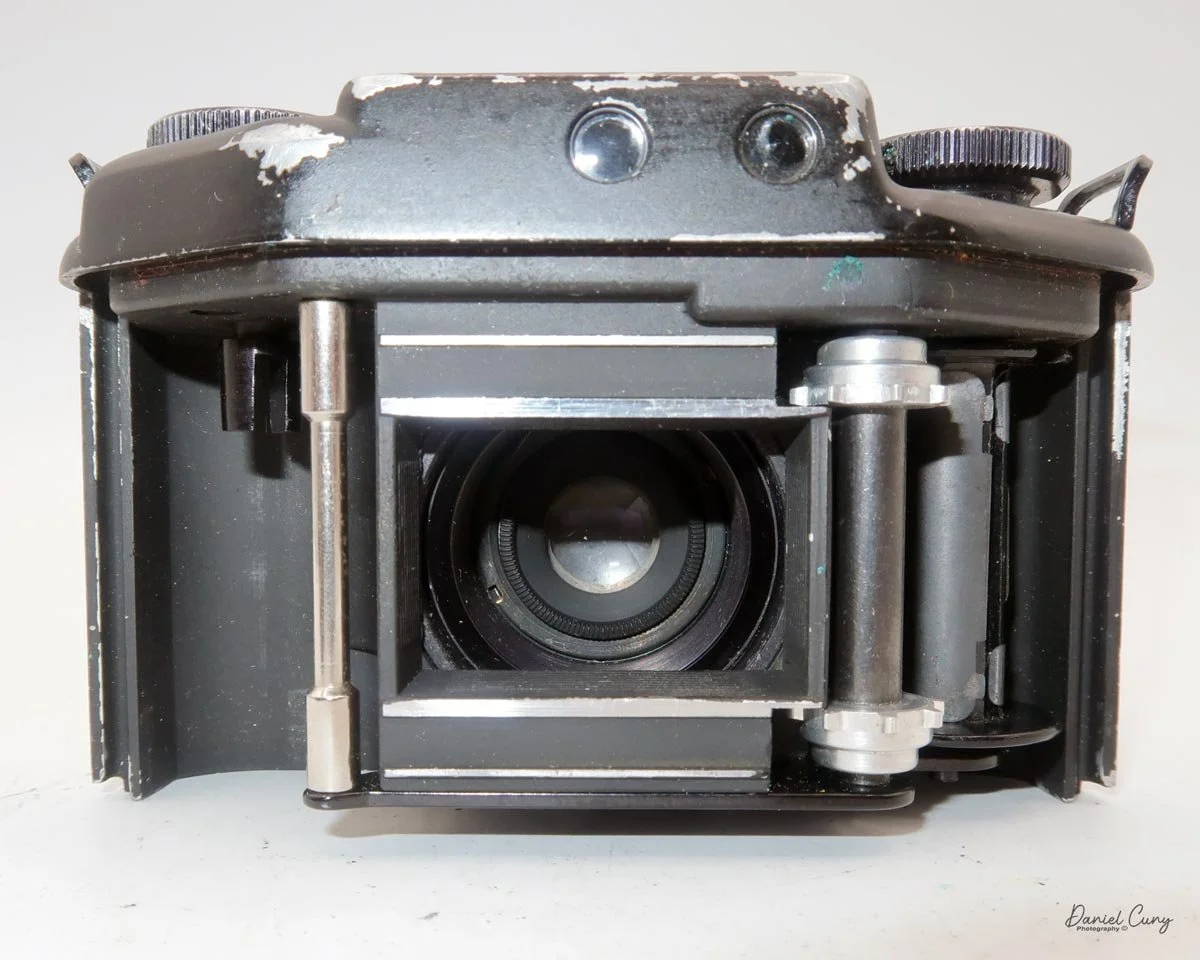
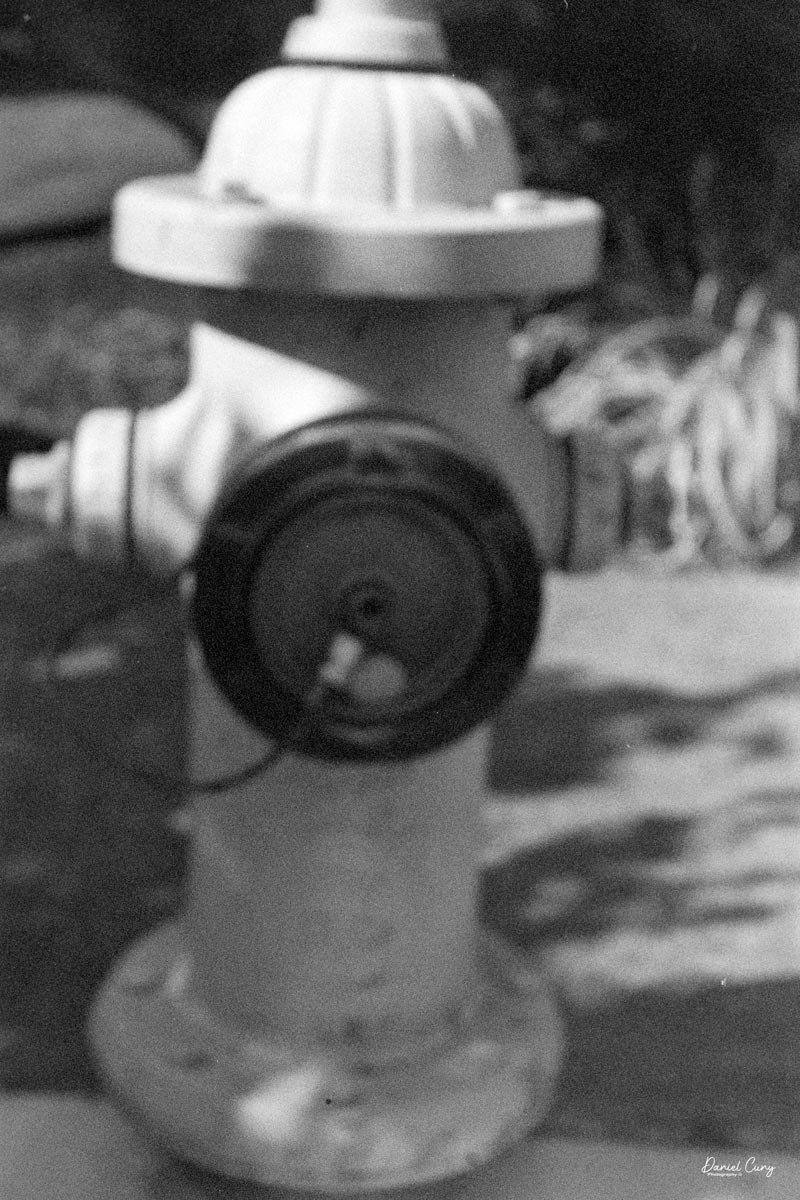
However, it wasn't until I finally pulled it off the shelf, loaded it up, processed the film, and saw the results that I realized there was a major flaw (see the images in the "Results" area). While the rangefinder worked as it should and the pressure plate was intact, the images were incredibly out of focus. I guess one of the lens elements is missing, or something is so out of whack that it ruins the focus. The back looks perfectly fine, so I'm at a loss.

After some research, I learned that some Bolsey "Special" cameras were made for microscopes and scientific purposes. Maybe this lens was specifically calibrated for extreme close-up work? But then again, the rangefinder worked perfectly for distance. It's a mystery.
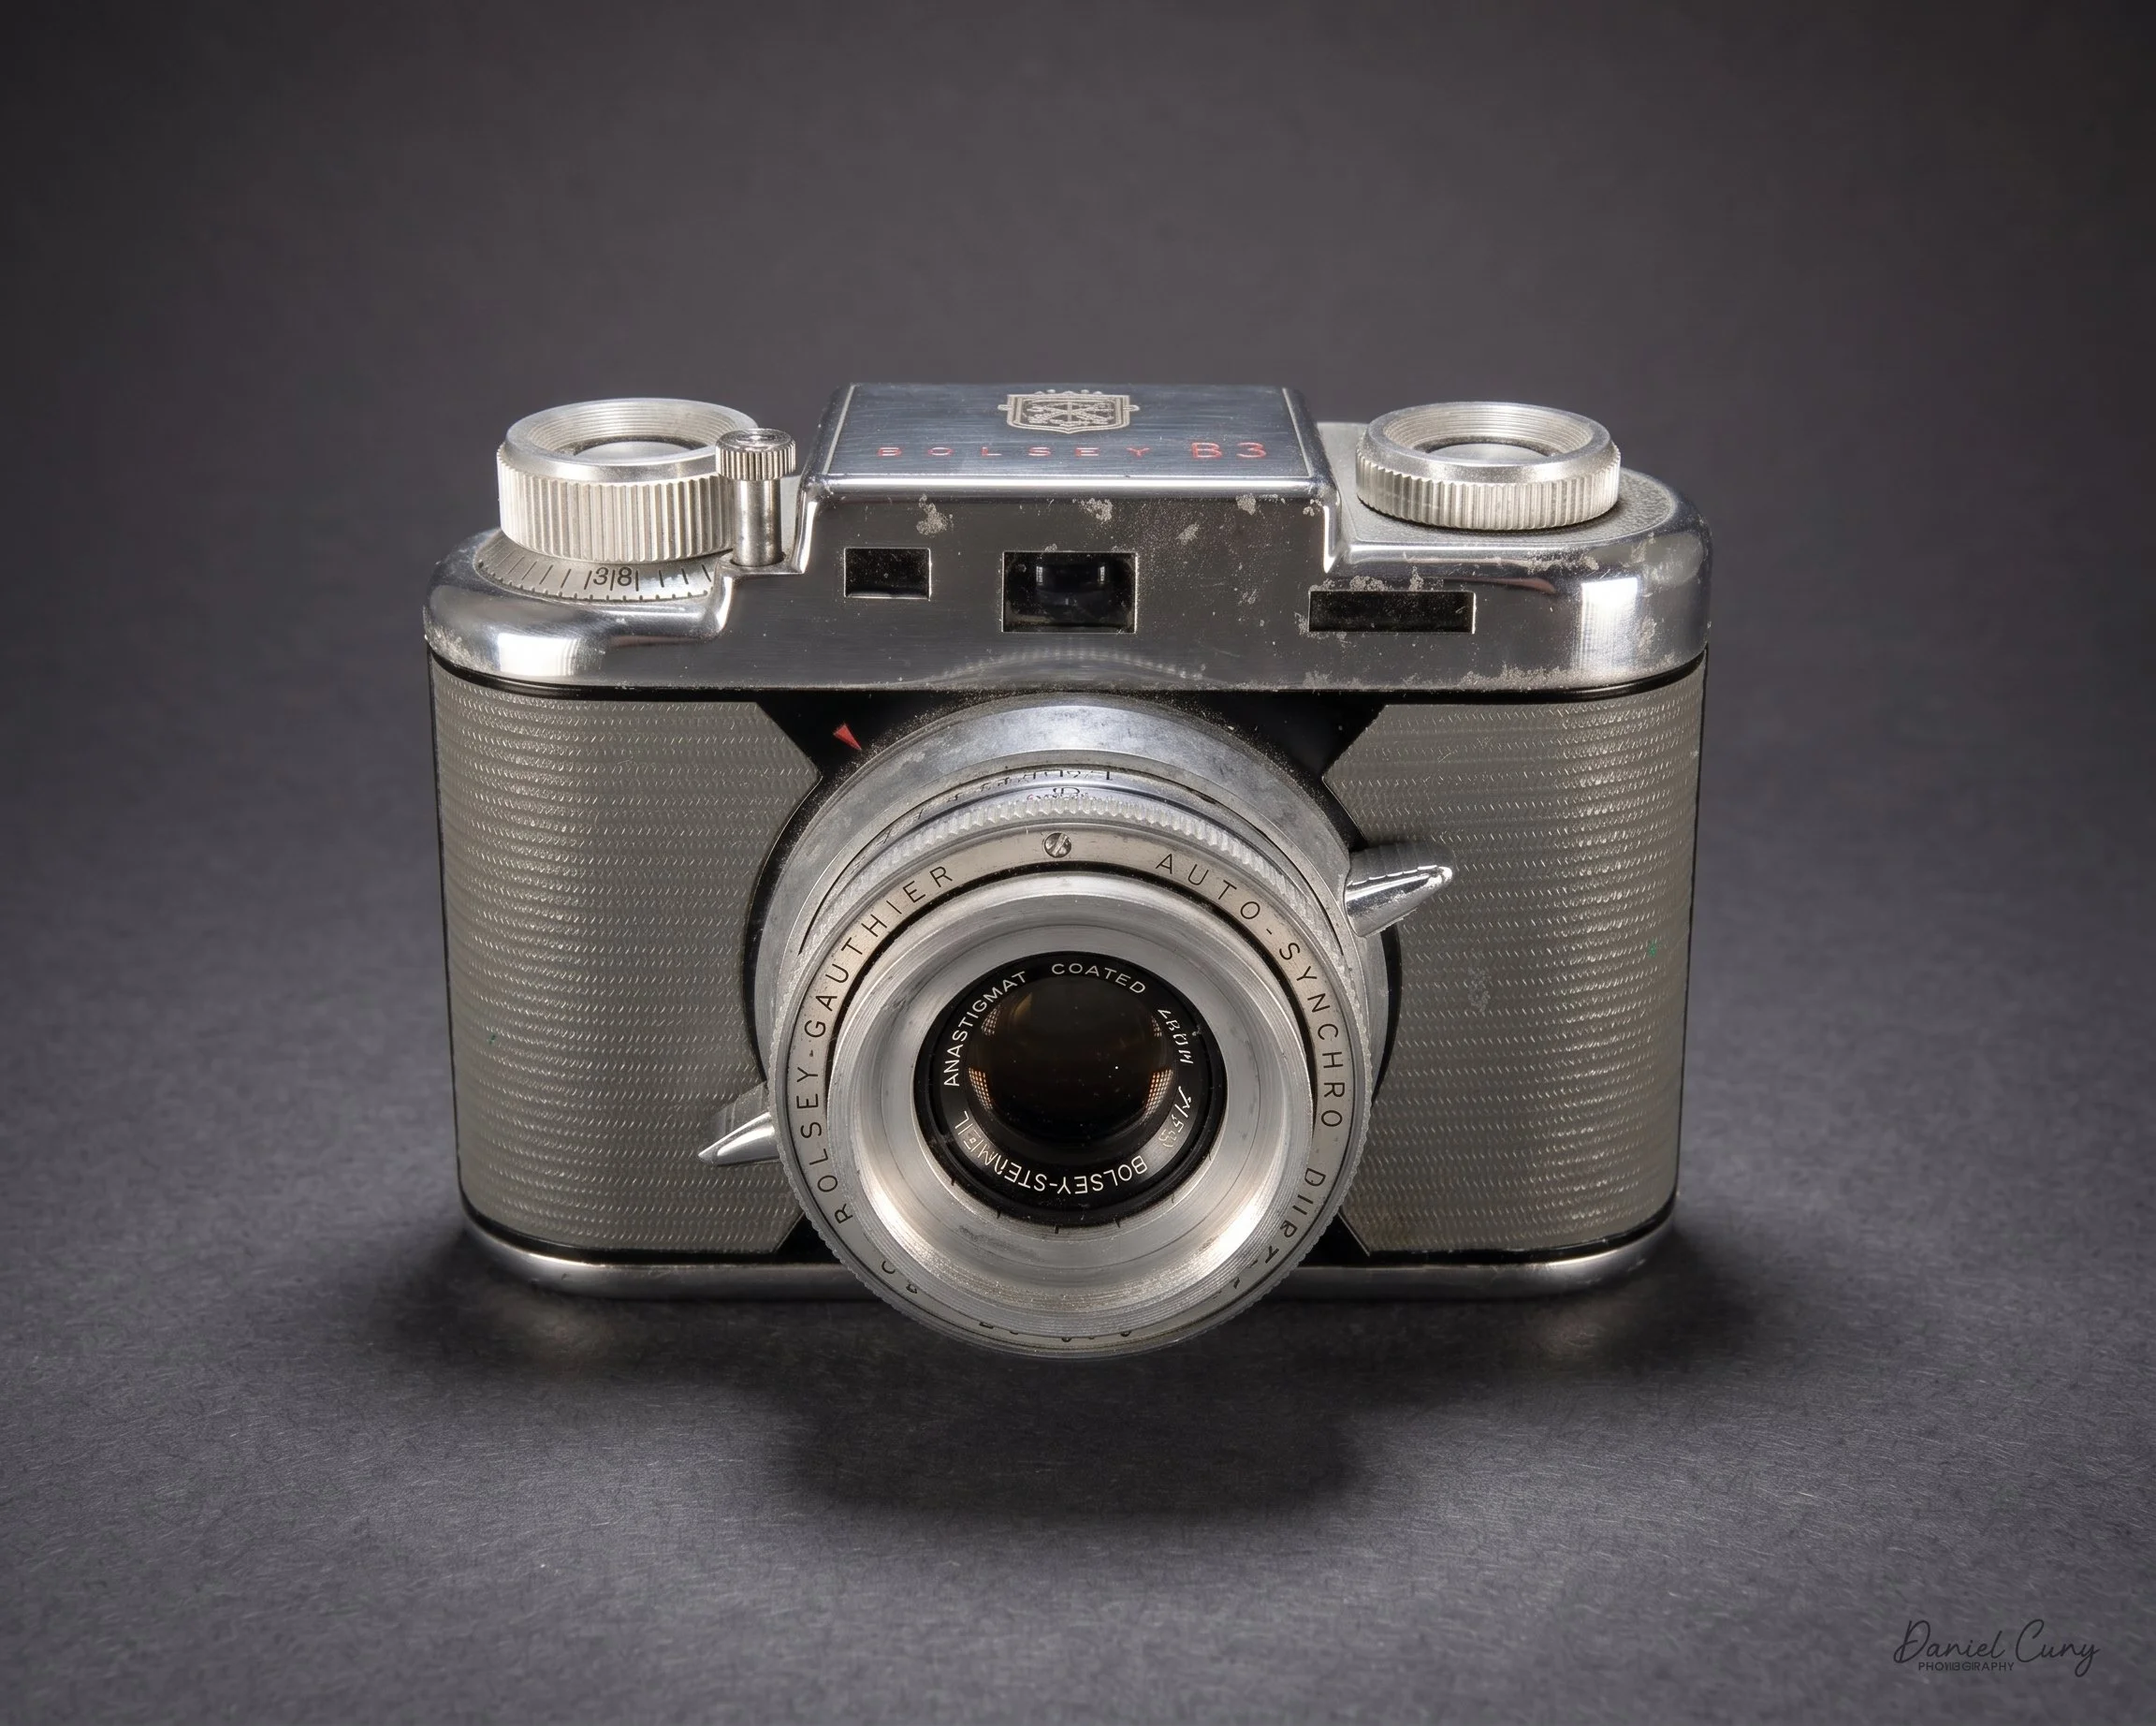
I bought the second camera, the Bolsey B3, at an antique store in a neighboring town about three years ago. I was walking through the basement section when I came across a booth with a few cameras, and there sat this grey B3. The chrome was tarnished, and the shutter was stuck open, but the top was clean, and it was grey—a color I hadn't seen on a Bolsey before. The price was only a few dollars, so even though the shutter wasn't working, I figured it would make a fantastic display piece alongside my other Bolseys.

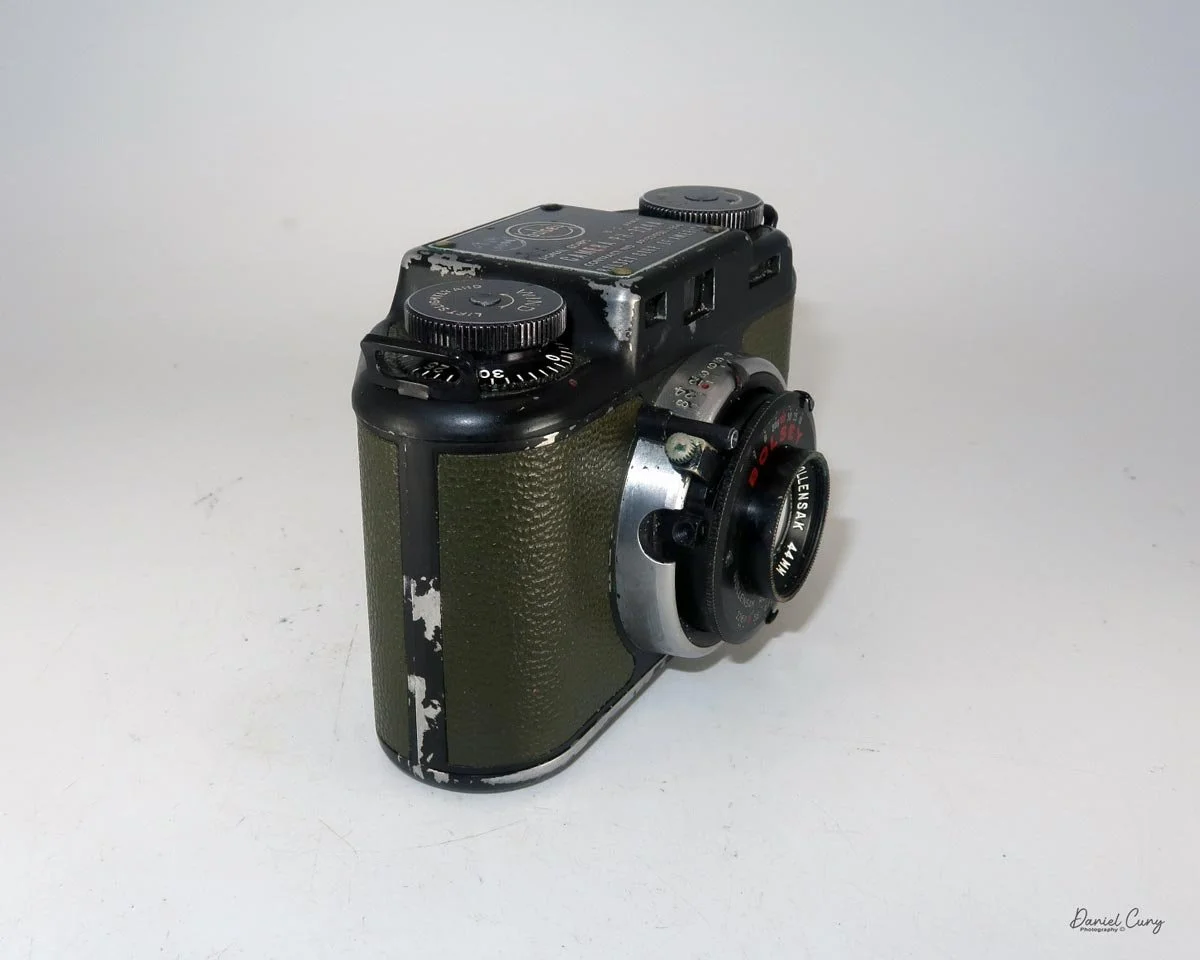
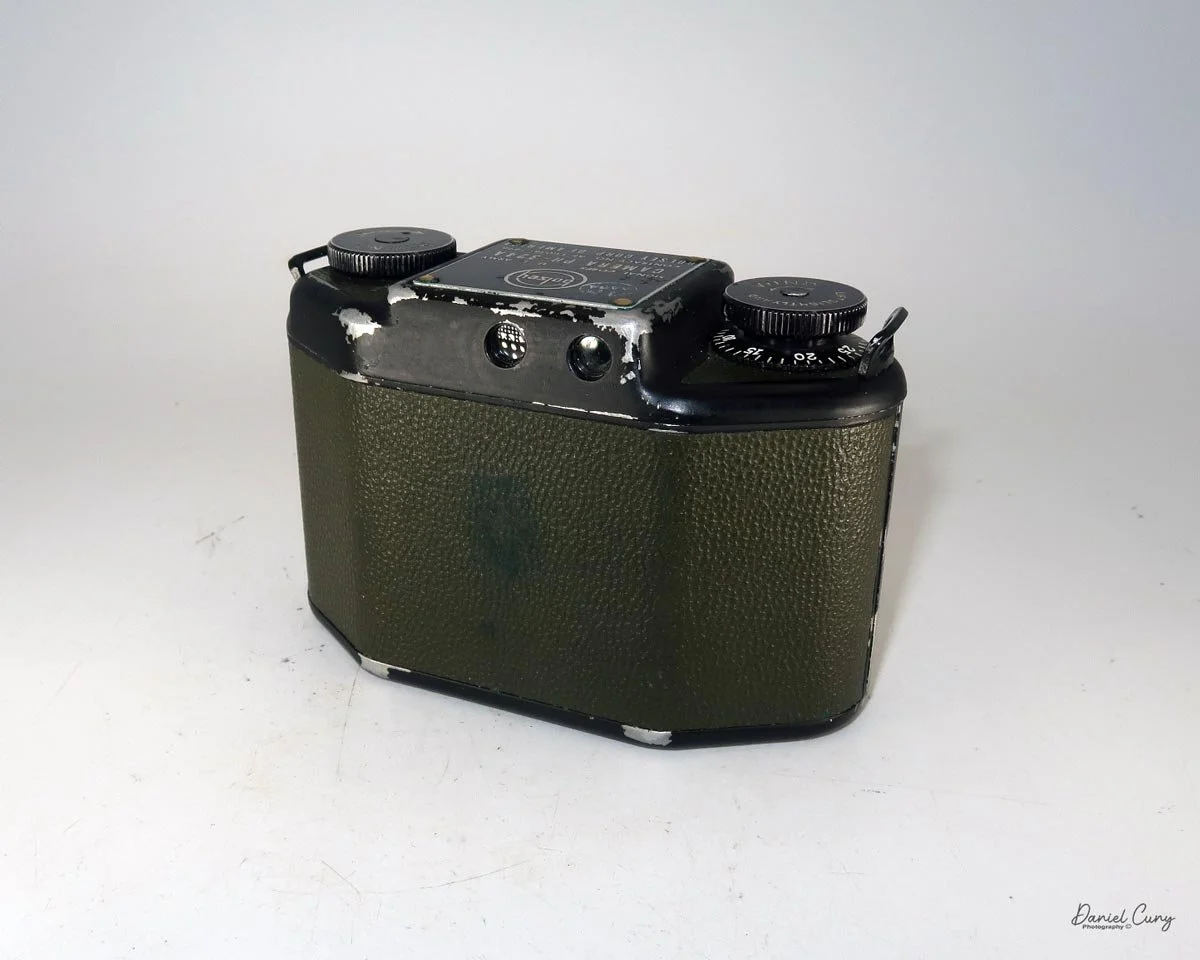
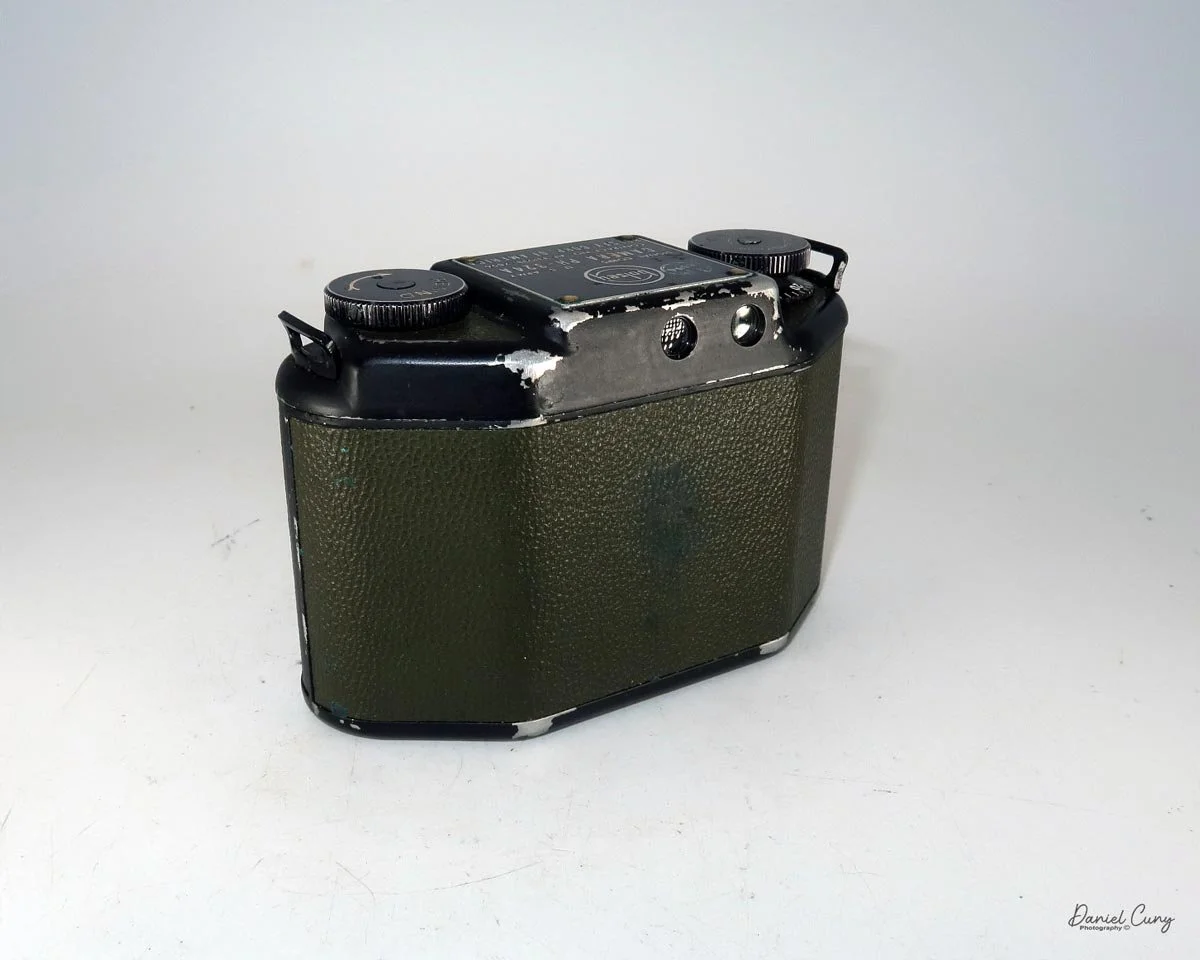
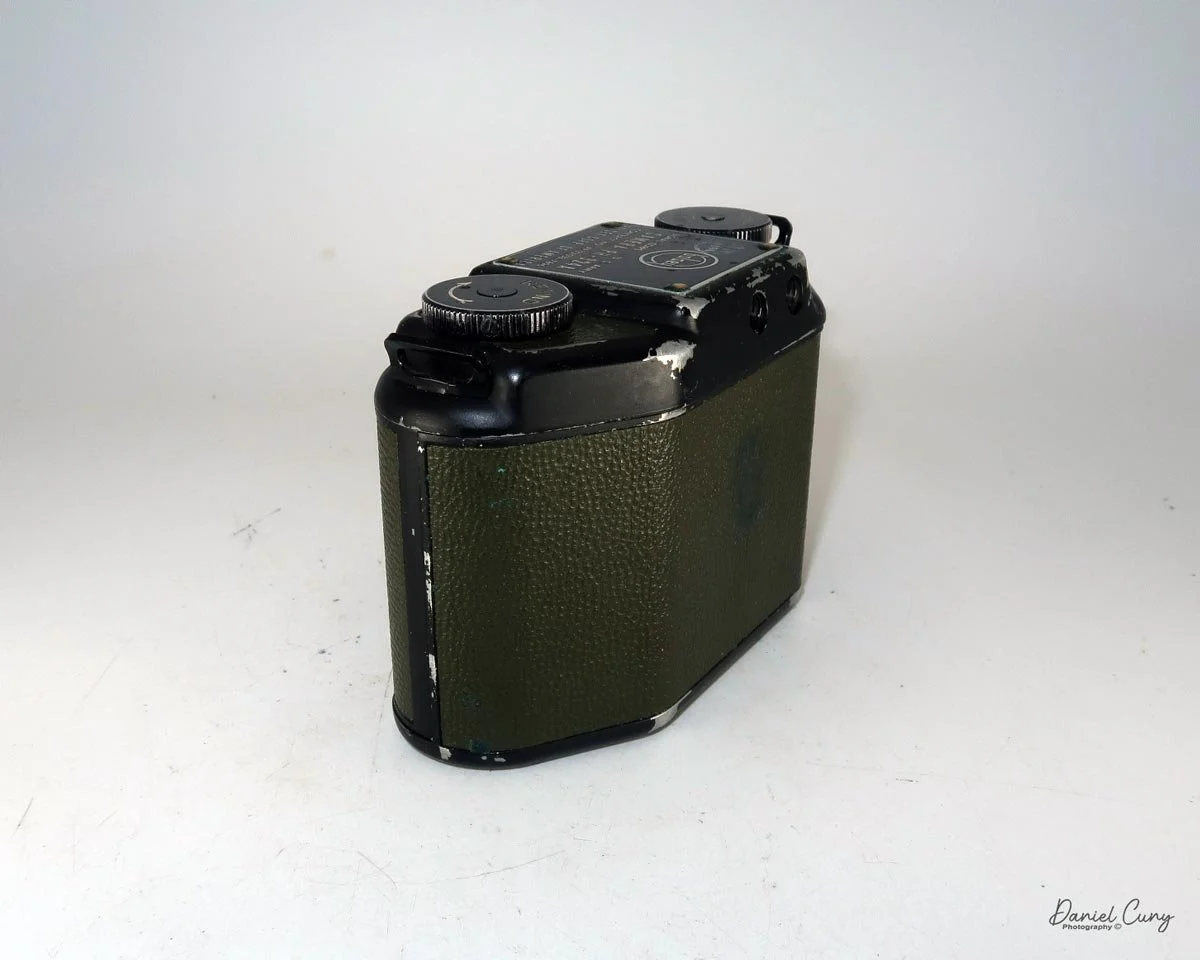
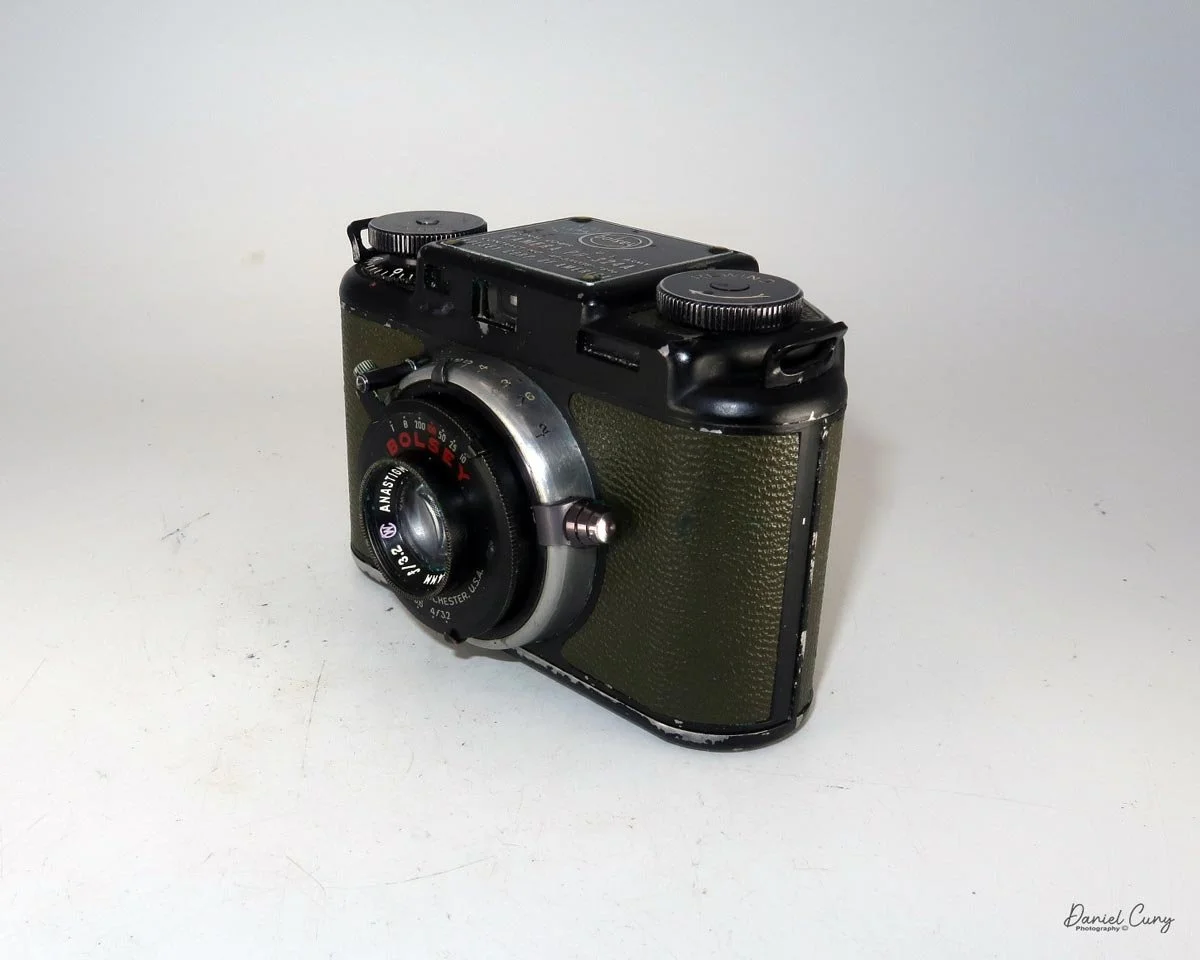
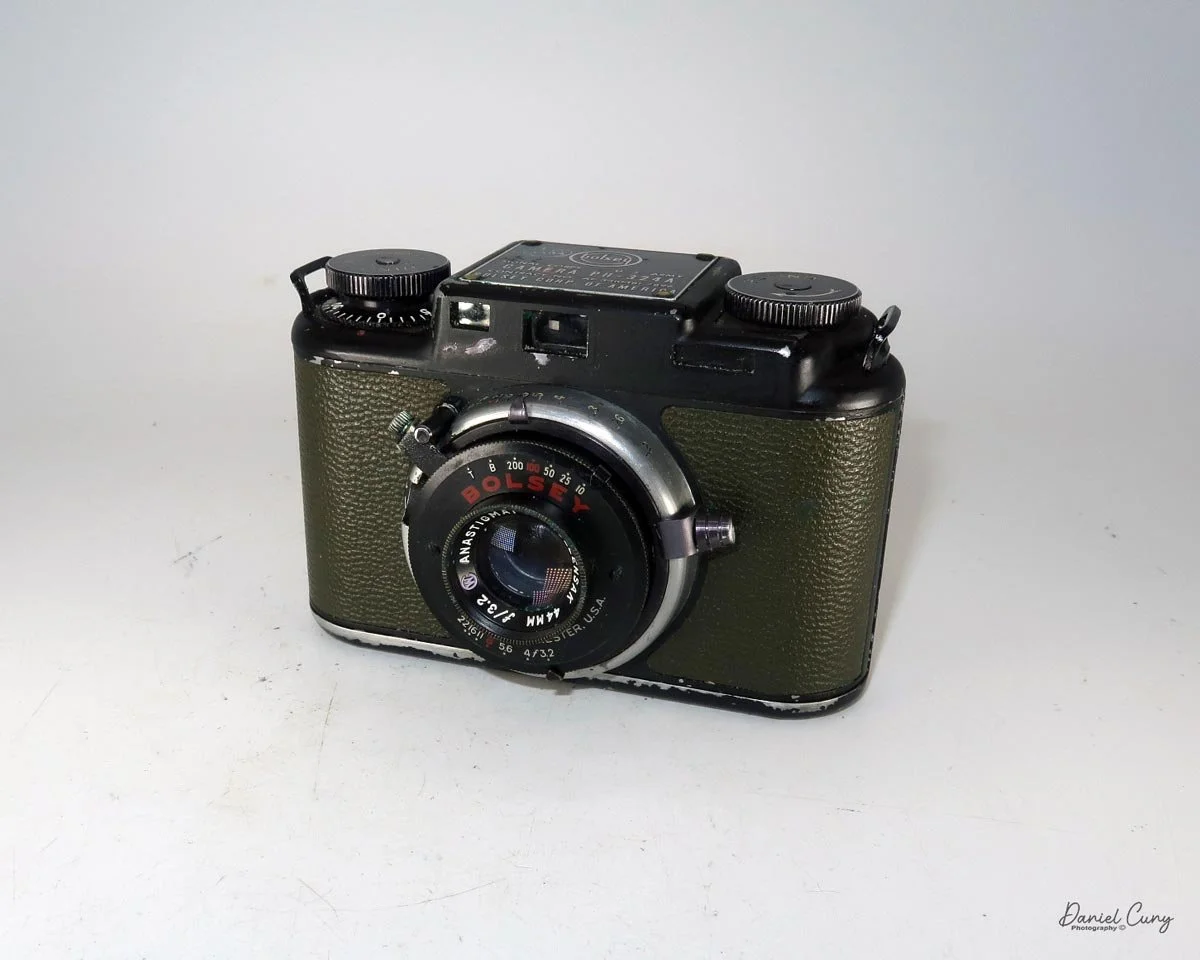
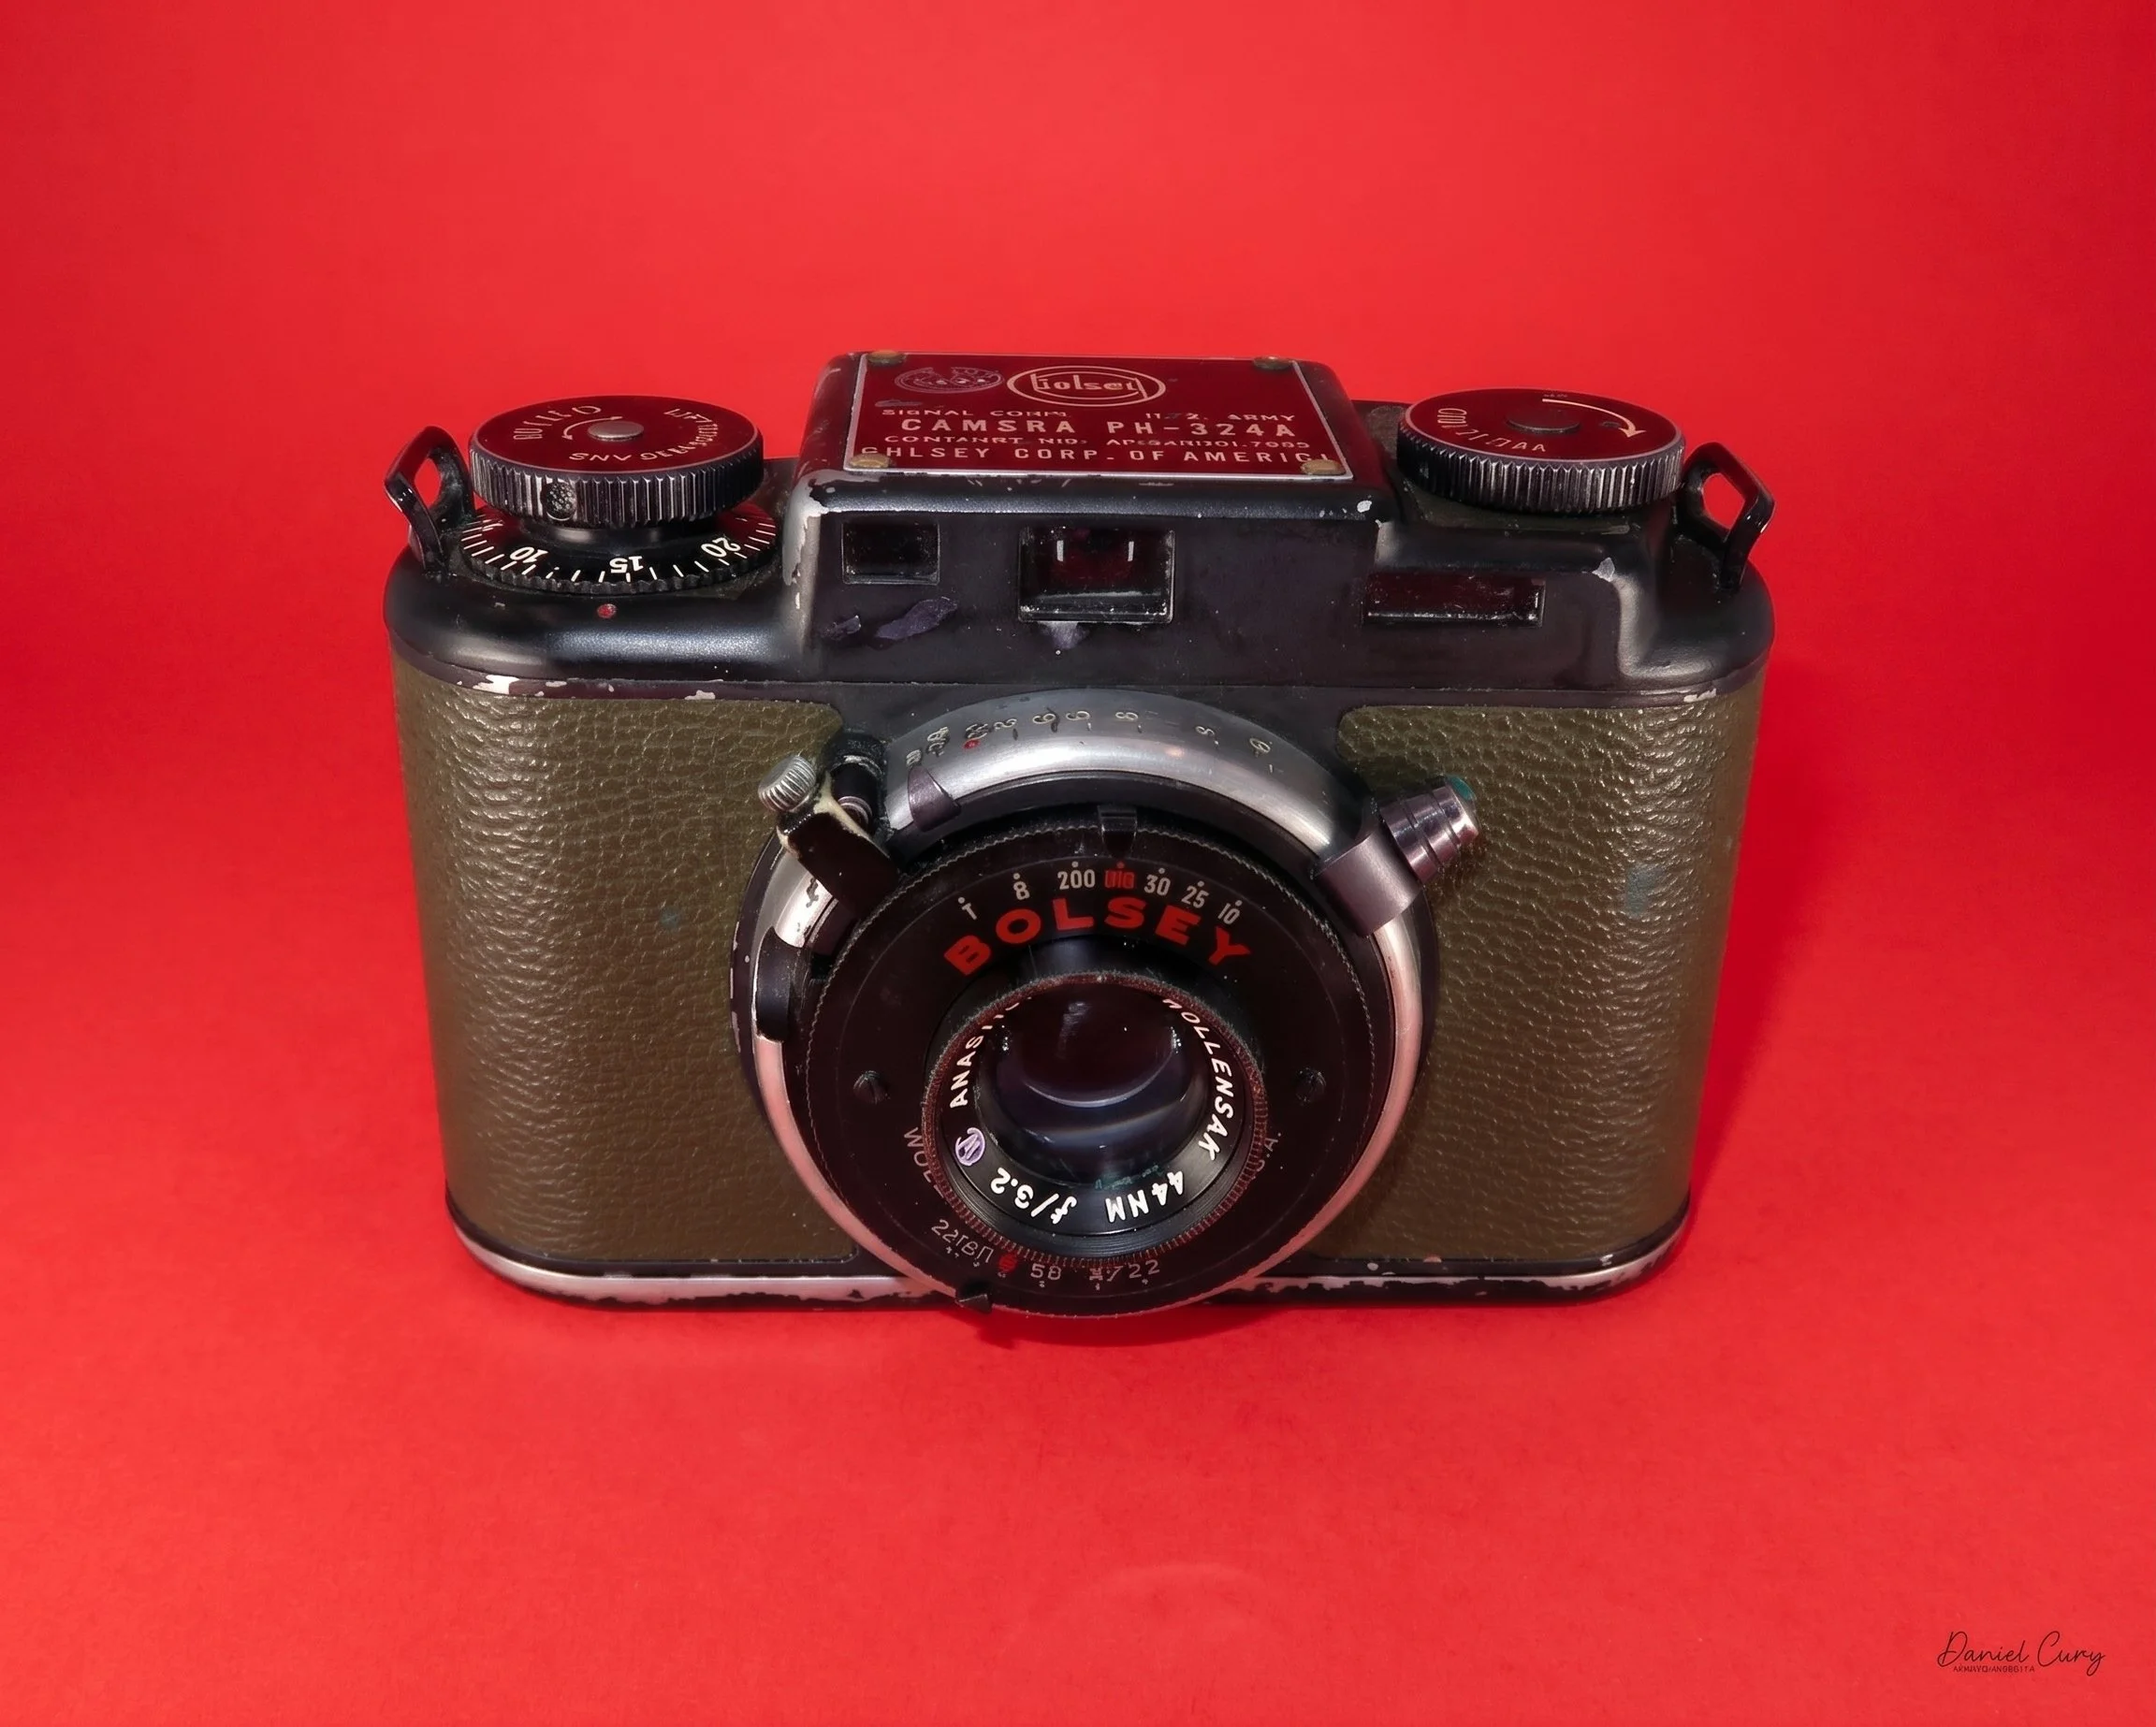
The newest Bolsey to join my collection is the PH-324A. This military camera was made for, and used by, the U.S. Signal Corps. This olive-drab camera features a stark black finish and a bold red "Bolsey" on the faceplate. It was part of a lot I bought at an auction house a few months ago.

While I always enjoy finding different colored versions of cameras, the stigma of a "military" model didn't initially excite me. That's possibly because the high prices they usually command typically turn me off—and keep them out of my budget! But the striking black finish on this one really won me over.

After processing the disappointing roll from the Bolsey Special, I loaded some film into the PH-324A and took it outside for a spin. Thankfully, this roll turned out much better, which you can see in the "Results" section below.

History:

The history of Bolsey cameras is inextricably linked to the brilliant and prolific mind of its founder, Jacques Bolsey. Born Yakob Bogopolsky in Kiev in 1895, he first made his mark on the photographic world in Switzerland during the 1920s. There, he designed the legendary Bolex 16mm motion picture camera, a revolutionary piece of equipment that helped democratize filmmaking for generations of operators. He also laid the mechanical groundwork for the Swiss Alpa-Reflex 35mm camera in the late 1930s before emigrating to the United States to escape the onset of World War II.
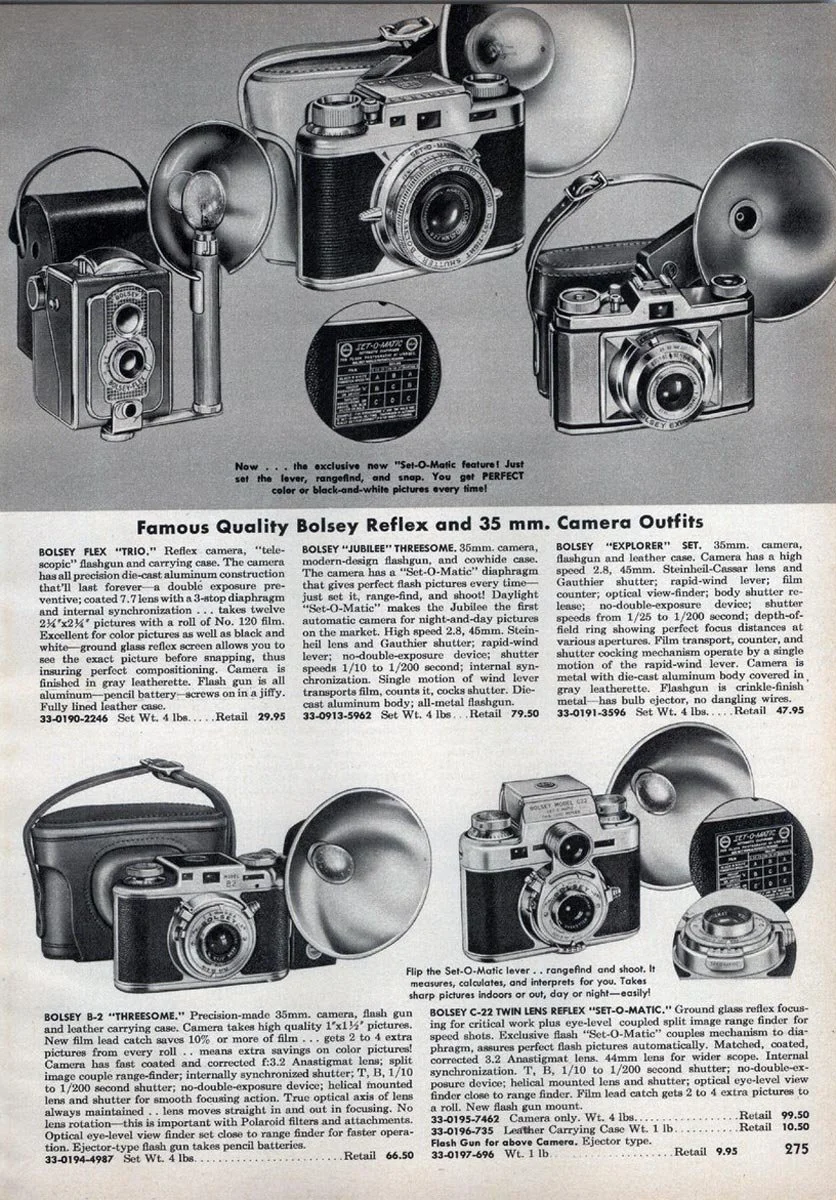
Bolsey Advertisment

During the war, Bolsey worked extensively with the U.S. government, designing durable, high-precision combat cameras for both aerial and ground photography. When peacetime arrived, he leveraged this military engineering experience to enter the booming consumer market. In 1947, he founded the Bolsey Corporation of America in New York and introduced his first major consumer camera, the Bolsey Model B.

The Bolsey Model B was a compact 35mm rangefinder featuring a distinctively heavy, cast-aluminum body. It possessed a uniquely rugged feel—a direct byproduct of Bolsey's wartime designs. Equipped with a fixed Wollensak Anastigmat 44mm f/3.2 lens and a split-image rangefinder, the Model B was both mechanically capable and affordable for the post-war middle class.

The company quickly iterated on this early success. The subsequent Model B2 added double-exposure prevention, while the exceptionally quirky Model C, introduced around 1950, stands out as one of Bolsey's most eccentric designs. The Bolsey C was an unusual hybrid: it functioned as a standard 35mm rangefinder but also integrated a twin-lens reflex (TLR) viewfinder on the top of the body. This let photographers look down into a ground-glass screen to focus, offering an alternative to the traditional eye-level viewfinder.

Later models, like the Bolsey B22 and the Jubilee (introduced in 1953 and 1955, respectively), featured a proprietary "Set-O-Matic" system. This mechanical innovation coupled aperture control directly to the focus mechanism, removing the mathematical guesswork from early flash photography.

Despite their mechanical durability and innovative features, Bolsey cameras suffered from inconsistent quality control in their external finishes. The metal plating on many camera bodies tended to deteriorate or pit quickly. By 1956, facing intense competition from domestic manufacturers like Kodak, as well as highly sophisticated new imports from Japan and Germany, Bolsey ceased camera production and sold his business interests to the Wittnauer Watch Company.

Jacques Bolsey passed away in 1962. Today, his legacy survives not only in the revered Bolex cinema cameras but also in the quirky, durable Bolsey 35mm rangefinders that remain fascinating artifacts of mid-century photographic engineering.

My Camera:

For this section, I'll focus on the PH-324A. The red "Special" is very similar to the PH-324A, while the Bolsey B3 is different mechanically and has some aesthetic differences, too.

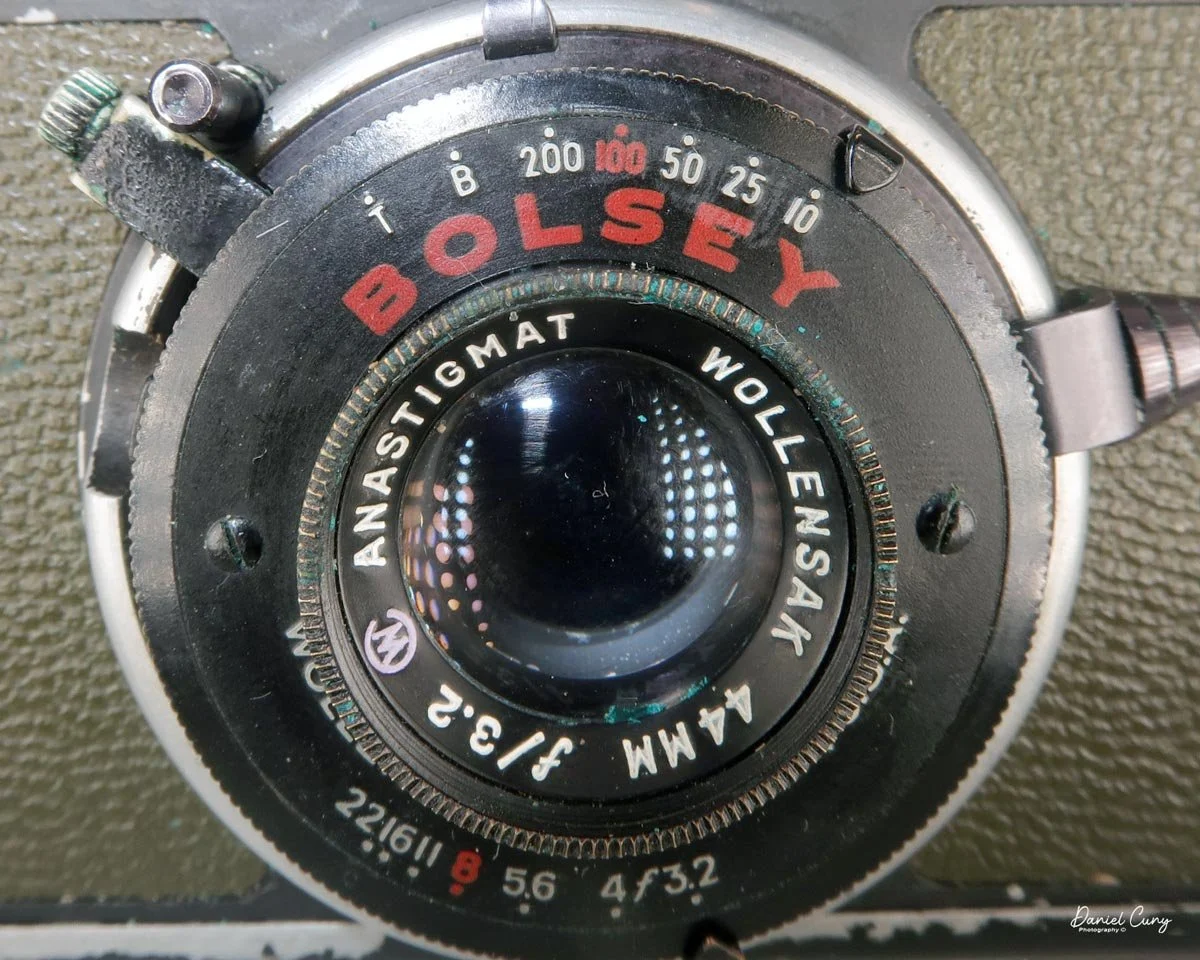
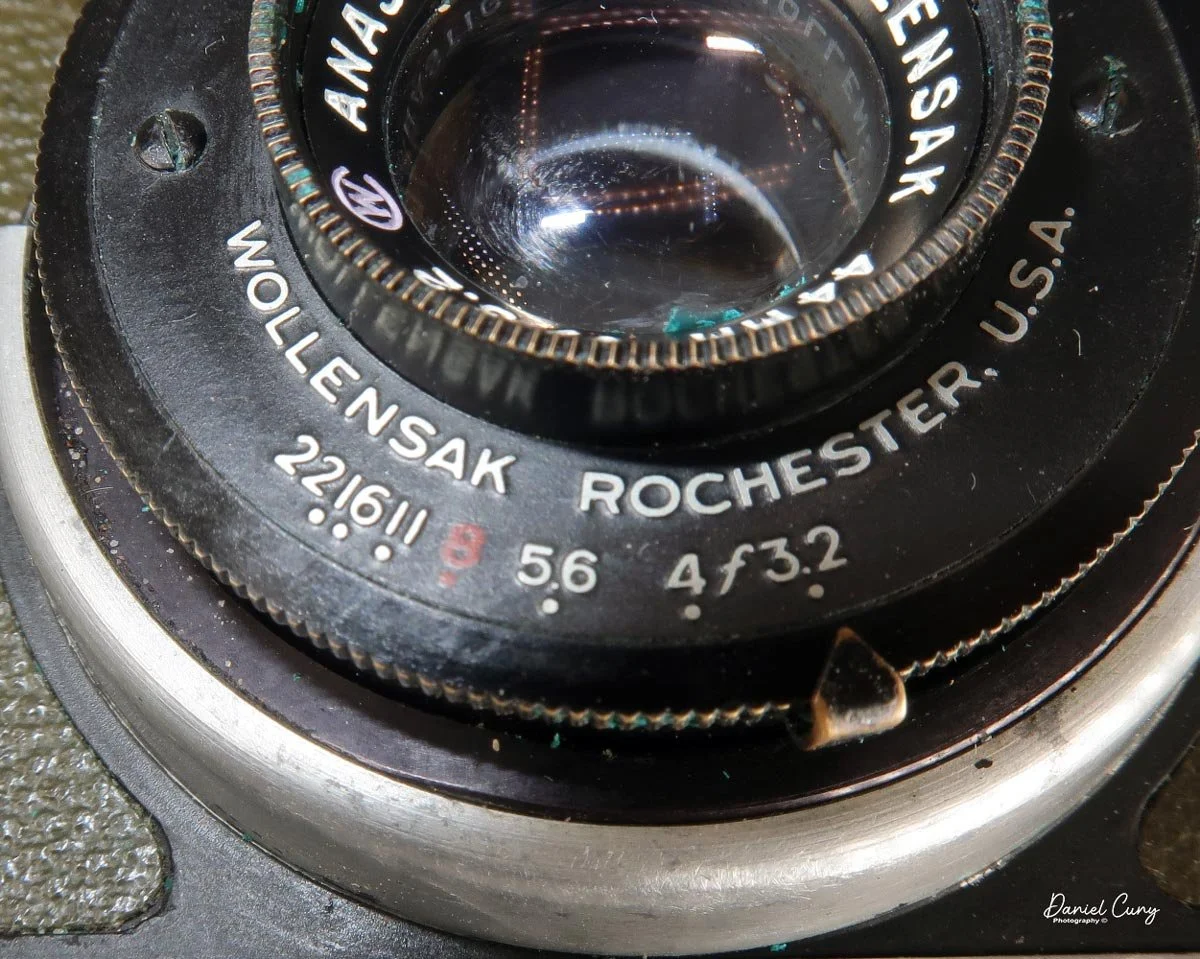
The Bolsey 35mm models are sturdy and compact, coming in at 4.25" across, 2.5" tall, and 2.5" deep, weighing 14.9 ounces without film. My camera has a Wollensak 44mm f/3.2 Anastigmat lens, and the serial number on my PH-324A is 95012.
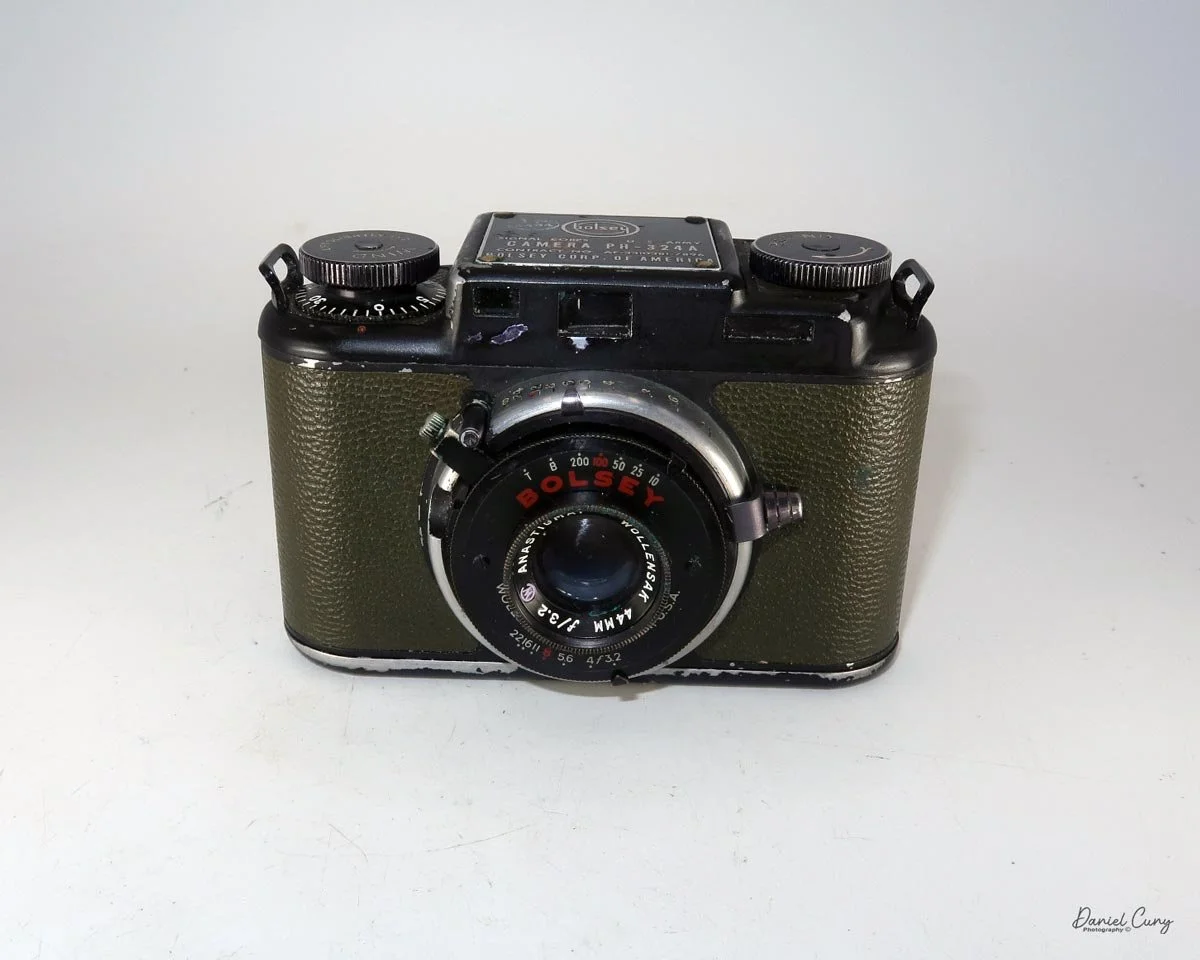
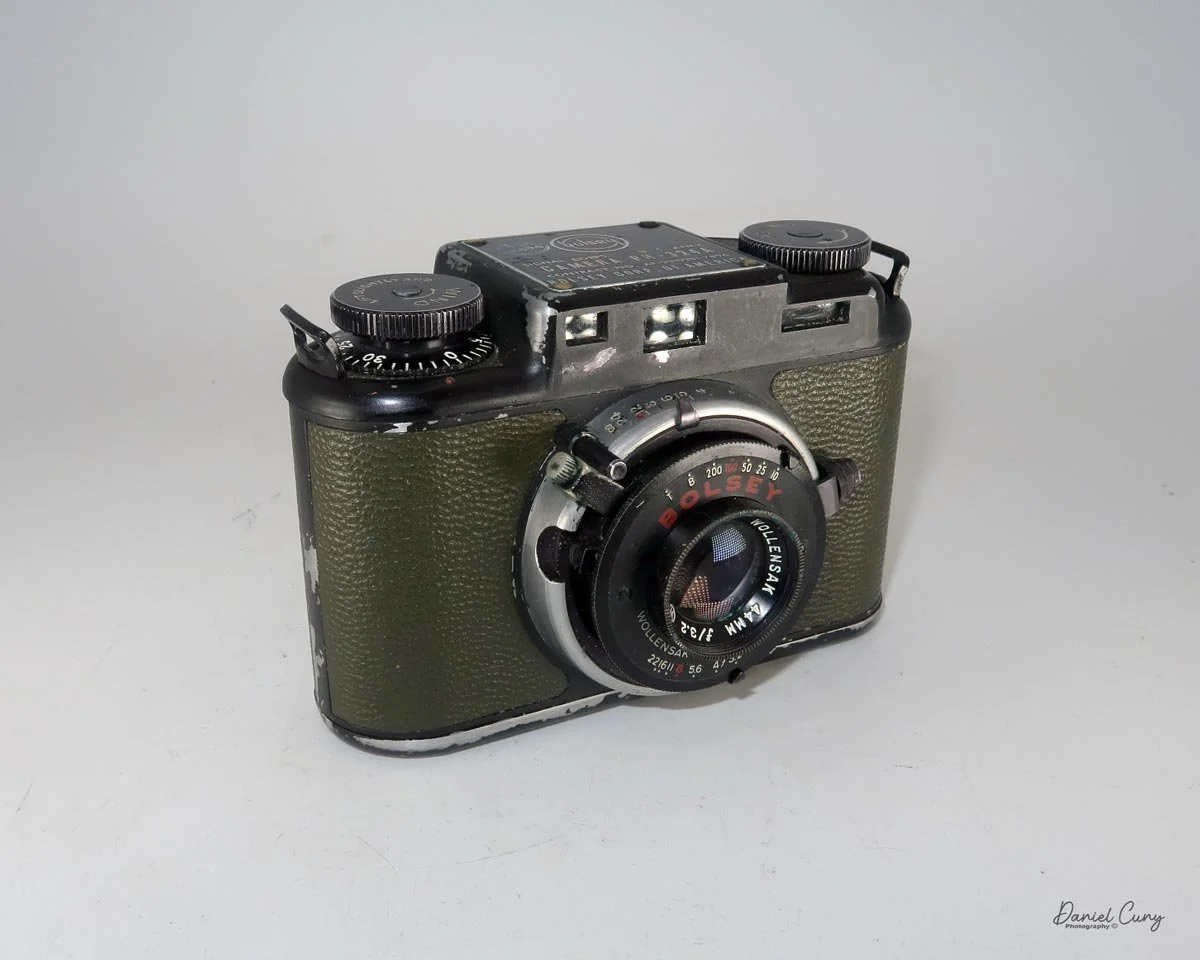
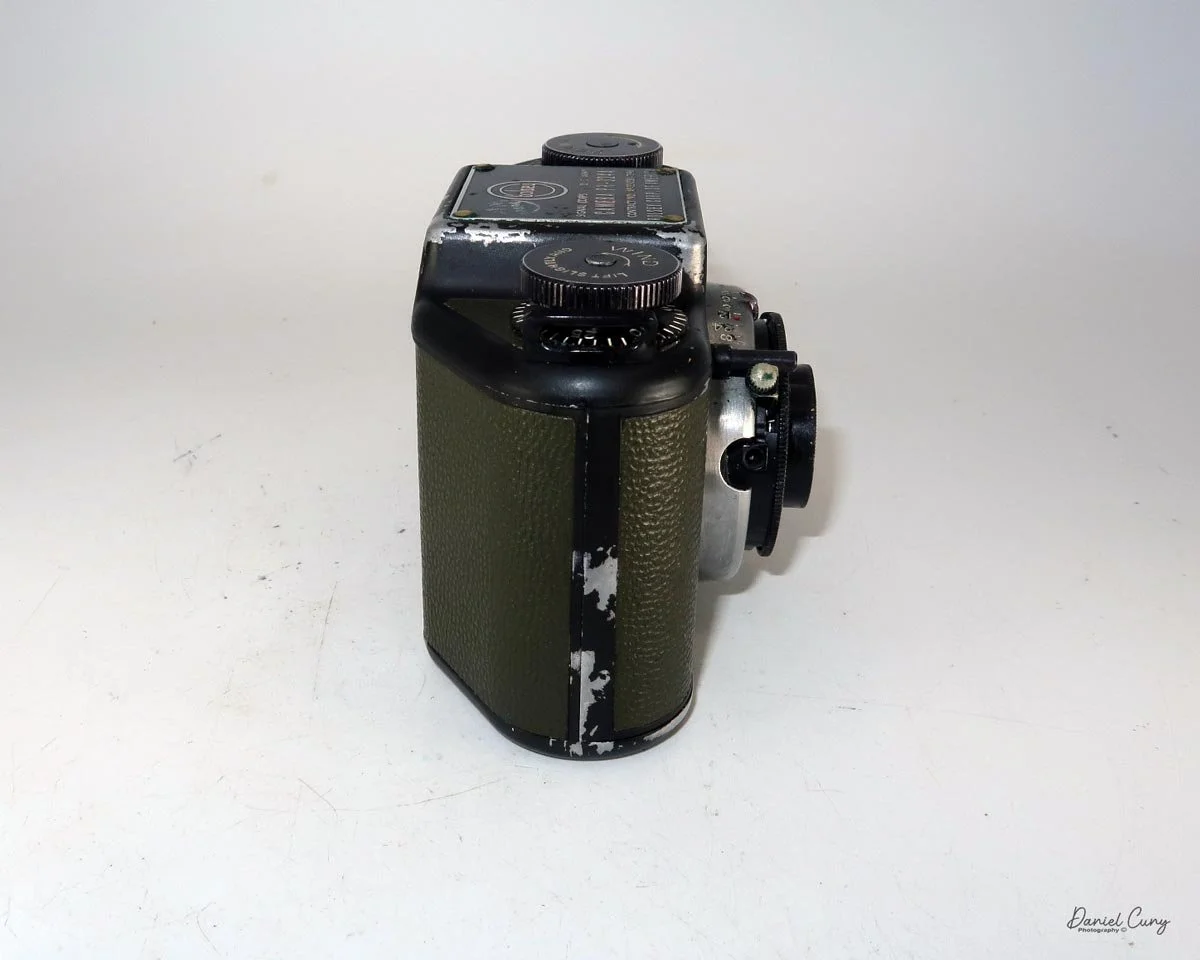
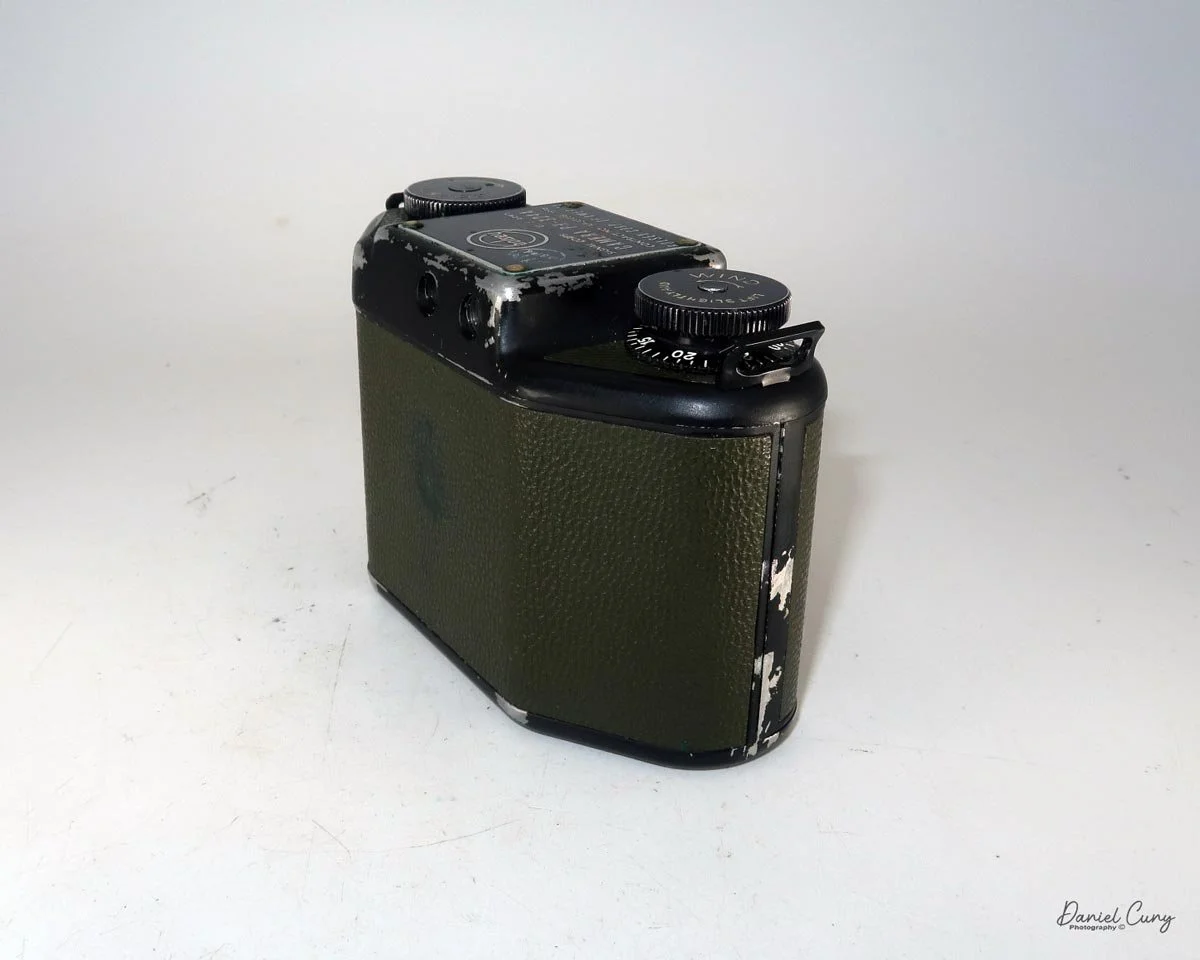
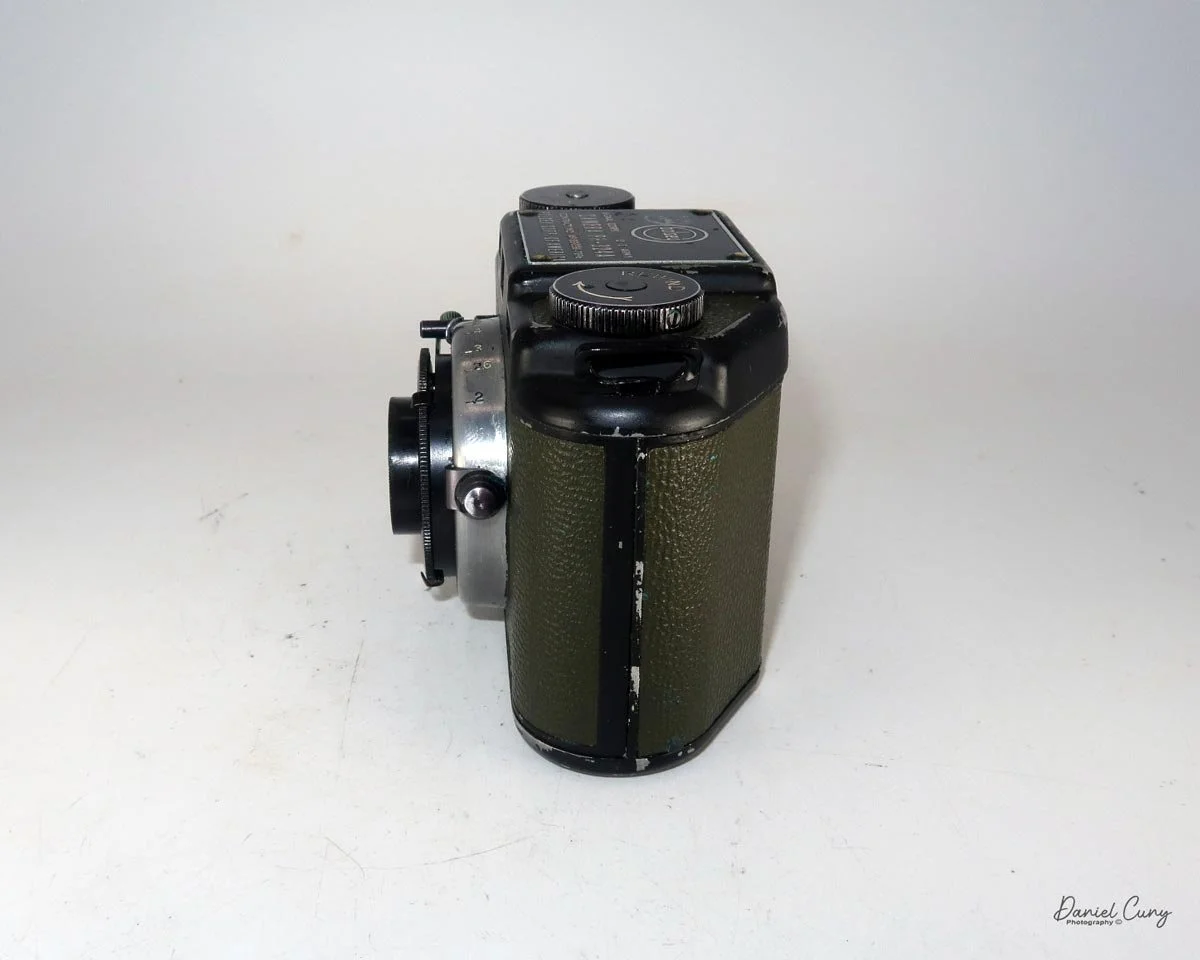
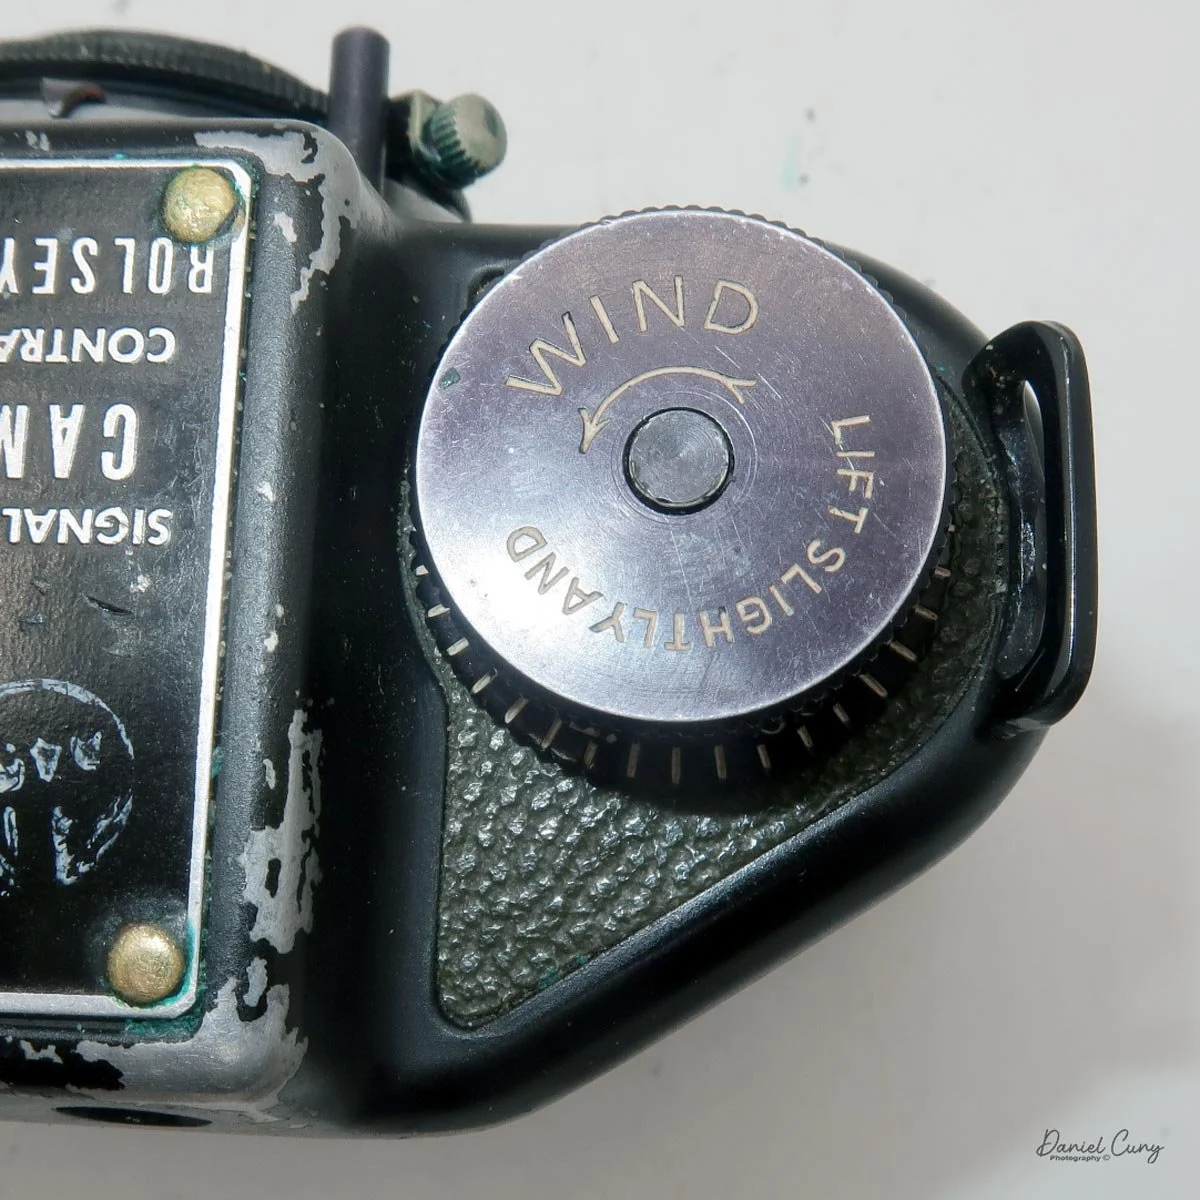
Looking along the top, you'll find just the rewind knob on the left. The middle of the PH-324A features the information plate with the Bolsey logo, reading: "Signal Corps. U.S. Army, Camera PH-324A," along with the contract name and "Bolsey Corp. of America." On the top right is the winding knob to advance the film. There's a helpful arrow indicating the turning direction, along with the instruction to "Lift slightly and Wind." Right below the winding lever is the frame counter.
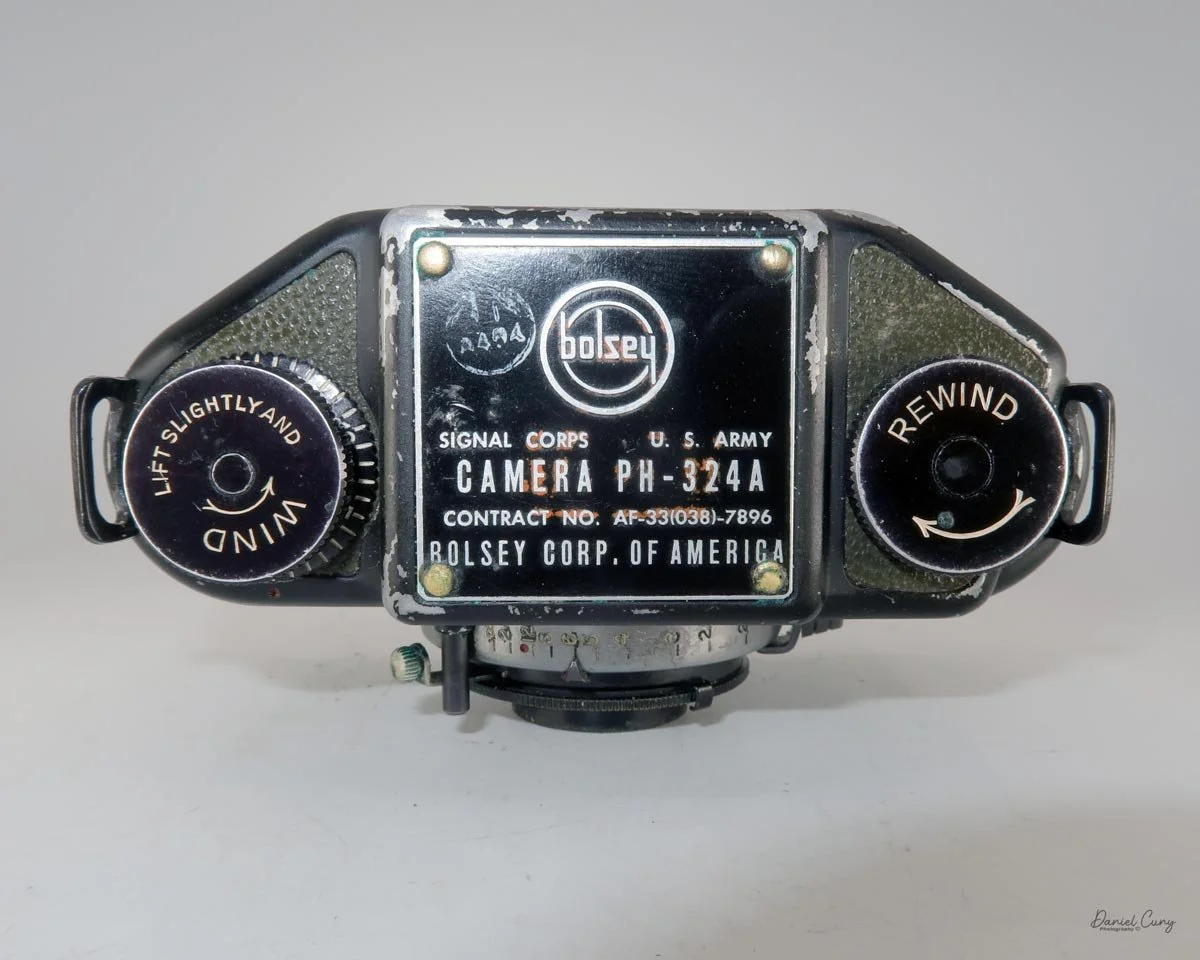
Top view of the Bolsey PH-324A camera

On the back of the camera are two holes for the viewfinder. The left is the standard finder used to frame your image, and the right is a split-image rangefinder used for focusing. For me, they are a little difficult to use, but I think that's because of the eye surgery I had over a year ago and simply getting more accustomed to using my left eye to focus.
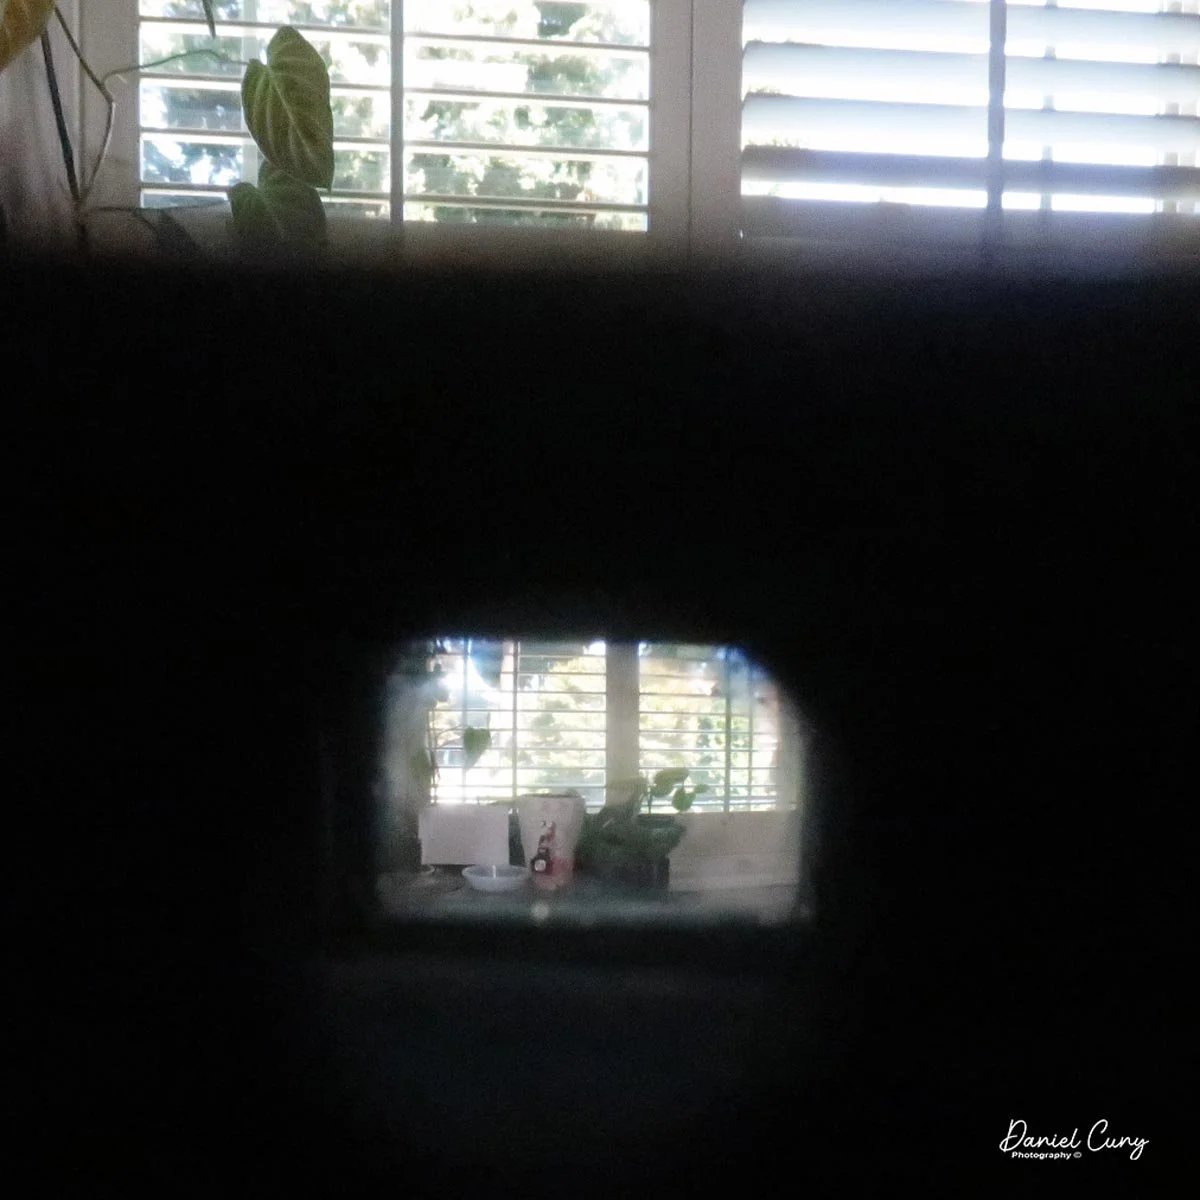
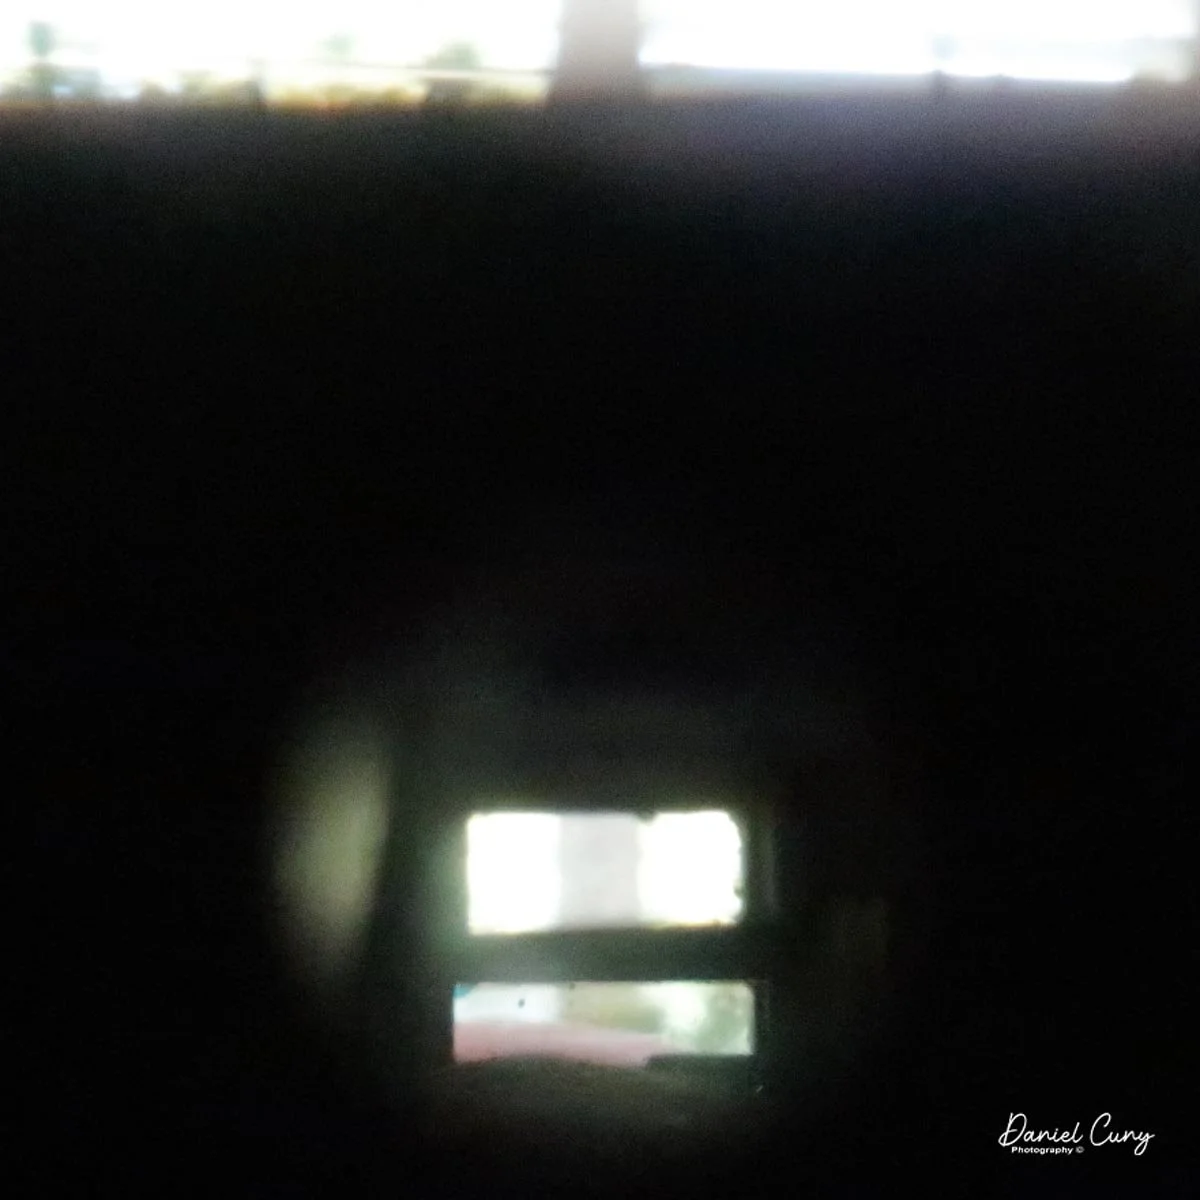
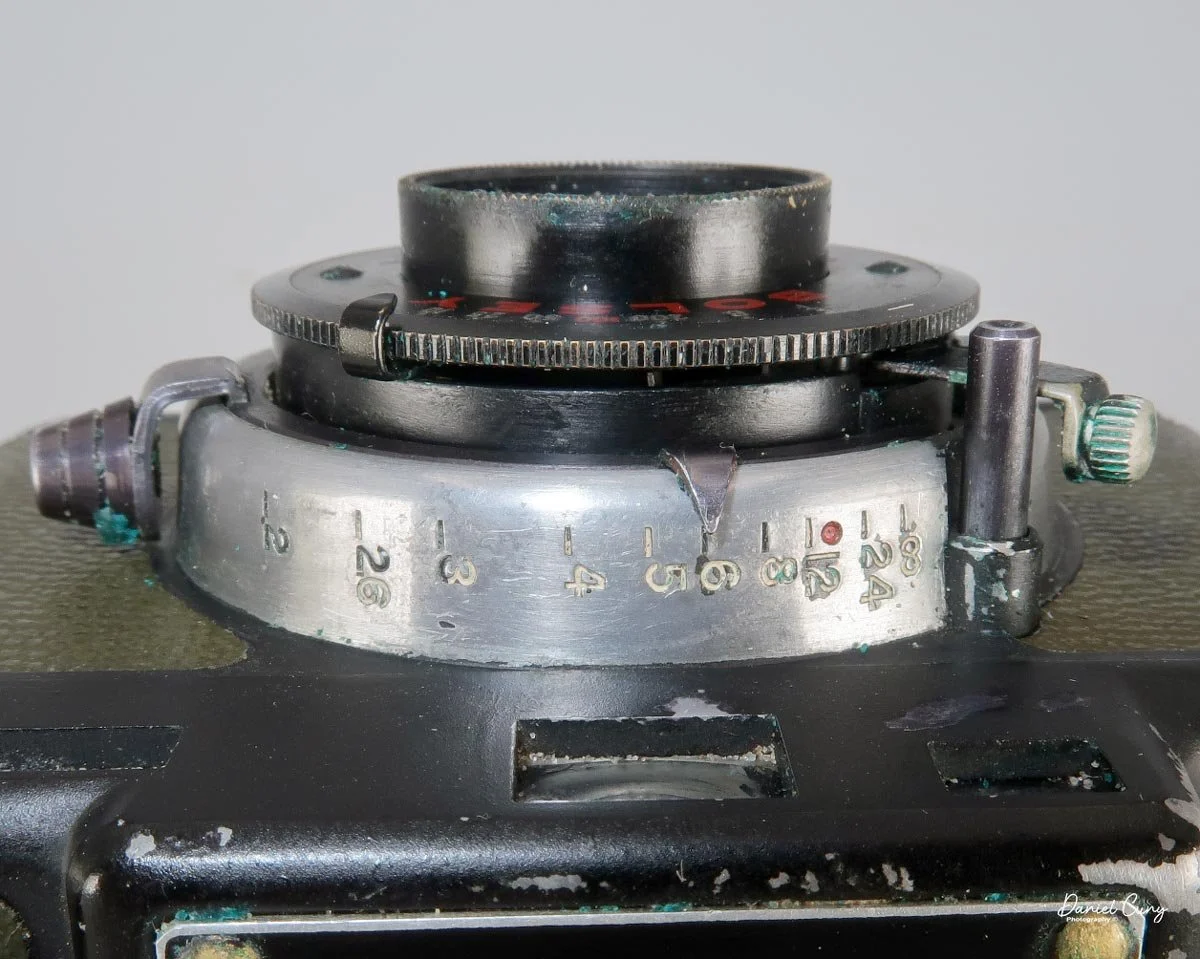
Moving to the front, the viewfinders are at the top. Down by the lens, you focus by sliding a large tab on the left side (as you hold the camera). On the PH-324A, there is a red dot and a slight indent just past the 12-foot mark. This is designed for hyperfocal focusing. Similar to how an Instamatic works, if you set the camera's focus to this point and use a small aperture in normal sunny conditions, your depth of field will keep everything from approximately 5 feet to infinity in sharp focus.

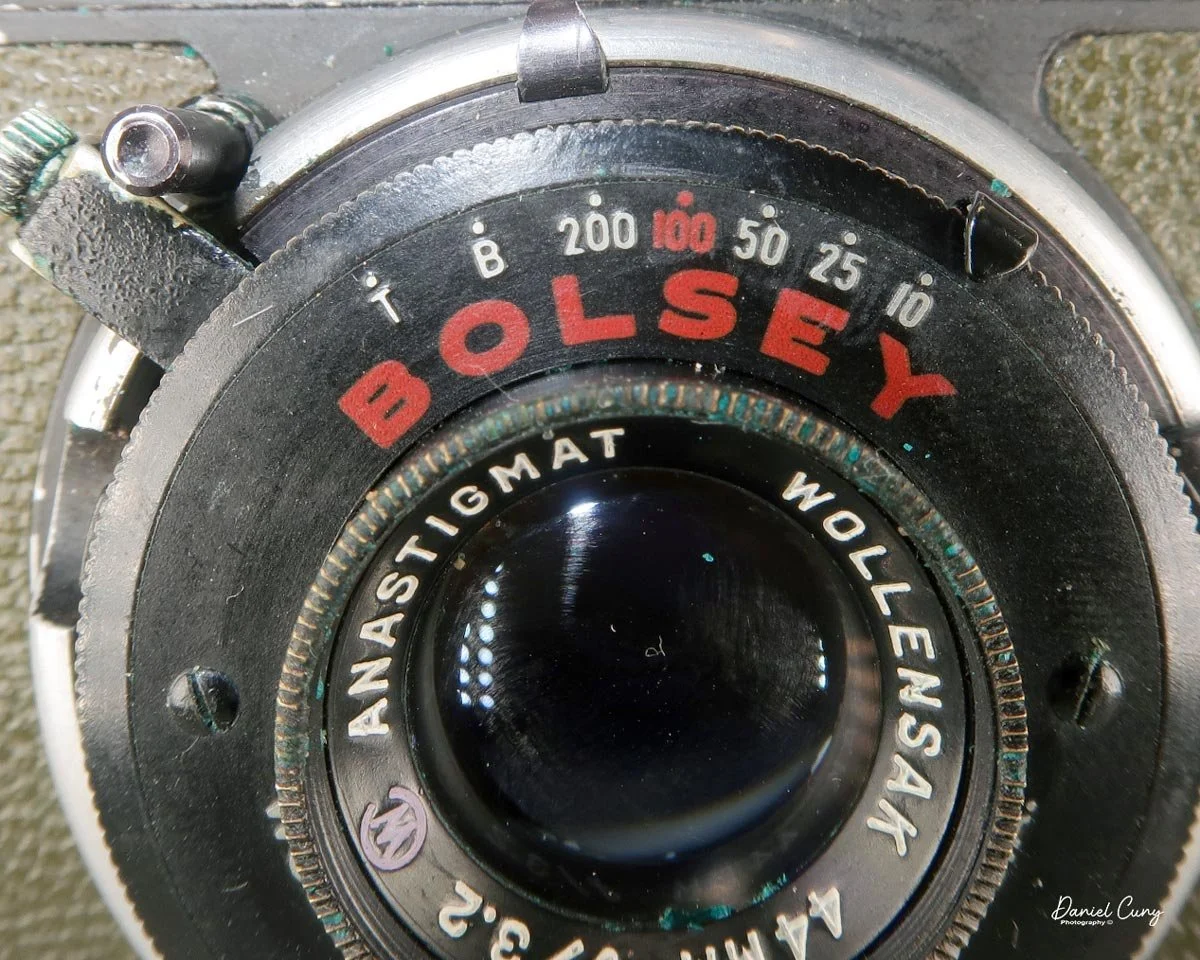
Above the lens are the shutter speeds, which range from 1/200 down to 1/10, along with "B" for Bulb and "T" for timed exposures. The 1/100 shutter speed is printed in red. You turn the outer knurled ring to select your desired speed.

Below the lens are the aperture settings, ranging from f/3.2 to f/22. Set these by sliding the small arrow to match your lighting conditions. The f/8 mark is also printed in red. When you set the camera to 1/100, f/8, and focus on the red dot (around 15 feet), the camera is extremely easy to operate because all the primary settings are color-coded in red.

The shutter release is located around the lens assembly in the ten o'clock position. Just press it down to fire the shutter.
The bottom of the camera has the film door release. Flip the lever to "open," then slide the back off to expose the loading area. From there, you load it as you would any standard 35mm camera.

After taking a photo, you must follow the instructions engraved on the film advance knob. I didn't notice this when I first loaded the camera. The winding gears felt stuck, and I actually tore some of the sprockets right off the film. To advance the film properly,  lift the winding knob slightly, then start turning.
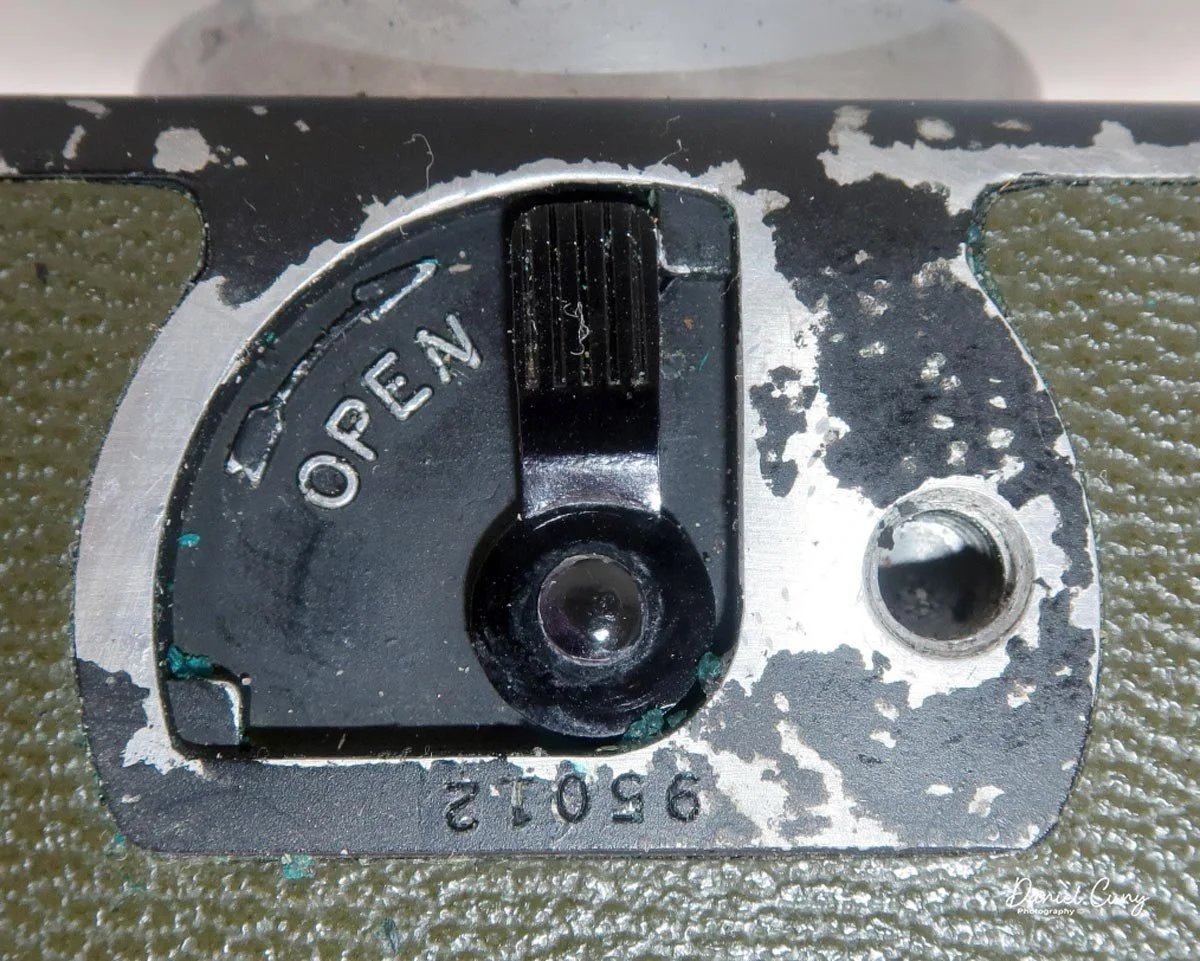
Lifting the knob releases the internal lock on the advance gear, allowing you to wind to the next frame. Without lifting it, you'll tear the sprocket holes just like I did before consulting the manual. When it's time to rewind the film into the cassette, there is no release button for the drive gears. You wind the rewind knob in the direction of the arrow, and the film pulls smoothly back into the cassette.
Results:

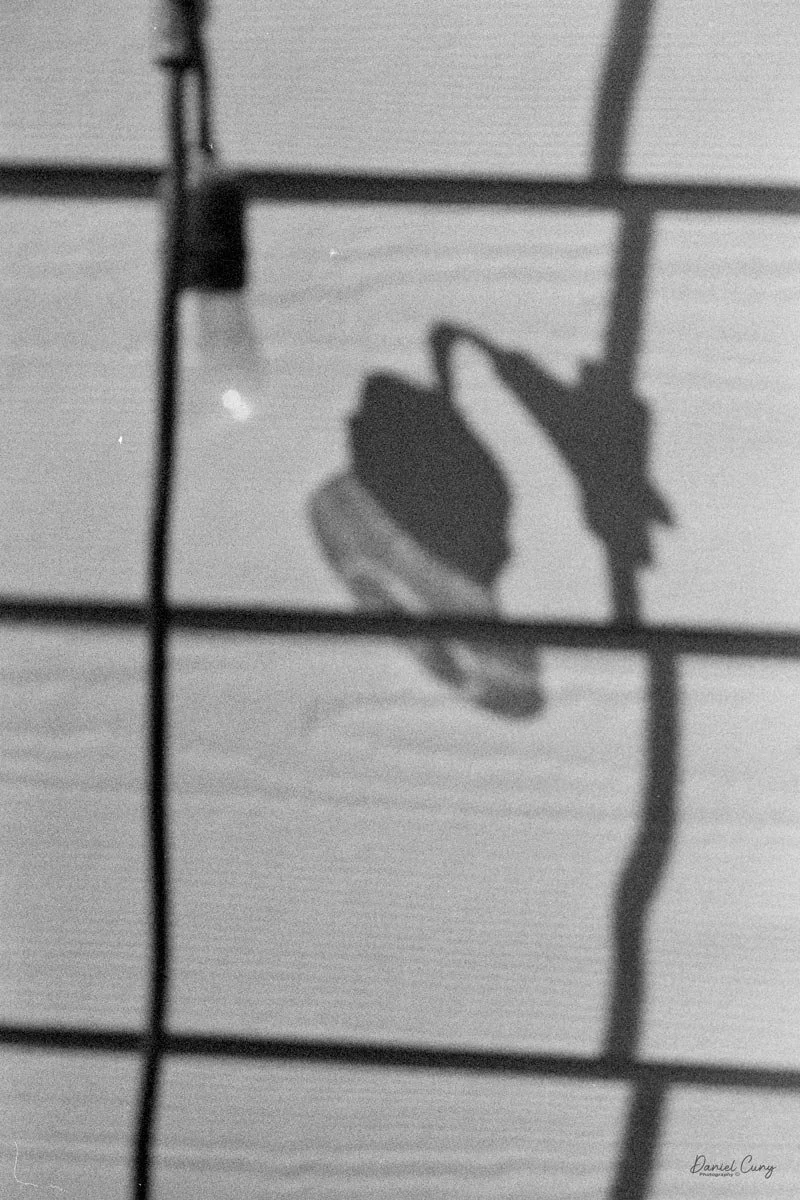
Loading up some expired Plus-X film from 1976 (which is still great film, by the way), I took a walk through my neighborhood and captured several of my usual test views.

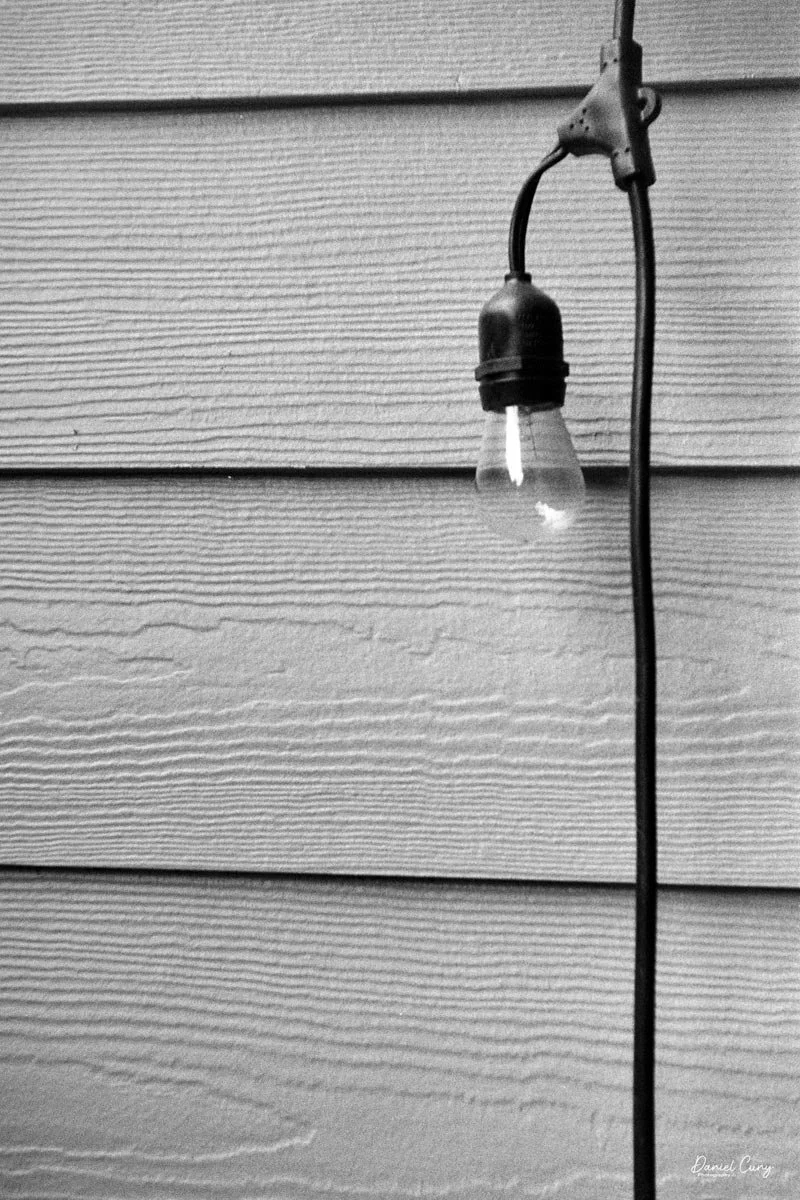
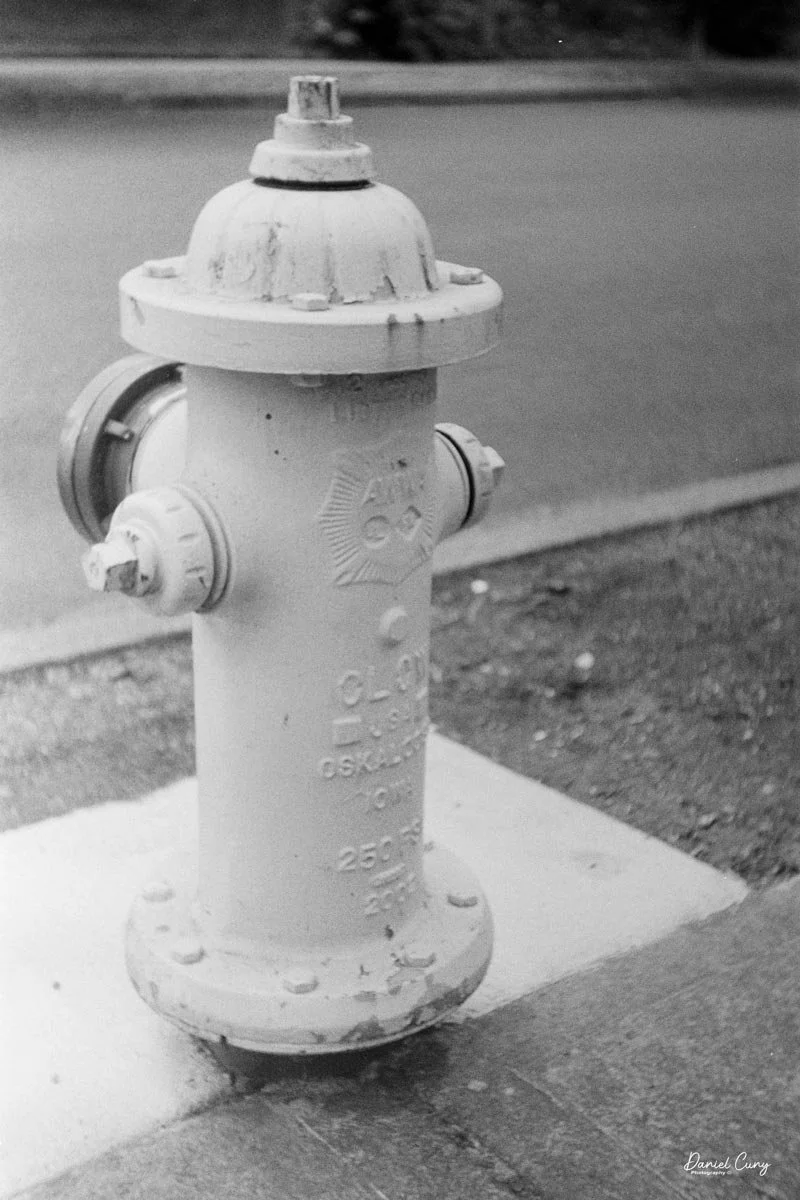
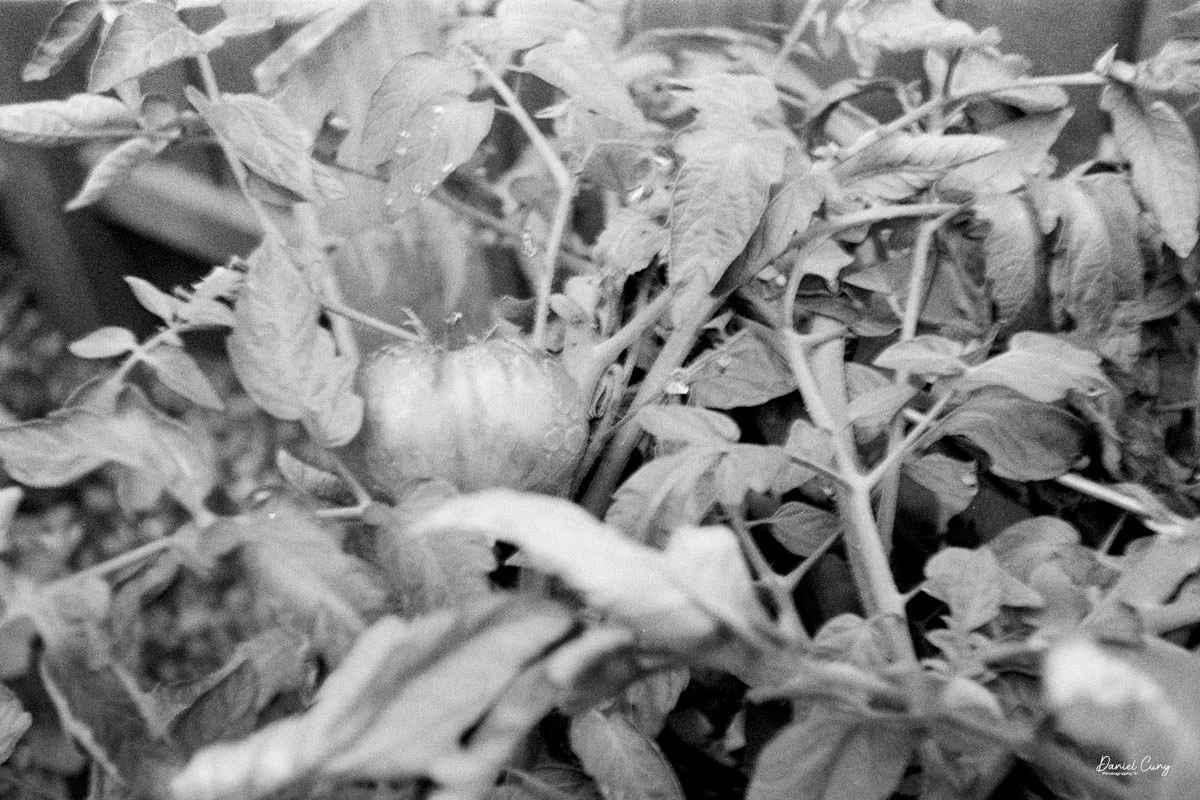
Here are a couple of the images taken with the red "Special." The final few—and much sharper—images are from the PH-324A, which did a considerably better job!
Conclusion:

The Bolseys are incredibly fun cameras to shoot with and remain some of my favorites in my collection. They are even more fun to use once you read the instructions and learn how to advance the film without tearing the sprocket holes!

The focus was surprisingly easy to nail, even for an old guy using his left eye. The viewfinder was clear, the shutter speeds seemed accurate, and the lens was sharp, producing some genuinely nice images despite the larger grain structure of the vintage Plus-X film.

Thank you for taking the time to read about some of the Bolsey cameras from my collection.

Overall, my experience with these cameras was very positive. While a slightly larger finder window would be nice, I do love shooting with a compact camera every once in a while. I've always felt that Bolsey cameras were well-built, quirky, and an absolute joy to use.

Are you interested in other vintage gear? Here are some of my other Camera Reviews.

Check out my Cuny's Camera Collection YouTube channel, where I am putting together video overviews of the cameras I write about. Be sure to subscribe and like the channel, too!

Cuny's Cameras and Photos is my online eBay store, where you will find some of the cameras I have reviewed, along with a wide range of other cameras, lenses, and items from my collection that I am thinning out.

Until next week, please be safe.
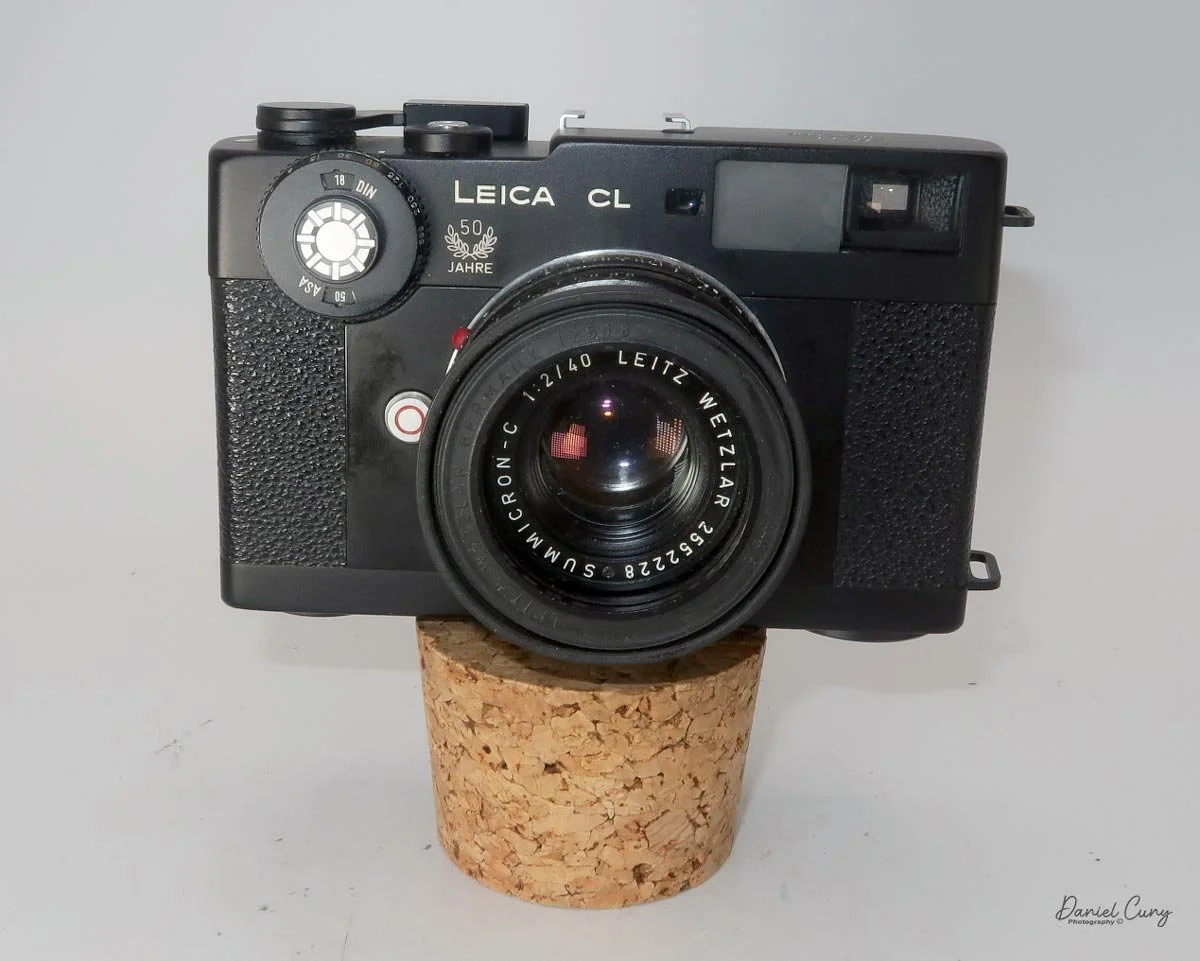
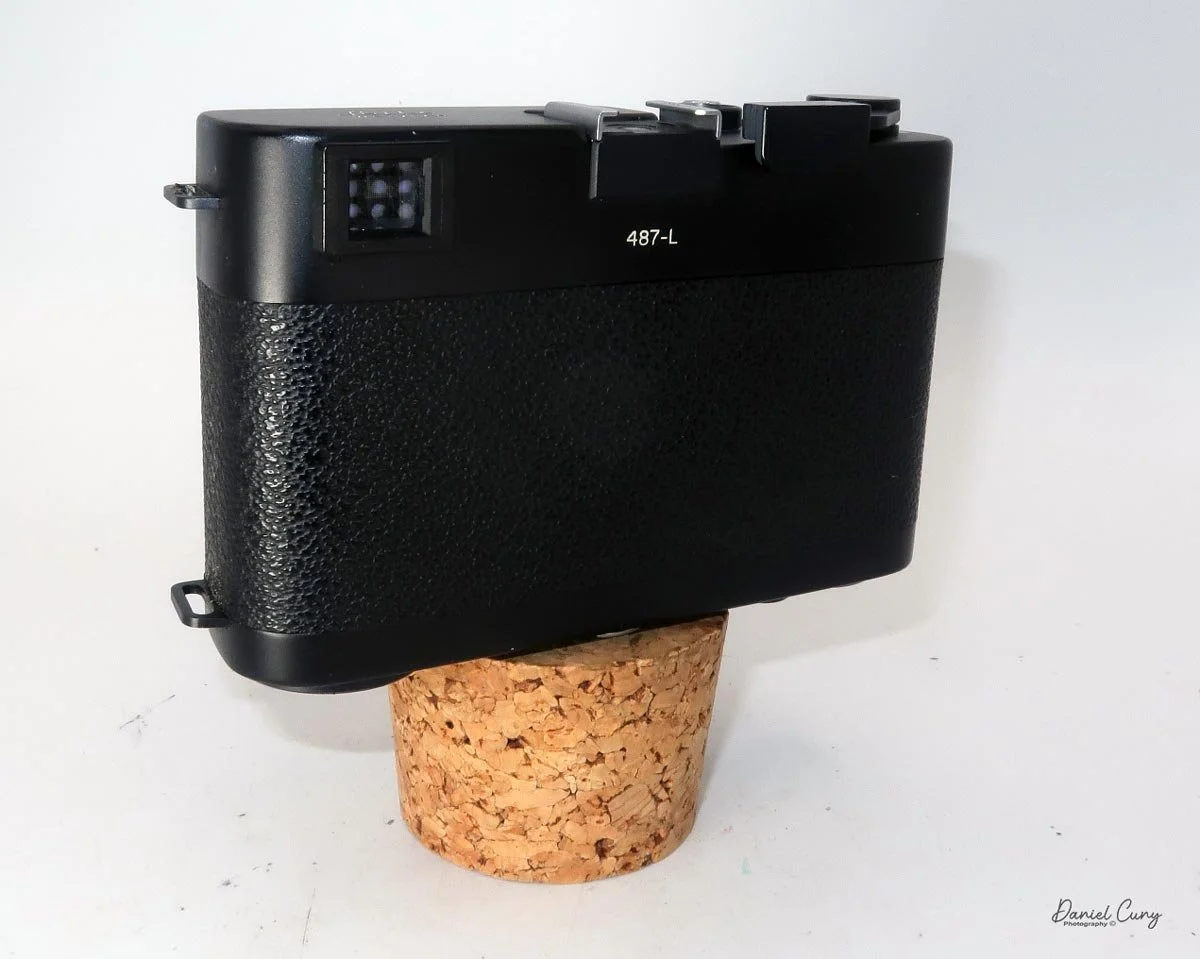
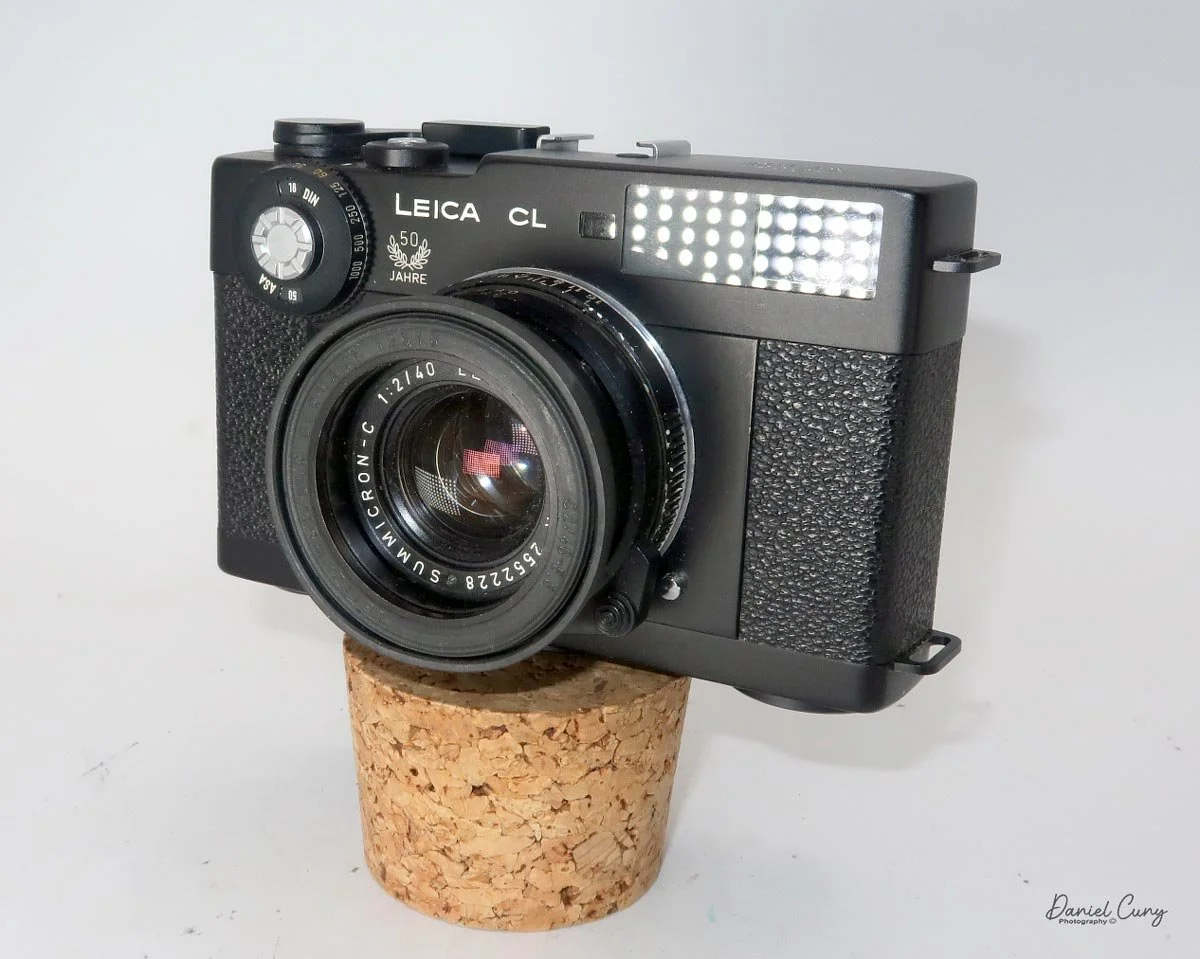
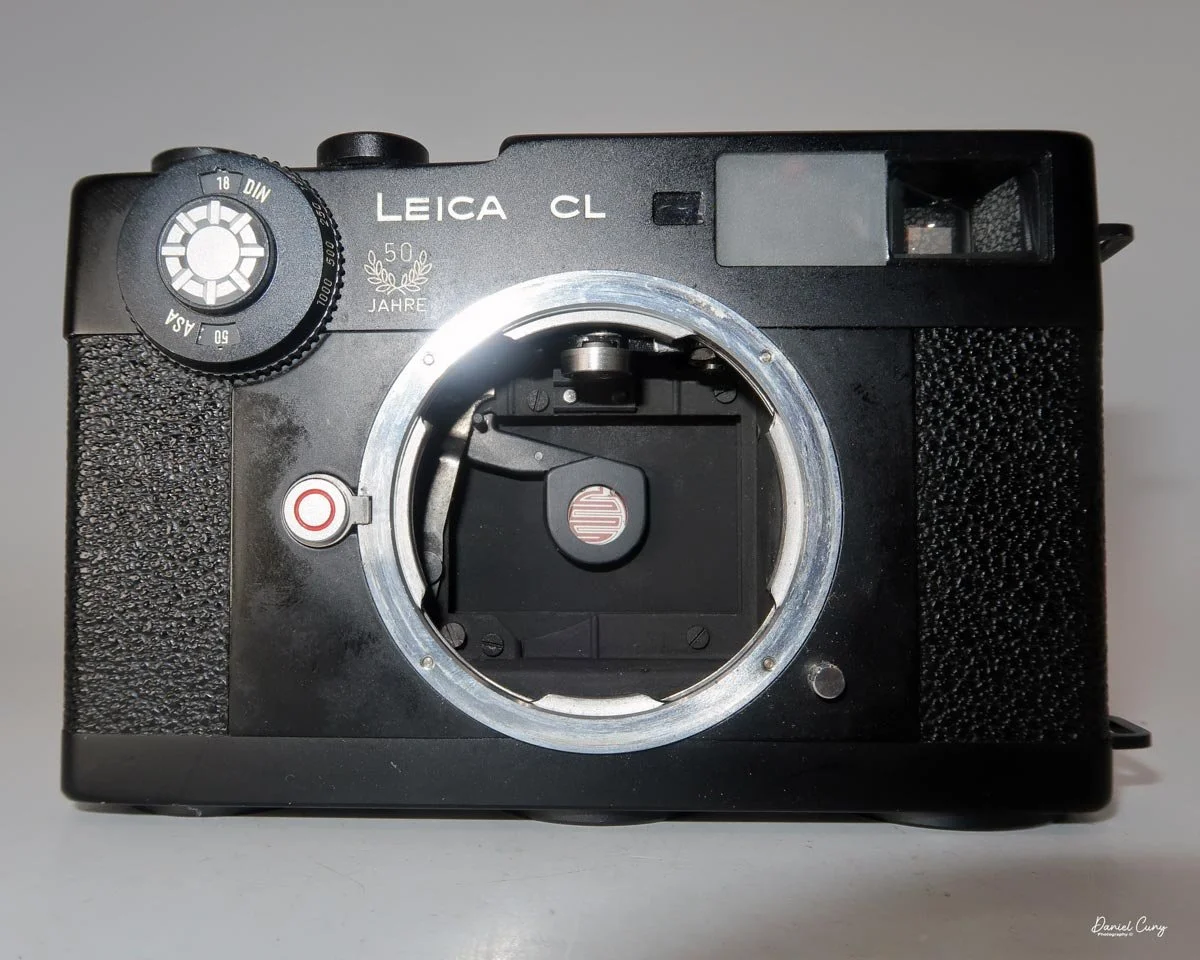
Leica CL Camera-50th Anniversary Edition

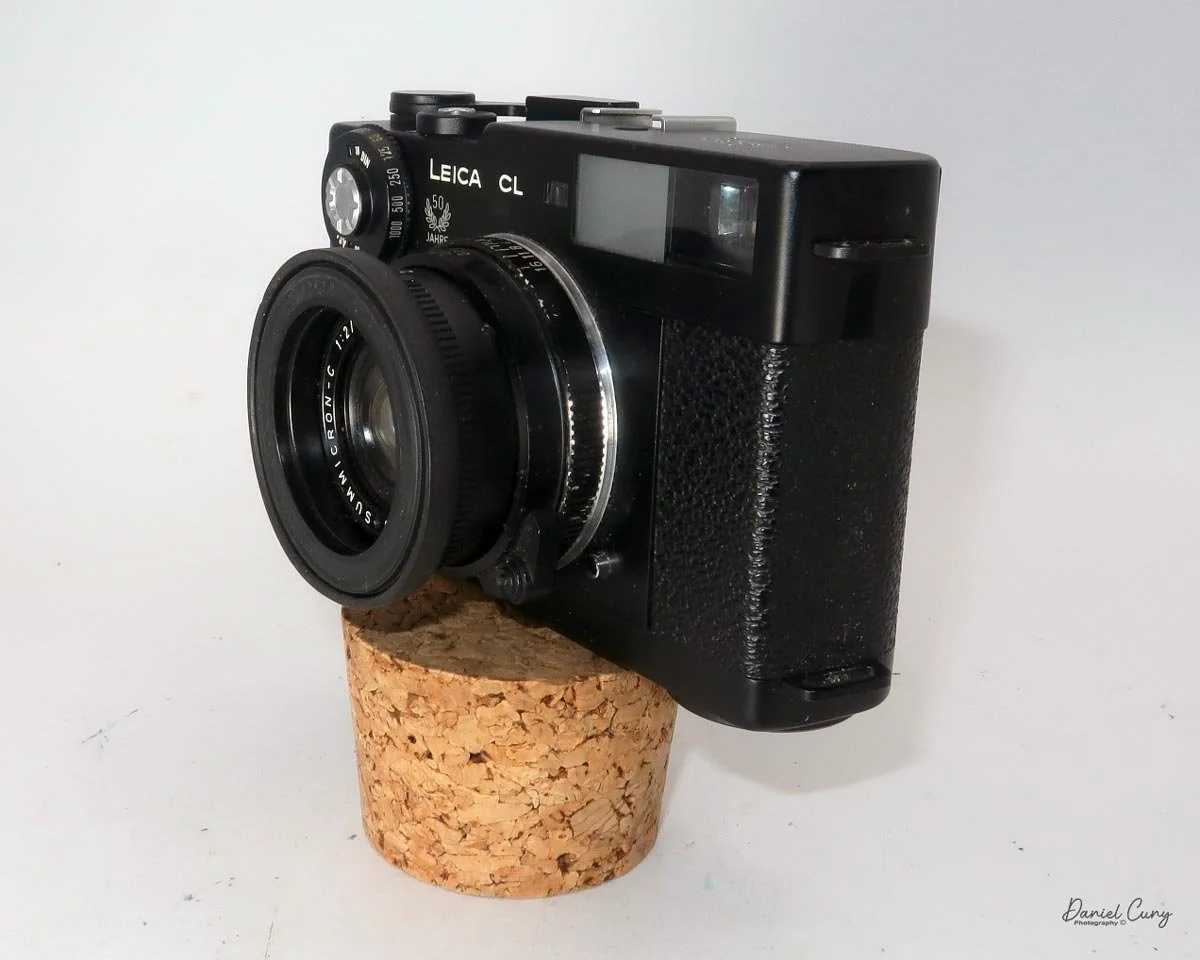
My Leica CL-50th Anniversary Edition Camera

I can remember when the Leica CL was first introduced. I was a junior in high school and attending concerts with my buddies. Because of its size, I thought it would be perfect to take to shows to photograph bands. It was small, compact, and had incredible optics.

 At the time, I shot Nikon, which was a bit bigger and heavier, and the idea of a smaller, lighter camera intrigued me.

 Unfortunately, I had a few obstacles to overcome to get one. The first and foremost was the price. At around $450.00 for the camera body with the 40mm lens, I needed to save a lot before I could afford it, especially while also buying records, paying for a car, and going to concerts. Something needed to give.

 For me personally, another drawback of the Leica CL was the lack of longer lenses for the body. At the time of release, they offered a 40mm and a 90mm, which they recommended, but for the shows I was photographing, I sometimes needed up to a 200mm. The 40mm or 90mm would be OK for some of the work, but I liked getting a bit closer to the performers, so the longer lens was very desirable.

 A good friend of mine, Greg Copeland, was an early adopter of the Olympus OM system and purchased his right after it was introduced in 1973. After I played with his for a while, I started to prefer shooting with a slightly bigger camera, as my hands just seemed to overlap the camera, and it didn't feel comfortable. As a result, the thought of owning a Leica CL subsided.

Leica CL 50th Anniversary

 Minolta introduced their version of the Leica CL, the Minolta CLE, in 1980, when I was working at a camera store in the San Francisco Bay Area. I briefly considered buying it through the employee purchase program, but I wasn't a big fan of Minolta cameras. Also, being married and having a two-year-old put a little damper on spending a lot of money on camera gear.

 Jump almost 40 years into the future, and an opportunity to purchase a Leica CL with the fitted leather case and Leitz Summicron-C 40mm f/2 lens dropped into my lap. I was in a camera store in a small Midwest town on a business trip, and as I was looking in one of the showcases, there it was.

 The owner at the time said he was having a difficult time selling it, and he would make me a good deal on it if I were interested. He said the meter wasn't working, but it did come with the hood, lens cap, and case. He threw out a price that was too good to pass up. I thought about it for a few minutes and started playing with it. It seemed in great condition, except for the meter, so I bought the camera and took it home.

History of Leica CL & Minolta CLE

The partnership between Leitz (the maker of Leica cameras) and Japanese manufacturer Minolta during the 1970s birthed two of the most fascinating rangefinders in photographic history: the Leica CL and the Minolta CLE. Conceived during a period of financial instability for Leica, this collaboration aimed to produce a compact, accessible entry point into the legendary M-mount system.

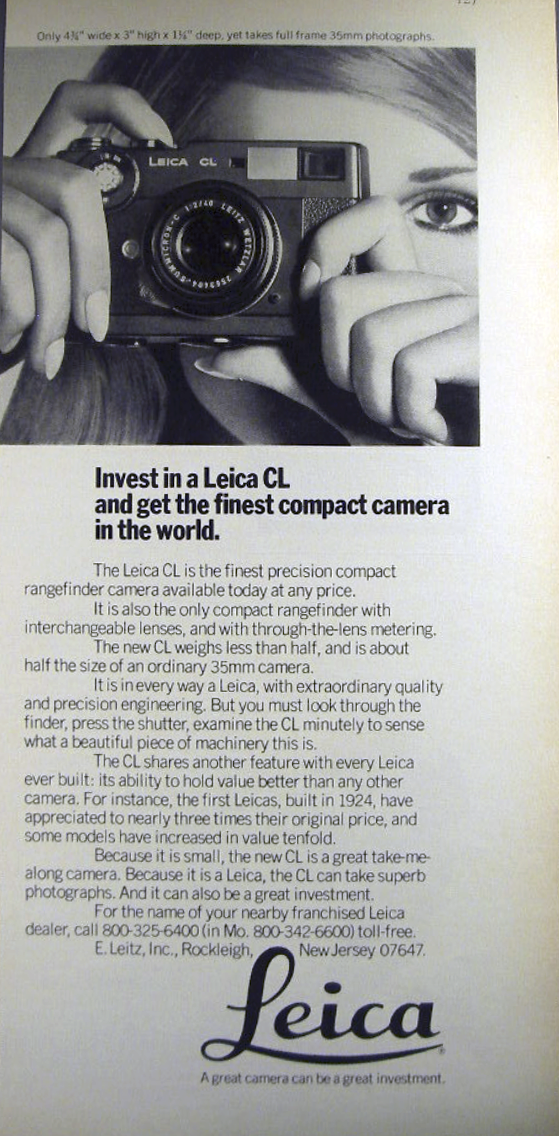
 Introduced in 1973, the Leica CL (Compact Leica) was designed by Leitz but manufactured in Japan by Minolta. It represented a radical departure from traditional Leica design. Weighing considerably less than its sibling, the polarizing Leica M5, the CL featured a vertically traveling cloth focal-plane shutter and a unique through-the-lens (TTL) light meter positioned on a pivoting arm that swung out of the way just before the shutter fired. To accompany the camera, Leitz introduced two compact, budget-friendly lenses: the 40mm f/2 Summicron-C and the 90mm f/4 Elmar-C.

Leica CL Advertisement

 The CL was a massive commercial success. However, its popularity became a double-edged sword. It sold so well that it reportedly cannibalized sales of the far more expensive M5, prompting Leitz to discontinue the CL prematurely in 1976 after producing roughly 65,000 units. Minolta also sold its own domestic version during this time, the Leitz Minolta CL, which was functionally identical.

 After the partnership dissolved, Minolta built on the CL and engineered a true technological marvel: the Minolta CLE (Compact Leica Electronic), released in 1980.

 While it retained the M-mount and a similar form factor, the CLE was entirely Minolta's creation and represented a massive leap forward. It replaced the CL's mechanical shutter and swinging meter arm with an advanced electronic stepless shutter and a cutting-edge silicon photodiode system.

 Most impressively, the CLE introduced aperture-priority auto-exposure and TTL off-the-film flash metering—features that would not appear on a true Leica M body until the M7 arrived over two decades later. Minolta paired the CLE with three exceptional M-Rokkor lenses: a 28mm f/2.8, a 40mm f/2, and a 90mm f/4. Despite its technological superiority, the CLE had a relatively short production run and was discontinued in 1985. Today, both cameras remain highly sought after by film enthusiasts as capable, lightweight alternatives to traditional M-system rangefinders.

My Camera

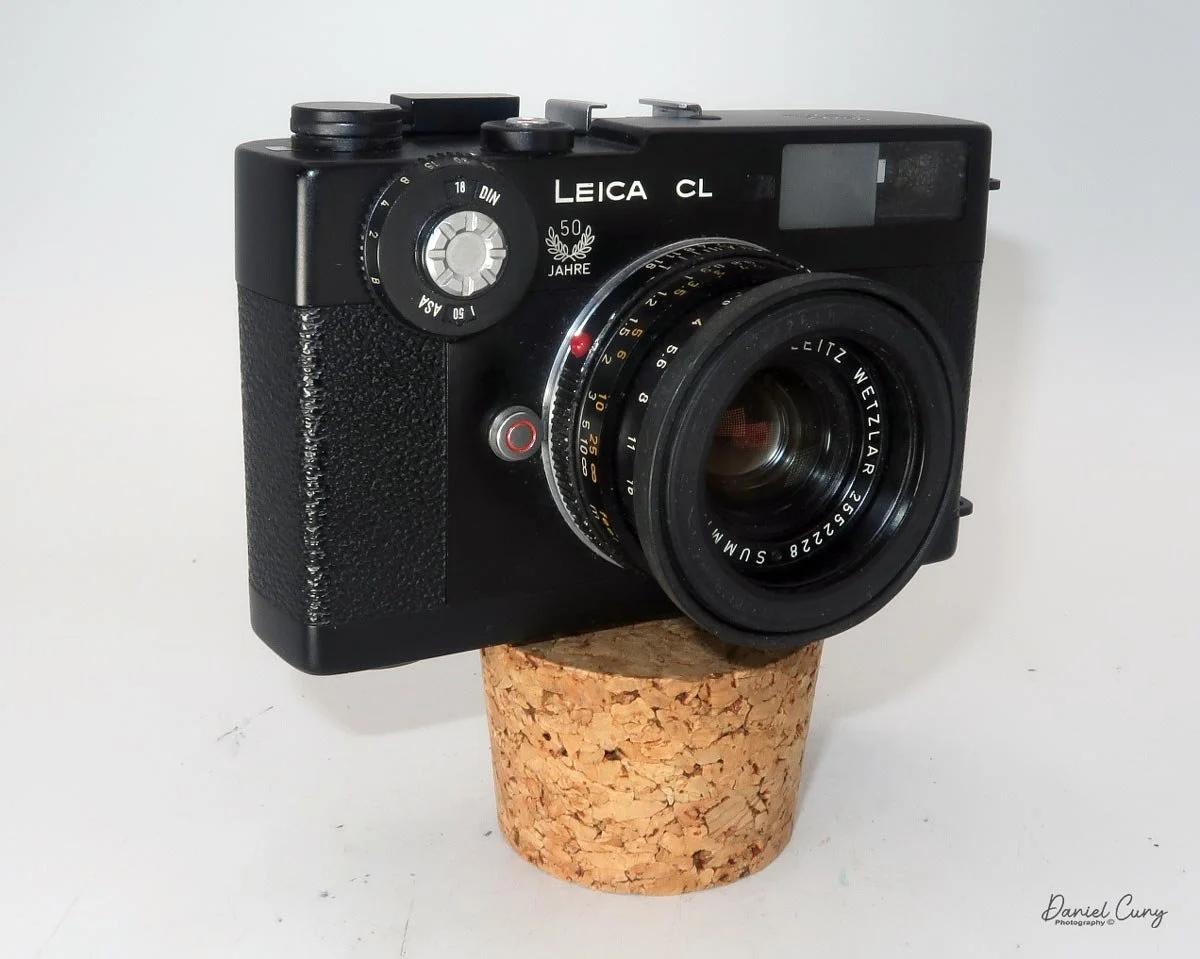
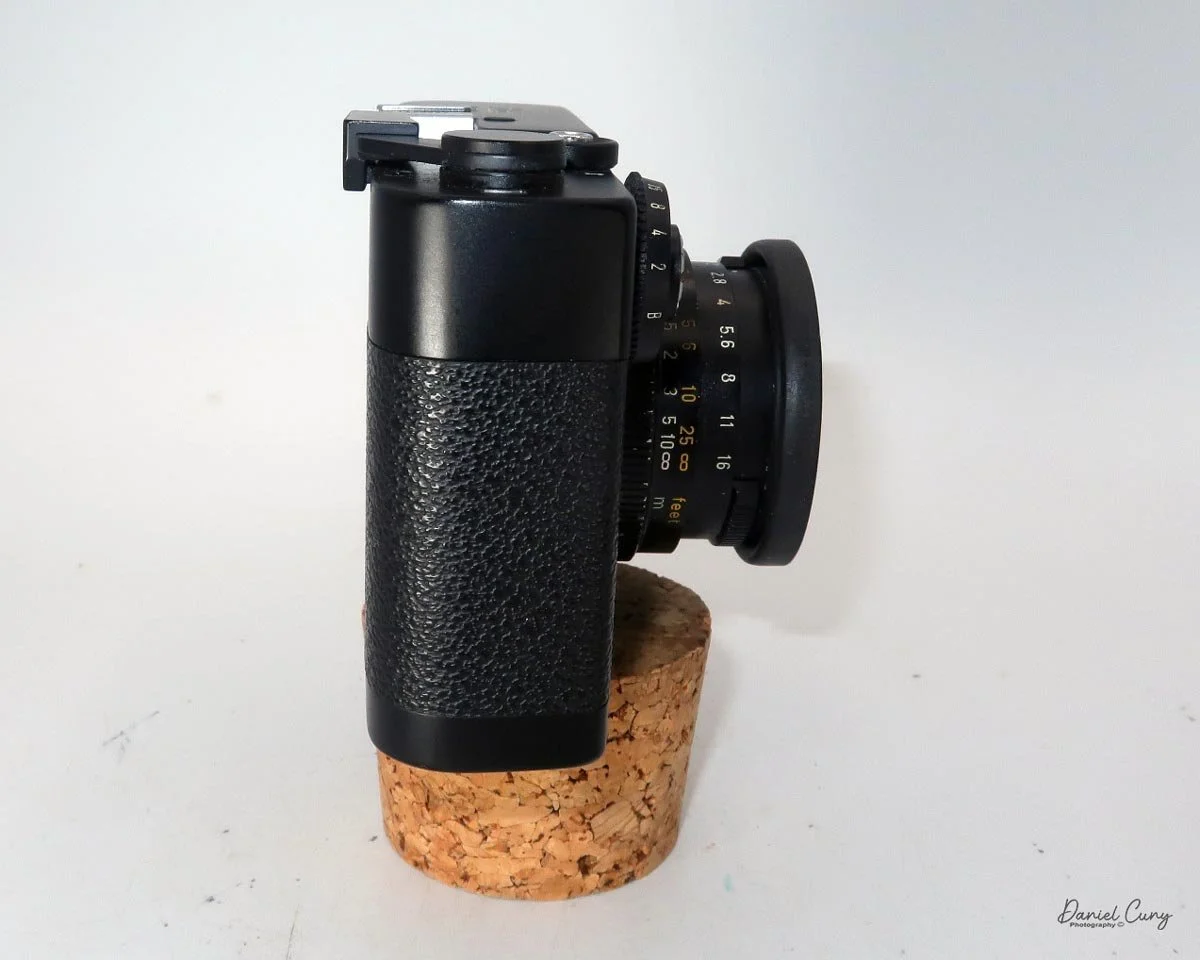
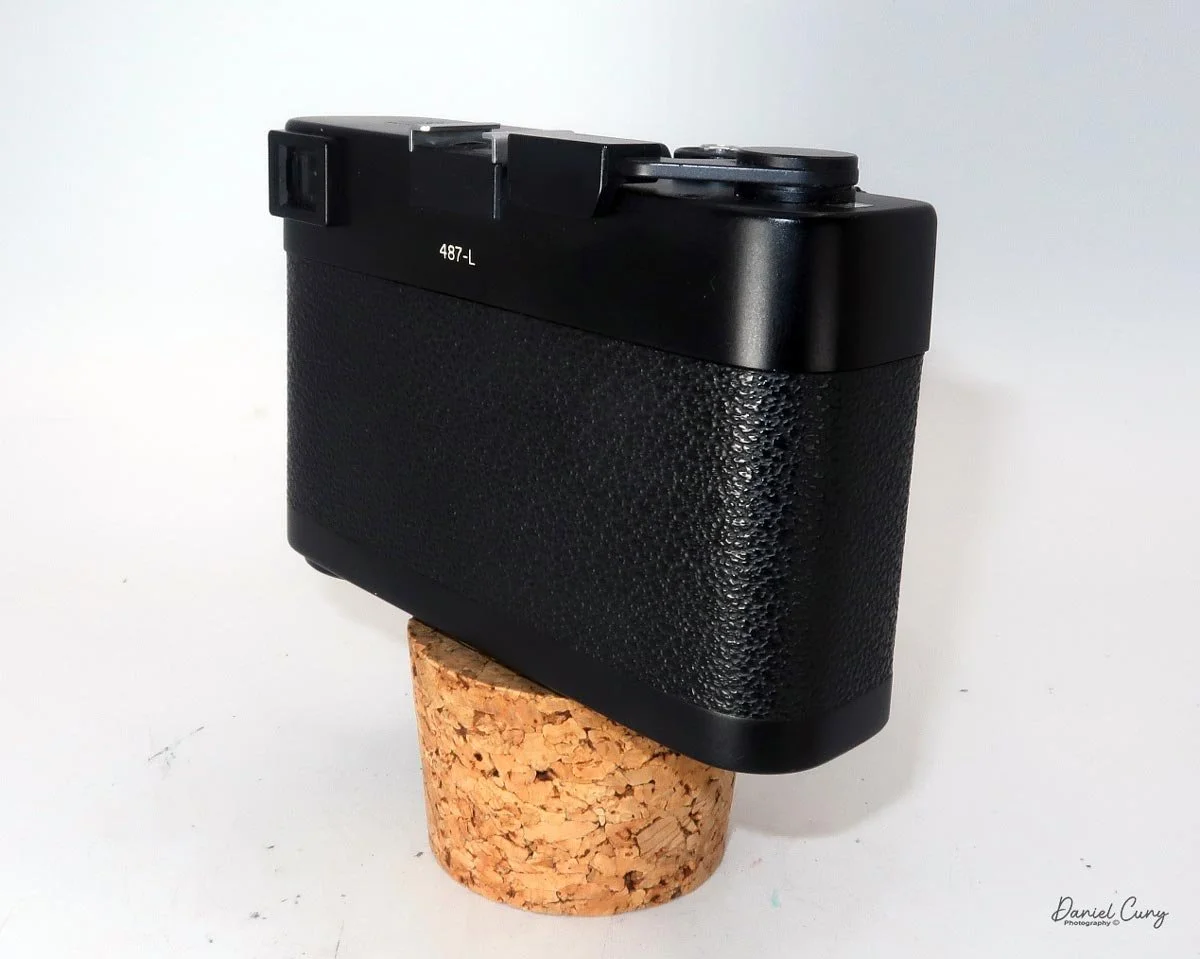
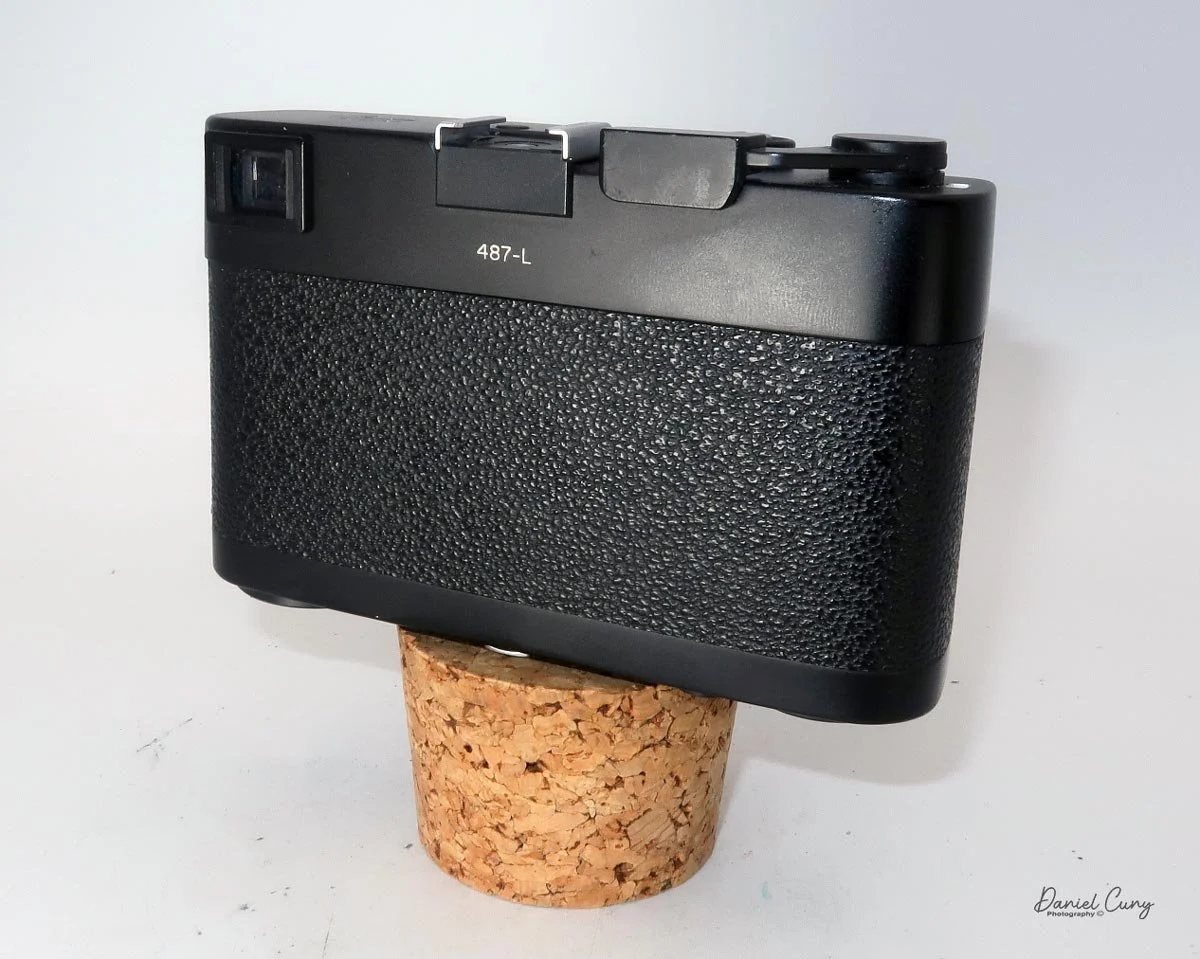
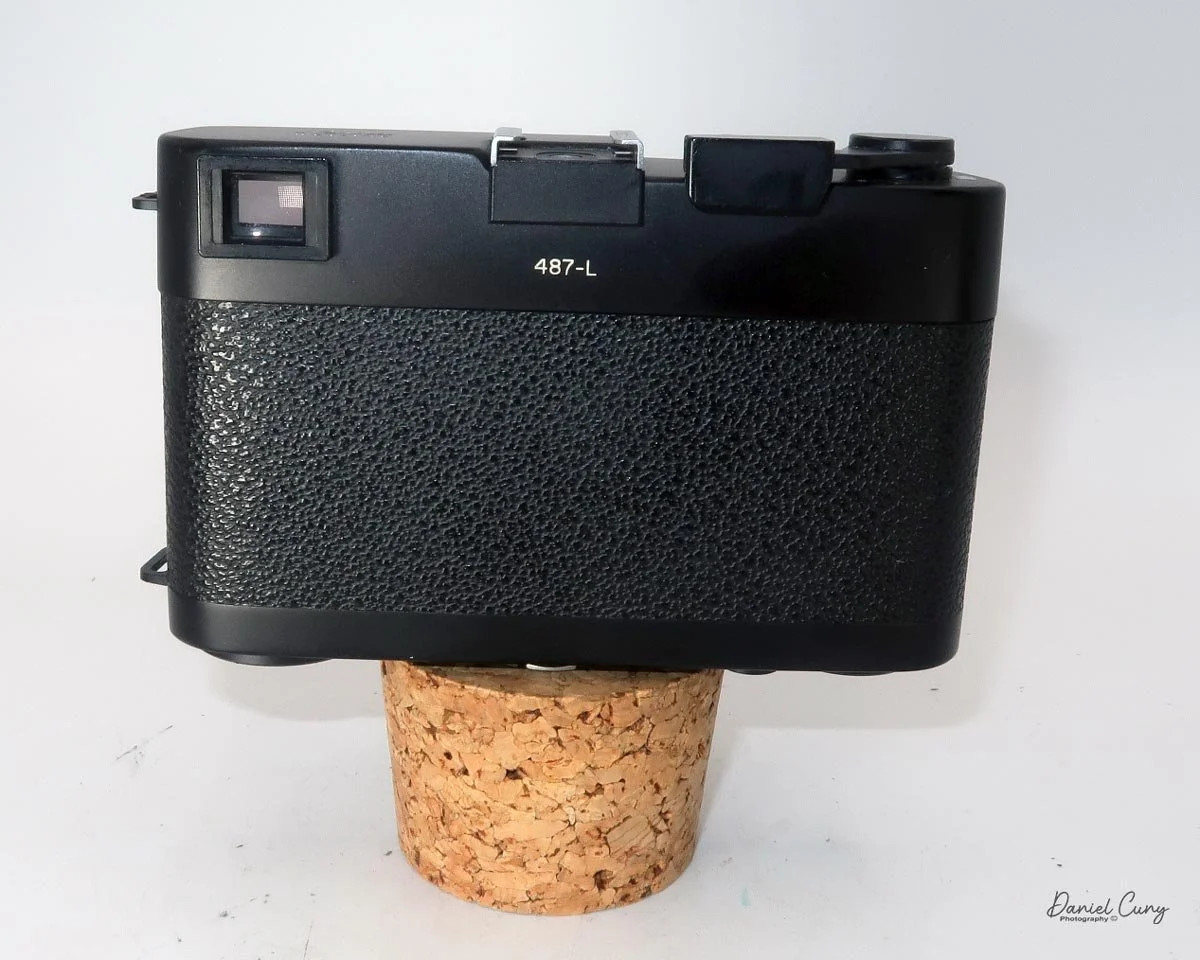
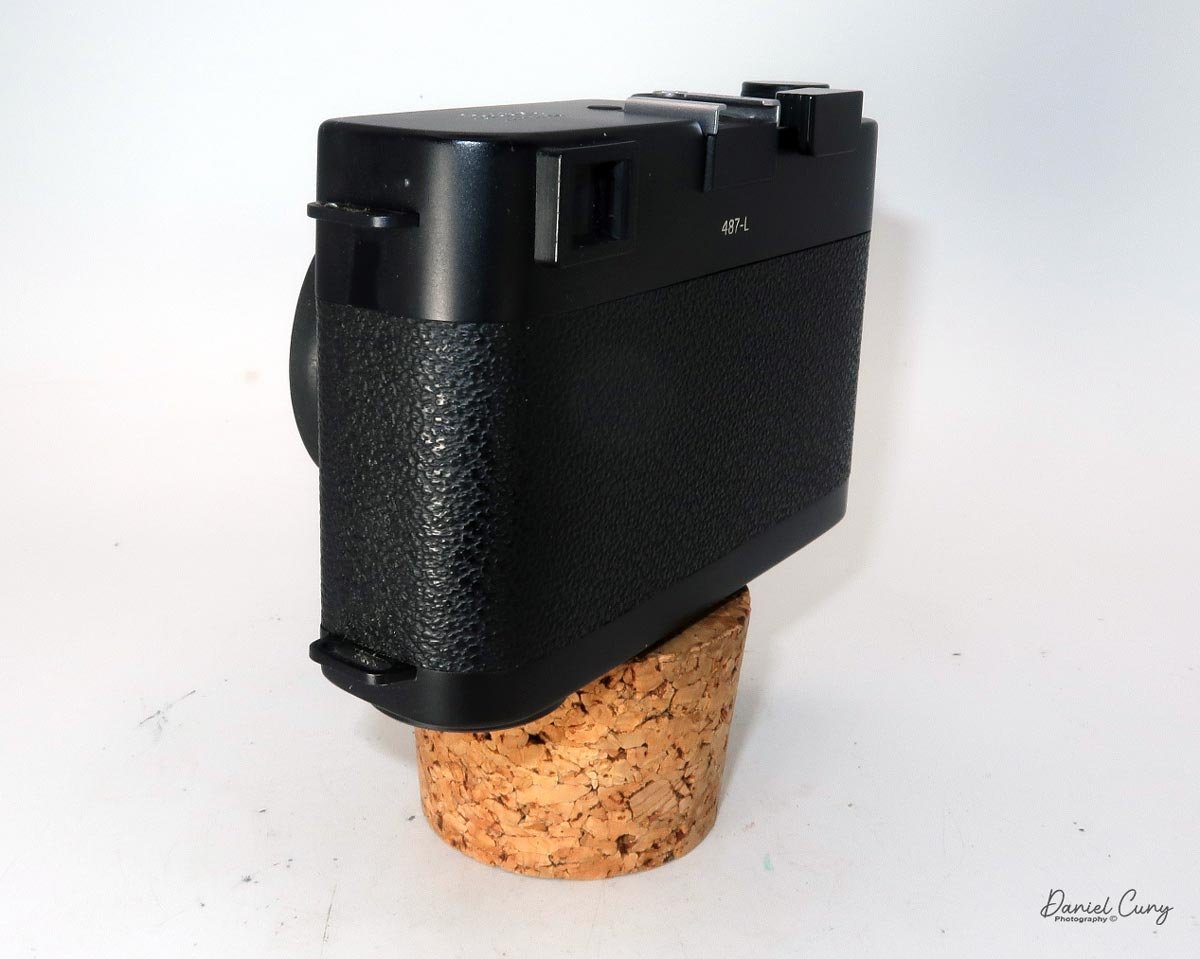
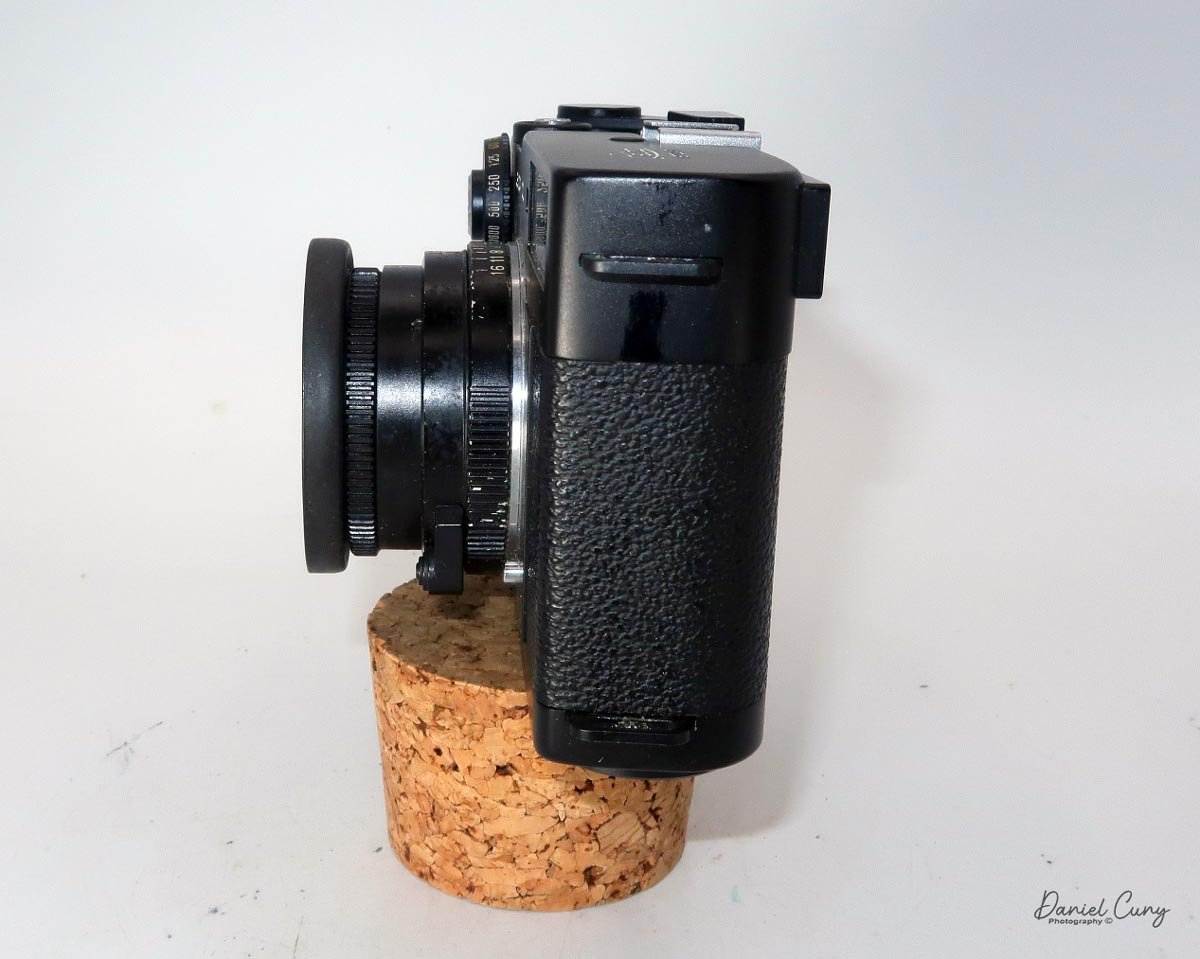
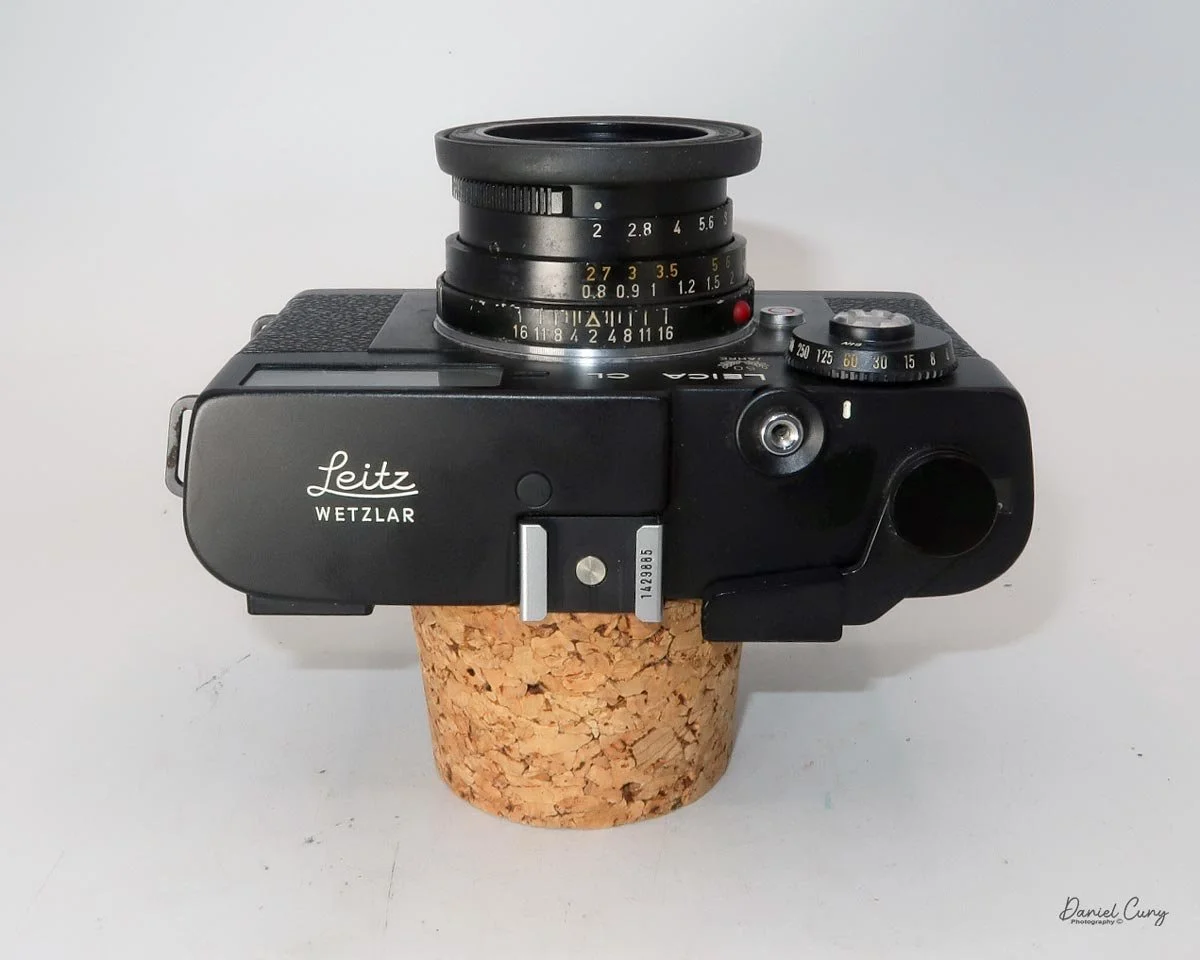
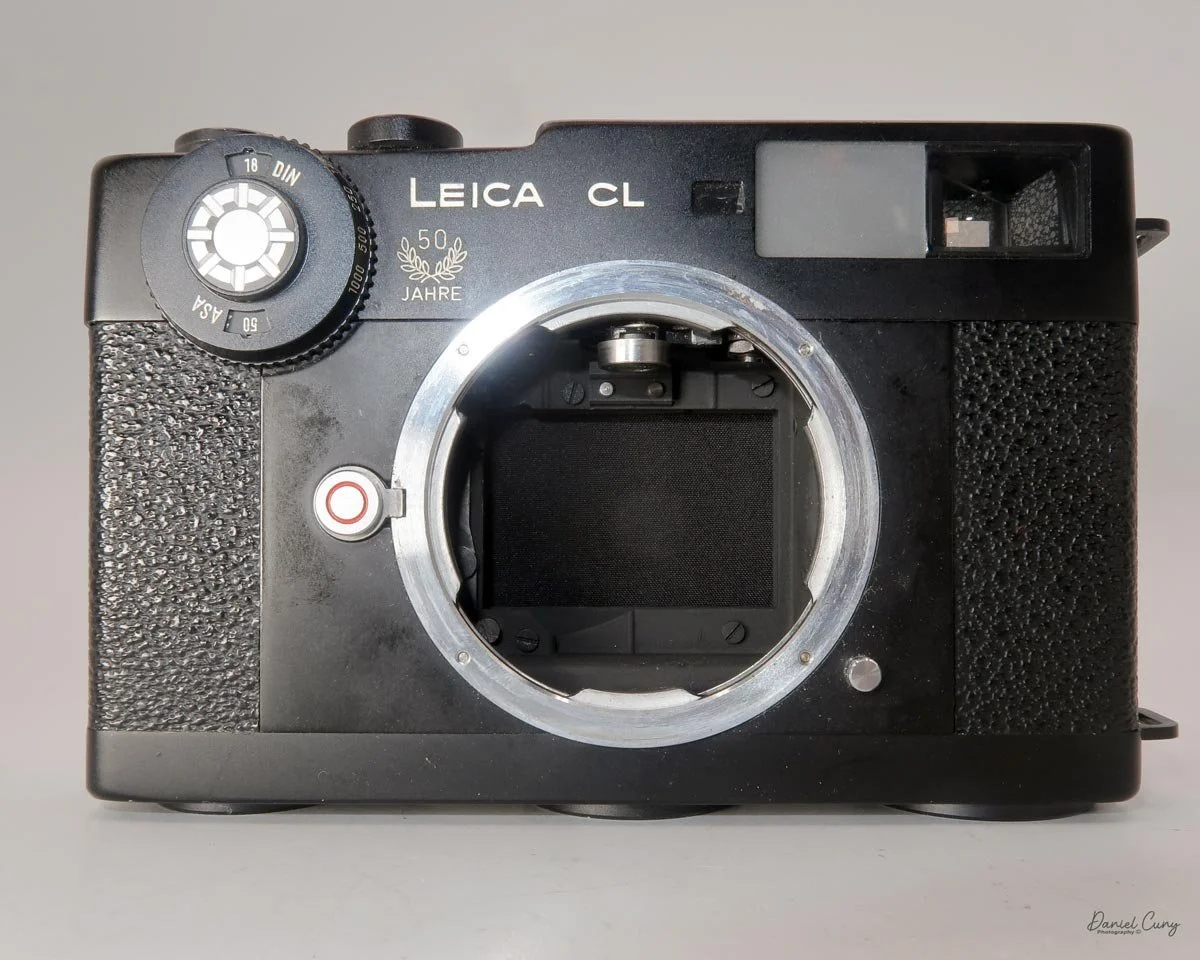
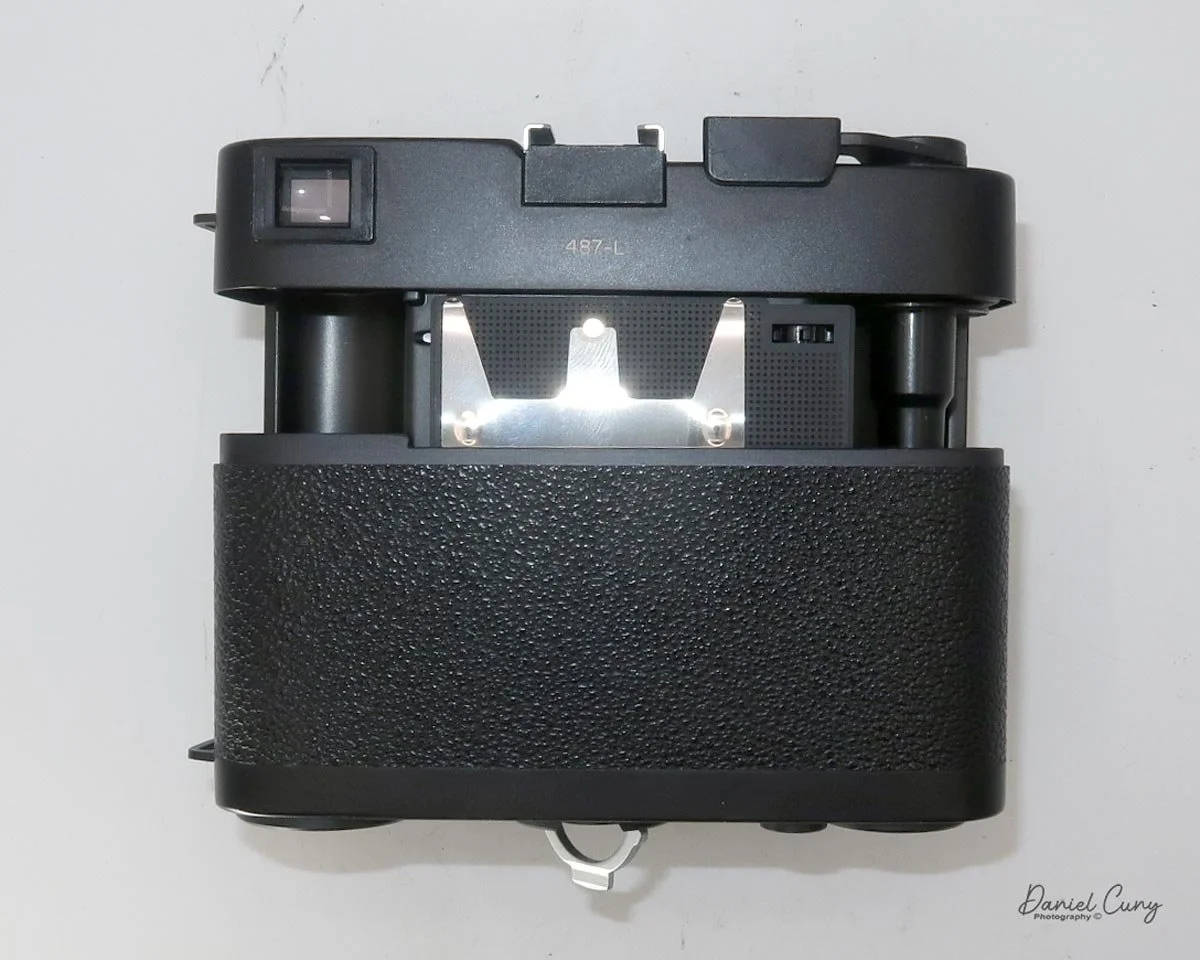
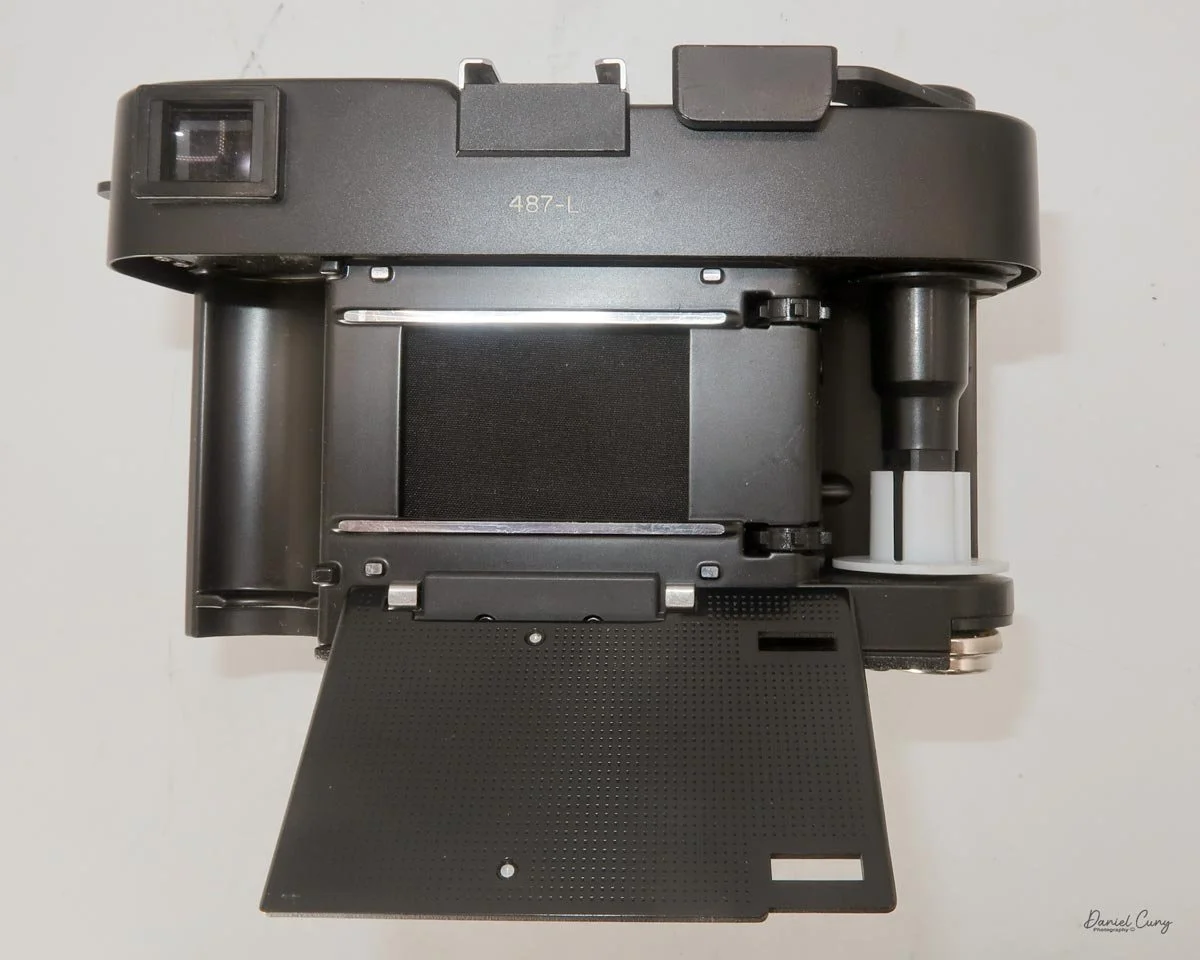
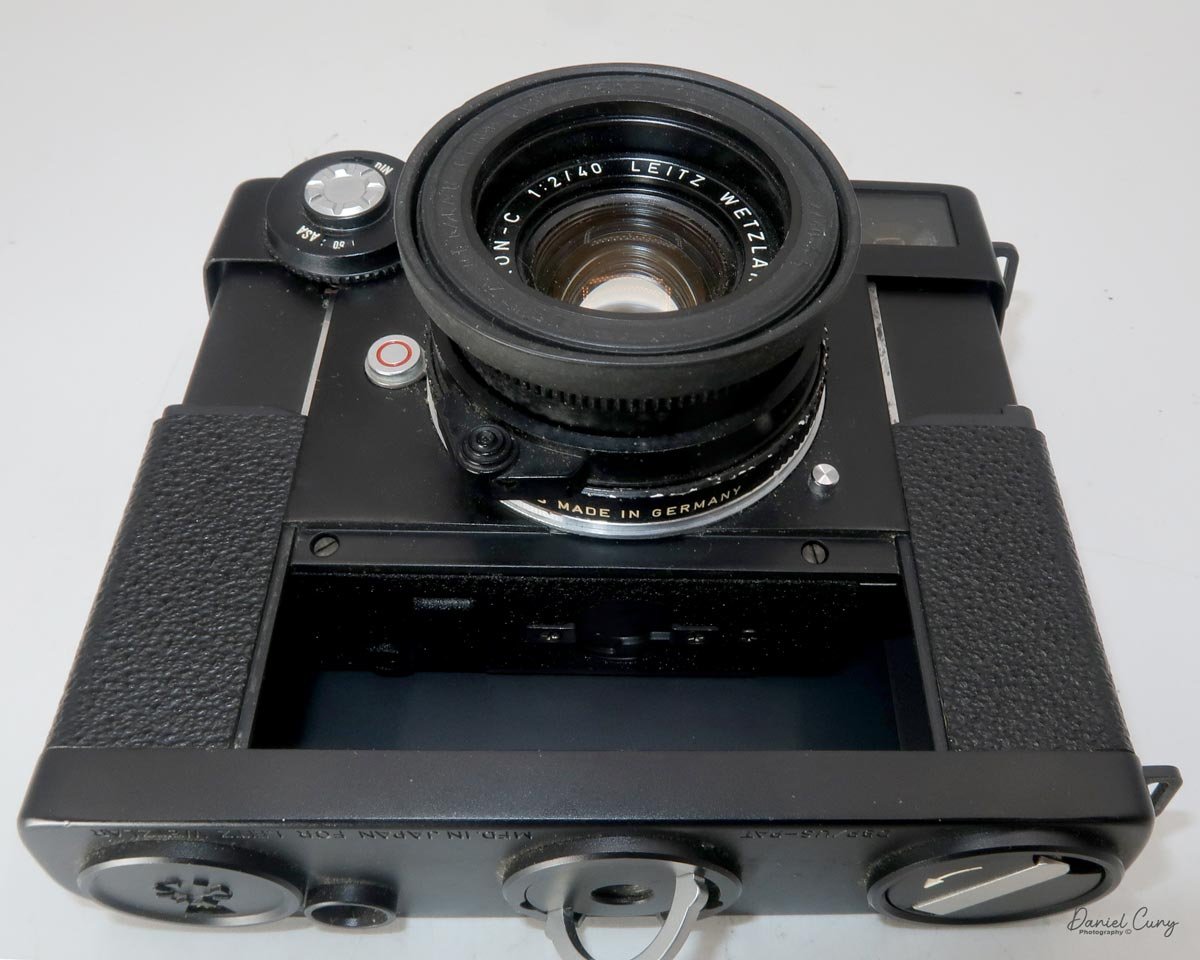
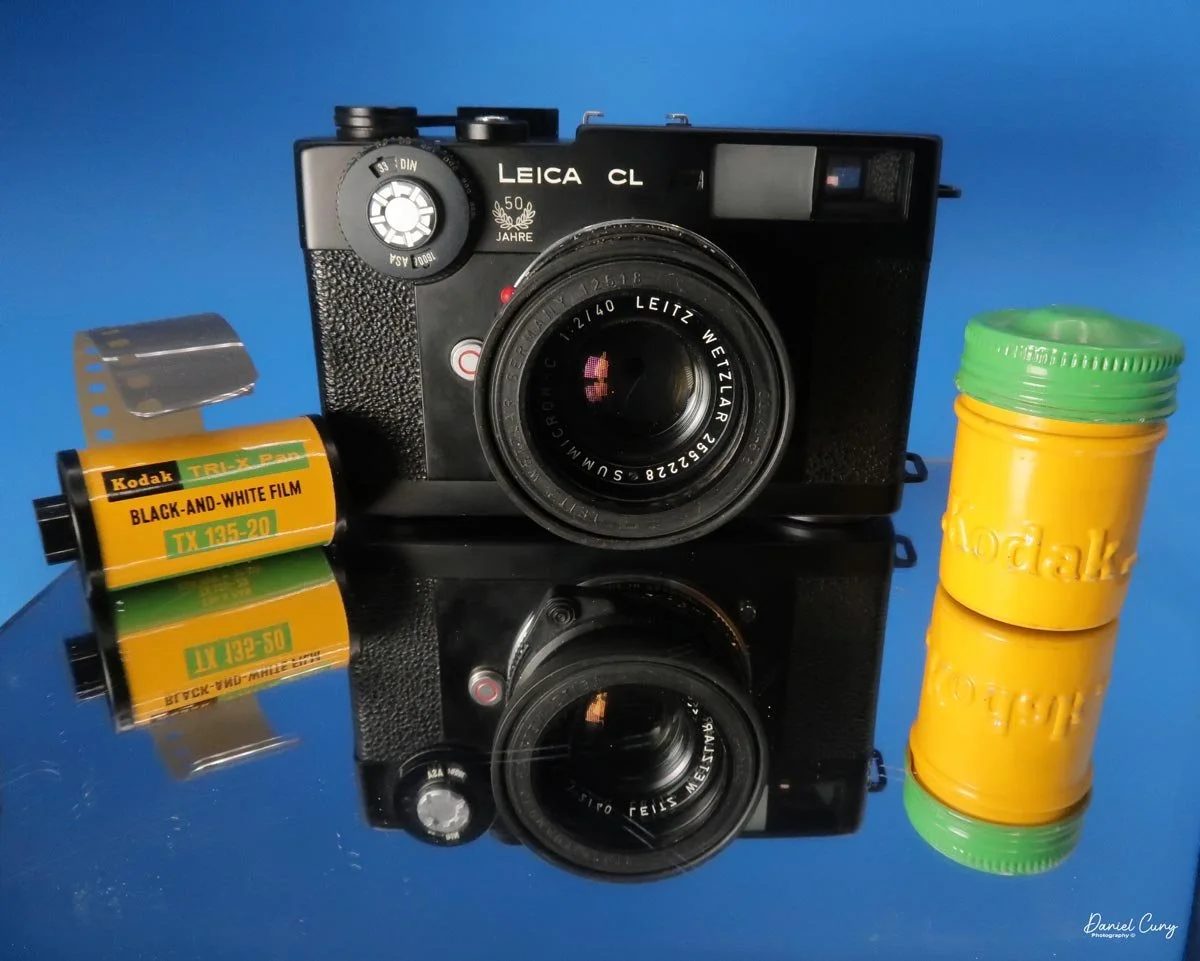
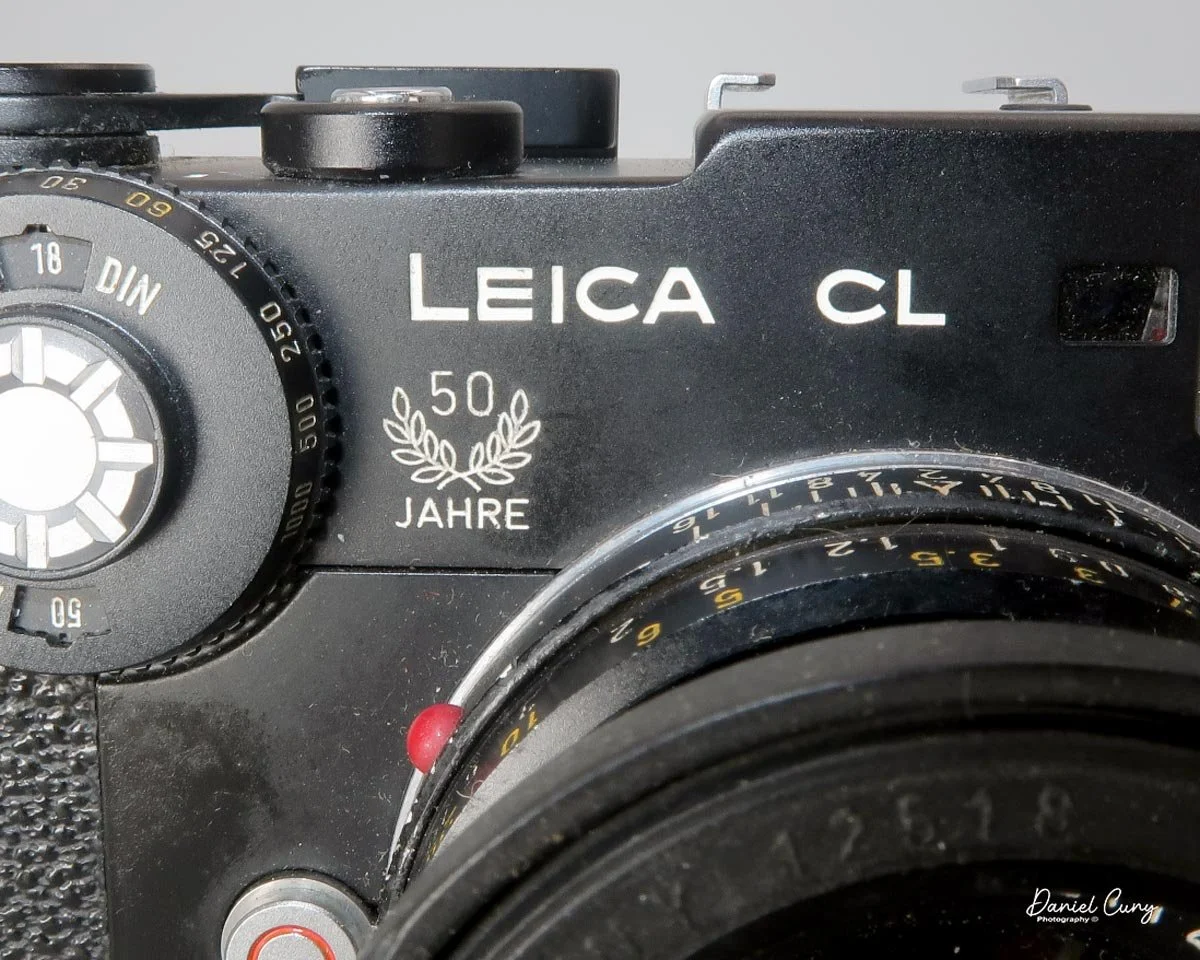
My Leica CL is a 50th-anniversary model with the stamp under the "Leica CL" name on the front. On the back of the camera body is engraved 487-L. The Leica CL is 4.75" wide by 3" tall by 2.5" deep, with the Leitz Summicron-C 40mm f/2 lens. The camera weighs 1 pound, 2 ounces with the hood and lens cap, and without film. The body serial number is 1429885, and the lens serial number is 2552228.

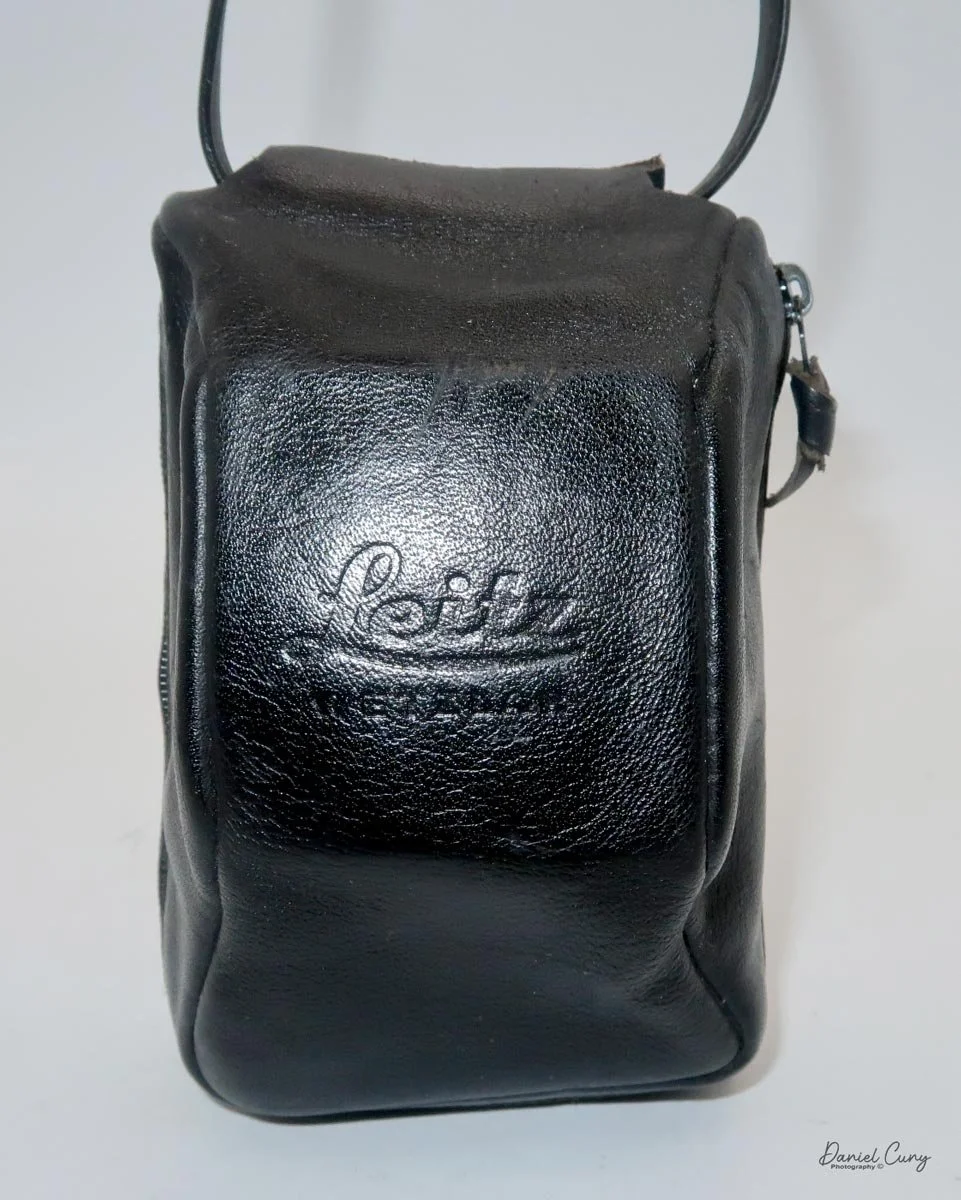
My Leica CL also has a vertical hanging, fitted leather case with "Leica Wetzlar" embossed on the front. I'm not a big fan of how the soft case works with the camera, as I find it gets in my way when using the camera. It does offer protection, so that's a plus.

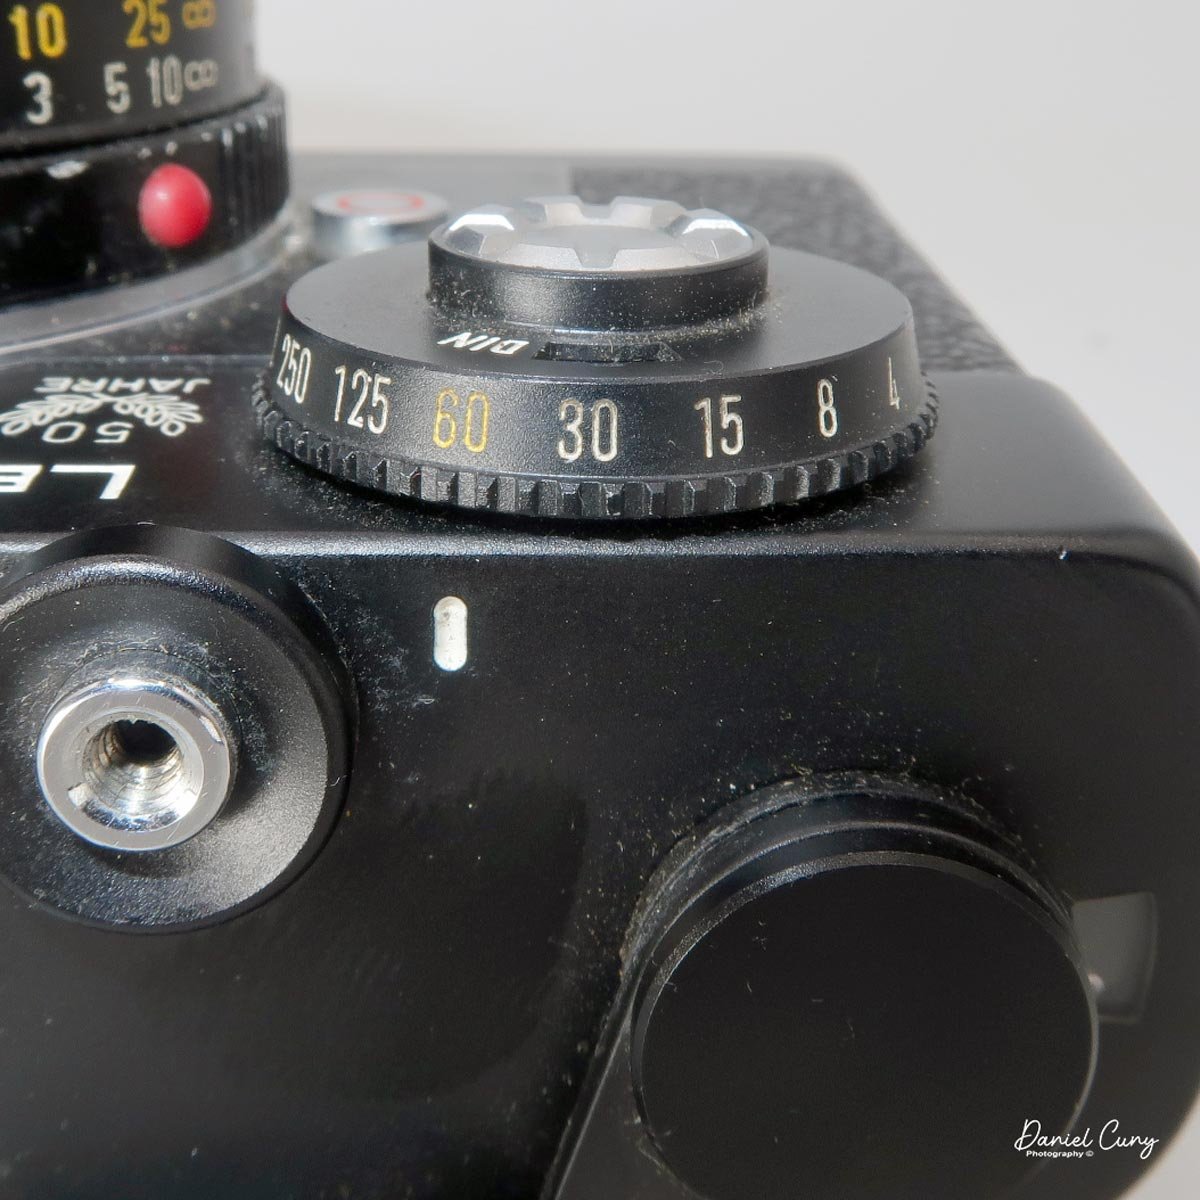
 Looking at the top of the camera, the Leica CL is rather plain. From left to right, there is the "Leitz Wetzlar" logo, a hot shoe for the flash, the shutter release (threaded for a cable release), a white line for setting the shutter speed, and a film winding lever.

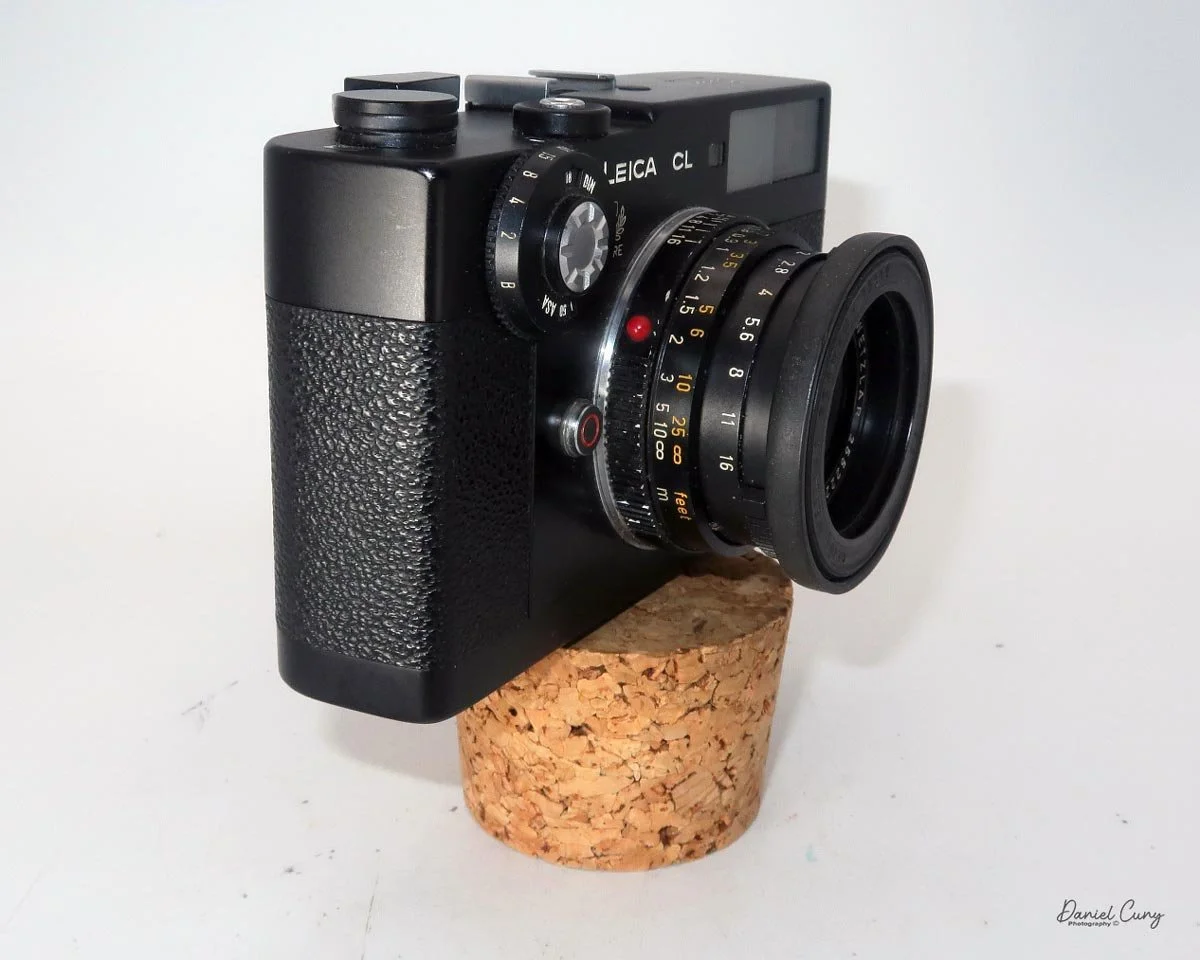
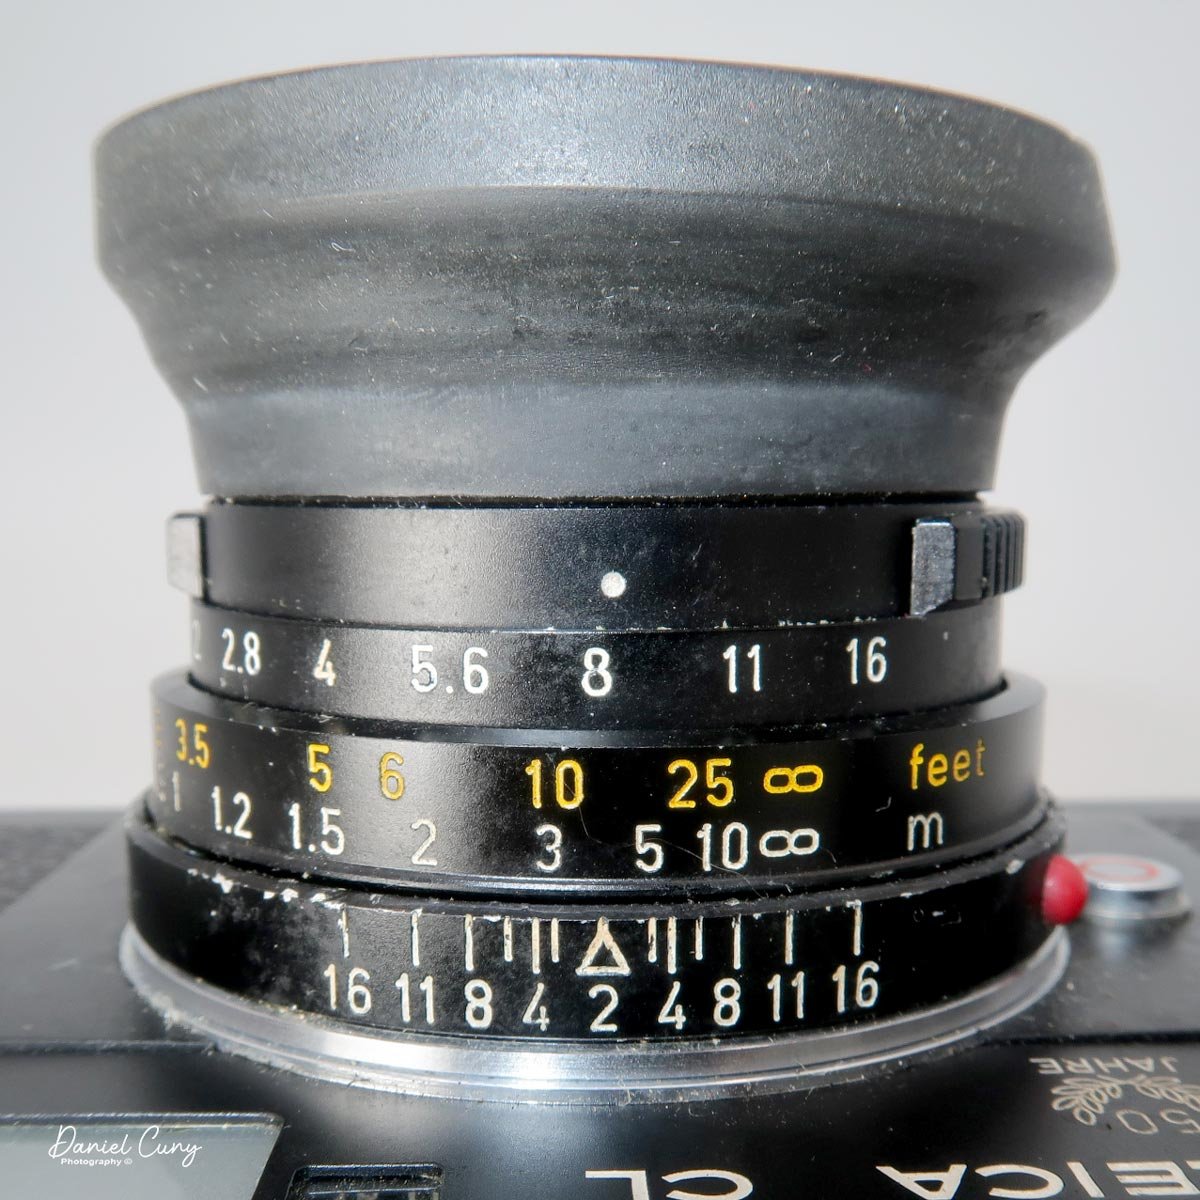
 Most exposure controls are on the front of the camera body or lens. In the upper left corner of the camera, as you face it, is the shutter speed wheel, which has speeds from 1/1000 to 1/2 (no 1 sec. exposure setting) and "B" for timed exposures. The shutter speed is set by turning the outer wheel to the desired speed, which is aligned with the small white line on the camera body. Some people get confused because the white line isn't directly above the shutter speed number, but slightly to the left. Make sure you set the shutter speed to the white line, and not at the top of the dial.

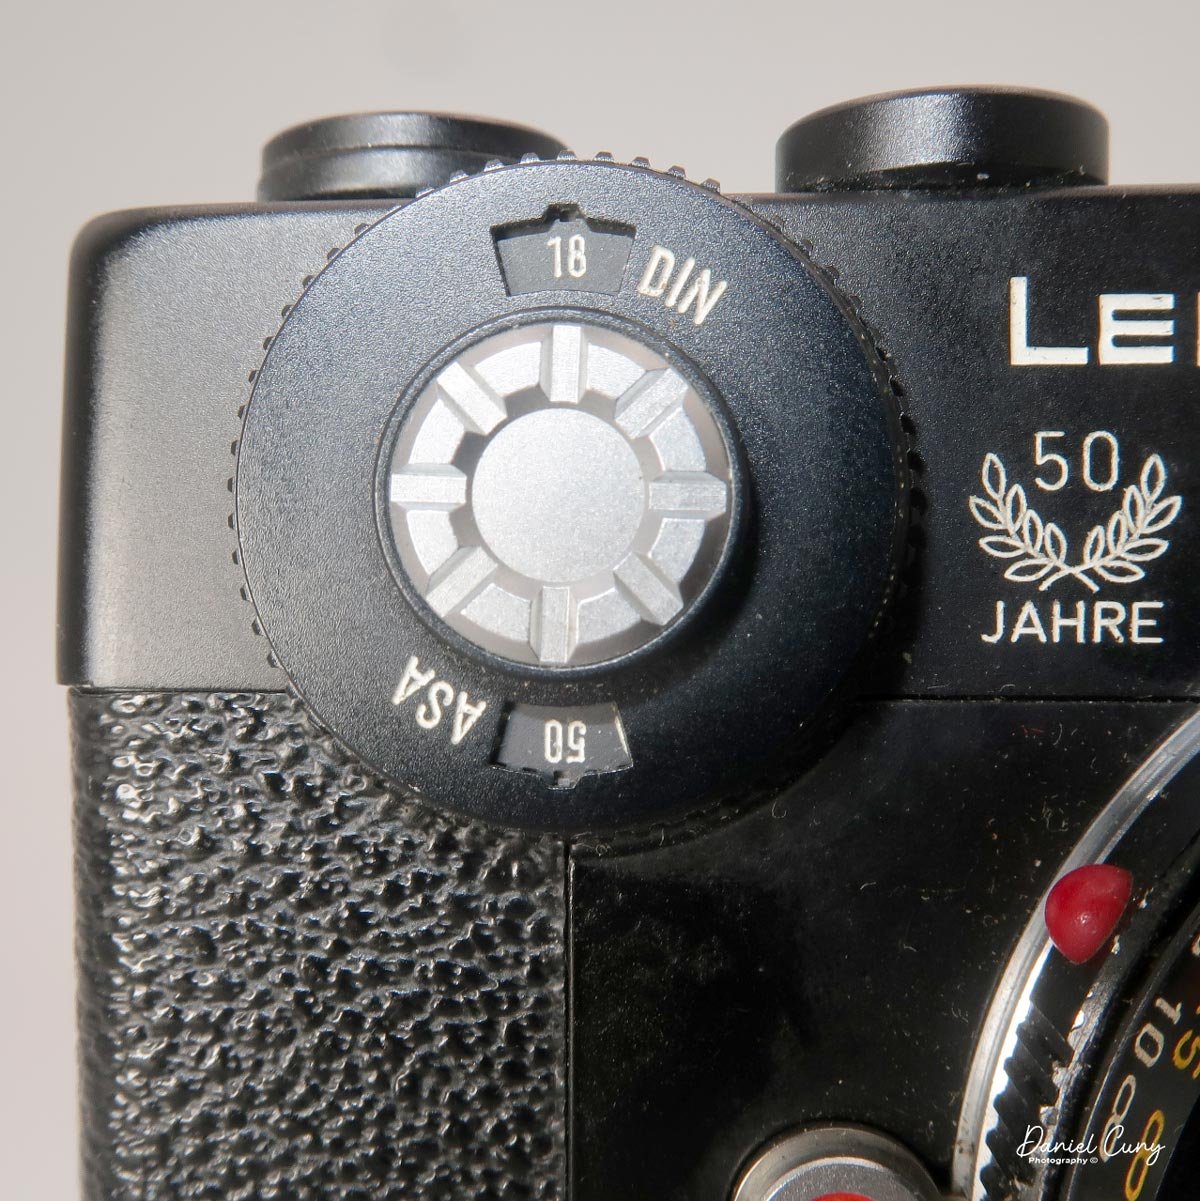
Inside the shutter speed dial is the ASA or DIN (ISO) setting for the internal light meter. Set the ASA by turning the chrome wheel with the pad of your finger or thumb to the desired film speed.

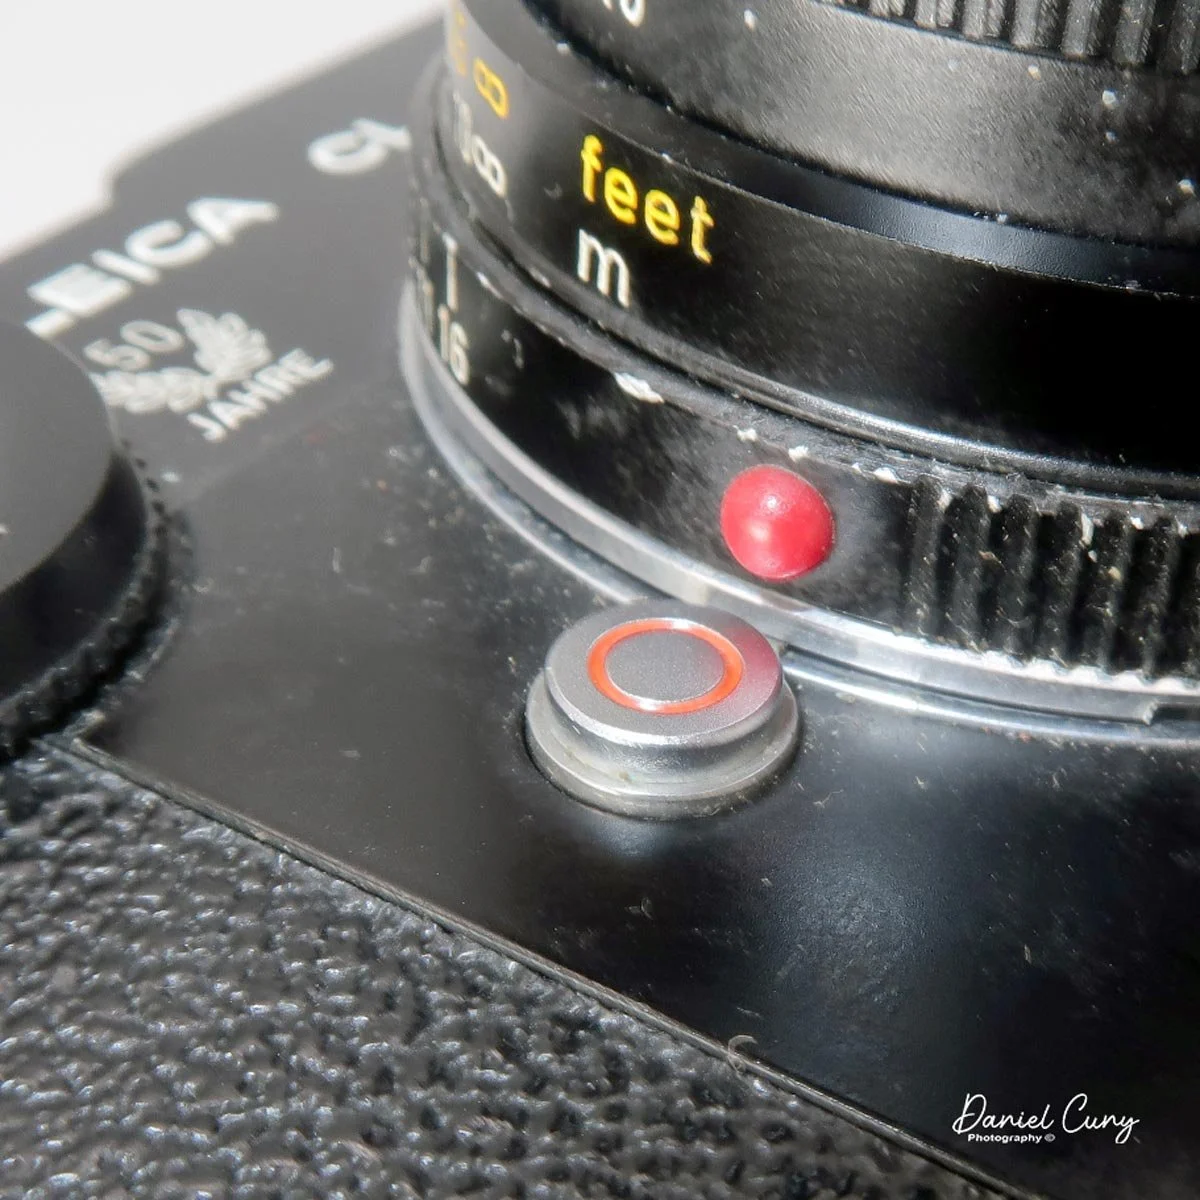
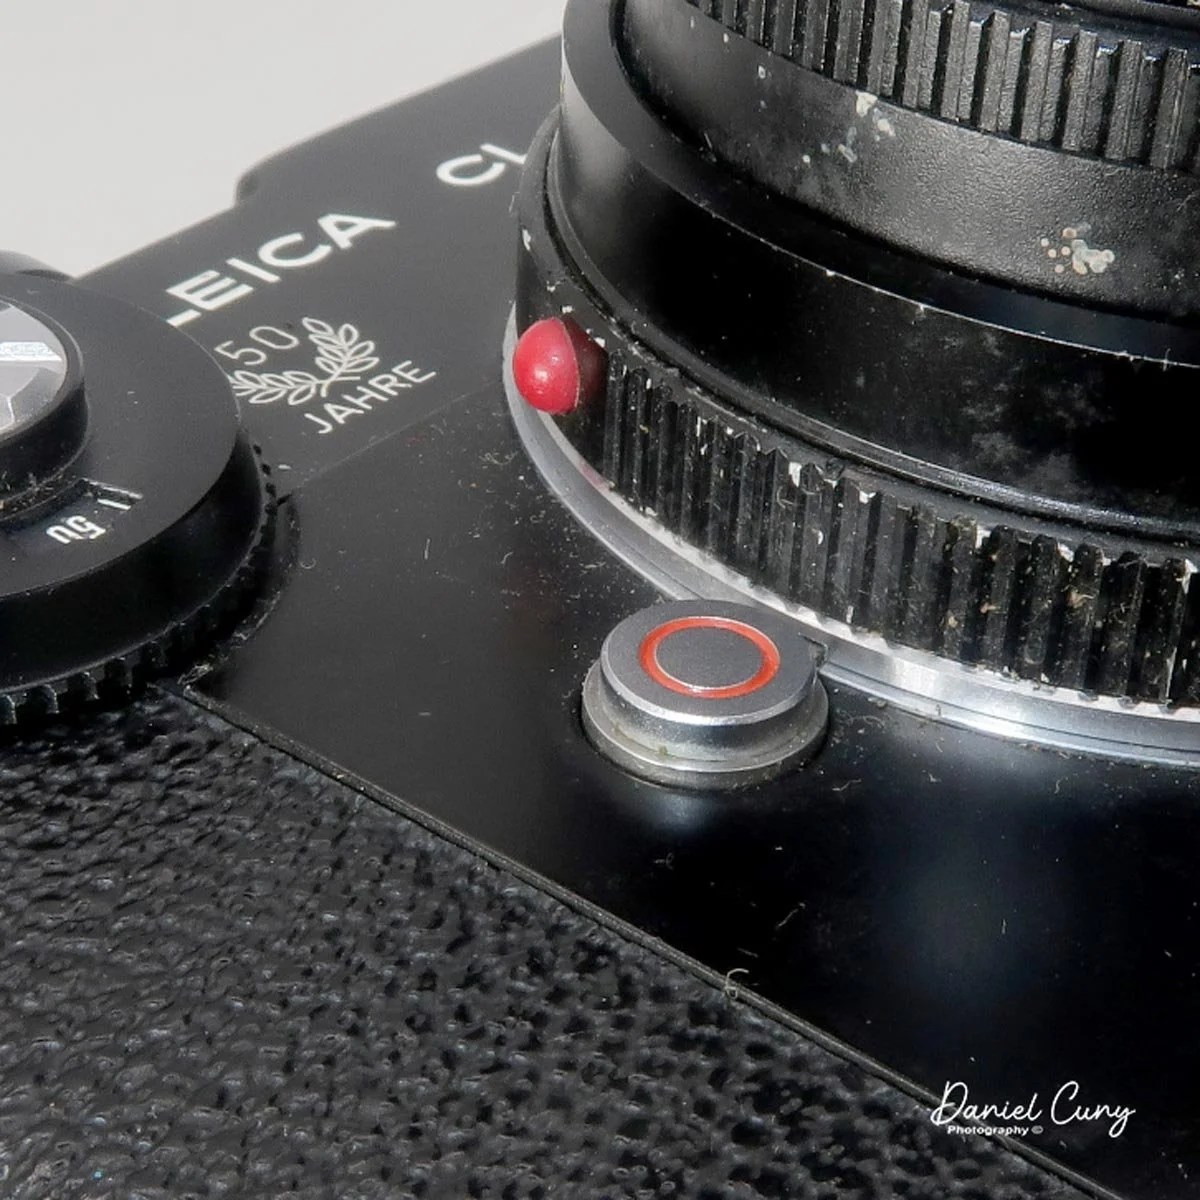
 Below the shutter speed wheel is a smaller round button with a red circle, which is the lens release button. Press the button and turn the lens counterclockwise a short distance until the red dot latches to the red circle, then remove the lens. To attach the lens, match the red dot on the lens to the red circle, then turn the lens clockwise until it clicks into place and locks onto the camera body.

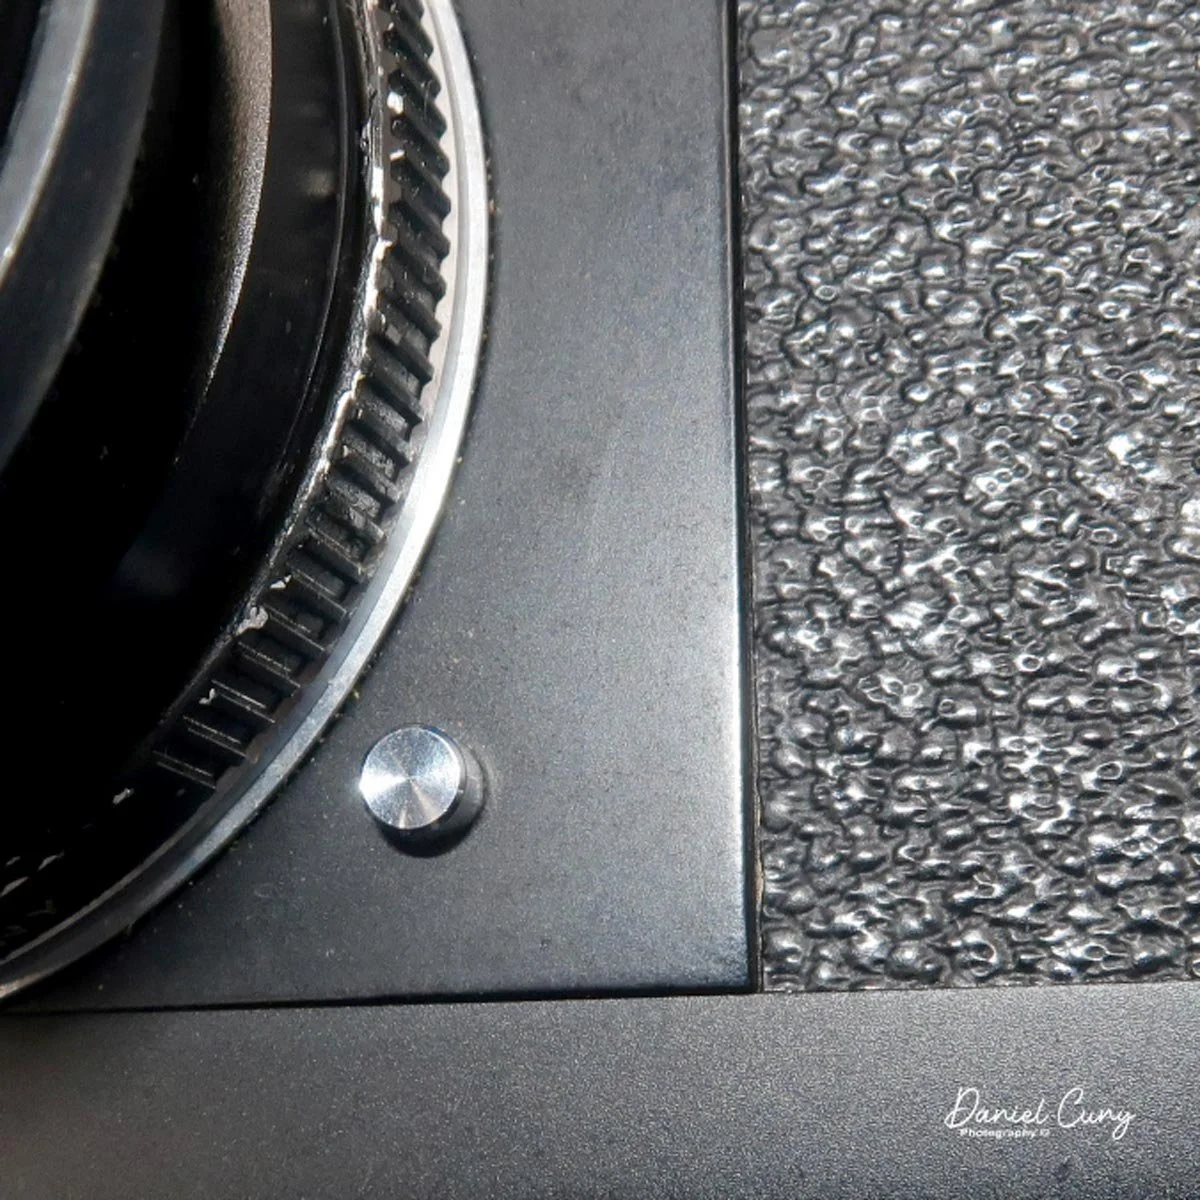
On the opposite side of the lens is an even smaller chrome button: the "battery test" button for the light meter. Unfortunately, the light meter on my camera isn't working, so it's not something I use when shooting with the Leica CL.

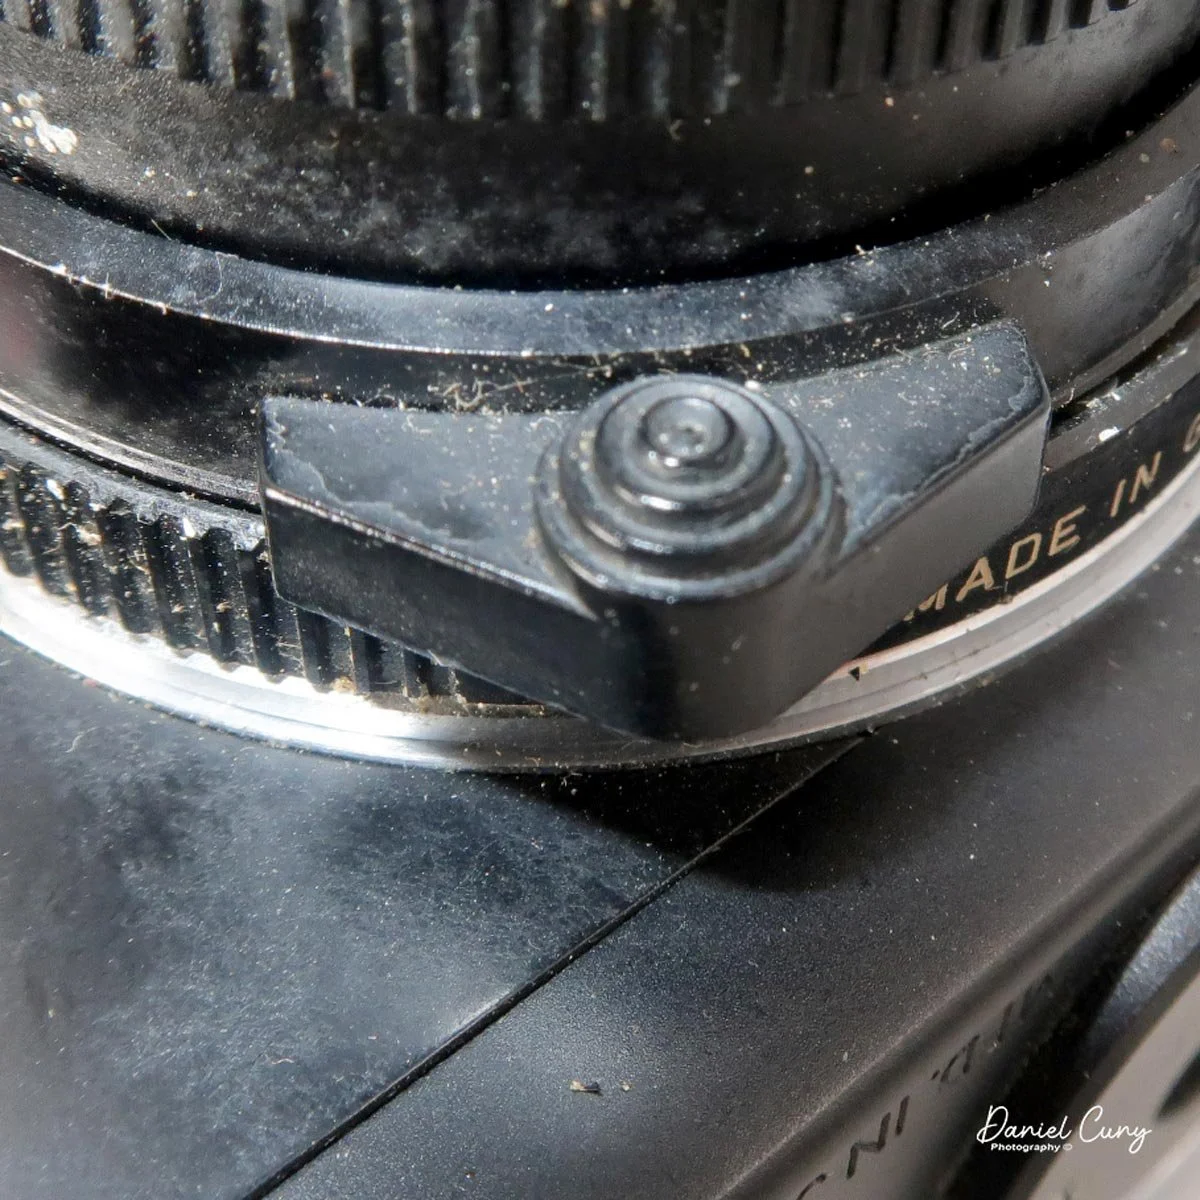
 On the lens is the focus knob, which is a larger knob on the bottom, and the aperture settings, which are located towards the front of the lens. I also have a rubber lens hood and a plastic lens cap that fits onto the hood; both came with the camera kit.

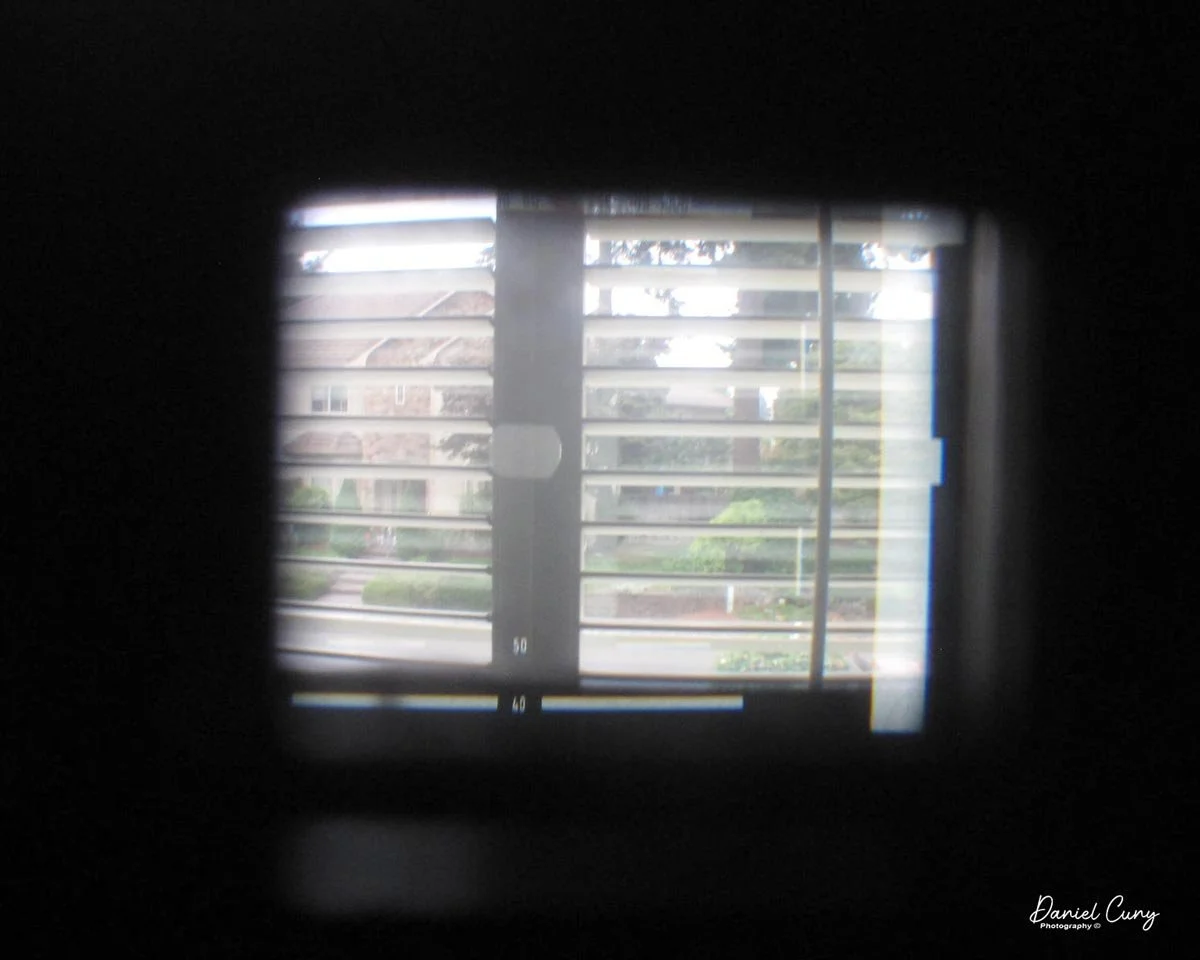
Looking through the viewfinder, there are several things to look at. In the middle is the bright rangefinder. This is a wonderful and very easy rangefinder. The image looks sharper (to me) when you bring the lines together in the yellowed area of the rangefinder. I'm generally not a big fan of rangefinders, but I do really like how this one performs.

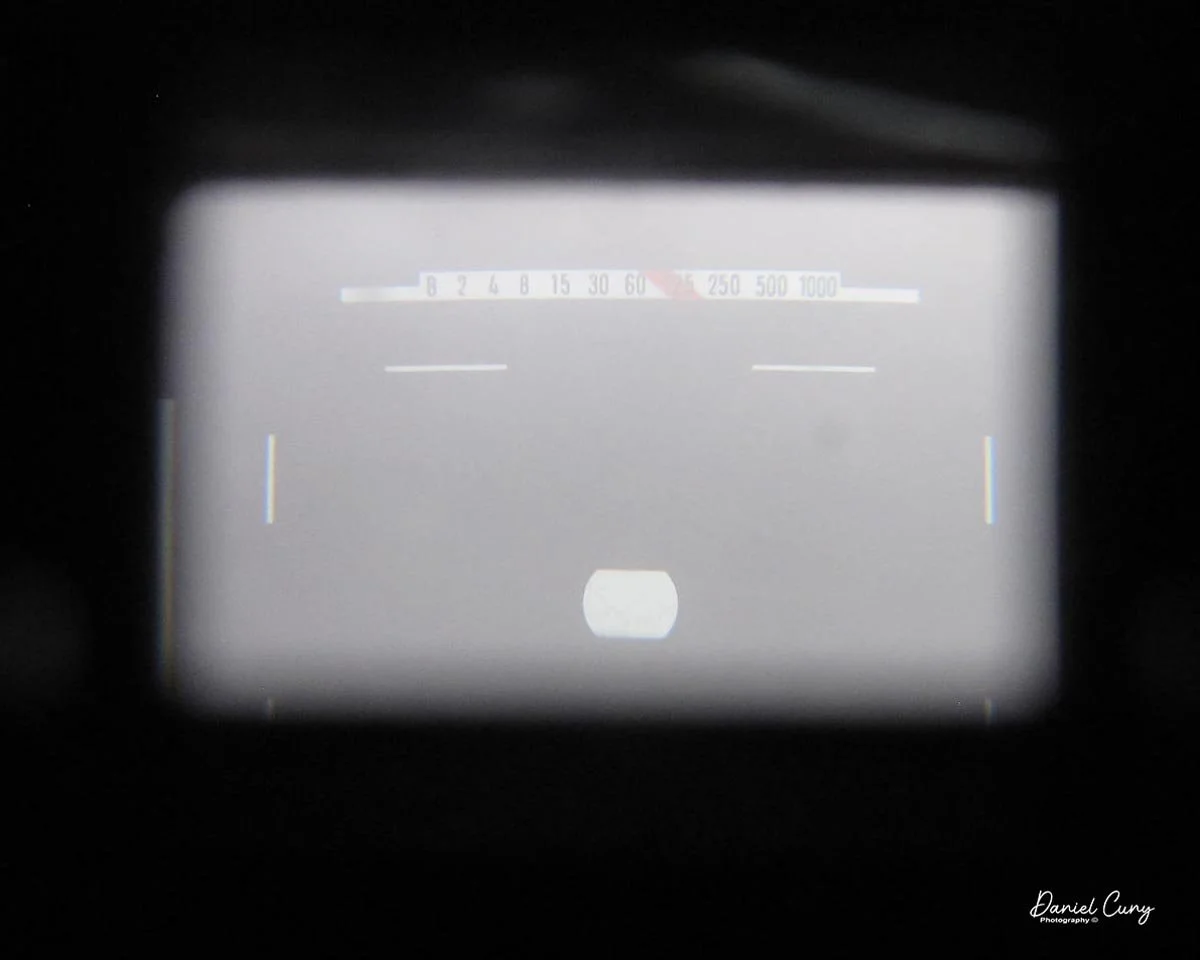
 It also has internal lines for a 40mm and 50mm lens. Along the top of the finder is the shutter speed, with a red bar sliding to the set shutter speed, which is easily adjusted with your forefinger rolling along the shutter speed selector.

On the right side of the viewfinder is the light meter. Leica interestingly designed the camera: when you wind it, a small hinged arm with a CDS sensor drops down in front of the vertically traveling focal plane shutter. This is what meters your exposures. As you change the shutter speed/aperture combination and the ASA setting, a bar moves up or down until it's in the center "cutout" area. When it's in the middle of the "cutout" area, the meter tells you it's properly exposed.

 When you click the shutter, the CDS sensor moves up just before the shutter opens and closes, exposing the film. Then, when you wind the film to the next exposure, the CDS sensor pulls back down and is ready to meter your next frame. If you haven't wound to the next frame and the winding lever is in close to the body, the meter is off. I also noticed that when you move the shutter speed dial to 1/2 sec. or "B", a red dot appears in the meter area. My best guess is that it's a longer exposure warning.

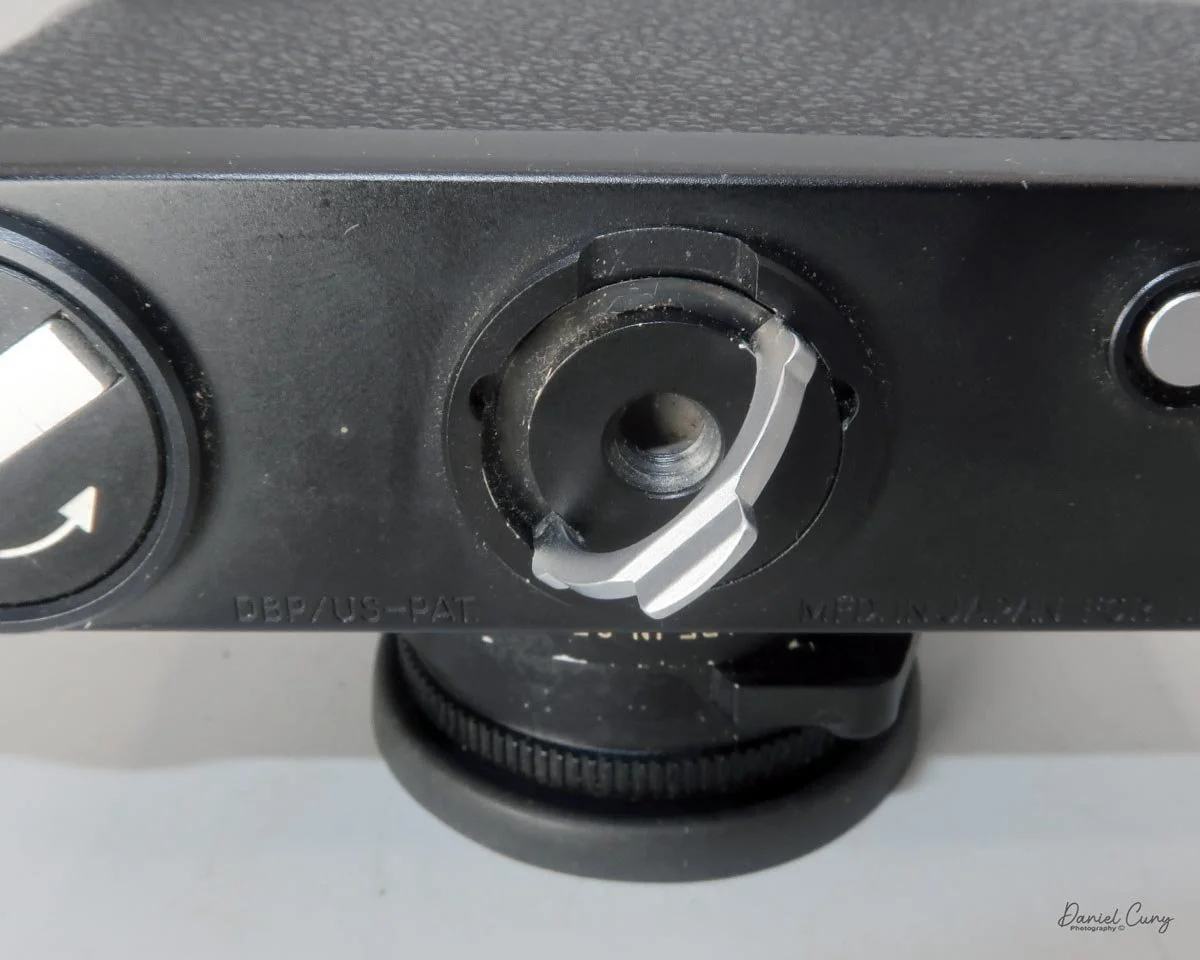
To remove the camera back to load the film, on the bottom of the camera in the center, there is a knob that you lift and turn until it stops. Then, slide the camera back down to slide the back off the camera body. Once you've done that, the pressure plate is hinged to the camera body, not the back of the film door you just removed.

 Put your film cassette in the left-side film chamber, flip down the pressure plate, and thread the lead into the grey clips on the take-up spool. Advance the film a bit to make sure it's caught and traveling across the shutter. Flip back the pressure plate, slide the camera back under the grooves on the front of the camera, sliding it all the way onto the camera body, and lock the film back onto the camera body.

The bottom of the film door also has the rewind crank and rewind button to unlock the film transport wheel, plus a small film reminder on the other side of the rewind crank.

 I have a few rolls of outdated Plus-X film dated to June 1976, which I have in both 36 and 20 exposures that I'm selling in my store on eBay, so I loaded a roll of 20 exposures into the camera, set my external light meter to ISO 50, and went for a walk around the neighborhood to see how the camera would perform.

 My Results

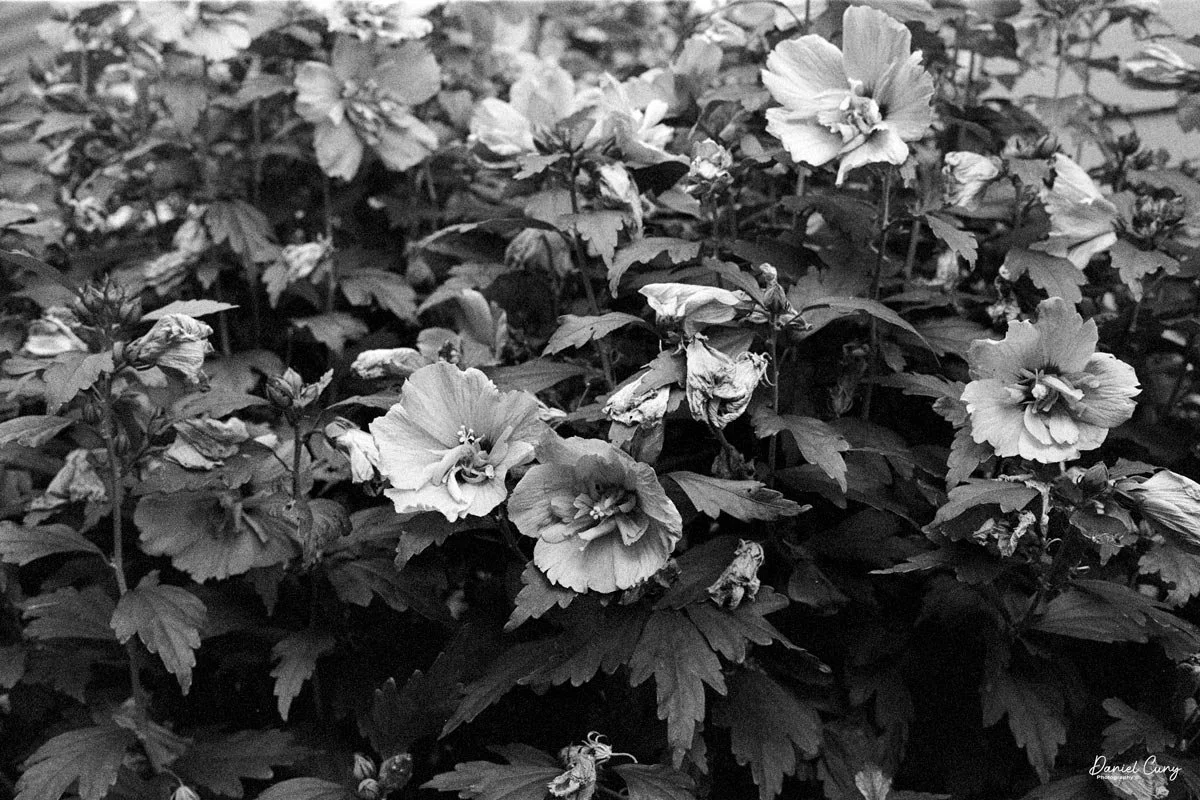
After walking the neighborhood and taking photos of many of the usual subjects to keep it somewhat consistent, I went home and processed the film. Here are some of the images I took on my walk.

Conclusion

I enjoyed many things about using the Leica CL. First and foremost was the focusing. I really enjoyed how the rangefinder reacted to the images I selected. It made it easy to focus, especially in busy areas with a lot of detail.

 The second thing I enjoyed about the camera was the image quality. Similar to the Contarex "Bullseye" camera, this lens is very sharp. I kind of marvel at how sharp these images are. Maybe it's because I try so many different cameras with average or below-average optics, but when you get a sharply focused photo, they just jump out at you.

 The camera case (to me) was a real pain. Having the case flop around when I'm using the camera was a negative experience. In the future, instead of latching the case through the strap, I'll put the strap on the camera and wrap the case around it for protection. When I unzip the case, I'll put it in my pocket. That's a more desirable solution for me.

 One other thing I noticed from the last few cameras shot with the expired Plus-X film I have is that I kind of like the grain of the film. It's a bit chunkier than the newer films, which I kind of enjoy and remember from my earlier days of shooting.

 Overall, my experience with the Leica CL was very positive. I would have liked an internal meter, but for the price I paid for the camera, lens, and case, I'm very happy and can use an external meter or guess exposures, which is pretty easy.

 Are you interested in other cameras? Here are some of my other Camera Reviews.

 Check out my Cuny's Camera Collection YouTube channel, where I am putting together video overviews of the cameras I write about. Be sure to subscribe and like the channel, too!

 Cuny's Cameras and Photos is my online eBay store, where you will find some of the cameras I have reviewed, along with a wide range of other cameras, lenses, and items from my collection that I am thinning out.

 Until next week, please be safe.
 

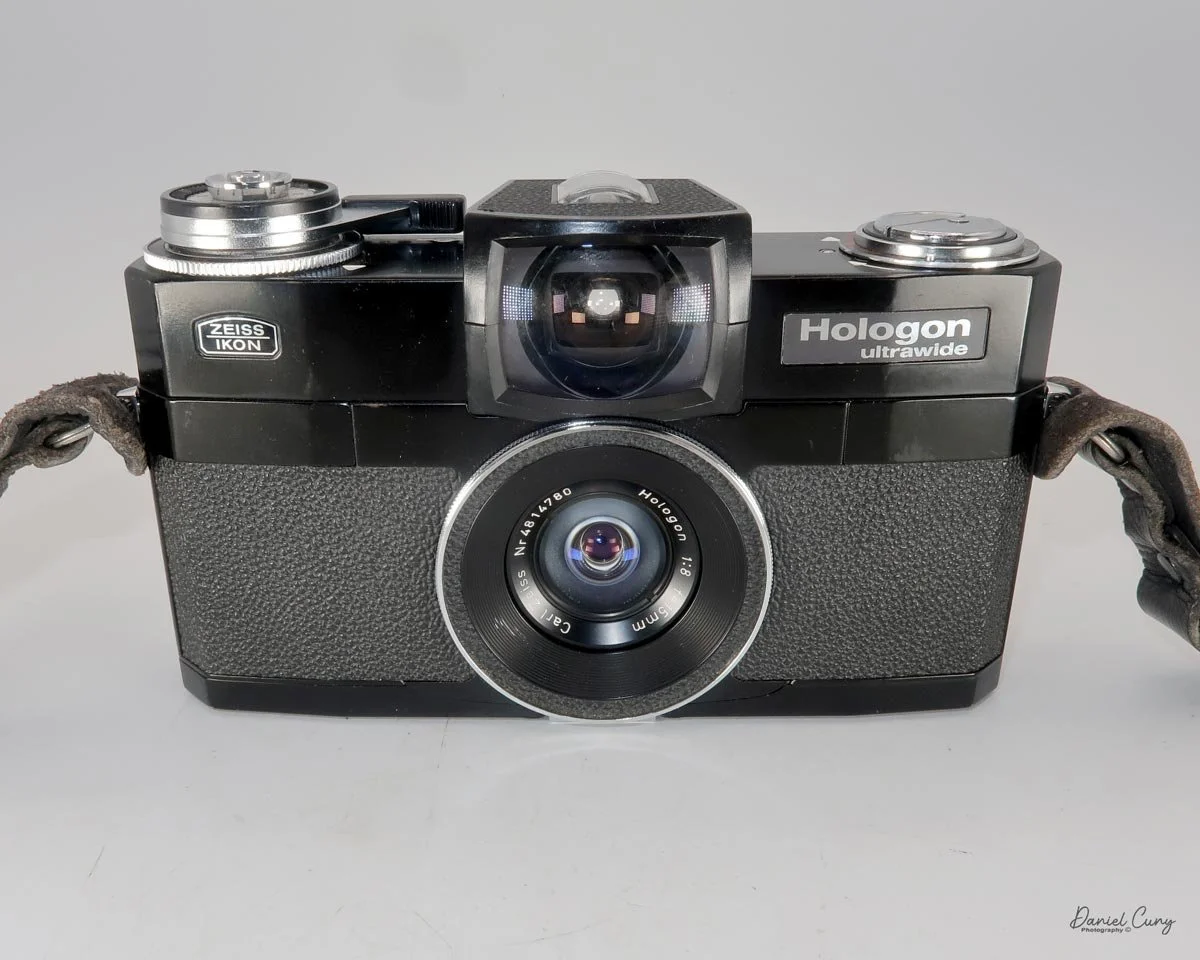
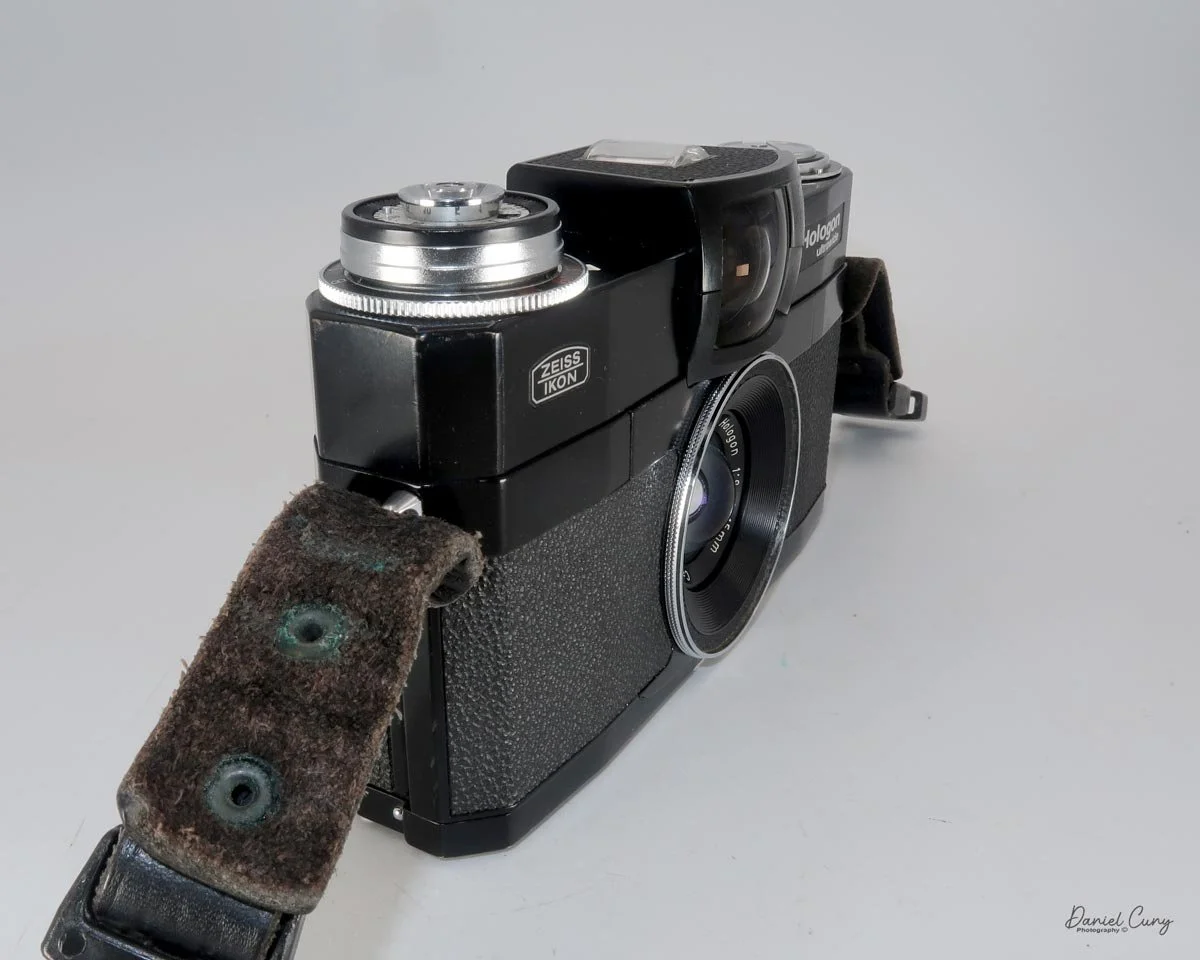
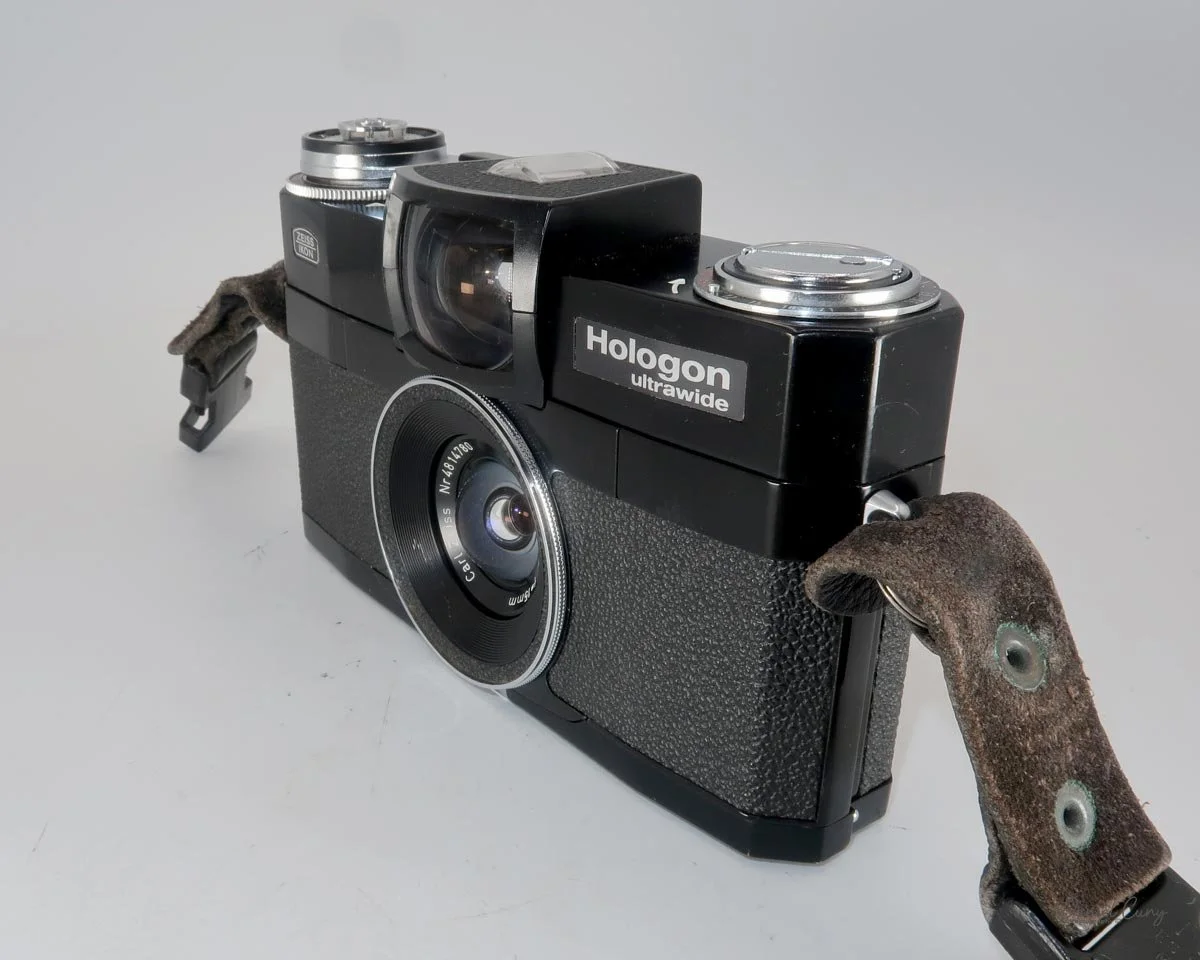
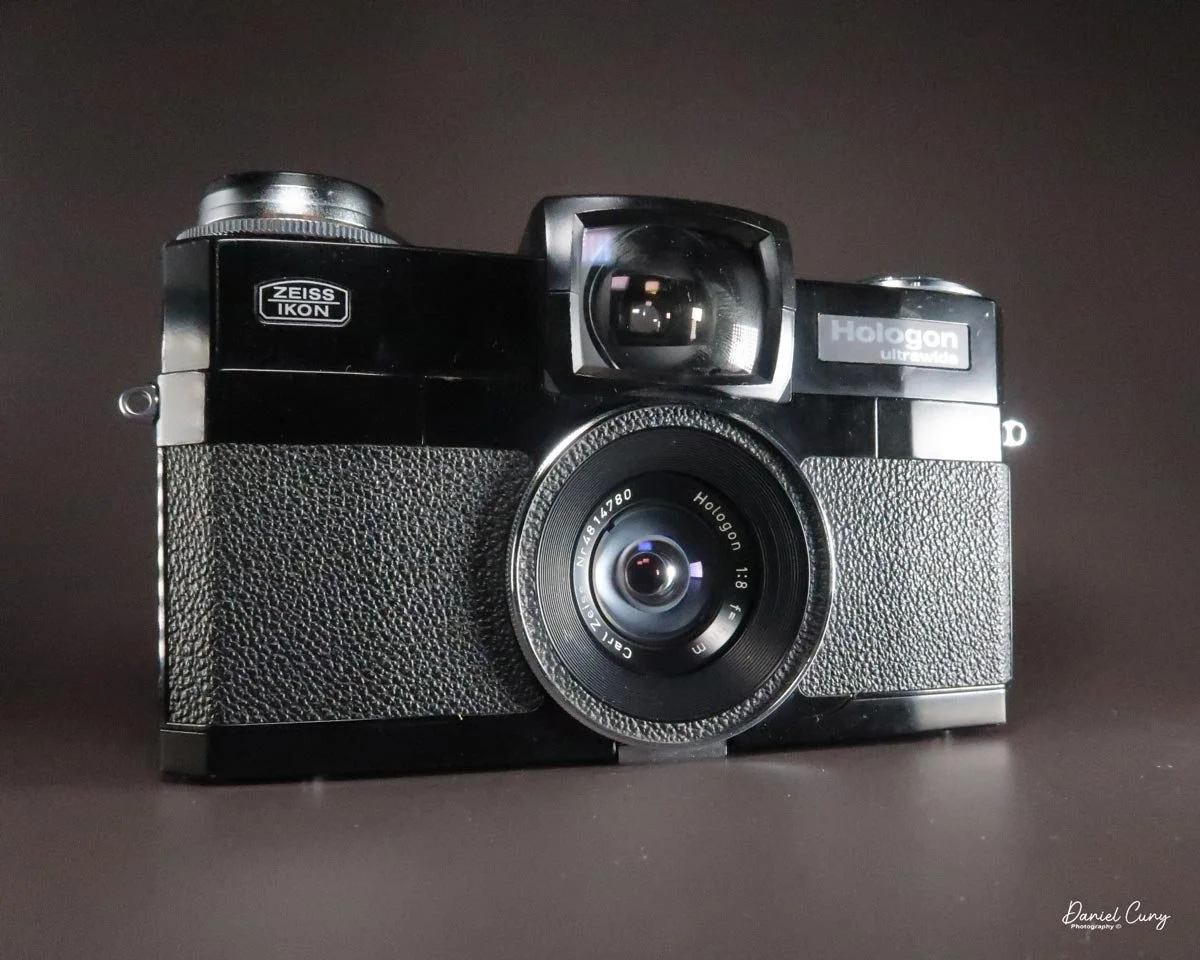
Zeiss Ikon Hologon Ultrawide camera

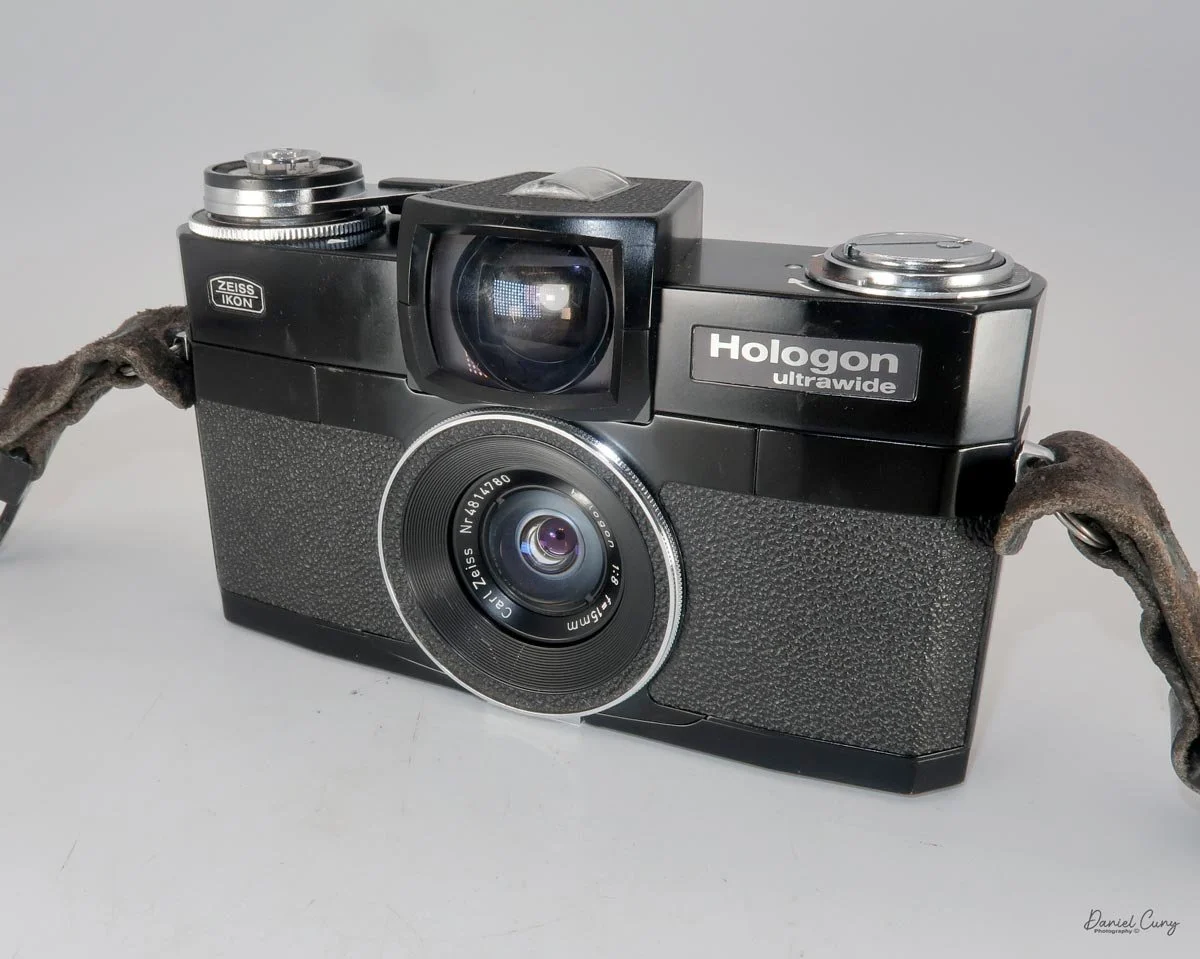
My Zeiss Ikon Hologon Ultrawide camera

When it comes to photography, I have a passion for all things panoramic and wide-angle, so the rare Zeiss Ikon Hologon Ultrawide camera was a camera I've always wanted to purchase. What's not to like? The whole camera was built around an incredible Carl Zeiss 15mm f/8 Hologon ultra-wide-angle lens, which the camera is named after.
 It wasn't until later in my career in the photo industry that I had the financial means to purchase one of these wonderful cameras. I'd seen them at camera shows, in online sales on eBay, and in other stores. I've even had the opportunity to purchase one back when I was first starting out collecting cameras, but the price was always beyond my reach.

 About 10 years ago, I was looking through the online catalog from Wetzlar Auctions in Germany. Basically, I was dreaming about the cameras that were still out of my reach. It wasn't the super-rare Leicas that caught my eye, but a hard-to-find Zeiss Ikon Hologon Ultrawide with the handle, cable release, center filter, lens caps, and case that made me pause.

 At the time, Wetzlar Auctions had a fairly low starting price, so I thought, "Why not? Let's give it a go," and see how quickly I'd be outbid. I put in a fair price that I was willing to pay for the camera, as they said it was in "good working condition."

 As time passed and the auction got closer, there weren't that many people interested in the camera, but my thoughts kept saying, "You'll be outbid soon."

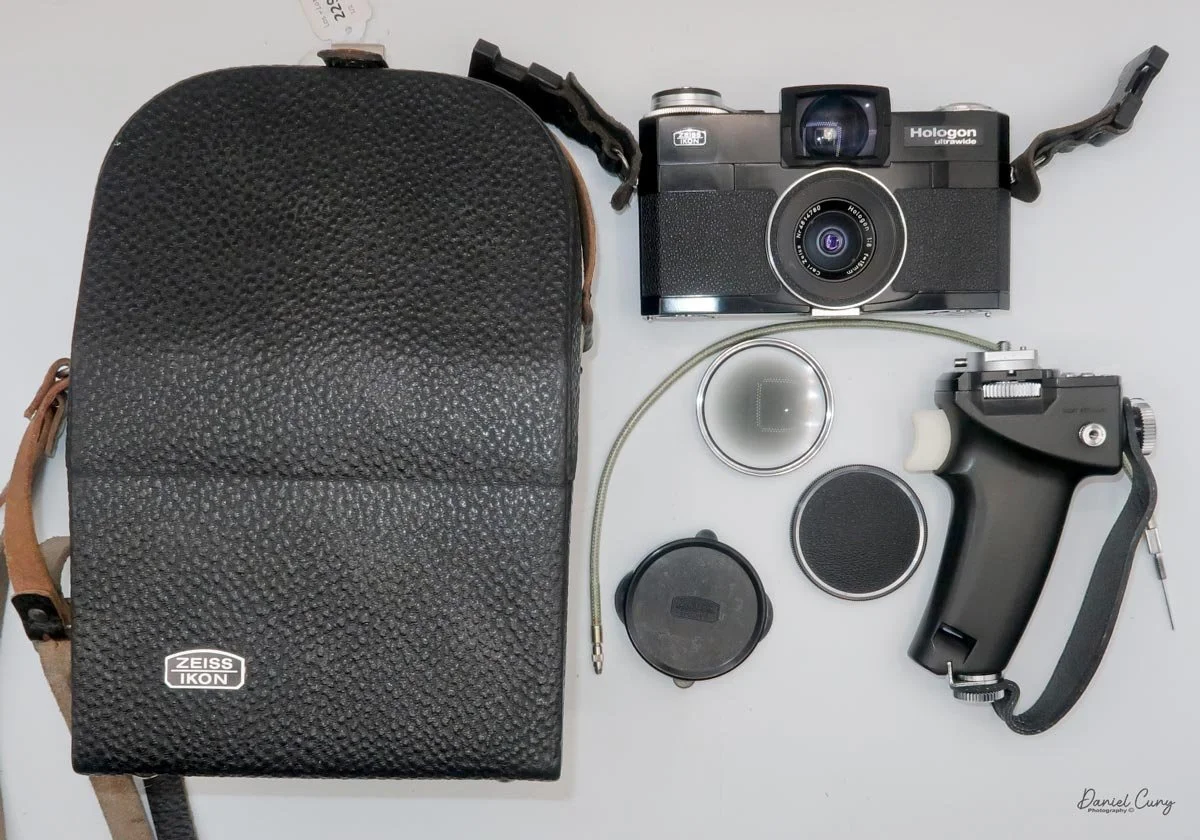
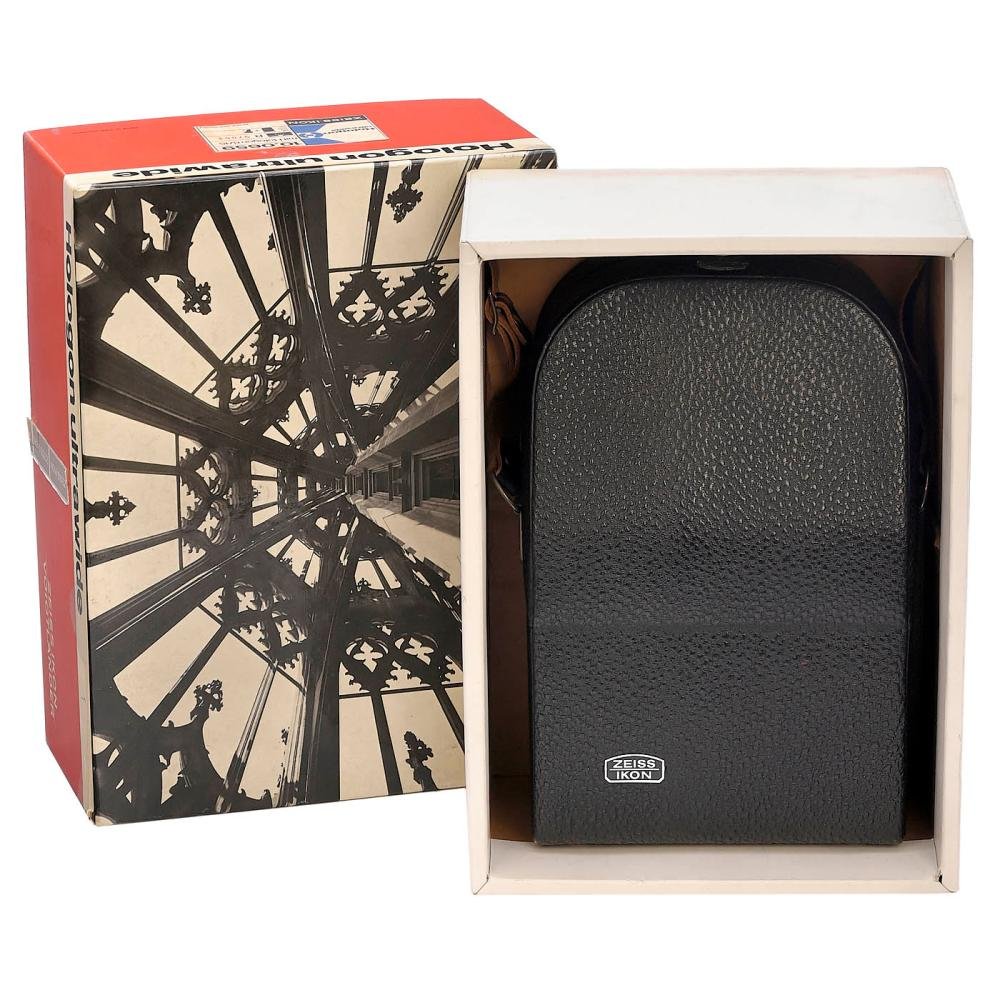
My outfit with case, center filter, grip, cable release and lens caps.

 On the day of the auction, I watched the results, and the price didn't reach my high bid. So, by the time the auction closed, I was the winner of the camera. There were concerns that the camera may not have met expectations, and there were underlying issues the auction house didn't disclose that I wasn't aware of.

 After paying for the camera, along with the auction house fees, etc., I then needed to pay to have the camera shipped from Germany to my home in the USA. It was a little bit more than I expected, but to me, it was still under the value of the camera, so I was pleased. Especially to have such a rare and special camera in my collection.

 It wasn't until I received the camera that I noticed the camera's take-up spool was missing, and the bubble level on top was dried out. Not the end of the world, as I purchased a Contaflex/Contax take-up spool that fits the camera well. It wasn't the original take-up spool with the red tips on the end, but it would wind the film in the camera.

 There wasn't much I could do about the bubble level, but at this point, it's water under the bridge. I now have a working Zeiss Ikon Hologon Ultrawide camera to put in the collection and use when I want.

History:

The Zeiss Ikon Hologon is one of the most unusual and technically ambitious 35mm cameras ever produced. Introduced in 1969, it was created around an extraordinary lens rather than the other way around. Its Carl Zeiss Hologon 15mm f/8 lens offered an astonishing 110-degree angle of view, making it one of the widest-angle lenses available for 35mm photography at the time.

Outfit in the original box.

 The story began with German optical designer Dr. Erhard Glatzel and his work at Carl Zeiss. The Hologon was an innovative three-element design intended to produce an extremely wide, rectilinear image with remarkably low distortion. The lens was so physically unusual that conventional 35mm camera bodies could not accommodate it properly. Its rear element needed to sit exceptionally close to the film plane. Rather than compromise the lens design, Zeiss created a camera specifically around it.

 The resulting Hologon camera was based on the chassis of the Zeiss Ikon Contarex but eliminated the SLR mirror and reflex viewing system. In their place was a large optical viewfinder with a built-in bubble level. The level was important because the enormous field of view made even a slight tilt of the camera very noticeable in the finished photograph. The camera also came with a distinctive pistol grip, designed partly to keep the photographer's fingers from appearing at the edges of photographs.

 The Hologon's lens was fixed at f/8 and had fixed focus, providing sharpness from approximately 0.5 meter to infinity. Because such a wide-angle optical design naturally suffered from illumination falloff toward the edges of the frame, Zeiss supplied a specially graduated center filter. This accessory was an essential part of the system rather than simply an optional convenience.

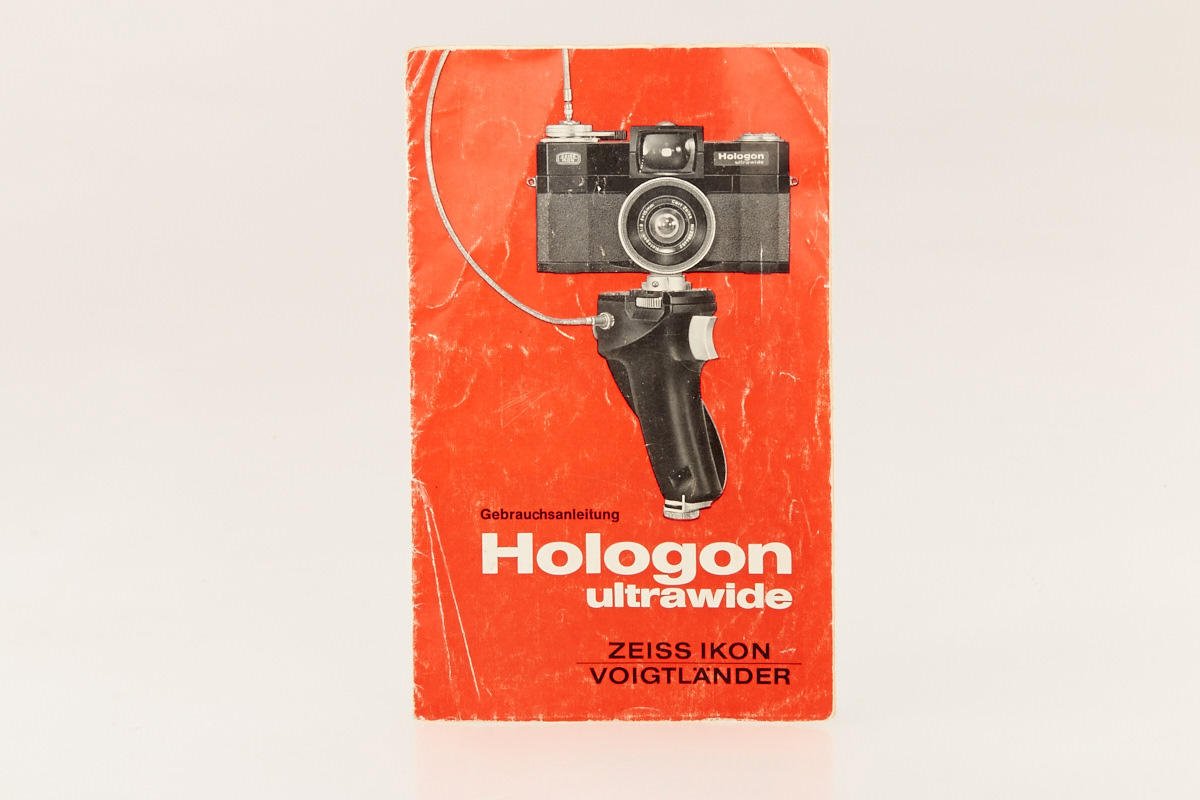
Zeiss Ikon Hologon Ultrawide manual

 Production numbers were extremely small. Approximately 1,400 Hologon cameras were produced, making it one of the rarest members of the Contarex family. Zeiss Ikon's camera manufacturing ended in the early 1970s, and the Hologon became one of the final and most exotic products associated with the Zeiss Ikon name.

 The Hologon lens itself survived beyond the camera. In 1972, unused lenses were offered in Leica M mount, complete with the appropriate accessories. The Hologon name was eventually revived in the 1990s for a redesigned 16mm f/8 lens used with the Contax G system.

 Today, the Zeiss Ikon Hologon is highly prized by collectors. It represents a remarkable moment when optical engineering took priority over conventional camera design—a camera literally built around a lens. Its rarity, distinctive appearance, and extraordinary 15mm Hologon optics have secured its place as one of the great classics of German camera history.

My Camera:

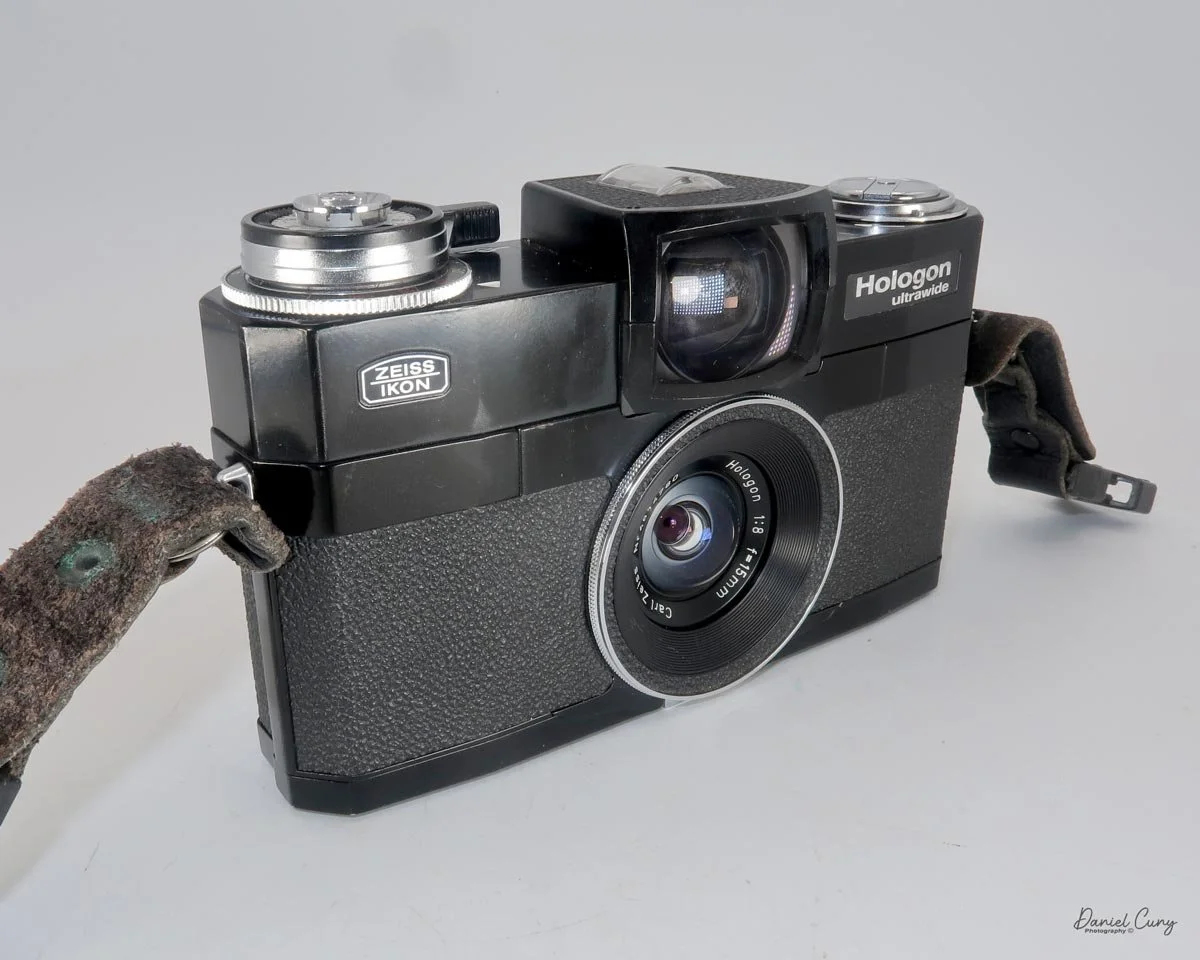
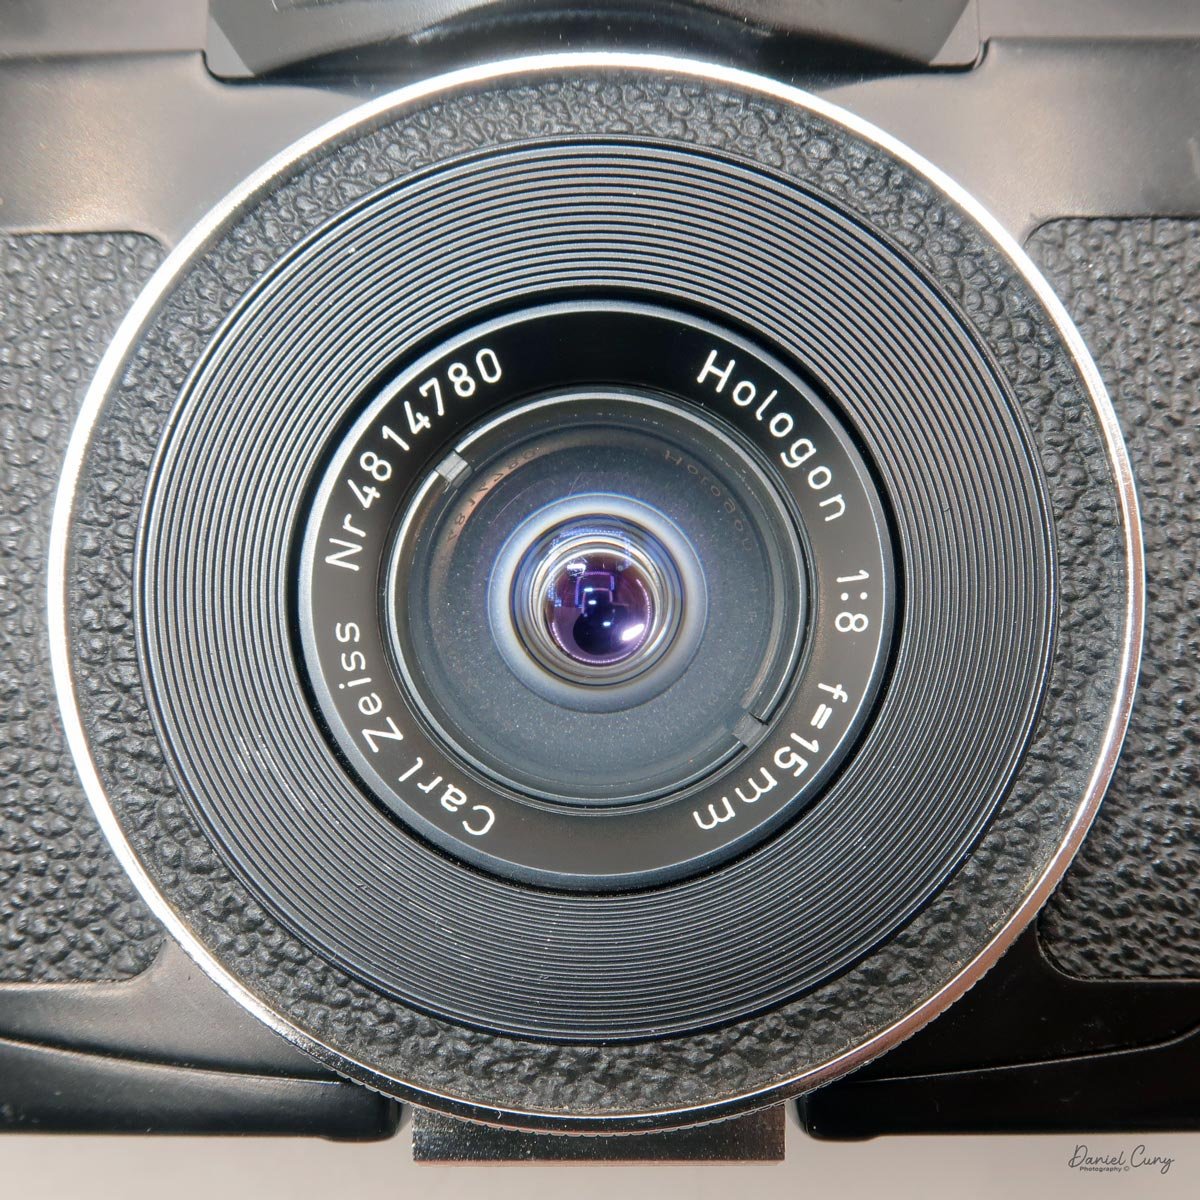
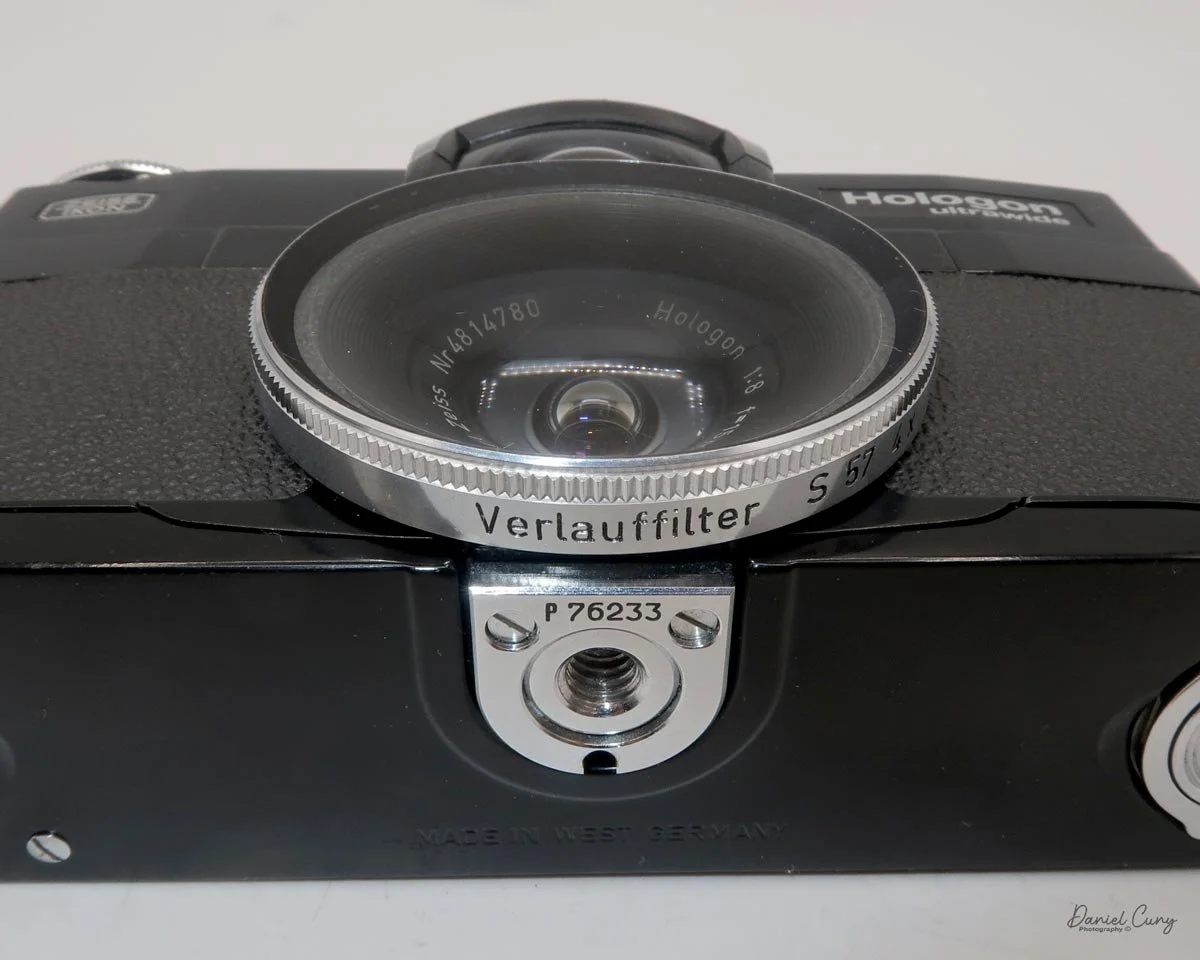
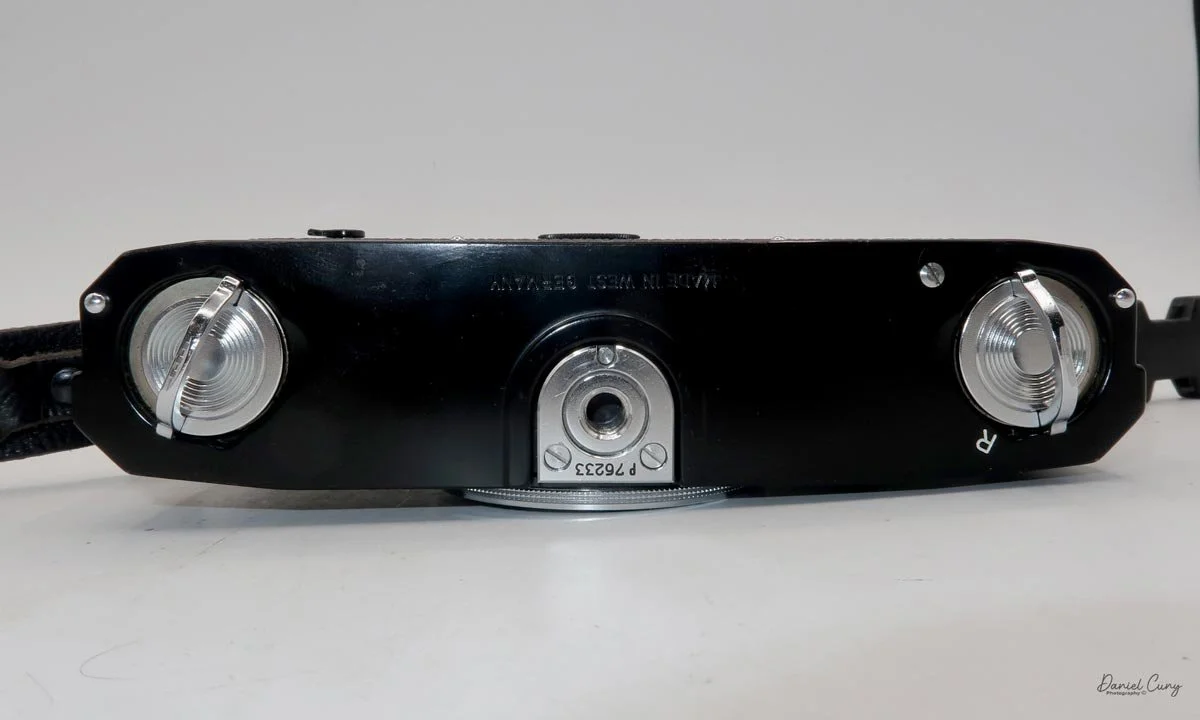
My Zeiss Ikon Hologon Ultrawide camera is based on the Zeiss Ikon Contarex body and is 6" wide by 3.5" tall by only 2" deep. The camera weighs in at 1 pound, 11.5 ounces with the Carl Zeiss Verlauffilter S 57 4x (center filter) and plastic lens cap. The camera's serial number is P76233. The camera has a Carl Zeiss Hologon 15mm f/8 lens, serial number 4814780.

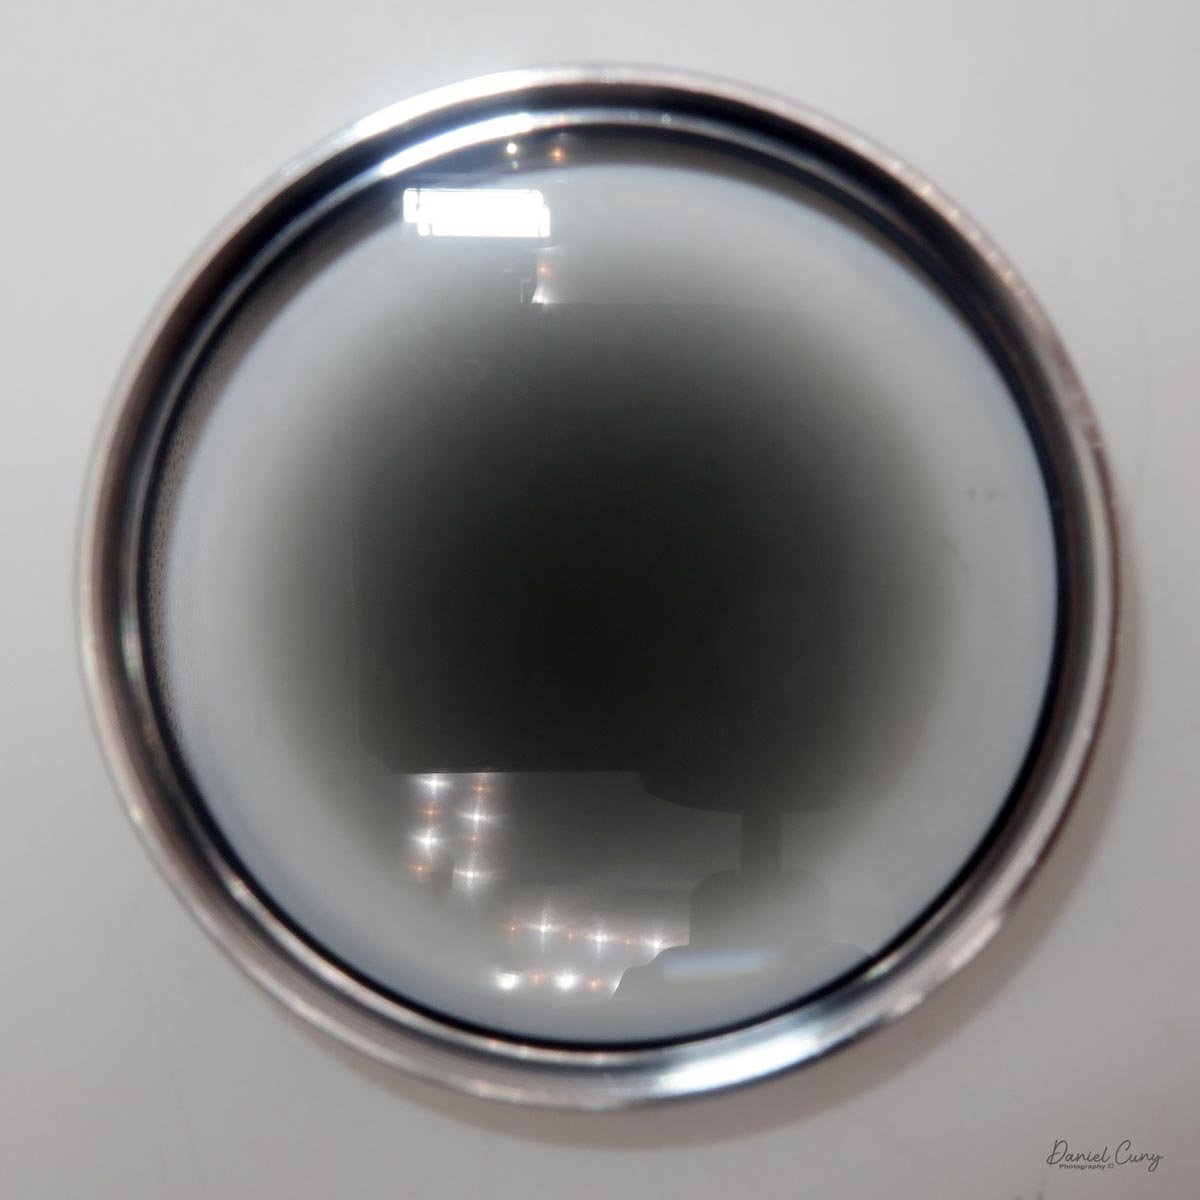
Due to the lens's wide angle of view, the camera has a center filter that is darker in the middle and lighter on the sides. This helps to even out the exposure in your images. If the camera didn't have the center filter, all the images would have a darker ring on the sides, giving the images a slight vignette appearance. The center filter evens out the vignette appearance in your images.

The filter has threads on the outside that thread into the threads on the outside of the lens and wrap around the lens. This is different from most filters, which thread onto the inside of a lens.

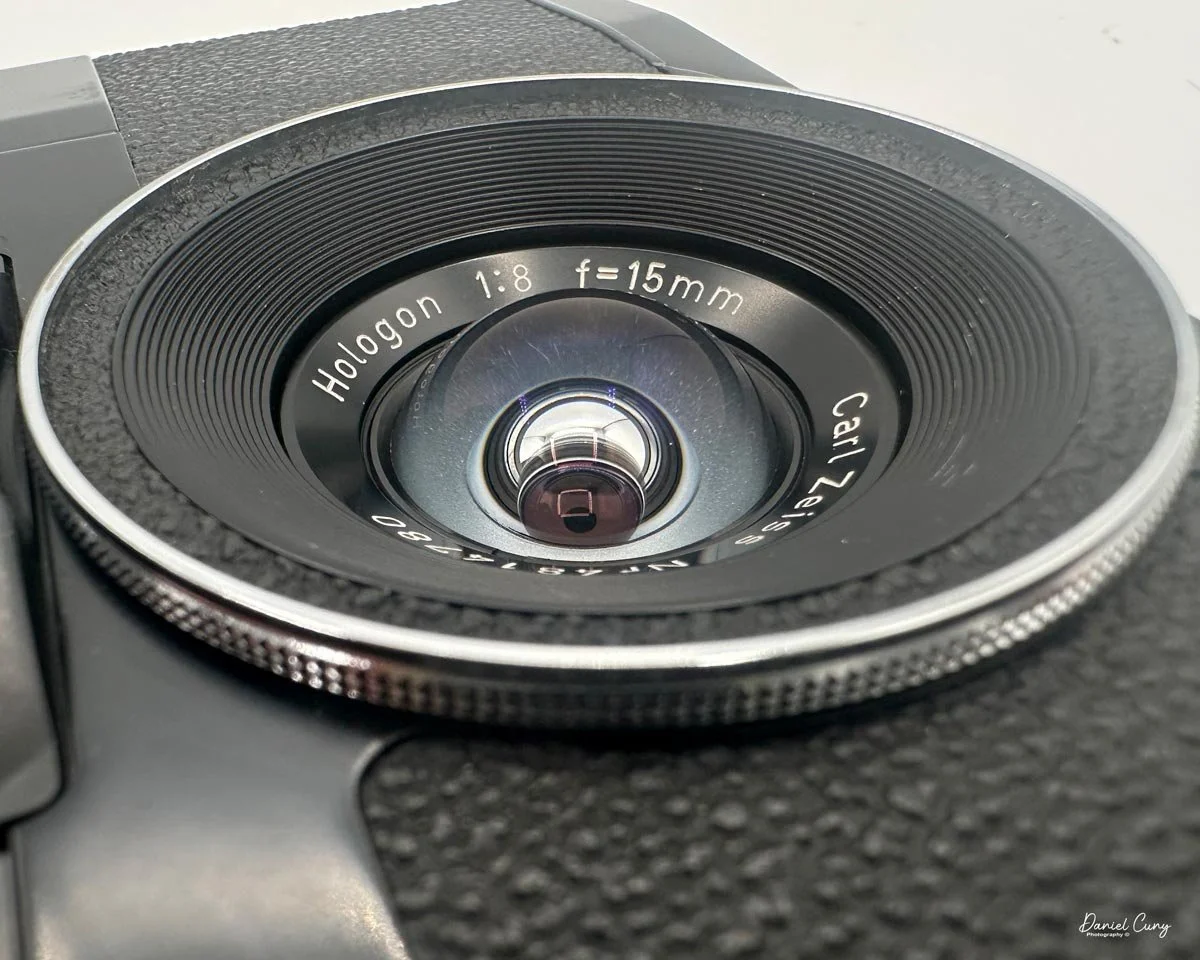
 When you look closely at the lens from the front, it has a rather flat appearance, but when you turn the camera and get in close to look at the lens, it definitely has a dome appearance. Its three-element configuration was revolutionary because it produced an exceptionally wide, essentially rectilinear image without relying on the fisheye projection used by many extreme wide-angle lenses.

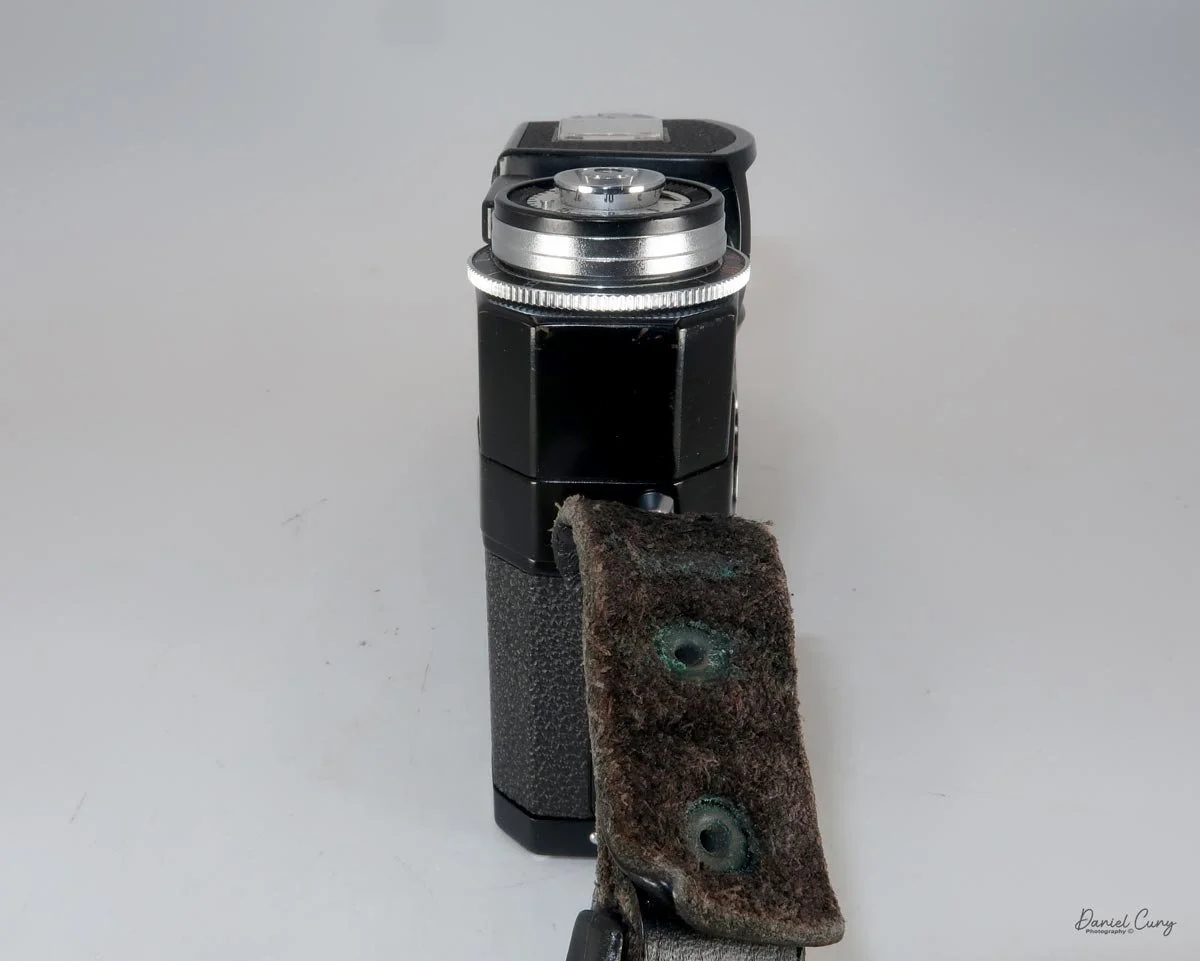
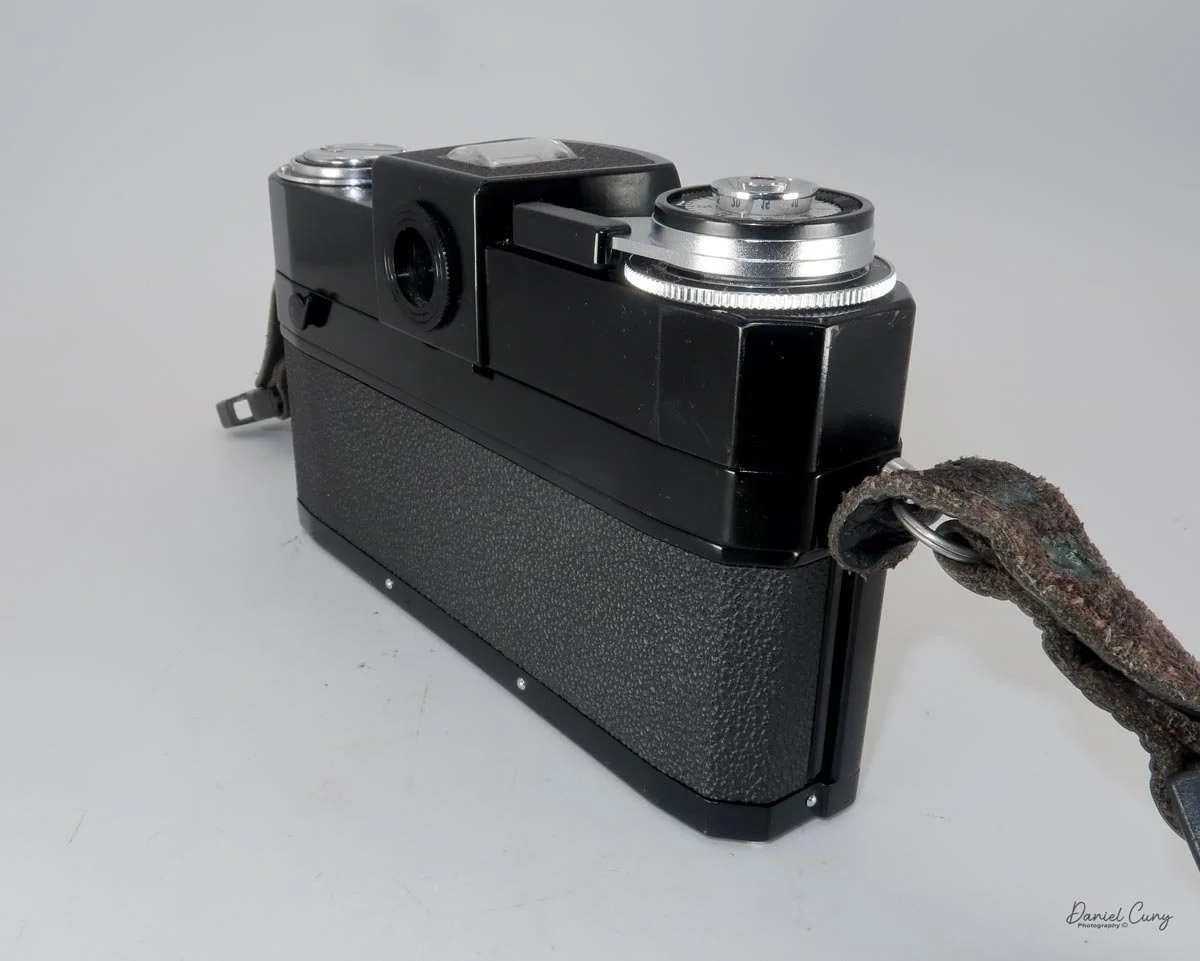
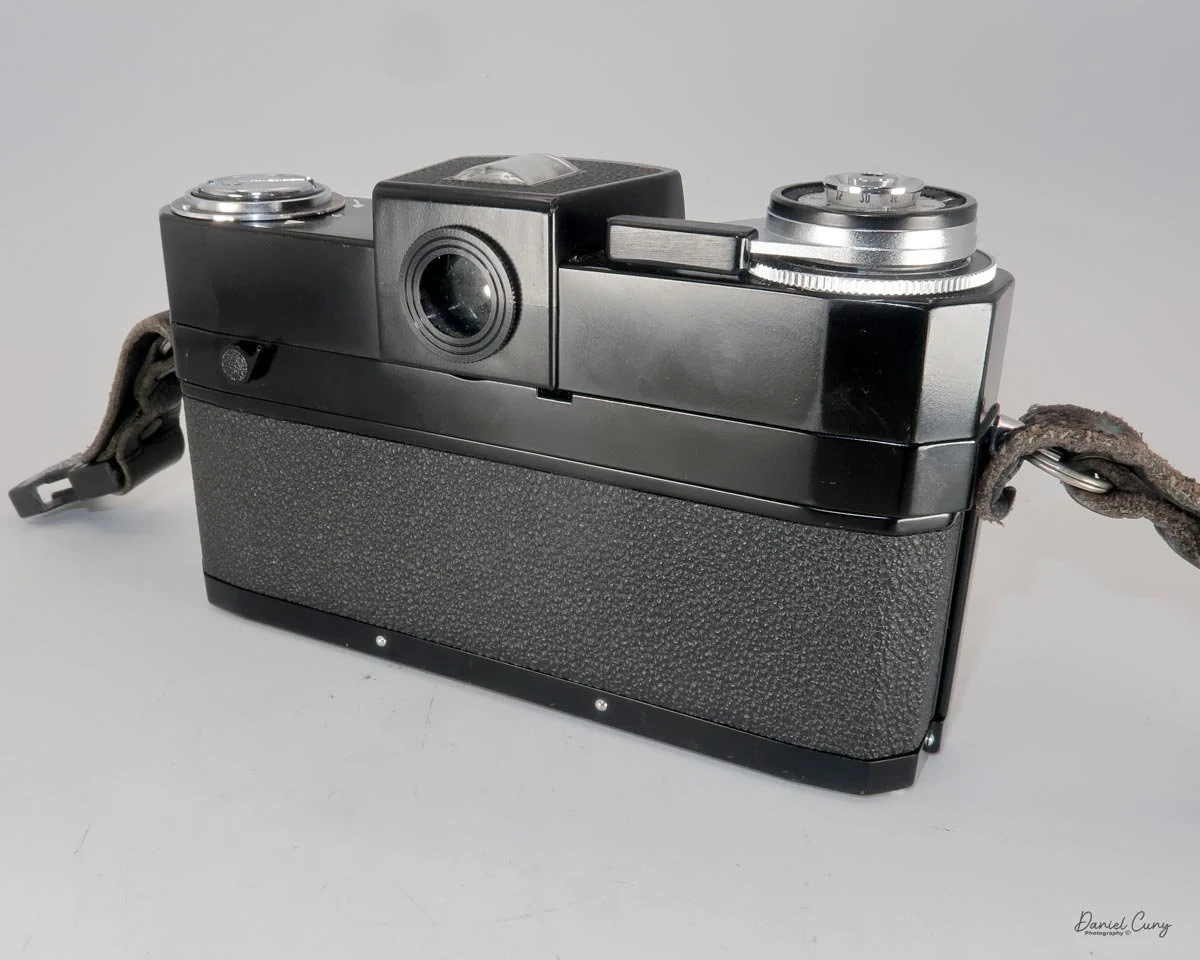
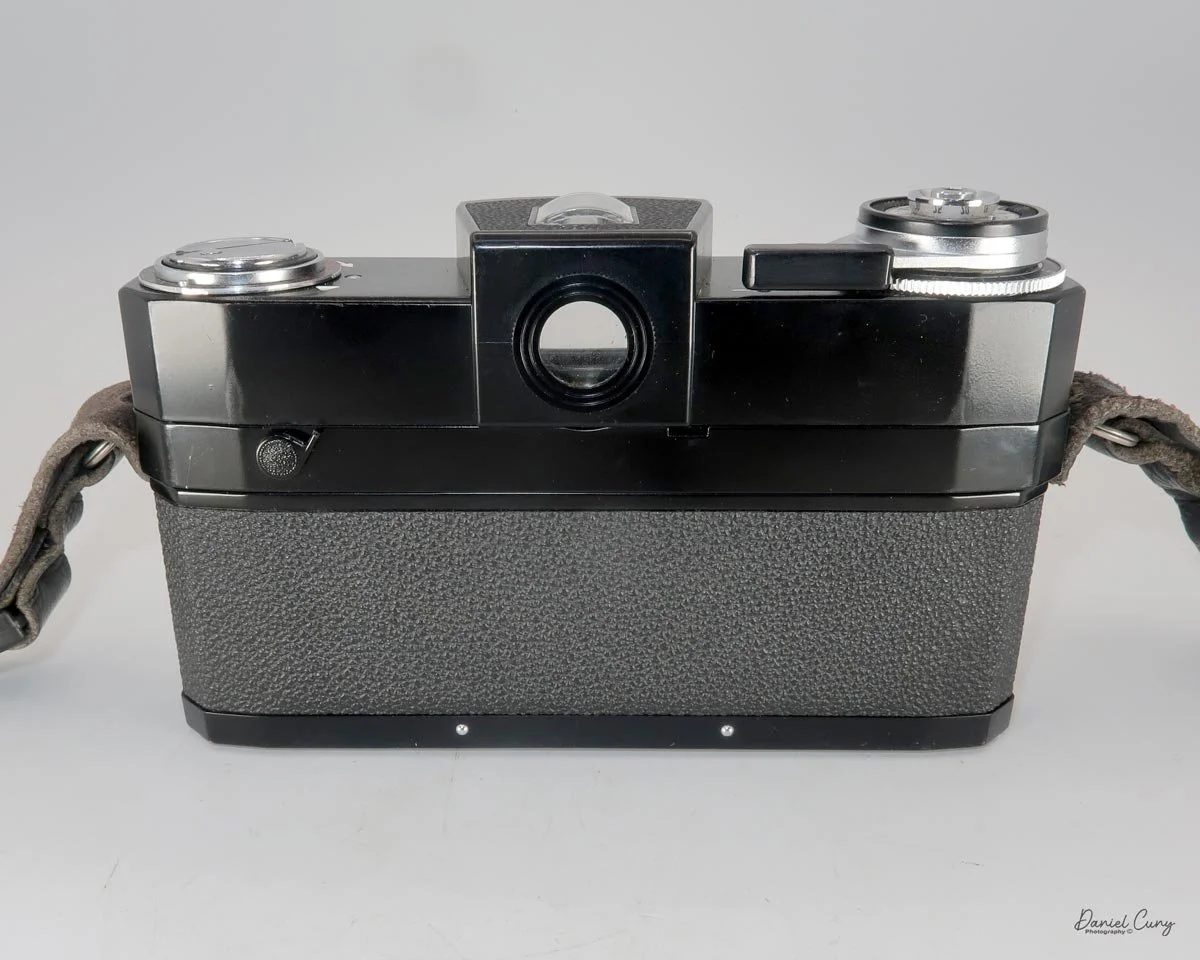
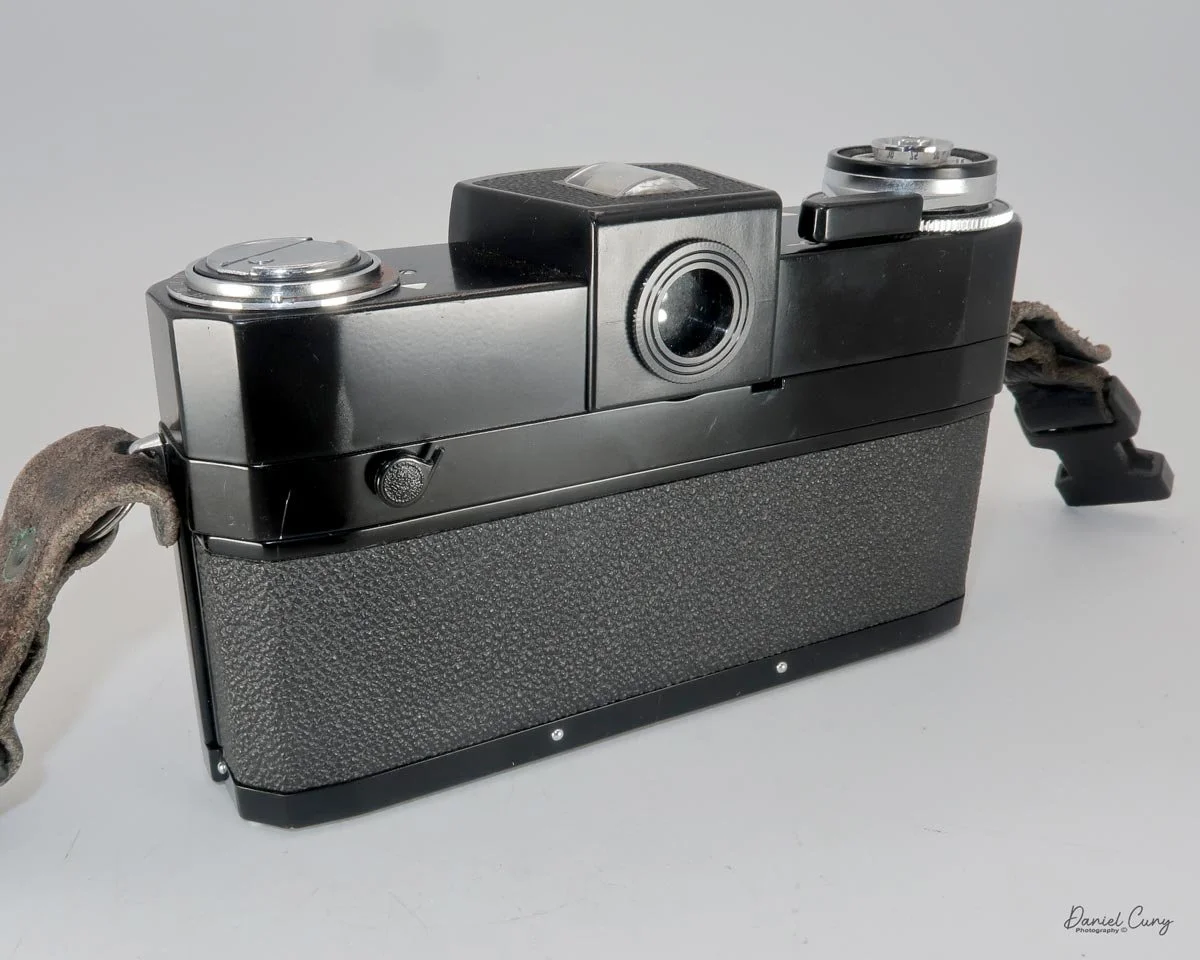
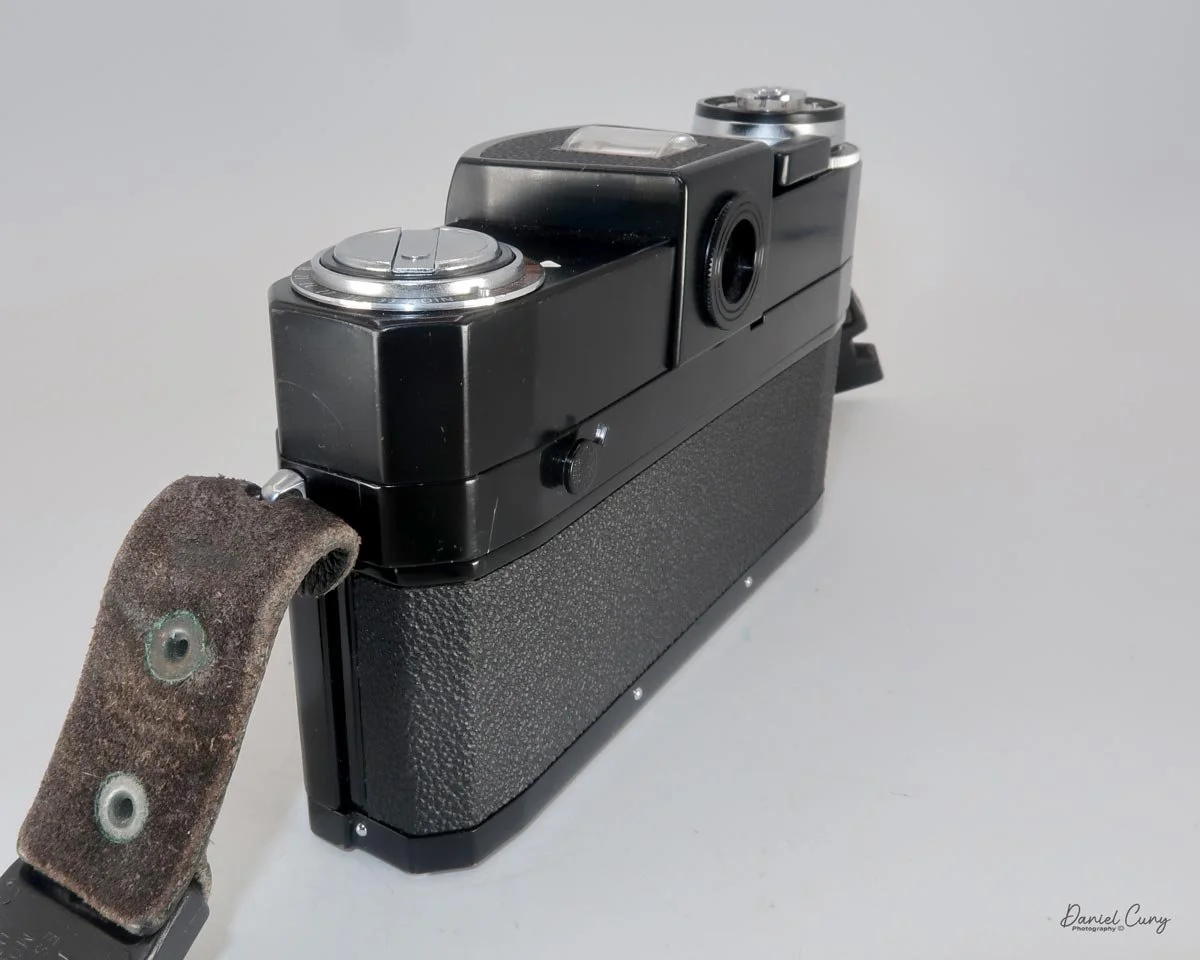
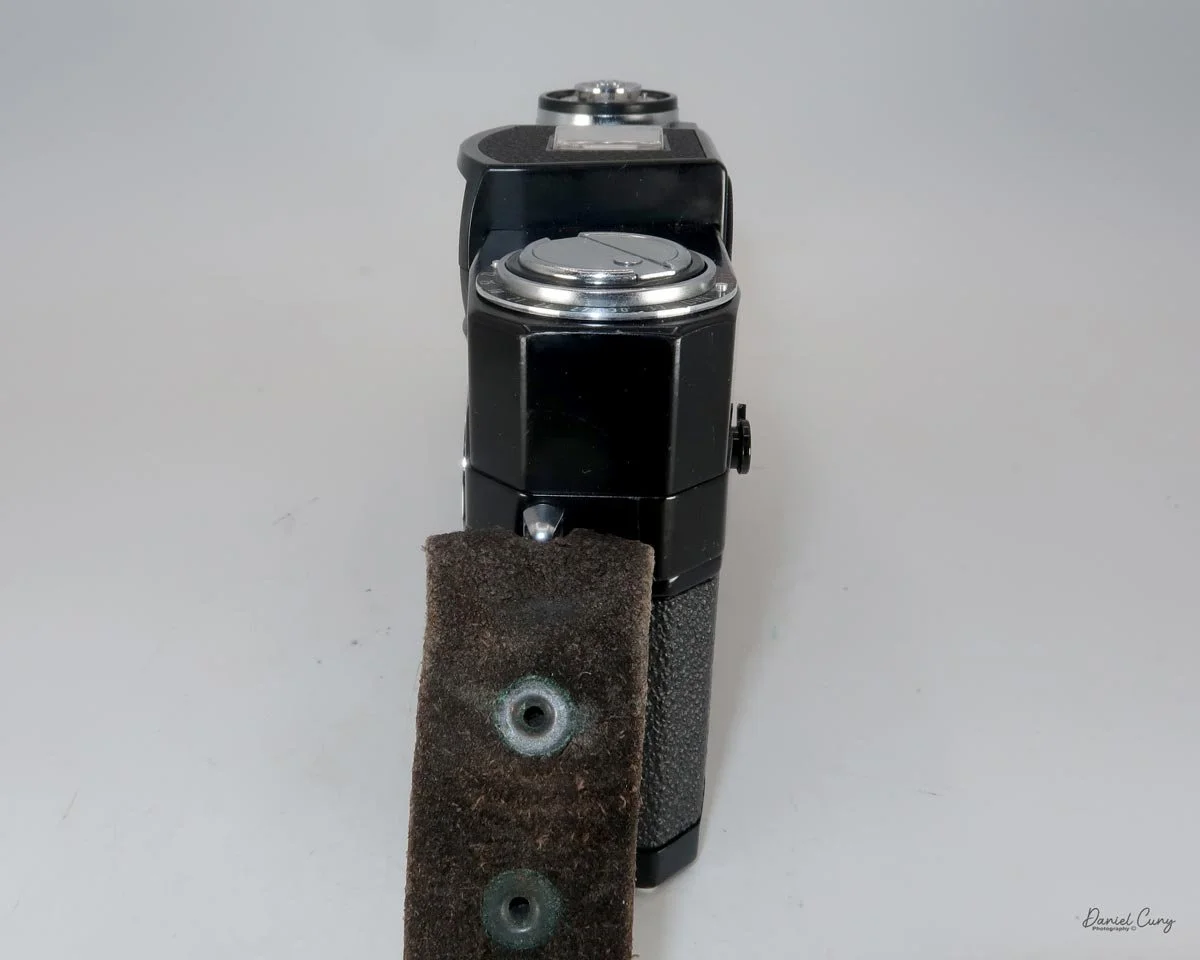
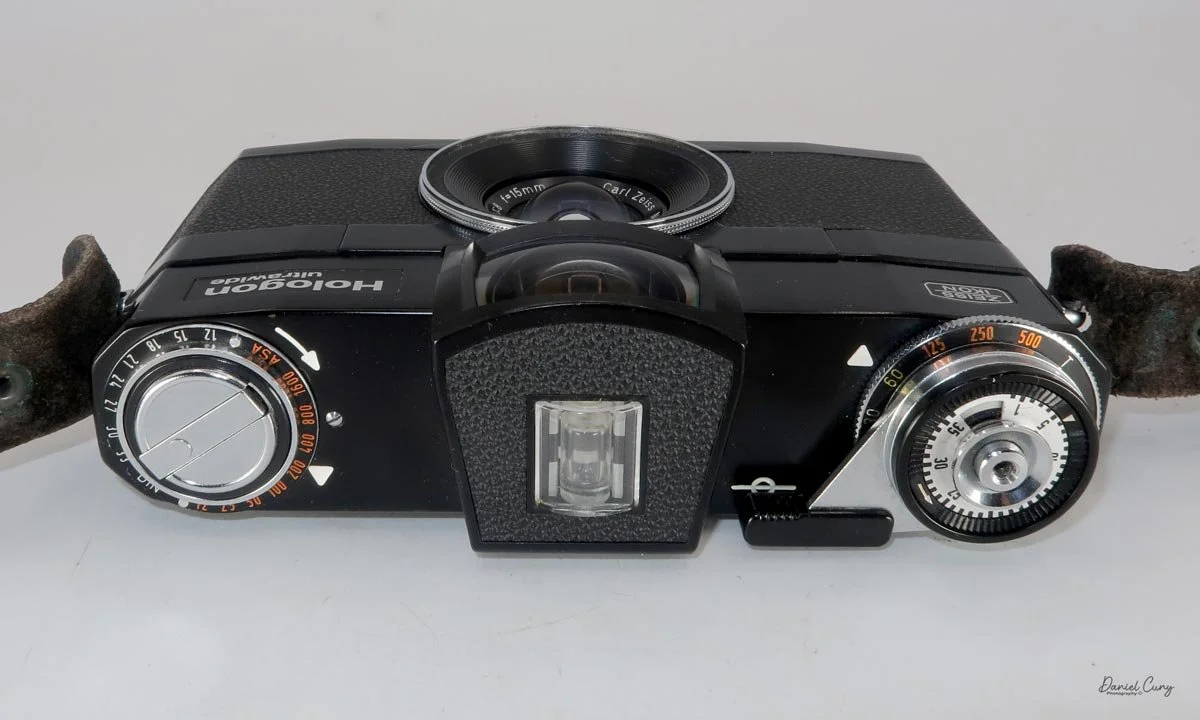
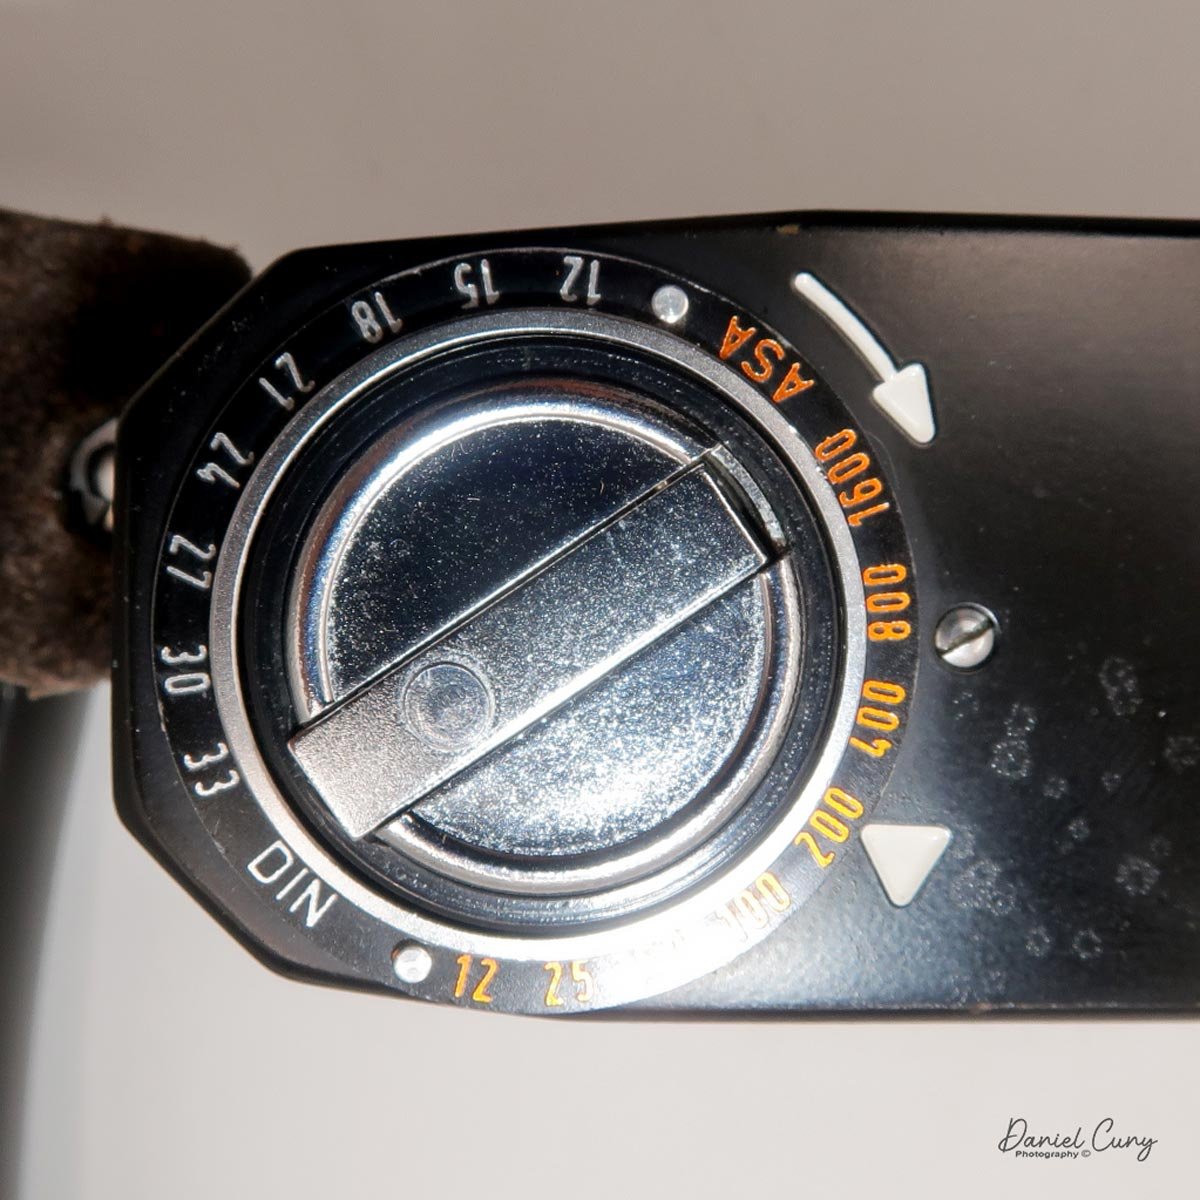
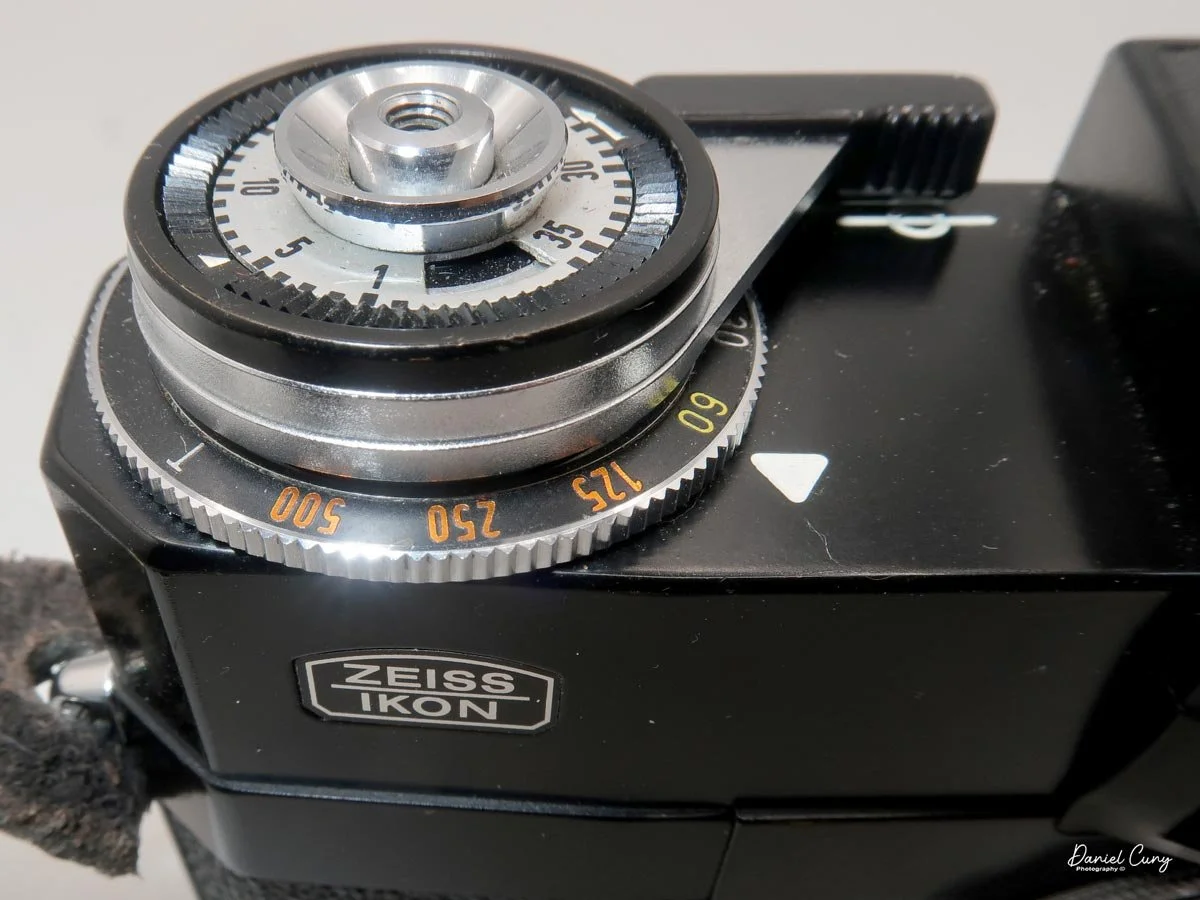
The camera is very basic and, as I mentioned, is based on the Zeiss Ikon Contarex body. Looking at the top of the camera, the camera's rewind crank is on the far left, surrounded by a movable wheel that shows, as a reminder to the photographer, what ASA (ISO) is in the camera. There is no meter in the camera, so it's really used as a reminder to the photographer what film speed they loaded into the camera.

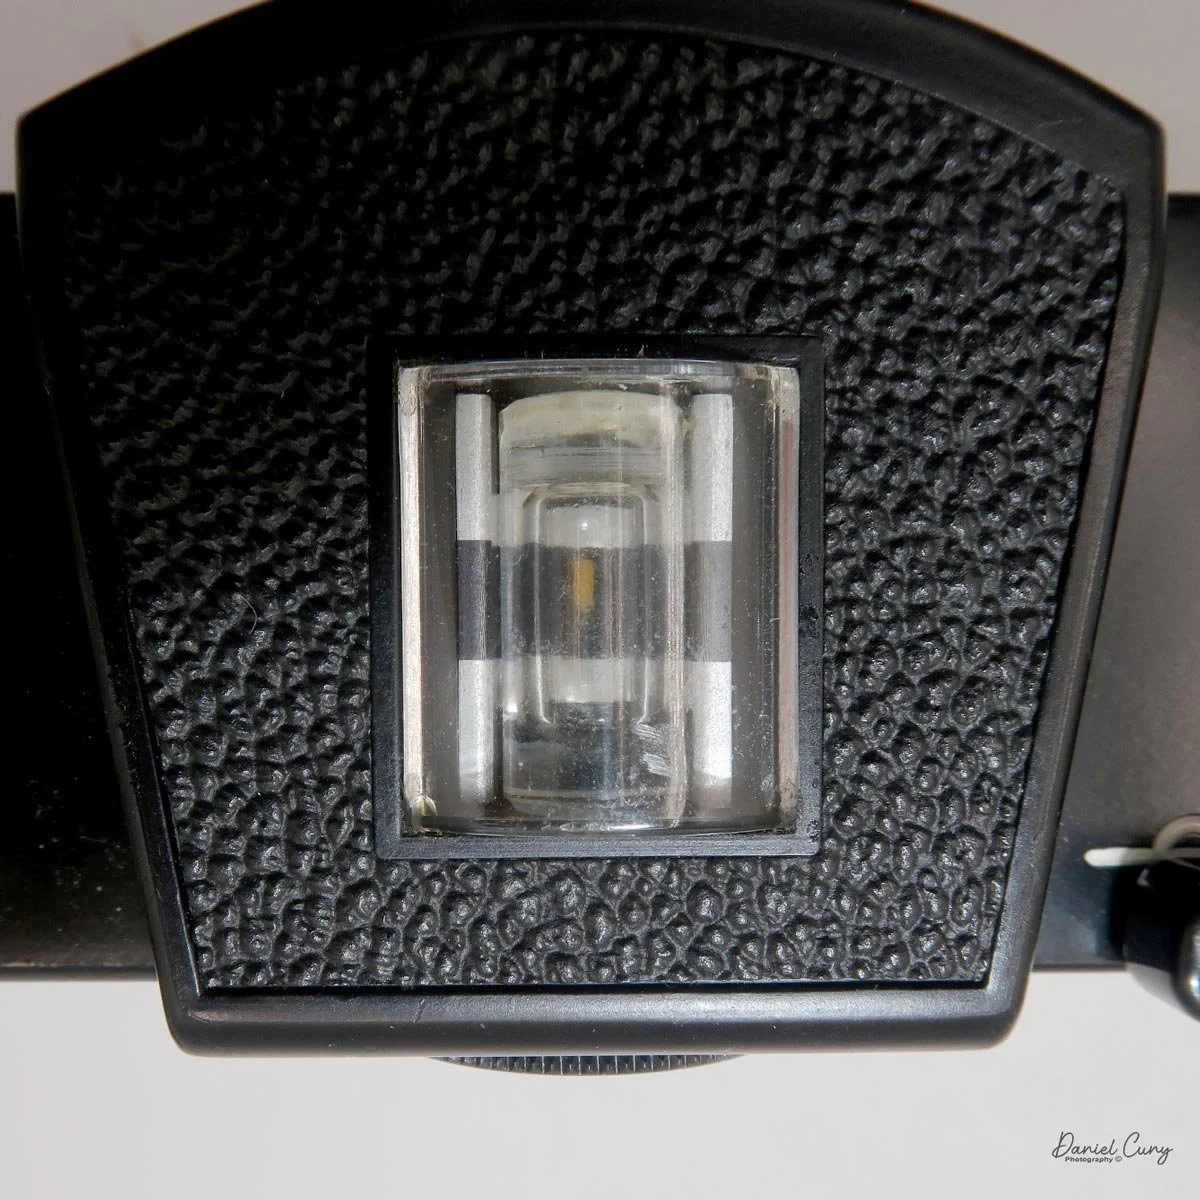
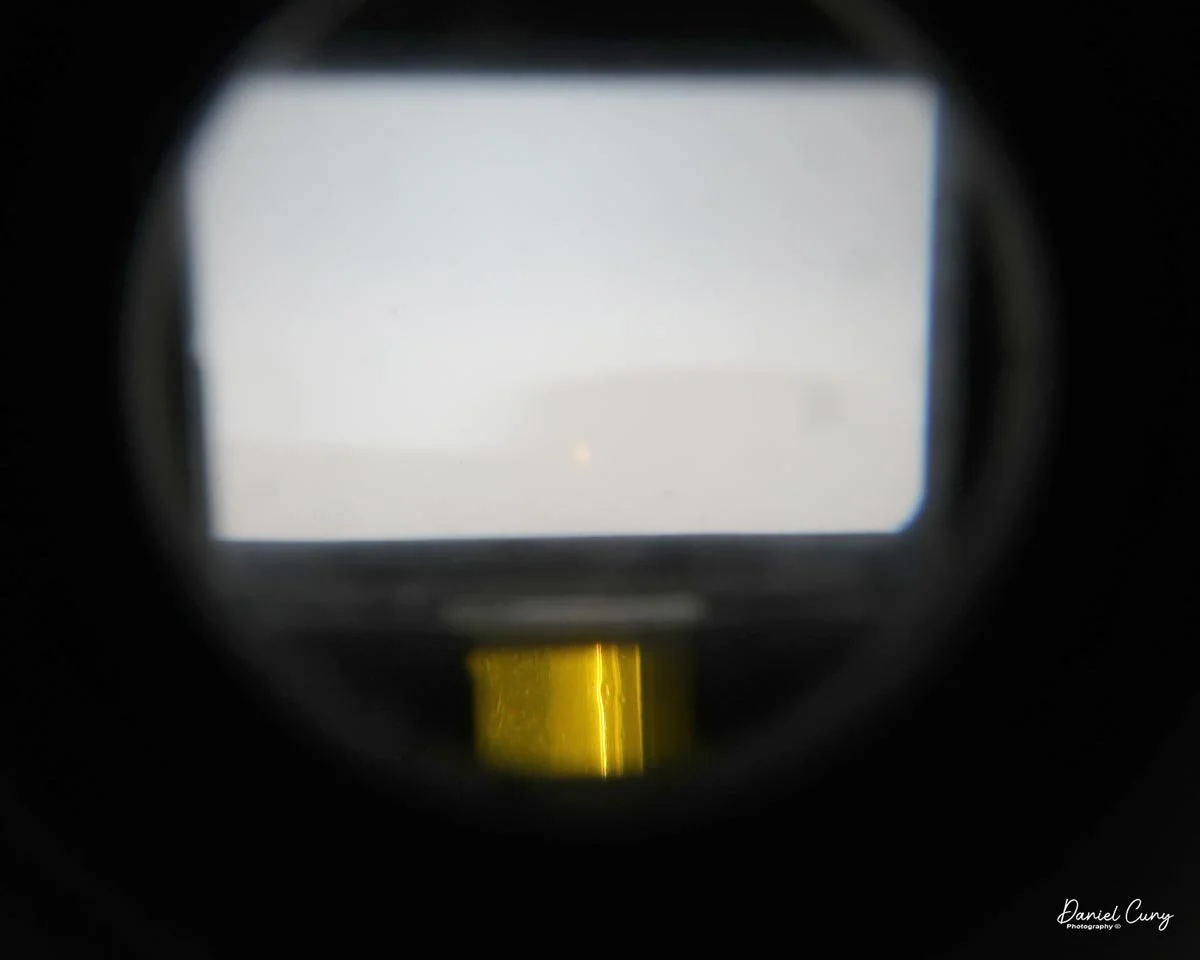
In the middle is a bubble level, which sits on top of a fairly large viewfinder. It needs to be especially big and wide to show approximately the same angle of view as the ultra-wide 15mm lens. Looking inside the viewfinder, you can see the bubble level just under the viewfinder. The bubble level is for vertical adjustment so you can keep the camera level for horizontal images. As previously mentioned, my bubble level is dry, so there is no bubble to see in mine.

 Moving to the right on the top of my camera is the film-winding lever, which sits on top of the camera's shutter-speed dial. The shutter speeds range from 1/500 to 1 second, plus "B" for bulb, and “T” for timed exposures. Above the winding lever is the camera's film counter, with the shutter release in the middle. The shutter-release button also has threads that accepts a cable release.

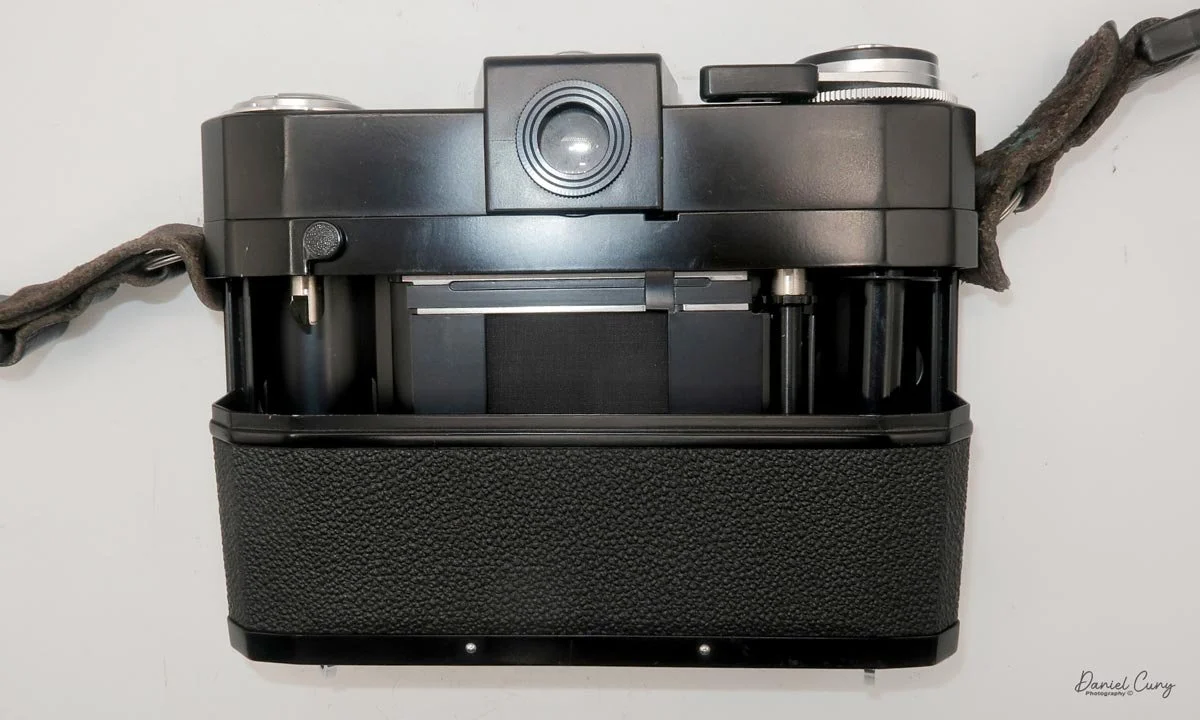
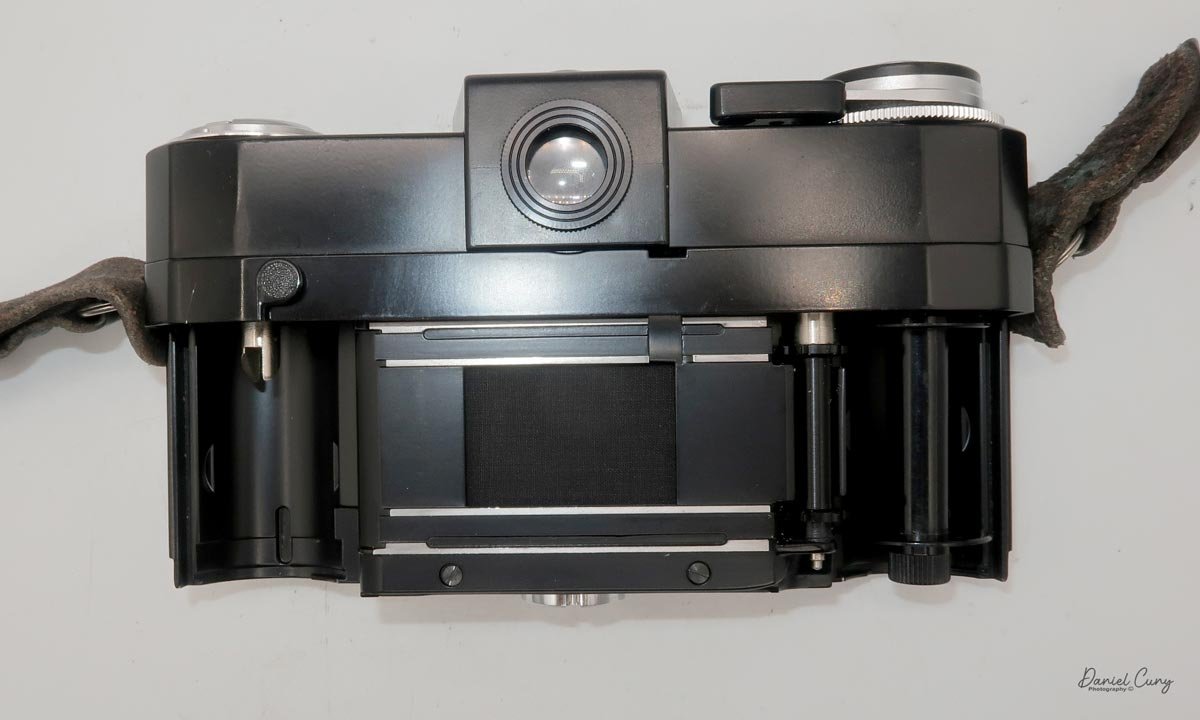
On the bottom of the camera are two latches that need to be turned, which allow you to slide the back off the camera and expose the film chamber. Once the back is removed, you'll load the 35mm film like you would with any other 35mm camera. Once you've loaded the film, put the film back into the grooves in the camera body and slide the back up and into position on the back of the camera. Once it's on, lock the two latches and flip down the handles so the camera sits flush.

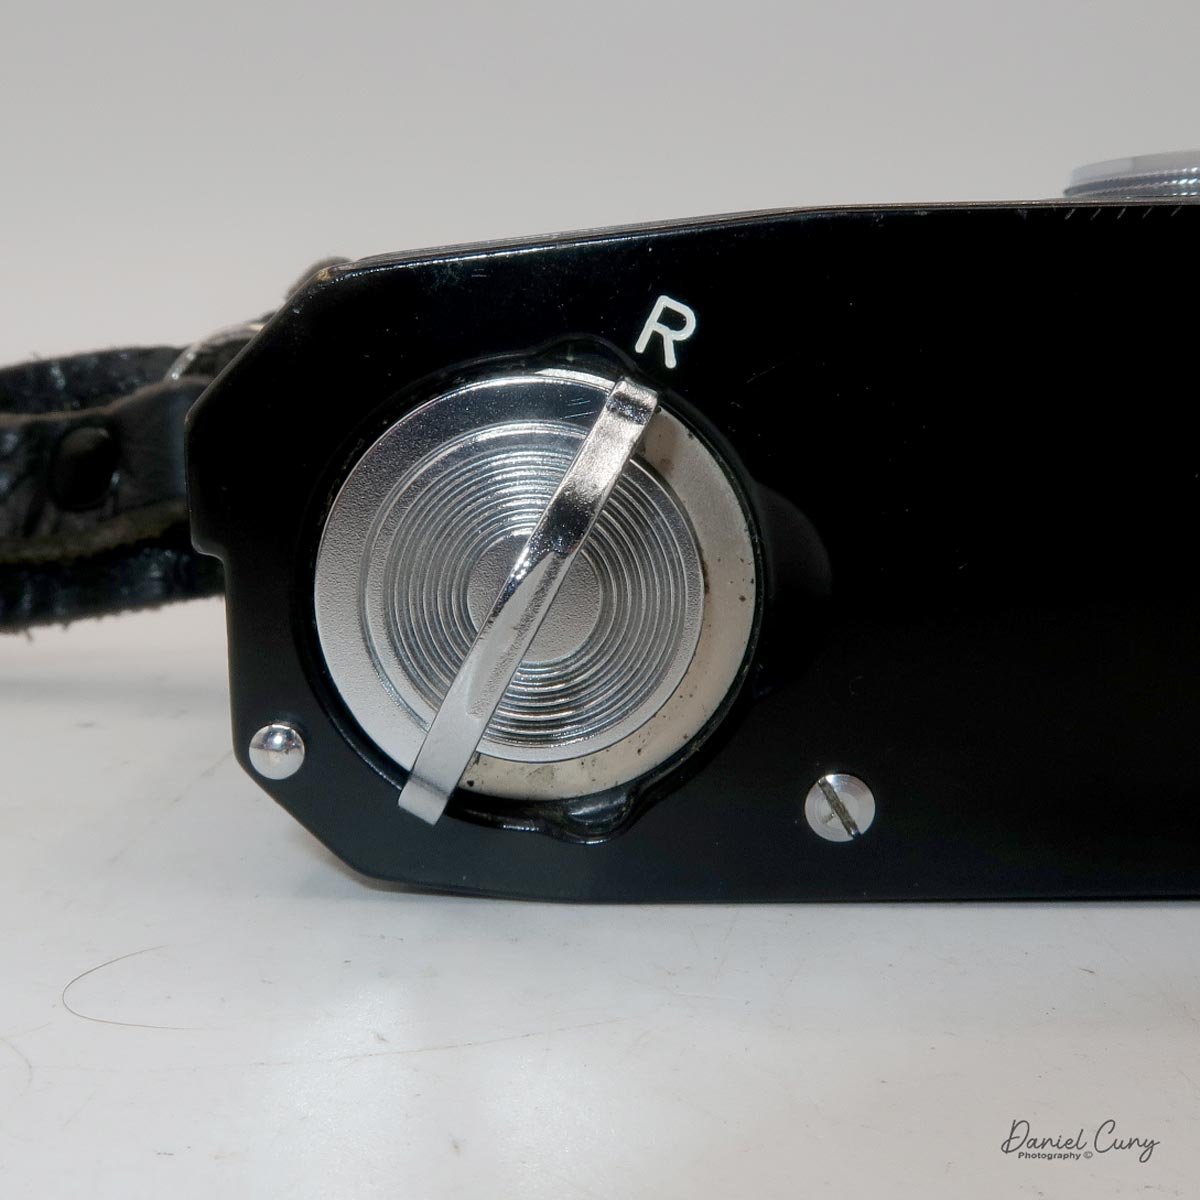
 When you get to the end of the roll, and it's time to rewind the film into the cassette, one of the latches on the bottom of the camera has an "R" for rewind. Lift the handle of this latch only and turn the lever until the handle is pointing at the "R" for rewind. Flip up the handle on the rewind knob and rewind the film into the 35mm cassette. Once the film is rewound, turn both levers to the open position, take the back off the camera, and remove the film for processing.

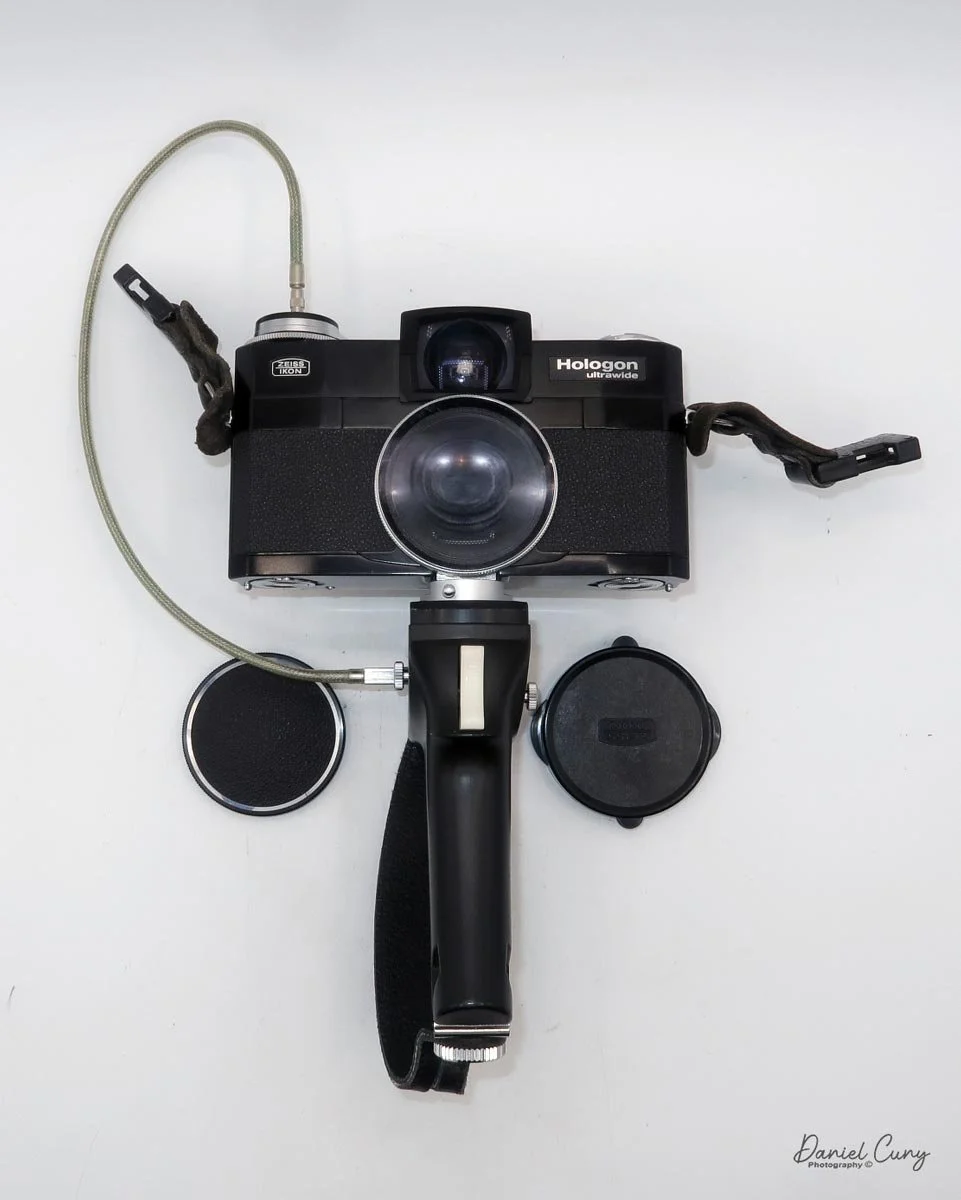
The Zeiss Ikon Hologon camera came with different accessories. There is a center filter, which I discussed earlier, and two lens caps. One is plastic and pops over the center filter when it's on the camera, and the other is a metal cap that threads around the lens, like the center filter, when the center filter is off the camera.

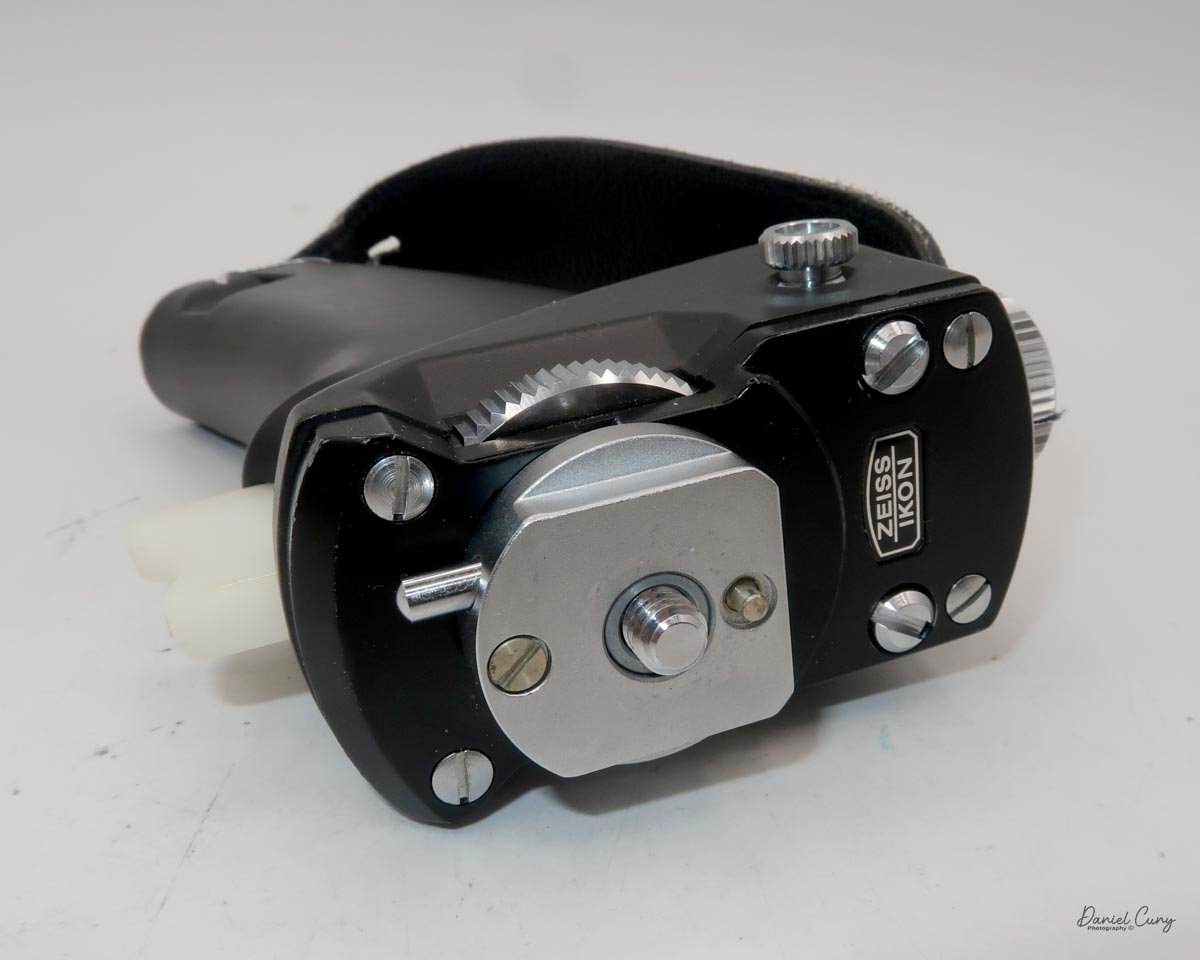
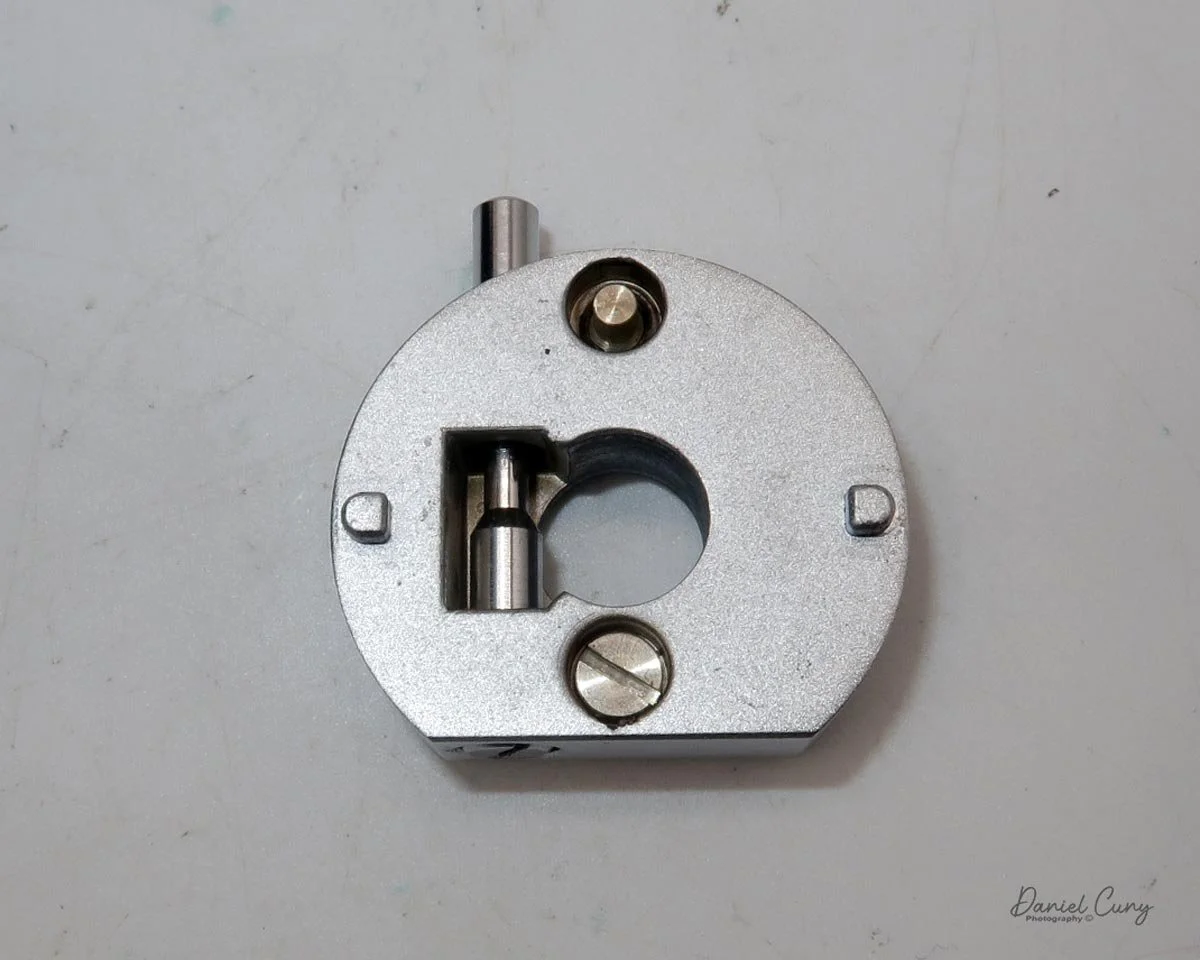
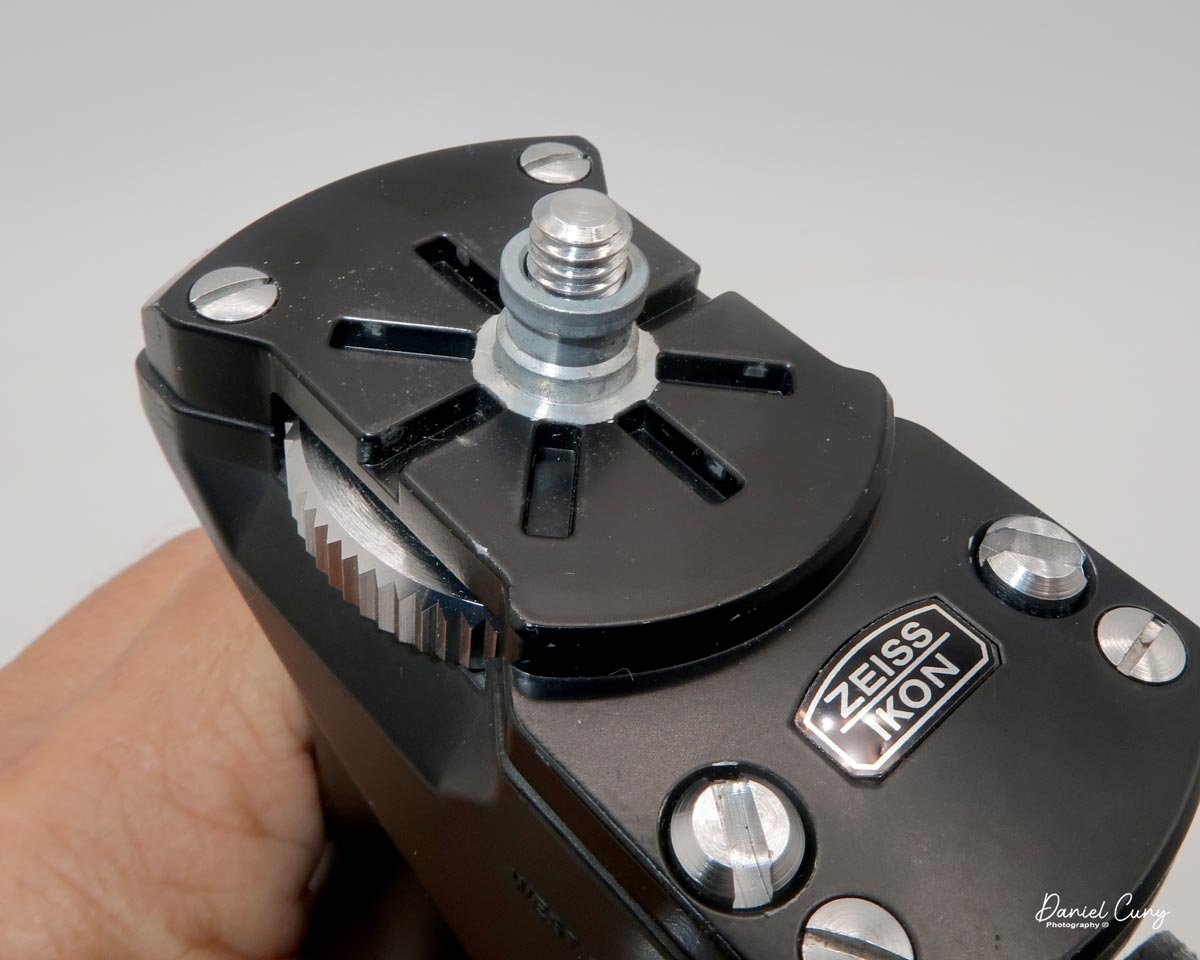
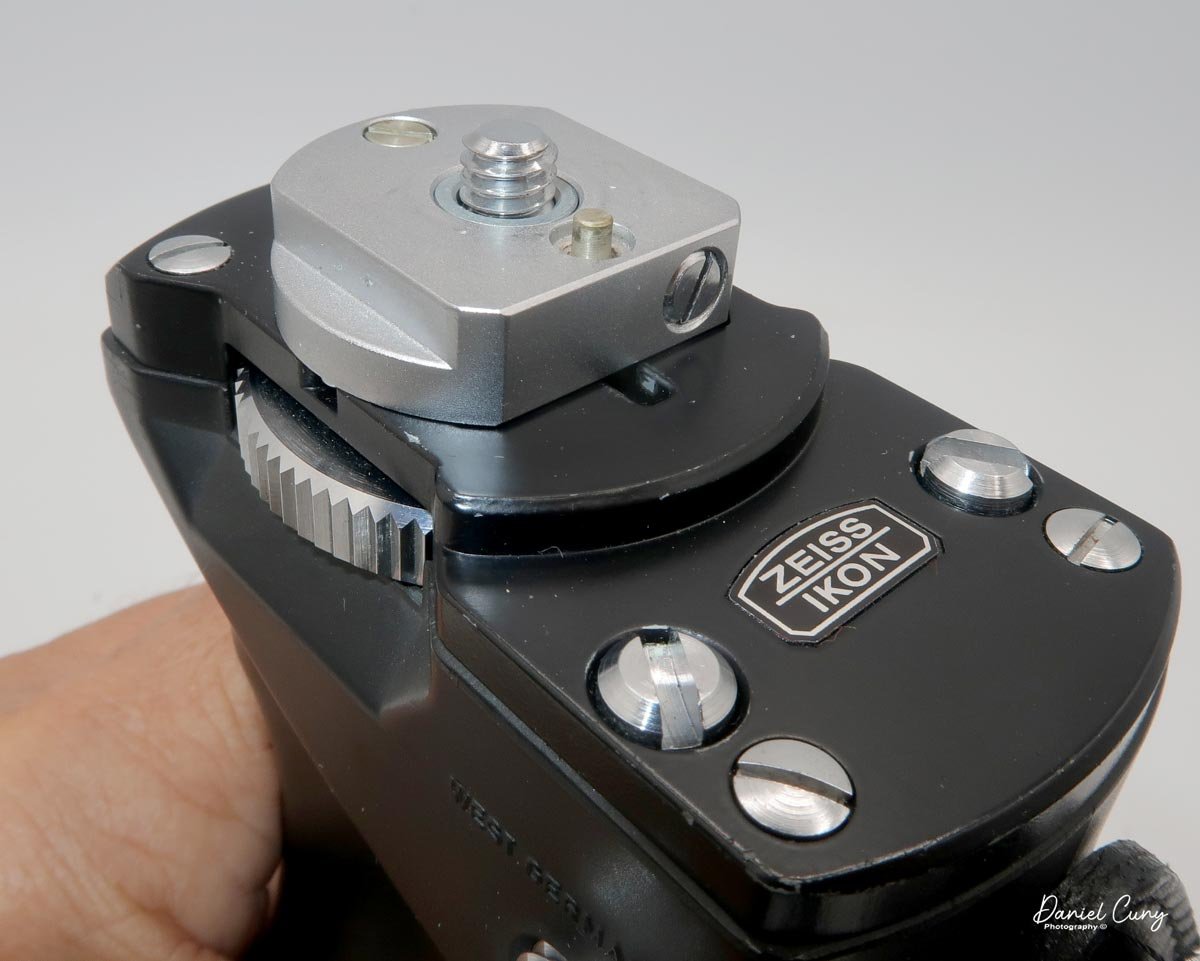
 There is also a pistol grip with a removable top, which allows the photographer to place the camera at different angles onto the pistol grip if desired. There is also a cable release that threads into the pistol grip and into the camera's shutter release. The pistol grip also has a leather strap to secure the grip to your hand when carrying it.

 The pistol grip is used so you don't wrap your hands around the camera when shooting, like you would with a regular 35mm camera. If you did, your fingers would appear on the sides of your images, very similar to the way they do with Widelux cameras.

Without the pistol grip, you'd need to hold the camera with your finger on top and your thumbs under it to stabilize it, much like you'd hold an Instamatic camera. You don't wrap your hands around this or Widelux cameras to avoid having your fingers in the images.

 Also included in the kit were the strap for the camera and a very nice hard compartment case for the camera, with room to hold the pistol grip. The case also has elastic straps to hold the center filter and extra lens cap.

Zeiss Ikon Hologon Ultrawide mounted on the pistol grip with center filter, and cable release. Two lens caps too.

Now that we have the camera loaded, let's take it out to see how it performs under normal working conditions.

 Results:

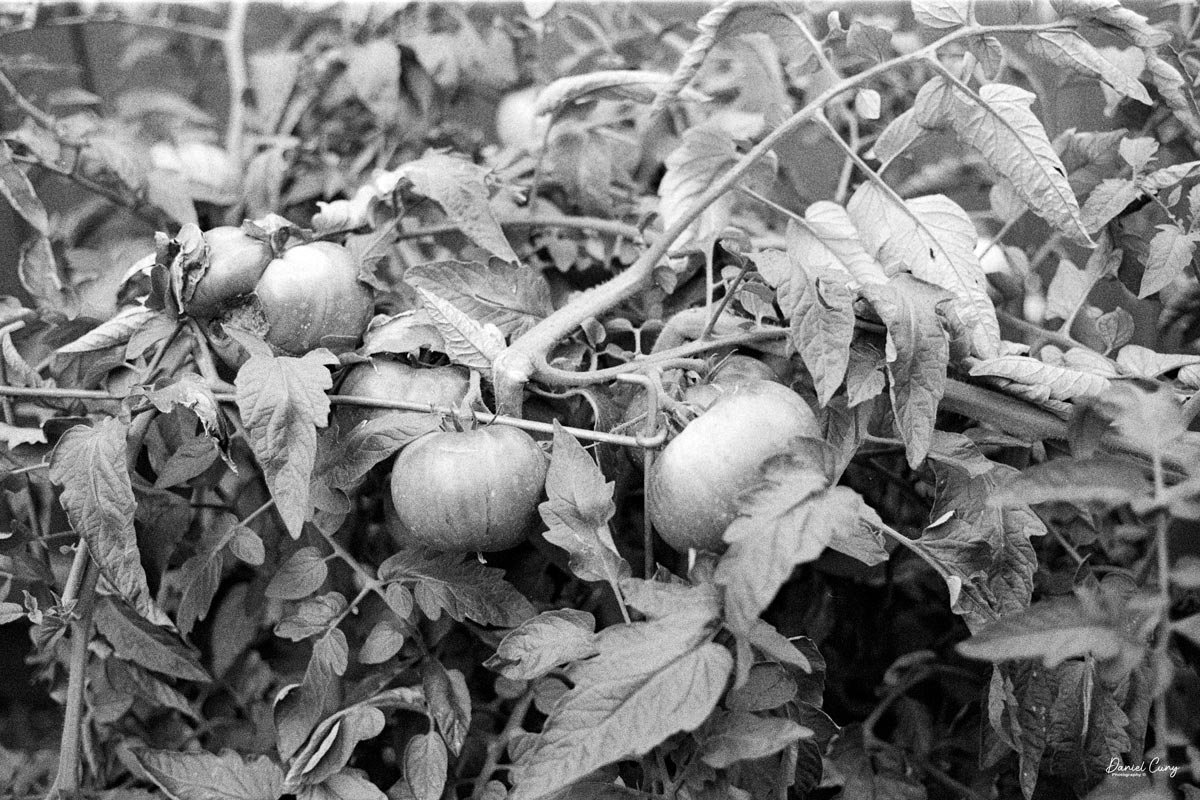
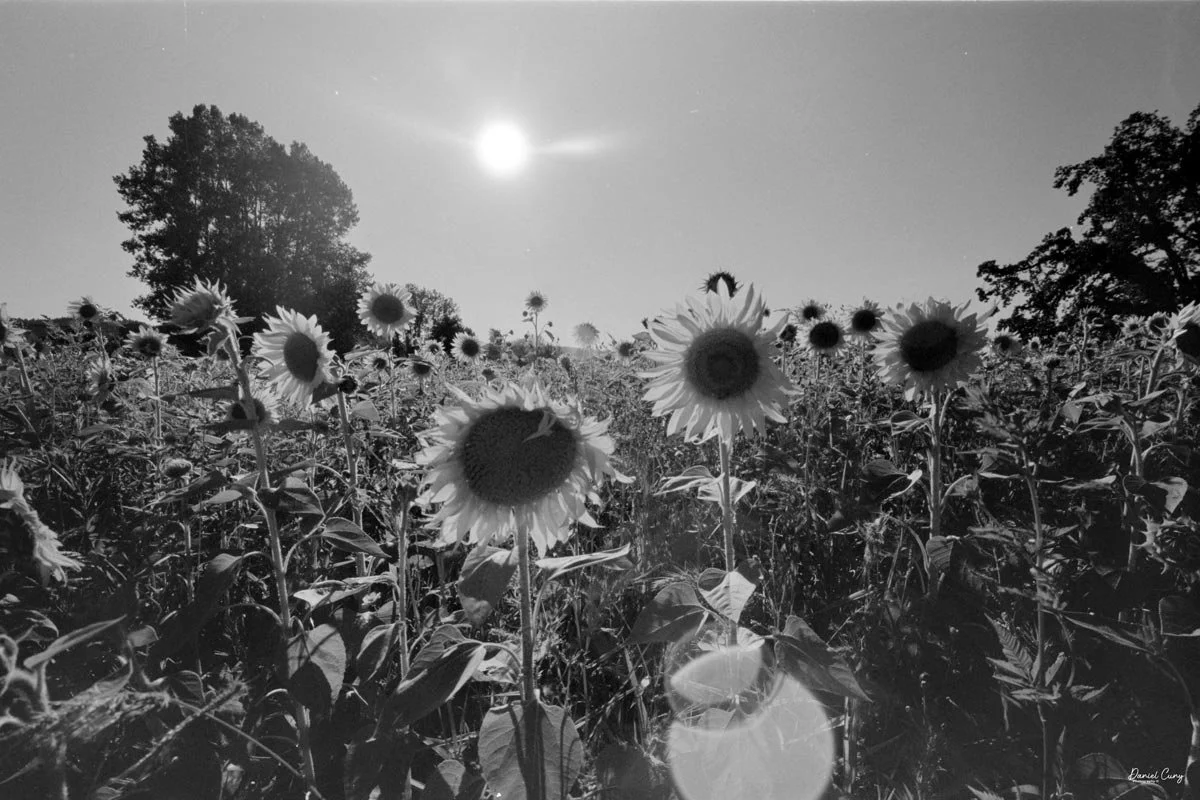
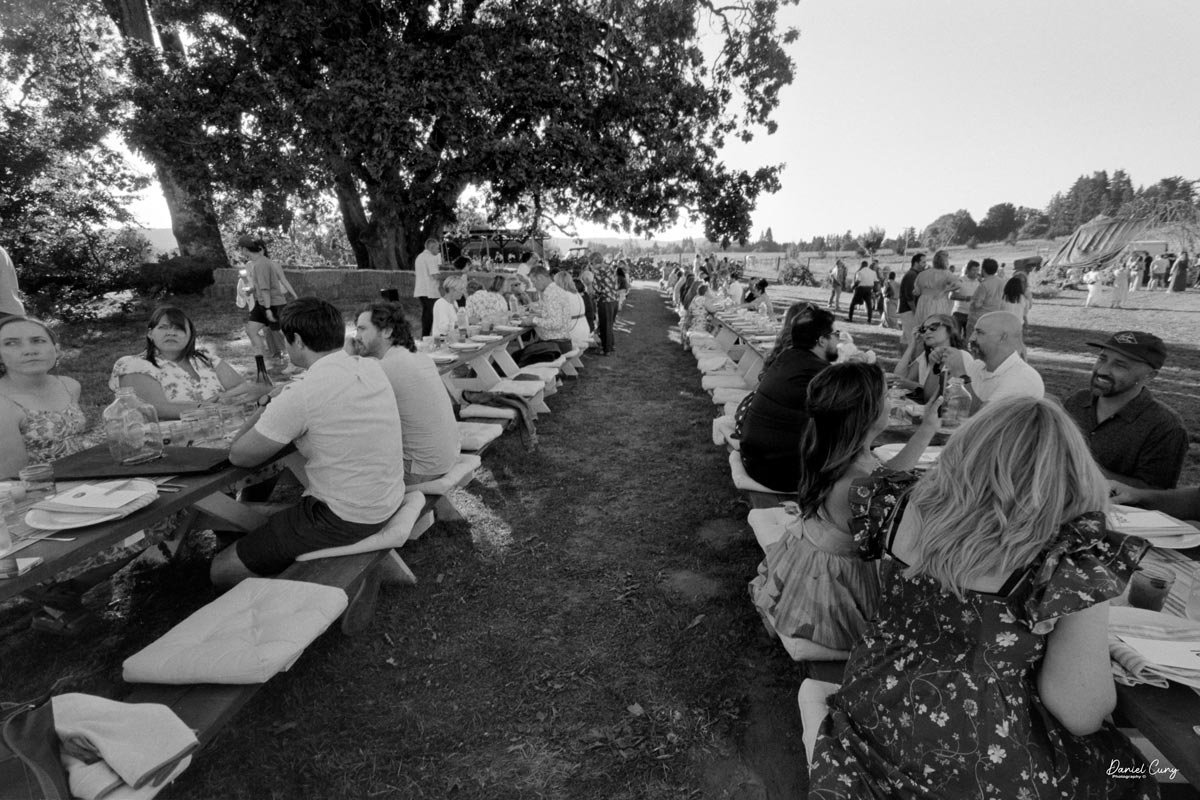
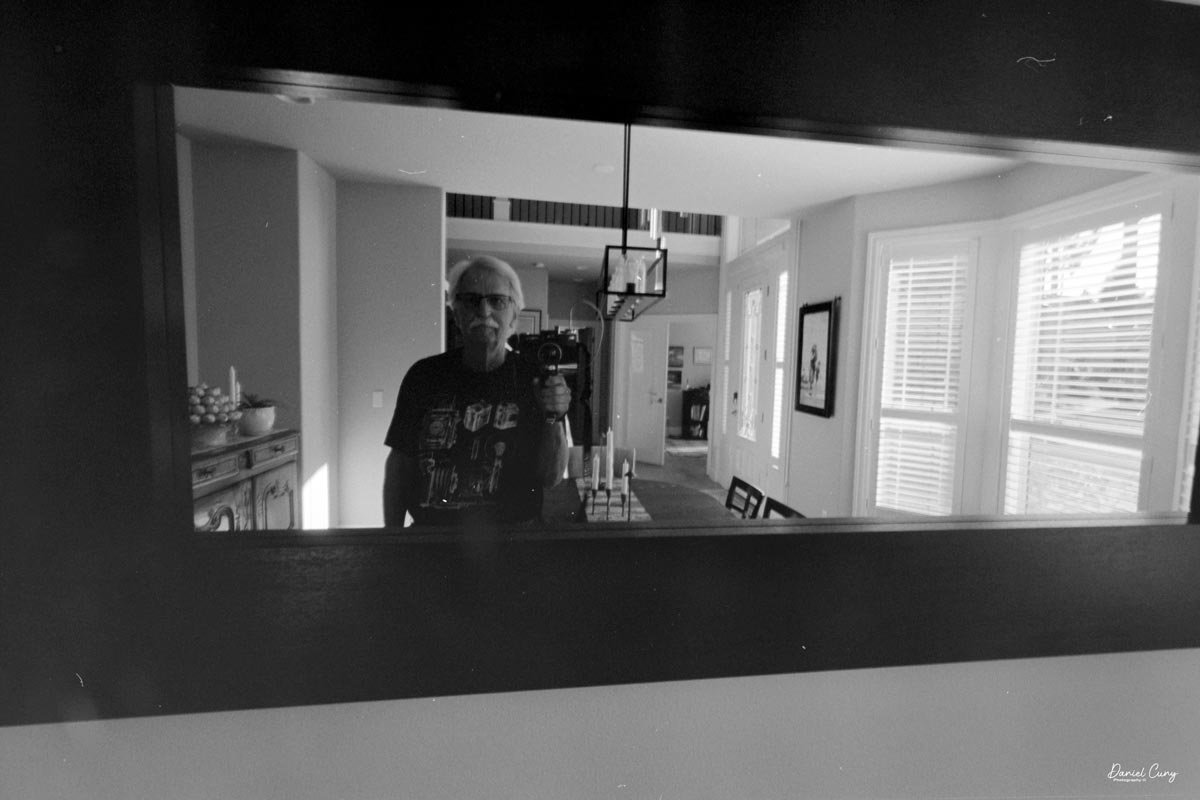
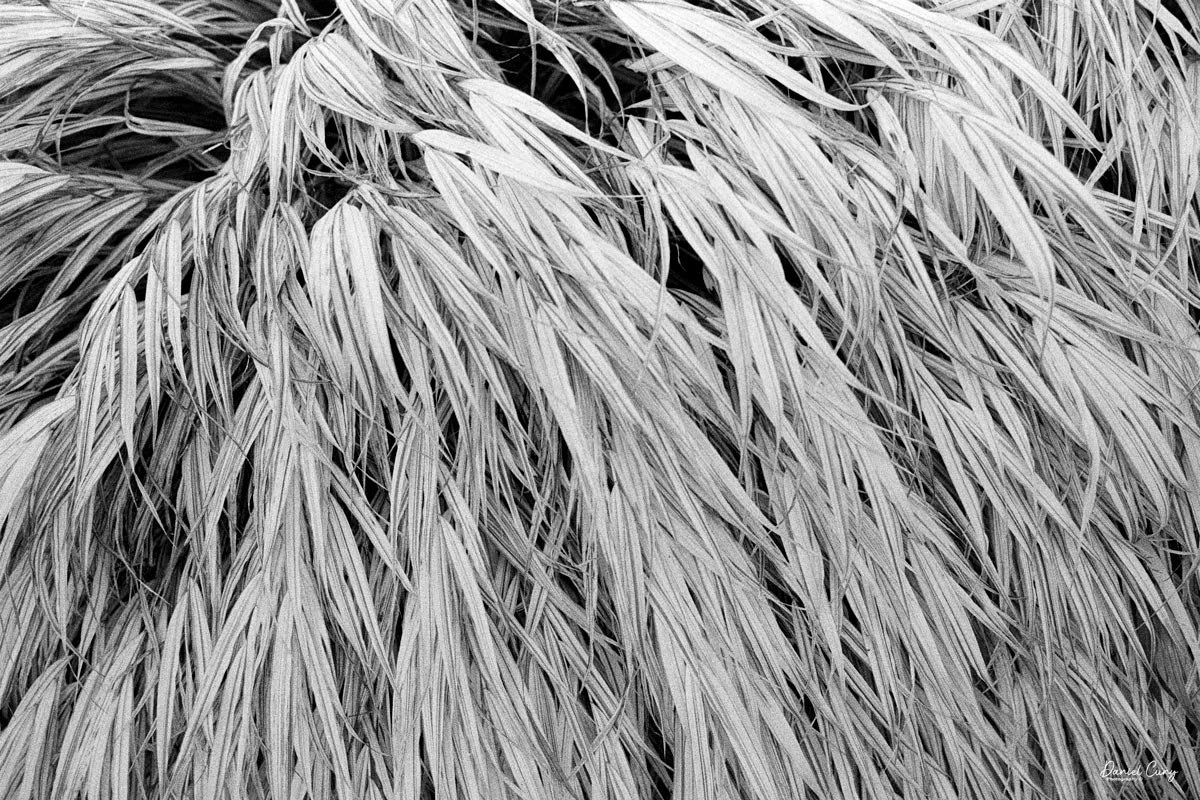
I took the camera to three different locations to try it out. First was a local farm that has a "farm-to-table" dinner we go to near Portland, OR. The name is Topaz Farms, and they are spectacular people who put on the most delicious dinners during the summertime.

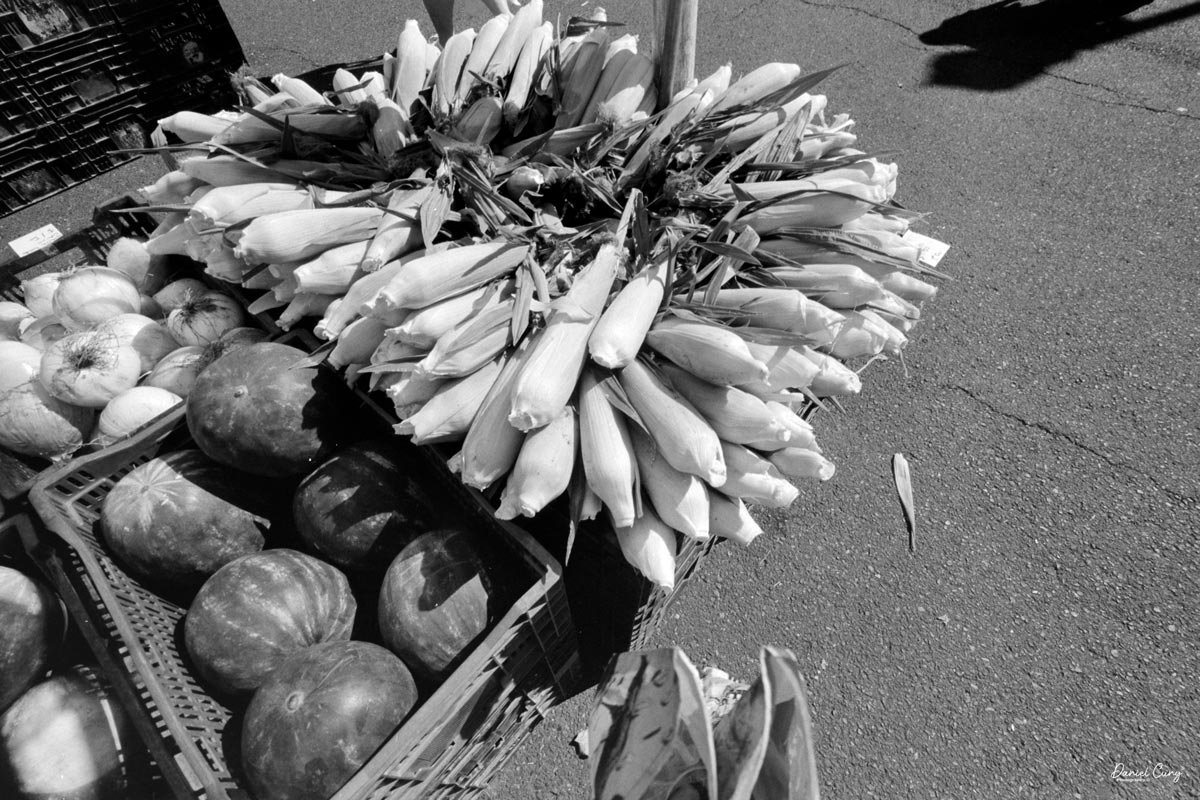
 The second was a local farmers market in the town we live in. I'd walk around and take photos of some of the vendors and their wares.

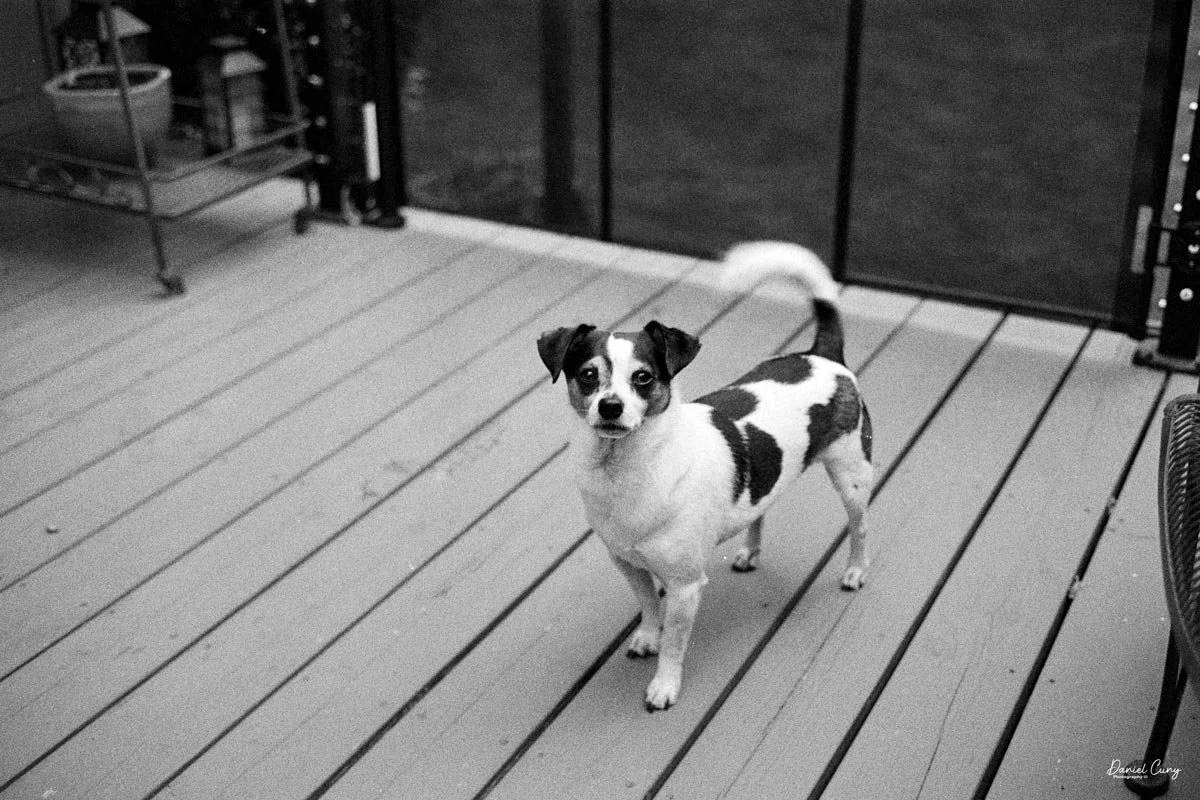
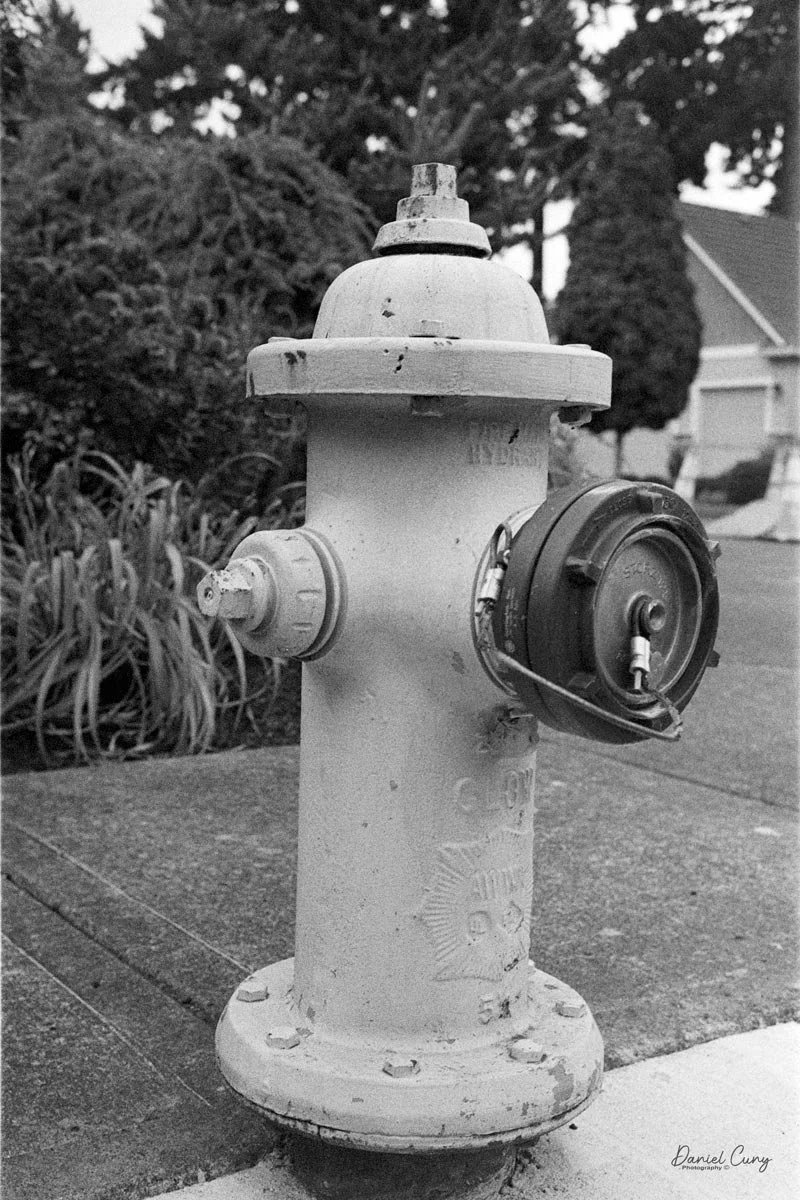
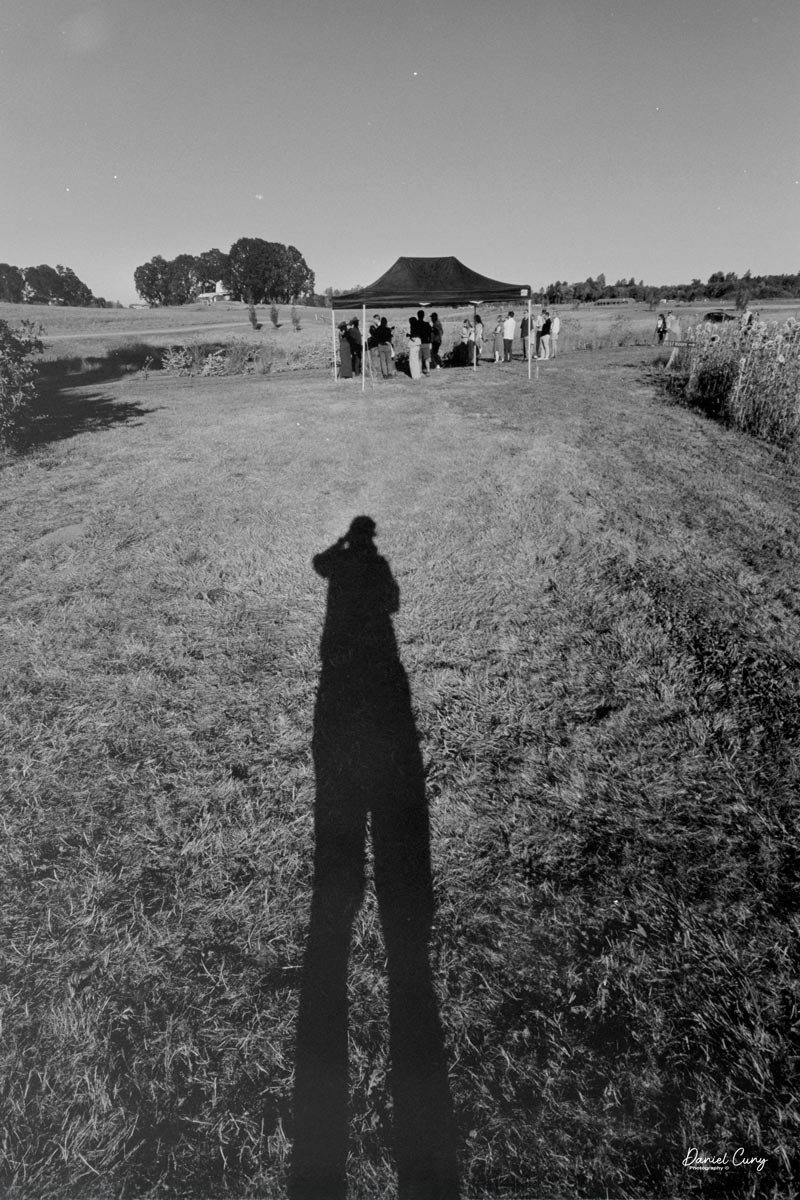
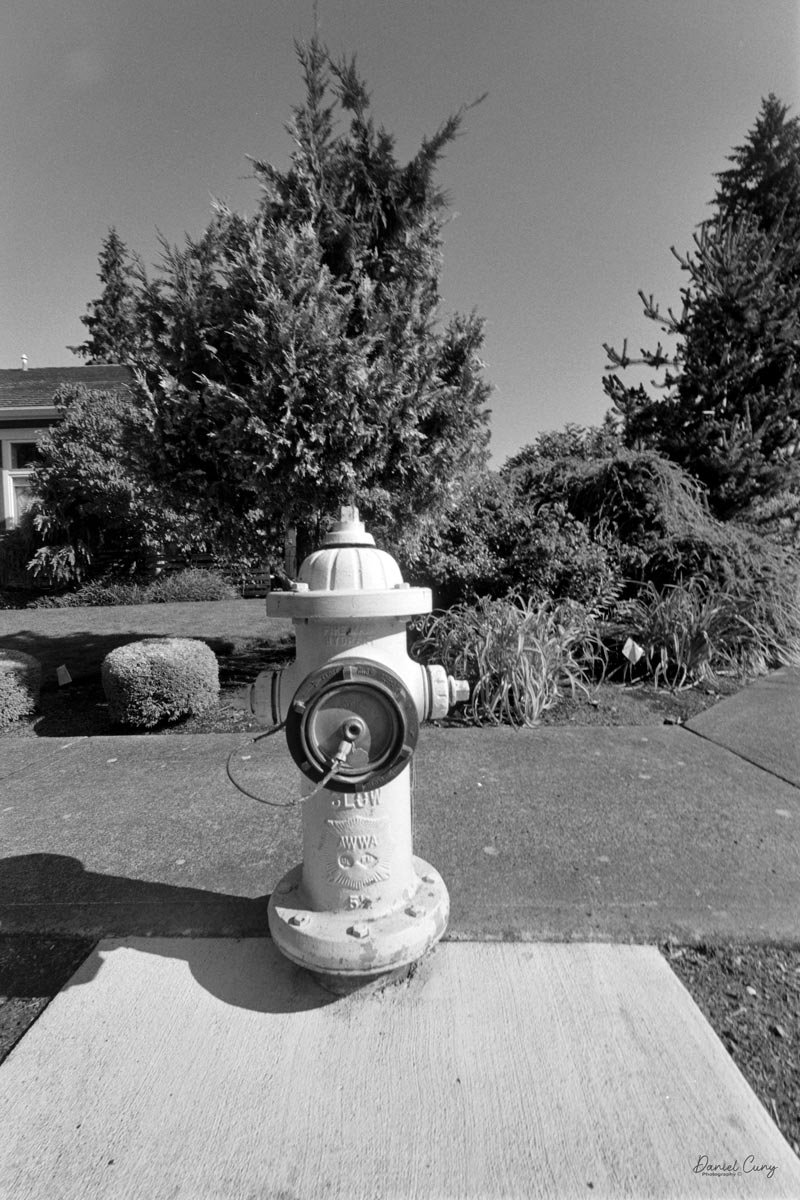
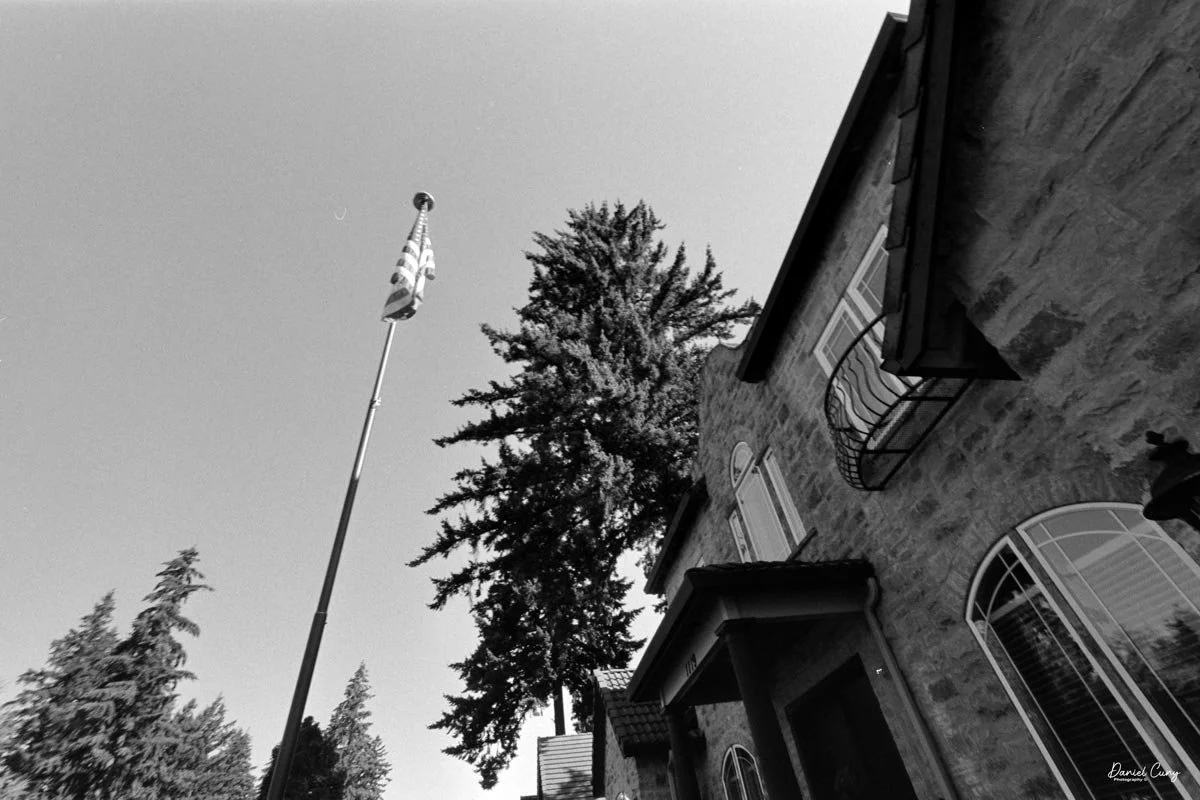
 Finally, I walked the neighborhood, taking some of the standard photos I try to take with all the cameras so that, if you want to look back and see the images, they would be in similar locations.

Here are some of the results from these events and locations.

Conclusion:

Once I processed the film, I noticed a few things about the camera that I felt were a bit odd. The spacing of the negatives was very thin and not the normal spacing I was expecting. This may have been caused by me purchasing a Contaflex/Contax take-up spool, which is thinner in diameter, giving the film less area to travel between images.

 The second thing is that the images didn't seem as sharp as I was expecting. Don't get me wrong, they are sharp, but not as sharp as last week's Contarex “Bullseye” body and lens. Especially being so wide and stopped down, I was expecting super-sharp images, but these were OK.

 It may have been the filter, but that was clean. My expectations were higher, and the images fell short.

 Because of that, I'll try another roll of film, and if I'm not impressed with those images, you may see this on eBay in the near future.

 Want to see other cameras? Here are some of my other Camera Reviews.

 Check out my Cuny's Camera Collection YouTube channel, where I am putting together video overviews of the cameras I write about. Be sure to subscribe and like the channel, too!

 Cuny's Cameras and Photos is my online eBay store, where you will find some of the cameras I have reviewed, along with a wide range of other cameras, lenses, and items from my collection that I am thinning out.

 Until next week, please be safe.