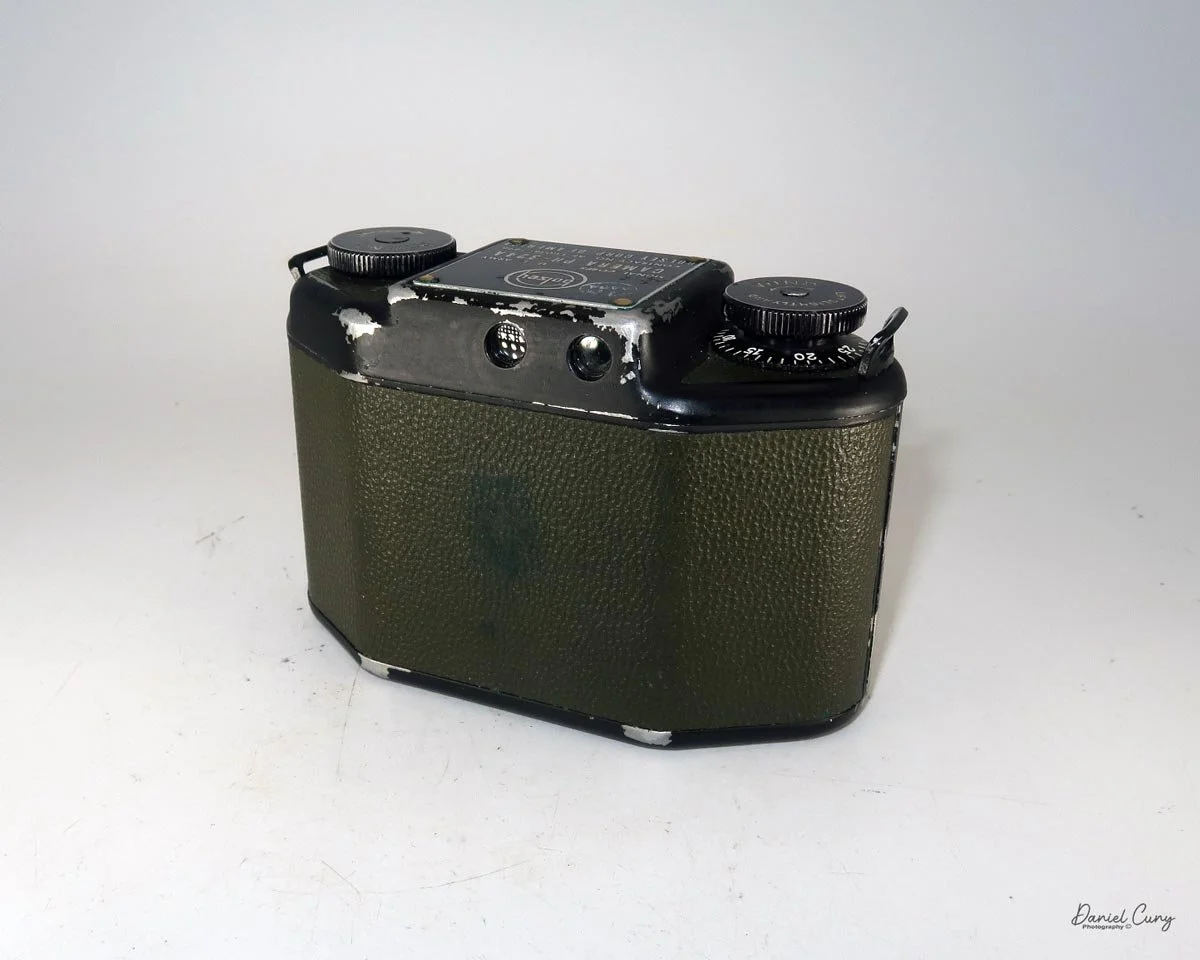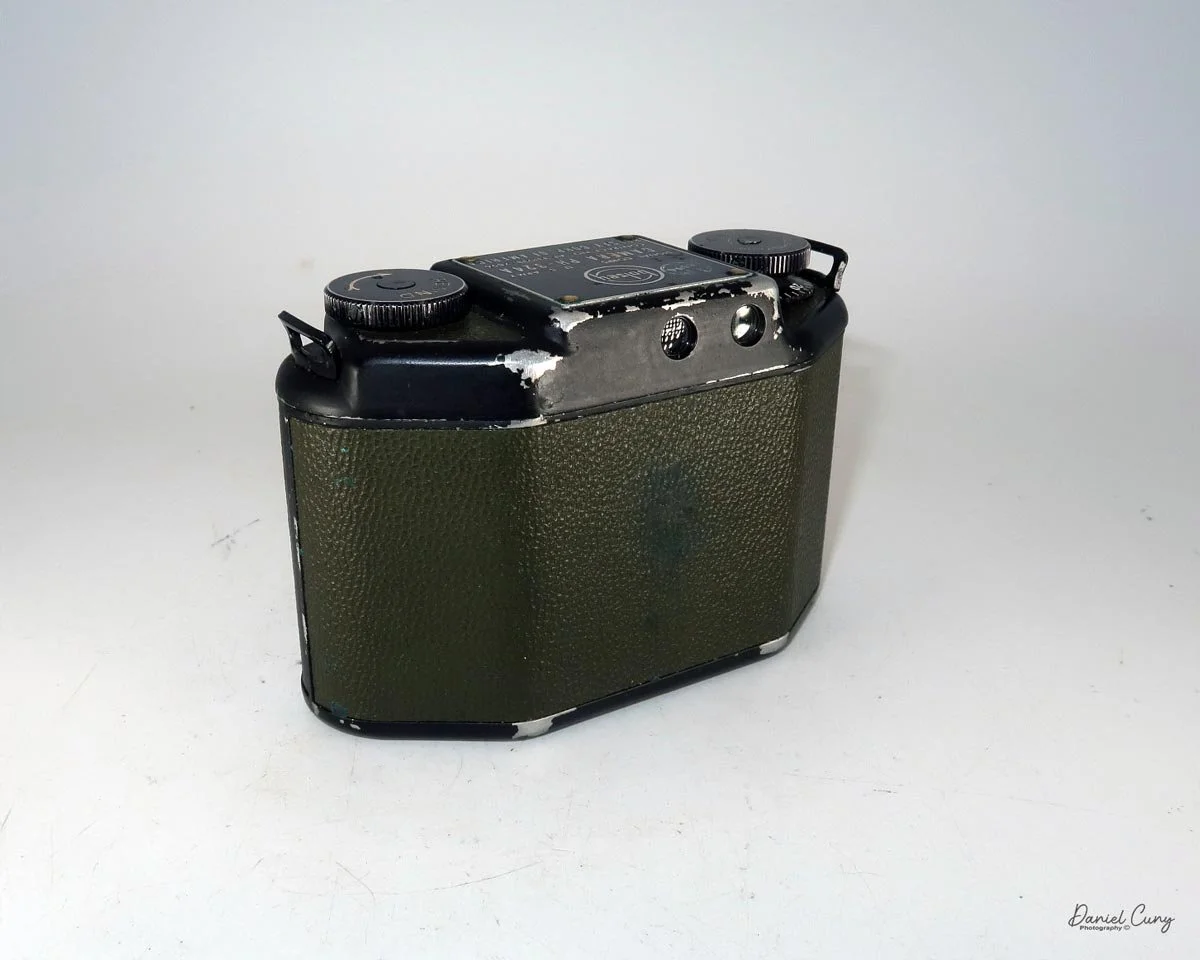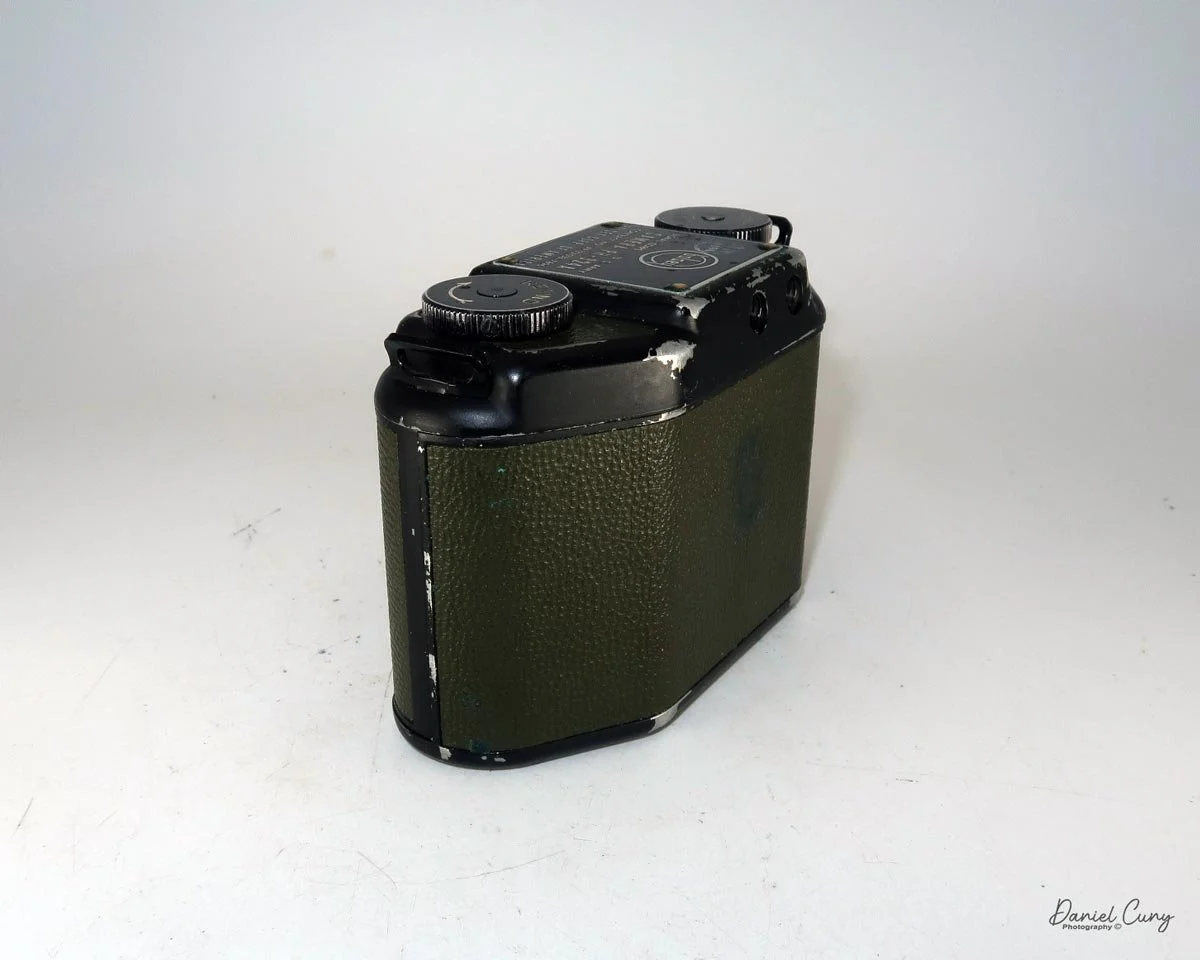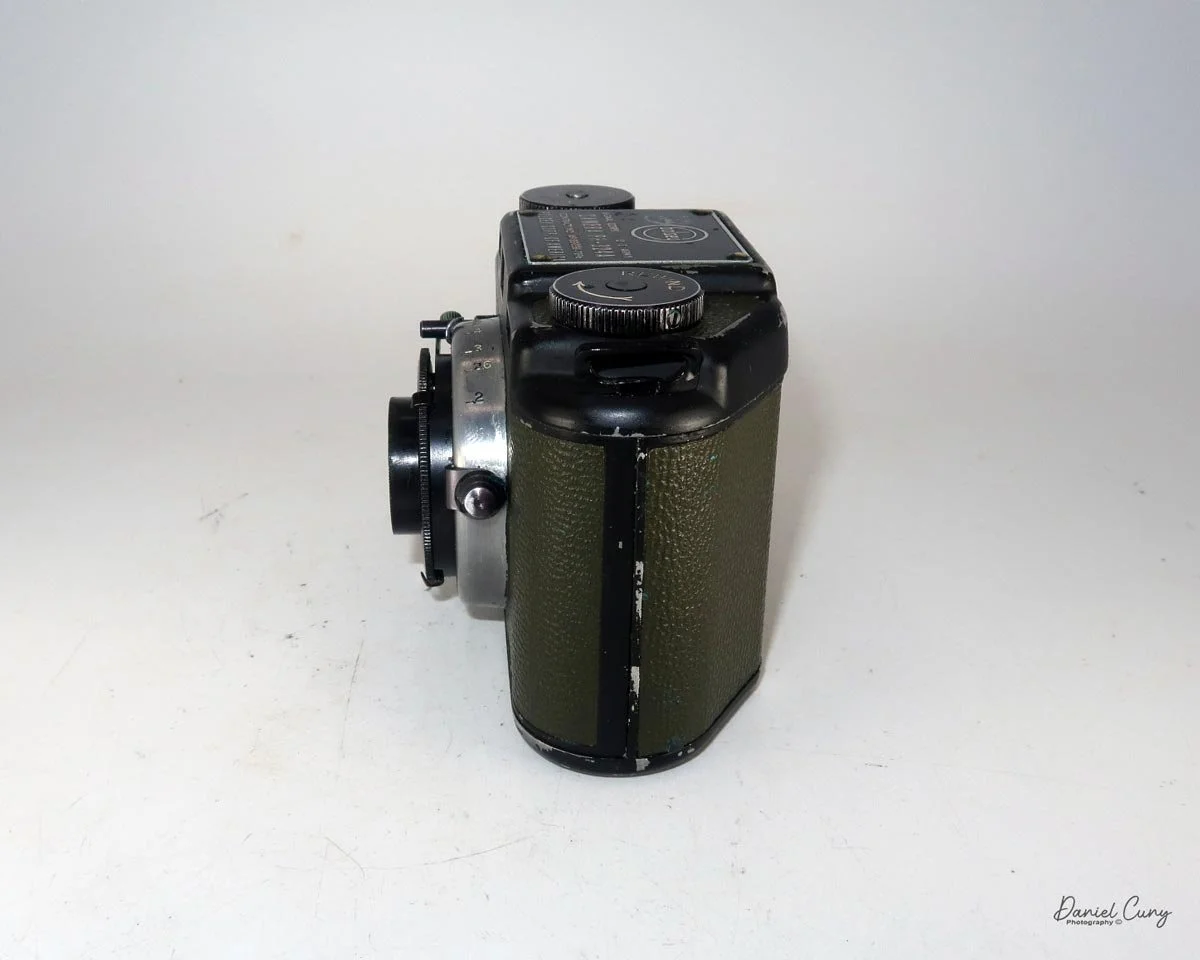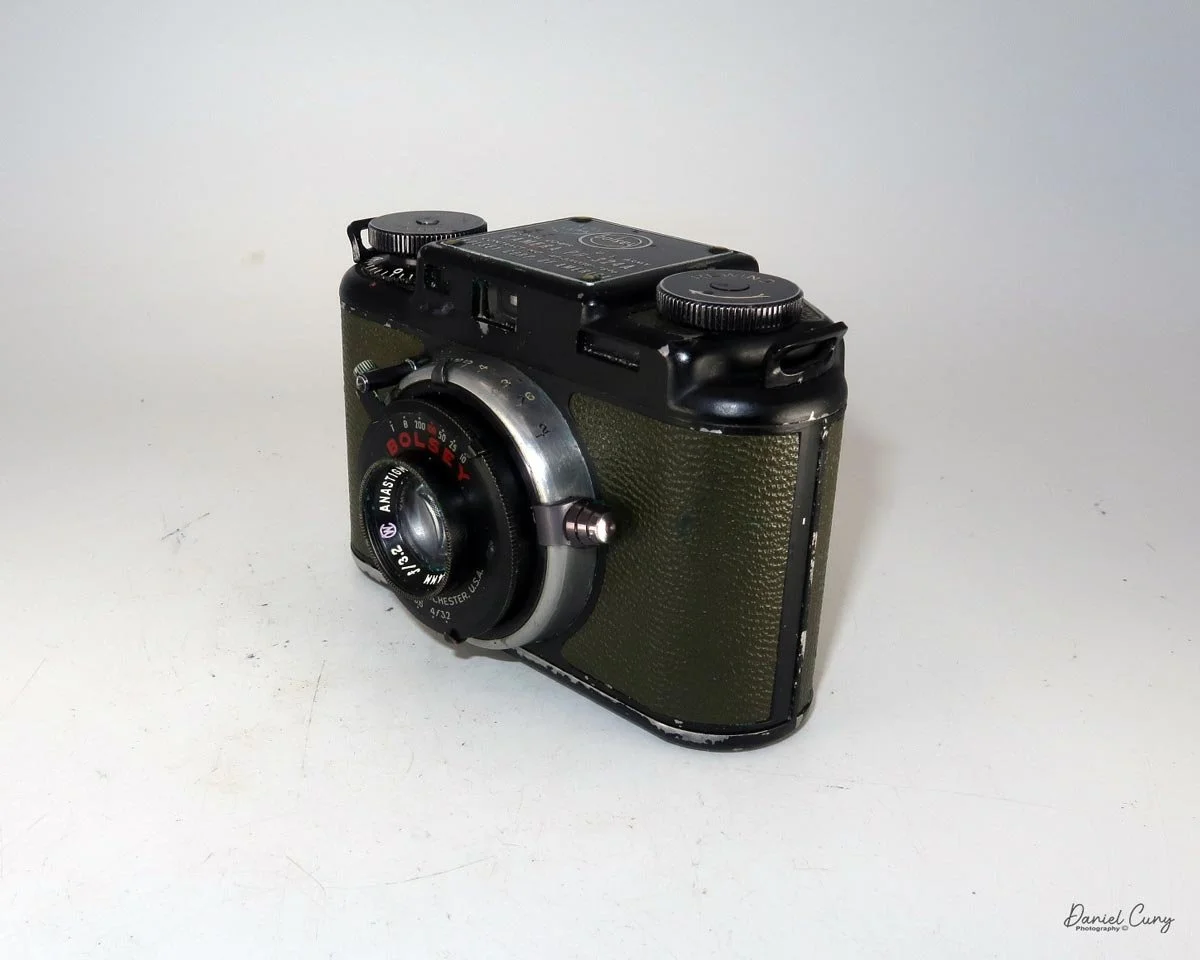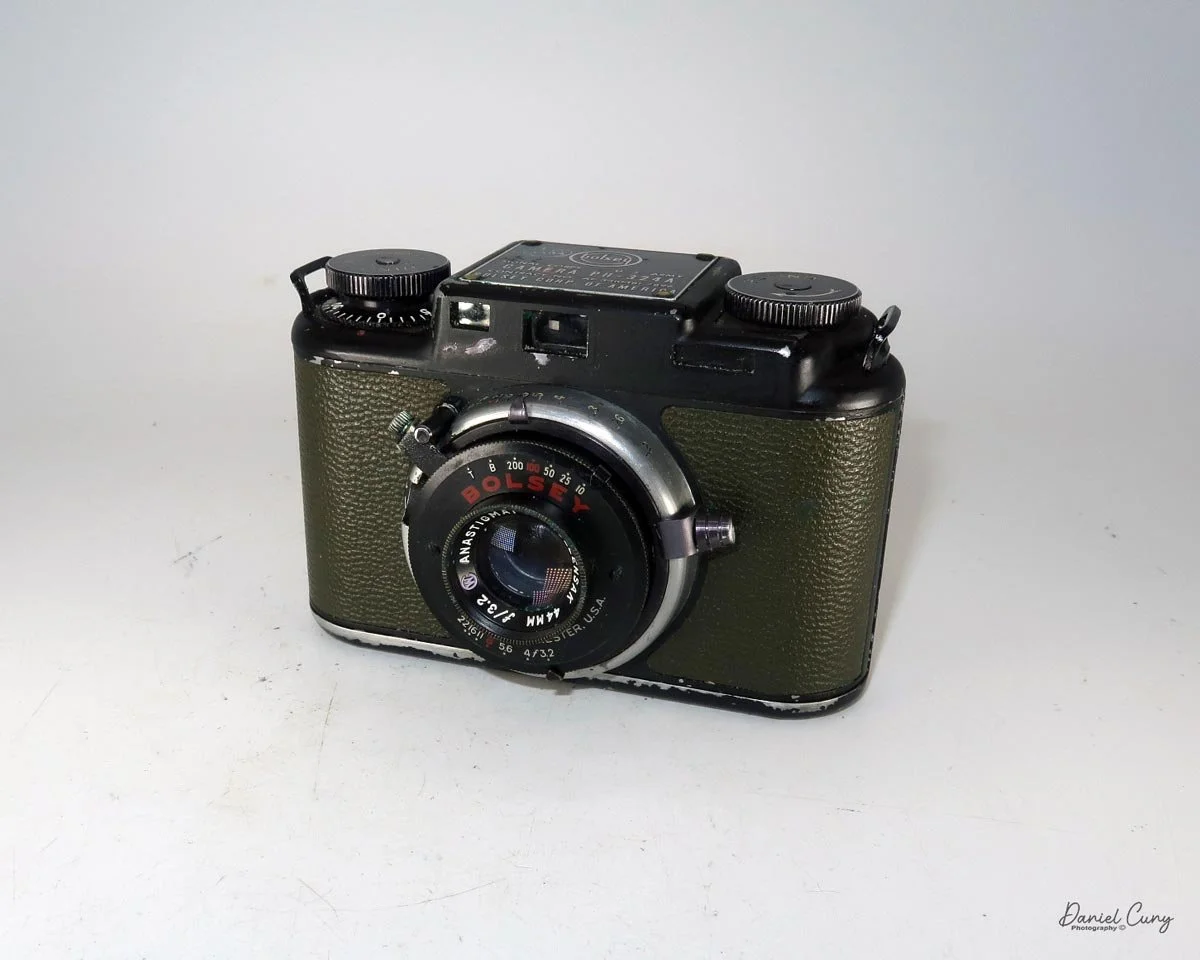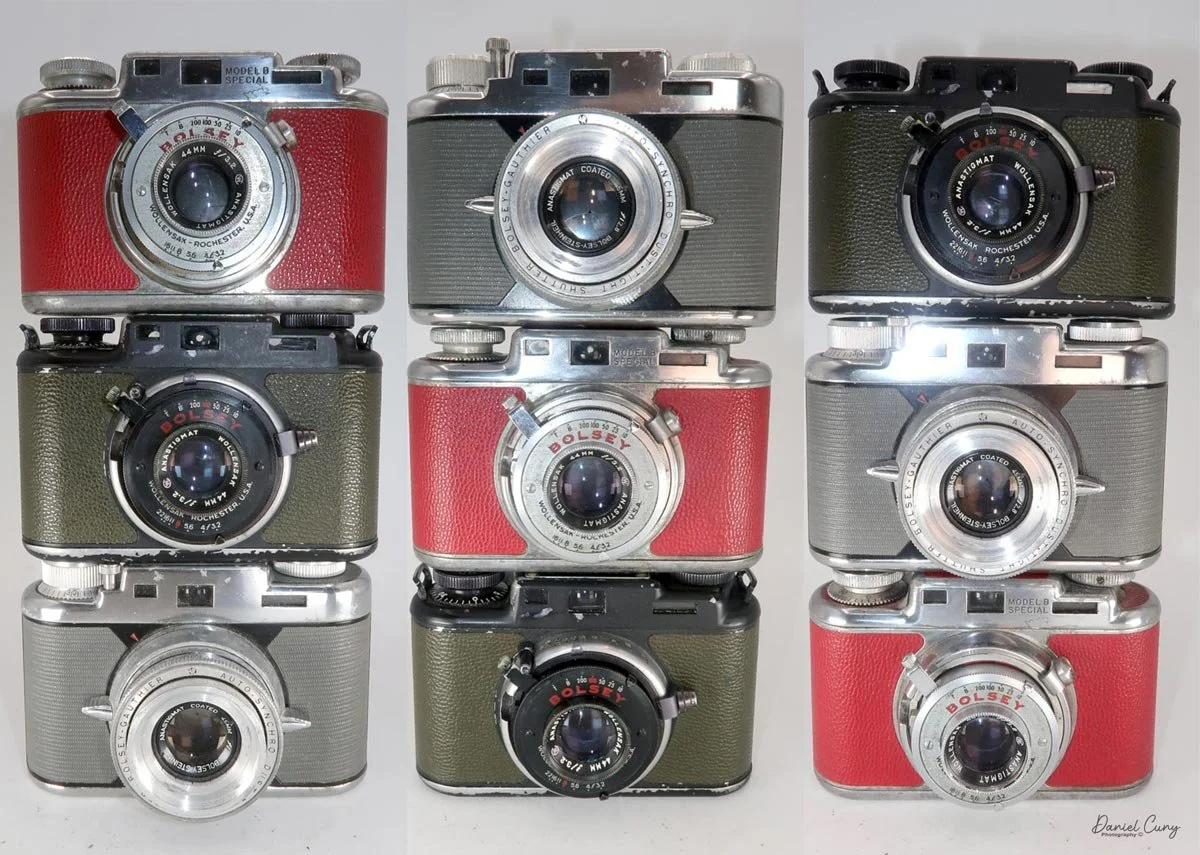
Bolsey PH-324A Camera, 35 Model B Special & B3

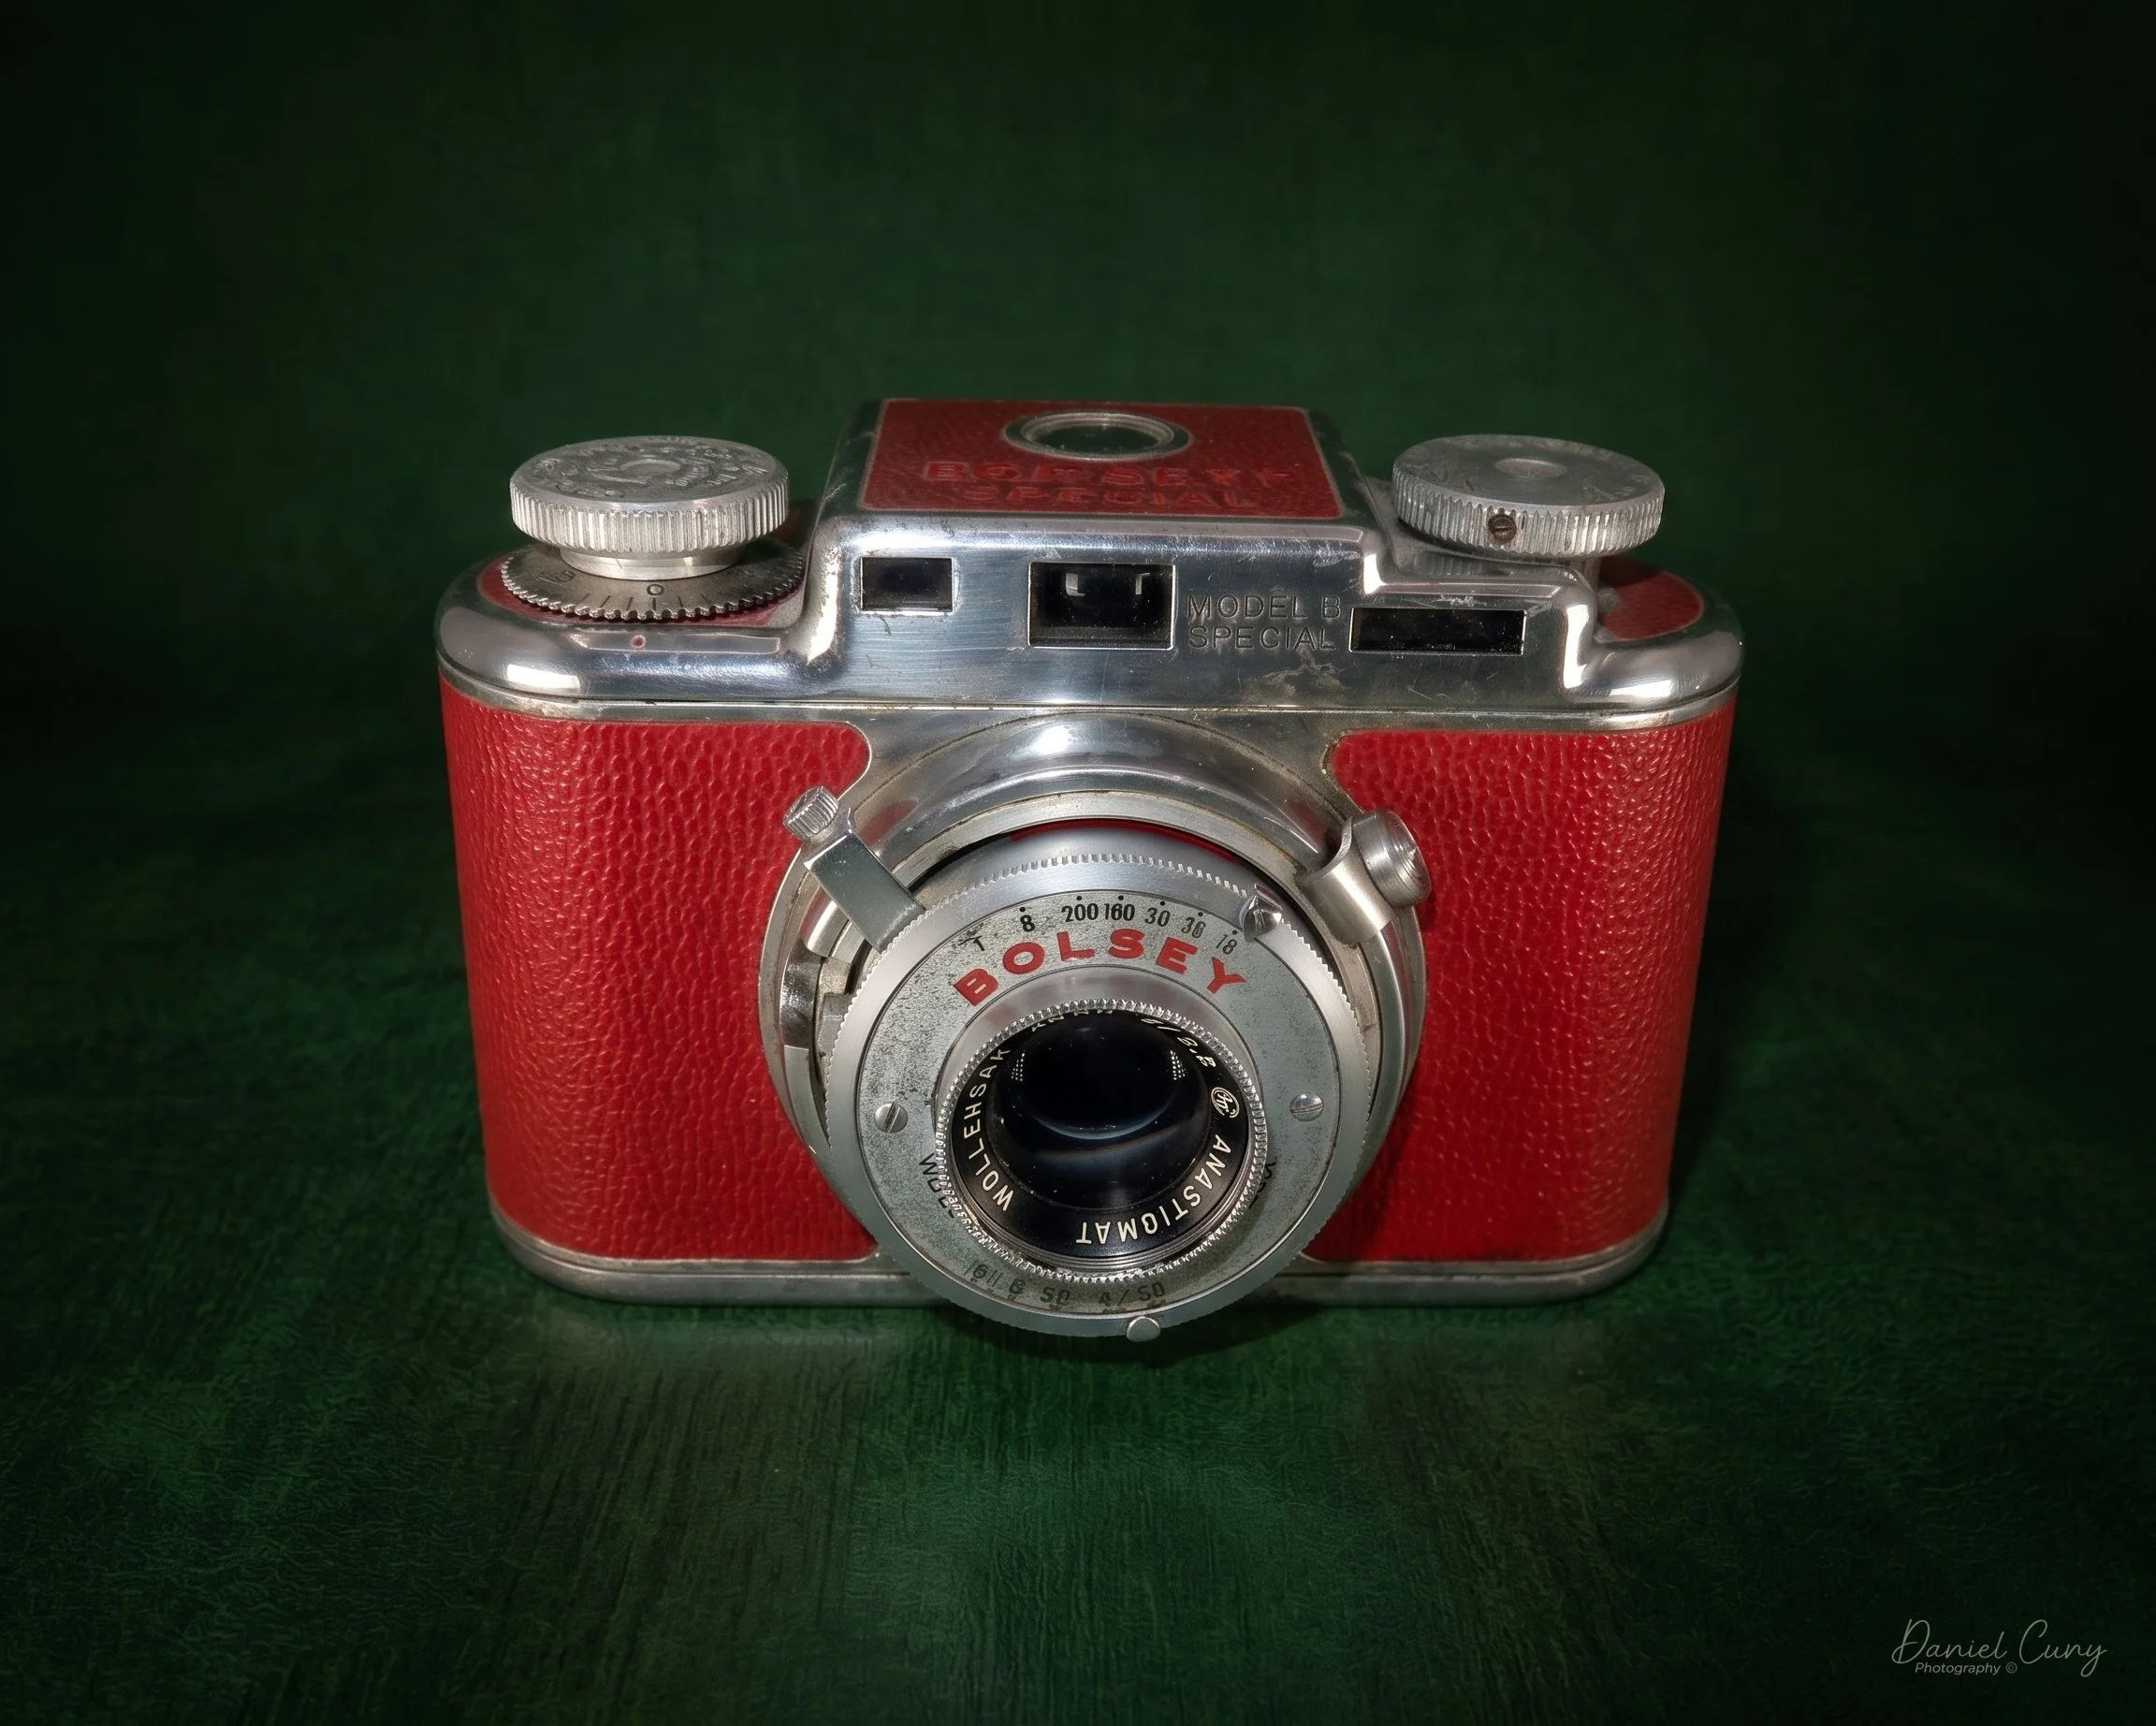
Composition of my Bolsey 35 B Special, PH-324A and B3 cameras

I've always been a fan of Bolsey cameras, as I've written about them in the past. Many of their models have a highly unusual appearance. Their 35mm cameras look somewhat bulbous from the top, with an odd three-sided removable back door. Yet, they seem to fit in the hand nicely thanks to their quirky form factor.

I've owned many Bolsey cameras over my collecting career, from the twin-lens Bolsey-Flex Trio and Bolsey 8 (both still and movie cameras) to the oddly shaped twin-lens 35mm Bolsey C model. But today I'm writing about their more common 35mm rangefinders—with the fun exception that they come in different colors.

One thing I've noticed is that the red logo Bolsey button on top of the camera is usually missing. I'd guess more than half the ones I've seen have lost this red button, likely popping off at some point in the camera's life. I've had some with and some without, so I generally look for and purchase them with the button intact, unless it's a truly "special" camera.

All three cameras I'm looking at today are based on the Bolsey B in terms of shape and most features. Due to my love for colored cameras, I couldn't resist putting this trio together—mainly for the fun of photographing them side-by-side and seeing what I could come up with for my lead photo.

The Bolsey "Special" is the oldest in my collection, and I purchased it online off eBay many years ago. The thought of adding a red Bolsey to the shelf was a huge plus for me. When I received it and saw it was in great physical shape, I was thrilled. Finding out the shutter and transport actually worked was just the frosting on the cake.

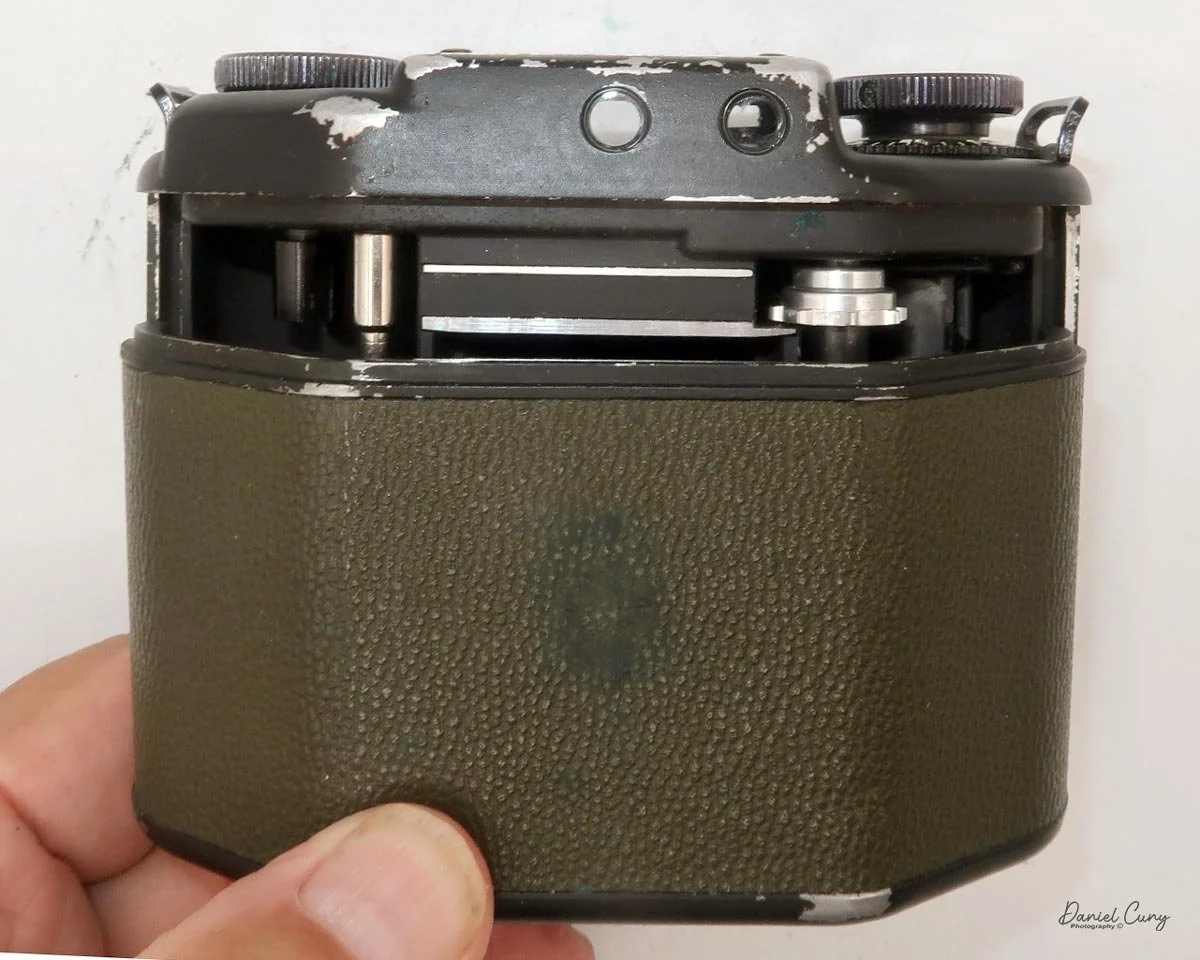
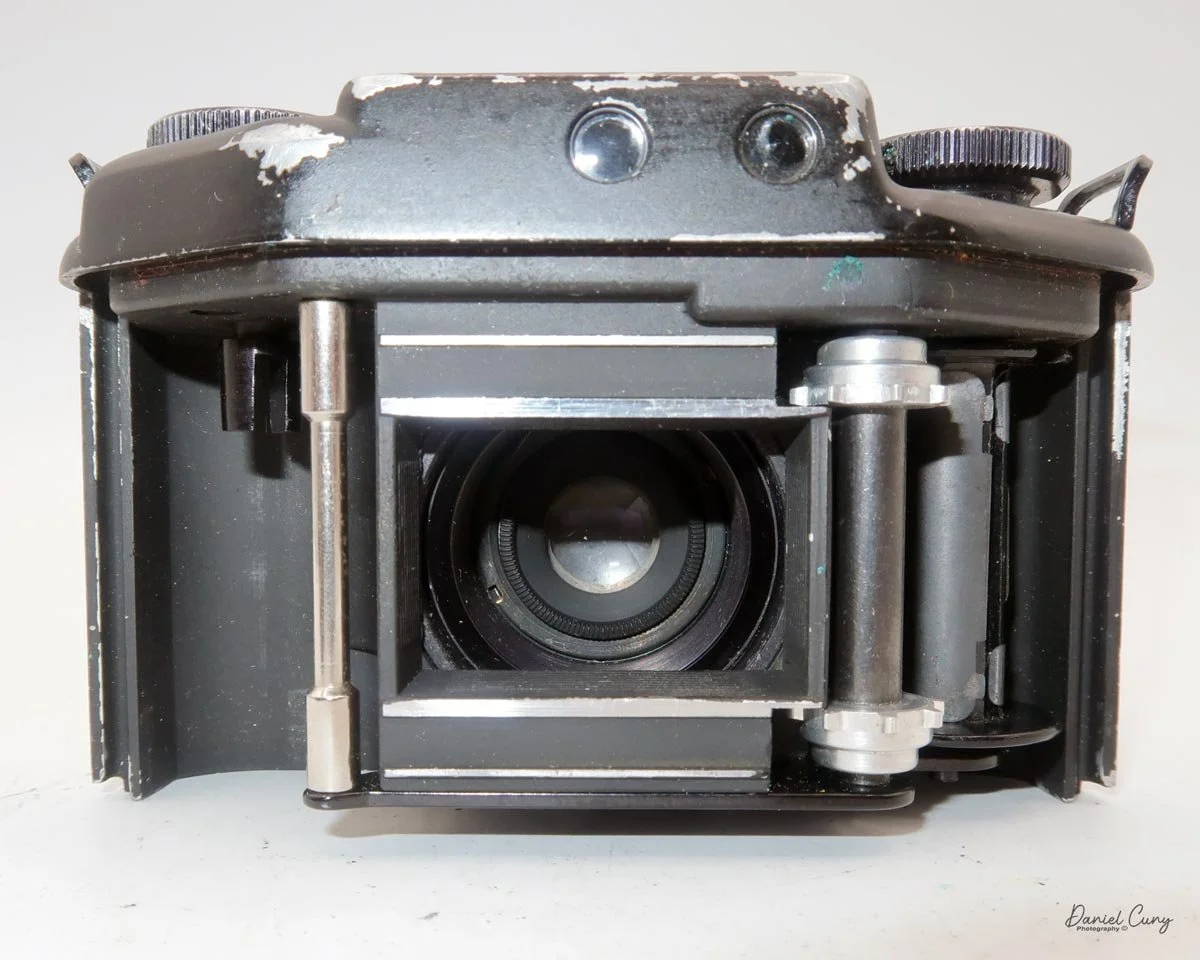
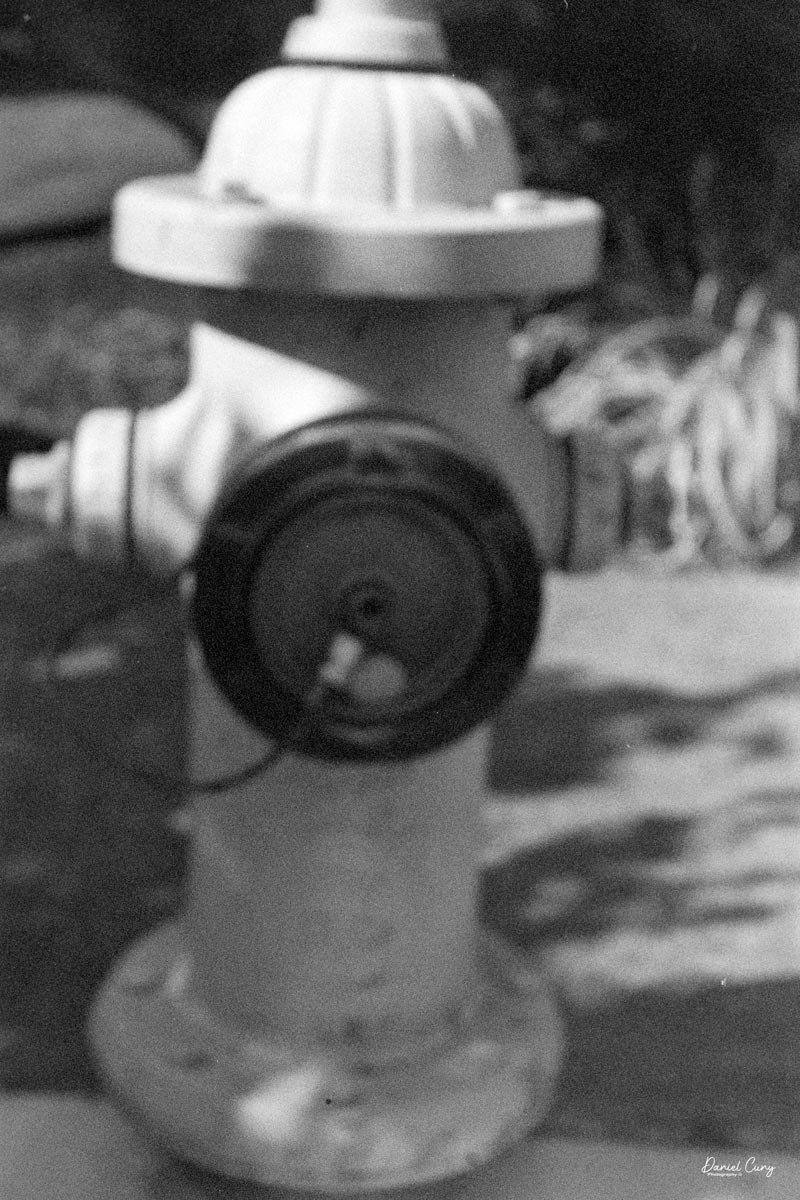
However, it wasn't until I finally pulled it off the shelf, loaded it up, processed the film, and saw the results that I realized there was a major flaw (see the images in the "Results" area). While the rangefinder worked as it should and the pressure plate was intact, the images were incredibly out of focus. I guess one of the lens elements is missing, or something is so out of whack that it ruins the focus. The back looks perfectly fine, so I'm at a loss.

After some research, I learned that some Bolsey "Special" cameras were made for microscopes and scientific purposes. Maybe this lens was specifically calibrated for extreme close-up work? But then again, the rangefinder worked perfectly for distance. It's a mystery.
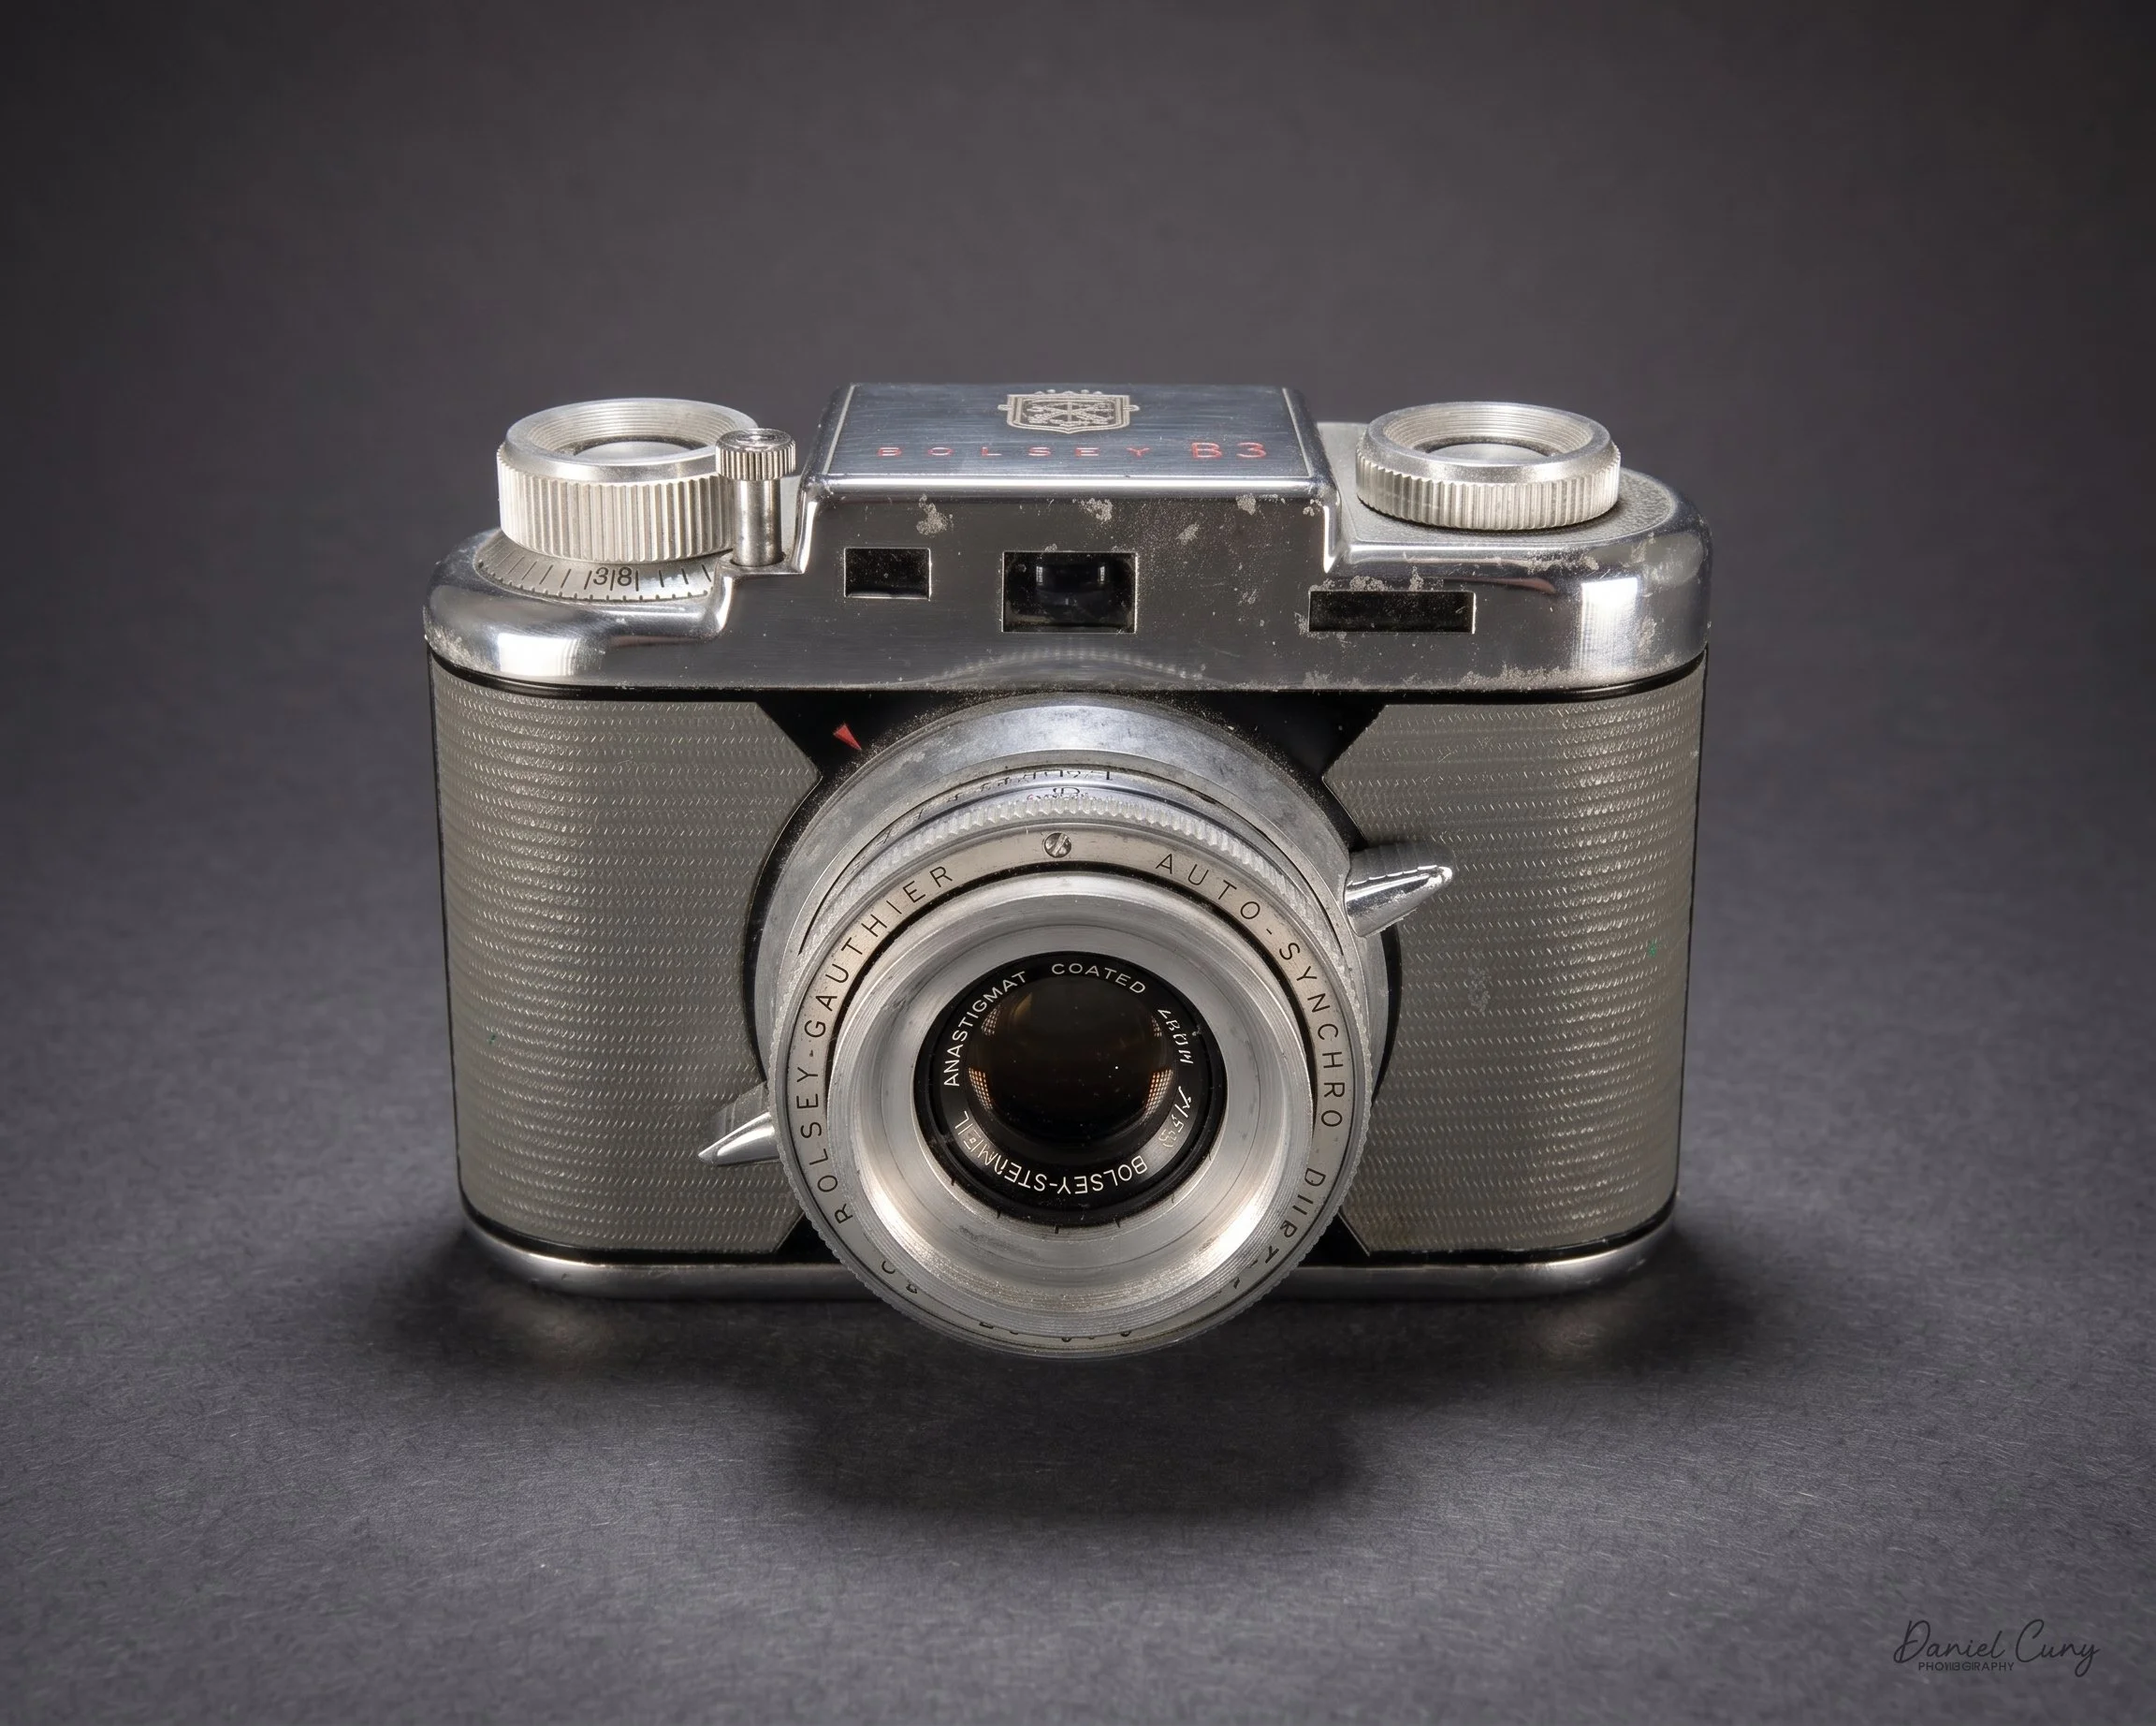
I bought the second camera, the Bolsey B3, at an antique store in a neighboring town about three years ago. I was walking through the basement section when I came across a booth with a few cameras, and there sat this grey B3. The chrome was tarnished, and the shutter was stuck open, but the top was clean, and it was grey—a color I hadn't seen on a Bolsey before. The price was only a few dollars, so even though the shutter wasn't working, I figured it would make a fantastic display piece alongside my other Bolseys.

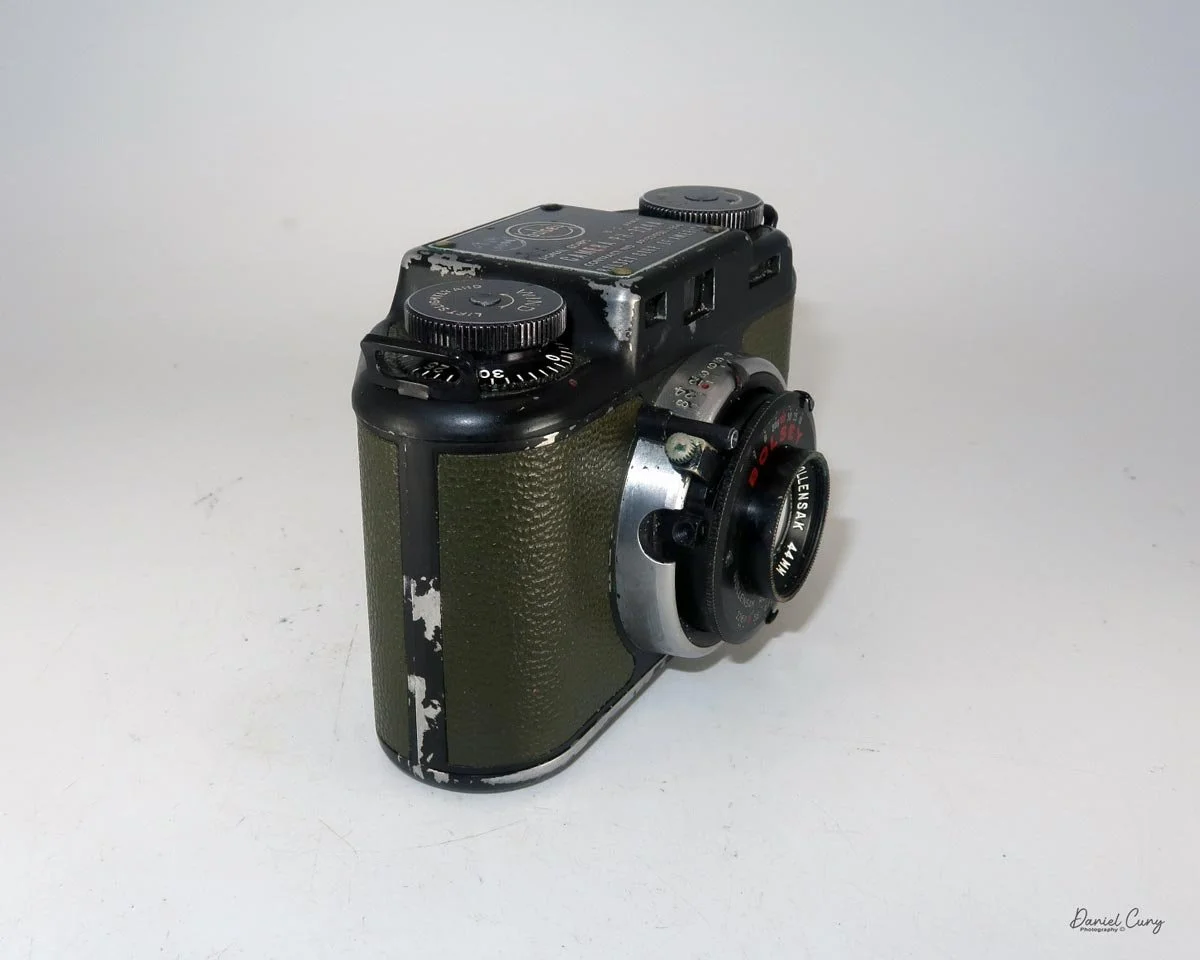
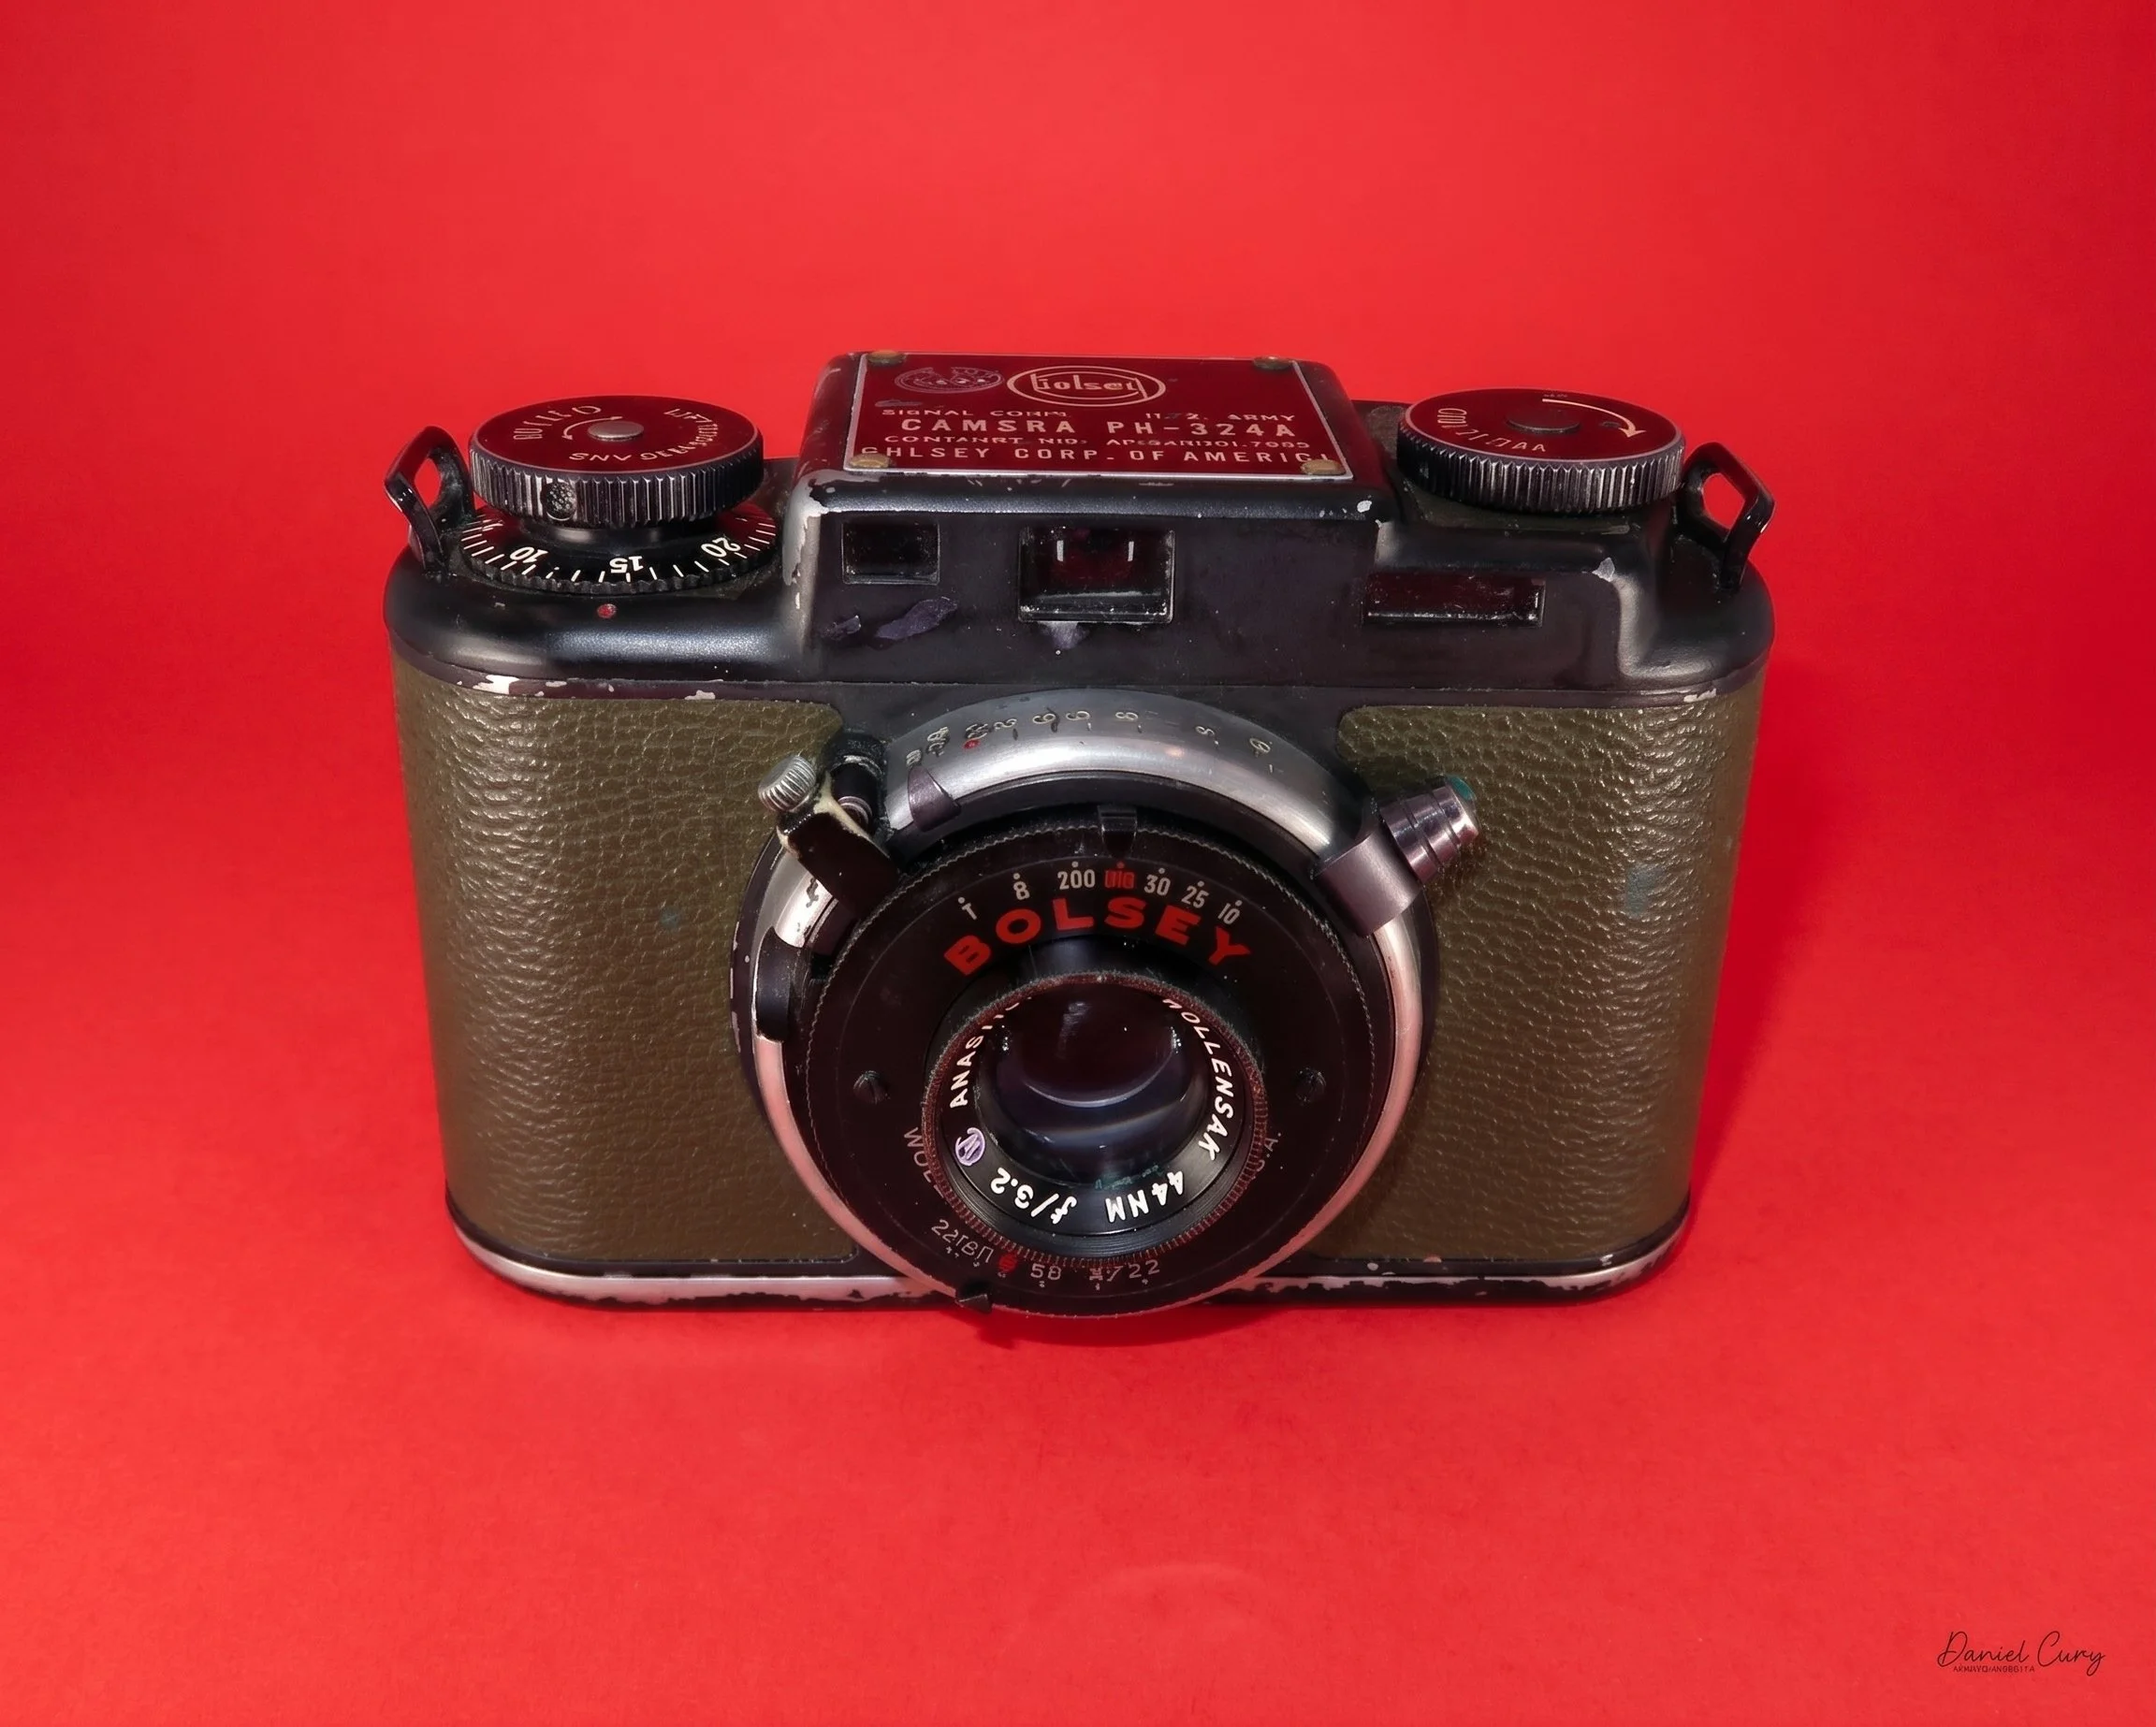
The newest Bolsey to join my collection is the PH-324A. This military camera was made for, and used by, the U.S. Signal Corps. This olive-drab camera features a stark black finish and a bold red "Bolsey" on the faceplate. It was part of a lot I bought at an auction house a few months ago.

While I always enjoy finding different colored versions of cameras, the stigma of a "military" model didn't initially excite me. That's possibly because the high prices they usually command typically turn me off—and keep them out of my budget! But the striking black finish on this one really won me over.

After processing the disappointing roll from the Bolsey Special, I loaded some film into the PH-324A and took it outside for a spin. Thankfully, this roll turned out much better, which you can see in the "Results" section below.

History:

The history of Bolsey cameras is inextricably linked to the brilliant and prolific mind of its founder, Jacques Bolsey. Born Yakob Bogopolsky in Kiev in 1895, he first made his mark on the photographic world in Switzerland during the 1920s. There, he designed the legendary Bolex 16mm motion picture camera, a revolutionary piece of equipment that helped democratize filmmaking for generations of operators. He also laid the mechanical groundwork for the Swiss Alpa-Reflex 35mm camera in the late 1930s before emigrating to the United States to escape the onset of World War II.
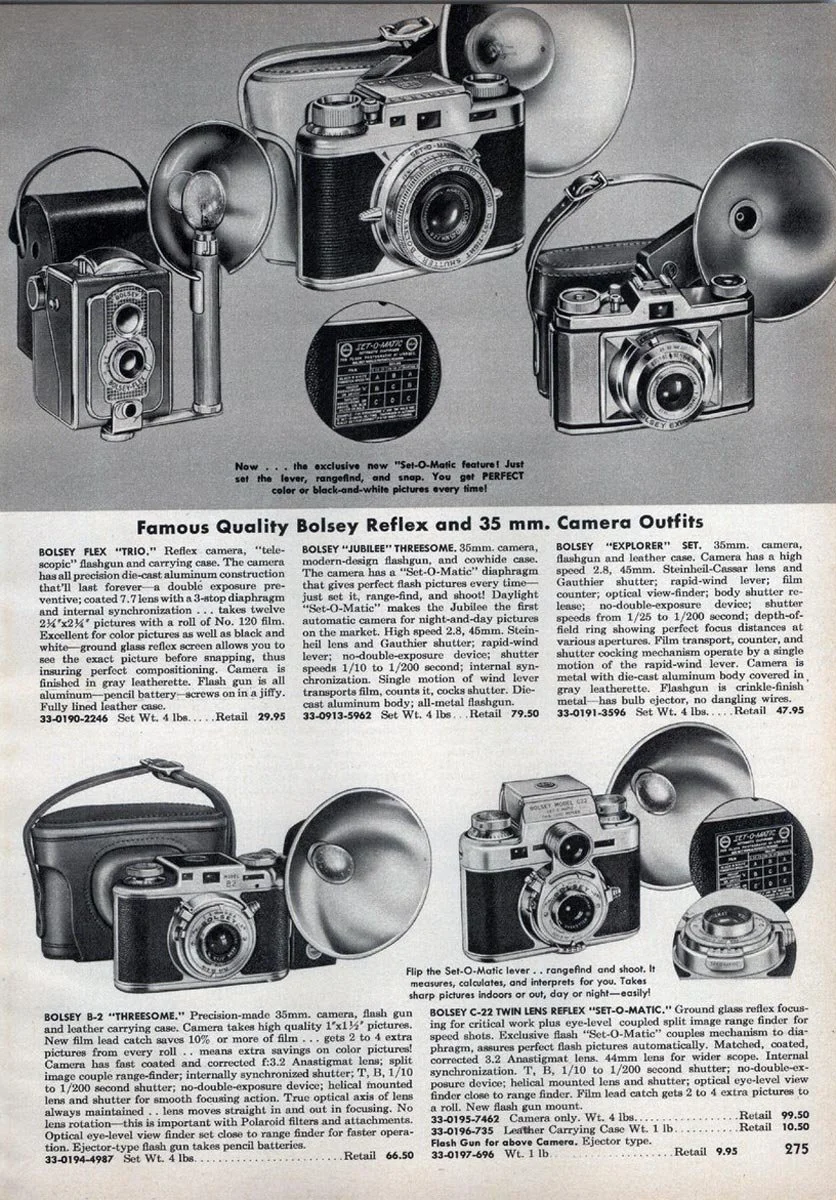
Bolsey Advertisment

During the war, Bolsey worked extensively with the U.S. government, designing durable, high-precision combat cameras for both aerial and ground photography. When peacetime arrived, he leveraged this military engineering experience to enter the booming consumer market. In 1947, he founded the Bolsey Corporation of America in New York and introduced his first major consumer camera, the Bolsey Model B.

The Bolsey Model B was a compact 35mm rangefinder featuring a distinctively heavy, cast-aluminum body. It possessed a uniquely rugged feel—a direct byproduct of Bolsey's wartime designs. Equipped with a fixed Wollensak Anastigmat 44mm f/3.2 lens and a split-image rangefinder, the Model B was both mechanically capable and affordable for the post-war middle class.

The company quickly iterated on this early success. The subsequent Model B2 added double-exposure prevention, while the exceptionally quirky Model C, introduced around 1950, stands out as one of Bolsey's most eccentric designs. The Bolsey C was an unusual hybrid: it functioned as a standard 35mm rangefinder but also integrated a twin-lens reflex (TLR) viewfinder on the top of the body. This let photographers look down into a ground-glass screen to focus, offering an alternative to the traditional eye-level viewfinder.

Later models, like the Bolsey B22 and the Jubilee (introduced in 1953 and 1955, respectively), featured a proprietary "Set-O-Matic" system. This mechanical innovation coupled aperture control directly to the focus mechanism, removing the mathematical guesswork from early flash photography.

Despite their mechanical durability and innovative features, Bolsey cameras suffered from inconsistent quality control in their external finishes. The metal plating on many camera bodies tended to deteriorate or pit quickly. By 1956, facing intense competition from domestic manufacturers like Kodak, as well as highly sophisticated new imports from Japan and Germany, Bolsey ceased camera production and sold his business interests to the Wittnauer Watch Company.

Jacques Bolsey passed away in 1962. Today, his legacy survives not only in the revered Bolex cinema cameras but also in the quirky, durable Bolsey 35mm rangefinders that remain fascinating artifacts of mid-century photographic engineering.

My Camera:

For this section, I'll focus on the PH-324A. The red "Special" is very similar to the PH-324A, while the Bolsey B3 is different mechanically and has some aesthetic differences, too.

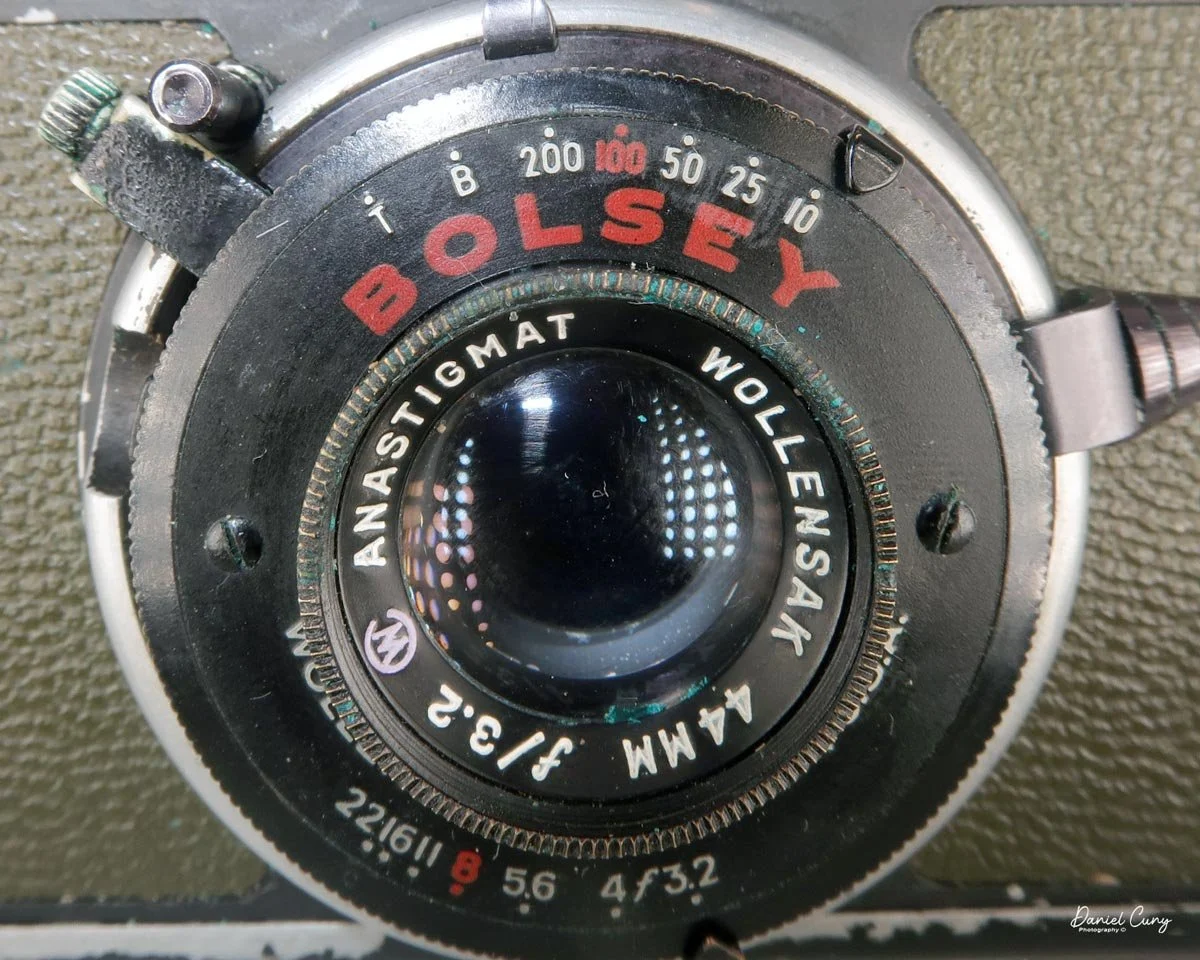
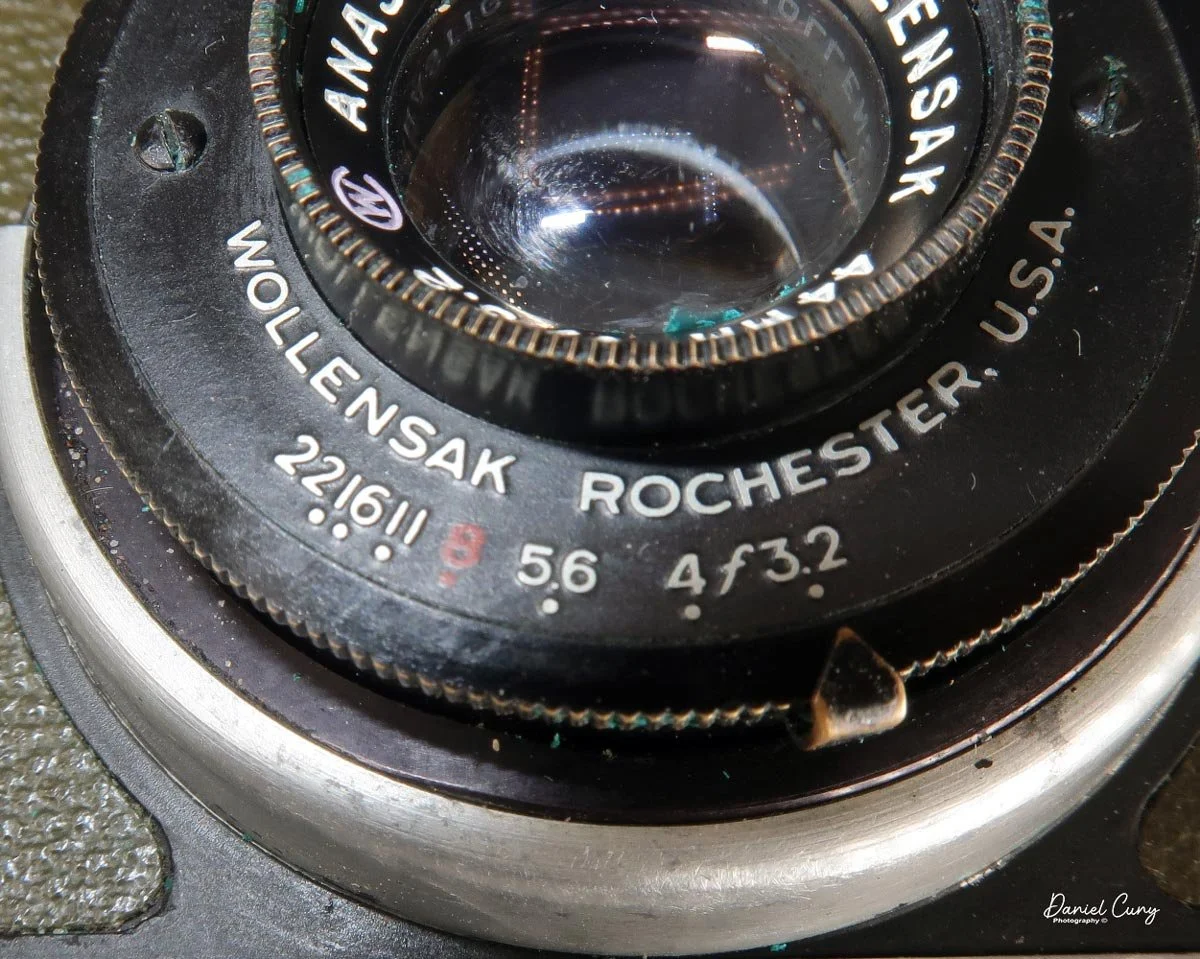
The Bolsey 35mm models are sturdy and compact, coming in at 4.25" across, 2.5" tall, and 2.5" deep, weighing 14.9 ounces without film. My camera has a Wollensak 44mm f/3.2 Anastigmat lens, and the serial number on my PH-324A is 95012.
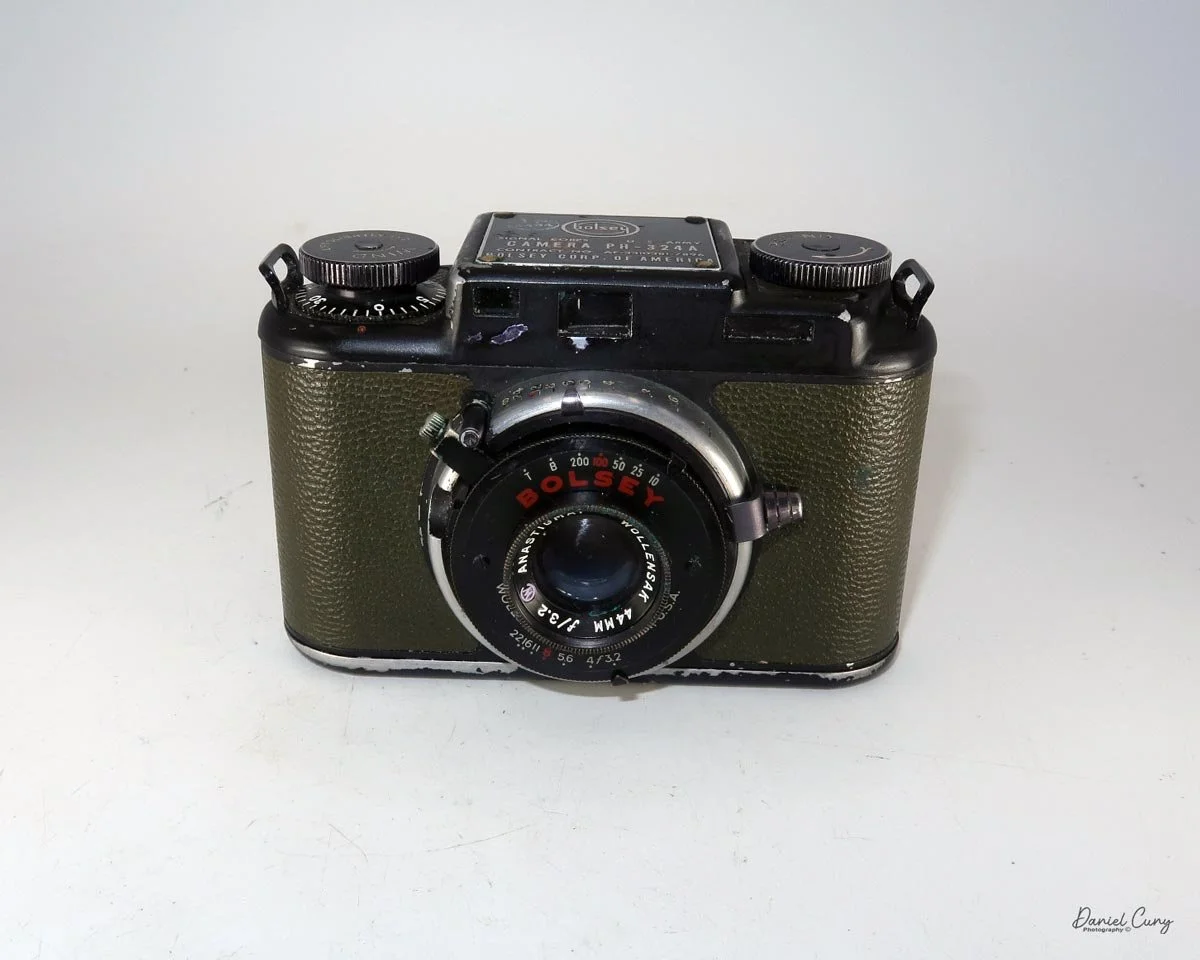
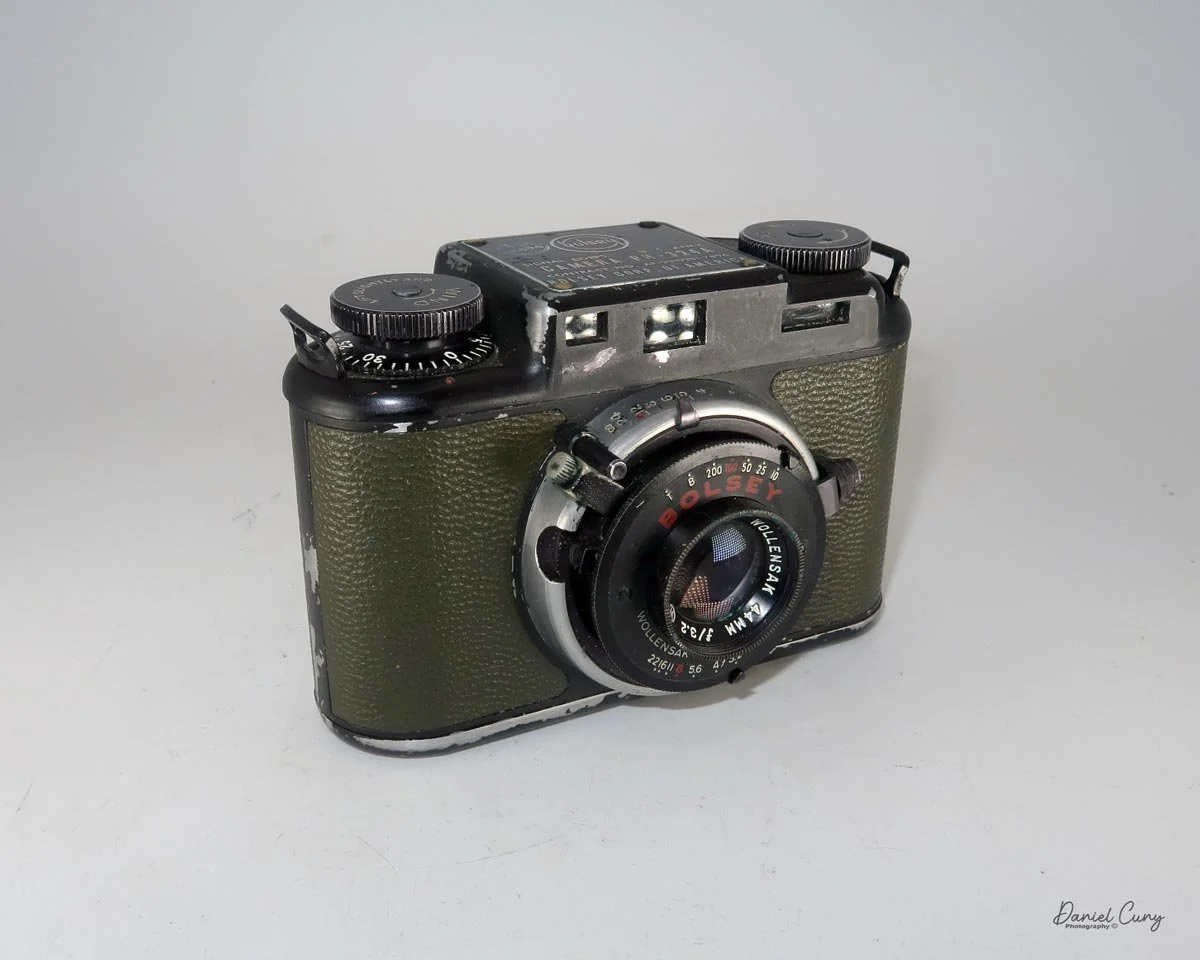
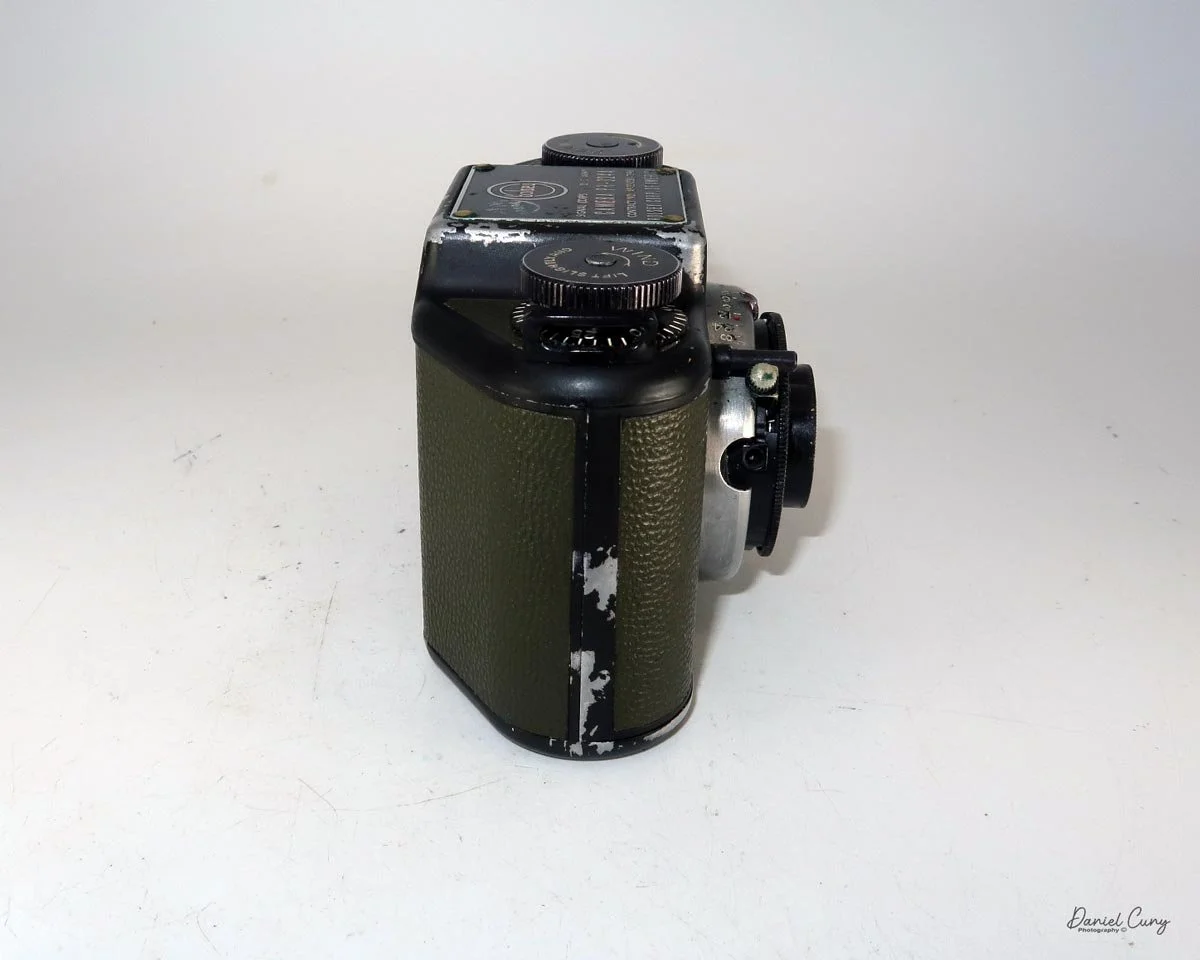
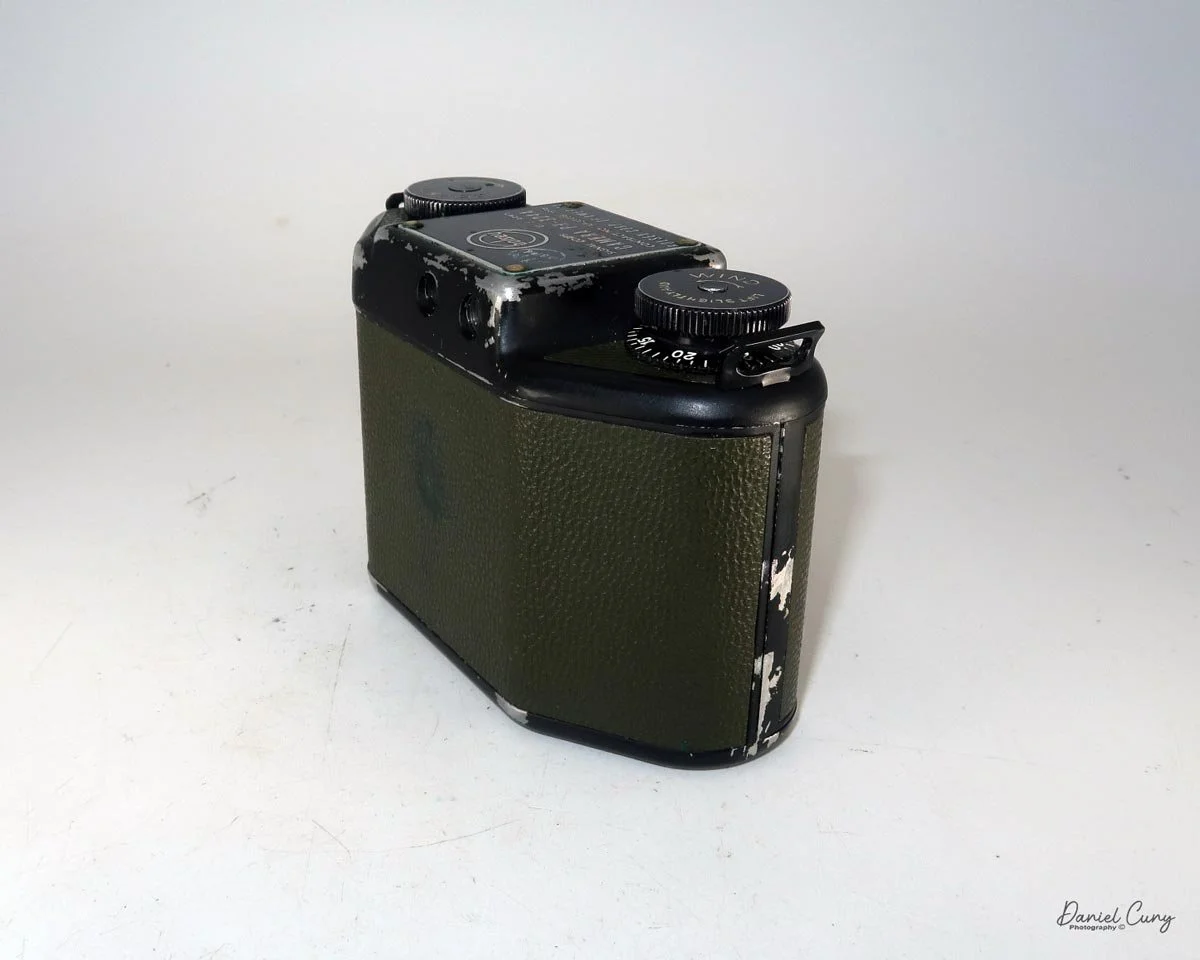
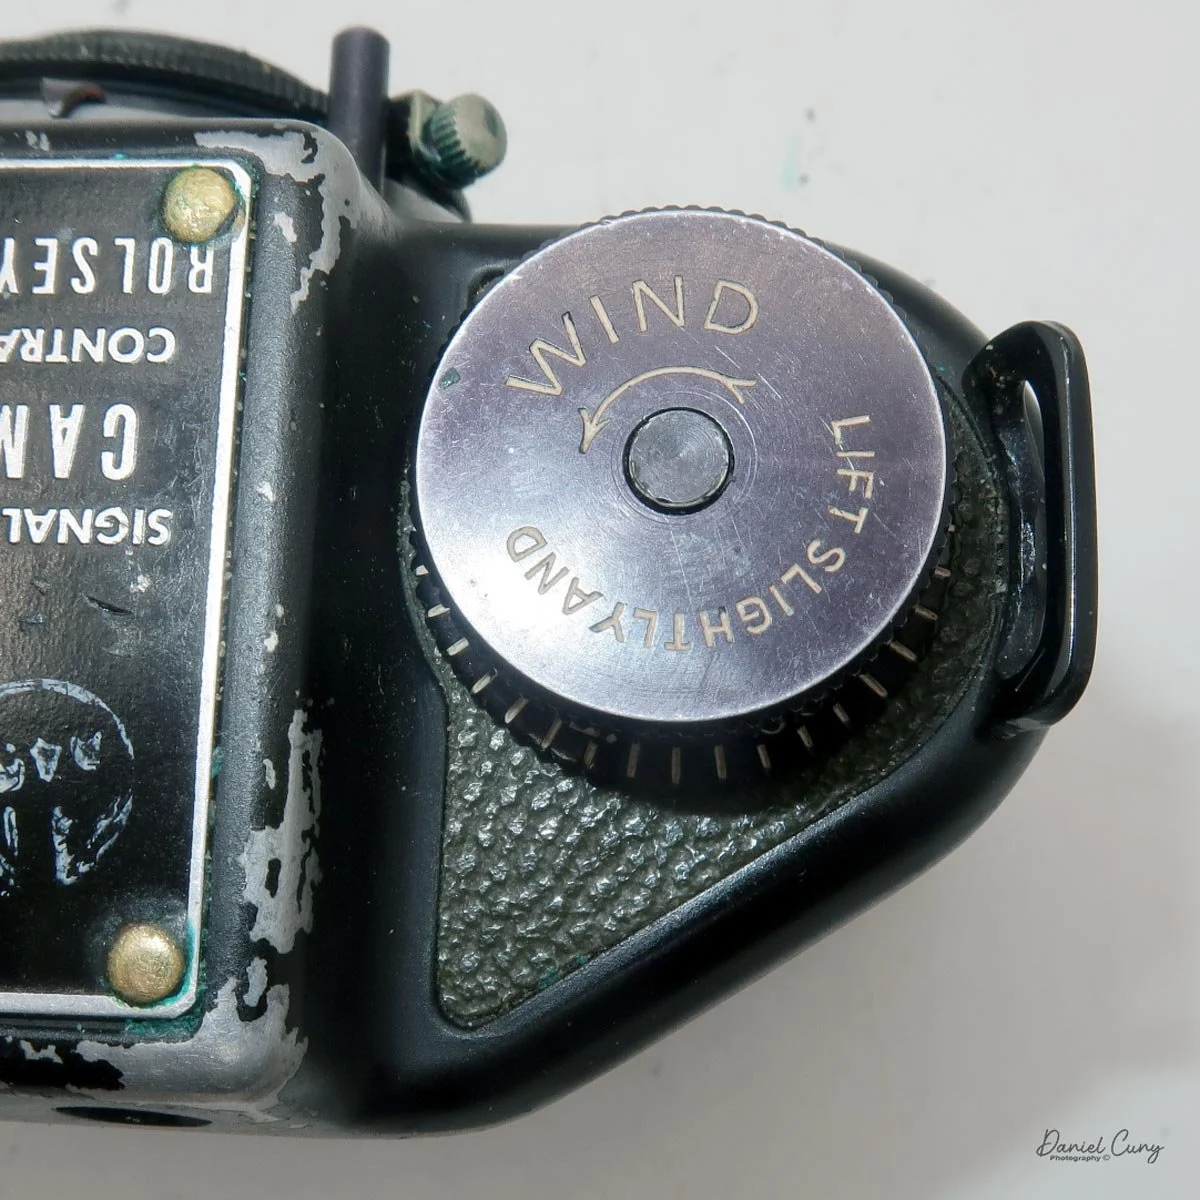
Looking along the top, you'll find just the rewind knob on the left. The middle of the PH-324A features the information plate with the Bolsey logo, reading: "Signal Corps. U.S. Army, Camera PH-324A," along with the contract name and "Bolsey Corp. of America." On the top right is the winding knob to advance the film. There's a helpful arrow indicating the turning direction, along with the instruction to "Lift slightly and Wind." Right below the winding lever is the frame counter.
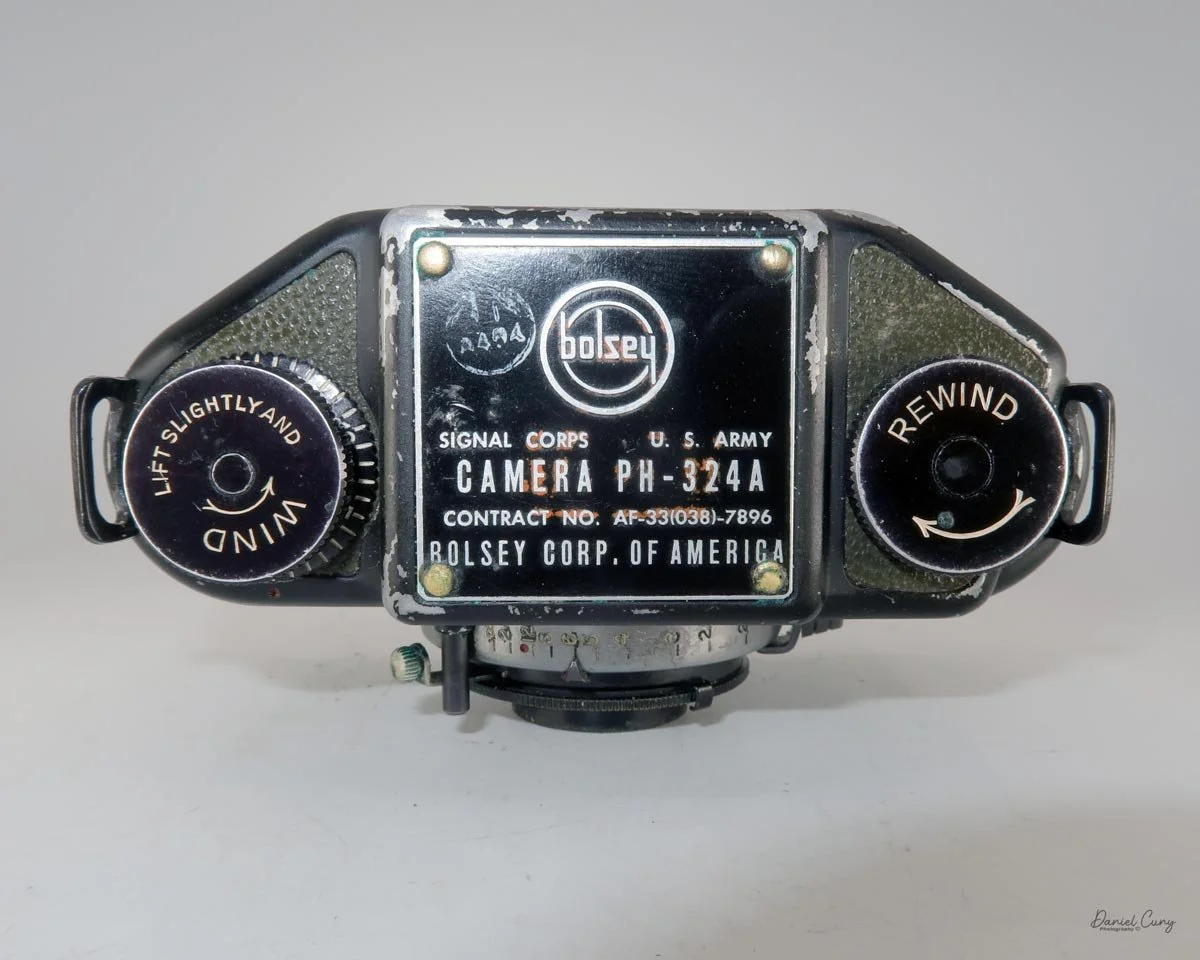
Top view of the Bolsey PH-324A camera

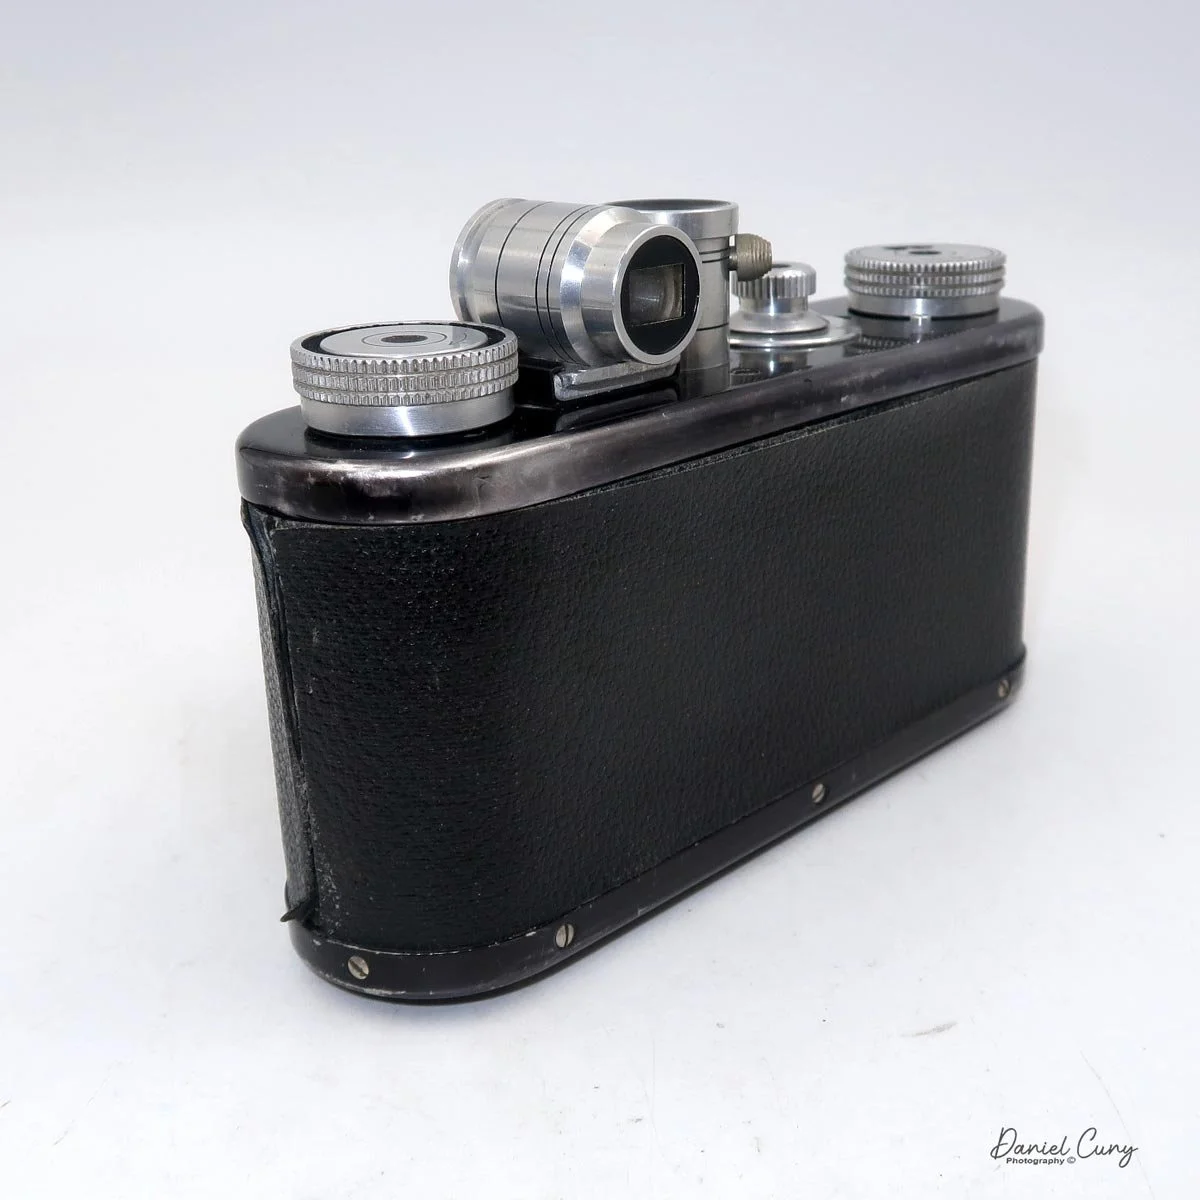
On the back of the camera are two holes for the viewfinder. The left is the standard finder used to frame your image, and the right is a split-image rangefinder used for focusing. For me, they are a little difficult to use, but I think that's because of the eye surgery I had over a year ago and simply getting more accustomed to using my left eye to focus.
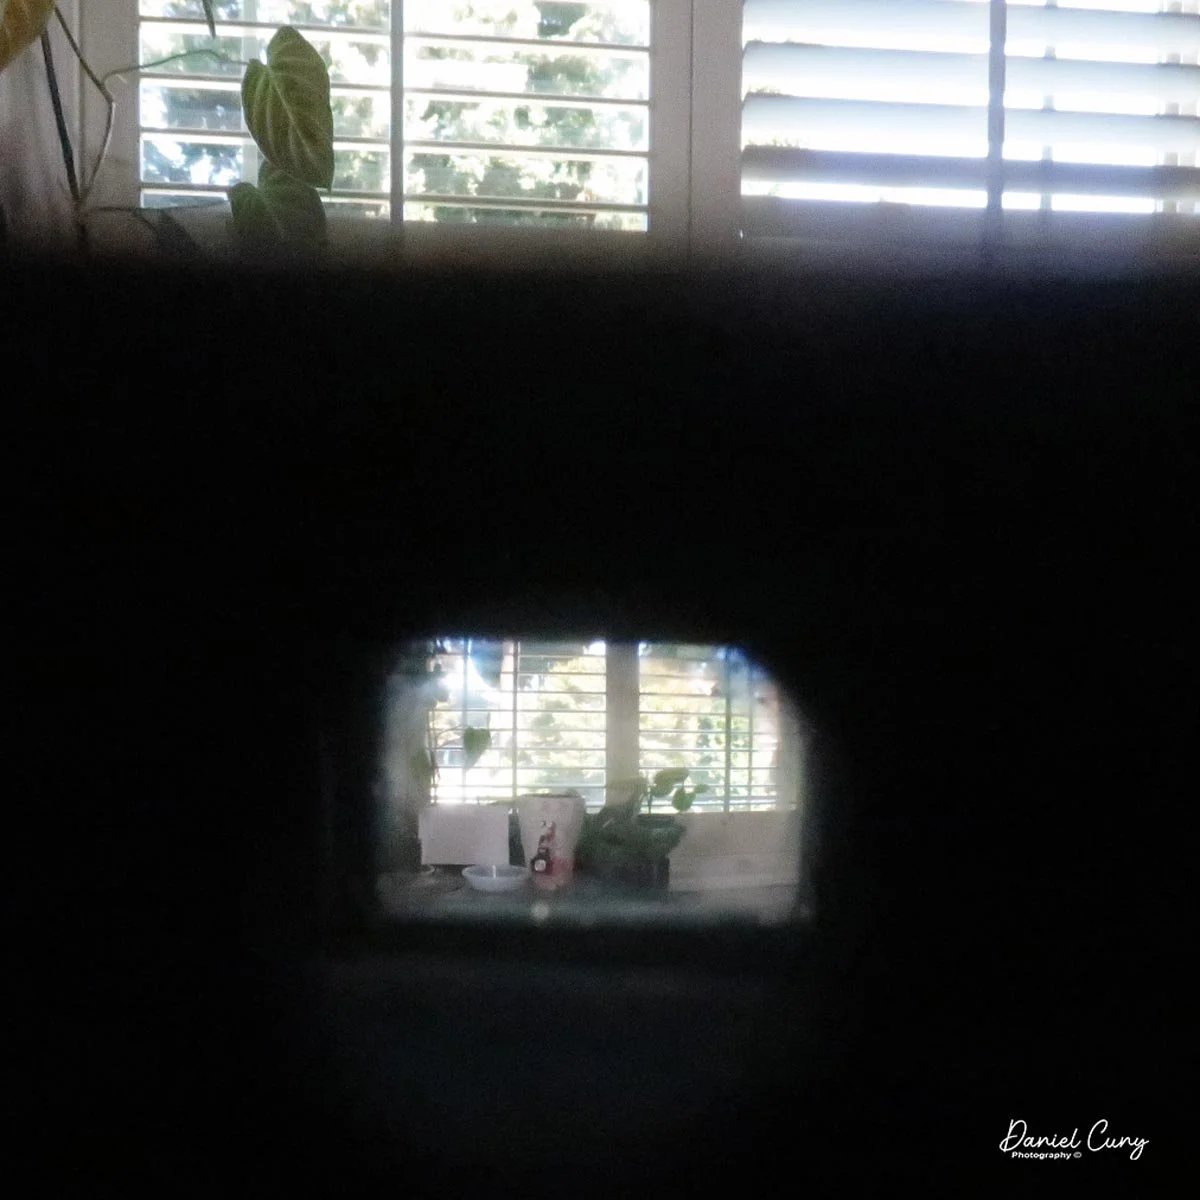
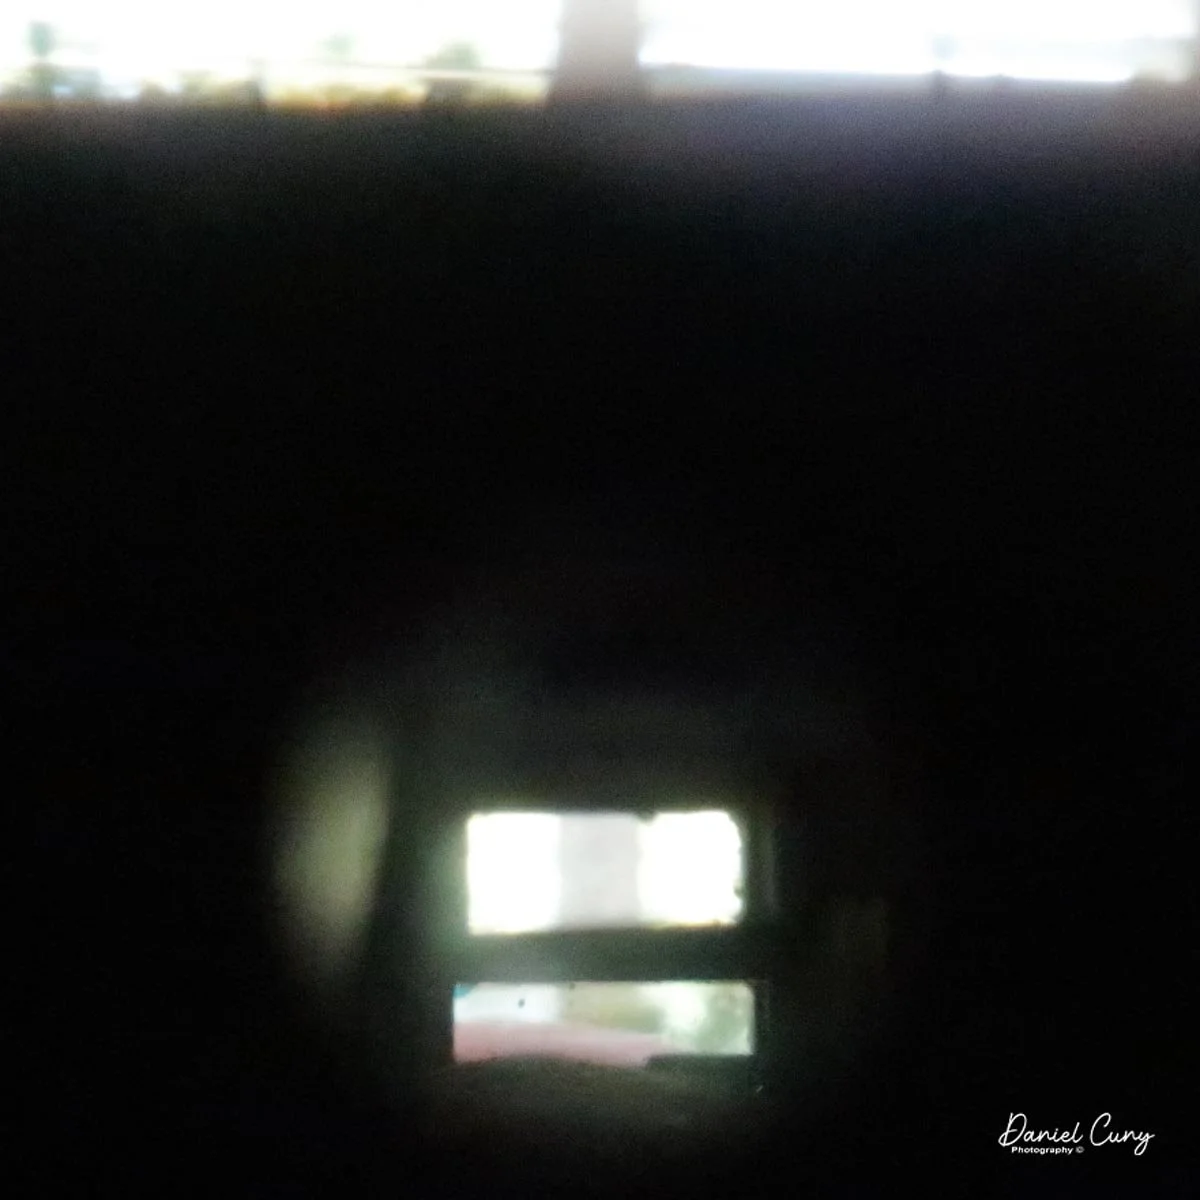
Moving to the front, the viewfinders are at the top. Down by the lens, you focus by sliding a large tab on the left side (as you hold the camera). On the PH-324A, there is a red dot and a slight indent just past the 12-foot mark. This is designed for hyperfocal focusing. Similar to how an Instamatic works, if you set the camera's focus to this point and use a small aperture in normal sunny conditions, your depth of field will keep everything from approximately 5 feet to infinity in sharp focus.

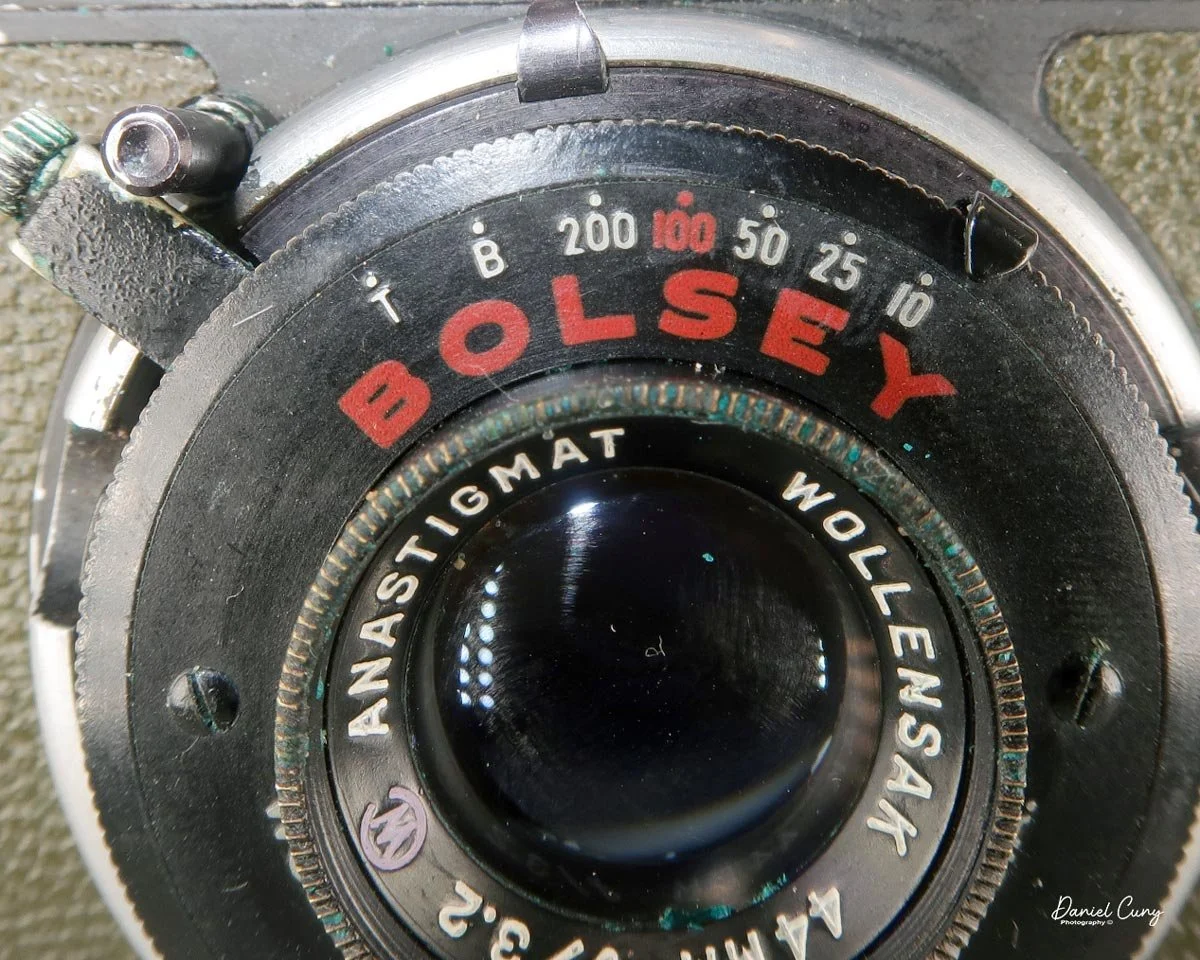
Above the lens are the shutter speeds, which range from 1/200 down to 1/10, along with "B" for Bulb and "T" for timed exposures. The 1/100 shutter speed is printed in red. You turn the outer knurled ring to select your desired speed.

Below the lens are the aperture settings, ranging from f/3.2 to f/22. Set these by sliding the small arrow to match your lighting conditions. The f/8 mark is also printed in red. When you set the camera to 1/100, f/8, and focus on the red dot (around 15 feet), the camera is extremely easy to operate because all the primary settings are color-coded in red.

The shutter release is located around the lens assembly in the ten o'clock position. Just press it down to fire the shutter.
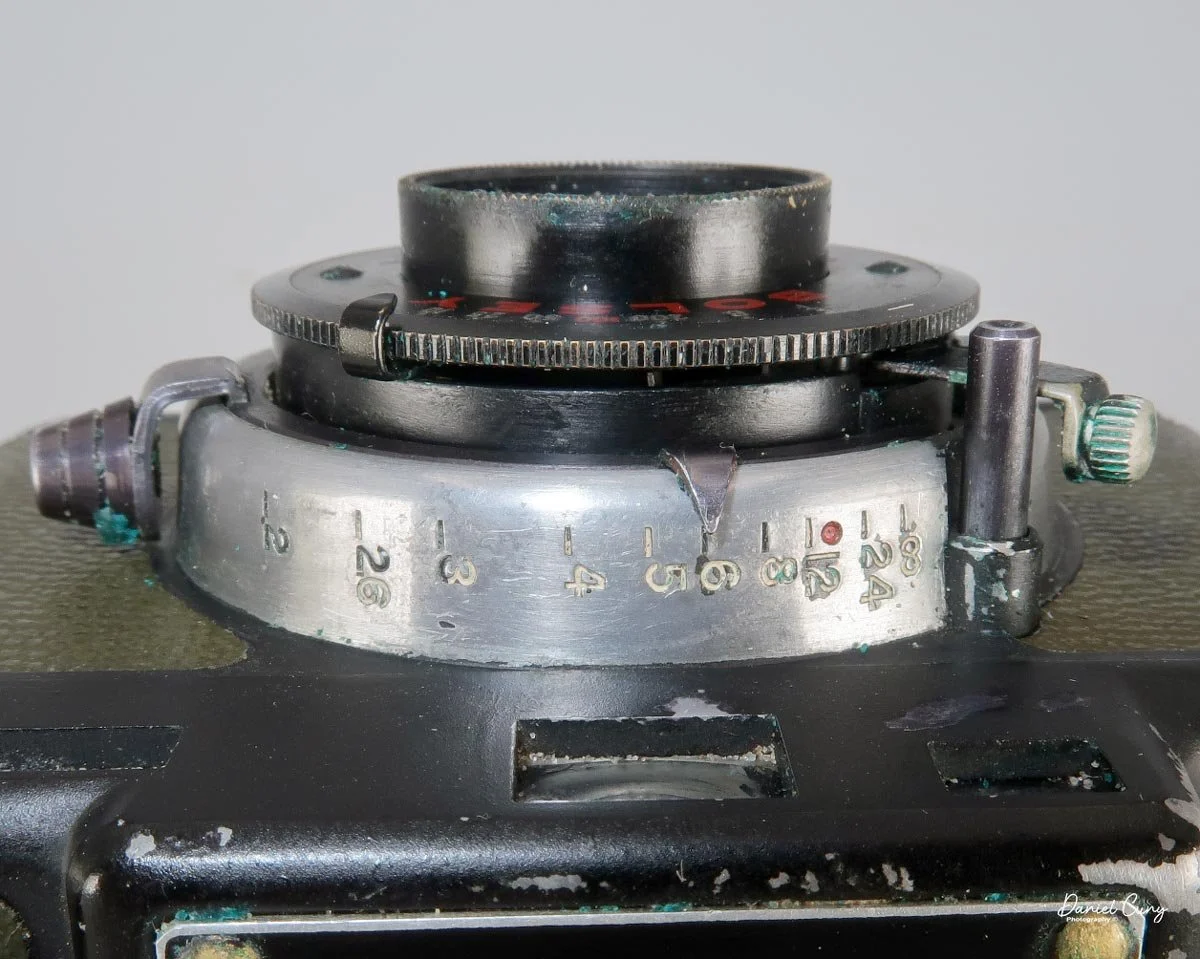
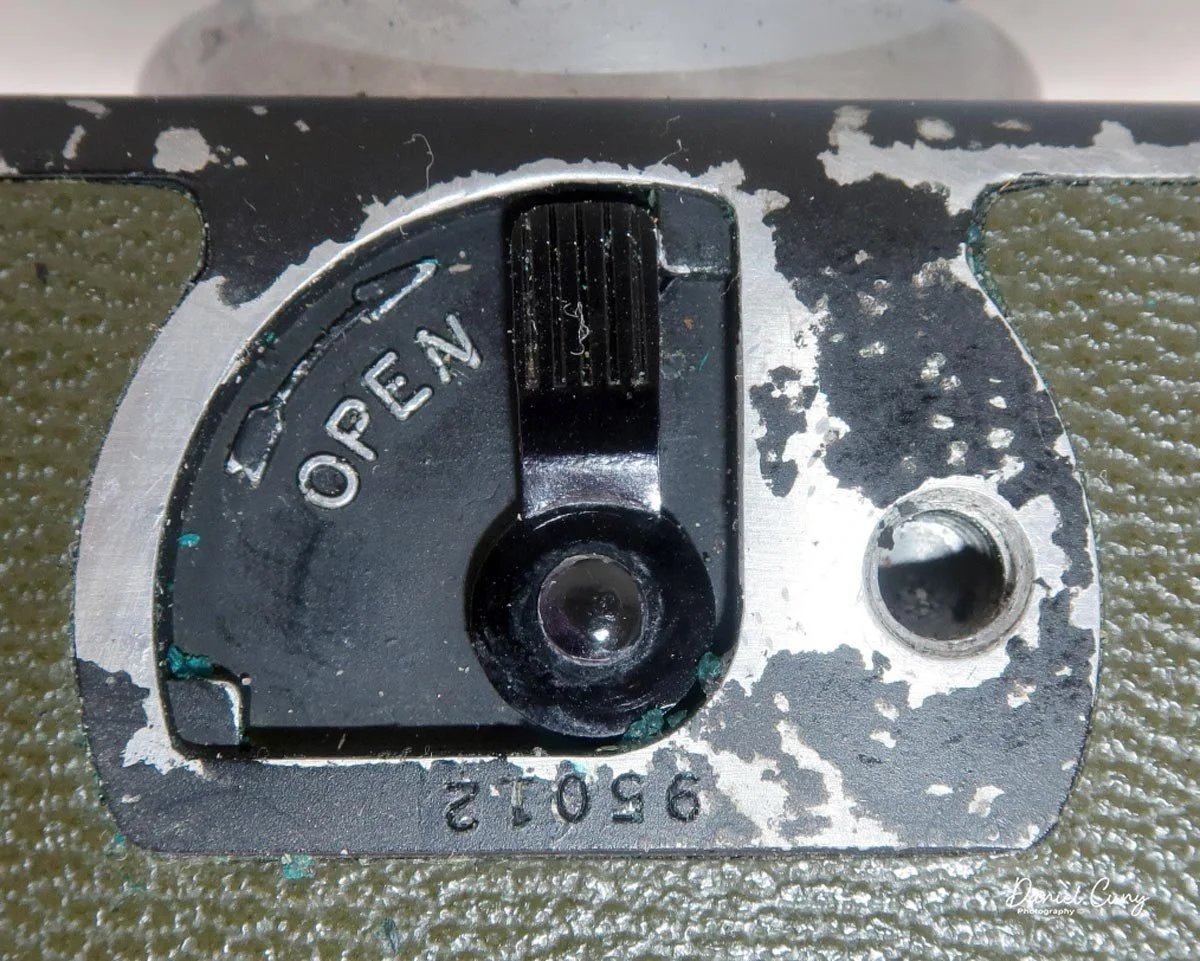
The bottom of the camera has the film door release. Flip the lever to "open," then slide the back off to expose the loading area. From there, you load it as you would any standard 35mm camera.

After taking a photo, you must follow the instructions engraved on the film advance knob. I didn't notice this when I first loaded the camera. The winding gears felt stuck, and I actually tore some of the sprockets right off the film. To advance the film properly,  lift the winding knob slightly, then start turning.
Lifting the knob releases the internal lock on the advance gear, allowing you to wind to the next frame. Without lifting it, you'll tear the sprocket holes just like I did before consulting the manual. When it's time to rewind the film into the cassette, there is no release button for the drive gears. You wind the rewind knob in the direction of the arrow, and the film pulls smoothly back into the cassette.
Results:

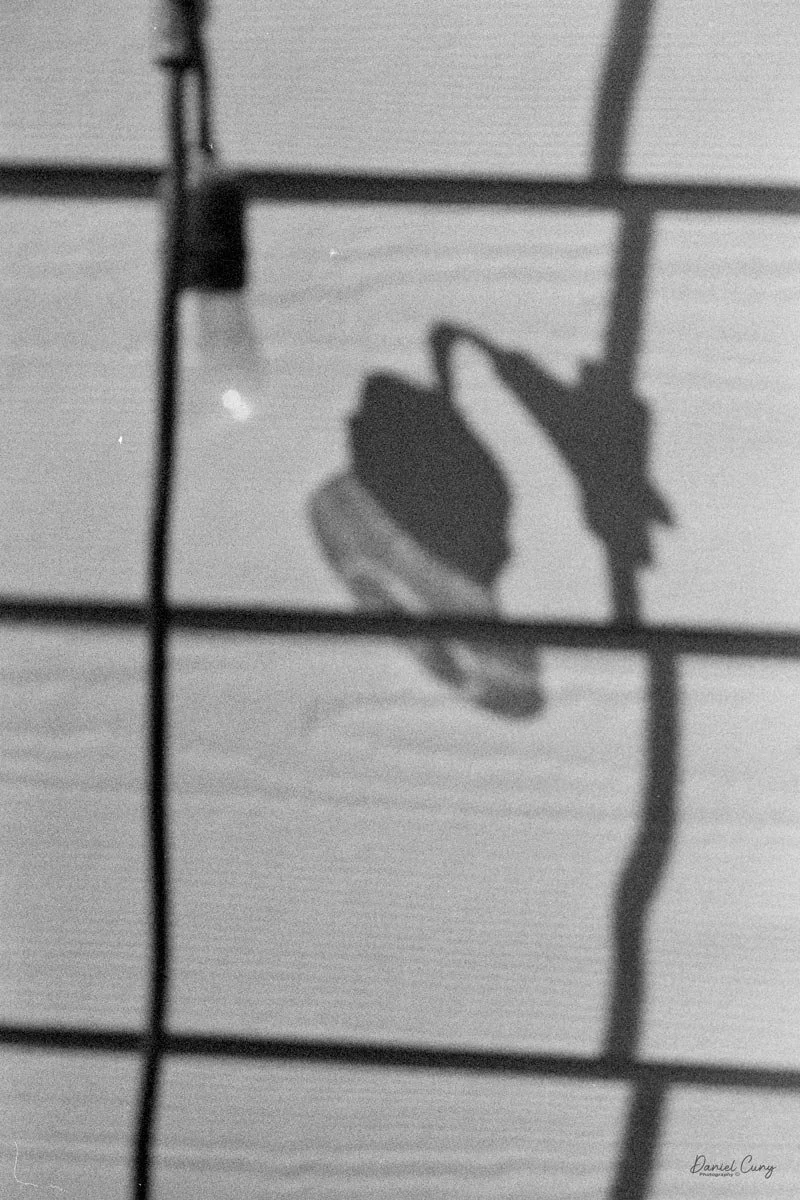
Loading up some expired Plus-X film from 1976 (which is still great film, by the way), I took a walk through my neighborhood and captured several of my usual test views.

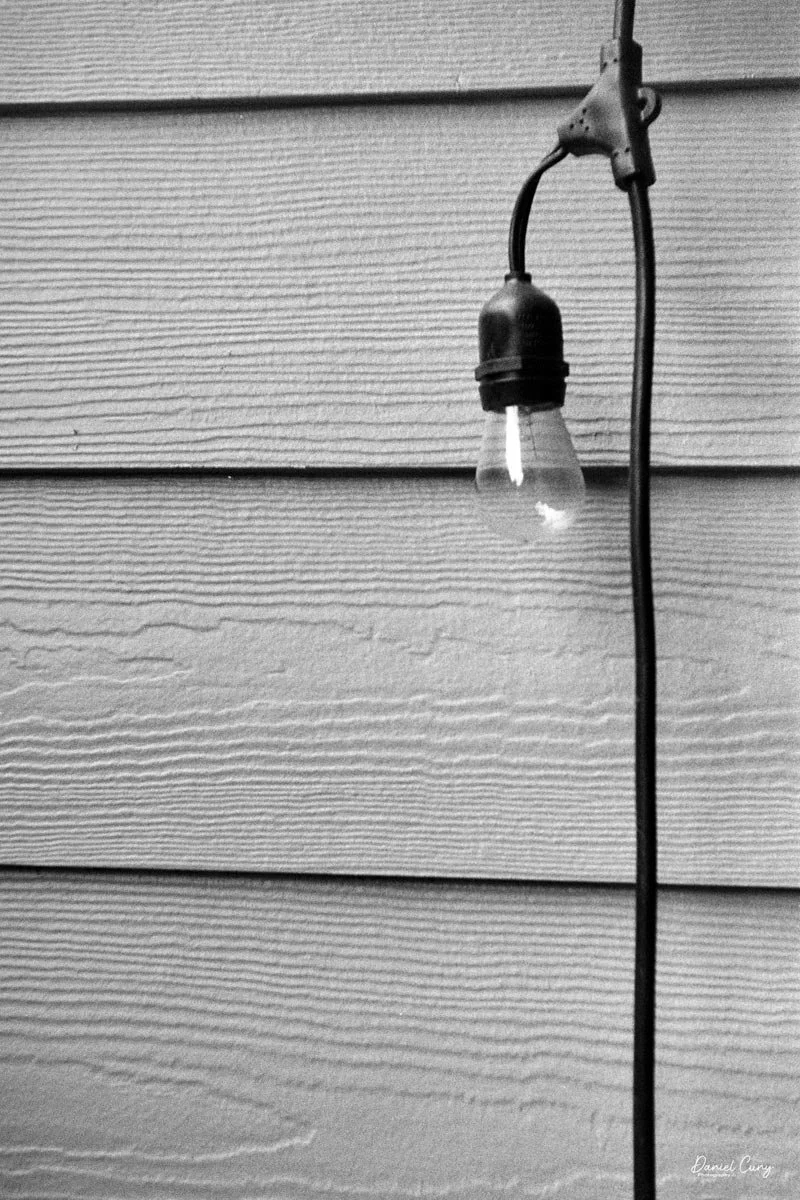
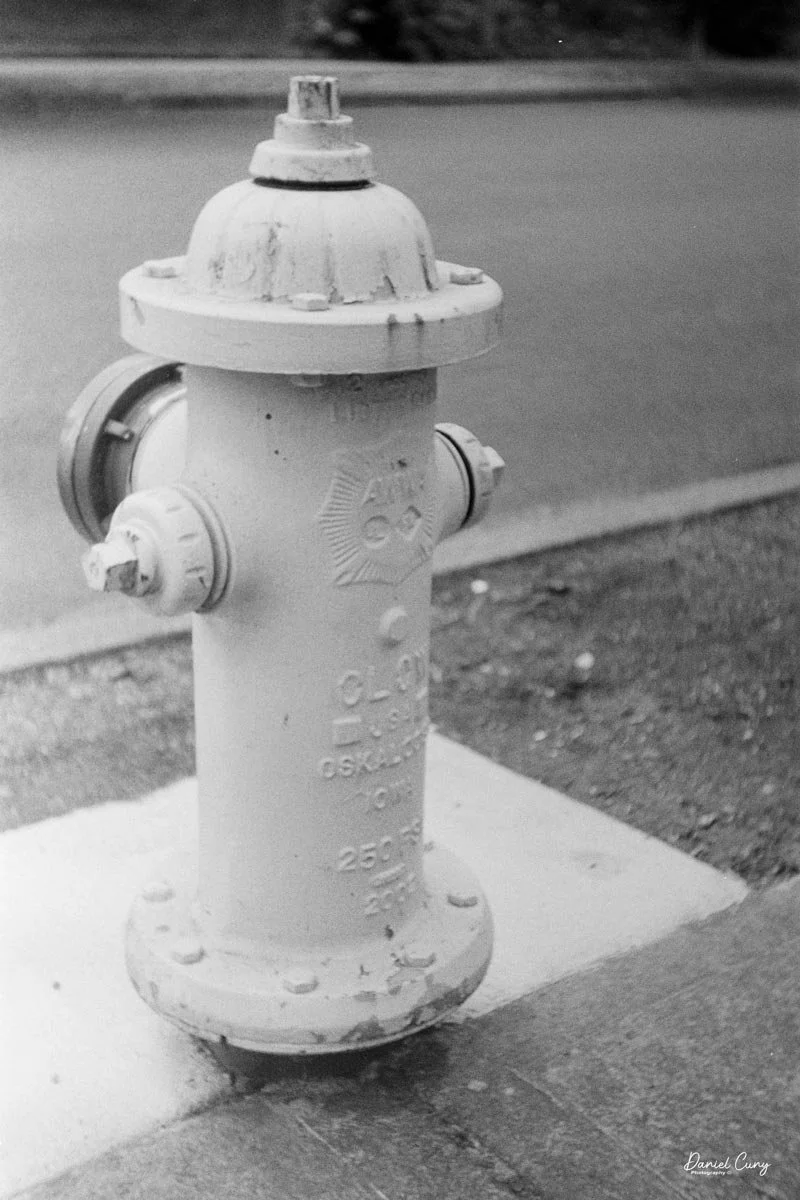
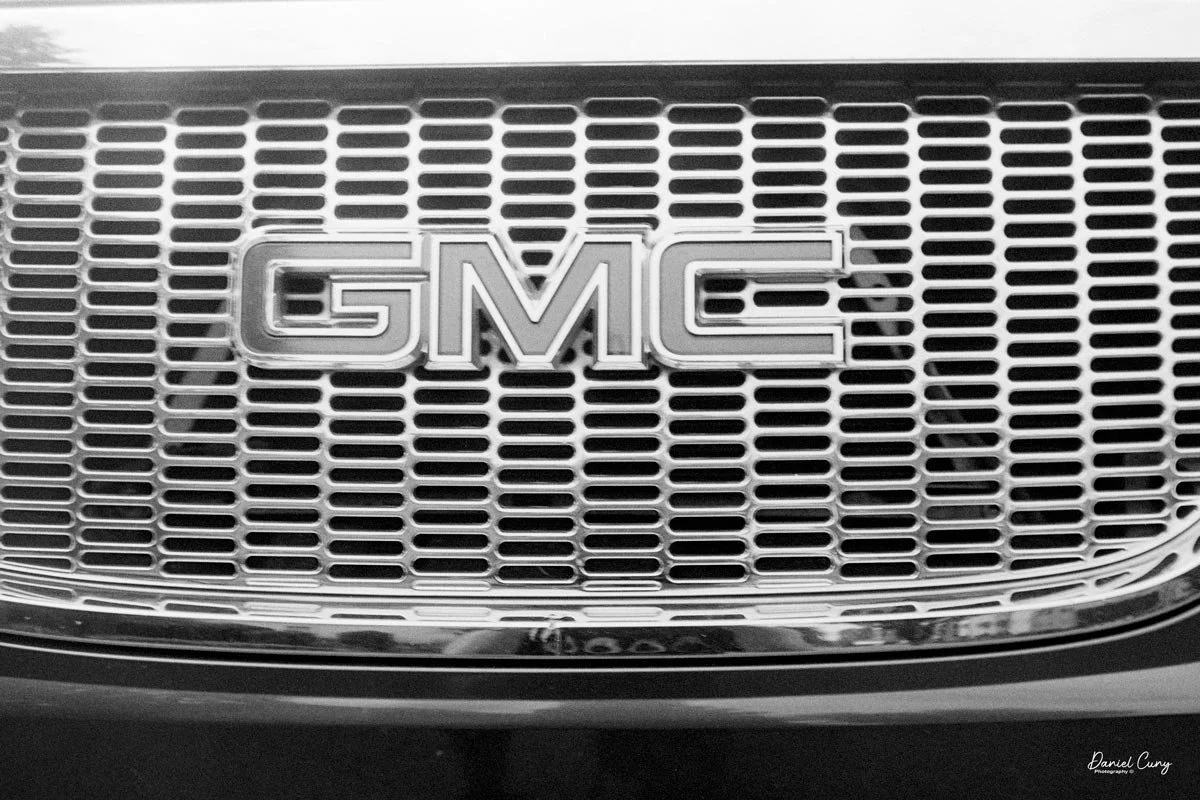
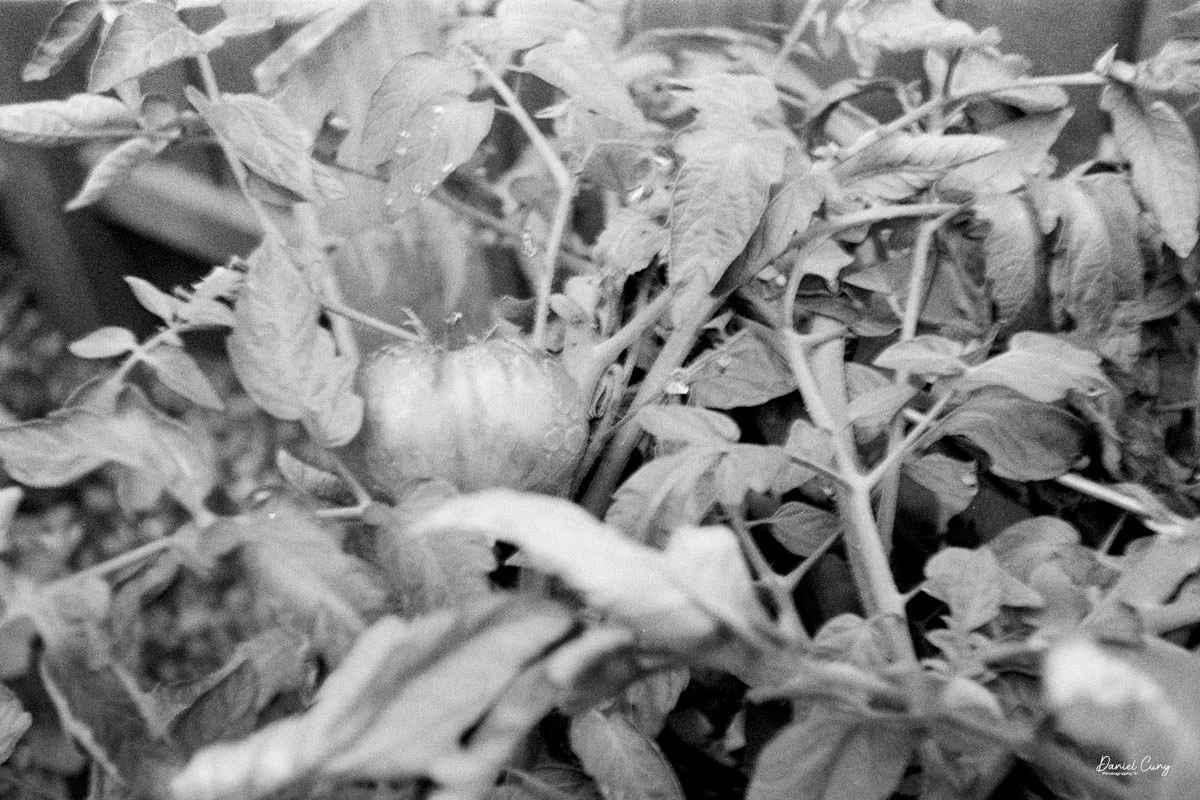
Here are a couple of the images taken with the red "Special." The final few—and much sharper—images are from the PH-324A, which did a considerably better job!
Conclusion:

The Bolseys are incredibly fun cameras to shoot with and remain some of my favorites in my collection. They are even more fun to use once you read the instructions and learn how to advance the film without tearing the sprocket holes!

The focus was surprisingly easy to nail, even for an old guy using his left eye. The viewfinder was clear, the shutter speeds seemed accurate, and the lens was sharp, producing some genuinely nice images despite the larger grain structure of the vintage Plus-X film.

Thank you for taking the time to read about some of the Bolsey cameras from my collection.

Overall, my experience with these cameras was very positive. While a slightly larger finder window would be nice, I do love shooting with a compact camera every once in a while. I've always felt that Bolsey cameras were well-built, quirky, and an absolute joy to use.

Are you interested in other vintage gear? Here are some of my other Camera Reviews.

Check out my Cuny's Camera Collection YouTube channel, where I am putting together video overviews of the cameras I write about. Be sure to subscribe and like the channel, too!

Cuny's Cameras and Photos is my online eBay store, where you will find some of the cameras I have reviewed, along with a wide range of other cameras, lenses, and items from my collection that I am thinning out.

Until next week, please be safe.
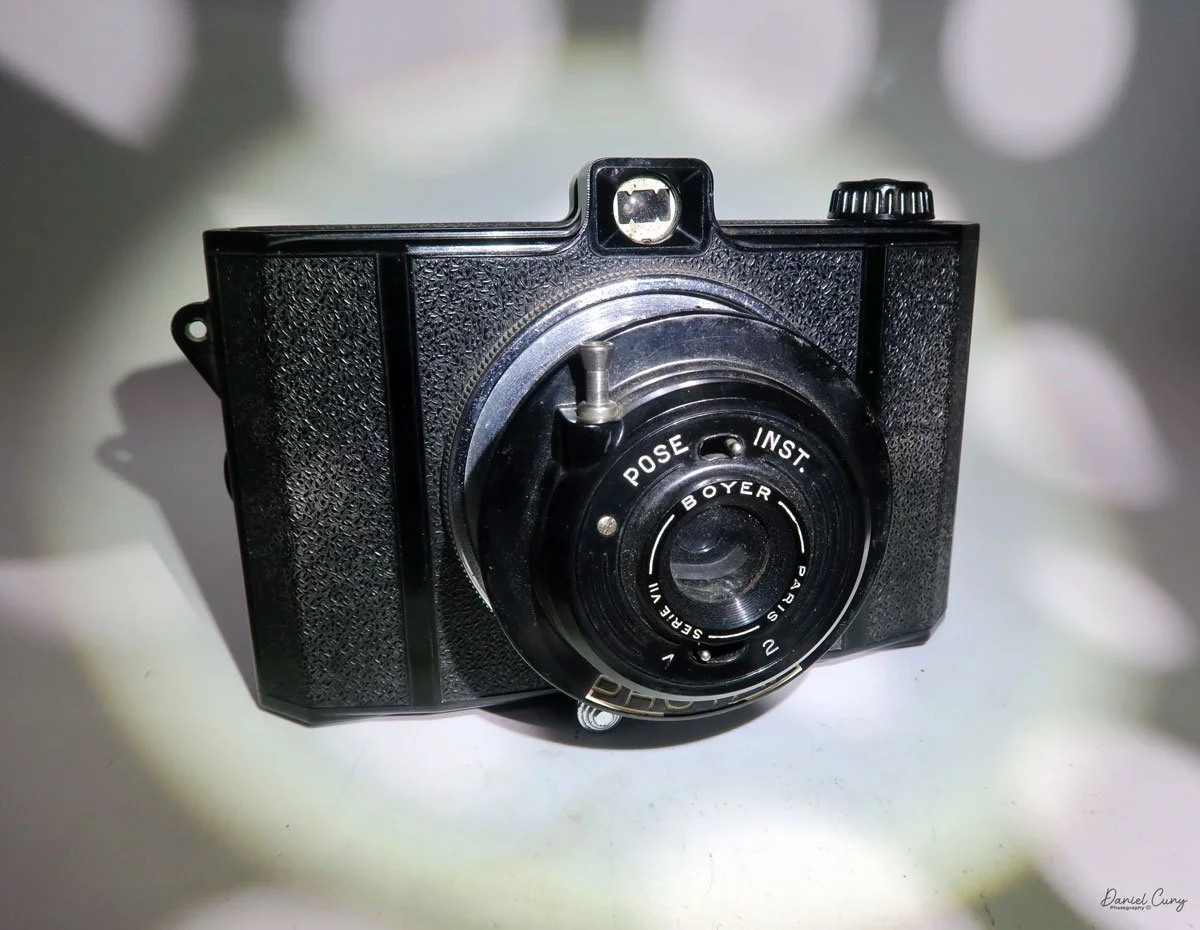
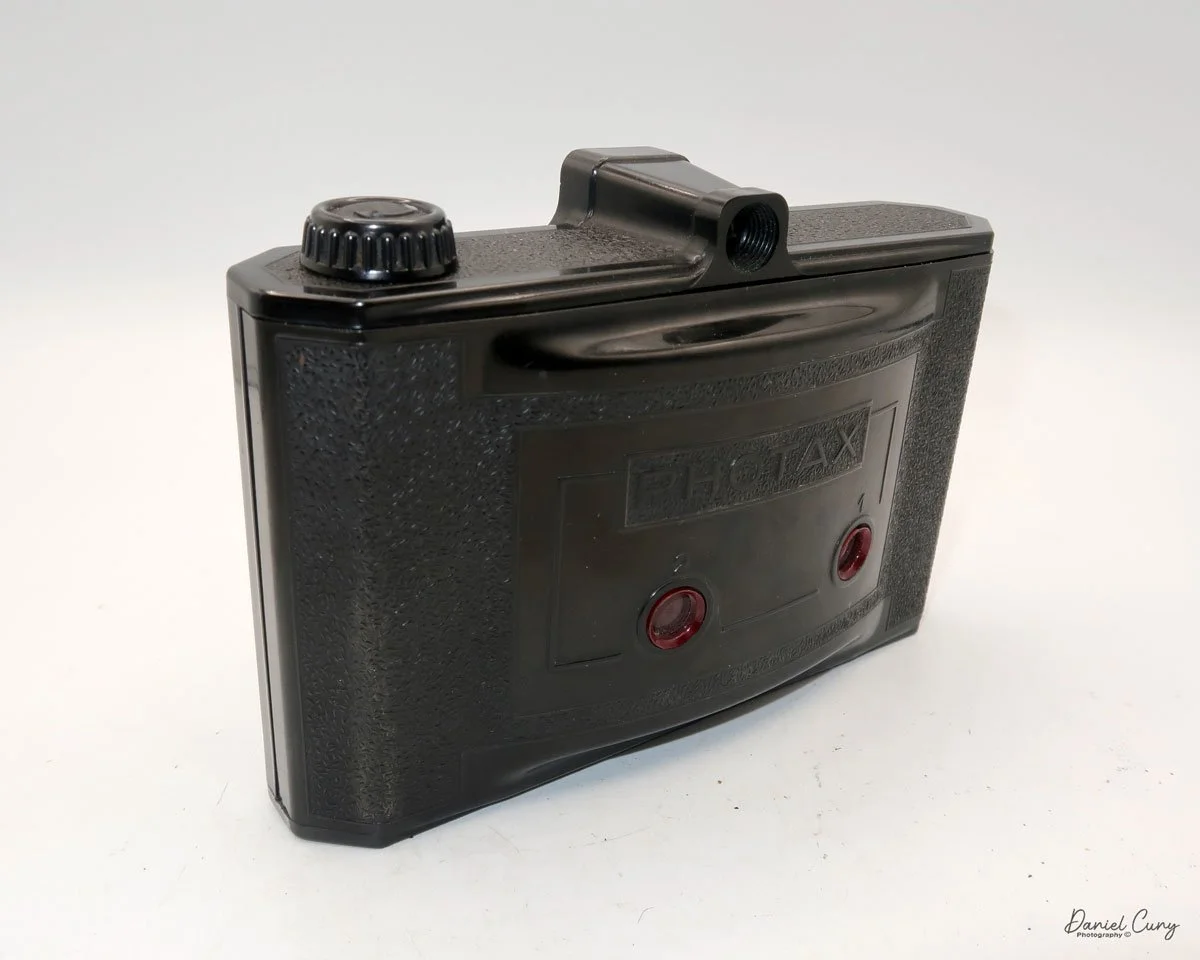
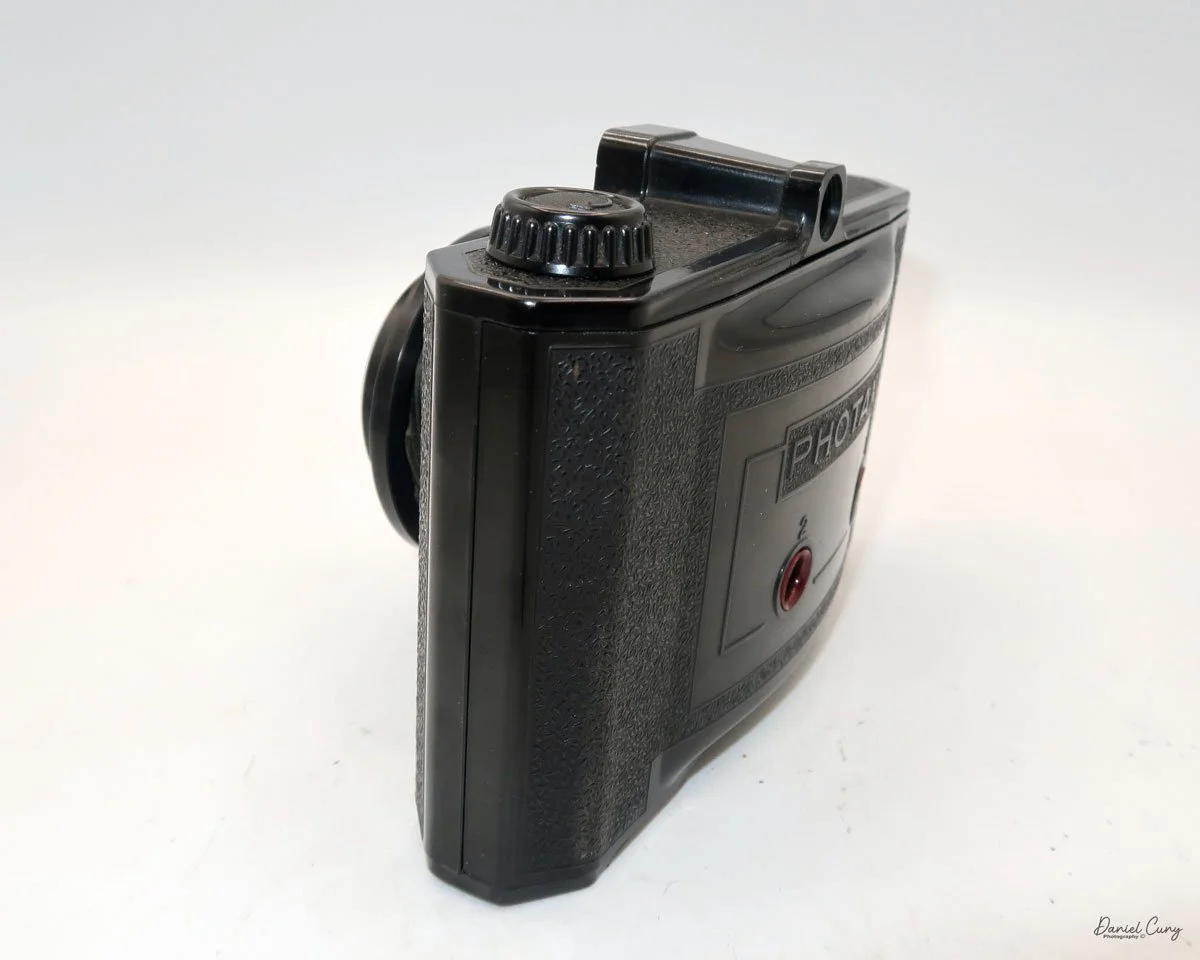
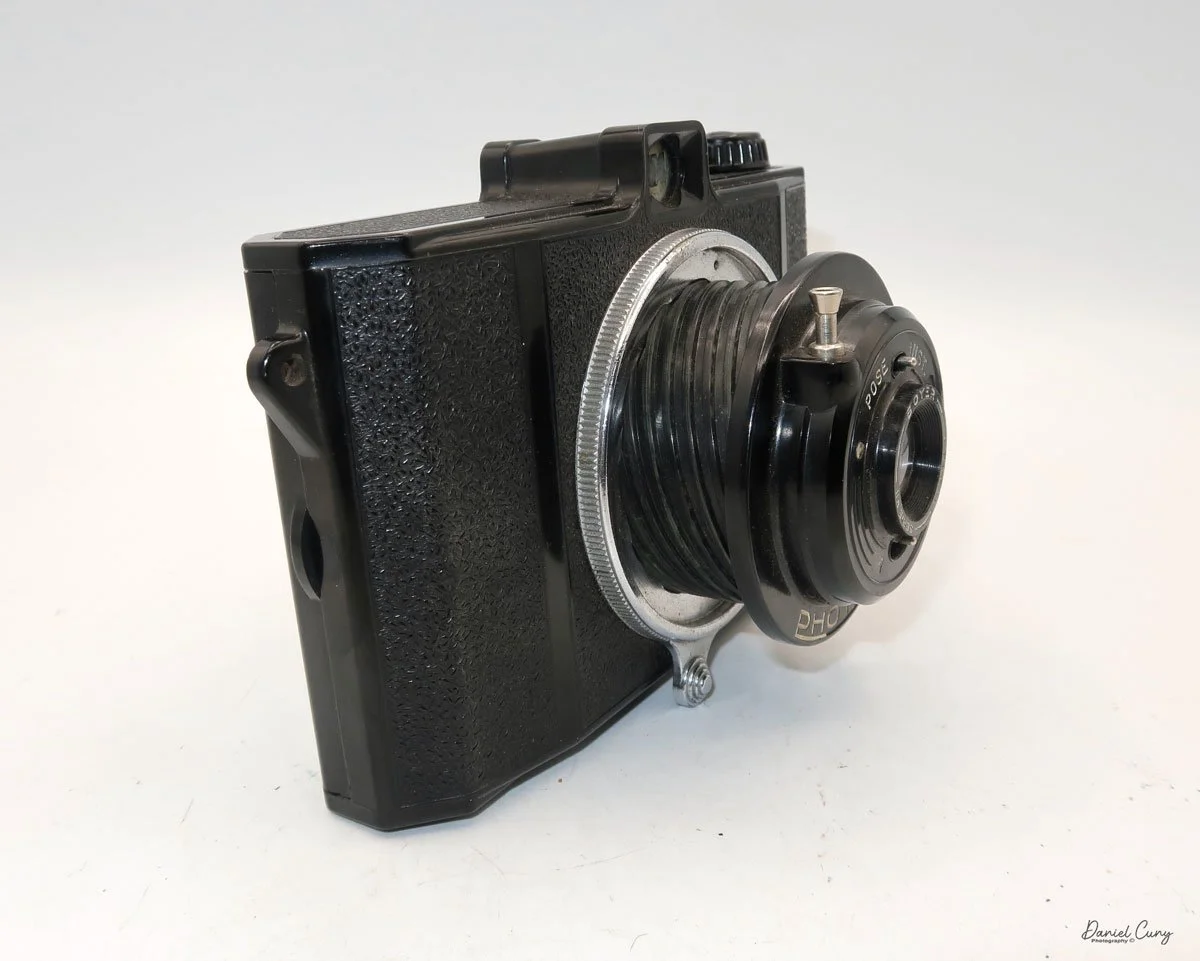
Photax 1 camera

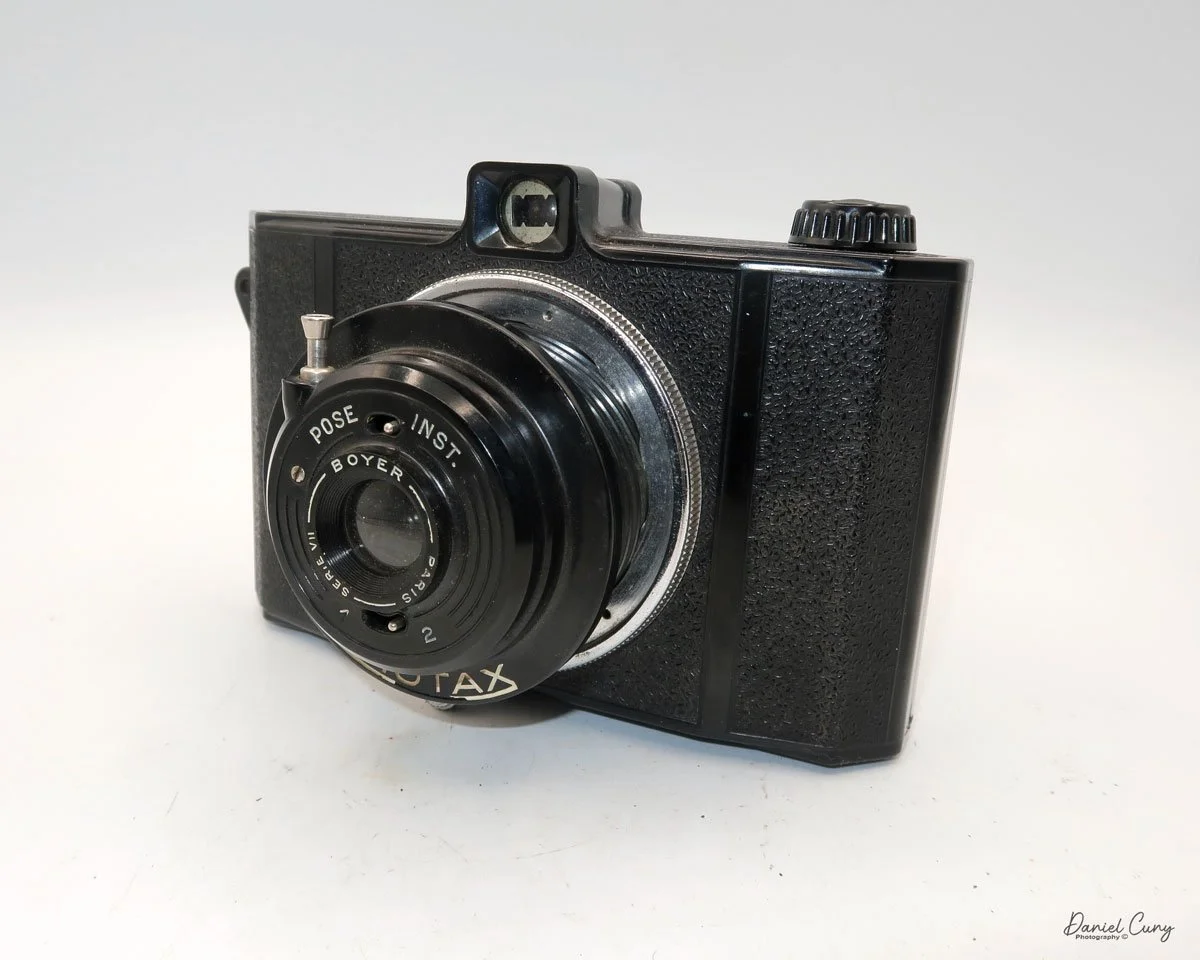
My Photax camera

This summer, as my wife and I visited Barcelona on a day when my wife was working, I decided to go to the local flea market to look for photo items to add to my collection. Attending local flea markets is something I look forward to, especially when we visit new cities and countries. My main objective was to find a camera built in Spain, which I accomplished by purchasing the Captain camera, which I reviewed earlier this year.

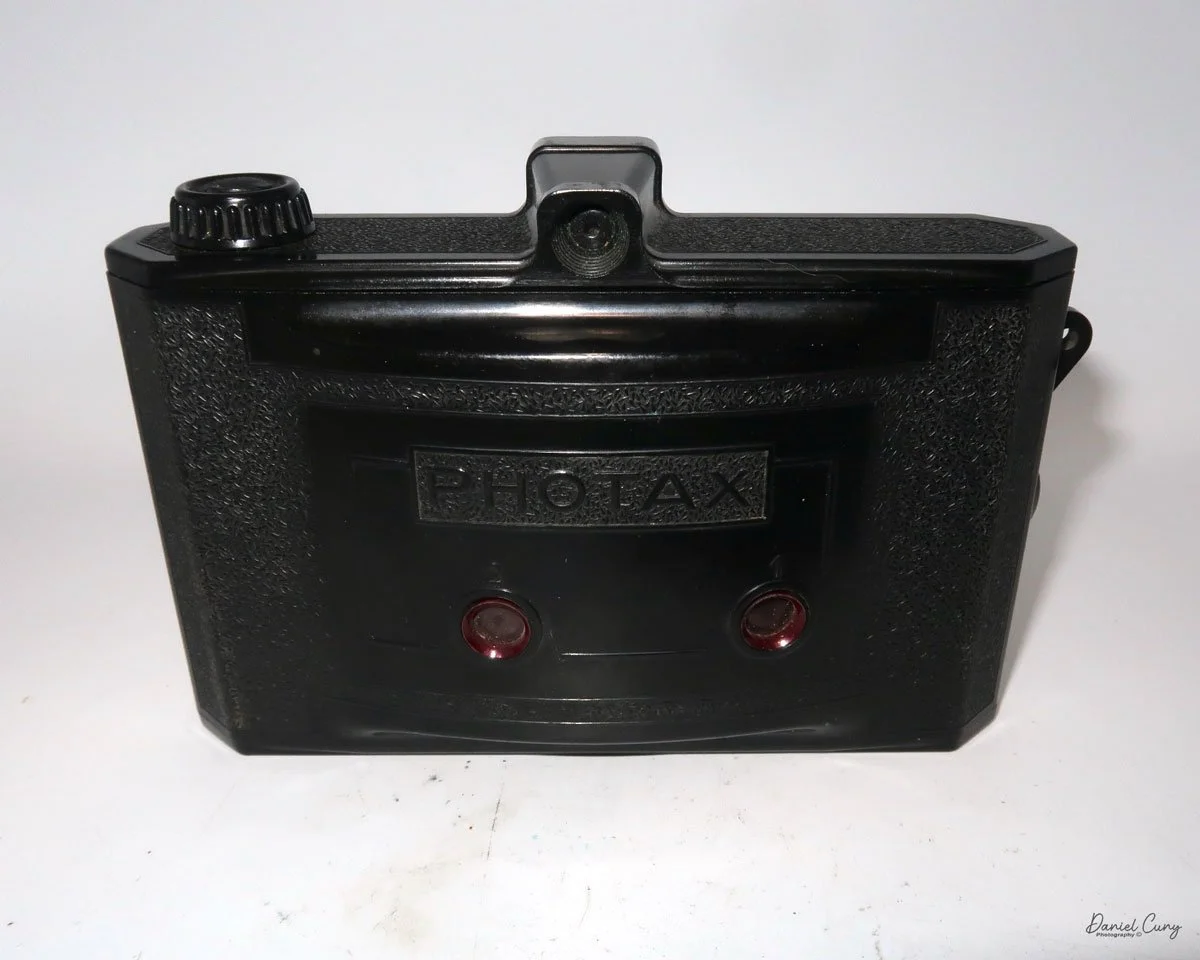
 Strolling the stalls at the flea market, I came across a very large Bakelite camera, which intrigued me. It was a Photax 1 camera made by MIOM in France. What I liked about the camera was its large size, and that came with the original fitted case. As I pulled out the camera to examine it, I noticed a very familiar twist-out style lens, and the shutter was working, which gave me confidence in my purchase. Talking to the person at Stoll about pricing for the camera, I offered a reasonably low price, which they rejected. However, they came back with a counteroffer, which I needed to consider for a while.

 As I spent more time examining different stalls and cameras. Still, my mind kept returning to the Photax 1 camera, which is the large camera with the untwisting lens. Before I left the flea market, I went back to the stall and renegotiated the price with the camera owner, coming to an agreeable price and purchasing the camera.

 This camera was one that I wanted to write about. It's an unusual-shaped camera made of Bakelite and is quite large. When I opened the back of the camera, I noticed that it was a 6 x 9 cm format, which intrigued me. Many of the cameras made by 

MIOM we're a smaller format, generally 6 x 4.5 cm.

 Let me tell you a little bit about the company.

History:

 MIOM (Manufacture d'Instruments d'Optique et de Mécanique) was a French company known for producing optical and mechanical instruments in the mid-20th century, particularly cameras. The firm operated mainly from the post-World War II era into the 1960s, a time when France was striving to rebuild its industrial base and compete in the rapidly evolving consumer goods market.

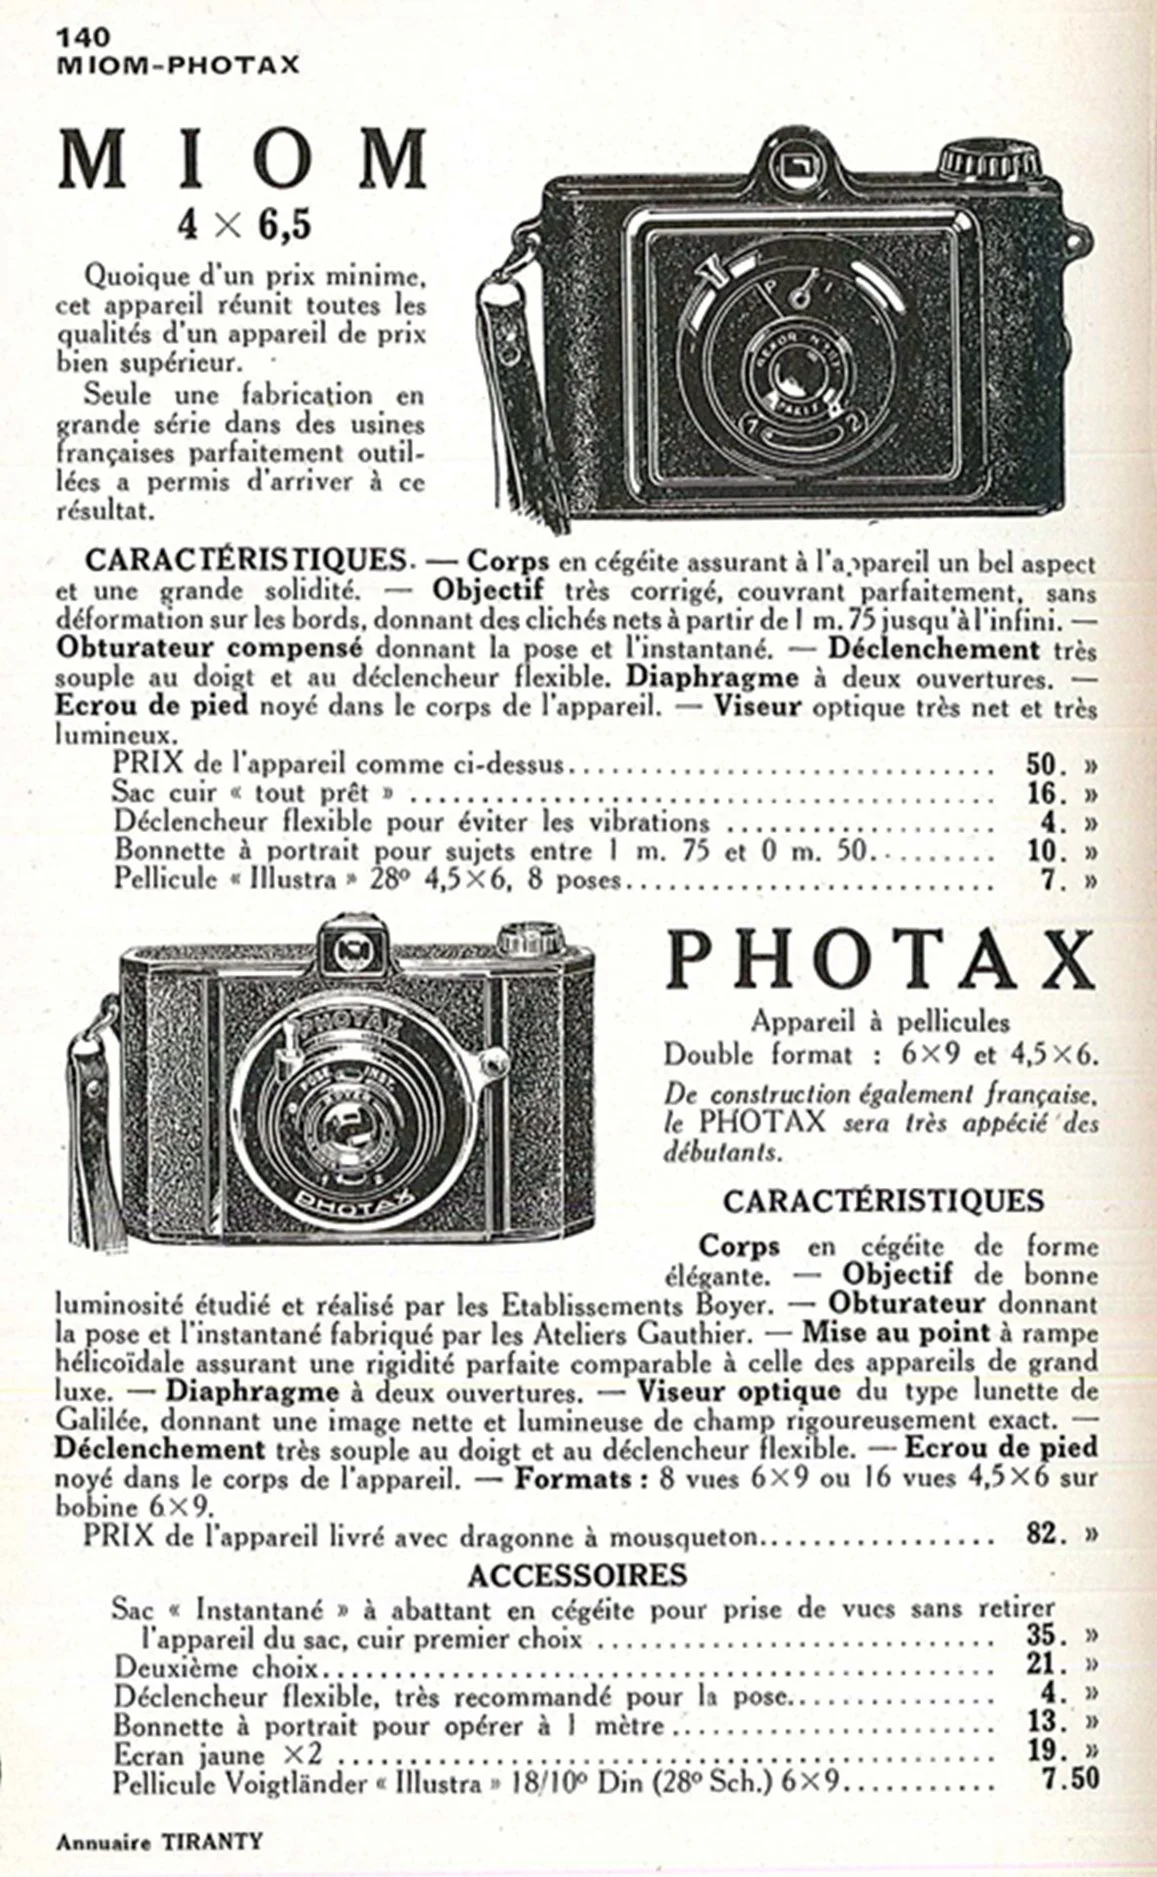
French Photax ad

 MIOM's roots were in precision engineering, and the company initially focused on optical devices before expanding into the field of photographic equipment. Its location in France allowed it to tap into a tradition of fine optical craftsmanship, drawing on expertise that had developed in Paris and other industrial centers since the 19th century.

 In the camera field, MIOM was best known for manufacturing compact and affordable models aimed at the amateur photography market. Among their most recognizable products was the MIOM Photax series—a line of simple, durable cameras using roll film. The Photax models often featured Bakelite bodies, a lightweight and inexpensive molded plastic popular in mid-century camera production. These cameras were designed for ease of use, appealing to the growing middle class and to families seeking to document their lives without investing in complex photographic gear.

 The Photax range evolved over the years, with various iterations accommodating different film formats, primarily 6×9 cm images on 120 roll film, and later 4.5×6 cm formats. Some models incorporated basic focusing and exposure controls, while others remained strictly fixed-focus, point-and-shoot devices. Though not technically advanced compared to contemporary offerings from Germany or Japan, MIOM's cameras were reliable, affordable, and accessible, helping to democratize photography in France.

 MIOM also ventured into specialized cameras, including stereo models, reflecting the brief postwar enthusiasm for 3D photography. Their designs maintained the company's hallmark of straightforward construction and modest pricing.

By the late 1960s, increasing competition from Japanese manufacturers, whose products offered superior optics and more advanced features at competitive prices, had eroded MIOM's market position. The brand gradually faded, and production ceased as the company either closed or shifted away from photographic equipment.

 Today, MIOM's cameras—especially the early Bakelite Photax models—are collected for their retro aesthetic and as examples of France's postwar consumer design. While they may never have rivaled the technical prowess of major brands, MIOM's work remains an essential chapter in the history of accessible, everyday photography.

 Below is a timeline outlining the evolution of MIOM's Photax camera series.

 1937 – Photax I- MIOM launches its photographic division with several models, including the original Photax (also branded as Camera 77, Loisirs), all of which use 120 film for 6×9 cm images. The Photax I is recognizable by its centrally positioned shutter button and Guillotine shutter, which offers two speeds. 

1938 – Photax II (and Blindé variant)- Introduced in 1938, the Photax II adopts the Boyer Serie VIII meniscus lens and maintains the simple two-speed shutter design. A "blindé" version appears—with a protective Bakelite lens cover that also shields the shutter release. 

1947 – Photax III- Following World War II, MIOM debuts the Photax III, featuring a threaded shutter release and leveraging the same Boyer Serie VIII lens. It introduces additional shutter settings (1/25 sec, 1/100 sec, and T) and continues to use the 620 film format. 

1951 – Photax IV (and IV F)- The Photax IV arrives with a Boyer Rexar meniscus lens and identical shutter options as the III, with enhanced flash synchronization. The IV F variant includes flash sync capabilities via a RIM shutter. 

1955 – Photax V- A stylish redesign marks the launch of Photax V in 1955. It features a modernized Bakelite aesthetic, bi-format capability (6×9 and 6×6 cm), and upgrades to an Angénieux Heanar Type V lens with full flash sync via RIM shutter 

1960–1962 – Photax VI -The final model in the Photax lineage, produced between 1960 and 1962, transitions from Bakelite to molded plastic, featuring a sleek, streamlined design. It's a square-format 6×6 medium-format camera that utilizes an Angénieux Heanar Type VI lens and RIM shutter with flash synchronization.


My Camera:

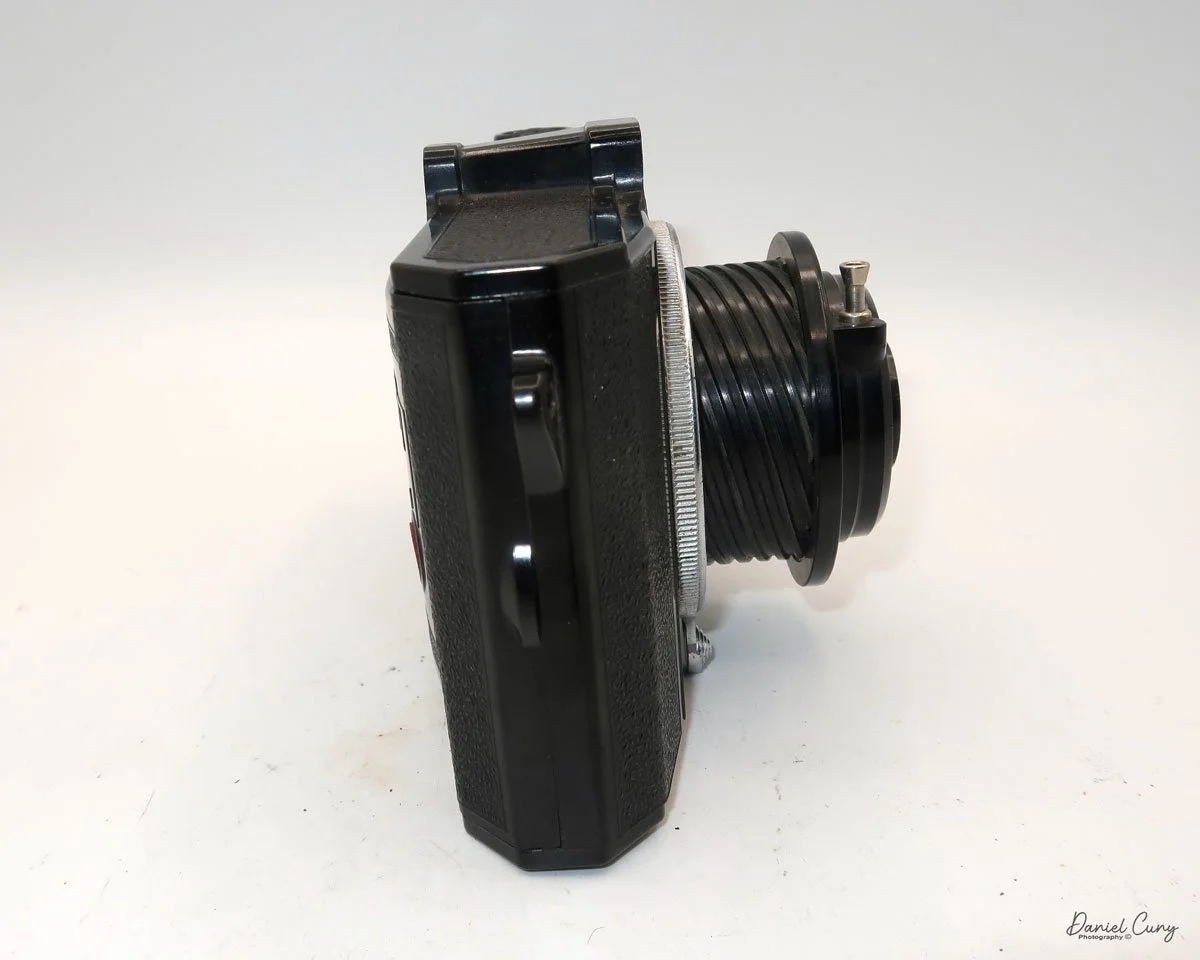
 My camera is 6 1/2 inches wide by 4 1/2 inches tall by 4 inches deep when the lens is unscrewed. In its closed position, the lens is 3 1/4 inches long. Without the case, my camera weighs 1 pound, 2.7 ounces.  The lens on the camera is a Boyer, Series VII lens.

The Photax 1 was produced for approximately one to two years, from 1939 to 1940. The Photax 1 camera uses 120 film, a departure from MIOM's earlier cameras, which used 127 film. As I mentioned earlier, this is a 6 x 9 cm format camera. The Photax 1 was sold with a film mask that allowed the photographer to shoot in the 6 x 4.5 cm format. Unfortunately, when I purchased this camera, the mask was missing, so my camera is only compatible with the 6 x 9 format.

 To extend the lines, there is a chrome ring around the lens with a knob at its top. Twist the ring clockwise, and the lens, which is on a helical screw, unscrews and moves into the taking position. The camera's controls are fundamental. There are only two shutter settings. One is "INST", which is for normal snapshots, and "POSE", which is for time exposures. These are changed by a little switch between the two settings. To control the aperture. There is a similar switch beneath the lens. One setting is the larger aperture, which is number one, and the second setting is for a smaller aperture.

There is no lock on the back of the camera to secure the back to the front of the camera body. To open the camera, on the right side, is a little foam plate that you pull away from the camera body, and the back of the camera comes off. To load the camera, follow a process similar to loading a 120 format or 120 film-style camera. The first thing you would do is to take the take-up spool from the right side of the camera and place it on the left side, under the film, and under the film advance knob. Place a fresh roll of film on the right-hand side and bring the leader over the shutter area. Insert the leader into the slot of the take-up spool and begin winding, ensuring the film advances smoothly. You turn the advance knob until you see "start" on the film's paper backing. At this point, put the back on the camera by just pressing it onto the camera‘s body.

At this point, wind the film advance knob until you see the number 1 in the first window, which is designated for the 6x9cm format. For the 6 x 4.5 format, you would wind until you see the number one in the number one window. After you take the picture, wind until you see the number one in the number two window. You repeat the steps through number eight, which would be the end of the roll of film. For 6 x 9 cm format images, you get eight images per roll. For 6 x 4.5 cm format, you get 16 pictures per roll of film. 

Fitted case for Photax 1 camera. Note the large plastic front cover.

 IMPORTANT: Be sure to turn the chrome ring so that your lenses are in the taking position before you start taking photographs. Failure to do this will result in your pictures being incredibly out of focus. On other MIOM cameras, if the lens is in the transport position, the shutter will not work. Unfortunately, with this camera, the shutter works when the lens is in the retracted or transporting position.

 The viewfinder on top of the camera is tiny, making it difficult to view your subject when framing your photograph. To take your photograph, the shutter release is located in the upper right-hand corner of the lens. Press the shutter button to take your picture. My camera has a cable release socket, and on the bottom of the camera, there is a tripod socket as well.

My Results:

 I cleaned the lens on the camera, loaded a fresh roll of 120 film, and took a walk around the neighborhood to see how this camera would perform.

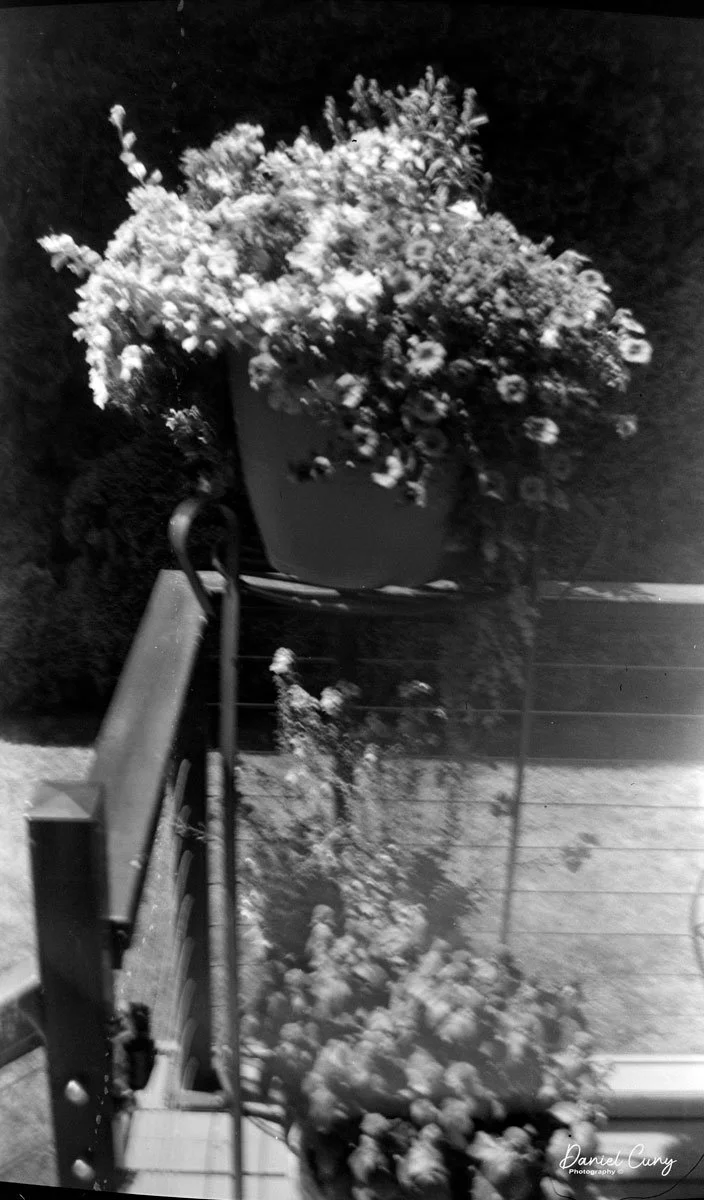
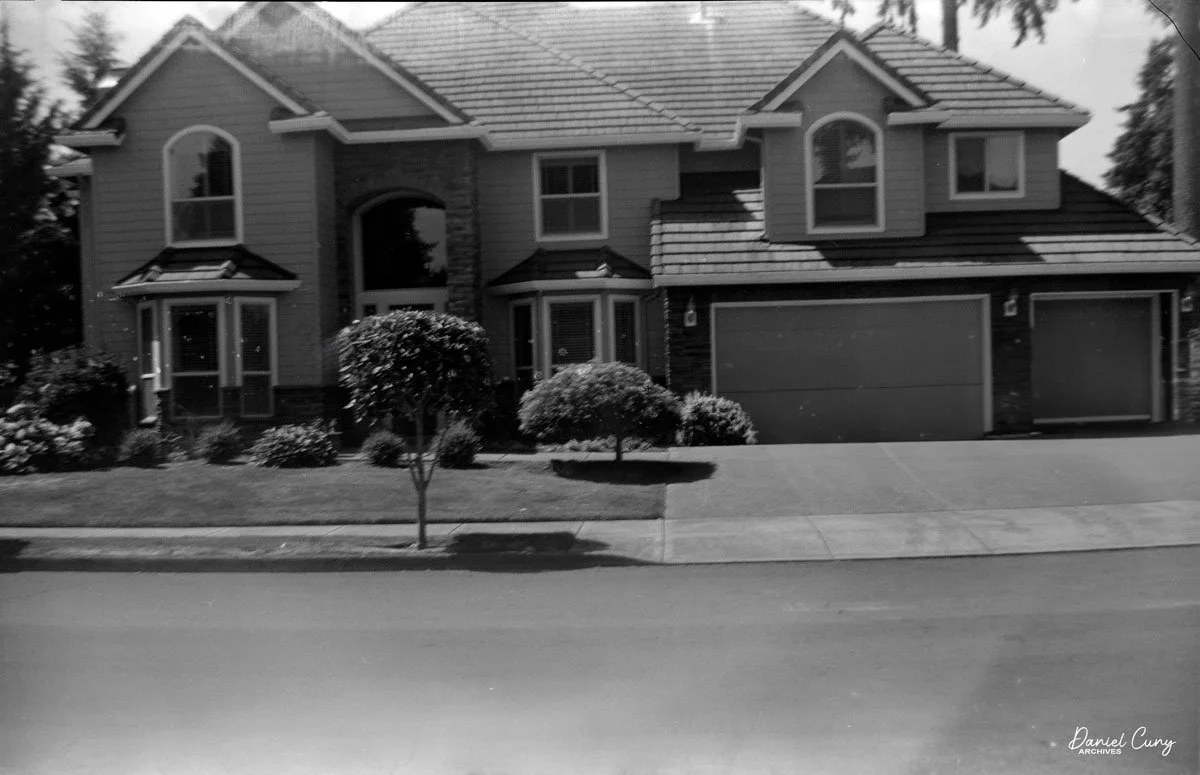
 For 100% transparency. I broke my arm two days before I took these photographs. It was challenging to hold the camera while taking the photos, so some of the blur or out-of-focus images may have been caused by camera movement.

 Here are the results.

Conclusion:

 The images produced by the camera were disappointing. I'm not sure if the blur in the

photo was caused by my lack of holding the camera still. According to the information on the back of the camera, the minimum focus distance is approximately 1 m. Many of the photographs I took, I tried to be more than 1 m away from the subject.

 Due to the sunny situation, having only one shutter speed to work with, and using the smallest aperture, the photographs are unimpressive. At this point, I'm not sure I'll use this camera again due to the quality of the images, which I found disappointing, especially considering it's a 6x9 format camera.

 Thank you for taking the time to read about this interesting Camera from France, built in the late 1930s. 

 If you're interested in seeing other camera reviews, click the link.

 I also have a store on eBay where I sell some of the cameras reviewed, along with a host of other photo items, Cuny's Camera & Photo.

 Until next time, please be safe.

Corfield Periflex Camera

The Corfield Periflex is a relatively new camera to my collection. I've only had it for a few months, but I've desired to own one for many years. The opportunity arose to purchase one of the earlier models that was in good working condition and at a reasonable price for this camera in its condition, so I grabbed the opportunity and purchased it.

My Corfield Periflex Camera

 When the camera arrived, it was in good working condition and in the cosmetic condition described, so I was pleased with the purchase. I knew from purchasing the camera that my aim was to do a blog post on it, as the camera has many unique features that have not been seen in cameras before or since. 

 The Periflex is a 35mm camera with an appearance that resembles a Leica only because of the size and initial shape of the camera. Unlike the Leica cameras, the Periflex doesn't offer the photographer rangefinder focus, sprockets film advance, removable baseplate, or take-up spool, but it does offer the same lens thread mount and excellent optics in a small and compact camera made in the United Kingdom.

The Company:

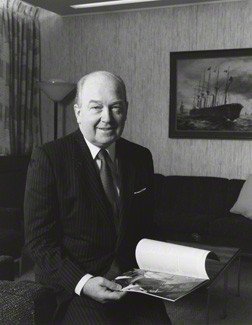
Sir Kenneth Corfield

Sir Kenneth Corfield (1924–2016) was a British engineer, entrepreneur, and photographer whose work significantly influenced the photographic industry in the UK, mainly through his company, Corfield Ltd. Known for his pioneering approach to camera design, Sir Kenneth's legacy is deeply intertwined with the Corfield Camera Company, which he founded in the mid-20th century. His innovative ideas, especially those focused on making quality, compact cameras, helped the brand gain a reputation in the photography community, although its operations ended in the 1970s.

 Kenneth Corfield was born in the UK in 1924 and trained as an engineer. He developed a passion for cameras and photography from an early age, and this interest led him to create camera equipment designed to fill the gaps he observed in the photographic tools available at the time. His mechanical expertise and curiosity about precision instruments motivated him to create Corfield Ltd., a company that produces cameras for professional and amateur photographers alike.

 Corfield founded his company in the post-war period when there was increasing demand for affordable, portable, high-quality photographic equipment. Starting in the 1940s, Corfield Ltd. initially operated as a small workshop but soon expanded to meet the needs of a growing photography market in the UK. Unlike the more prominent, established companies primarily located in Germany and Japan, Corfield's British roots gave his products a unique appeal in the domestic market. They also partnered with British Optical Lens Co. in Walsall, which designed and made the Lumar optics for Corfield.

Ad for the Corfield Camera

The company's first significant product was the Periflex, introduced in 1953. This camera became known for its innovative use of a periscope-type viewing system. This device made the Periflex one of the more unique 35mm cameras available at the time, as it allowed users to see the image through the lens without needing an expensive reflex mirror. The camera was compact, affordable, and relatively simple compared to other rangefinders, and it catered to a market that wanted quality at an accessible price.

The Periflex series became the backbone of Corfield Ltd.'s reputation. The first model, the Periflex I, was followed by several iterations, including the Periflex II, III, and Gold Star. Each version introduced new features and enhancements to meet photographers' increasing demands, such as improved shutter speeds, lens mounts, and more durable designs. 

The defining characteristic of the Periflex cameras was the periscope-like focusing mechanism. This mechanism, placed directly above the lens, allowed photographers to focus accurately without the bulk or complexity of a traditional single-lens reflex (SLR) system. This feature made the Periflex a unique hybrid of a rangefinder and SLR qualities, appealing to those who valued compact design but still wanted accurate focus control. Although some photographers found the system unorthodox, others appreciated the camera's compactness and precision, making it popular among professionals and amateurs.

Despite its successes, Corfield Ltd. faced stiff competition from German and Japanese camera manufacturers, producing high-quality cameras on a much larger scale. Companies like Leica, Nikon, and Canon dominated the market with advanced SLRs, and Corfield's unique designs needed to catch up with the rapid technological advancements. While the Periflex series had gained a loyal following, it required more sophistication and reliability than its competitors, ultimately limiting its market appeal.

In the 1970s, Corfield Ltd. ceased producing its cameras, and the Periflex series also ended production. Although the brand did not survive, the innovations introduced by Kenneth Corfield influenced camera design and highlighted the potential for high-quality British-made photographic equipment.

Kenneth Corfield's contributions to the photographic world extended beyond his camera company. Even after Corfield Ltd. ceased operations, he remained active in the photography industry. Later in his career, Corfield was involved with Gandolfi, a British large-format camera manufacturer, and his influence continued to be felt through his consulting and design work in the field.

Corfield's legacy is remembered by photography enthusiasts and collectors who admire his innovative approach to camera design. The Periflex cameras, in particular, are valued among collectors for their uniqueness and historical significance. Sir Kenneth's work reflects a time of British ingenuity in the photographic industry. It is a testament to a small, independent company's impact on a competitive global market.

Bev Parker has a wonderful website dedicated to The Corfield Company.

My Camera:

My Corfield Periflex camera isn't the first model, as the first 200 Periflex camera had a black top and bottom plate like mine. Still, they were covered in brownish pigskin on the body. I believe mine is the third version, as the engraving has been moved to the periscope but still has the black top and bottom plate, black leatherette covering, and chrome lens.

 My Periflex camera is 5.5" wide by 3.25" tall, including the periscope, and 3.25" deep from the back of the camera to the front of the lens focused to infinity. With the standard Lumar 50mm f3.5 lens, it weighs 1 lb 1.4 oz. The camera is made from aluminum, as opposed to brass, which was a more common construction material at the time. Aluminum was easy to work with for both the body and lenses and was less expensive.

This hybrid camera doesn't have a rangefinder to focus. Still, it has a very small mirror that drops down into the camera and points out through the lens, allowing the photographer to focus on the subject, which is very similar to a single-lens reflex camera. The periscope is achieved by the center tube over the lens, which has a small knob on the back that you pull down and look through the optics on the top to view your subject.

Periscope mirror when depredded in the film chamber

I was very skeptical at first, but it does work and focuses very crisply on the subject as it should. There are some things that could be improved in this system. First, you need to open the aperture to get the brightest image to focus on, so you don't do this quickly. Once the camera is focused, you stop the lens down to the desired aperture setting to get the proper exposure, move your eye to the mounted viewfinder on the top to frame your subject, and then take the photo. Once you do it a few times, it becomes manageable. But it would be best if you remembered to reset your aperture, which I didn't do on a few frames. That's just a matter of getting to know the camera and using it more often. I DID like looking through the lens in a small compact camera to focus on the subject.

 My Periflex has shutter speeds from 1/1000 to 1/30 sec exposure times along with "B" for timed exposures. Above the shutter speed indicator is a knob that needs to be turned to cock the shutter before making an exposure. Advancing the film DOES NOT cock the shutter. These are two separate operations and are not intertwined. You do, however, need to advance the film winding lever AND cock the shutter before the camera will fire. This makes it impossible to take a double exposure on this camera. At least, I am still looking for a way to do it. The shutter release button is on the front of the camera, similar to the Topcon cameras, so it's more of a squeezing motion than a pressing down motion. There is a removable collar around the shutter release to attach a Leica-style cable release for time exposures.

Top view of Corfield Periflex. from L-R, Rewind knob, Removable viewfinder, Periscope mirror, Shutter speed dial with Shutter cocking knob, Rewind button, Film advance knob

Another oddity about my camera is that I didn’t discover it until after I had shot all the photos for this post. I didn’t think there were aperture settings on the lens, but after I reread the instruction manual, there is a small black mark on the lens that goes along the depth of field scale which indicates what aperture you’re using. Looking at the Corfield Periflex instruction manual, they discuss apertures and depth of field, but there is where the aperture settings are. All my exposures were guesses of the size of the aperture needed. The focus on my lens is smooth, the aperture ring moves well, too, and the Lumar lens system has a Leica Thread mount, so the advantage is you can use any LTM lens with this camera.


Loading the film is very simple, and there is another camera oddity in the loading process on the camera. To open the back to load the film, you turn the chrome circle on the camera next to the tripod socket until the arrow points to the white dot. Once that is done, the camera's back will slide downward, exposing the film chamber. I first noticed that there was no drive gear to advance the film, and the take-up spool (drum) on the camera was much larger than the usual 35mm cameras on the market. The take-up spool is actually a drum that advances 180 degrees per wind of the film advance, so as the film is pulled and wrapped around the drum, the spacing of the film frames becomes more significant as you go from the first to the last frame.

Once the film is loaded, you slide the back into position on the camera and turn the chrome wheel on the bottom away from the white dot to lock the back onto the camera. When finished taking the roll of photos, rewind the film back into the film cassette. The drum/take-up spool release is a small chrome button between the shutter and film advance knobs. Press that button down, and you can rewind the film back into the cassette for processing.

My results:

I took the camera for a walk in the neighborhood on a sunny afternoon to see what I could do with the camera. It took some time to think about the metering process on the subject. Opening the aperture, setting the shutter speed, pressing down the periscope to focus (which was fun and easy), resetting the aperture to a size opening I thought might be the correct aperture size, putting the viewfinder to my eye to compose the photo, then taking the photo. Certainly not like cameras today with autofocus, automatic light meter settings, etc. You slow down, take your time and compose the shot, which I enjoy doing.

Here are a few of the images from the camera.

Conclusion:

I enjoyed shooting with the Corfield Periflex. It slows you down and makes you think about the process of creating an image rather than taking one. Not that the photos shown are any works of art, but I like the slower and more methodical process of taking the photo.

 The camera is small and compact, has the shutter speeds needed, and has good optical sharpness. After finding where the aperture settings are, it makes more sense on how to do the aperture settings. I only wish I knew that before using the camera for the first time.

 Thank you for taking a few minutes from your day to read my review of the Corfield Periflex, a gem of a camera. 

 Until next week, please be safe.
Seagull 4 Twin Lens Reflex Camera

It's been far too long since my last blog posting. I will do better by bringing cameras from my collection back to the forefront of my camera collection.

My camera with great leather case.

Last fall, sometime around October, I spotted a very underused and, more so, underappreciated camera on my shelves. It's from a camera company I rarely see written about. I'm writing this post about the Shanghai Seagull 4 Twin Lens camera.

HISTORY:

In my research on the Shanghai Seagull Camera Co., There's not a lot of information on the company. The camera industry in China is new and rarely shown due to the country's small number of camera companies. At least this is true in the Western world due to the Cold War and the frosty relations we had with China before Nixon's visit in 1972.

From the information found, the Shanghai Camera Company started in 1958 in Shanghai, China, and is considered the oldest camera company in China. They made several different cameras, from Twin Lens Reflex to 35mm cameras, which my father brought home for me back in the early 1970s, to folding cameras. There were many upgrades to the Seagull TLR line, and I'm not 100% sure of my model, but it's early. Most likely, it was sometime in the late 1960s or early 1970s.

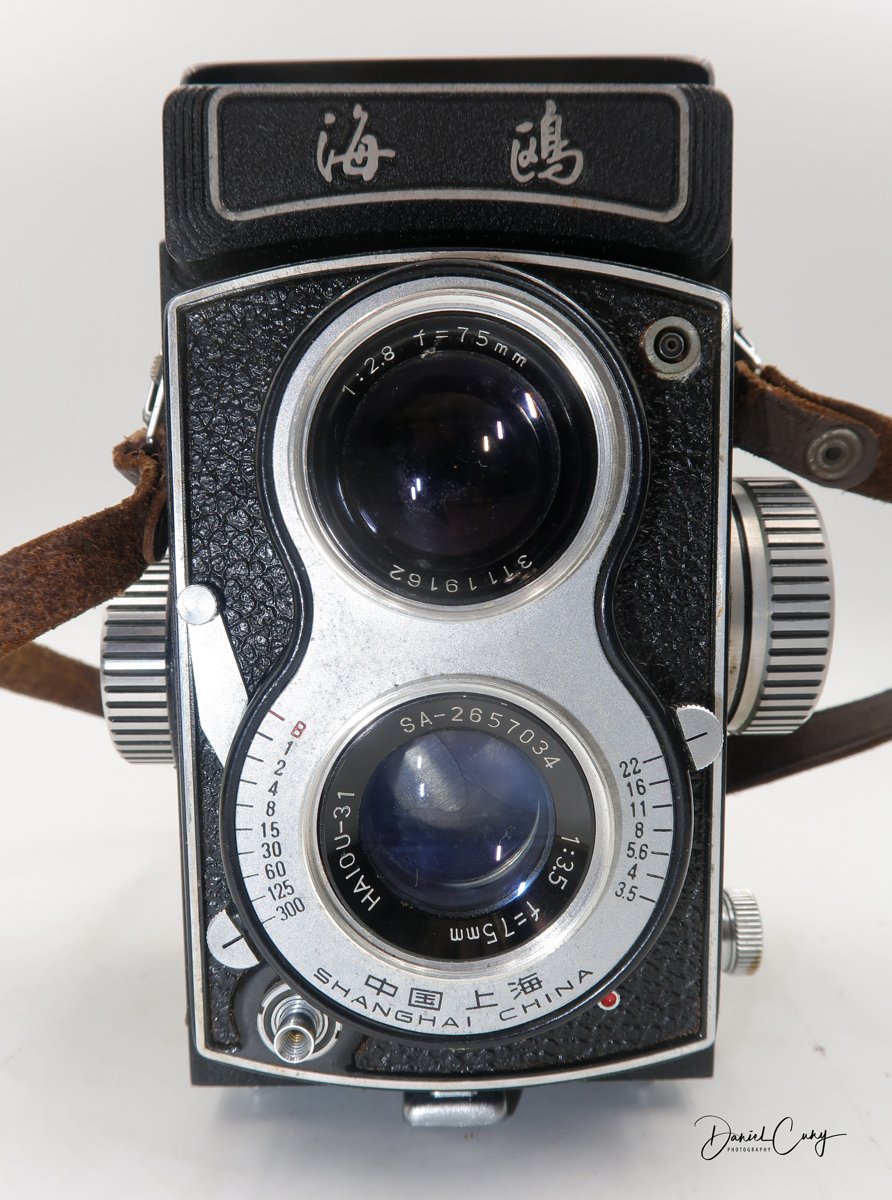
Front view of Seagull 4

A new Shanghai Seagull Digital Camera Co. Ltd. started in January 2011. They state they absorbed the R&D and manufacturing of Shanghai Camera General Factory, which has a nearly 60 years history. They manufacture UAV digital cameras for observation and tactical planning, so I'm guessing they are drones.


THE CAMERA:

I've always enjoyed shooting with twin-lens reflex cameras. It was the first type of camera I owned. I shot weddings with TLR, and still, to this day, I enjoy looking through the viewfinder and popping up the magnifier to double-check focus.

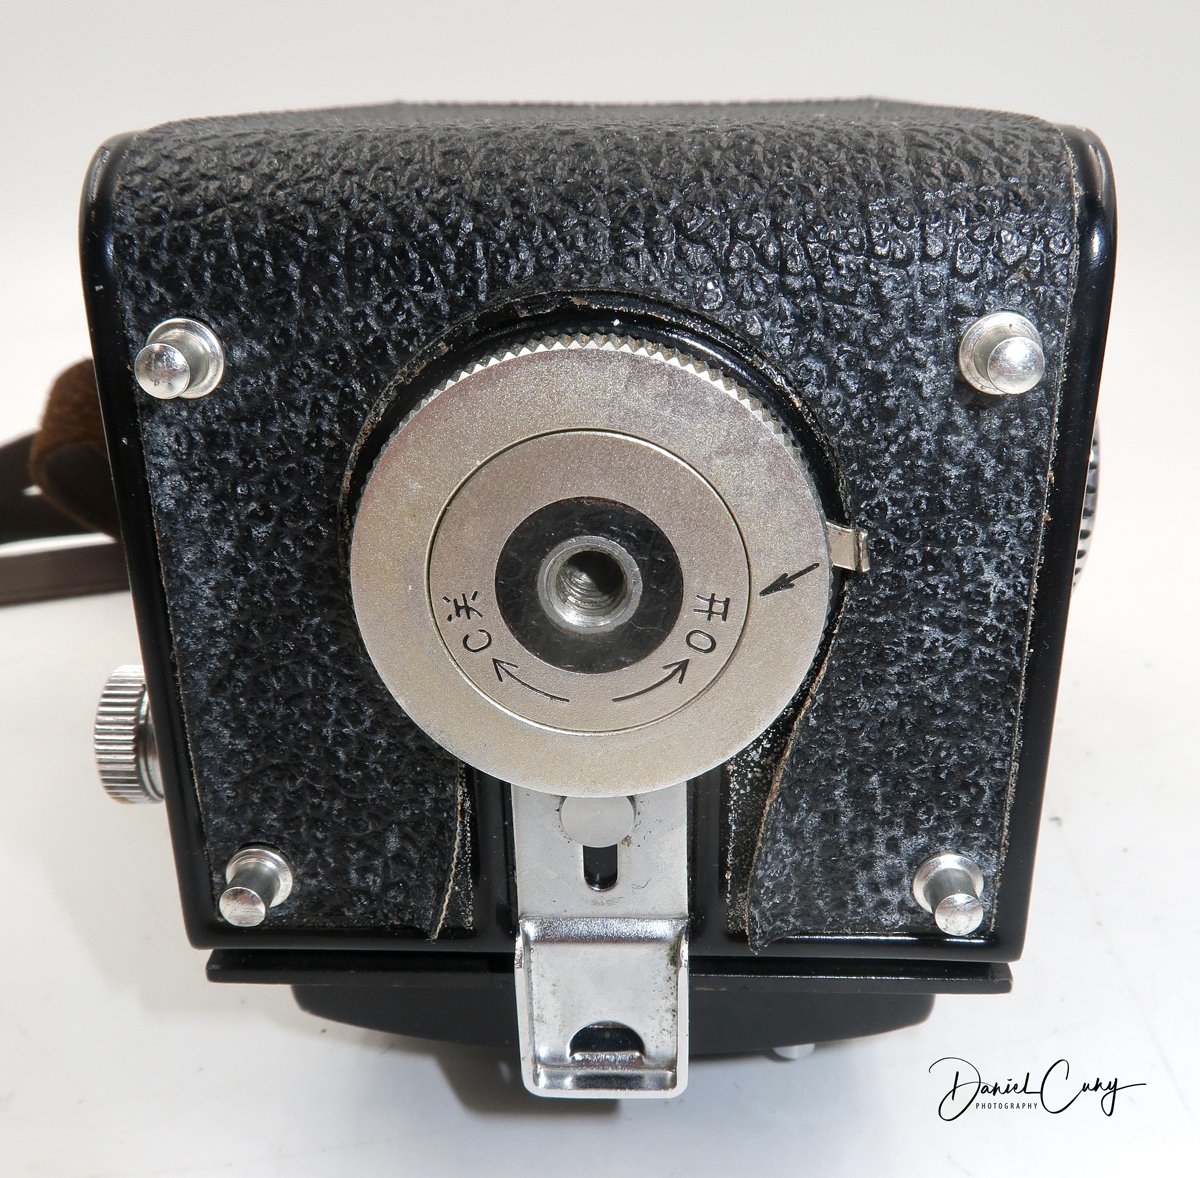
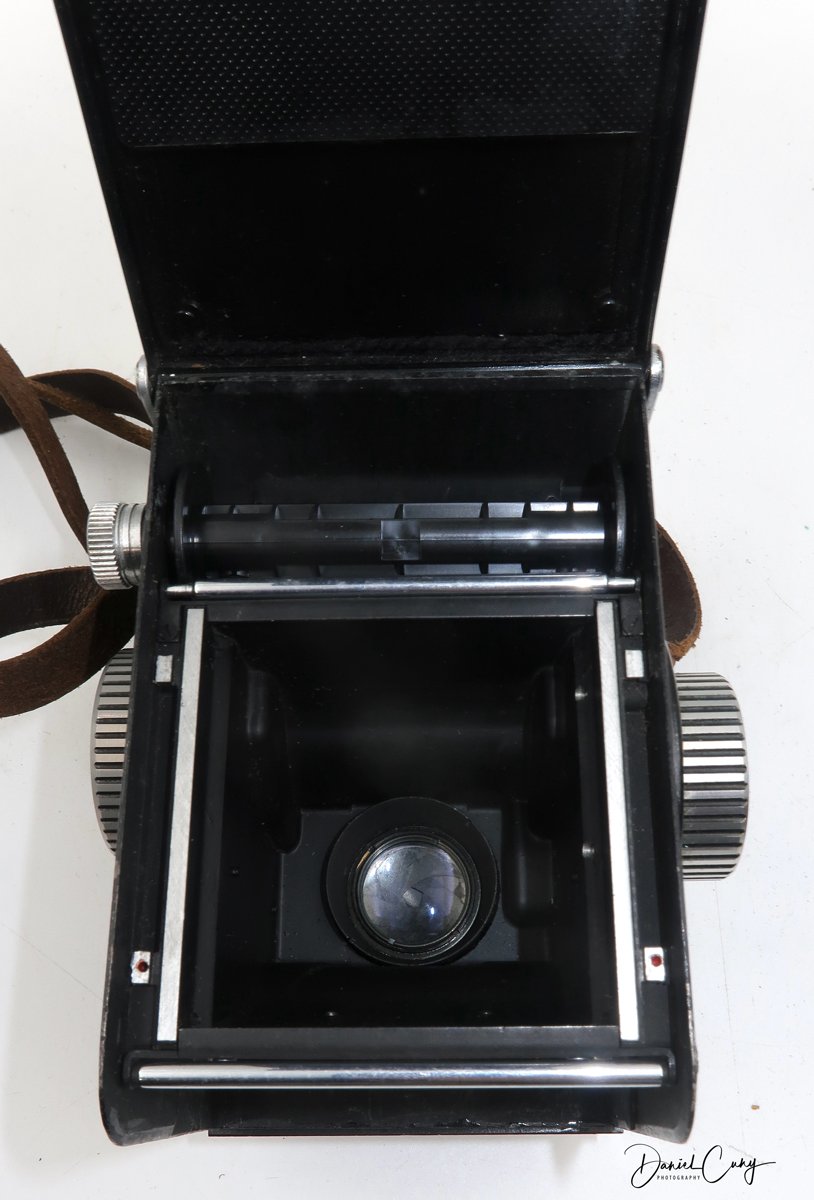
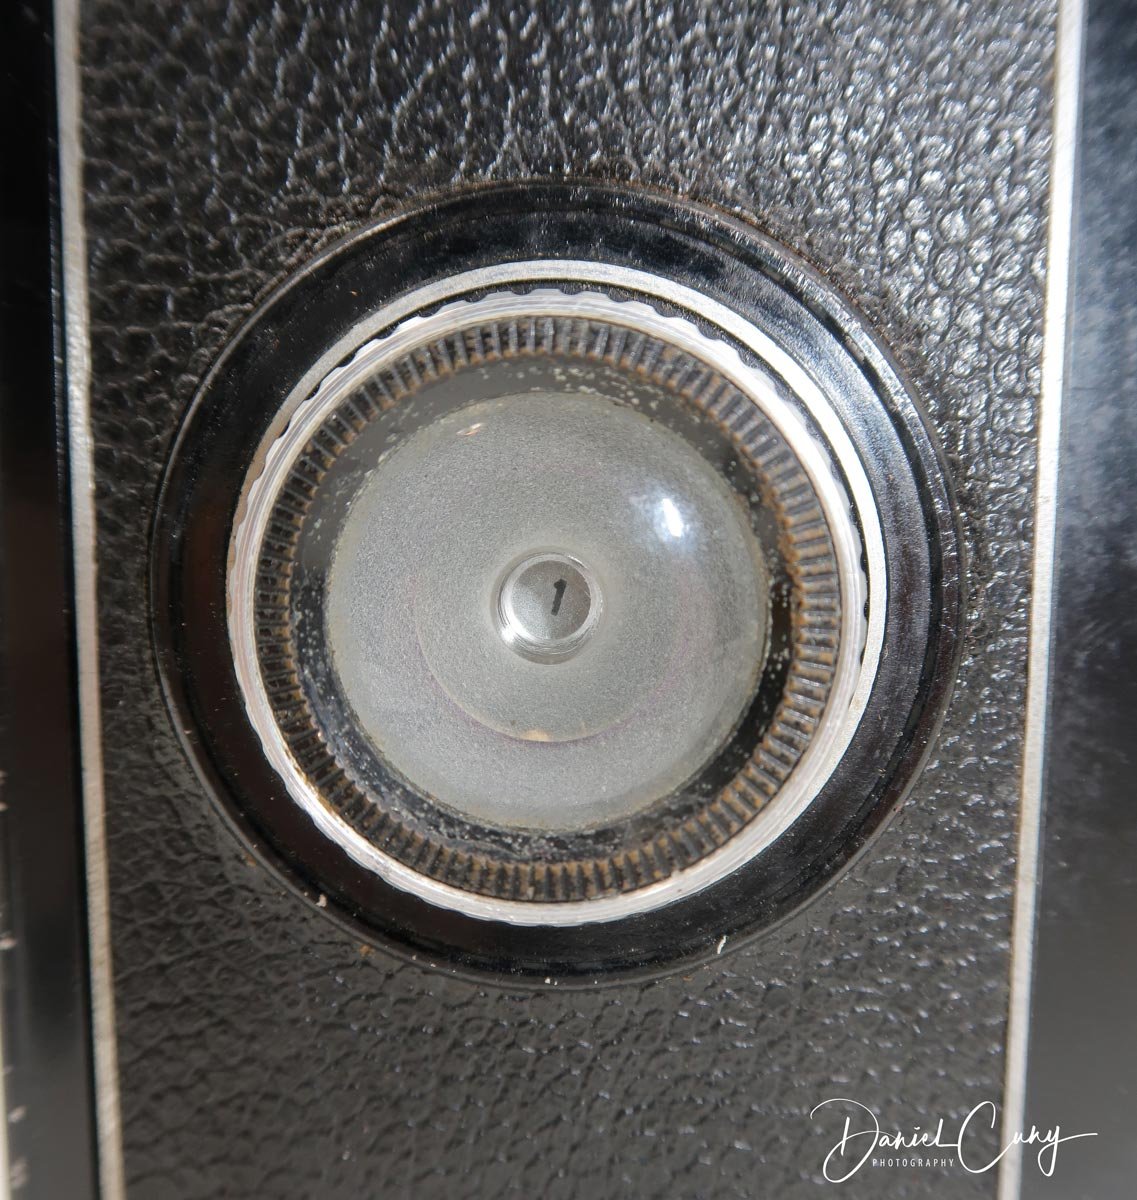
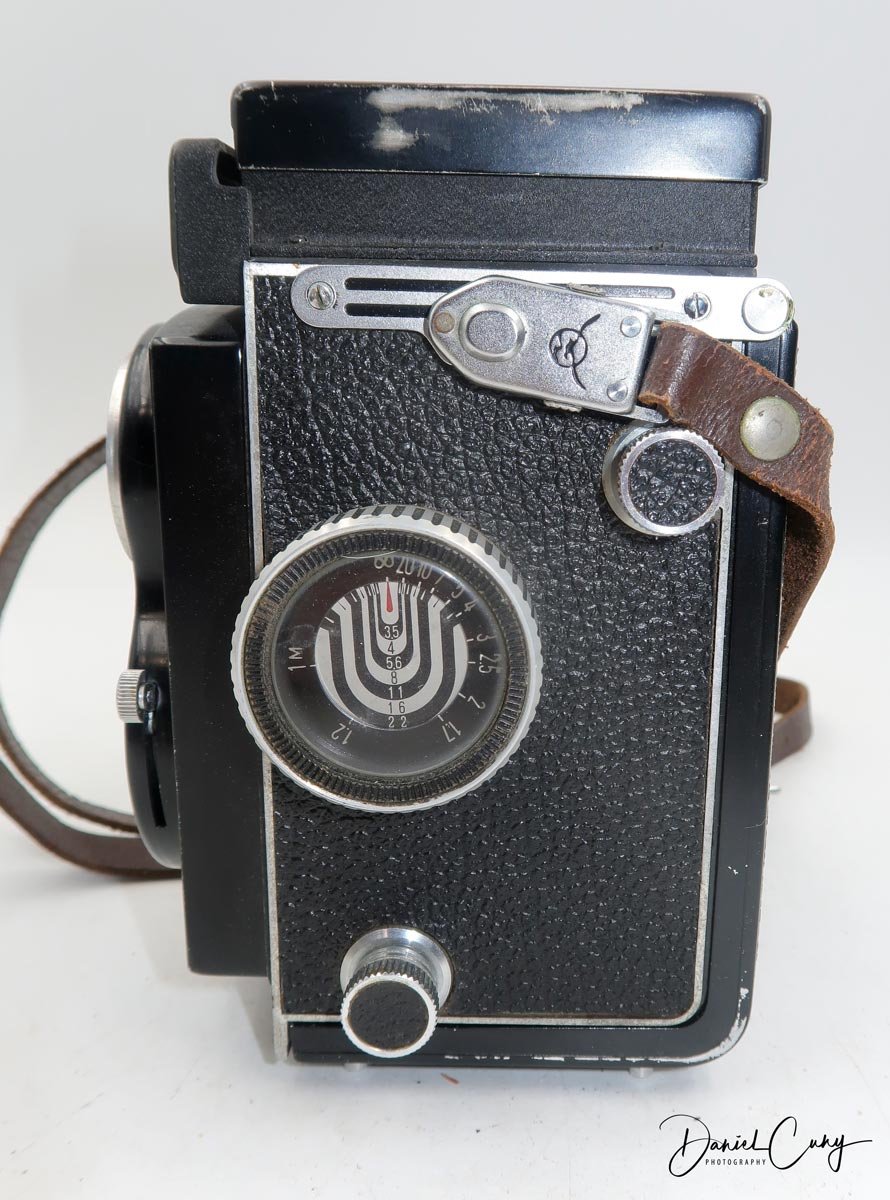
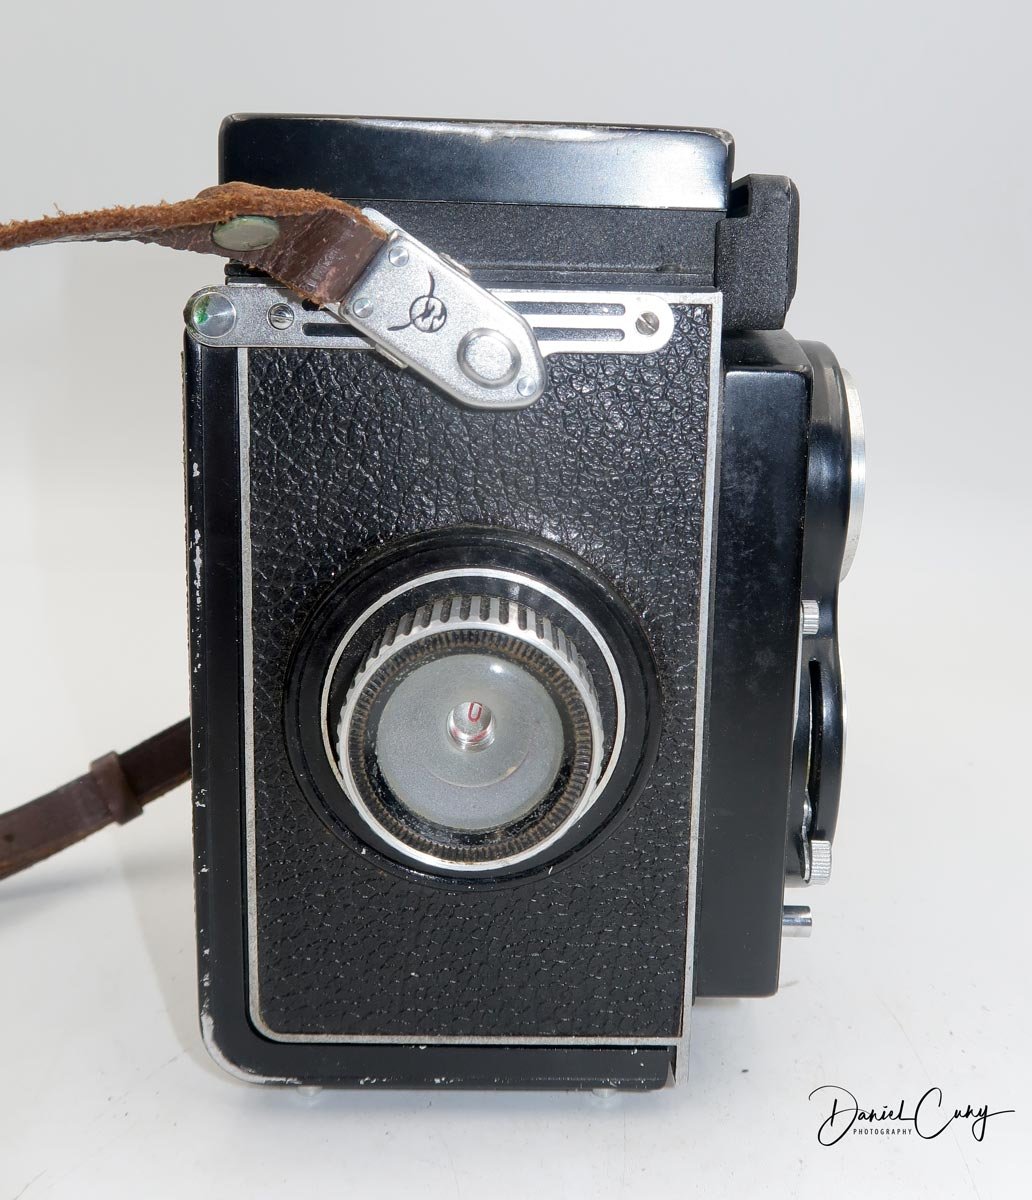
To open the back to load the film. You pull down a small locking pin before turning the dial to open the back of the camera. This is a nice feature, so you don't accidentally turn the dial to open the back, exposing your film. I've not seen that on other cameras, so I'm unsure how helpful this is. When you open the back, the frame counter, which is located on the right side of the camera as you're holding it, resets to "0".

After conventionally loading the film, move the empty spool from the bottom of the camera to the top and put the fresh roll on the bottom. I am then threading over the lens area and onto the top spool. Turing the winding lever until you see the arrows from the paper backing pointing outwards. I close the back of the camera and wind the transport lever until the winding stops, and looking at the frame counter, I'm at number 1.

Here's where the camera gets a bit odd, and you'll need to determine the best way to proceed with your shooting. There is no double exposure prevention mechanism on this camera. I had maybe 7 or 8 double-exposed photos the first time I shot with it.

On the front of the camera is the average shutter speeds ranging from 1/300 to 1 sec. Along with "B". The shutter speed is set by sliding a button up or down until the marking along the lens points to the desired shutter speed. On the other side of the lens is a similar button with aperture settings from f3.5 to f22. You slide up or down to get to the desired aperture setting. This camera has no meter, so an external meter is needed.

Next to the shutter speed button is a longish bar with a knob on it which you press down to cock the shutter. Once cocked, you can press the shutter release button on the bottom right of the camera to expose your film. As mentioned above, you can do this as many times as you want to on the same photo. You'll need to either wind to your next frame, then cock the shutter and fire, or wind to your next frame just after taking a photo.

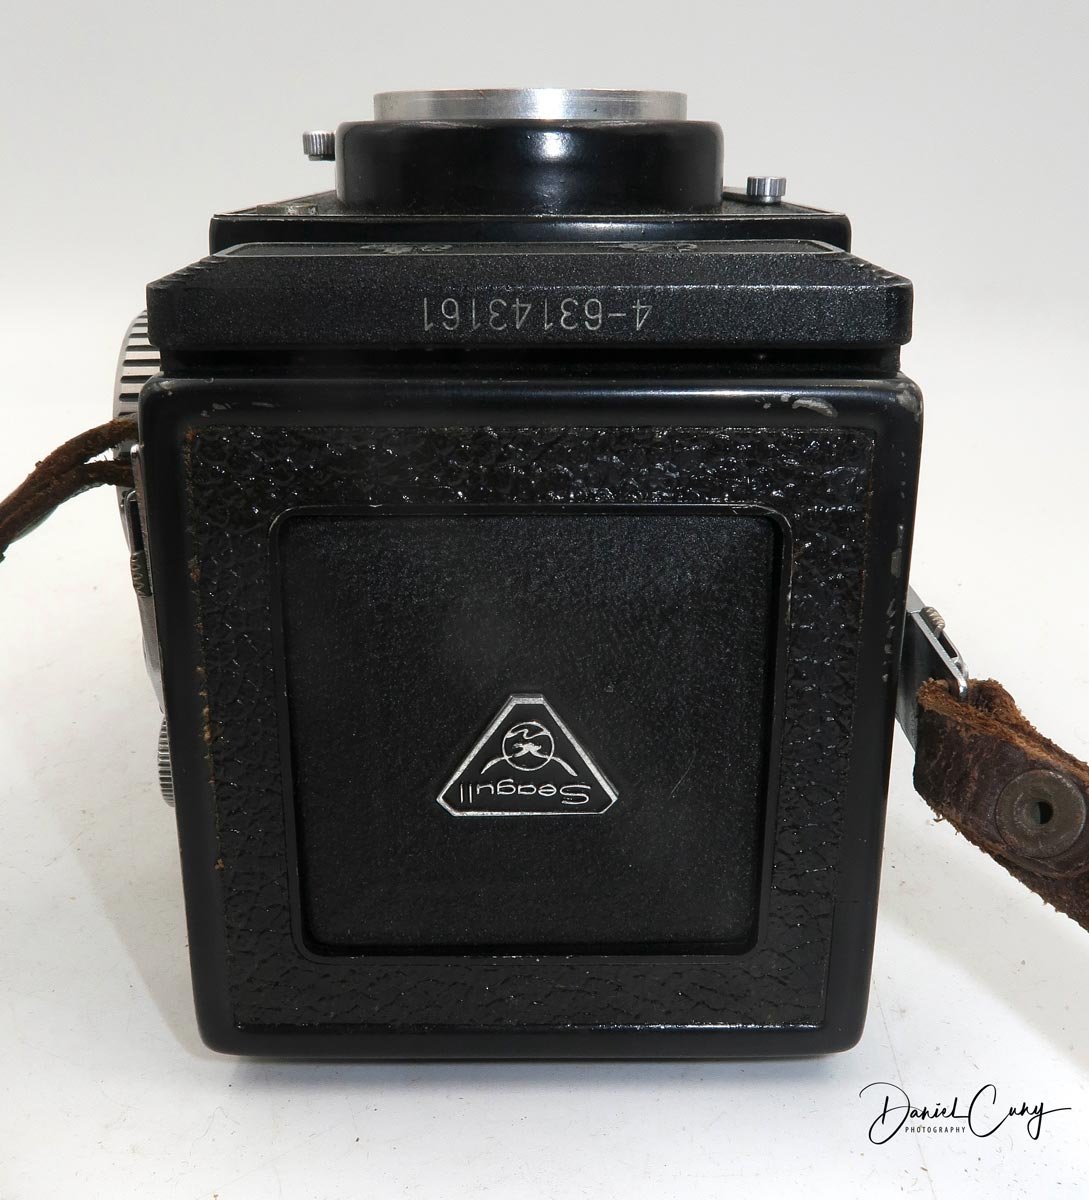
Camera Logo with Model and Serial number above.

MY EXPERIENCE:

On my first roll of film, there were many times when on a hike, I'd put the camera away after taking a photo, then walk to my next area to shoot and cock the shutter and take another on top of the last one. Once you realize there is NO DOUBLE EXPOSURE lock, you'll learn. The next time I use it, I will shoot, then wind. Walk to my next area to shoot, the cock, the shutter, shoot, and wind. Something I'm sure you're more intelligent than me and will remember.

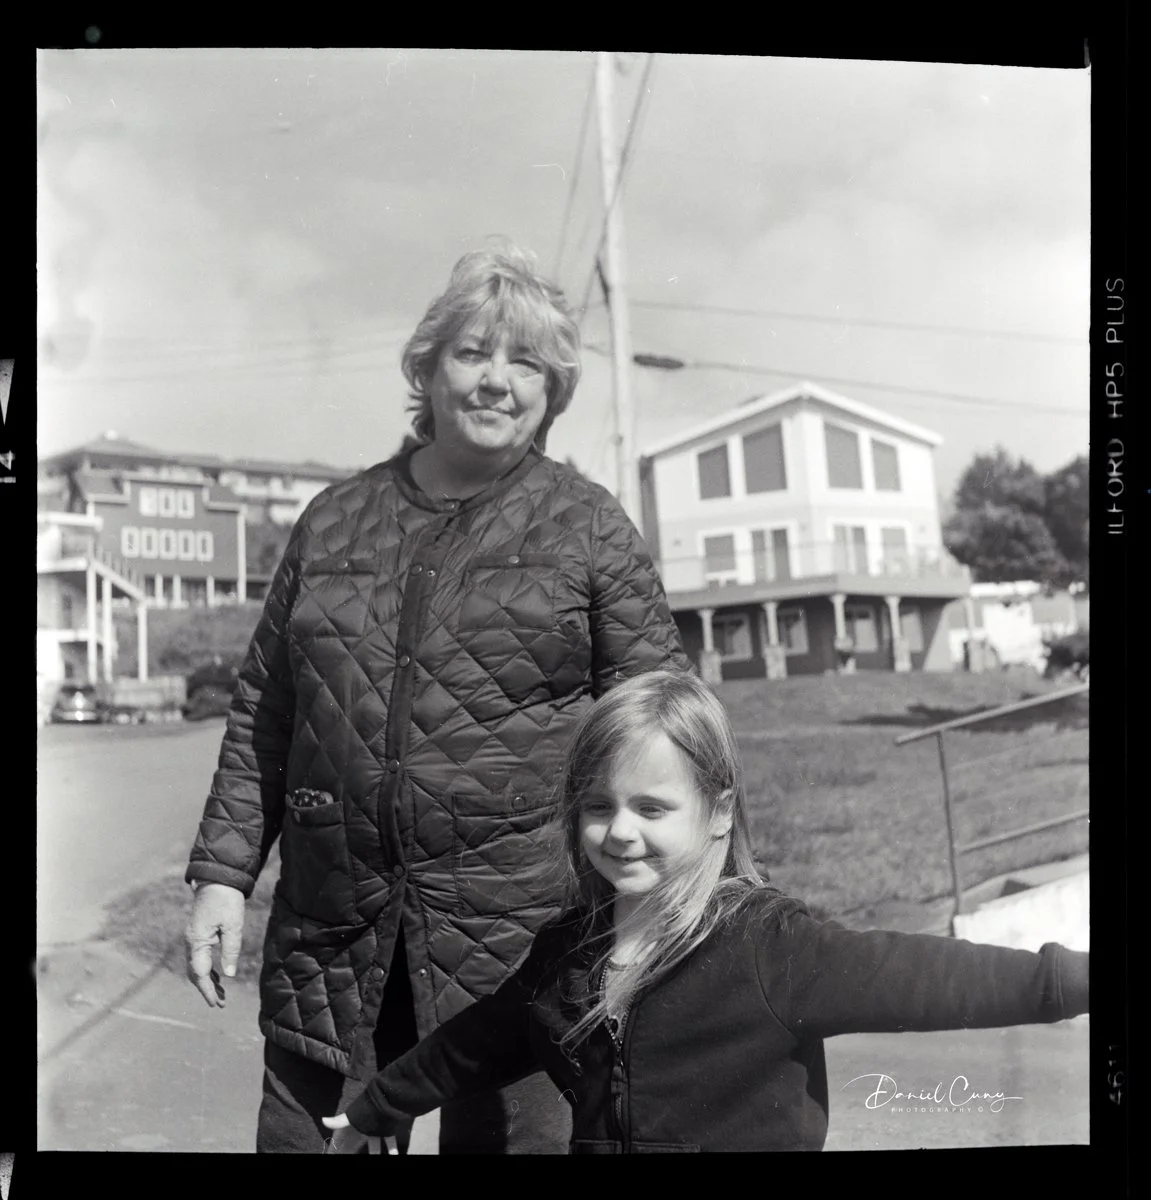
My Granddaughter at the beach

My son, daughter in Law and Granddaughter enjoying the beach.

My wife and granddaughter headed to the beach.

Conclusion:

I enjoyed using this camera. The Seagull 4 is inexpensive, and the results are decent. It would be a great entry-level camera for someone wanting to get into medium format. I don't know if parts are readily available to fix it if it breaks down, but it's a fun camera to take photos with for now.

I appreciate you taking a few minutes to read my blog post. I have the next camera picked for the next blog post, and it won’t be long until I finish it. Until next time, please be safe and enjoy the never-ending hunt for fantastic cameras.