QRS Kamra

My QRS Kamra in box with manual

I first saw the QRS Kamra many years ago at a camera show when I was still living in the San Francisco Bay area. The camera has a look unlike any 35mm camera I had seen before. Up until this time, I was used to looking at a 35mm camera as either a single-lens reflex or a rangefinder style camera. When I first came across the QRS Kamra, my initial impression was that it was a movie camera, given that many cameras from this era have a rather boxy style.

 I spoke with the vendor who had the camera, and he let me try it out, warning me that it wasn't working, which is a common issue with this camera. Still, after picking up and looking at the beautiful brown mottled finish, odd looking shutter release that also seconds as the film transport, and the overall oddness (to me) of the camera, I told myself that I'd like to have one for my collection some day, because the price of the camera was more that I could spend on a camera at the time.

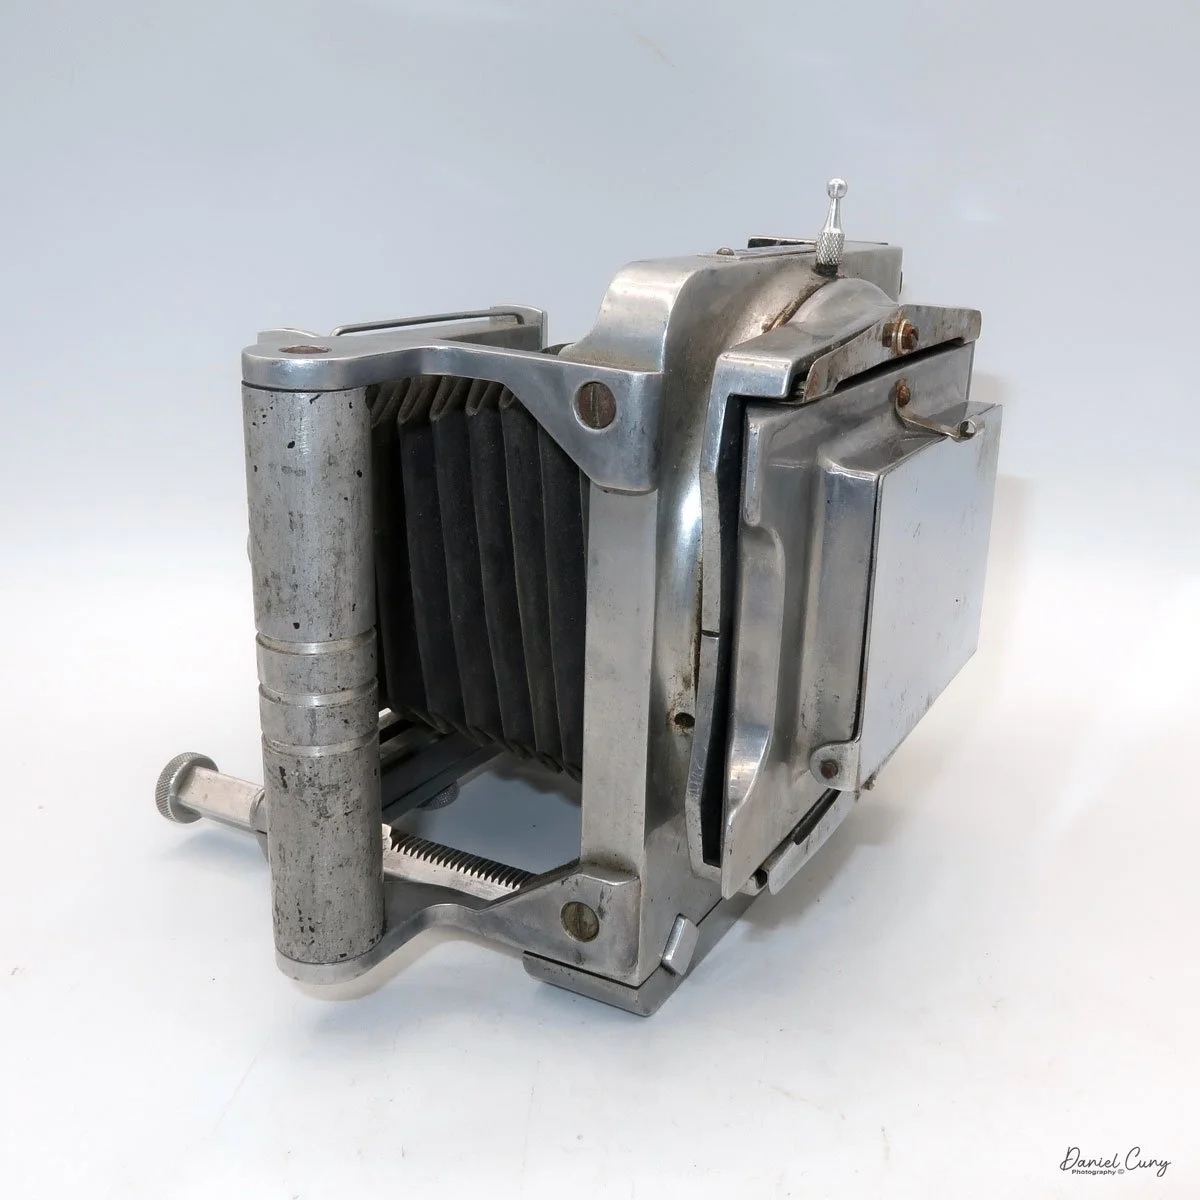
Back portion of the QRS Kamra

 Years go by, and the kids grow up, all the while my fascination with cameras kept growing. During these times, I would frequent a local flea market held at a drive-in theater on Sunday mornings, and I can still remember looking over one person's goods for sale and recognizing what I had many years earlier at the camera show. It was indeed a QRS Kamra. I spoke with the vendor at the flea market, and they mentioned that the camera was their grandfather's from a small collection he had owned. They just wanted to get rid of it, so I bought it for a reasonable price. Unfortunately, this camera was missing the shutter release and winding crank, a common issue with this model. At the time, I was thrilled to have it in my collection.

QRS Kamra w/Registration cards.

 I generally keep cameras in my collection for a few years, then look for a better version if I plan to keep it. About eight to ten years after purchasing the QRS Kamra, I put it up for sale on eBay and sold it to someone else looking to add it to their collection. Since then, I purchased another QRS Kamera in the box with a handle, although it had a broken handle.

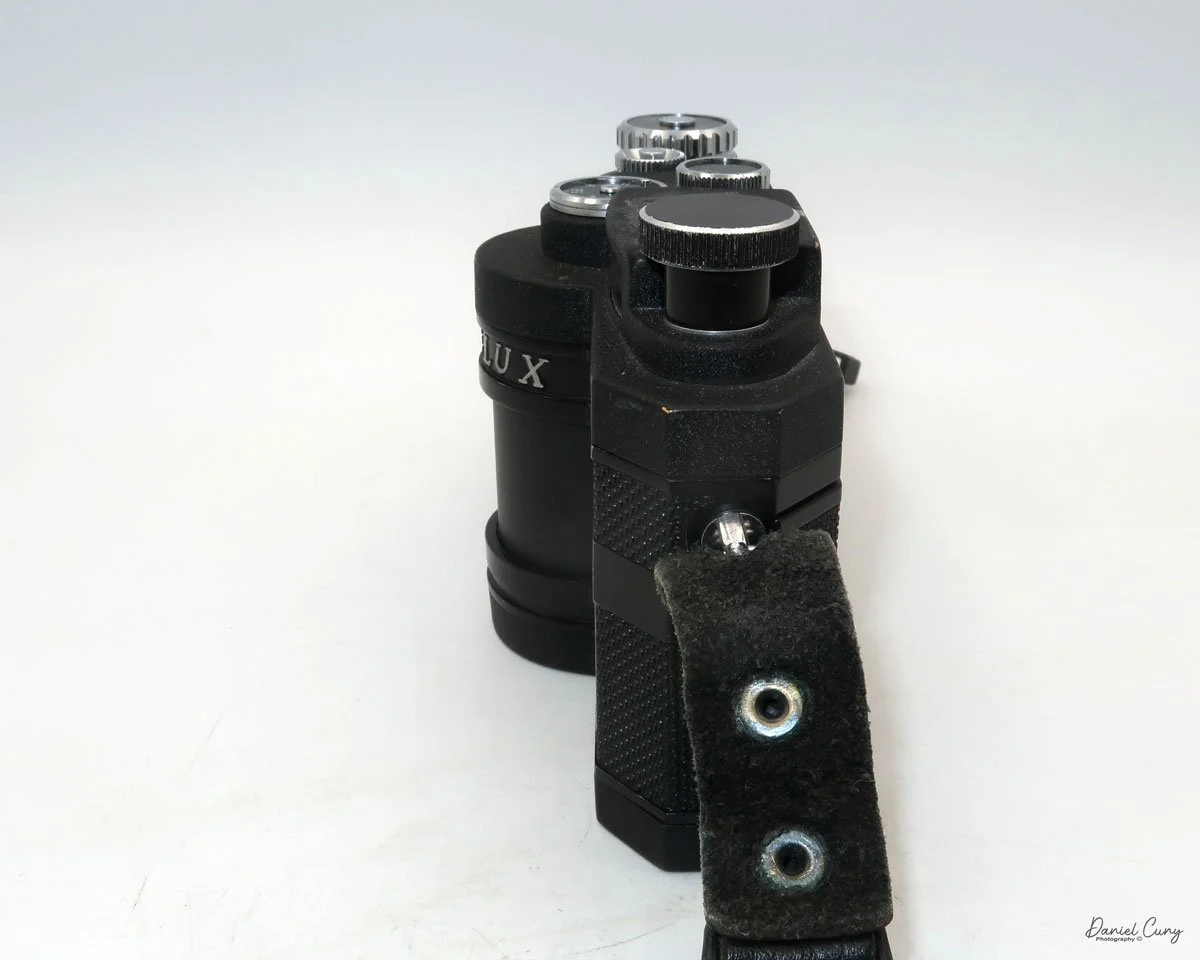
 On another occasion, many years after selling the QRS Kamra, I purchased a "lot" of cameras and photo items. Hidden in the photos, I found an Ellison Kamra, a camera very similar to the QRS Kamra. It's slightly larger, featuring a pull-down lens and viewfinder, and is made from Bakelite, dating back a couple of years. I was amazed to find it among this lot of cameras. Looking back at the photo, all you could see was one of the ends, as it was buried under several different items.

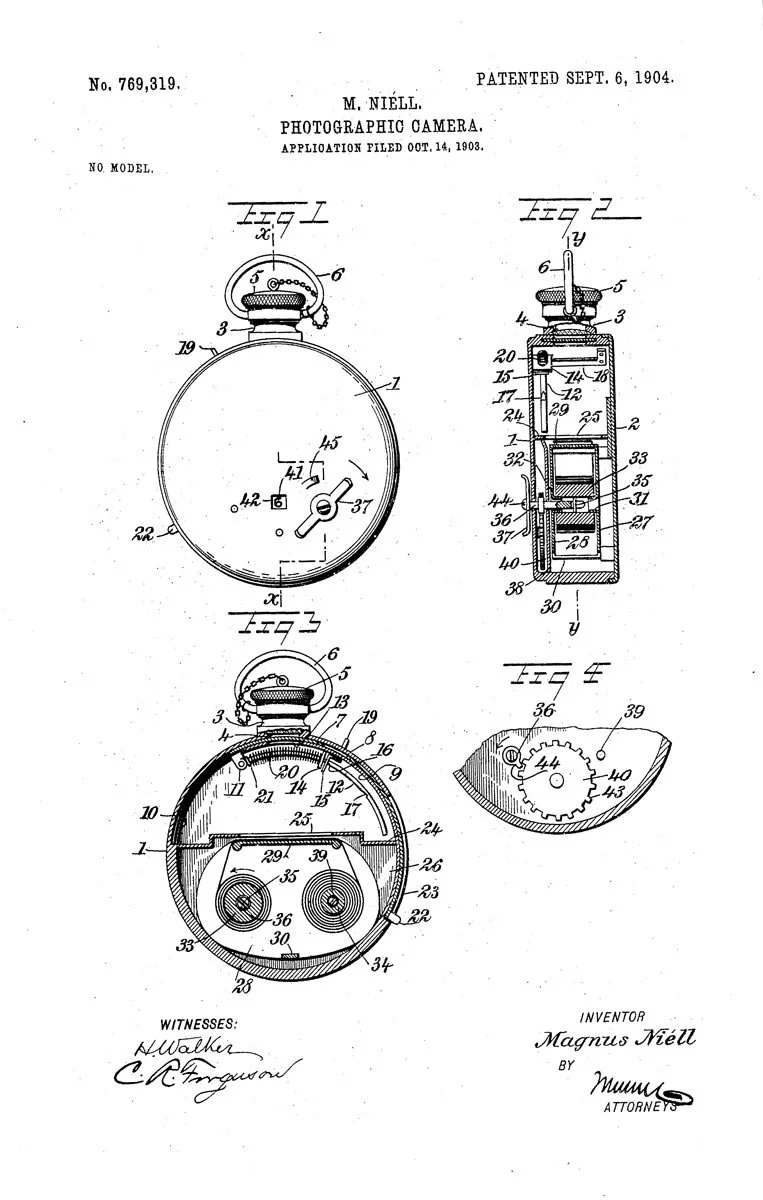
 In 1926, Michael Ellison and Edward McAuliffe of Los Angeles filed a patent for a new two-bladed shutter system. They wanted to use the new shutter on a camera they designed and built called the Ellison Kamra. They only produced one camera, which used 35mm film, a format popular in both movie and still cameras at the time. Unfortunately, the Ellison Kamra only lasted a few years, and by 1935, they were out of business.

 The QRS Kamra was also sold under the DeVry Kamra after QRS purchased DeVry in 1929, but this only lasted for a year. The unusual item I still can't put together is the relationship between both the Ellisons and QRS Kamra's. They both have similar-looking cameras, use the same shutter system, and share very similar layouts.

History:

 The histories of DeVry and QRS, though largely separate, are linked by a noteworthy, albeit brief, corporate union in the early 20th century. Both companies originated in Chicago with a focus on cutting-edge technology of their time.

Michael Ellison and Edward McAuliffe Patent

 Herman DeVry, an inventor and innovator in visual education, founded the DeVry Corporation in 1913. He made a name for himself by creating the "Theater in a Suitcase," the first portable motion picture projector, which revolutionized the use of film in schools and other institutions. His work was dedicated to making learning more visual and accessible through technology.

 Around the same time, the QRS Music Company, founded in 1900 by Melville Clark, was a dominant force in the music technology of the era: the player piano. QRS became the world's largest manufacturer of piano rolls, capturing the live performances of famous artists and making music widely available for in-home entertainment long before the advent of widespread audio recording.

 The paths of these two innovative companies converged in 1929 when QRS, looking to diversify its technology portfolio, purchased the DeVry Corporation. For a short period, the company operated under the name QRS-DeVry, producing devices like movie cameras and projectors. However, this merger was short-lived.

 By the early 1930s, the two entities went their separate ways. Herman DeVry, in collaboration with Dr. Lee de Forest, shifted his focus entirely to technical education, establishing DeForest Training School in 1931. This institution would evolve over the decades, becoming DeVry Technical Institute and eventually the well-known DeVry University, a prominent for-profit institution focused on career-oriented education.

 Meanwhile, QRS returned to its musical roots. After a series of ownership changes, it continued to produce piano rolls for decades and adapted to new technologies, eventually developing modern digital player piano systems. While their corporate marriage was brief, both DeVry and QRS left lasting, independent legacies in the fields of education and automated music technology.

My Kamra (Camera):

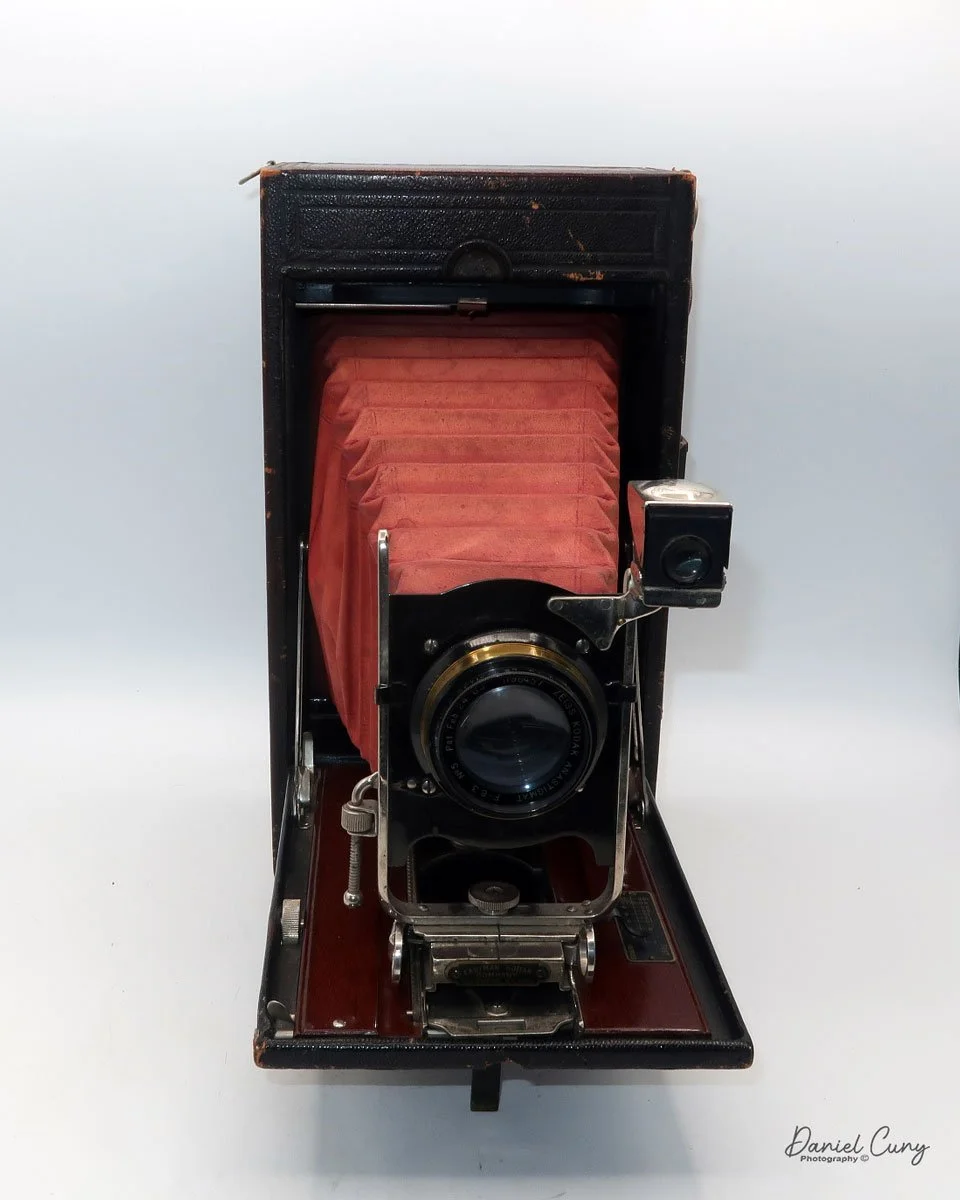
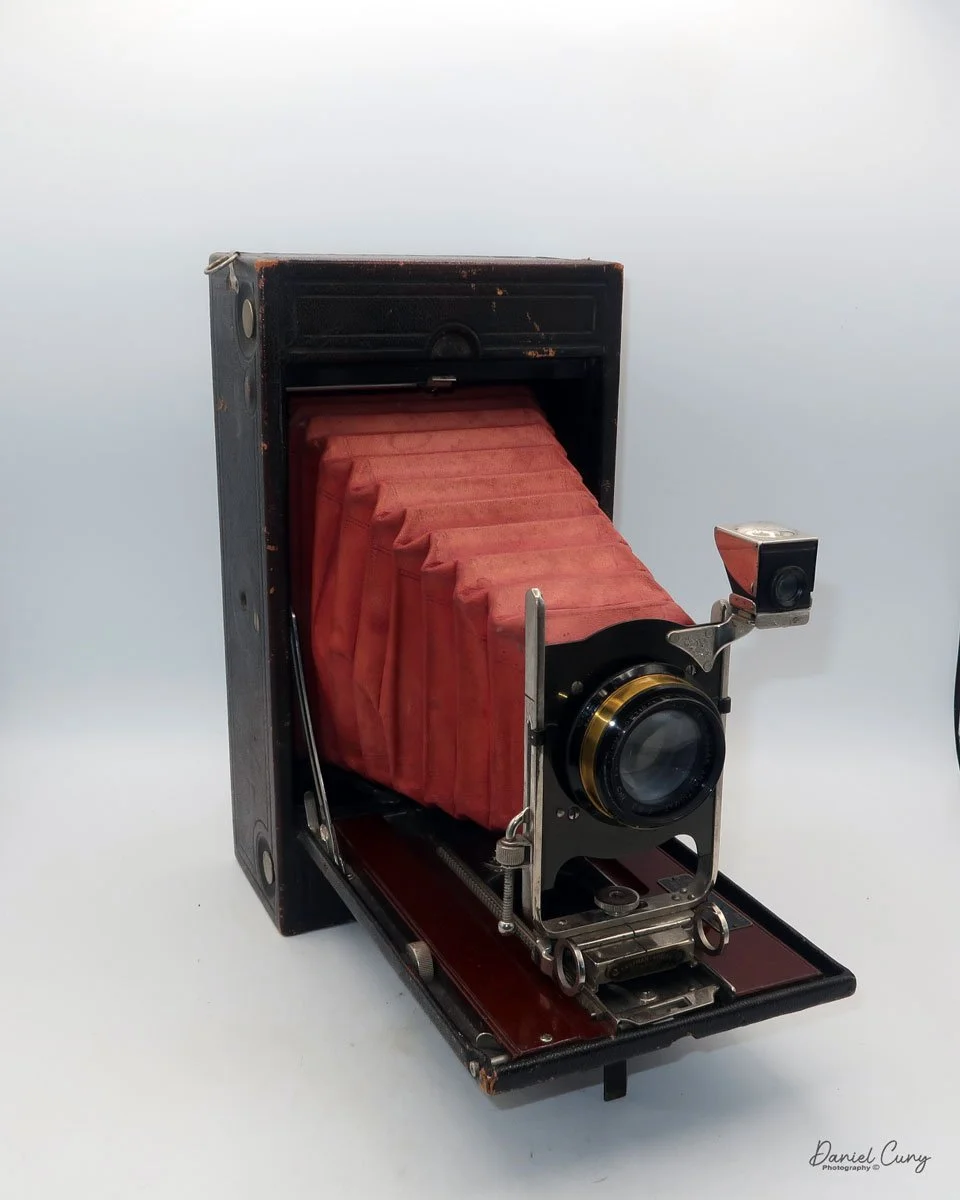
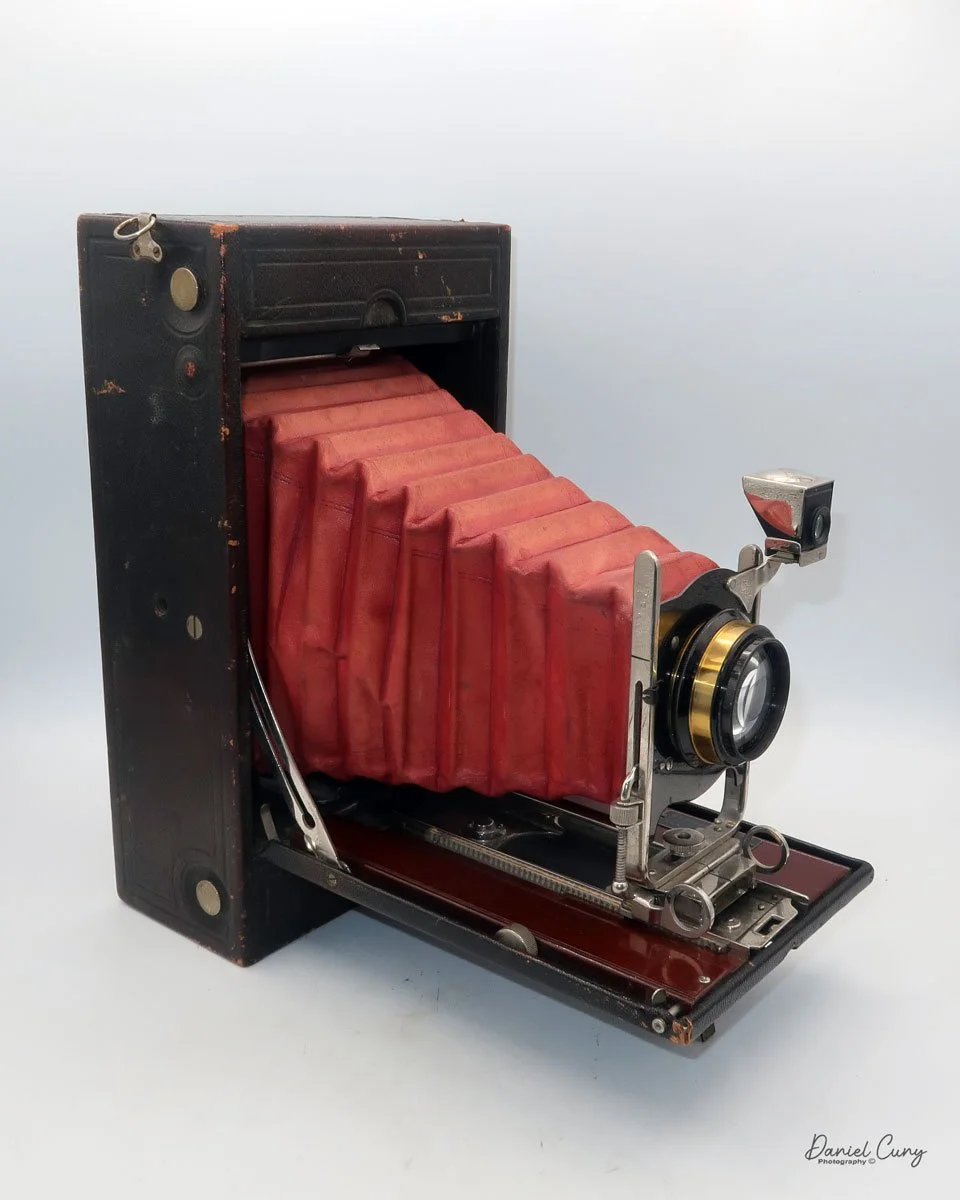
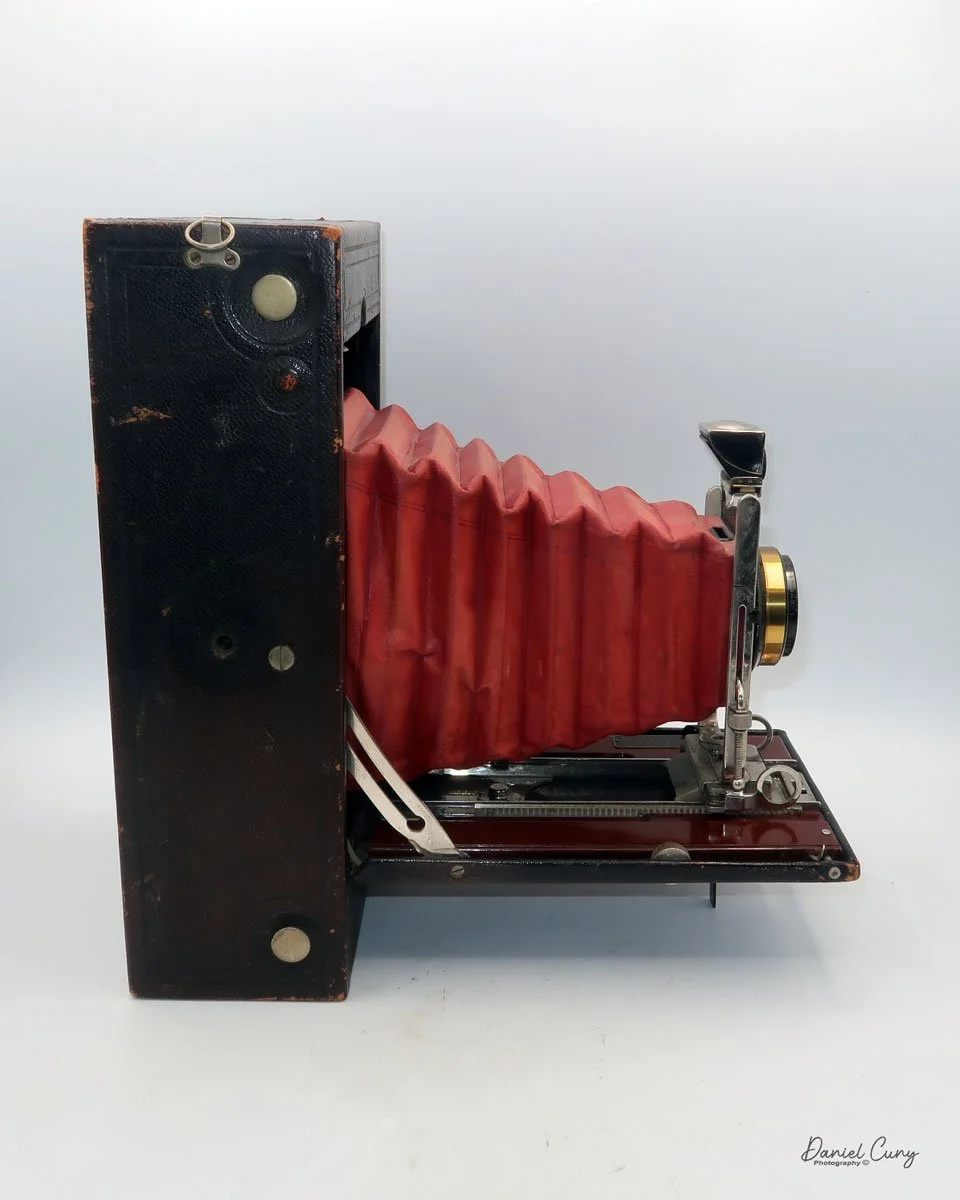
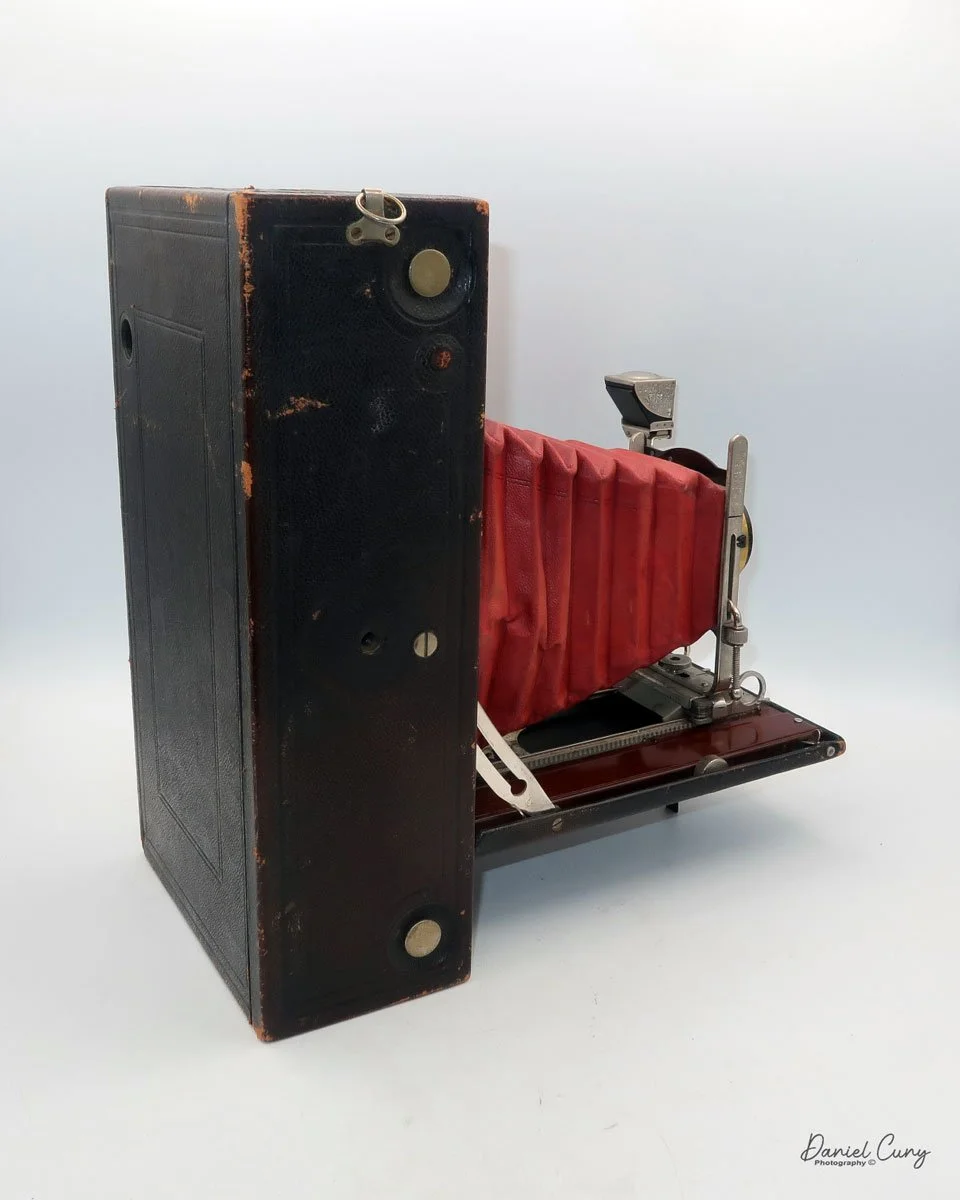
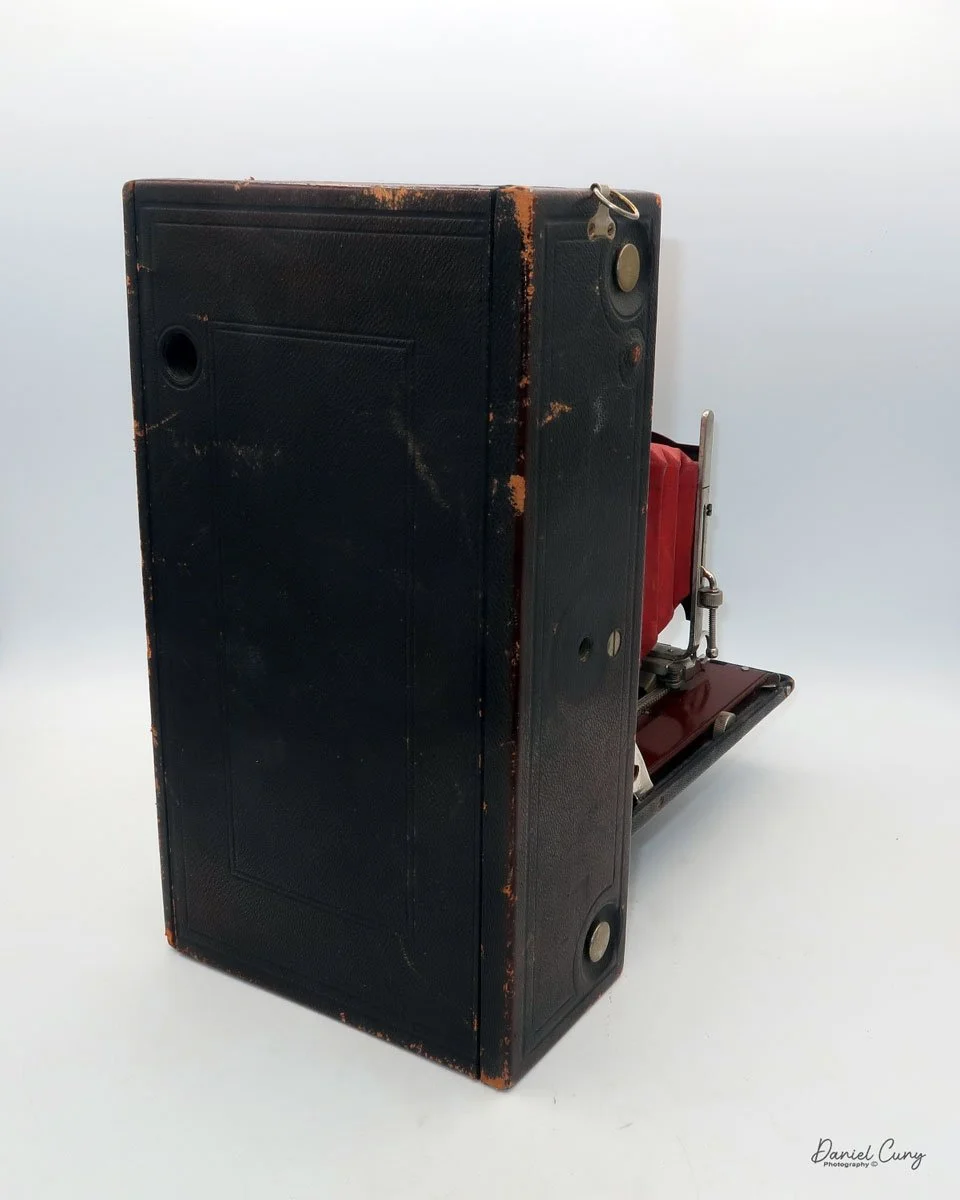
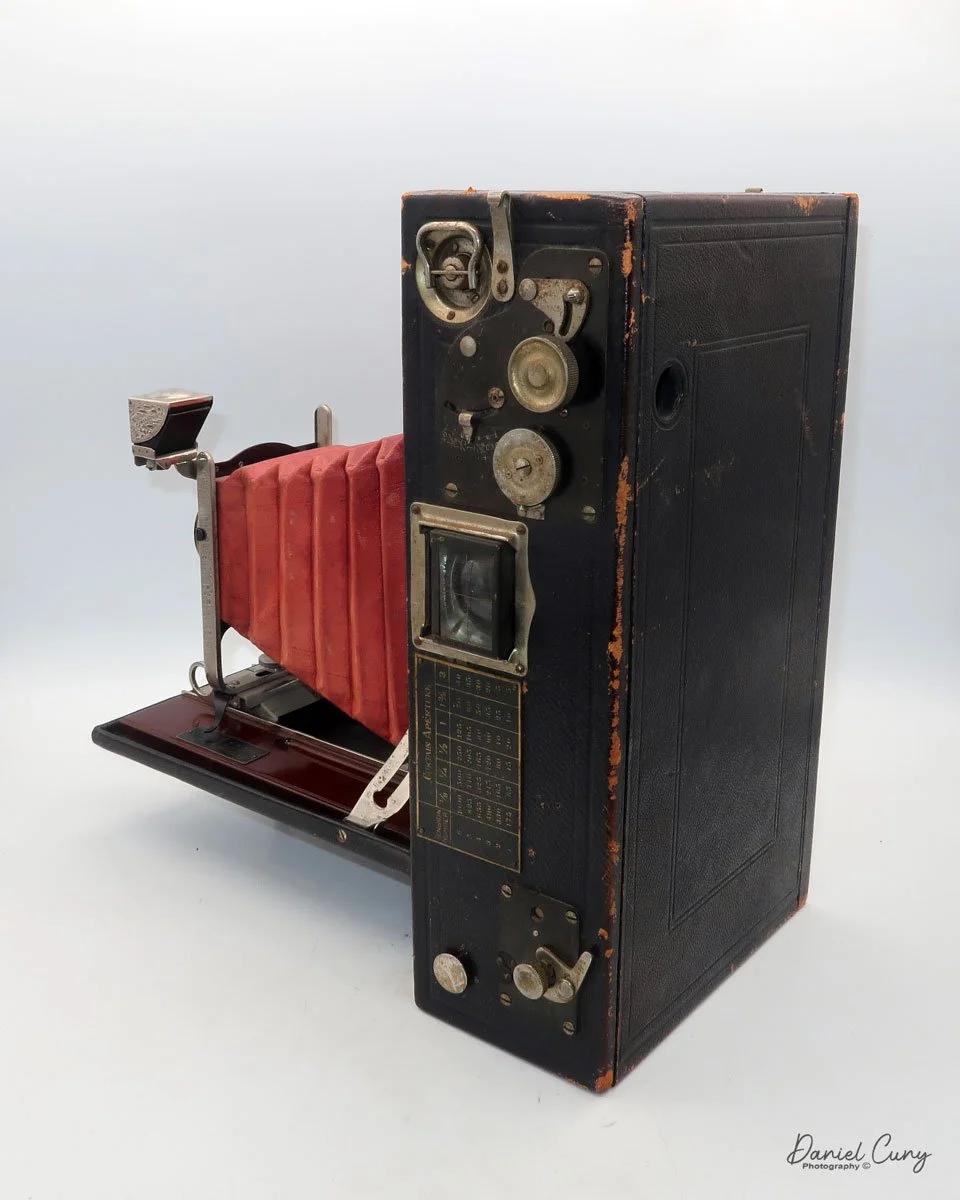
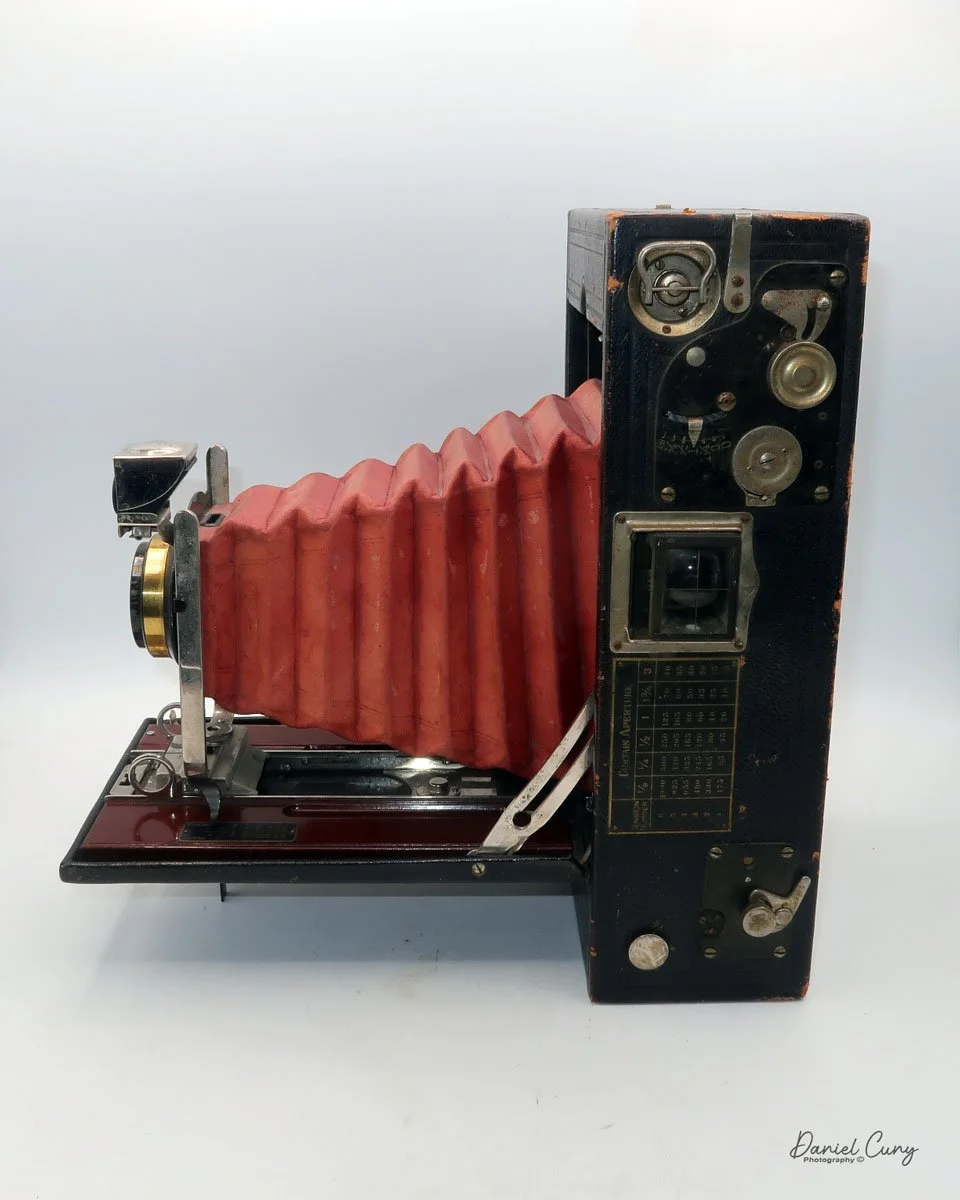
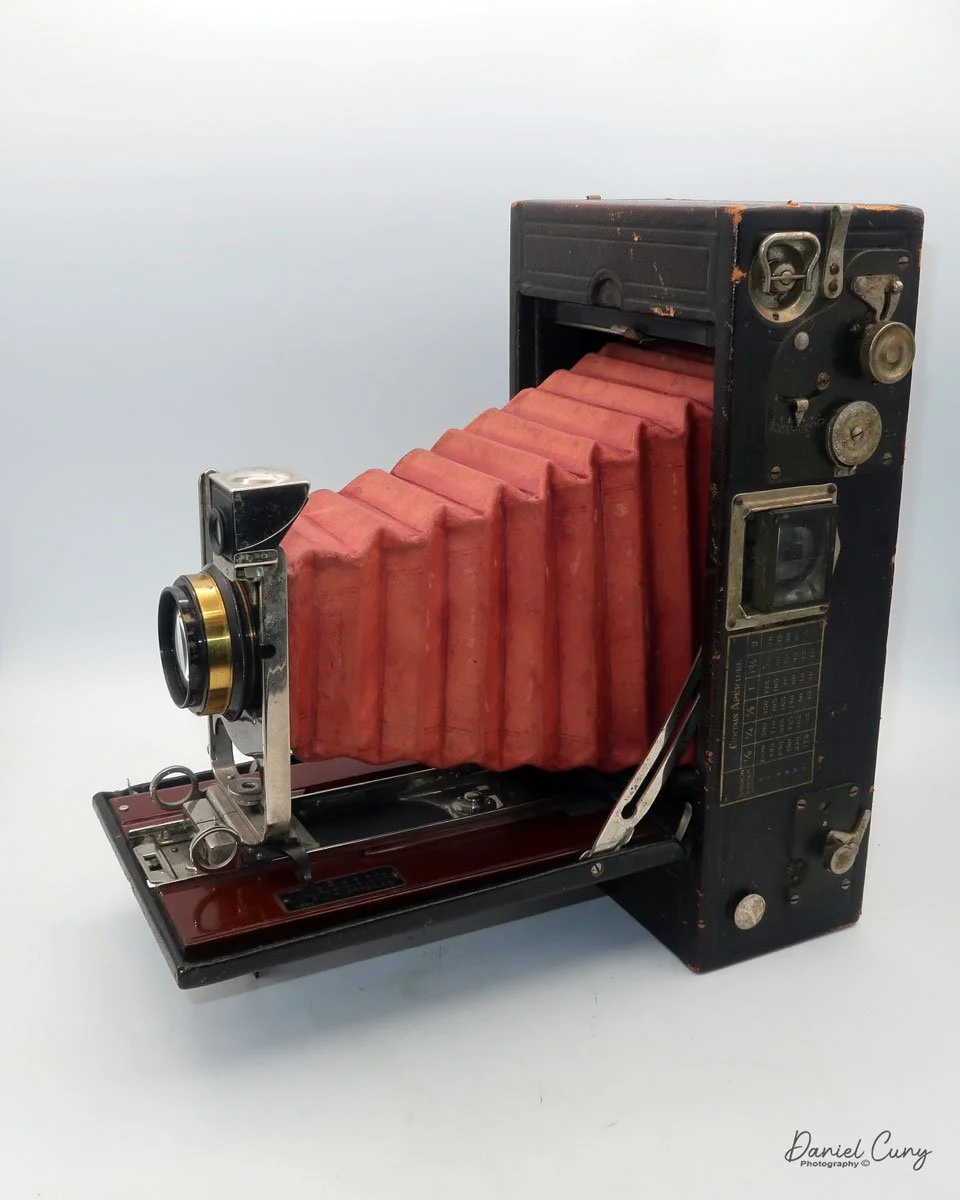
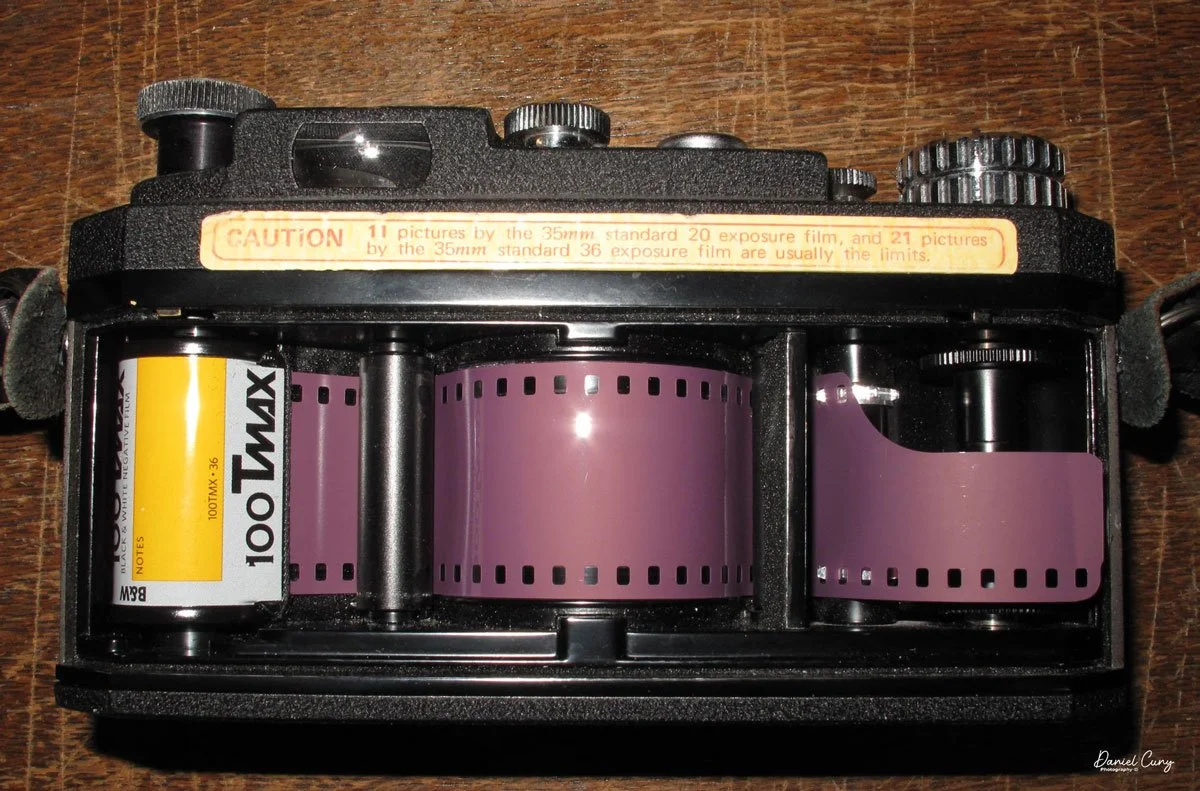
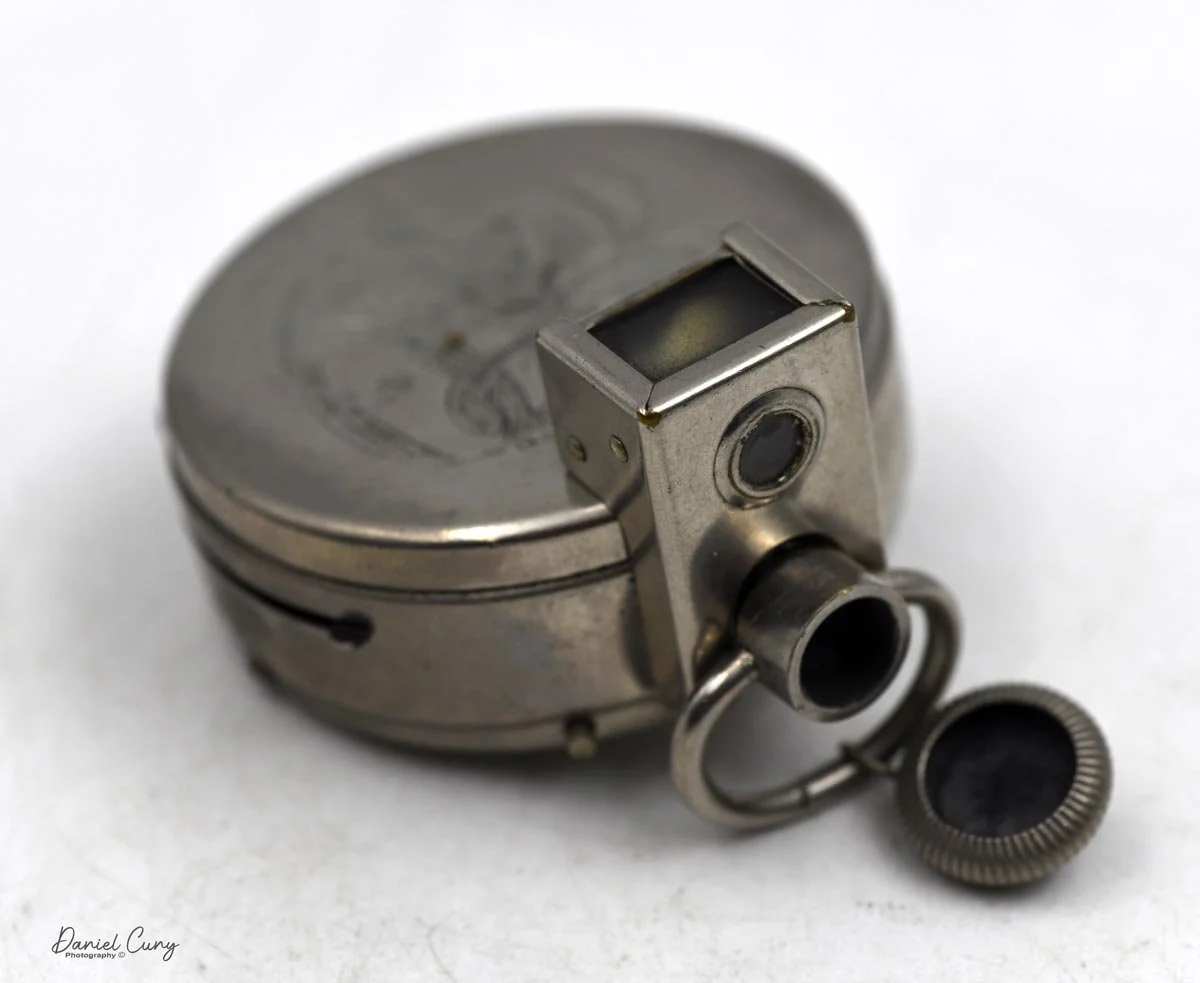
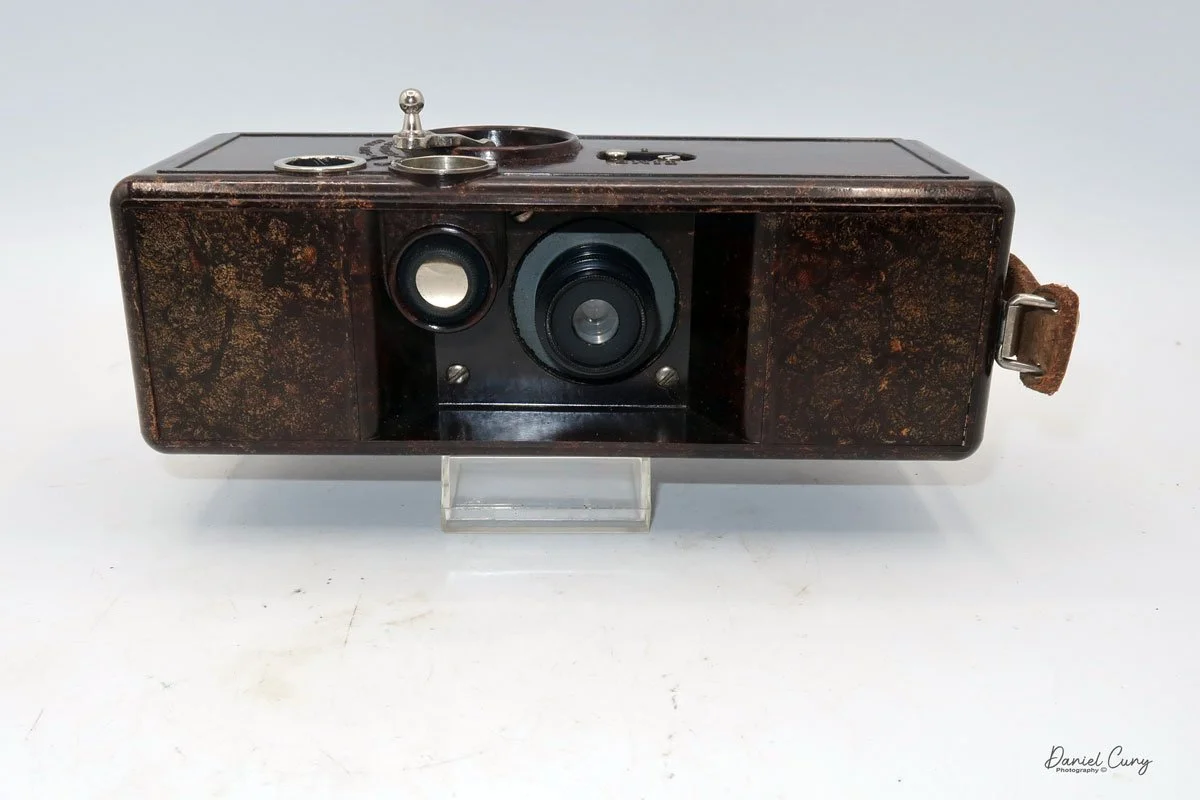
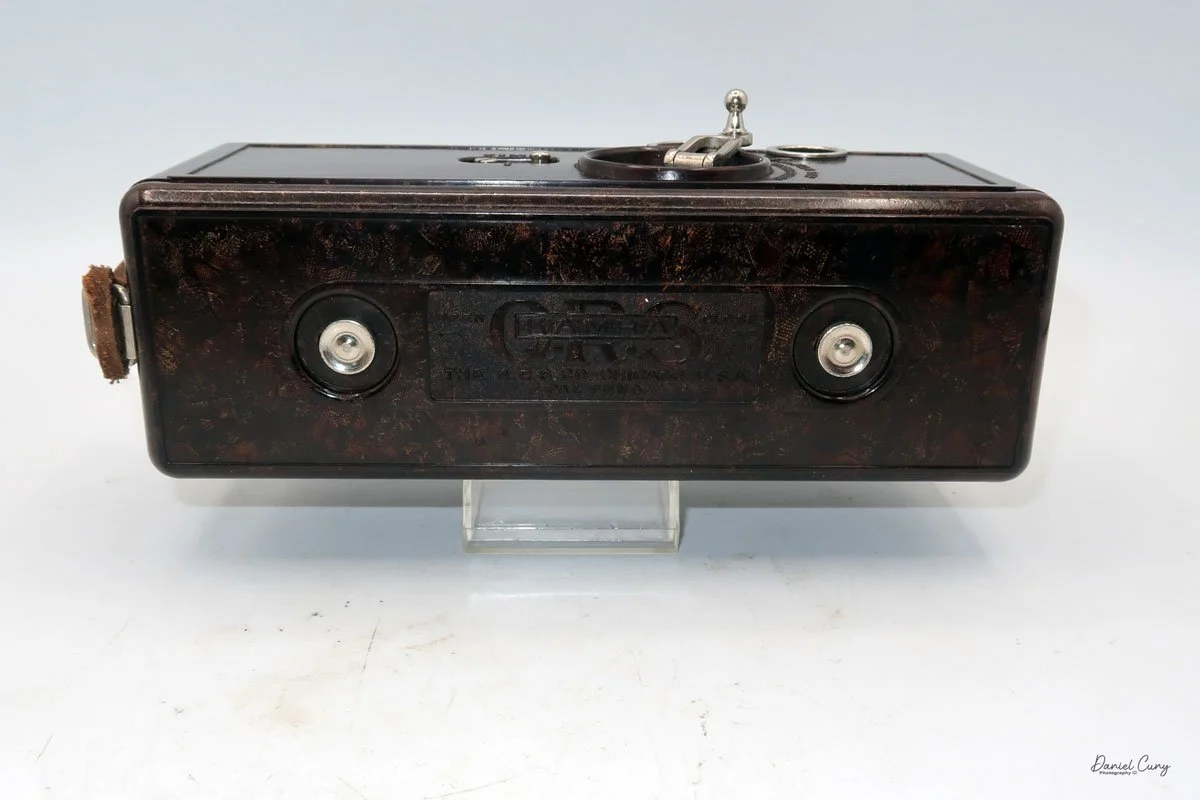
 My QRS Kamra is 7.5" wide by 3" deep by 2.5" tall, and weighs 1 pound, 14.1 ounces. The serial number on my Kamra is Series No. A 3008, so it is a relatively early version of the camera. The camera is made of a brown Bakelite material with cotton filler, which gives the camera a mottled look. The camera has a fixed focus 40mm f7.7 lens and a bright viewfinder.

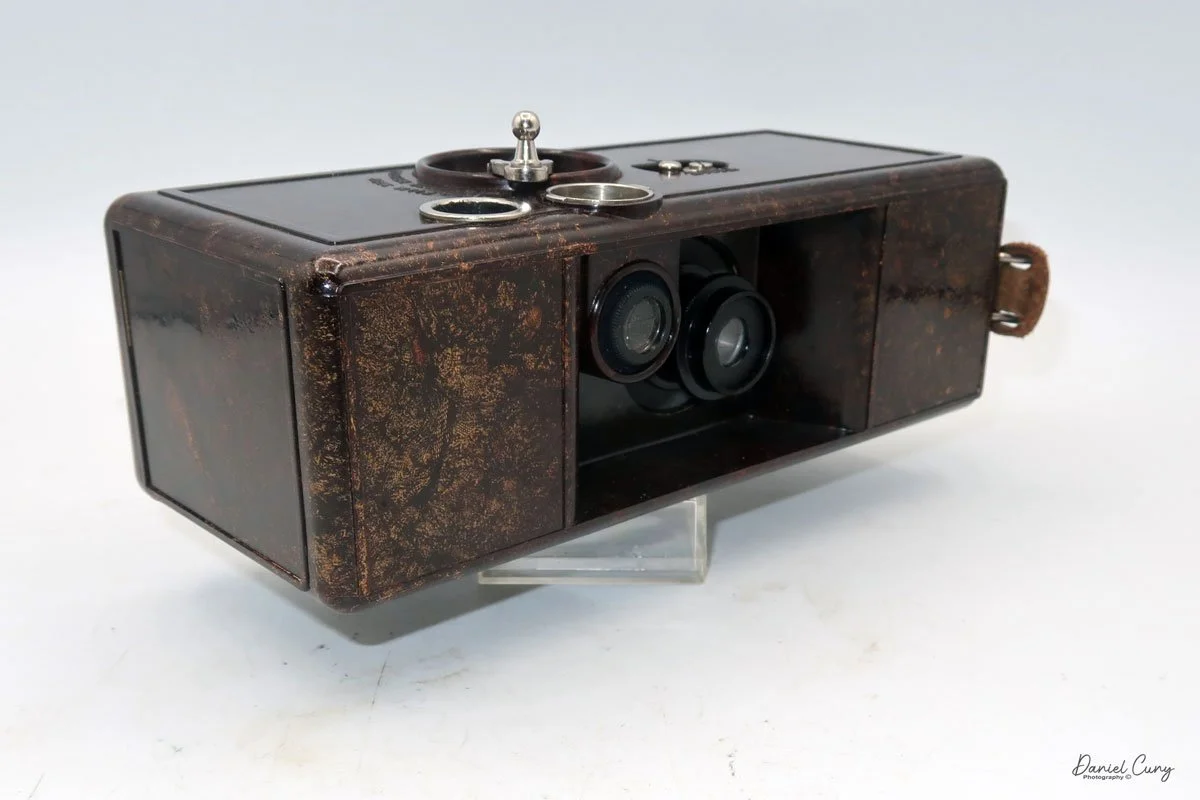
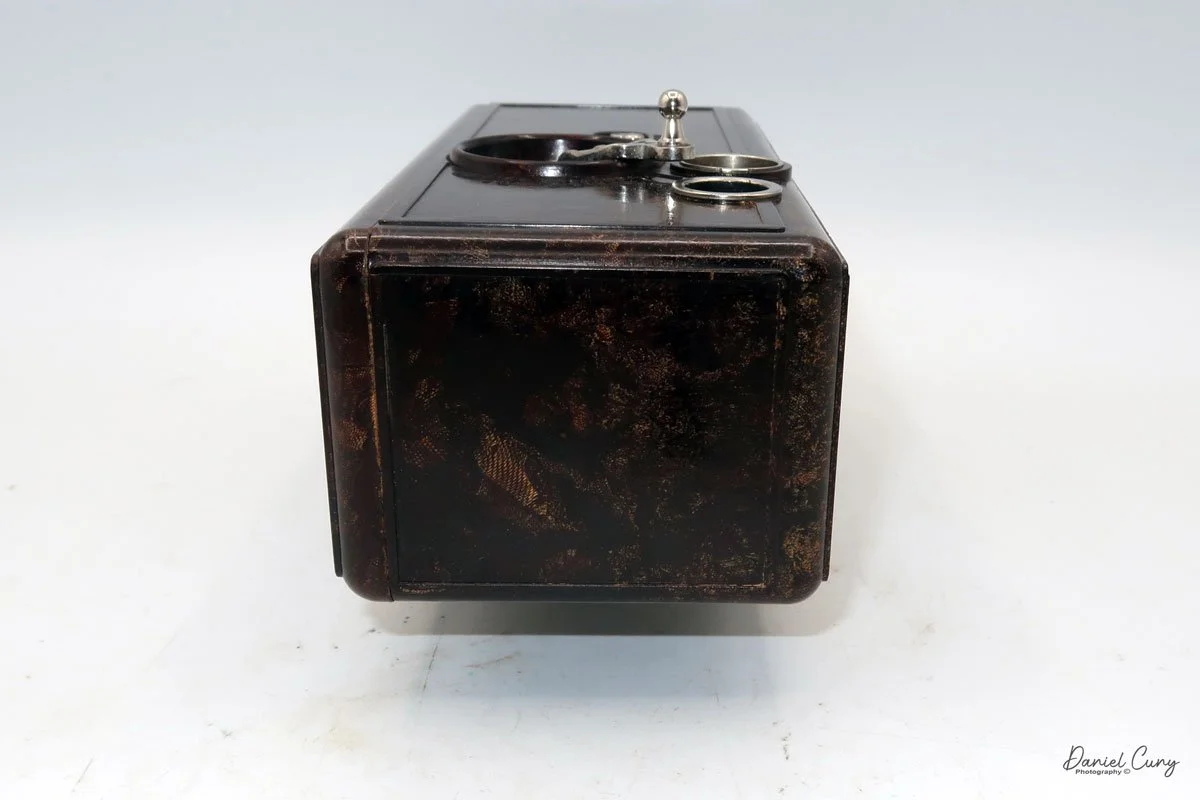
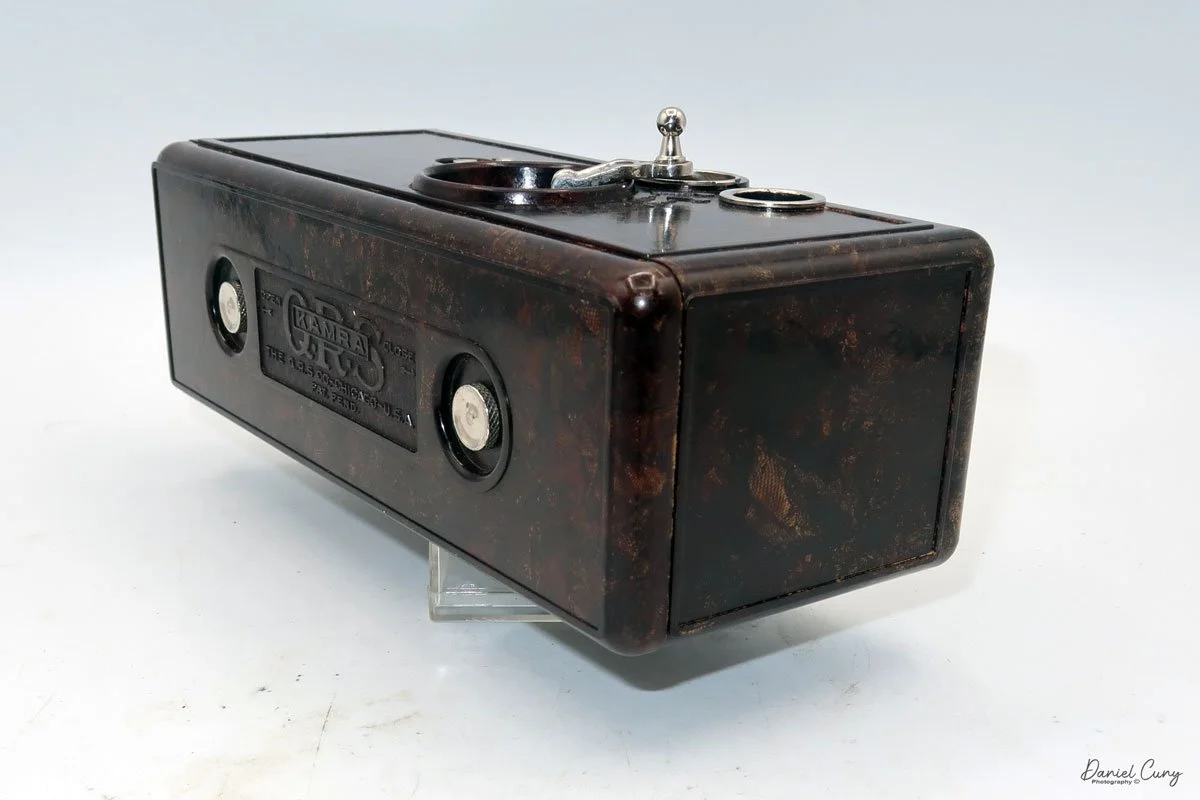
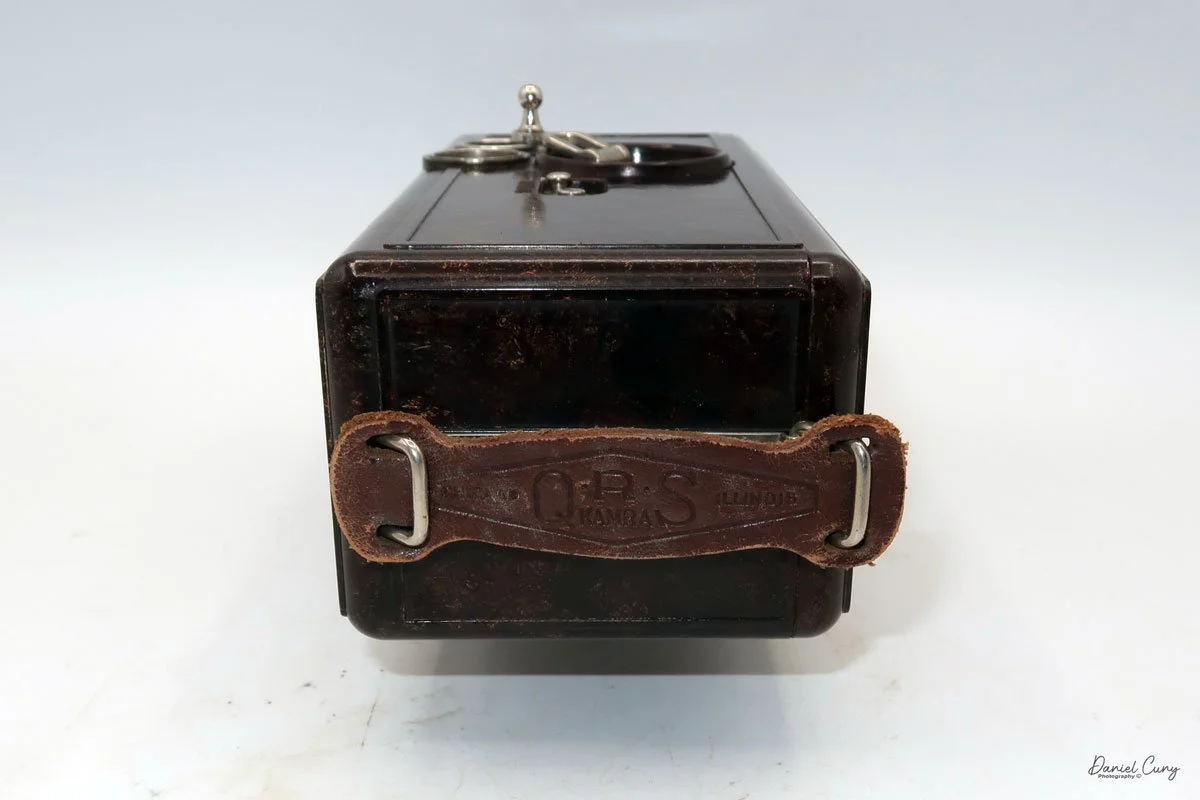
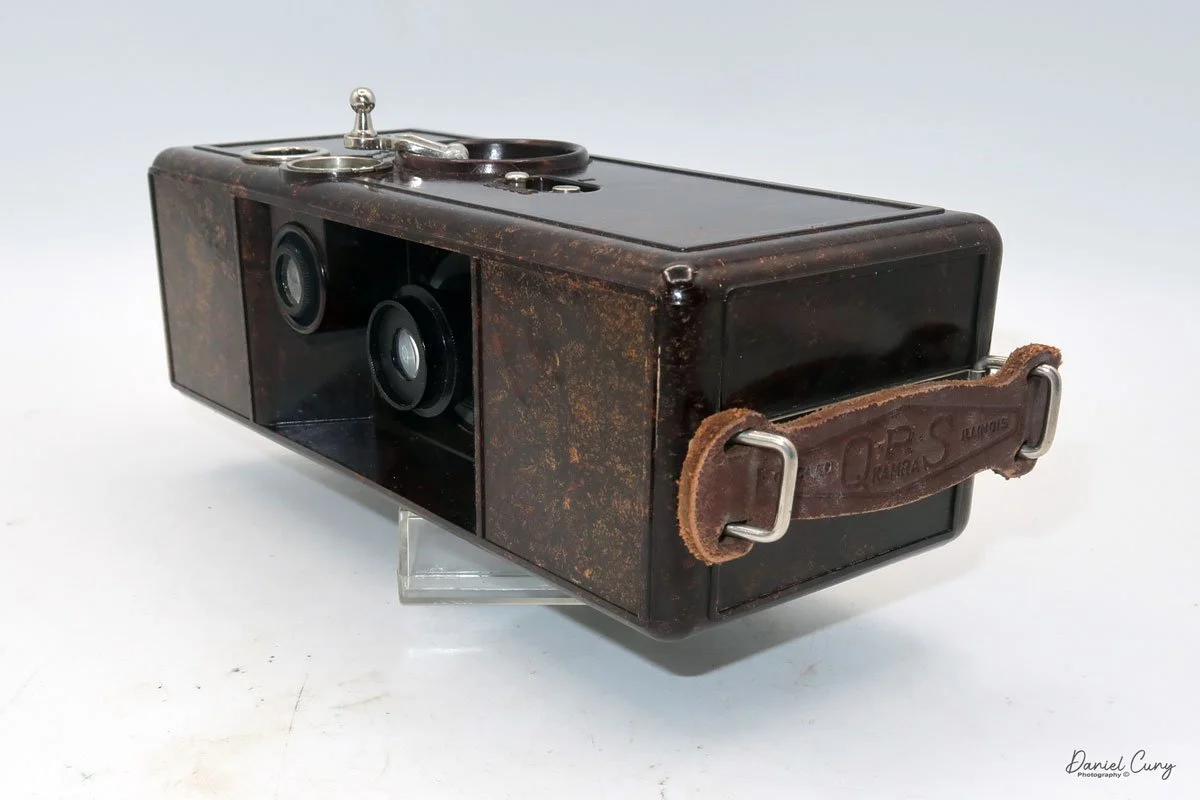
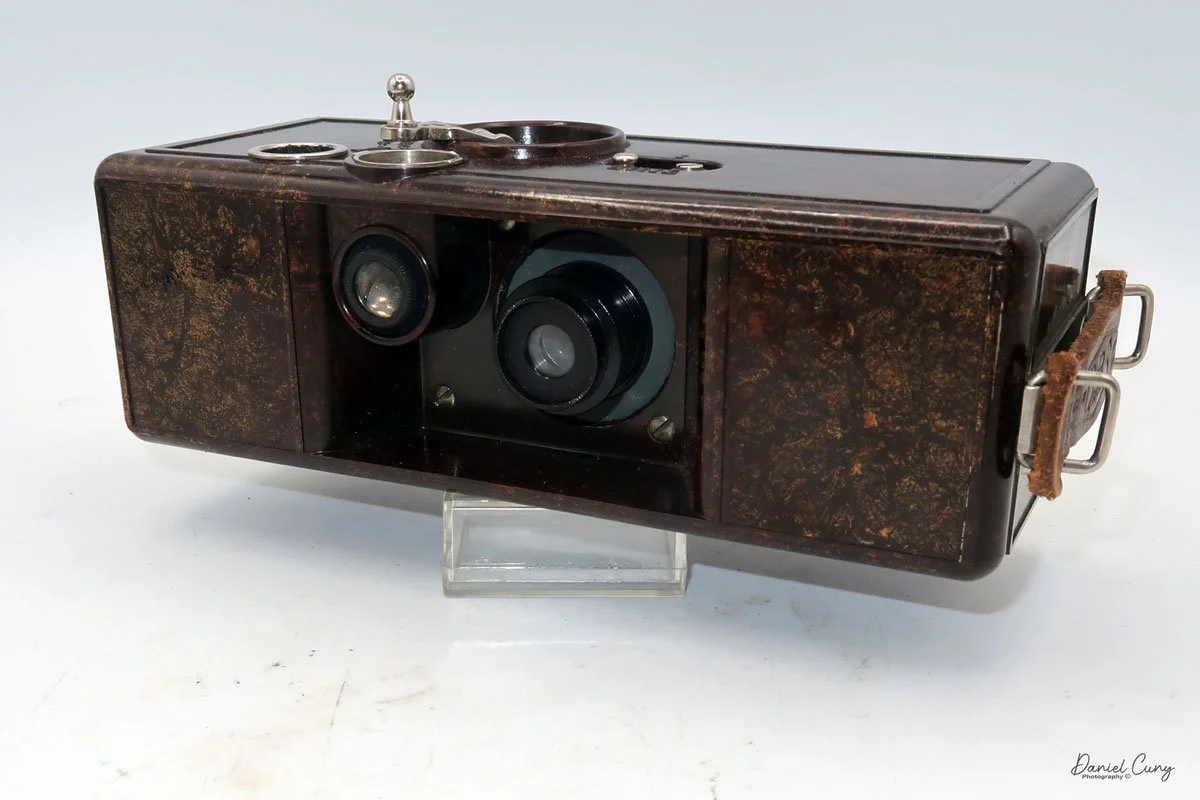
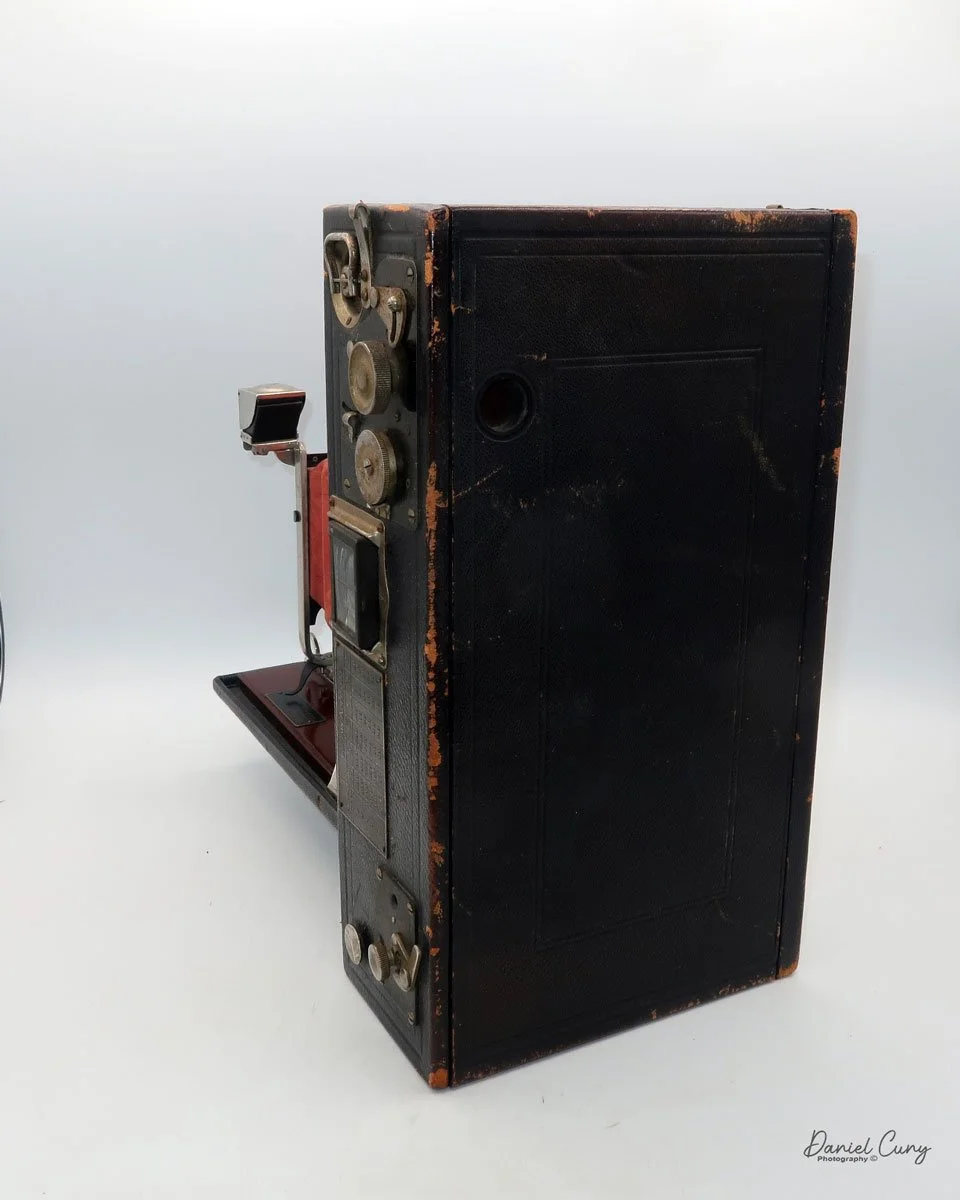
On top of the camera, all the controls are located. There are really only two controls on the camera. On the far left, you'll find the shutter setting options: "time" for long exposures and "I" for instant. Just to the right of the shutter settings is the fold-up crank. This crank is turned in the clockwise direction to advance the film, or to the counterclockwise direction to snap the photo.

Just above the shutter release and film advance crank is the bright viewfinder, and to the right of that is the frame counter. This QRS Kamra allows for up to 40 photos to be loaded into their special film cassettes.

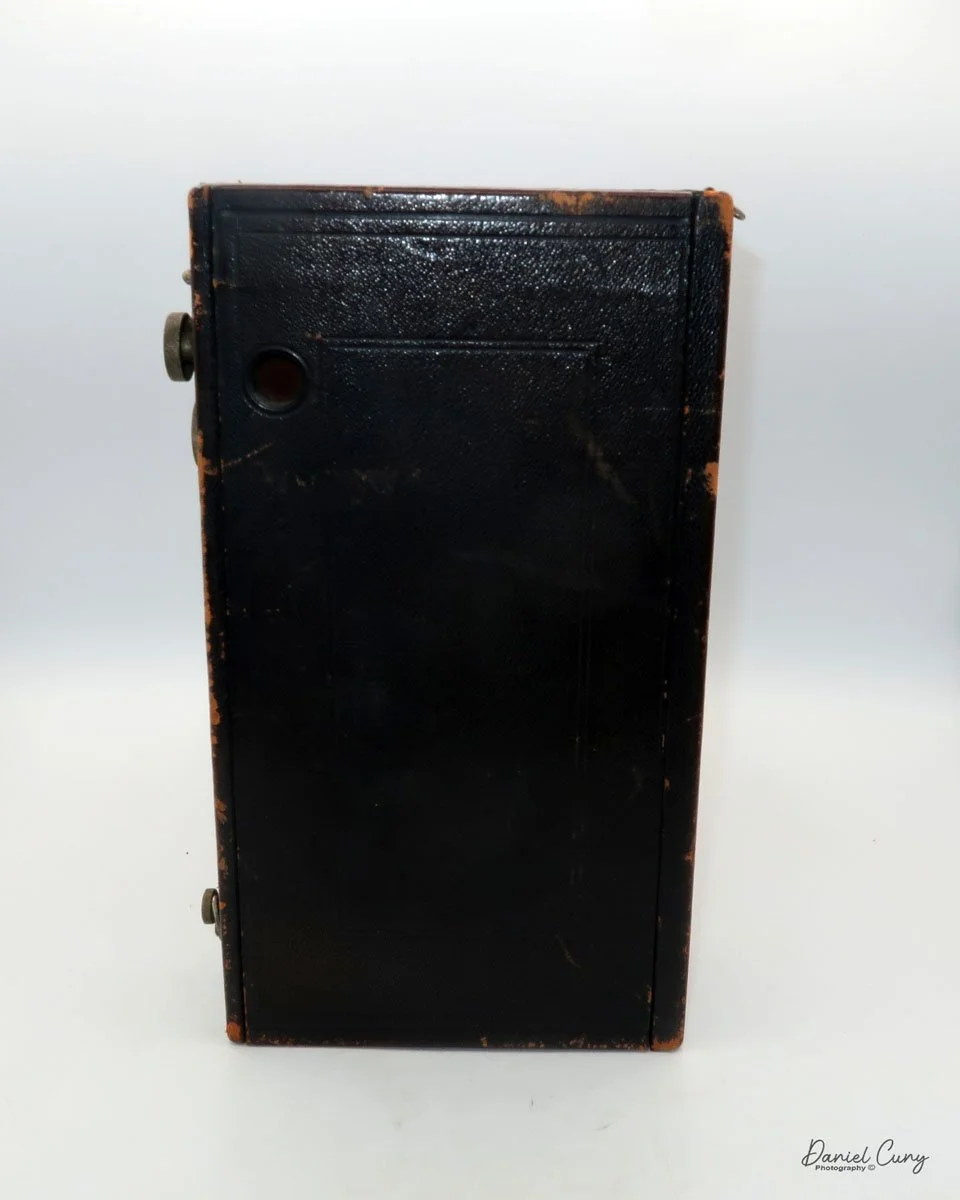
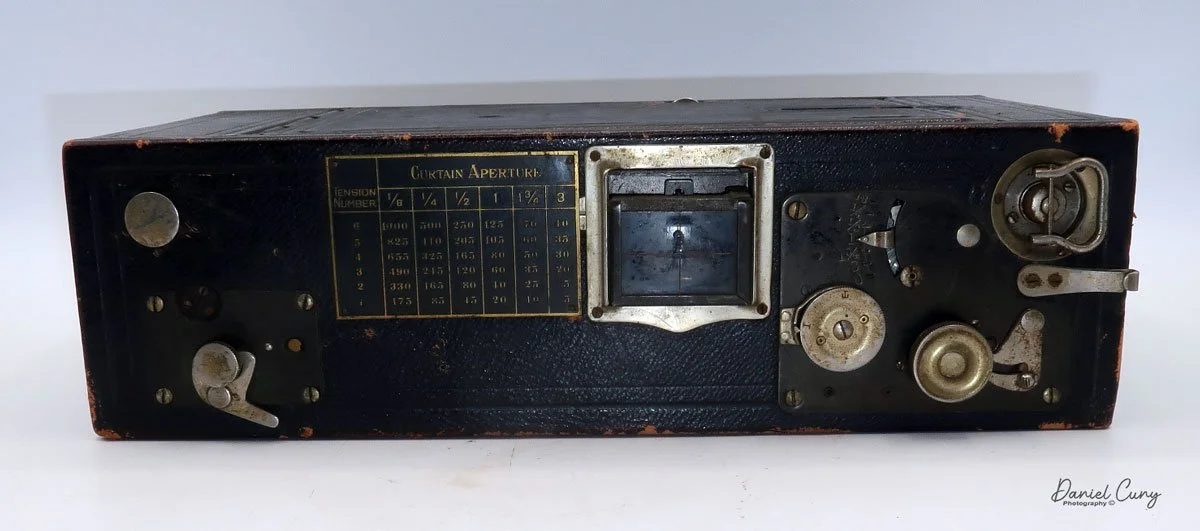
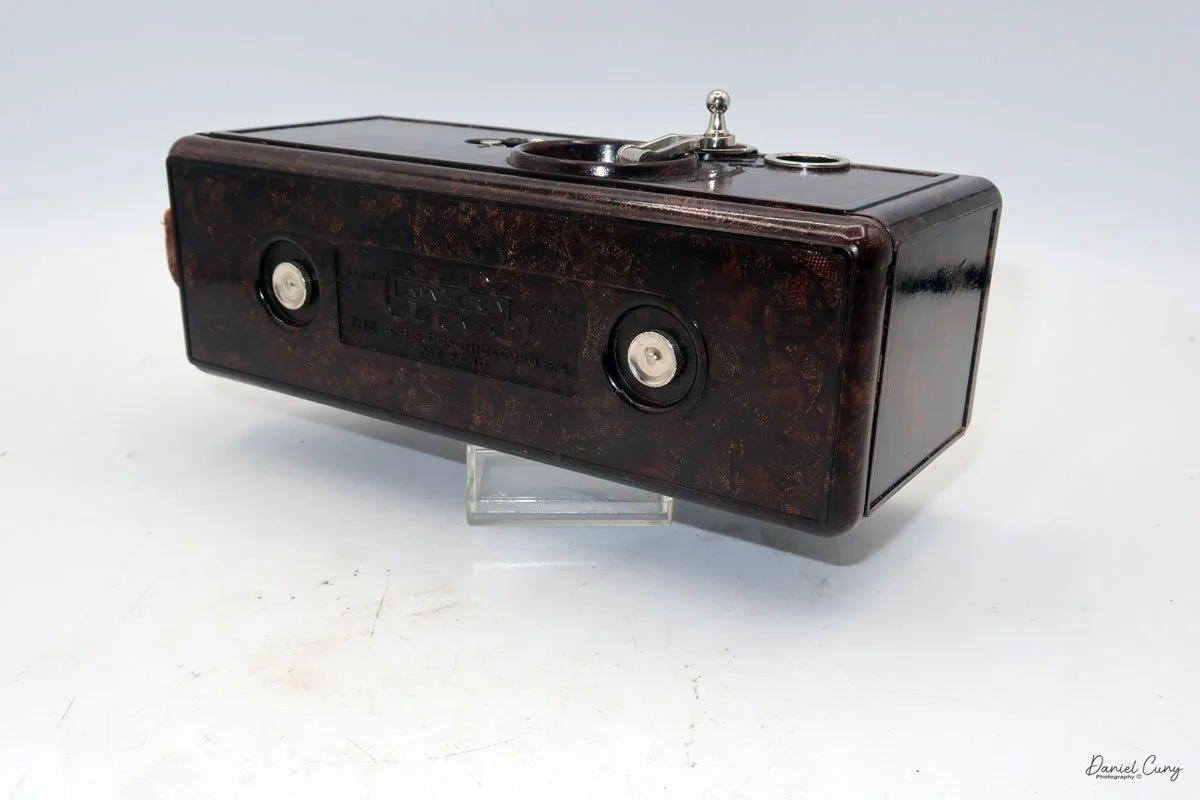
To open the back to load film, slide the two knobs on the back of the camera to the left, which allows the back to come off. Once the back is off, you can see two metal cassettes inside the camera. The cassettes take 35mm film, which you'd load into the cassette on the left, and the exposed film would travel into the cassette on the right. There is no inner spool in the cassettes; the film slides into the cassette, very similar to how the Ansco memo cameras operate.

When you turn the crank on top of the camera to advance the film, the drive gears on top and bottom transport the film from the supply cassette into the exposed cassette. The advanced gears are attached to the frame counter, which would move to the next frame. Once all the images were taken, you take the cassette on the right to be processed. Then load the camera with more film and take more photos. 

 The camera is straightforward and basic, without a lot of bells and whistles. The cameras were only made for a few years, first as the QRS Kamra, then, after QRS was purchased, the camera became the DeVry Kamra. Unfortunately, due to a few factors, the cameras were only made for a few years. One factor was the emergence of 35mm cameras, and the second was the poor quality of the advance and shutter release wheel, which broke on many of the QRS and later the DeVry Kamras.

Conclusion:

 I'm glad to have the odd and unusual camera in my collection. The more I think about the connection between the Ellison camera and the QRS Kamra, the more I realize its significance. The QRS company was looking for an inexpensive and straightforward camera. With the new two-blade shutter the Ellison company had, I'm sure they were anxious to get it onto other cameras, and they made the connection somehow.

 Like many of these cameras, mine is operational, but I discovered a fascinating individual in the UK who rebuilt the shutter and created a more reliable crank for the top of the camera. Here is his article on Restoring a QRS Kamra. Once he got the camera operational, he mentions towards the end that the quality of the images is pretty poor. Please take a look at his article; it's very well done.

Here’s a copy of the QRS Kamra manual I found stuck to the top of the camera box.

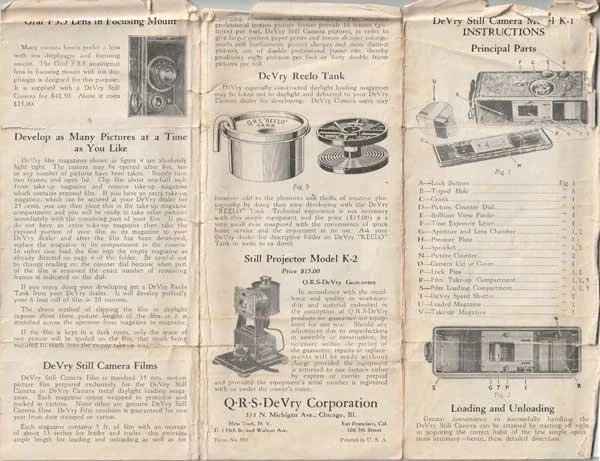
QRS Kamra manual Pg. 1

QRS Kamra manual Pg. 2

 Thank you for taking a few minutes to read about this odd bird of a camera (Kamra).

 Here's a link to my other camera reviews.

 I also have an eBay store, Cuny's Camera and Photo, where I sell some of the cameras I've reviewed, along with many other photo odds and ends.

 Until next week, please be safe.

No. 4A Speed Kodak Camera

My No. 4A Speed Kodak camera

The No. 4A Speed Kodak camera is a massive camera. It's one of the largest folding-style cameras in my collection. I recently acquired this camera as a trade during a camera show in Seattle, where I was a vendor. 

 The person I acquired the camera from has a very similar collection to mine. During our discussion, he mentioned that he had two No. 4A Speed Kodak cameras. On display at the show was a large and heavy Japanese machine gun camera. I owned the camera for many years, but I didn't want to transport it back to my home, so I asked if he was interested in trading one of his No. 4A cameras for my Japanese machine gun camera. I was very excited when the discussion of trading one camera for the number four speed Kodak became official.

 This is the second No. 4A Speed Kodak camera I've had the pleasure of owning. The first number for a Kodak camera that I purchased was from a customer in Atlanta, Georgia. During a visit to an antique store, I mentioned that I collect cameras. The owner of the shop told me that they were the trustees of an estate that owned many cameras and were getting ready to sell them. I asked if I could see their collection, and they said yes. 

 Unfortunately, I only had about 30 minutes to rummage through what they had, as I had a sales appointment with a customer and didn't want to be late. While rummaging through the cameras I had set aside, I came across 15 to 20 items I wanted to purchase from the estate, including a No. 4A Speed Kodak camera. The camera was in my collection for several years until one day I decided to sell it. 

After selling the No. 4A Speed Kodak, I regretted selling it due to how rare they are and how seldom you see them for sale. It's a camera that I've been looking to purchase again for many years.  I was thrilled to find one and strike a deal for it while I was a vendor at the Camera show in Seattle.

 History:

From Kodak 1912 Sales Catalog.

 George Eastman, a self-taught chemist and businessman, revolutionized the world of photography with the founding of the Eastman Kodak Company. Born in 1854, Eastman's early life was marked by financial hardship, forcing him to leave school at 14 to support his family. His foray into photography began in the late 1870s, a time when the process was cumbersome and expensive, requiring heavy equipment and on-the-spot chemical processing. Eastman envisioned a more straightforward, more accessible method for capturing images.

Advertisement for Speed Kodak cameras.

 After years of experimenting in his mother's kitchen, Eastman developed a successful dry-plate formula and a machine for mass-producing them. This innovation led to the establishment of the Eastman Dry Plate Company in 1881. A pivotal moment came in 1888 with the introduction of the first Kodak camera. It was a small, user-friendly box camera that came pre-loaded with a roll of film capable of 100 exposures. The company's slogan, "You press the button, we do the rest," perfectly encapsulated its business model. Once the roll was finished, the entire camera was sent back to the factory in Rochester, New York, where the film was developed and printed, and a new roll of film was inserted before being returned to the customer.

 The turn of the century saw another groundbreaking innovation with the release of the Kodak Brownie camera in 1900. Priced at just one dollar, the Brownie was marketed towards children but was embraced by all. This affordable and easy-to-use camera democratized photography, turning it from a professional trade into a popular hobby. For the first time, ordinary people could create their own visual records of their lives, leading to the advent of the "snapshot."

 For much of the 20th century, Kodak dominated the photography industry, pioneering advancements in color film and motion picture technology. However, the company's reliance on its highly profitable film business model proved to be its undoing. Despite inventing the first digital camera in 1975, Kodak was slow to embrace the new technology, fearing it would cannibalize its film sales. This hesitation allowed competitors to seize the digital market. By the time Kodak fully committed to digital, it was too late. The company filed for bankruptcy in 2012, a poignant end for a company that had once put a camera in everyone's hands.

My Camera:

As I mentioned in the first line of this blog, the No. 4A Speed Kodak is a behemoth of a camera, which has a beautiful red bellows, measuring 11.75" tall, by 6.5" wide, and 3.5" deep when the camera is closed. When the camera is opened, the lens extended, the camera is 12" deep. My camera weighs in at 5 lbs. 11.5 ounces. The camera first appeared in the Kodak sales catalogue in 1908 and remained there until 1912.

The serial number of my camera is 519-D, which you can find on the back side of the "Kodak" leg used to support the camera when opened. My No. 4A Speed Kodak camera has a batch ID number of 747, which is found on the inside of the back door, along with a matching number on the film "wings" used when loading film. 

 The negative size of the No. 4A Speed Kodak is a whopping 4 1/4" x 6 1/2" on 126-sized roll film. Not to be confused with the 126 cartridge film from the 1960s. Please note the size of the film spool for the No. 4A speed Kodak compared to a spool from a 120 size film.

The unique feature of the No. 4A Speed Kodak is its built-in Focal Plane shutter system. This shutter allows the camera to shoot from speeds of 1/5 on the slow end to a top-end shutter speed of 1/1000. The camera could also do timed exposures if necessary. The focal plane shutter is set by a series of tension wheels and settings done on the top of the camera. To achieve the desired shutter speed, the tensions and sliders are adjusted according to the graph displayed on top of the camera.

 To open the camera and take a photo, as with many other Kodaks, a button on the side unlocks the folding bed. Once the bed is opened and in the locked position, the lens can be slid out onto the bed by pinching the two grips just under the lens and sliding it into the "taking" position. There is a fine focus adjustment on the folding bed, allowing you to focus on your subject. 

 Similar to other folding cameras, a waist-level finder is located to the top right of the lens and covered by a chrome cover to prevent dirt from hindering your ability to frame your subject. This waist-level finder can be used for vertical or swung sideways for horizontal images. There is a secondary finder on top of the camera that flips up, and according to the catalog, this is an extra called the Direct Viewfinder.  

 To close the camera, use the two grips to slide the lens back into the camera body. Once you're all the way in, press down on the arms that lock the camera erect. They will unlock, allowing you to fold the bed back into the camera's body and lock it back in place.

To open the back of the camera and load the film, use the two buttons located on each side of the camera body near the back. Press both buttons, and the back will come off the camera. Sometimes you'll need to pull the back away from the body to remove it if it doesn't spring open. The sides of the camera will also swing open, making it easier to insert or remove the roll. You'll also need to unhook the side strap before taking the back off. Unfortunately, my No. 4A Speed Kodak is missing the strap, but this procedure is similar to how the Kodak Panoram cameras open and close.

 Once the film is loaded in the camera, slide the bottom of the back into the slot and press it into position, ensuring the side wings are closed. The back will then snap and lock into place.

Conclusion:

 The focal plane shutter on my camera is not operable, and the shutter curtains are very brittle. After a bit of coaxing and taking the time to work with it, I managed to get one of the shutter curtains to close, but you can see how brittle it is from the photos.

 Also, on my No. 4A Speed Kodak, the red bellows have separated from the black fabric on the inside of the bellows on the right side of the camera. That's why the bellows seem so wonky on that side. Still, having one of these cameras for display purposes is a wonderful thing, and I'm pleased to have this 110-year-old camera back in my collection.

 Thank you for taking the time to look over and read about this fascinating camera from Kodak's past.

 Click the link to see other Camera Reviews.

 Visit Cuny's Camera and Photos on my eBay store to see cameras and other photo odds and ends I have for sale. At times, I even sell cameras from my reviews.

 Until next week, please be safe.


Riley Rilex camera

My Riley Rilex camera

The first time I saw the Riley Rilex camera was at a camera show in Seattle, WA, about six months ago. I was selling cameras and other photo items at the show. A friend who had driven up from the same area I live in and know well approached me looking to sell the Riley Rilex camera.

 He handed me the camera, and my first impression was that it was an odd and unusual-looking press-style camera. It was a full-sized 4x5 press camera, but It's a more miniature 2 1/4 x 3 1/4 press-style camera. There's a large handle on one side, making it very easy to handle and carry, but what caught my eye was the bright aluminum camera body and how light and compact the camera was. A rangefinder was attached to the side of the camera, and the focusing method seemed sketchy and rudimentary but was in working condition. 

 Playing with the camera, the shutter worked well, the aperture moved as it should, the bellows were intact and seemed in excellent condition, and the focus was smooth. When my friend told me the asking price, I told him I didn't do much with this style of camera and handed it back to him, but then he lowered his price, and my thought was, this seems to be an odd and unusual camera, it would be fun to write about it. I had never heard of a Riley Rilex camera, so it would be fun to research it. I thought I had some holder back home, so I pulled the trigger and purchased the camera from him with the intent to write this article about it.

Nameplate on my Riley Rilex camera

 I've owned several Graflex Baby Graphic cameras, so I'm not unaware of the smaller press cameras made during the 1940s and early 1950s. The Baby Graphic cameras are fully enclosed within the camera body, which is covered in black leatherette. Here is the Riley Rilex camera, which is almost the direct opposite. It is bright and shiny, made from lightweight aluminum, and without a boxy case, the lens and bellows fit into. What an odd and wonderful-looking camera.

The Company:

Several camera companies opened up in Southern California just after World War II. Companies like Printex, which manufactured a 4x5 Press camera in Pasadena, CA; Newton Photo Products in Los Angeles, CA, which made a lightweight view camera; and Brand Camera Company, also of Los Angeles, also made a rail-style view camera. All of these companies opened right after World War II, between 1947 and 1947, giving returning soldiers employment and hoping to build onto the growing photographic industry of the time.

 Curtis Riley was a tinkerer, amateur inventor, and aircraft engineer at Lockheed in Los Angeles, CA, during the 1940s. A photographer friend, frustrated by the weight of press cameras during this time, mentioned to Curtis that the cameras were rugged to carry around. Curtis, at the time, was working with lightweight aluminum for the aircraft industry, so he took up the idea of coming up with a lighter-weight camera for the industry.

Ad for Rilex camera

This was the start of the husband and wife-owned company, Riley Research Company, located at 128 Berkeley Street, Santa Monica, CA. Curtis came up with the design of the Riley Rilex camera, and they started to produce the aluminum body camera. It's unknown how many employees they had or if they did most of the manufacturing themselves. The design is relatively simple, and once the camera pieces were machined, putting them together wouldn't be difficult. It was confirmed that Gay, Curtis's wife, would fold the bellows at the kitchen table, and from what I understand, it wasn't her favorite job.

It's estimated that The Reily Research Company produced around 800 cameras over three years, during which the company was in business. The cameras had the option of a Wollensak Raptar lens in an Alphax shutter. If you wanted the Rapax shutter with speeds up to 1/400 sec., that was an additional $12.00.

 Advertising of the camera started in the fall of 1948 with ads in Popular Photography and local camera stores. The Riley Rilex camera was advertised for $49.50, including a tax-free lens. The rangefinder was "optional Equipment." In the advertisement listing the included Lens and Rangefinder, the camera is listed at $99.80, with a savings of $35.24.

 Unfortunately, the Riley Rilex was only advertised for three years, from 1948 to 1951. Due to the success of this small camera company in filling a requested need, other larger manufacturers began building a similar style of camera. After 1951, Curtis and Gay moved on to other endeavors, and the Riley Rilex camera became a desired collectible camera. 

The Camera:

My Riley Rilex camera measures 7" wide, including the metal handle, by 6" tall, including the eyesight knob, which doubles as a tightening screw on the back of the camera by the rotating back, by 6.5" with the bellows extended or 5.25" with the lens and bellows retracted. My Riley Rilex camera weighs 2 lb. 14.6oz and includes a 101mm f4.5 Wollensak Raptar lens in a Rapax shutter. My camera was an upgrade to the information above. I also have the Model B camera with the serial number 617 

 The Riley Rilex camera was made in three models: A, AB, and B. The first model, the "A," was short-lived, as the recommendation of adding a rangefinder to the side of the camera was made. The first production run was halted to add a rangefinder and the focusing rod to the camera's right side. I've seen some examples of the Rilex camera with a Kalart or Hugo Meyer rangefinder. One of the other modifications was having a rangefinder that supported an external flash.

To use the external rangefinder on the Rilex camera, a focusing rod comes out of the top of the rangefinder and leans up against an aluminum block attached to the focusing rack and pinion rod for focusing capabilities. When you used the rack and pinion focusing on the camera, the focus rod would move, thus focusing on the rangefinder.

 You can also use the traditional ground glass on the back of the camera, which flips down or up depending on the orientation of the camera's back. The back of the camera is highly polished chrome, which adds to its look.

To change the orientation of the cameras back from horizontal to vertical, the eyesight, which can be used with the wire built into the front frame, can be used as an action finder, which can be turned to lock or unlock the back rotation. There is a small line just behind the eyesight knob to show the camera's back is level with the camera.

 The camera offers full swings, tilts, rises (no falls), and horizontal shifts from the front brace of the camera. Like the back, there are centering marks on the front to quickly return the camera to a level and even settings on the camera. One thing on my camera that I'm sure some have already noticed is that I'm missing one of the knurled nuts that hold the 2 3/8"  lens board onto the camera body. That wouldn't affect the clarity or ability to use the camera. It's more of a visual appearance flaw than anything.

Unfortunately, I don't have the film holder for this size of the film, and the back of the camera cannot be easily removed to use a roll film adapter, so I could not use the camera, which would have been fun to try.


Conclusion:

I've had the absolute pleasure of continuing correspondence with Curtis and Gay's granddaughter, Barbara. She has helped me with this article by providing fabulous family photos and advertising for the family company. I want to thank her for all the insight she's offered me, which is tremendously appreciated.

 The camera itself is marvelous. It's small, compact, and visually appealing. The bellows are made from a stronger material than most view or press cameras, and it's terrific to think they were all hand-folded.

 I need to find a small film holder to try out this camera. I know I've had them, but I must have sold them with other cameras or just separately. Once I actually use the camera, I'll be sure to update this post with some images it produces.

 Thank you for reading about this unique family-owned camera company from Los Angeles that filled a niche product people were asking for at the time.

 Are you interested in reading my other camera reviews?

 I also have a store on eBay, Cuny's Camera, which has some odd and unusual products, including cameras and lenses.

 Until next week, please be safe.

Panon Widelux F7 Camera

My Widelux F7 camera

I enjoy several different types, styles, or kinds of cameras. When I started collecting cameras over 50 years ago, I was drawn to anything out of the ordinary. If the camera had a different faceplate on a box-style camera or was a different color or shape, these were the items I've always searched for when I go out looking for cameras or anything photographic to add to my growing and now hopefully somewhat shrinking collection as I'm "trying" to downsize my collection.

 One of my favorite types and styles of cameras is panoramic cameras, which fit right in with the odd or unusual types made. They take different forms when you start to look at the various styles of panoramic cameras. They can look like a wood and bellows camera on a geared tripod, which would be a circuit camera and one of the first styles of panoramic camera. They can look like a more extended box style camera but have a lens that rotates across a curved film plane similar to the Kodak Panoram or more intricate Multiscope Al-Vista camera, which employed different sizes of "flags" to speed up or slow down the rotation of the lens. Or an elongated camera similar to the Fuji 6x17 or Horseman 6x12 camera.

Image taken from Widelux F7 Manual

 Essentially, panoramic cameras expose a longer piece of film in the camera itself. They generally have a wide-angle lens to expand the area the camera and film see. It is very similar to cropping the top and/or bottoms of any format film to give the appearance of a longer, broader photo. I remember in the 1980s and 90s when the camera had the "panoramic" feature built into the point-and-shoot camera that did nothing more than have a blade within the camera close to the film plane that would crop the top and bottom of the film frame to take what appeared to be a panoramic negative. Heck, they even had disposable cameras that did just that.

 I have several panoramic cameras, and a few years ago, I purchased a very good Widelux F7 camera. Cosmetically, it wasn't the best, and it needed some work, so I researched where and who could repair the camera for me. Ultimately, I sent the camera to Precision Camera Works in Lakeway, Texas. If the lens turret doesn't move smoothly across the film plane, the camera will cause banding due to the inconsistent movement of the lens.

 Upon completion of the overhaul, they did an outstanding job. They even replaced the difficult-to-turn rewind knob with something better, which makes the camera easier to rewind the film. The best part is the new rewind knob doesn't tear into your skin when you rewind the film, which was one of the big pet peeves of the camera before I had it serviced. They did return the old knob, so if I wanted to have it put back, it's quickly done.

The video below shows the camera being re-wound, then I changed the shutter speed to show the lens movement.

The Old and New Company:

The Old Company:

The Widelux camera was made by Panon Camera Shoko, which was started in 1952 by Nakayama Shozo. A small camera manufacturer originally made the Panon camera, which I wrote about back in 2020. It was a swing-lens camera made for 120-size film. The company was small but specialized in the swing-lens panoramic camera style and improved the larger 120-format camera.

 In 1958, the Panon company, known for its swing lens style of panoramic cameras, introduced its first 35mm panoramic camera, the Widelux F1. This camera, incorporating a 26mm f2.8 lens, exposed a film frame 24x59, approximately 65% longer than the standard 35mm frame. This extra area gives photographers a 140-degree diagonal angle of view and 126 degrees horizontally. Over the years, Panon Camera Shoko continued to innovate and improve its models, leading to the production halt of the F8 model in the mid-1990s.

 1963 Panon introduced the Panophic, a 120-film format swing-lens panoramic camera. This is an updated version of the Panon camera with an interesting design, a curved back, and a much larger viewfinder on top. In 1987, Panon introduced the Widelux 1500.

The New Company:

There is someone more famous than myself who also enjoys panoramic cameras and photography, and that's the Big Lebowski himself, Jeff Bridges, and his wife Susan, a tremendous photographer in her own right. They are partnering with Marwan El Mozayen, Editor-in-Chief of Silvergrains Classic, and Charys Schuler. They have formed SilverBridges, planning to re-introduce the new Widelux X camera. Their goal is to have the camera introduced sometime in 2025. My fingers are crossed, and if they need someone to test the camera and give it a review, I'm personally raising my hand now. I and a thousand other people have a much larger audience than I have.

My Camera:

My Widelux F7 camera is not just a piece of equipment; it's a companion on my photographic journey. It's 6.5" wide, 3 5/8" tall, and 2.25" deep from the front of the lens turret to the rear of the camera. The F7 weighs 1 lb. 14 oz. with a roll of film in the camera. Like all Widelux F7 cameras, I have a 26mm f2.8 lens, serial # 466392. The lens rotates on a cylinder across a curved film plane to get a longer negative area. Because of this longer negative, the camera only takes 21 images on a roll of 36 exposures. I generally get 22 when I use my camera. It will take approximately 13 on a roll of 24. Here is the manual for the Widelux F7.

There are only three shutter speeds on the camera: 1/250, 1/125, and 1/15. The aperture on the lens ranges from F2.8 to F11, so the exposure control, while adequate for most shooting, is less than what most people would consider normal. All of the controls are on the top of the camera, along with a bubble level to make sure things are straight, the film advance and rewind knobs, along with a wide viewfinder to give the photographer an approximate view of what they'll get within the photo.

The more tricky thing about the Widelux camera is the film loading. If not done correctly, which is what happened on my first roll, some of the negative areas won't be sharp. To take the back off the Widelux F7 camera, there is a locking knob on the back to lock by turning counterclockwise to the unlock position and clockwise to lock the back onto the camera, which is clearly seen.

 Once the back is off the camera, the typical film chamber is where you put the fresh roll on the right-hand side. Lift up the rewind knob to put the fresh roll in, then to hold it into place, press the rewind knob down to lock the film cassette into the camera. At this point, I crimp the very end of the film upwards to help the loading process.

There are two columns, one on either side of the curved film plane. The film must go under the first column on the left-hand side, then over the film plane, and then back under the column on the right-hand side. This is where I ran into a problem with my first roll of film. There is a slit between the right-hand column and what you see looking down on the camera. Make sure the film goes all the way down under the column before it comes back up by winding the camera and having the film drive gear pull the film leader back up. The first time I loaded the camera, the film went through the slot, and the right side of my negatives wasn't sharp, and I was disappointed.

One of the reasons why I crimp the end of the film leader is to grab onto the film drive gear when going under the second column. It needs something to catch onto to pull the film up and across the drive gear before I place the leader into the take-up spool. It's not that difficult, but you'll understand once you get the camera. Before I put the back onto the camera, I always take up the slack with the rewind knob, so once I put the film back onto the camera and lock it, I can see the rewind knob turn as I wind to the next frame. This way, I know my film is transporting across the shutter, and I'm taking photos. When I worked retail in a camera store, I can't tell you how many times I had people not load their cameras correctly, and watching the rewind knob turn when advancing the film is a surefire way of telling if the film is loaded correctly.

Arrows showing angle of view.

Now that the camera is loaded and you're ready to start taking photos, it's VERY important to understand how to hold the Widelux camera. You don't hold the Widelux like a regular 35mm camera because of how the lens swings and the wide angle lens; your knuckles and/or fingers will be on the sides of each negative. You want to hold the camera with your thumbs on the bottom of the camera and your fingers on the top—nothing on the sides. Take your meter reading, grab the camera on top and bottom, look through the viewfinder, and press the shutter. You'll hear the whirring of the shutter as the lens swings across the film plane. Wind the film to the next frame and repeat. It will initially feel odd, but once you see your fingers in the photos, you'll quickly correct the holding procedure.

 Now that you've finished the roll of film, press the rewind button on the bottom of the camera and rewind the film into the cassette. Open the back door and take the film to get processed. In my case, take it to the dark bag and processing tank to process the film.

My Results:

I took some photos of walking through the neighborhood for the blog post. I have taken the camera to Africa, Europe, and many other places and absolutely LOVE this camera.

My Conclusion:

What else can I say that I haven't already said in the blog? This is one of my, if not my favorite film cameras. I also love shooting with my Panon, but it's a more prominent and heavier camera, although the results are terrific with the Panon.

 I made a short video on the Widelux F7 basic controls & Loading film.

 Thank you for taking a few minutes from your day to read about this wonderful and exciting camera. I hope many of you have one; if not, you're missing a superb camera.

 Until next week, please be safe.

Expo Watch Camera

This week's camera blog is about another unusual camera given to me many years ago by one of my sisters' in-laws who passed away. The family members knew I enjoyed cameras, so they gifted the camera to me and asked me to take care of it for the man who passed. 

My Expo Watch Camera

 When I first received the Expo Watch camera, I was utterly surprised and deeply touched by the generosity. Opening the small box to reveal the fantastic camera in good working condition was a moment I'll never forget. It was a revelation that the person who passed knew about my love for cameras. It could have been my wonderful sister who had shared my passion with the family.

 Needless to say, it's in a prominent place in my collection and something I look at almost daily and think about the generosity of the person who gifted it to me.

 To add to the story of this blog and the Expo Watch camera, about three to four years ago, I purchased a "lot" of camera items. Among the other items I bought were accessories from what I thought were for the Expo Watch camera. However, after researching the cameras, I found that they are actually for the slightly later British version made by Houghton, the Ticka camera. They fit and work on both the Expo and Ticka cameras.

The Company:

Patent for Expo Camera

The camera was designed and invented by a Swedish designer, Magnus Niéll, who lived in Sweden and New York. The patent for the Expo Watch camera was approved on September 6, 1904. This camera was a significant innovation in the history of photography, as it was one of the first to feature a daylight-loadable film cassette with 25, 16mm x 22mm, or 5/8" x 7/8" exposures in each cassette.

 The Expo Camera Company, located at 256 West 23rd Street, New York, manufactured the Expo Watch camera. It also produced the Expo Police Camera and developed and enlarged accessories for both cameras. The company offered film processing and printing to its customers. If interested, here's a copy of the full Expo Camera Pricelist and Manual.

In an ad I found published in 1917, the purchase price for the Expo Watch Camera was $2.50. According to the price list above, the processing fee was 10 cents to develop per roll of film. Contact prints (5/8"x7/8") were .10 cents per dozen, .07 cents per 2x3 enlargement, and .10 cents per 3x4 enlargement. I also enjoyed their statement that "Cash should accompany all orders for development, printing, and enlarging."

Ad for Expo Watch Camera

 The Expo Watch camera started in 1905, was taken over in the late 1920s by the dealer G Gennart, who produced several different names on the camera. In 1935, there were red, blue, and black enamel cameras, which were extremely rare. 

 In 1905, or shortly after, Magnus Niéll offered the camera's design to the British camera manufacturer Houghton, who produced the same camera under the Ticka name. The Ticka camera was available in the United Kingdom from 1905 to 1914. Some of the later Ticka models had a replica watch face on the front, with the hand indicating the angle of view the photographer would have when taking a photo.

Magnus Niéll designed other cameras for Houghton, such as the Ensign Midget, Ensignette, and the unusual design folding plate Lopa camera made by Kindermann. 

My Camera:

My Expo Watch camera measures 2 3/8" in diameter across the body of the camera, and if you measure from the front of the lens, including the fob ring, to the rear of the camera is 3" long and 1" deep, including the winding knob and the camera weighs 2.7oz. The camera is made from Nickel and has a highly polished chrome top and bottom.

The camera was designed like a pocket watch so it would be inconspicuous for the people the photographer wanted to photograph. This design feature allowed the user of the Expo Watch camera to easily keep it in one of his vest pockets, making it ideal for candid photography. The photographer could remove the camera from his pocket, take the cap off the lens, point it at his subject, and take a photo.

Beneath the fob ring is a lens cap resembling a pocket camera's winding stem. Under the lens cap is a fixed focus, 25mm lens. The camera has two settings for shutter speeds. There is "I" for an instant, approximately 1/125 speed, and the other setting is "T" for a time exposure. The shutter settings are done on the side of the camera with a lever you pull down. The shutter release butting is a small pin on the underside of the camera set at the one o'clock position. Once the camera's shutter is cocked, you press that pin in, and the shutter releases, making the photo.

The shutter release button on Expo Watch Camera

The shutter is not self-capping, meaning that when you cock the shutter, you're exposing the film to light, so it was recommended to keep the lens cap on until you're ready to make the exposure. 

Shutter cocking Mechanist and settings for Shutter speed.

 The lens cap served as the shutter time if you were doing time exposures. You set it to "T," click the shutter, take the lens cap off for exposure, put the lens cap on to end exposure, and the cock the shutter again for the following exposure. I can almost 100% guarantee that 99.9% of these images are blurry due to the person's hand holding the camera for any period of time, along with the movement of taking off and putting on the lens cap, and the negative being so small.

On the underside of the camera, or the opposite side of the removable plate with the beautifully etched "EXPO," is the winding lever you turn to advance the film. Just to the left of the winding knob is a small window that tells the photographer what frame number they're on. Above the winding knob is another logo for the camera company, which includes EXPO in the center of an oval. Around the oval is Pat throughout the world. On top and under is The Expo Camera New York USA

On the bottom of the camera is a lever you can turn to help pop off the etched plate, which comes off to load the film. I'm too afraid to turn this lever too hard, as I don't want the lever to snap off, so to remove the etched plate, I use my fingernails and pull the plate off to expose where the film goes. Once the plate is removed, the film cassette fits into the bottom portion of the camera.

The Expo Camera did have two different viewfinders available that would fit around the collar of the lens, under the winding stem. A simple model A ground glass viewfinder sold for .50 cents, and a model B brilliant finder sold for .75 cents.

 I also have an item made for the Ticka Camera in the group. There were a few accessories, such as the time exposure lens cap. This item fits over the lens and is held into place by a tension screw. Once in place, you can pull the lever up/down depending on how it is mounted to open the lens, exposing the film to light. Using the time exposure cap is considerably easier than taking the lens cap on and off for time exposures. Another item I have is a separate finder lens which is a larger glass item with a convex lens and attaches onto the camera like the other viewfinders. It has the exact attaching mechanism that fits around the lens collar. From what I'm seeing online, both the time exposure lens cap and the larger window finder were made for the TICKA camera.

Conclusion:

The Expo Watch Camera is a fun and exciting camera to have in my collection. I cherish the way I received it. The more I researched the camera and its different variations, the more I'd like to expand my collection to include the Ticka model with the watch face on it or even some of the colored models I'm always drawn to.


Reference:

Pacific Rim:  https://www.pacificrimcamera.com/rl/01266/01266.pdf

Historic Cameras:  http://www.historiccamera.com/cgi-bin/librarium2/pm.cgi?action=app_display&app=datasheet&app_id=919&

Submini.com:  http://www.submin.com/large/collection/expo/introduction.htm

Vintage photo:  http://www.vintagephoto.tv/expowatch.shtml