Voigtländer Bessa 66 cameras

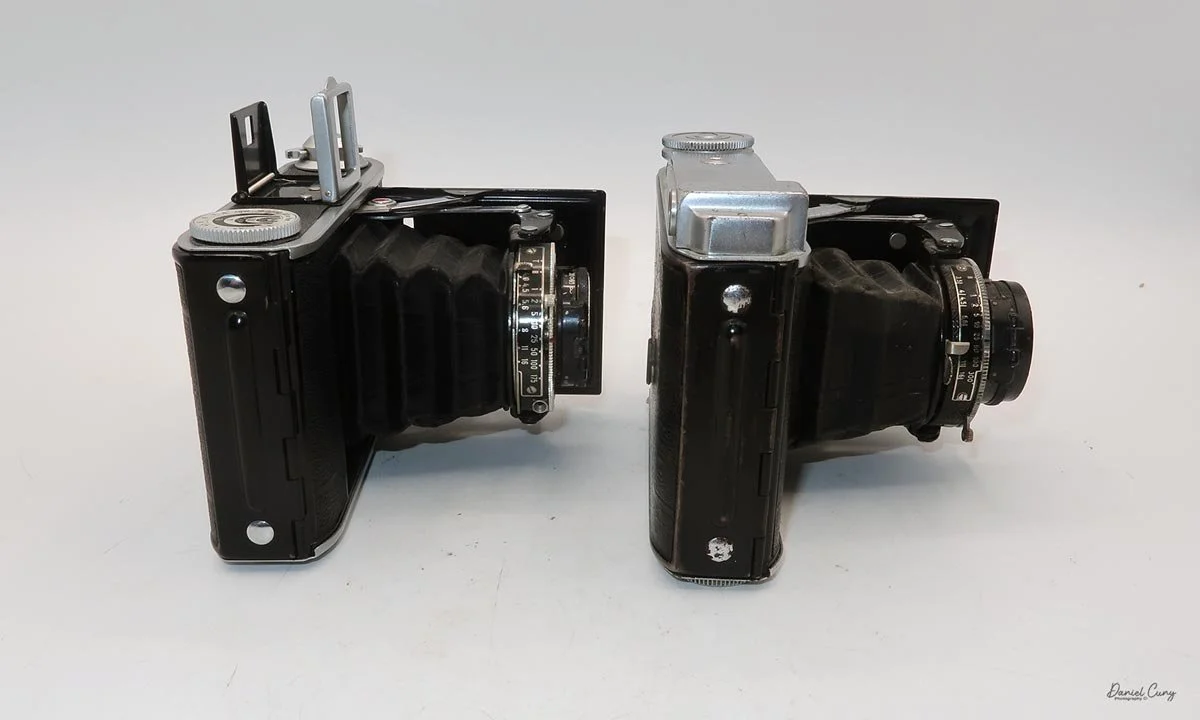
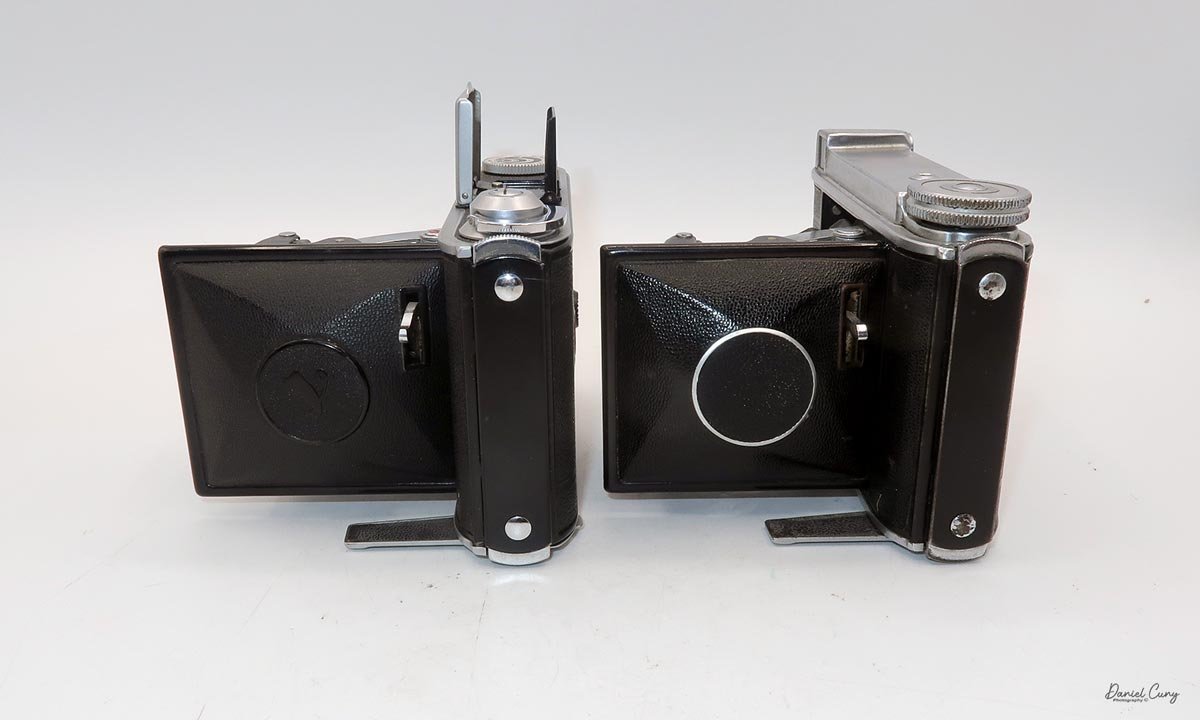
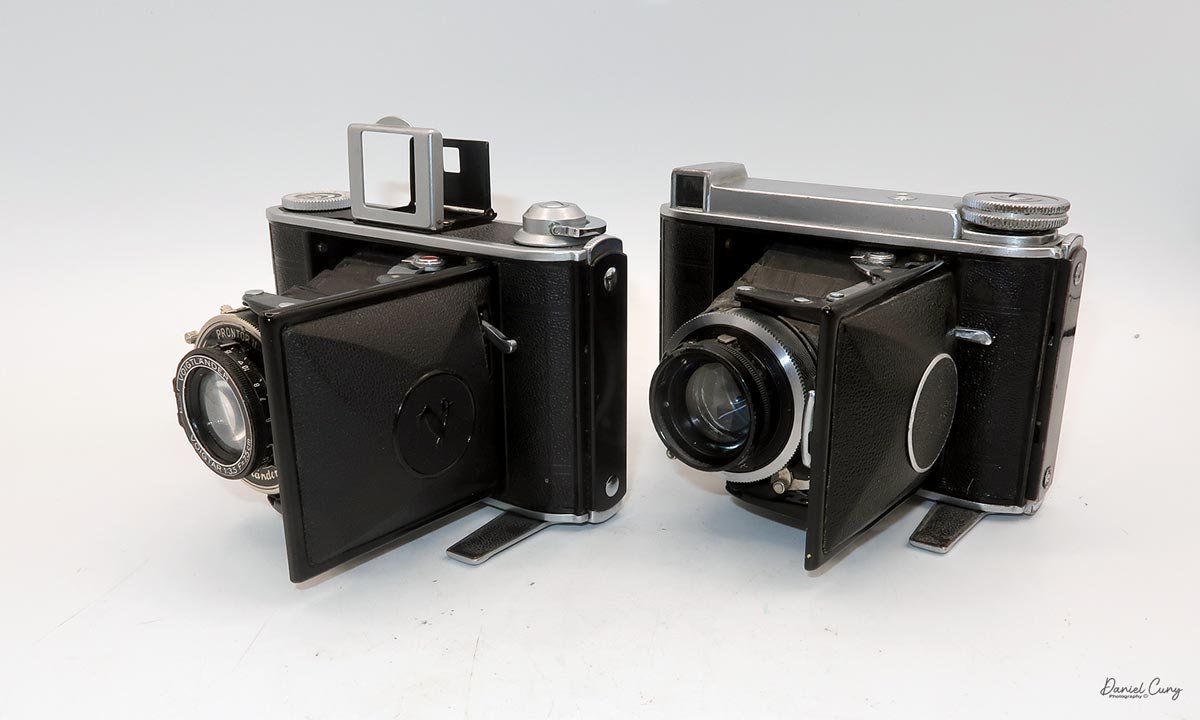
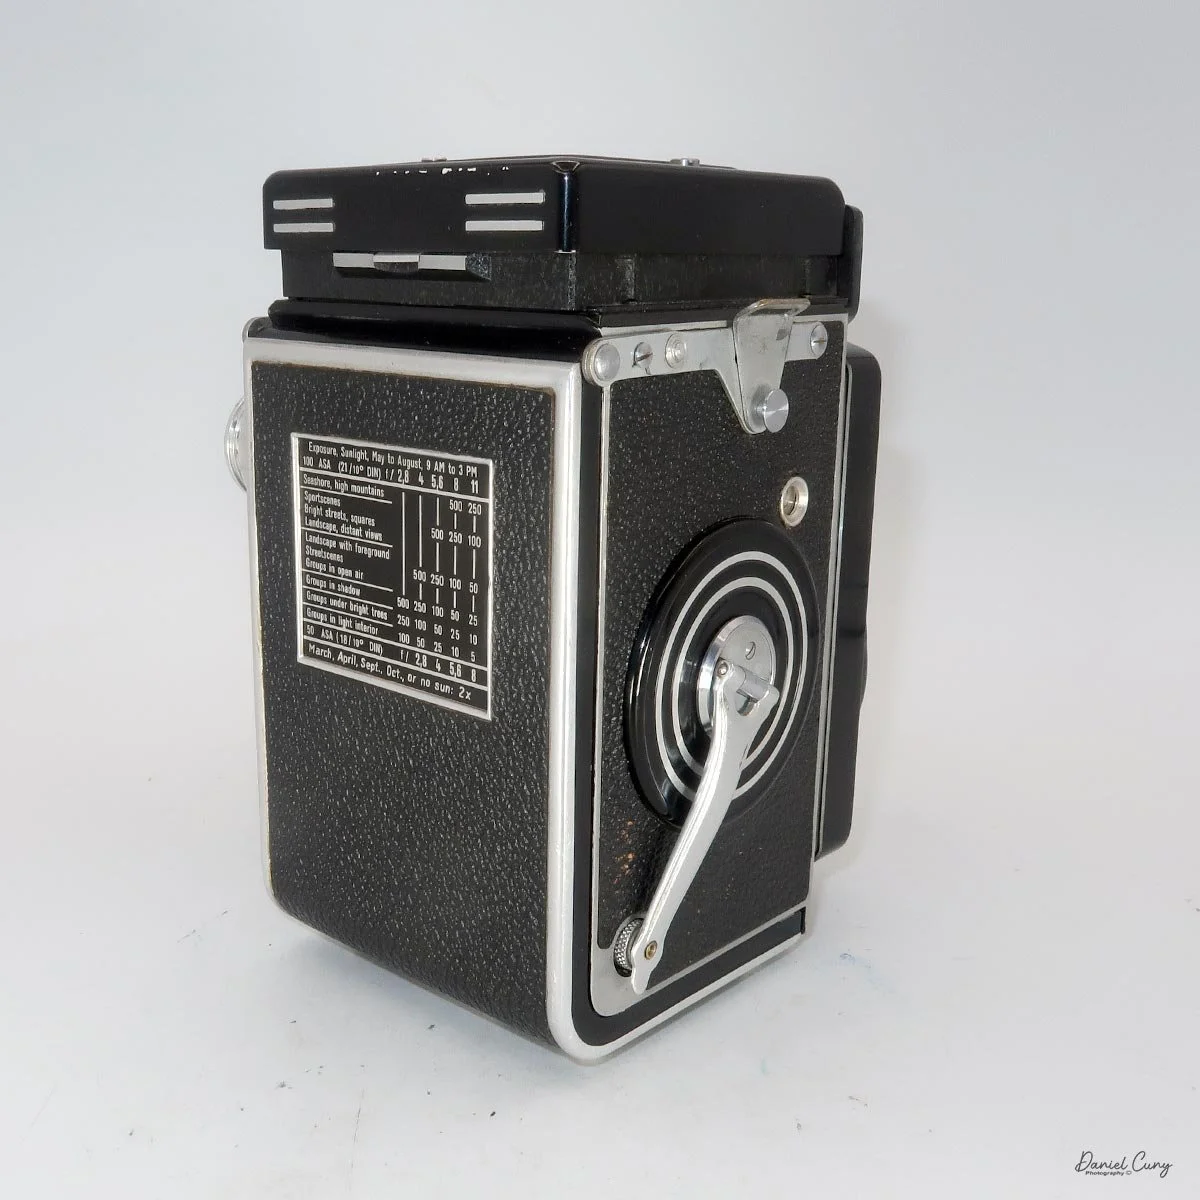
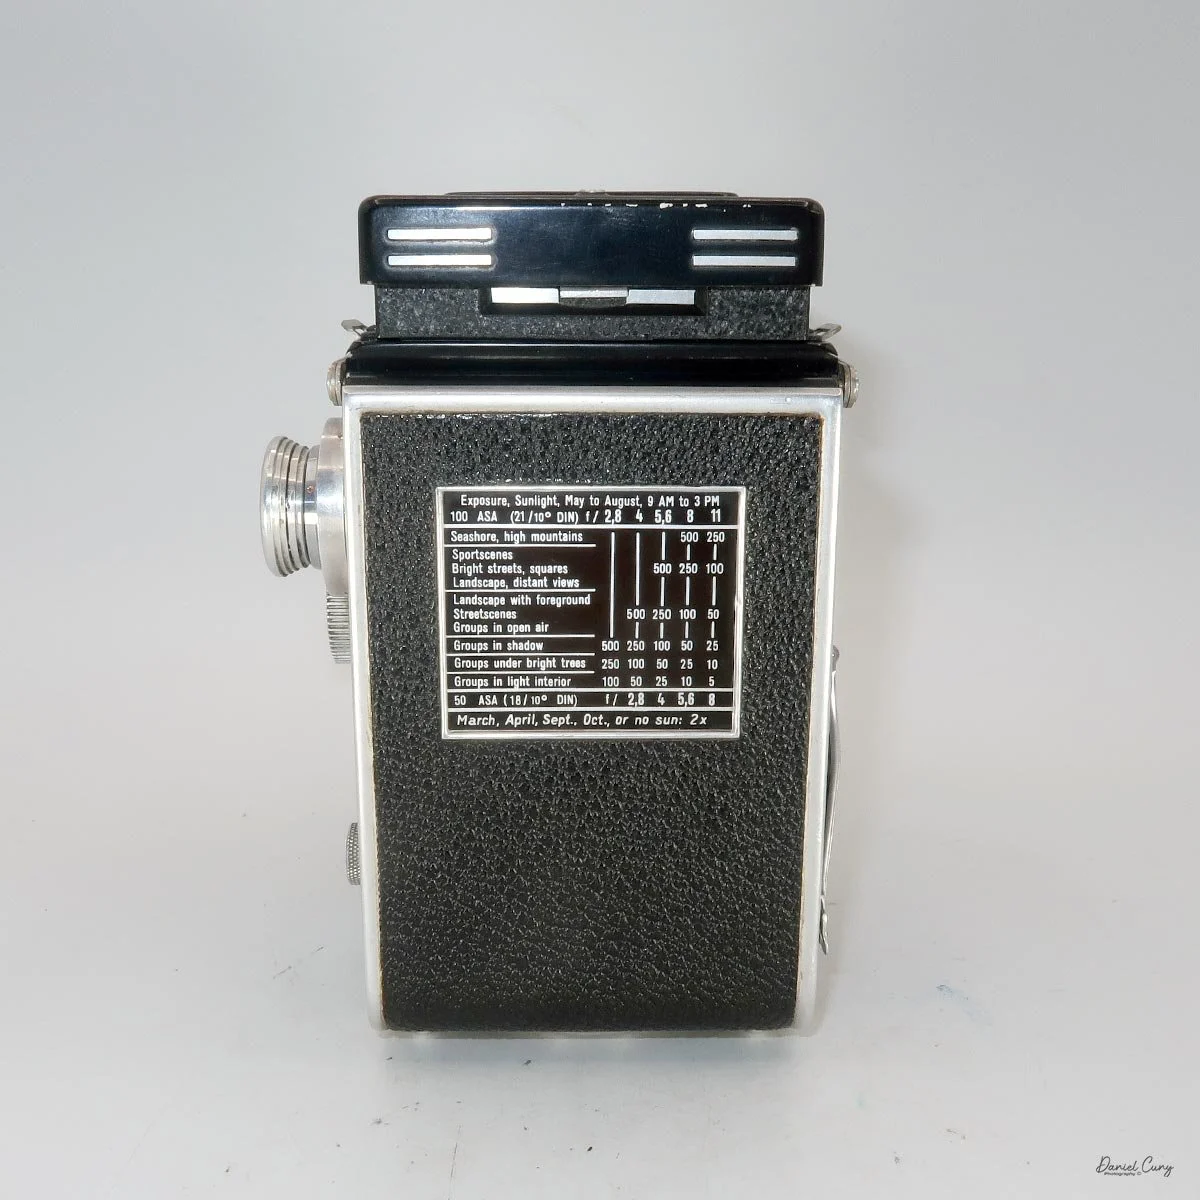
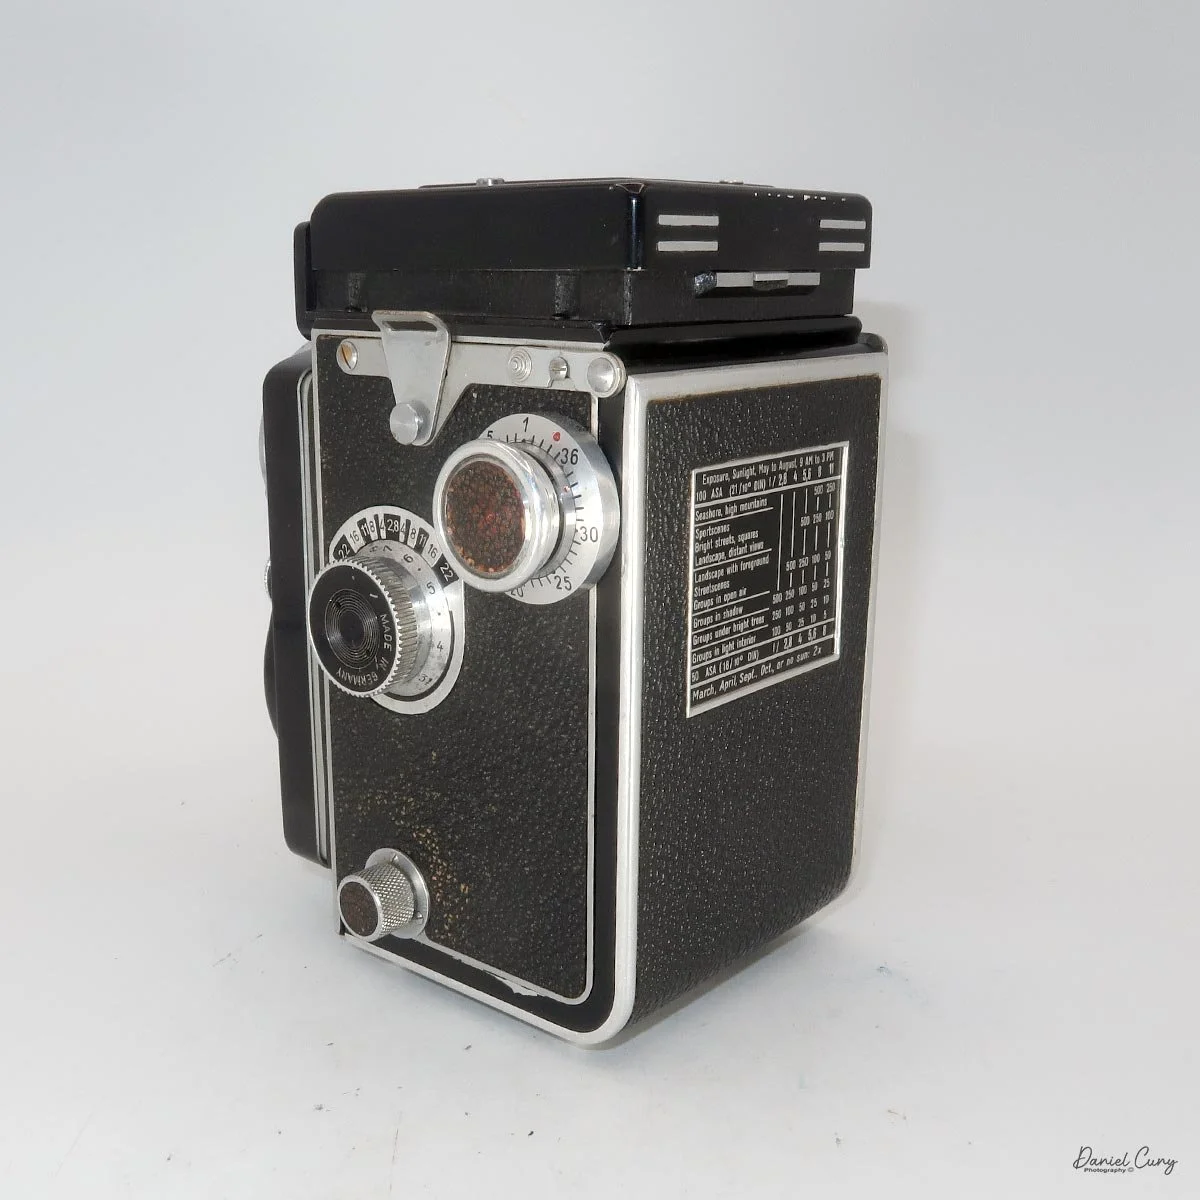
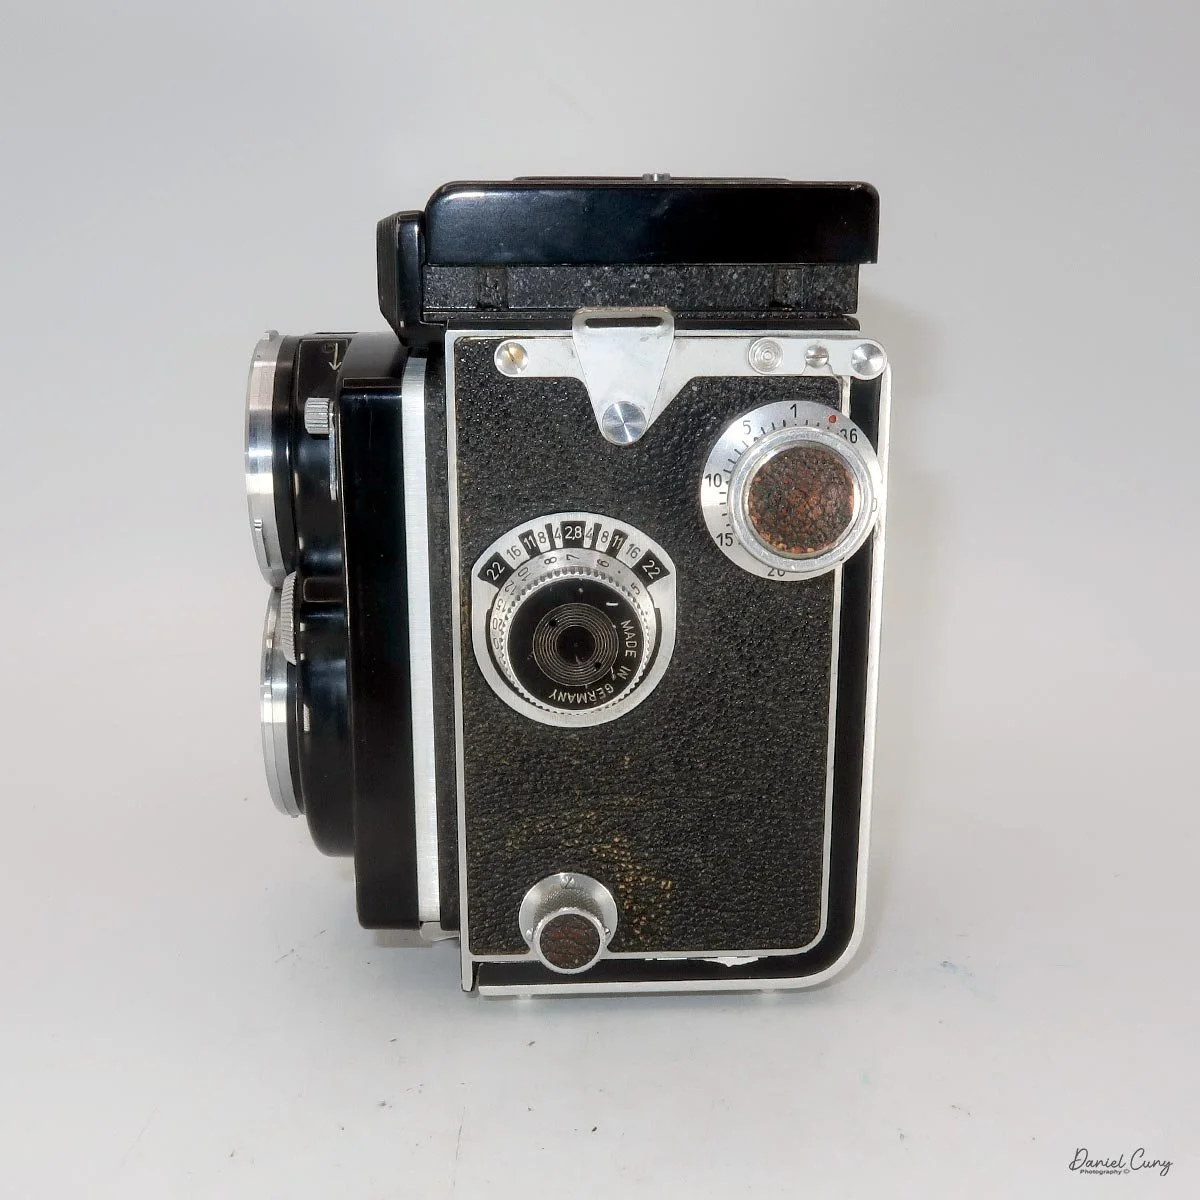
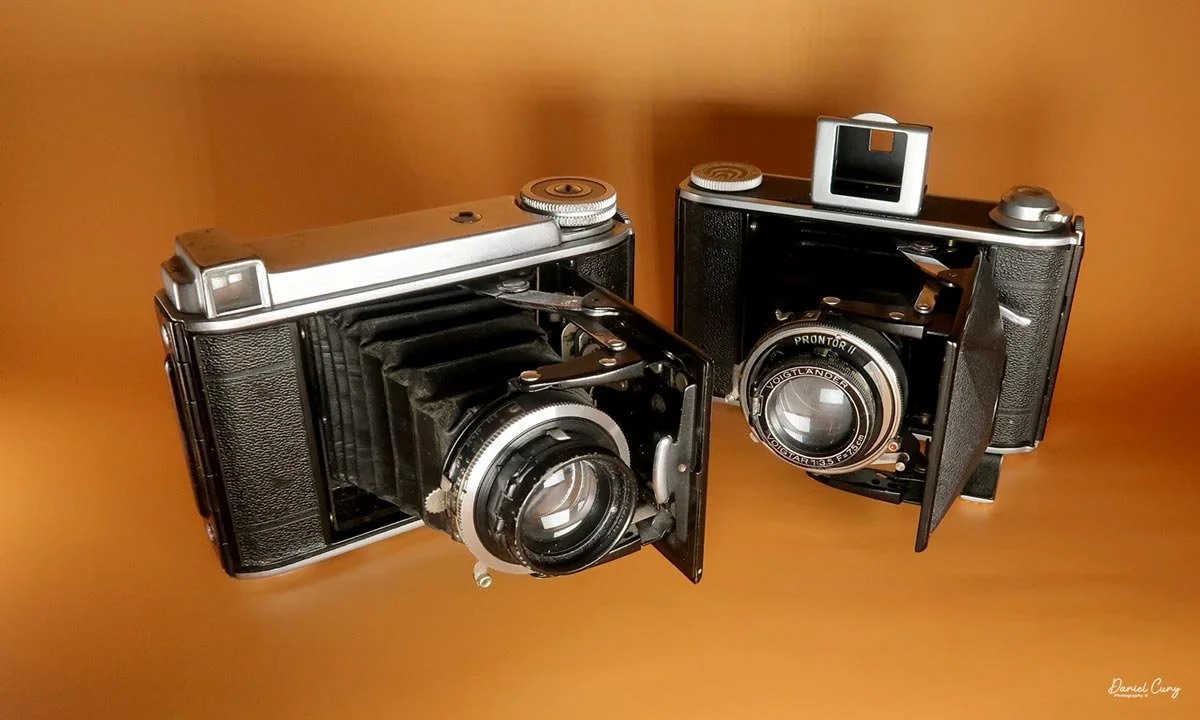
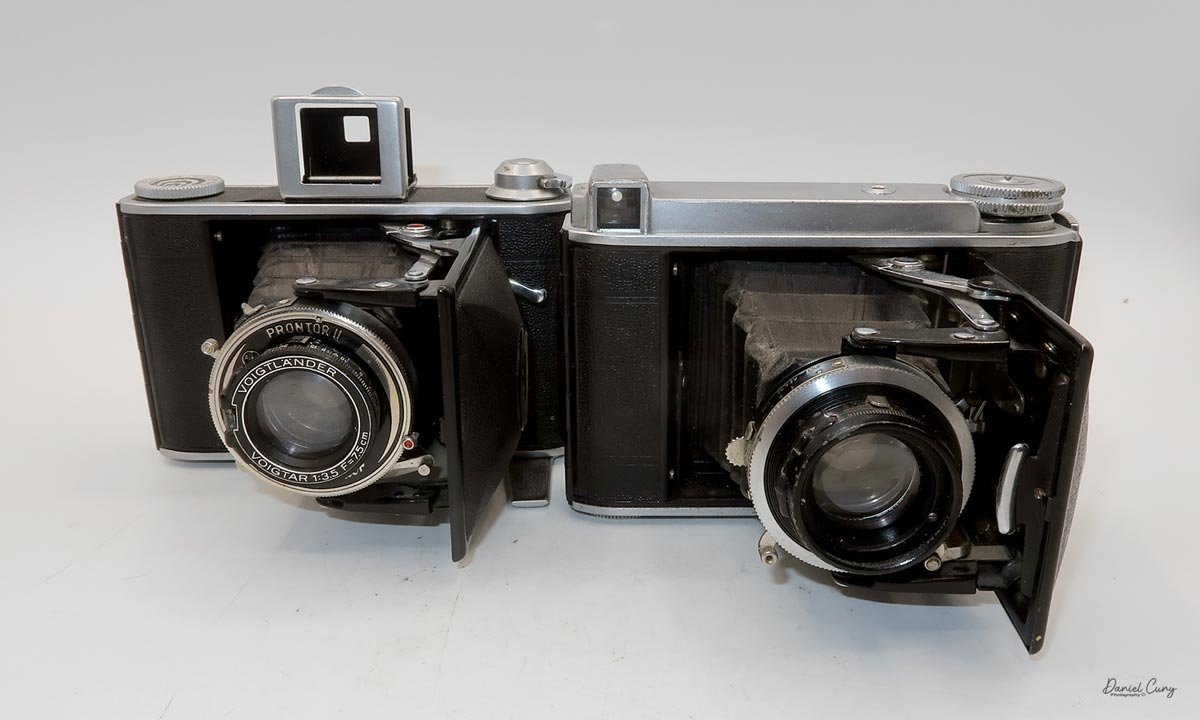
My two Bessa 66 cameras

It's interesting how you can notice some cameras and miss others at the same time.

While I've owned a Voigtländer Bessa in the past, I picked up the smaller Baby Bessa, or Bessa 66, from a collection in Las Vegas about a month ago. I dismissed the camera as I thought it was a similar-looking Voigtländer Vito, a much different 35mm camera than the Bessa 66, which is a compact, medium format 6x6cm camera.

There were actually three similar-looking cameras in the group I had set aside because I had mistaken them for Voigtländer Vito cameras, but after popping the fronts open, I was surprised to see longer bellows and shutters.

As I turned over the camera, I then noticed the embossed BESSA 66 on the back of the camera, and realized that the camera was slightly bigger than the Vito cameras I've had in the past. I was going on merely the appearance of the camera's shape, which is similar. It's the domed front of the camera that houses the lens that is similar on many of the Voigtländer cameras.

After I gathered the three similar cameras for a thorough check-out, I mistakenly thought they were different. Still, I found out two were Bessa 66 cameras and the third was a more refined Perkeo I. At this point, I figured it would be fun to write about the two Bessa 66 cameras and put the Perkeo away for another day.

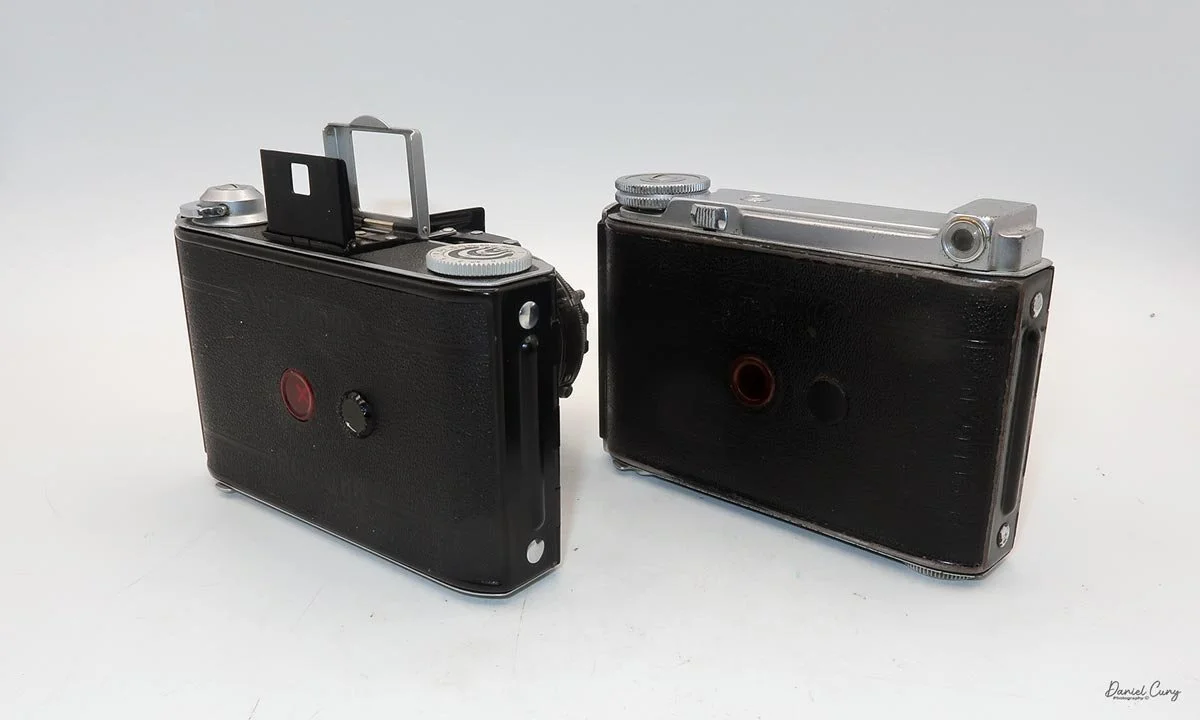
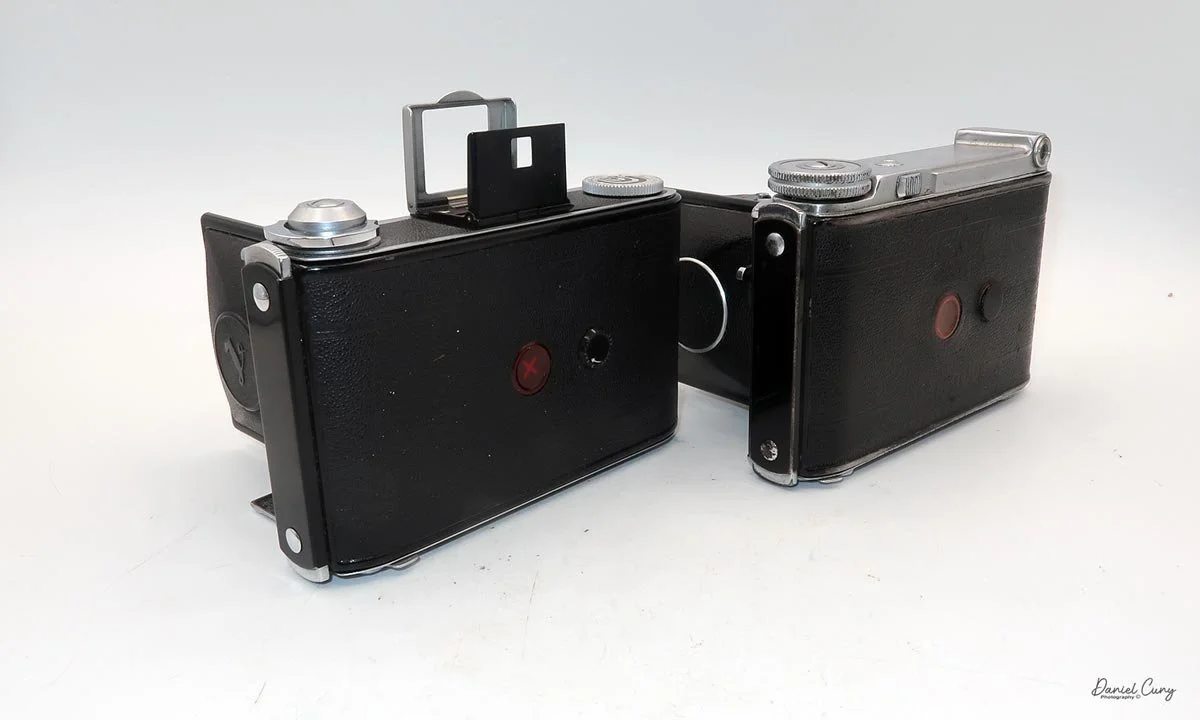
There were a couple of differences I noticed right away about the two Bessa 66 cameras. The main difference was the viewfinder on top of the cameras. One had a fold-out, pop-up finder, more like a sports finder. In contrast, the other has an optical finder incorporated into the top of the camera.

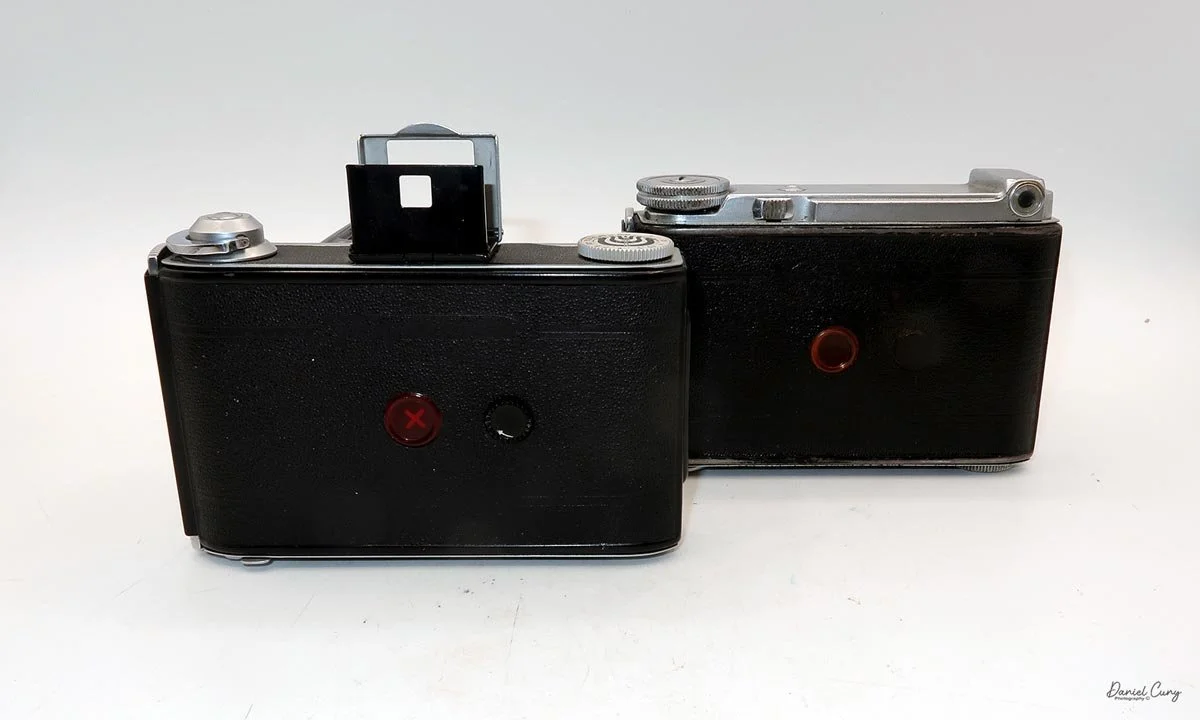
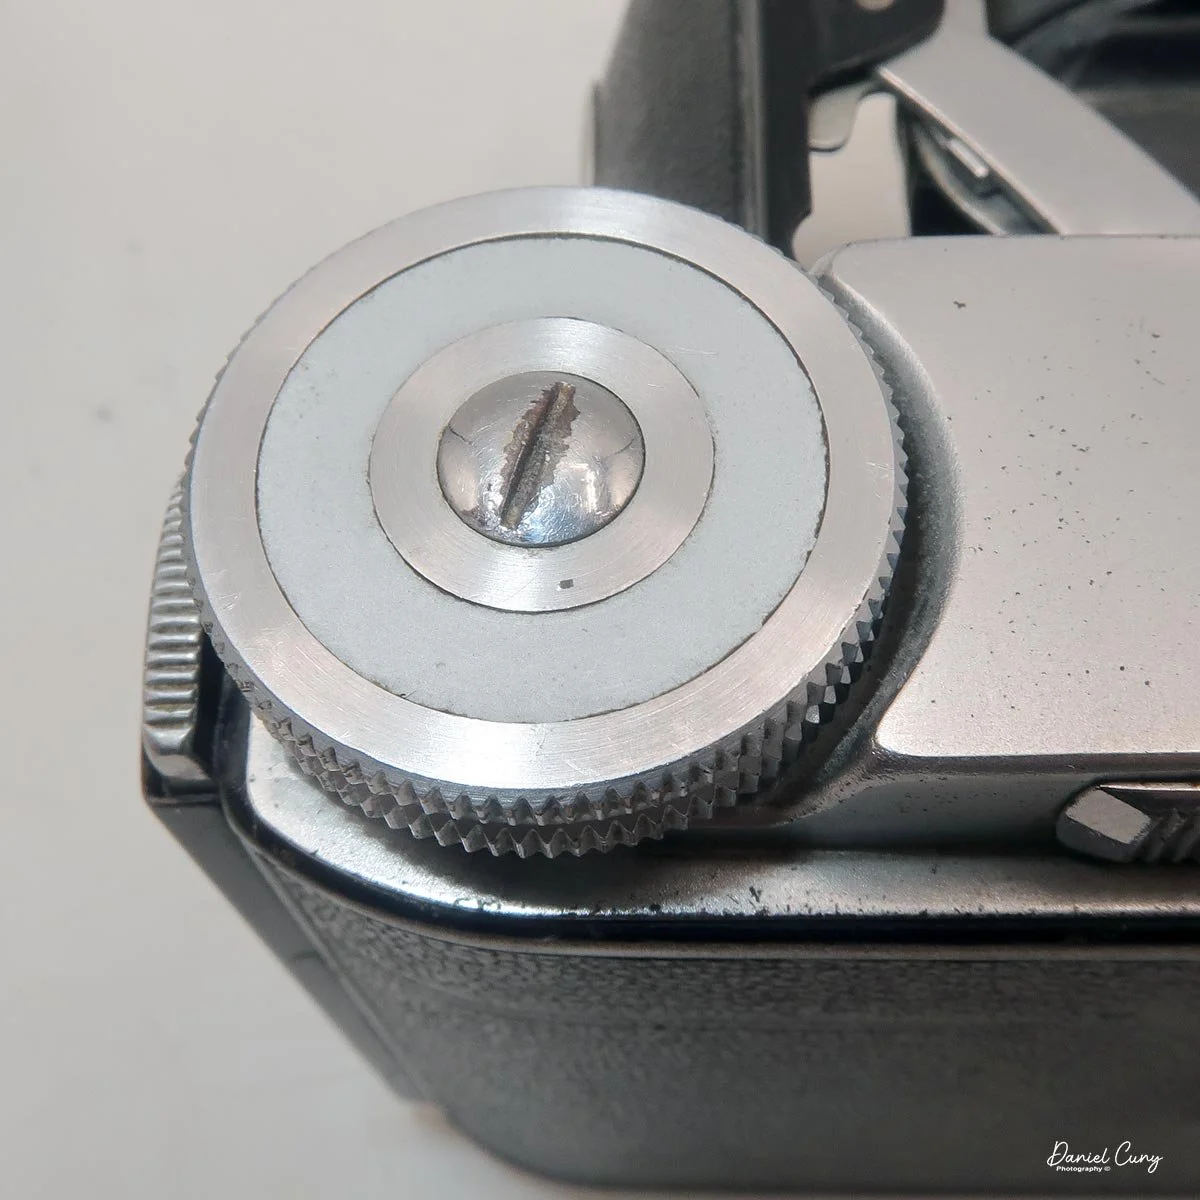
The second thing I noticed was that the film-advance knobs differed between the two cameras. One has a lift-up handle to advance the film, while the other has a more robust wheel, which makes advancing the film easier.
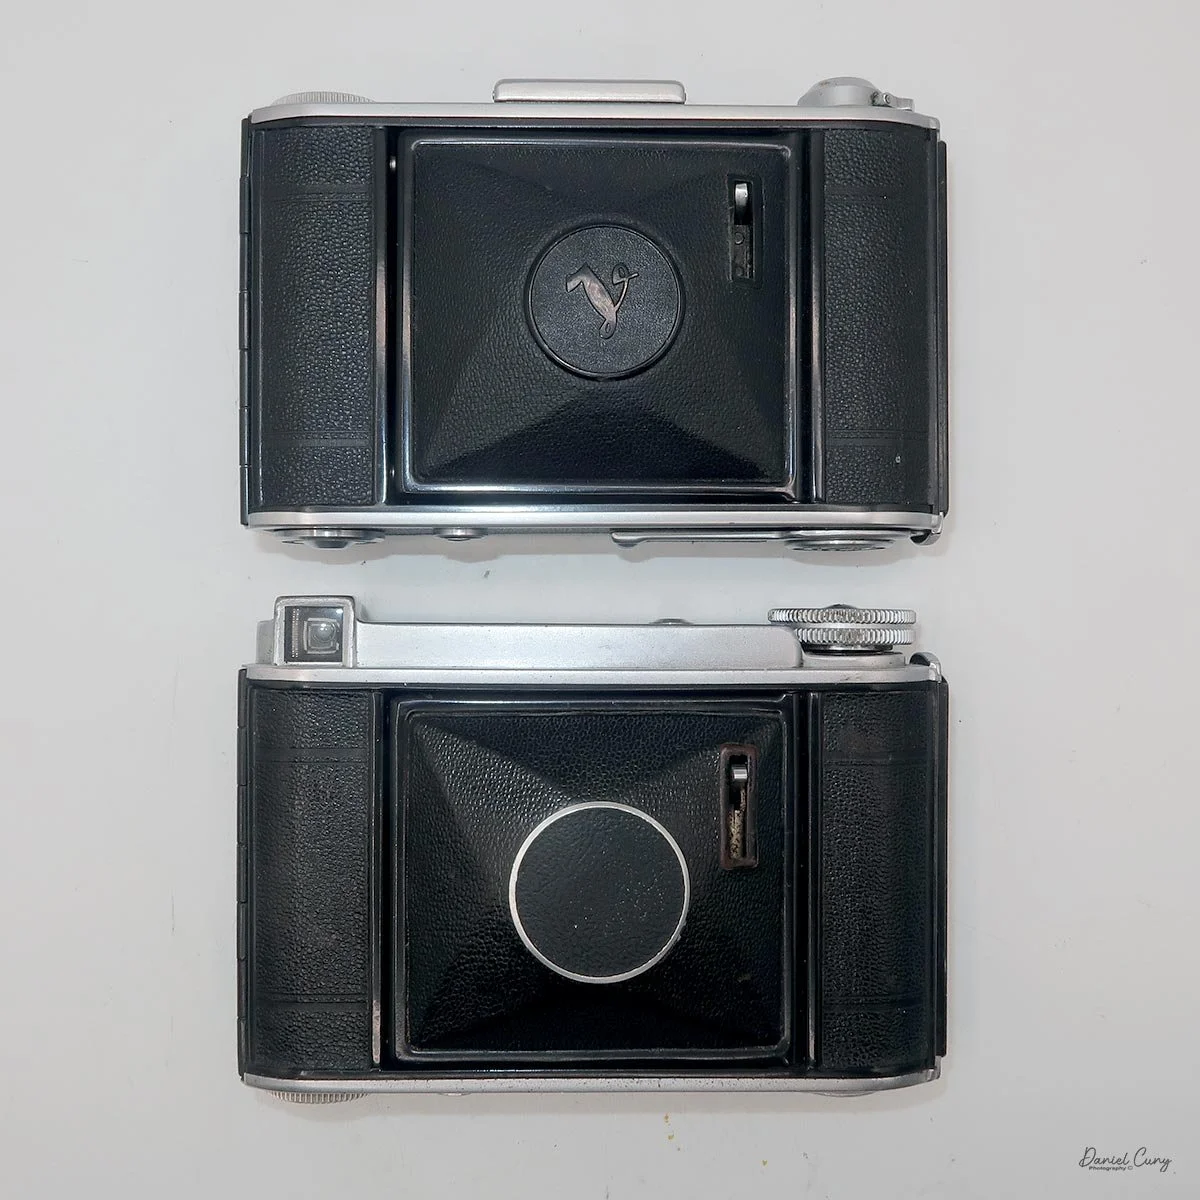
Bessa 66 Standard (top), and Bessa 66 Deluxe (bottom)

Looking online at the differences between the two cameras, one is an earlier "Standard" version with the pop-up finder and handle advance. In contrast, the later camera, which some people call the "Deluxe" version, has an optical viewfinder and a round film-advance knob.

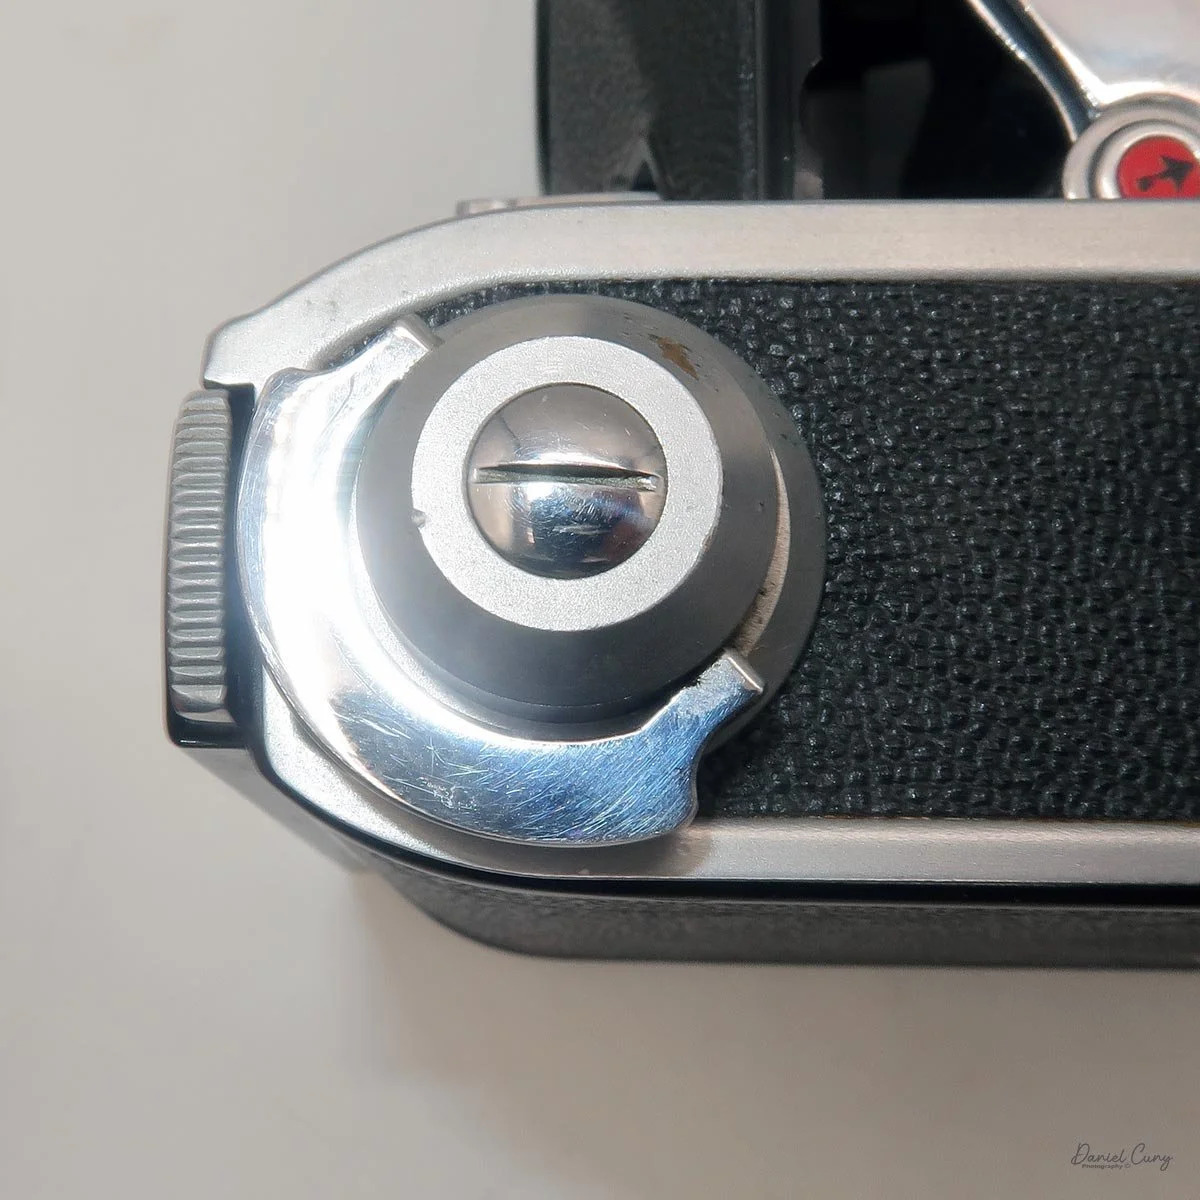
The only other thing I noticed looking at the cameras from the outside is that the Deluxe camera has a bigger and sturdier knob on the bottom where the new roll of film is placed, which resembles the winding knob on top, as opposed to a slightly different one on the "Standard" version. These knobs don't affect how the camera operates, since neither pulls out to let the fresh roll into the film chamber. Still, I'll get into loading the camera later in the post.

At this point, I'm impressed with the Bessa 66 cameras, as I am with many of the Voigtländer cameras. They feel very similar to other folding 6x6cm cameras from this timeframe, like the Zeiss Ikontas made before WWII, in size and artistry, along with other Japanese cameras like the Mamiya Six and Mizuho Six.

The larger film format makes them terrific travel cameras. They are small and compact, have wonderful lenses, shoot 6x6 (or, in some cases, 6x4.5 or 6x7), and fit in your pocket for easy transport.

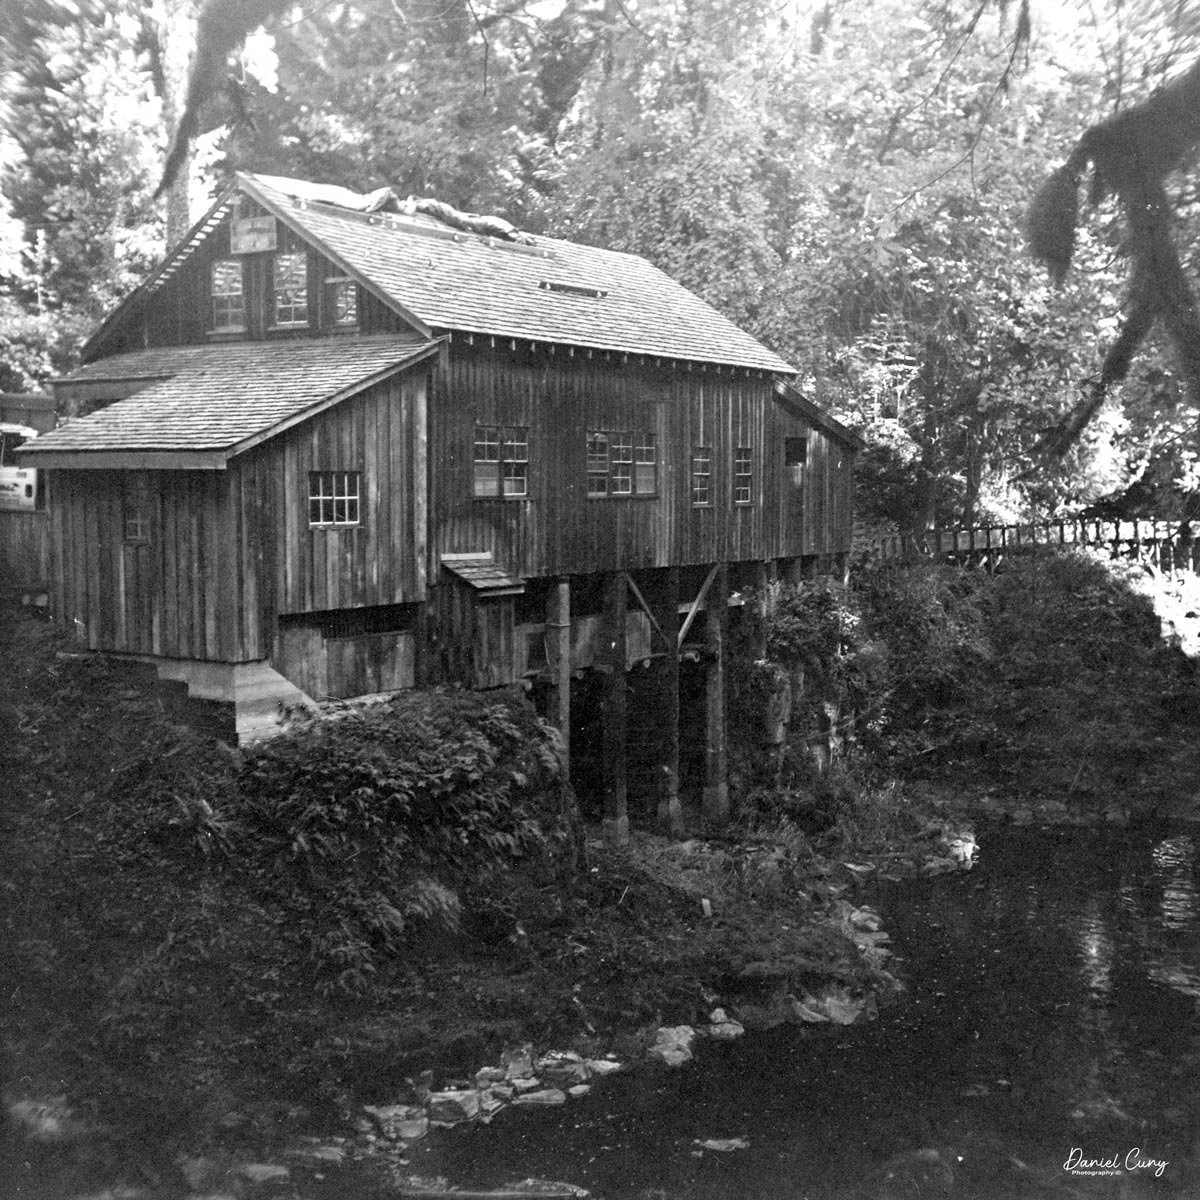
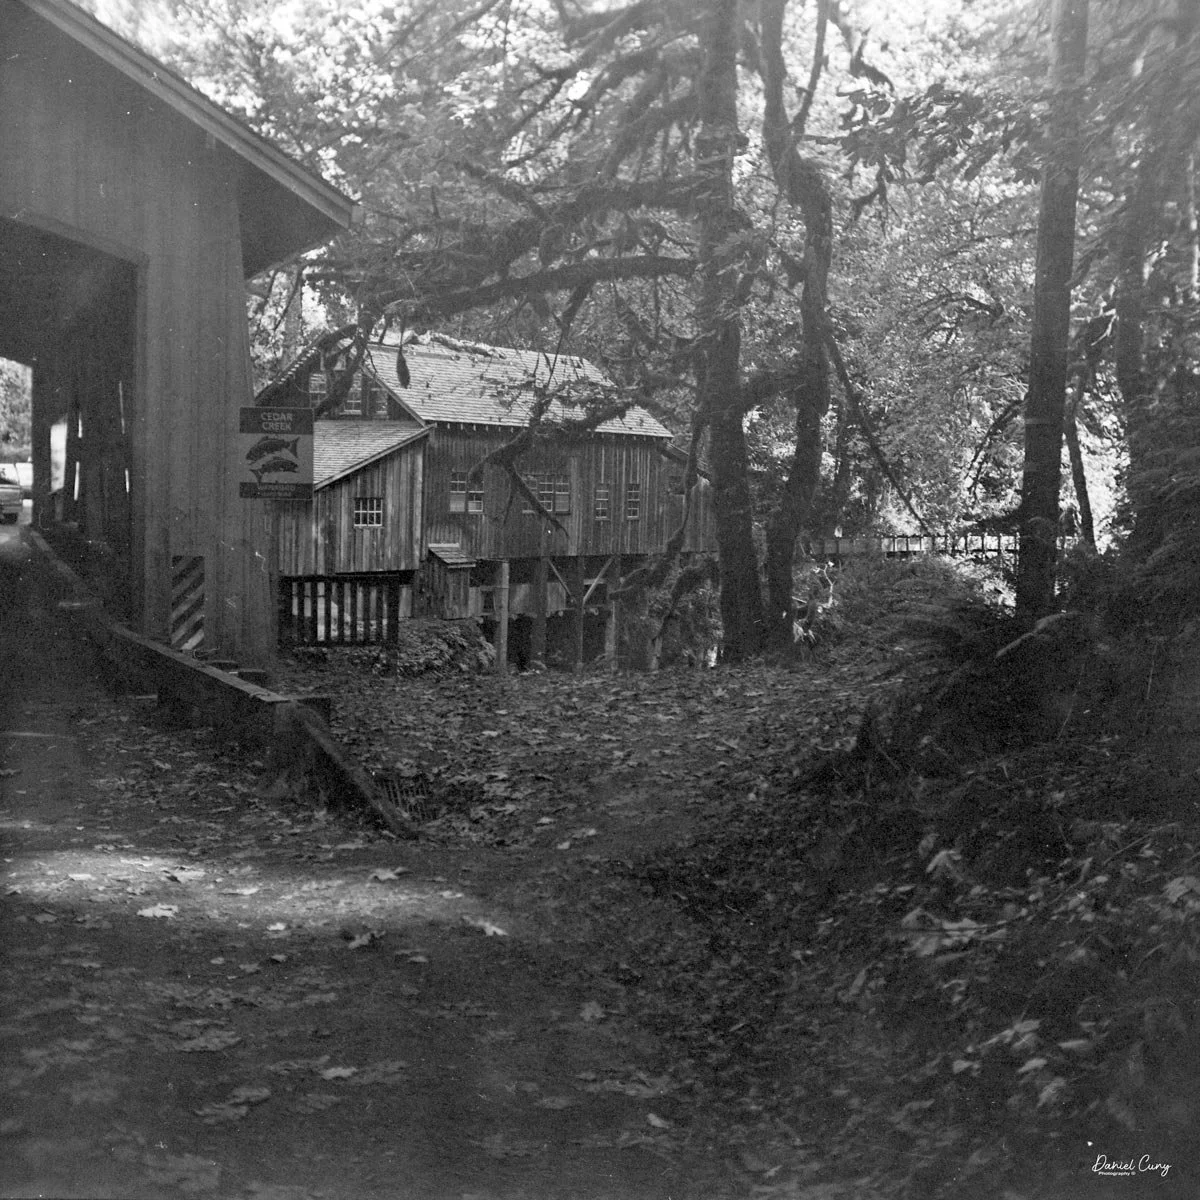
My wife wanted to go to a local Grist Mill, which is about 30 minutes from our house. So I loaded a roll of outdated Plus-X film into the Bessa 66 Deluxe, and off we went to see how the camera performed.

History: The Voigtländer Bessa Cameras

Voigtländer is the oldest name in photography. Johann Christoph Voigtländer founded the firm in Vienna in 1756, making optical instruments long before photography existed, and the company opened its Braunschweig, Germany, branch in 1849. By the time the Bessa arrived, Voigtländer had already been building cameras for nearly a century.
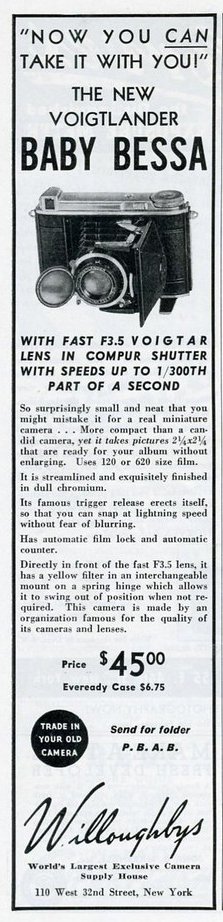
Bessa 66 advertisment

The Bessa line began in 1929 with a folding rollfilm camera that was clever in a very practical way: it was a dual-format camera, taking both 6x9 and 4.5x6 pictures on standard 120 film. A photographer could shoot large negatives or twice as many smaller ones by changing the mask. In 1935, Voigtländer added a coupled rangefinder version, the Bessa Rangefinder, and the line became one of Germany's best-known folding camera families.

The cameras most collectors mean by "Baby Bessa" came out in 1938. These were the single-format Bessa 46 and Bessa 66, smaller companions to the big Bessa. The Bessa 46 shot sixteen 4.5x6 frames on a roll of 120, while the Bessa 66 shot twelve square 6x6 frames. Both were self-erecting folders: press a button on the baseplate and the front springs open, ready to shoot. Focusing was by guesswork, using a scale on the lens, and neither Baby Bessa was ever sold with a coupled rangefinder.

Like most German cameras of the period, the Baby Bessas came in a wide range of lens and shutter combinations, which is part of what makes collecting them fun. Entry-level models carried the three-element Voigtar or Vaskar. Better models got the four-element Skopar or the famous five-element Heliar, usually with a Compur or Prontor shutter. Early models had a folding frame finder; later ones got a proper optical viewfinder on the top plate, along with a film counter, a depth-of-field calculator, and a hinged yellow filter.

Production was interrupted by the Second World War, and after the war only the Bessa 66 came back, since the 4.5x6 format was already covered by the regular Bessa. Post-war Bessa 66 cameras came with coated lenses, a Vaskar version selling in America for $49.50 and a Color-Skopar version for $64.50. In 1950 the little folder was reborn under the older Perkeo name, and the Perkeo E of 1954 finally added a rangefinder the Baby Bessa never had. The line ended around 1955, shortly after the Carl Zeiss Foundation acquired Voigtländer.

The big Bessa lived on a little longer as the Bessa I and Bessa II of 1950, and the Bessa name itself would return decades later on Cosina's rangefinder cameras. But the Baby Bessa remains the line's sweet spot: a genuinely pocketable 120 folder, built by the oldest camera maker in the business, that still shoots beautifully today.

My Cameras

The two Voigtländer Bessa 66 cameras are virtually the same size, with the Deluxe slightly taller because of the optical viewfinder. I'll mainly talk about the Deluxe version, as it's the camera I put film in and shot with. The camera is 3.5" tall by 5" wide, and 1.75" deep with the lens closed and 4" deep with the lens extended. The camera weighs 1 pound, 2 ounces without film loaded.
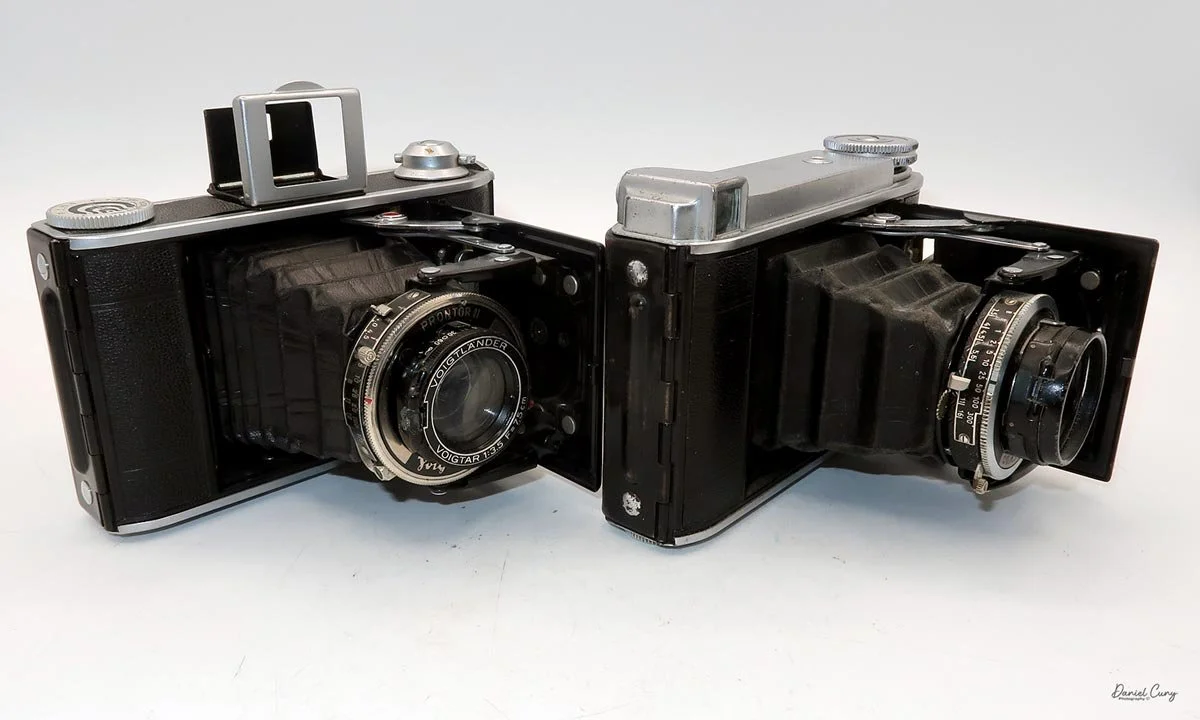
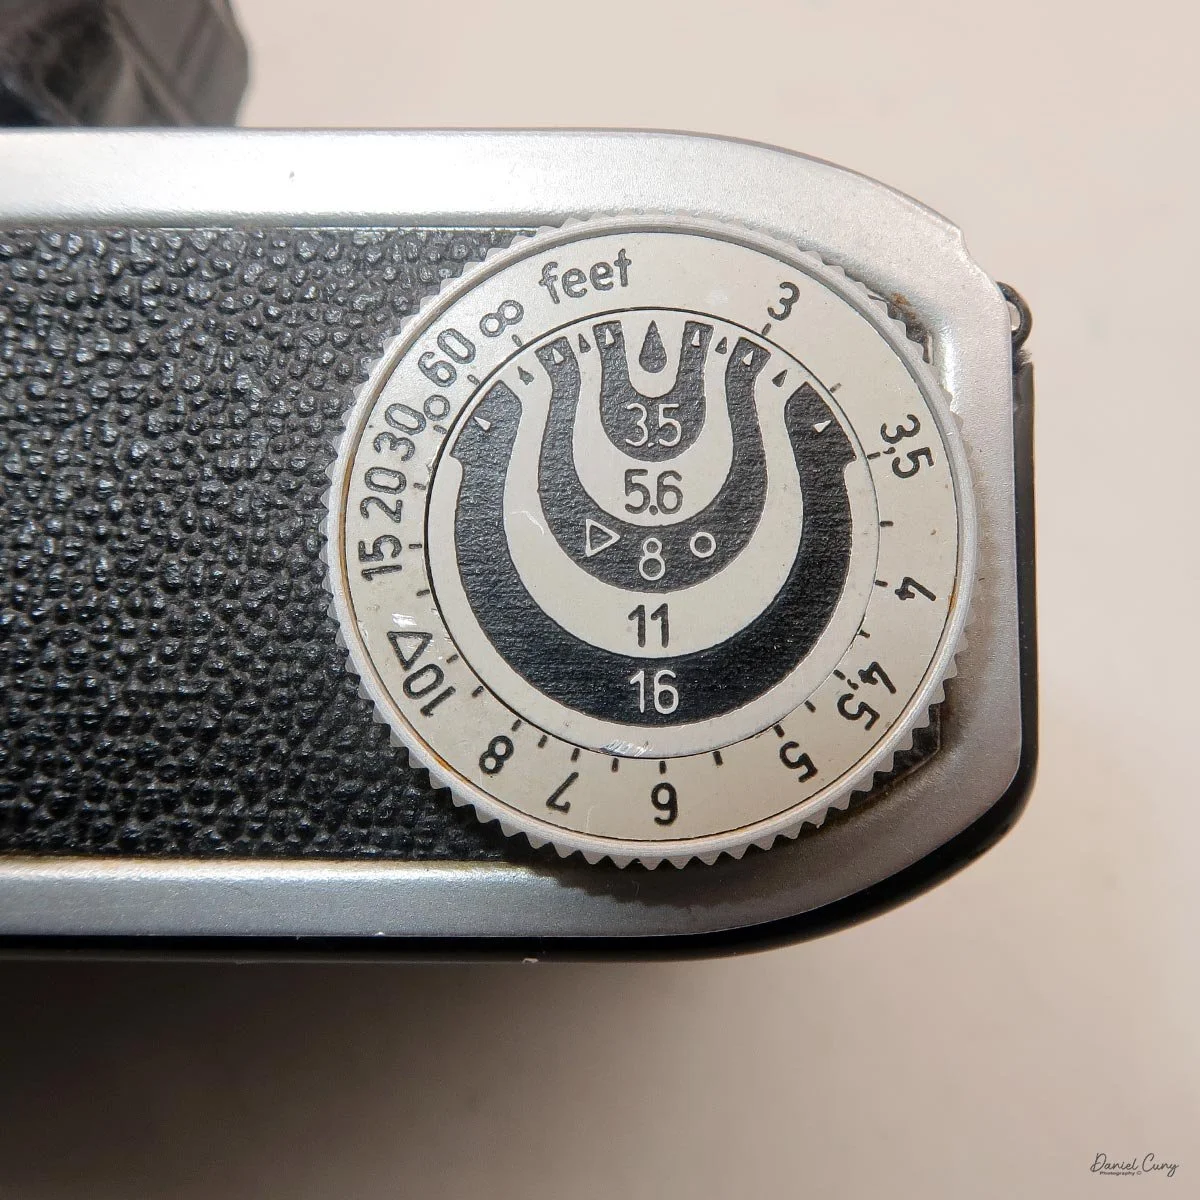
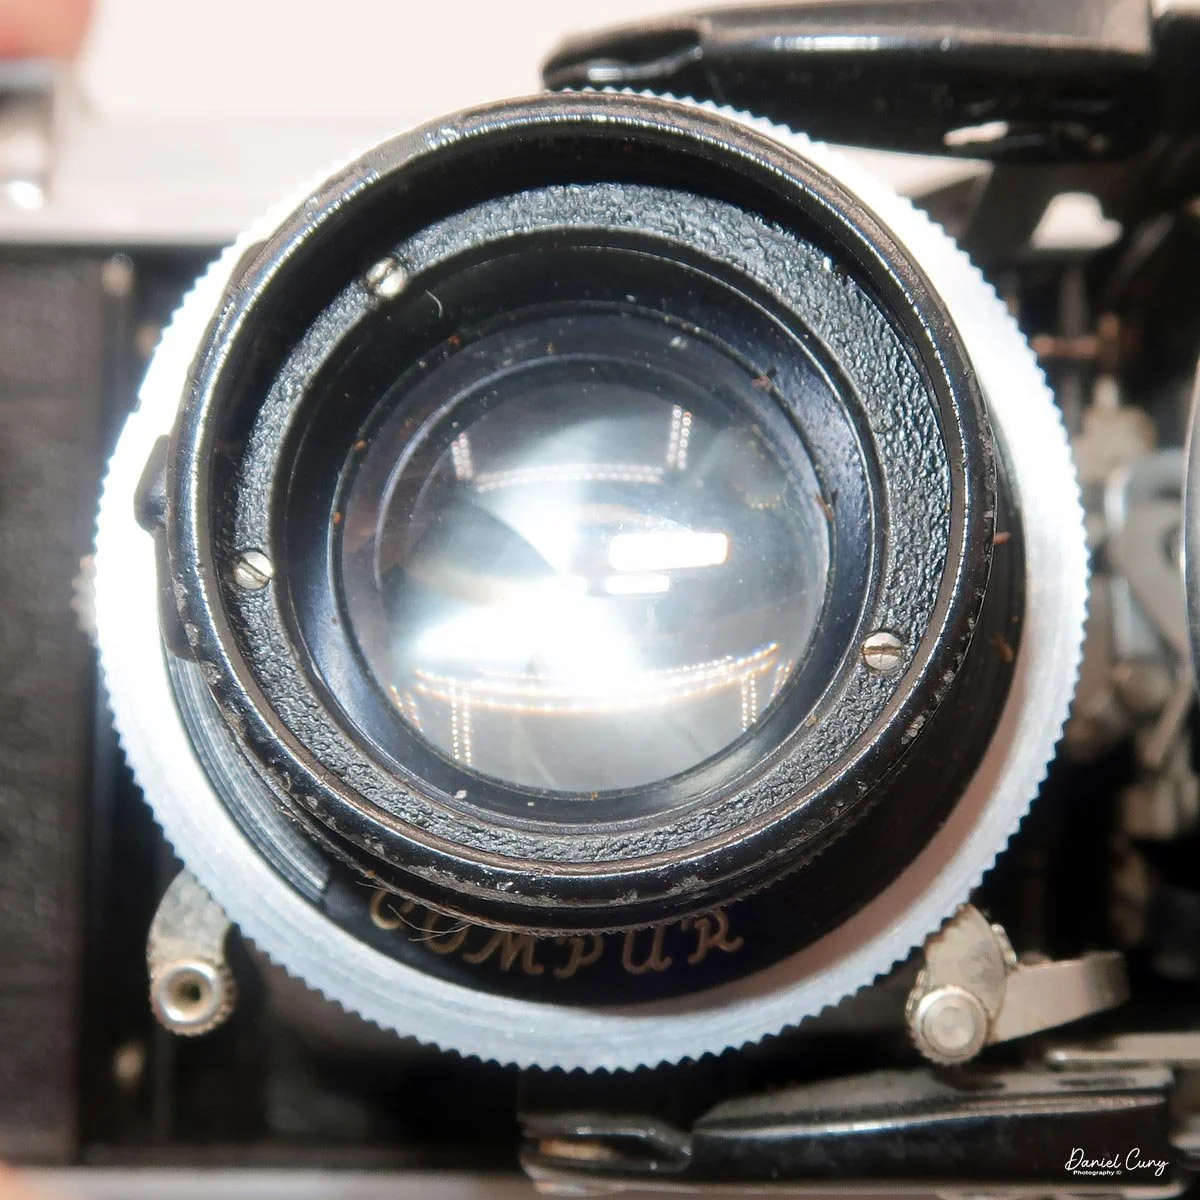
My Bessa 66 Deluxe version has a few issues. One of the nice things about the pre-war Bessa 66 versions is that it has a flip-up yellow, or contrast, filter for black-and-white film. Unfortunately, the glass part of the filter is gone on the camera I have. It also looks like the ring around the lens with the lens name, focal length, and maximum aperture is missing from my Deluxe camera but is on the Standard camera. So I'm not sure if the Deluxe camera has the four-element Skopar or the famous five-element Heliar lens.

The lenses on either of the Bessa 66 cameras are manual, meaning there is no rangefinder for focus, so you'll have to manually guess the distance to your subject and turn the lens to that "guessed" distance, then take your photo.
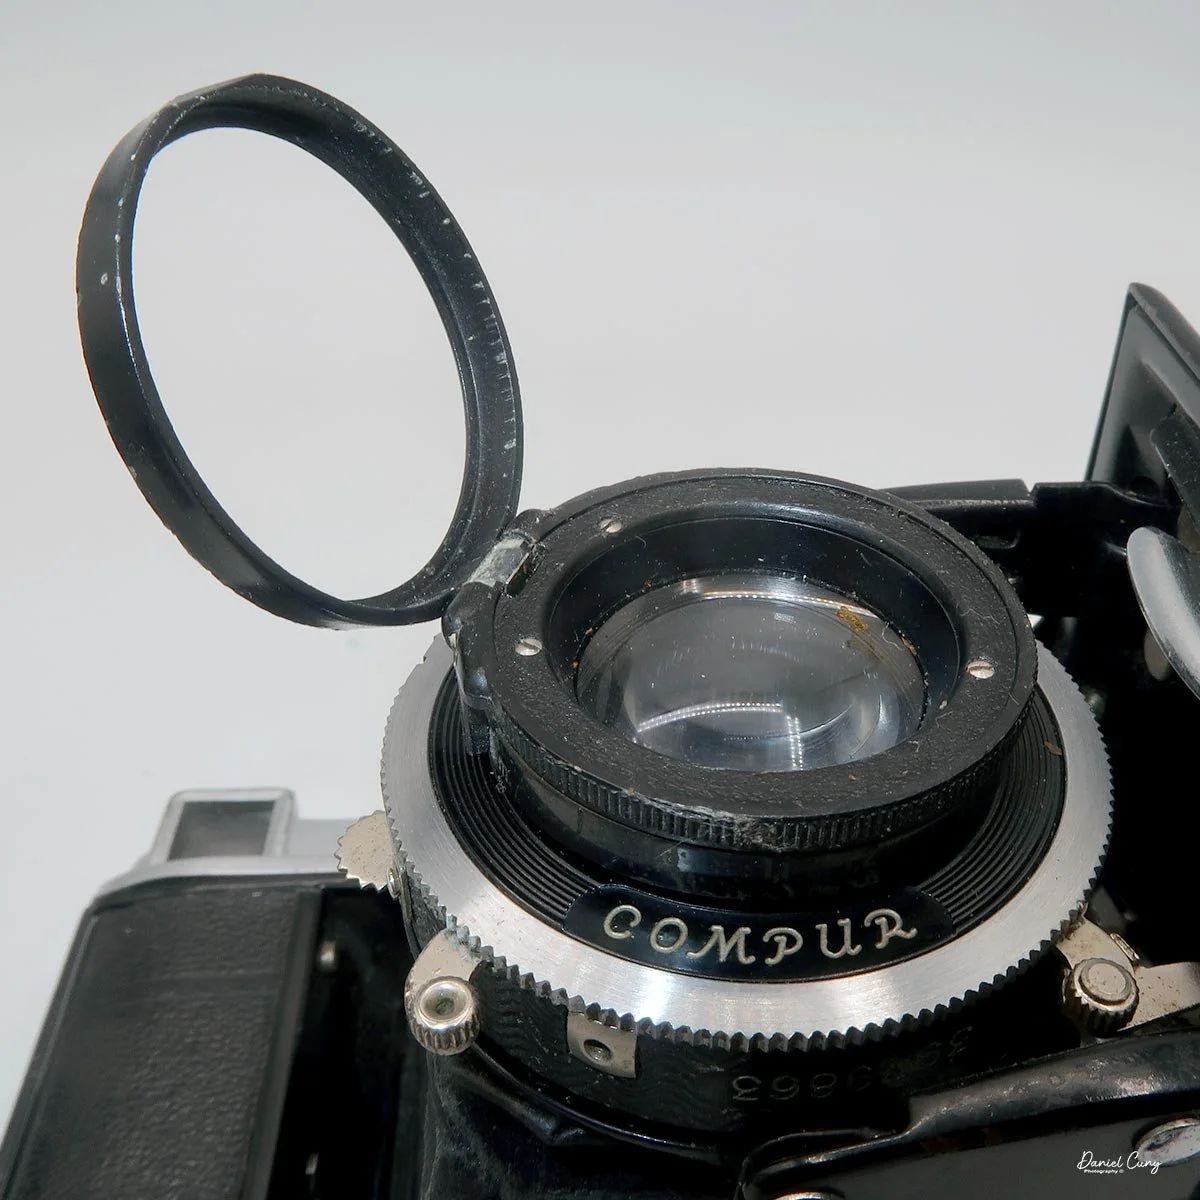
The pre-war Bessa 66 cameras had the hinged filter, which was not fitted to the post-war cameras. Because the filter was fragile, many cameras had it broken off through use. On the Standard camera I have, it looks like the filter has been broken off the camera.

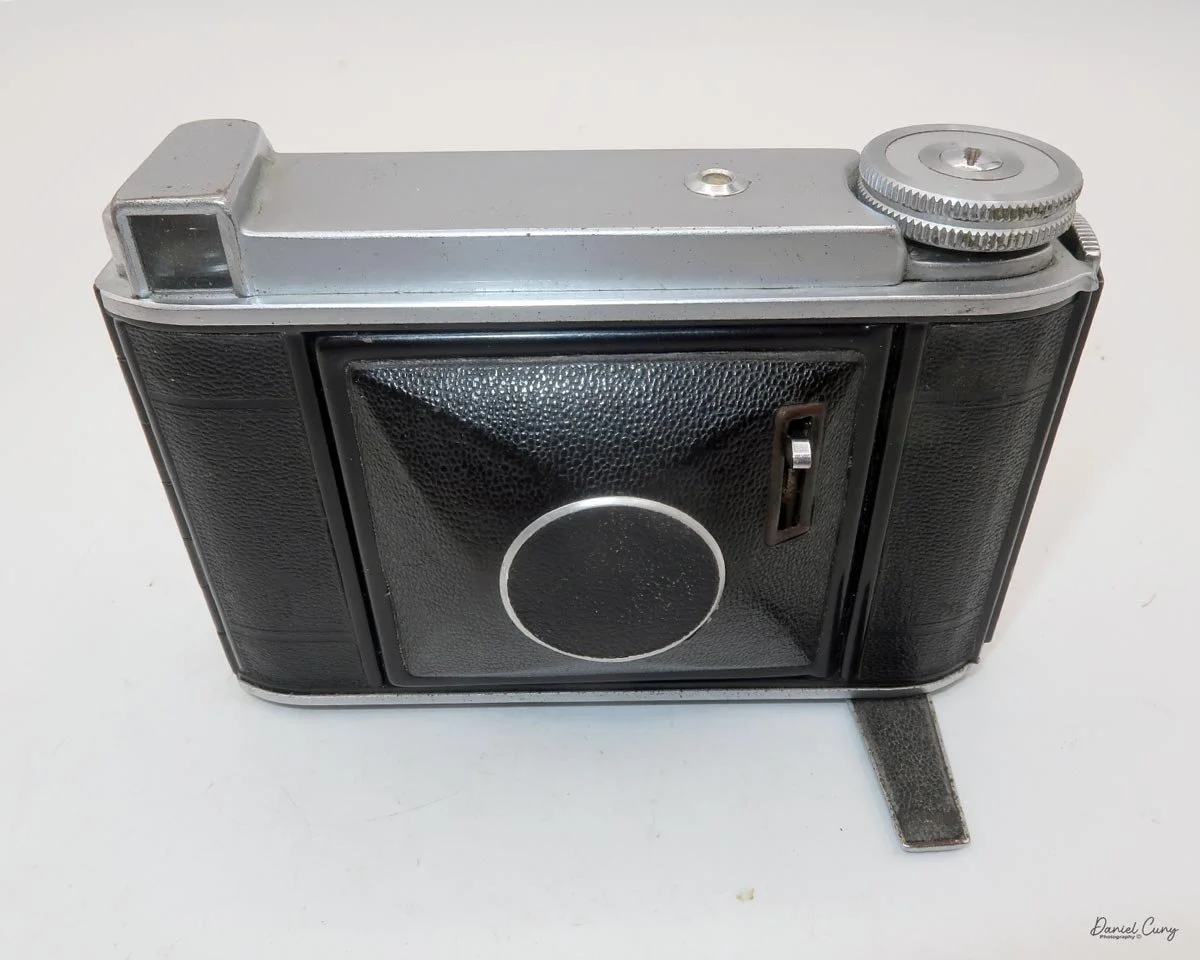
To open the camera to expose the lens and shutter, which is on a black bellows, press the chrome button on the bottom of the camera; the lens/shutter then pops out.

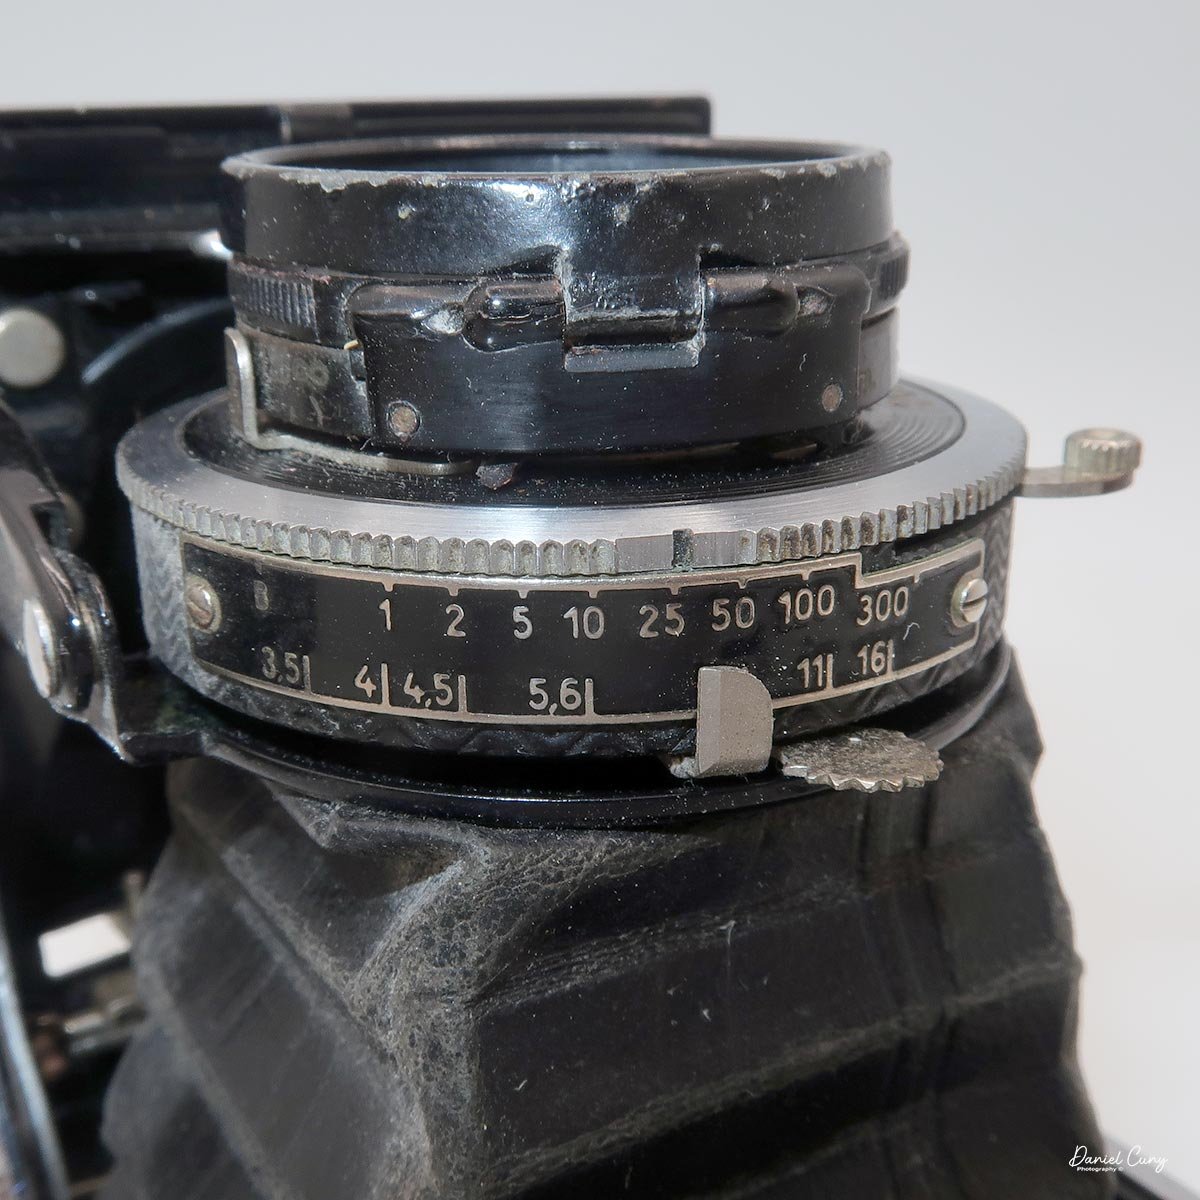
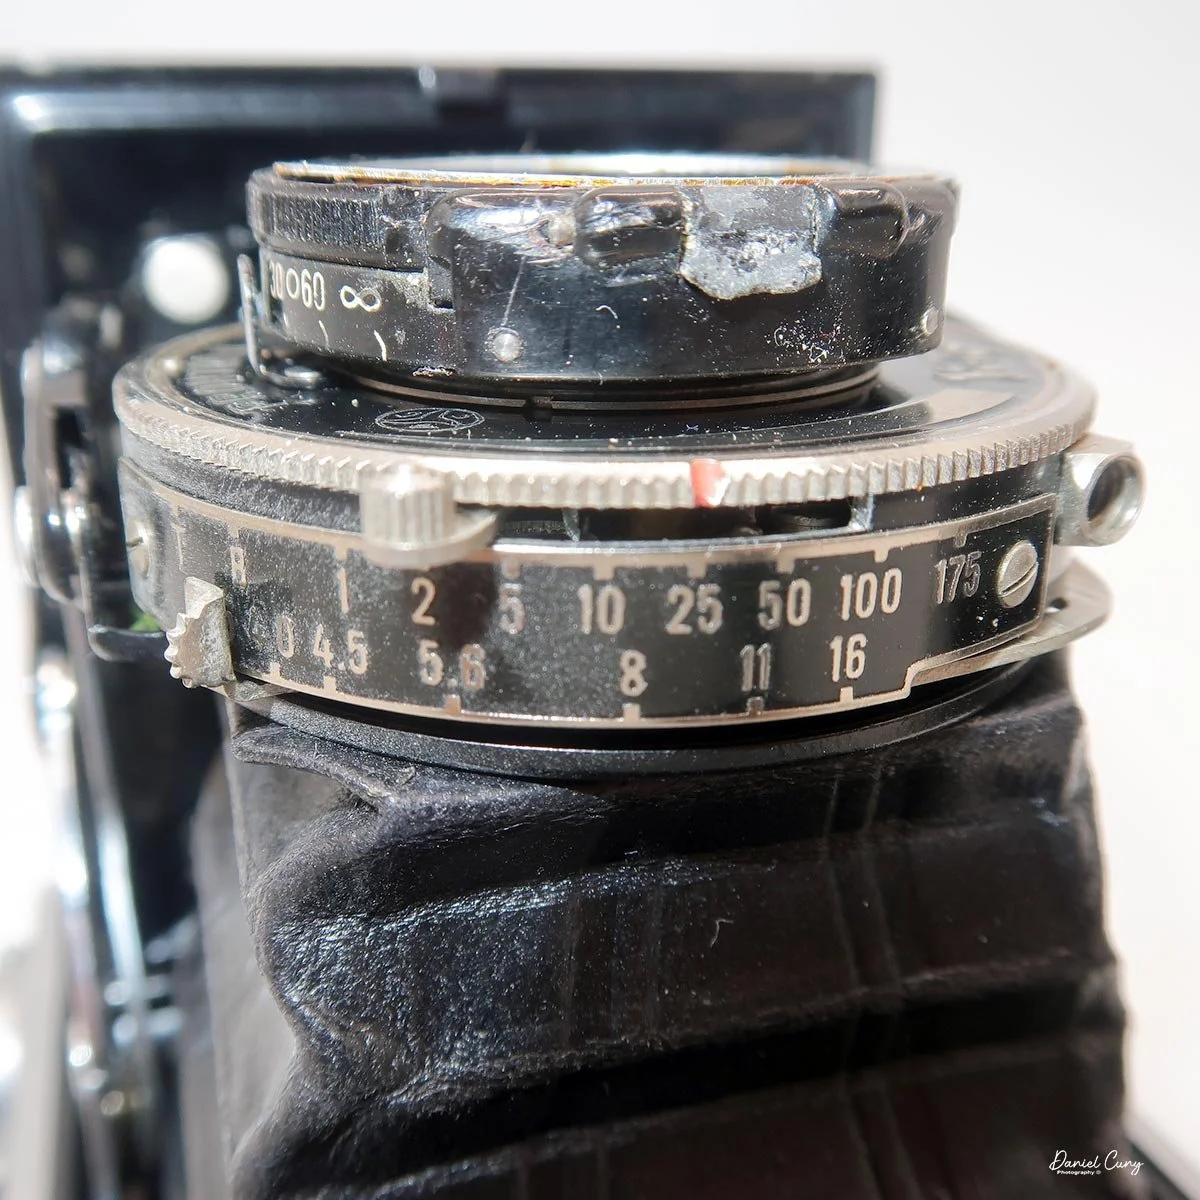
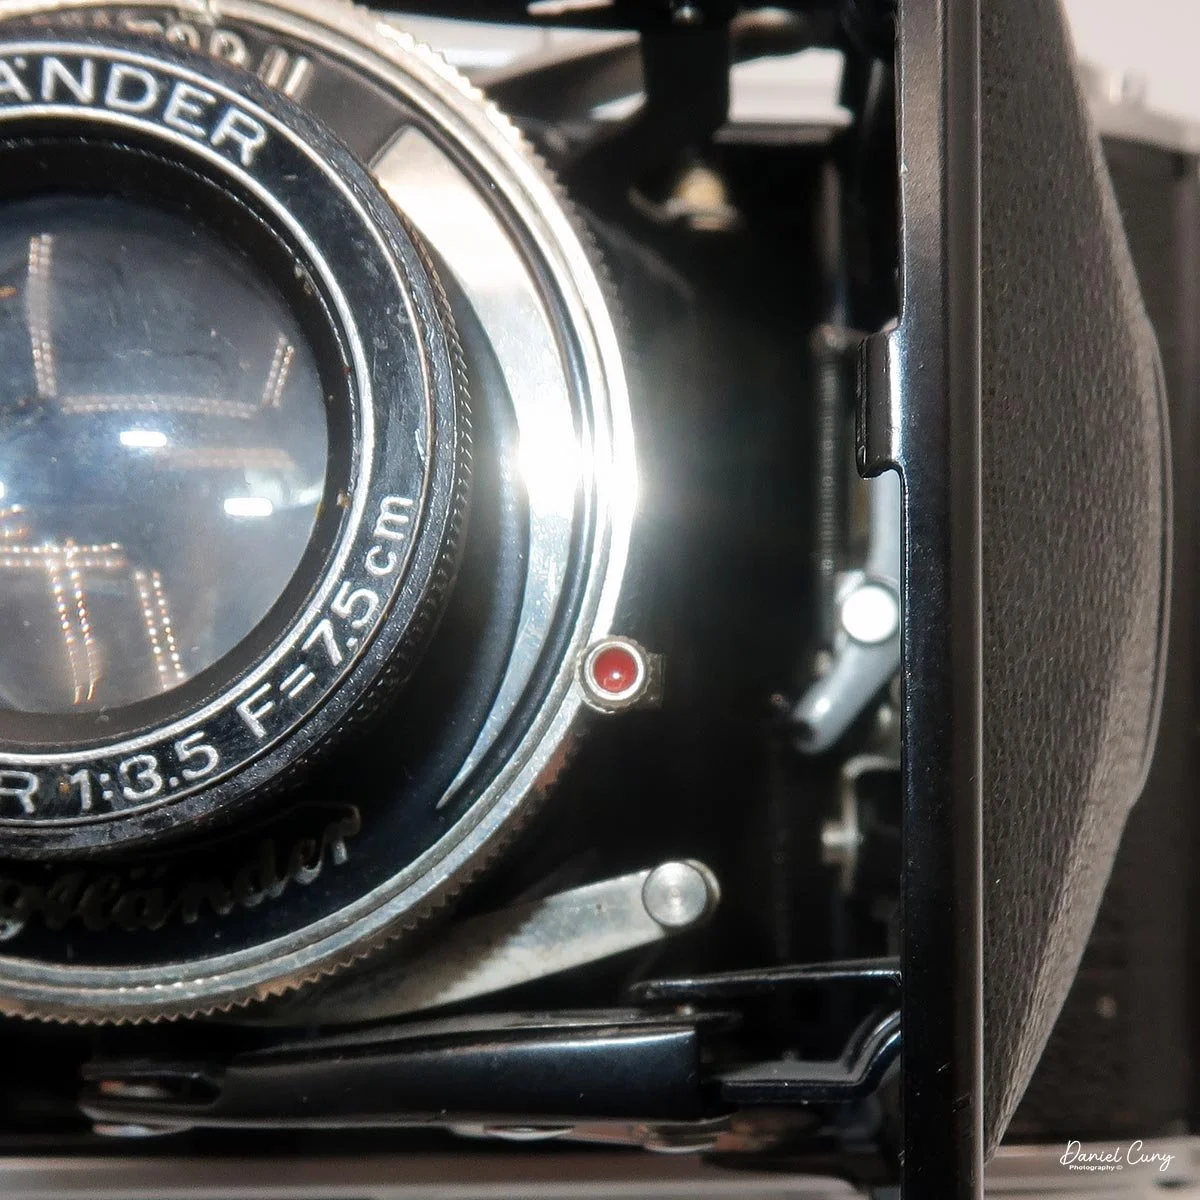
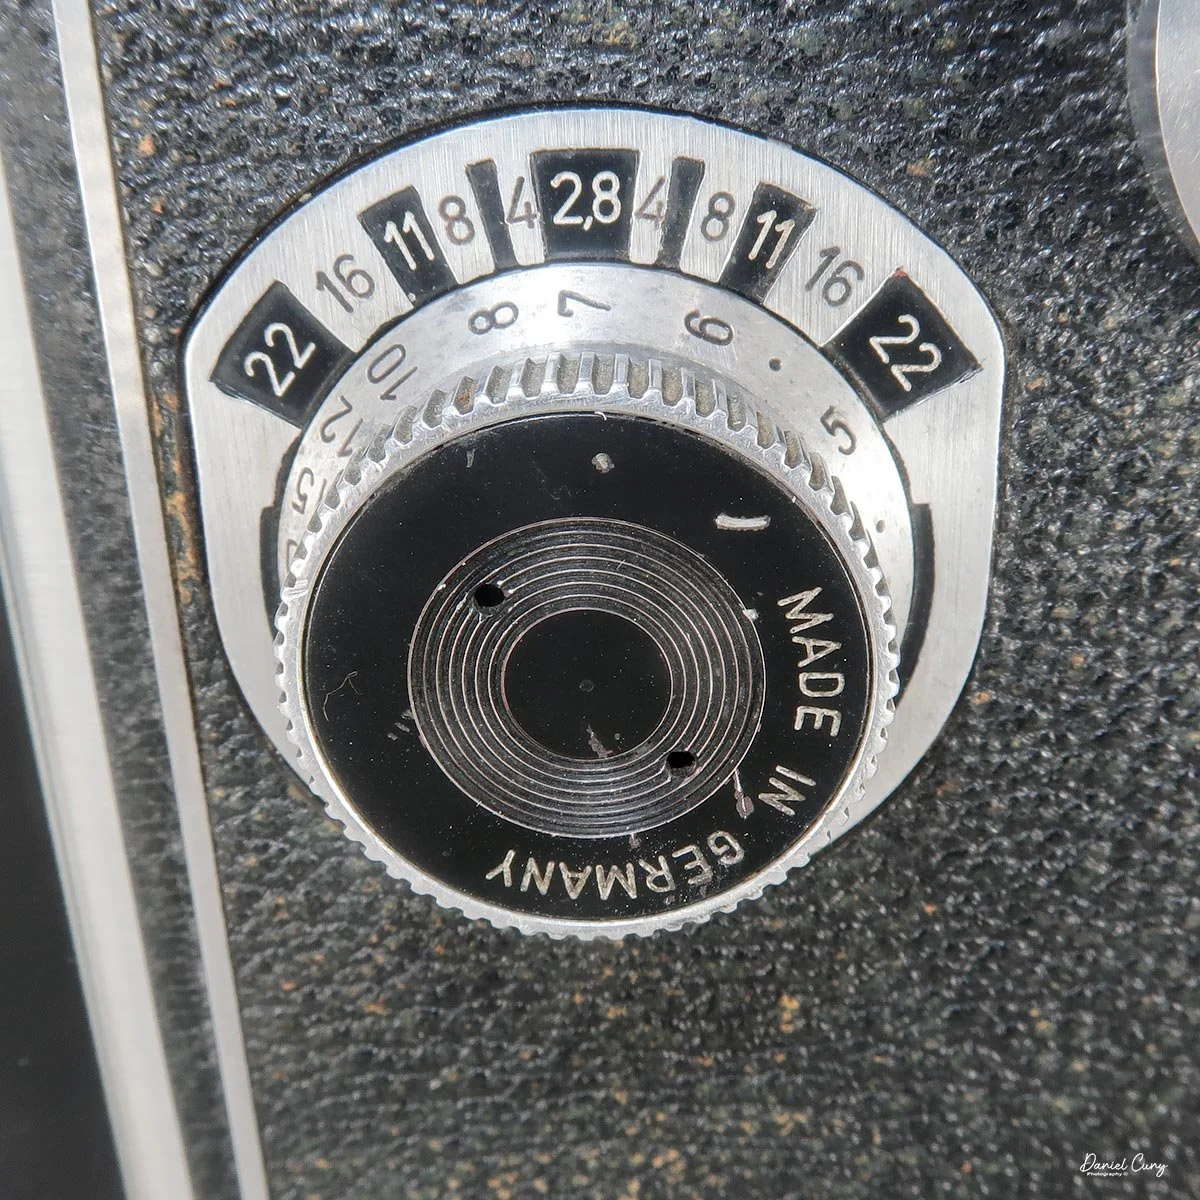
My Deluxe camera has a Compur shutter with shutter speeds from 1/300 to 1 second, plus B for timed exposures. The Standard camera has a Prontor II shutter, which offers shutter speeds from 1/175 to 1 second and "B" for timed exposures. Both cameras have maximum apertures of f/3.5 and go to f/16.

Once the camera is opened, the shutter speeds can be changed by turning the outer ring around the shutter. A red dot points towards the desired shutter speed. The aperture is set via a sliding lever which will point to the desired aperture setting. You cock the shutter by pulling back the cocking lever on the right side of the shutter.

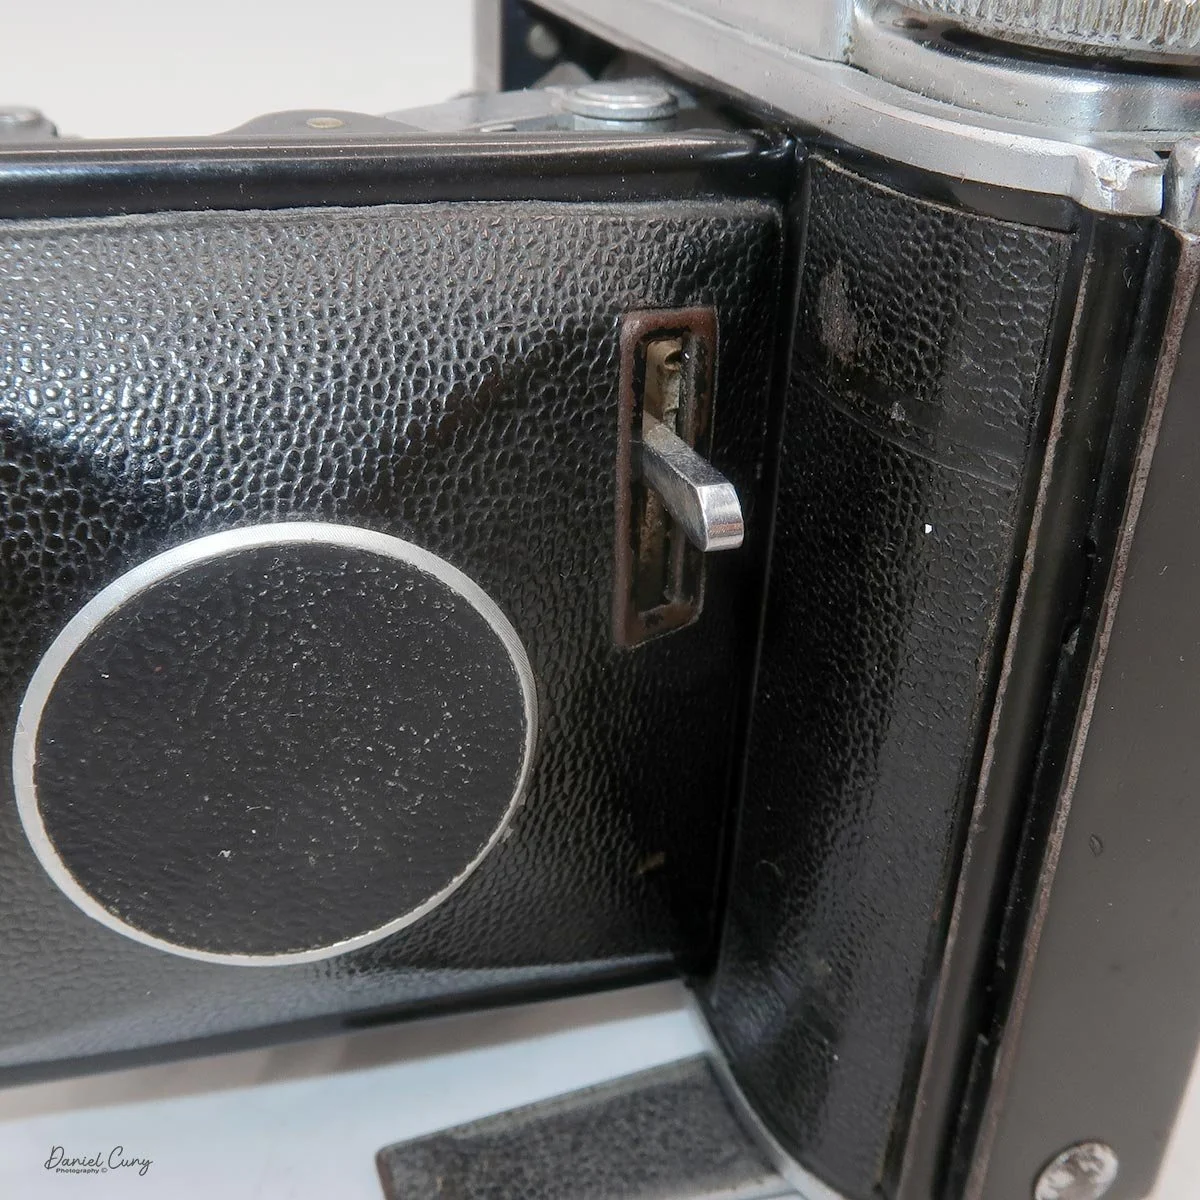
Both the Standard and the Deluxe Bessa 66 release the shutter by the shutter release that is incorporated into the lens door, which trips the shutter via linkage inside the lens door. You'll need to get used to this shutter release, as it's an uncommon place for one.

To close the lens/shutter back into the camera, pull out the hinged locking Standard on either side of the Standard camera; the camera starts to collapse, then press in the front door to close it.
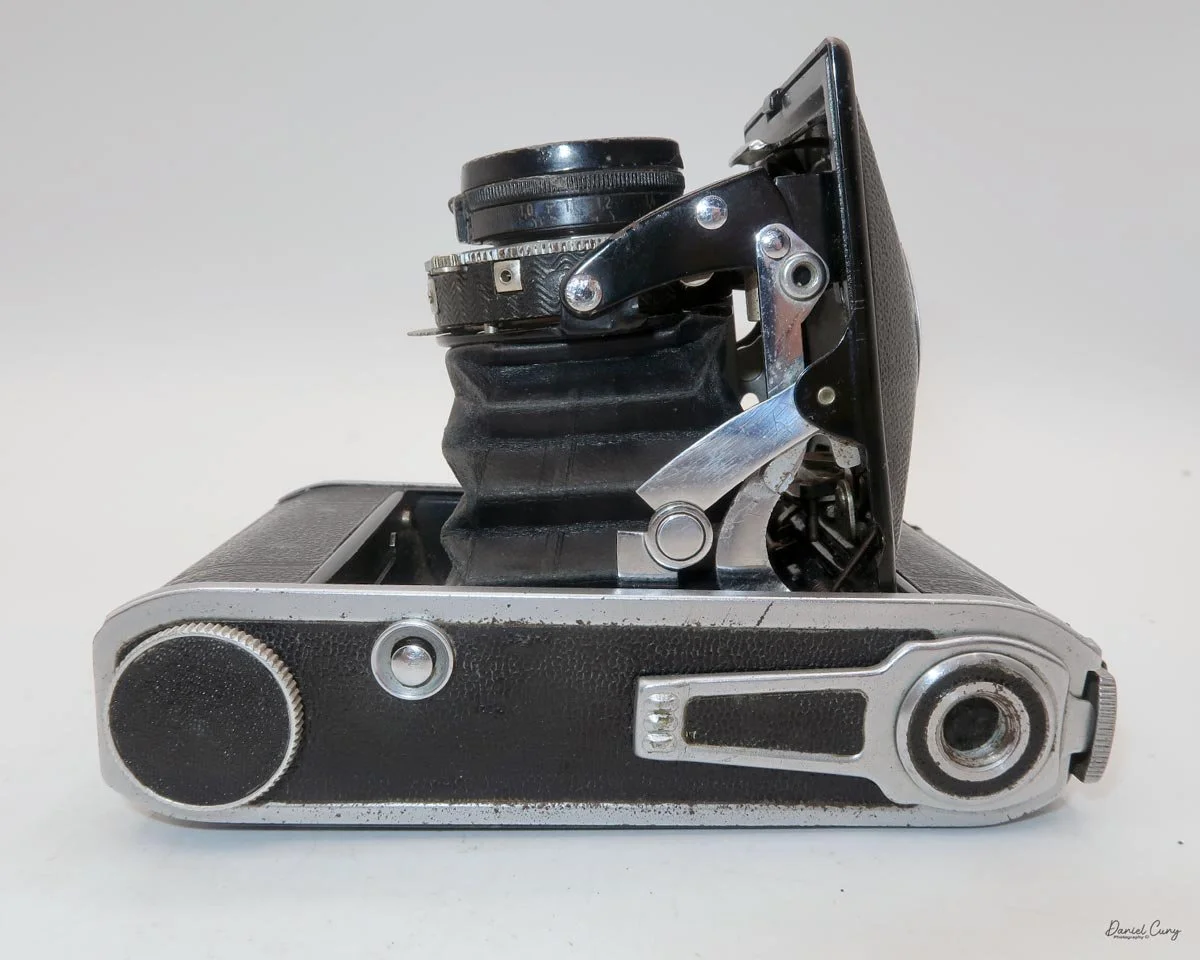
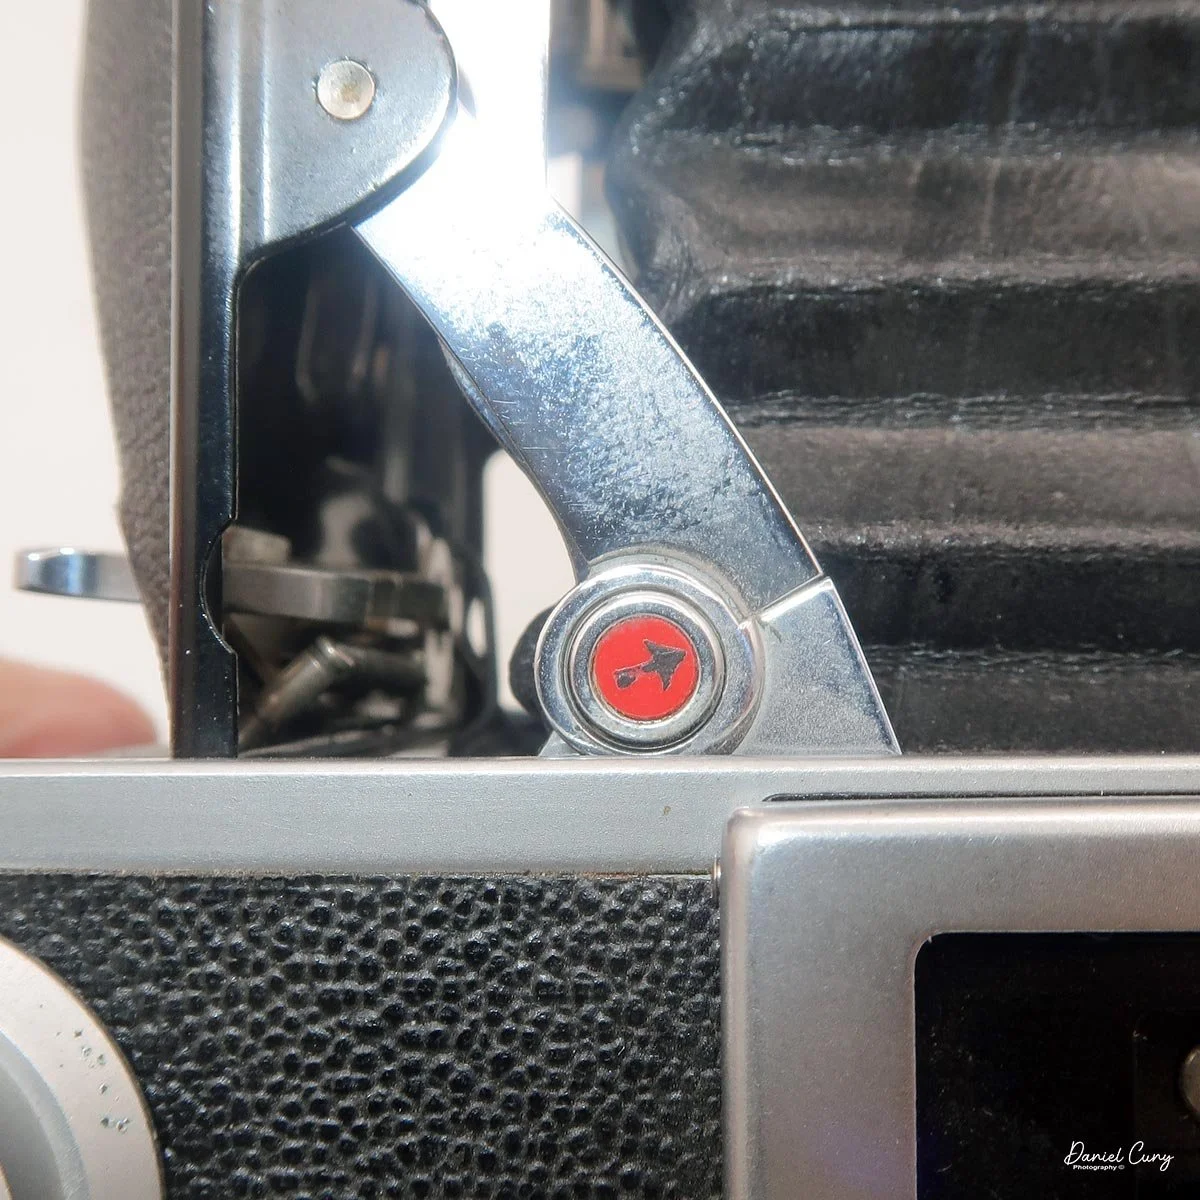
The Deluxe camera closes a bit differently. In the front, just below the lens, press in the chrome bar to release the locked hinge holding the lens rigid; then press in the lens door to close it. Both are similar, but the Deluxe camera is simpler and more of a nicety, which makes closing it easier.

To open the back of the camera to load film, slide the chrome-and-black foot on the bottom of the camera. This foot has two features. One keeps the back locked, as one end slides under the bottom latch needed to open the film back. This prevents anyone from pressing the bars together to open the film back. The other feature, and the more useful one, is that sliding the leg out creates a base that keeps the camera upright and prevents the front from tipping forward onto the lens.
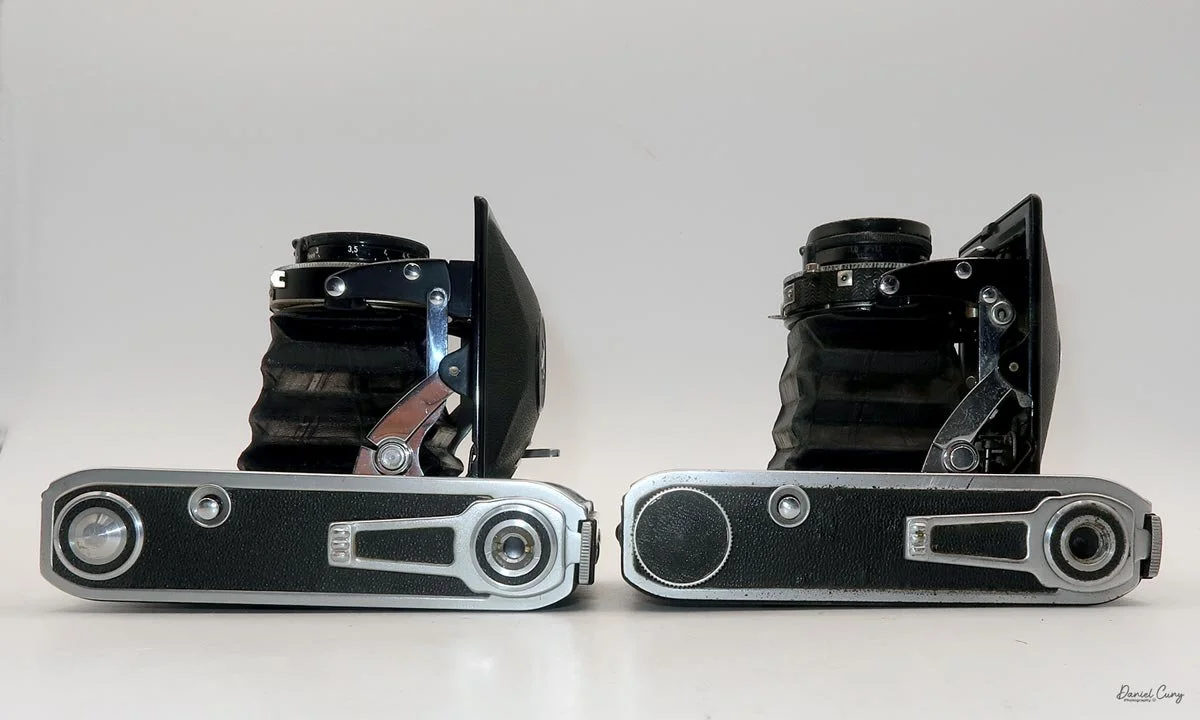
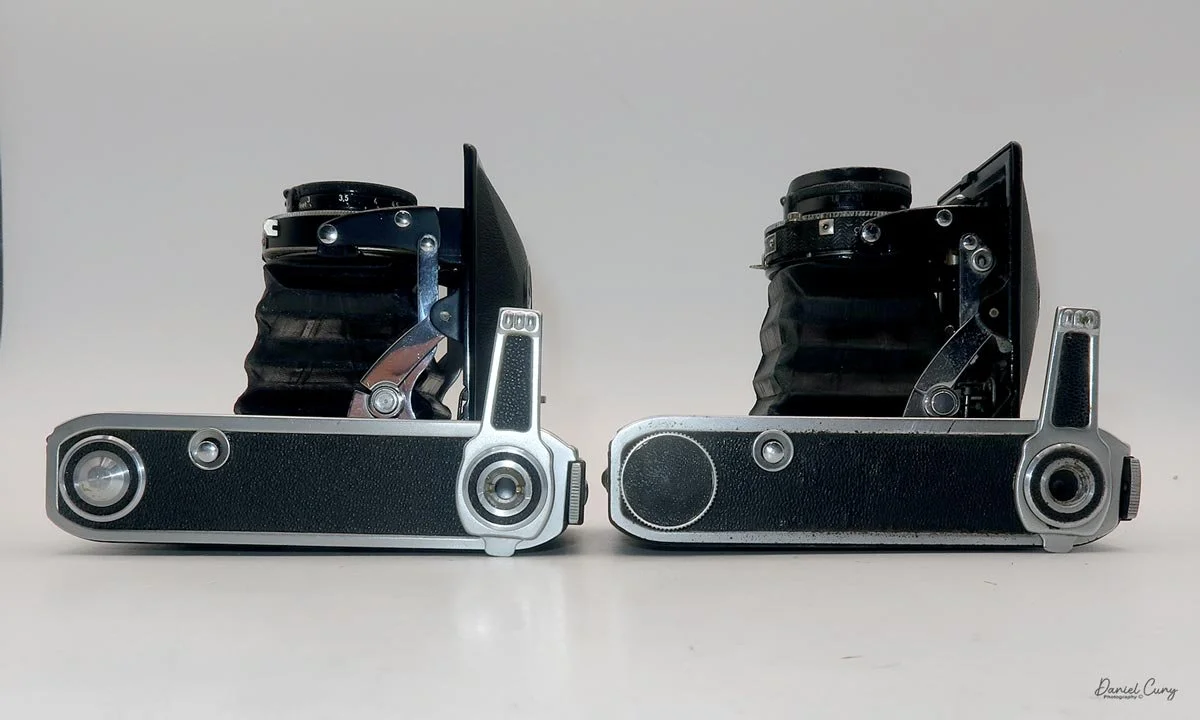
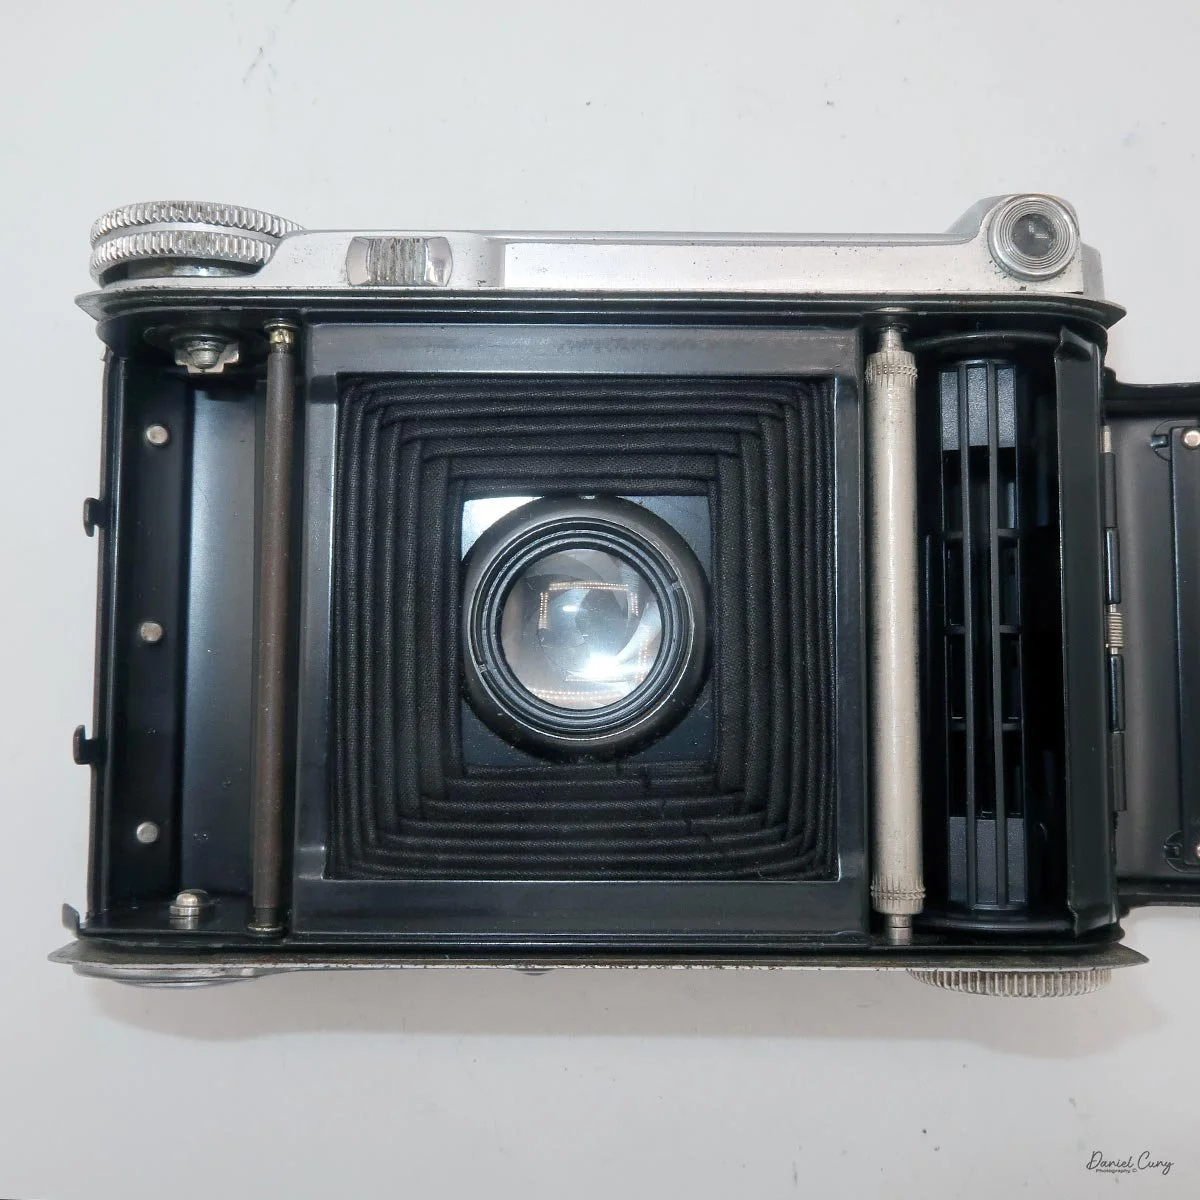
Once the foot is in the out position, press the two bars together on the film door to open the back. At this point, load film into the Bessa as you would any 120 film camera: thread the lead into the take-up spool, wind until you see the start arrows, then close the back of the camera.

Both the Deluxe and Standard cameras have a red window on the back to wind until you see the next frame number. These windows also have a cover you can open or close via a small black knob next to it. When closed, the window shows an "X" so you know it's closed.
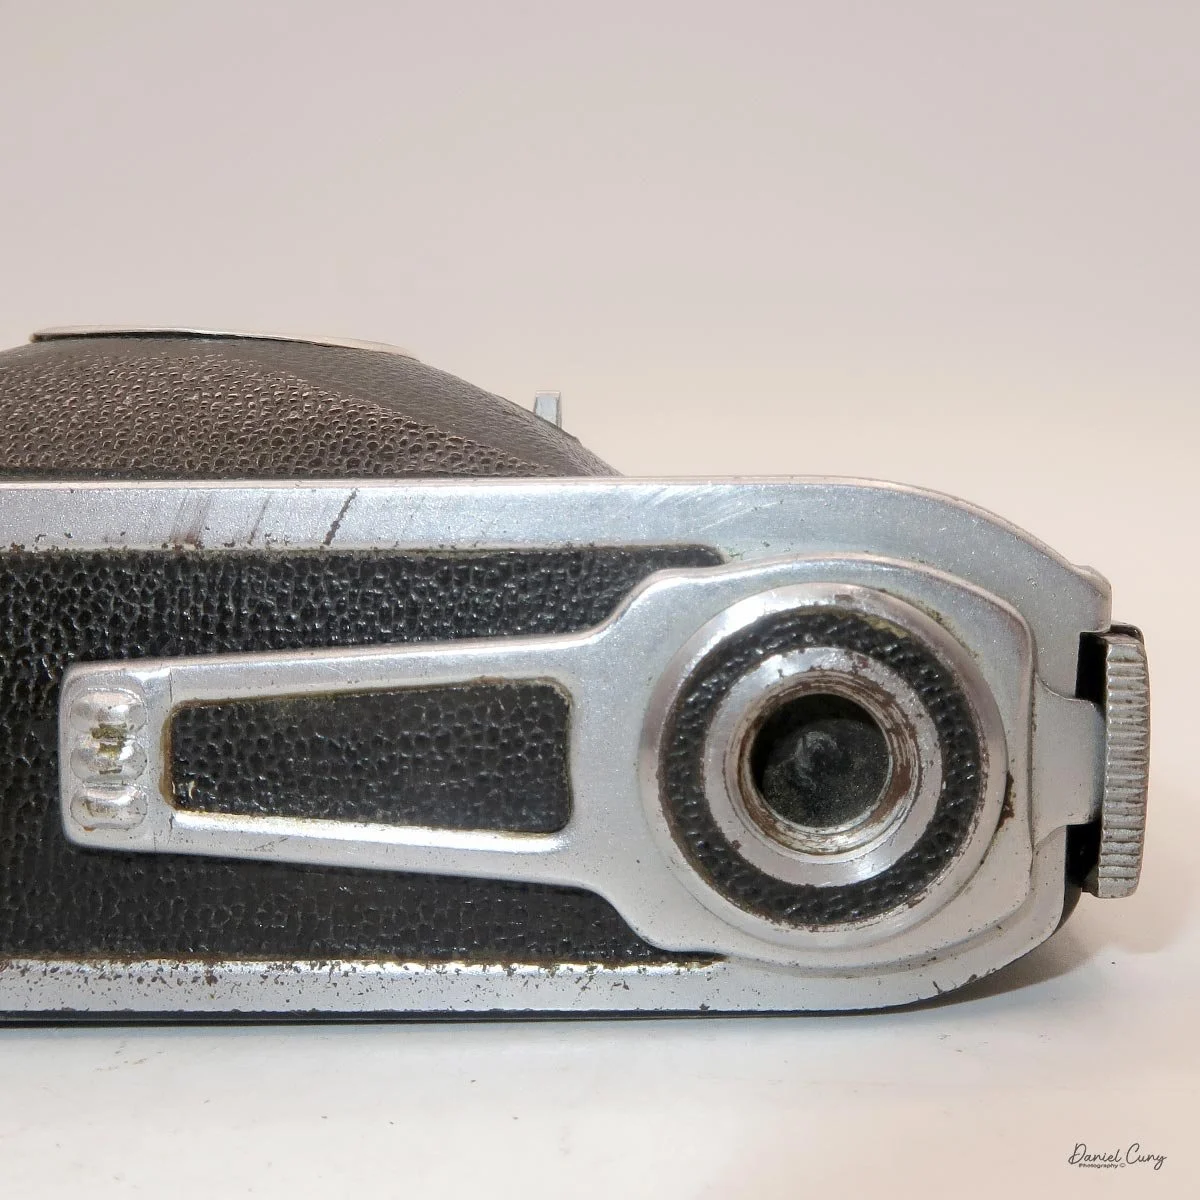
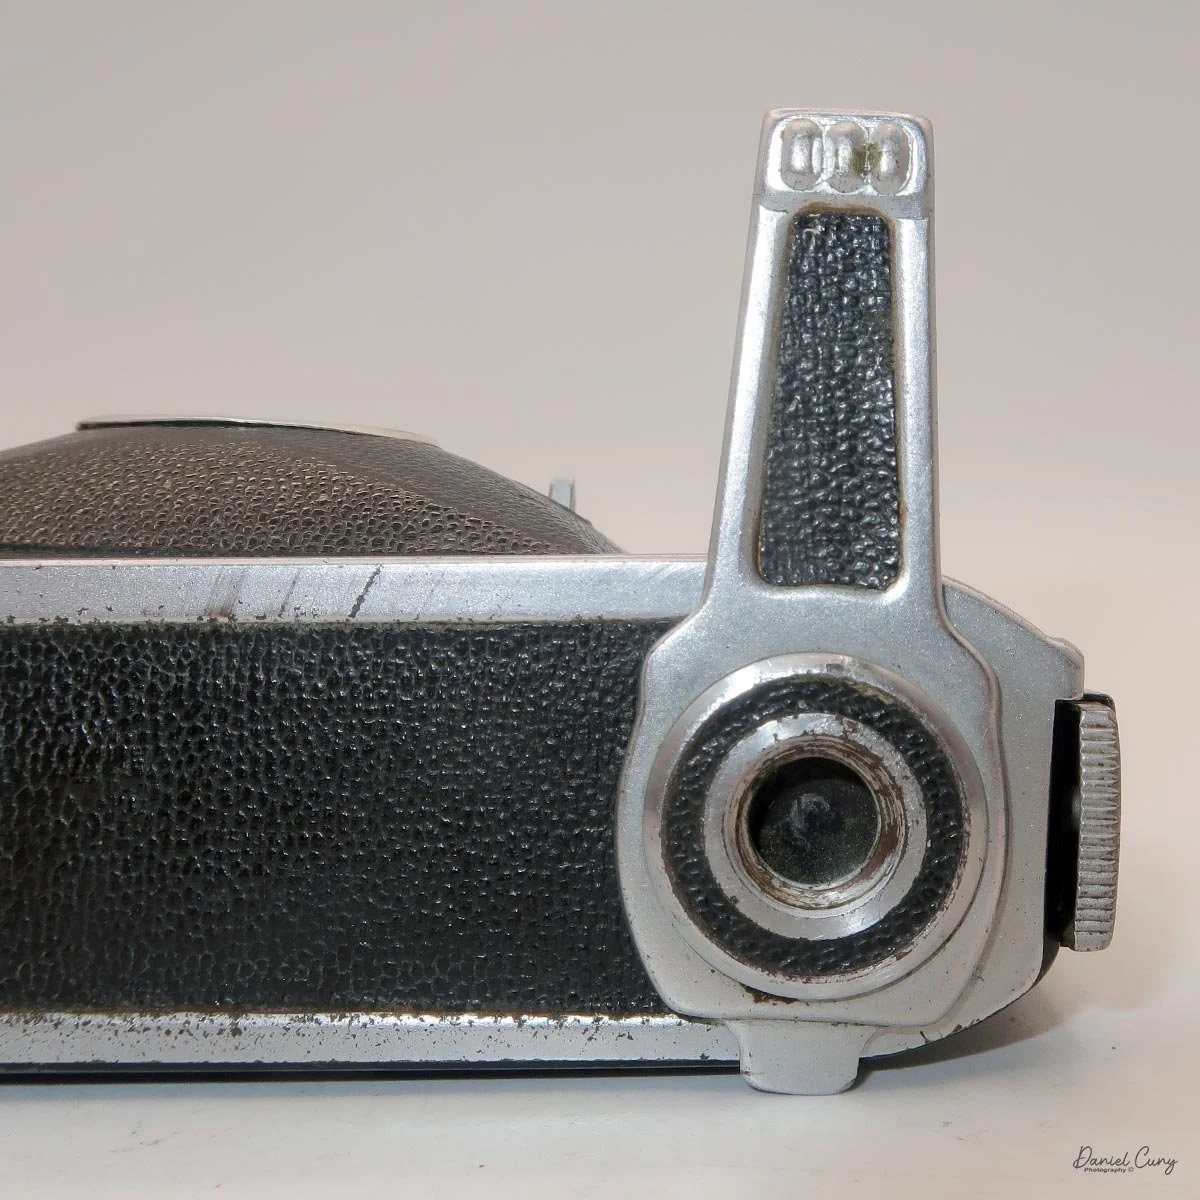
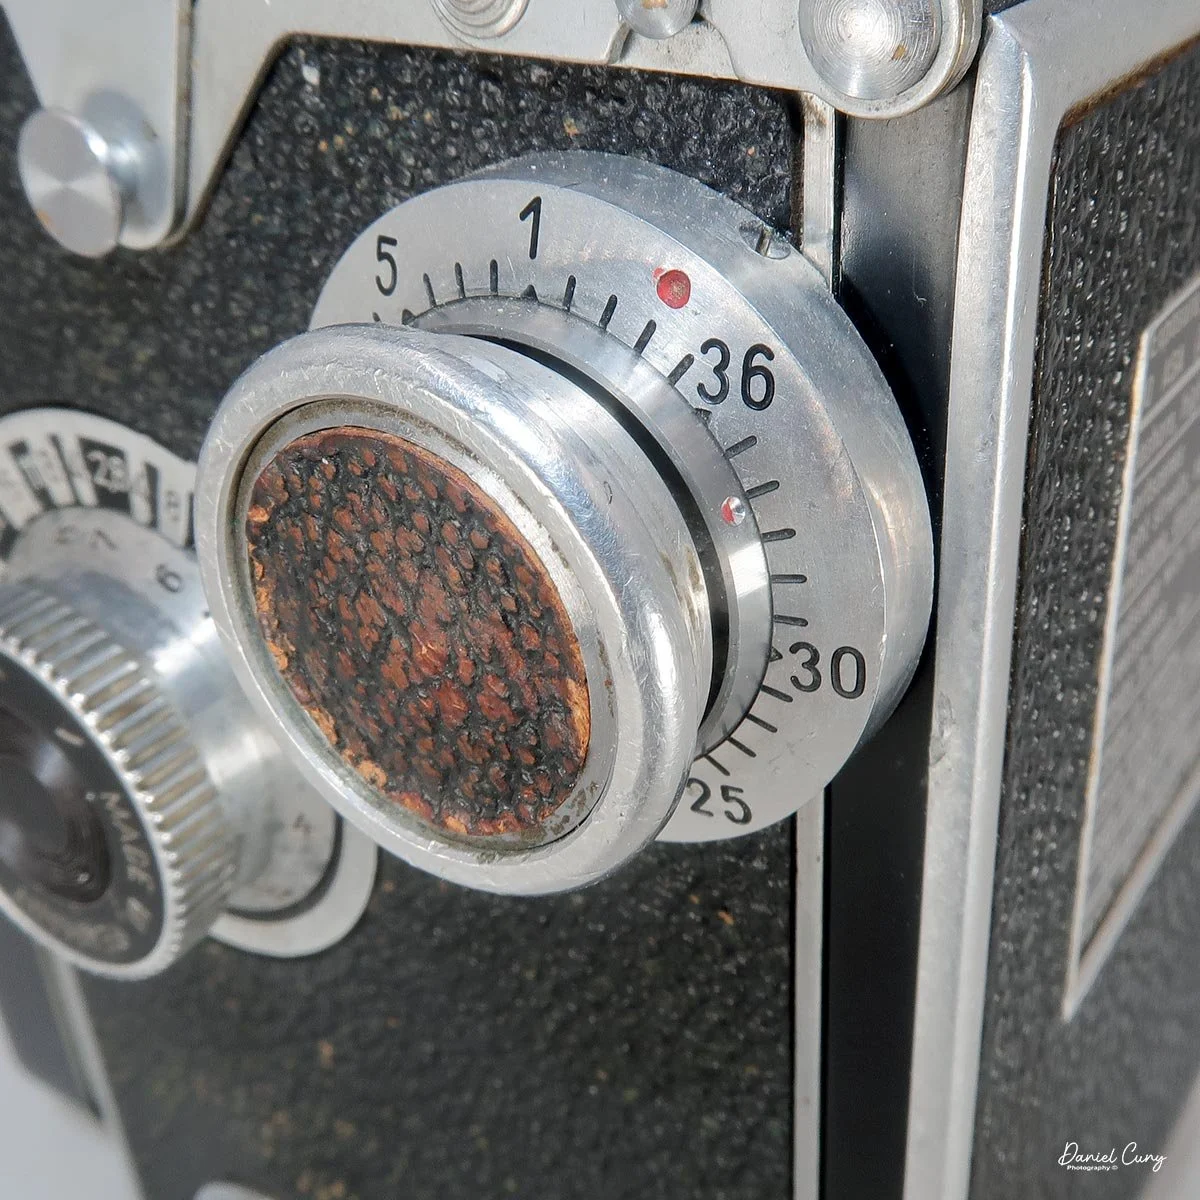
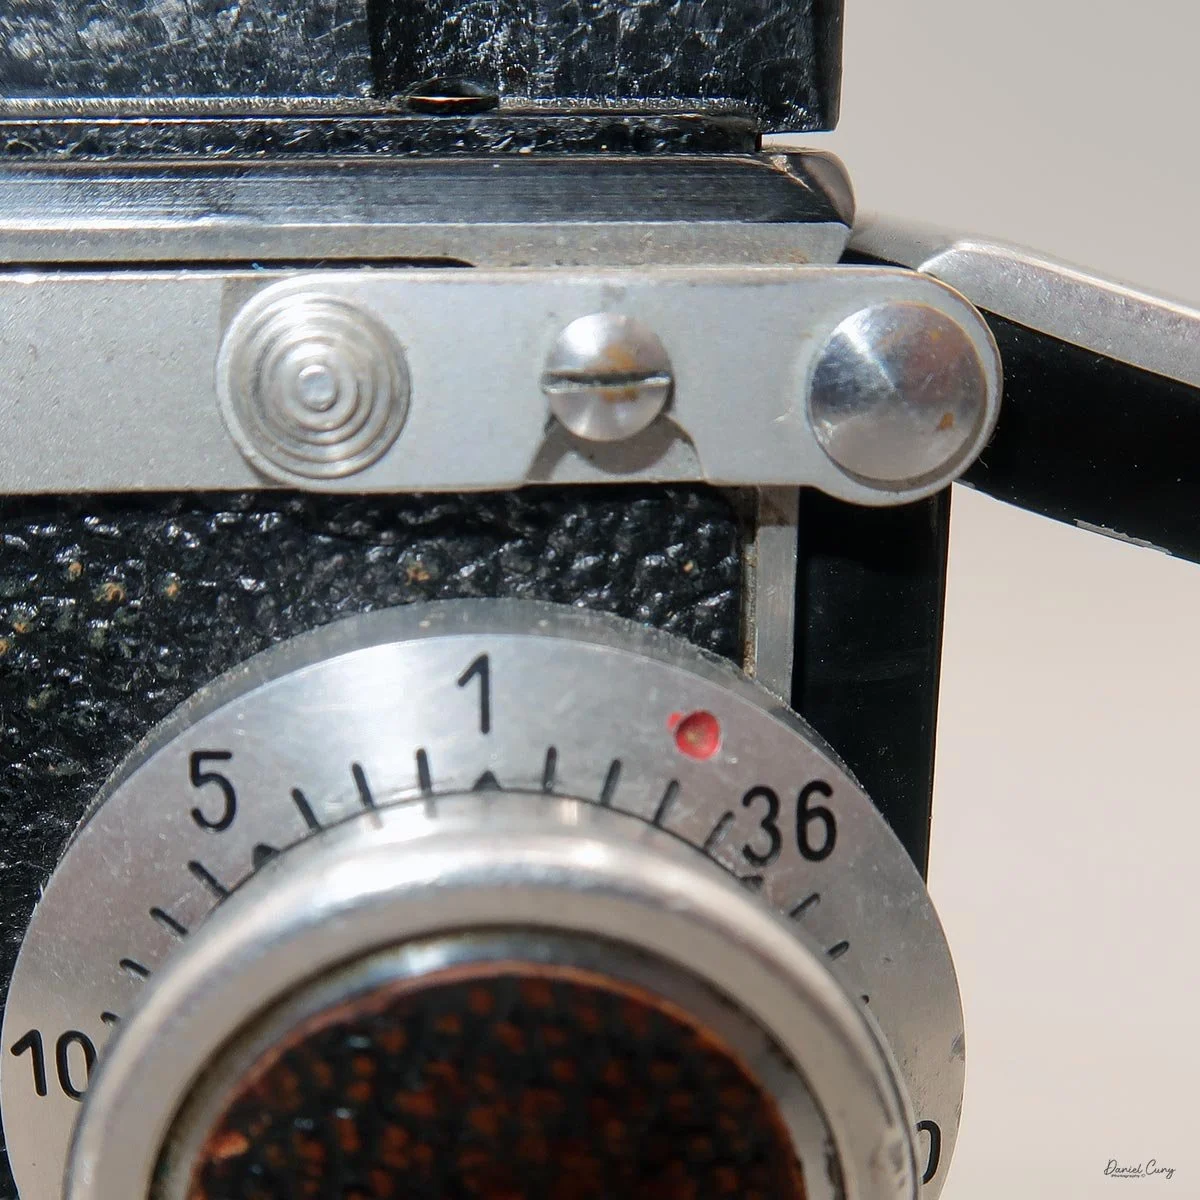
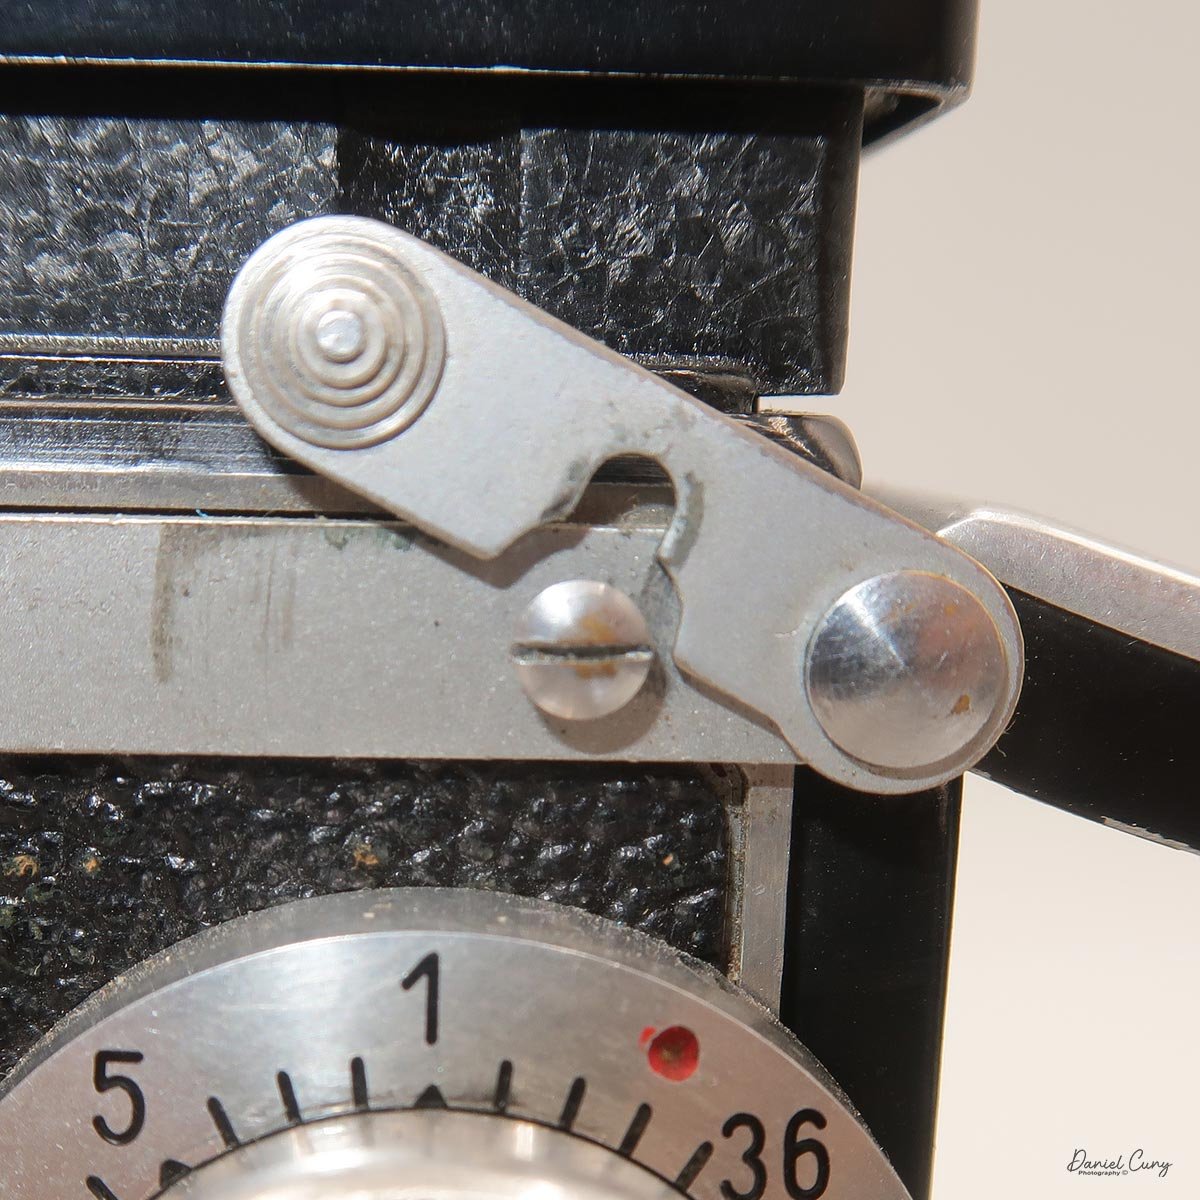
The Deluxe camera has a "Semi-Automatic Film Advance system," as described in Mike Butkus's manual and his other incredible camera manuals. The camera has a switch on the back and a frame counter on top.
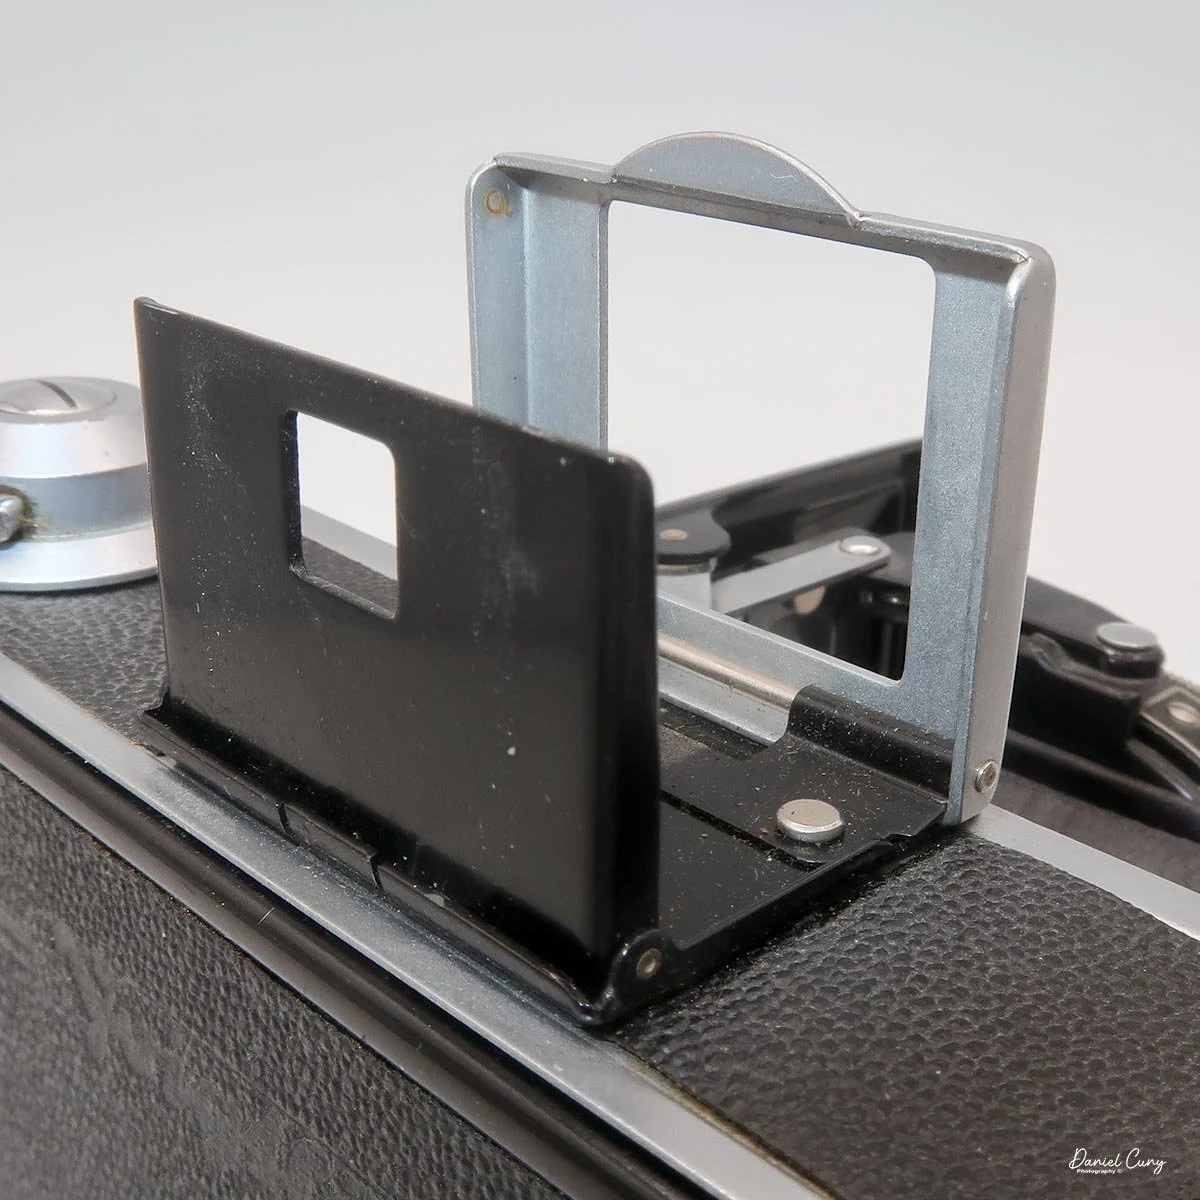
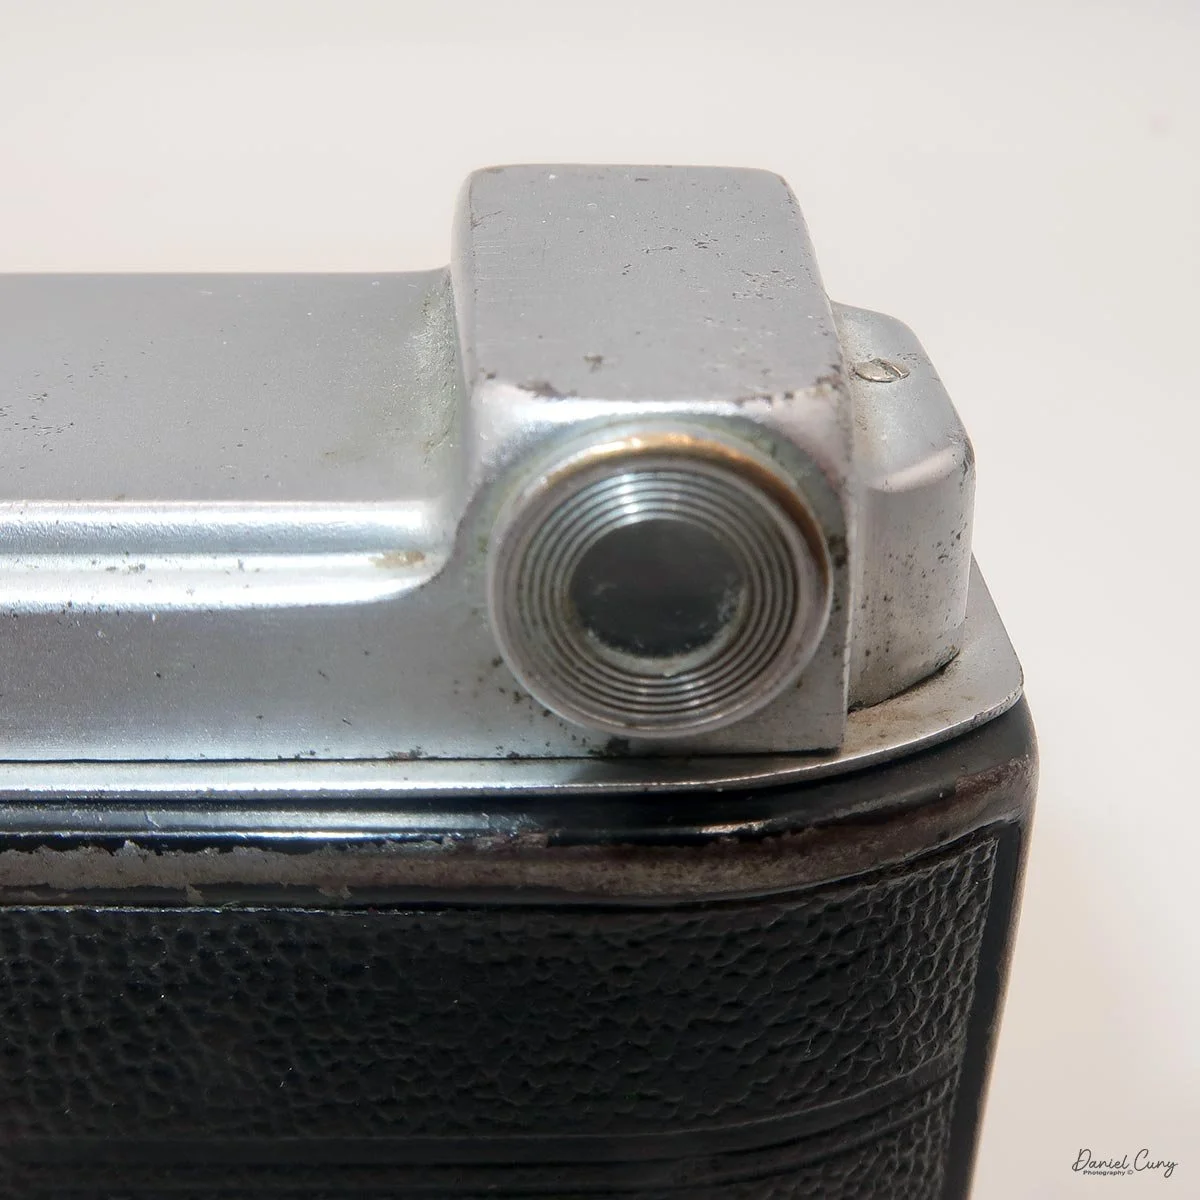
Here's how the film advance works on the Deluxe camera:

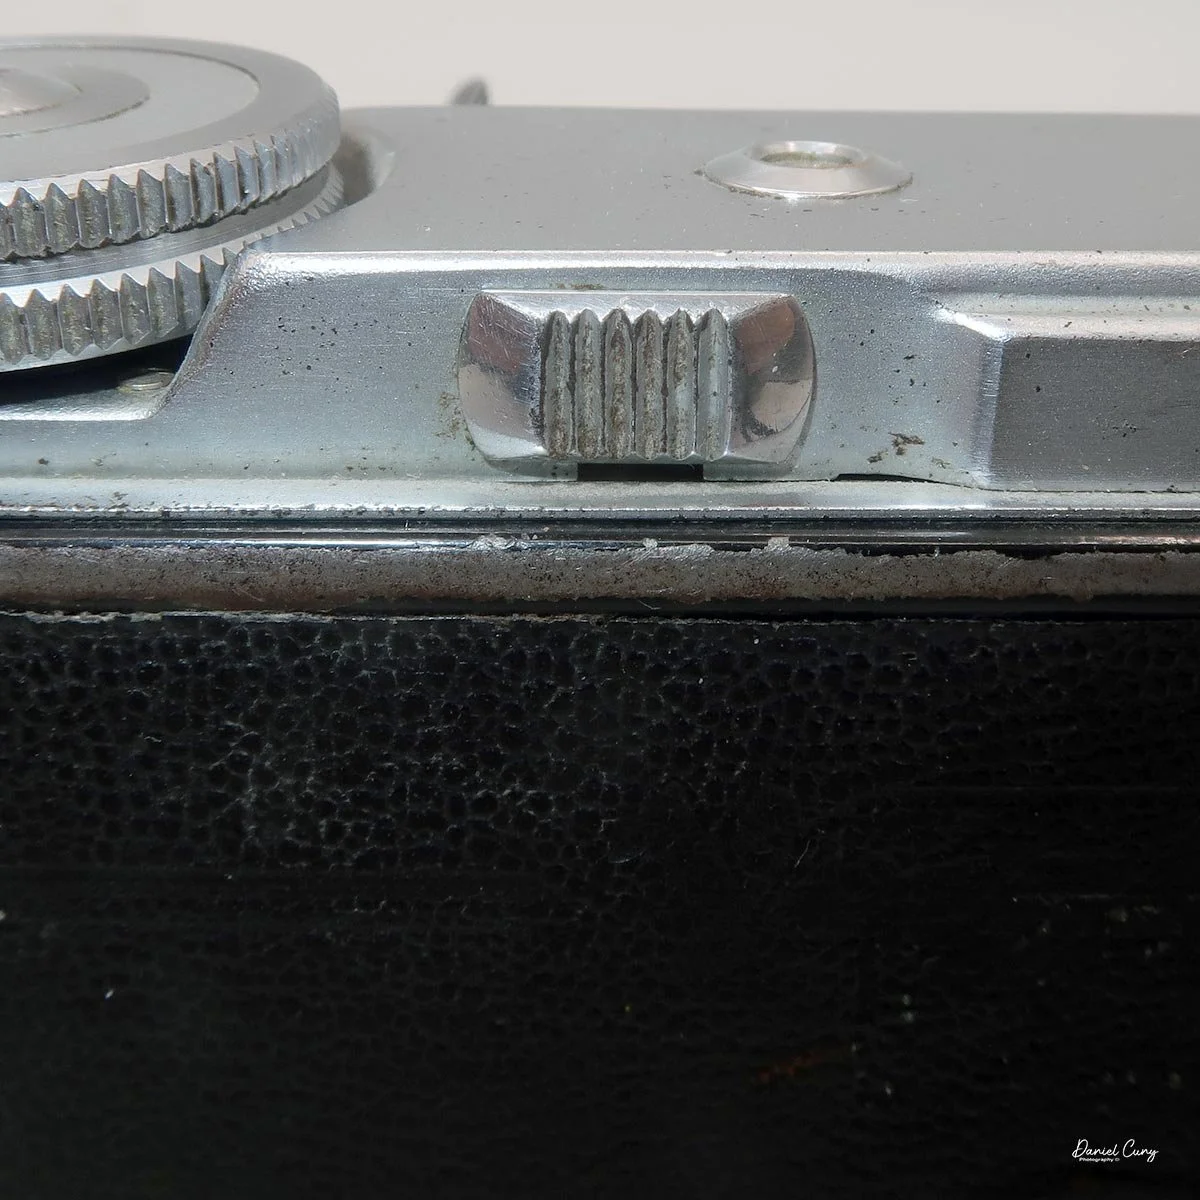
  • -- On the back and front of the camera, just under the top, next to the film winding knob, are two sliding latches. If the frame counter on top doesn't show 0, slide these latches to the left and right, back and front in turn until the frame counter shows 0.

  • -- On the back of the camera is a red window that will show an X. To the right of it is a flat serrated wheel of equal diameter.

  • -- Open the red window by turning the wheel 90 degrees clockwise. Turn the winding knob until the number 1 appears in the red window.

  • -- Turn the wheel back to close the red window.

  • -- Looking at the top of the camera, slide the latch on the back to the left. The frame counter on top will show 1. The camera is now ready to take the first picture.

  • -- To advance the film, slide the latch on the front to the right. The frame counter will show 2. Turn the winding knob until it stops. Take the second picture. Repeat until the counter shows 12 and take the last picture. Slide the front latch one more time until the counter shows 0, then turn the knob until the film is completely wound.

My Results:

Here are a few of the frames I took while my wife and I visited the Grist Mill, which is beautiful this time of year.
Conclusion:

I've always been a big fan of Voigtländer cameras. To have one that is both medium format and pocket-sized, with sharp lenses, is a real bonus and makes it one of my favorites. The only thing that would make it better would be rangefinder focus. That's what makes cameras like the Zeiss Super Ikontas and other Japanese cameras like the Mamiya Six or Konica Pearl so desirable.

Thank you for taking the time to read about the Bessa 66 cameras I recently added to my collection.

Are you interested in other vintage gear? Here are some of my other Camera Reviews.

Check out my Cuny's Camera Collection YouTube channel, where I am putting together video overviews of the cameras I write about. Be sure to subscribe and like the channel, too!

Cuny's Cameras and Photos is my online eBay store, where you will find some of the cameras I have reviewed, along with a wide range of other cameras, lenses, and items from my collection that I am thinning out.

Until next week, please be safe.
Rolleiflex 2.8B camera

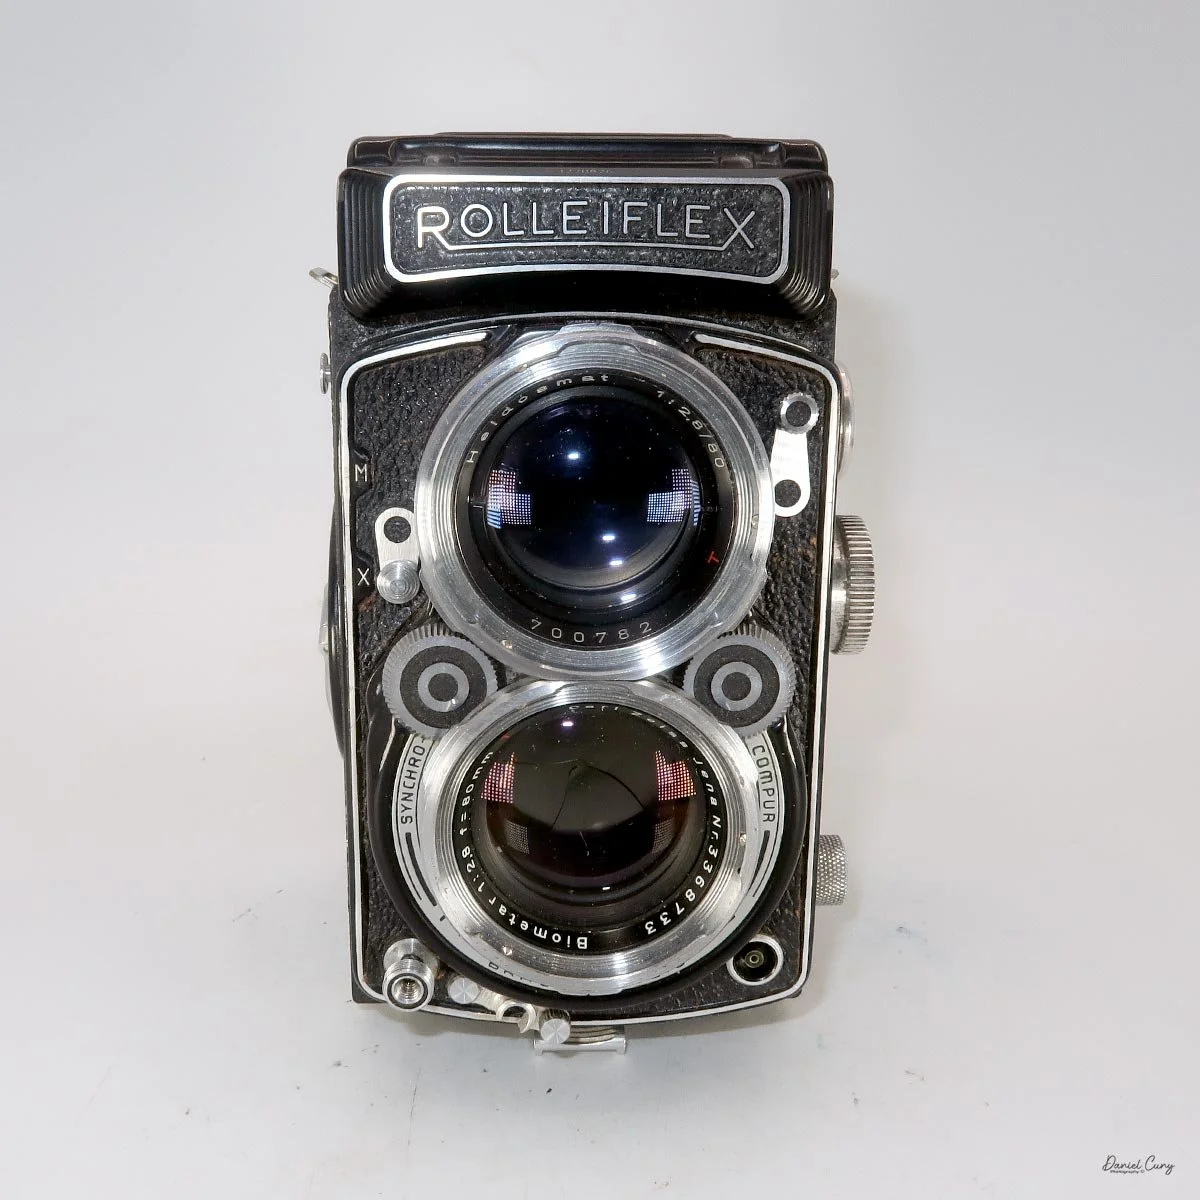
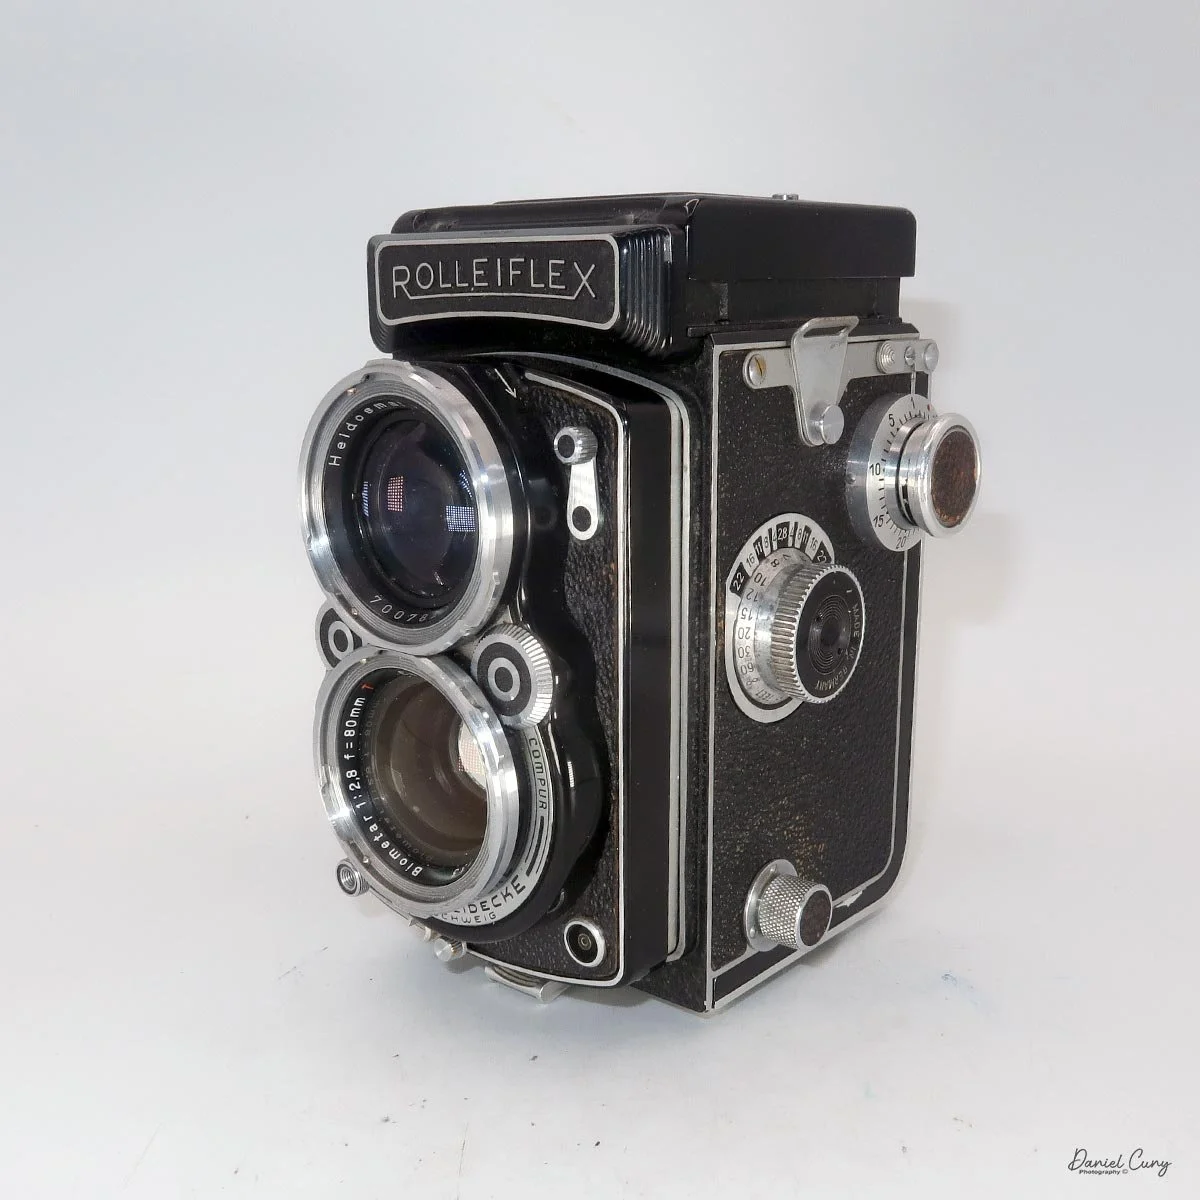
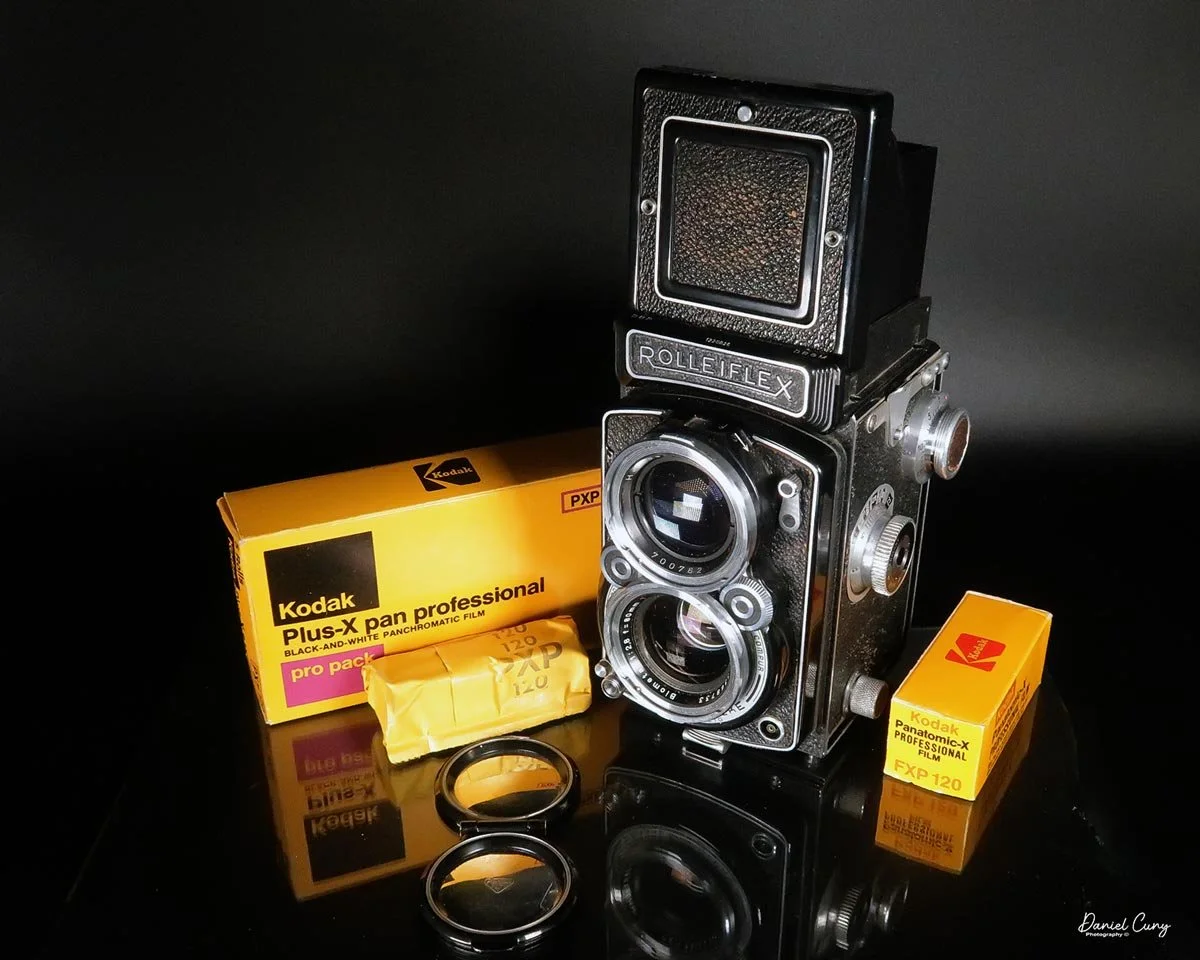
My Rolleiflex 2.8B camera

I've long wanted a Rolleiflex 2.8 in my collection and almost pulled the trigger a few times, but it wasn't until the most recent camera show in Kent, WA, that I finally did.

It wasn't a true purchase; it was a trade for something equally rare: an early Hasselblad Super Wide that I had recently had completely overhauled by a tremendous technician on the east coast. I had written about the Hasselblad Super Wide years ago, and the camera didn't include a film back or finder, so I figured it was a fair trade for both of us.

I was told that the Rolleiflex 2.8B was overhauled by a Portland, OR repair shop I was familiar with, which made the camera even more desirable in the trade. It didn't include a strap or case, but it did have the lens cap, which was good. I had played around with the camera briefly at the show, and it was from one of the other sellers, which carries weight with me, since it wasn't a random passerby looking to sell equipment, which happens at the show.

Don't get me wrong, I have bought items from people walking the show, and I always like interacting with them, seeing what they have, and making deals. I'm not an expert on lenses and optics, but the dealer said the 2.8B was rarer because of the Carl Zeiss Biometar lens.

Being a fan of anything Zeiss, the Rolleiflex cameras I've passed on in the past have had Schneider lenses, as I've known that while the Schneider lenses are good, the Zeiss lenses are more desirable.

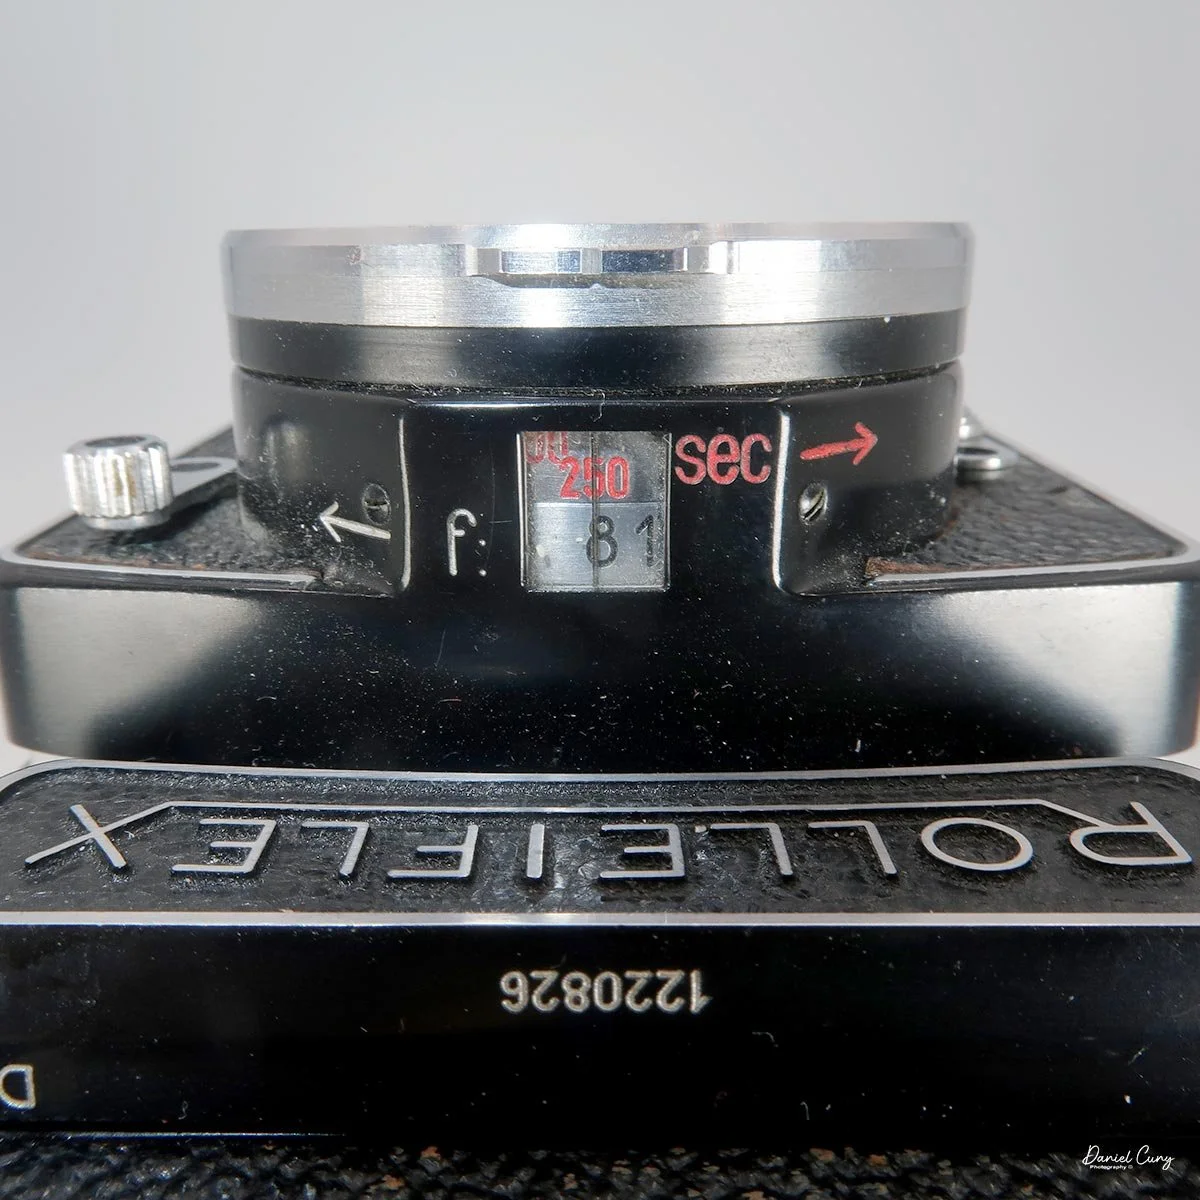
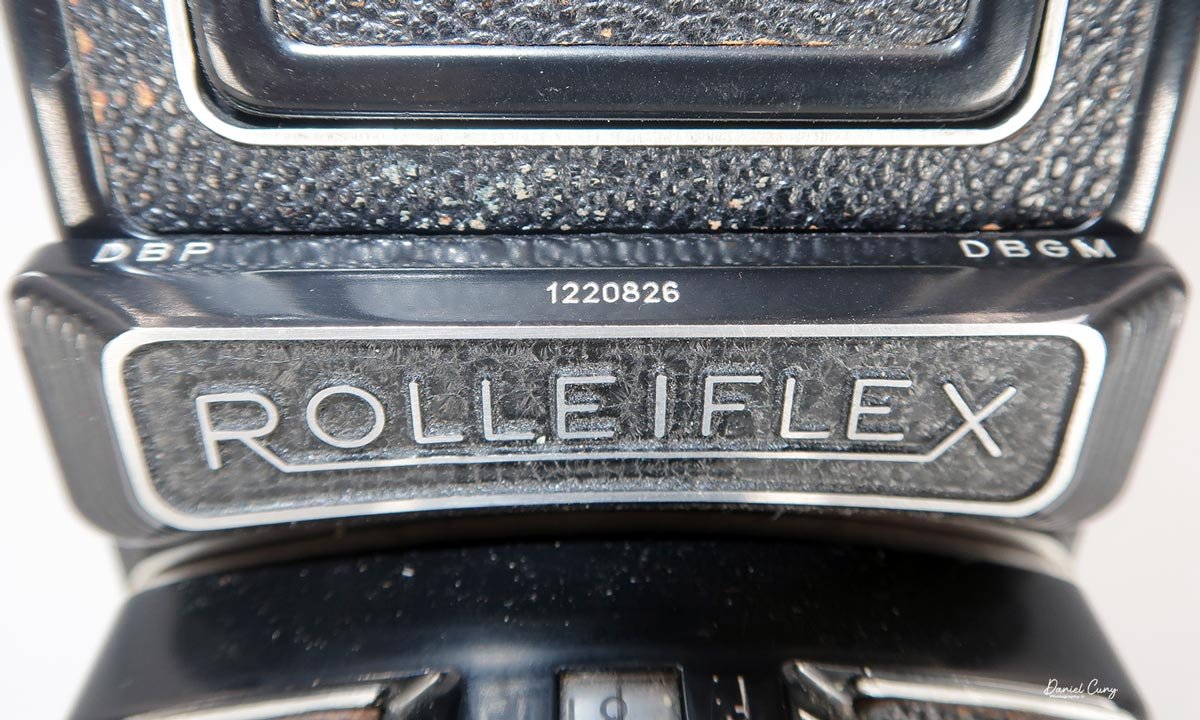
Rolleiflex nameplate with serial number

As I generally do when I check out a camera, I check the slow shutter speeds first. I feel that if the camera has an issue, the slow shutter speeds fail before the faster ones, so I set the shutter speed on the Rolleiflex 2.8B to 1 second, and it sounded accurate. That was a good sign to me, but the one thing I failed to do until I got home with the camera was to check the high-end speeds. The shutter speed and aperture wheels moved smoothly, and the lens was bright and clean. The dealer mentioned that he replaced the normal focusing screen with a brighter focusing screen.

It wasn't until I got home and put film in the camera that I noticed it wouldn't go to the highest speed of 1/500. It went partway toward the setting, but not all the way. I don't force a camera to a specific setting, because it can do more harm. Maybe the gears aren't meshing properly, or the lubrication has gummed up a bit.

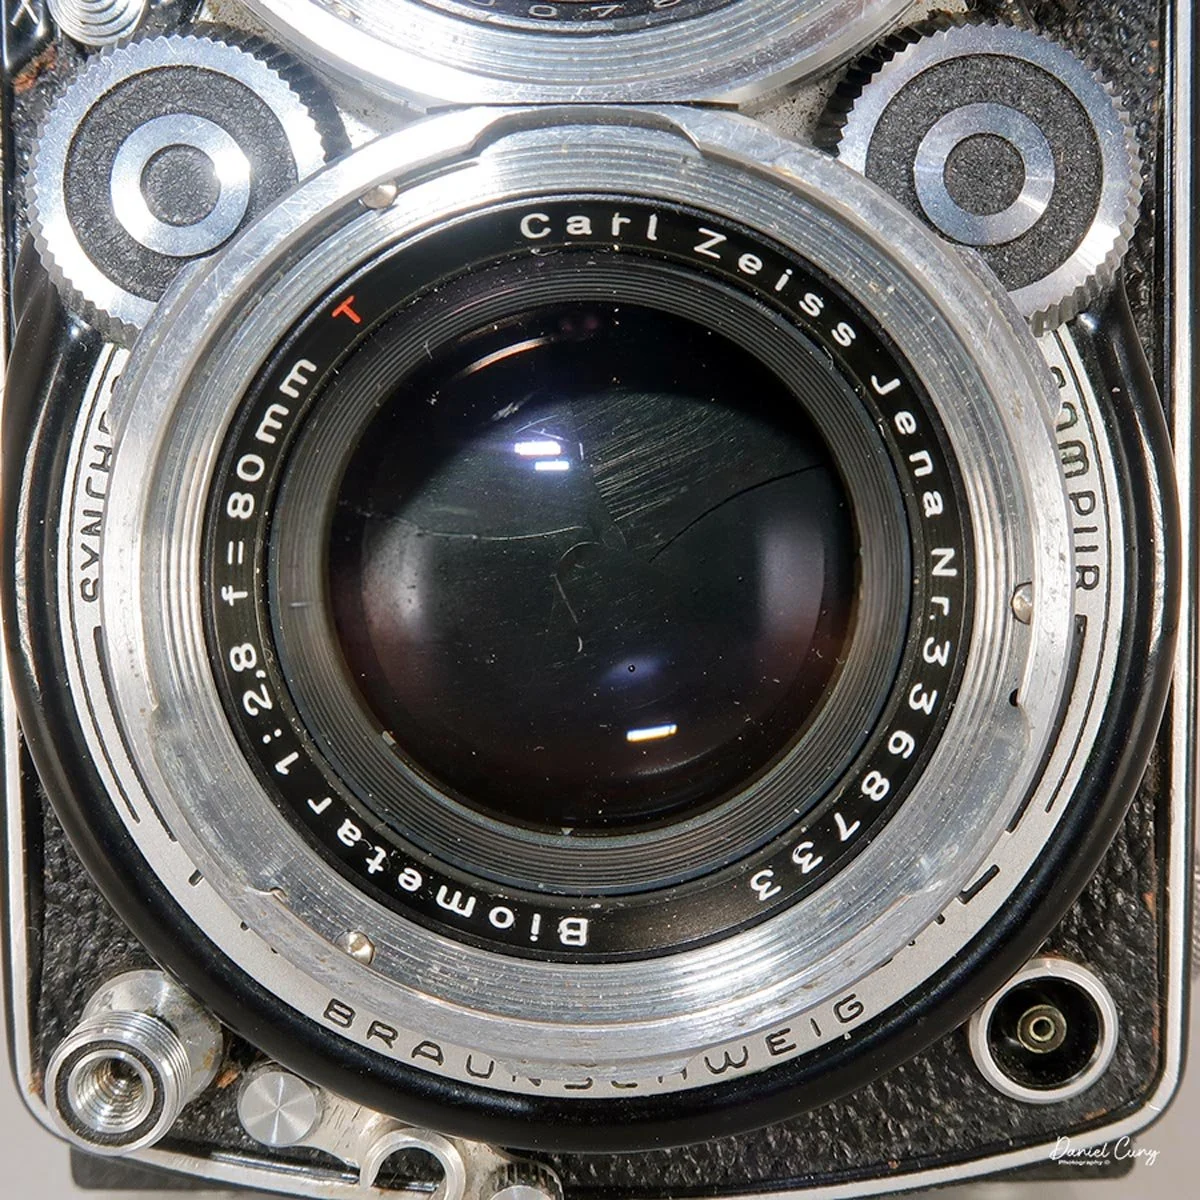
Infamous Carl Zeiss Biometar lens

At this point, I'll need a technician to look at the camera and see why it didn't reach the highest speed. I also didn't ask when the camera was overhauled, as it may have been done a few years ago, so I'm not going to fault the dealer.

It's not a huge factor that soured my taste for the camera, but one reason I liked the f/2.8 version was to shoot at the widest setting to get shallow depth of field and see the bokeh the lens produces.

Other than that one item, the camera is in wonderful condition. I'm still happy I made the trade, especially after showing the camera to another collector friend who is a big vintage collector and user and said the 2.8B is a VERY collectible version because of the lens and the low number of units made with it.

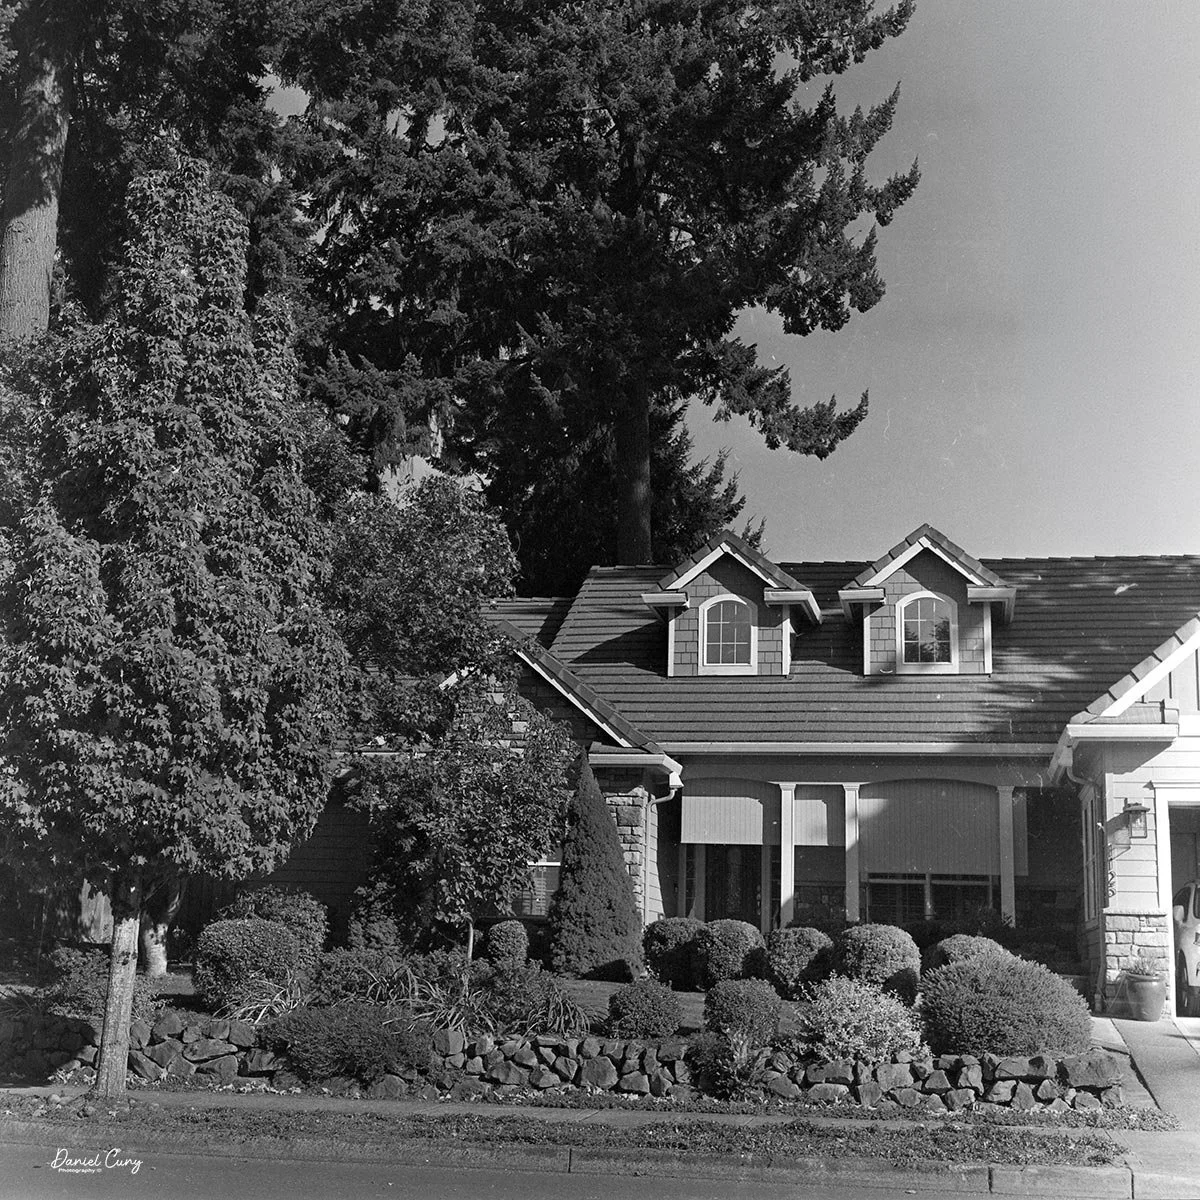
I had some expired Plus-X film in my drawer, which I generally like to use when testing a camera, so I put a roll in the Rolleiflex 2.8B and took a walk through the neighborhood to see how the camera would perform and look at the images it produced.

History:

Rollei's story starts in 1920, when Paul Franke and Reinhold Heidecke founded Franke & Heidecke in Braunschweig, Germany. Their Rolleiflex of 1929 invented the modern twin-lens reflex, and by the 1950s and '60s the 2.8F and 3.5F — carrying 80mm f/2.8 and 75mm f/3.5 Planar and Xenotar lenses — had made Rolleiflex the gold standard of medium format. Few people realize that those famous Western lenses had an identical twin on the other side of the Iron Curtain: the Carl Zeiss Jena Biometar.

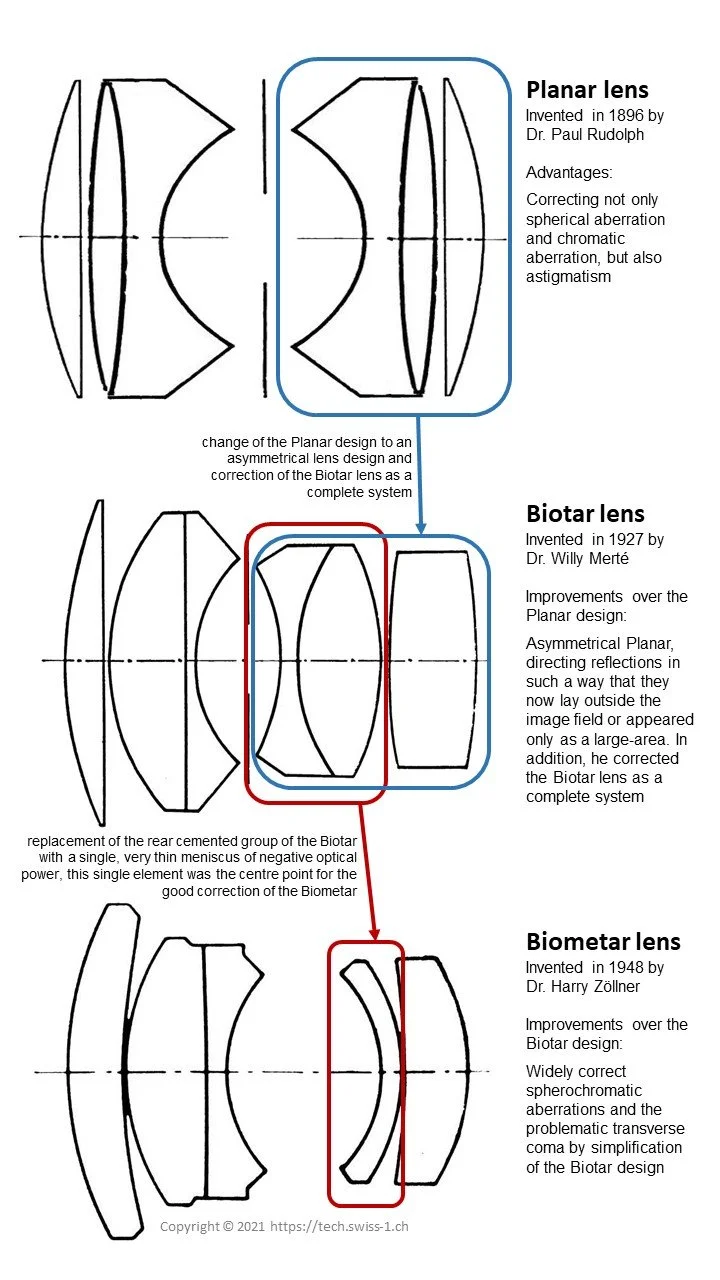
The Biometar descends from Willi Merté's 1927 Biotar, the great six-element Double Gauss design. After the war, designer Harry Zöllner at Zeiss Jena set out to simplify it. Working with Rudolf Solisch, he kept the Biotar's front group. Still, he replaced the rear cemented doublet with a single, steeply curved thin meniscus element — five elements in four groups in all. That one element carried the lens's entire correction, and it was brutally hard to manufacture: center-grinding such a thin, curved piece of glass pushed the era's machinery to its limits. The Biometar could never be cheap, but it was brilliant.

Then politics split the design in two. When Solisch left Jena for the West, he carried the Biometar type with him to Schneider — and Schneider's Xenotar for the Rolleiflex 2.8 is virtually identical in shape to the Biometar. Zeiss Oberkochen's Planar for the same camera was a parallel five-element variation. One design family, two Germanys: in the East it wore the Biometar name, in the West it focused the Rolleiflex.

You'll most often meet the Biometar 80mm f/2.8. Calculated in June 1956 and first produced in March 1959, it replaced the Tessar as the standard lens of the Praktisix — soon renamed the Pentacon Six — and held that job for the system's entire life, some thirty years of production. It came in silver, then the famous "zebra" finish, then all-black multi-coated form. Zeiss Jena even made batches for Japan's Bronica in the 1970s, when Bronica's usual supplier, Nikon, grew too expensive.

The Pentacon Six was the Eastern rival Rollei answered with the SL66 in 1966 — and the Biometar-equipped system outlived its Western challenger. Franke & Heidecke went bankrupt in 1981; a decade later, Biometars were still rolling out of Jena. It's a lens with two histories, and the Rolleiflex carries one of them in every 2.8F ever made.

The Rolleiflex 2.8B: The Rarest of Them All

Zeiss Lens designs

But the Biometar's most famous appearance came a decade before the Pentacon Six, on a Rolleiflex itself—and it's why collectors hunt the Rolleiflex 2.8B. Rollei's first f/2.8 attempt, the 2.8A of 1949, carried an 80mm Tessar that wasn't sharp enough at f/2.8; some cameras were even recalled for lens replacement, and Zeiss-Opton's postwar production was too limited to fix the problem. The answer came from the other Germany. Zöllner had finished his Biometar 2.8/80 back in September 1948, and it was the best lens available for a Rolleiflex 2.8. From February 1952, Franke & Heidecke fitted it to the new 2.8B.

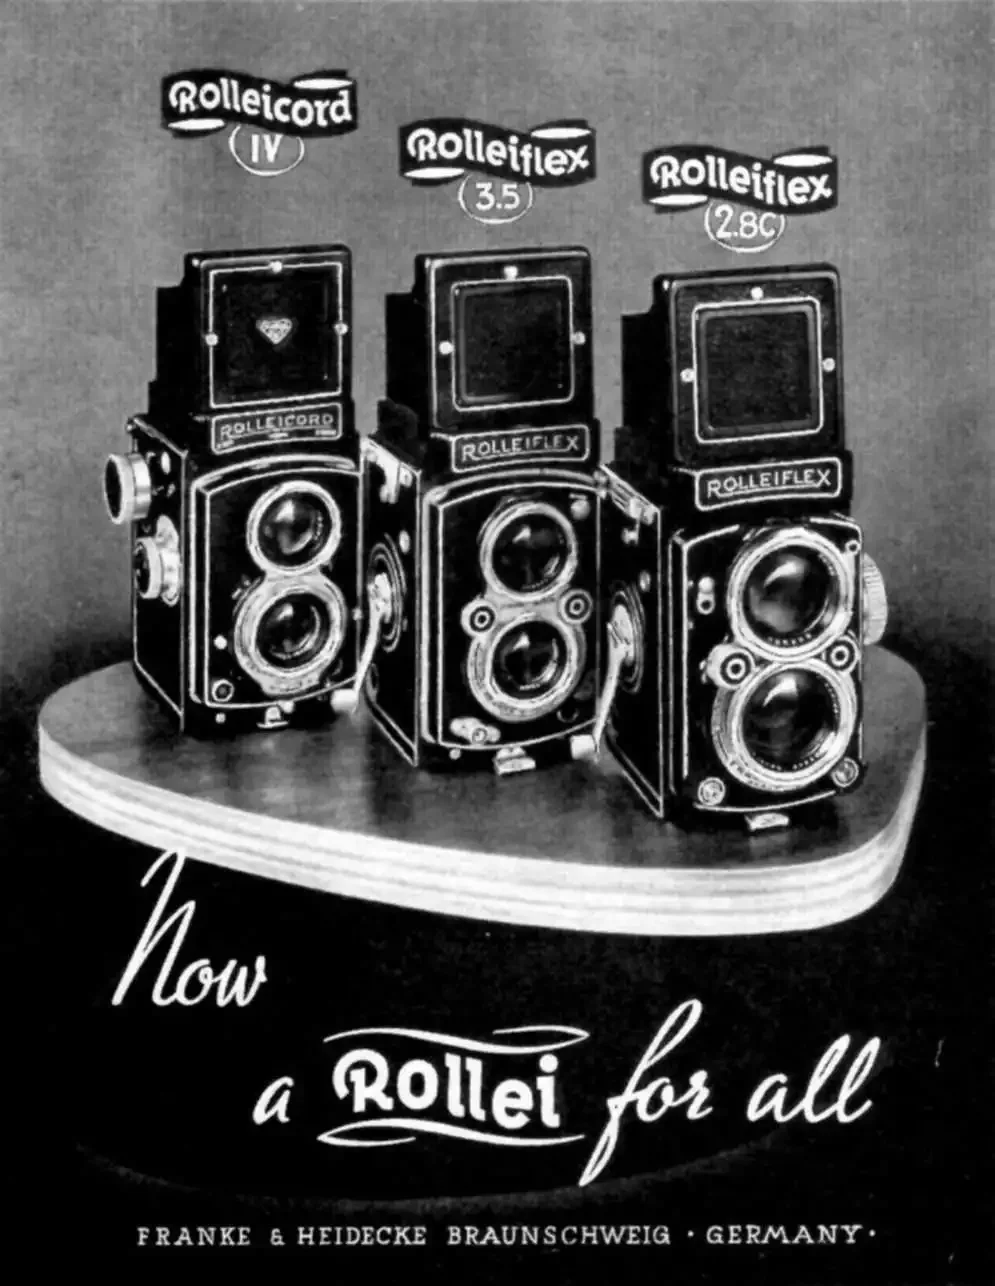
Then the Cold War shut the door. As the two German states hardened into enemies — and the two Zeiss companies into legal combatants — getting lenses out of Soviet-occupied Jena and into Braunschweig became harder by the month—production of the 2.8B ended in March 1953, after just thirteen months. Only 1,250 cameras were made, making it one of the rarest standard-production Rolleiflexes ever sold — no prototype, no special edition, just a regular model that politics strangled in its crib. Rollei barely advertised it; most were built for delivery to the USA, so even the German and British press largely ignored it. By December 1952, the replacement was ready: the 2.8C, carrying the Western twins of the Biometar — Oberkochen's Planar and Schneider's Xenotar.

For collectors, the 2.8B checks every box. Production numbers are tiny and well documented. It's the only Rolleiflex ever fitted with an East German lens — a West German camera wearing Jena glass, a combination that would have been impossible a few years later. And the Biometar itself, the first of Zöllner's five-element designs, has its own rendering. Find one with the "Carl Zeiss Jena Biometar" engraving and Bay III fittings, and you're holding the rarest production Rolleiflex of them all.

My Camera:

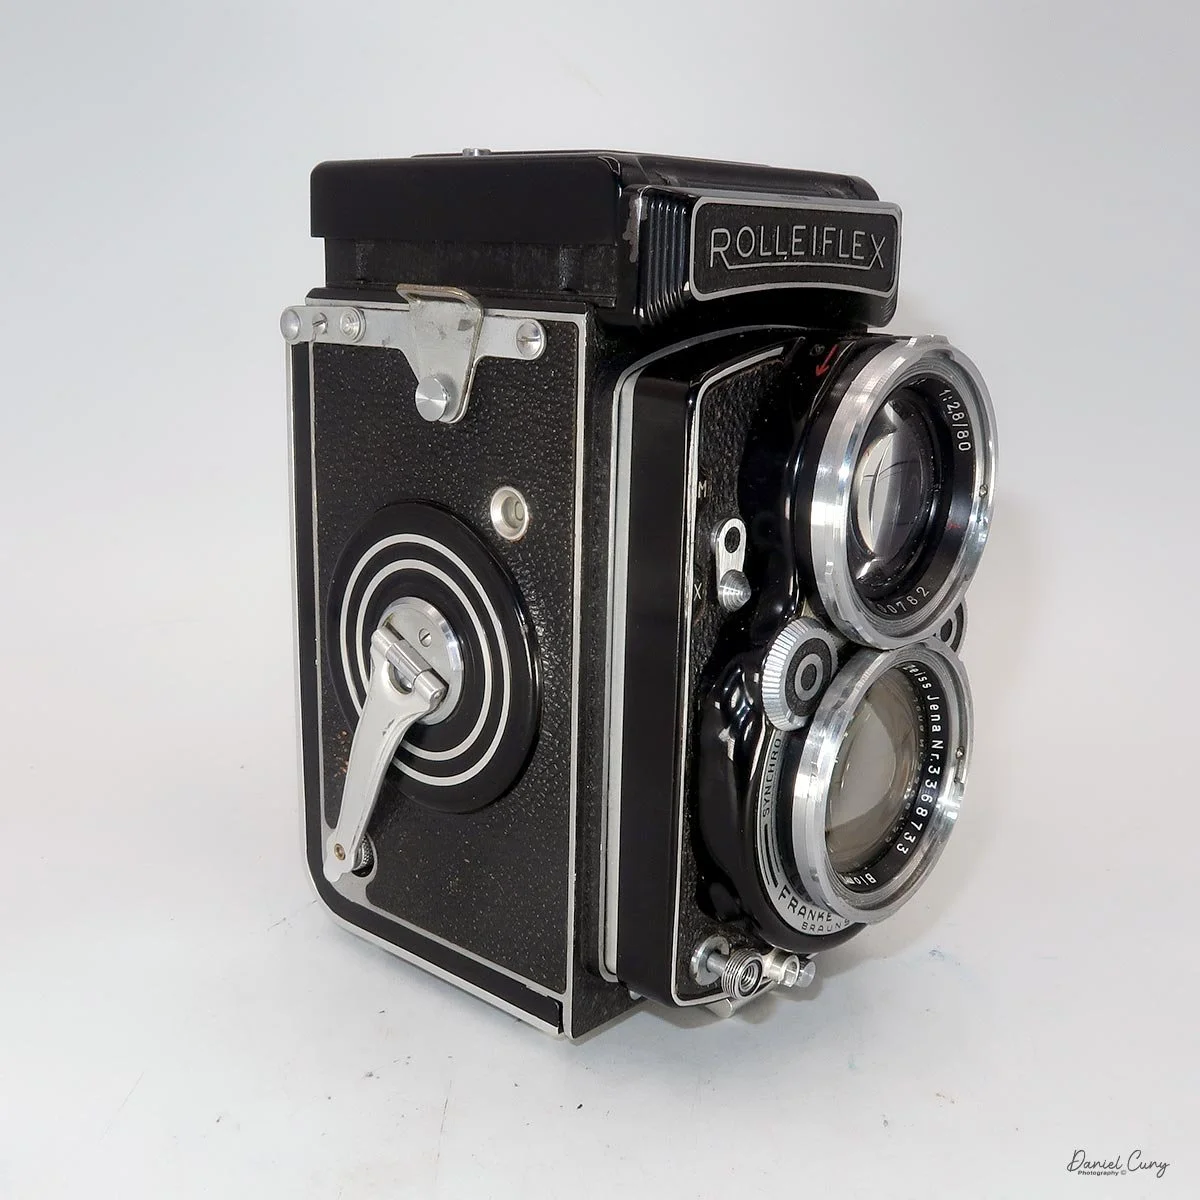
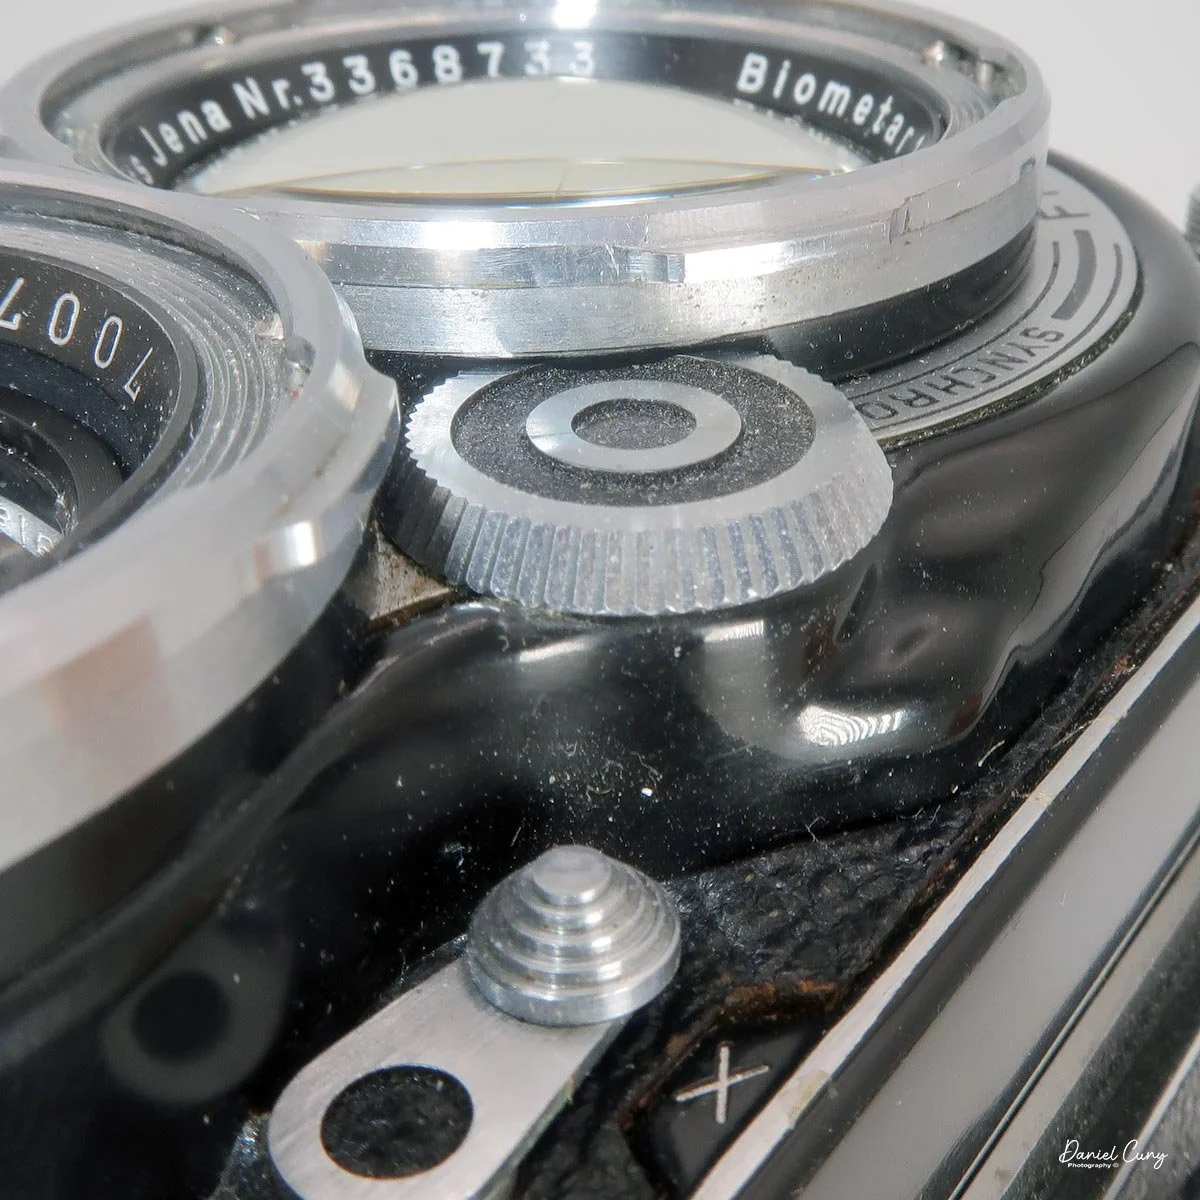
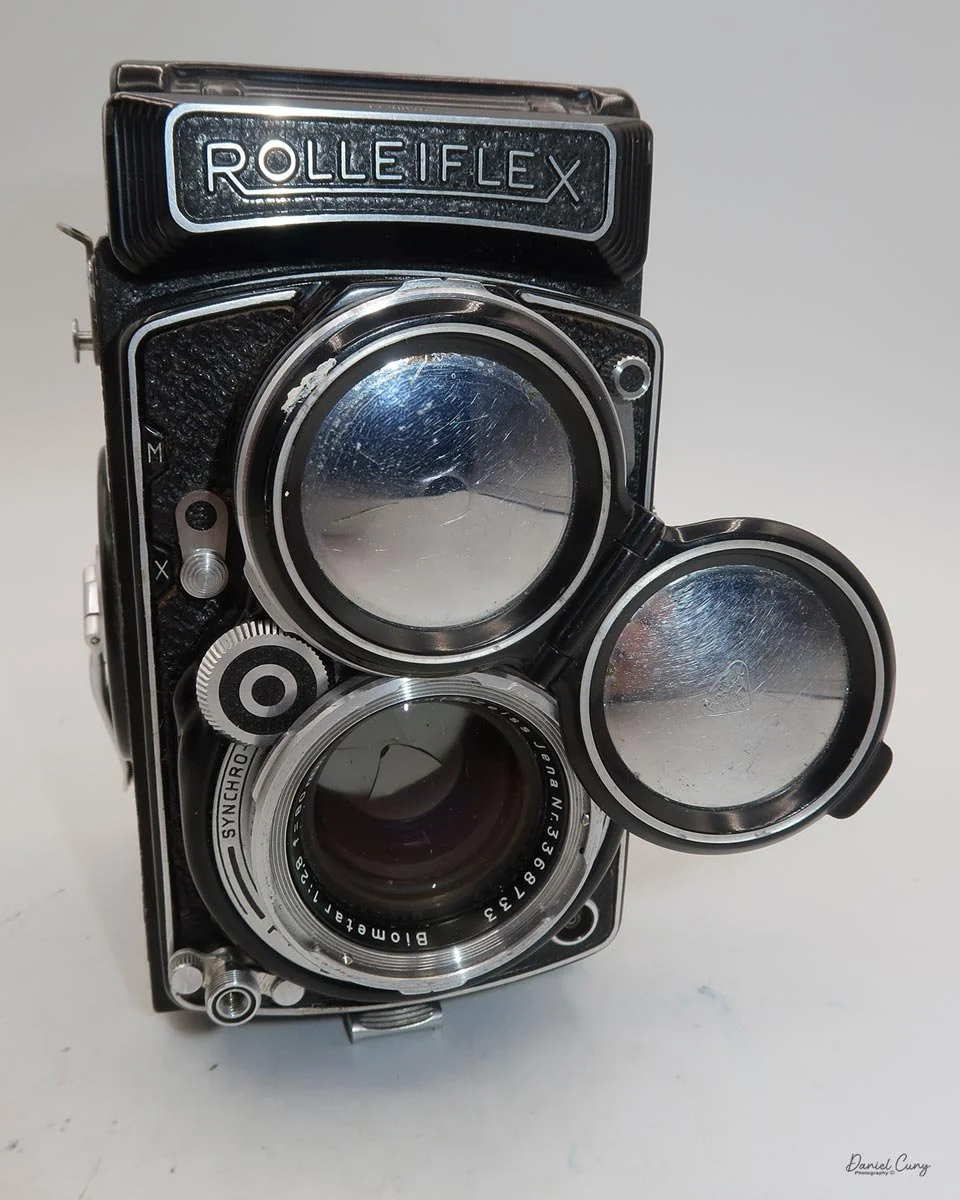
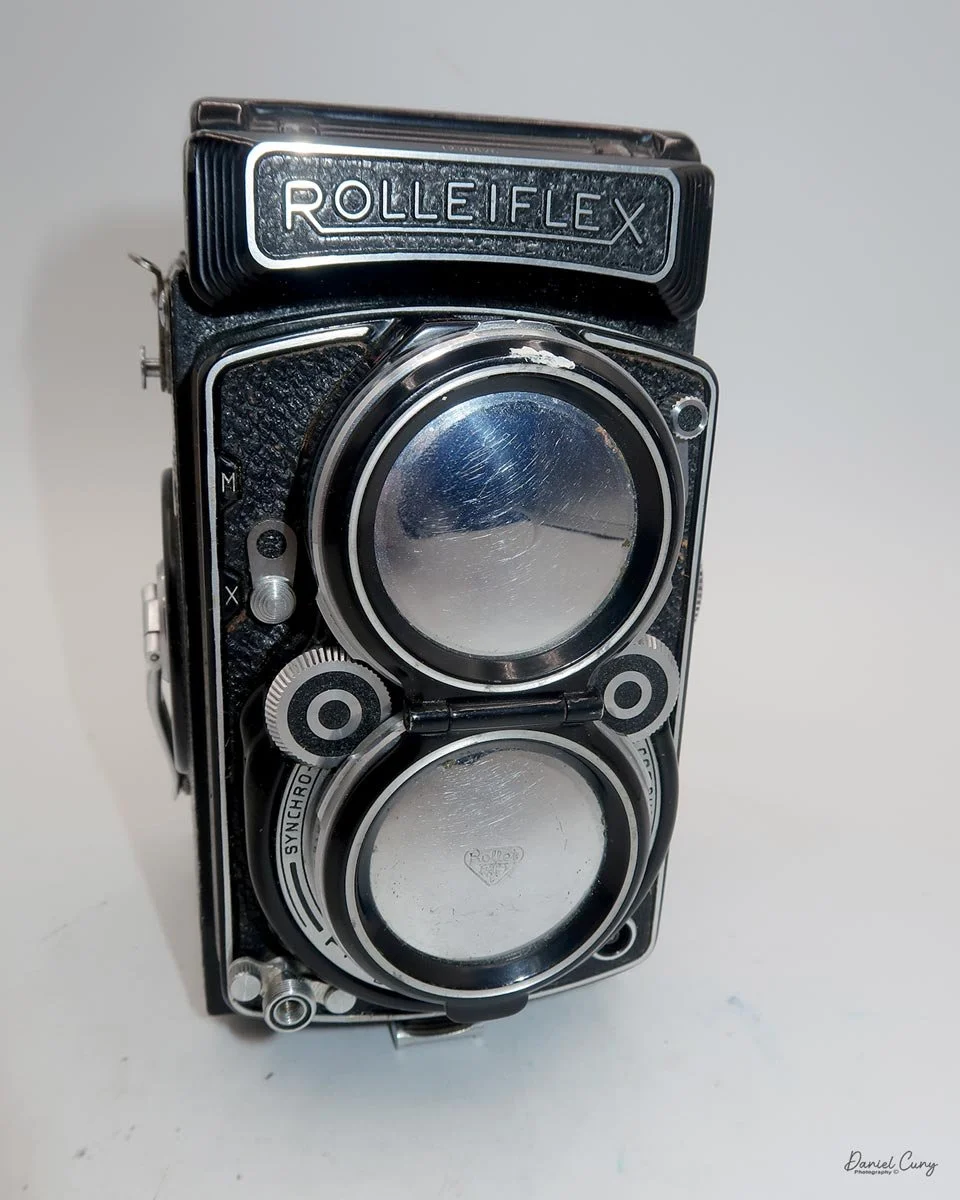
My Rolleiflex 2.8B is 5.5" tall with the light chimney closed and 8" tall with it extended, 3.5" wide, and 4.25" deep with the lens focused to infinity, serial # 1220826. The Rolleiflex 2.8B has a Carl Zeiss Jena Biometar 80mm f/2.8 "taking" lens, serial # 33687733, and a Heidosmat 80mm f/2.8 viewing lens, serial # 700782. The camera weighs 2 pounds, 7.6 ounces without film.

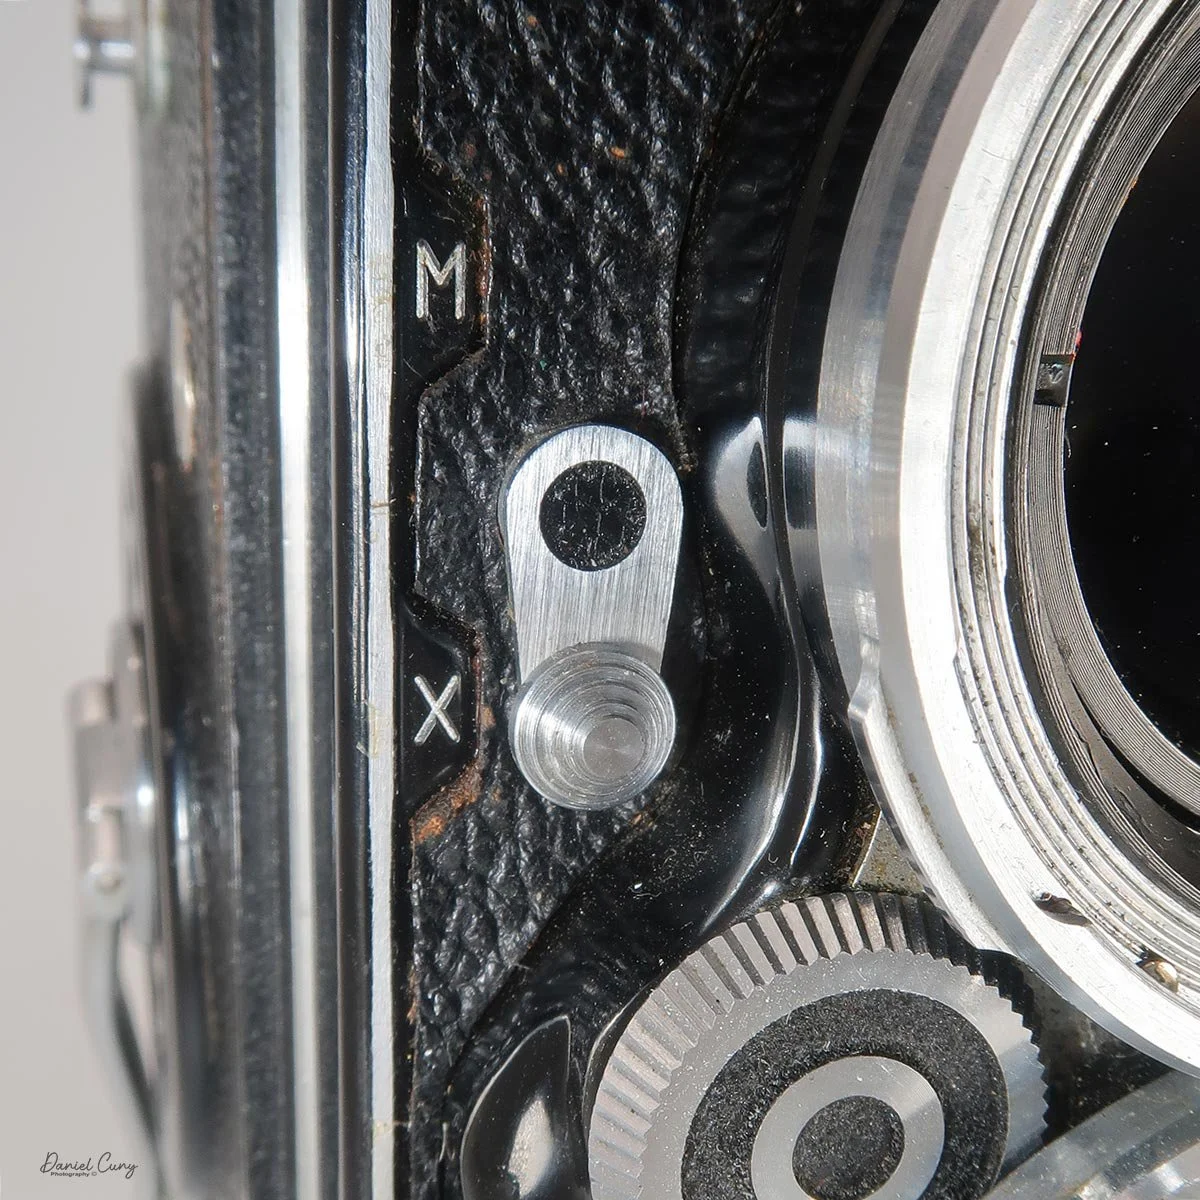
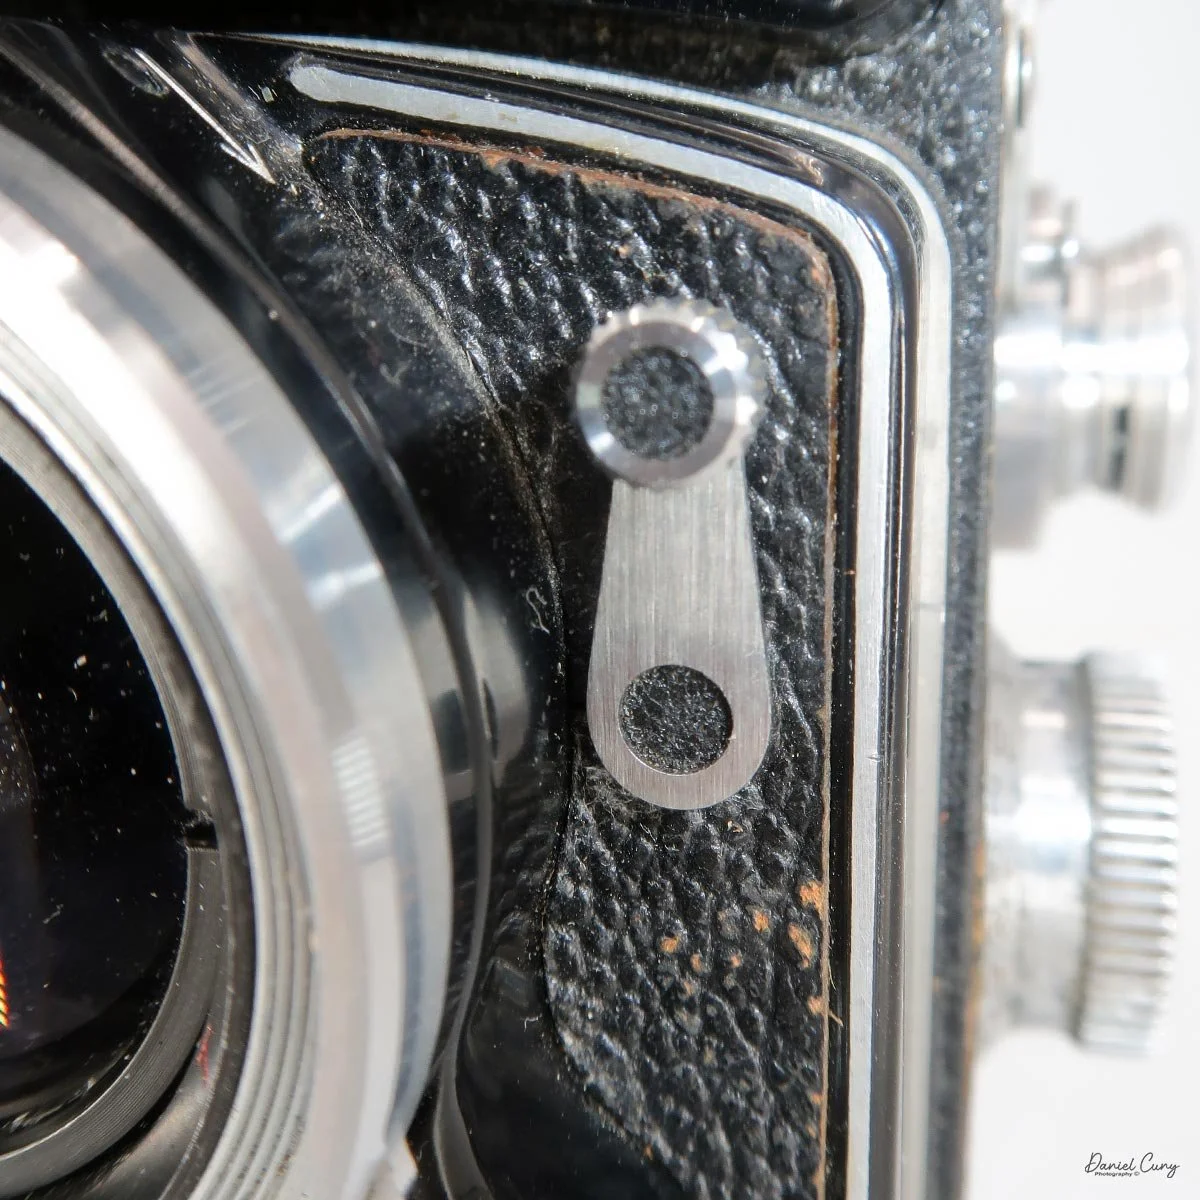
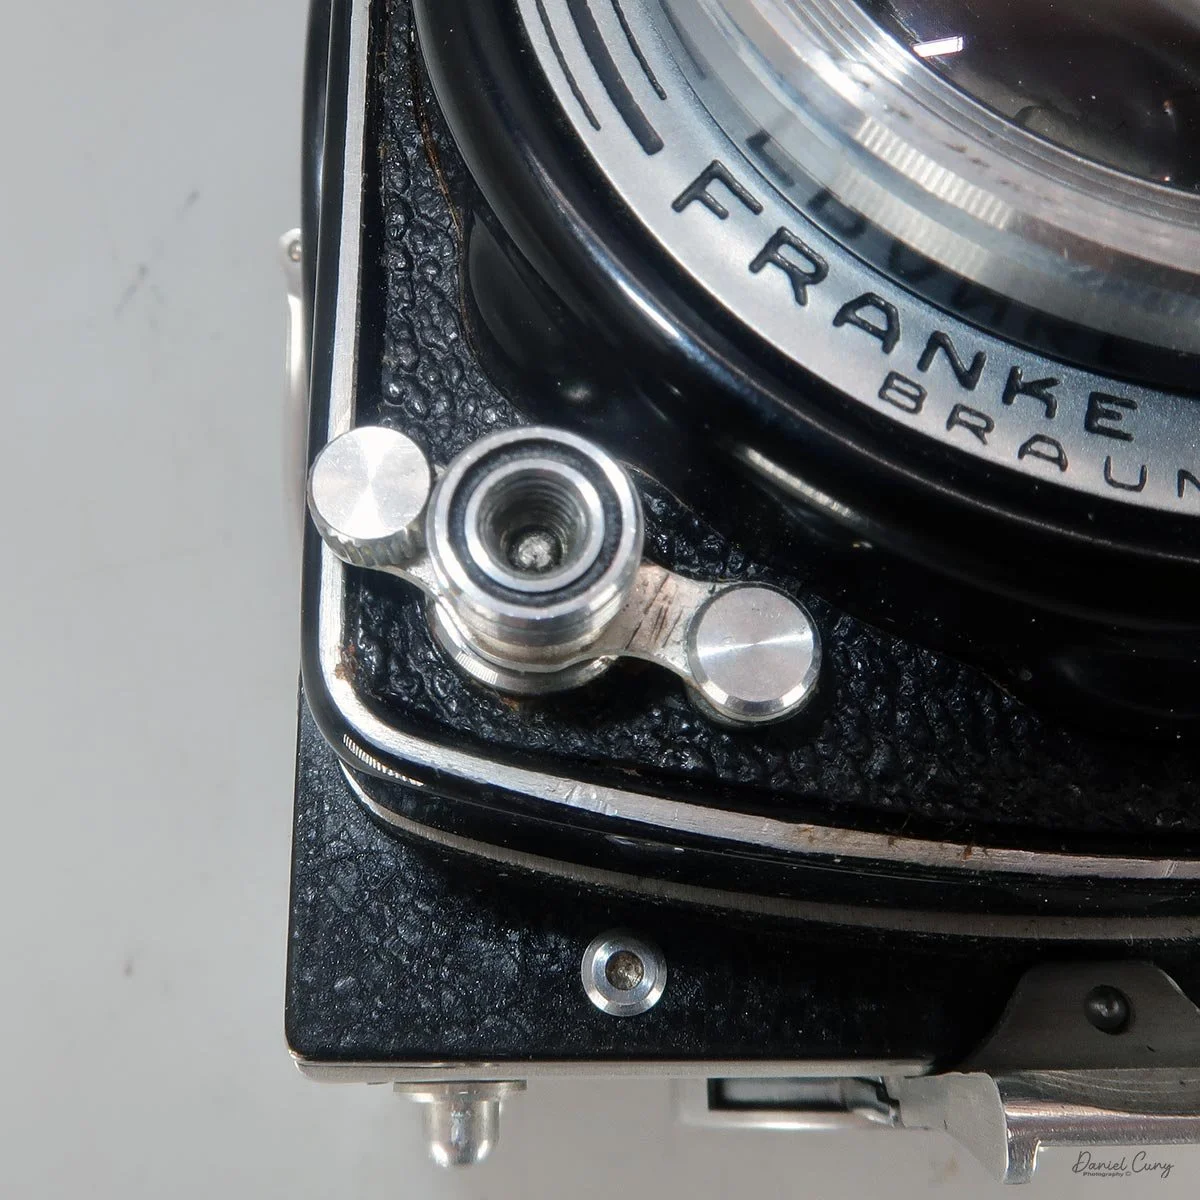
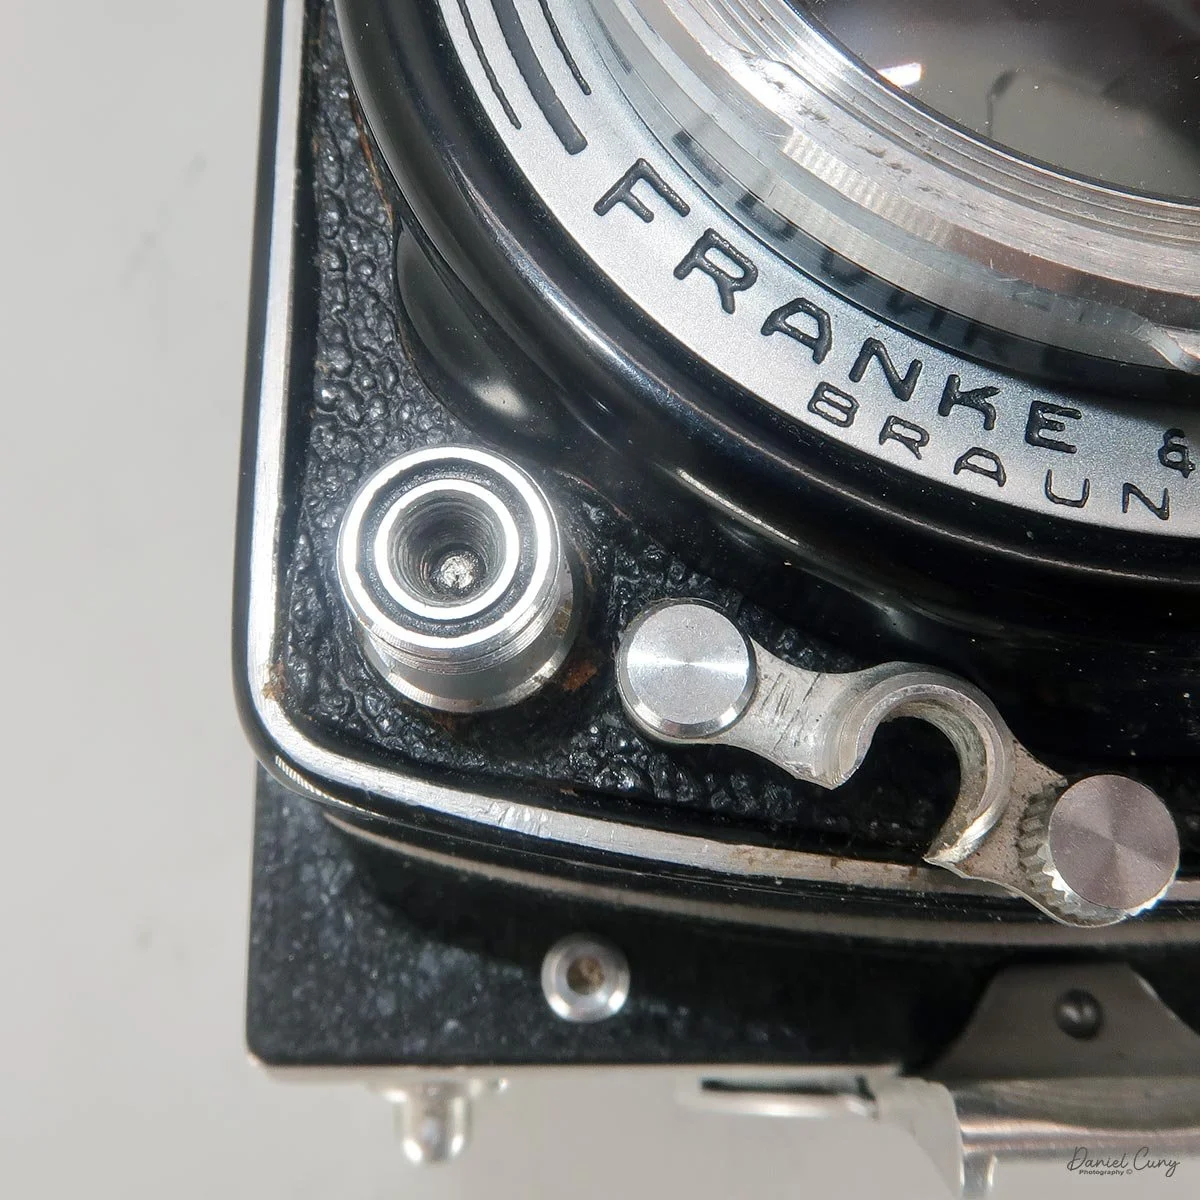
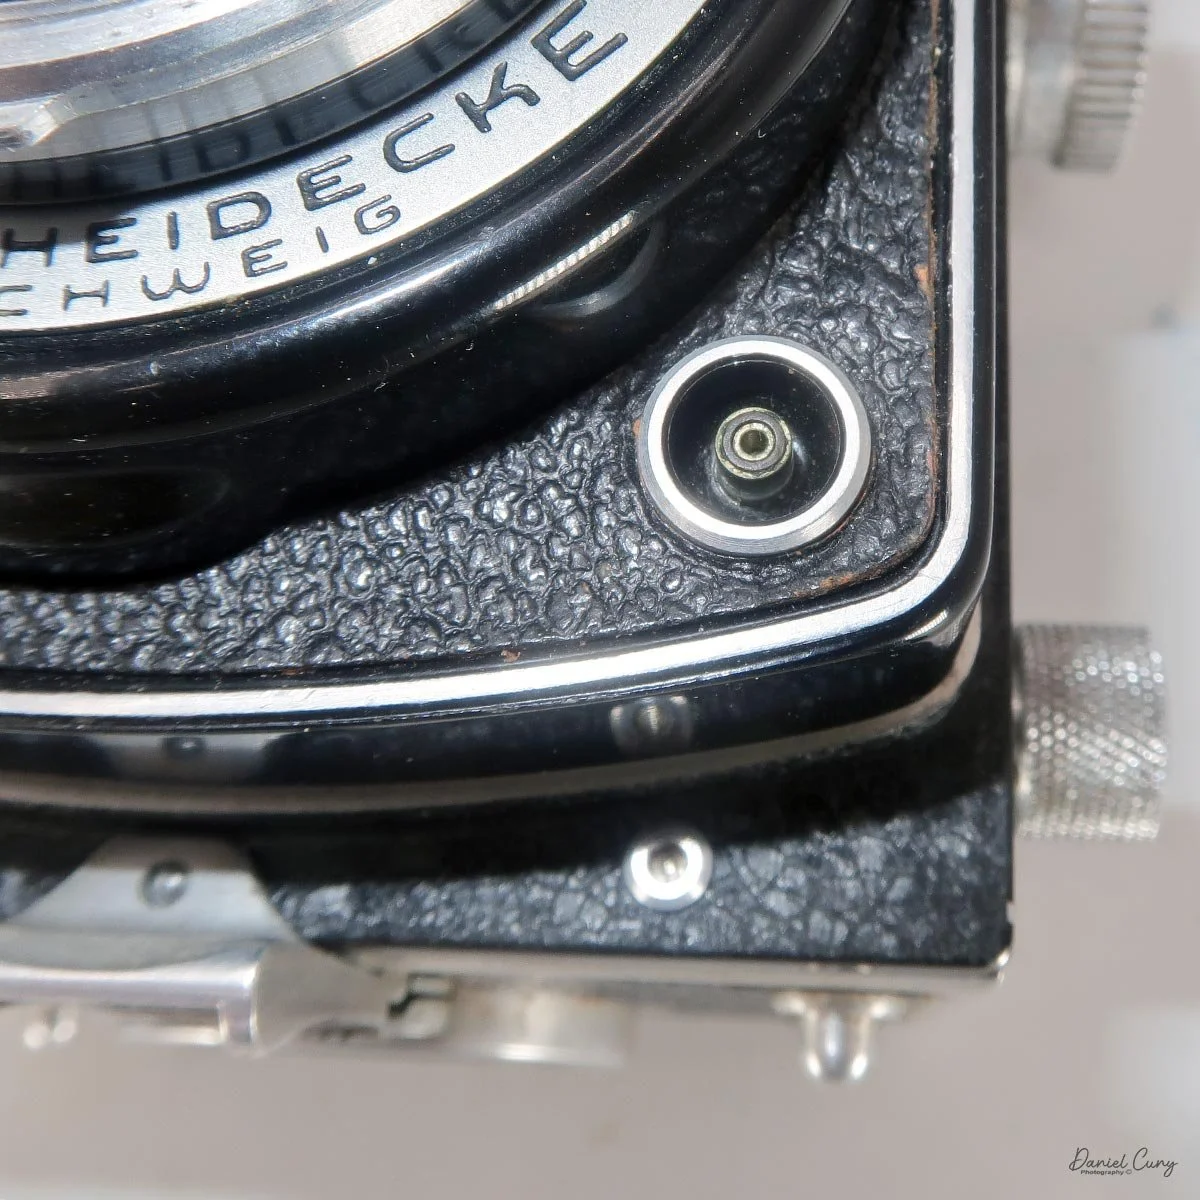
Let me start with the front of the camera. Looking at the camera straight on, the upper left corner has a switch to set either "X" (electronic) or "M" (bulb) sync for the flash. In the upper right corner is another lever, the camera's self-timer, which, when pulled down and the shutter is tripped, gives the photographer approximately a 10-second delay.

On top of the viewfinder is a window showing the current shutter speed and aperture settings. A red arrow points down to the right with "SEC," and a black arrow points left with "F." The arrows point to the two wheels on either side of the camera, between the viewing and taking lenses: the right wheel sets the shutter speed, and the left sets the aperture.

Turning these wheels changes these settings, which you view from the top, looking down onto the camera. The shutter speed range on the Rolleiflex 2.8B runs from 1/500 to 1 sec., plus "B" for timed exposures. The aperture settings range from F/2.8 to f/22.

On the bottom left is the camera's shutter release button, along with a "locking" lever that needs to be pulled down to release the "lock" of the shutter release. The shutter release is also threaded for a cable release for timed exposures. The flash sync cable socket is on the bottom right of the Rolleiflex 2.8 B.

On the left side of the camera are three knobs. The knob in the middle is the focus control of the camera. The Rolleiflex 2.8B minimum focus is 3 feet to infinity. The outer ring of the focus knob has the depth-of-field scale for the selected focus distance.

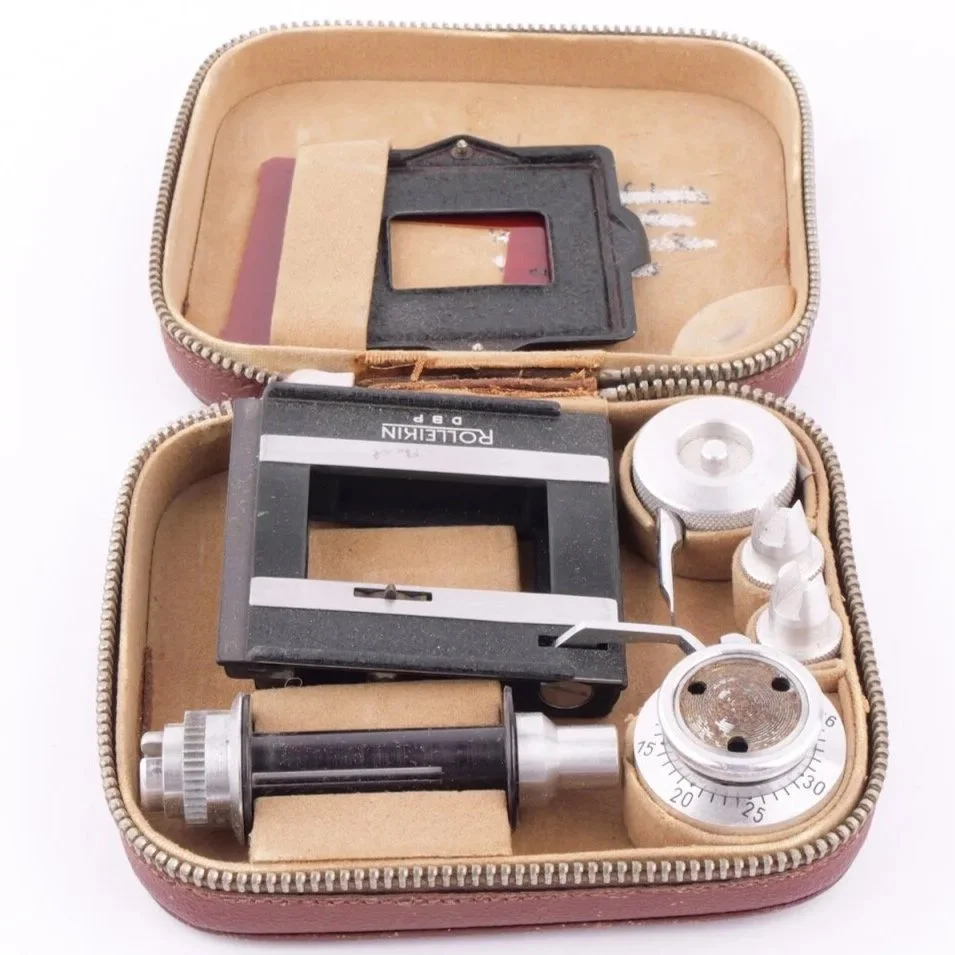
The other two knobs can be pulled out to load the camera with 120-size film used in Rolleiflex 6x6 cameras. The top knob can also count 35mm frames if you remove the camera's back and attach the Rolleiflex Rolleikin 1 adapter, which lets you shoot 35mm film in the Rolleiflex cameras.

To remove the film back, on both the left and right sides of the camera are clips that you lift up. When you unlock the film door with the switch on the bottom of the camera and lift the door as you would to load film, you can remove the back door and replace it with the Rolleikin door, along with the 35mm adapter. The Rolleikin 1 kit's own back has the pressure plate and sprocket wheel built into it, so the camera's back comes off entirely — it's the later Rolleikin 2 that keeps the camera's own back, on models with the adjustable pressure plate.

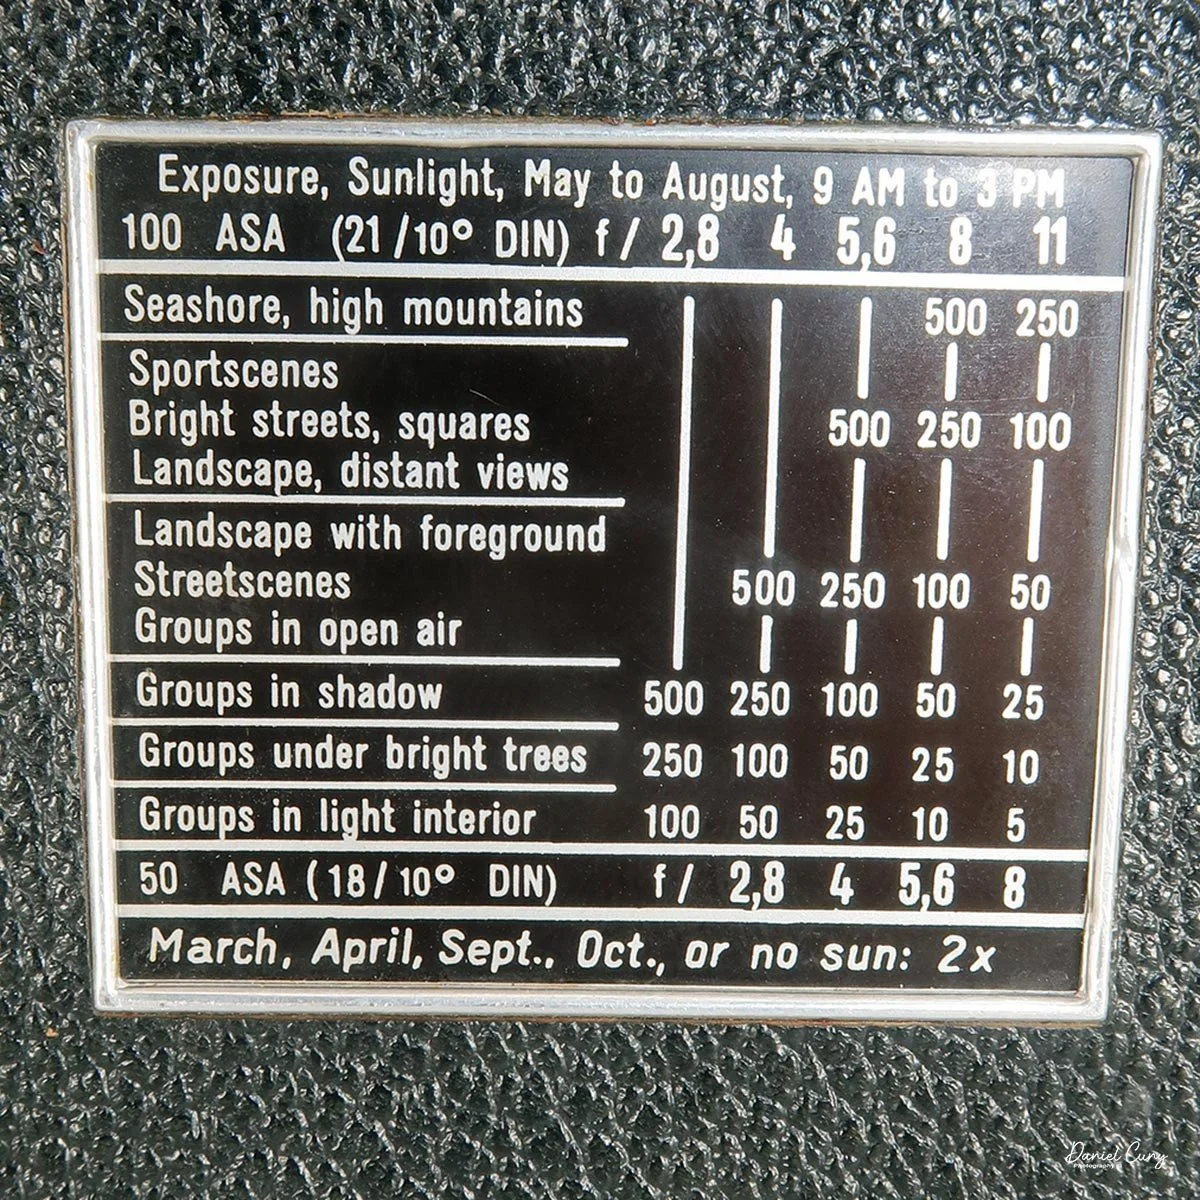
The camera back has an exposure index that shows approximate exposure settings for 100 ASA film.

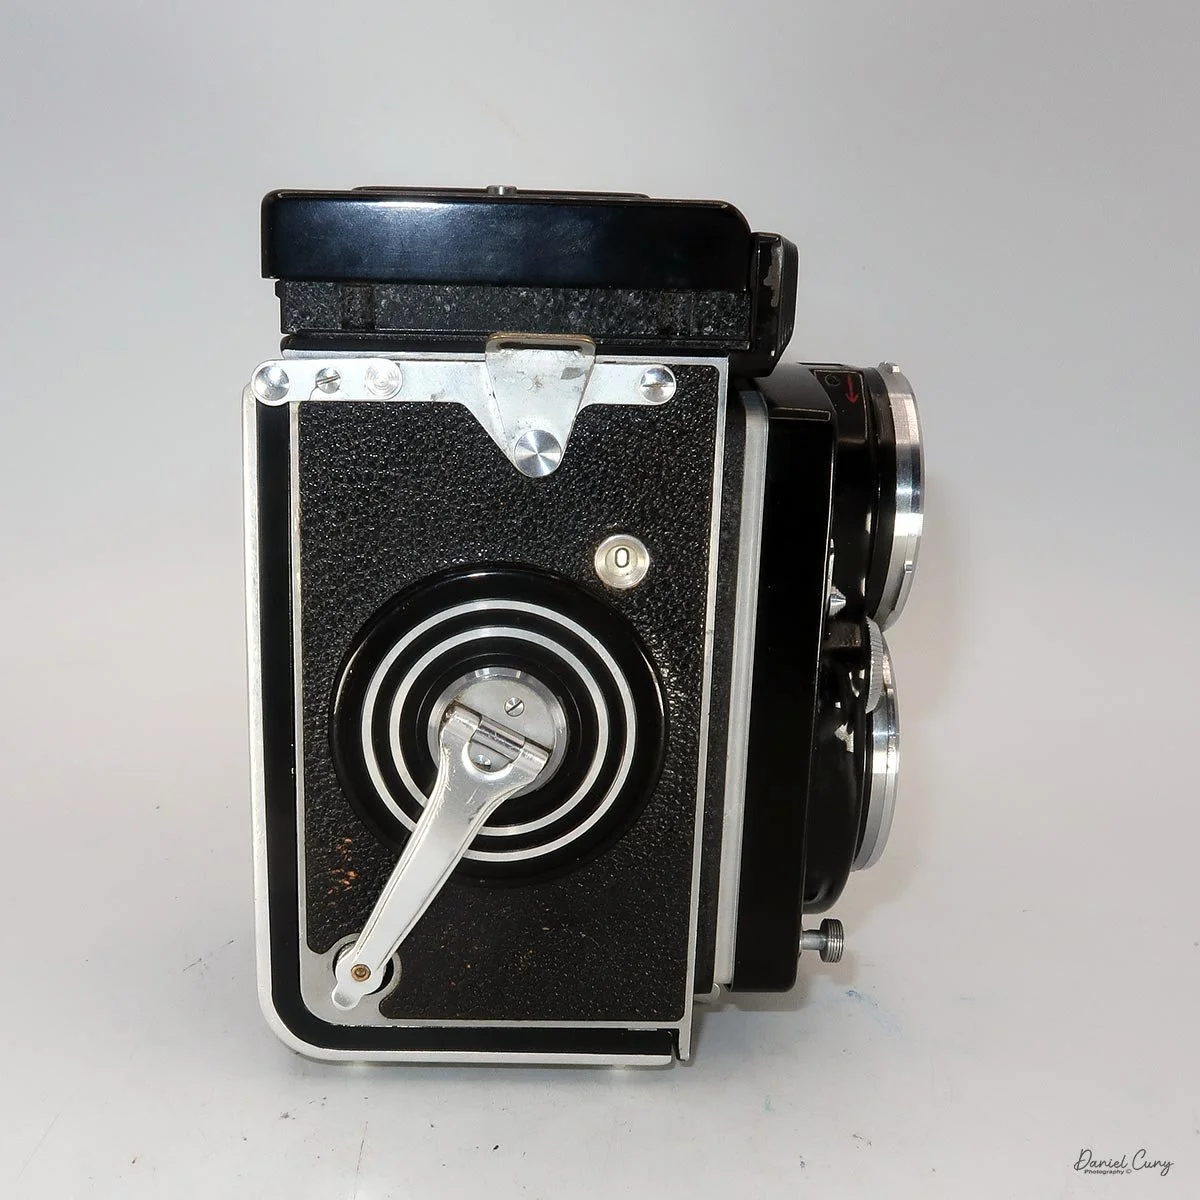
The right side of the camera has the film advance crank, which you turn clockwise to advance the film, then about half a turn counterclockwise to cock the shutter and prepare the camera for the next exposure. Just above the film advance crank is the camera's frame counter.

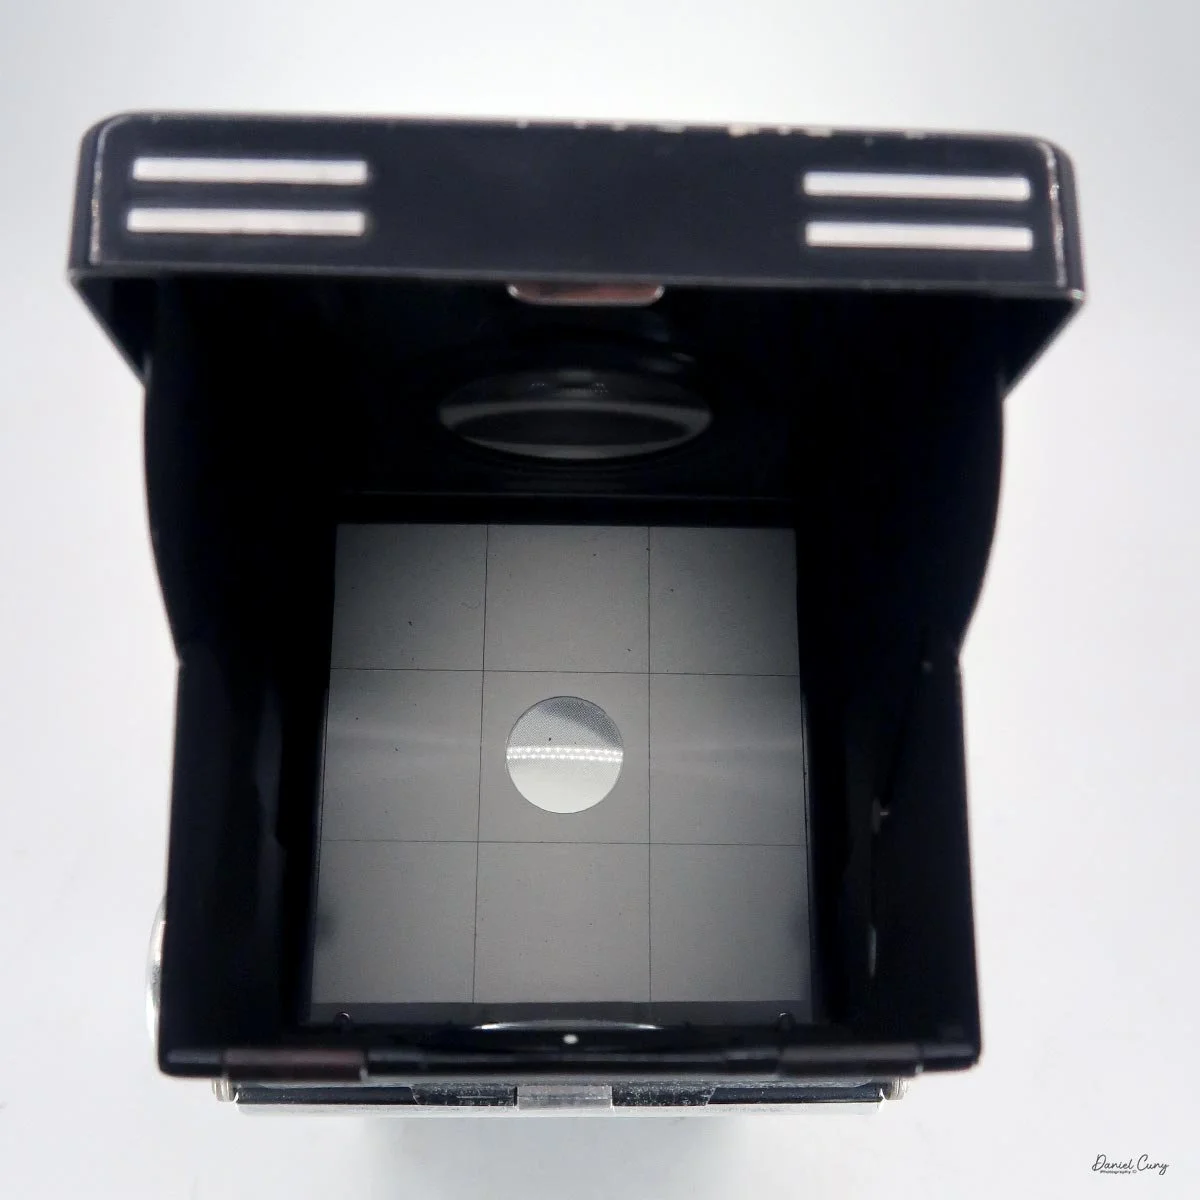
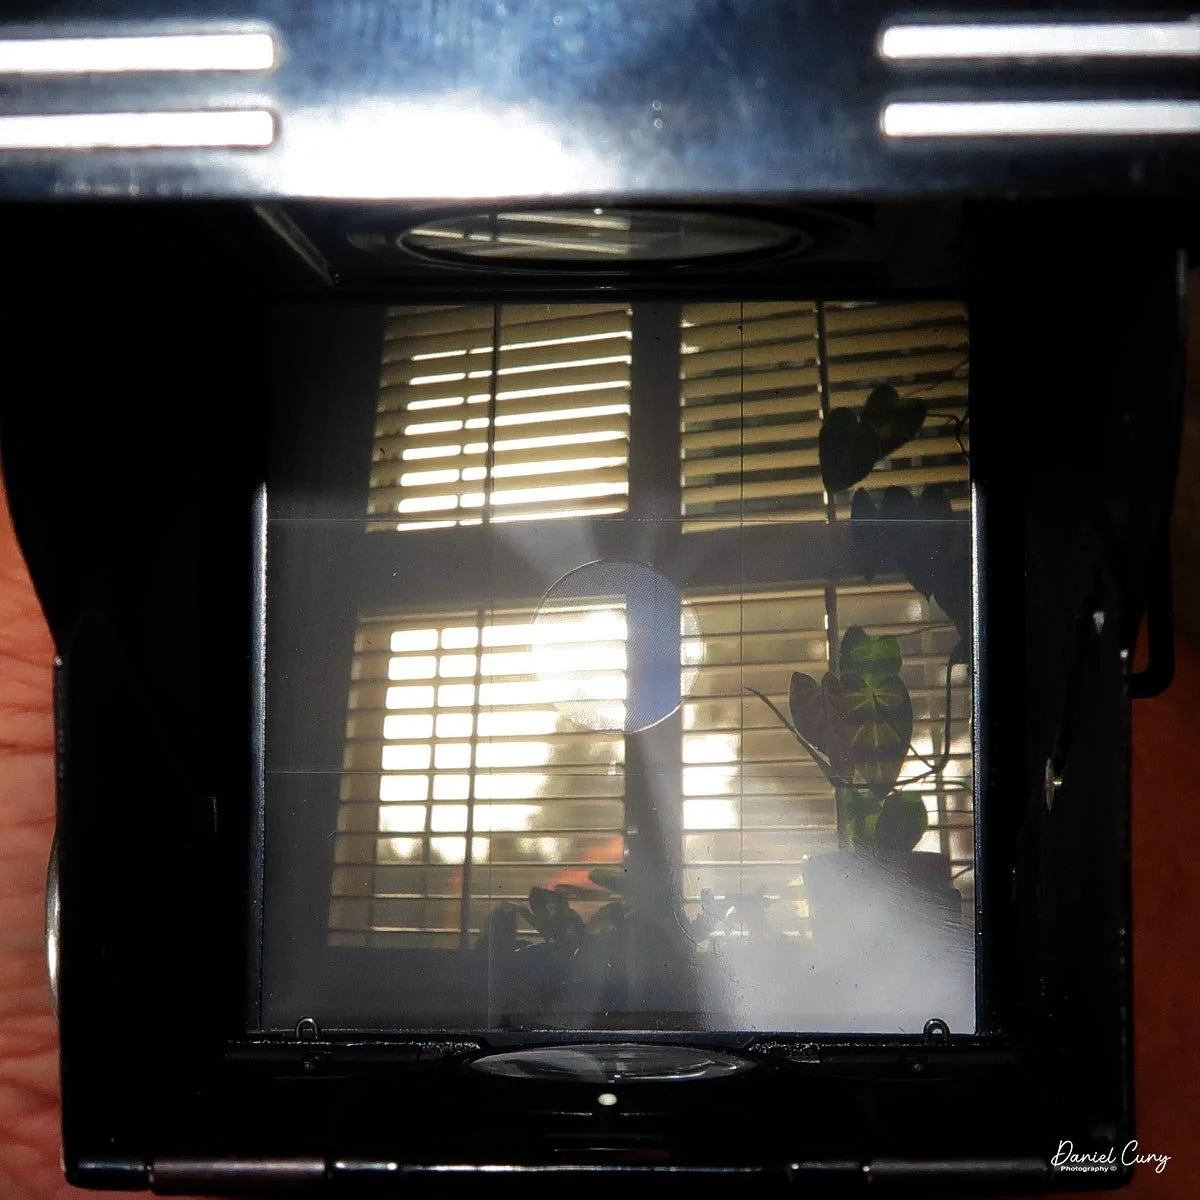
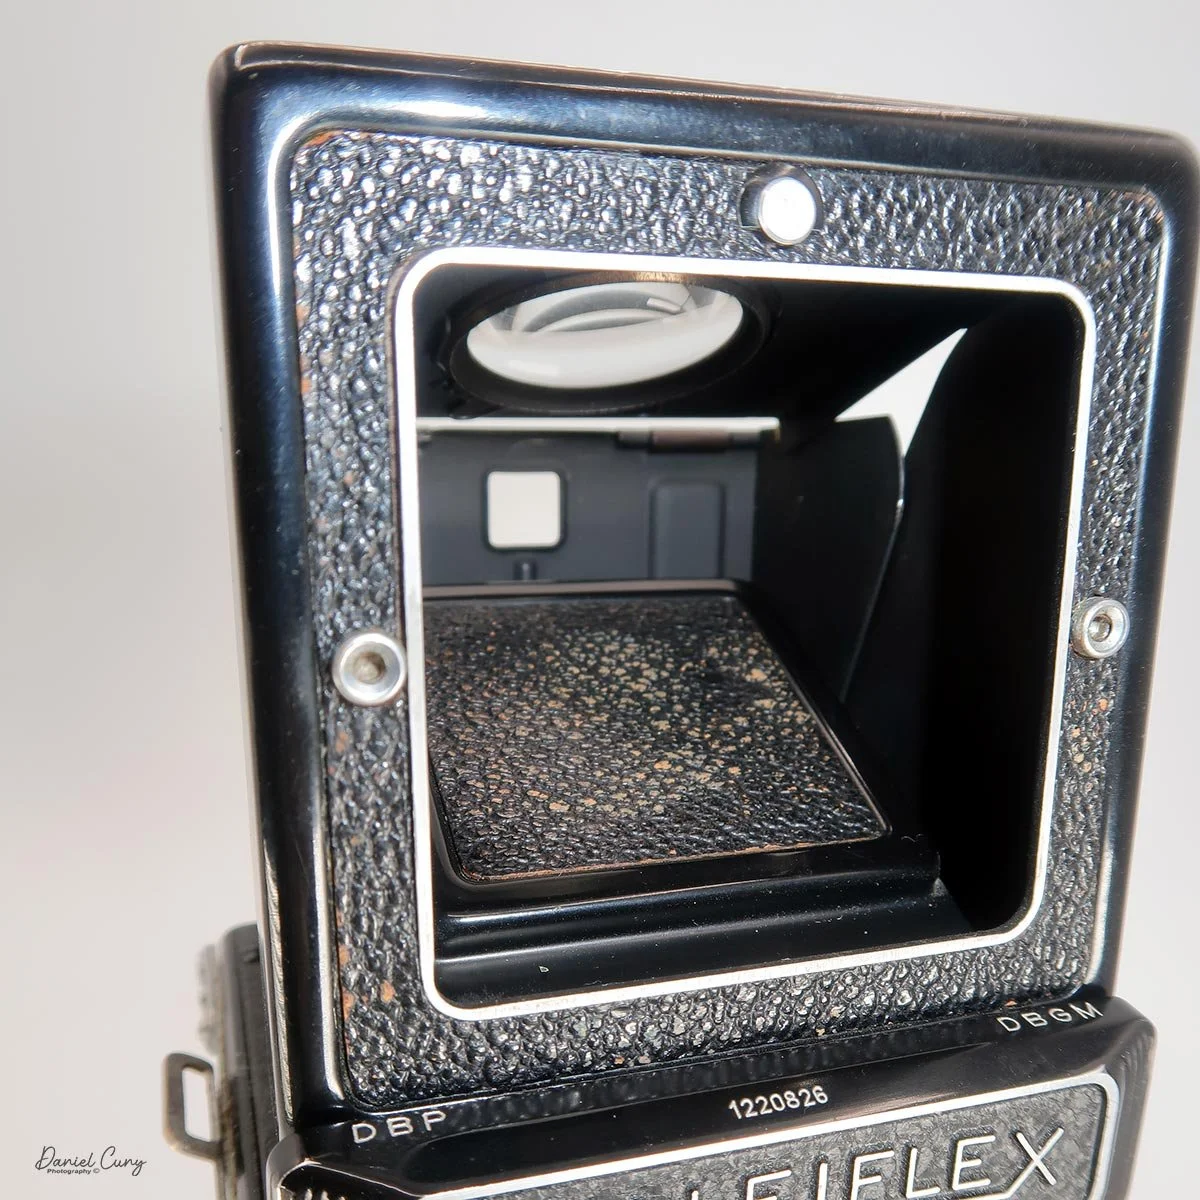
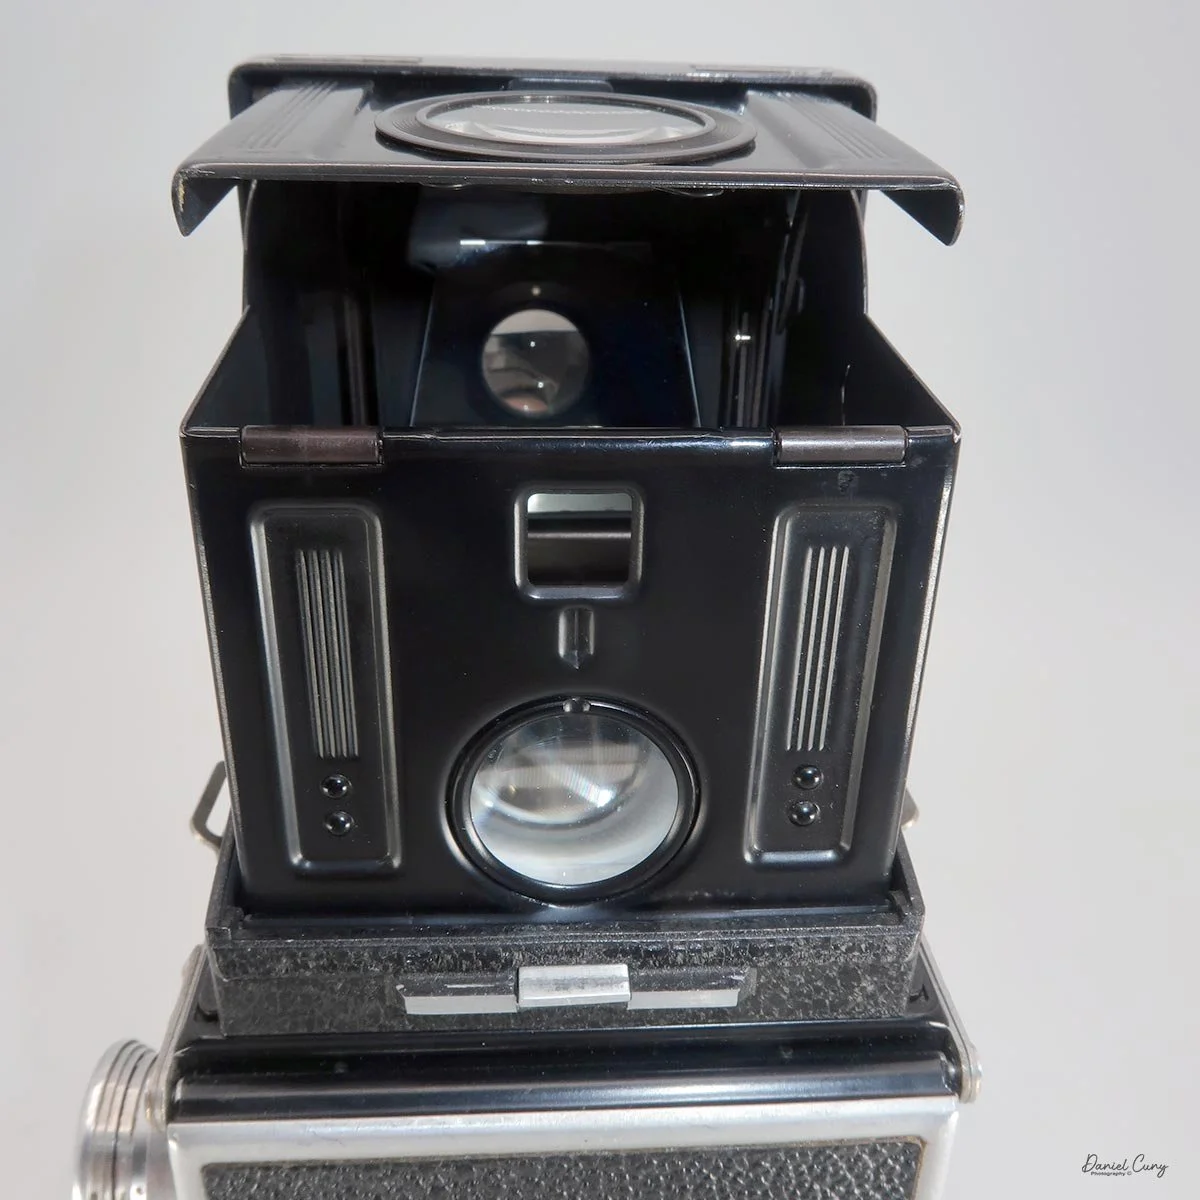
To view the image through the viewing lens, lift the back of the light chimney; it opens to let you look down into the camera. The finder on the Rolleiflex 2.8B has a few viewing options. There's the normal viewing when looking down into the camera, along with a flip-up magnifying glass, which can be flipped up via a chrome tab in the middle of the front portion of the light chimney. This is handy for fine focus.

Looking on the back of the light chimney, there is a square cut out, so when you press in the front portion of the chimney, you can use it as a "sport" finder for quick photos. Even better, just below the square cutout is an optical lens you can look through to focus, much like you would with a 35mm camera.

If looking down on your subject is difficult, open the light chimney, lift the magnifying glass, and press the front panel of the light chimney. Now look through the lens on the back of the finder, and you have an eye-level finder that you can focus. I really enjoy this feature of the camera. To close the light chimney, press the top back; the chimney closes for transport.

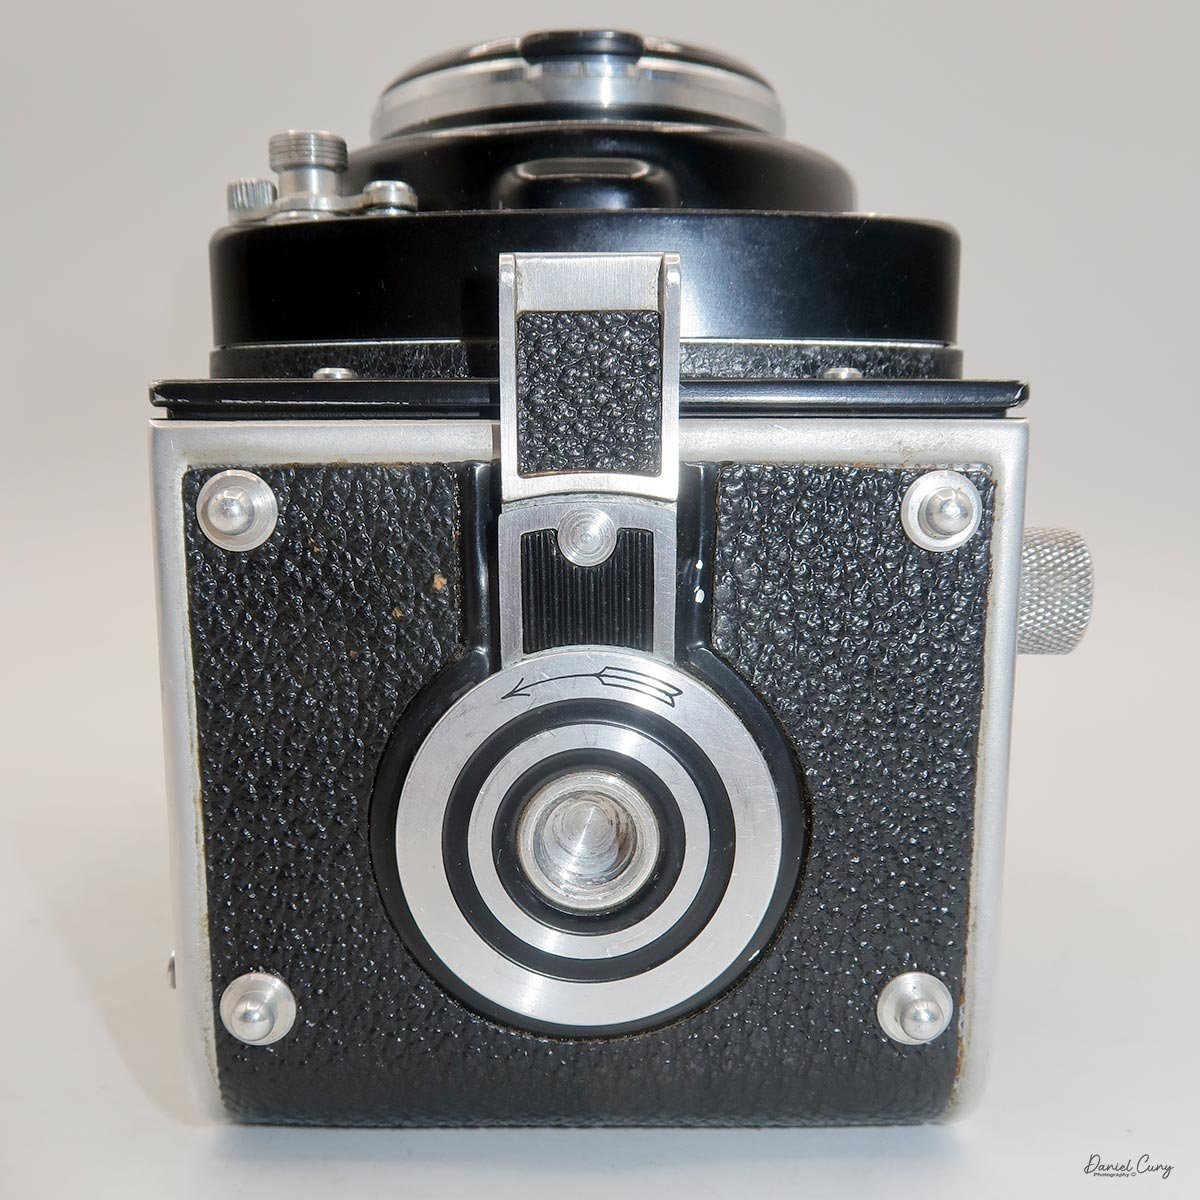
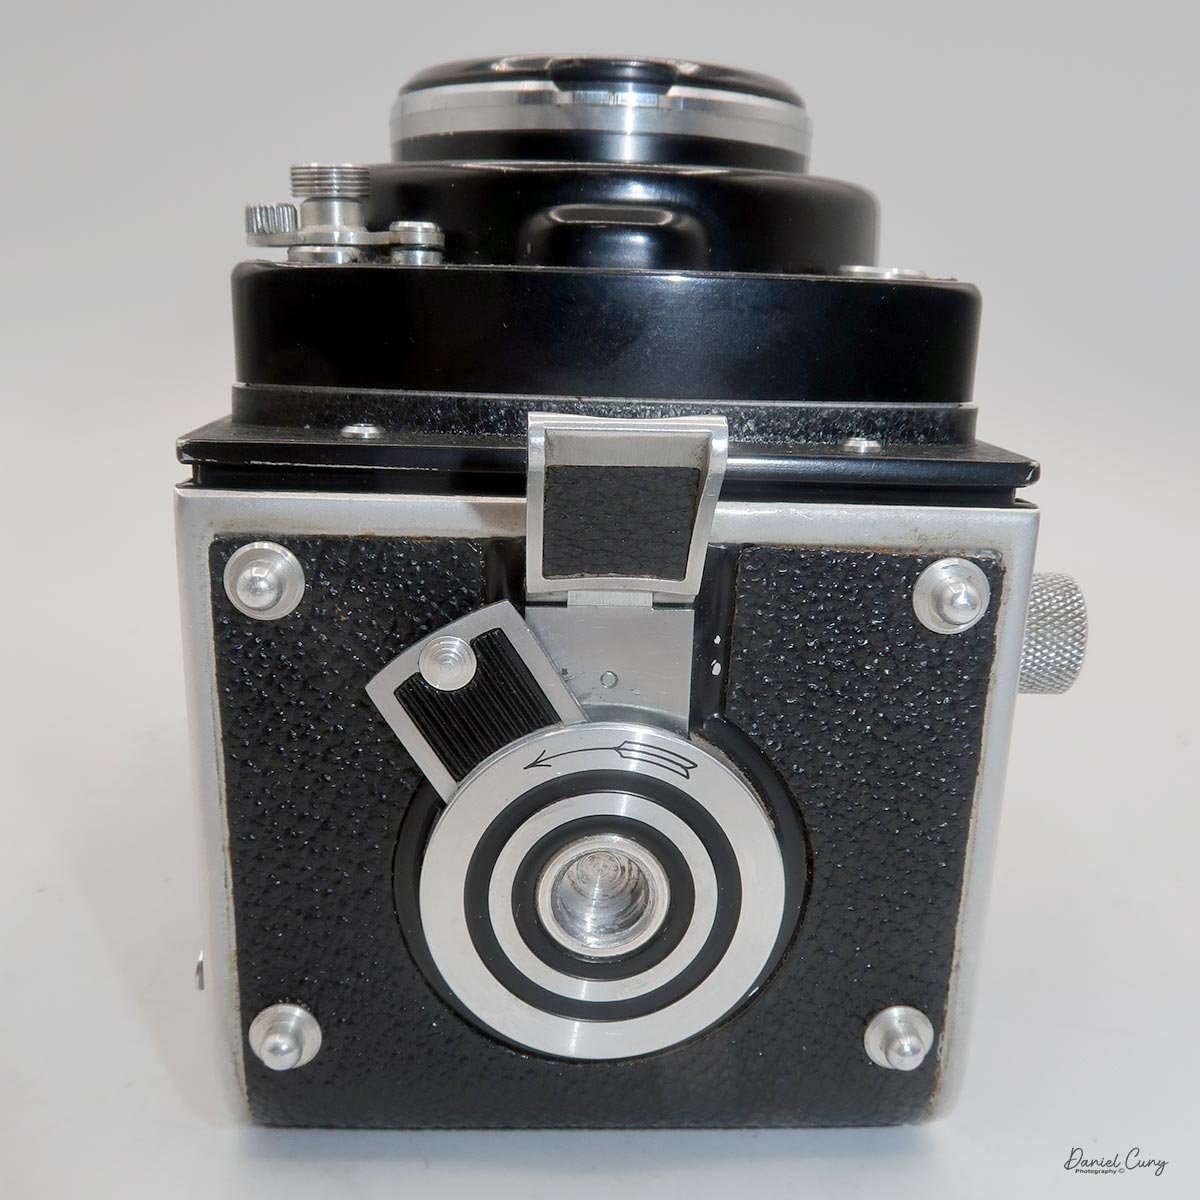
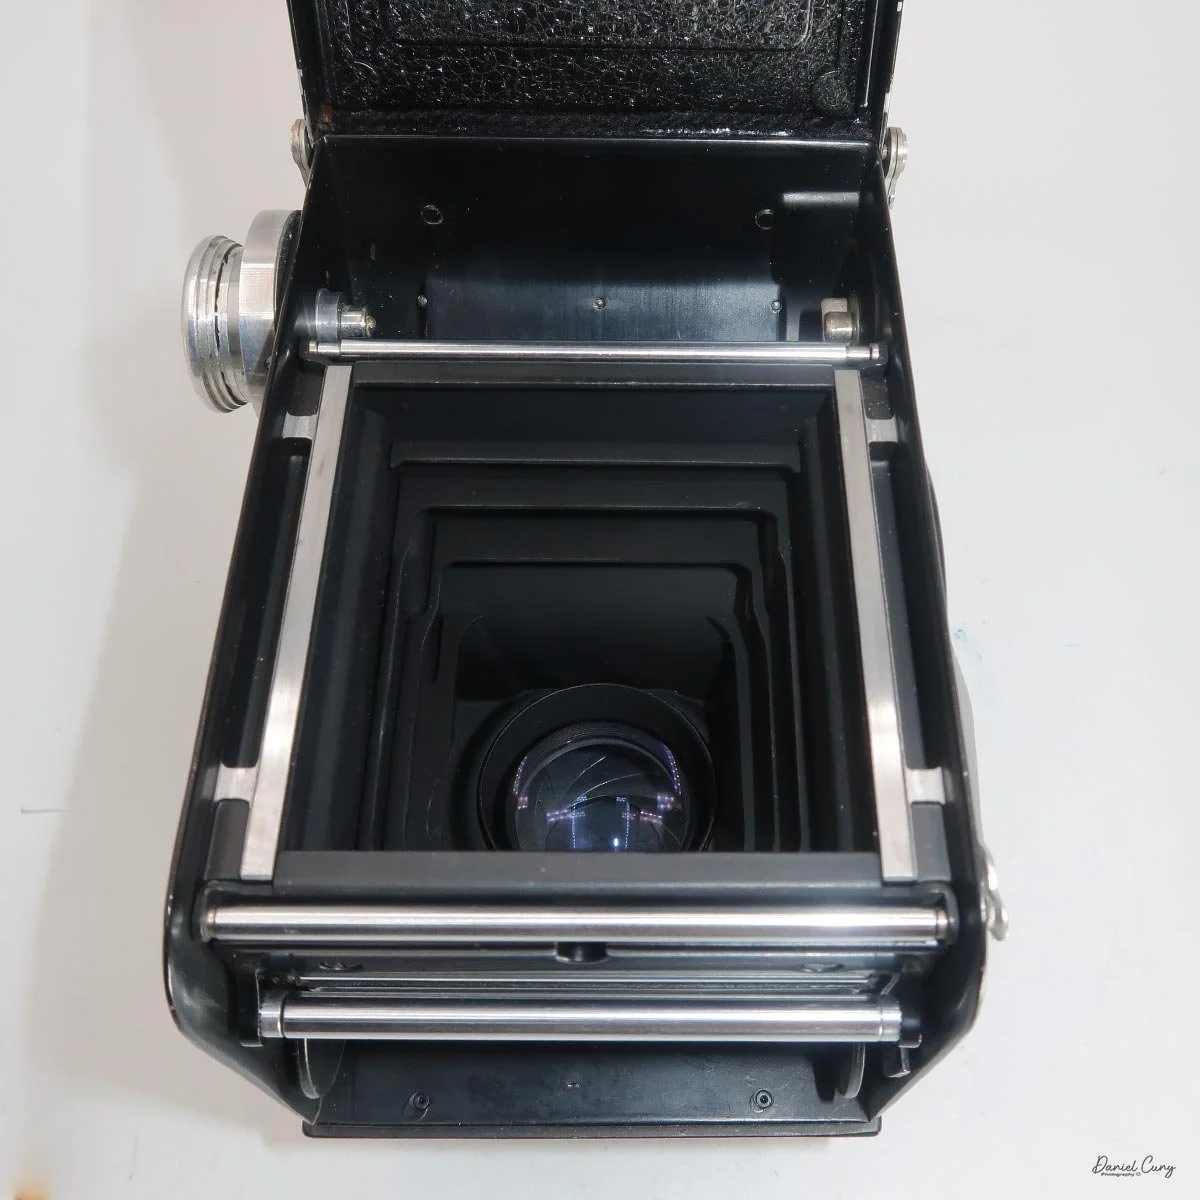
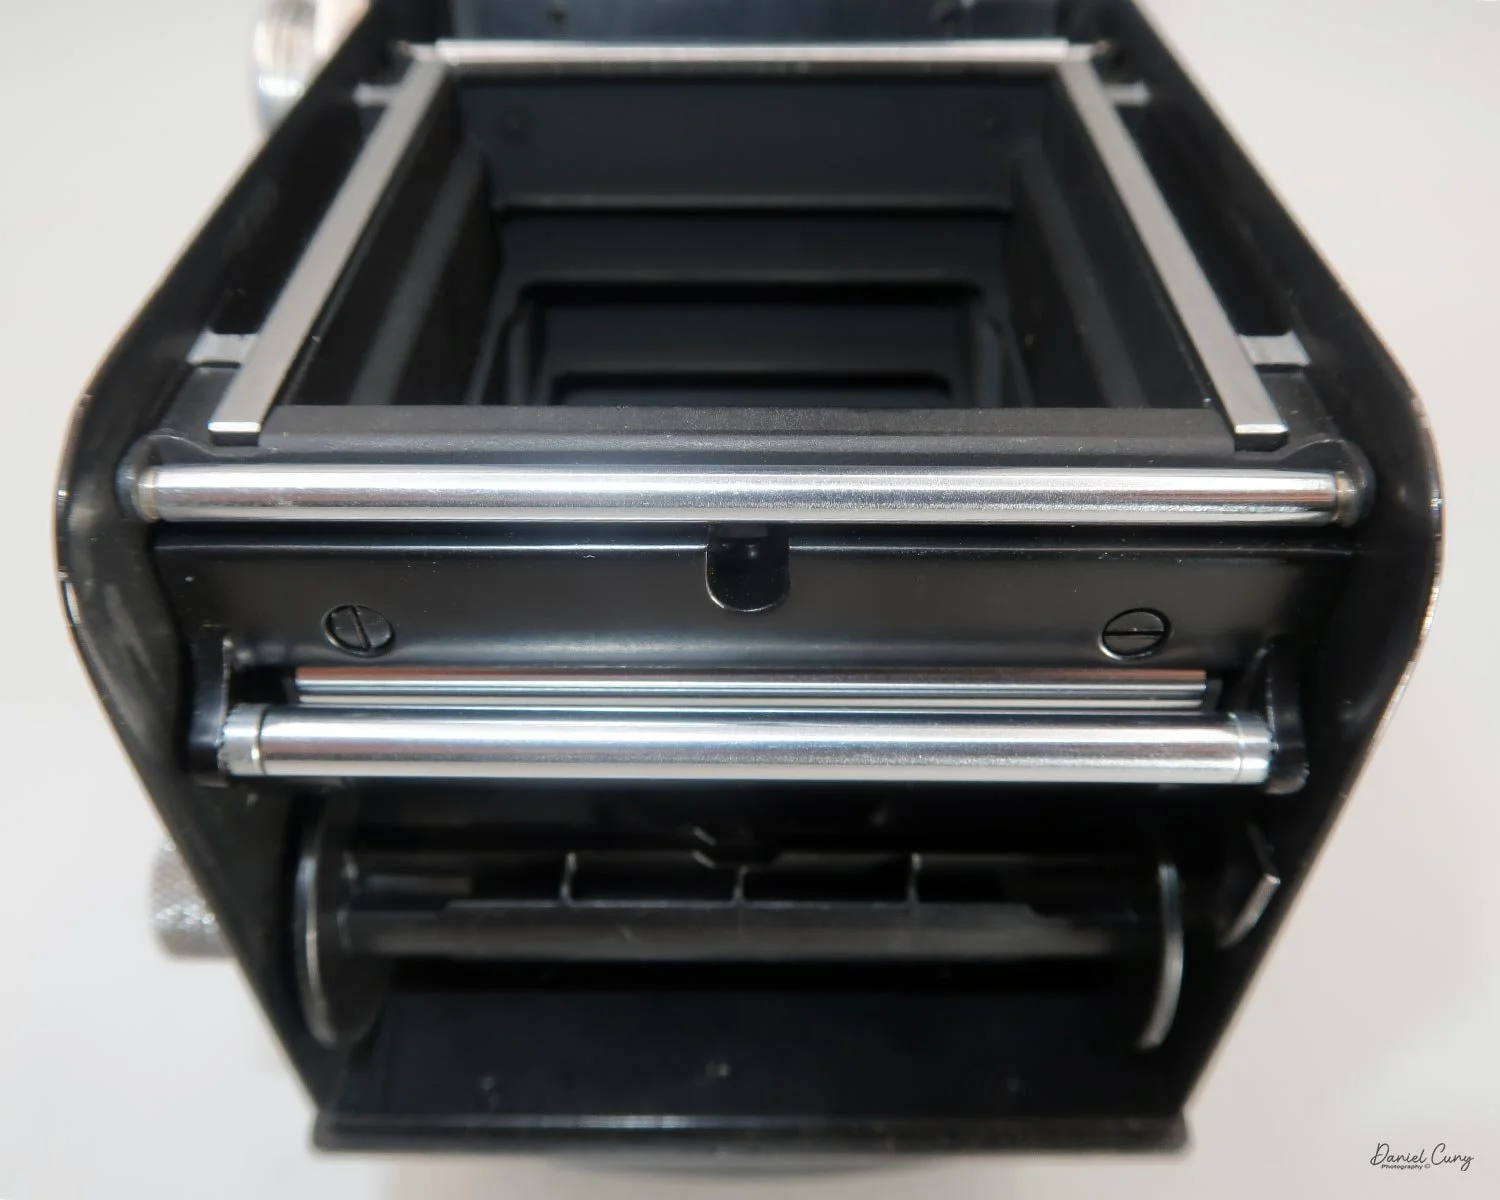
To open the back of the camera to load film, use the switch on the bottom of the camera around the tripod socket. Turn the lever in the direction of the arrow; the locking bar will lift, allowing you to lift the film door to load film into the camera.

When loading film into the Rolleiflex 2.8B, slide the paper leader under the first chrome wheel, then over the second wheel and across the film plane, before threading it into the take-up spool. Going under the first wheel sets the camera's transport and frame counter. Once you see the arrows pointing outward, you can close the back, lock the door, and turn the film-winding crank until it stops; then turn it back to set the shutter. You're now ready for your first photo, and the counter will be at number 1.

My camera also came with the original Rollei lens cap, which can be tricky to put on if you're not familiar with putting it on and taking it off. To remove the lens cap, lift the bottom lens portion (it's hinged) and turn the cap to the left if you're holding the camera, or to the right if you're facing the camera.

The lenses have a bayonet mount, which in Rollei language is Bay III because of its bayonet size. Turn the cap about a quarter turn, then release it from the top or viewing lens. To attach the lens cap, turn it about a quarter turn to the side, making sure it's engaged into the bayonet, then place it over the taking lens and press to click it into place.

My Results:

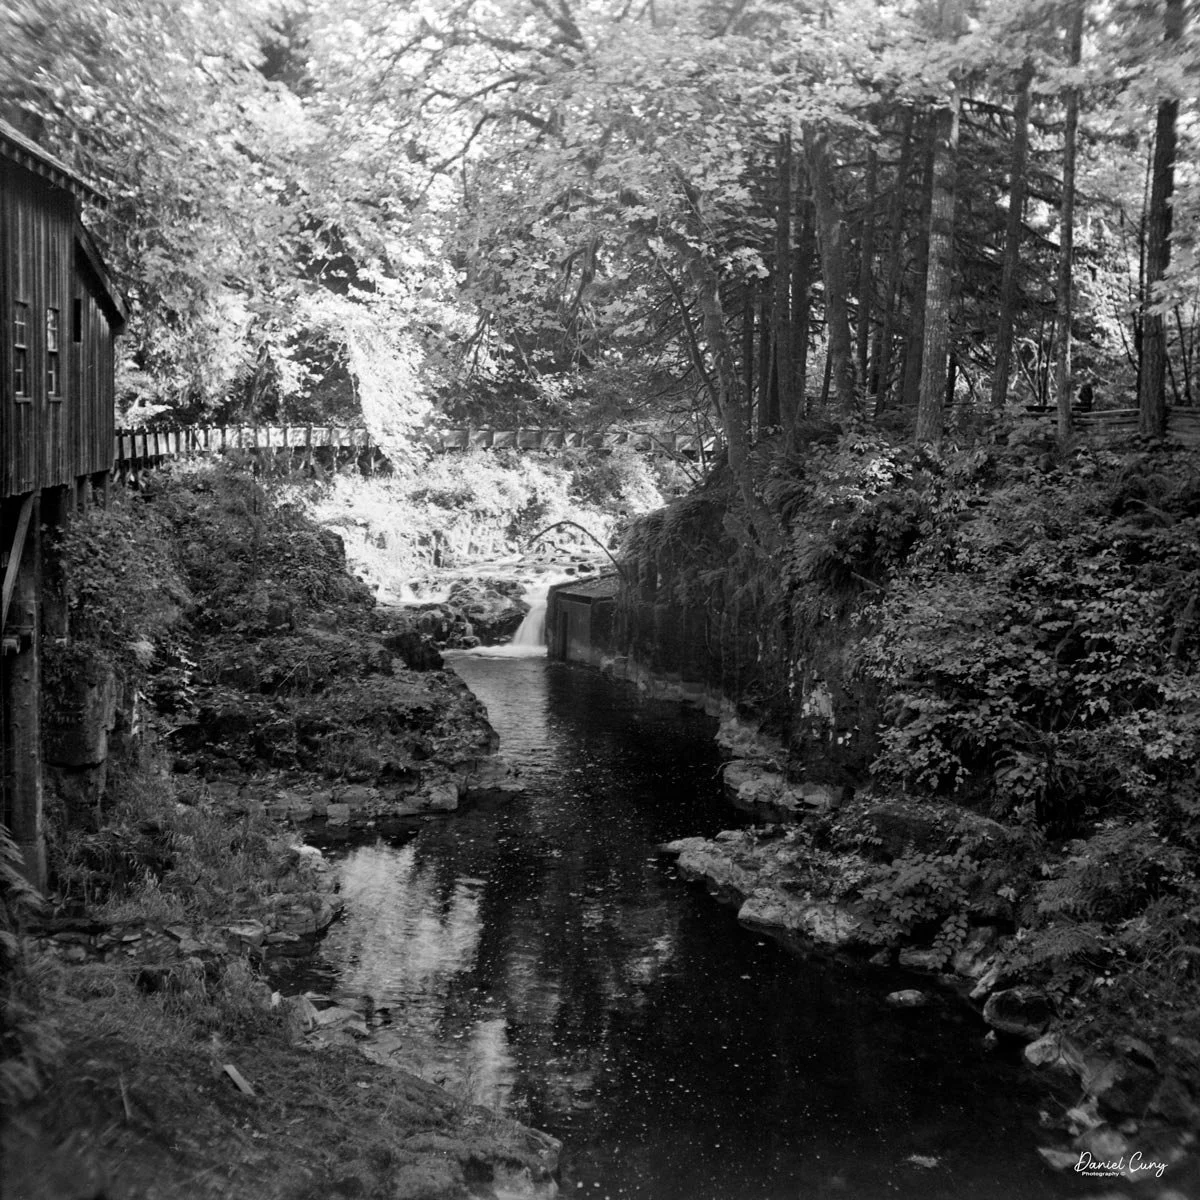
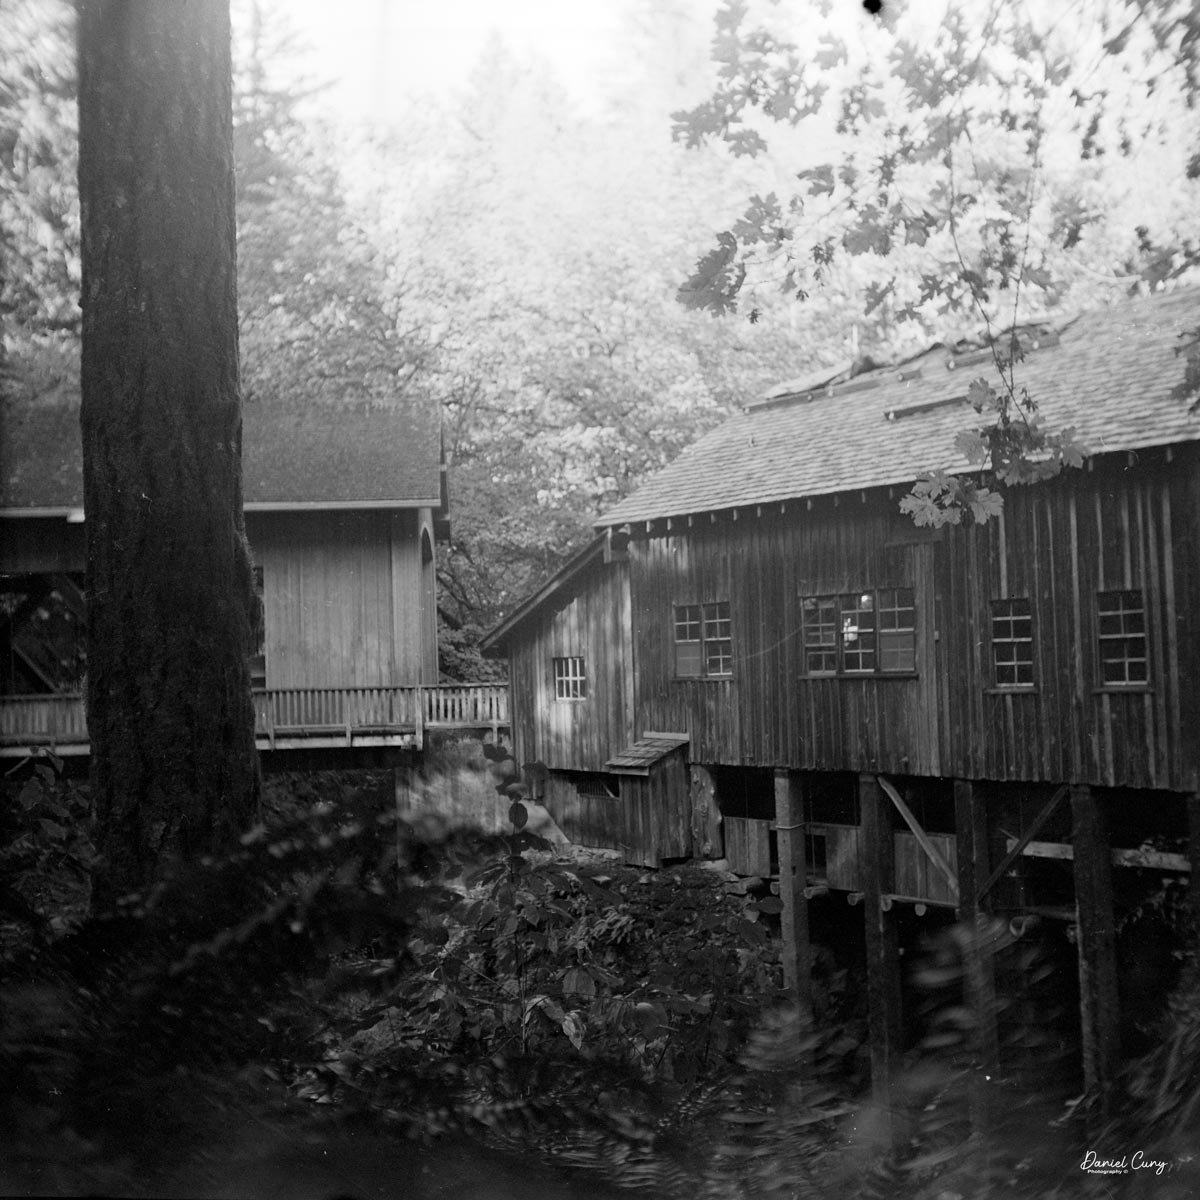
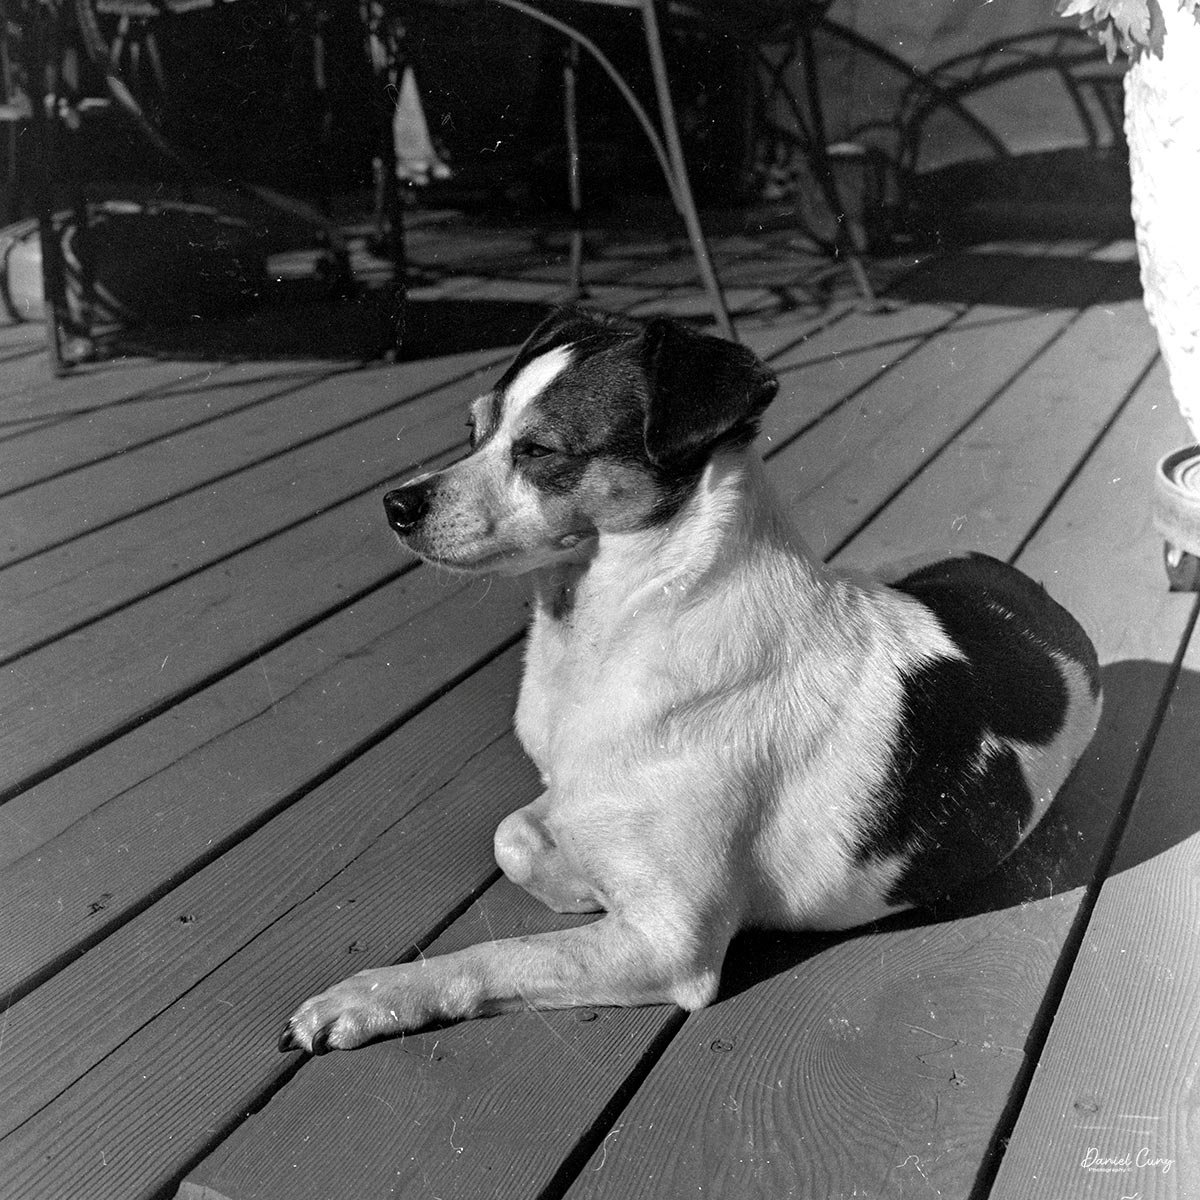
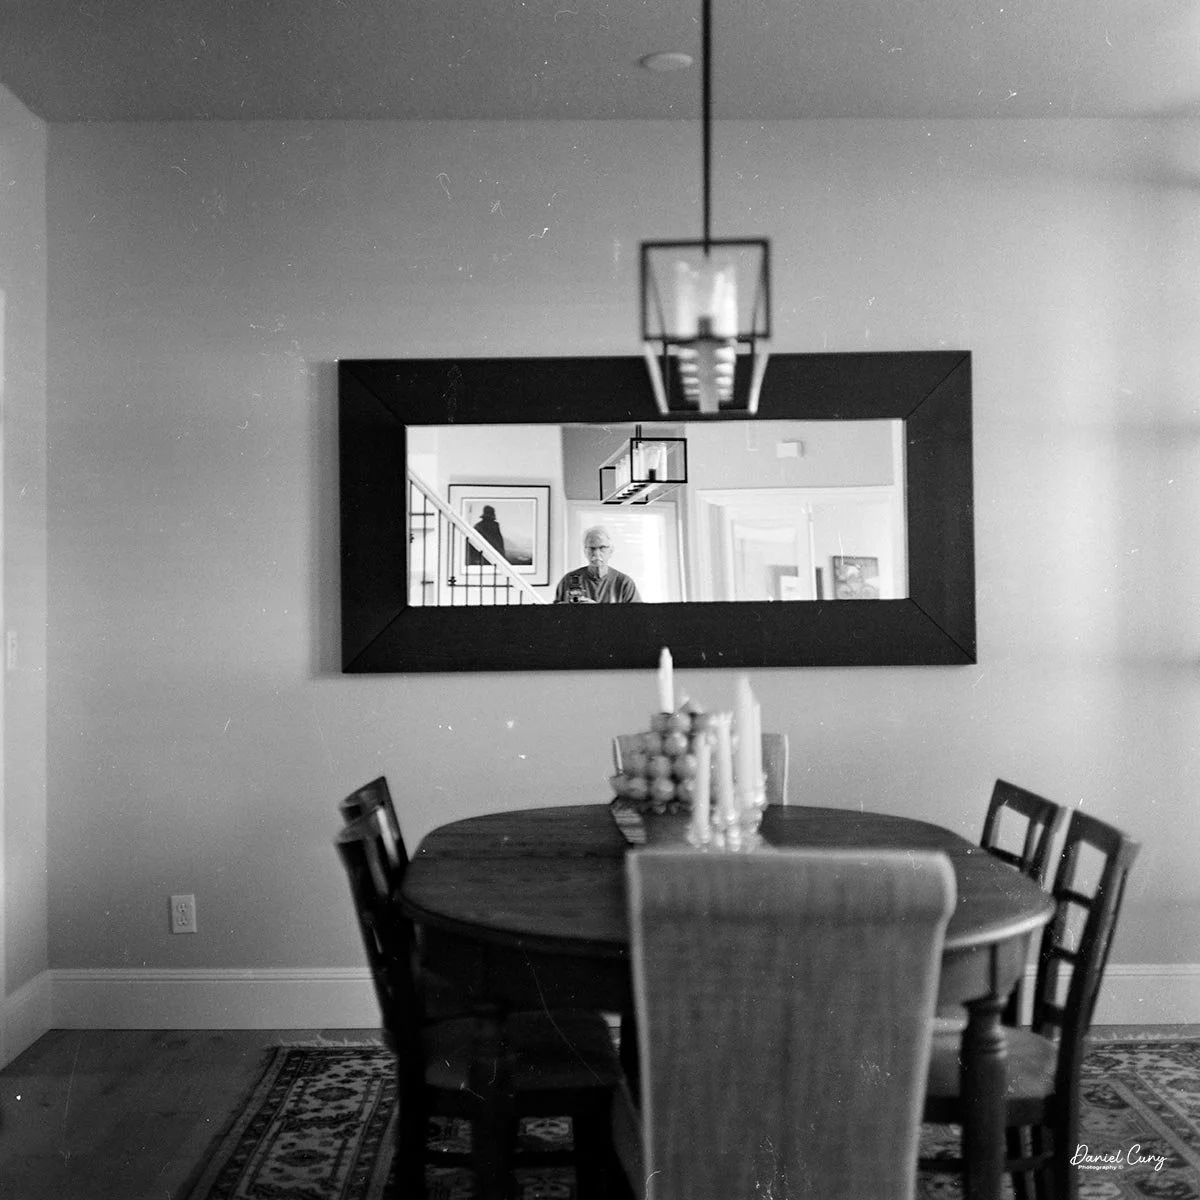
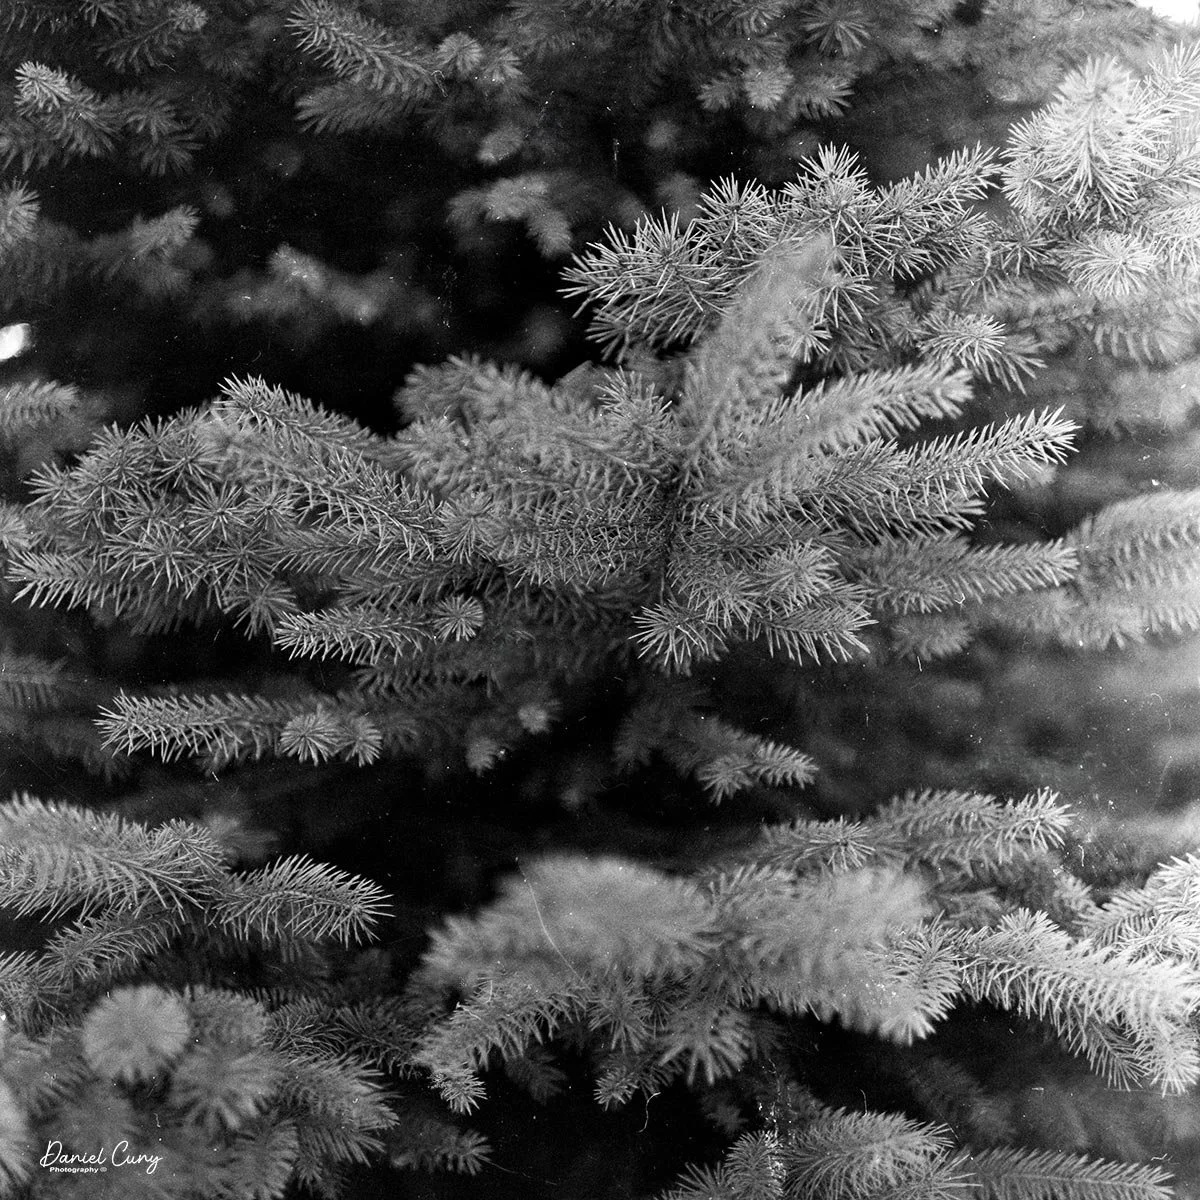
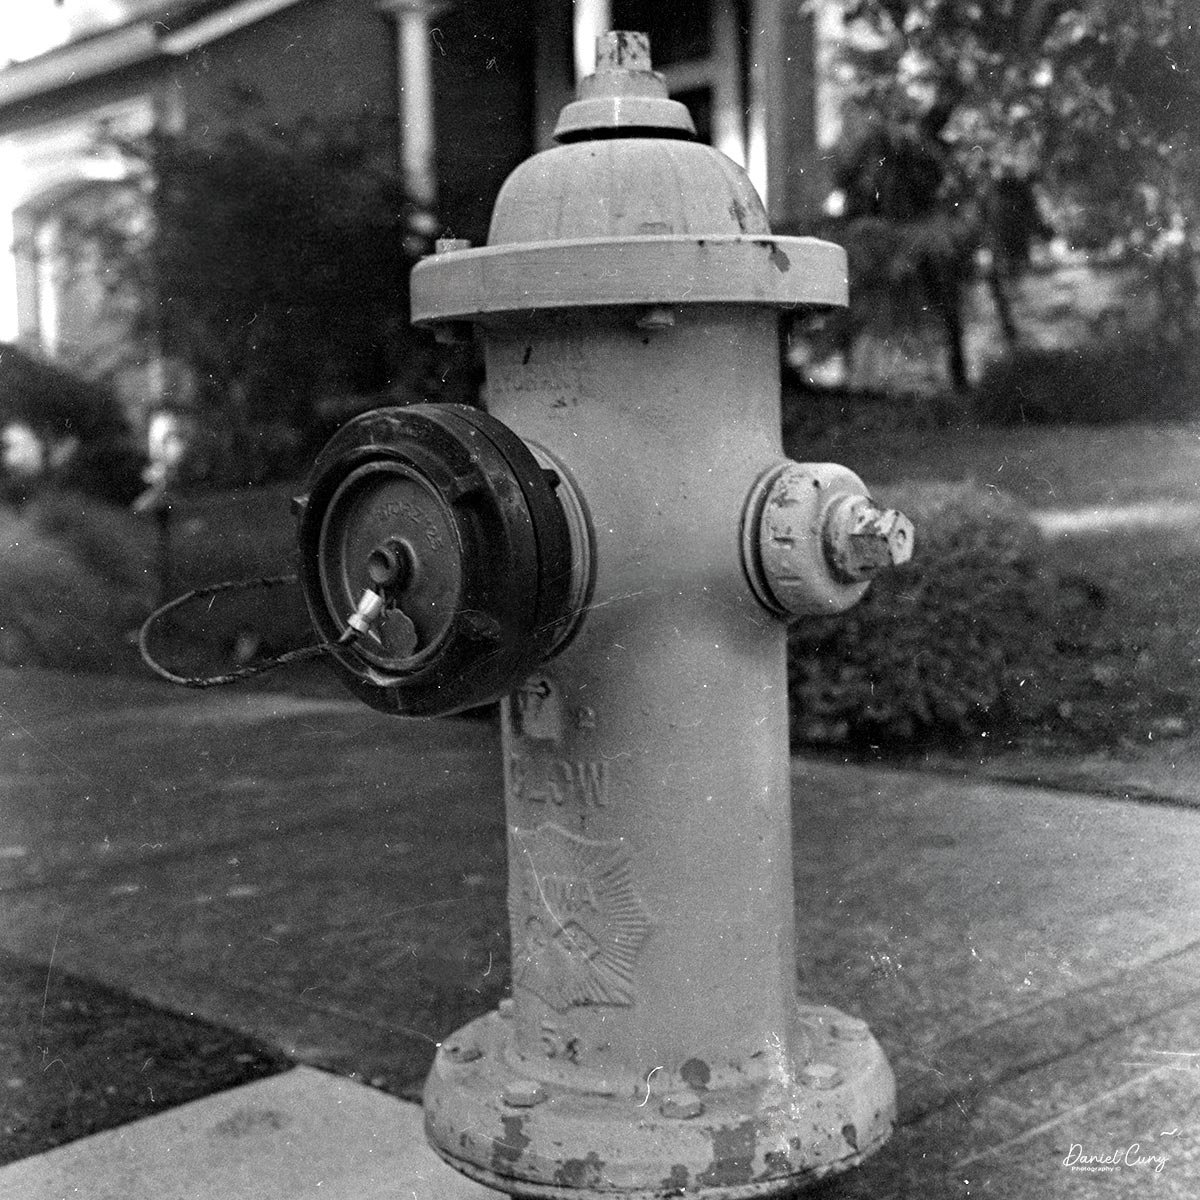
Now that we've loaded film in the camera and we walked through the neighborhood taking photos, let's see how the camera performed. Here are some of the photos taken with the Rolleiflex 2.8B.

Conclusion:

I should have gotten a Rolleiflex 2.8 sooner, as these are wonderful cameras to use. I remember many years ago, in the 1980s, shooting weddings for the camera shop I worked for with a Rolleiflex, which I really enjoyed. Even more than shooting weddings with Hasselblads. I must confess, the Rolleis they had were for the 2nd and 3rd shooters, so I mostly shot with the Rolleis, but I really liked their leaf shutters, and once you got used to the reverse viewing, they were tremendous cameras.

I really enjoyed the "eye-level" focusing and the brighter focusing screen, which made it extremely easy to focus. The camera handled like a champ. The images are extremely sharp, and now I need a wider strap and clips so I can take it out more often. Overall, my experience with the Rolleiflex 2.8B was very positive.

Thank you for taking the time to read about the Rolleiflex 2.8B I recently added to my collection.

Are you interested in other vintage gear? Here are some of my other Camera Reviews.

Check out my Cuny's Camera Collection YouTube channel, where I am putting together video overviews of the cameras I write about. Be sure to subscribe and like the channel, too!

Cuny's Cameras and Photos is my online eBay store, where you will find some of the cameras I have reviewed, along with a wide range of other cameras, lenses, and items from my collection that I am thinning out.

Until next week, please be safe.
Panon 120 Panoramic Camera-Update

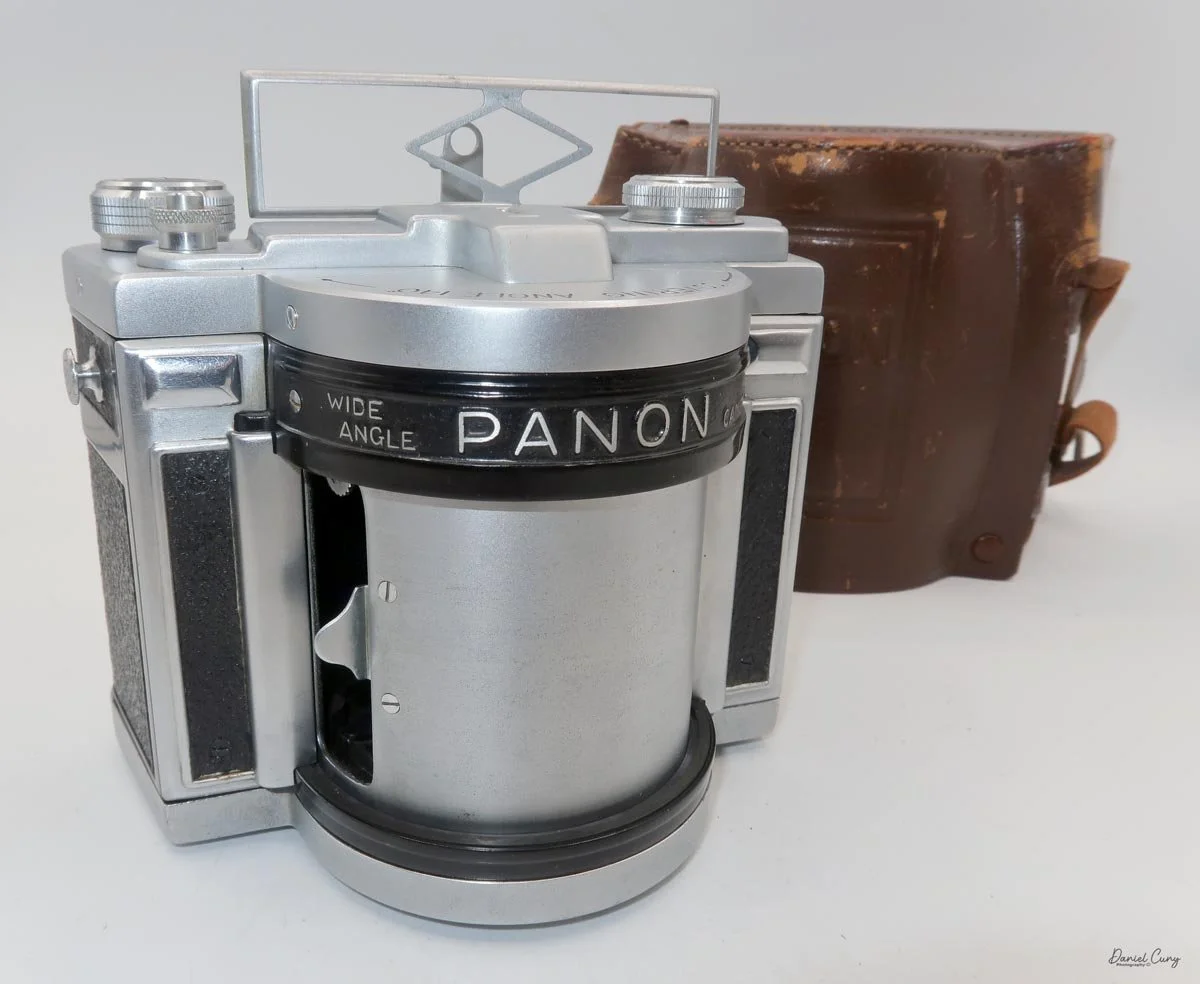
My Panon 120 camera with case.
It's interesting how cameras can just stop working, especially when they haven't been used for a while. I wanted to do an update on the Panon 120 camera post I wrote a few years ago. It's a camera I really enjoy shooting with due to the panoramic format and its ability to use 120 film as opposed to 35mm.
 I'm updating my blog post for two main reasons. First, when I initially planned to go to Japan for camera shopping, I wanted to take the Panon 120 with me. But when I picked it up after about a year of not using it, the camera wouldn't fire.

 I sent the camera off to Precision Camera Works in Austin, TX—they did a wonderful job overhauling my Widelux F7, so I wanted them to do the same for the Panon 120. To my surprise, the lead technician at Precision hurt his hand and the repair took longer than anticipated, but they were kind enough to get my camera back to me right before my trip. The camera is now in outstanding condition, so one of the reasons for this blog update was to take some fresh photos to update the website.

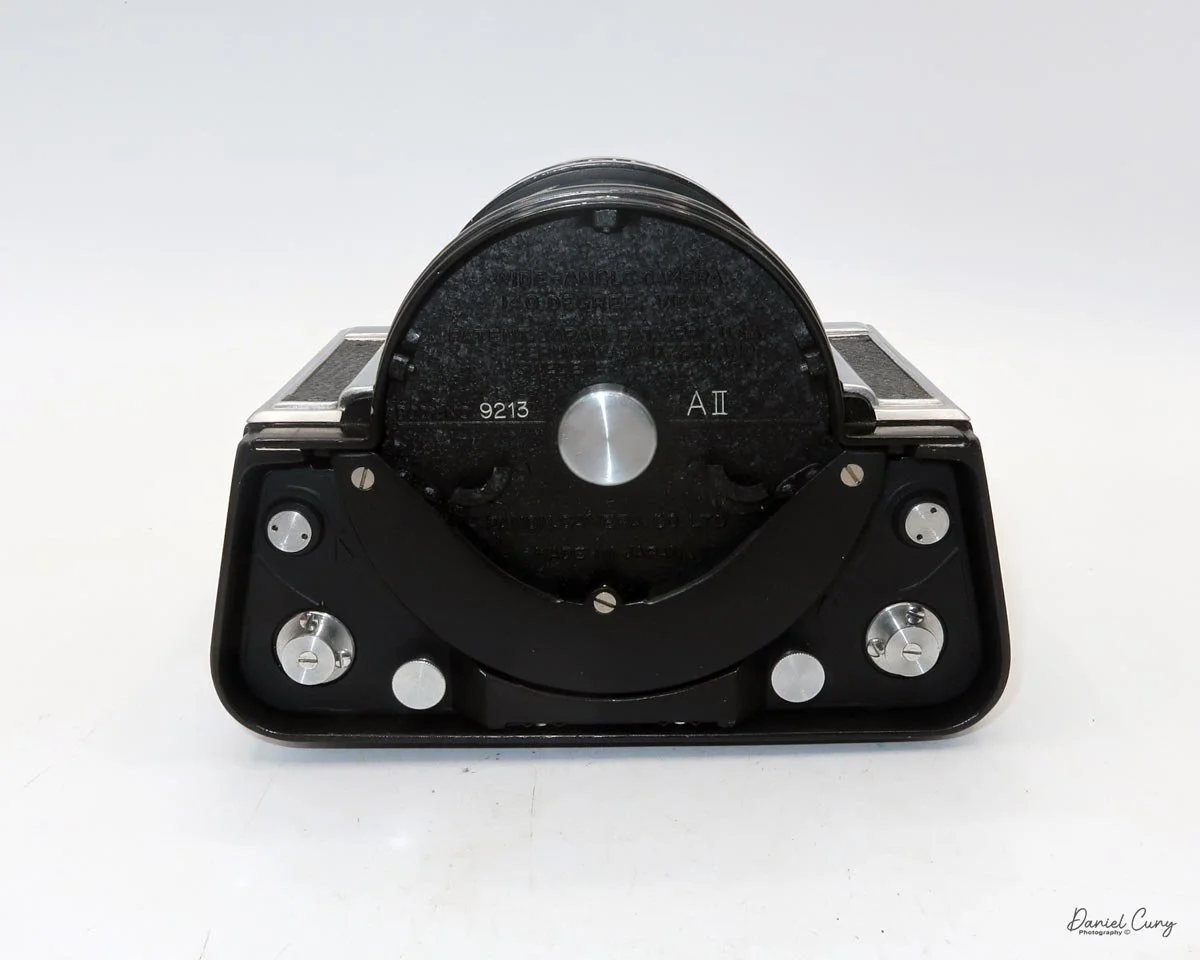
 The second reason for the update happened while I was browsing an online auction. In one of the photos, I spotted what appeared to be a Panon lens assembly resting on its side, along with a box of parts in a separate image. There were a few large-format lenses in the lot as well, so I took a gamble, put in a bid I thought was fair, and to my surprise, I won the auction.

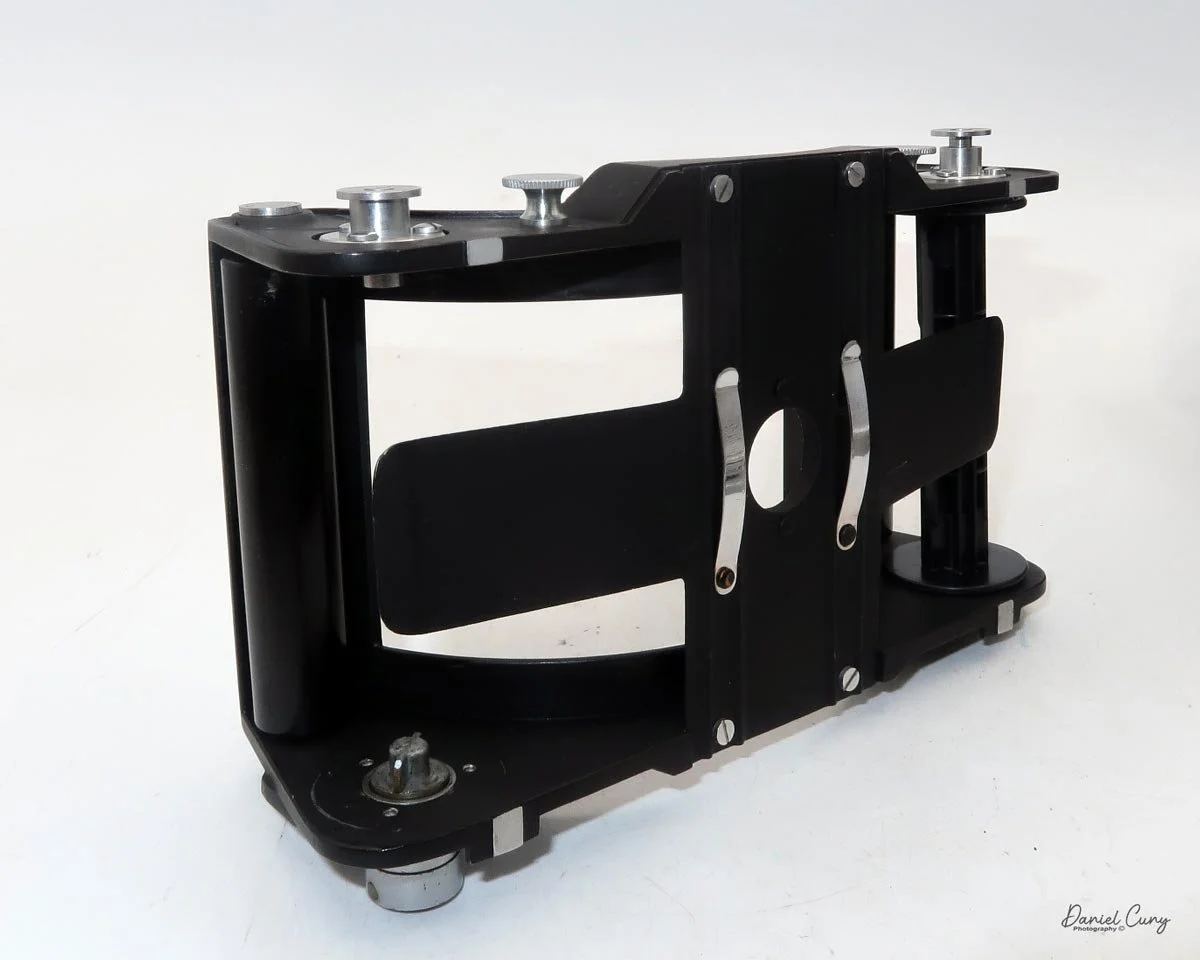
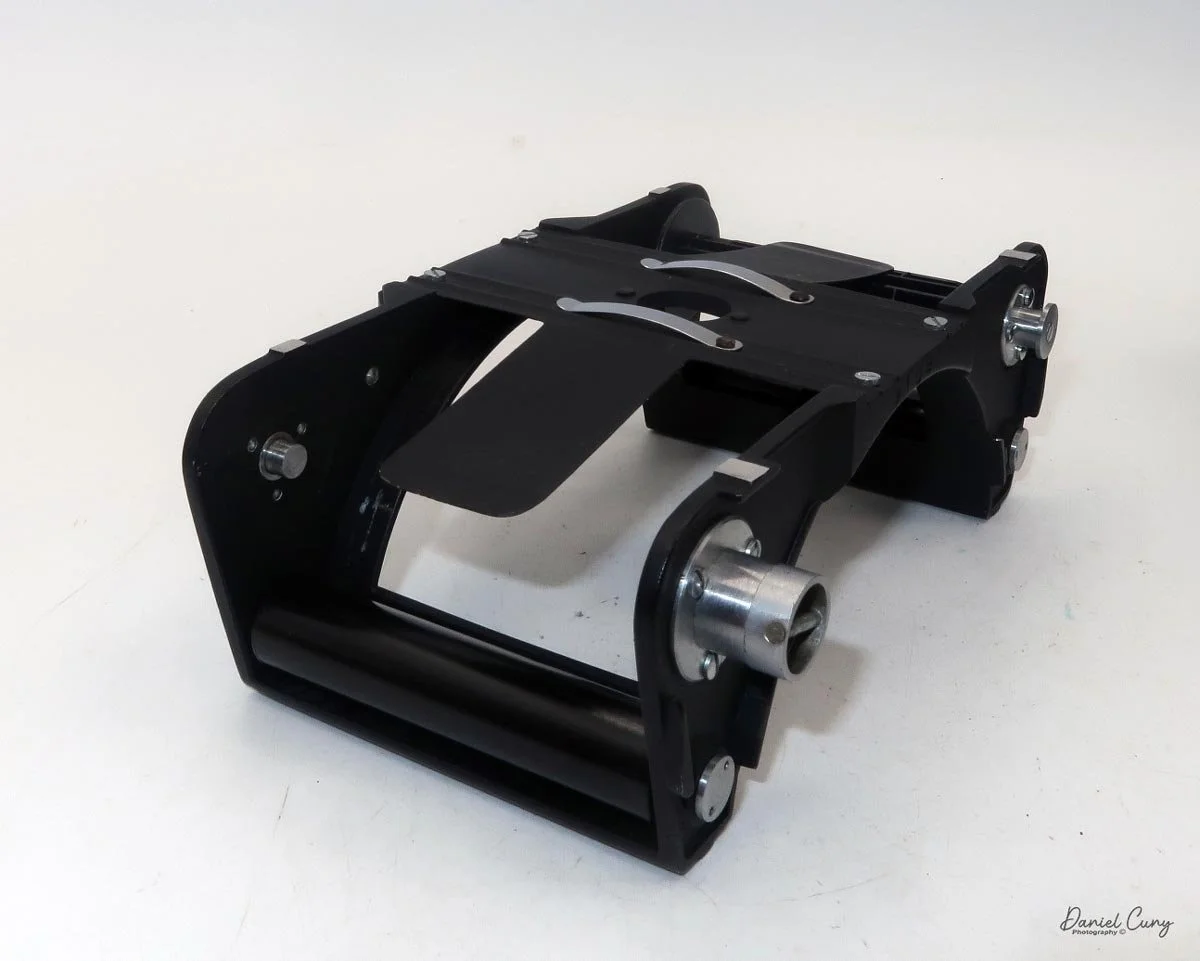
 When the package arrived, the "parts" Panon 120 seemed surprisingly complete. The lens assembly was in what appeared to be good condition. The body, back, and film loading cartridge were all intact with no damage, and the gearing system looked solid. I sent another note to Precision to ask for a quote on getting what appeared to be a 90 to 95% complete camera up and running.

 After a few weeks, I received a note from Precision stating that the camera was going to require much more than their standard overhaul service. While I was still interested in getting it put together into a working model, they explained that they would need to charge by the hour, bringing the total cost higher than I was willing to spend.

 With that said, I'm planning on listing the parts camera on my eBay store soon. I'm hoping to find someone willing to take their time, put the pieces together, and end up with a wonderful Panon 120 to use or sell.

A Quirky Strap Dilemma

Another oddity of the Panon 120 is that the strap lugs are larger than those on a Mamiya, Hasselblad, or Rollei, making it very difficult to find a strap that fits. I've tried about seven or eight different standard straps that clip onto camera lugs, but they were all too small. Because of this, I've resorted to using a guitar strap.

 The issue with the guitar strap—and this is just my own insecurity—is the lingering thought that the camera might slip out of the strap and fall to the ground. I know this is completely irrational and very unlikely to happen, especially since guitars are often more expensive than many cameras, and I shouldn't worry about it. But hey, that's just how my brain works!

My Camera

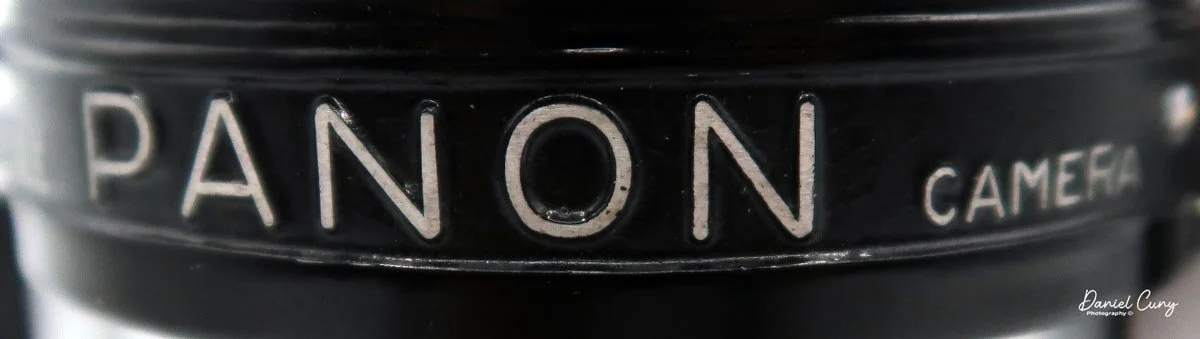
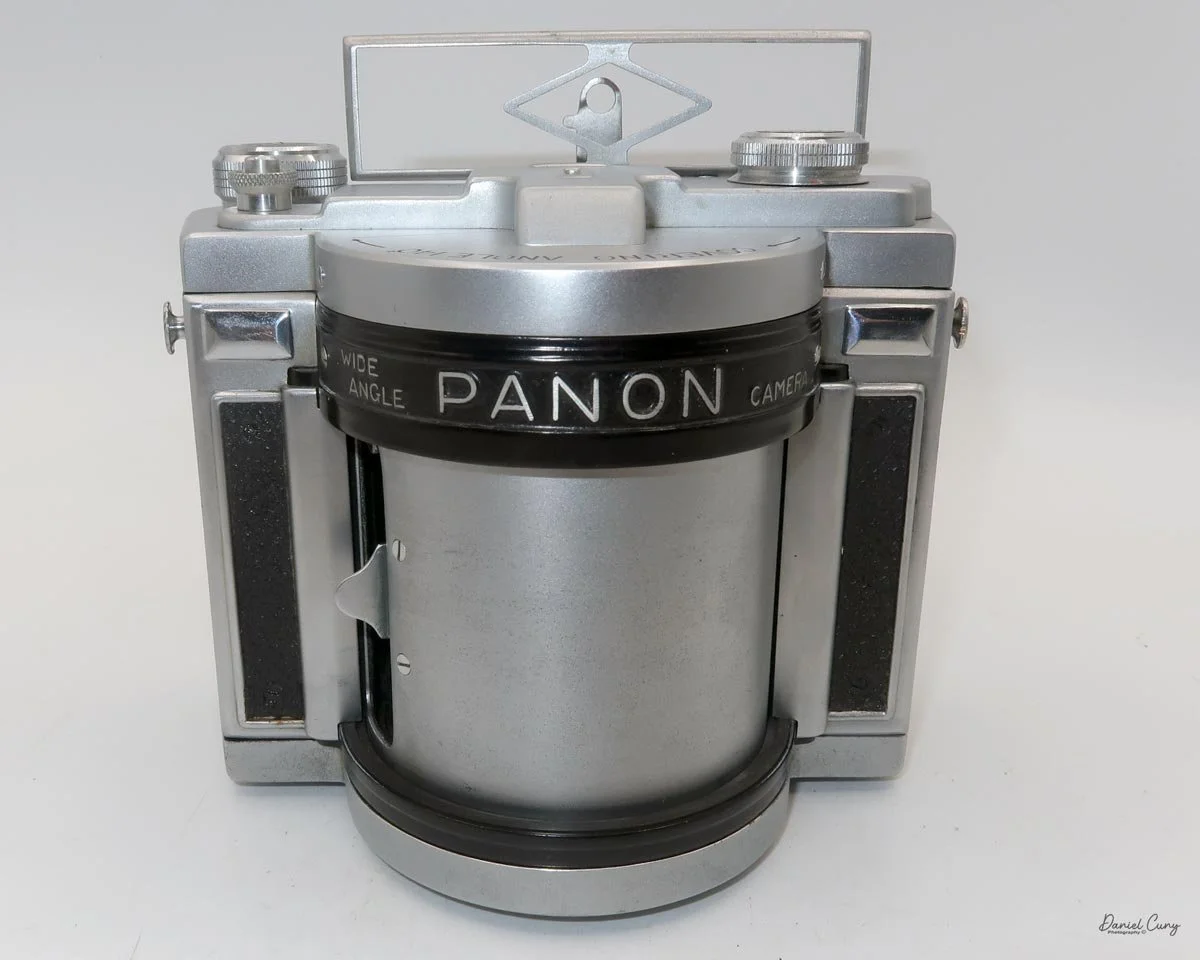
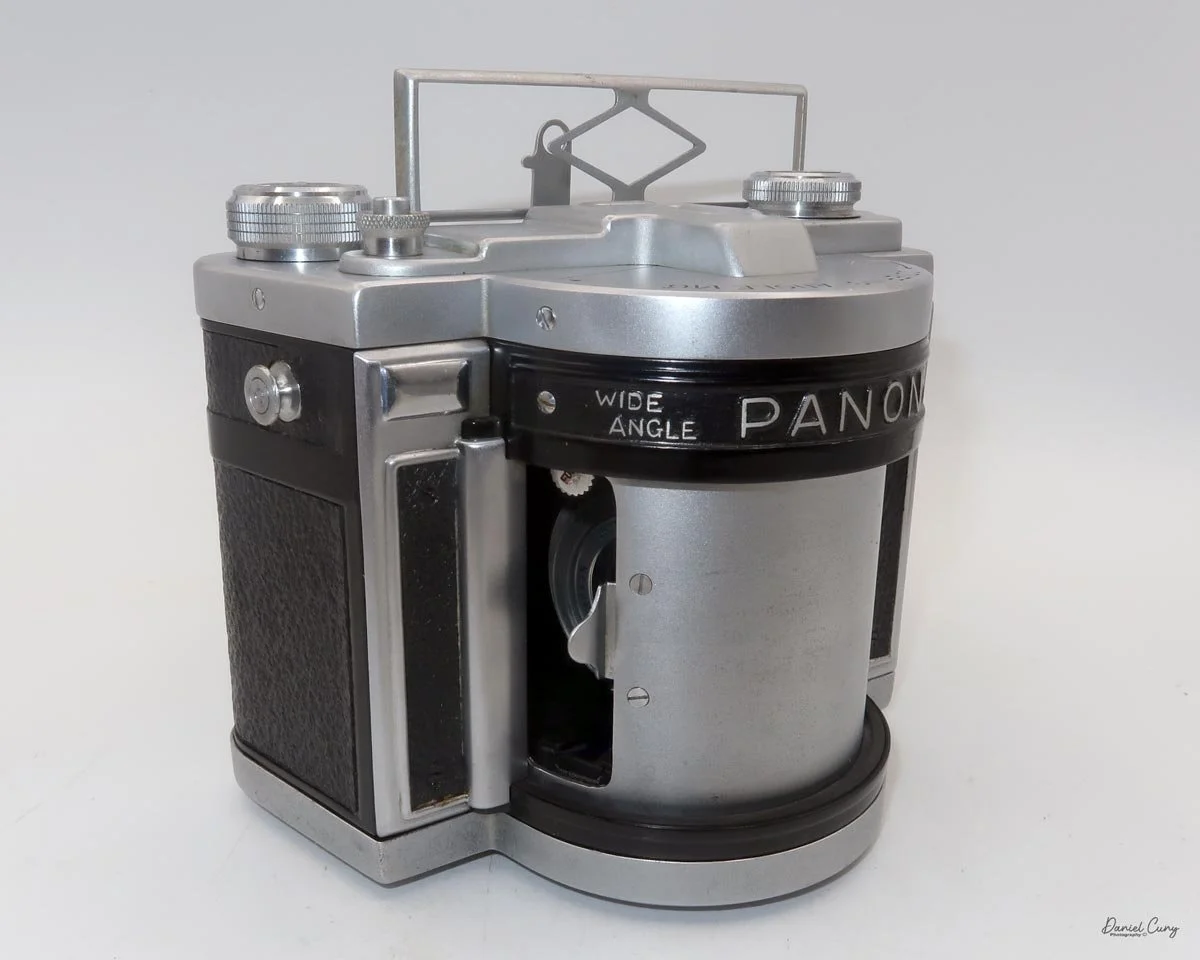
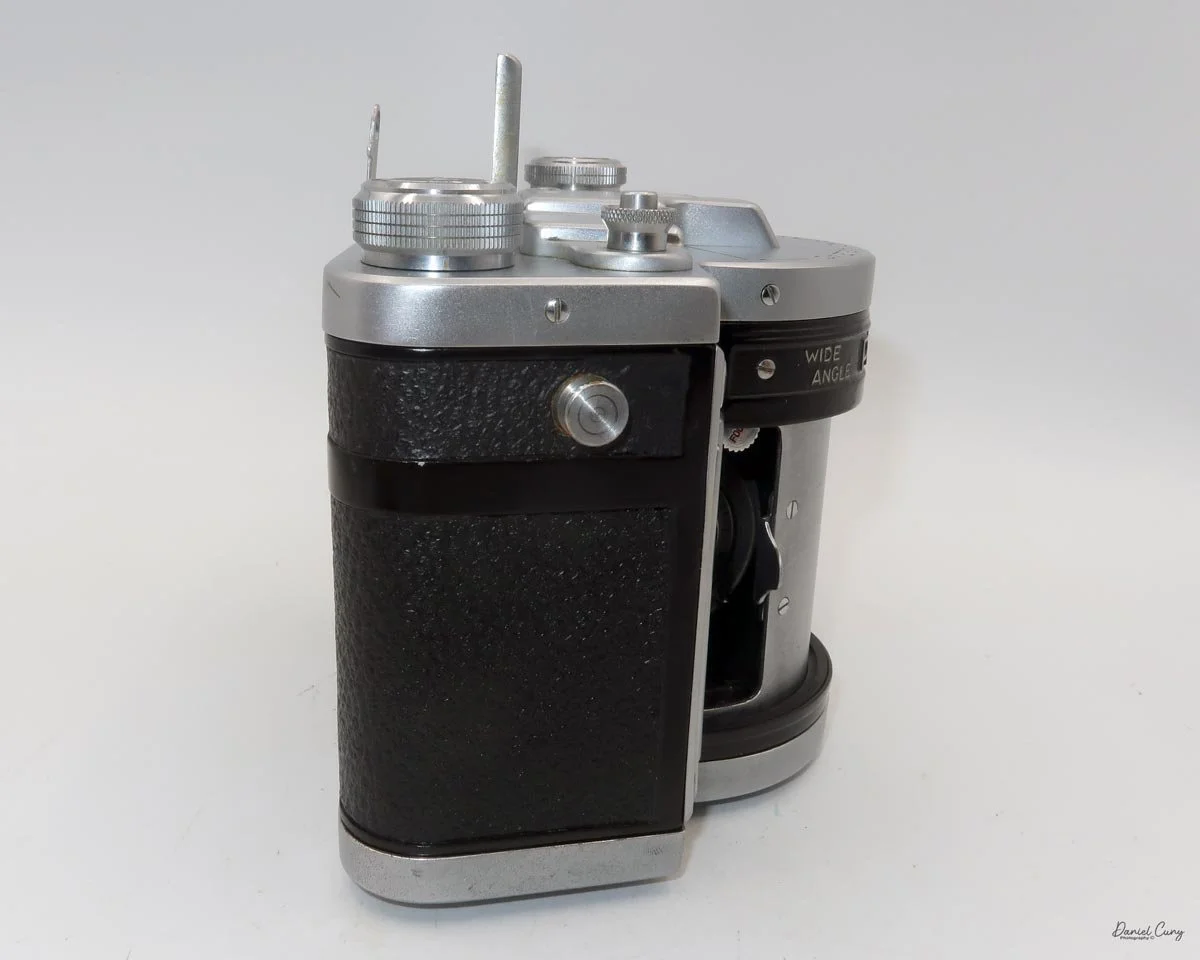
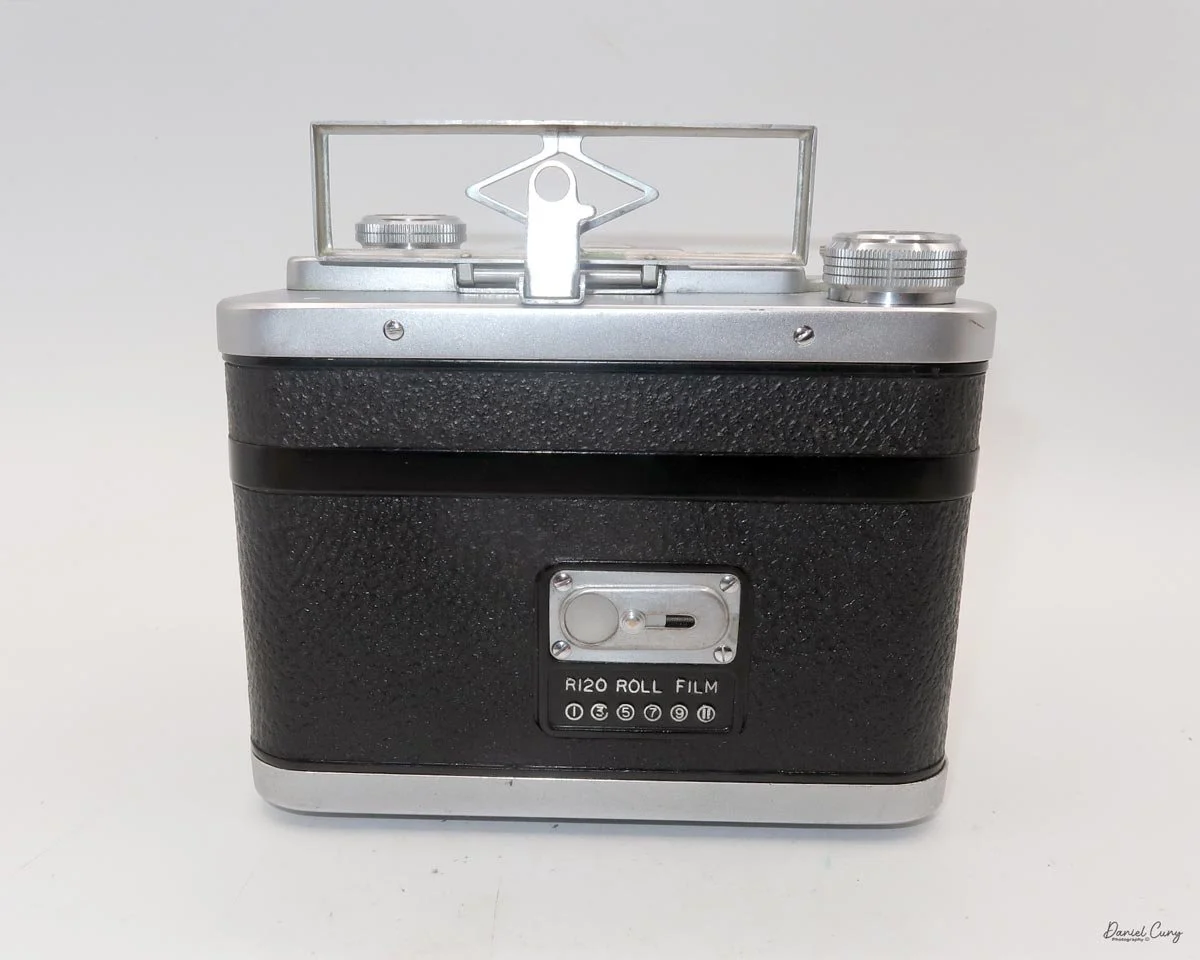
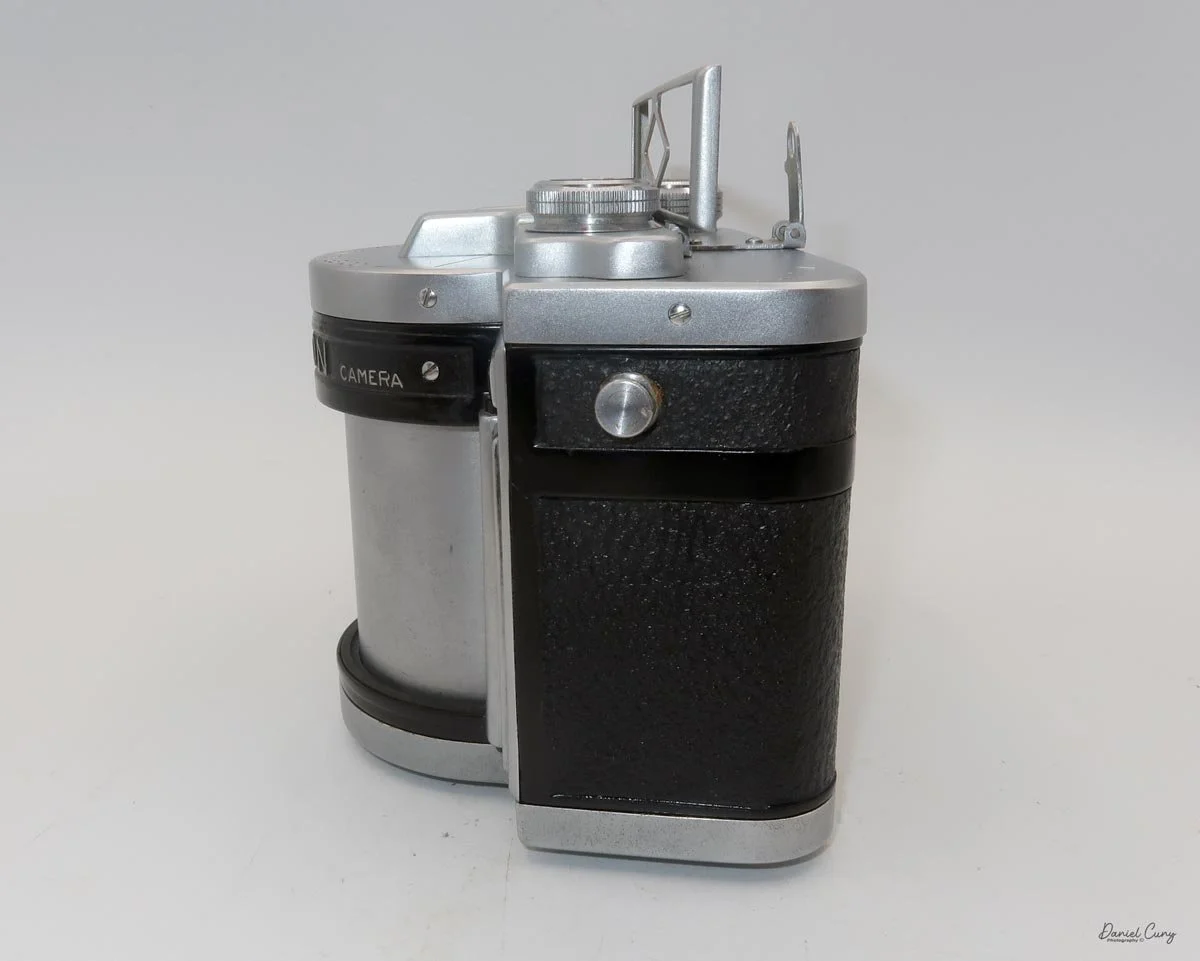
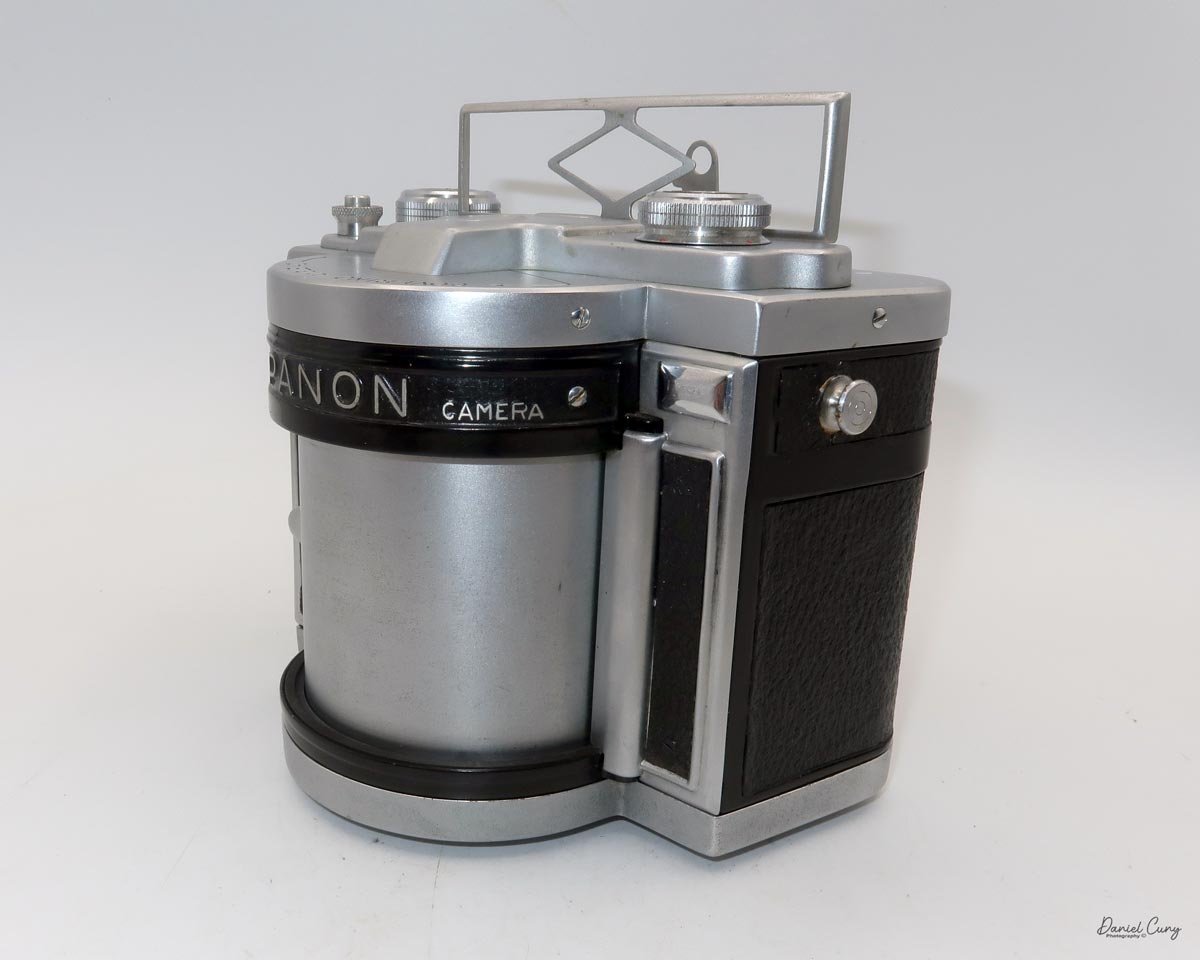
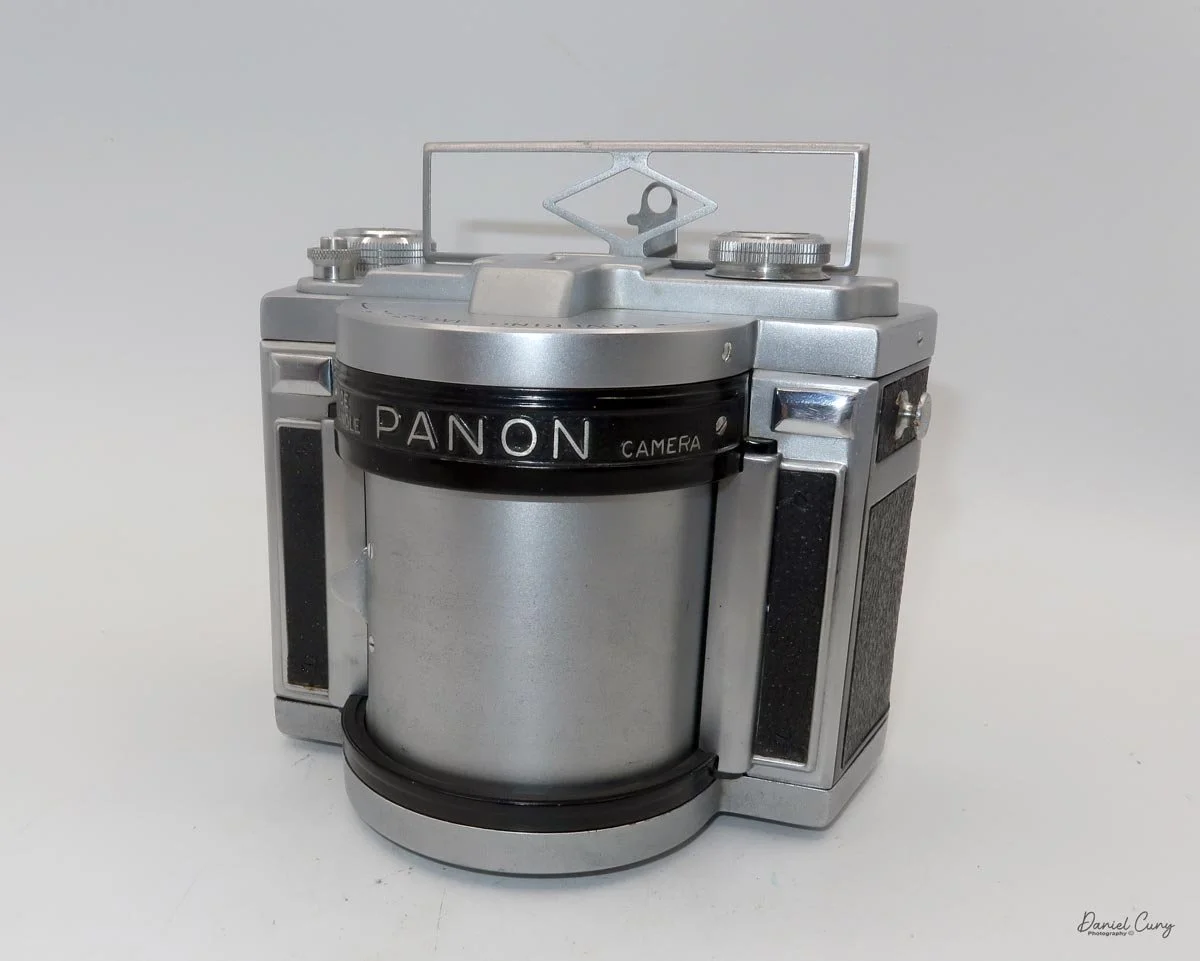
The Panon 120 camera is a beast in size and weight. The camera measures 4.75” tall by 6” wide at the widest part the rear) by 4.25” deep, and weighs a whopping 4 pounds 2 ounces without film or the fitted leather case. The camera produces a whopping 6x14 negative due to the curved film plane and rotating lens.

Unlike the Widelux camera which rotates the lens and cock the shutter when you advance the film, the Panon 120 you need to manually pull the lens from one side to the other to cock the shutter. That’s what the pull area on the side of the lens is for.

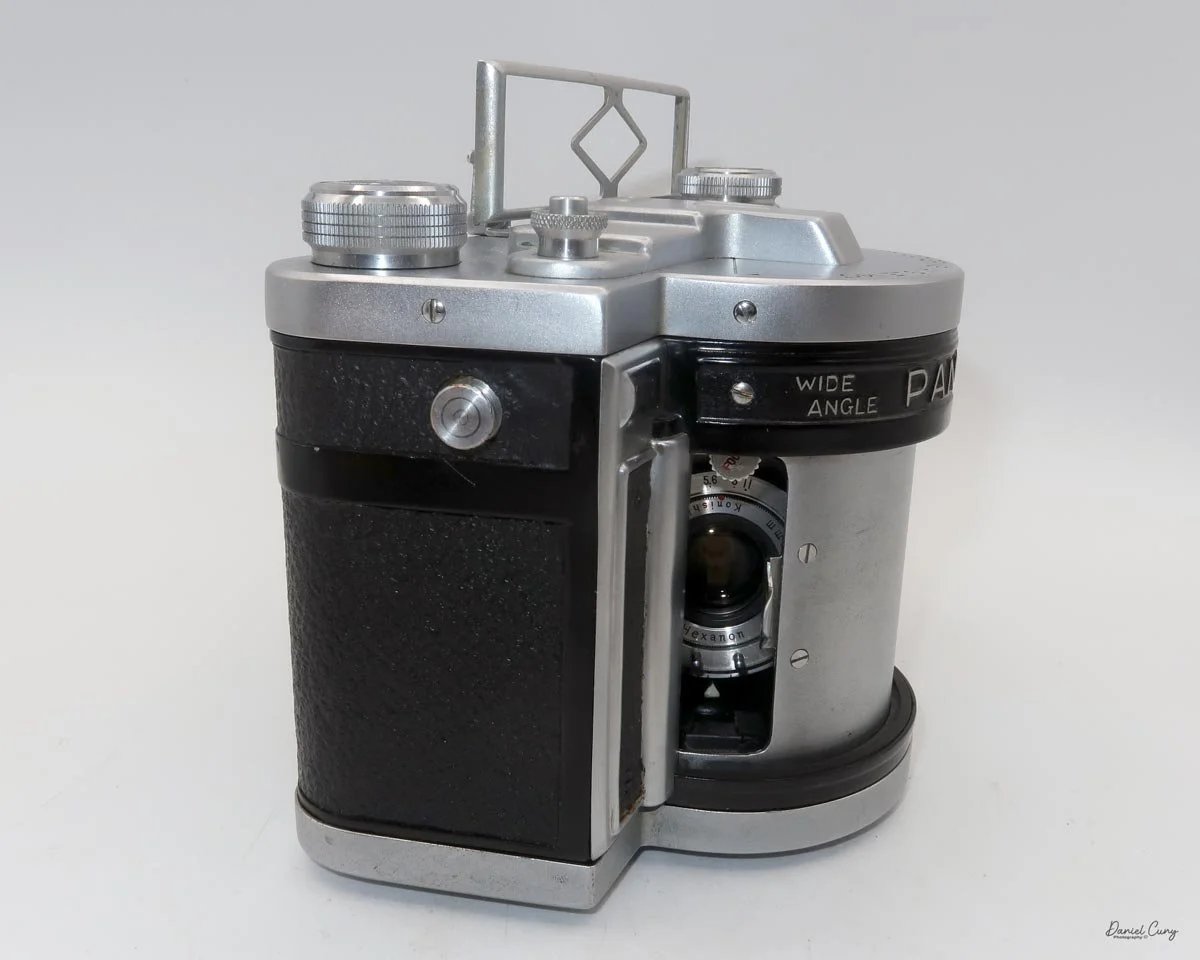
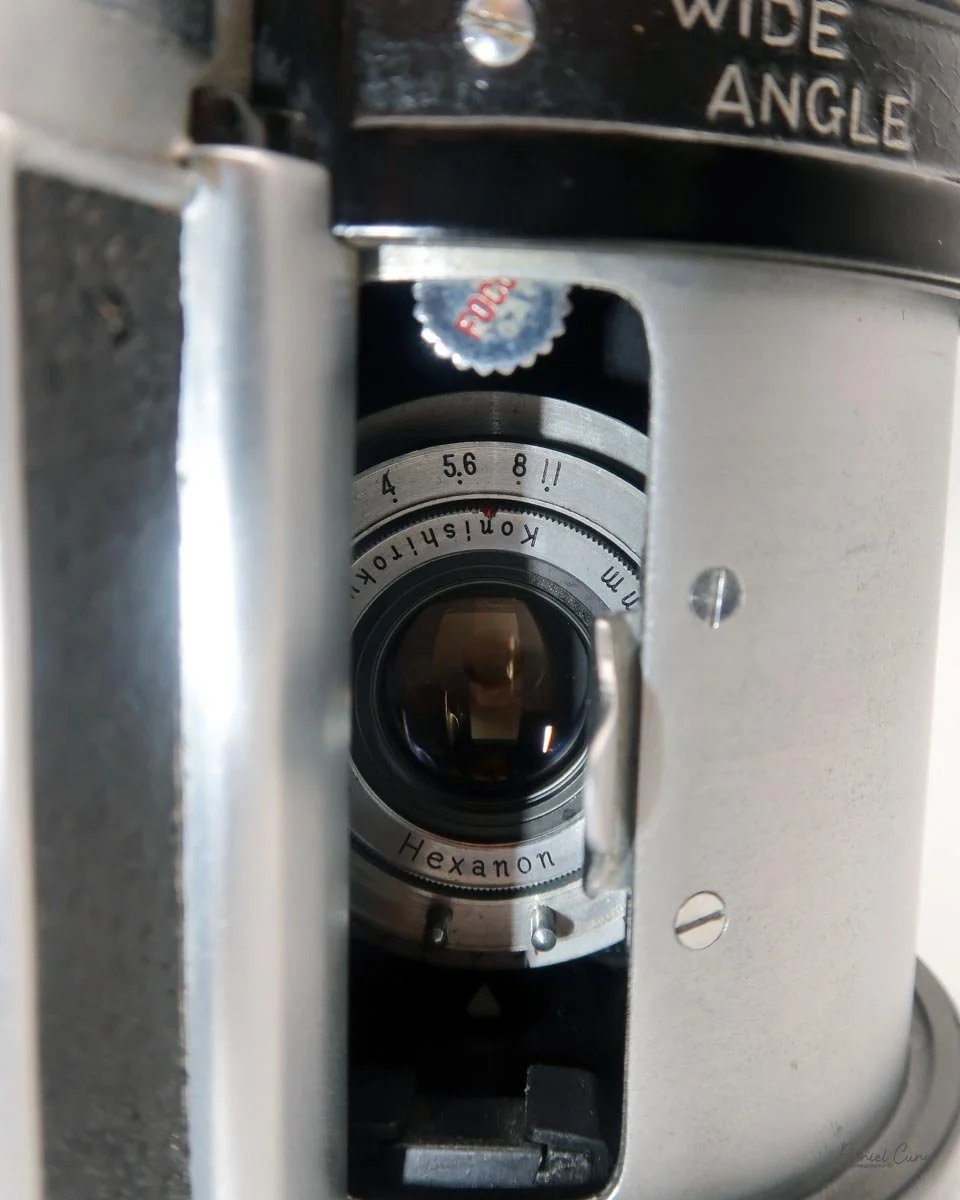
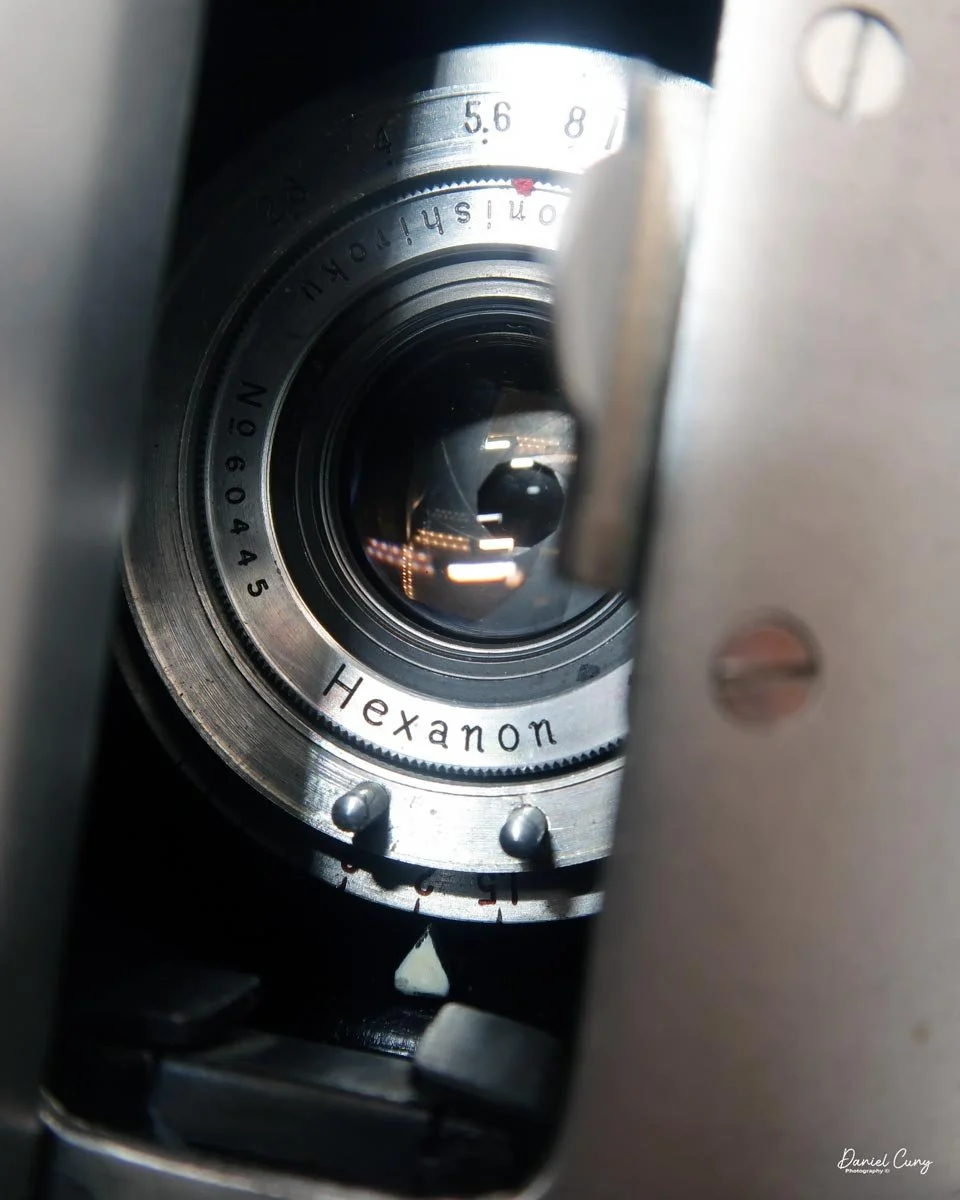
The lens on the Panon 120 is a 50mm f/2.8 Konishiroku Hexanon (Konica) lens with aperture settings from F/2.8 to f/11. You set the aperture manually by sliding a lever inside the lens chamber to the desired setting.

Focusing is done manually too on the Panon 120 camera. On top of the lens chamber is a wheel with “focus” written on it. Turn the wheel and look at the lens to find the distance to your subject.

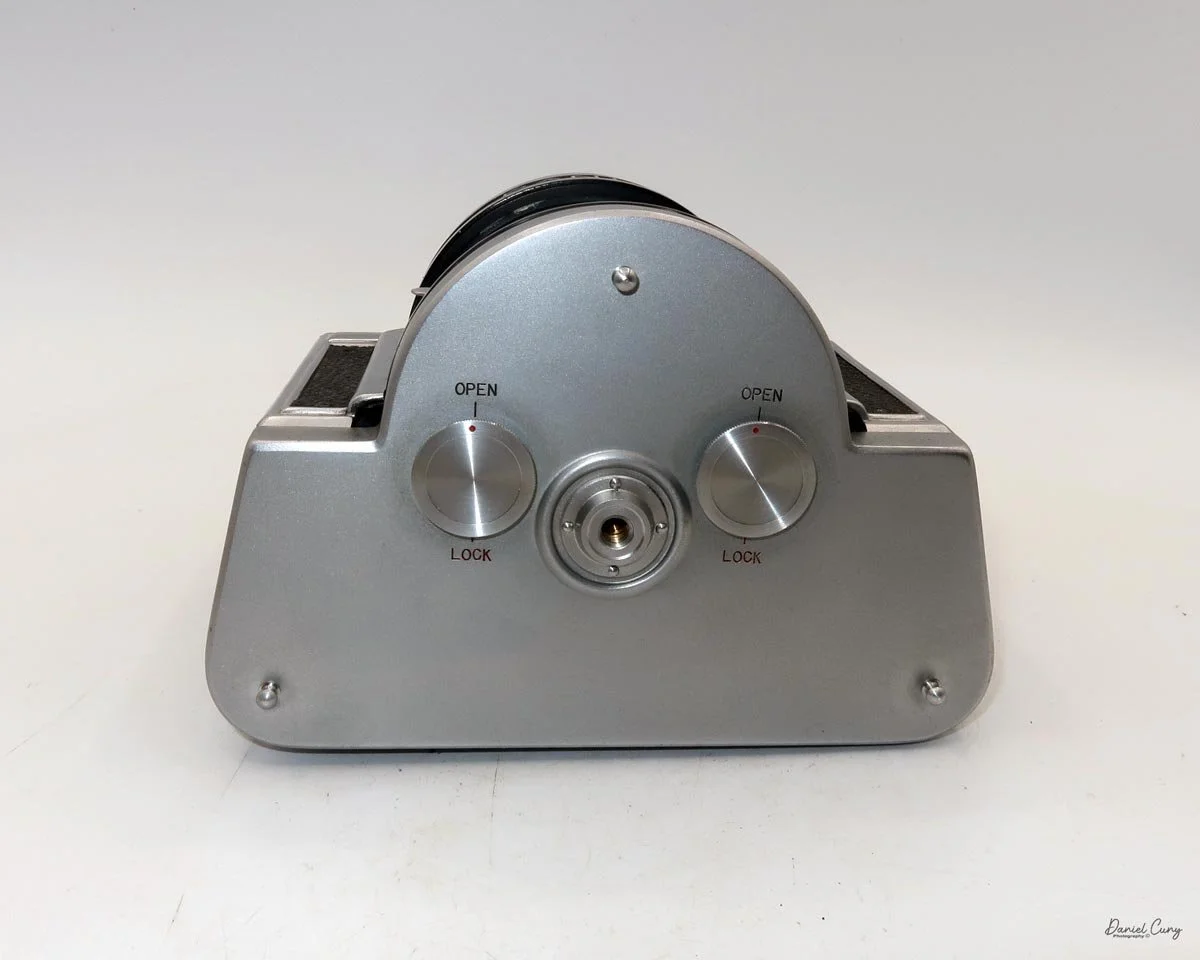
Loading the film is done by removing the bottom of the camera by unlocking two wheels on the bottom, then sliding out the film holder which is curved to match the rotating lens.

The hardest part of loading the film is making sure the film is behind the curved wall, then placing the film insert back into the camera the right way. If the insert is backwards, the winding wheel sticks up and the film door cannot be placed back onto the camera. Just reverse the insert, and the film will fit properly.

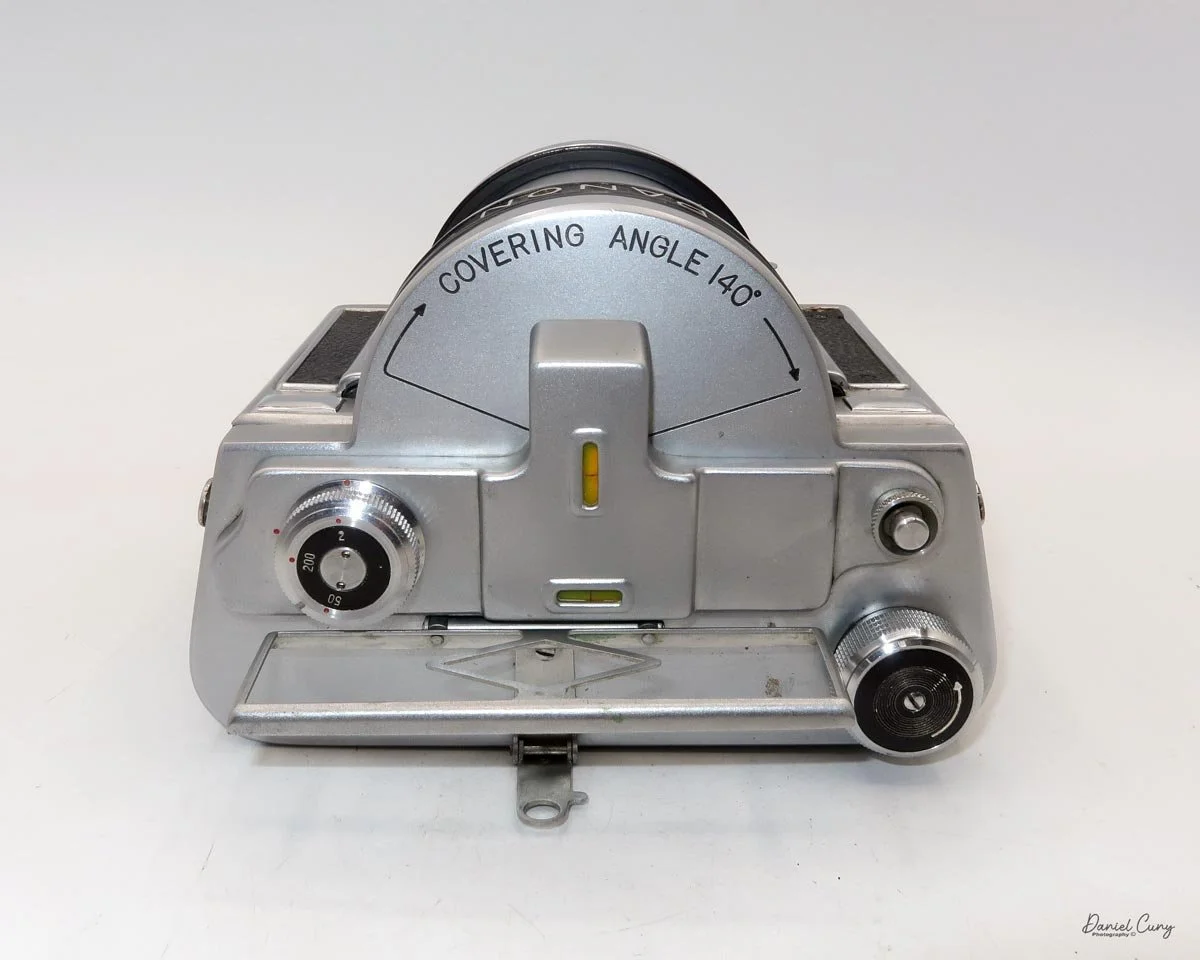
There are onle 3 shutter speeds on the Panon 120, 1/200, 1/50 and 1/2. The shutter speeds are set by turning a wheel on the top of the camera. Also on the top of the camera are two bubble levels, one for vertical, and one for horizontal. The flip up viewfinder is alo on the top of the camera.

Top view of the Panon 120 camera

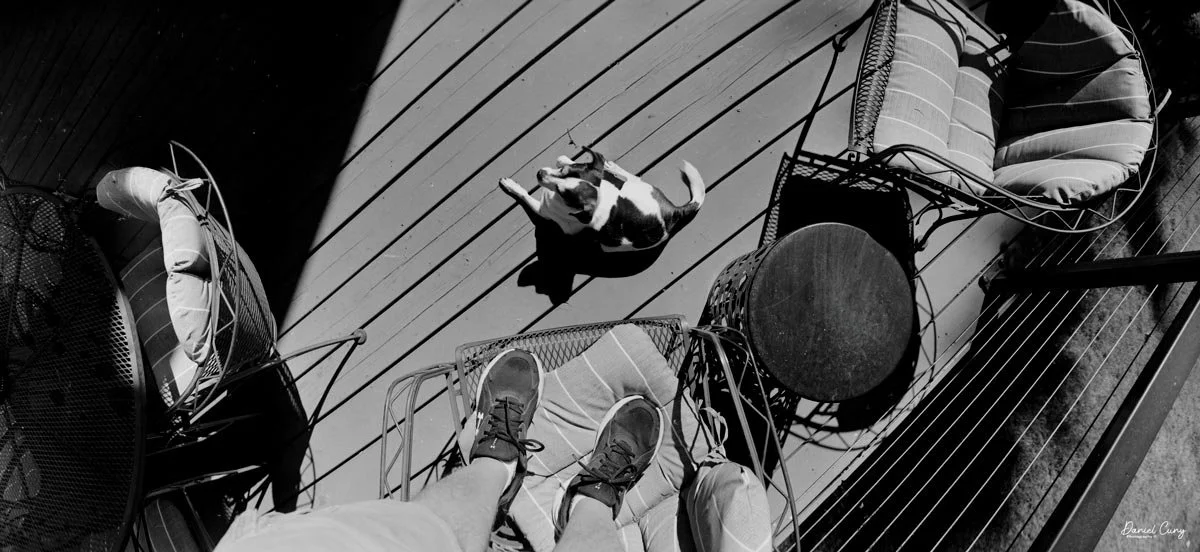
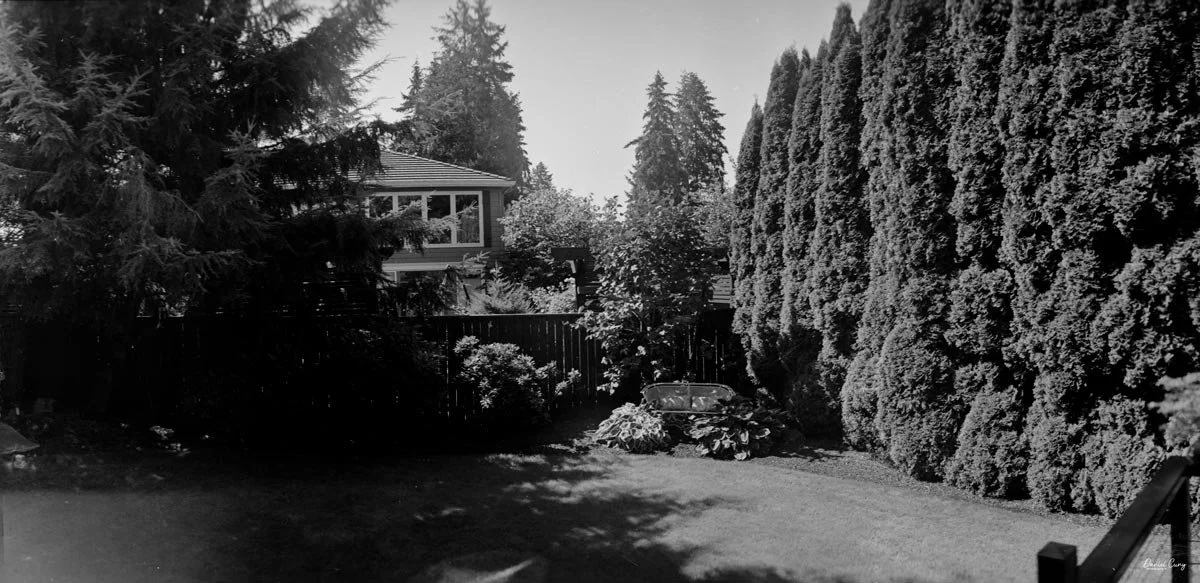
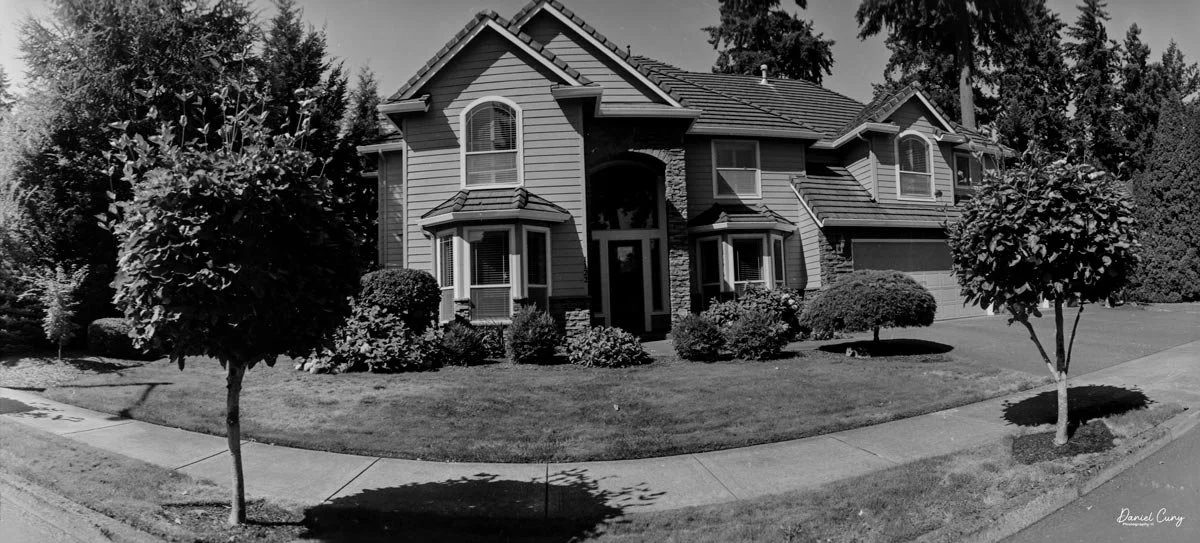
My Results

Now that I've had the camera serviced, I loaded up a fresh roll of 120 film and walked through the neighborhood to take some photos for the blog.

 Here are some of the recent photos taken with the Panon 120.

Conclusion

I have a real internal conflict with this camera. On one hand, I love that it's essentially a medium-format version of the Widelux (which is my go-to camera that I shoot with around 90% of the time). On the other hand, the sheer size and weight of the Panon always give me second thoughts about taking it out.

 There are things I just need to resolve in my head so I can start using the Panon 120 more often. Beyond the size and weight, the main operational differences are having to manually focus the Panon 120 (whereas the Widelux is fixed-focus), dealing with different shutter speeds, and having to manually set the lens before firing the shutter, unlike the Widelux, which cocks the shutter automatically when you advance the film.

 Thank you for taking the time to read this updated review of the Panon 120 camera!

Are you interested in other vintage gear? Be sure to check out some of my other Camera Reviews.

 Check out my Cuny's Camera Collection YouTube channel, where I'm putting together video overviews of the cameras I write about. Be sure to subscribe and like the channel, too!

 Cuny's Cameras and Photos is my online eBay store, where you'll find some of the cameras I've reviewed, along with a wide range of other cameras, lenses, and gear from my personal collection that I am thinning out.

 Until next week, please be safe!