Welta Penti camera

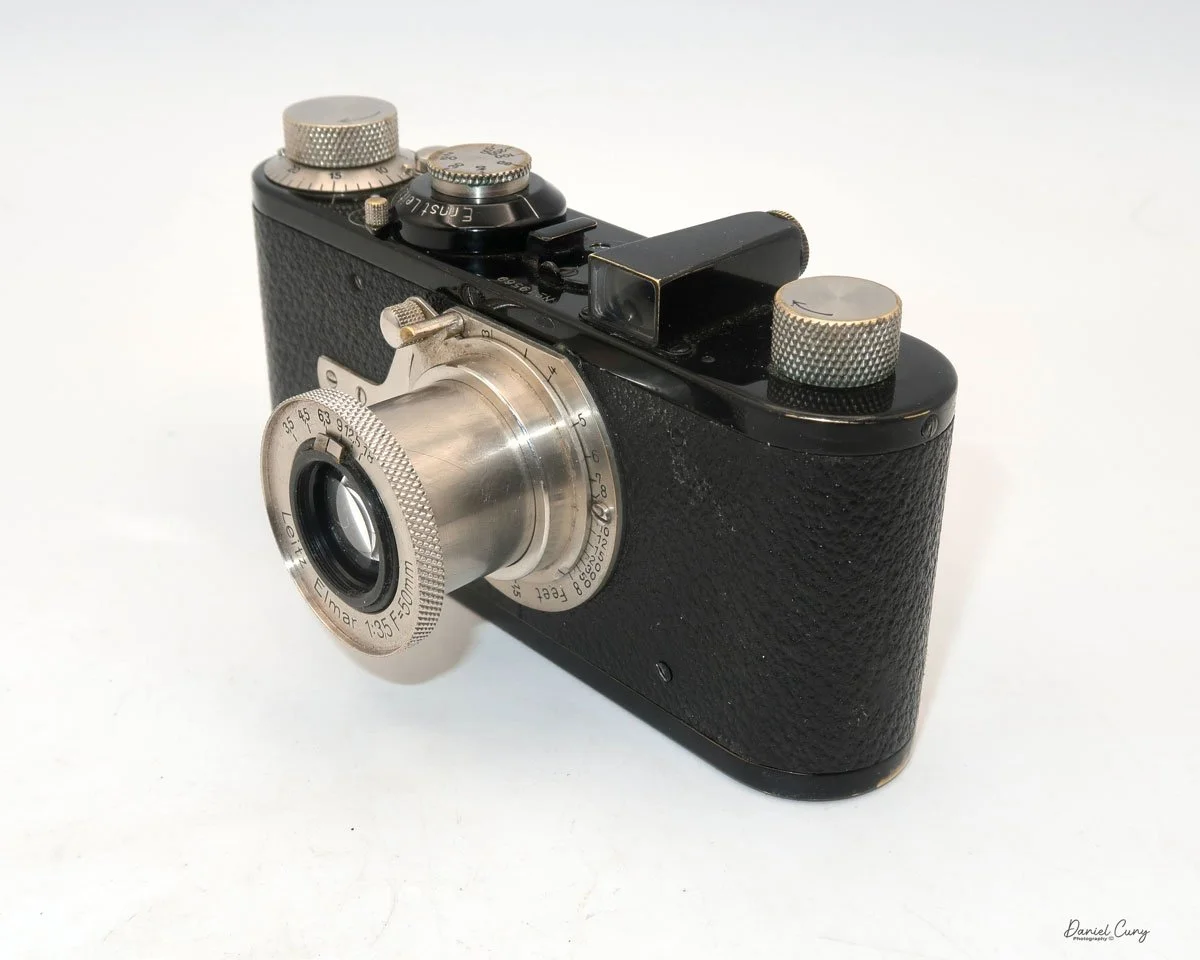
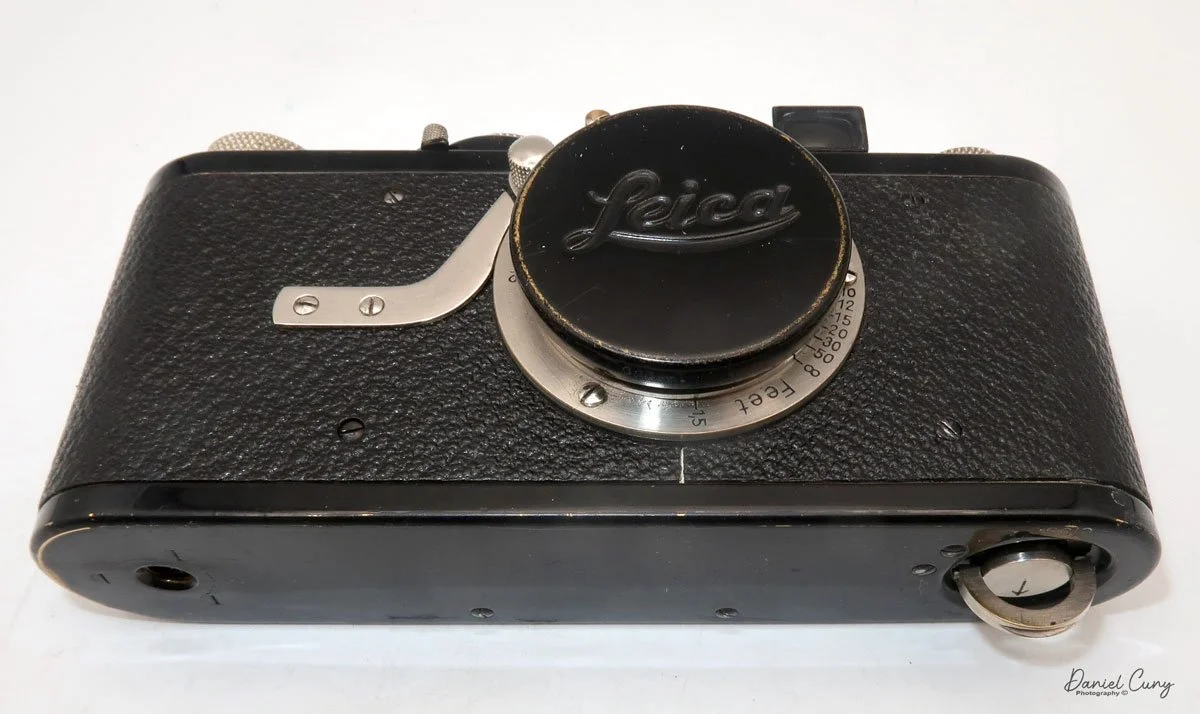
My Welta Penti camera

The first time I laid my eyes on a Welta Penti camera was almost 45 years ago. I was working as a salesperson at the local camera store in our area, and someone brought in a beautiful gold-colored camera with dark red trim circling the center. I was a bit flabbergasted when I saw it. The customer had just received it from a relative and wanted to know how to use it.

 At the time, I was in my early twenties, and although I had never seen one before, I started to play with it and explained the camera as I tinkered with it. I was learning about the camera at the same time.  The easy part was explaining the items located around the lens, like shutter speed, focus distance, and aperture settings. Still, when I clicked the shutter, and the advance rod came shooting out of the camera, I think I let out a little gasp of surprise as the woman I was explaining the camera to just smiled and said, "That happened to me when I snapped the shutter, but I didn't know what I did".

 It wasn't until I took the back off the camera and noticed that when you pushed the film advancing rod in, it engaged with the film's sprocket holes and pushed the film into the take-up cannister. The rod stayed in the camera body until you snapped the shutter again. Also, with the back off the camera, I did see that the camera took 35mm film, but not the regular 35mm film that the majority of photographers were used to, but the Agfa Rapid style 35mm film. At the time, we did sell a small quantity of Agfa Rapid film. 

The brilliant gold toned Welta Penti camera with advance rod out.

 While I had the camera's back off, I double-checked that the shutter was opening and closing. The aperture was operating correctly, which it was. I explained to the owner of the camera that it was called a Half-Frame camera, meaning it used only half the size of a standard 35mm camera. She would get twice the number of photos from a roll of film. If she purchased a roll of 20 exposures, she would be getting 40, 41, or possibly 42 pictures from the roll. I sold her a roll of film, loaded it into her camera, and sent her on her way. 

 The whole time I was holding this camera, I couldn't help but think, What a beautiful camera. Keep in mind, this was around the same time as I was starting to collect cameras and the ones that impressed me the most were camera with color, like the Kodak Rainbow,  Petites and Beau Brownies camera, so a gold camera with dark red circling the camera just sort of blew my mind and I wanted to know more about them.

 Fast forward 45 years, and at a recent camera collectors fair in Seattle, I purchased two Penti cameras, both in good working condition. I had previously owned a few of the Penti cameras, but sold them off years ago so when I saw them at the camera show, I thought it would be great opportunity to add them to my collection and also to write about them in one of my camera collecting blog posts.

History:

Welta Kamerawerks, a significant yet often overlooked German camera manufacturer, has a history that mirrors the turbulent narrative of the 20th century in its Dresden-area home. Founded in 1914 as Weeka-Kamera-Werk by Walter Waurich and Theodor Weber in Freital, a suburb of Dresden, the company was renamed Welta-Kamerawerk Waurich & Co. in 1919. From its inception, Welta carved out a niche for itself by producing a wide array of high-quality, medium-priced folding plate and roll film cameras, putting it in direct competition with other German contemporaries, such as Balda and Certo.

Welta Kamera Werks

 Before World War II, Welta was known for its solid engineering and innovation. The company produced a range of popular models. Still, it was cameras like the high-end Weltur series that cemented its reputation. Introduced in 1935, the Weltur was a sophisticated folding camera featuring a coupled rangefinder. This design element positioned it in direct competition with premium brands. Welta also ventured into more ambitious designs, creating the unique folding Twin-Lens Reflex (TLR) cameras, the Perfekta (6x6) and Superfekta (6x9). Though not commercial successes, these models are now highly prized by collectors for their fascinating design and mechanical complexity. Many of their cameras were offered with high-quality lenses from renowned makers like Carl Zeiss and Schneider-Kreuznach, appealing to serious photographers.

 The aftermath of World War II dramatically altered the company's trajectory. Located in what would become East Germany, the Welta factory was dismantled and its equipment sent to the Soviet Union as part of war reparations. However, production managed to restart by 1947 under the new state-controlled entity, VEB Welta-Kamera-Werk. The company continued to produce successful pre-war designs, such as the Welti 35mm folder. It absorbed other nationalized firms, including the Richter company in 1950, which led to the development of the successful Reflekta TLR series.

 Despite its resilience, the era of consolidation in the East German photographic industry marked the end of Welta's independence. In 1959, VEB Welta was merged with several other Dresden-based camera makers, including Belca and Altissa, to form the massive conglomerate VEB Kamera- und Kinowerke Dresden, which would later become the famous Pentacon. Following this merger, the Welta name, which had defined quality German cameras for over four decades, gradually disappeared from the market, marking the end of a significant chapter in photographic history.

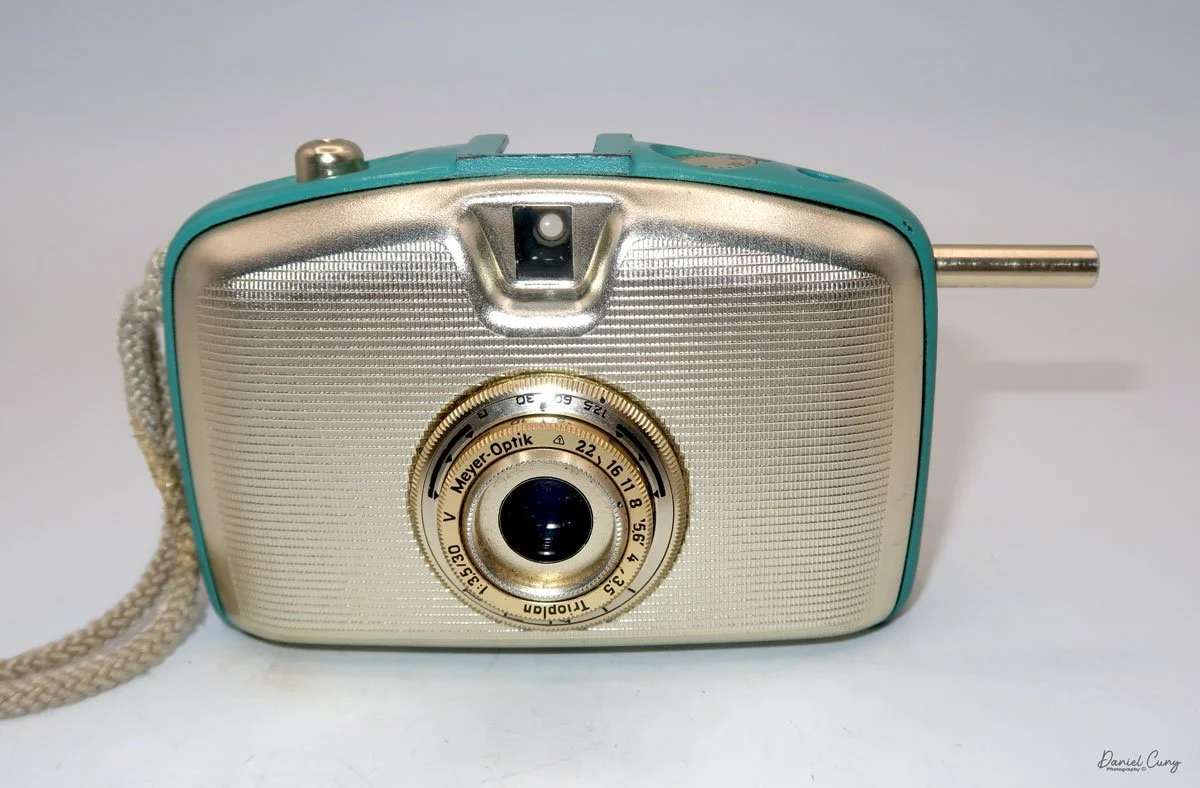
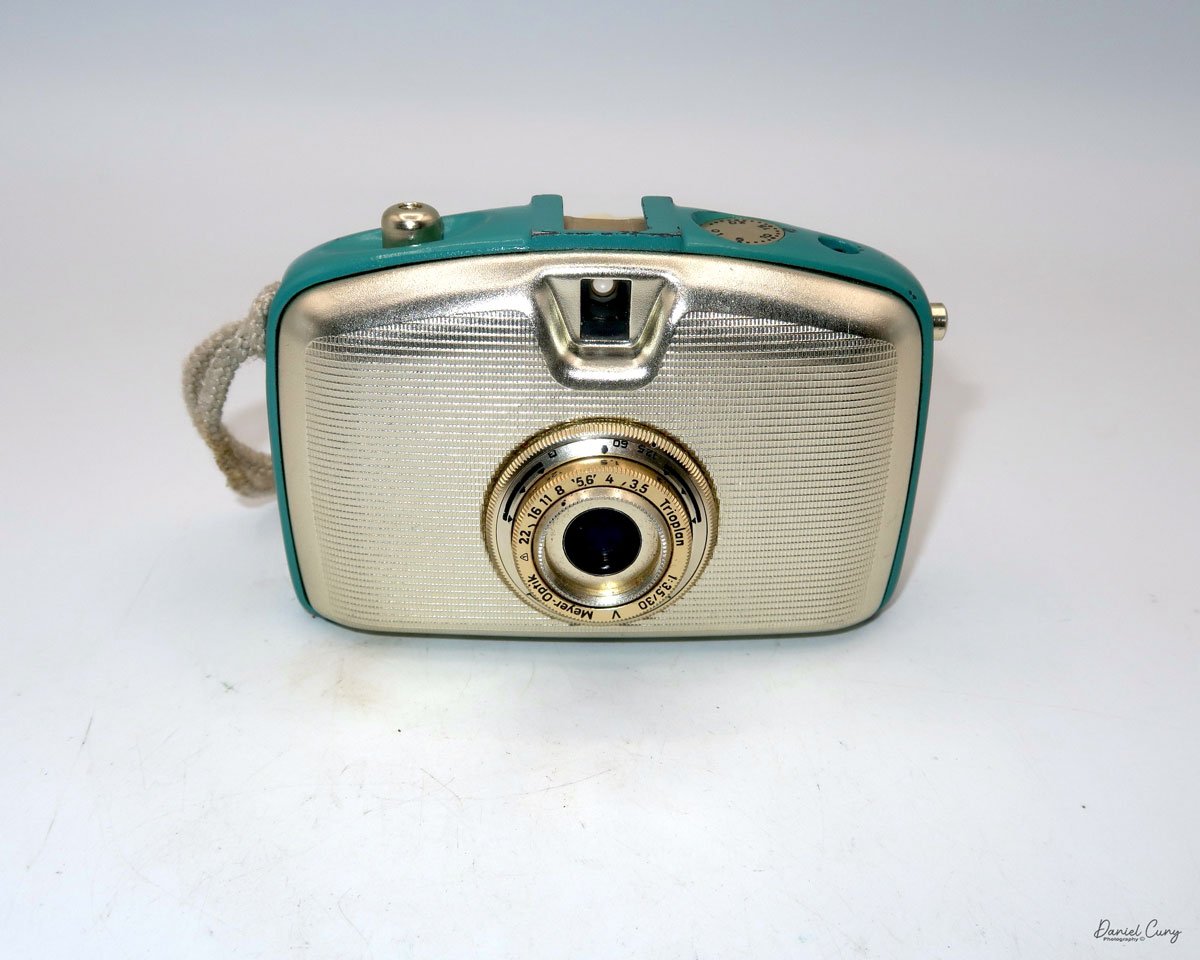
My dark red and turquoise Welti Penti cameras

 The Welta Penti was introduced in 1959 and produced until 1977 with a few modifications. In 1961, the Penti I and Penti II were introduced. The Penti I had a broader front viewfinder area and small knobs on the lens to control the different lens functions, like aperture and shutter speeds, and the Penti II was similar to the Penti I but incorporated a selenium cell light meter. 

 All Penti cameras are 35mm, half-frame cameras that take an 18x24mm image in a vertical format. The Penti and Penti I cameras have a Meyer-Optik Tripolan 30mm f/3.5 lens. The Penti II has a Domiplan 30mm f/3.5 lens.

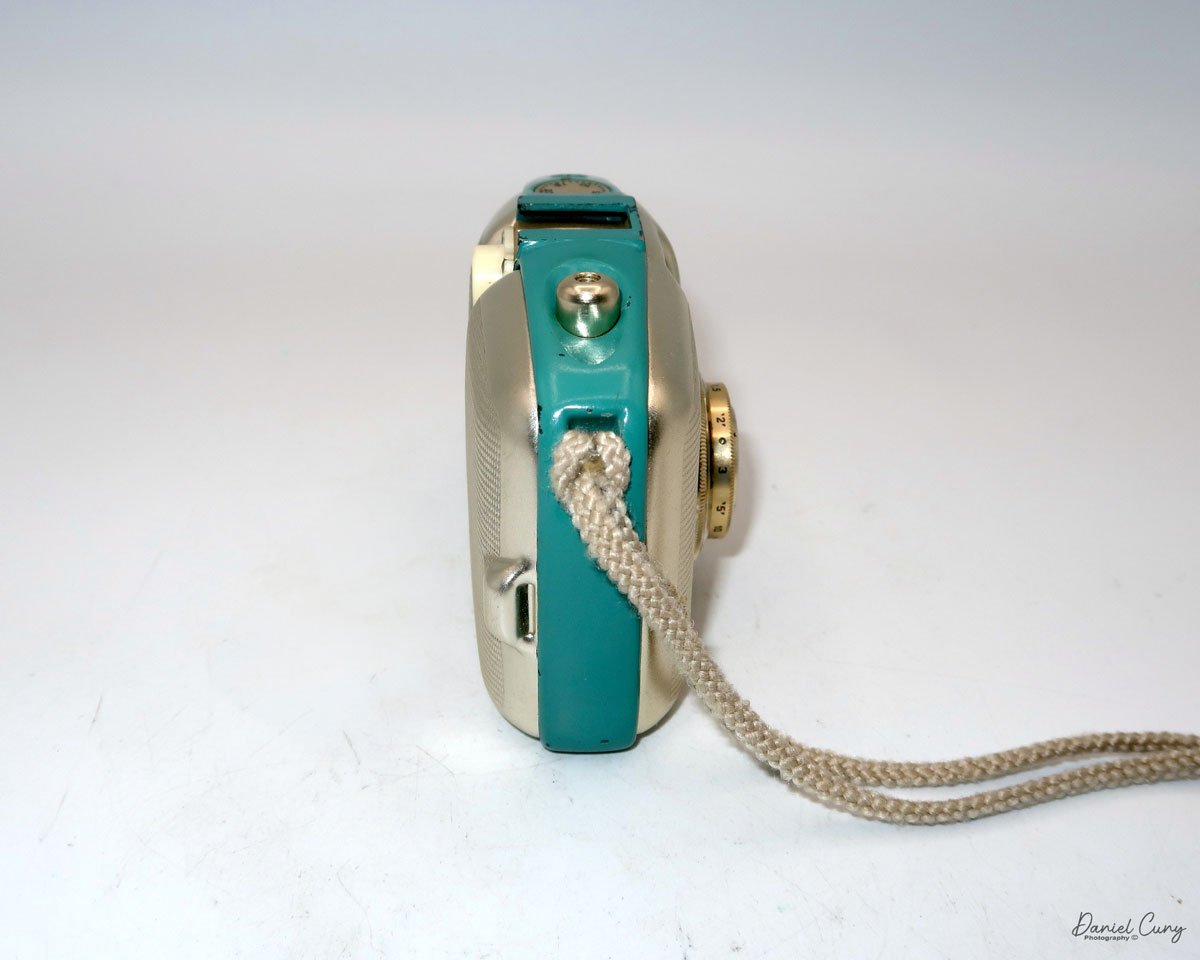
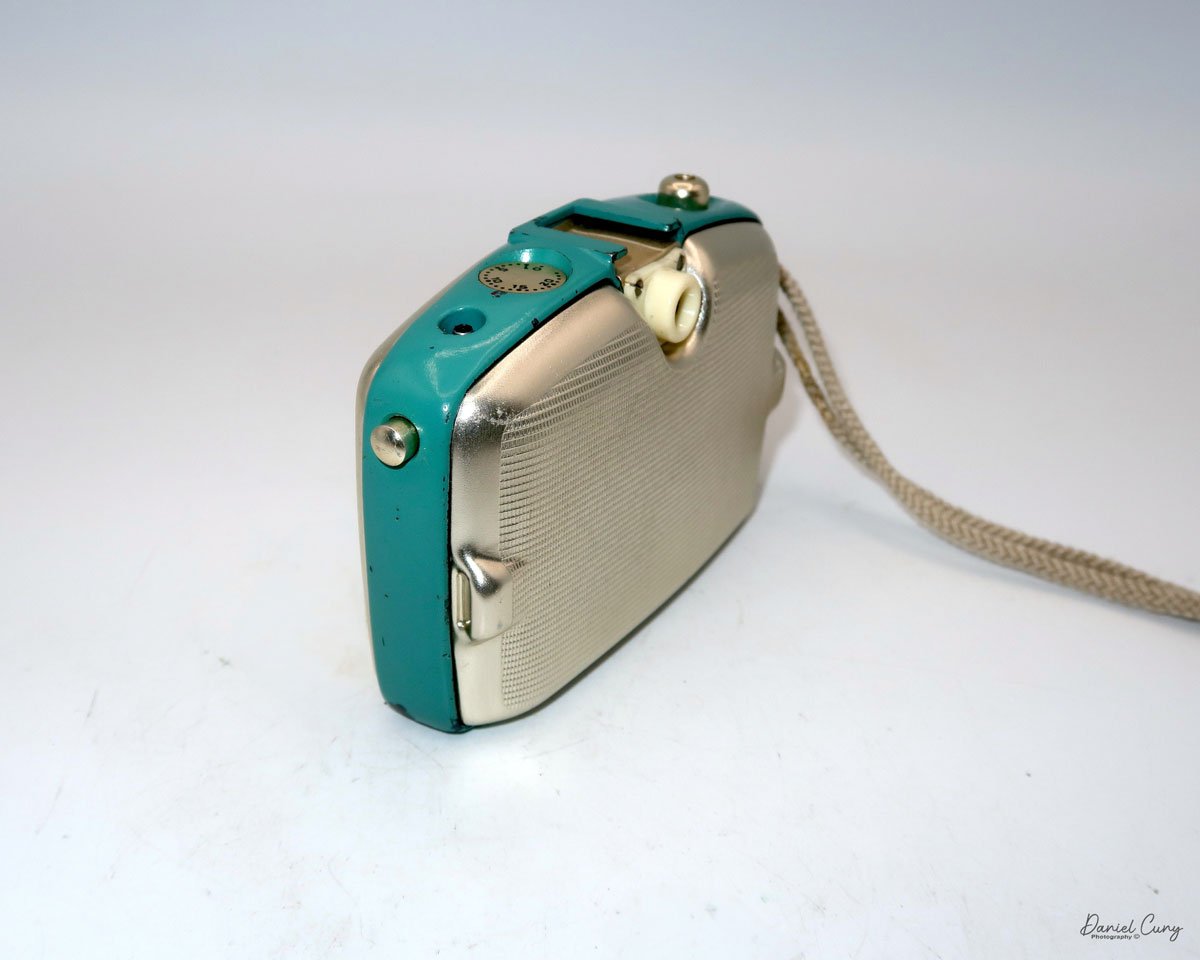
 The 28mm to 30mm is considered a standard lens for the half-frame style cameras. The Welta Penti cameras came in different colors; all had a brilliant gold-toned camera body, but the band around the camera came in black, dark blue, turquoise, dark red, or white.

My Camera:

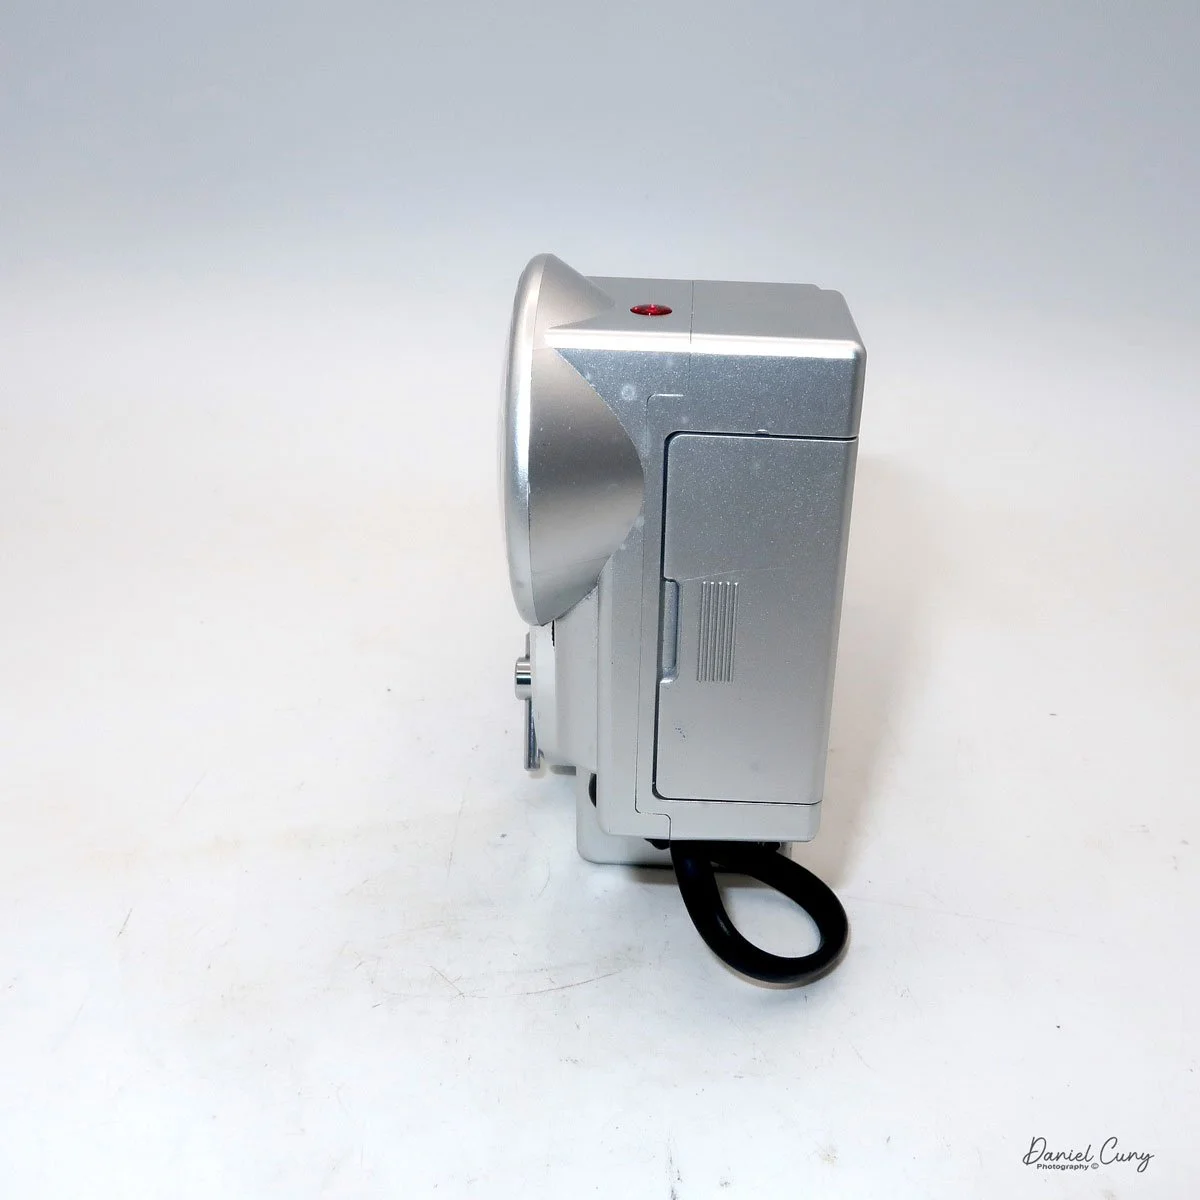
My Welta Penti is a small and compact camera, making it another fantastic option to keep in your pocket or jacket, ready to take photos. The camera measures 4.25" wide by 2.75" tall and is only 1.5" deep, weighing 8 oz. A metal lens hood and case are available for the camera, but unfortunately, my camera does not have either one.

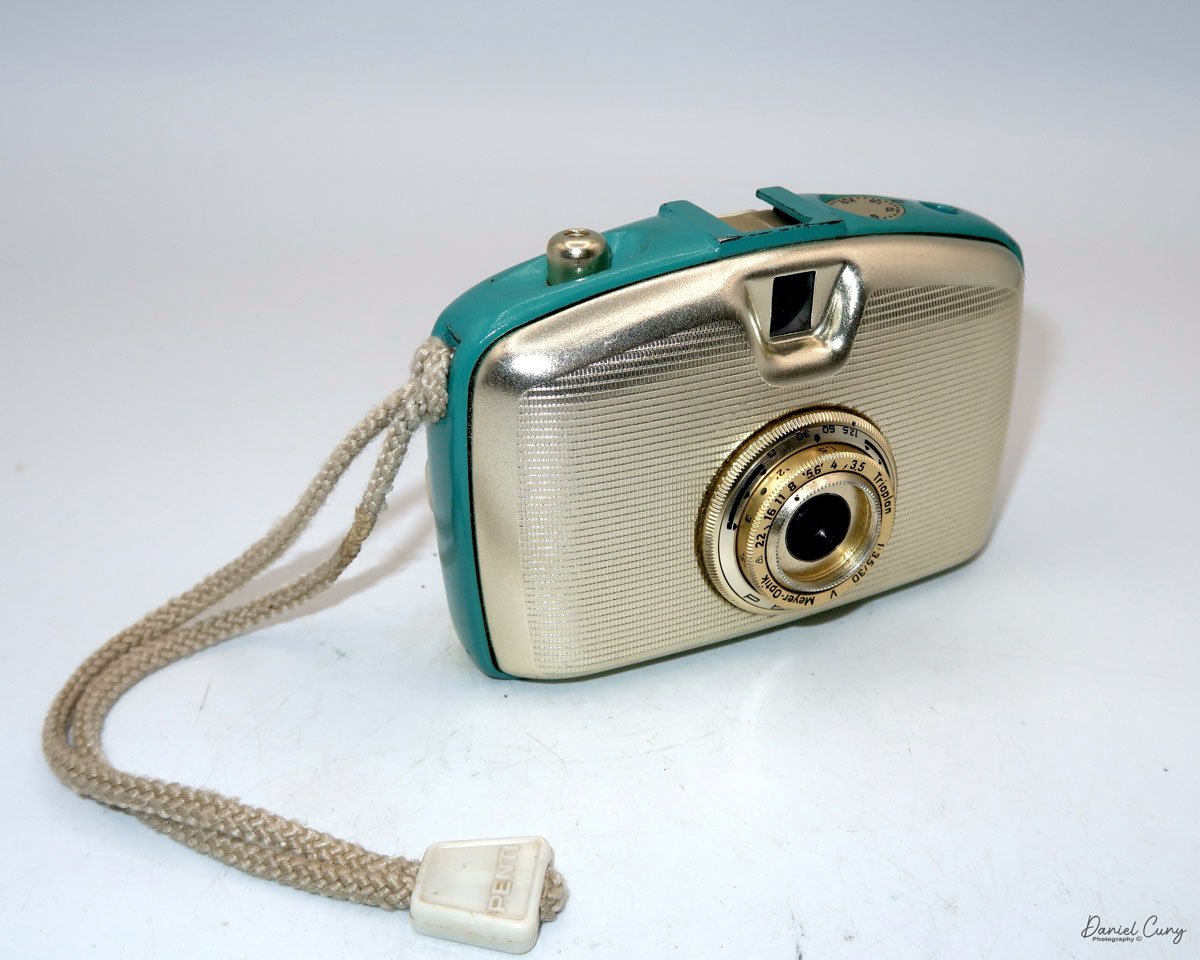
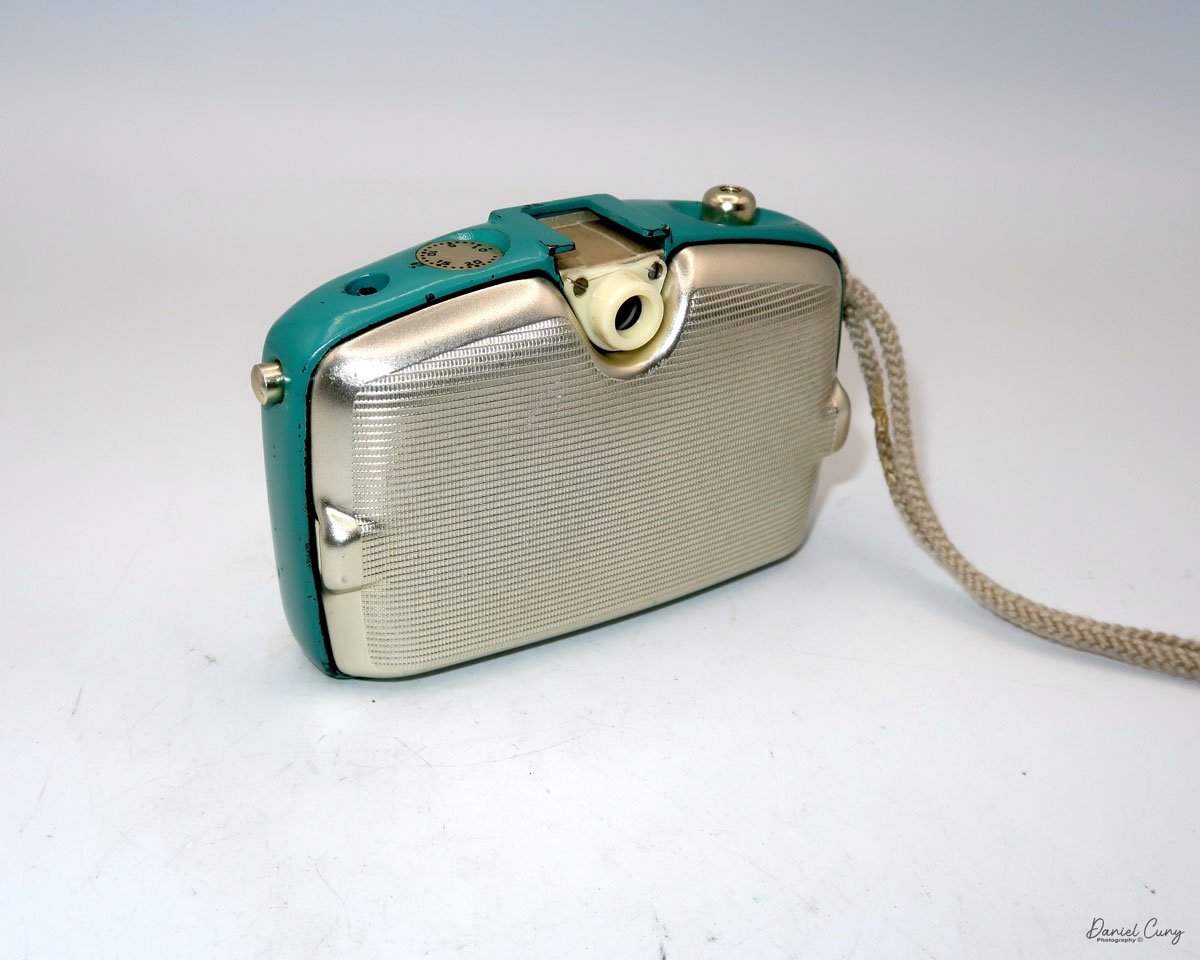
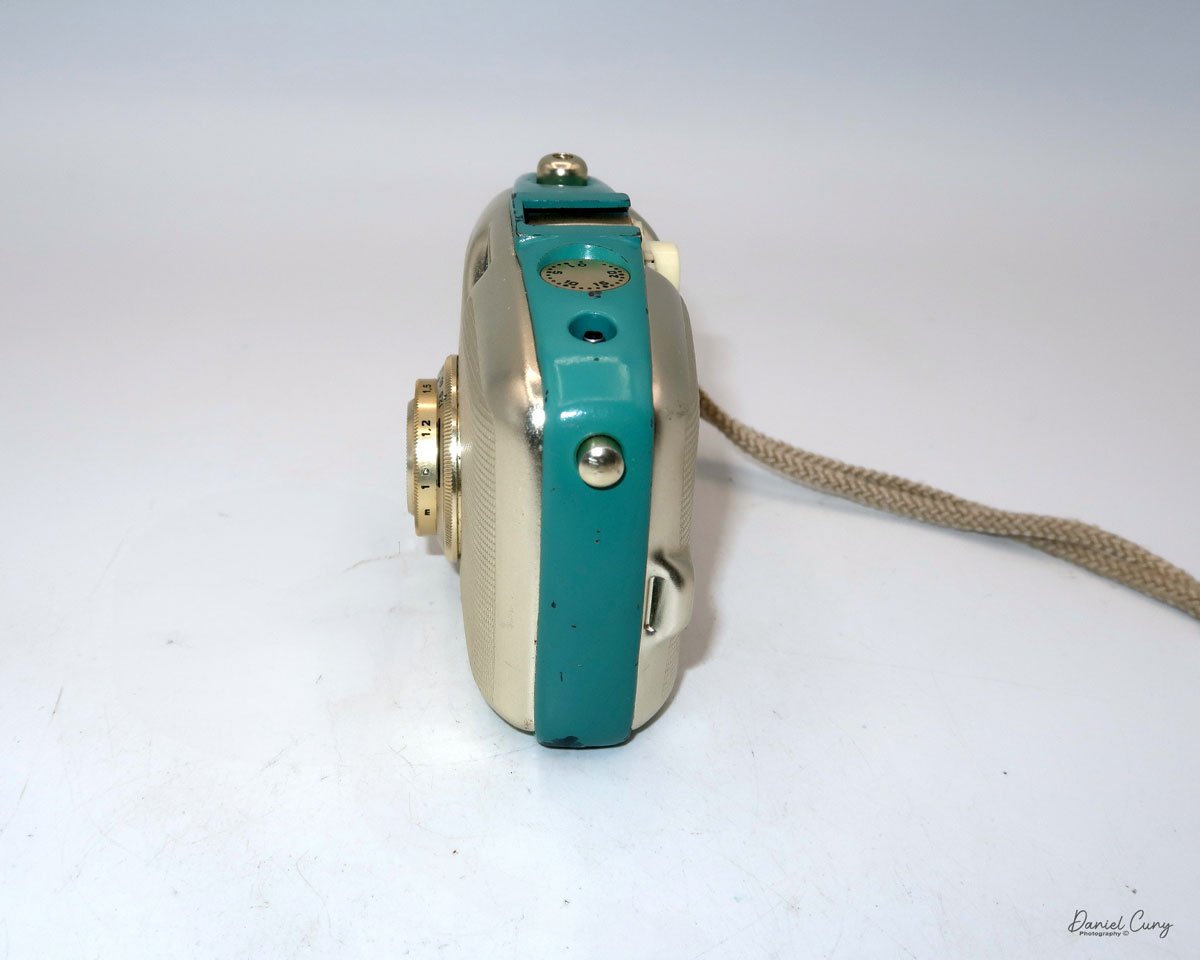
Around the lens, and closest to the camera body, is a ring that controls the shutter speeds, which range from 1/125 to 1/30, and a square that represents timed exposures. Inside the shutter speed control is the lens's focusing ring, which focuses down to 1m. Inside the focusing ring are the lens's aperture settings, which go from F/3.5 to F/22. On the Penti camera, these are awkward to move. Now that I've shot with the camera, I understand why they added the small knobs to the updated Penti I and II model cameras. These are the only settings on the camera, except for the frame counter, which is reset to zero using a wheel located inside the camera.

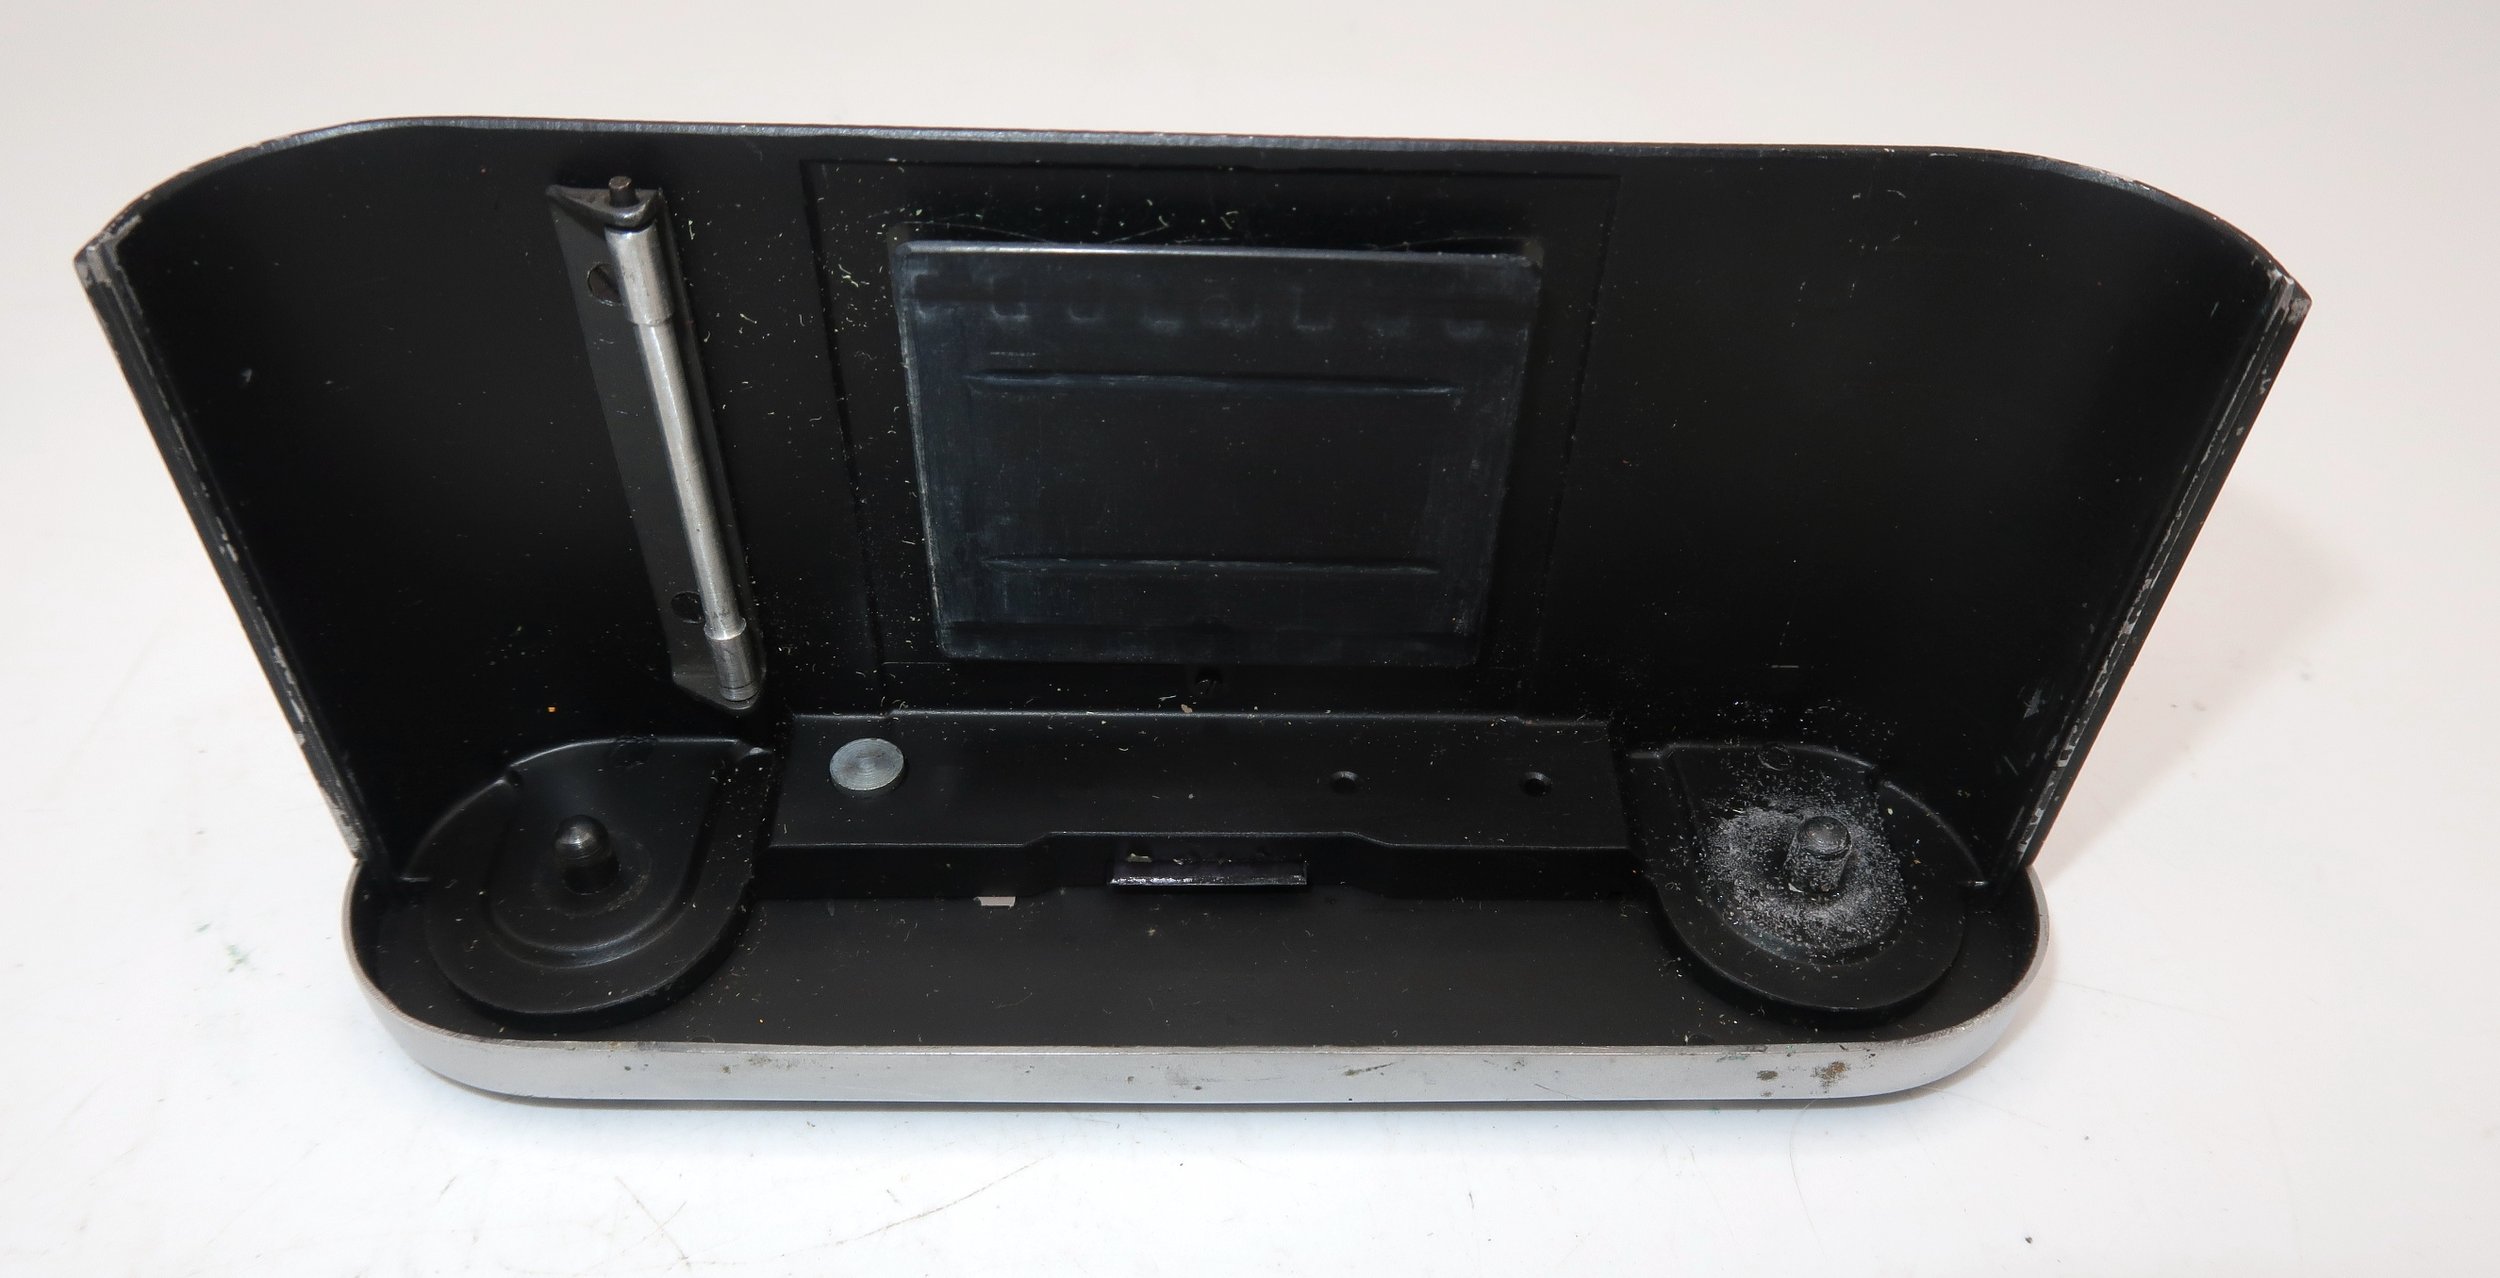
To remove the back to load the film, there are two grips molded into the back of the camera that you grab and pull the back away from the camera body. The back is held in place with two spring clips that engage with the molded grips to secure it to the camera body.

 Once you have the back off the camera's body, you see the two Agfa-style film cassettes, along with a silver pressure plate that swings down when loading the film and a sliding bar that holds the take-up cassette in place. The nice thing about these film cassettes is that nothing is holding the film inside: no tape or clip is used. The film is loose inside the cassette and has just been wound onto a spool.

To load the Agfa style cassettes, insert 35mm film. Luckily for me, I just purchased a 100' roll of B&W film, which I just loaded into my bulk film loader, so I have plenty of film. Just remember, you don't need a lot of film because you're getting twice as many photos on the roll. 

 Here is the procedure I used to load the cassettes. I removed the film cassettes from the camera and, along with my bulk film loader, placed them in a dark bag. I cut off a piece of film, approximately 2-3 feet long, from my bulk loader and slid the end of the film into one of the cassettes, ensuring the film's emulsion faced down, just like any 35mm film. Once I pushed the film into the film cassette, I removed it from the dark bag and trimmed the exposed film's corners.

I placed the cassette with the film inside on the left side of the camera's body, pulled down the pressure plate, and gently slid the trimmed end of the film into the take-up spool on the right-hand side. I snapped the shutter, and the film advancing rod popped out of the camera's body. The film is transported from the film cassette to the take-up cassette by a piece of metal with two prongs that push the film into the take-up cassette when the film advancing rod is slid into the camera's body. 

 When you take the photo, the pronged metal piece disengages from the film's sprockets. It moves to the left, so when you push the rod in, the pronged piece of metal grabs the film's sprockets and pushes the film from the cassette on the left to the take-up spool on the right. At this point, flip up the pressure plate, and immediately to the left of the viewfinder is a thumb wheel that allows you to zero out the frame counter, indicating the number of photos you've taken. Pop the film back onto the camera body, ensuring it's positioned correctly, and then start taking pictures.

The problem in my circumstance was that, since I didn't know how long the film I cut was, I didn't know how many photos I'd get on the unknown length of film I cut in the dark bag. The good or not-so-good news is that, with these cassettes, you don't know when you reach the end of the roll because you're transitioning from one cassette to another. There's no rewinding the film into the cassette. When you're done with the roll, the pronged metal piece has no more film to push into the take-up cassette, and a film tail (the end of the film) protrudes from the take-up spool.


My Results:

Now that I had film loaded in the camera and my trusty Sekonic L-308 meter with me, I took general meter readings. I then took our dog for a walk through the neighborhood. I snapped a few photos, both vertically and by turning the camera to get a few horizontal images. Here are the results from my walk with Ernie.

Conclusion:

What a fun camera to shoot with. It's small, compact, and fits easily into my pocket. The film advance rod popped out as it should, the viewfinder framed the images well, and there were no snags on transporting the film from one cassette to the other, which is what I was most worried about when using it.

 The few minor drawbacks I have with the camera are that, with my larger hands, the settings were a bit clumsy, but not too difficult to use once I got accustomed to their location. Additionally, I was unsure of how many images I had taken on the film, so I had to insert the film cassette. Out of the approximately 2 feet of film I put in the film cassette, I received 22 good images on the negatives, two of which were partial frames.

I also seem to have a slight light leak coming from either the bottom of the camera, as there’s a consistent bright area on my photos, which I’ll need to investigate. The images also look to have an “infrared” glow to them, which I liked.

 To read about any of the other cameras reviewed, click the link.

 I also sell cameras, lenses, and other odd camera items on my eBay store, Cuny's Camera and Photo. Stop by and go shopping.

 Thank you for taking the time to read about this fantastic little camera. I'd love to hear from you, so please email me with any comments or concerns you have about any of my reviews.

 Until next week, please be safe.

Futura-S Camera

My Futura-S camera.

As a camera collector for over 50 years, I was unaware of the Futura cameras for almost 45 years. It wasn't until a friend and fellow collector mentioned the Futura camera that it stuck in the back of my mind, as I haven't come across one in all these years of collecting.

 After hearing about the Futura cameras, I did some research and had many questions: How well were they built? How many lenses were available? How many different models did they offer? What lens mount did the camera offer? So I pulled out my trusty camera bible, McKeown's camera guide, and started to learn about the little-known (to me) brand of Futura cameras.

Futura Logo on the camera

Having purchased my Futura-S camera in a "lot" of cameras purchased, and it wasn't until I received the box of cameras that I noticed one of the cameras was the Futura-S. The only thing in the photo of the camera "lot" was the back of the brown case. The top of the case was missing, so I figured it was some random or very common camera that I've owned in the past, but when I took the camera out of the case, the Futura was in surprisingly good condition and seemed to be working, too.

 Picking up the camera, I set the shutter speeds to higher speeds to see if the shutter fired, and it did. The transport moved and cocked the shutter. The lens looked clean, and then I tried some of the slower speeds on the camera. That's where I ran into some difficulty. The slower speeds locked up the shutter, and it wasn't until I reset the shutter speeds to a higher speed that the shutter closed, and I was able to cock the shutter again.

 One of my first thoughts was I wanted to run some film through the camera to see how it handled it. Then, I felt compelled to write about my experience with the camera and how it was handled, knowing I couldn't use any shutter speed lower than 1/50 in my testing experience.

History:

Fritz Kuhnert founded Optische Anstalt in Freiburg, Germany in 1942. The company initially manufactured optical equipment for the German military during World War II. The factory was bombed and destroyed during the war. In 1946, Fritz rebuilt the company in Gundelfingen, a nearby town, and concentrated his efforts on producing consumer cameras due to the growing photography market.

 1947, the company introduced its first camera at Photokina, the Efka 24. It was a simple scale-focus camera that used 35mm film to produce 24x24mm images. The name "Efka" was derived from the phonetic spelling of Kuhnert's initials, "FK." In 1950, the company introduced the Futura, a more advanced 35mm rangefinder camera with interchangeable lenses and a proprietary screw mount. The lenses were named after Kuhnert's family members: Elor (his wife Elenore), Evar (his daughter Eva), and Petar (his son Peter). 

 In 1951, due to financial difficulties, Kuhnert sold the company Hamburg ship-line owners Ernst and Eduard Komorowski, who renamed it Futura Kamerawerk GmbH. Under their ownership, the company produced four different 35mm rangefinder cameras, including the Futura S, which was introduced in 1952. This model featured a Synchro-Compur shutter and maintained its predecessor's distinctive design and lens mount. They also produced two of the fastest standard 50mm and portrait 70mm lenses of the time with a maximum aperture of F1.5, named Futura Frilon.

 Futura Kamerawerk struggled to compete with established German brands like Leica and the emerging Japanese camera industry despite producing high-quality cameras. The company ceased operations in 1957 and closed the factory in 1958. Today, Futura cameras are valued by collectors for their unique design and historical significance.

My Camera:

My Futura-S is 5" wide by 3" tall by 2.5" deep with my Futura Elor 50mm f2.8 lens. Without the fitted leather case, my camera weighs 1 lb. 9.4 oz. The Futura-S is a very well-made camera but a bit heavy due to its solid cast metal body. I prefer heavier cameras because they fit my hands better. Cameras like the Nikon F body, the Robot Royal, and now the Futura cameras feel comfortable.

The "S" in the Futura line stands for Syncro-Compur, or the shutter system used on this camera. All of the exposure controls are located around or on the lens. The shutter speed dial is located on the outside of the lens area and is moved by two knobs on opposite ends of the dial. The shutter speeds go from 1/500 to 1 sec. along with "B". Also, on the bottom of the shutter speed ring is "Futura Freiburg."

 The focus is controlled by the ring just inside the shutter speed control. This ring has a larger knob sticking out to change the focus as needed to create a sharp focus. The aperture ring is on the lens barrel itself. The aperture range is f/2.8 to f/22. There is an even larger knob located on the outside of the shutter speed ring, which sets the flash sync for "X," electronic flash, or "M," bulb flash.

To remove the lens, you unthread it from the body. The lens has a proprietary thread mount of 33.8mm, so it's not your usual Leica or Pentax thread mount system. I must say, the lens has a very fluid and lean look to it. On the back of the camera is the rangefinder viewing eyepiece. The rangefinder on my camera is exceptionally bright and accurate. We'll see when I test the camera with film in it.

On top of the camera going from left to right, is the rewind knob, which has an arrow on top to show the direction to turn to rewind the film into the cassette. Next is a cold shoe used for a mounted meter or flash attachment.  Behind the cold shoe is a pointer switch, which you can point to either  SW, 'Schwartz/Weiss' (Black & White); C, 'Color'; CN, 'Color Negative.', which is a reminder to the photographer to the film in the camera. Thank you, David Babsky and Mike Eckman, for this information. 

 Next to the cold shoe is a lever which on my camera is a non working on my camera self-timer. Above that and slightly to the right is an additive frame counter. Twist the dial to "0" when you load the film, and the frame counter increases. Just below the frame counter is the cable release threaded shutter release. An interesting item about the shutter release is you can "lock" it down for longer exposures by turning it to the right after depressing it, which locks it in the open position until you turn it to the left to release it. 

Having the locking shutter release is good if you don't have a cable release, but the bad thing is you're still moving the camera a bit during exposure, which might create blur in the image. On the far right is the film advance knob. This turns counterclockwise to advance the film.

 Four nubs on the bottom of the camera lift it and give it stability when placed on a flat surface. Also, there are two knurled buttons, one on the left, to release the drive gear and allow the film to be rewound into the film cassette. The larger one in the center of the camera opens the back of the camera to load film. Slide the larger button toward the arrow pointing to "O," and the back will come off by pulling it down.

Once the back is off the camera, the take-up spool comes out for more effortless film loading. The camera's serial number is imprinted on the metal plate under the frame window. My serial number is S11244. When you put the back onto the camera and slide it up, it automatically locks onto the camera.

 My Results:

Now that I have put a roll of T-Max 400, 24-exposure film into the camera, which I purchased out of date a few months back, I want to walk around the neighborhood to take photos. Unfortunately, my wife was taking a nap, so I needed to keep my eye on our two dogs, who have a tendency to bark when out of sight. So, I just stayed mainly in my backyard to take the photos.

 I have to say the camera was extremely fun to shoot with, but the one thing that kept bugging me was the camera advance knob. I'm just not used to turning the knob counterclockwise to advance the film. It's not that big of a deal, but I kept turning it clockwise for the first few frames to advance the frame. Once I had it in my head that the winding knob was "backward," it went smoothly, and the camera did a fantastic job. 

 Here are a few of the frames from my backyard.

Conclusion:

I don't know how I didn't know about the Futura-S for so many years. It's a fantastic German rangefinder camera with excellent optics. While my camera could use a complete CLA to bring it up to excellent condition, I have to say that for its condition, it did great.

 I can see why this is a desirable camera, especially for the discounted price from top brands like Leica or Alpa. The camera is compact and easy to use, and the rangefinder produces fantastic results.

 Thank you for taking a few minutes from your day to read about this underappreciated German rangefinder built in the 1950s.

 I'd love to hear from you if you have any questions or comments about this camera.

 Until next week, please be safe. 

Olympus O-Product Camera

My Olympus O-Product Camera

In high school, my good friend Greg Copeland introduced me to the Olympus camera system in the early 1970s. He was the first person I knew who bought into the Olympus OM system with the OM-1, which I believe was in 1973. At that time, Olympus was very innovative, making the most miniature SLR camera system, which included a complete line of small, compact lenses with very nice optics. I can still remember Greg telling me how much he enjoyed how nice the camera was made. He would take the camera with him all the time. At the time, I was using either the Topcon Super D or, possibly, I had moved on to shooting with a Nikon Nikkormat.

 I started working in the photo industry in late 1973 when I was hired as a seasonal employee in the camera department at my local K-Mart. That position didn't last long, but it led me to work at the local camera store chain about a year later. I was hired to work in the warehouse and handle all the camera and lens repairs.

 When I started working at the local camera store, the Olympus OM system had a decent hold on the market. However, it was still lagging behind the big kids in the marketplace. Olympus was continually pushing the envelope with many new and exciting products like the terrific XA camera line, which, to this day, is one of my favorite cameras. Olympus introduced new additions to its system yearly, which always had customers in the store talking about its products.

Olympus O camera & Flash

 I tell you this because I have seen many odd and unusual cameras introduced by camera companies over the years, and many of them came out in the 1980s to the mid-1990s. The Minolta Prod 20, the Yashica Samurai, and Canon had the Epoca series of cameras. There's a great blog on some of these cameras on the Kosmo Foto Blog.

 One of the cameras that greatly impacted me when it was introduced in 1988 was the Olympus O-Product camera. It was a limited edition, and only 20,000 cameras were made. The Olympus O-Product camera had a very unusual, art deco look of a circle in a square and was made of brushed aluminum. At the time, the cost was prohibitive for me to purchase, but I remember thinking that someday, I'd really like to have one in my collection. Its unique design always intrigued me.

The Company:

The history of Olympus cameras is a story of innovation, precision engineering, and a relentless pursuit of compact, high-quality imaging tools. Founded 1919 in Japan as Takachiho Seisakusho, the company initially specialized in microscopes and thermometers. In 1949, it was renamed Olympus Optical Co., Ltd., and it soon began making a name for itself in photography.

 Olympus entered the camera market in 1936 with the launch of the Semi-Olympus I. This bellows camera used the German-made Zuiko lens, setting the stage for a signature brand name synonymous with Olympus Optics. However, it was not until the post-war period that Olympus truly revolutionized the photography industry.

 One of the most pivotal moments came in 1959 with the release of the Olympus Pen. Designed by the legendary Yoshihisa Maitani, the Pen was a half-frame 35mm camera, meaning it could shoot twice as many exposures per roll of film. It was compact and affordable and helped democratize photography for a wider audience. The Pen series enjoyed massive popularity and marked Olympus as a leader in miniaturization without sacrificing quality.

 The next major innovation came in 1972 with the OM system. Again spearheaded by Maitani, the Olympus OM-1 was a compact, lightweight SLR (single-lens reflex) camera that offered full functionality in a significantly smaller body than its contemporaries. This system appealed to professionals and enthusiasts alike, reshaping expectations for what an SLR could be.

 In the digital age, Olympus continued to push boundaries. In 1996, they released their first digital camera, the Camedia C-800L. However, the Four Thirds system, introduced in collaboration with Kodak in 2003, made a lasting mark. This was followed by the Micro Four Thirds system in 2008, which eliminated the mirror box of traditional DSLRs, allowing for even more compact and lightweight cameras. The Olympus PEN E-P1, released in 2009, revived the classic Pen design in a digital form and was among the first mirrorless cameras to gain traction in the market.

 In 2020, Olympus exited the camera business, selling its imaging division to Japan Industrial Partners, which rebranded the line as OM SYSTEM. Despite the transition, Olympus's legacy lives on through continued innovation and the enduring influence of its designs on modern photography.

The Camera.

I've always thought of the Olympus O-Product camera as more of an art piece rather than a functioning camera, but it is fully functional. In its simplest form, the Olympus O-Product is a "point-and-shoot" camera. There are no settings on the camera that the photographer needs or can really set, which makes it incredibly simple and straightforward to use.

Camera’s number from production lot.

 The camera is relatively small, measuring 4" wide by 3.5" tall and 2" deep. These measurements are for the camera alone and not with the flash attached. If I add the detachable flash, the camera is 5.75" wide by 4" tall. The camera weighs just under 1 lbs. at 15.2 oz. with the flash attached. My camera is number 11289 out of 20,000. The camera also features a unique circular viewfinder and a distinctive shutter button, adding to its charm and functionality.

 The Olympus O-Product camera is powered by 2-AAA batteries that fit into the camera's bottom. The 2-AAA batteries also power the detachable flash. The camera is very simple and basic. Once the batteries are in the camera, you can load film, which is autoloading. There is no need to set the film's ISO because the camera has DX coding for the film loaded. Once you put the leader on the take-up spool and close the back of the camera, the camera automatically winds the film to frame number one.

 To turn on the camera, a lever you pull down on the front opens the front door, exposing the 35mm f3.5 Olympus lens. To turn the camera off, close the front door. There are no shutter speeds to set as the camera has a programmed electronic shutter. The camera is also autofocusing. In the center of the viewfinder,  you'll see a white circle when you depress the shutter button halfway on the front of the camera. In that case, a light will light up next to the "AF" in the upper right-hand corner, letting you know the camera has focused on the subject, and you can press the button to take the photo. Once you take the picture, the camera automatically advances to the next frame. Once you've taken all the photos on the roll of film, the camera will automatically rewind the film into the film cassette.

 The flash for the camera is detachable, so if you don't need it, you can take it off. To take the flash off, you need to unscrew the mounting screw, and the flash will come off the camera. You still need to unplug the cord from the flash to the camera, which pulls out, so it's very simple. To attach the flash, you screw it onto the camera and plug in the cord. If the camera needs the flash, a red ready light on top of it lights up when the flash is ready and will fire if it determines it needs the extra light to make a proper exposure.

 There are two buttons on the camera's top next to the flash attachment that allows the photographer to make adjustments when shooting.  One of the buttons is a self-timer. If you want to get into the photo, press the self-timer, giving you 10 seconds to get into it. The other button is a rewind button. Suppose, for some reason, you want to change to a different type of film. In that case, you can depress the rewind button. The camera will automatically rewind the film back, leaving a little bit of the leader exposed so you can re-load it when you want to finish that roll of film.

My Results.

I put batteries in the camera and flash, loaded it with a roll of Ilford Plus 50 black and white film, walked through the house, and strolled around the block taking photos. The camera determined if the flash was needed, which was pretty fun. It was too simple for my taste as sometimes I like to use fill flash, but this camera didn't allow me to do so. I could trick the meter by putting my finger over the meter area, but for this blog post, I wanted to be free and let the camera do all the work.

 Here are a few of the photos taken on my walk.

Conclusion.

Using such a simple but beautifully made camera was a lot of fun. The camera produces very sharp images and is extremely easy to use. When I was working at the camera store, we used the term PHD cameras, which always meant "push here dear," meaning the camera was very simple for either men or women. Put the camera to your eye, point it at your subject and "push here dear".

 As I mentioned earlier, the Olympus O-Product camera is more of a work of art or statement camera that looks terrific in the collection. It's not really made to be used on a daily basis, but using it every once in a while is good. I wouldn't want the camera to get more scuffed than it already is, but taking the camera out was fun, as was running film through it.

 Thank you for taking a few minutes from your day to read about this art piece that can also be used as a camera.

 Until next week, please be safe.

Leica I

My Leica I camera

I purchased the Leica I camera and accessories around 6 years ago when I saw a local ad of someone wanting to sell off a recently departed family member's old cameras. I responded to the ad, and for some reason, the person liked my passion for cameras and photography, so when I heard that the camera they had from a grandparent was a Leica, it piqued my interest. They had mentioned that the camera was in good shape and had some accessories in a case; I told them I was interested in seeing what they had.

 I try not to get into situations where you meet someone with some valuable equipment at a random location, so for safety reasons for both parties, we met at a local police station, which was agreeable to both. When they pulled out the case and I saw it was an early Leica, my heart fluttered a bit. 

My Leica I outfit

 Pulling the camera from the case, I found it in excellent condition and working. All the shutter speeds sounded accurate to the ear, and the rangefinder and extra film cassette were in the metal container and within the case, too. The owner wanted to be sure the camera was going to a good home and not just being sold. I reassured the person that I planned on keeping the camera and shooting with it, which they loved.

 Since adding the Leica I to my collection, I've made a point to keep it in top condition. Every now and then, I take it out and give the shutter a few test clicks to ensure it's in good working order. However, due to my busy schedule, I hadn't had the chance to load a roll of film and actually use the camera until recently.

 I wanted to write about the Leica 1 for my blog about a month ago.  I took the camera out and started to put a roll of film into the camera to shoot with it, and the shutter jammed. What bad luck! I called my friend Allen Wade at CameraWerks in NY, who always does a terrific job servicing my cameras and lenses. I sent the Leica 1 along with a few other items to him to get serviced. About a month later, I received the cameras back from him, and they were in fabulous condition. At this point, I put a fresh roll of film into the camera to see how the camera worked so I could write about it.

The Company:

Oskar Barnack was a German optical engineer who revolutionized photography by inventing the first practical 35mm camera, the Leica I. Born in 1879, Barnack initially worked in the optical industry, eventually joining Ernst Leitz Optische Werke, a German company specializing in microscopes and optical instruments. His pioneering work in miniaturizing cameras led to the creation of the Leica, which forever changed the way photographs were taken.

Ad for Leica 1

 Before Barnack's innovation, photography relied on bulky, cumbersome cameras that used large-format glass plates or film sheets. These devices were difficult to transport and required long exposure times, limiting their usability. An enthusiastic amateur photographer, Barnack sought to develop a more compact and convenient camera system that would still produce high-quality images. He turned to 35mm cinema film, which was already used in the motion picture industry, and repurposed it for still photography. He aimed to create a small, lightweight camera that could capture multiple images on a single roll of film.

 Around 1913-1914, Barnack developed a prototype of what would later become the Leica (short for "Leitz Camera"). This early model, known as the "Ur-Leica," used perforated 35mm film and a horizontal transport mechanism. The key innovation was that the film was advanced in small increments, allowing multiple exposures on a roll rather than requiring a single frame per exposure. Barnack also incorporated a focal-plane shutter, providing precise control over exposure times.

 The outbreak of World War I delayed the commercialization of the Leica. Still, in 1924, Ernst Leitz II, head of the Leitz company, decided to move forward with production. The Leica I was officially introduced at the Leipzig Spring Fair in 1925, marking the beginning of the 35mm camera revolution. The camera instantly succeeded due to its portability, superior image quality, and innovative design.

 Leica cameras quickly became popular among professional and amateur photographers, particularly in journalism and street photography. Their ability to take quick, candid shots without cumbersome equipment made Leica the camera of choice for legendary photographers like Henri Cartier-Bresson and Robert Capa.

 Over the decades, Leica continued to innovate, introducing models such as the Leica II (1932) with interchangeable lenses and the Leica M series (1954), which refined the rangefinder design. The company also played a crucial role in developing optical advancements, such as high-quality lenses like the Summicron and Noctilux.

 Today, Leica remains an iconic brand known for its precision engineering and commitment to craftsmanship. Oskar Barnack's vision laid the foundation for modern photography, and his pioneering work continues to influence camera design and photographic culture worldwide.

My Camera:

The first thing I noticed when I started to use the Leica I was how compact the camera is. When the lens is retracted, the camera is one you can put into your coat pocket to have handy when traveling or just for everyday use. The camera is 5.25" wide by 2.5" tall, including the winding knobs and viewfinder, by 1 5/8" deep when the lens is retracted and 2.5" deep when the lens is extended. My Leica 1 weighs just under 1 lb. and comes in at 15.6 oz without film loaded into the camera. The serial number on my camera is 19569, which, according to the lists online, the camera was made in 1929, along with a bit over 8,000 made that year. The Leica 1 cameras were made between 1926 and 1931 and were popular, producing approximately 70,000 cameras during that time. My camera comes with a Leitz Elmar 50mm f3.5 lens, and I've looked everywhere but do not see a serial number on the lens. This could be because the camera didn't have interchangeable lenses, and the serial number for the camera was enough.

The early Leica is different from the later models as the rangefinder is separate and needs to be attached to the accessory shoe for the photographer to achieve fine focus on the subject. Once the photographer uses the rangefinder, they need to transfer the focus distance shown on the rangefinder to the lens focus before taking the photo, so the process is longer and more tedious. The viewfinder on the top is for composition purposes only.

 Also, the lens needs to be extended from the camera body and "locked" into position by turning the lens clockwise until you feel the lens cannot be turned anymore. Now you're in the "taking" position of the lens. To retract the lens for transportation or to put it away, turn it counterclockwise, press it back into the body, and put the lens cap on so you don't damage the optics. The lens on the Leica 1 isn't interchangeable due to a pin at the 11:00 position on the camera body, which prevents the lens from being unscrewed from the camera body. The pin also limits the lens's ability to focus only from the minimum focus distance of 1.5 feet to infinity. Unscrewing the pin will remove the lens from the body for servicing or cleaning if needed.

Also on top of the camera is the shutter speed dial with speeds of 1/500, 1/200, 1/100, 1/60, 1/40, 1/30, 1/20, and "Z" for timed exposures. You must lift and turn the dial to change the shutter speed. Still, it's always recommended to do so after you cock the shutter, which is done by winding the film advance lever until it stops. The shutter release is next to the film advance lever and just behind the switch for film advance, which is in the "A" position, flipping it to "R" for film rewind.

Loading the film on a Leica is different than what people are now used to when they load a 35mm camera. The back on early Leica's and rangefinder cameras do not swing open. You must remove the base plate by turning a switch on the bottom to the "open" position, then pull the baseplate off the camera. You can take out the film's take-up spool, which you can grab and pull out. The easiest way to load the camera is to put the film leader into the take-up spool, then pull a bit of the film leader out so you can slide the film cassette and take-up spool into the camera body at once. Push the cassette and take the spool into position, ensuring the film is behind the shutter. Put back on the baseplate and turn the switch to "locked." 

Before I wind to the first frame, I always take up the slack by turning the rewind knob a bit, so when I do wind to the first frame, I watch the rewind knob turn so I know the film is transporting across the shutter. Set the frame counter to 1, which is around the film advance knob and can be moved by two pegs on either side of the knob. Double-check to ensure the film advance switch is in the "A" position and wind to your first frame.

 Now that I have the camera loaded with film, I'm going to take a stroll through the neighborhood and see how it performs.

My Results.

After attaching the rangefinder to the camera, I wanted to get the whole experience of what it was like to photograph with the Leica I, as people did almost 100 years ago. I also have my trusty Sekonic L-308X-U around my neck for accurate metering; I went walking through the neighborhood, focusing on the subject, then transferring from what the rangefinder said the focus. Using the meter to get proper meter readings and setting both the shutter and aperture to the meter settings. I really took my time taking photos with this camera.

 Here are a few of the different images I took with the early Leica I camera.

Conclusion:

I can see why people would have liked and wanted to use this camera almost 100 years ago. It's small, compact, and lightweight. The process of taking photos was slower. Still, it was fun compared to what they needed to do 100 years ago. As a photographer, taking your time, metering your subject, focusing on your subject, and composing the photo was fun. It's much different than what we have now with autofocus, automatic metering, and film advance.

I made a short video on the Leica 1 Camera, which shows the controls and loading the camera with film.

 I want to start using the Leica I regularly. It's quiet to shoot with, the lens is sharp, and it's small and compact. Overall, it's a great and fun camera.

 Thank you for taking a few minutes from your day to read about this old gem of a camera.

  I'll be taking next week off, as I'll be helping at a photo conference all week. I'll see you in a couple of weeks. Until then, please be safe.