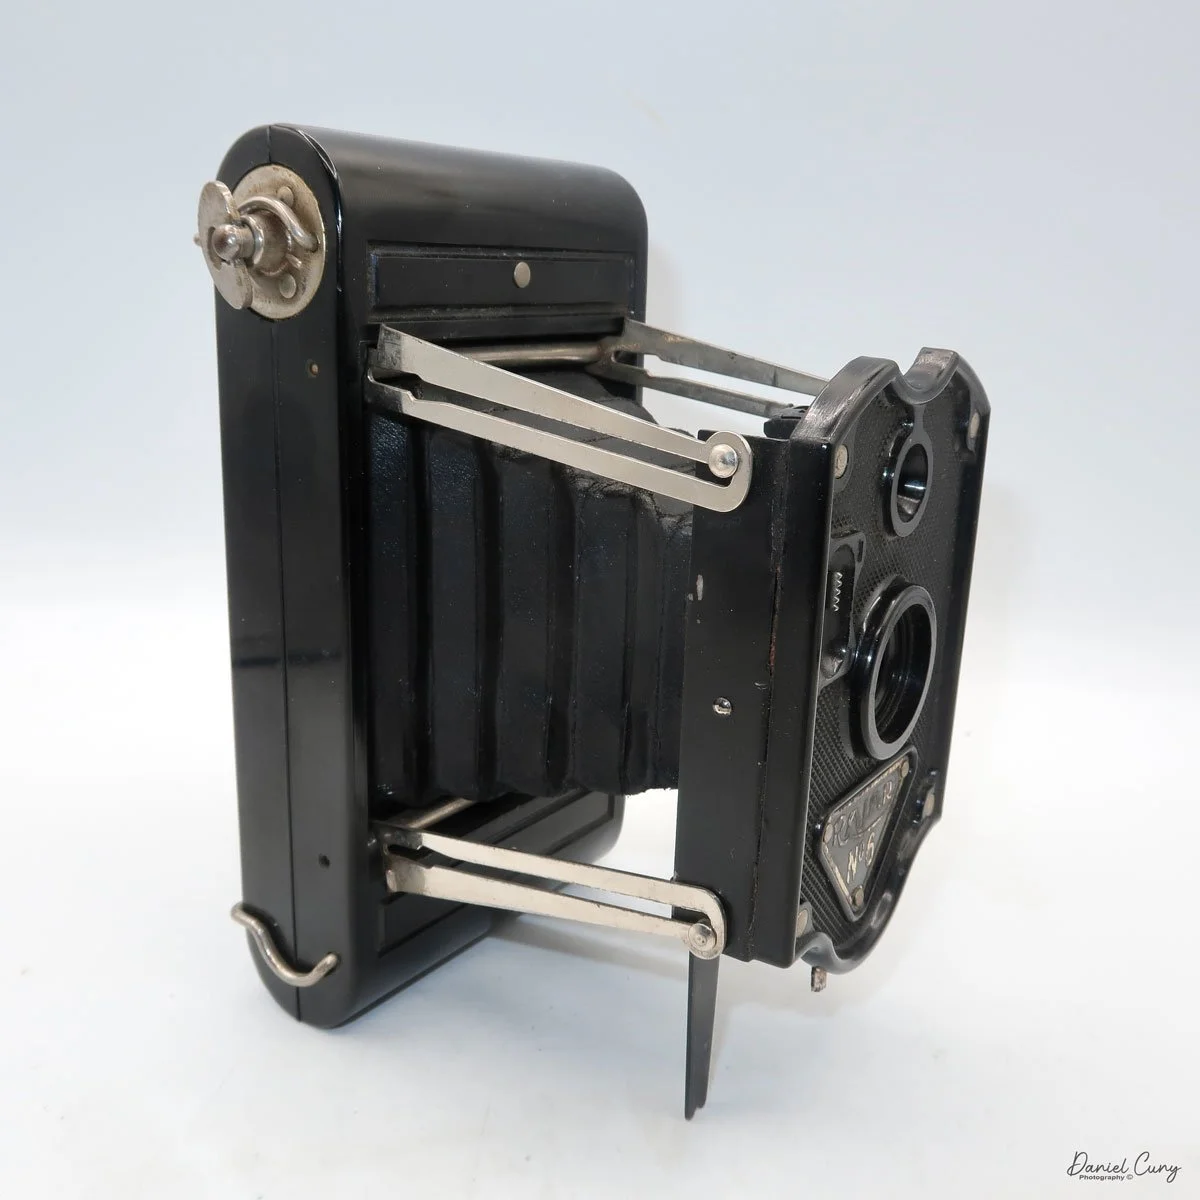
Futura-S Camera

My Futura-S camera.

As a camera collector for over 50 years, I was unaware of the Futura cameras for almost 45 years. It wasn't until a friend and fellow collector mentioned the Futura camera that it stuck in the back of my mind, as I haven't come across one in all these years of collecting.

 After hearing about the Futura cameras, I did some research and had many questions: How well were they built? How many lenses were available? How many different models did they offer? What lens mount did the camera offer? So I pulled out my trusty camera bible, McKeown's camera guide, and started to learn about the little-known (to me) brand of Futura cameras.

Futura Logo on the camera

Having purchased my Futura-S camera in a "lot" of cameras purchased, and it wasn't until I received the box of cameras that I noticed one of the cameras was the Futura-S. The only thing in the photo of the camera "lot" was the back of the brown case. The top of the case was missing, so I figured it was some random or very common camera that I've owned in the past, but when I took the camera out of the case, the Futura was in surprisingly good condition and seemed to be working, too.

 Picking up the camera, I set the shutter speeds to higher speeds to see if the shutter fired, and it did. The transport moved and cocked the shutter. The lens looked clean, and then I tried some of the slower speeds on the camera. That's where I ran into some difficulty. The slower speeds locked up the shutter, and it wasn't until I reset the shutter speeds to a higher speed that the shutter closed, and I was able to cock the shutter again.

 One of my first thoughts was I wanted to run some film through the camera to see how it handled it. Then, I felt compelled to write about my experience with the camera and how it was handled, knowing I couldn't use any shutter speed lower than 1/50 in my testing experience.

History:

Fritz Kuhnert founded Optische Anstalt in Freiburg, Germany in 1942. The company initially manufactured optical equipment for the German military during World War II. The factory was bombed and destroyed during the war. In 1946, Fritz rebuilt the company in Gundelfingen, a nearby town, and concentrated his efforts on producing consumer cameras due to the growing photography market.

 1947, the company introduced its first camera at Photokina, the Efka 24. It was a simple scale-focus camera that used 35mm film to produce 24x24mm images. The name "Efka" was derived from the phonetic spelling of Kuhnert's initials, "FK." In 1950, the company introduced the Futura, a more advanced 35mm rangefinder camera with interchangeable lenses and a proprietary screw mount. The lenses were named after Kuhnert's family members: Elor (his wife Elenore), Evar (his daughter Eva), and Petar (his son Peter). 

 In 1951, due to financial difficulties, Kuhnert sold the company Hamburg ship-line owners Ernst and Eduard Komorowski, who renamed it Futura Kamerawerk GmbH. Under their ownership, the company produced four different 35mm rangefinder cameras, including the Futura S, which was introduced in 1952. This model featured a Synchro-Compur shutter and maintained its predecessor's distinctive design and lens mount. They also produced two of the fastest standard 50mm and portrait 70mm lenses of the time with a maximum aperture of F1.5, named Futura Frilon.

 Futura Kamerawerk struggled to compete with established German brands like Leica and the emerging Japanese camera industry despite producing high-quality cameras. The company ceased operations in 1957 and closed the factory in 1958. Today, Futura cameras are valued by collectors for their unique design and historical significance.

My Camera:

My Futura-S is 5" wide by 3" tall by 2.5" deep with my Futura Elor 50mm f2.8 lens. Without the fitted leather case, my camera weighs 1 lb. 9.4 oz. The Futura-S is a very well-made camera but a bit heavy due to its solid cast metal body. I prefer heavier cameras because they fit my hands better. Cameras like the Nikon F body, the Robot Royal, and now the Futura cameras feel comfortable.

The "S" in the Futura line stands for Syncro-Compur, or the shutter system used on this camera. All of the exposure controls are located around or on the lens. The shutter speed dial is located on the outside of the lens area and is moved by two knobs on opposite ends of the dial. The shutter speeds go from 1/500 to 1 sec. along with "B". Also, on the bottom of the shutter speed ring is "Futura Freiburg."

 The focus is controlled by the ring just inside the shutter speed control. This ring has a larger knob sticking out to change the focus as needed to create a sharp focus. The aperture ring is on the lens barrel itself. The aperture range is f/2.8 to f/22. There is an even larger knob located on the outside of the shutter speed ring, which sets the flash sync for "X," electronic flash, or "M," bulb flash.

To remove the lens, you unthread it from the body. The lens has a proprietary thread mount of 33.8mm, so it's not your usual Leica or Pentax thread mount system. I must say, the lens has a very fluid and lean look to it. On the back of the camera is the rangefinder viewing eyepiece. The rangefinder on my camera is exceptionally bright and accurate. We'll see when I test the camera with film in it.

On top of the camera going from left to right, is the rewind knob, which has an arrow on top to show the direction to turn to rewind the film into the cassette. Next is a cold shoe used for a mounted meter or flash attachment.  Behind the cold shoe is a pointer switch, which you can point to either  SW, 'Schwartz/Weiss' (Black & White); C, 'Color'; CN, 'Color Negative.', which is a reminder to the photographer to the film in the camera. Thank you, David Babsky and Mike Eckman, for this information. 

 Next to the cold shoe is a lever which on my camera is a non working on my camera self-timer. Above that and slightly to the right is an additive frame counter. Twist the dial to "0" when you load the film, and the frame counter increases. Just below the frame counter is the cable release threaded shutter release. An interesting item about the shutter release is you can "lock" it down for longer exposures by turning it to the right after depressing it, which locks it in the open position until you turn it to the left to release it. 

Having the locking shutter release is good if you don't have a cable release, but the bad thing is you're still moving the camera a bit during exposure, which might create blur in the image. On the far right is the film advance knob. This turns counterclockwise to advance the film.

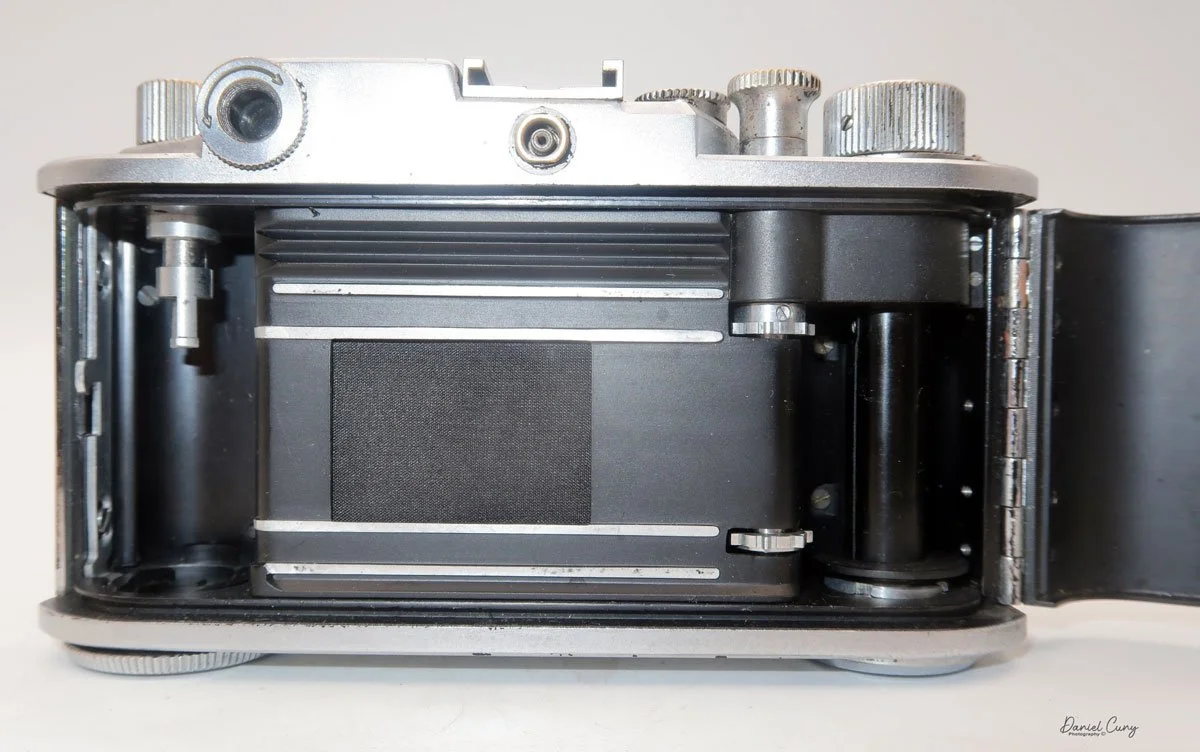
 Four nubs on the bottom of the camera lift it and give it stability when placed on a flat surface. Also, there are two knurled buttons, one on the left, to release the drive gear and allow the film to be rewound into the film cassette. The larger one in the center of the camera opens the back of the camera to load film. Slide the larger button toward the arrow pointing to "O," and the back will come off by pulling it down.

Once the back is off the camera, the take-up spool comes out for more effortless film loading. The camera's serial number is imprinted on the metal plate under the frame window. My serial number is S11244. When you put the back onto the camera and slide it up, it automatically locks onto the camera.

 My Results:

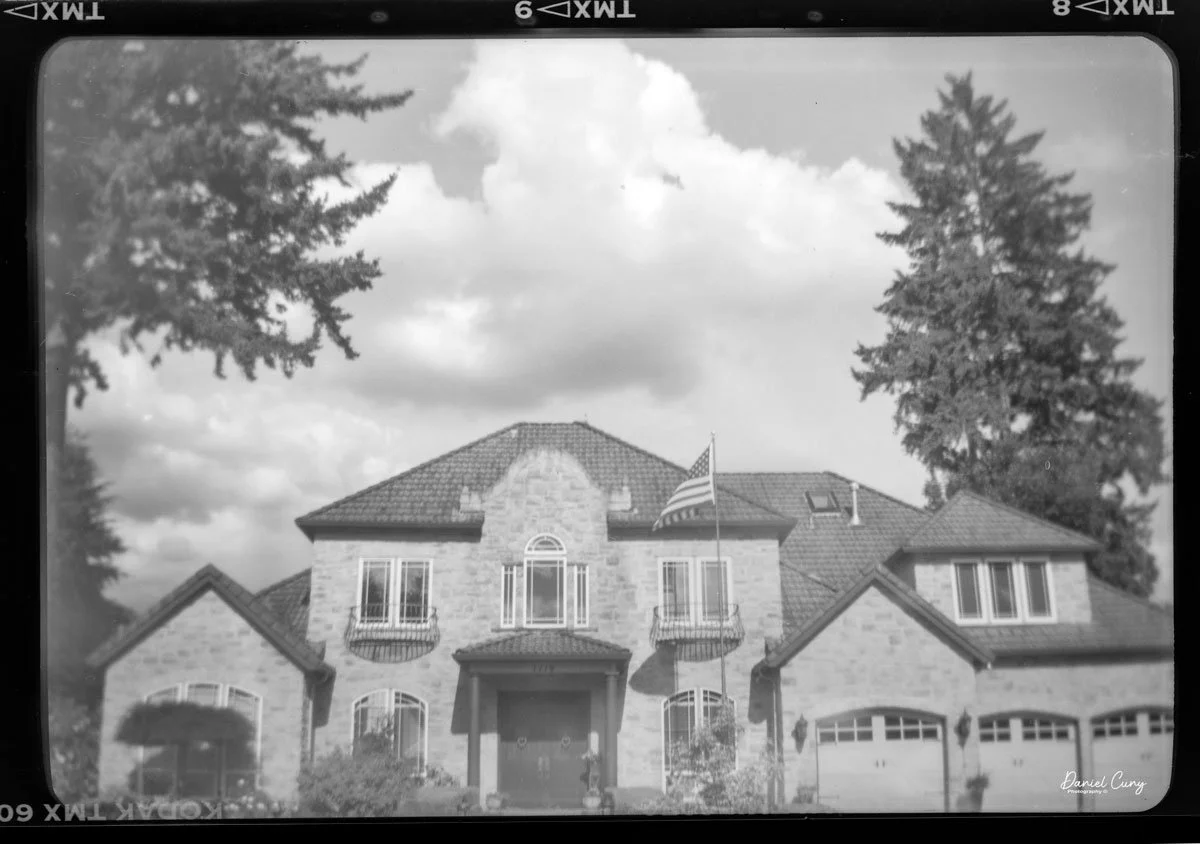
Now that I have put a roll of T-Max 400, 24-exposure film into the camera, which I purchased out of date a few months back, I want to walk around the neighborhood to take photos. Unfortunately, my wife was taking a nap, so I needed to keep my eye on our two dogs, who have a tendency to bark when out of sight. So, I just stayed mainly in my backyard to take the photos.

 I have to say the camera was extremely fun to shoot with, but the one thing that kept bugging me was the camera advance knob. I'm just not used to turning the knob counterclockwise to advance the film. It's not that big of a deal, but I kept turning it clockwise for the first few frames to advance the frame. Once I had it in my head that the winding knob was "backward," it went smoothly, and the camera did a fantastic job. 

 Here are a few of the frames from my backyard.

Conclusion:

I don't know how I didn't know about the Futura-S for so many years. It's a fantastic German rangefinder camera with excellent optics. While my camera could use a complete CLA to bring it up to excellent condition, I have to say that for its condition, it did great.

 I can see why this is a desirable camera, especially for the discounted price from top brands like Leica or Alpa. The camera is compact and easy to use, and the rangefinder produces fantastic results.

 Thank you for taking a few minutes from your day to read about this underappreciated German rangefinder built in the 1950s.

 I'd love to hear from you if you have any questions or comments about this camera.

 Until next week, please be safe. 

Rajar No. 6 Camera

My Rajar No. 6 camera

I don't know what it is about the Rajar No. 6 camera, but ever since I purchased my first McKeown's camera guide more than 40 years ago and spent hours leafing through the pages learning about all the different styles and shapes of cameras, I've always desired to have one in my collection.

 It wasn't until just a few months ago that I pulled the trigger and purchased one from a great reseller in the U.K. It was listed for parts that were not working. The seller was selling the camera for a friend and wasn't sure if it was in good working condition. They mentioned the shutter fired but couldn't guarantee the other working parts of the camera, so I took a chance and purchased it. I don't know why it took so long to get one.

 The shape of the face and the crosshatching on the camera's face drew me to it. It has a very classy and classic look, which is something I find on many cameras made during this timeframe.

 It took a while for the camera to arrive from the U.K., but it arrived last week, and I was anxious to see its physical condition. To my surprise, the camera was not only in excellent physical condition with no chips in the Bakelite, but the shutter was firing, and there was a roll of film still in the camera, which the seller failed to mention, so I was doubly happy.

 I took hold of the film advance knob to see if the film was advancing, and it was so at this point, I didn't see anything wrong with the camera. Not knowing how old the film was, I went outside to take the last few frames on the included old roll of film, and it wasn't until I got to the final frame I found out what was wrong with the camera. 

 I wasn't aware of what was so different in the film spool until I took the film out of the camera, which I needed to do in a dark bag since the camera stopped winding right after I took the final photo on the roll of film included with the camera.

 The Rajar No.6 camera has a special take-up spool written right there on the back of the camera, "only the Rajar No. 6 spool will fit this camera". I saw that when the camera arrived and at first I thought I couldn't shoot with it because it took a different or special size of film. Nope, it's the take-up spool. At least in my camera, the take-up spool is special and has a square tip that fits into the take-up spool instead of a slot that fits into most 120 spools. 

 It appears the Rajar No.6 has a brass item attached to the metal take-up spool that had become loose, making it impossible for the camera to wind the film to the next frame. The drive portion came loose, and the film wouldn't advance anymore. The disconnect of the brass piece and the take-up spool must have happened during the winding of the film, as it was working for a few frames. Another explanation is that the brass portion was stuck to the take-up spool and became loose after the film was with a few frames.

The Company:

Rajar No. 6 nameplate

Rajar Ltd. was established in 1901 as an offshoot of Brooks-Watson Daylight Camera Company Ltd., which had a facility in Liverpool. The company produced camera film, paper, and Rajar film backs for daylight loading film. In 1904, it moved to Moberly and was renamed Rajar Ltd.

 In 1921, Rajar Ltd. They merged with six other companies to form APM, Amalgamated Photographic Manufacturers Ltd. In London, in 1928, four companies involved in film manufacturing formed APeM, Amalgamated Photographic Equipment Manufacturers Ltd. APeM, which would eventually be rolled into Ilford, which is still one of the major film companies today.

 The Rajar No. 6 camera was introduced in 1929, just a year after APeM started. APeM also produced box camera as well.

The one thing that makes the Rajar No.6 camera unique is that the camera body, faceplate, and back are all made from Bakelite. The Rajar No. 6  was the first camera to have the majority of the camera built with the new material. As I mentioned earlier, it's incredible that after almost 100 years, the Bakelite is still in fabulous condition. There are no chips to be found, and the camera still has the gorgeous shine of the new camera.

My Camera:

My Rajar camera measures 6.5" tall by 4" wide, including the winding key, by 4.5" deep when the camera is extended. My camera weighs 1 lb. 0,6 oz., so the camera is very light. The camera is extremely simple as it has a meniscus lens, and an "Everest" shutter, meaning it doesn't cock. When you move the shutter release from one side to the other, the shutter fires, and then when you move it back, the shutter fires again, so you'll need to wind the film right after taking the photo to avoid double exposures.

There is no aperture setting, as the lens aperture is set to what I'm guessing at F8. The only shutter speed setting is for instant or timed exposures. The Rajar No.6 camera is a strut-style folding camera, which means the camera body pulls away from the body on four chrome rigid arms, as opposed to the traditional folding bed style.

 It took me a few minutes to figure out how to pull the faceplate away from the body, but when I held the camera upside down, the faceplate dropped, and it was easy to pull it away from the body and lock it into position. To close the camera, you only need to pull outward on the four strut corners, and the faceplate folds back into the camera body. There is a small viewfinder on the top of the camera, but this only works for vertical photos. There is no viewfinder for horizontal images unless you tilt your head, which is very uncomfortable.

To open the back of the camera to load film, two clips hold the back onto the camera's body. Just flip back the clips, and the back can be lifted off easily. The Rajar No. 6 camera is a 6x9 format camera and takes eight exposures on a roll of 120 film. Yes, the only difference between the No. 6 spool is the take-up spool. It's not a different film size, as 120 film fits the camera well. I've even seen that Rajar made an adapter to fit onto its square proprietary film take-up end to fit into 120 film spools. I don't have one of the adapters, so I'll need to keep my special take-up spool and reuse it with each roll of film.

My Photos:

Since the take-up spool appeared to be broken and I couldn't pull the film from it, I glued the special square drive area directly onto the metal spool that it was spinning freely on. After waiting an hour or so for the glue to dry, I loaded a roll of 120 film into the camera and onto the special take-up reel. The take-up spool worked wonderfully, and I got through the roll of film without a hitch. In fact, the film transport was extremely smooth.

 Here are some results from walking through my neighborhood with the Rajar No. 6 camera.

Conclusion.

The images have a softness that I find appealing. They are very similar to Lomography-style cameras like the Diana. They seem a bit sharper than a Diana, but the lens has a creamy effect on the images (in my opinion). I enjoy that the corners are rounded on the negatives. I also see that the images extend into the rebate portion of the film's border, as I can see the film name and other information in the image area.

 The camera worked great. The shutter was smooth, and the film transport was even smoother. Once I glued the two pieces together and dropped the film into the camera, the photo-taking experience went flawlessly.

 The camera is compact, rugged, and a real "point-and-shoot" style camera. I aimed the camera for horizontal images and figured the lens on the camera was most likely for wide images, which proved to be true.

 Thank you for taking a few minutes to read about this fun and easy camera to shoot with.

 I'd love to hear from you, so if you have any experience with this camera or any of the others I've written about, please email me.

 Until next week, please be safe.

Olympus O-Product Camera

My Olympus O-Product Camera

In high school, my good friend Greg Copeland introduced me to the Olympus camera system in the early 1970s. He was the first person I knew who bought into the Olympus OM system with the OM-1, which I believe was in 1973. At that time, Olympus was very innovative, making the most miniature SLR camera system, which included a complete line of small, compact lenses with very nice optics. I can still remember Greg telling me how much he enjoyed how nice the camera was made. He would take the camera with him all the time. At the time, I was using either the Topcon Super D or, possibly, I had moved on to shooting with a Nikon Nikkormat.

 I started working in the photo industry in late 1973 when I was hired as a seasonal employee in the camera department at my local K-Mart. That position didn't last long, but it led me to work at the local camera store chain about a year later. I was hired to work in the warehouse and handle all the camera and lens repairs.

 When I started working at the local camera store, the Olympus OM system had a decent hold on the market. However, it was still lagging behind the big kids in the marketplace. Olympus was continually pushing the envelope with many new and exciting products like the terrific XA camera line, which, to this day, is one of my favorite cameras. Olympus introduced new additions to its system yearly, which always had customers in the store talking about its products.

Olympus O camera & Flash

 I tell you this because I have seen many odd and unusual cameras introduced by camera companies over the years, and many of them came out in the 1980s to the mid-1990s. The Minolta Prod 20, the Yashica Samurai, and Canon had the Epoca series of cameras. There's a great blog on some of these cameras on the Kosmo Foto Blog.

 One of the cameras that greatly impacted me when it was introduced in 1988 was the Olympus O-Product camera. It was a limited edition, and only 20,000 cameras were made. The Olympus O-Product camera had a very unusual, art deco look of a circle in a square and was made of brushed aluminum. At the time, the cost was prohibitive for me to purchase, but I remember thinking that someday, I'd really like to have one in my collection. Its unique design always intrigued me.

The Company:

The history of Olympus cameras is a story of innovation, precision engineering, and a relentless pursuit of compact, high-quality imaging tools. Founded 1919 in Japan as Takachiho Seisakusho, the company initially specialized in microscopes and thermometers. In 1949, it was renamed Olympus Optical Co., Ltd., and it soon began making a name for itself in photography.

 Olympus entered the camera market in 1936 with the launch of the Semi-Olympus I. This bellows camera used the German-made Zuiko lens, setting the stage for a signature brand name synonymous with Olympus Optics. However, it was not until the post-war period that Olympus truly revolutionized the photography industry.

 One of the most pivotal moments came in 1959 with the release of the Olympus Pen. Designed by the legendary Yoshihisa Maitani, the Pen was a half-frame 35mm camera, meaning it could shoot twice as many exposures per roll of film. It was compact and affordable and helped democratize photography for a wider audience. The Pen series enjoyed massive popularity and marked Olympus as a leader in miniaturization without sacrificing quality.

 The next major innovation came in 1972 with the OM system. Again spearheaded by Maitani, the Olympus OM-1 was a compact, lightweight SLR (single-lens reflex) camera that offered full functionality in a significantly smaller body than its contemporaries. This system appealed to professionals and enthusiasts alike, reshaping expectations for what an SLR could be.

 In the digital age, Olympus continued to push boundaries. In 1996, they released their first digital camera, the Camedia C-800L. However, the Four Thirds system, introduced in collaboration with Kodak in 2003, made a lasting mark. This was followed by the Micro Four Thirds system in 2008, which eliminated the mirror box of traditional DSLRs, allowing for even more compact and lightweight cameras. The Olympus PEN E-P1, released in 2009, revived the classic Pen design in a digital form and was among the first mirrorless cameras to gain traction in the market.

 In 2020, Olympus exited the camera business, selling its imaging division to Japan Industrial Partners, which rebranded the line as OM SYSTEM. Despite the transition, Olympus's legacy lives on through continued innovation and the enduring influence of its designs on modern photography.

The Camera.

I've always thought of the Olympus O-Product camera as more of an art piece rather than a functioning camera, but it is fully functional. In its simplest form, the Olympus O-Product is a "point-and-shoot" camera. There are no settings on the camera that the photographer needs or can really set, which makes it incredibly simple and straightforward to use.

Camera’s number from production lot.

 The camera is relatively small, measuring 4" wide by 3.5" tall and 2" deep. These measurements are for the camera alone and not with the flash attached. If I add the detachable flash, the camera is 5.75" wide by 4" tall. The camera weighs just under 1 lbs. at 15.2 oz. with the flash attached. My camera is number 11289 out of 20,000. The camera also features a unique circular viewfinder and a distinctive shutter button, adding to its charm and functionality.

 The Olympus O-Product camera is powered by 2-AAA batteries that fit into the camera's bottom. The 2-AAA batteries also power the detachable flash. The camera is very simple and basic. Once the batteries are in the camera, you can load film, which is autoloading. There is no need to set the film's ISO because the camera has DX coding for the film loaded. Once you put the leader on the take-up spool and close the back of the camera, the camera automatically winds the film to frame number one.

 To turn on the camera, a lever you pull down on the front opens the front door, exposing the 35mm f3.5 Olympus lens. To turn the camera off, close the front door. There are no shutter speeds to set as the camera has a programmed electronic shutter. The camera is also autofocusing. In the center of the viewfinder,  you'll see a white circle when you depress the shutter button halfway on the front of the camera. In that case, a light will light up next to the "AF" in the upper right-hand corner, letting you know the camera has focused on the subject, and you can press the button to take the photo. Once you take the picture, the camera automatically advances to the next frame. Once you've taken all the photos on the roll of film, the camera will automatically rewind the film into the film cassette.

 The flash for the camera is detachable, so if you don't need it, you can take it off. To take the flash off, you need to unscrew the mounting screw, and the flash will come off the camera. You still need to unplug the cord from the flash to the camera, which pulls out, so it's very simple. To attach the flash, you screw it onto the camera and plug in the cord. If the camera needs the flash, a red ready light on top of it lights up when the flash is ready and will fire if it determines it needs the extra light to make a proper exposure.

 There are two buttons on the camera's top next to the flash attachment that allows the photographer to make adjustments when shooting.  One of the buttons is a self-timer. If you want to get into the photo, press the self-timer, giving you 10 seconds to get into it. The other button is a rewind button. Suppose, for some reason, you want to change to a different type of film. In that case, you can depress the rewind button. The camera will automatically rewind the film back, leaving a little bit of the leader exposed so you can re-load it when you want to finish that roll of film.

My Results.

I put batteries in the camera and flash, loaded it with a roll of Ilford Plus 50 black and white film, walked through the house, and strolled around the block taking photos. The camera determined if the flash was needed, which was pretty fun. It was too simple for my taste as sometimes I like to use fill flash, but this camera didn't allow me to do so. I could trick the meter by putting my finger over the meter area, but for this blog post, I wanted to be free and let the camera do all the work.

 Here are a few of the photos taken on my walk.

Conclusion.

Using such a simple but beautifully made camera was a lot of fun. The camera produces very sharp images and is extremely easy to use. When I was working at the camera store, we used the term PHD cameras, which always meant "push here dear," meaning the camera was very simple for either men or women. Put the camera to your eye, point it at your subject and "push here dear".

 As I mentioned earlier, the Olympus O-Product camera is more of a work of art or statement camera that looks terrific in the collection. It's not really made to be used on a daily basis, but using it every once in a while is good. I wouldn't want the camera to get more scuffed than it already is, but taking the camera out was fun, as was running film through it.

 Thank you for taking a few minutes from your day to read about this art piece that can also be used as a camera.

 Until next week, please be safe.

Minolta-35 Model II

My Minolta-35, Model II

The Minolta-35 Model II camera I have was an unexpected discovery, purchased with several other cameras through an online auction. It wasn't the camera I was originally after in the lot, but the only thing that distinguished it in the photo was the fitted case, with 'Minolta' proudly displayed on the face.

 There were so many different models of camera from Minolta during this timeframe that I wasn't sure what was actually in the fitted case. Still, when I received the "lot" of cameras and uncased the Minolta-35, someone had painted the camera black. And whoever painted it did an abysmal job of it. I only wish I had photos of the camera in that state, but I didn't think of it then. The camera was painted black, and the shutter wasn't working. The good news is that the camera had a good and clean lens.

 Over the years, I have brought the camera to a few different collectible camera shows in hopes of selling it, but no sales have been made. 

 One day, a few months ago, I was browsing the cameras on my shelf, looking for one to write about, when I picked up the Minolta. I felt a personal connection to it, and determined to do a blog post, I sent it off to my trusty camera technician, Allen, at CameraWerks in NY to have it CLA'd. Despite its modest value, the fact that it's from the early 1950s and a very respectable Leica thread mount 'clone' made it worth the investment for me.

My Minolta-35, Model II with case.

 Before I sent the camera to Allen, I wanted to get the black paint off the camera and bring it back to the original chrome camera it was. I had bought some Acetone to see if I could gently get rid of the paint and not ruin any of the other parts of the camera. Unfortunately, the Acetone didn't work well and didn't take much of the paint off. Then, I noticed that if I used my fingernail, the paint would chip off reasonably easily. I also noticed that in our kitchen, we had some bamboo skewers, which seemed to work OK, so to get into some of the tighter spots, I used the bamboo skewer, and to get into the very tight areas, I used the tip of some of the metal tweezers I have for some very minor repairs.

 The camera still has some very minor spotting of black paint, as you'll see in the photos in the article, but 99.8% of the paint is gone. The camera looks considerably better than it did before. It's in great working condition, and even the rangefinder is clean and accurate, so it was time to do my blog on this early Minolta 35mm rangefinder camera.

The Company:

Minolta was a pioneering Japanese camera manufacturer known for its innovative contributions to photography. Founded in 1928 as Nichi-Doku Shashinki Shōten (which translates to "Japanese-German Camera Company"), the company was renamed Minolta in 1933. The name Minolta is derived from "Mechanismus, Instrumente, Optik und Linsen von Tashima," reflecting its German-Japanese technological collaboration.

Ad for Minolta 35 camera.

 Minolta's early cameras were heavily influenced by German designs, particularly Leica and Contax rangefinders. The company released its first camera, the Nifcarette, in 1929, followed by various medium-format folding cameras in the 1930s. After World War II, Minolta resumed camera production, releasing the Minolta-35 in 1947, which became Japan's first 35mm camera with a coupled rangefinder.

 Minolta's breakthrough came in 1958 with the Minolta SR-2, its first single-lens reflex (SLR) camera. Throughout the 1960s, the company expanded its SLR lineup, introducing the Minolta SR-T 101 in 1966, which featured an innovative through-the-lens (TTL) metering system. The 1970s saw Minolta partner with Leica, resulting in co-developed cameras like the Leica R3 and Minolta XE-7.

 One of Minolta's most revolutionary releases was the Minolta XD-7 (XD-11 in North America) in 1977, the world's first camera with aperture-priority and shutter-priority automatic exposure modes. This technological advancement set the stage for further automation in cameras.

 In 1985, Minolta changed the photography world with the Minolta Maxxum 7000 ( Alpha 7000 in Japan and Dynax 7000in Europe). This was the first SLR camera with fully integrated autofocus, making it far easier for photographers to achieve sharp images quickly. The Maxxum series gained popularity, pushing competitors like Canon and Nikon to accelerate their autofocus developments.

During the 1990s, Minolta expanded into digital imaging and compact cameras while maintaining its SLR dominance with the Dynax (Maxxum) series. The Minolta RD-175, released in 1995, was one of the earliest digital SLRs, marking Minolta's transition into the digital era.

 In 2003, Minolta merged with Konica, another Japanese camera giant, to form Konica Minolta. However, due to declining camera sales, Konica Minolta exited the camera business in 2006, selling its assets, including the popular A-mount system, to Sony. This acquisition helped Sony establish itself in the DSLR market, leading to the Alpha series that continues today.

Though Minolta as a brand no longer produces cameras, its legacy lives on through Sony's Alpha series, which traces its roots back to Minolta's innovative technologies.

My Camera:

My Minolta-35, Model II is 5 3/8" wide by 3" tall by 3" deep, which includes the Chiyoko Super Rokkor 5cm (50mm) F2.8 lens. If I take the lens off, the body only is 1.5" deep. The camera weighs 1 lb. 10.9 oz is a very comfortable camera size and weight, and it fits into my hands nicely. The Minolta-35 Model II has shutter speeds ranging from 1/500 down to 1 second, with "T" for timed exposures and "B" for bulb. 

 The Minolta-35 Model II also splits the shutter speeds into two different dials on the camera with the higher speeds on the top dial, which go from 1/500 to 1/25 and "B" and from 1/25 to 1 sec, and "T" on the secondary shutter speed dial on the front of the camera just above the self-timer. To set the shutter speed, you'll need to lift up the dial and turn it to the desired speed for the exposure. Changing the shutter speeds should only be done once you cock the shutter.

To use the secondary or lower shutter speeds, the top dial needs to be set to 1/25, and the lower speed dial needs to be set at whatever of the slower speeds you'll be shooting. This method is prevalent for Leica copy cameras from this era. 

 The Chiyoko Super Rokkor lens on my Minolta-35 is smooth and in excellent condition. To focus, similar to other Leica thread mount lenses, a locking pin is used to lock the lens to the infinity position. To release the lock and focus to a closer range, press the release button and turn the lens to the desired focus distance. Inside the camera is a built-in rangefinder, which will aid the photographer in the distance needed to take a sharp photo. Along the outer rim of the lens is the lens's aperture ring, which goes from F2.8 to F22.

The shutter release is on the top of the camera, just to the right of the shutter speed dial. A small crown-shaped piece surrounds it, which can be removed to use a cable release for the timed or longer exposure times built into the camera.

 Just above the shutter release is the rewind switch, which you slide to the "R" position to release the camera's drive gear so you can rewind the film back into the film canister when you complete the roll of film. Just to the right of the rewind switch is the film winding knob which has an arrow on top to show the user which direction to turn to advance the film to the next frame. At the bottom of the film winding knob is the frame counter which you need to zero out when you load a new roll of film into the camera so you'll know how many photos you've taken on the roll you loaded into the camera.

On the far left of the camera is the film rewind knob. Lift the knob up to make the rewinding of the film back into the film canisters easier. Once the back of the camera is open, you can lift the rewind knob even higher to remove or load the film canister in or out of the camera.

 Right in the middle of the camera, on the top plate, is the Minolta-35 name along with the serial number, which on my camera is 90899, and Chiyoda Kogaku. I enjoy the modernistic font used on the older Minolta camera, which is very elegant.

Top plate with name on the Minolta-35, Model II camera.

 On the back of the camera is the viewfinder window for focus, and on the outside is a dioptric adjustment. This is for people who wear glasses. Turning the dial around the finder window allows you to adjust your glasses prescription to correct vision issues. You can put the camera to your eye without wearing your glasses and still get a sharp photo. In the center of the back of the camera is the flash sync plug, which is just below the accessory shoe used for a flash attachment.

To open the camera to load film, there is a small knob on the bottom of the Minolta-35 that you'll need to turn counterclockwise until the "open" dot is lining up with the arrow. When this happens, the back of the camera springs open, and you load the camera just like you would any standard 35mm camera. 

Lift the rewind knob to load the film cassette into the camera. Pull the leader across the drive gears and put the film leader into the slot on the take-up spool. Take the tension of the film up by turning the rewind knob clockwise to take the slack up on the film. Close the back turn the open/close knob to the "closed" position to lock the camera's back, and wind to your first frame. Watch that the rewind knob is turning when you advance the film so you know the film is transporting in the camera, and set the frame counter to number one.


My Results:

I loaded my Minolta-35 camera with a roll of Ilford Pan F Plus 50 ISO black-and-white film. I wanted to use a slow speed to see how the camera would perform in lower-light situations. I also had my trusty Sekonic L-308 meter with me to achieve accurate exposures. I knew I could always count on Sekonic to give precise light readings. 

 Now that I had film loaded into the newly serviced camera, I walked through my yard and neighborhood to take photos with the Minolta-35 camera. Here are a few of the images I took on my walk.

My Conclusion:

The camera was enjoyable to photograph with. The rangefinder was bright and accurate. I tried many slow shutter speeds to see how the camera performed under these low-light circumstances. I had a great time using this camera and want to continue using it. The overhaul made a tremendous difference; without the black paint on the camera, it also looks terrific.

 Thank you for taking a few minutes from your busy schedule to read about this excellent rangefinder camera from Minolta

 Until next week, please be safe.

The Vena Venaret Camera

While the Netherlands is renowned for its windmills, tulips, canals, and bike riding, it's not often associated with camera manufacturing. However, it's home to some unique camera companies, including the popular Cambo. In fact, there were around 20 camera manufacturers in the country, such as Philips, which I've previously featured in a blog post, and other lesser-known companies like Tahbes, Foka, and a few smaller ones.

 My connection to these cameras is quite recent, as I was drawn to them by their vibrant colors. As I've shared in previous posts, I have a fondness for colored cameras, a fascination that still holds true today. Whether it's a blue, green, rose, or any other uniquely colored camera, I'm immediately captivated and feel a strong desire to own it. In this case, I was fortunate to acquire two cameras-a striking green one with a black faceplate, and a brown version with a matching faceplate. 

 After doing a little digging on the camera and company, I found that the two I purchased were also different models. The brown camera is the Vena Venaret due to the accessory shoe on the top of the camera, while the green is the Vena Venaret Jr., the same model but without the accessory shoe. The good news is that the Venaret Jr. I purchased has a leather fitted case that was in excellent condition, and it is the model I shot in the blog post.

The Company:

Vena Optical Devices was founded in Amsterdam in  1940 by Evert Verlegh and Samuel Naarden. The company's name is a mixture of the starting letter from each founder's last name: VE from Verlegh and NA from Naarden. It was a difficult time to start a company due to the war, as Samuel was making optical lenses for Old Delft Company. While many of the company's Jewish employees were deported, it was difficult for them to do anything regarding the cameras made until after WWII ended.

 In 1948, Vena came out with the Venaret camera. According to the instruction manual, the camera was designed by F. Kochman, the former manufacturer of the Reflex-Korelle camera. Mr. Kochman was living in The Netherlands for a few years, was an employee of Vena, and designed the Venaret camera; according to the manual, "His long experience in the field of camera construction is already a guarantee for the good health of the newborn." With this knowledge, the Venaret looks similar to the Reflex-Korelle camera, although a much simpler version.

 The Venaret had a few different versions. The camera was produced with a black faceplate and black covering, a white faceplate with black covering, or a brown faceplate and brown covering, which is the model I recently received.

 The Venaret Jr. camera has a white faceplate with a black covering, a black faceplate with a black covering, and a white faceplate with a green covering, and the model I recently received has a black faceplate with a green covering. 

 In 1949, Vena produced a couple of straightforward box cameras, the Vena Box and Sport Box. It's estimated that Vena produced between 20,000 and 30,000 cameras before it went bankrupt and closed its doors in 1951. This was a very short-lived camera company, but it produced some brightly colored and very simply designed cameras.

My Camera:

My camera is 5.25" wide by 3.5" tall, including the viewfinder, 3 3/8" deep, and weighs 14.9 oz. and has a very cube shape. There are two shutter speeds on the camera, 1/25 and 1/50, along with "T" for timed exposures. The camera has a 75mm f7.7 Meniscus lens with four aperture settings, F7.7, F9, F11, and F16. The shutter speeds are set with a toggle switch above the lens with the "T" setting in the middle. The aperture settings are on the side of the lens. The shutter release is on the right side of the camera. There is no cocking of the shutter. Pressing down the shutter lever to take the photo is very simple.

To open the camera to load the film is easy once you figure it out. On top of the camera is a sliding lever. Slide it to the "O" or open position. Grab the lens protruding area and pull up from the back of the camera. There is a small channel that the front of the camera slides into that allows the front of the camera to slide out of, which exposes the film camera where you can load or unload the film, depending on if all photos are taken. Once the film is loaded or unloaded, put the ridge of the back of the camera into the channel on the front and slide down until the top fits snuggly into the back, then slide the lever on the top to the right to lock the camera while taking photos.

There is no lens focusing, and the minimum focus is approx. 3 meters, about 10'. I found this out when I processed the negatives after taking the camera out and shot with it on a sometimes sunny afternoon, which was rare in the Portland area in November. Looking at the photos, I initially thought 3' was the minimum focus, but those images are blurry while the background is sharp. After I thought about it, I realized that many cameras that don't have focus ability have a "close up" filter or lens when you want to take photos from 1-3 meters, so that mistake was on me.


Note the shutter speed and aperture settings.

This is a very simple camera without many bells or whistles, but I wanted to shoot with it to see how it performed. In today's cameras, this would be considered a "point and shoot" style, with minimal settings and no focus ability.

My Results:

After putting in a roll of film, walking through the neighborhood, and taking simple, composed images, I went to my darkroom to process the negatives and see the results. 

 Here are a few of the images I took with this colorful gem of a camera:

Conclusion:

Except for my thinking the camera would focus closer than 10', the images are relatively sharp and clean. I didn't purchase these cameras, but I wanted to see how sharp they could produce, and they were pretty decent.

 Thank you for taking the time to delve into the history of this short-lived camera company from a country not typically associated with camera manufacturing. Despite its brief existence, Vena Optical Devices managed to create a truly beautiful and functional camera.

 Until next week, please be safe.