Zeiss Ikon Super Ikonta 531/2

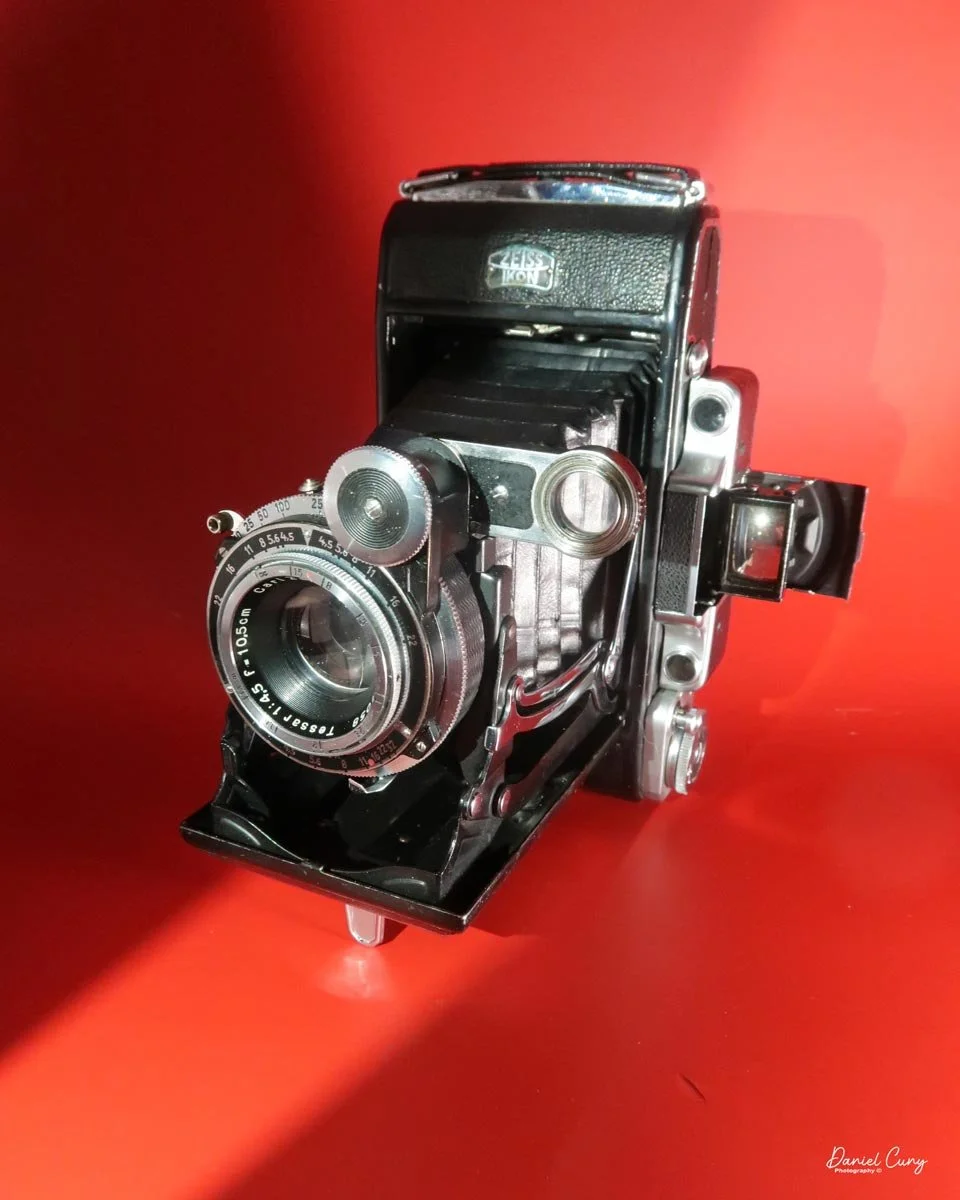
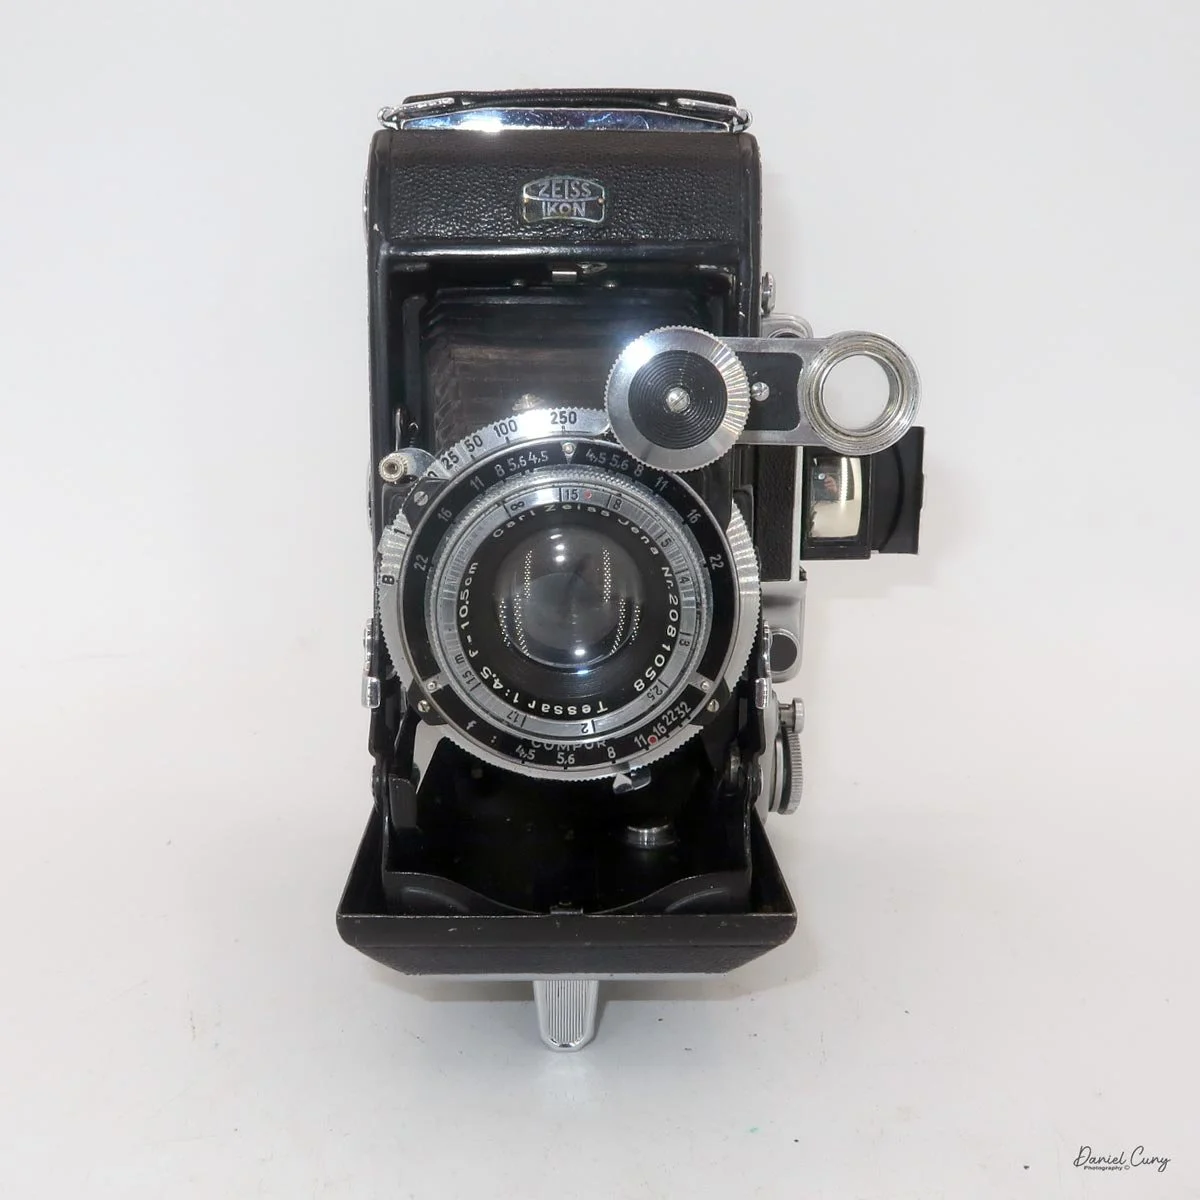
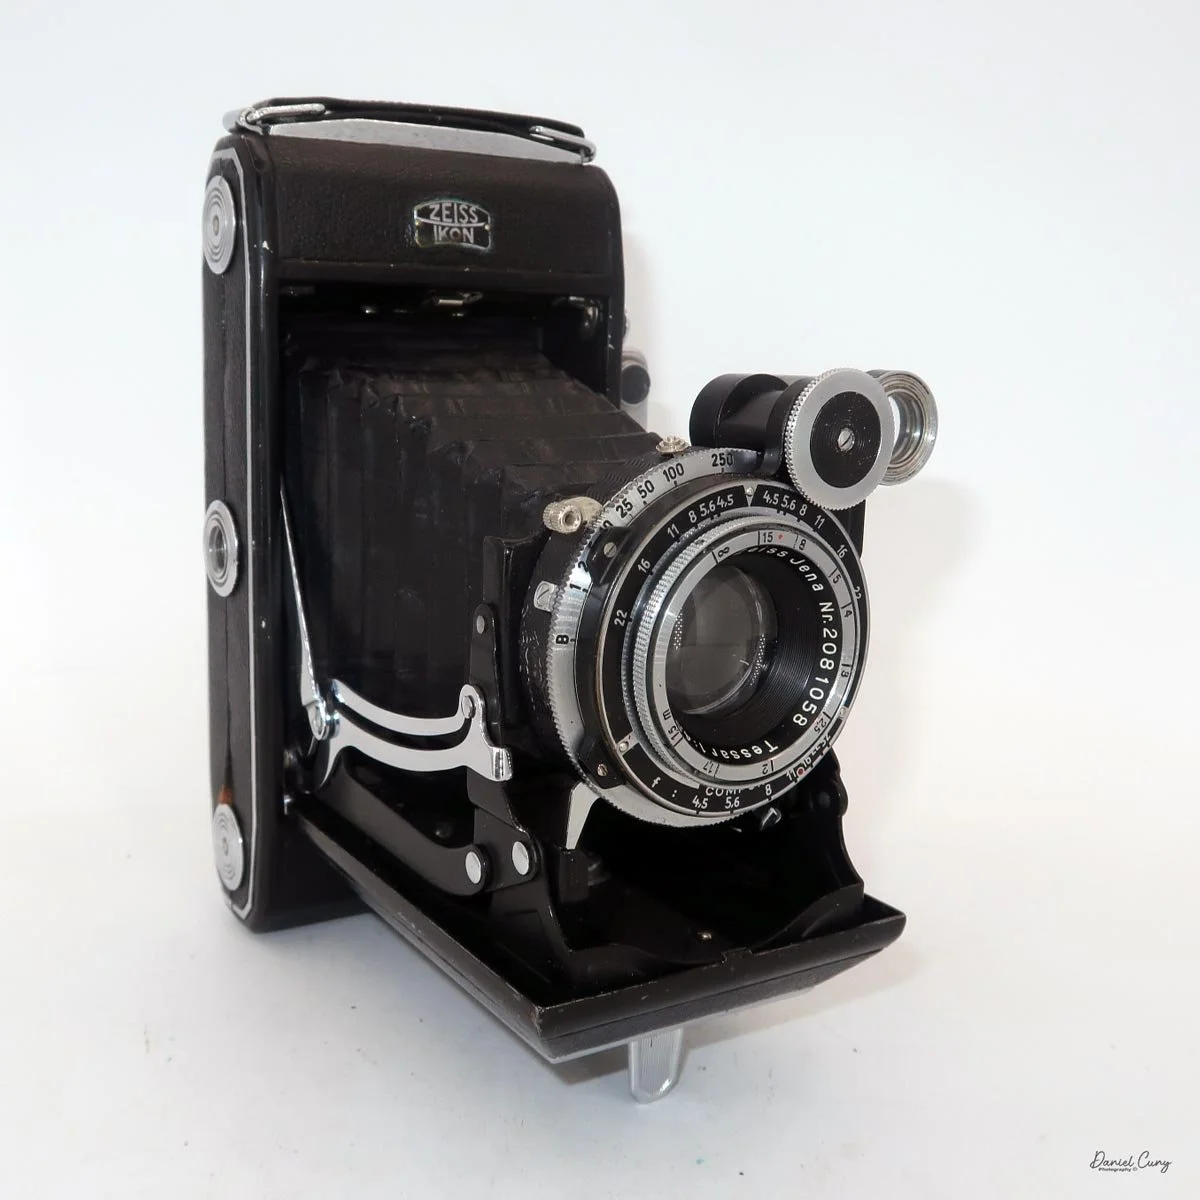
My Zeiss Ikon Super Ikonta 530/2 camera

Walking through flea markets, garage sales, or camera shows, I always stop to look at what Zeiss cameras they have, and the cameras that I always pick up to look over are any of the Zeiss Ikon Super Ikonta cameras. Not only because they look impressive even when closed, but also because I'm always struck by how well-made and intricate they are for a camera that's 90 years old.

 To me, the Super Ikonta cameras are like looking at a masterpiece of art. They are timeless in their form, compactness, and mechanical intricacies. When closed, they are compact and sturdy. They have a heft to them that you know they were manufactured to last a long time.

 Zeiss Ikon made four different Super Ikonta styles. There were the smaller models in 6x4.5 or 6x6cm formats, then they also made a larger, specifically longer version that shot 6x9, and a rare version that shot 6x11cm. The 6x9cm version came with a metal insert that reduced the image size to 6x4.5, essentially allowing the photographer to get twice as many images on the 120 roll film loaded in the camera.

 Having owned both in my life, I'm torn between them. On the one hand, I prefer the longer negatives, so the 6x9cm version is appealing, but it's also a bit bigger to carry. The more compact 6x6cm version is a terrific camera to carry when you travel. They are compact, fit in your pocket, have wonderful optics, and use a rangefinder to focus.

 Looking at the cameras on my shelf for a camera to write about, the Zeiss Ikon Super Ikonta 530/2 was a camera I recently got back from a full CLA, so I knew, or at least hoped there wouldn't, or shouldn't be an issue putting film in the camera and running a roll of film through it. 

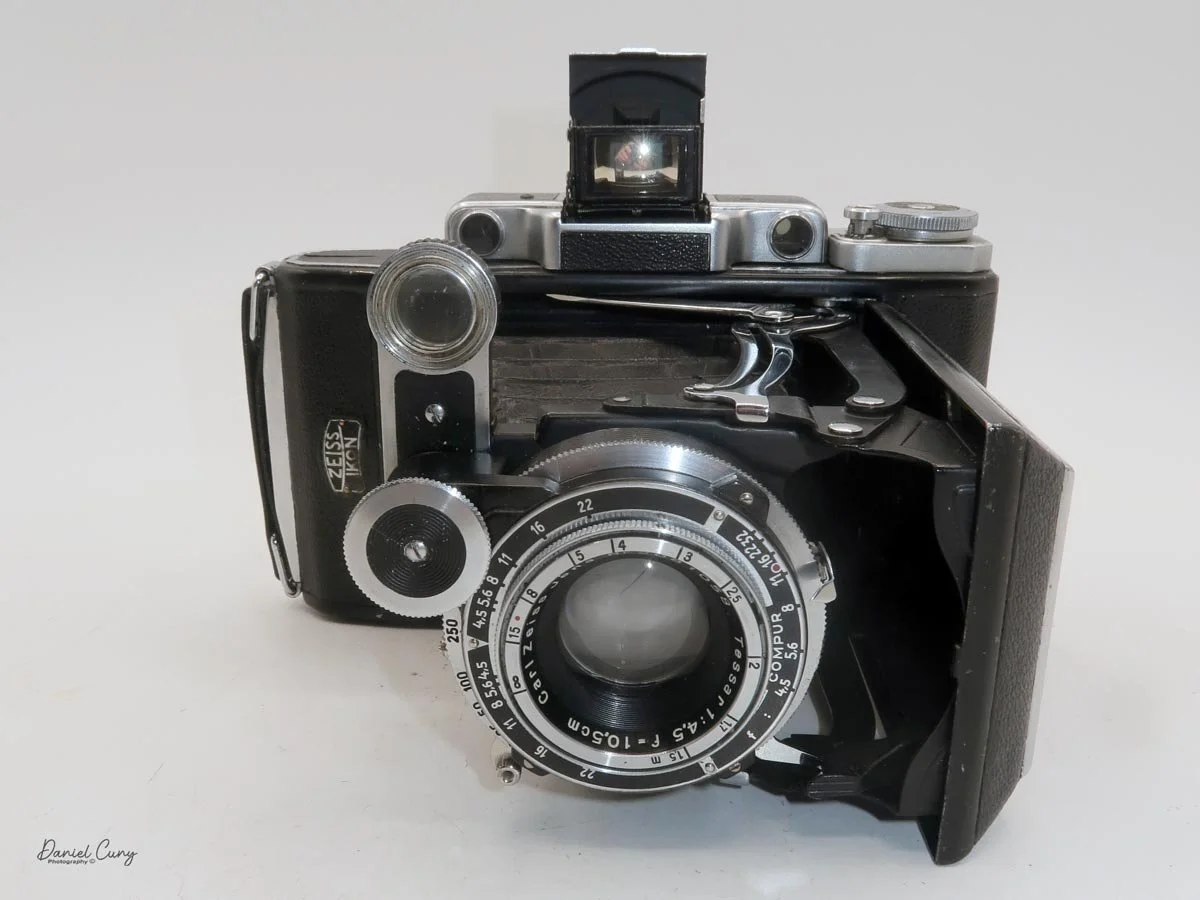
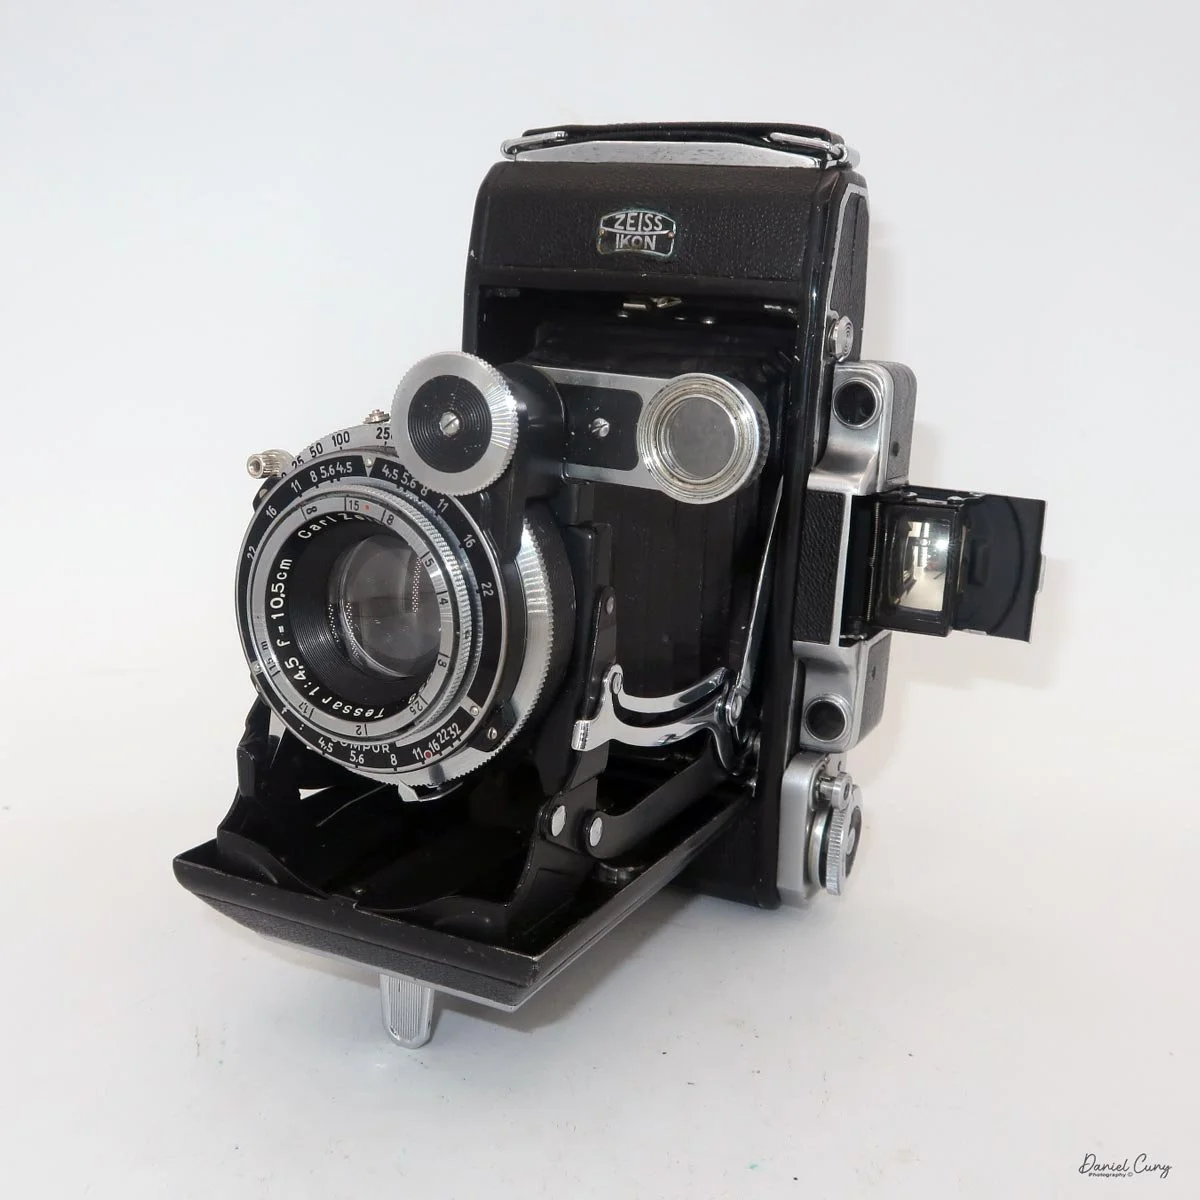
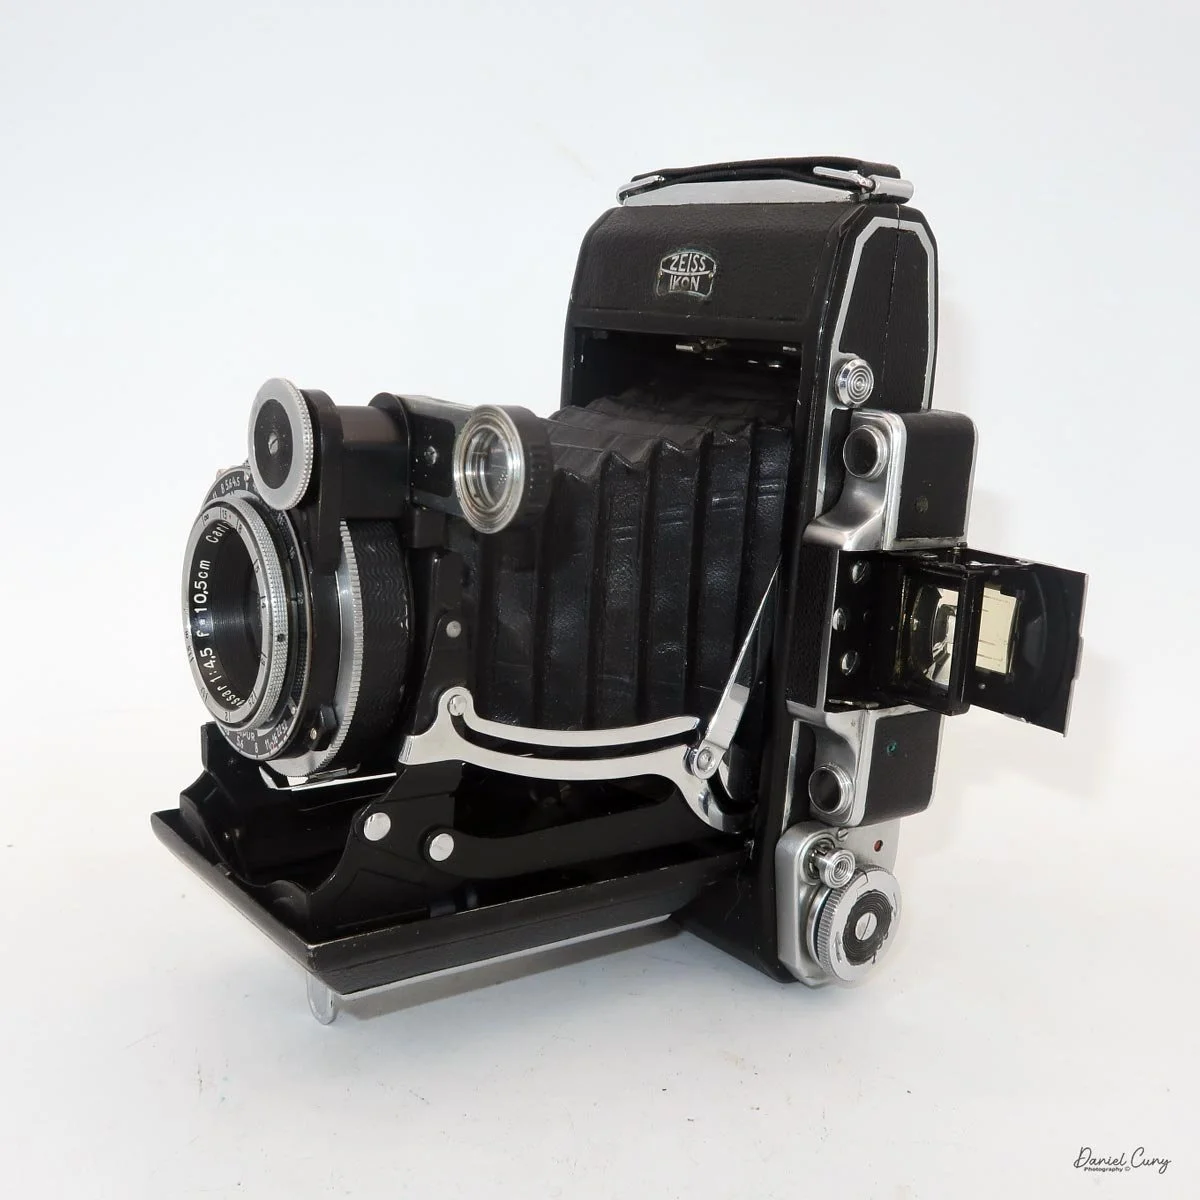
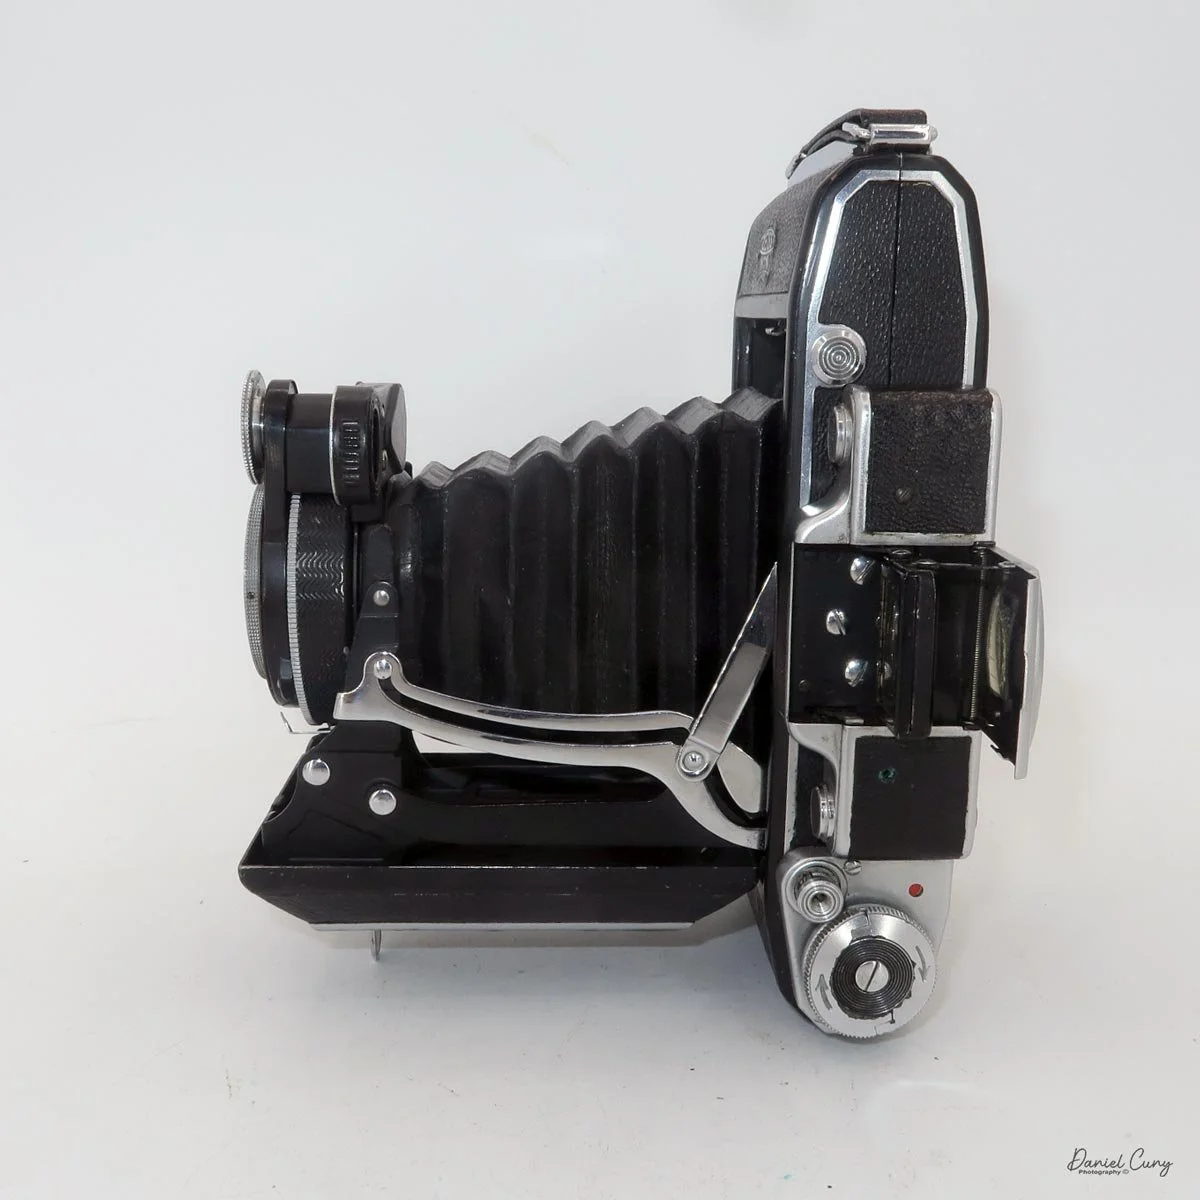
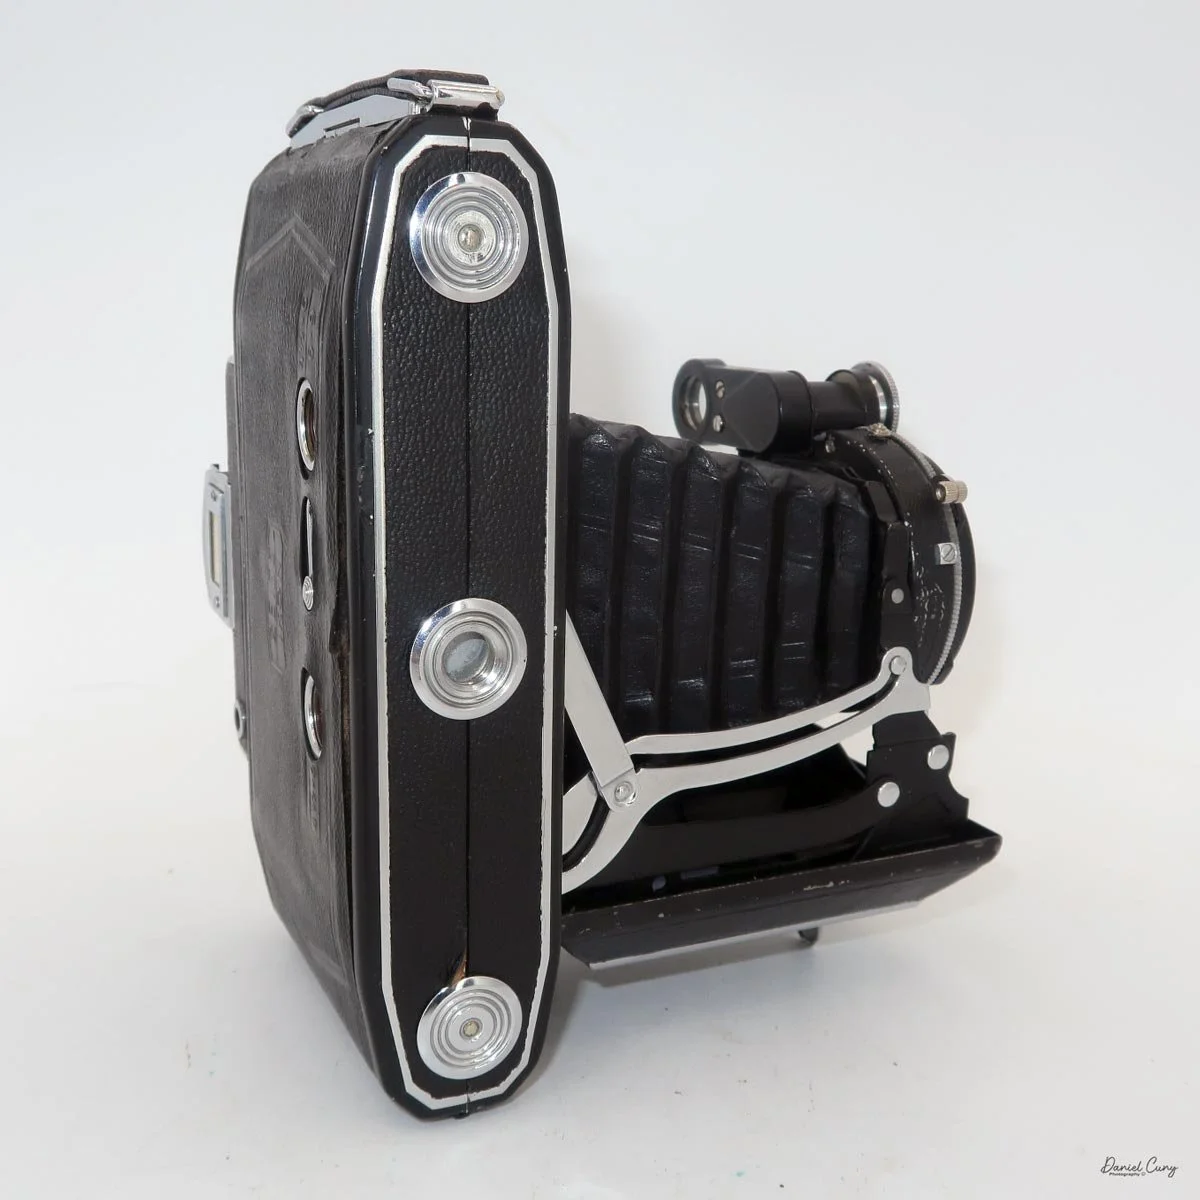
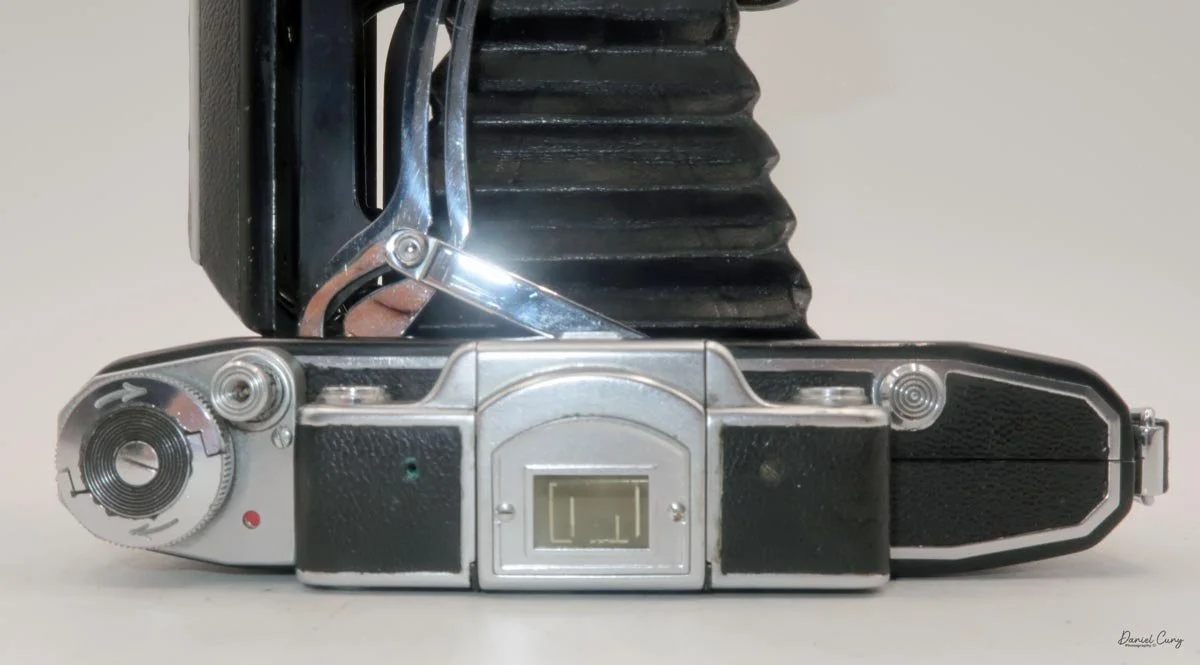
Horizontal view of my Zeiss Ikon Soper Ikonta 530/2 camera

 The camera I had purchased almost a year ago was from an online auction. I saw it at the auction along with a few other cameras, placed a fairly low bid, and won it. The camera was shipped to me, and upon inspection, I noticed the shutter wasn't working. It worked at higher speeds, but the camera needed servicing, so I sent it for CLA.

 My camera came back from the technician and looked flawless. The rangefinder was bright and accurate, the lens was bright, the focus was smooth, and the lens popped out of the camera as if it were new. 

 Whenever I see a Zeiss Ikon Super Ikonta or another rangefinder folding camera, the first thing I check is the shutter to see if it's opening/closing, especially at slower speeds. Then I check the focus to see how smoothly the lens and focus knob turn. It seems that many of the cameras have very stiff focusing, so when the camera came back, and the focus knob turned so nicely, I must have had a large grin on my face, as this was a new experience for me: a smooth focus.

 With all that said, it was time to put a fresh roll of 120 film into the camera and take a walk through the neighborhood on a wonderful spring afternoon. The sun was out, and so many of the trees and flowers were in bloom, it was the ideal opportunity to take my newly CLA'D Zeiss Ikon Super Ikonta for a spin.

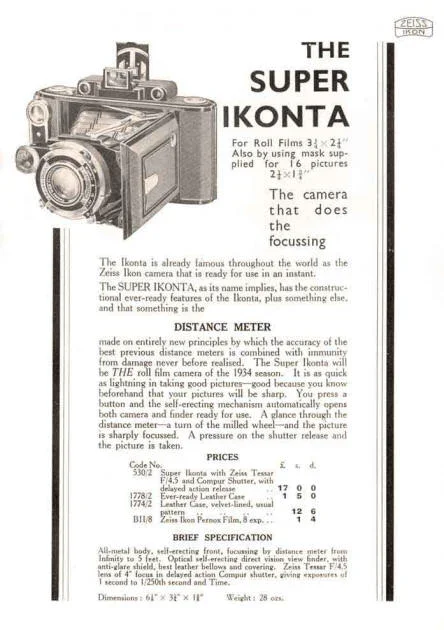
Brief History of the Zeiss Ikonta Cameras:

 Zeiss Ikon and the Ikonta cameras sit at an important crossroads in European camera history. Formed in 1926 from the merger of four major German makers—Contessa-Nettel, Ernemann, Goerz, and Ica—Zeiss Ikon became one of the largest and most influential camera companies in the world, backed by the Carl Zeiss optical tradition.

 The Ikonta line emerged around 1929 as Zeiss Ikon's premium folding-camera family. It was introduced in several sizes, including 6x4.5, 6x6, and 6x9 roll film frames, and represented the company's effort to rationalize and modernize the crowded product lines inherited from the merger. These cameras were built as elegant folders: compact when closed, but capable of producing high-quality medium-format images when opened.

 What made Ikonta especially significant was its market position. Zeiss Ikon used better lenses and more refined construction on Ikonta models, while cheaper versions sometimes carried the related Ikomat name. The line became closely associated with Carl Zeiss lenses, such as the Tessar, which helped the cameras earn a strong reputation for sharpness and image quality.

 A major step forward came with the Super Ikonta series, introduced in 1933. The "Super" name indicated the addition of a coupled rangefinder, making focusing far easier and more accurate than the original scale-focusing Ikontas. That innovation helped define some of the best prewar folding cameras available.

 Production continued through the war years and into the postwar period, but folding cameras gradually lost favor as photography shifted toward more modern fixed-lens designs and 35mm systems. Even so, Ikonta and Super Ikonta remain admired today for their craftsmanship, portability, and classic Zeiss optical quality.

My Camera:

 My Zeiss Ikon Super Ikonta 531/2 is 7" wide by 4" tall and 2 "deep when the lens is retracted, and it's 5" tall when you open the camera, and the viewfinder pops up, and 5.5" deep when the lens is extended. The camera weighs 1 pound 15 ounces without the case or film loaded. My serial number is E30192.

The Zeiss Ikon Super Ikonta 531/2 camera has several different options for lens and shutter combinations:

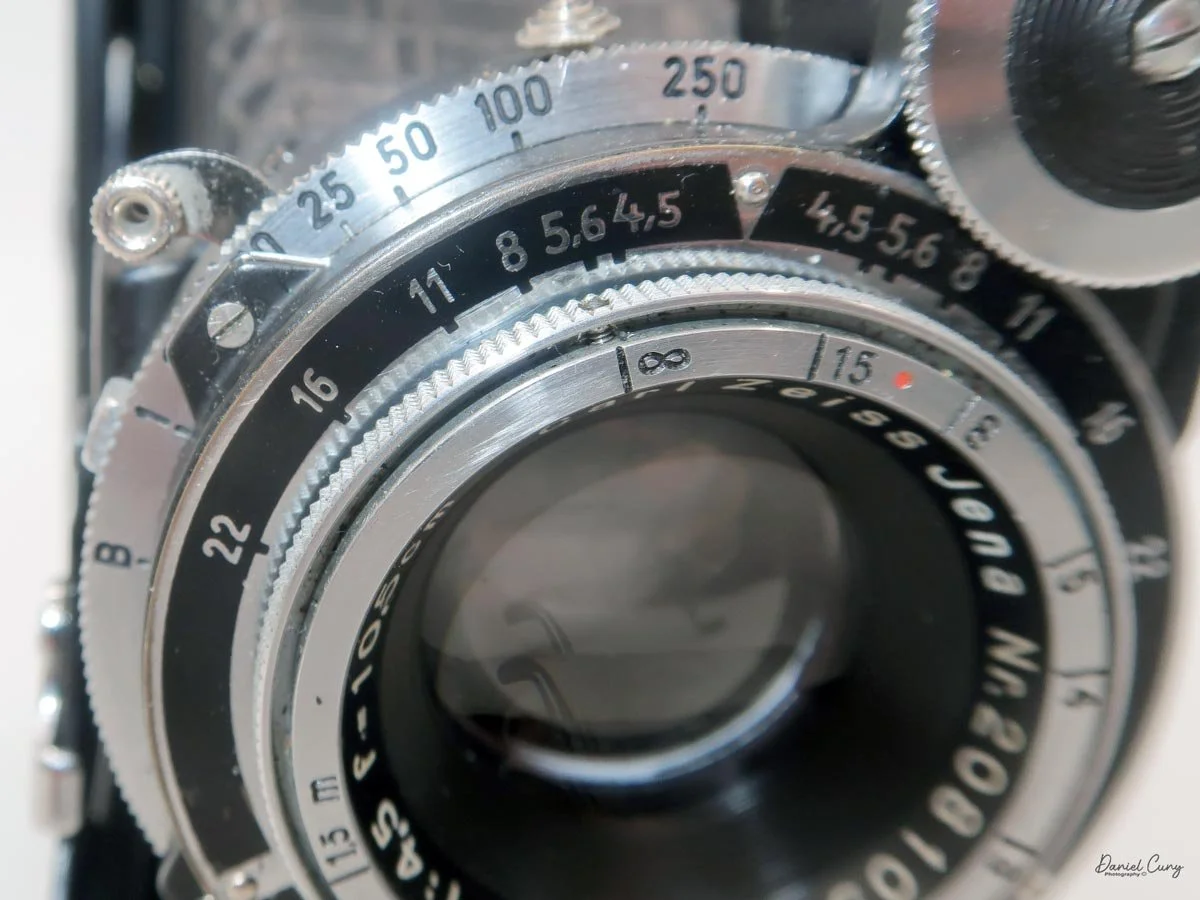
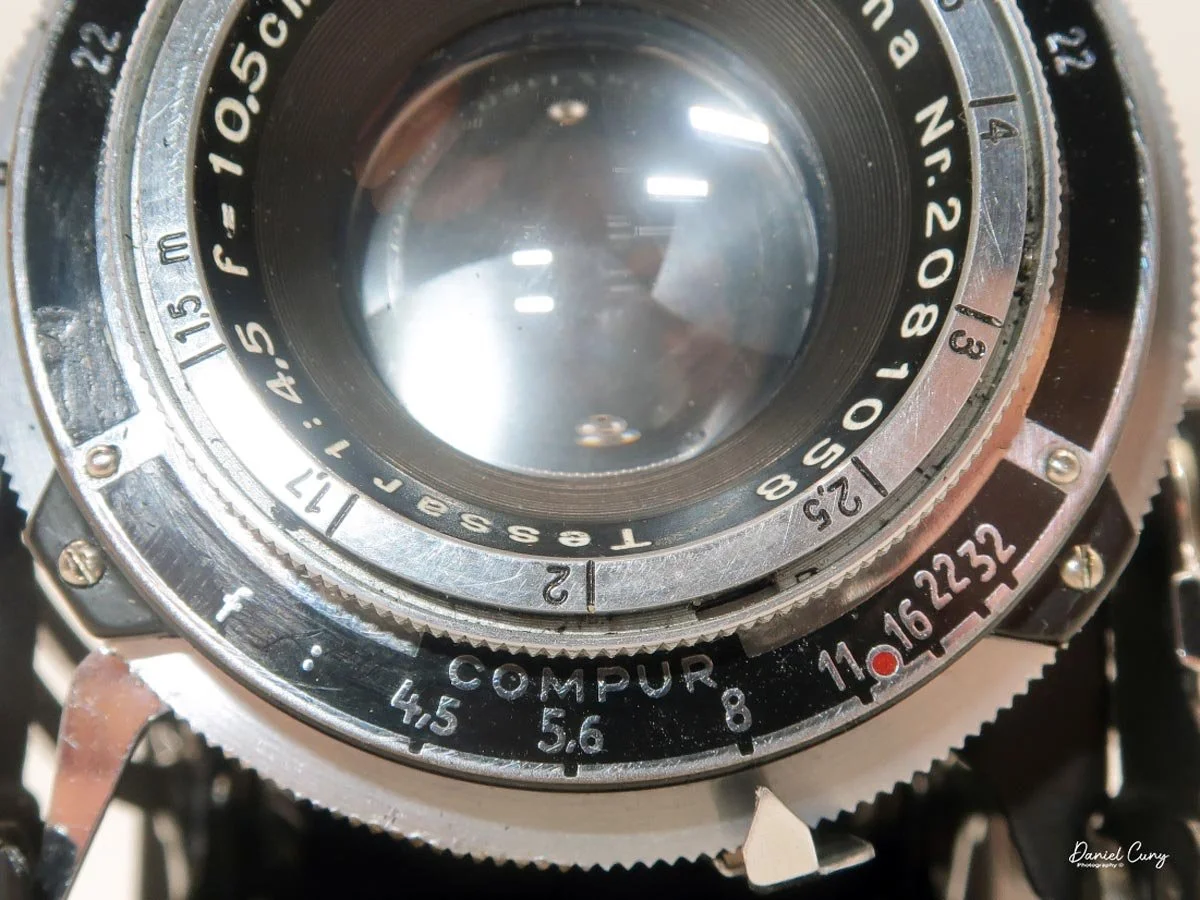
  • Tessar 10.5 cm f/4.5 in a Compur shutter. This combination is the best-documented early setup for the 530/2, especially on black-enamel versions from the early 1930s.

  • Triotar 10.5 cm f/4.5 in a Klio shutter. Some early examples were fitted this way, making it a less common but real configuration.

  • Tessar 10.5 cm f/4.5 in a Klio shutter. At least one documented example shows this pairing, indicating that Zeiss Ikon used multiple shutters during the model's production.

  • Later or related Super Ikonta variants appear with Tessar lenses in Compur Rapid or Synchro-Compur shutters, though those are more typical of later Super Ikonta models.

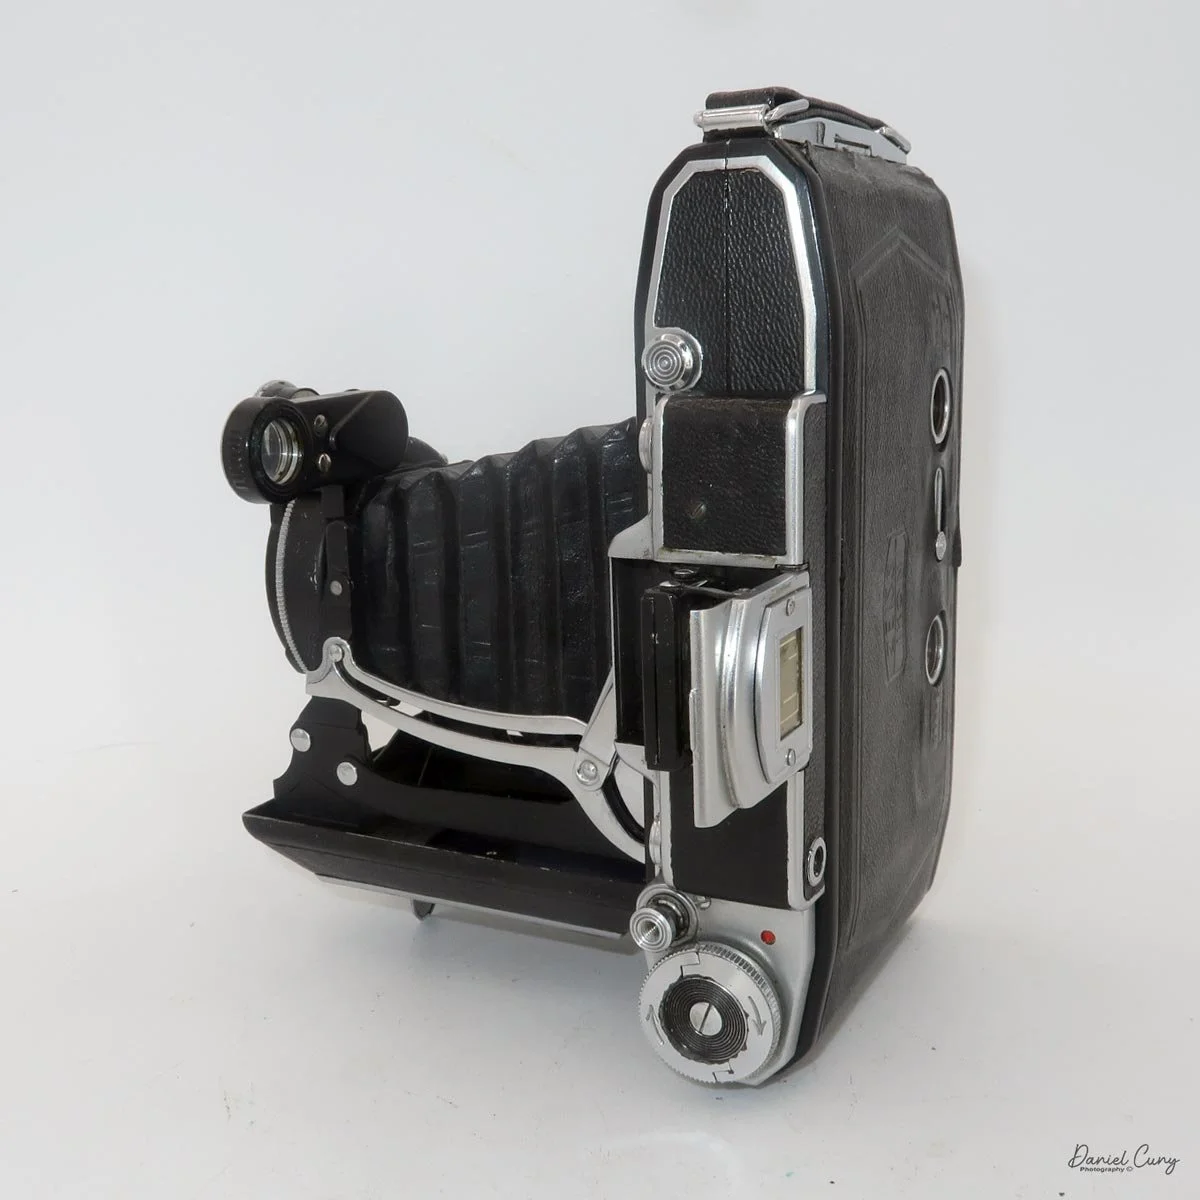
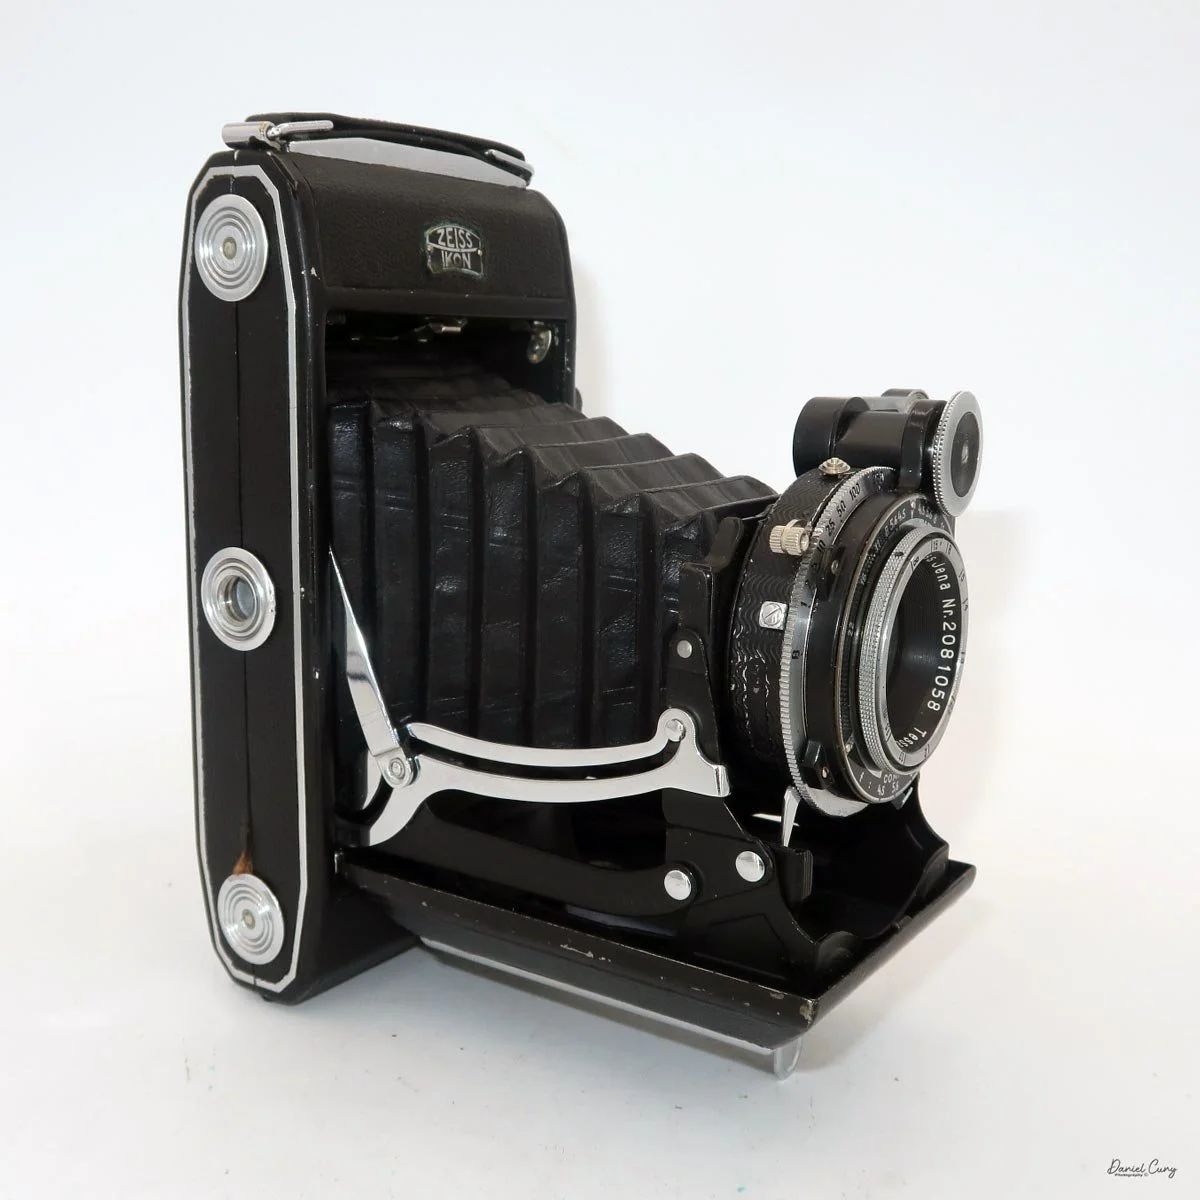
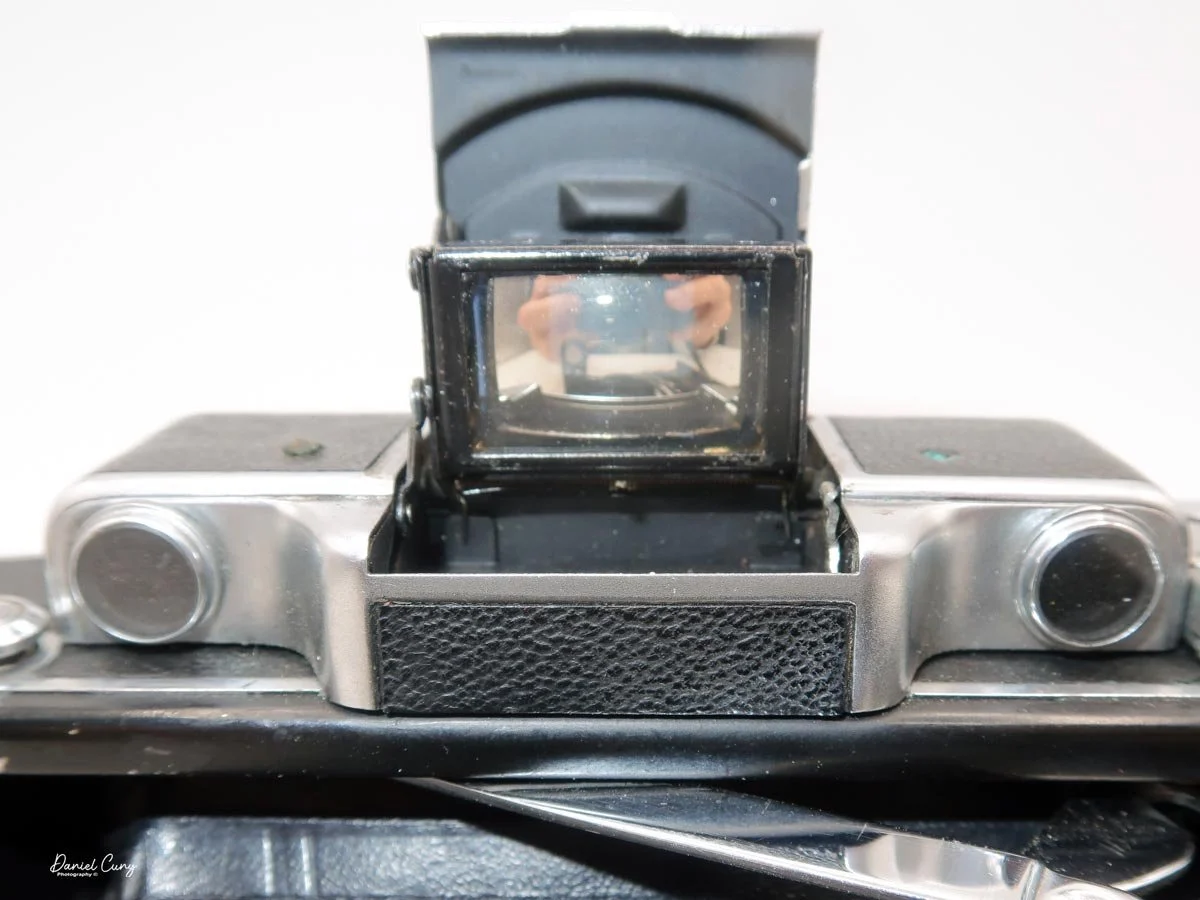
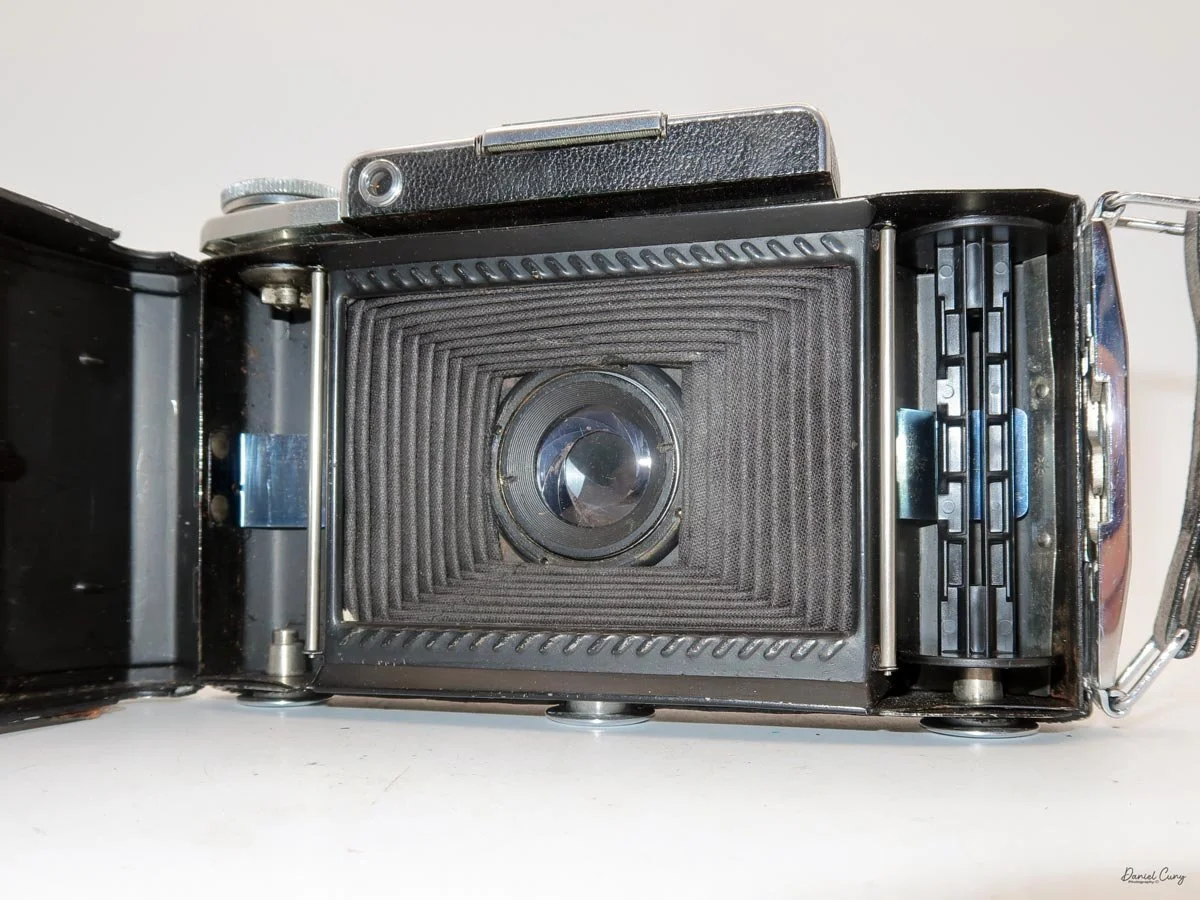
Looking at the top of the camera, on the right side of the rangefinder, is a button that opens the camera when it's closed. According to the Zeiss Ikon Super Ikonta manual. Hold the camera in your right hand, with the front slightly pointed down. Press the button, and the camera should open slightly. Then pull down on the front cover so the bellows and lens extend to the taking position. Once the lens is extended, you'll need to swing the arm holding the small round lens into place so you can use the rangefinder for focusing. Also, when you open the camera, the Albada (sports) finder springs open. Look through the Albada finder; it has lines for both 6x9cm images in a horizontal format and for 6x4.5cm images for a vertical subject.

Now that the camera is open, you're ready to make exposures once the film is loaded, which we'll get to in just a moment. The shutter and aperture settings are located around the lens. Shutter speeds from 1/250 to 1 sec, plus "B," are set by turning the ring to the desired speed. The aperture is set by sliding the arrowed lever at the bottom of the lens to the desired aperture, which ranges from F/4.5 to F/32 on my camera.

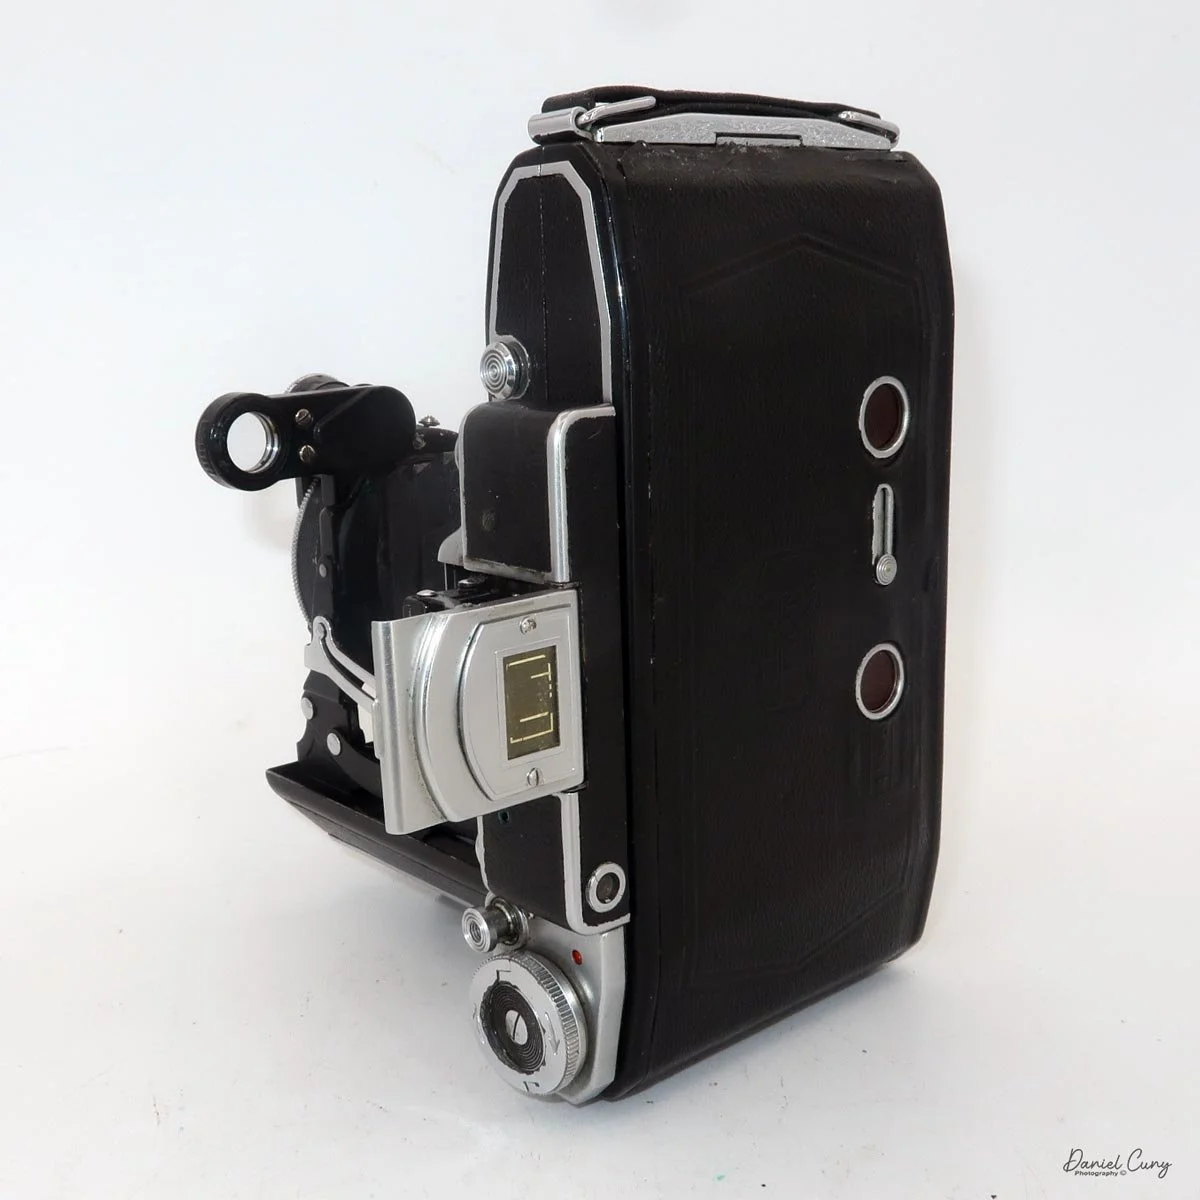
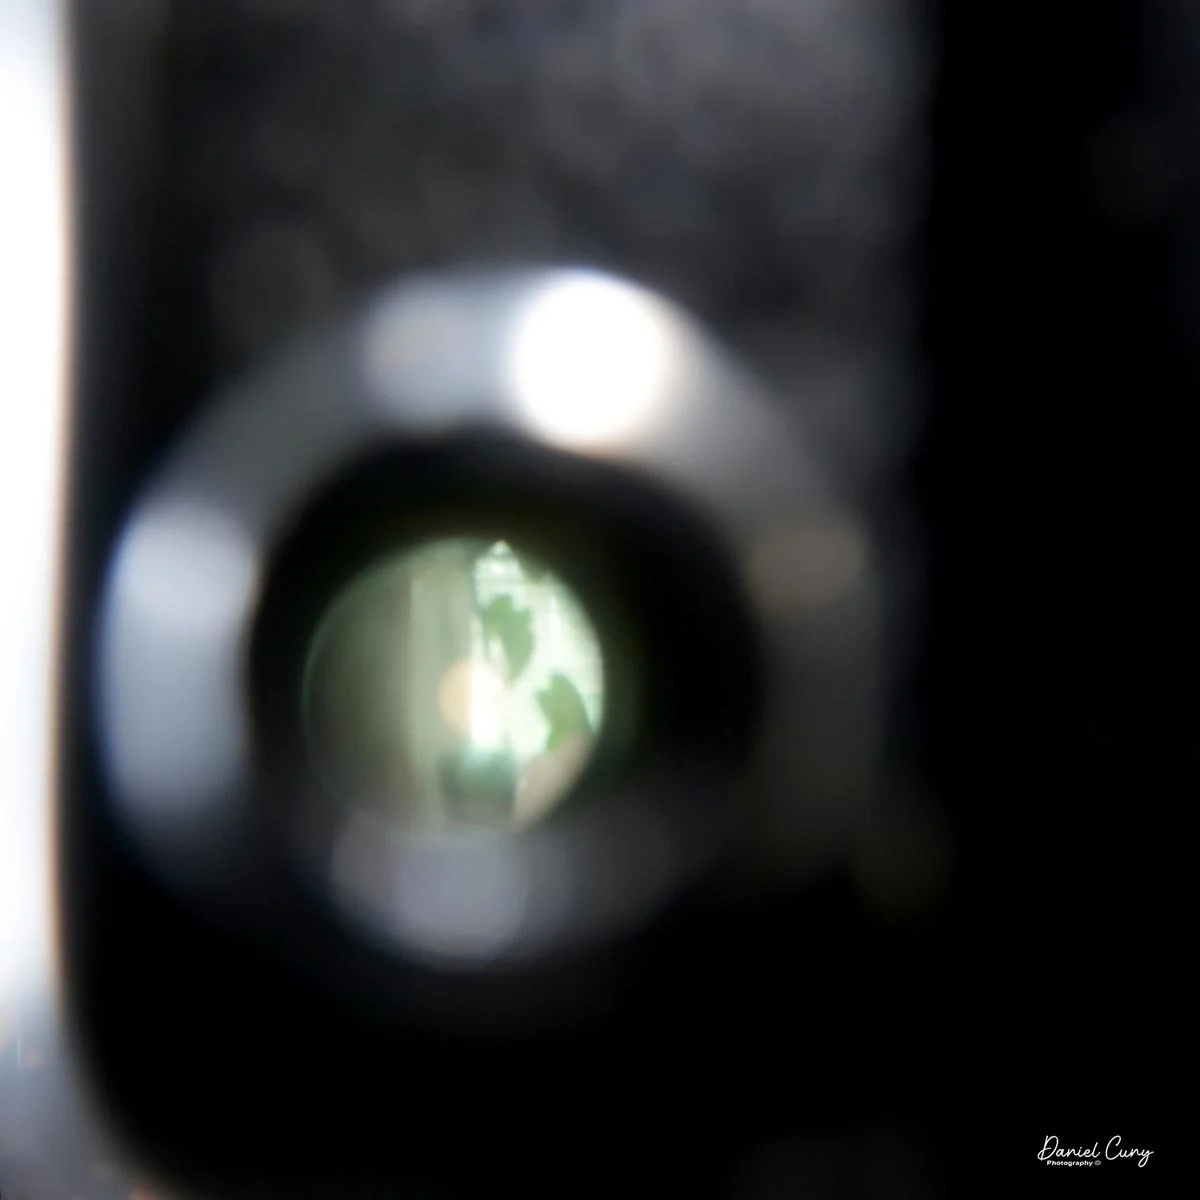
 The focus wheel is on the front of the swing arm you moved over for the rangefinder, just above the lens when the camera is in the vertical position. For focusing, look through the small window on the back of the camera. Turn the dial to use rangefinder focus, which includes a small yellow area in the middle of the finder. When out of focus, the subject will appear as two images. Your main subject, and a second image in the yellow area. Turn the wheel until both images merge into one, indicating the subject is now in focus. 

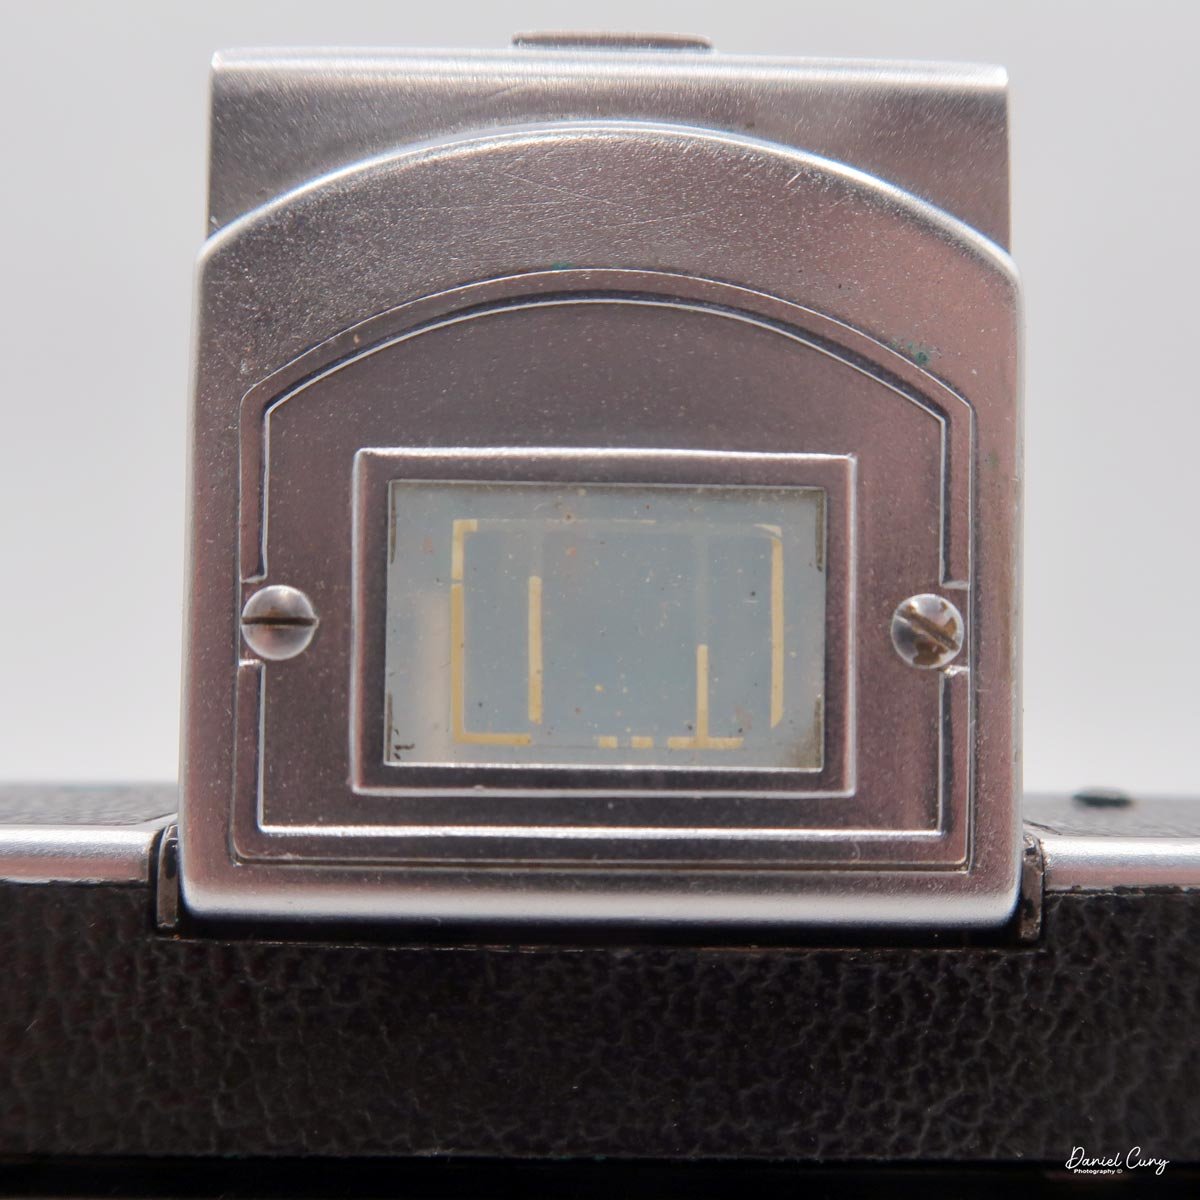
Set your shutter speed and aperture setting, and don't forget to cock the shutter. The shutter release is on the top, left side of the camera. Press the shutter release, which will trip the shutter via a series of linkages that run along the bottom of the lens bed. Just behind the shutter release is a small window. When the window is grey, the shutter has been tripped, and you'll need to turn the film winding lever until the small window turns red. At this point, you can re-cock the shutter and release it. 

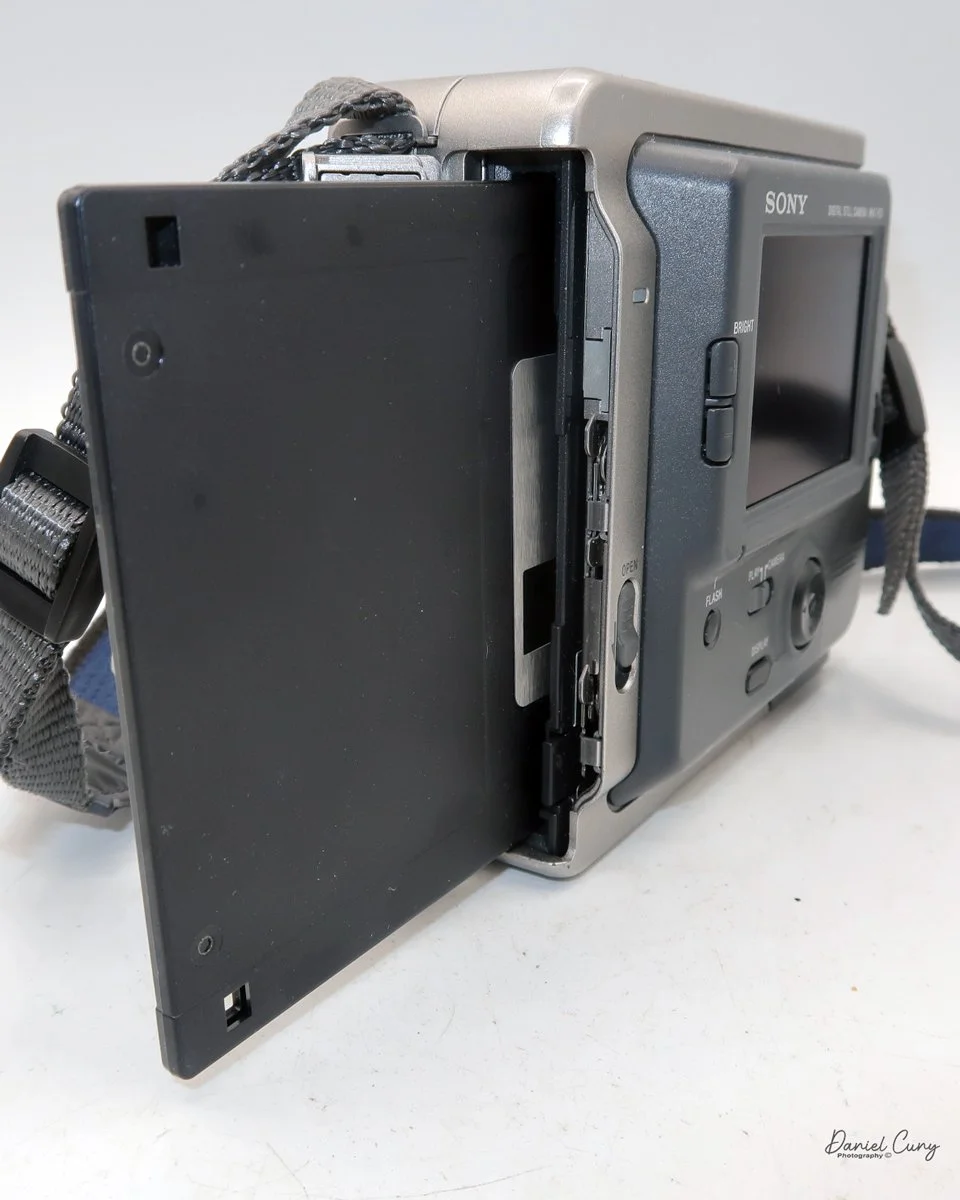
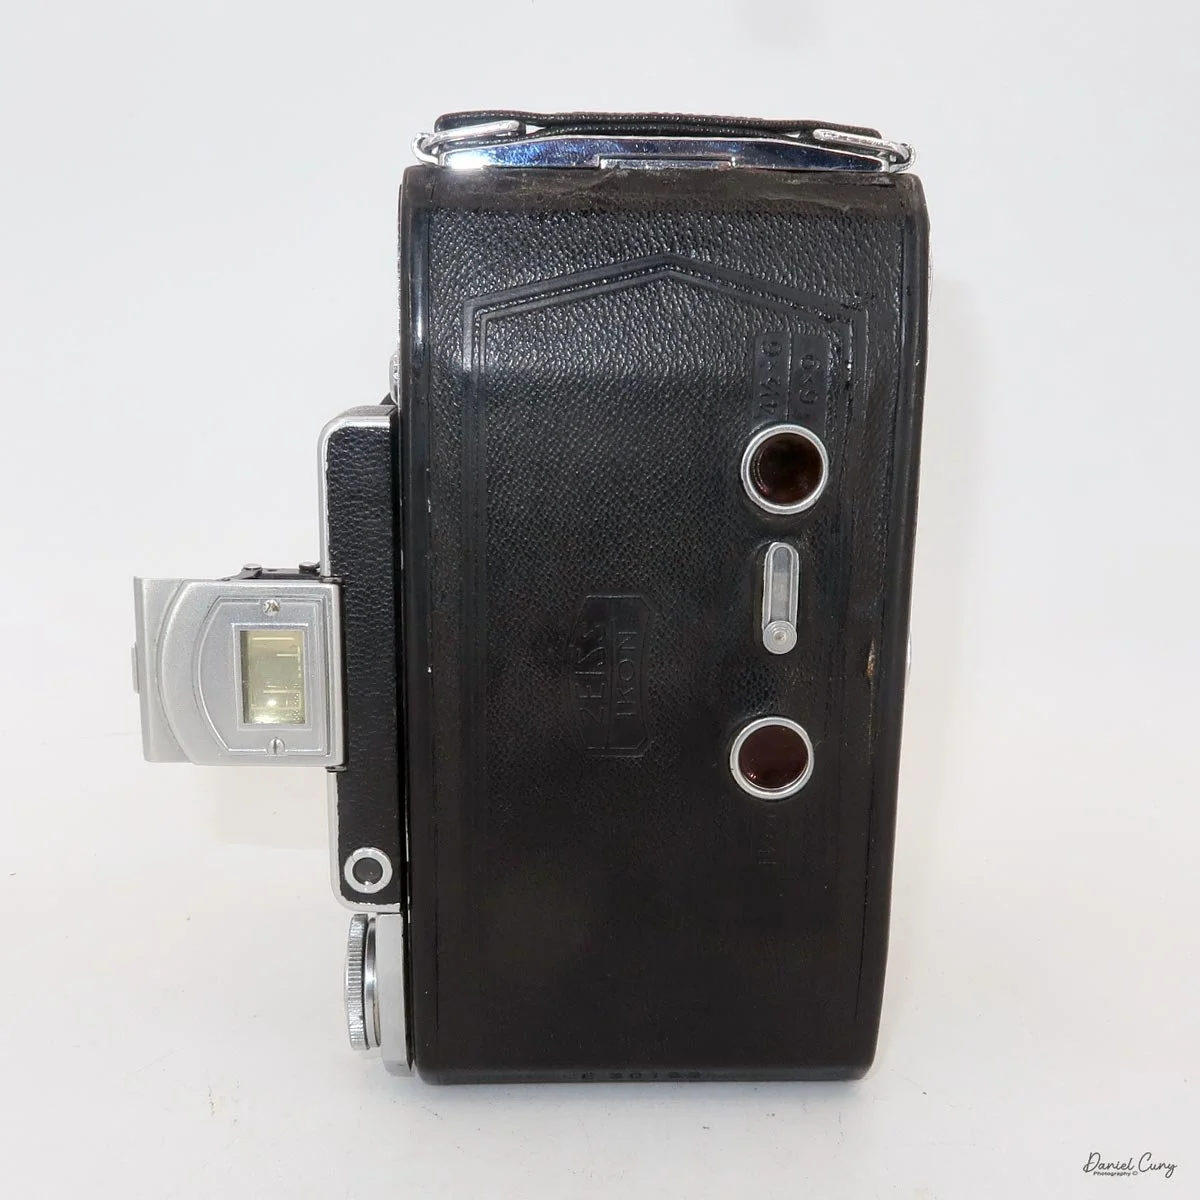
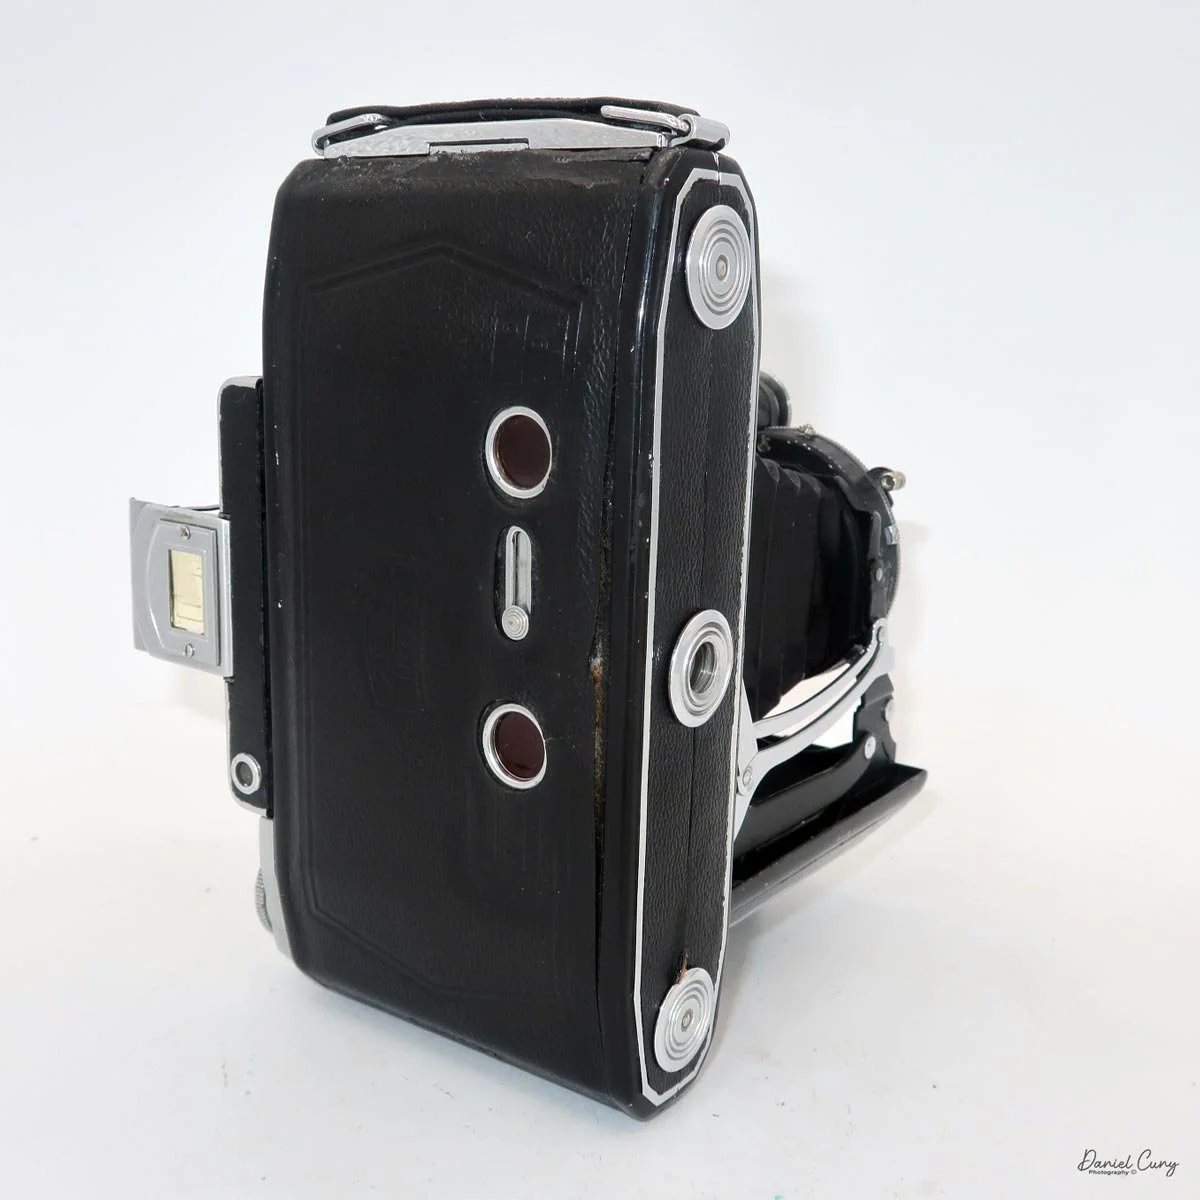
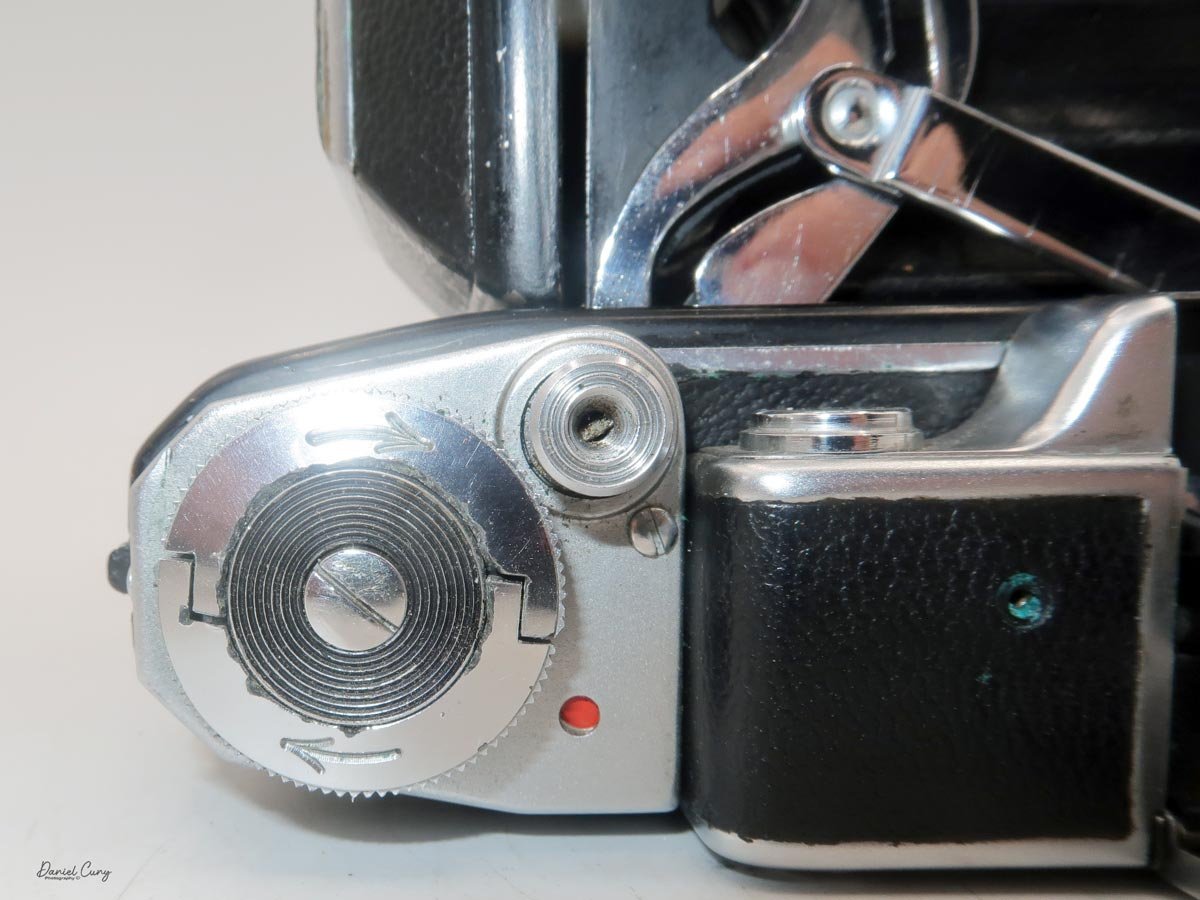
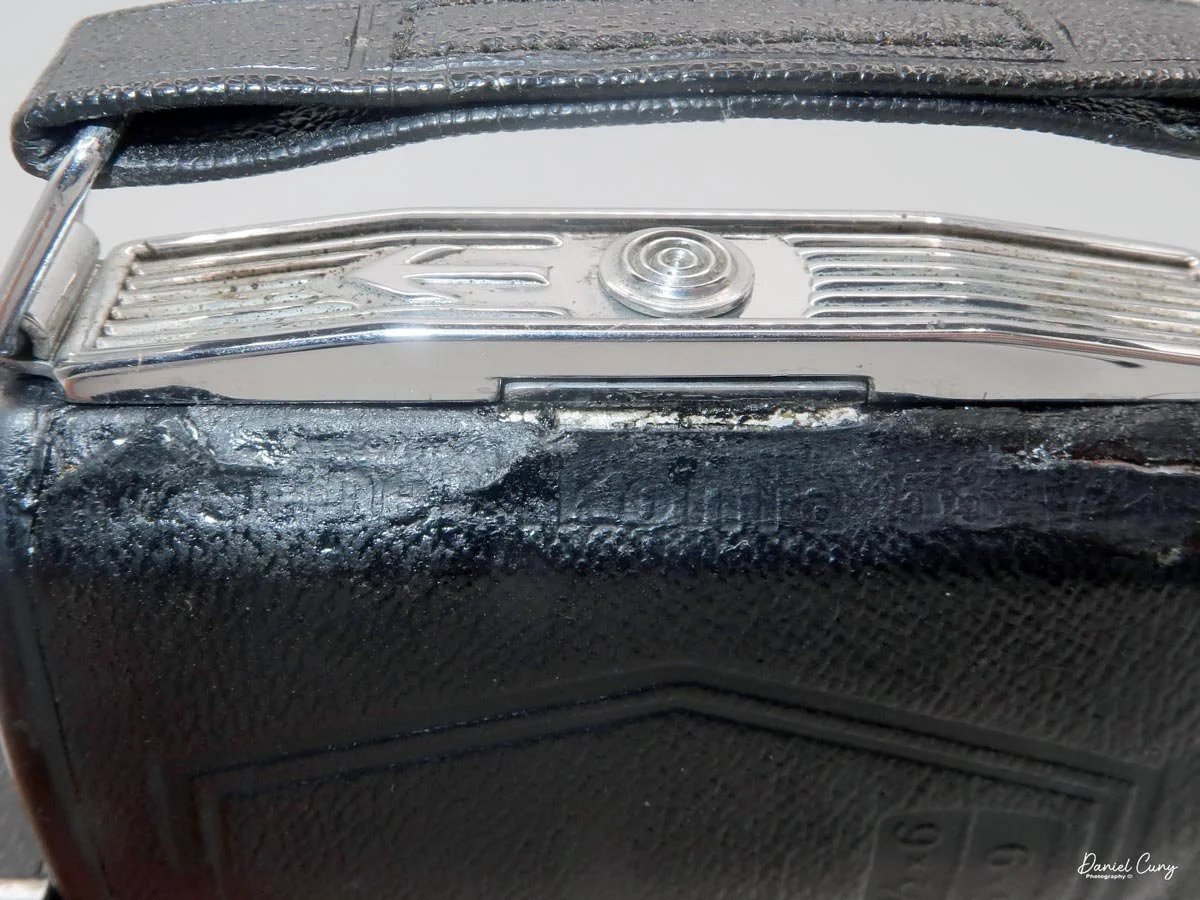
To open the back of the camera to load film, under the camera's handle is a small slider with an arrow pointing toward the opening. Slide the small knob in the direction of the arrow, and the camera back will open. Load the film as you would any 120 roll film camera, roll the film so the "start" arrows are showing, then close the back of the camera, and wind the film advance knob so the number 1 shows up in the appropriate window on the back of the camera. 

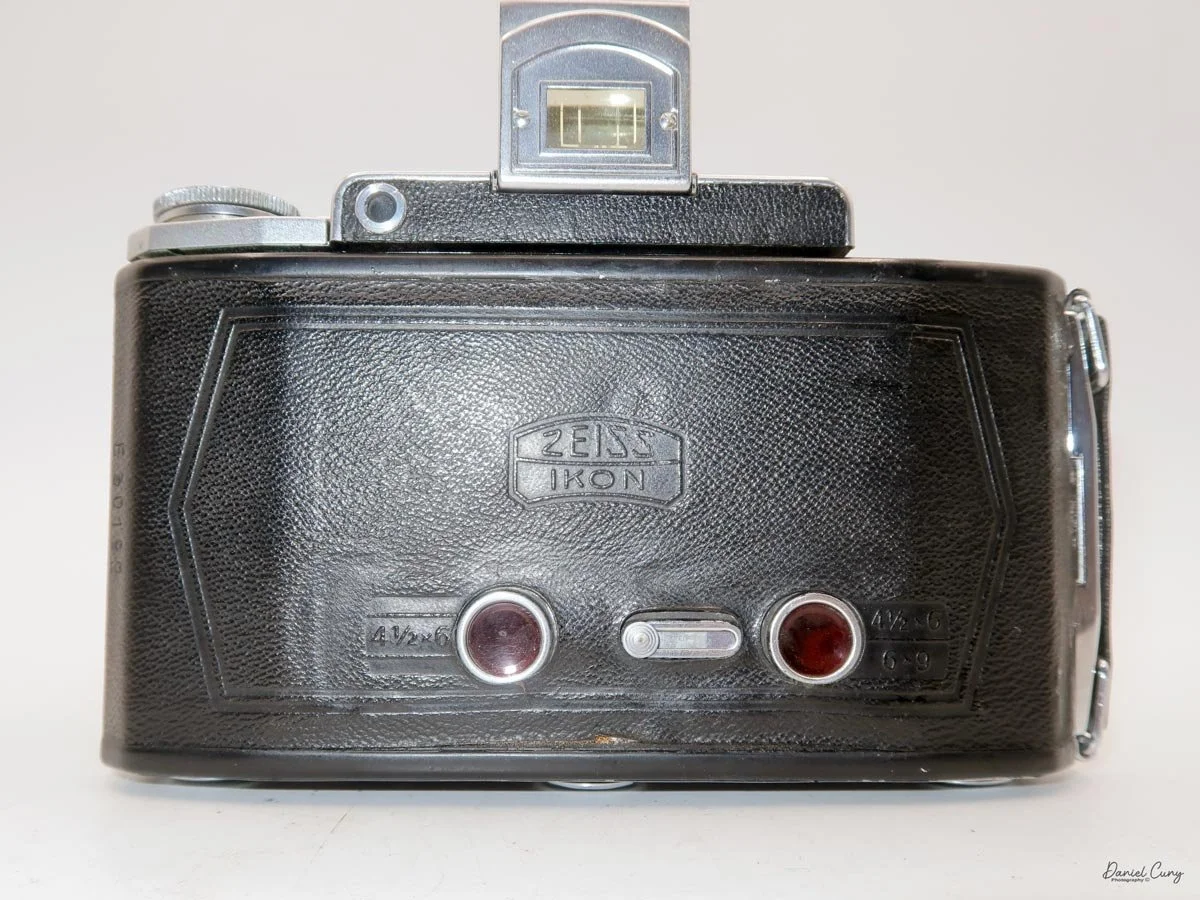
There are two red widows on the back of the camera: one for 6x9cm images and one for 6x4.5 cm images, if you have the metal insert in. If you have the insert in the camera, you'll use both windows for film advance, as you would with a 127 film camera with two windows. Stop at the number 1 on the far right window, then take your photo. Wind the film until the number 1 appears in the second window on the left, then take your photo. Then wind the film until the number 2 shows up on the first window on the right side, and so on through the number 8. For 6x9cm images, you'll get 8 exposures per roll; for 6x4.5, 16.

 To close the camera for transport, slide the arm you extended for focus back over the bellows. Holding the camera with both hands, press in on the locking arms on the struts to lock the bellows and lens into place; the bed will collapse a bit. Fold the lens back into the camera until the camera clicks closed, then flip down the Albana finder.
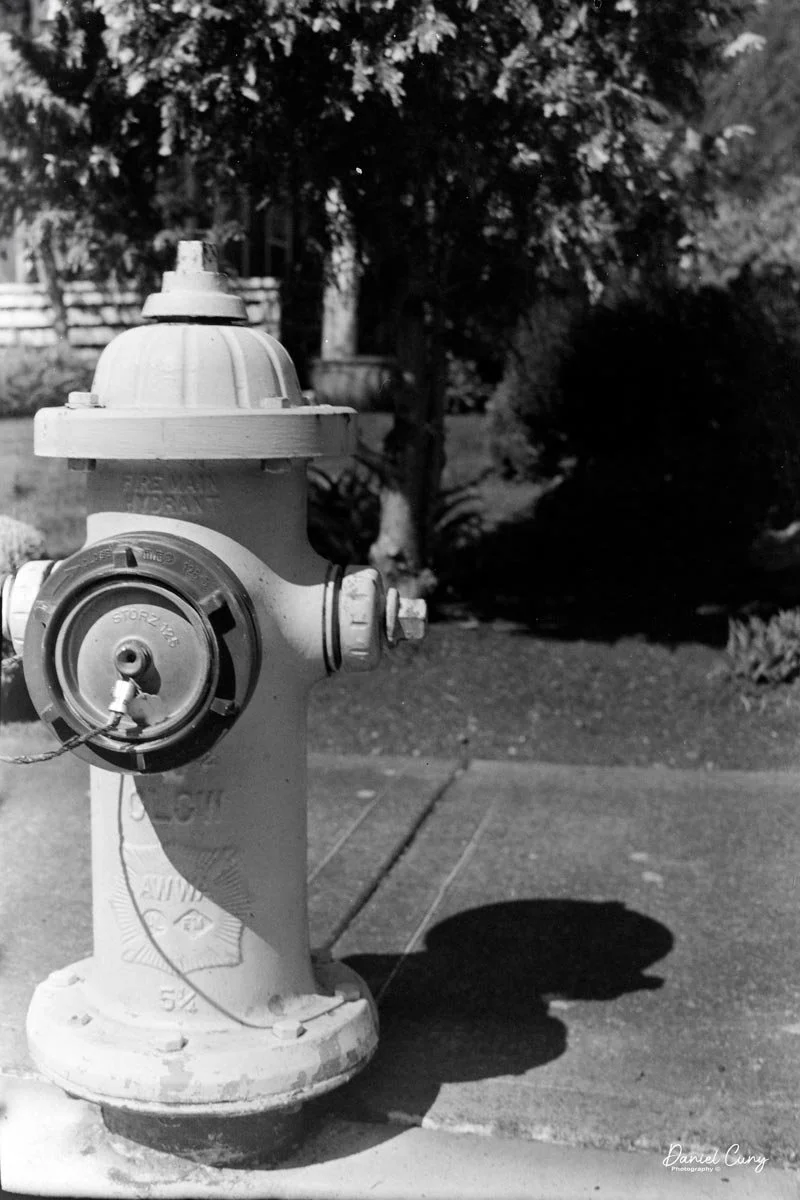
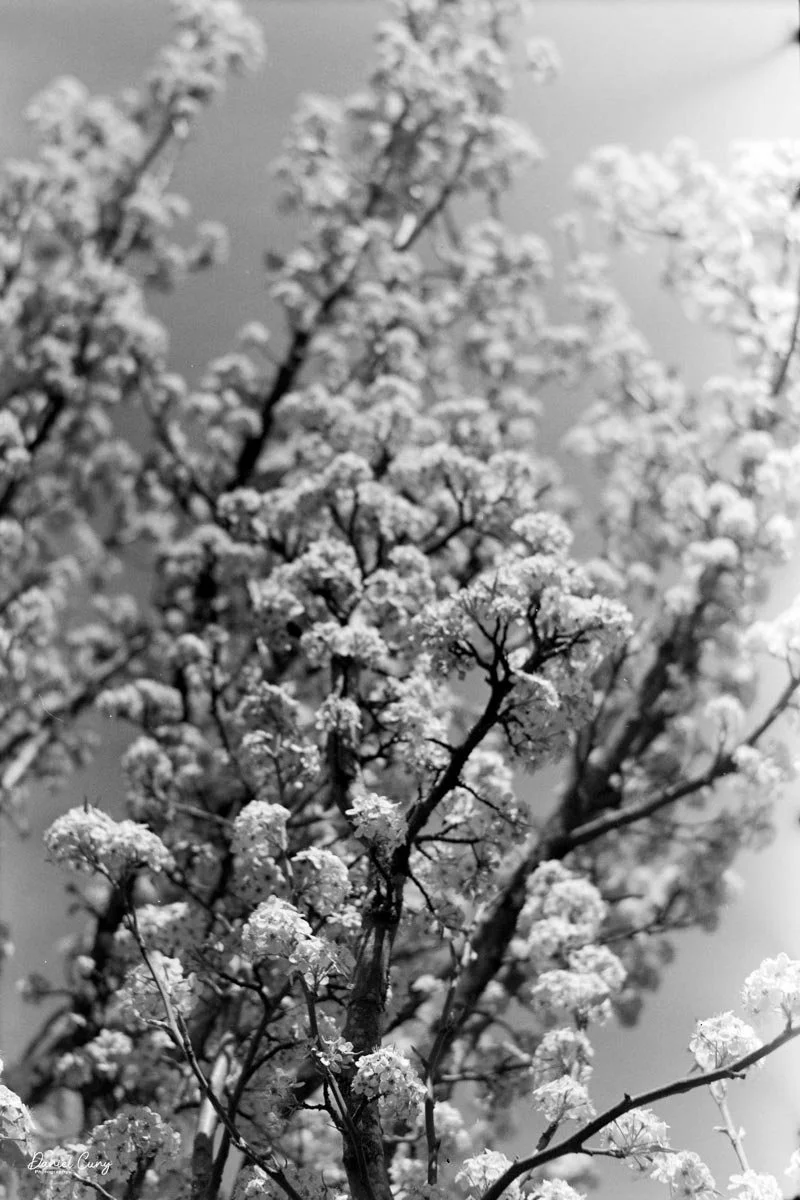
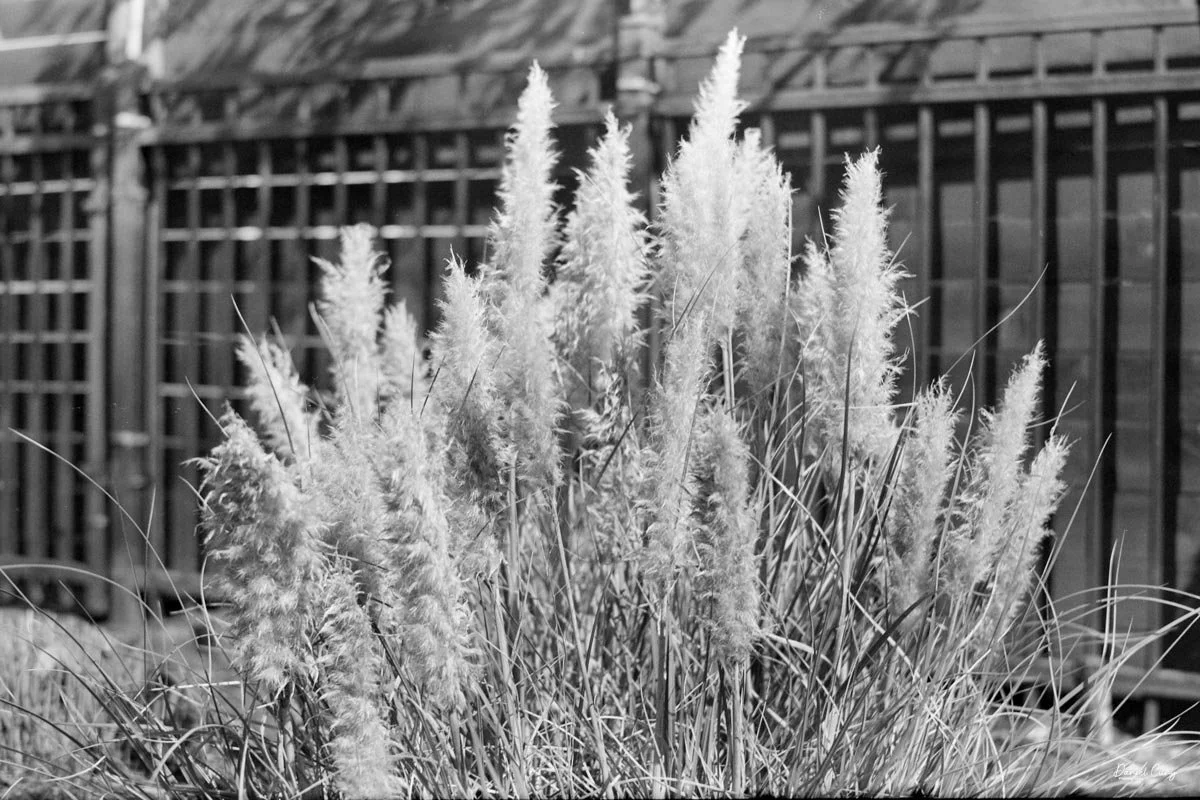
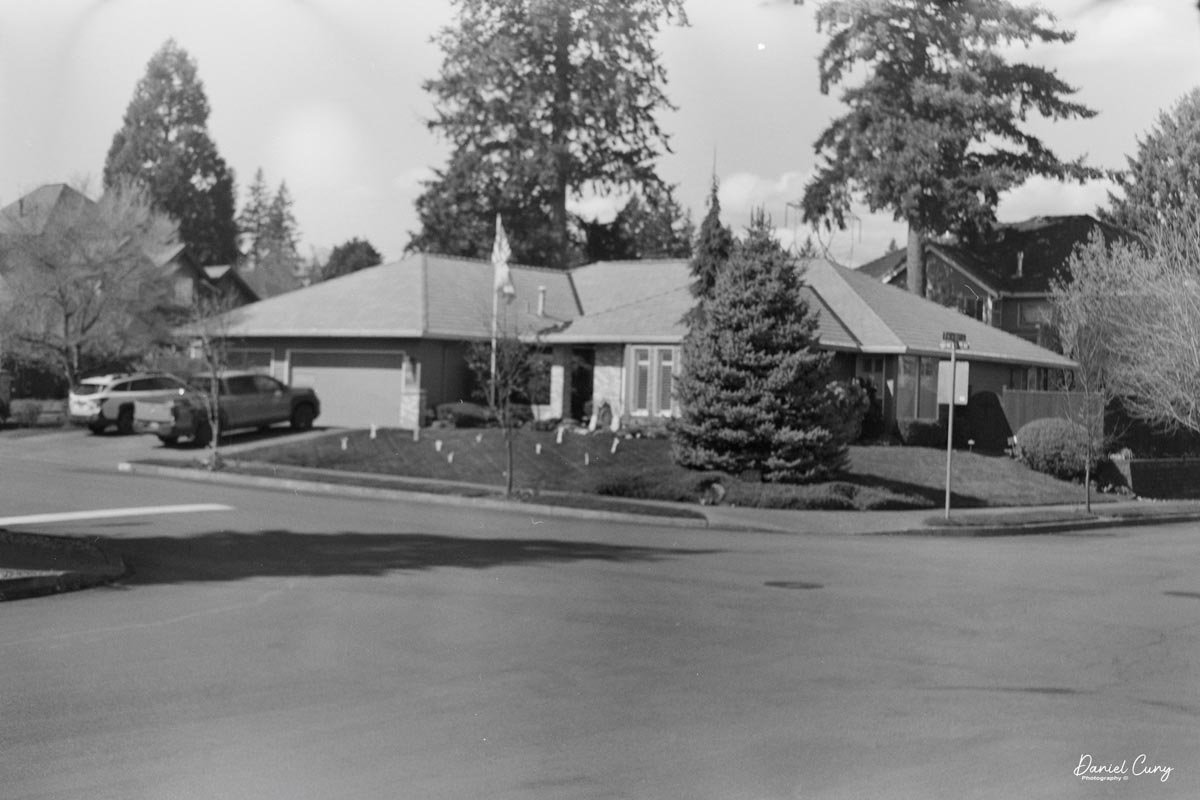
My Images:

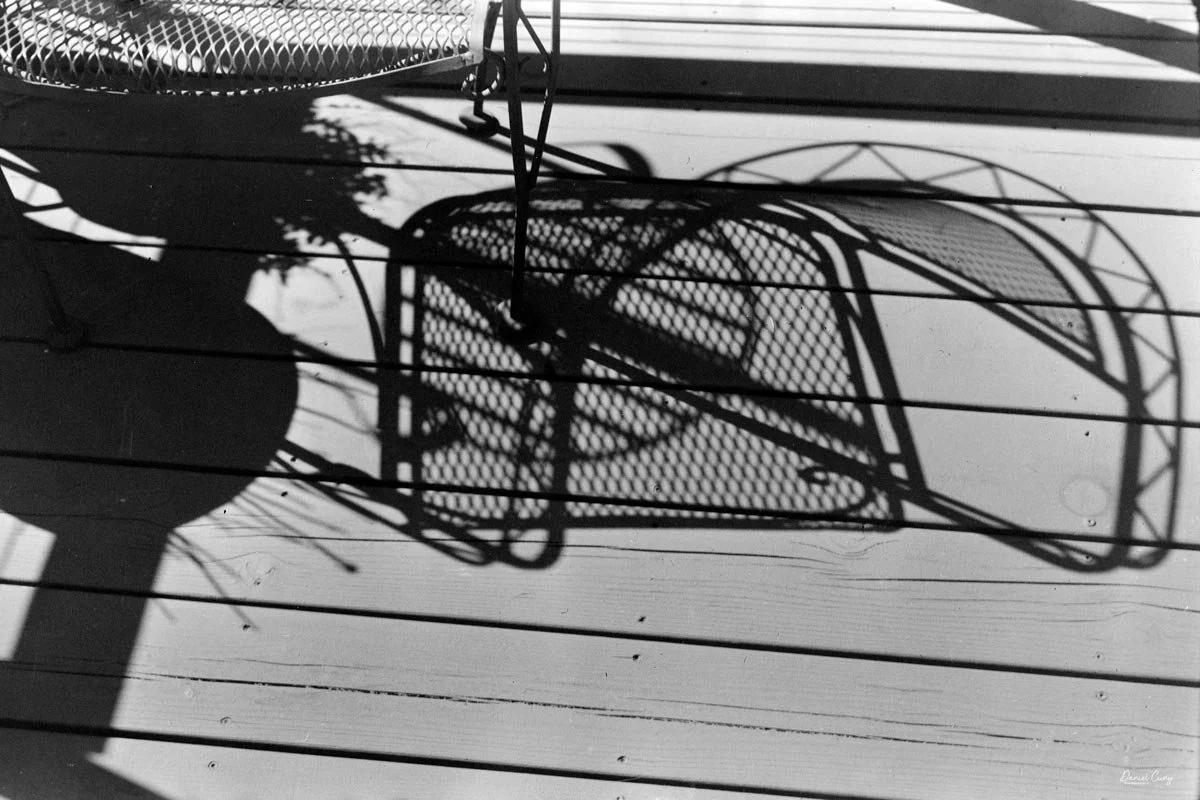
 Let's take a look at how the images turned out. Here are a few of the images I took with the Zeiss Ikon Super Ikonta camera.

Conclusion:

 The first few images were incredibly sharp, well-exposed, and as I expected. I noticed that towards the end of the roll, the images became softer and less sharp, which concerned me. What did I do wrong?

 To give some background, I had eye surgery on my right eye, which is my dominant eye, about a year or two ago. When I went to see the eye doctor, I could barely make out details with my right eye, so surgery was necessary. Since then, it's gotten a bit better, but not as good as it used to be. Now I'm getting used to putting the camera up to my left eye, which is considerably better than my right. It still feels awkward, but it's my new normal.

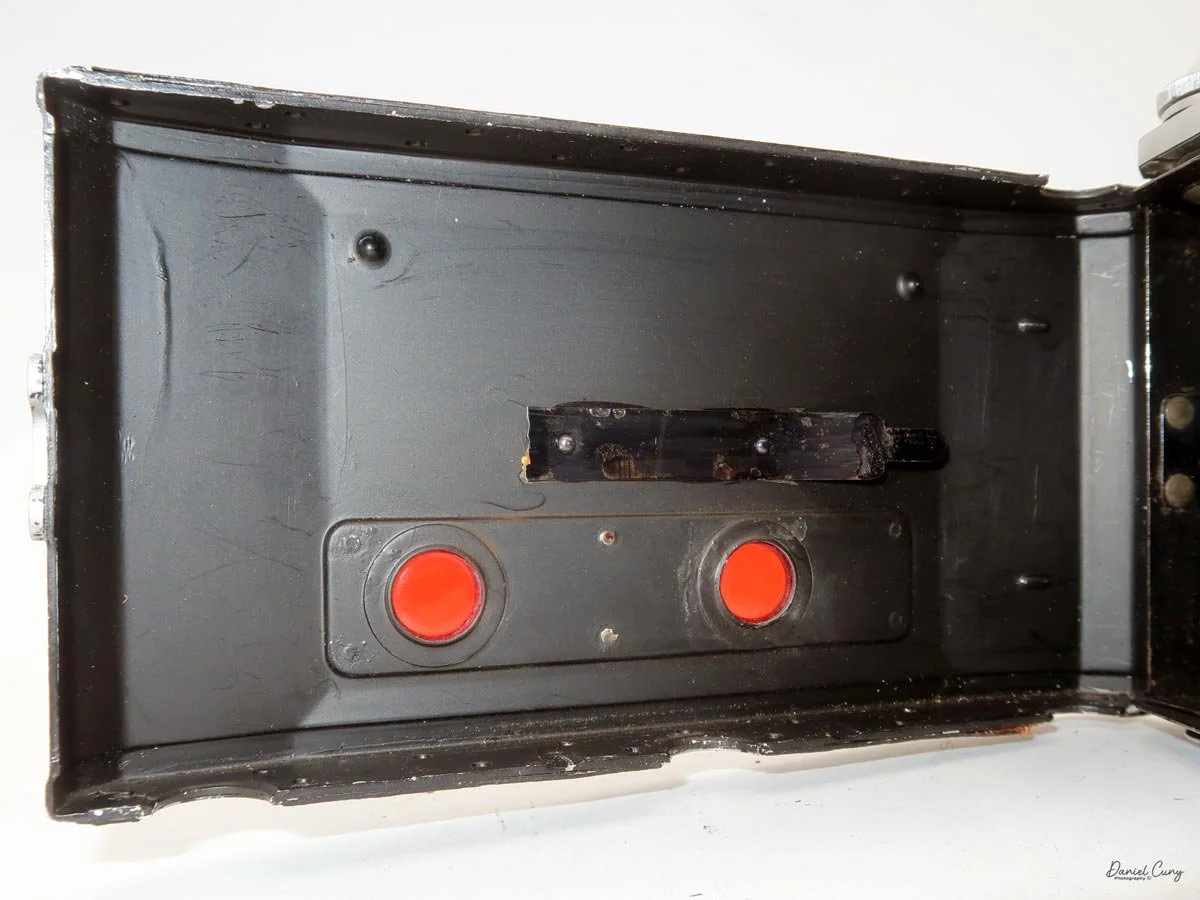
Missing pressure plate

 I thought this contributed to the images being soft. Then I remember what a good friend, Mike Eckman, said a few weeks ago when we were discussing image sharpness. He said that he had a similar instance and noticed that the film's pressure plate was missing. At this point, I opened the back of the camera, and sure enough, the pressure plate was missing. 

 How could I miss that when I'm loading the camera? You get so used to looking at and loading cameras that you miss that a camera doesn't have a pressure plate.

 At this point, I'm sure I could manufacture one out of something like thin foamcore and just cut out circles for the red window. Still, it's a lot of fun to use, and the images are incredible. I'll chalk it up as a learning experience and double-check to be sure they have the pressure plate from now on.

 Here are some of the other Camera Reviews I've done.

 Cuny's Cameras and Photos is my online eBay store where I sell some of the cameras I've reviewed, along with other camera accessories, lenses, etc.

 Please feel free to comment on this or any of the other camera reviews I've done. I'd love to hear from you.

 Until next week, please be safe.


Sony Mavica MVC-FD5

My Sony Maniac MVC-FD5 camera.

I started working in a retail camera shop way back in 1975. The store where I worked was dominated by non-professional photographers, with more of a consumer-based customer base. We sold a lot of film and processed a lot of film. At that time, the store where I worked had a good mix of simple cameras, such as the Kodak Instamatic, and some of the more basic Polaroid models of pack cameras. 

 But if you wandered over to the more professional side of the store, the cameras on that side of the store had Nikon F and Nikkormat, Minolta SRT series, Canon FTb, Pentax Spotmatic, mainly single-lens reflex and simpler rangefinder cameras were available. The market in our store didn't offer higher-end brands such as Leica, Hasselblad, or large-format brands like Sinar or Toyo.

My camera with floppy disk, and manual

 The owner of the camera shop was always looking at new technology and ways to set us apart from the other local camera stores. I still remember back in 1988, when we were introduced to "new technology" that didn't capture images on film. Still, it was a rather small 2" floppy disk. The odd thing about this new revolutionary camera was that it didn't come from a "regular" camera company, but from the major consumer electronics firm from Japan, Sony. At that time, Sony was known to most Americans for their radios, televisions, and other electronics.

 The camera was named the Mavica (magnetic video camera) MVC-C1 which was a consumer based camera which was flat shaped, that fit well in your hand, and held a 2" floppy disk called the Mavipak. At the time, these were what we consider "digital images", but rather Still Video Images recorded onto the floppy disk, and intended to be played back on your television. You could record up to fifty images on the Mavipak. Once the images were taken, you'd connect the camera to your television using the MAP-T1 adapter and display the images on the television screen.

 In December 1988, Canon introduced a similar camera, the XapShop. It too was a similar-shaped camera that captured still video images on a 2" floppy disk. While both cameras were making a splash in the market, it wasn't until early 1989 that the Sony MVC-C1 became readily available to consumers.

 At the time, the idea of capturing images on a floppy disk was odd, and the image quality was poor. Also, when the camera was introduced, it had a hefty price of $650.00 for the Sony and a similar price for the Canon XapShot kit, which, for our consumer-based market, was a steep purchase.

 Still, the owner of the camera stores thought well enough of the cameras that we picked up a few of both the Sony and Canon lines of still video cameras, and for a while, we did well selling them to the early adopters in the community. These were the same people who had early Motorola mobile phones.

Sony Digital History:

 Sony's ascent to the top of the digital imaging world didn't happen overnight; it was the result of decades of transition from analog video heritage to high-resolution silicon. While many associate the "digital revolution" with the late 90s, Sony's groundwork began much earlier with a device that wasn't technically digital, but fundamentally changed how we perceived photography.

Sony Mavica advertisement.

 In 1981, Sony unveiled the Mavica (Magnetic Video Camera). It is often cited as the spark for the digital revolution, though it was actually a "still video" camera. Instead of film, it recorded analog signals onto a proprietary 2-inch floppy disk called the "Mavipak." While the resolution was equivalent to just 0.28 megapixels and intended for television viewing, it proved that the industry could move away from chemical processing toward instant gratification.

 It wasn't until the late 1980s and early 1990s that Sony moved into fully digital territory. In 1988, they introduced the MVC-C1, the first Mavica aimed at consumers. However, the real breakthrough for the masses arrived in 1996 with the Cyber-shot DSC-F1. This camera featured a distinctive swiveling lens, a built-in flash, and a 1.8-inch color LCD screen—a luxury at the time. It utilized a 0.35-megapixel CCD sensor and marked the birth of the "Cyber-shot" brand, which would dominate the point-and-shoot market for the next two decades.

 In 1997, Sony released the Digital Mavica MVC-FD5 and FD7. These were iconic because they used standard 3.5-inch floppy disks as storage media. While competitors were struggling with expensive, proprietary cables and software, Sony users could pop their disk into any PC and view their photos instantly. This ease of use allowed Sony to capture roughly 40% of the digital camera market by the end of the 1990s.

 As the 2000s began, Sony pivoted from a gadget manufacturer to a serious contender in the optics market. By acquiring Konica Minolta's camera business in 2006, Sony gained the mechanical "know-how" of traditional SLR systems. This led to the birth of the Alpha series.

From the experimental Mavica to the launch of the first full-frame mirrorless systems, Sony's beginning was defined by a willingness to abandon tradition in favor of electronic innovation. They didn't just join the camera industry; they forced it to go digital.

My Camera:

 My Sony Mavica MVC-FD5 was introduced in late 1997 or early 1998. It's a fairly large camera, measuring 5" wide by 4.25" tall by 2" deep, and it weighs 1 pound, 5.7 ounces with the battery, strap, and a 3.5" floppy disk installed. The camera has a 4.8mm F/2.0 lens, equivalent to a 47mm lens on a 35mm camera. The camera is a fixed focus camera and in normal mode will focus to approximately 4' from the lens. The camera does have a macro lens. Under the flash, there is a sliding bar you slide to put the camera in macro mode; then the focus distance is 3"-9" from the lens surface. 

The images are recorded onto a standard 3.5" floppy disk (1.44mb) which is inserted into the camera through a door on the left side of the camera. On the back of the camera, in the lower left corner is a switch which says, "open". Sliding the button down, opens the door where you insert the 3.5" floppy disk. To remove the disk, press the button inside the disk's door, and the floppy will be ejected. 

 The camera records images at 640 x 480 resolution in JPEG format and has two shooting modes: Standard and Fine. Each floppy disk will hold 30-40 standard images or 15-20 fine images.

All the controls on the Sony Mavica MVC-FD5 camera are located on the back. The controls are around the main 2.5" screen, which has a total of 61380 dots. Once the camera is turned on, which is done by a sliding switch to the right of the screen, named "power on/off". Slide the switch down to turn the camera on, and to shut it off, slide it down again.

It's very interesting, and something I didn't remember from owning this camera soon after it came out in the late 1990s. Still, once you turn the camera "on, and there's a floppy disk in the camera, you'll hear a noise of the internal disk drive spinning and making sounds because the camera is checking the disk, making sure it's seated correctly and can write to it. It's also the sound you hear when you switch the button on the back of the camera from "play" to "camera," or vice versa, as the camera spins the disk to read images or prepare to accept them. It also makes a sound when in "play" mode, as you go from one image to another. Here's a short video of turning on the camera and taking a photo.

Video showing the camera being powered on and the time to record an image with camera sounds.

Once the camera is powered "on", most controls are set via a rocker switch and a button to the lower right of the camera's screen. As mentioned previously, there is also a switch for "camera" or "play" which allows the camera's settings to be set in each mode. If you press the rocker switch when it's in the "camera" mode, a menu will pop up with options for Clock Set, Beep, Field/Frame, Quality, and Return.

In the "play" mode, the menu settings are Clock Set, Beep, Format Disk, Delete, Protect, and Return. Interestingly, Clock Set and Beep are in both the camera and play menu. 

One other button on the back of the camera is "display," which turns the menu on or off on the camera or in play settings. It lets you focus on the images on the screen without being distracted by menu settings that can cover parts of the screen.

 Once the clock settings are set, you've turned on/off the beep sound, and you have the floppy disk in the camera. You're ready to power on the camera to take a photo. When you turn on the camera, you'll hear disk noises, see the date pop up on the back, and, in the upper right corner, see a spinning circle indicating the disk is turning inside the camera. Now you're ready to take photos.

 The camera doesn't have a viewfinder, so once the camera is powered on, and the screen has gotten past the time function, you've seen the spinning disk, the camera will go into "live" mode, where you'll see the images you're pointing the camera at on the back screen. Like many cameras from this era, the screen is dark, and you can barely see an image on a bright, sunny day. You can brighten or darken the screen with two switches to the left of the screen, named "bright" with a "+" on the top button, and a "-" on the bottom.

There is no shutter or aperture control on the camera, as exposure is automatically controlled. You can make the images brighter or darker by up to 1.5 stops by changing the EV setting on the camera's screen once the camera is turned on and in "camera" mode.

 Another oddity of this camera, as with more modern cameras, is that the Sony Mavica MVC FD5 doesn't display the "just taken" photo on the screen once it's captured. To see that image, you'll need to switch from "camera" to "play" mode. The camera will whizz the floppy disk, and you can preview the previously taken image. In the "play" mode, you can view either single images by pressing the arrows forward to backwards, or you can press "index" so you can display a series of six images at a time and scroll to the image you want to see, and press the rocker button to display. PLEASE REMEMBER: every time you switch from one image to the other, the camera displays a message on the back screen that says "accessing file," and it takes a few seconds to show the image.

 In the "play" menu, you can also "protect" or "delete" images. Still, like the other settings, it takes a few seconds for the camera to complete the request, since it's basically a small computer with a built-in floppy disk and has to find, access, and complete the request you're making.

 At the bottom of the camera is the door, which you open and insert the charged battery to power the camera. The camera's battery isn't rated in shots, but in time. Once you power the camera "on", in the lower right-hand corner of the screen, you see the time in minutes remaining on the battery before recharging is needed.

My Images:

 My wife, daughter, daughter's dog, Bean, and I went for a walk on the town's downtown walkway on the Columbia River. It's a relatively new section of town with shops, restaurants, and housing. It was a sunny and somewhat warm January day in the Portland, OR area, so I took the camera on our trip.

 Since it was a bright sunny day, the rear screen was difficult to see, especially when you're trying to have the sun on the subject, meaning the sun is also hitting the screen as you're taking the images.

 Another interesting fact is that these files are small. Even the largest files the camera produced were only 70kb for Fine and 34kb for Standard images. These were specifically made for viewing on your computer or television, and are not really intended to be printed, especially not anything larger than the standard 3x5 photo.

 Here are some images from our walk.

Conclusion:

 I never would have guessed that a 2-inch floppy disk would eventually bring the Nikon F's reign to an end. The MVC-FD5 wasn't a 'pro' tool—it couldn't compete with a Hasselblad for clarity—but it offered something those giants couldn't: the end of the waiting period. It traded resolution for time, a trade-off that eventually redefined the entire industry.

 It's interesting for the young photographers of today to compare this camera to what's available on our phones; it's an eye-opening comparison:

Camera: Sony Mavica MVC-FD5 (1997) Modern Smartphone (Approx.)

Resolution: 0.3 Megapixels (640 x 480) 12 - 48 Megapixels

Storage Media: 3.5" Floppy Disk (1.44 MB) Internal Flash (128 GB+)

Photo Capacity: ~20 "Fine" Image 30,000+ Images

Write Speed: ~4-6 Seconds per photo Instant

 I had owned this camera sometime in the late 1990s. It wasn't long after it was introduced that I purchased a used one. It was in 1999 when I had one. 

 Thinking back, this was a pretty fun camera to shoot with, and now that I have it again, it's fun to hear it make the different noises as it accesses the files to show on the screen. The images are very small and, as mentioned, made for screen viewing, not much resolution to make prints from. Even by today's computer standards, the images look very pixilated due to the higher resolution of today's screens.

 I'm happy to have this camera back in my collection, more as a marker of digital photography's growth than something I'm going to use daily. It is, just like with older film cameras, fun to see how these image-making machines have progressed over time.

 Thank you for taking the time to read a bit about this older digital camera from my collection. Next week will be the final installment of January's Early Digital month, and I have a rare and good one for you. Please remember to keep an eye out for it.

 Here are some of my other Camera Reviews.

 I also have a store on eBay, Cuny's Cameras and Photo, where I sell some of the cameras reviewed, along with many other camera odds and ends. If there's something that interests you, drop me a line, and I'll offer a discount.

 Until next week, please be safe,