Mizuho Six camera

My Mizuho Six camera & case

During my trip to Tokyo a month or so ago, one of my primary goals was to find a little-known or unusual camera to write about for this camera-collecting blog.

 It was on my last day in Tokyo that I visited Used Camera Box for the second time. To say this camera store is filled to the rafters is beyond description. Most of the camera stores I visited in Tokyo were well laid out, with space between cameras. All the items with tags and prices are very visible. It's very similar to what you'd see in any city in the world, with cameras or other products displayed. 

 The Used Camera Box is unlike most camera stores you'll come across.  The shop is pretty small, but the amount of cameras they have is unbelievable.  Many of the showcases featuring the higher-priced, most desirable cameras are well displayed. 

 Then there are other areas of the store with showcases with cameras on top of cameras, on top of cameras. Stacked three high and so crammed next to each other, it's difficult to see what they have towards the back of the showcase. 

 There are the bins, many, many bin of cameras. All around the store's perimeter are tall showcases. In front of these tall showcases are plastic bins filled with more cameras. Many of the cameras in these bins are "bargain" items, which means they might have a part missing or not work. These bins are stacked three high, going around much of the store. Because of this, it's probably one of my favorite used camera stores. 

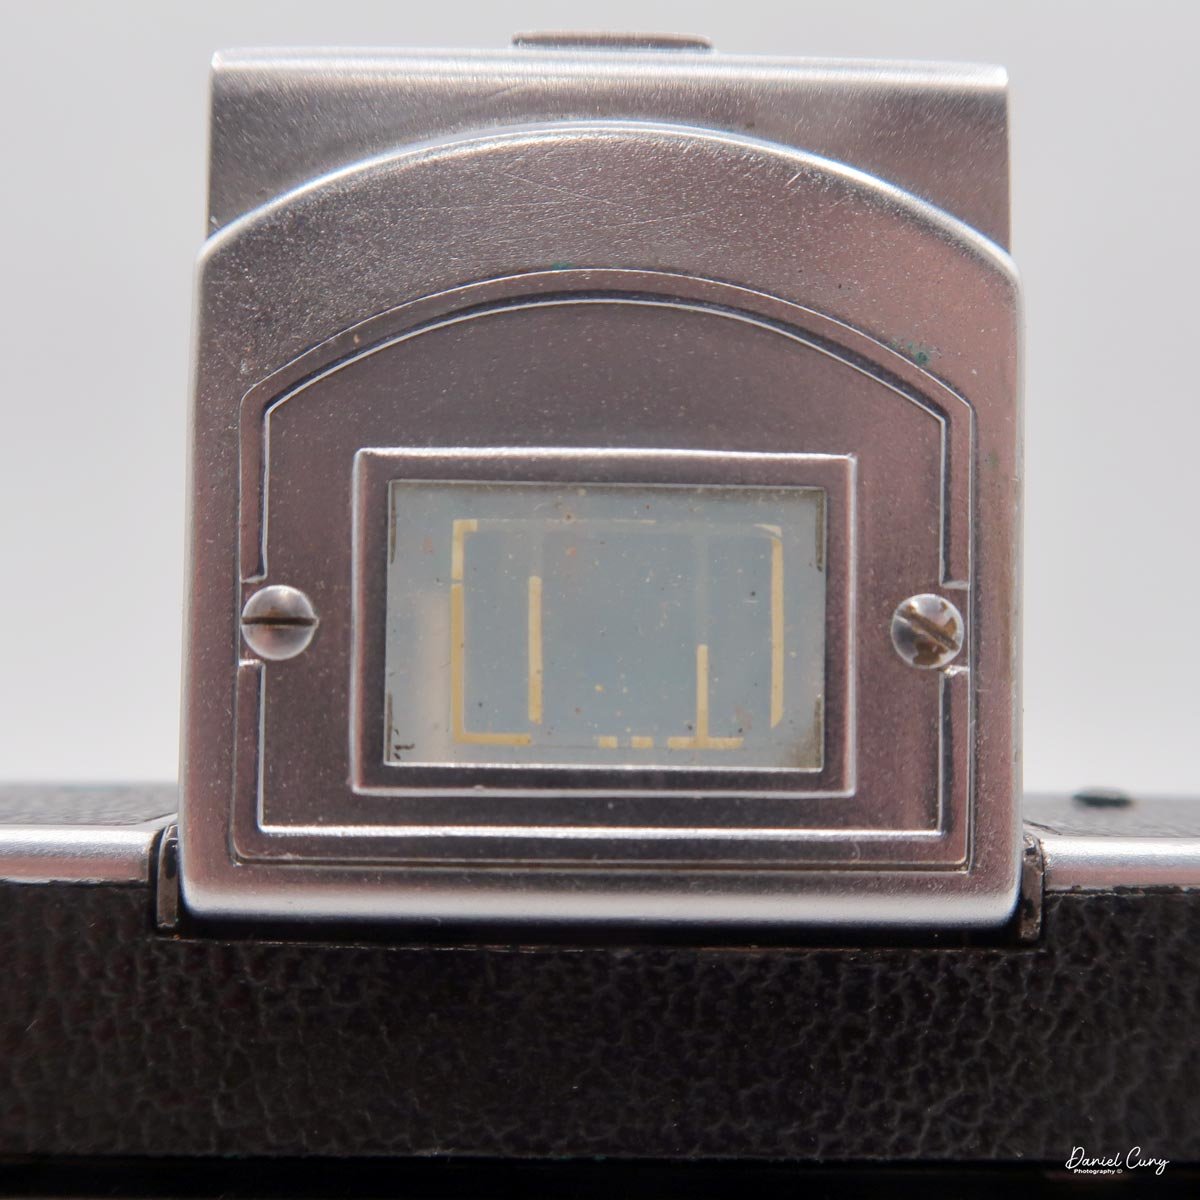
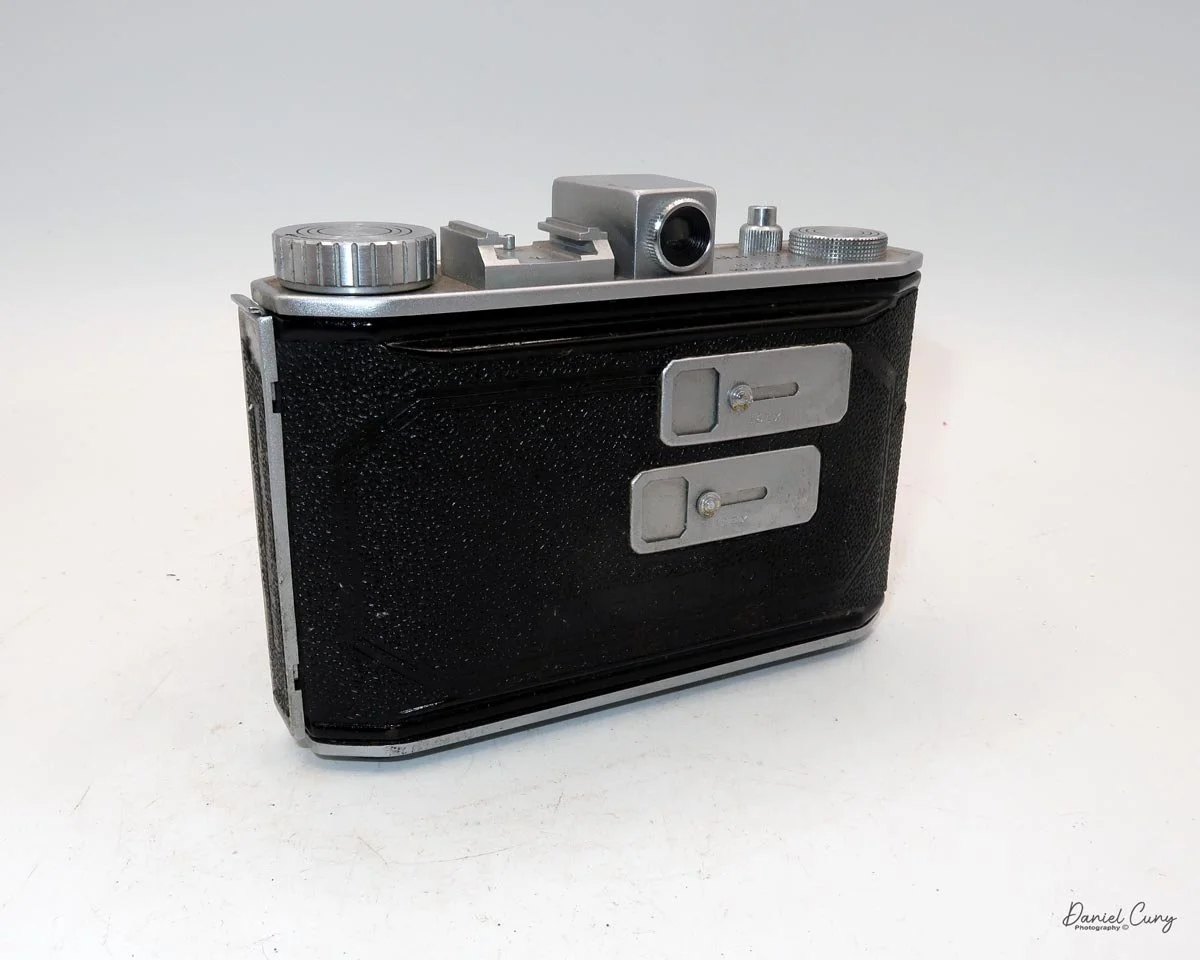
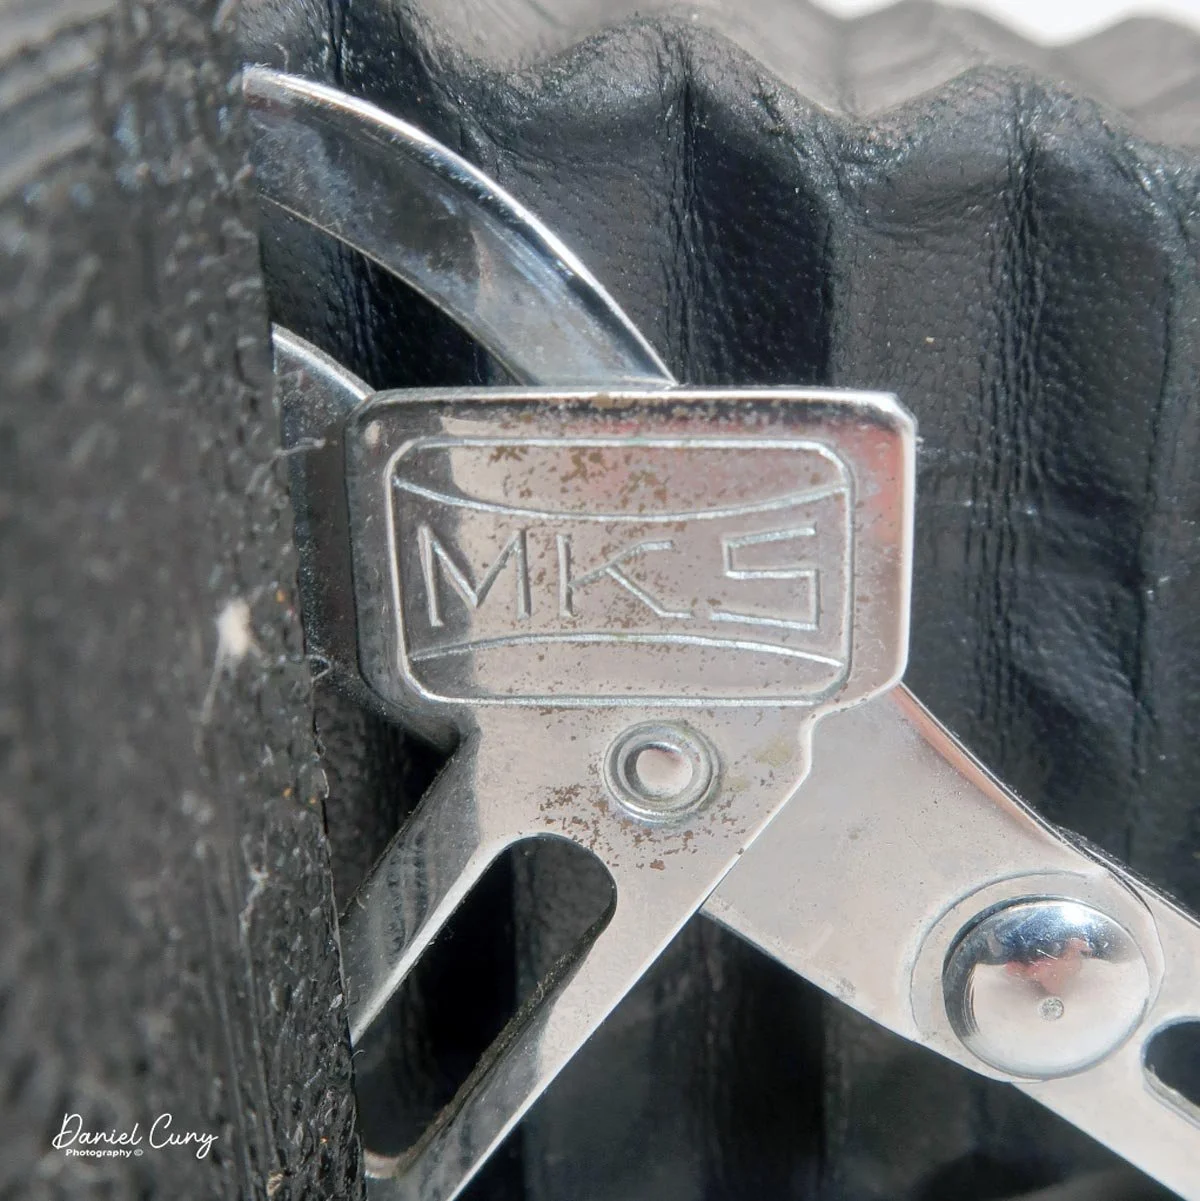
Name on top of the camera below the shutter release

 For me, the real pleasure of collecting is the hunt. The excitement of finding a real odd or unusual item at a bargain price. It's similar to going to a Flea Market, as there may be a real treasure in the next cabinet or stall. 

 I worked my way to one of my favorite showcases towards the back of the store. It's a showcase filled with many of the older cameras. It has a mix of higher-priced and lower-priced items. The patient salesperson let me pull items out and check them out. It was from this showcase that I found this week's camera, the Mizuho Six. The camera comes with a nice leather-fitted case, too. This, along with last week's Baron RI, was another camera I had never heard of until I researched it.

 Just like last week's blog about the Baron RI camera, this week's camera is another very similar style. It's a folding 120 camera made in the early 1950s, when Japan was rebuilding after World War II. 

 It was manufactured by another, smaller, and little-known company that later changed its name to Neoca. Here's some history on the brand.

History:

 The Mizuho Six began life in the early 1950s, when Mizuho Koki of Japan was producing folding medium-format cameras for a market that still valued compactness and simplicity. These early Mizuho-branded folders used 120 film and reflected the practical, postwar approach common among smaller Japanese camera makers.

From my book on collecting Japanese Cameras

 In 1954, the company changed its name to Neoca, and the Mizuho Six line became part of that transition. The name change marked a shift from the earlier Mizuho identity toward a broader Neoca camera range. At the same time, the foldable medium-format design remained rooted in the company's first postwar products.

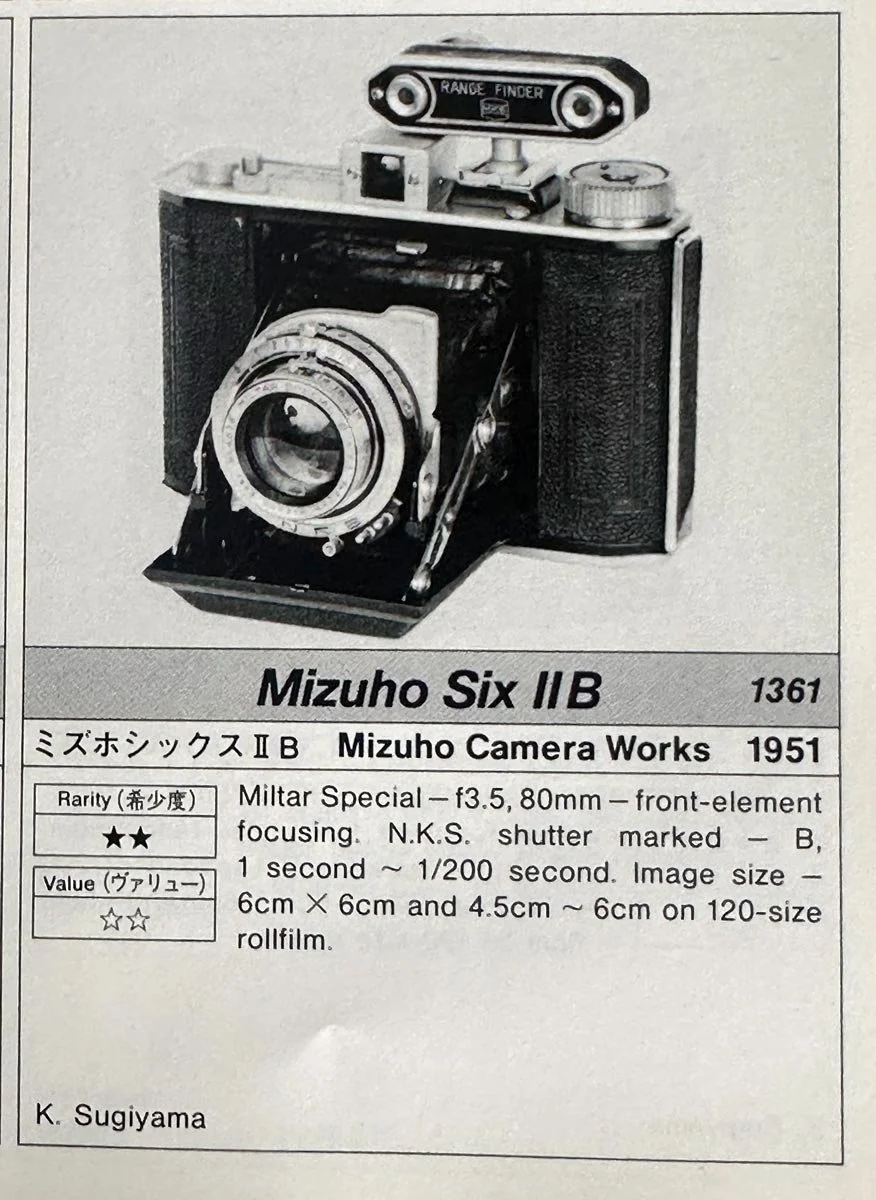
 The Mizuho Six itself went through a series of small but meaningful variations rather than a dramatic redesign. Known versions include the Mizuho Six I, II, III, IIB, IIIB, and V, as well as later Super models such as the Super, Super N, and Super T. These changes suggest the camera was gradually updated with different body details, finder arrangements, and lens or shutter combinations.

 The best-known early version, such as the Mizuho Six V a, was a folding camera that offered either 4.5x6 or 6x6 cm exposures and used an uncoupled rangefinder. That combination made it a flexible, straightforward tool for photographers who wanted medium-format image quality in a portable body.

 As Neoca moved into its own identity after 1954, the company shifted increasingly toward compact 35mm cameras. Still, the Mizuho Six remains important as a bridge between eras. It represents the company's early craftsmanship and the transitional period when Japanese manufacturers were moving from traditional folding cameras toward the more modern designs that would dominate later in the decade.

My Camera:

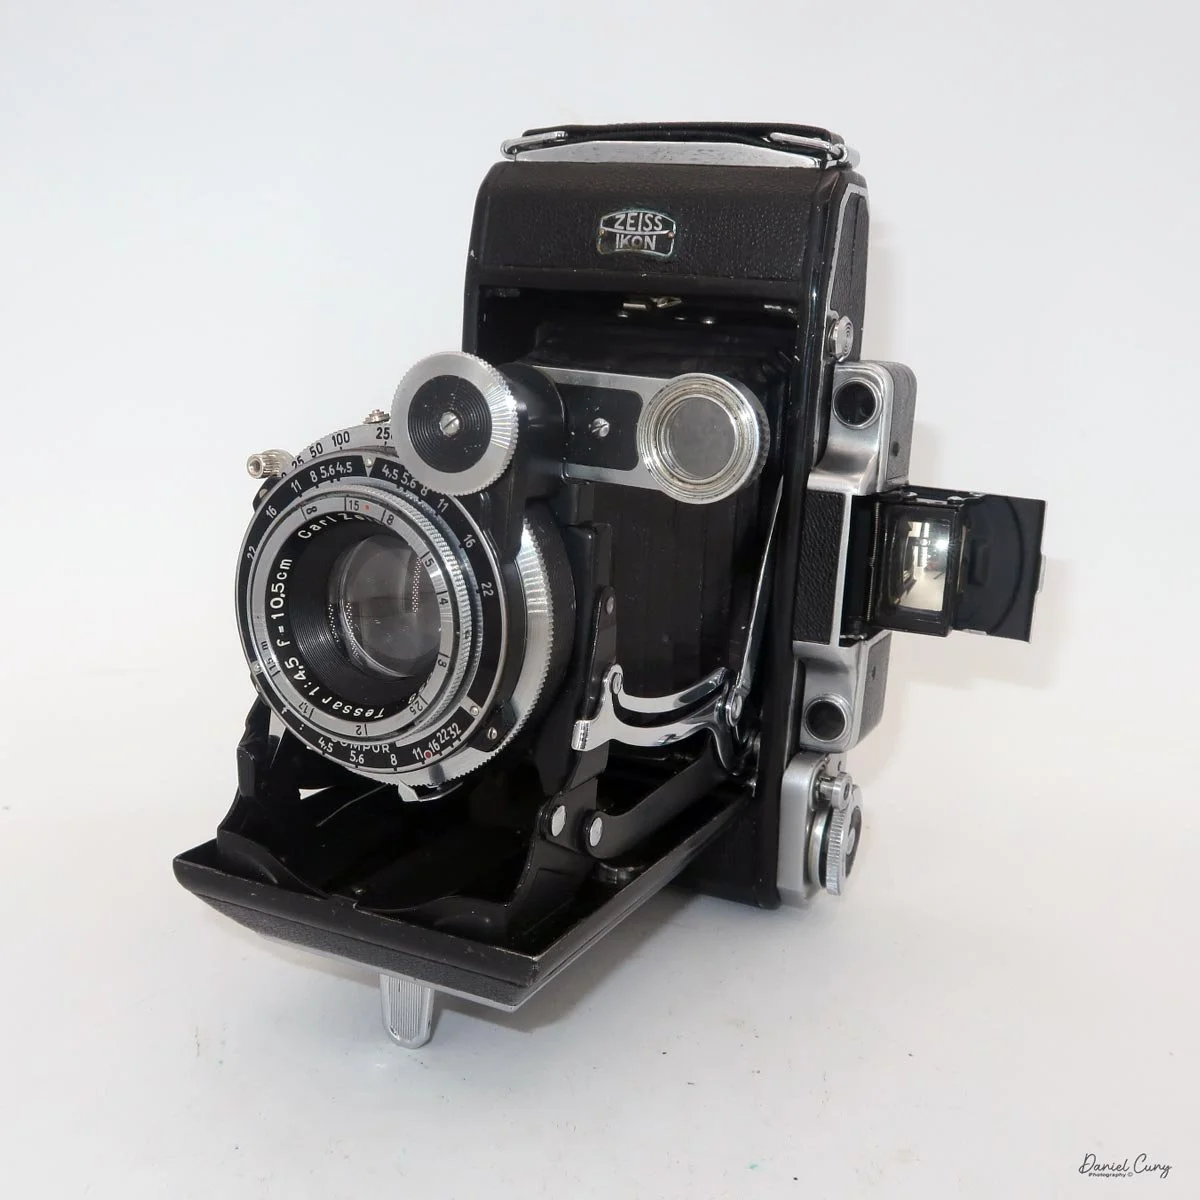
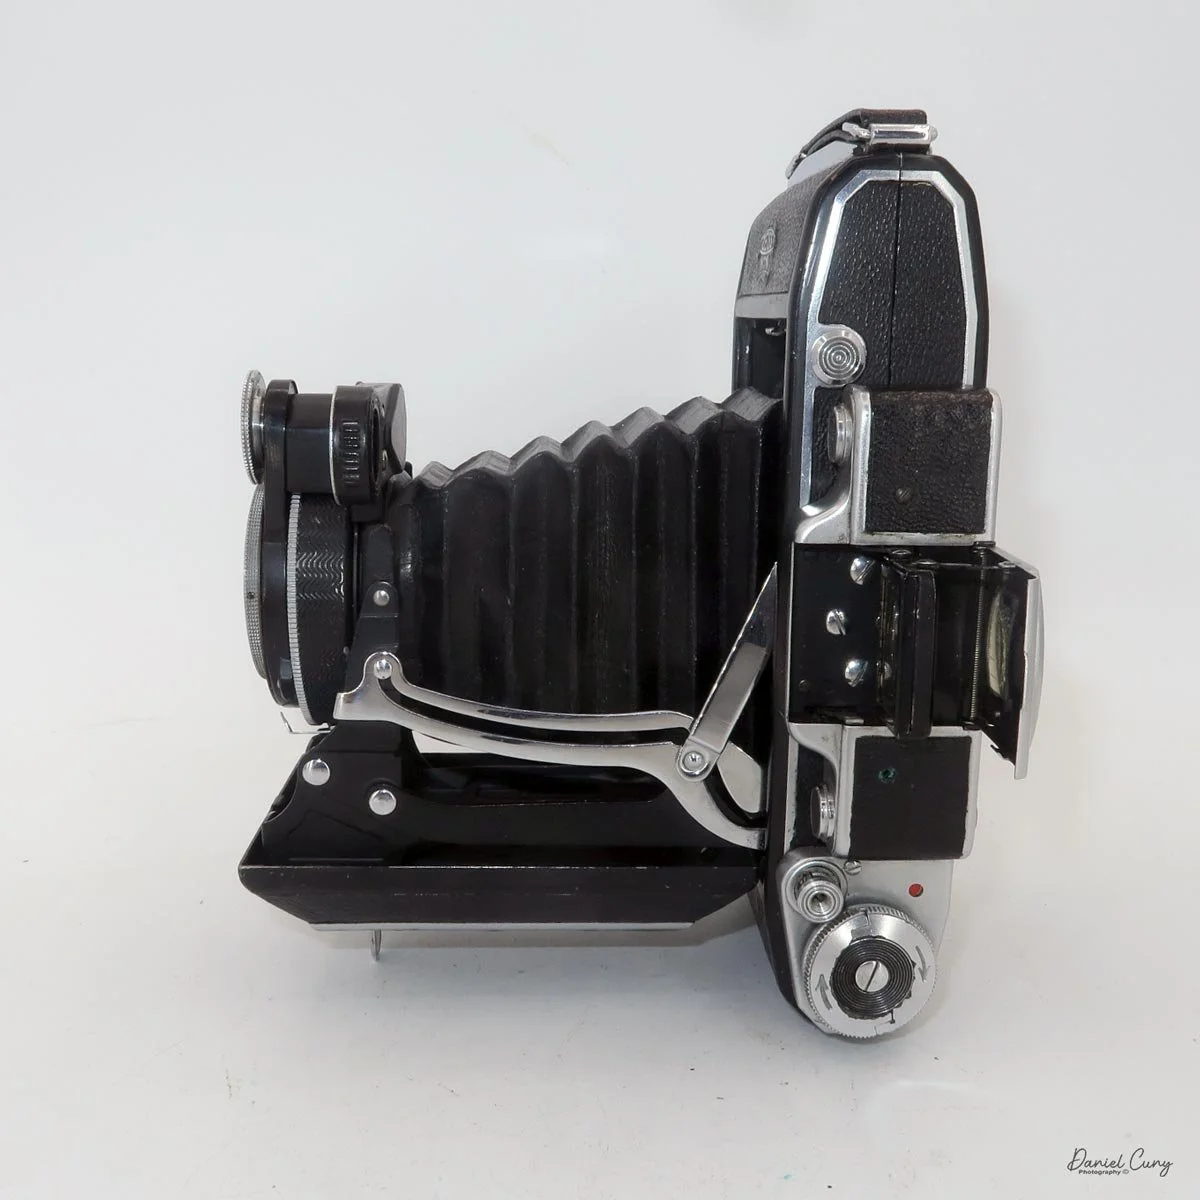
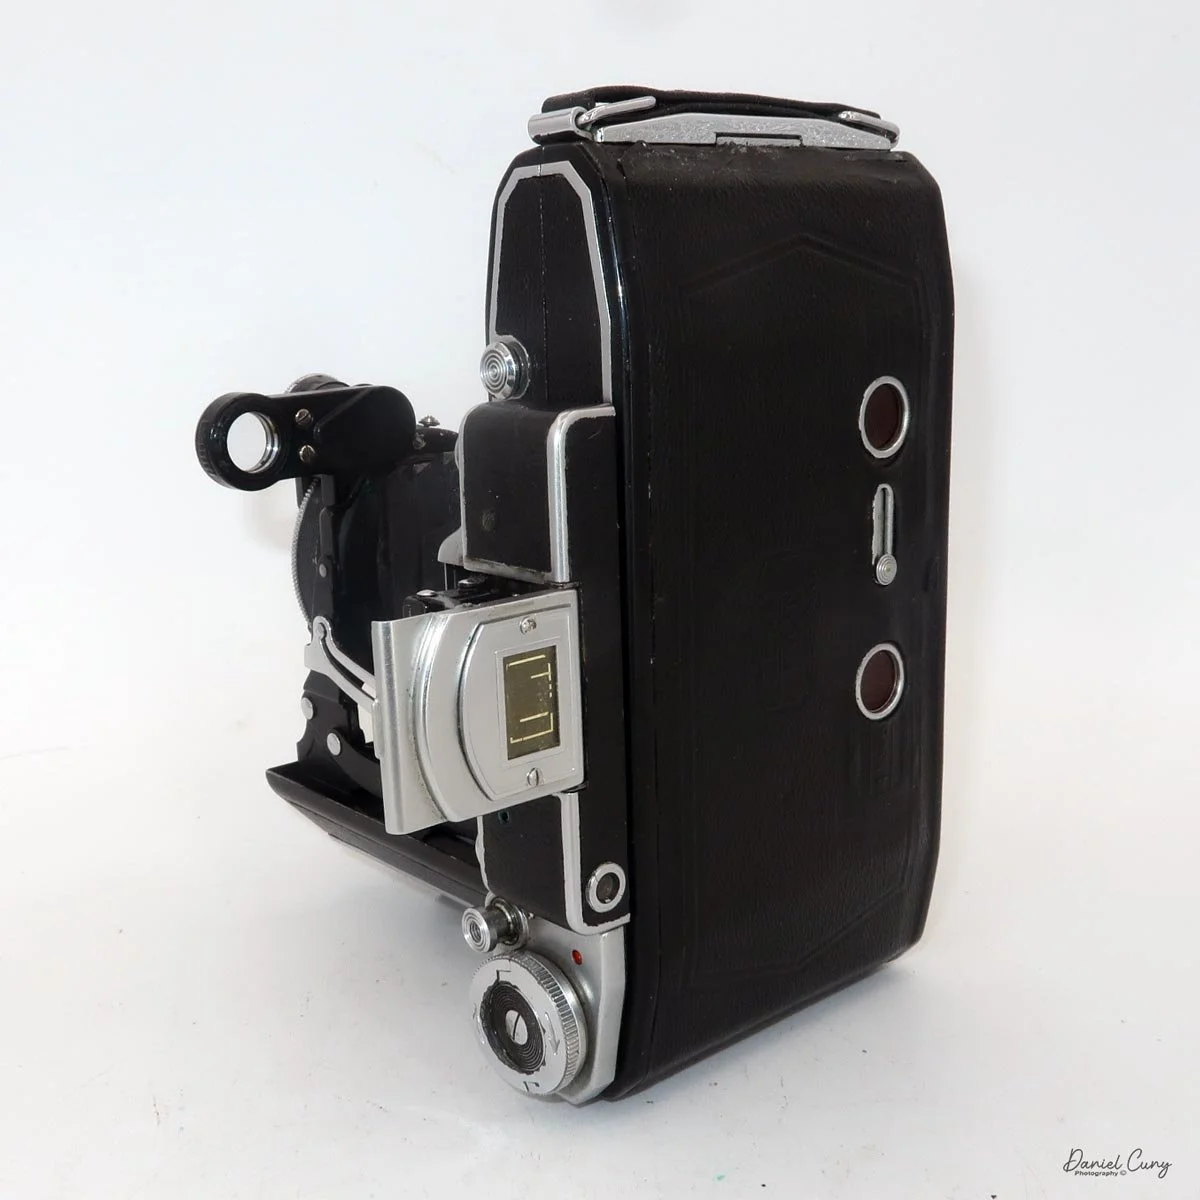
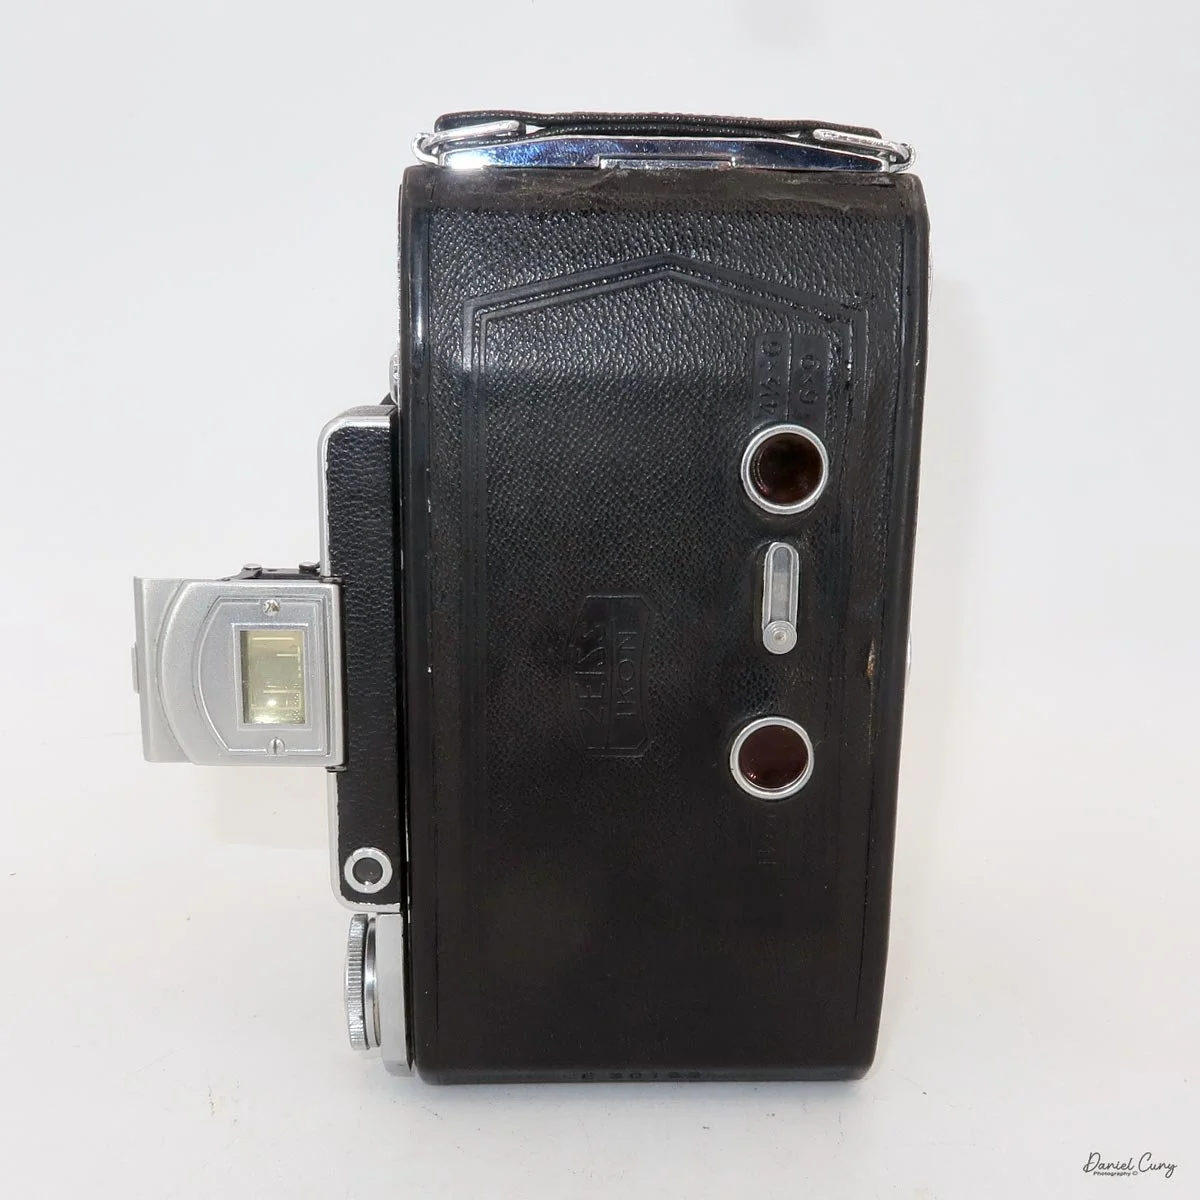
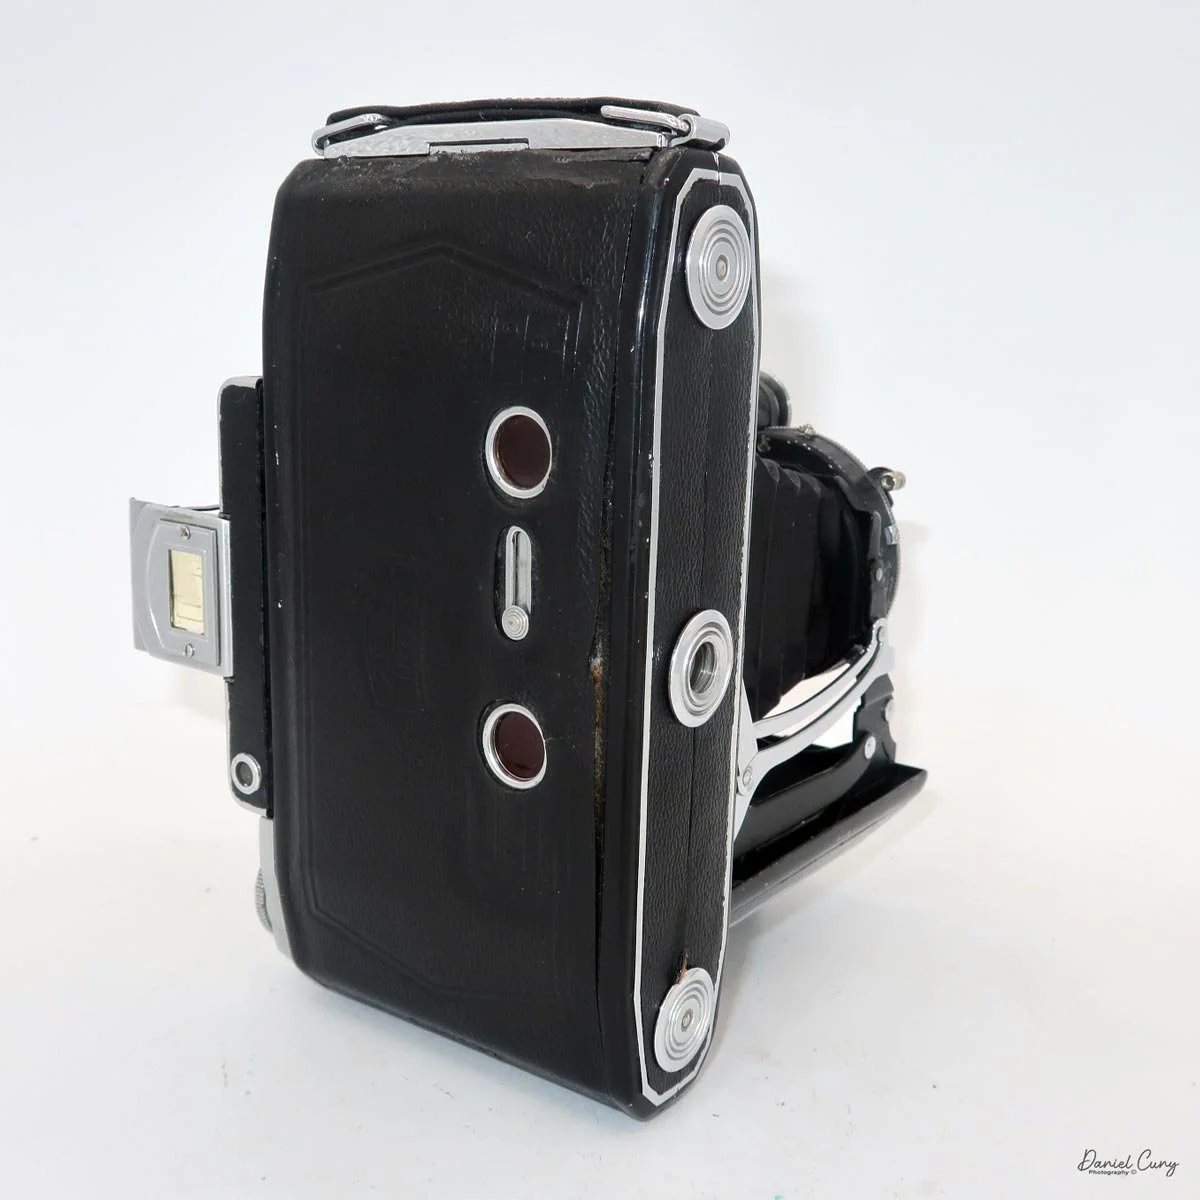
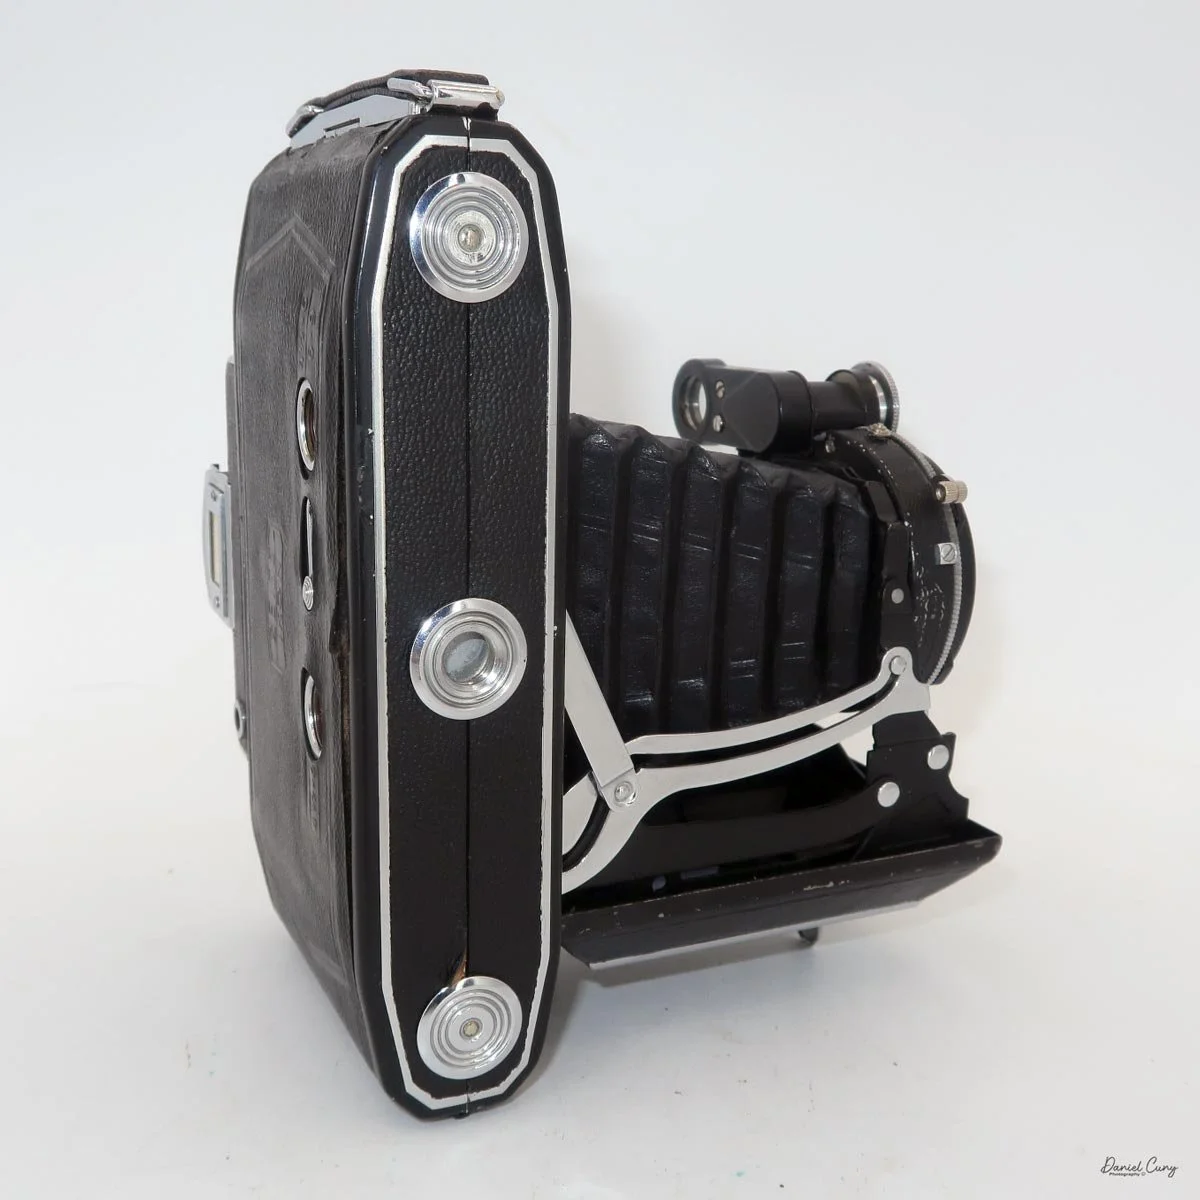
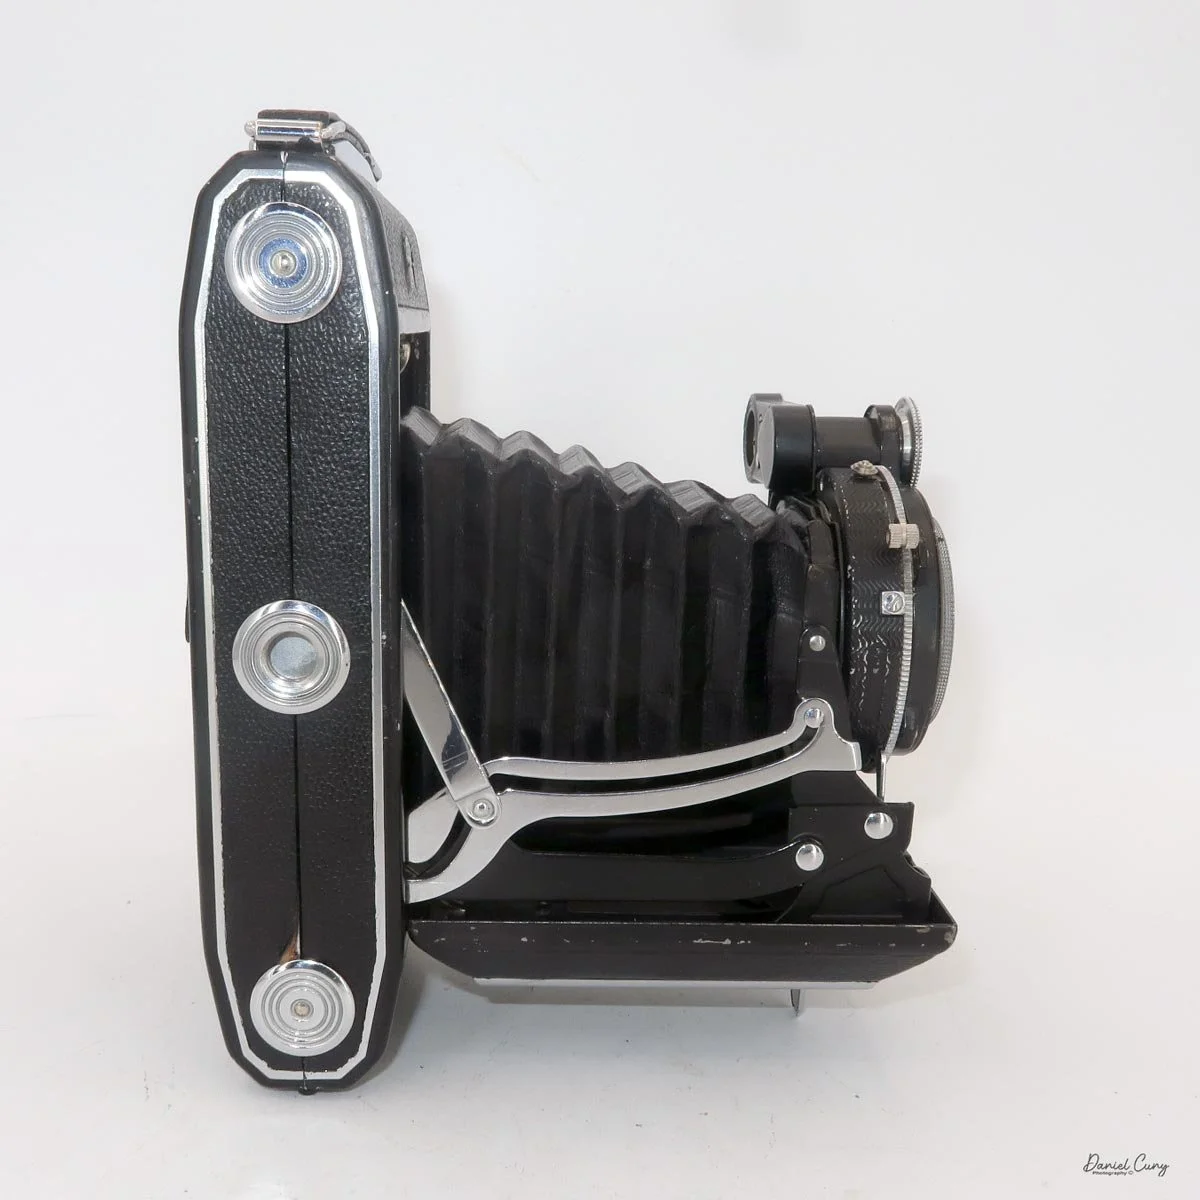
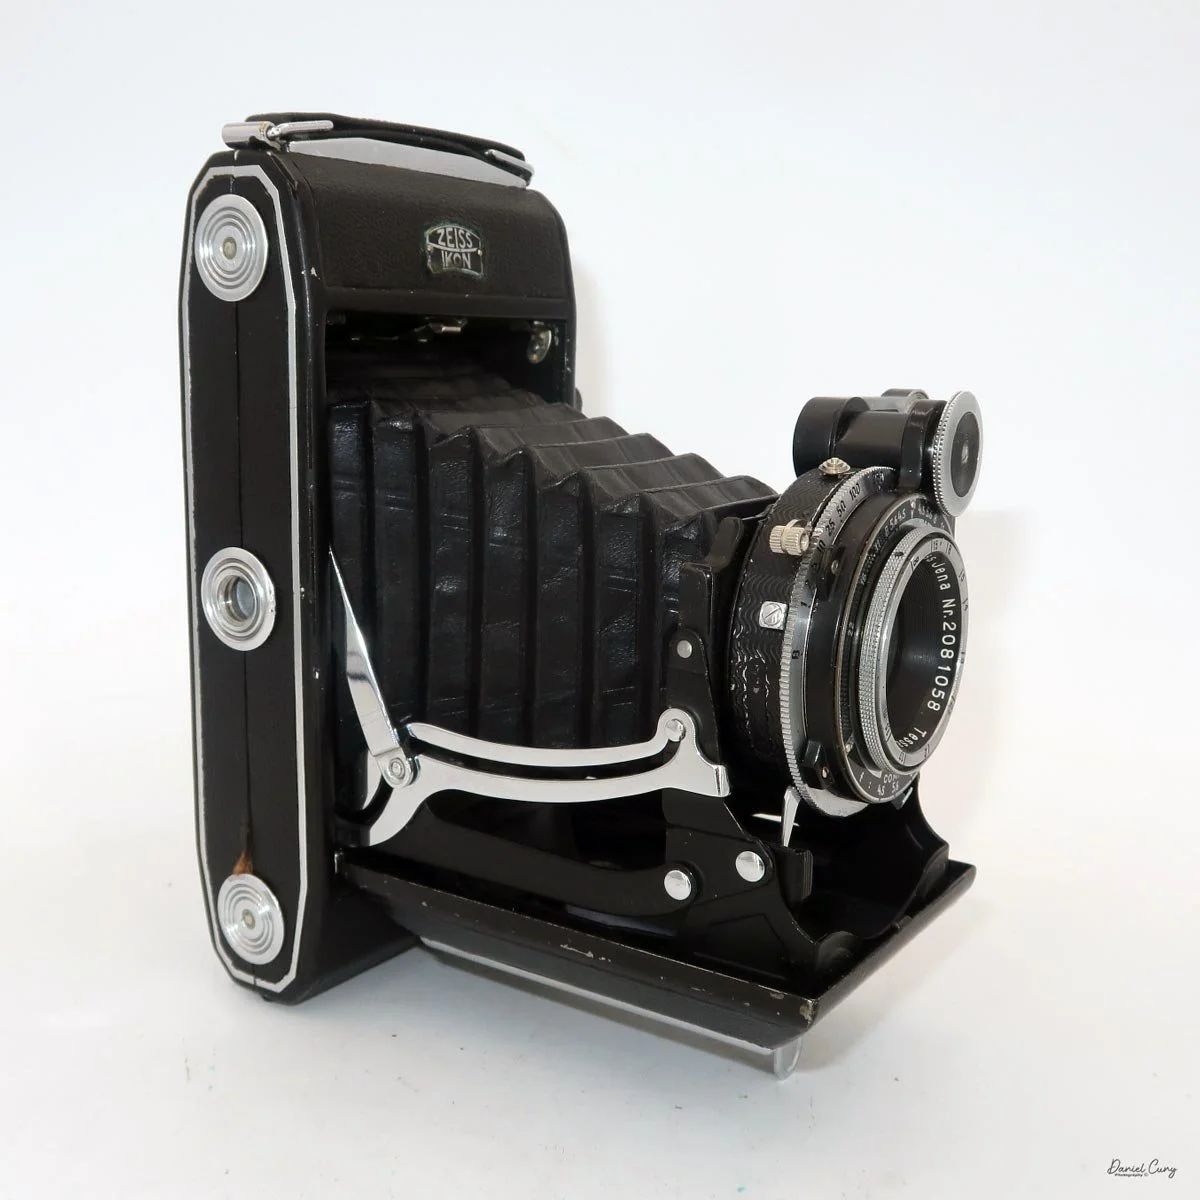
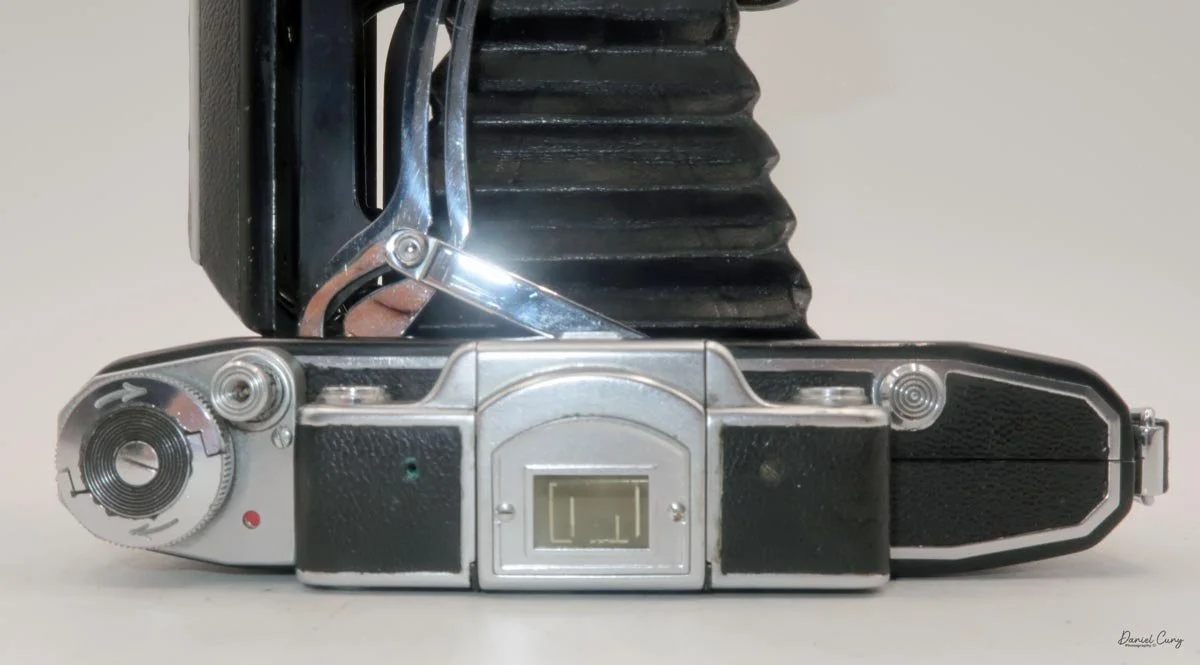
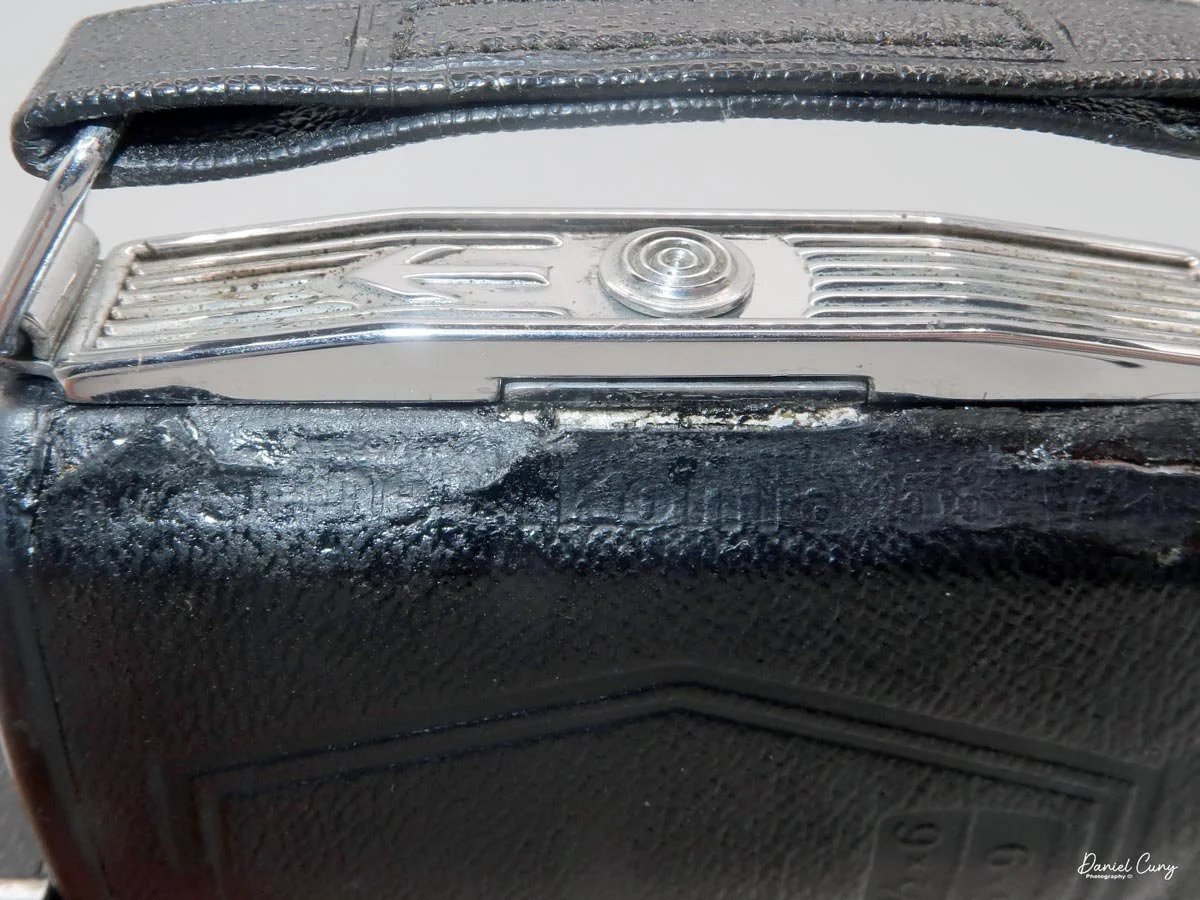
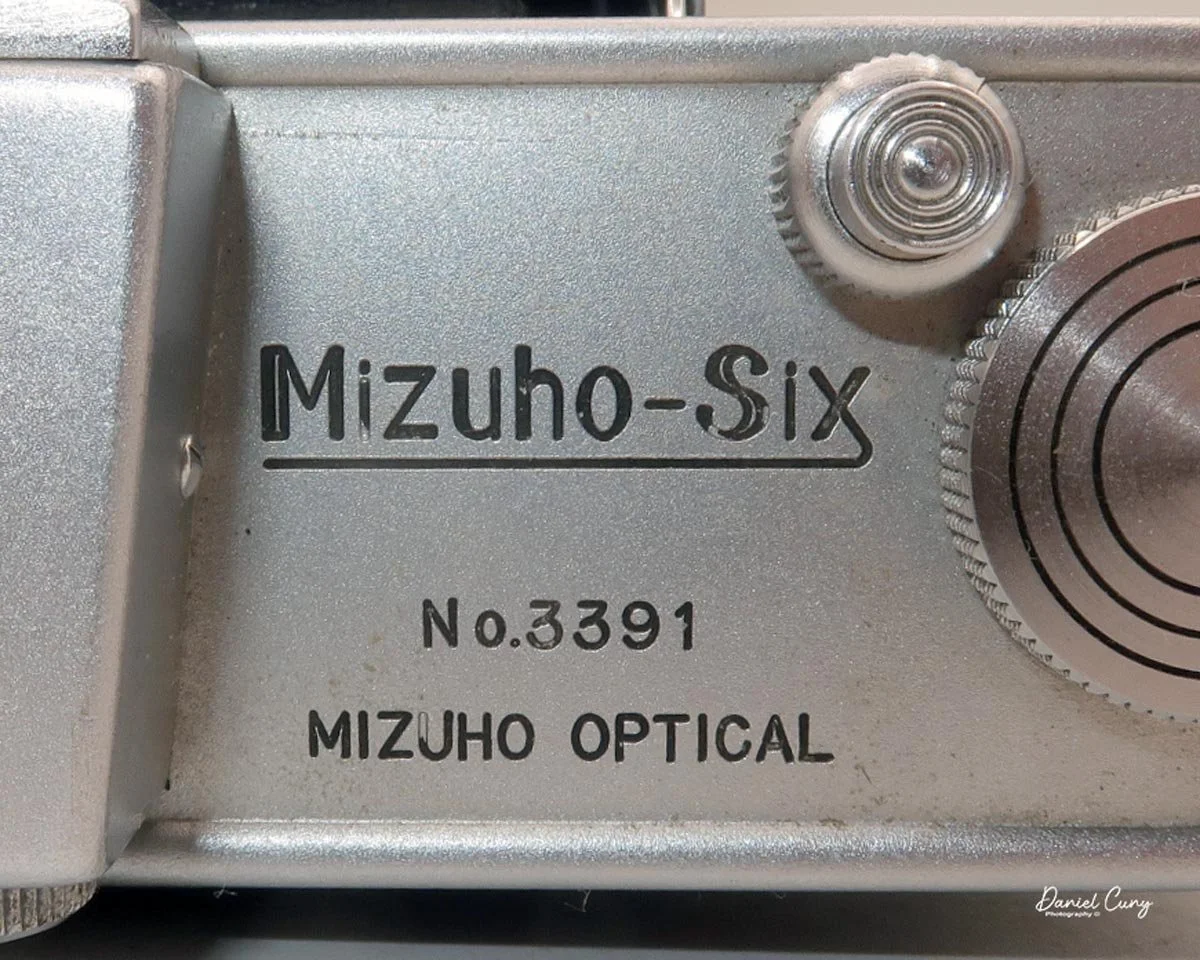
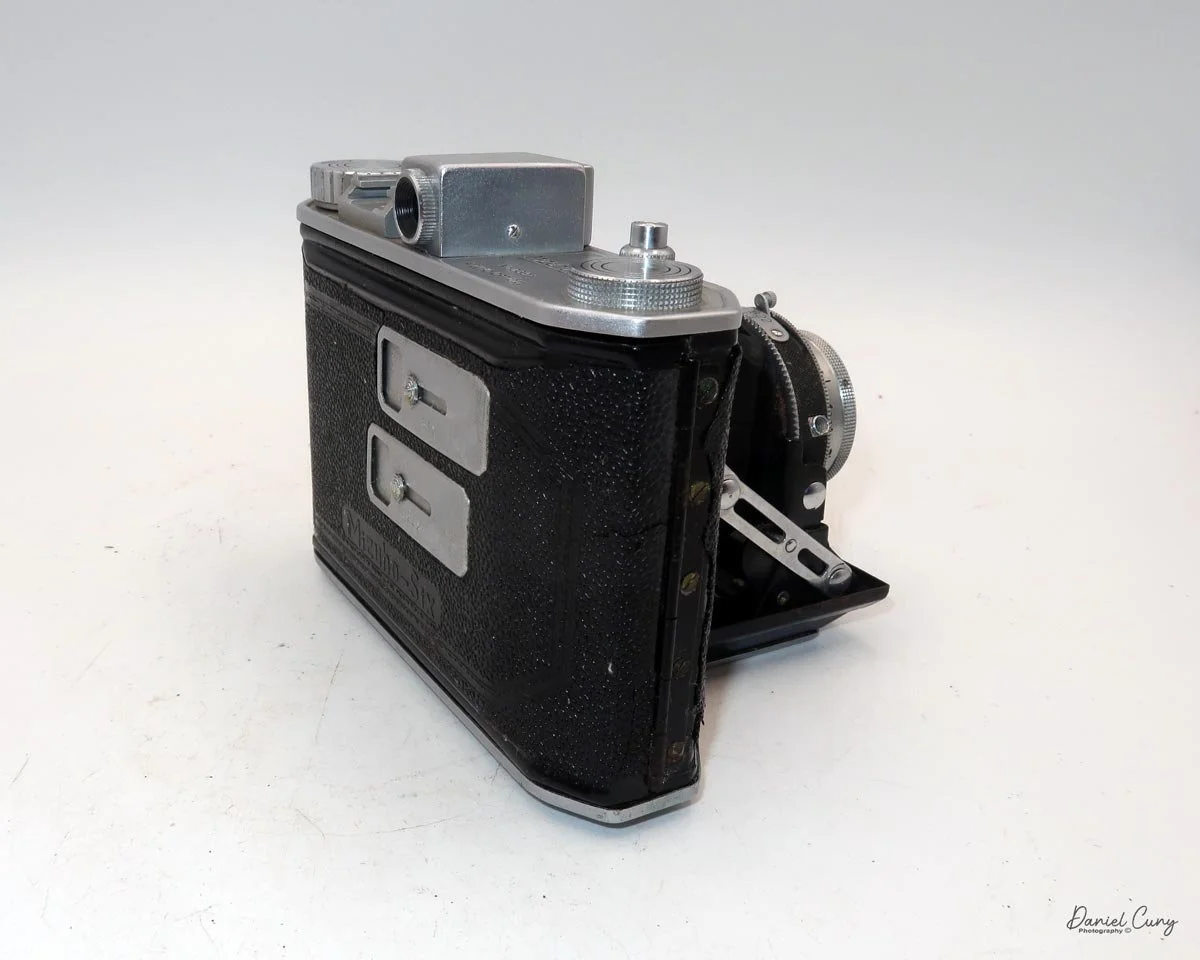
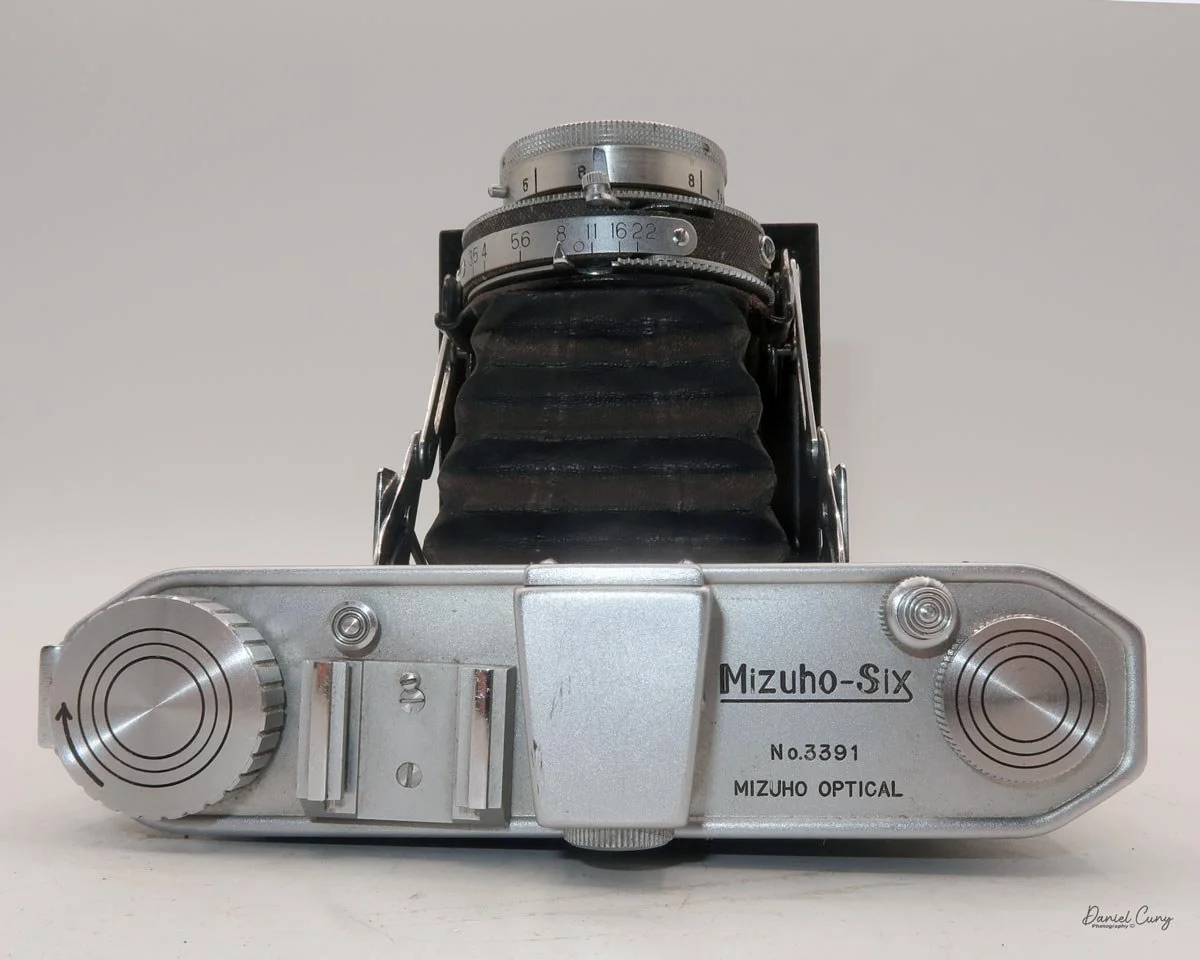
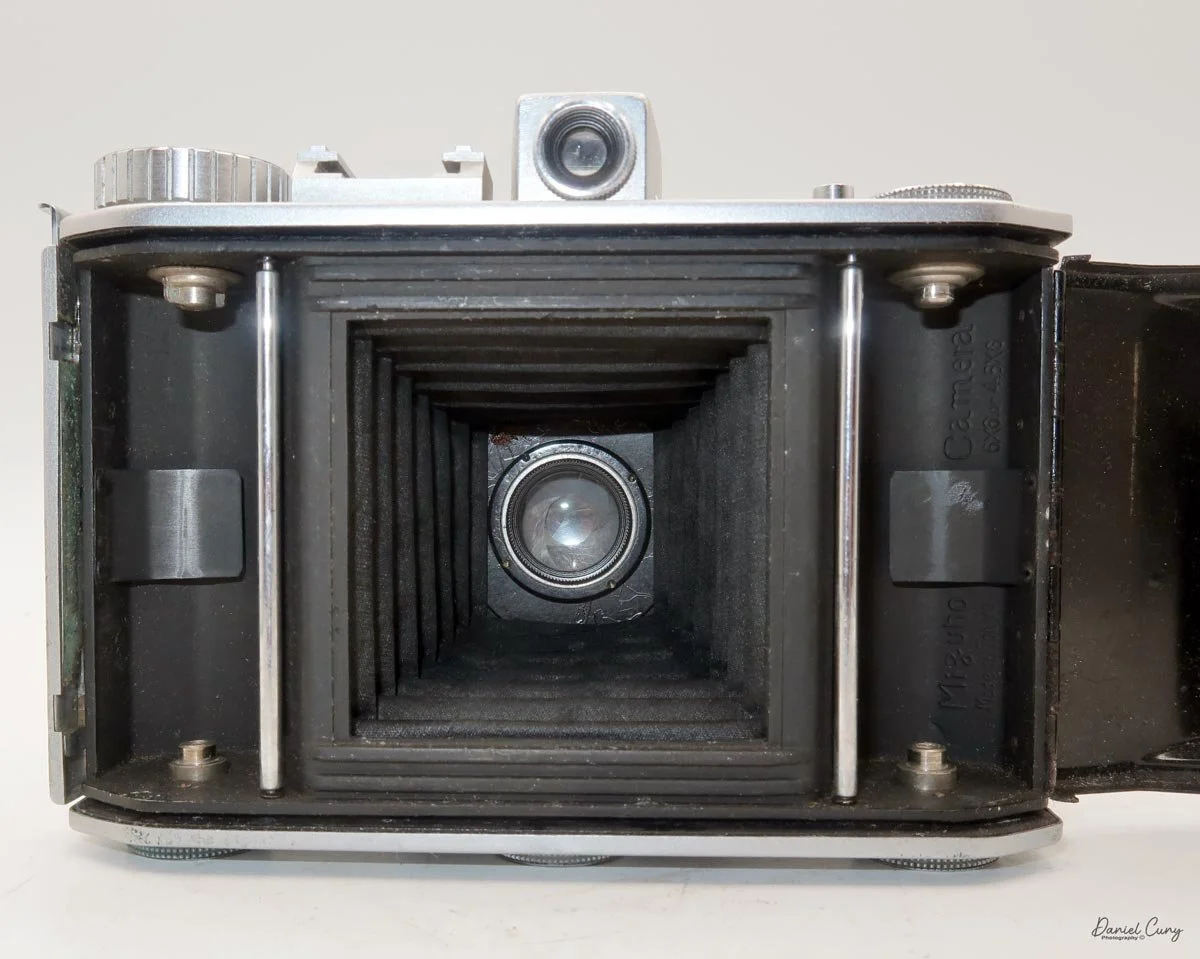
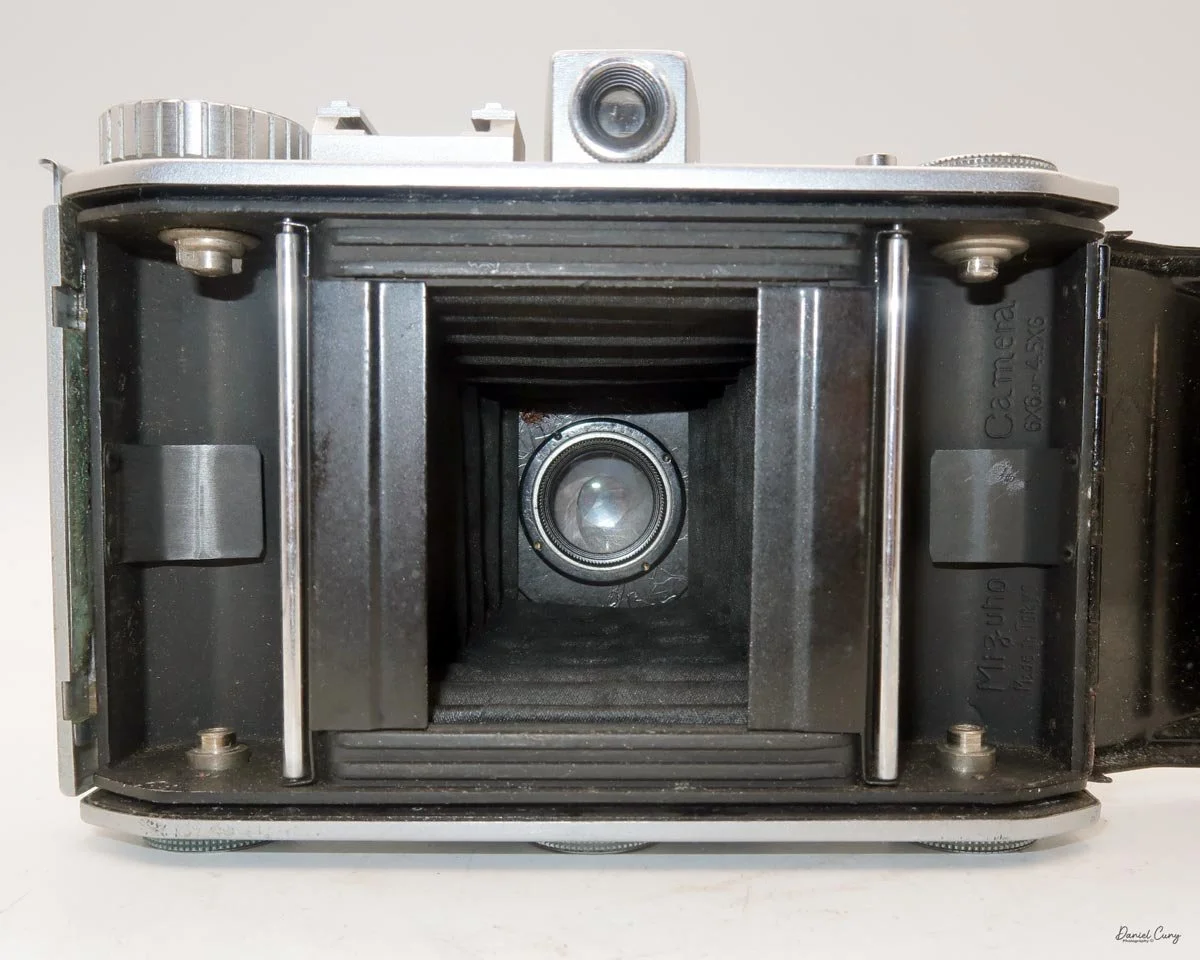
 Built in the early 1950s, my Mizuho Six camera is 5.5" wide, by 4" tall, by 2" deep with the lens closed, and 4" deep when the lens is extended into the taking position. The camera weighs 1 pound, 7 ounces without film loaded. The camera's serial number is 3391. The camera also has "Made in Occupied Japan" embossed on the side where the film door release is located.

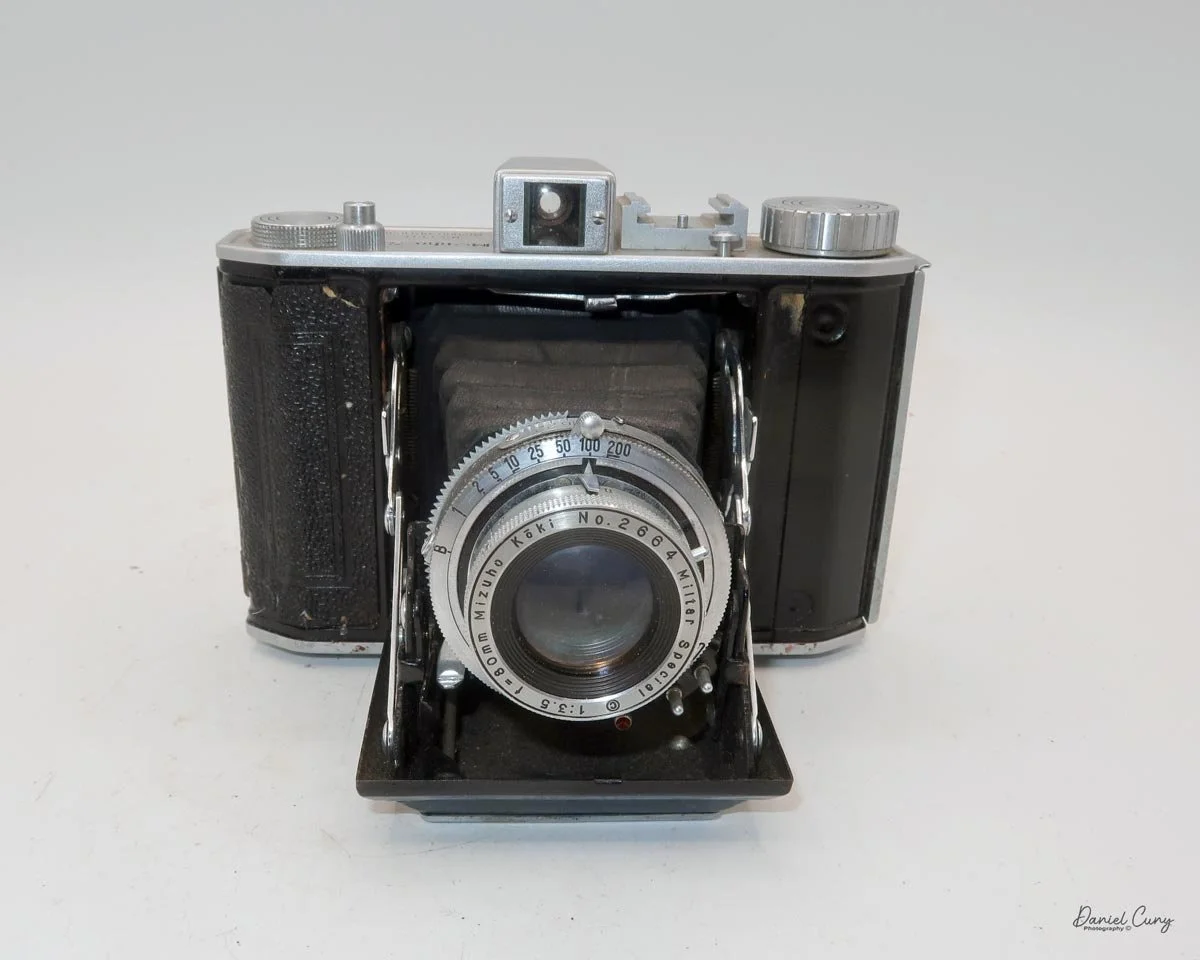
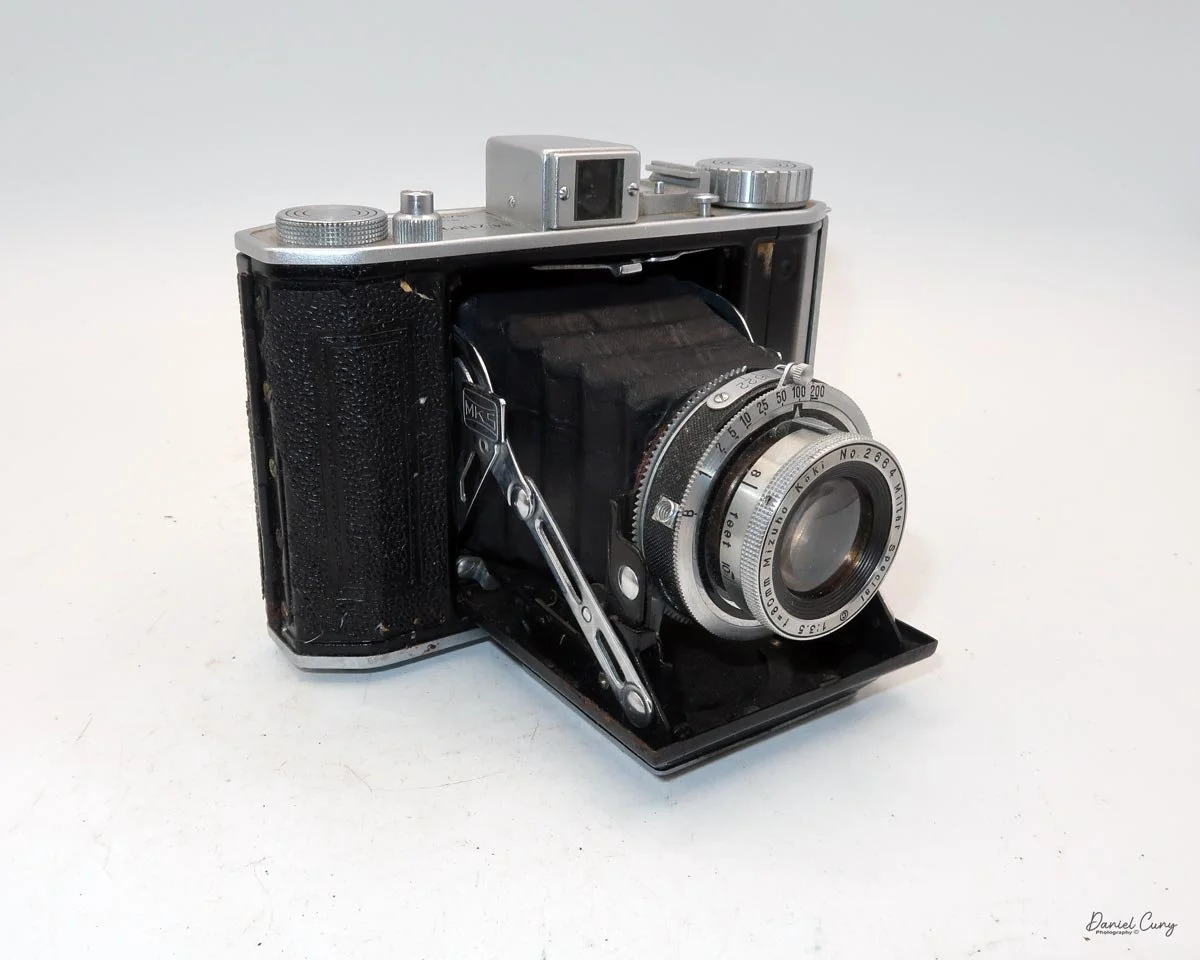
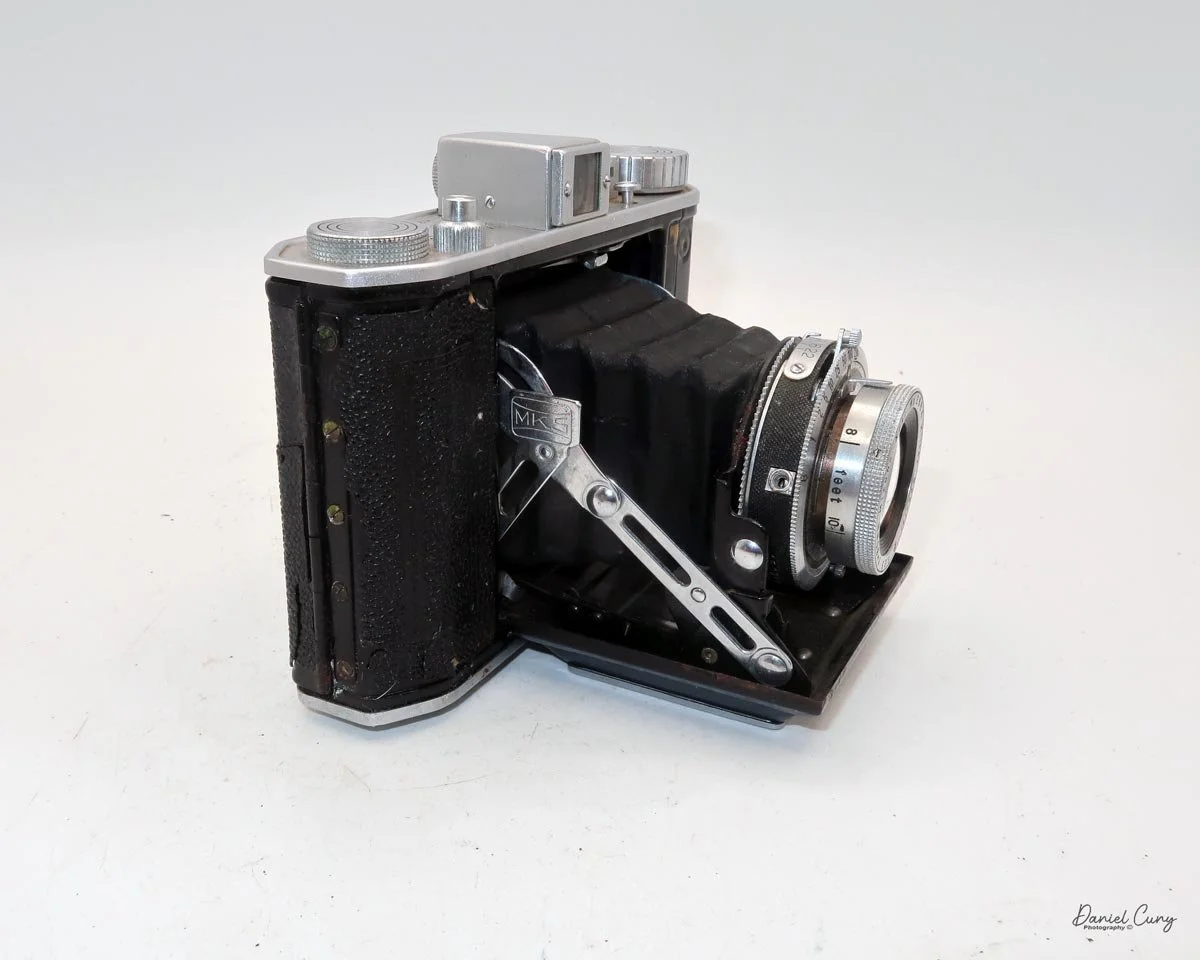
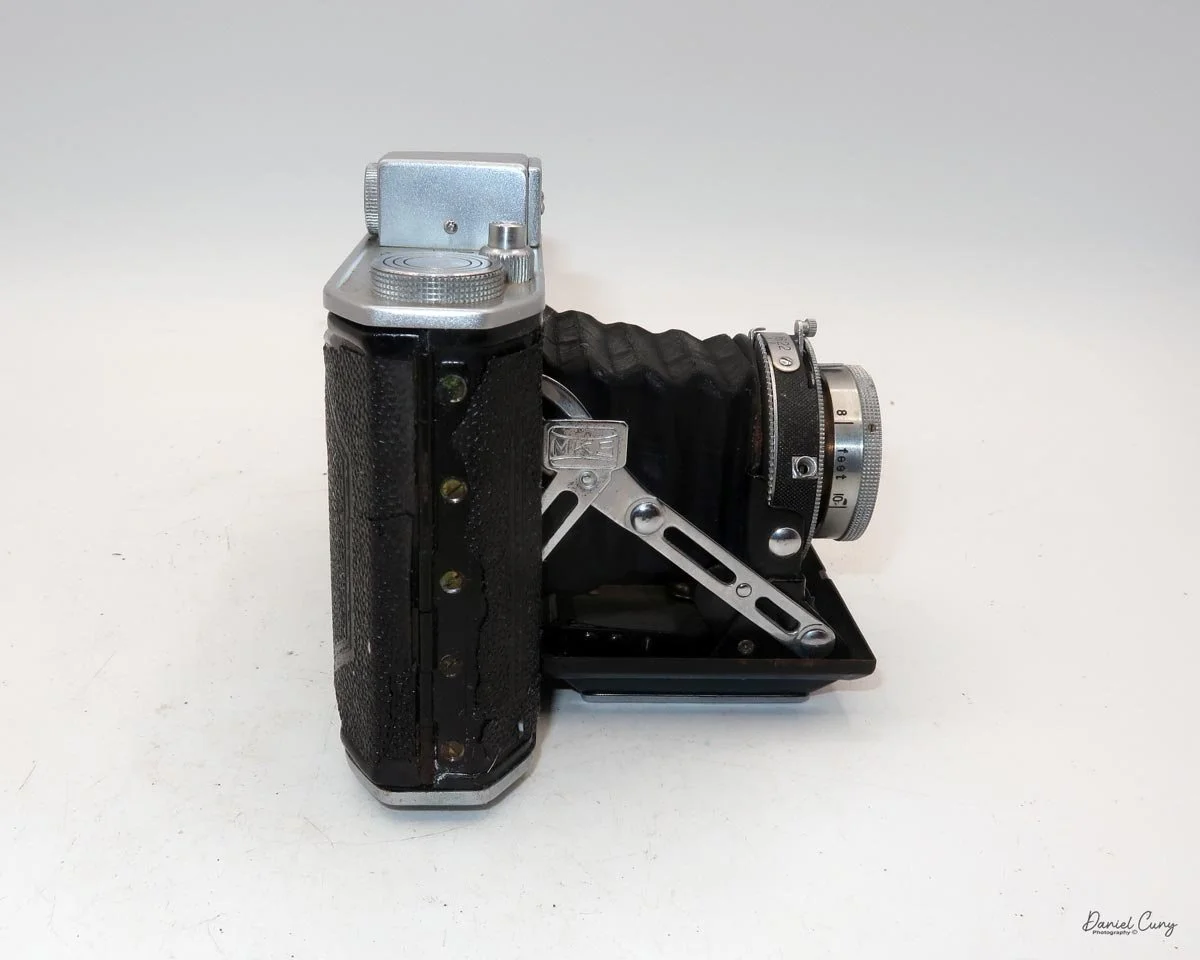
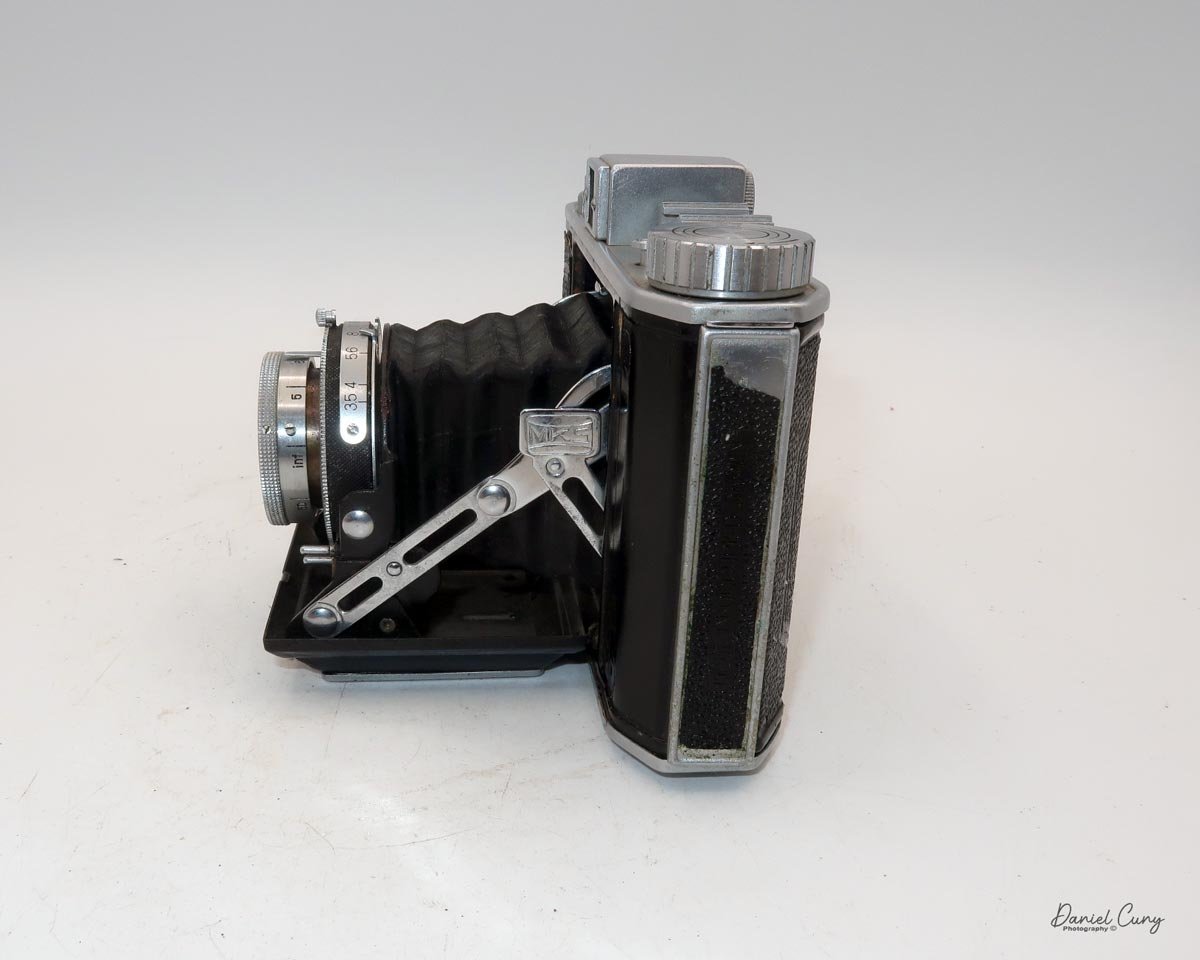
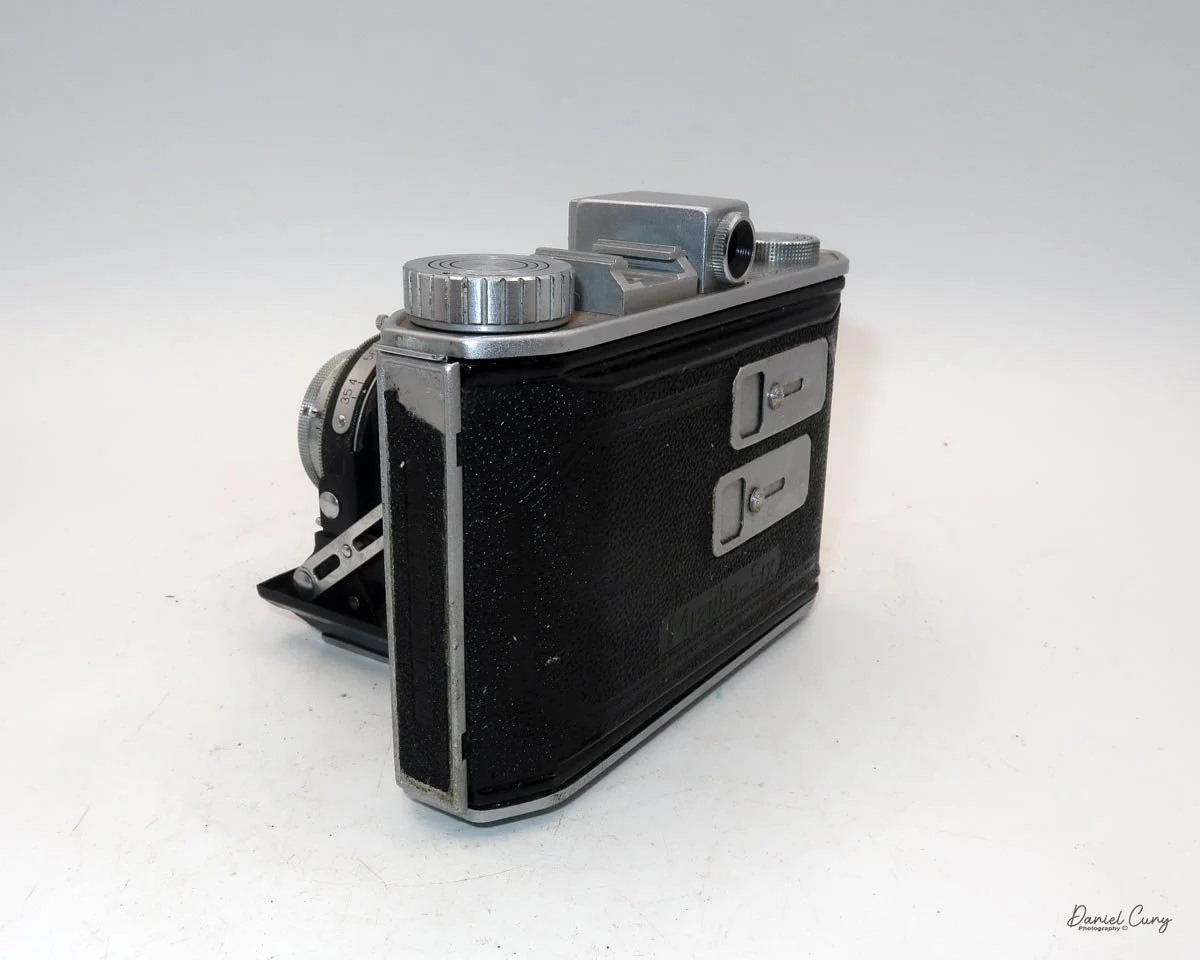
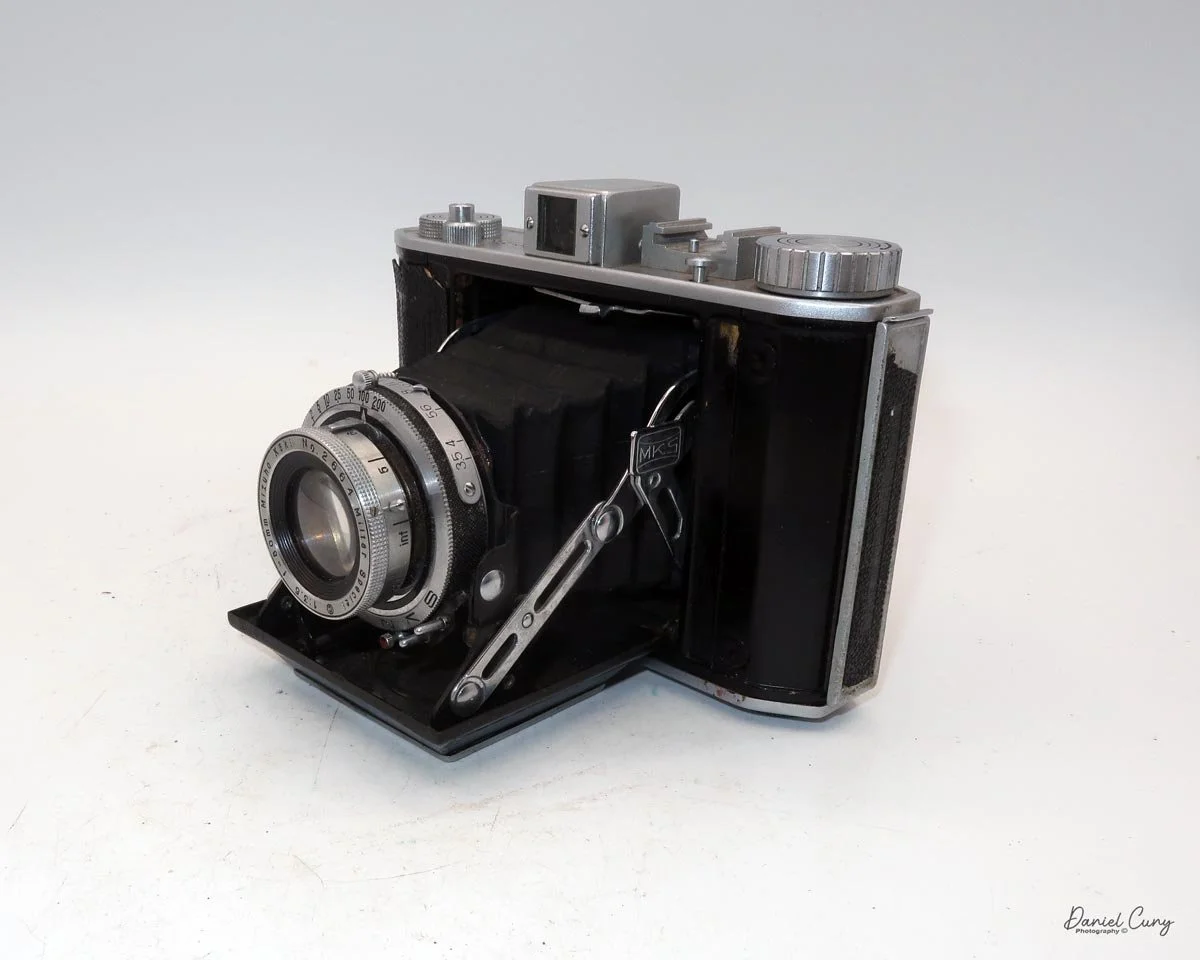
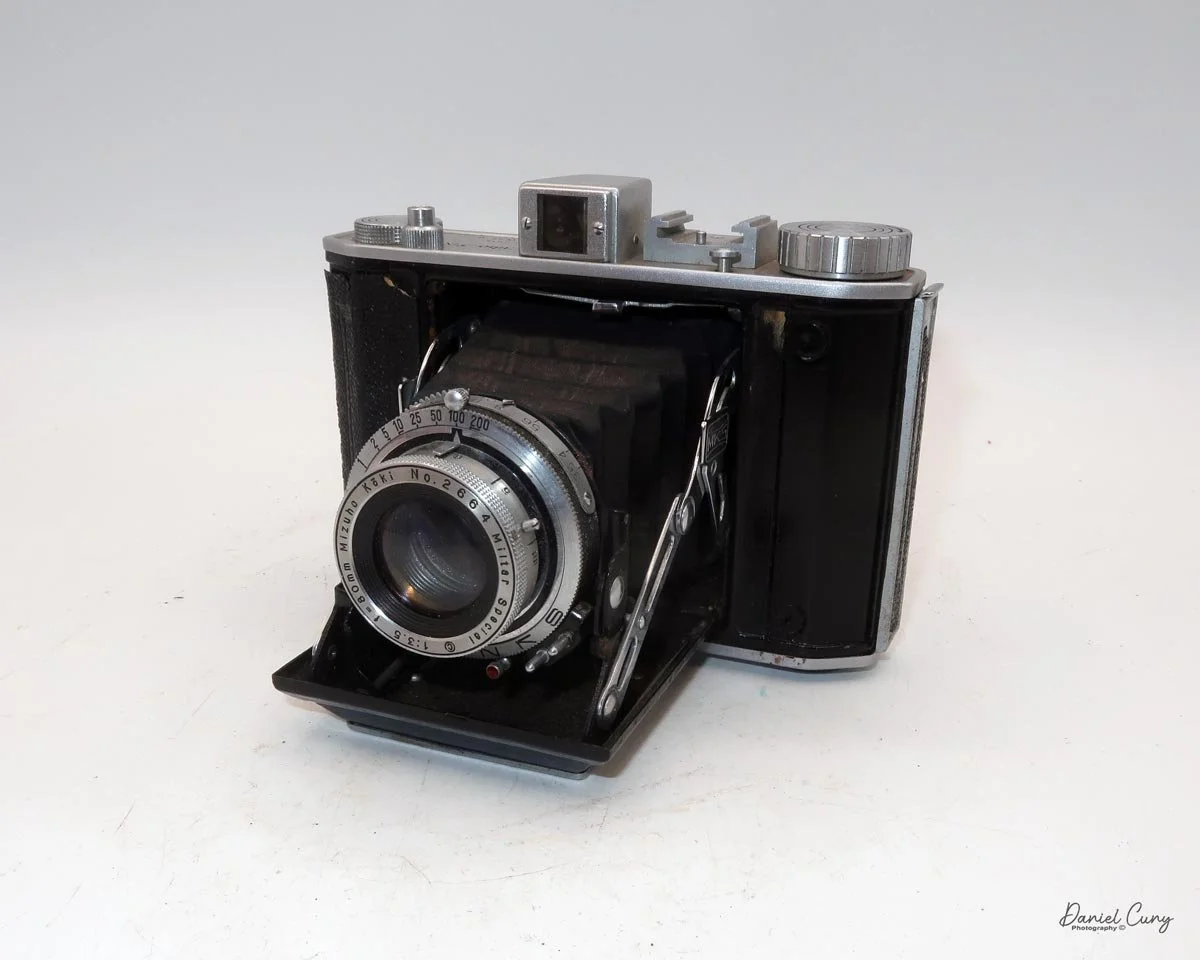
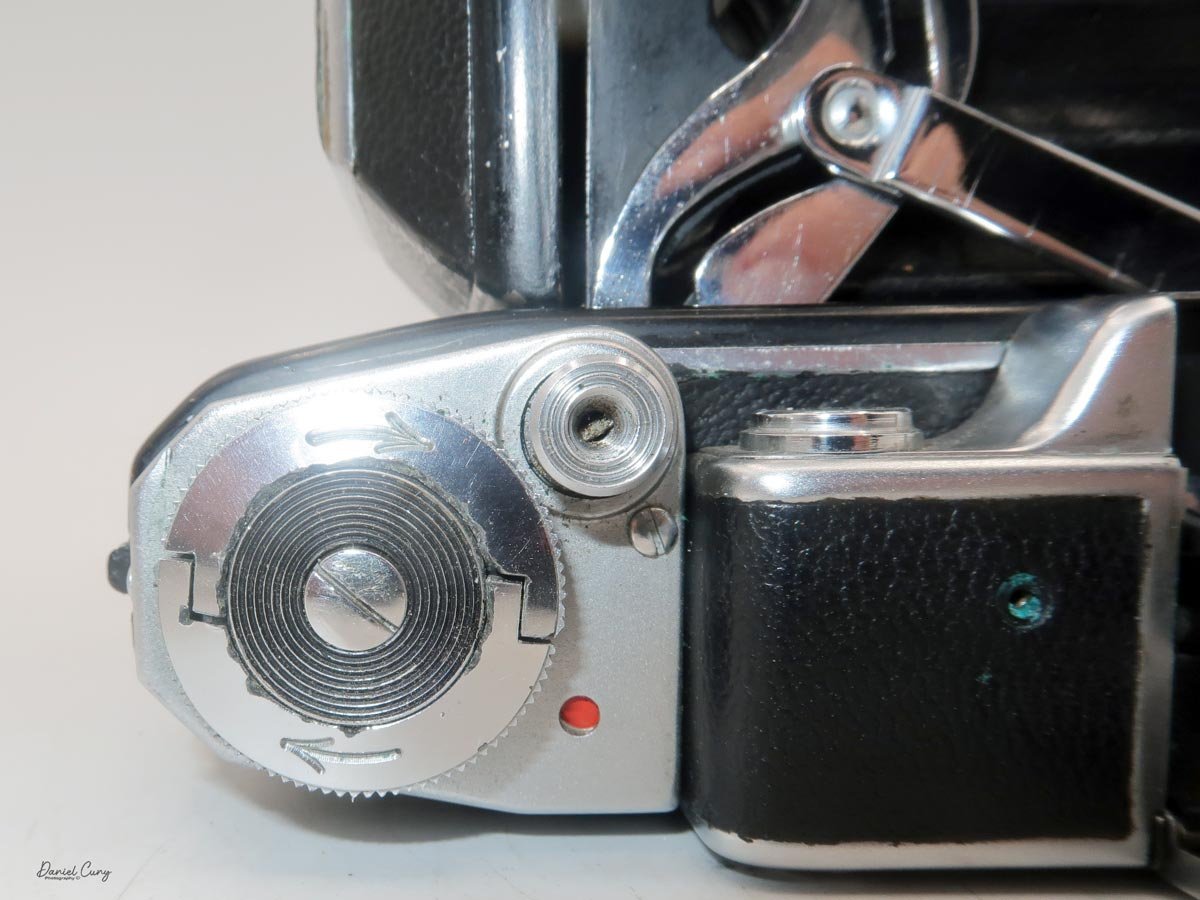
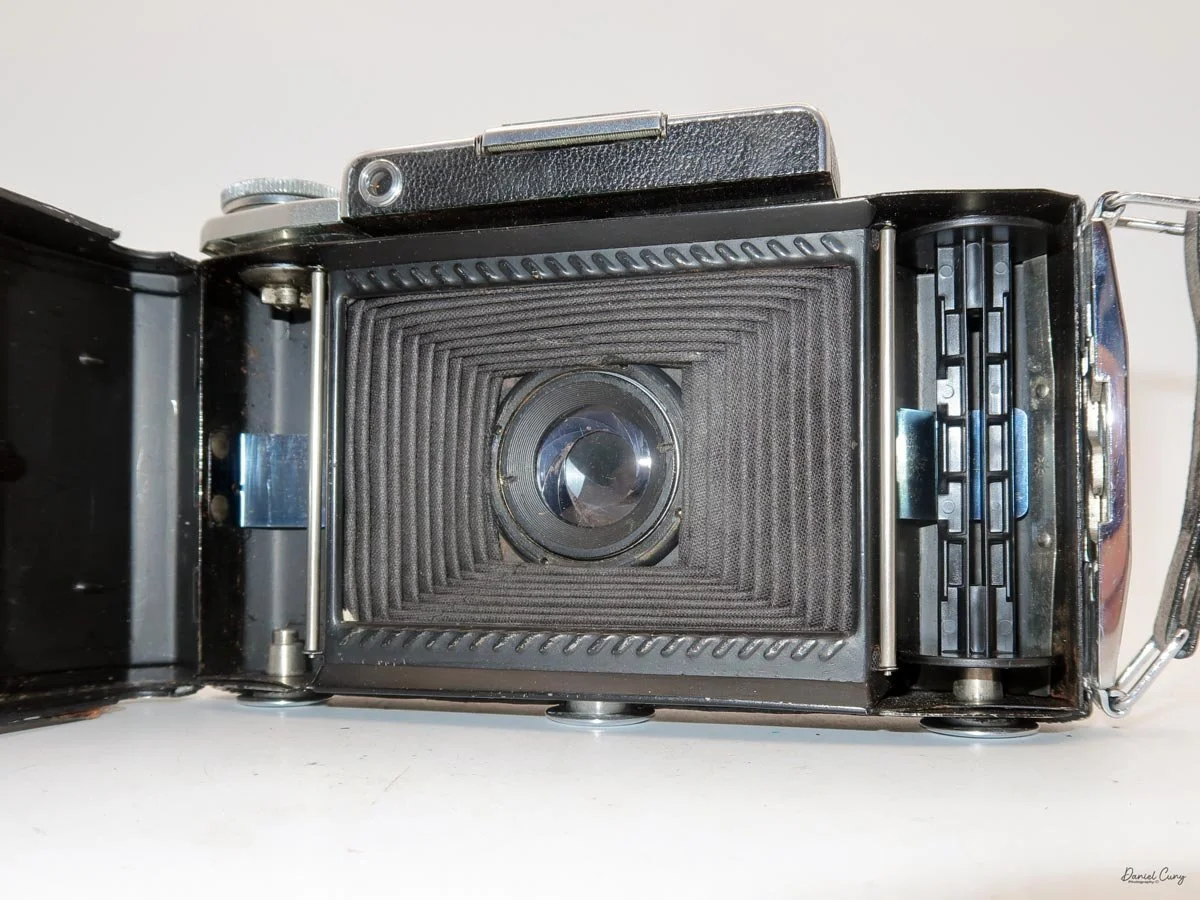
To open the lens to take a photo, depress the small button on top of the camera located in front of the accessory shoe, and to the right of the film winding knob. Once depressed, the lens board opens, exposing the lens.

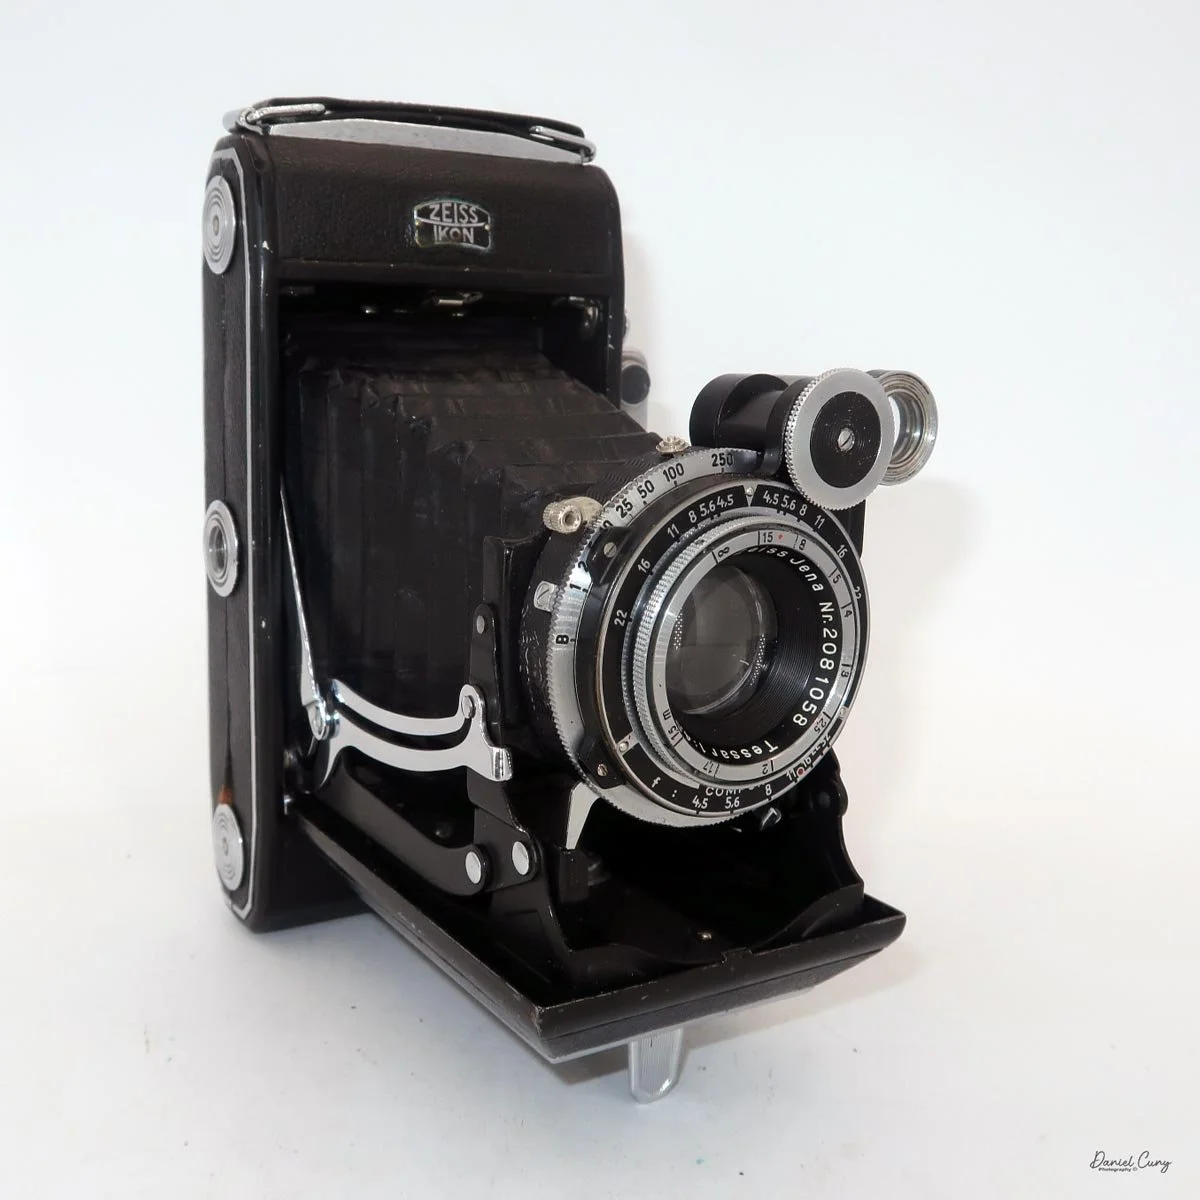
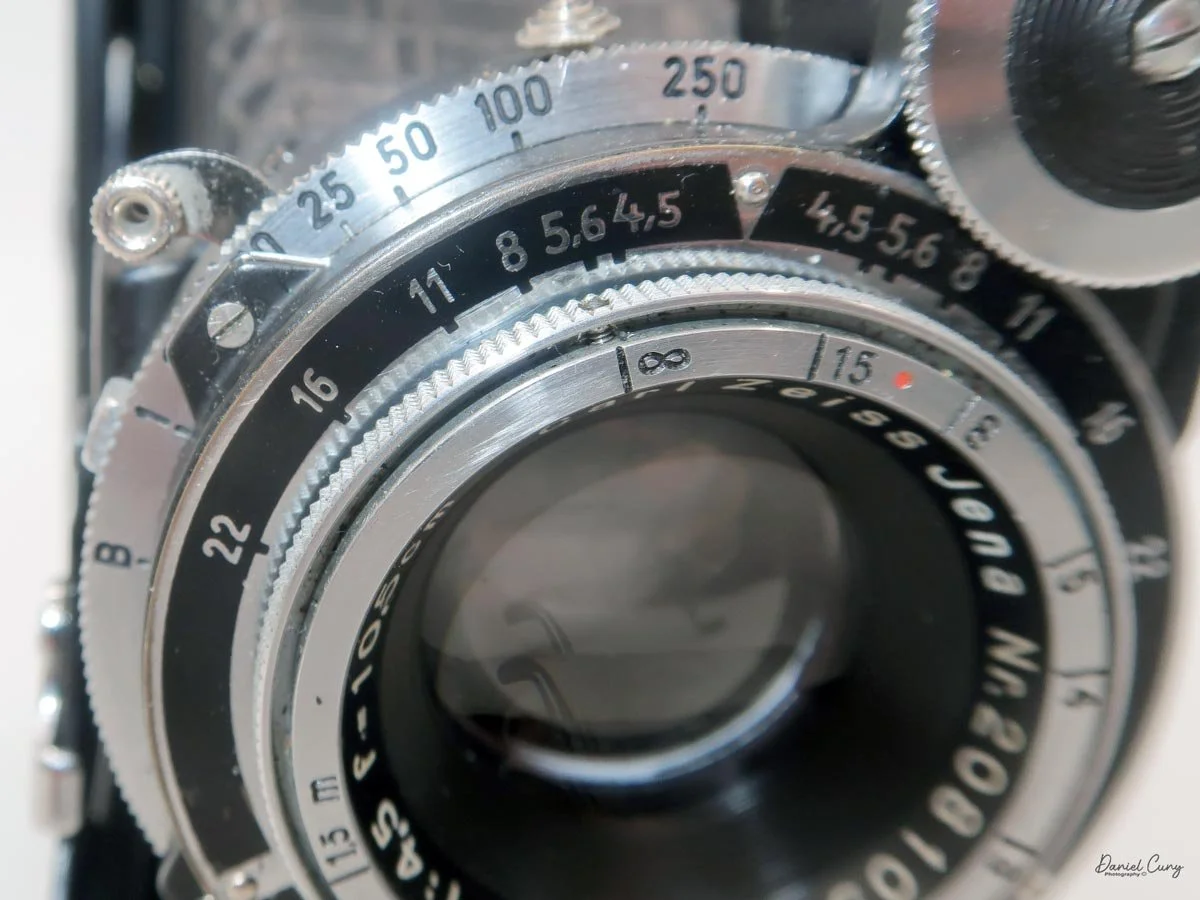
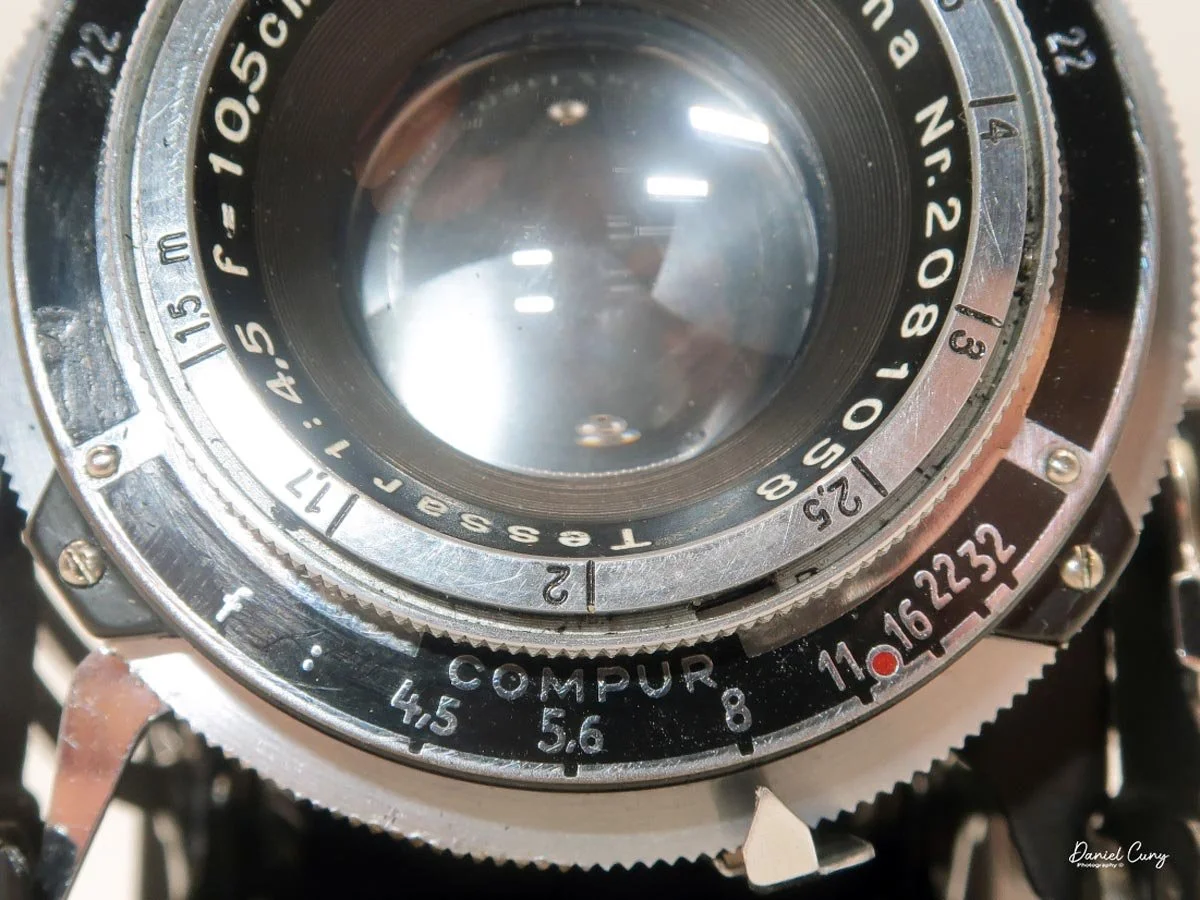
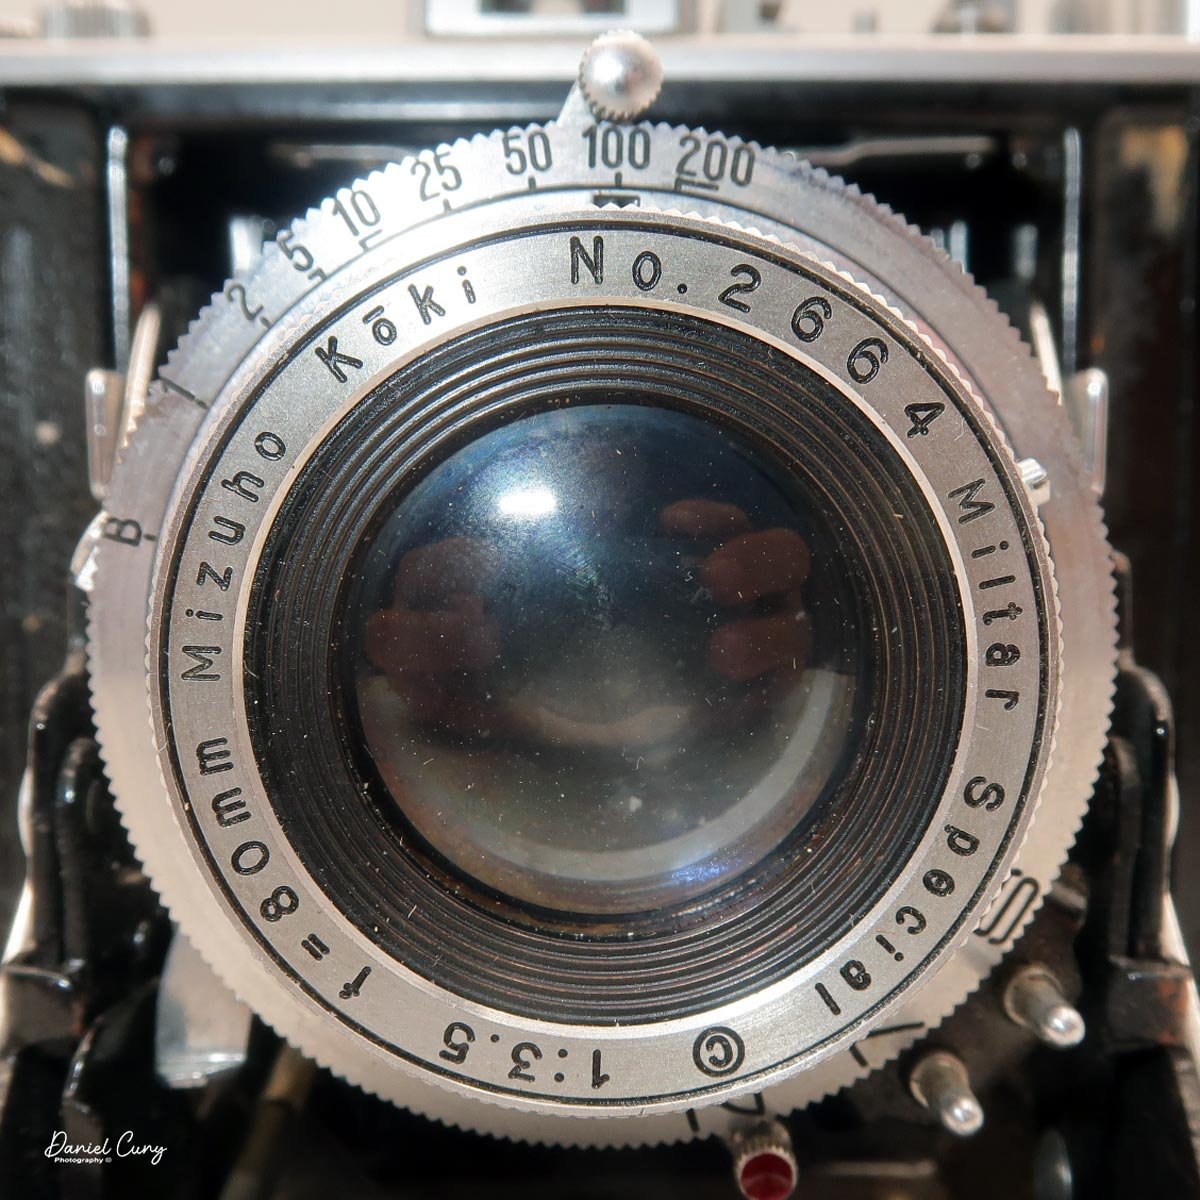
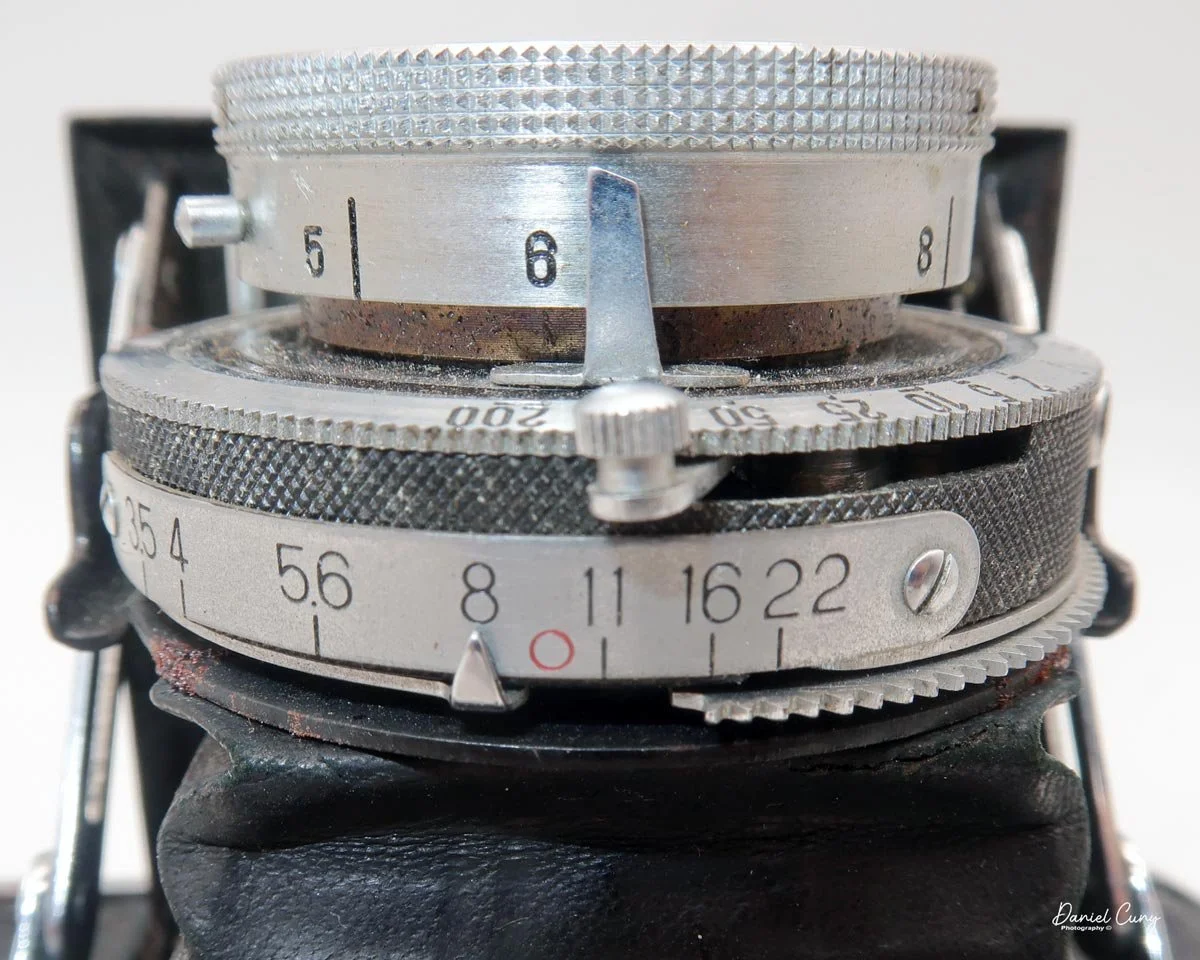
 The Mizuho Six has an 80mm Mizuho Kiko Miltar Special F/3.5 lens, serial # 2664, in an NKS shutter. The shutter speeds range from 1/200 to 1 sec, along with "B" for timed exposures. The shutter speed is set by turning the shutter speed dial around the lens to the desired speed. The shutter release is located on the top, right side of the camera, just in front of the "Mizuo-Six" name and serial number.

 The aperture is set similarly by sliding a knurled ring around the lens to the desired aperture, which ranges from F/3.5 to F/22.

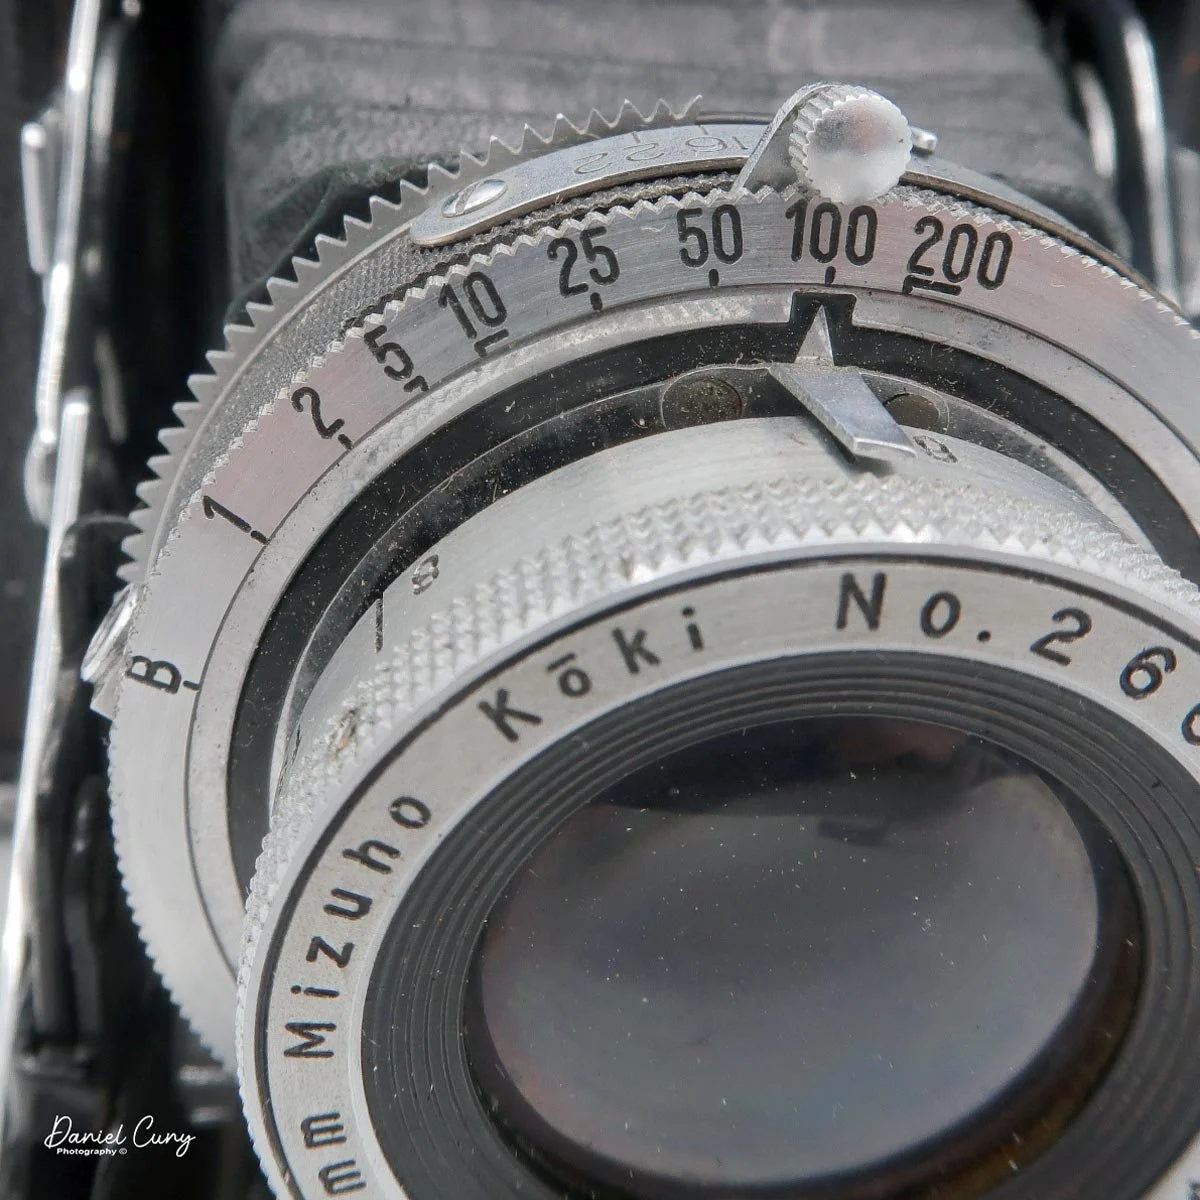
It wasn't until I shot my first roll of film through the camera that I realized the shutter wasn't working properly, so I'll need to either get it fixed or sell the camera with the defect. The issue is when I cock the shutter, which is done with a small switch on the top of the lens, the shutter remains open until you depress the shutter release. It doesn't really "cock" the shutter as it should. 

 What I did notice was when I pulled the shutter cocking ever over to the farthest position, the shutter wouldn't open. It was when I released the lever after the cocking maneuver that the lens stayed open. If I pulled the lever all the way, held it, and then tripped the shutter release, the shutter would work as intended. This was awkward to use this way, but it's the method used to take the blog images.

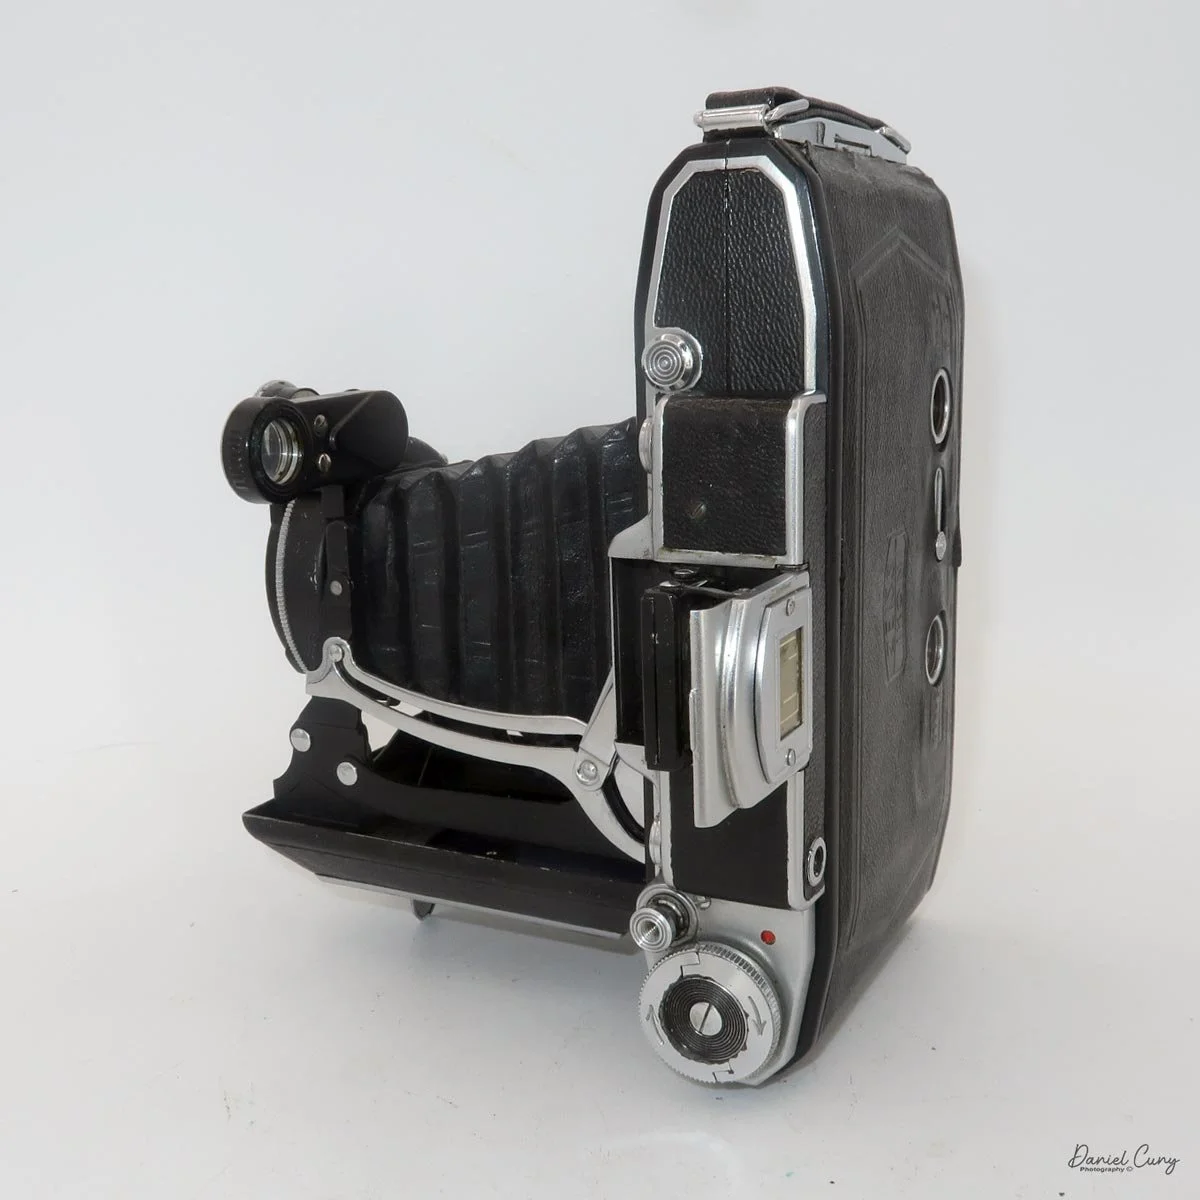
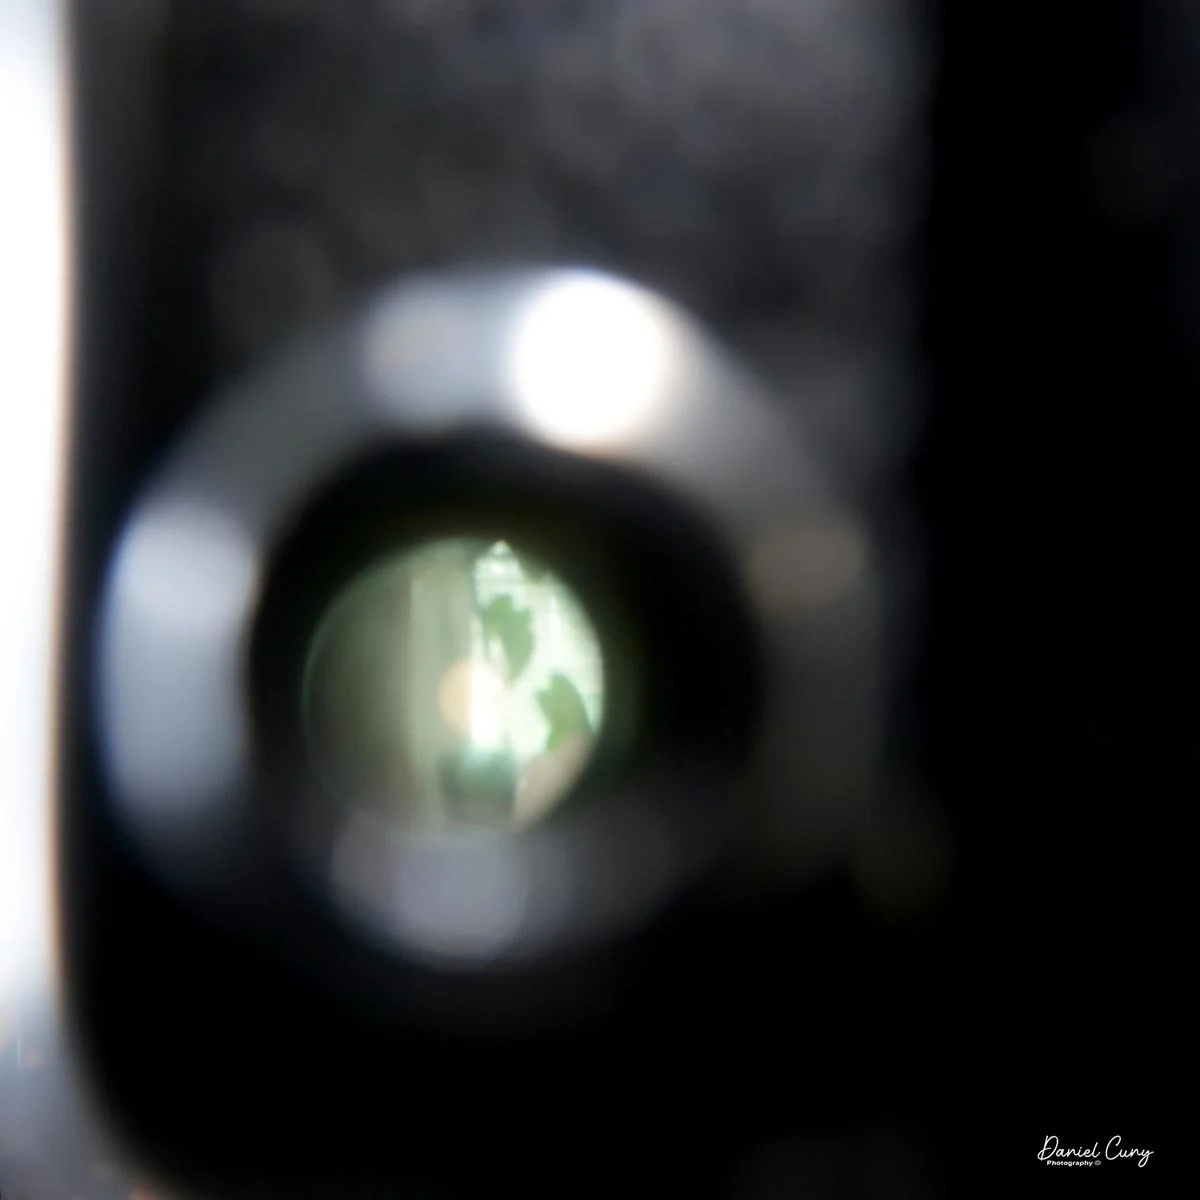
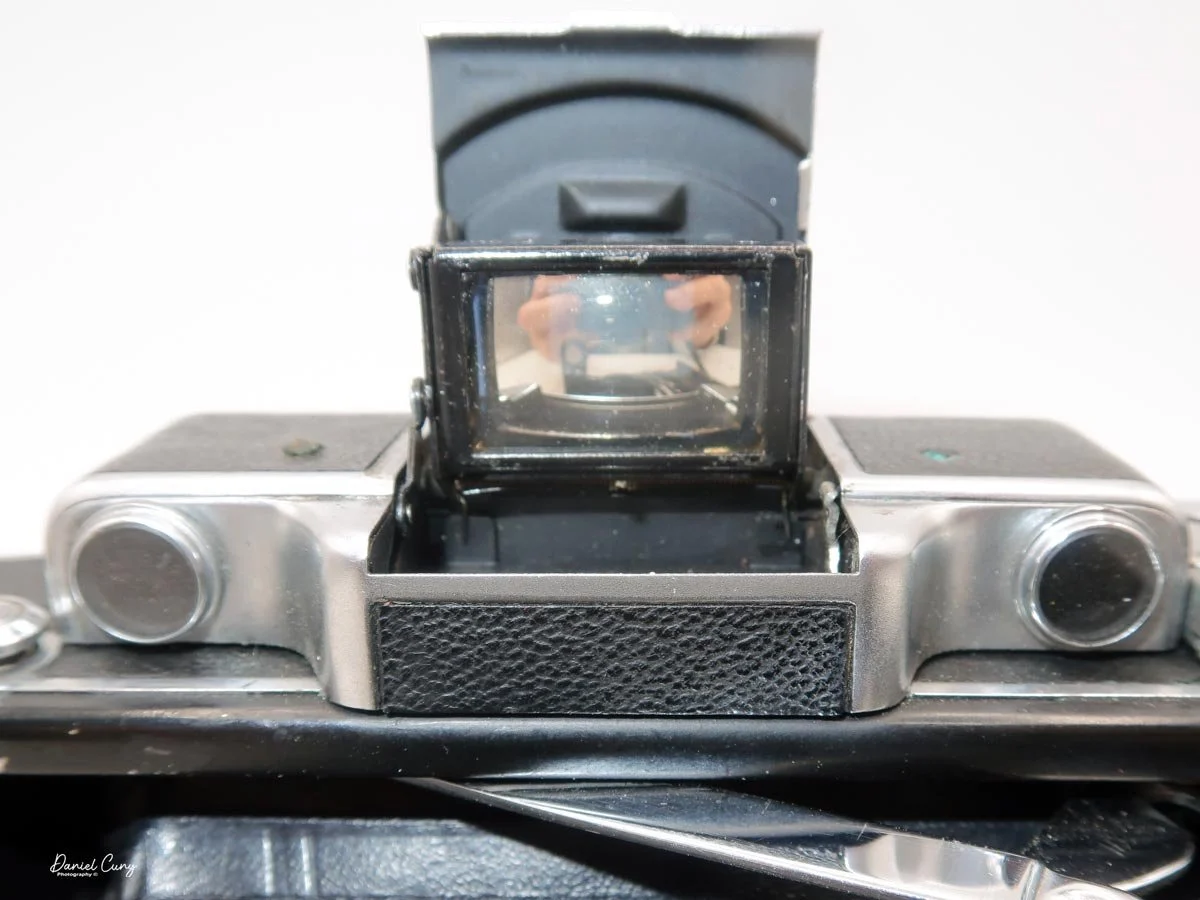
 There is no rangefinder in this camera; it has only an optical viewfinder on top to frame your images. To focus on the subject, rotate the lens manually to the "guessed" distance to your subject before taking the photo.

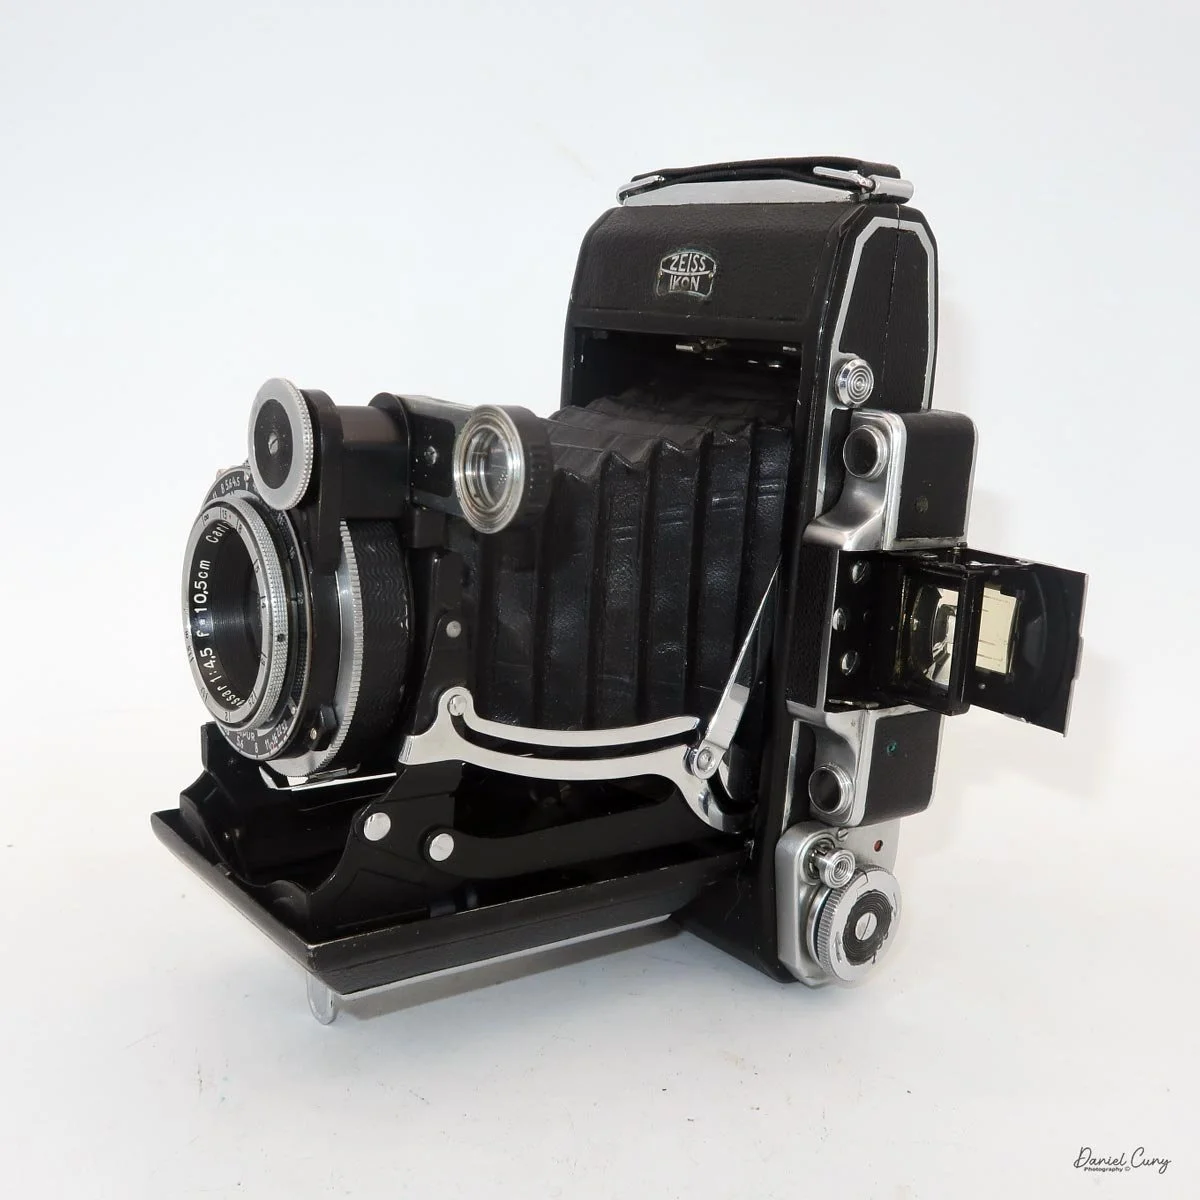
 To close the camera for transport, depress the two enlarged tabs on the camera's struts inwards. The lens board will collapse, and you can close it back onto the camera body, which will lock it into position.

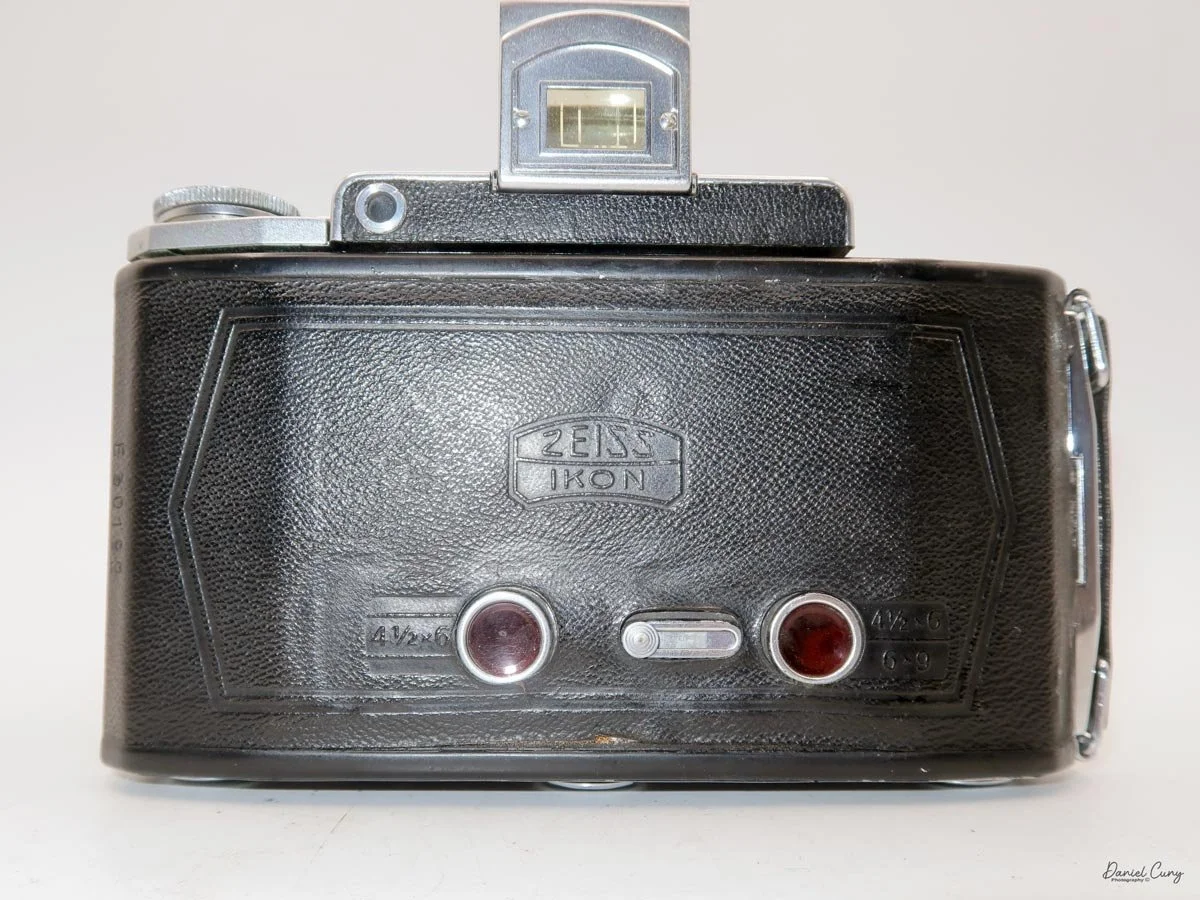
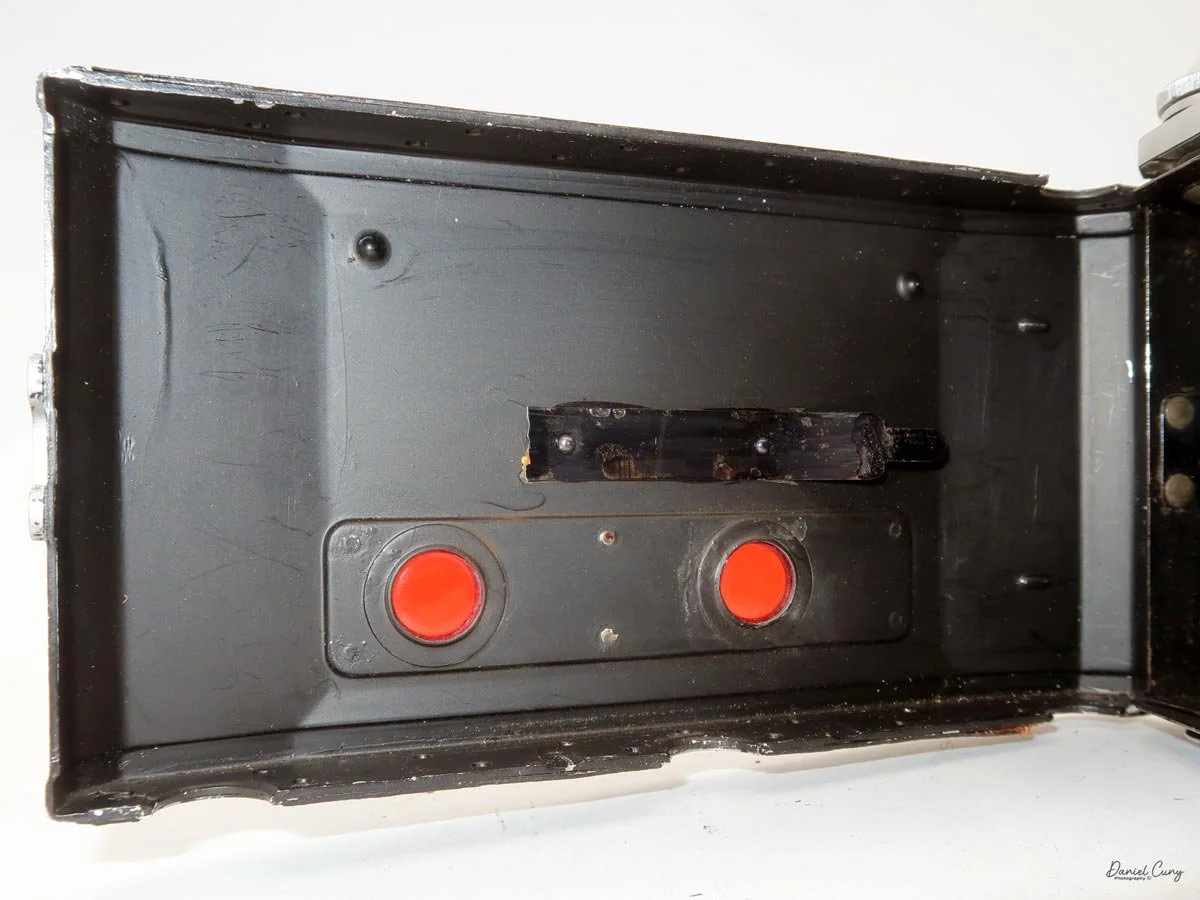
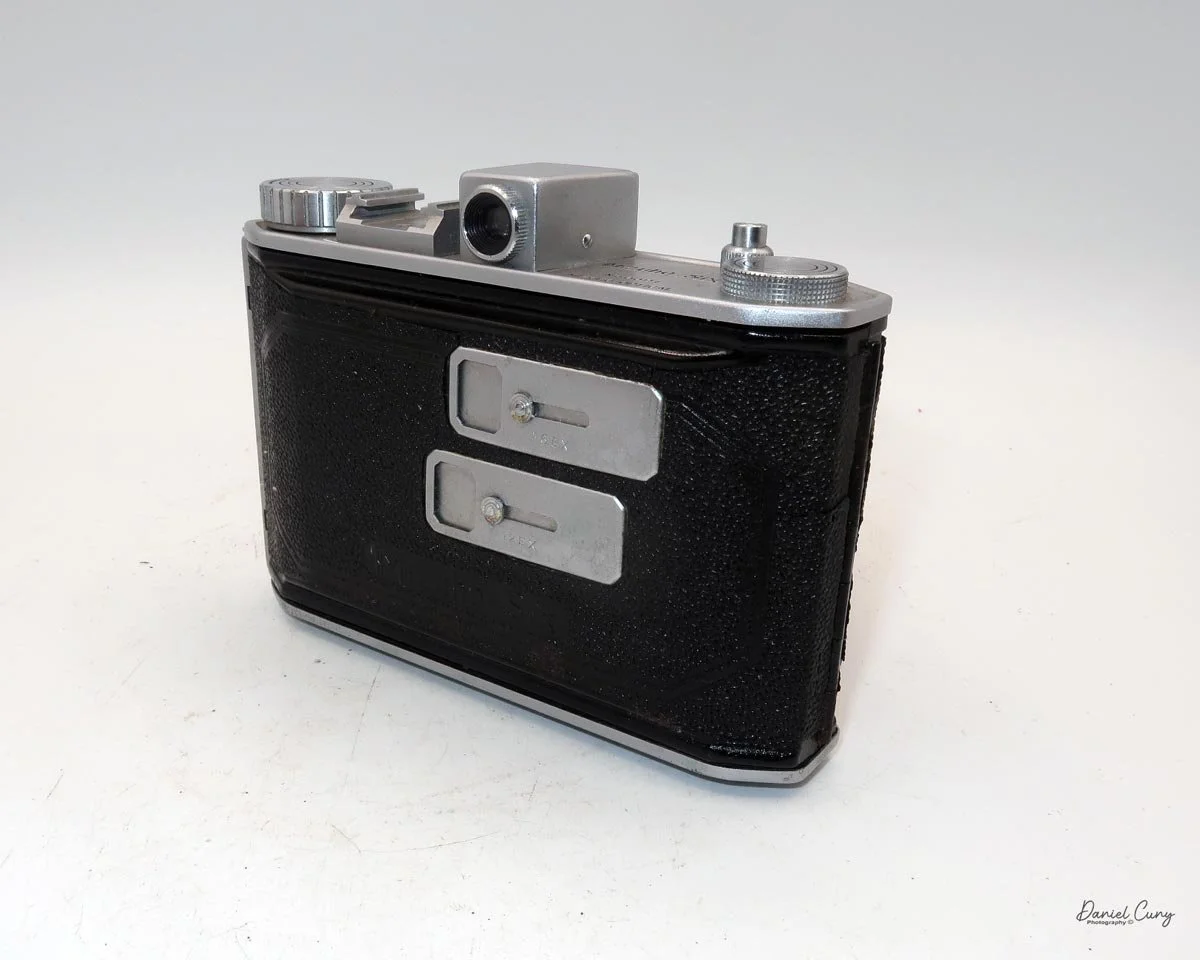
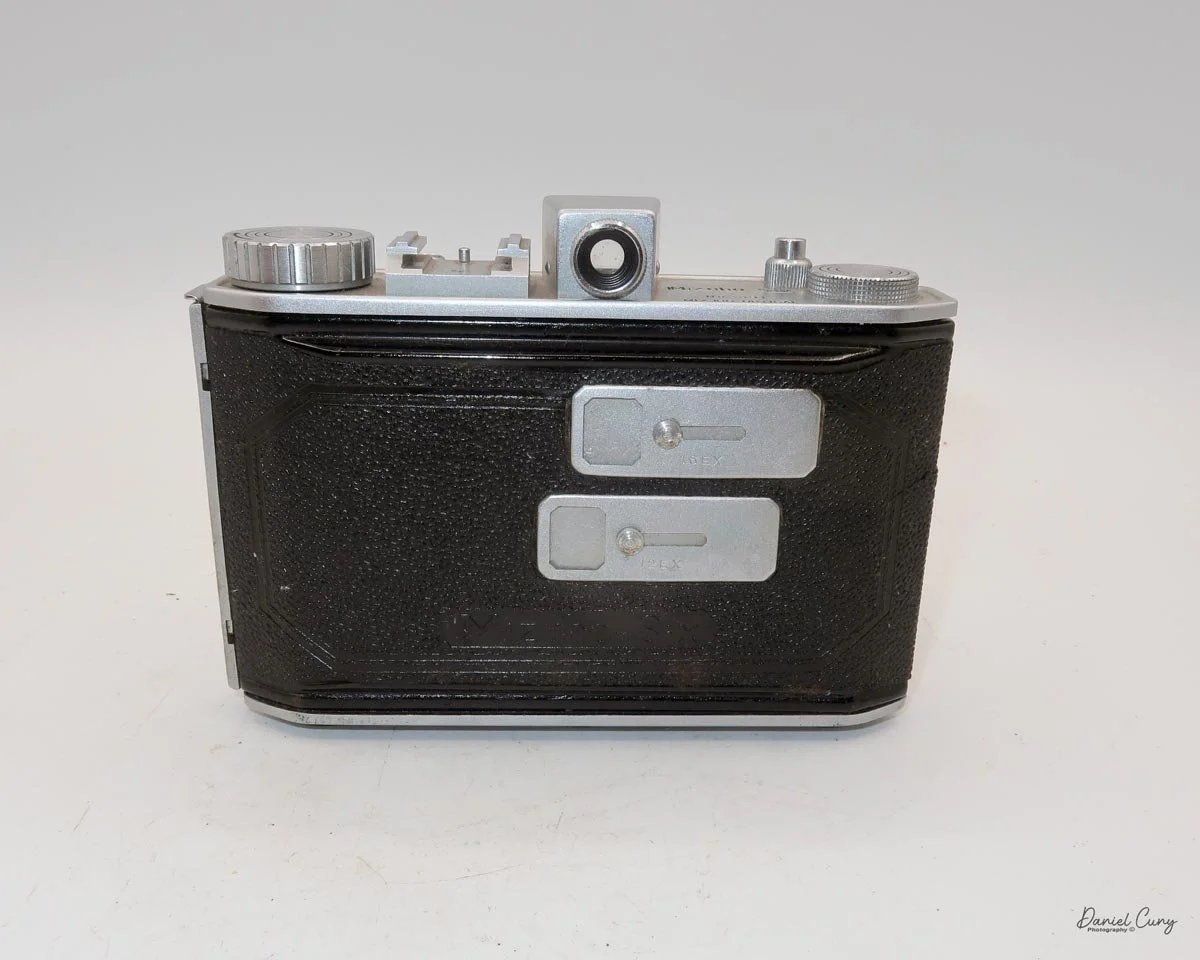
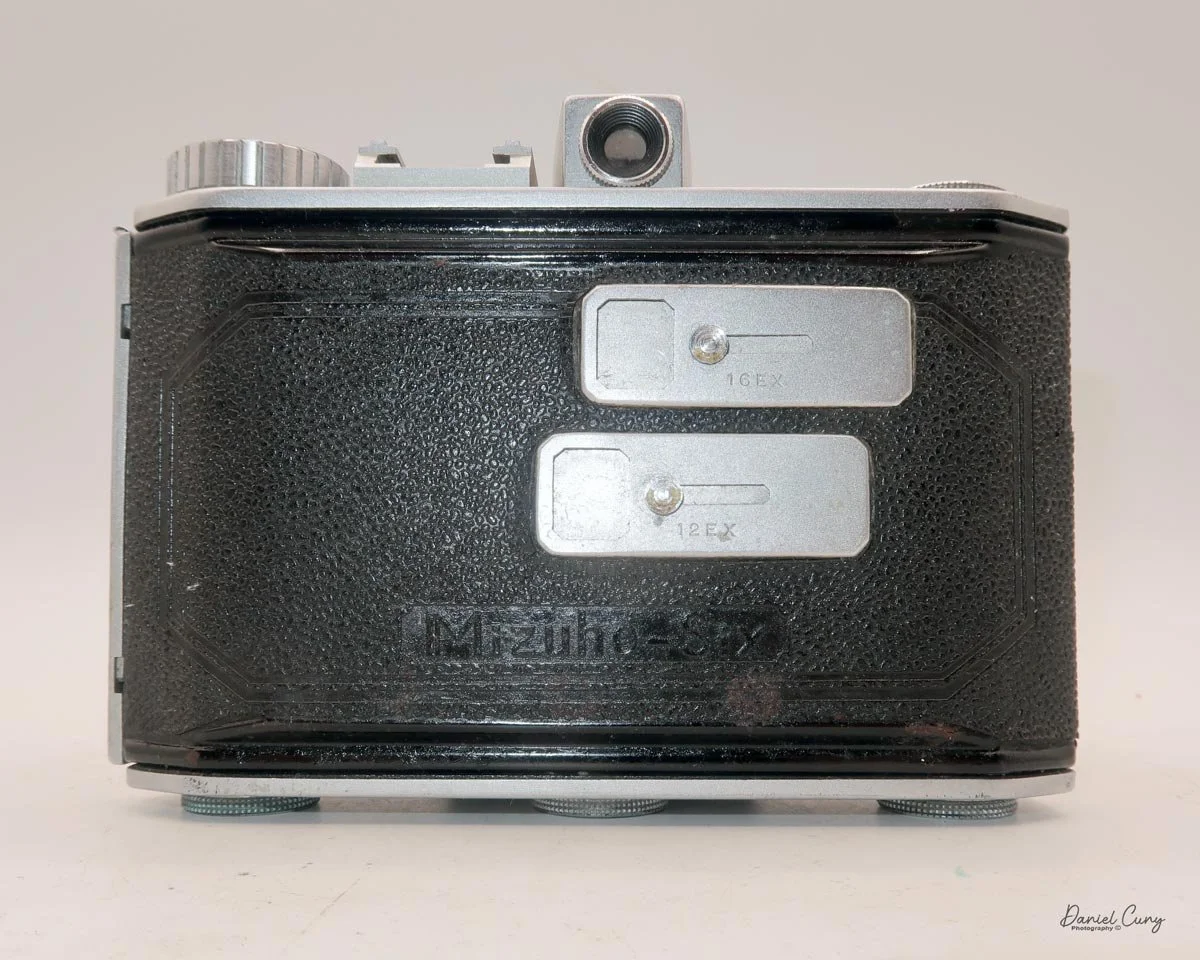
The one interesting feature of this camera is the ability to shoot either 6x6cm or 6x4.5cm. When you open the back of the camera to load film, there are two "wings" that can be pulled up from each side of the film chamber, covering a portion of the taking area and thus cropping the frame size from 6x6cm to 6x4.5cm.

 Once you make the change, you'll then use the appropriate red window on the back of the camera to count the frame numbers imprinted on the 120 rolls of film. It will also give the photographer four more images per roll, going from 12 images on a 6x6cm format to 16 on a 6x4.5 format camera. You'll need to shoot the entire roll in that format, as there's no way to change formats mid-roll.

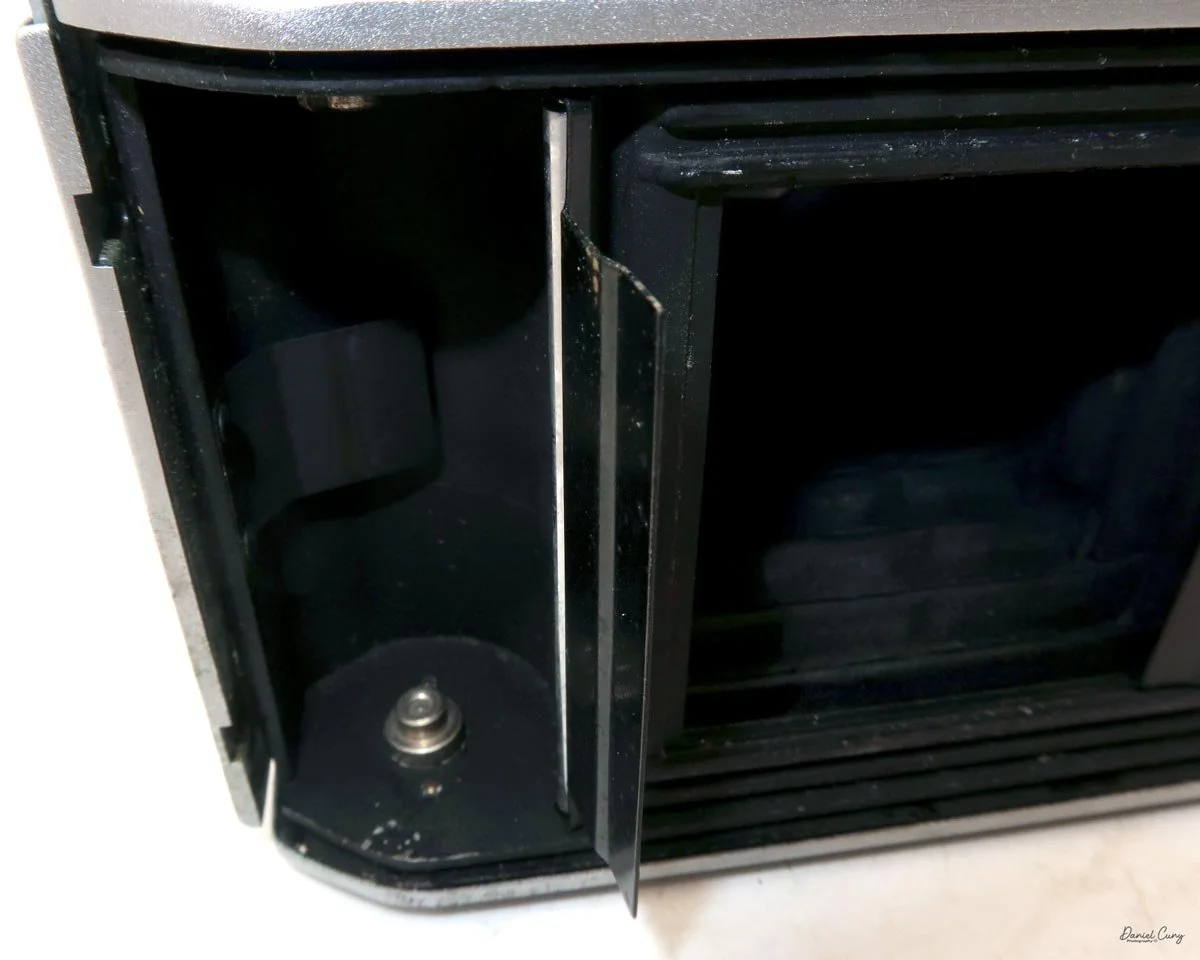
You load the camera as you would any roll-film camera, with the take-up spool on the left side. Load the fresh roll on the right, and bring the film's leader to the take-up spool on the left,  making sure the leader is in the take-up spool. Then wind until you see the "start" arrows pointing outwards. Close the back of the camera and wind the film until you see the number 1 in the red window for the format you're using.

 Now that we have film loaded into the camera, let's take it out and see what results we get.

 My Results:

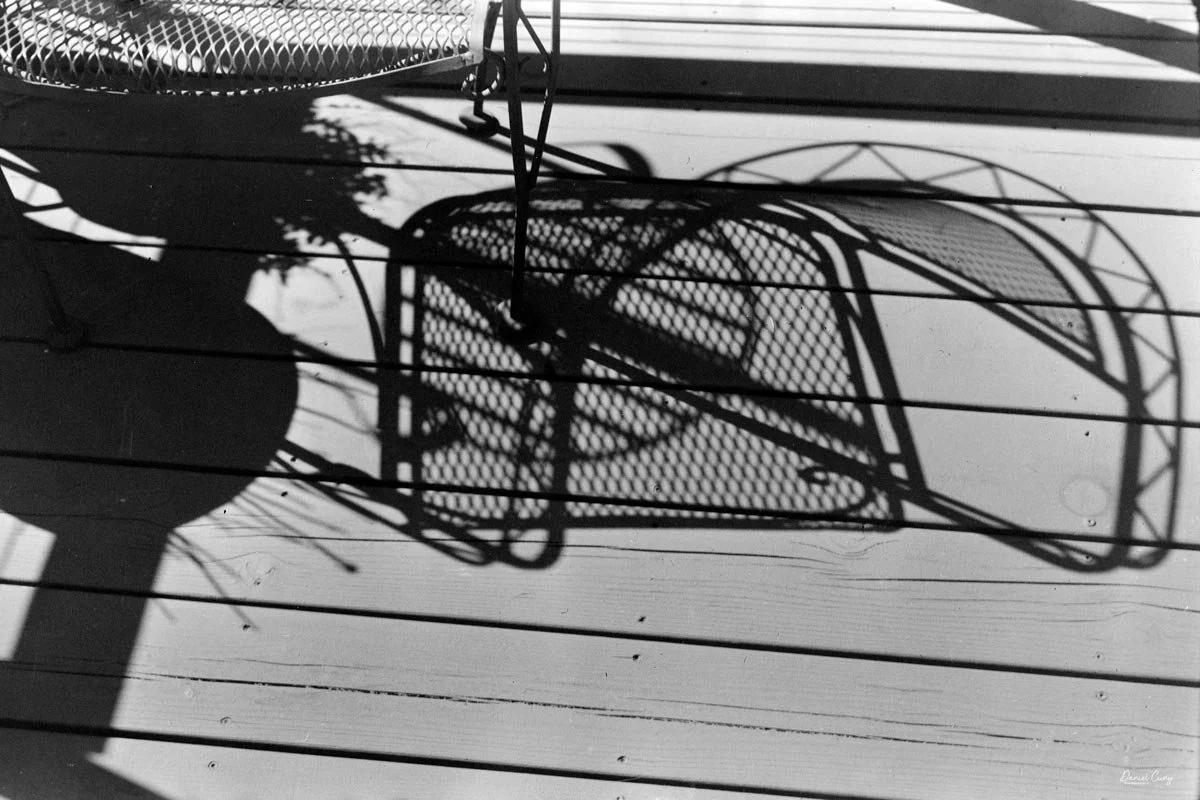
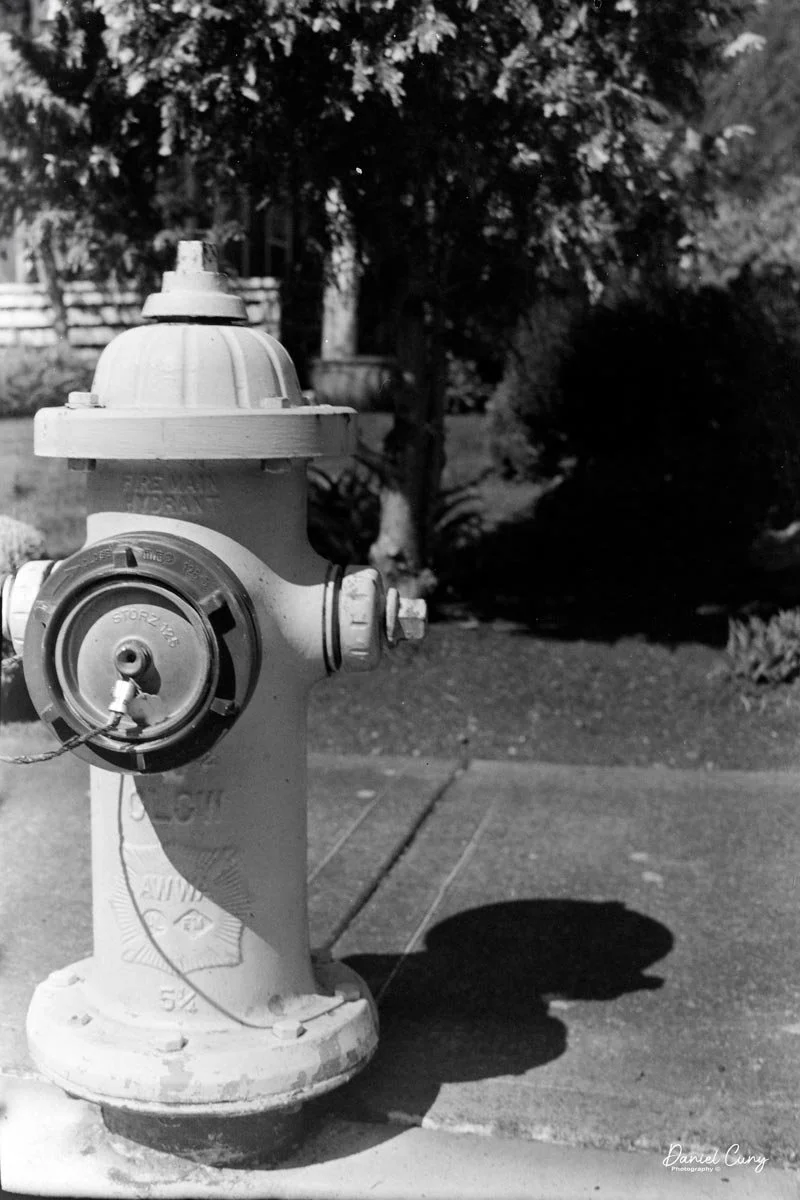
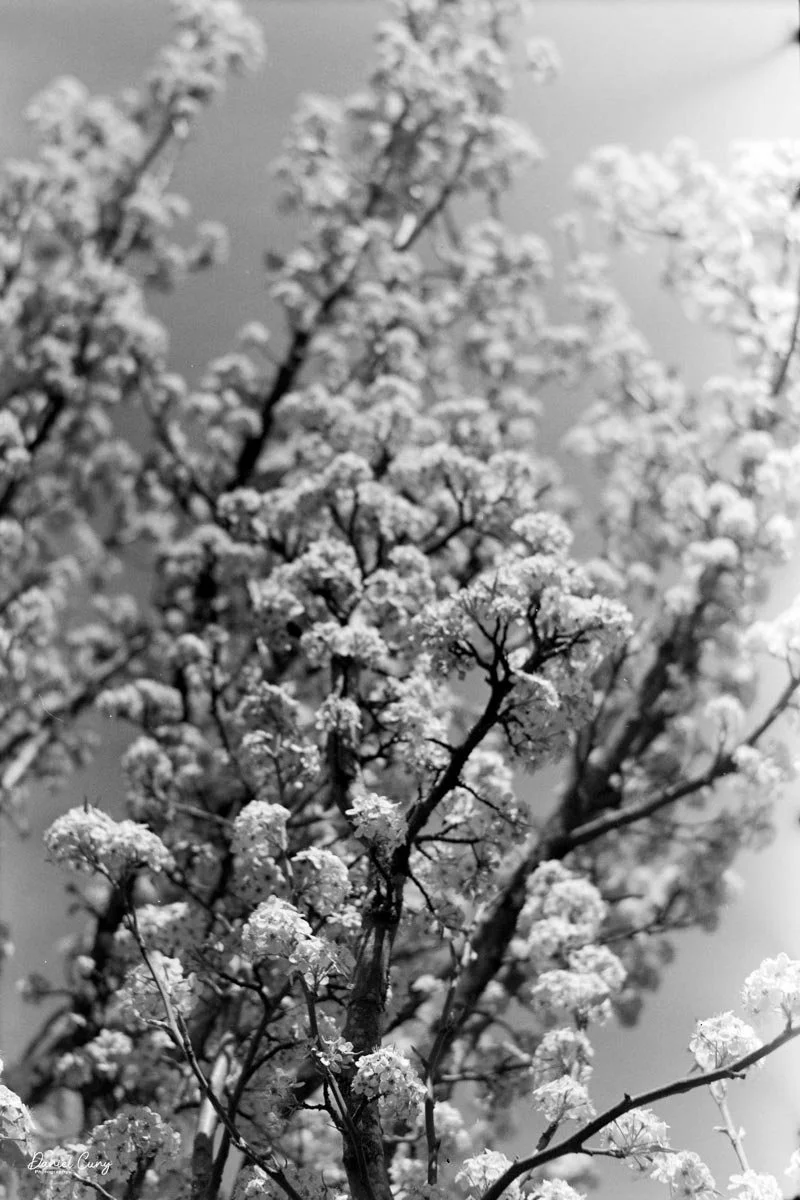
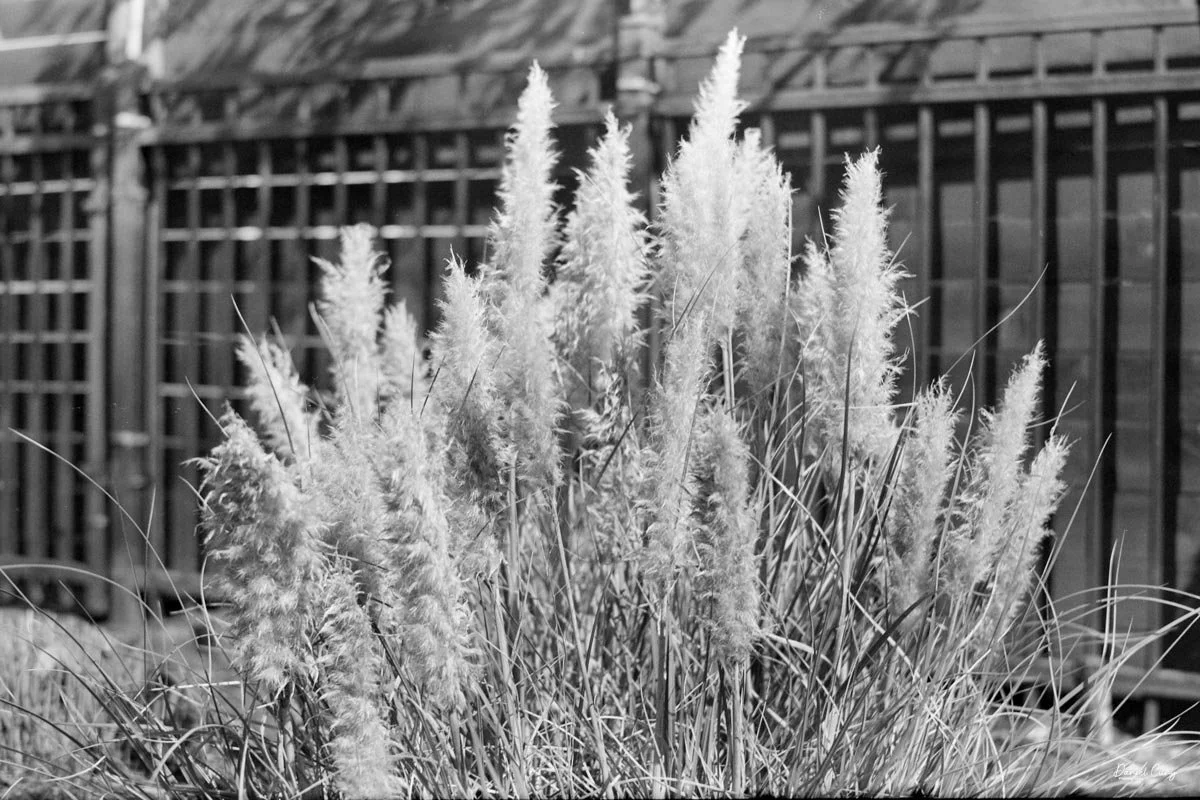
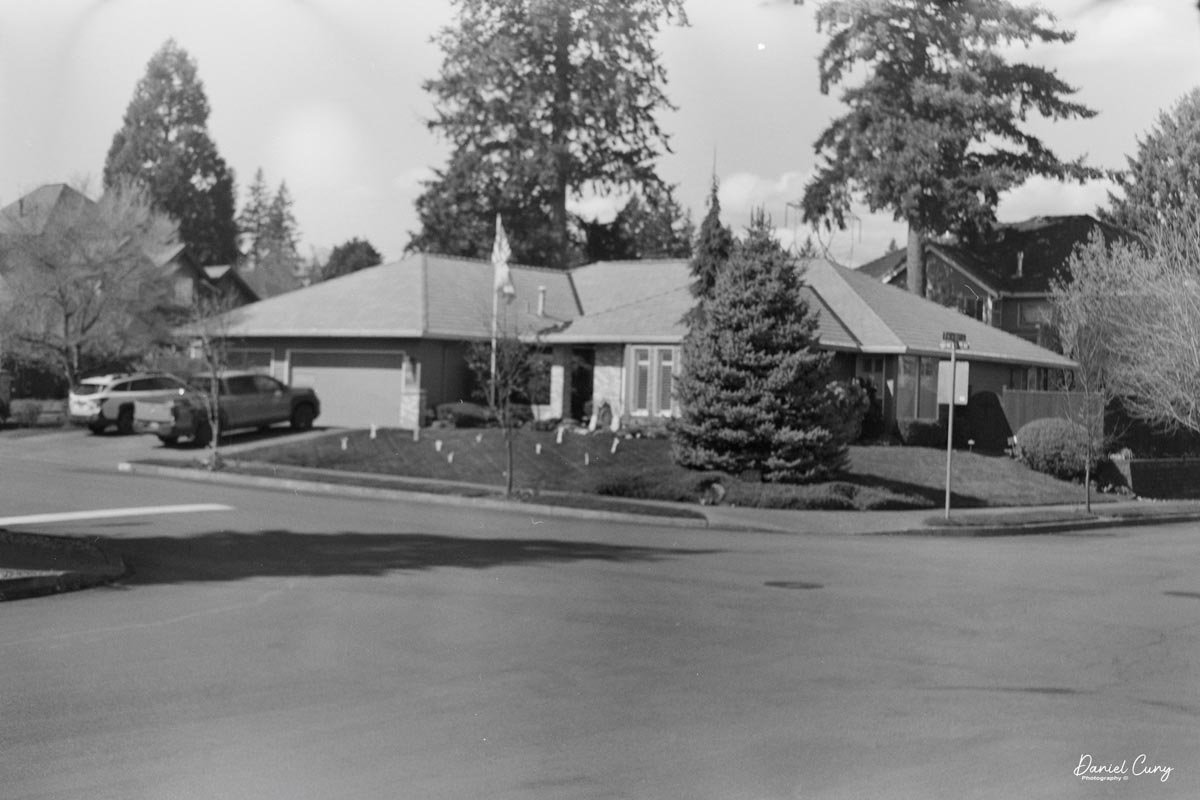
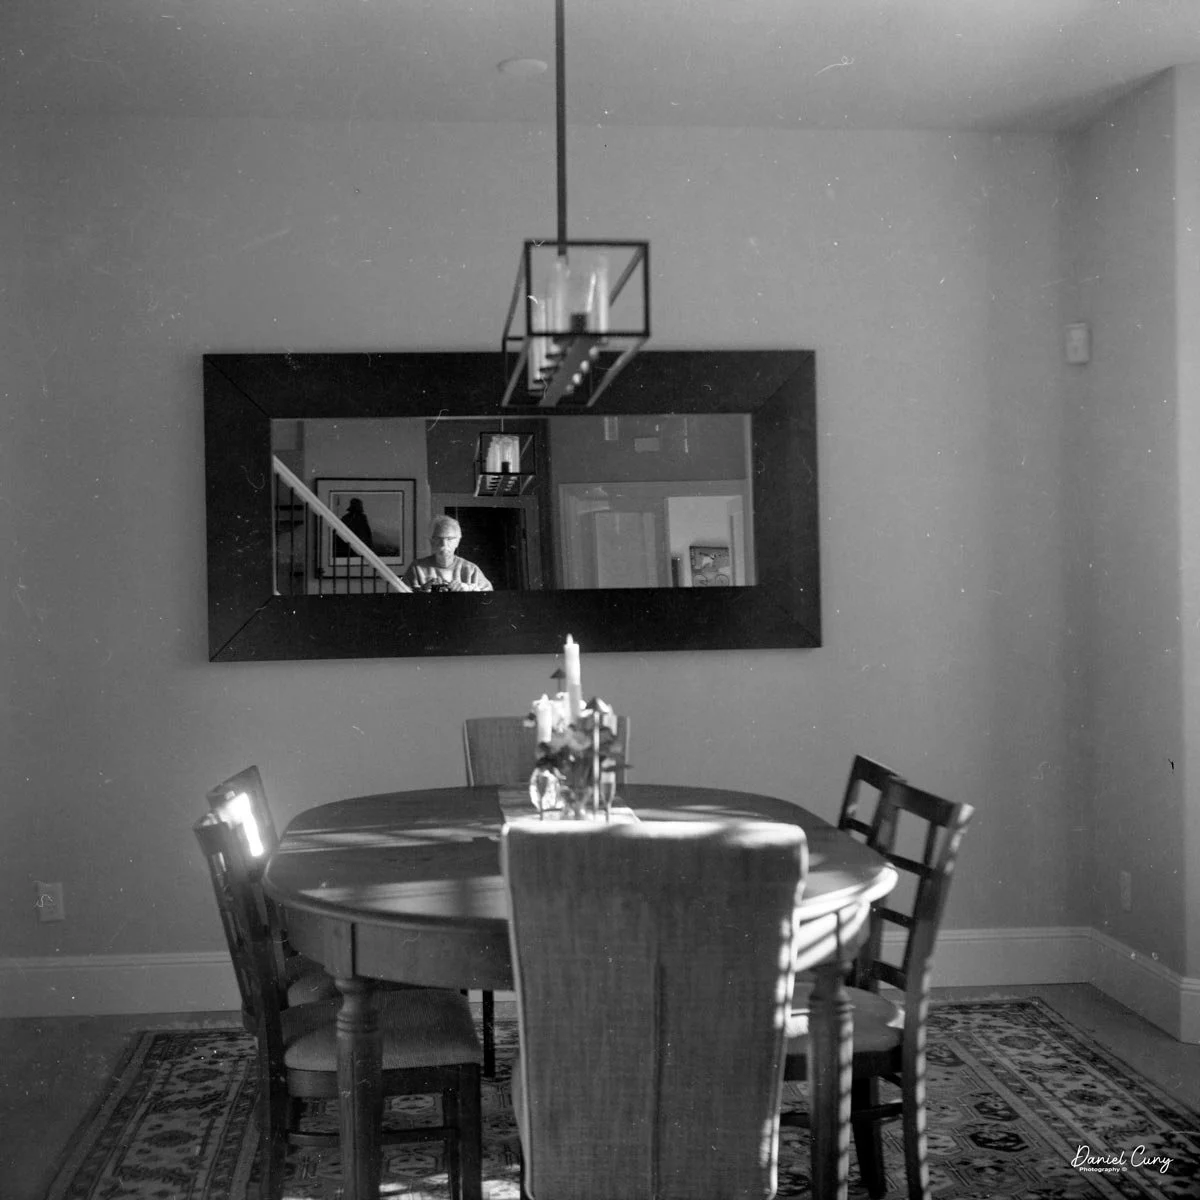
 Opening the Mizuho Six and cleaning both the front and rear elements of the lens before loading the camera. I had some T-Max 100 film that was just about out of date, so I loaded it into the camera. I chose the 6x6cm format so I could use a larger image size and assess the lens's sharpness.

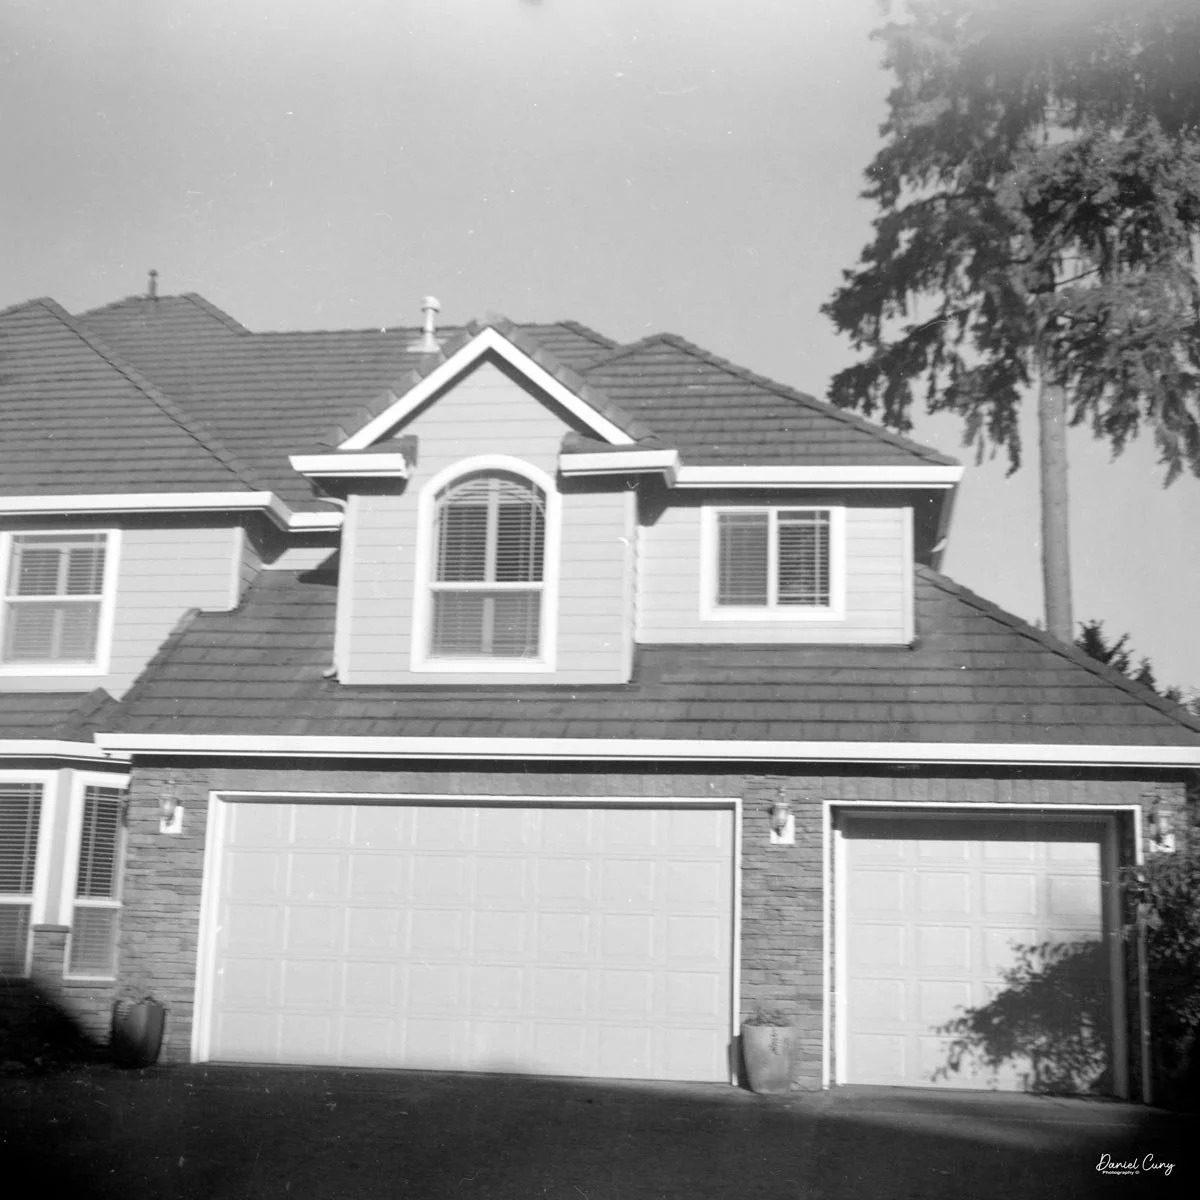
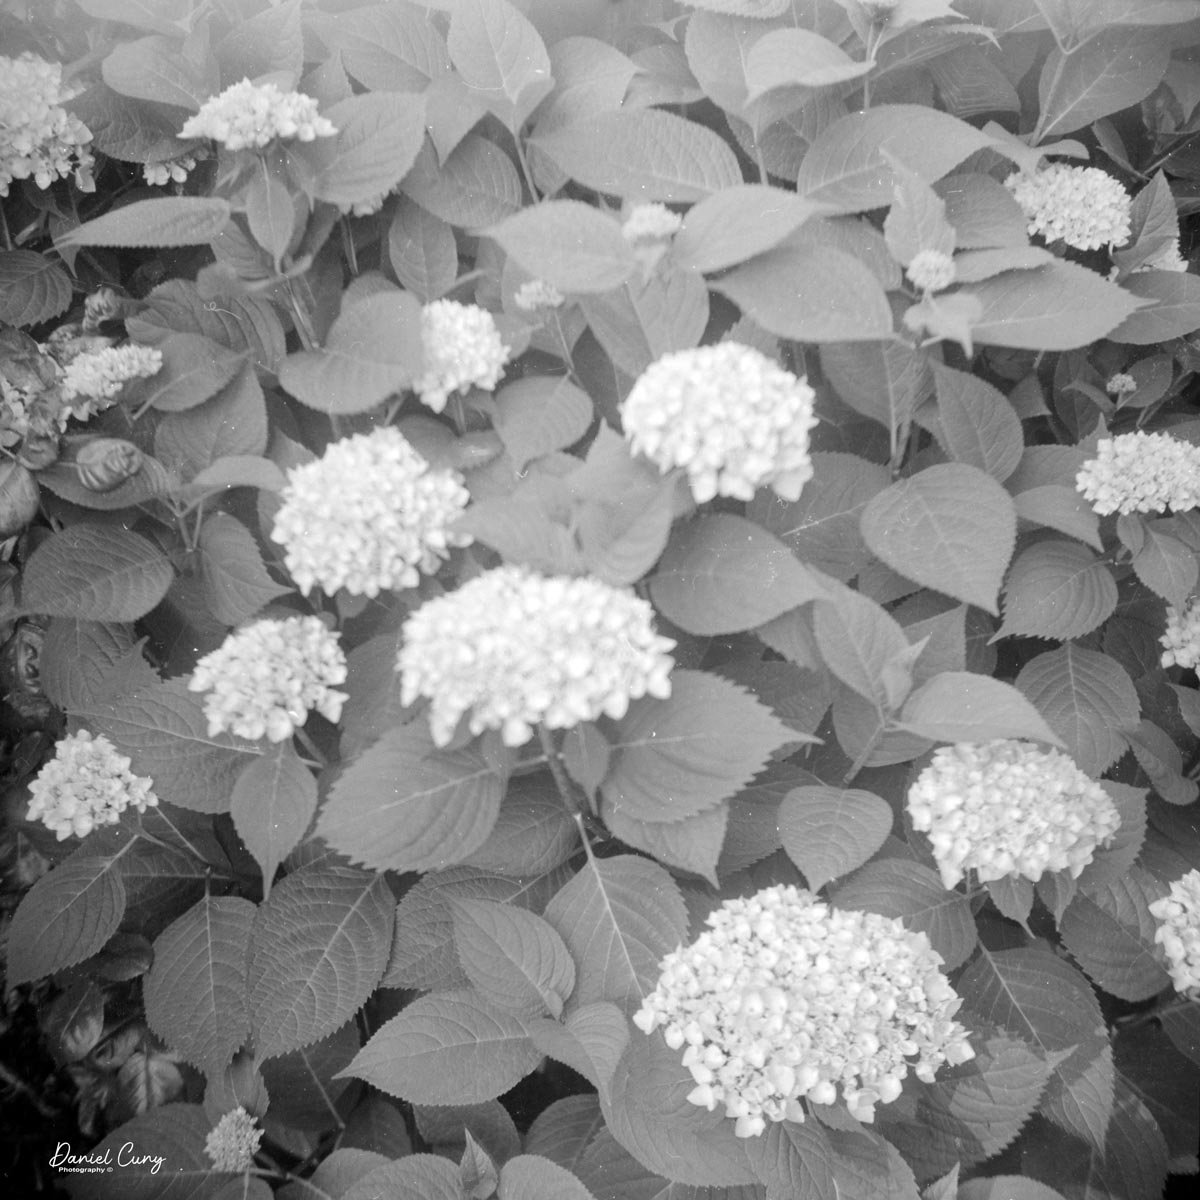
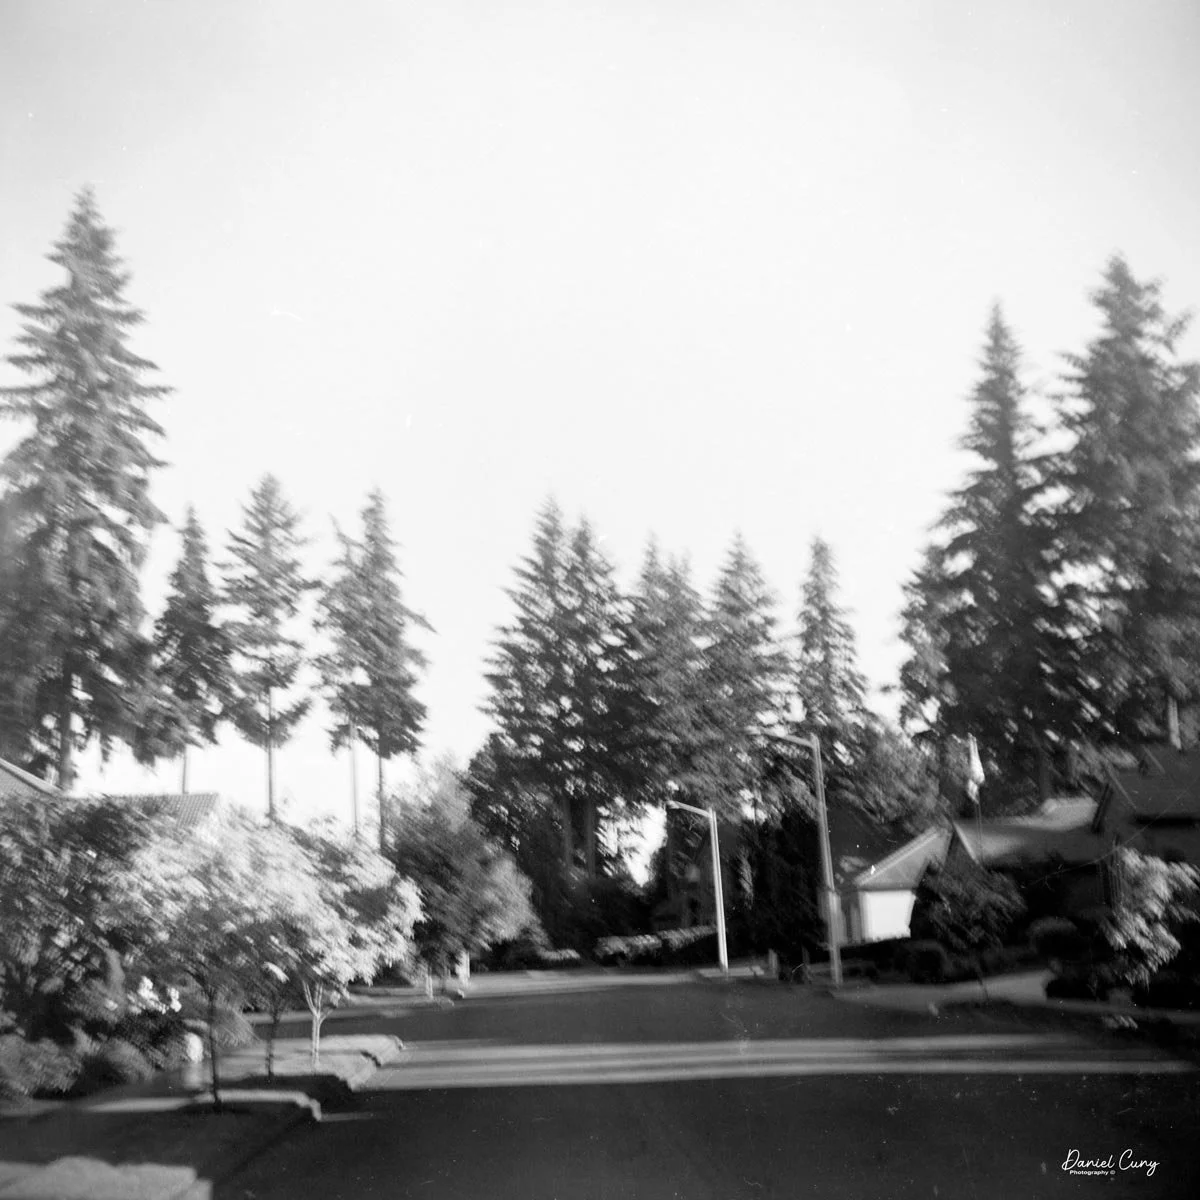
 Here are the results from my walk around the neighborhood with the Mizuho Six camera

Conclusion:

 Well, I think the second roll of film turned out much better than the first roll, but I'm not overly impressed with the sharpness. This could be from a couple of different factors.

 While I cleaned the lens as best I could, it still seems to have some haze. The second factor is that the lens is slightly out of registration. I'm a fairly good guesser of distance, and the lens even at infinity seems a bit out of focus. I also think that some of the issues with the focus were caused by camera movement and what I needed to do to operate the shutter.

 The camera also has cosmetic issues. Some parts of the leatherette are missing and can be easily replaced. Given the shutter issues and the lenses' haze, this may not last long in my collection, and you'll probably see this in my online store soon.

 On the plus side, the camera can shoot in different formats, which is a nice feature, but I don't think it's going to overcome the camera's faults. It's a fun camera to shoot with, and I was happy to learn more about this camera.

 Thank you for taking some time from your busy day to learn a bit about this little-known camera from the beginning of the Japanese camera revolution.

 Here's a link to my other Camera Reviews.

 Cuny's Cameras and Photos is my online eBay store where you'll find some of the cameras I reviewed for sale, along with many other cameras, lenses, and photo items from my collection.

 Until next week, please be safe.

Zeiss Ikon Super Ikonta 531/2

My Zeiss Ikon Super Ikonta 530/2 camera

Walking through flea markets, garage sales, or camera shows, I always stop to look at what Zeiss cameras they have, and the cameras that I always pick up to look over are any of the Zeiss Ikon Super Ikonta cameras. Not only because they look impressive even when closed, but also because I'm always struck by how well-made and intricate they are for a camera that's 90 years old.

 To me, the Super Ikonta cameras are like looking at a masterpiece of art. They are timeless in their form, compactness, and mechanical intricacies. When closed, they are compact and sturdy. They have a heft to them that you know they were manufactured to last a long time.

 Zeiss Ikon made four different Super Ikonta styles. There were the smaller models in 6x4.5 or 6x6cm formats, then they also made a larger, specifically longer version that shot 6x9, and a rare version that shot 6x11cm. The 6x9cm version came with a metal insert that reduced the image size to 6x4.5, essentially allowing the photographer to get twice as many images on the 120 roll film loaded in the camera.

 Having owned both in my life, I'm torn between them. On the one hand, I prefer the longer negatives, so the 6x9cm version is appealing, but it's also a bit bigger to carry. The more compact 6x6cm version is a terrific camera to carry when you travel. They are compact, fit in your pocket, have wonderful optics, and use a rangefinder to focus.

 Looking at the cameras on my shelf for a camera to write about, the Zeiss Ikon Super Ikonta 530/2 was a camera I recently got back from a full CLA, so I knew, or at least hoped there wouldn't, or shouldn't be an issue putting film in the camera and running a roll of film through it. 

Horizontal view of my Zeiss Ikon Soper Ikonta 530/2 camera

 The camera I had purchased almost a year ago was from an online auction. I saw it at the auction along with a few other cameras, placed a fairly low bid, and won it. The camera was shipped to me, and upon inspection, I noticed the shutter wasn't working. It worked at higher speeds, but the camera needed servicing, so I sent it for CLA.

 My camera came back from the technician and looked flawless. The rangefinder was bright and accurate, the lens was bright, the focus was smooth, and the lens popped out of the camera as if it were new. 

 Whenever I see a Zeiss Ikon Super Ikonta or another rangefinder folding camera, the first thing I check is the shutter to see if it's opening/closing, especially at slower speeds. Then I check the focus to see how smoothly the lens and focus knob turn. It seems that many of the cameras have very stiff focusing, so when the camera came back, and the focus knob turned so nicely, I must have had a large grin on my face, as this was a new experience for me: a smooth focus.

 With all that said, it was time to put a fresh roll of 120 film into the camera and take a walk through the neighborhood on a wonderful spring afternoon. The sun was out, and so many of the trees and flowers were in bloom, it was the ideal opportunity to take my newly CLA'D Zeiss Ikon Super Ikonta for a spin.

Brief History of the Zeiss Ikonta Cameras:

 Zeiss Ikon and the Ikonta cameras sit at an important crossroads in European camera history. Formed in 1926 from the merger of four major German makers—Contessa-Nettel, Ernemann, Goerz, and Ica—Zeiss Ikon became one of the largest and most influential camera companies in the world, backed by the Carl Zeiss optical tradition.

 The Ikonta line emerged around 1929 as Zeiss Ikon's premium folding-camera family. It was introduced in several sizes, including 6x4.5, 6x6, and 6x9 roll film frames, and represented the company's effort to rationalize and modernize the crowded product lines inherited from the merger. These cameras were built as elegant folders: compact when closed, but capable of producing high-quality medium-format images when opened.

 What made Ikonta especially significant was its market position. Zeiss Ikon used better lenses and more refined construction on Ikonta models, while cheaper versions sometimes carried the related Ikomat name. The line became closely associated with Carl Zeiss lenses, such as the Tessar, which helped the cameras earn a strong reputation for sharpness and image quality.

 A major step forward came with the Super Ikonta series, introduced in 1933. The "Super" name indicated the addition of a coupled rangefinder, making focusing far easier and more accurate than the original scale-focusing Ikontas. That innovation helped define some of the best prewar folding cameras available.

 Production continued through the war years and into the postwar period, but folding cameras gradually lost favor as photography shifted toward more modern fixed-lens designs and 35mm systems. Even so, Ikonta and Super Ikonta remain admired today for their craftsmanship, portability, and classic Zeiss optical quality.

My Camera:

 My Zeiss Ikon Super Ikonta 531/2 is 7" wide by 4" tall and 2 "deep when the lens is retracted, and it's 5" tall when you open the camera, and the viewfinder pops up, and 5.5" deep when the lens is extended. The camera weighs 1 pound 15 ounces without the case or film loaded. My serial number is E30192.

The Zeiss Ikon Super Ikonta 531/2 camera has several different options for lens and shutter combinations:

  • Tessar 10.5 cm f/4.5 in a Compur shutter. This combination is the best-documented early setup for the 530/2, especially on black-enamel versions from the early 1930s.

  • Triotar 10.5 cm f/4.5 in a Klio shutter. Some early examples were fitted this way, making it a less common but real configuration.

  • Tessar 10.5 cm f/4.5 in a Klio shutter. At least one documented example shows this pairing, indicating that Zeiss Ikon used multiple shutters during the model's production.

  • Later or related Super Ikonta variants appear with Tessar lenses in Compur Rapid or Synchro-Compur shutters, though those are more typical of later Super Ikonta models.

Looking at the top of the camera, on the right side of the rangefinder, is a button that opens the camera when it's closed. According to the Zeiss Ikon Super Ikonta manual. Hold the camera in your right hand, with the front slightly pointed down. Press the button, and the camera should open slightly. Then pull down on the front cover so the bellows and lens extend to the taking position. Once the lens is extended, you'll need to swing the arm holding the small round lens into place so you can use the rangefinder for focusing. Also, when you open the camera, the Albada (sports) finder springs open. Look through the Albada finder; it has lines for both 6x9cm images in a horizontal format and for 6x4.5cm images for a vertical subject.

Now that the camera is open, you're ready to make exposures once the film is loaded, which we'll get to in just a moment. The shutter and aperture settings are located around the lens. Shutter speeds from 1/250 to 1 sec, plus "B," are set by turning the ring to the desired speed. The aperture is set by sliding the arrowed lever at the bottom of the lens to the desired aperture, which ranges from F/4.5 to F/32 on my camera.

 The focus wheel is on the front of the swing arm you moved over for the rangefinder, just above the lens when the camera is in the vertical position. For focusing, look through the small window on the back of the camera. Turn the dial to use rangefinder focus, which includes a small yellow area in the middle of the finder. When out of focus, the subject will appear as two images. Your main subject, and a second image in the yellow area. Turn the wheel until both images merge into one, indicating the subject is now in focus. 

Set your shutter speed and aperture setting, and don't forget to cock the shutter. The shutter release is on the top, left side of the camera. Press the shutter release, which will trip the shutter via a series of linkages that run along the bottom of the lens bed. Just behind the shutter release is a small window. When the window is grey, the shutter has been tripped, and you'll need to turn the film winding lever until the small window turns red. At this point, you can re-cock the shutter and release it. 

To open the back of the camera to load film, under the camera's handle is a small slider with an arrow pointing toward the opening. Slide the small knob in the direction of the arrow, and the camera back will open. Load the film as you would any 120 roll film camera, roll the film so the "start" arrows are showing, then close the back of the camera, and wind the film advance knob so the number 1 shows up in the appropriate window on the back of the camera. 

There are two red widows on the back of the camera: one for 6x9cm images and one for 6x4.5 cm images, if you have the metal insert in. If you have the insert in the camera, you'll use both windows for film advance, as you would with a 127 film camera with two windows. Stop at the number 1 on the far right window, then take your photo. Wind the film until the number 1 appears in the second window on the left, then take your photo. Then wind the film until the number 2 shows up on the first window on the right side, and so on through the number 8. For 6x9cm images, you'll get 8 exposures per roll; for 6x4.5, 16.

 To close the camera for transport, slide the arm you extended for focus back over the bellows. Holding the camera with both hands, press in on the locking arms on the struts to lock the bellows and lens into place; the bed will collapse a bit. Fold the lens back into the camera until the camera clicks closed, then flip down the Albana finder.

My Images:

 Let's take a look at how the images turned out. Here are a few of the images I took with the Zeiss Ikon Super Ikonta camera.

Conclusion:

 The first few images were incredibly sharp, well-exposed, and as I expected. I noticed that towards the end of the roll, the images became softer and less sharp, which concerned me. What did I do wrong?

 To give some background, I had eye surgery on my right eye, which is my dominant eye, about a year or two ago. When I went to see the eye doctor, I could barely make out details with my right eye, so surgery was necessary. Since then, it's gotten a bit better, but not as good as it used to be. Now I'm getting used to putting the camera up to my left eye, which is considerably better than my right. It still feels awkward, but it's my new normal.

Missing pressure plate

 I thought this contributed to the images being soft. Then I remember what a good friend, Mike Eckman, said a few weeks ago when we were discussing image sharpness. He said that he had a similar instance and noticed that the film's pressure plate was missing. At this point, I opened the back of the camera, and sure enough, the pressure plate was missing. 

 How could I miss that when I'm loading the camera? You get so used to looking at and loading cameras that you miss that a camera doesn't have a pressure plate.

 At this point, I'm sure I could manufacture one out of something like thin foamcore and just cut out circles for the red window. Still, it's a lot of fun to use, and the images are incredible. I'll chalk it up as a learning experience and double-check to be sure they have the pressure plate from now on.

 Here are some of the other Camera Reviews I've done.

 Cuny's Cameras and Photos is my online eBay store where I sell some of the cameras I've reviewed, along with other camera accessories, lenses, etc.

 Please feel free to comment on this or any of the other camera reviews I've done. I'd love to hear from you.

 Until next week, please be safe.