My Minolta Vest camera
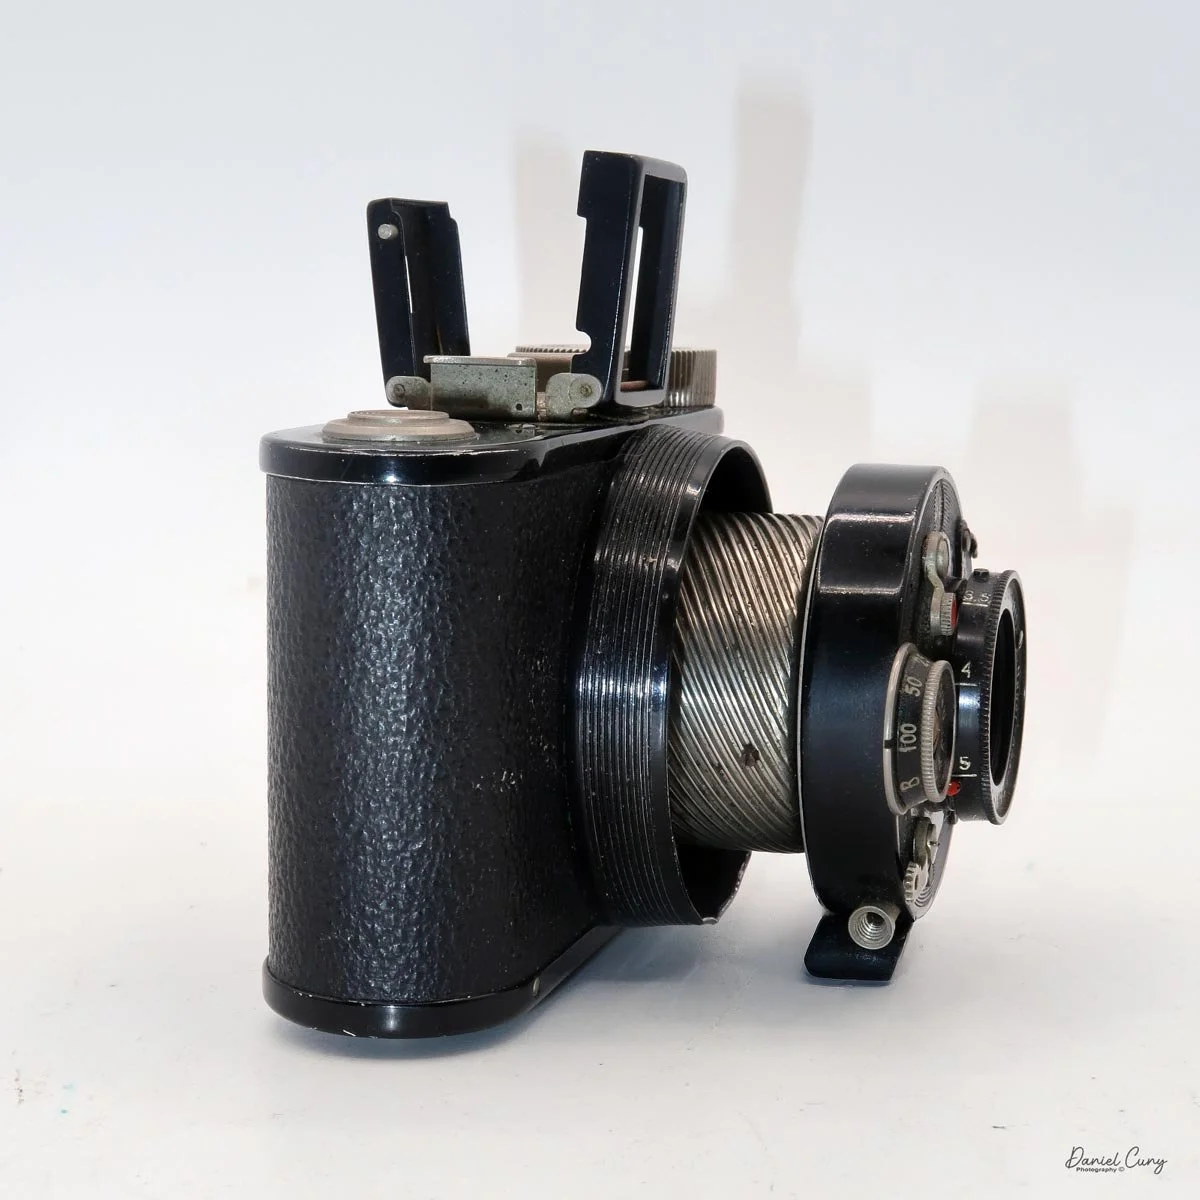
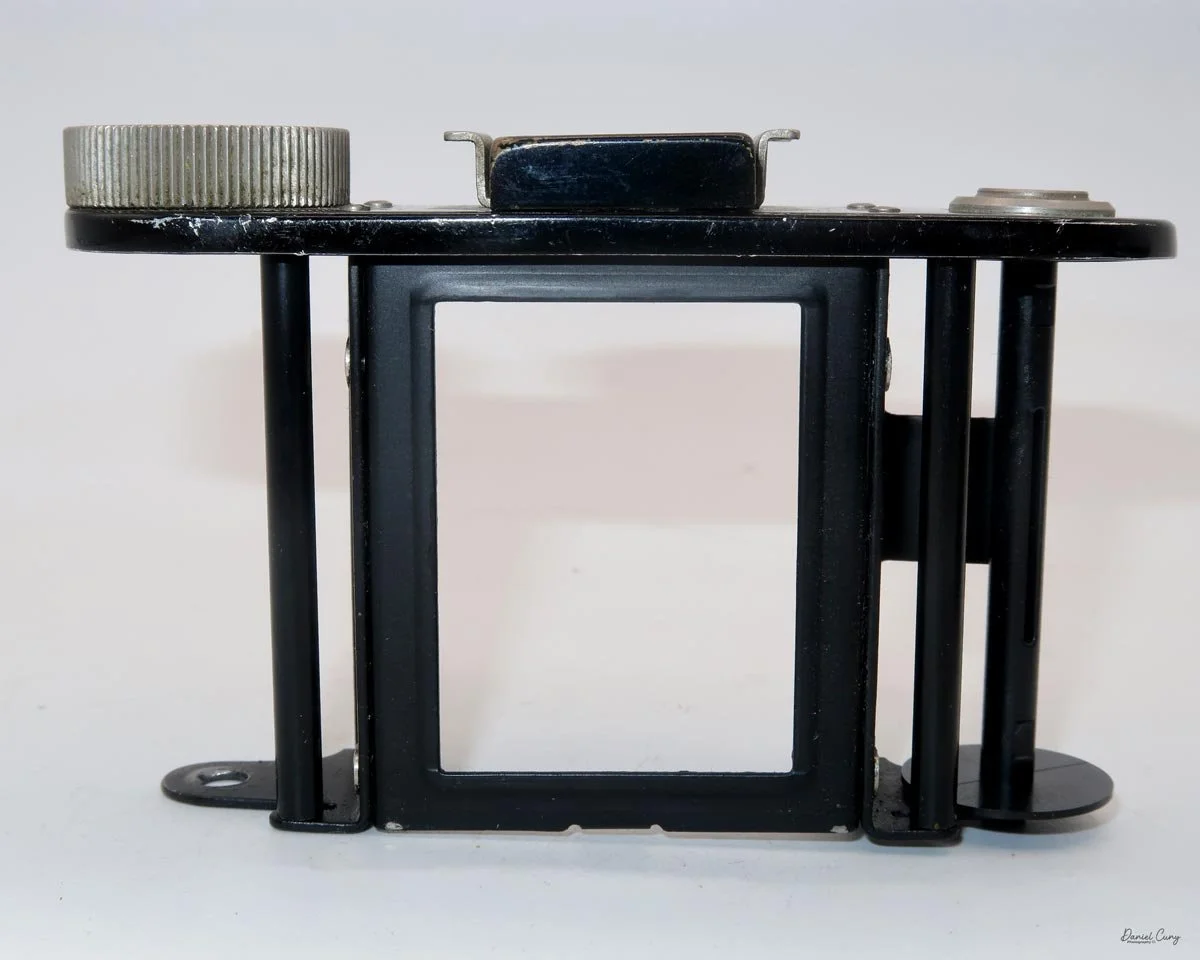
My interest in the Minolta Vest began a few months ago when I saw a post on Facebook. What I like most about the camera is its similarity to the Minolta Six. Both cameras use a three-tier, stacked metal bellows system that extends and collapses, unlike the standard cloth- or leather-covered cardboard bellows found on most cameras.
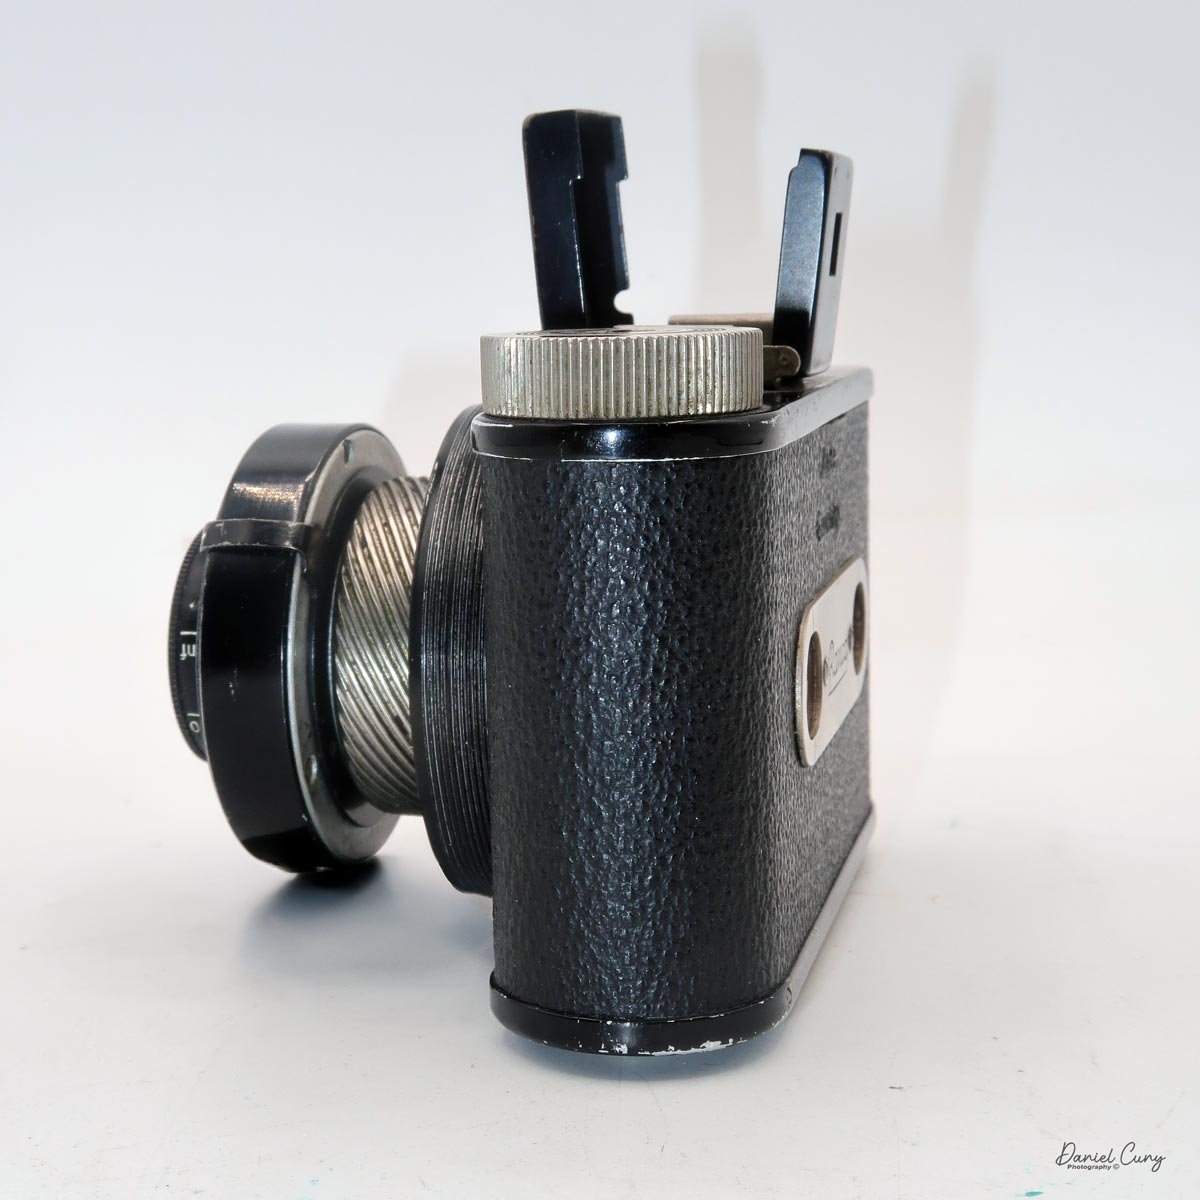
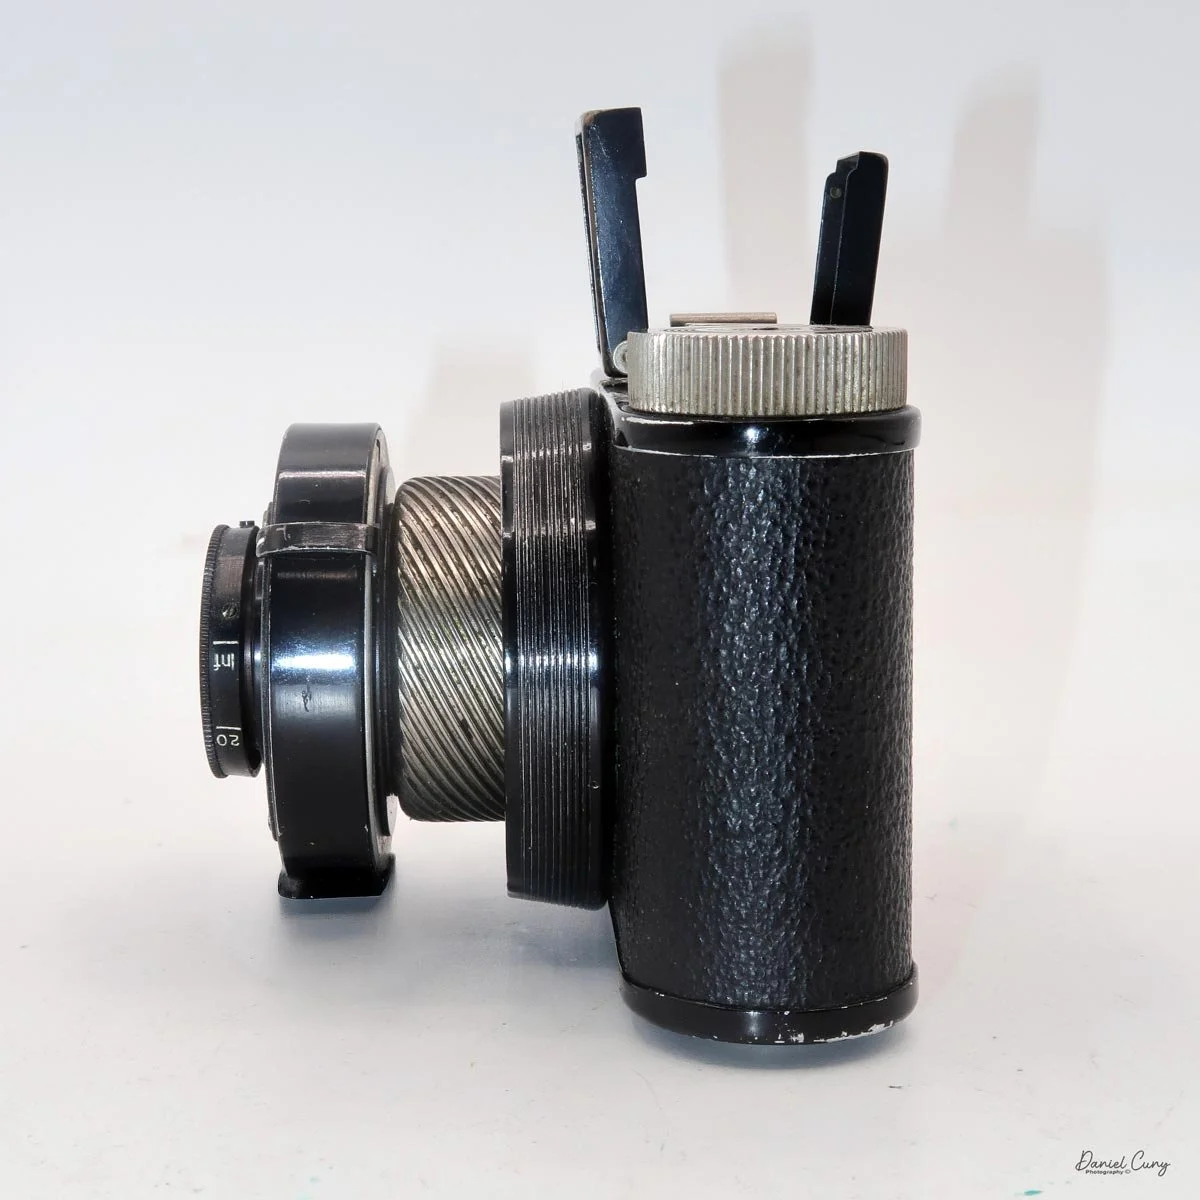
When I first pulled out the lens on either the Minolta Six or the Minolta Vest, the metal stacking bellows reminded me of a Japanese pagoda. Both cameras have a beautiful chrome pattern set against stark black Bakelite, giving them a strong Art Deco appearance. It's the artistry and attention to detail that you don't see in cameras produced today.
Knowing about this early Minolta camera with metal stacking bellows, I made a point of keeping an eye out for one during my trip to Tokyo a few weeks ago.
Fate was on my side, and I found a Minolta Vest in decent condition at the Tokyo City flea market. As I walked past one of the many hundreds of stalls, I noticed one of the vendors had a few cameras on his table. When I picked up the camera, I saw the Minolta name embossed on the back. Then, as I pulled the lens away from the camera body and the metal stacked bellows appeared, I was filled with excitement and joy.
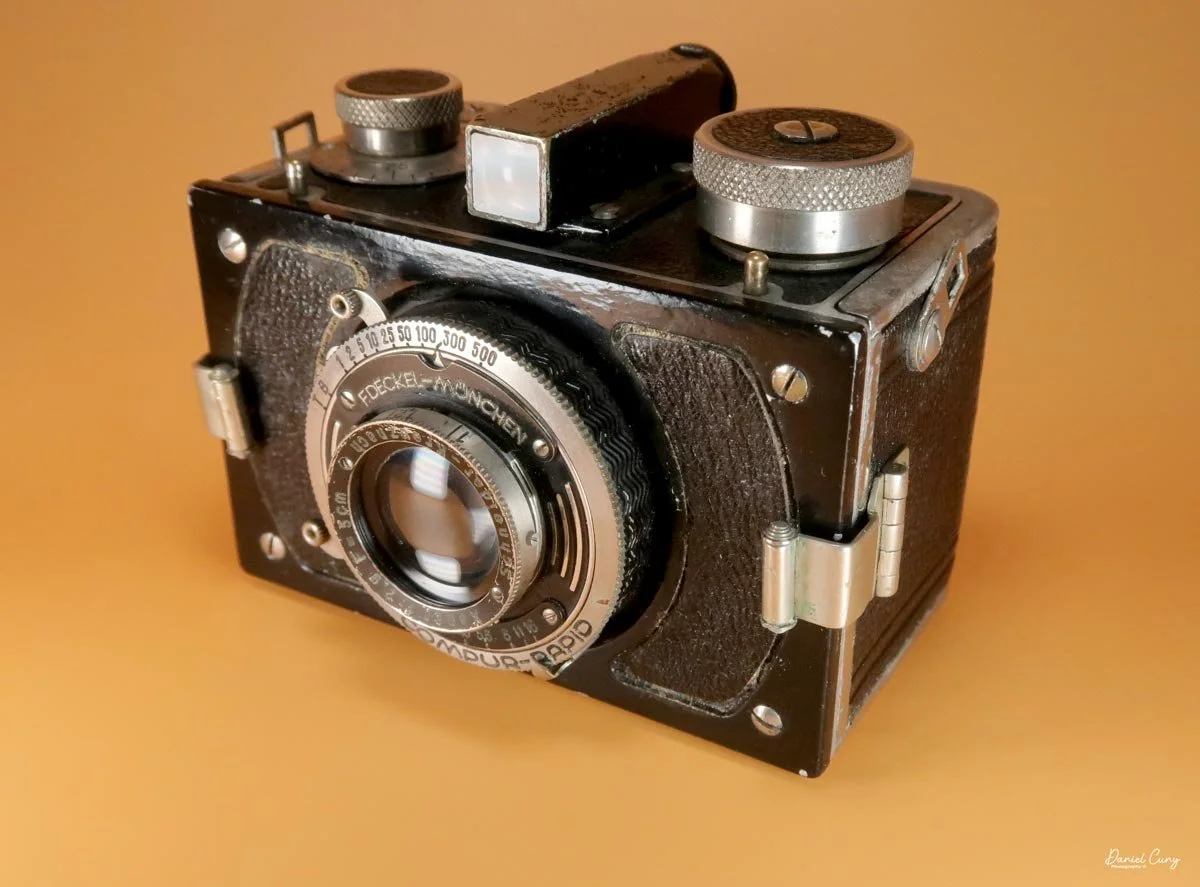
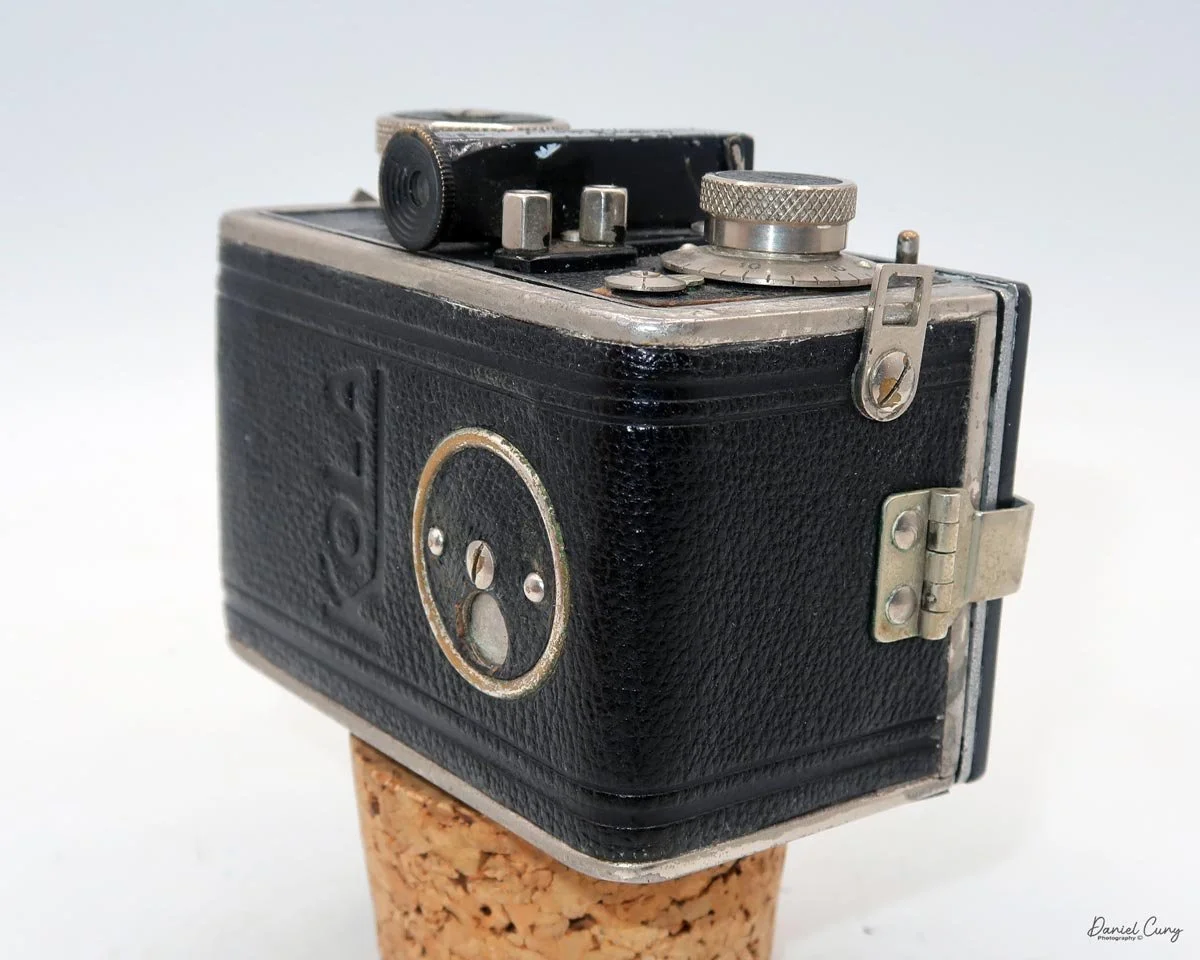
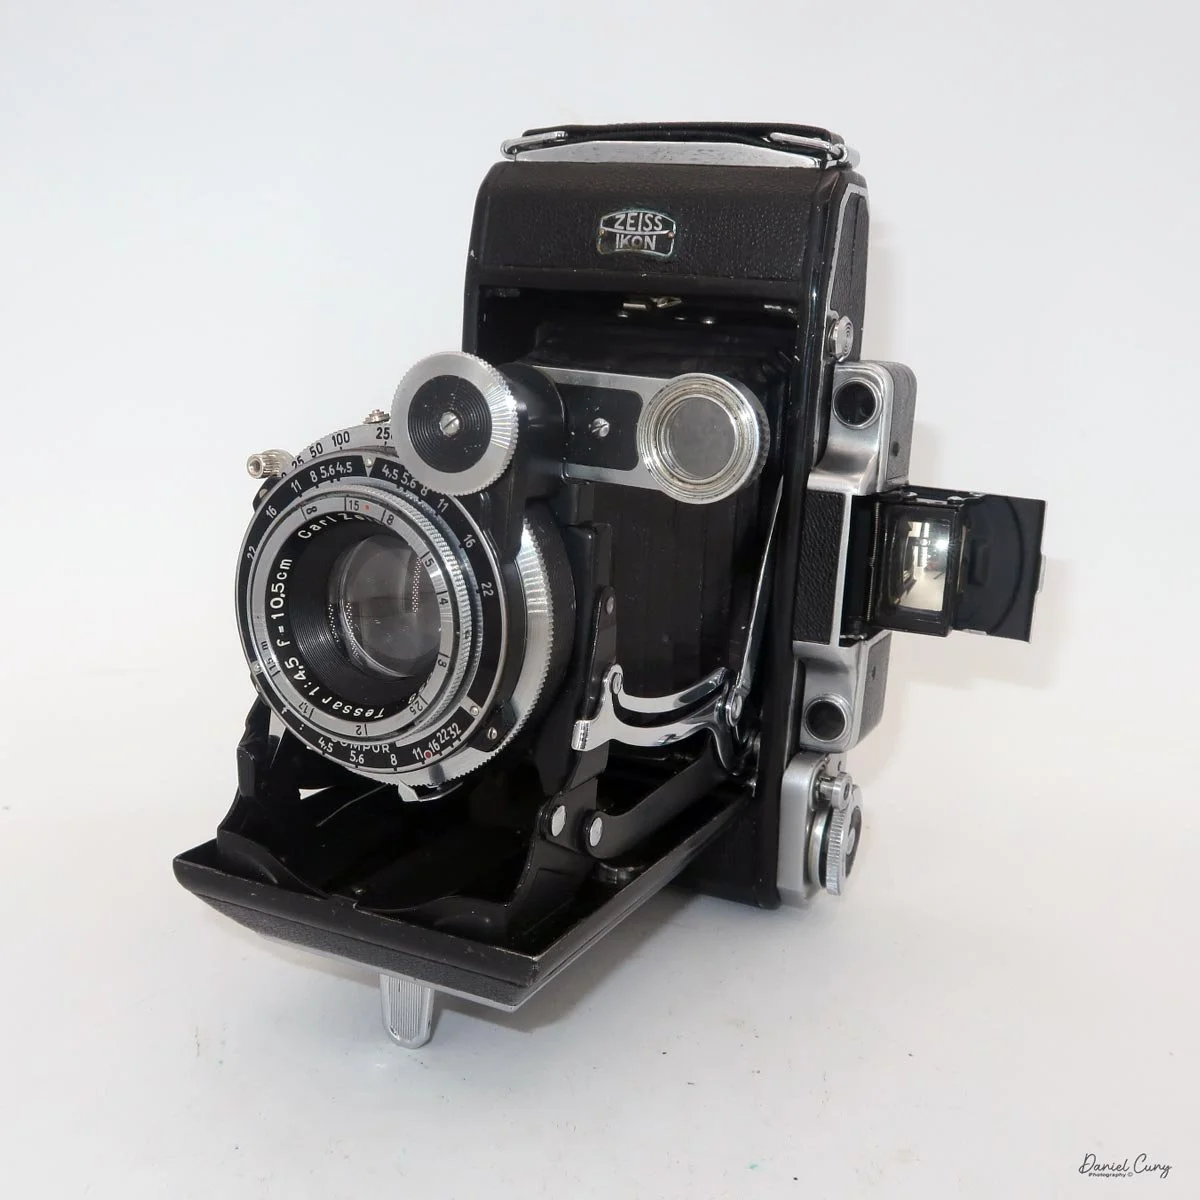
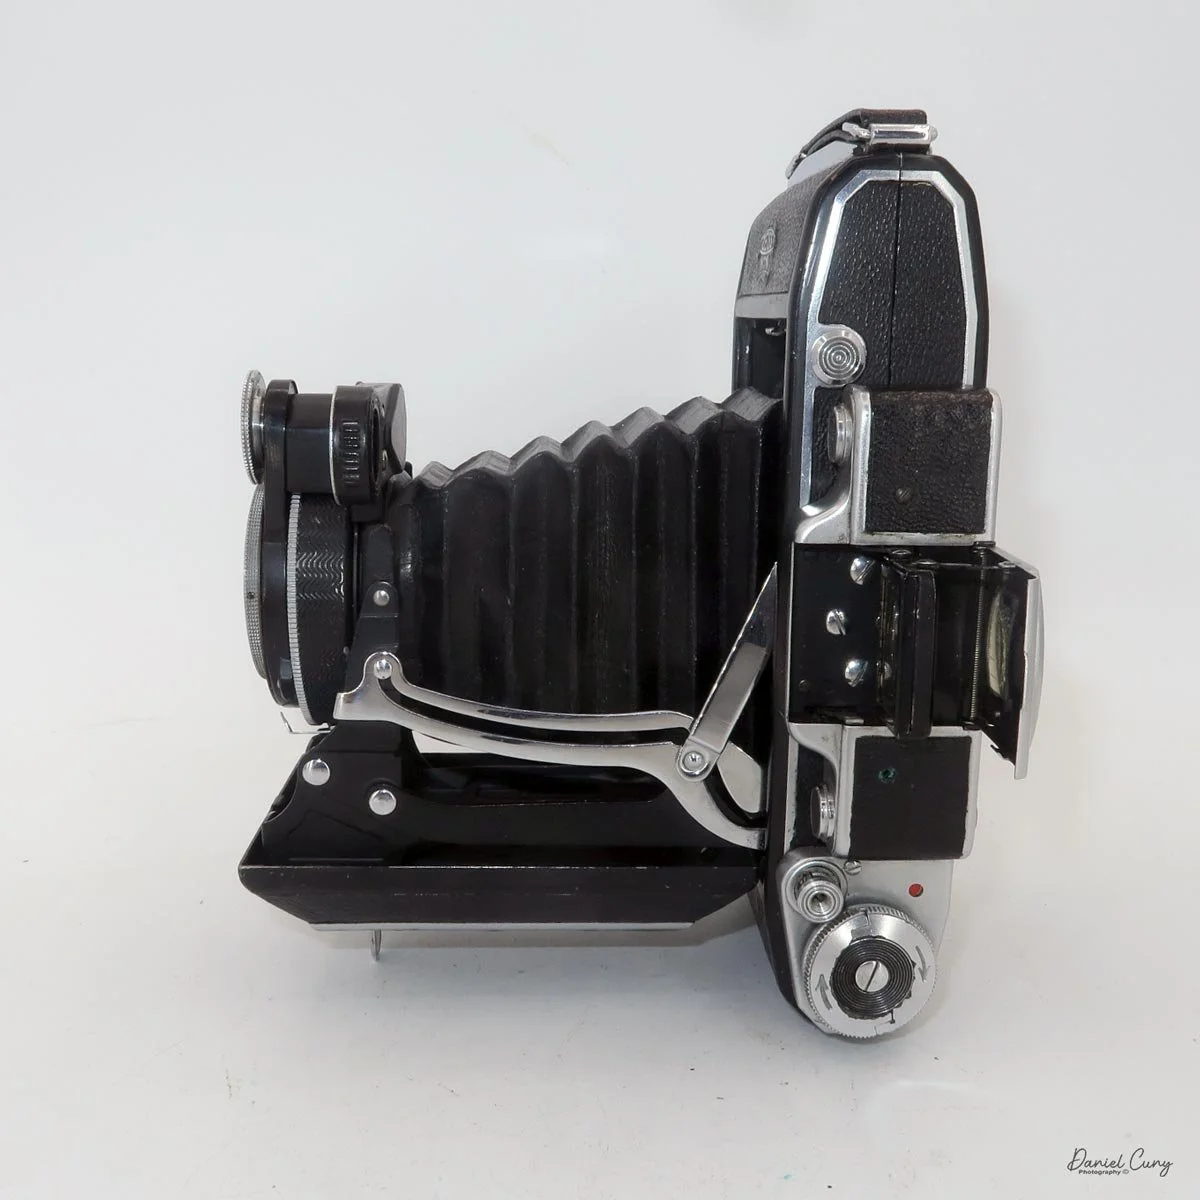
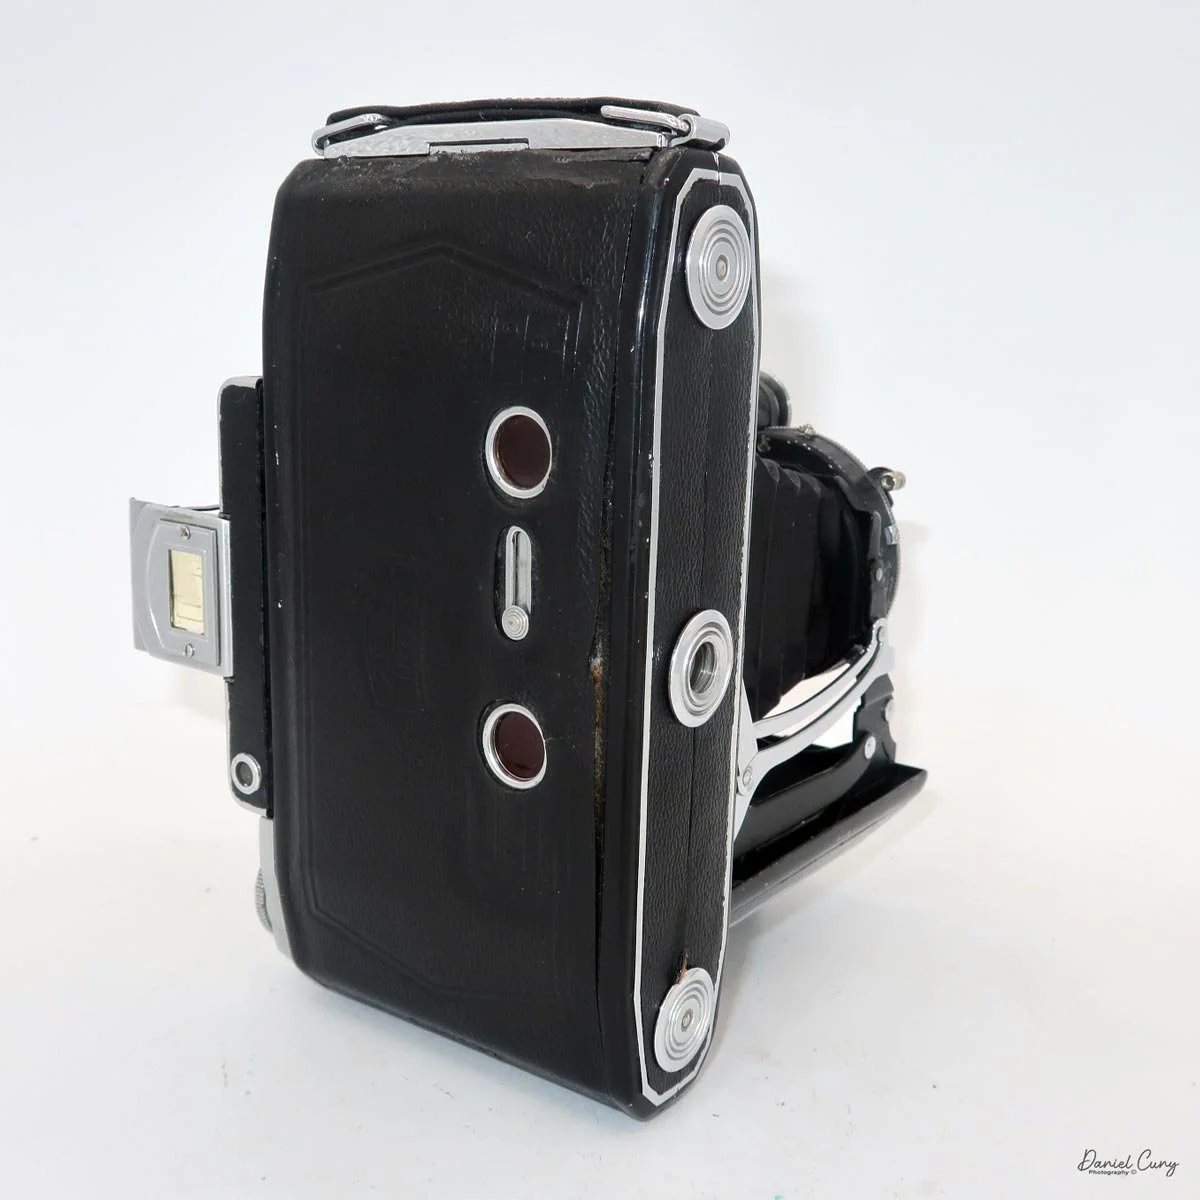
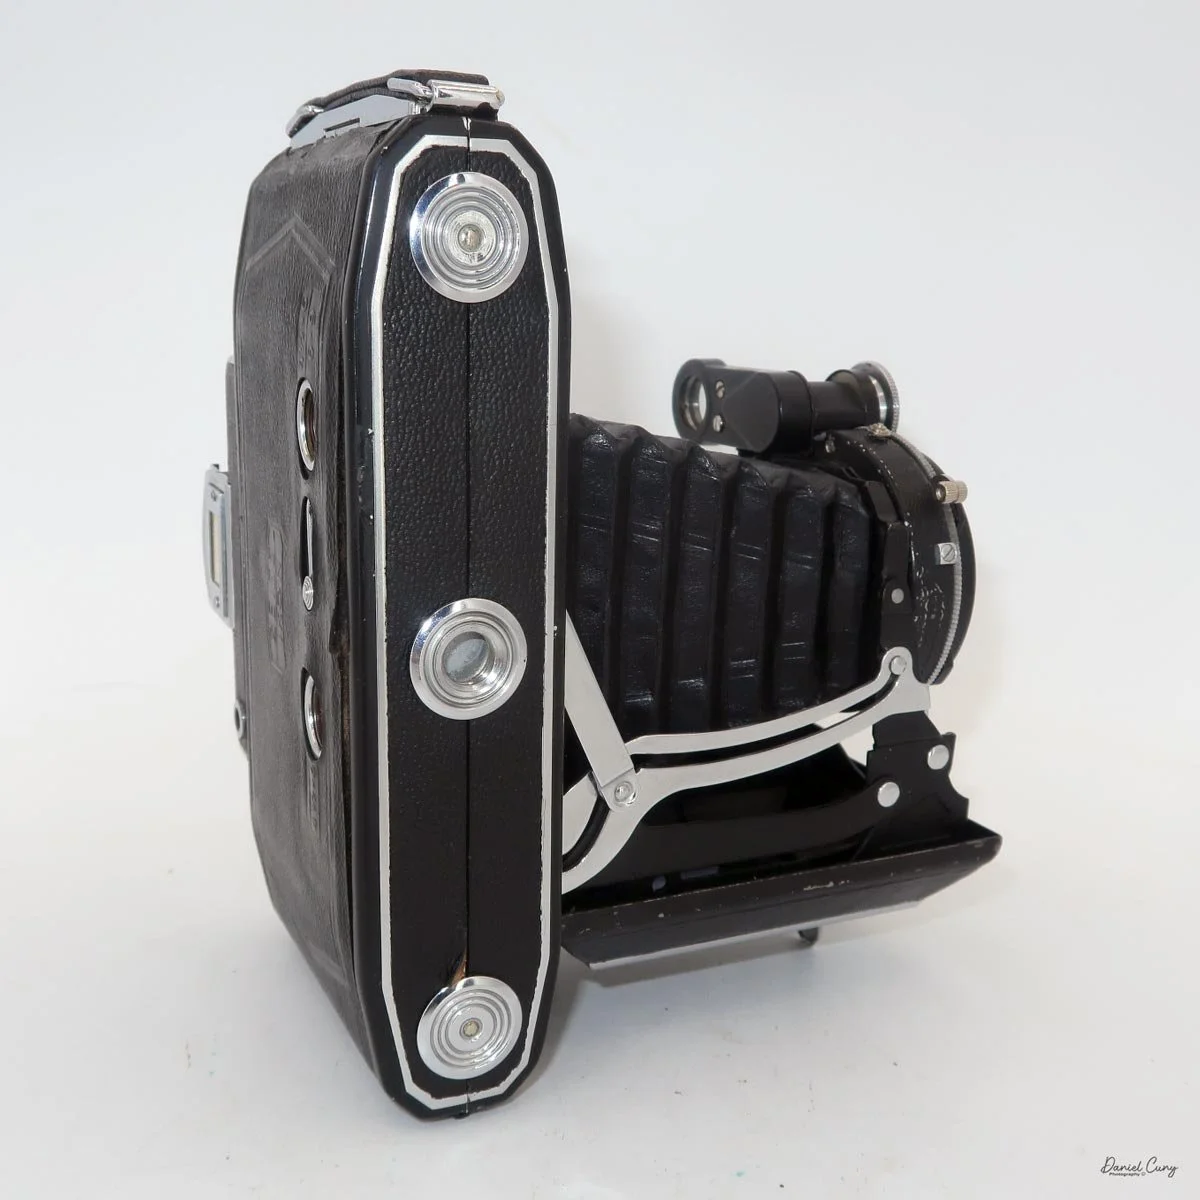
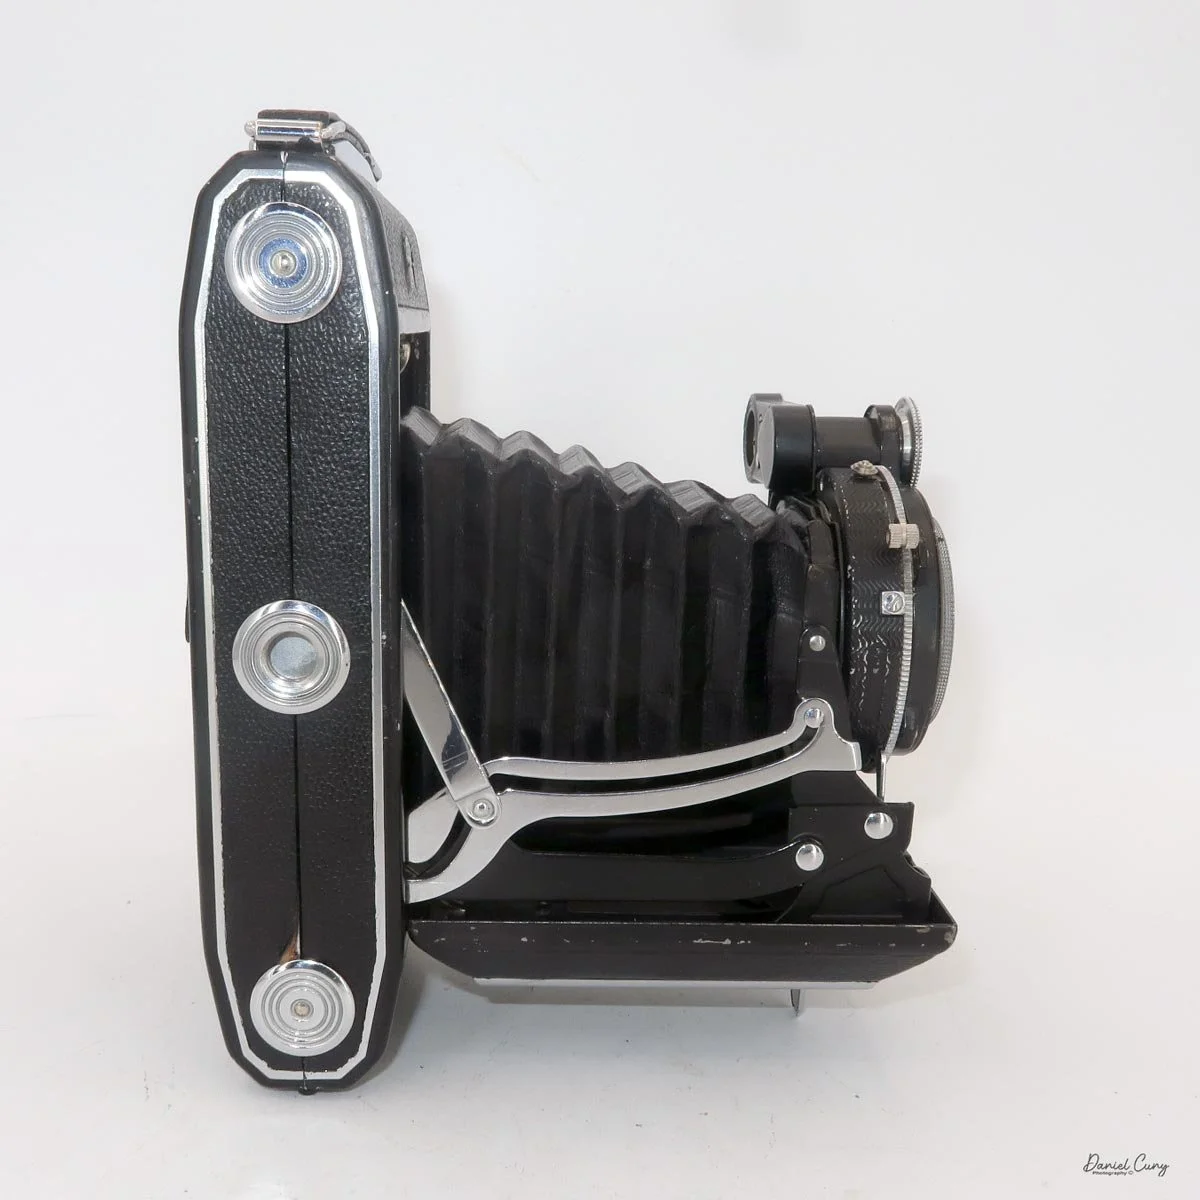
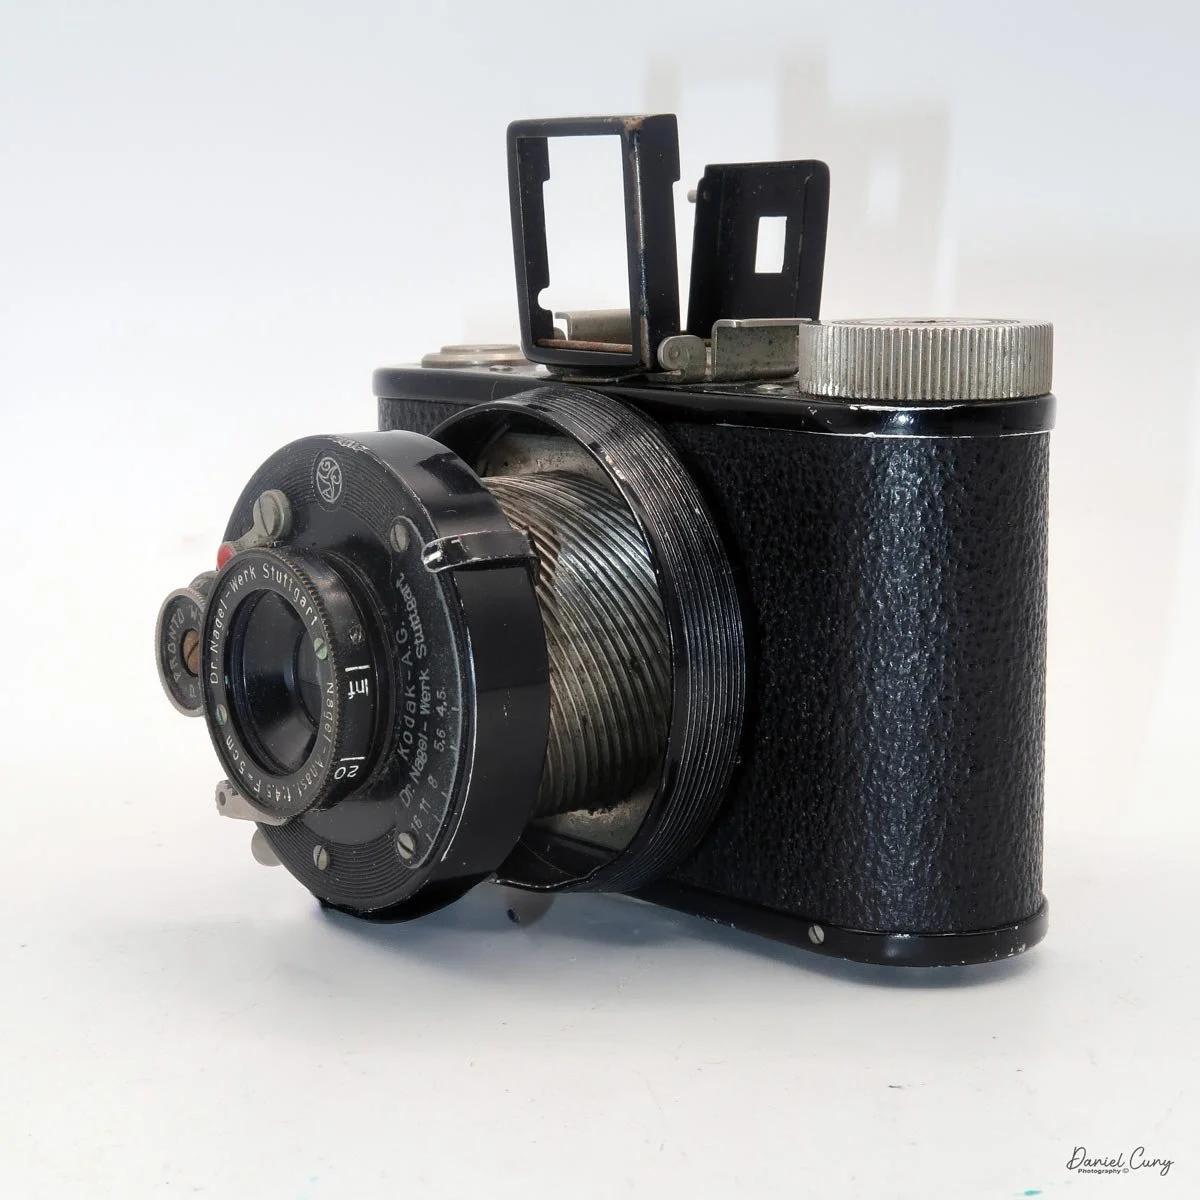
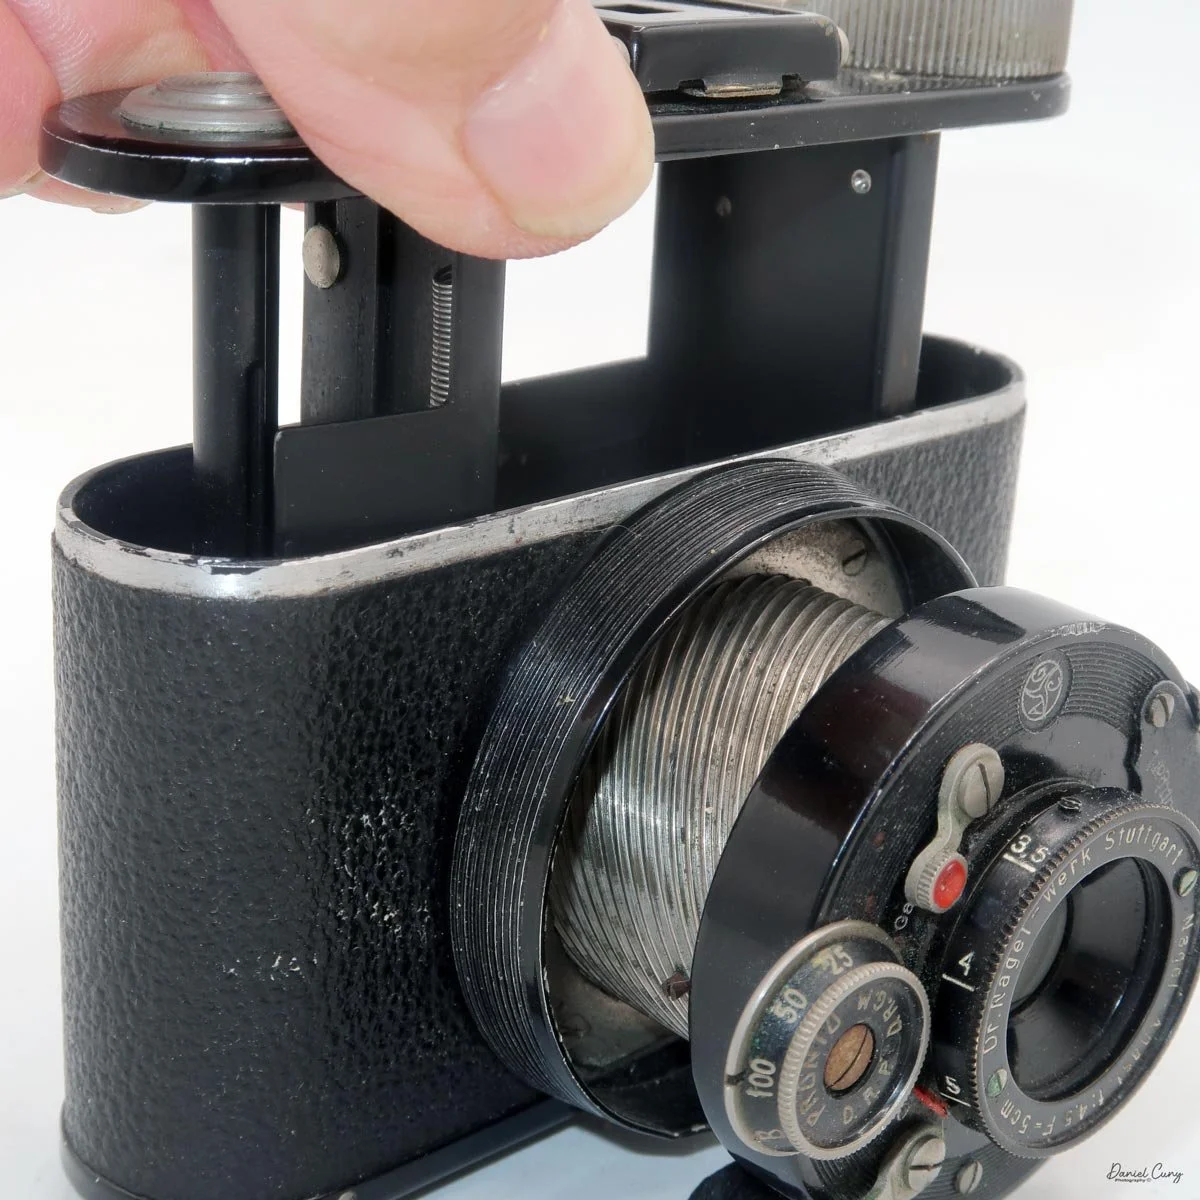
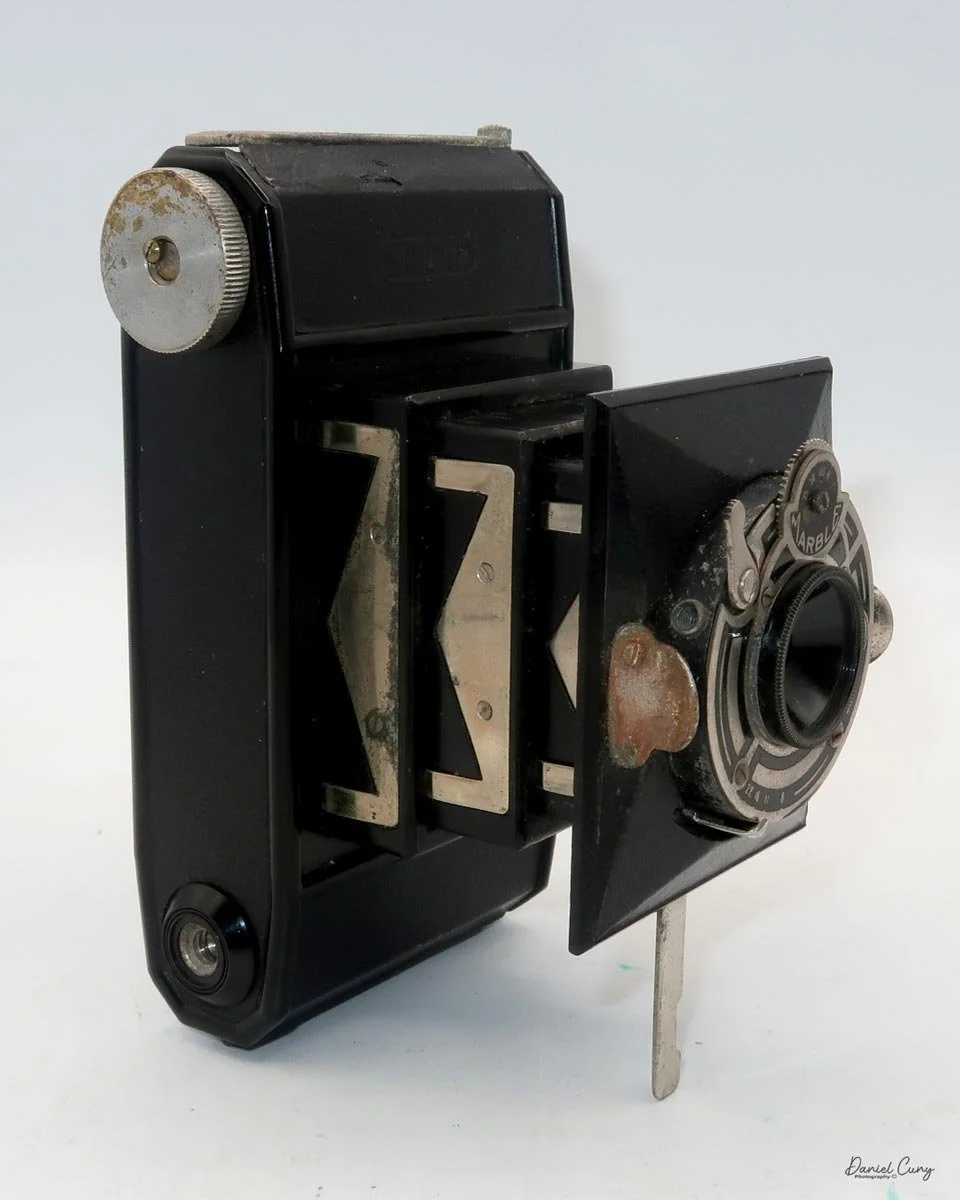
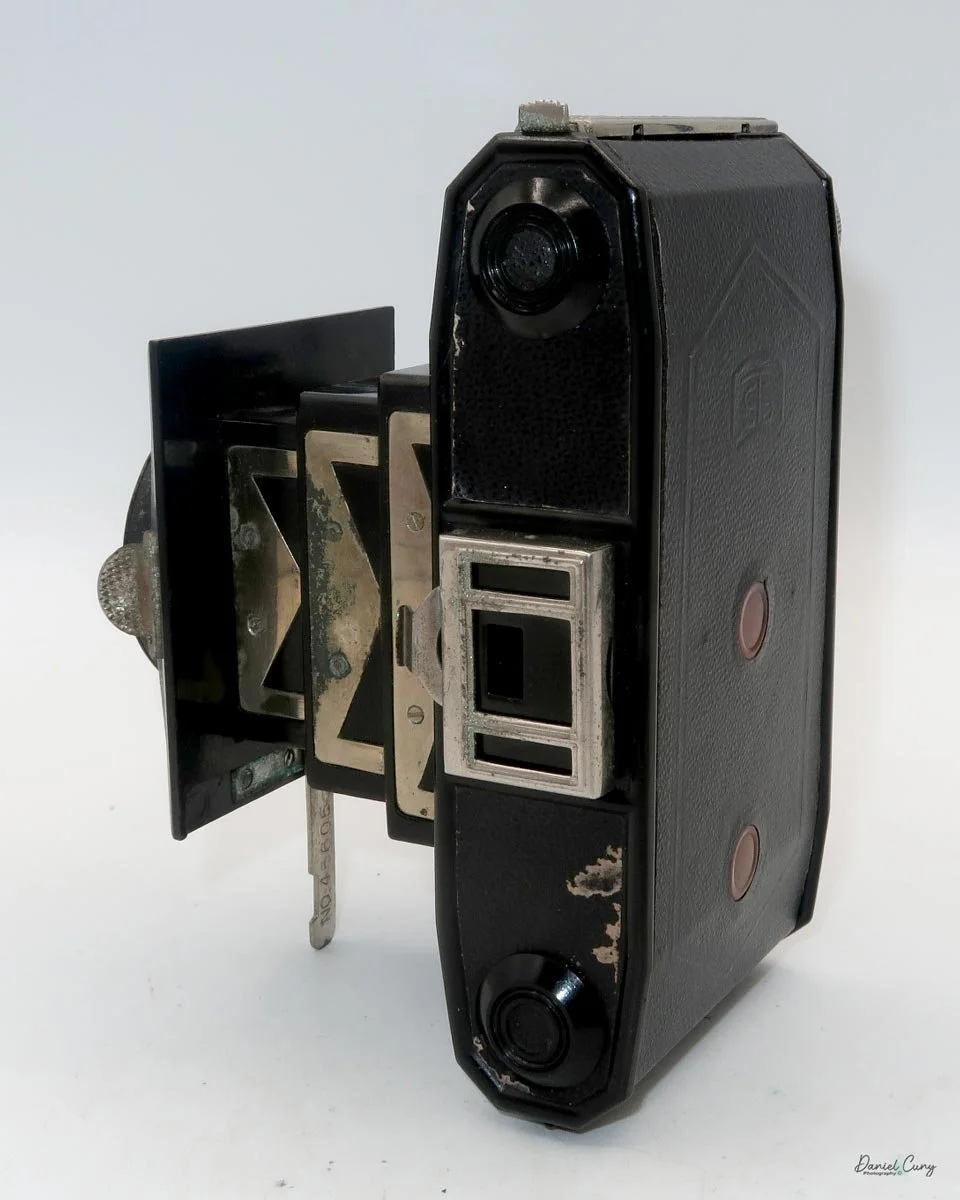
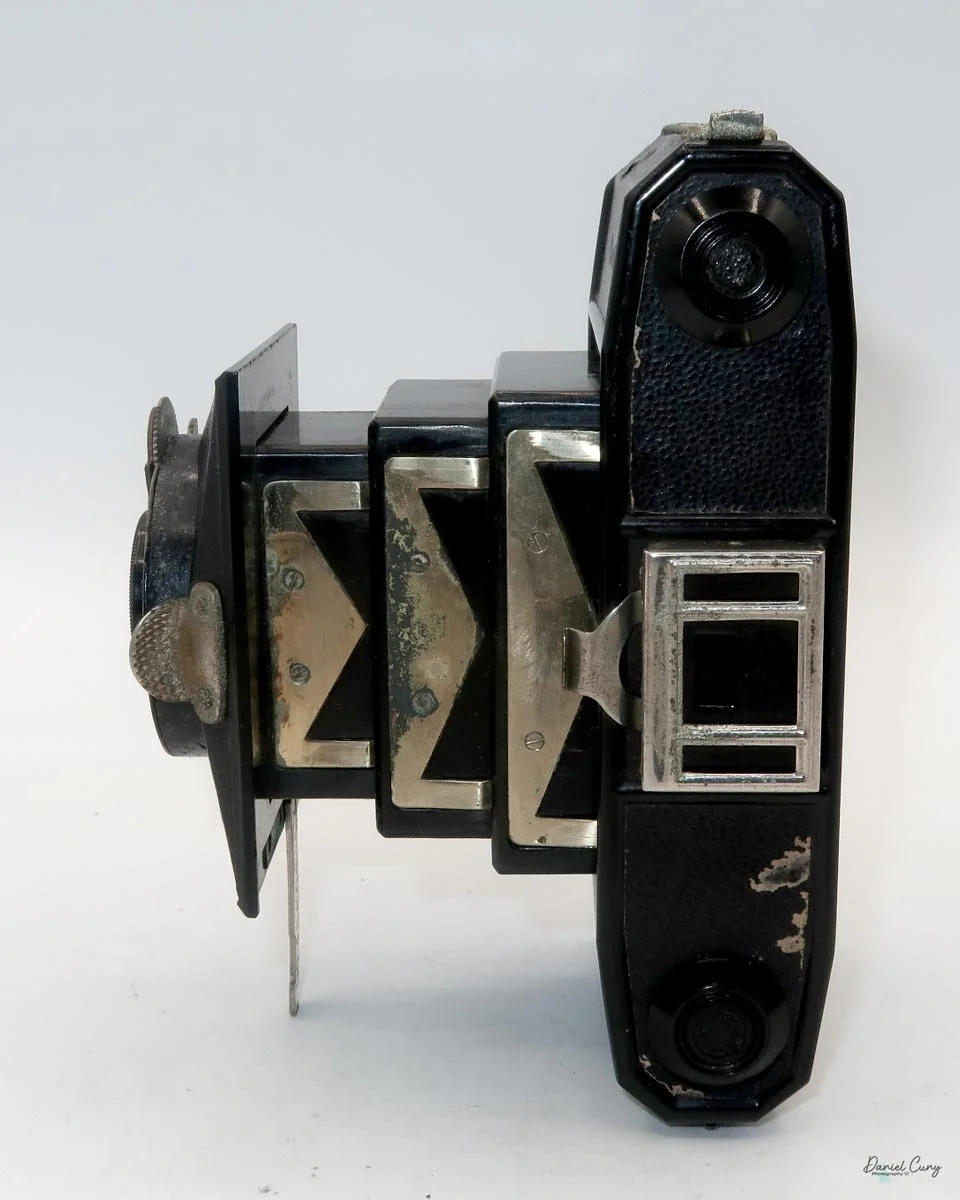
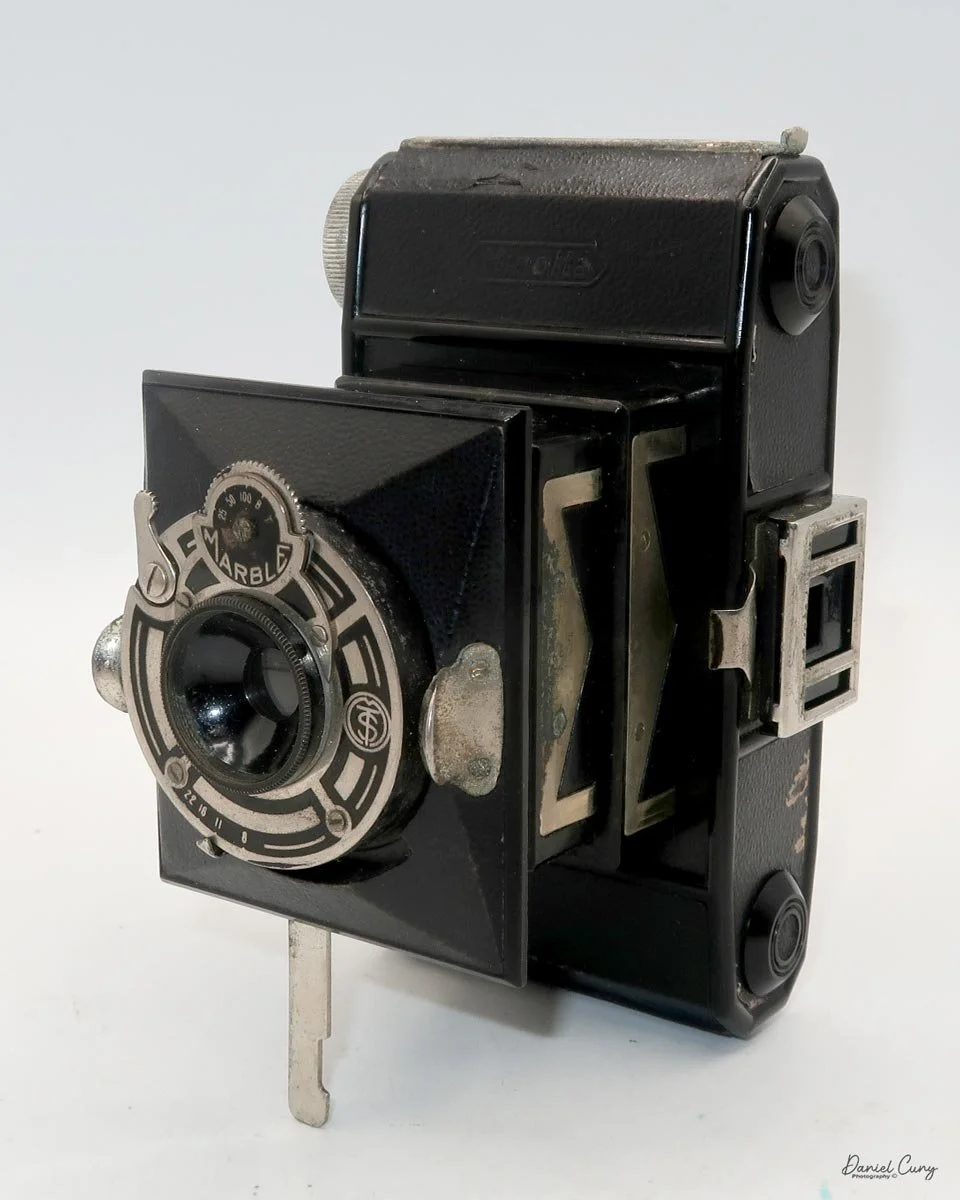
Minolta Vest rigid stacking bellows that resemble a Pagoda
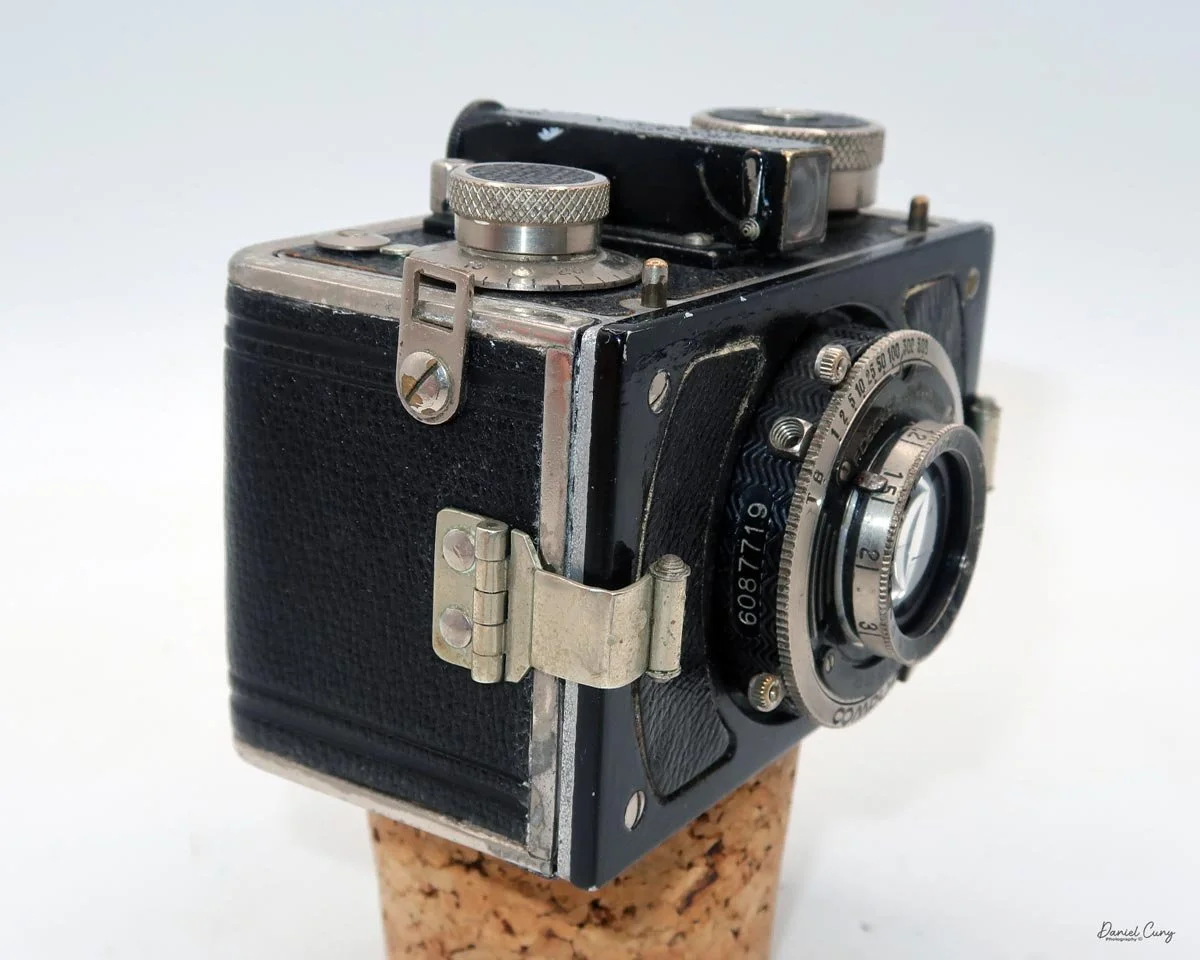
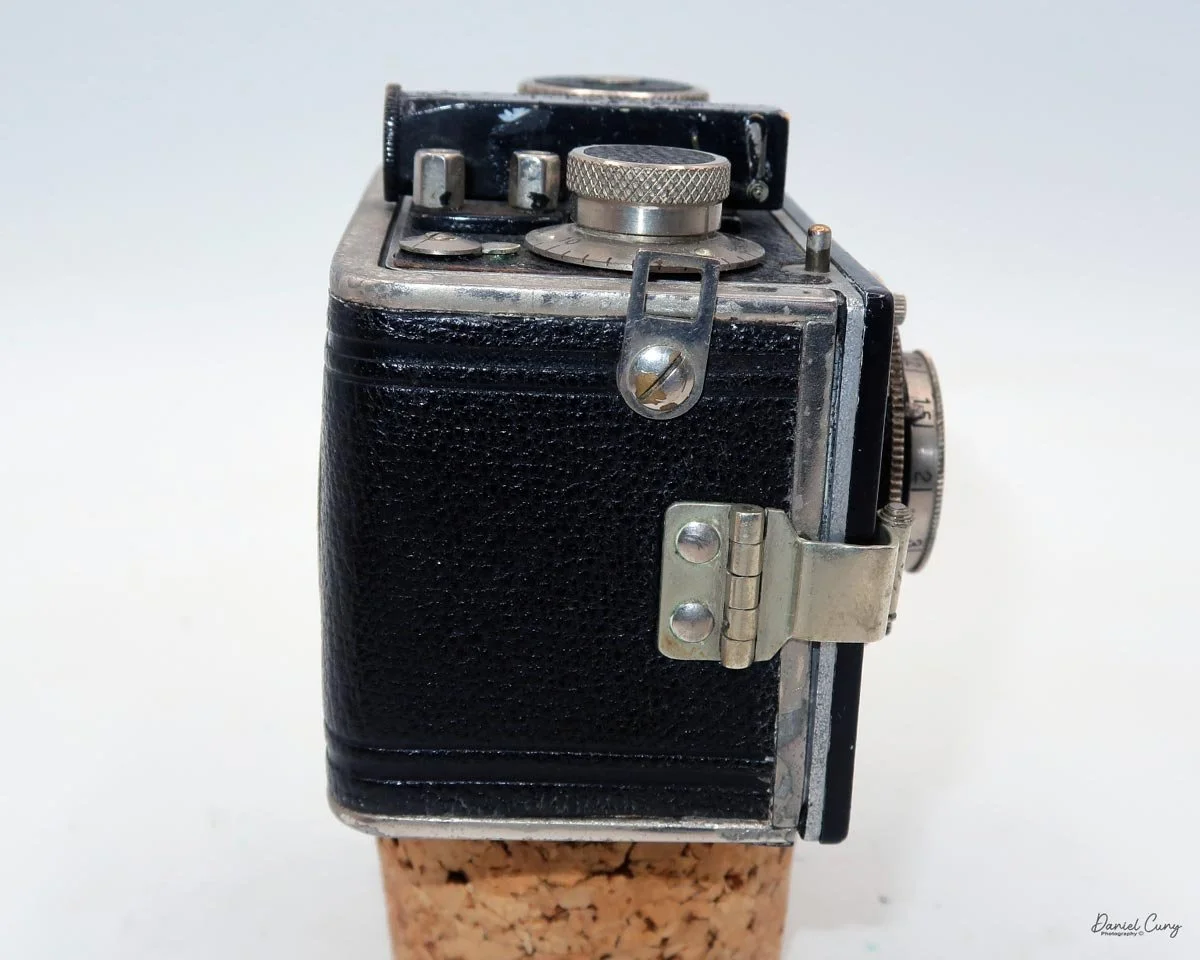
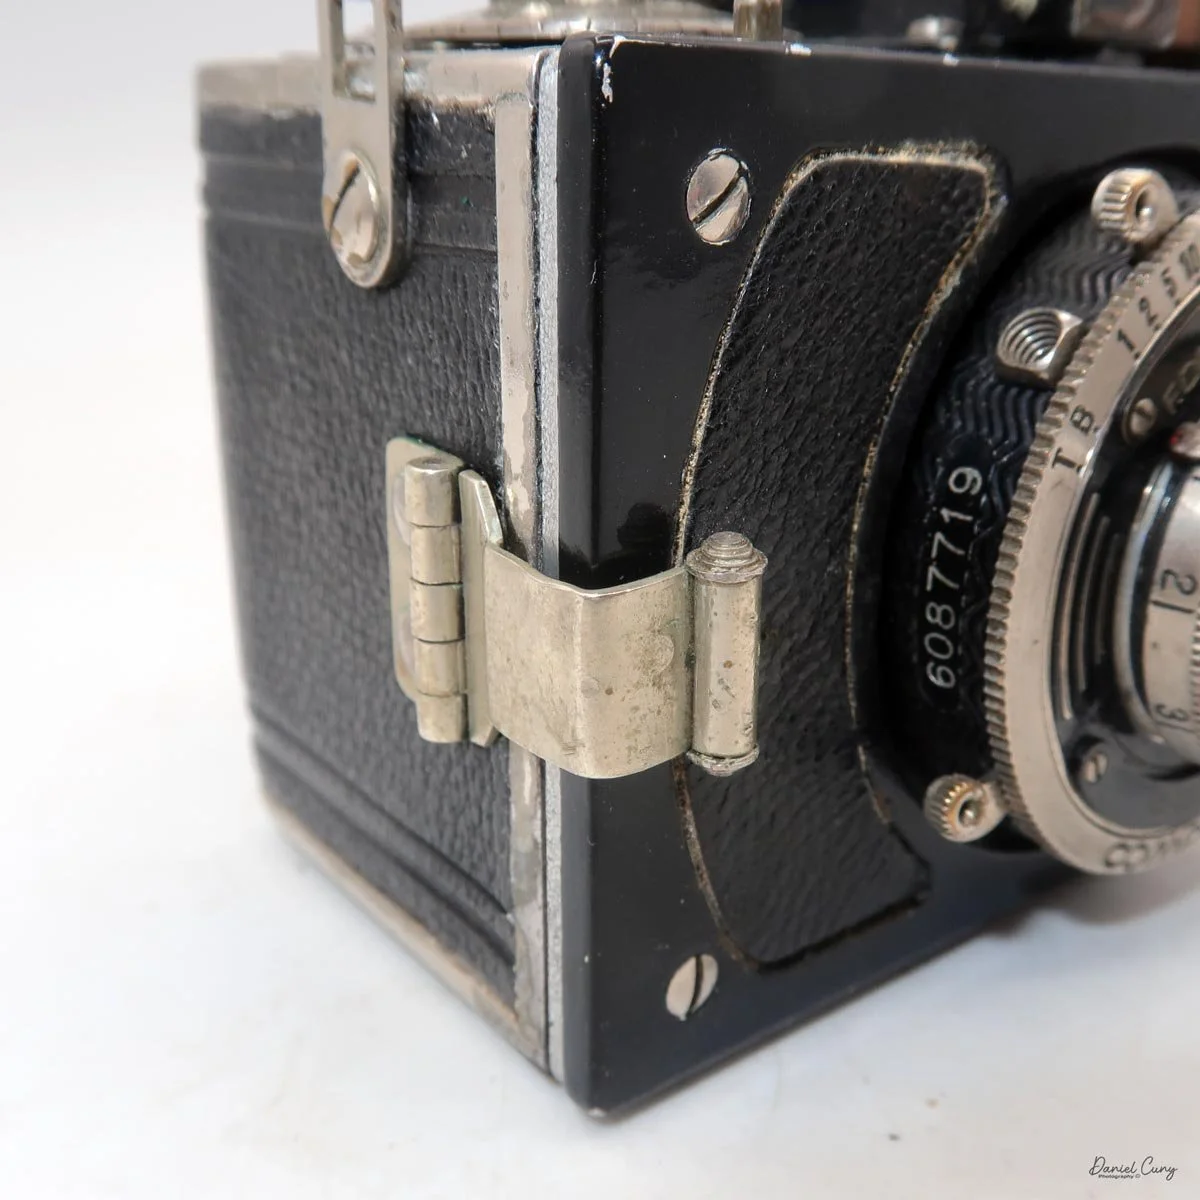
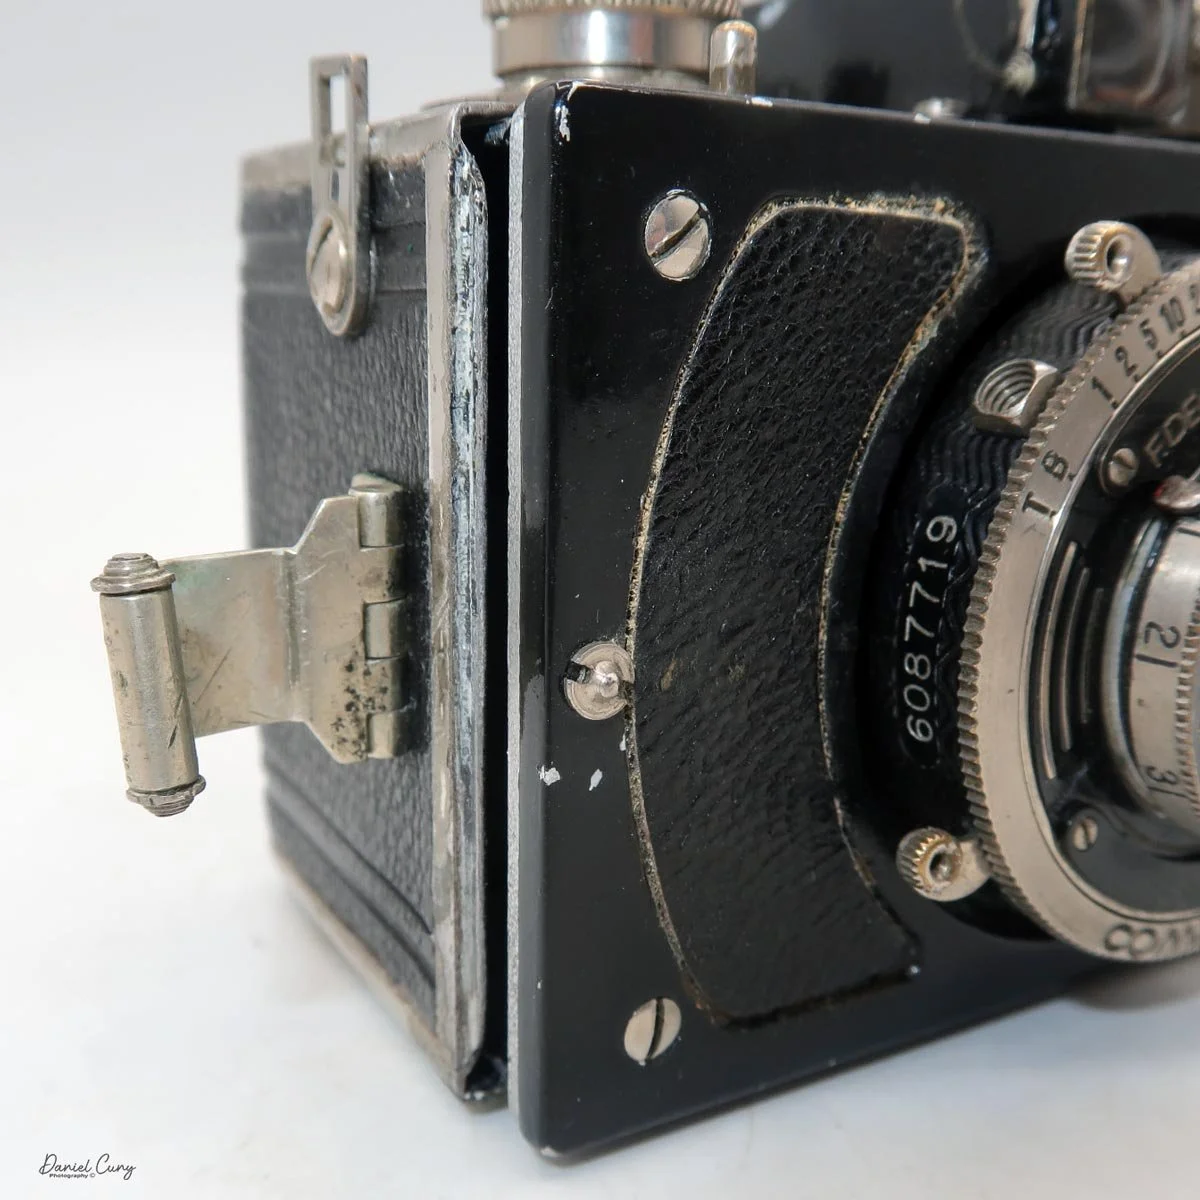
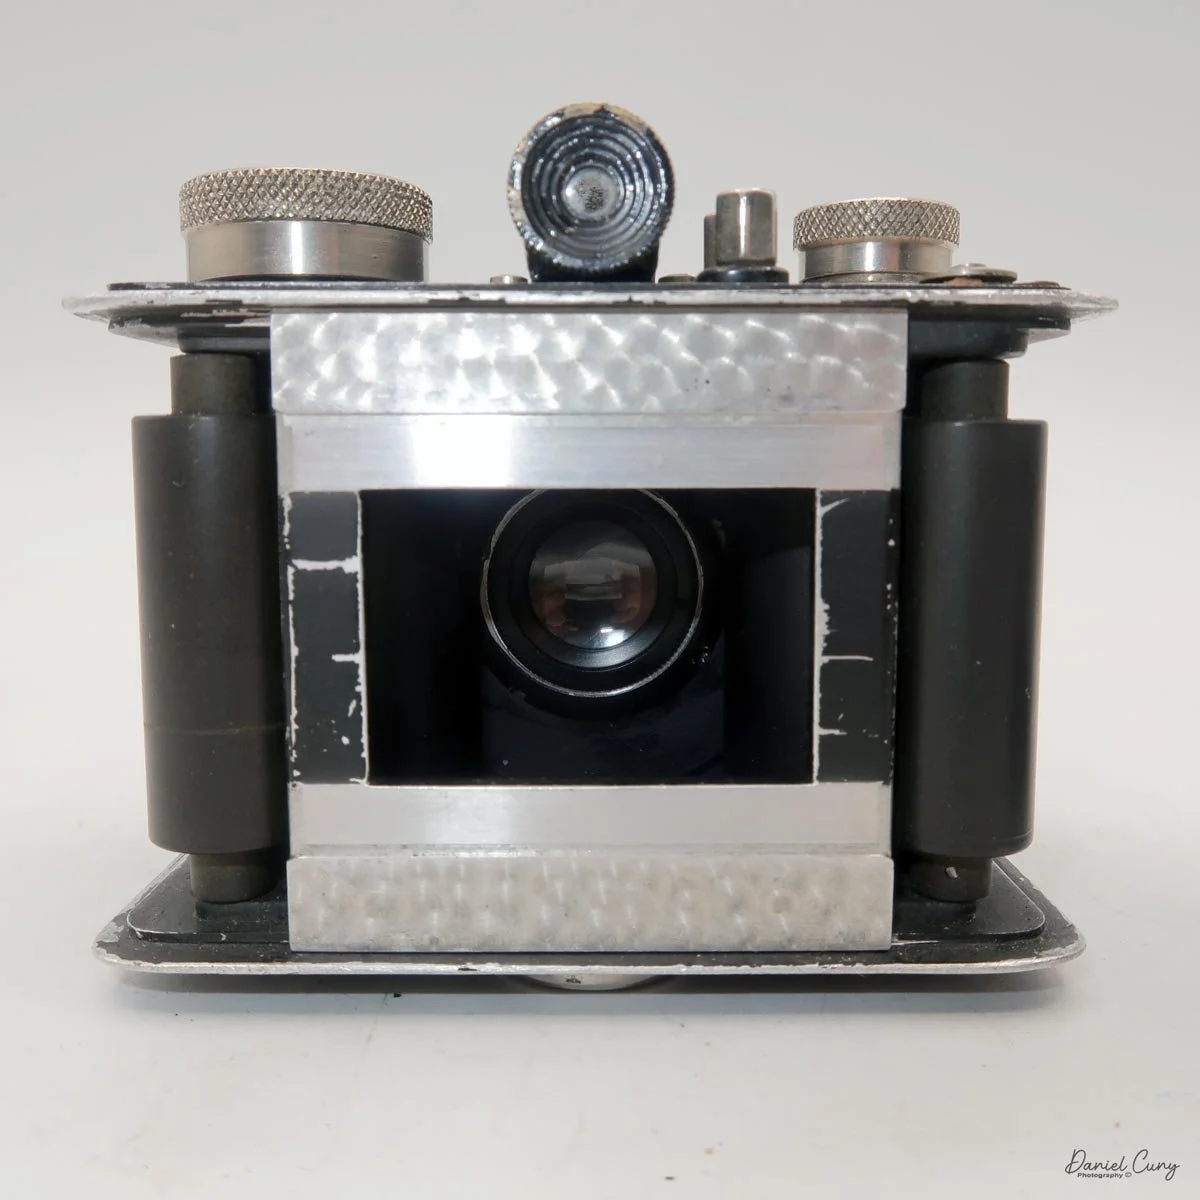
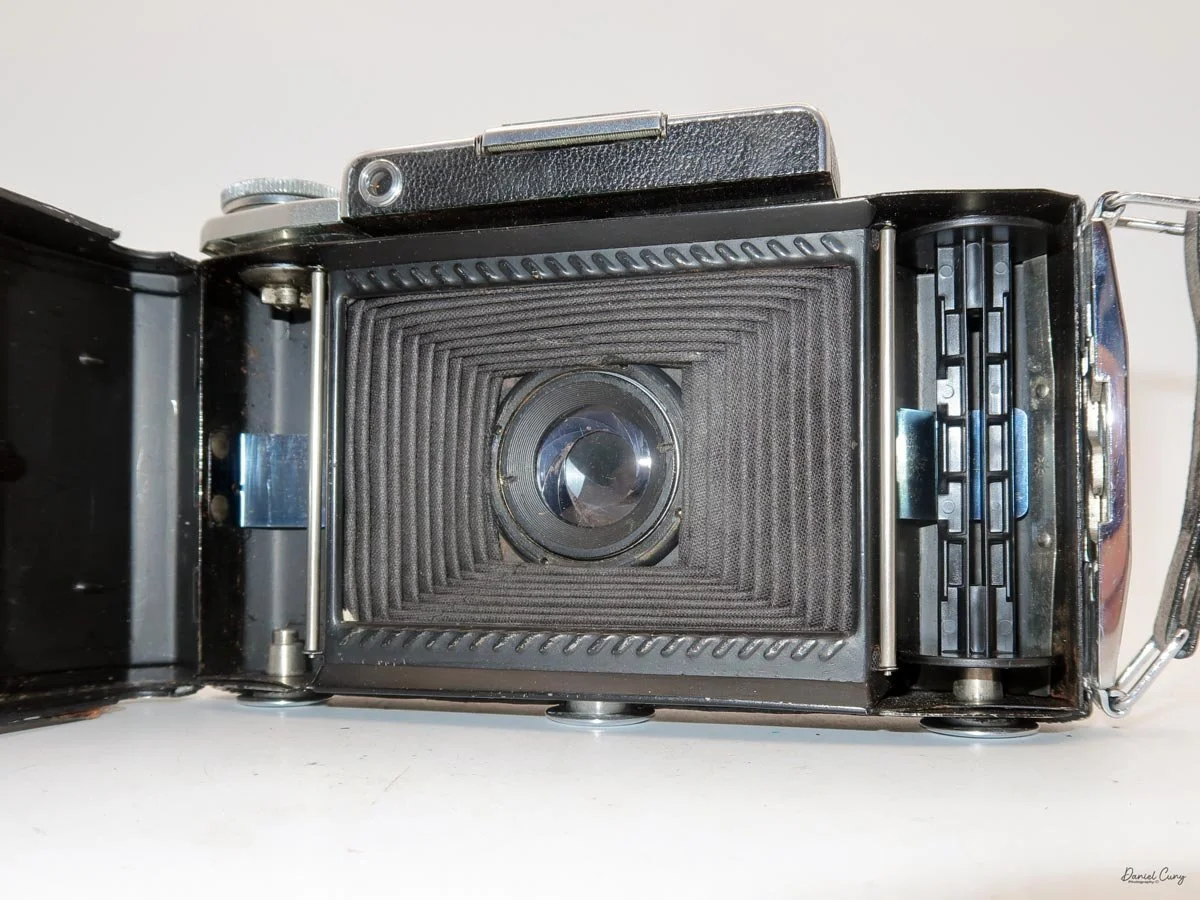
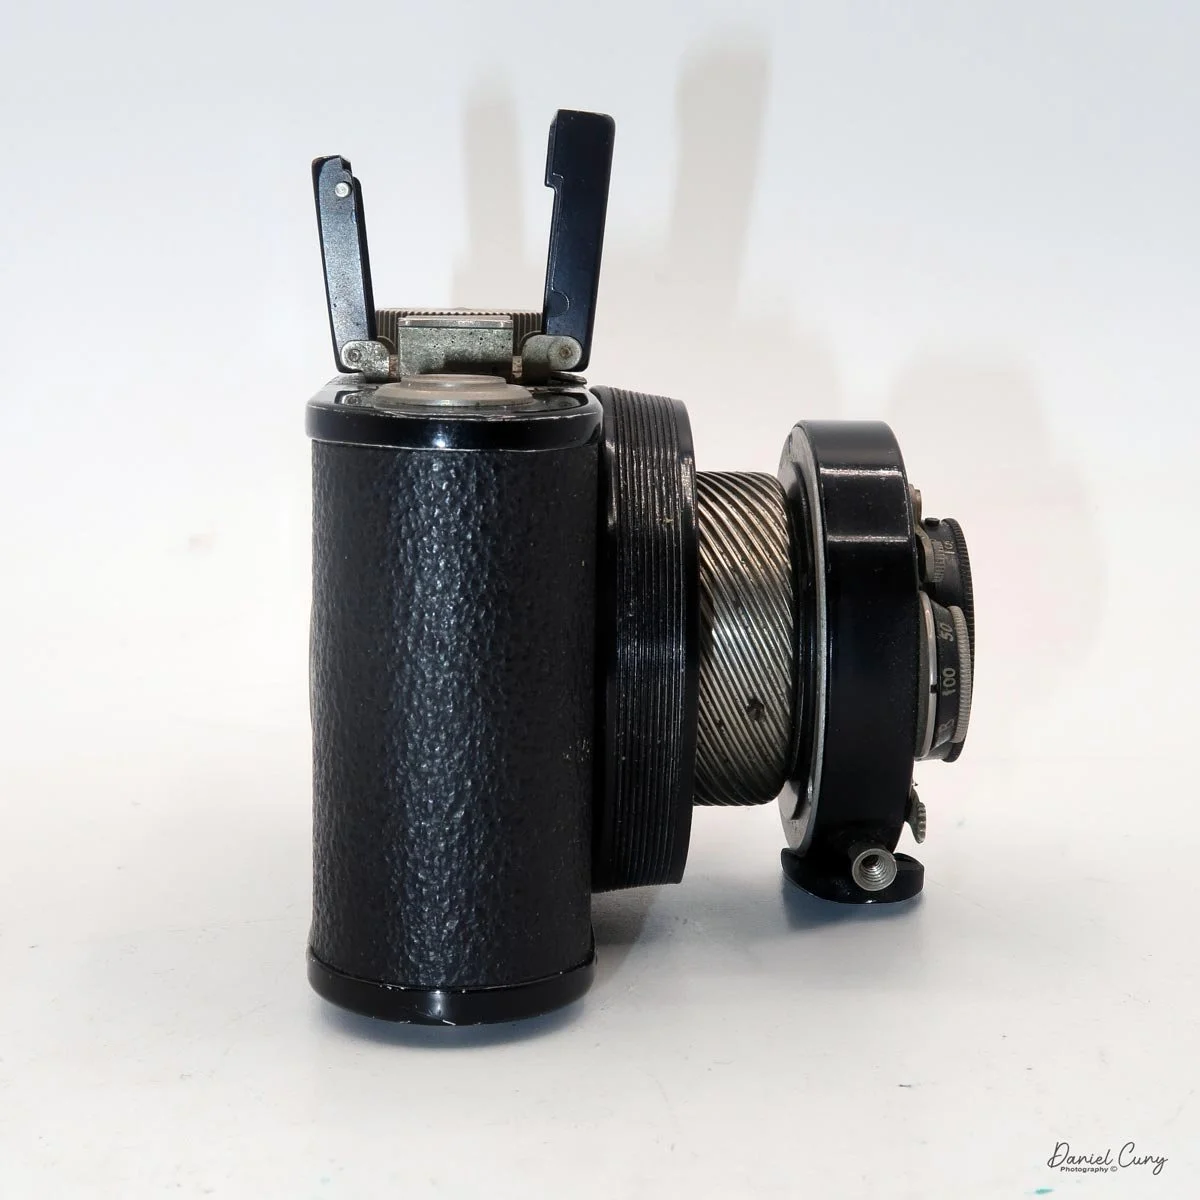
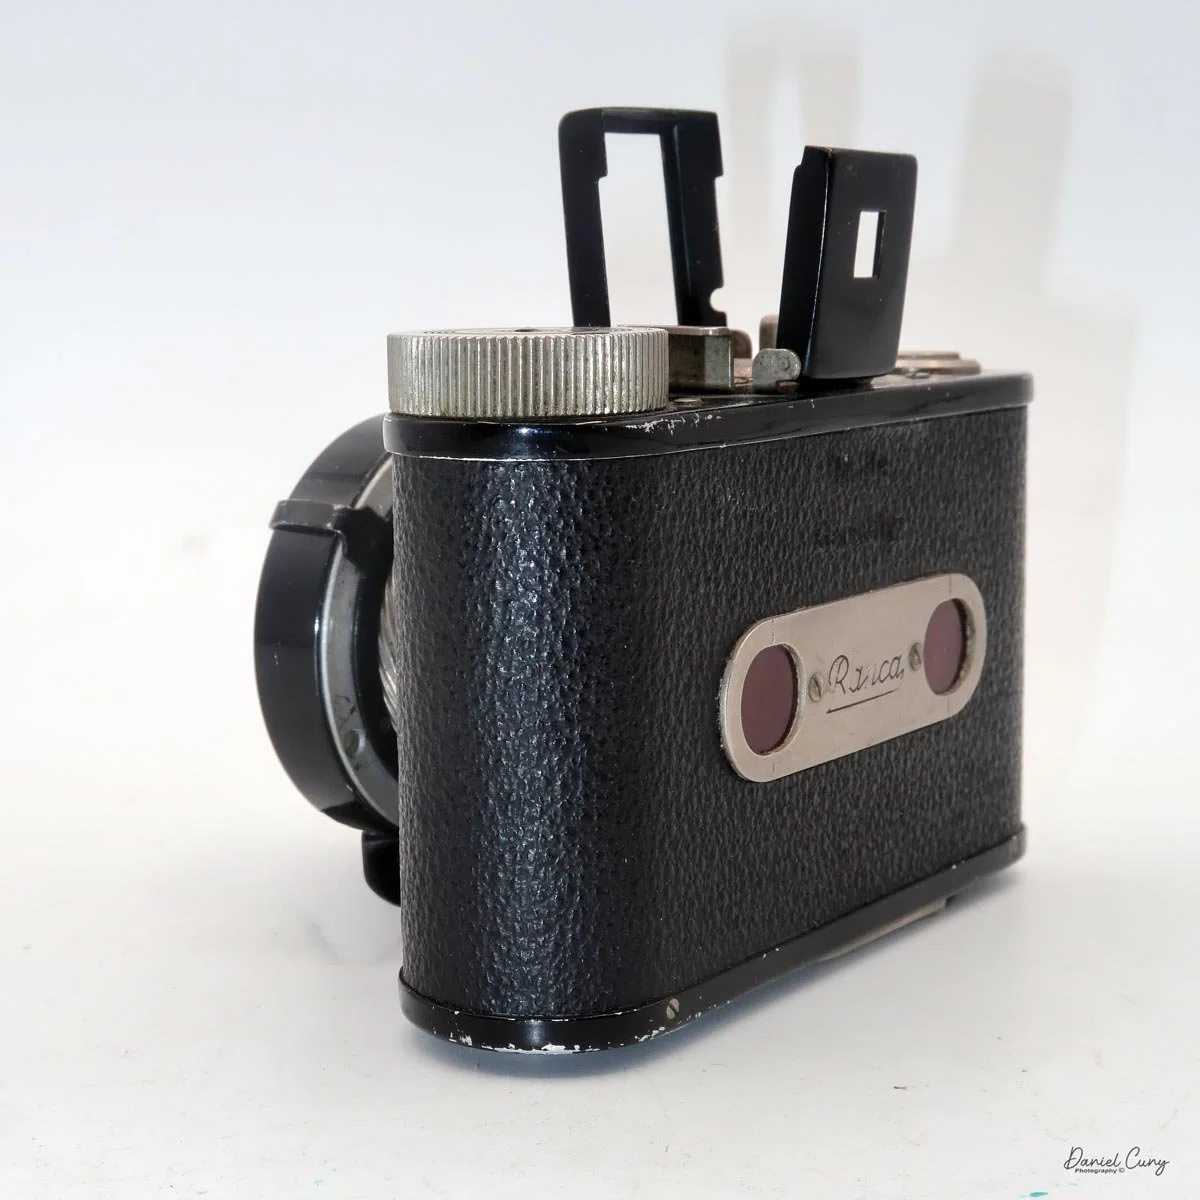
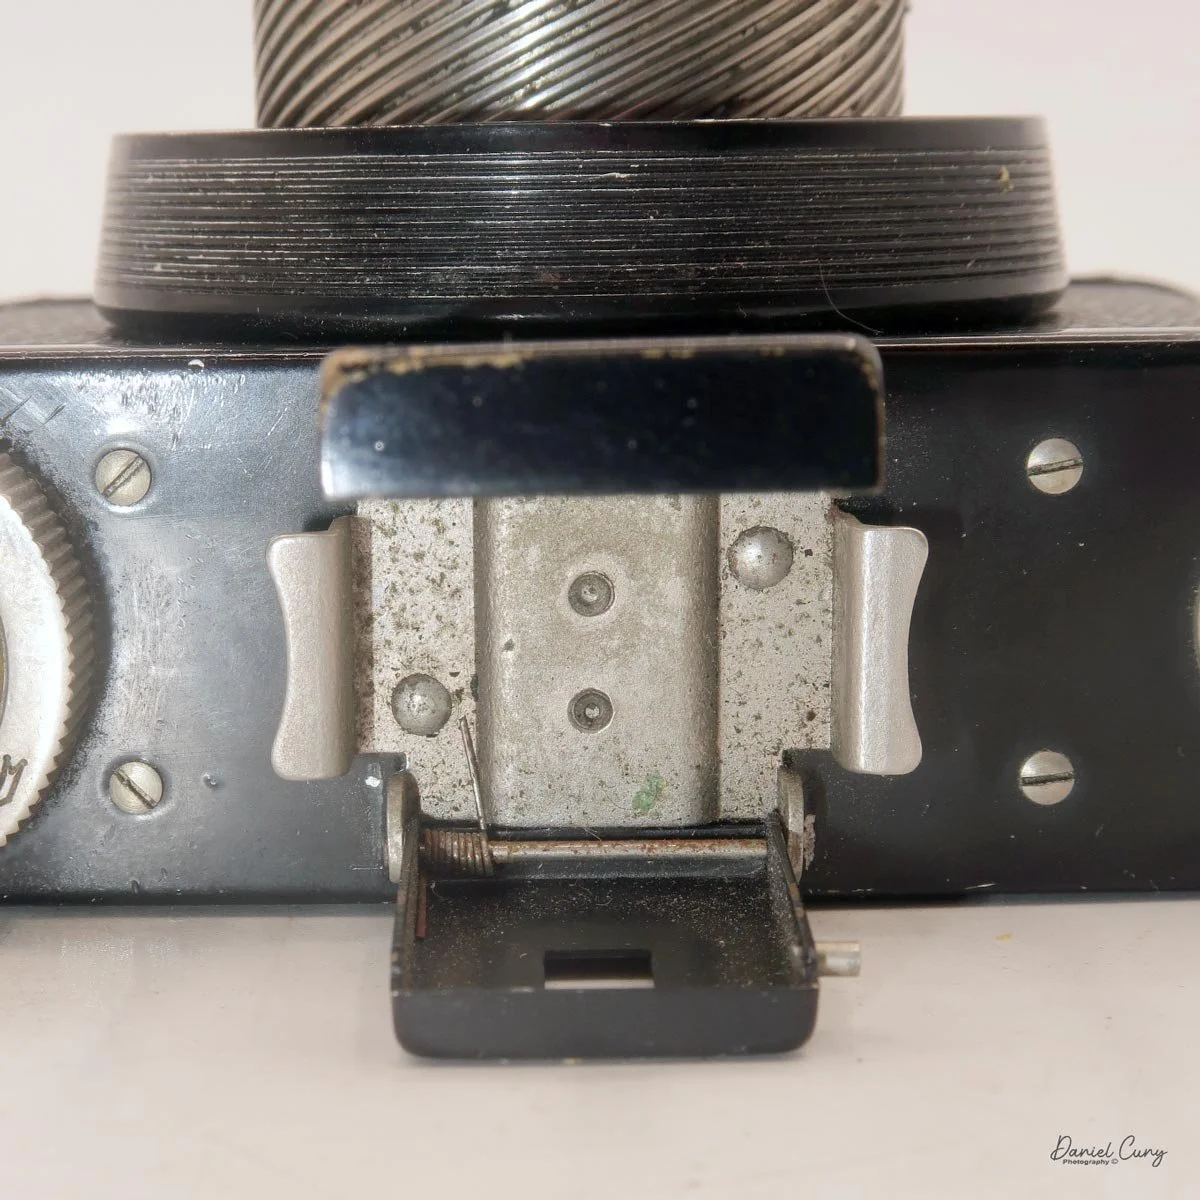
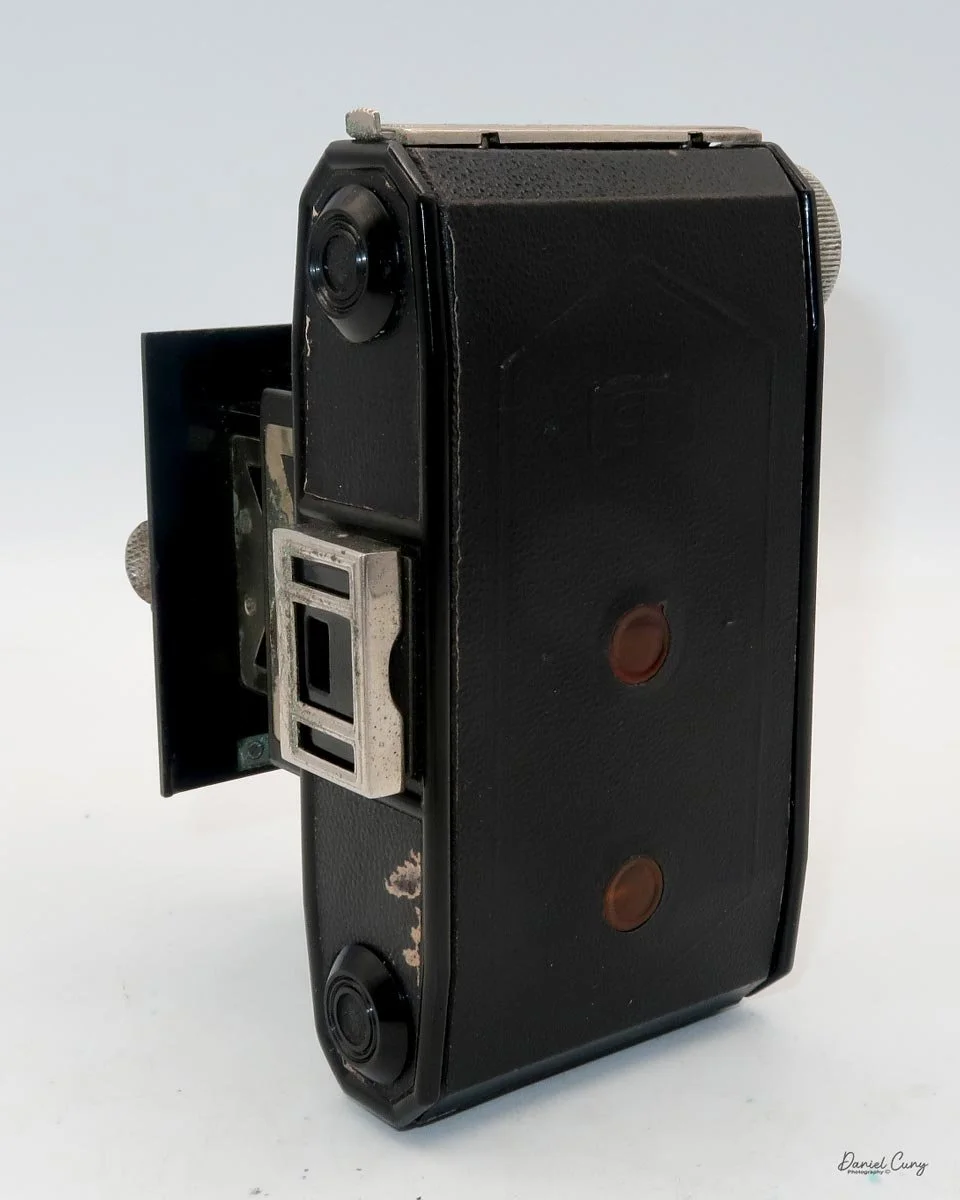
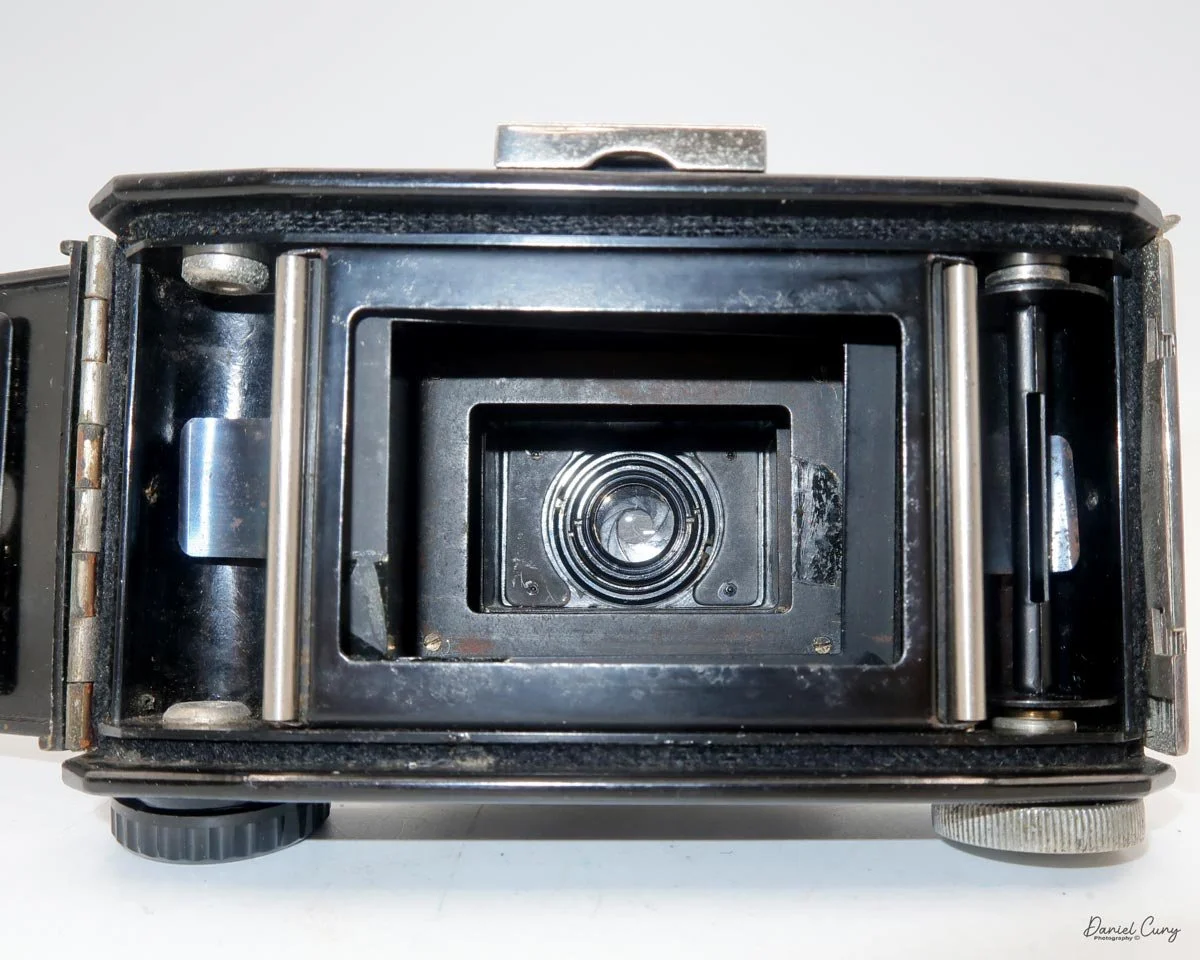
There are two metal grips on either side of the lens that you use to pull it away from the camera body. The stacked bellows were somewhat stiff, with a bit of corrosion on the chrome, but with a little coaxing, the lens fully extended. I played with the shutter system, and it fired, but inconsistently. Sometimes the shutter would fire when the release was pressed, and sometimes it wouldn't. That was a bit of a disappointment, but not a dealbreaker.
The lens appeared to be fine, and the aperture moved smoothly as it opened and closed. The lens was a bit difficult to return to the closed position, as I expected due to bellows corrosion, but with a bit of effort, it did retract.
There were a few other cameras I was interested in on his table, so I gathered the two or three items I wanted and asked for the price. After a bit of negotiating using my phone to translate, we agreed on a price. I put the items in my backpack and, with a grin on my face and knowing I'd be writing a blog post about the camera, wandered off to see what other treasures I could find at that terrific, bustling flea market.
Early History
Minolta began as a small but ambitious Japanese camera business in 1928, founded by Kazuo Tashima under the name Nichi-Doku Shashinki Shōten. From the start, the company was shaped by a fascination with German optics and camera design, and its earliest products reflected that influence. In 1929, Minolta introduced its first camera, the Nifcalette, a folding roll-film model that showed the company's early dependence on imported components and foreign technical models. Even so, it marked the beginning of a distinctly Japanese camera maker that would soon develop its own identity.
The company adopted the name Minolta in 1931, a move that signaled a more confident and modern direction. The name was meant to evoke mechanisms, instruments, optics, and lenses, and it captured the firm's growing ambition to become more than a reseller of products influenced by foreign markets. During the early 1930s, Minolta gradually moved from imitation toward originality, developing folding cameras that were practical, attractive, and increasingly self-reliant in design. By 1933, the company had introduced its first camera under the Minolta name, a moment that helped establish the brand as a serious presence in Japan's emerging camera industry.
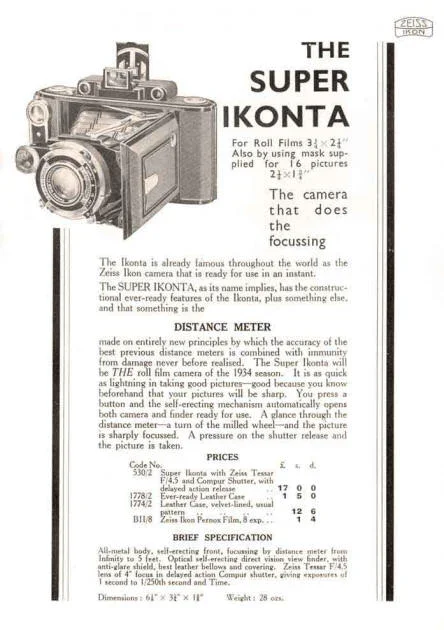
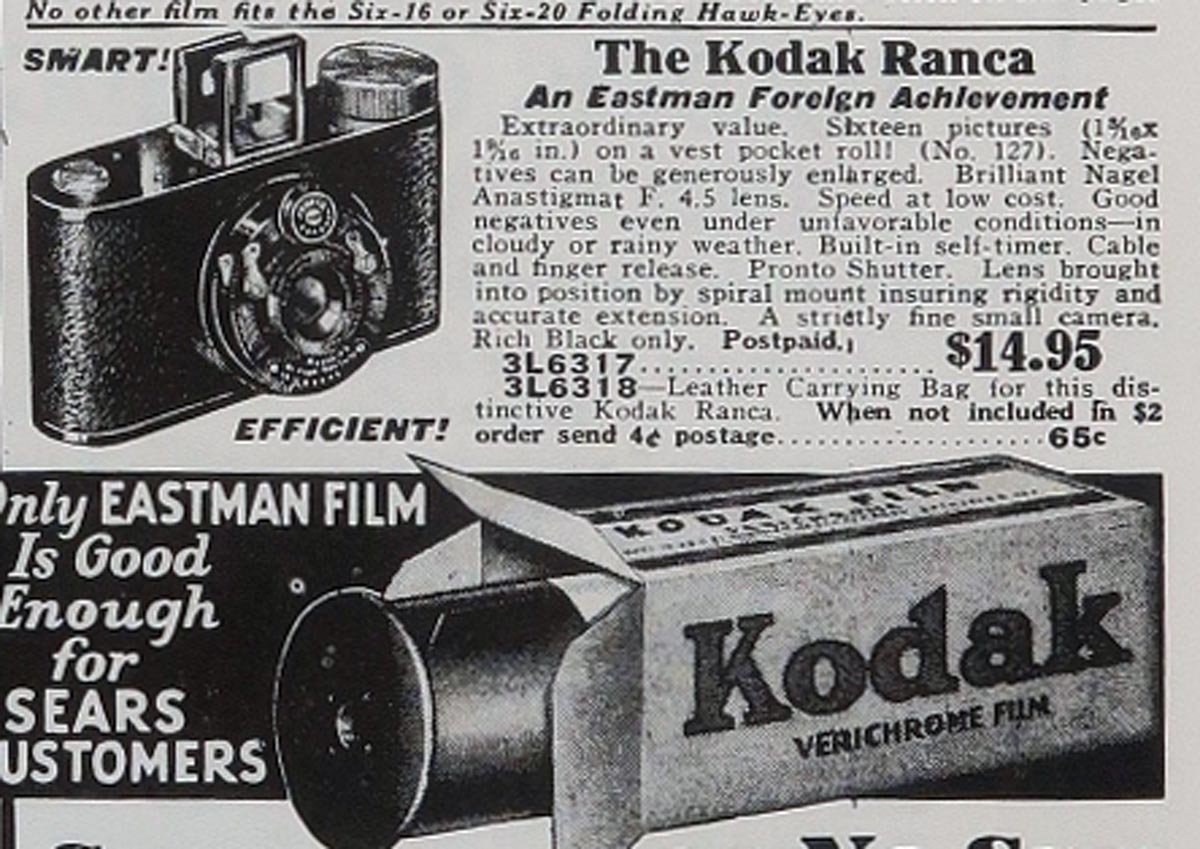
Advertisment for Minolta Vest
Before World War II, Minolta was still a relatively young company, but it was already building the foundations of its future reputation. Models such as the Minolta Vest in 1934 and the Minolta Flex in 1937 demonstrated the brand's expanding technical range. The Flex was especially notable as Japan's second twin-lens reflex camera, placing Minolta among the more innovative camera makers of the era. These prewar years were important not because Minolta dominated the market, but because they revealed a company learning quickly, adapting foreign ideas, and steadily refining its own manufacturing skills.
World War II disrupted Japanese industry, and like many camera makers, Minolta faced a difficult transition as the country shifted toward wartime production. After the war, the company entered a new phase of growth. Japan's postwar recovery created strong demand for precision optical equipment, and Minolta was well-positioned to benefit. In the 1950s, the company moved into 35mm camera production, a crucial step that aligned it with the global photography market. Minolta's postwar cameras gained attention for their solid engineering and user-friendly design, helping the brand earn a stronger international reputation.
Over time, Minolta became known for more than just reliable film cameras. It developed a reputation for innovation in metering, automation, and eventually autofocus, especially in the late twentieth century. But those later successes were rooted in the company's early decades: a period of experimentation, persistence, and gradual technical maturity. The story of Minolta before and after World War II is really the story of a company that began by studying the best ideas from abroad, then turned those lessons into a lasting photographic identity.
My Camera
The camera was built between 1934 and just before World War II, with production ending in 1940.
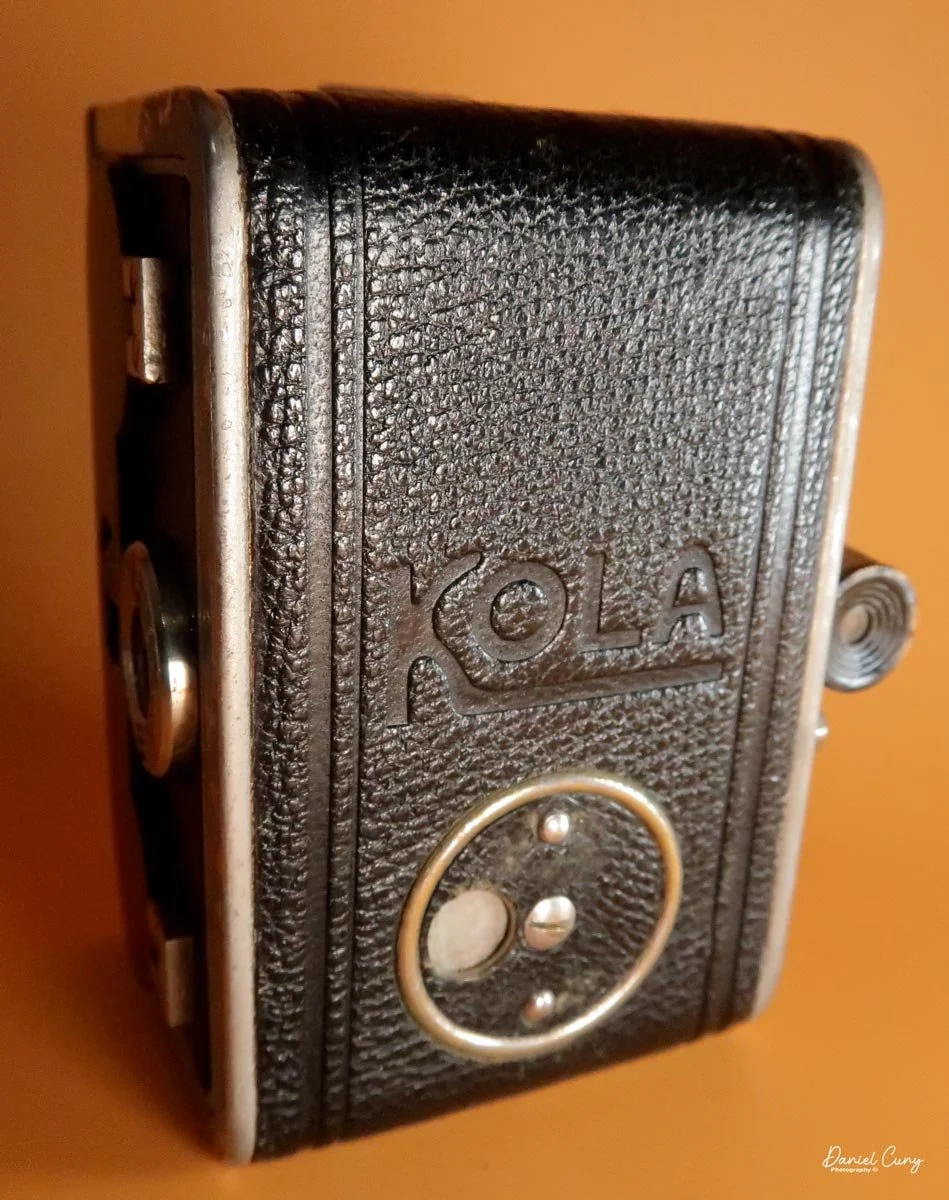
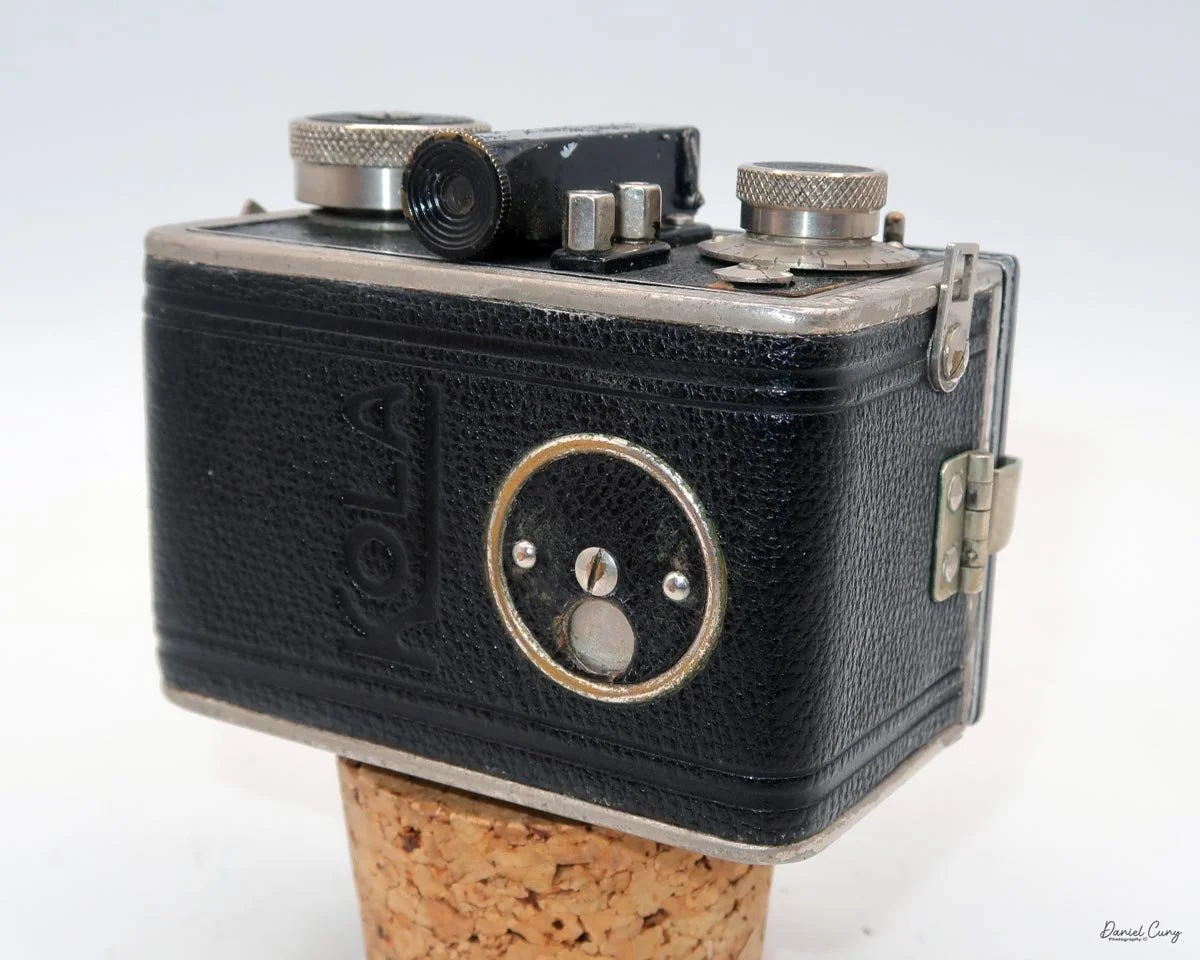
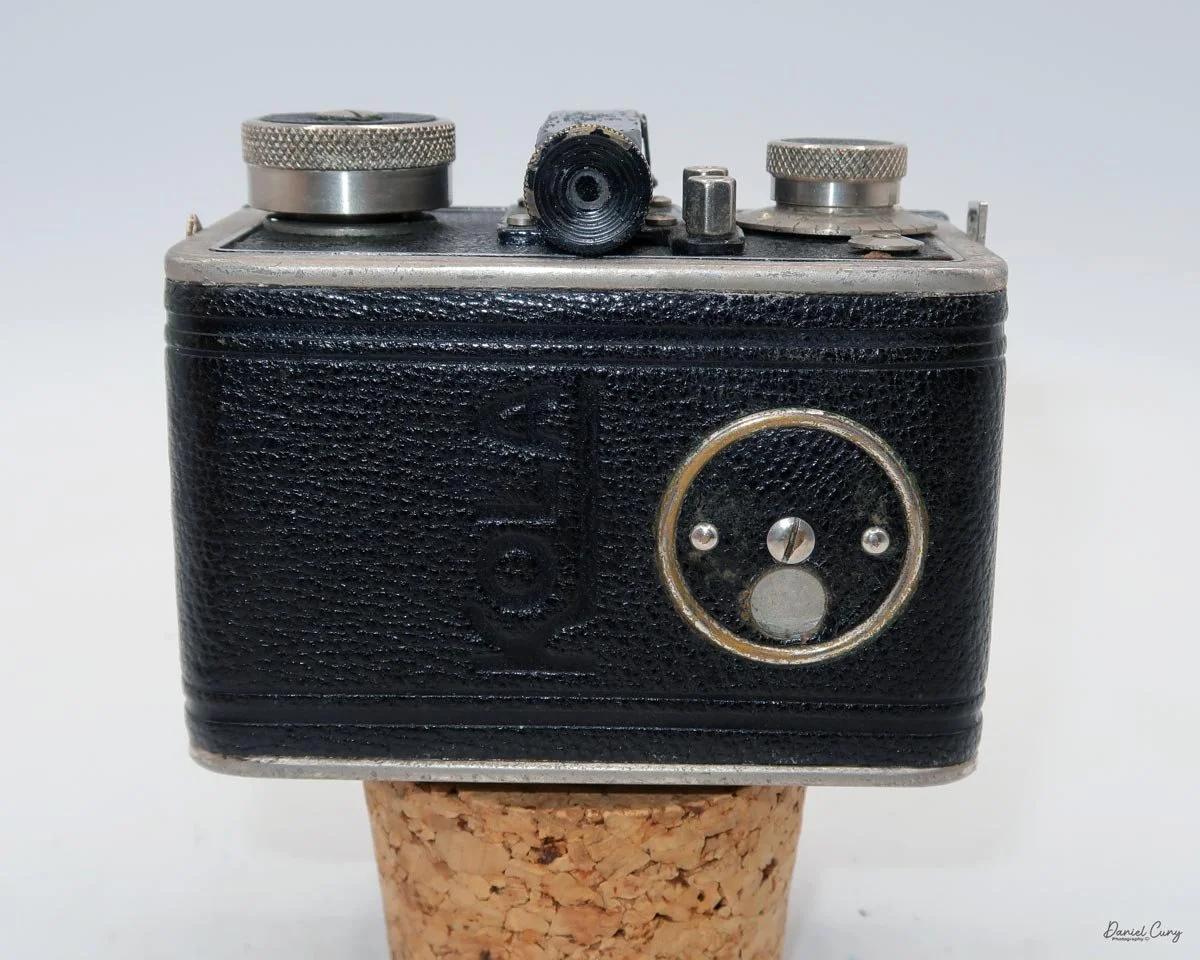
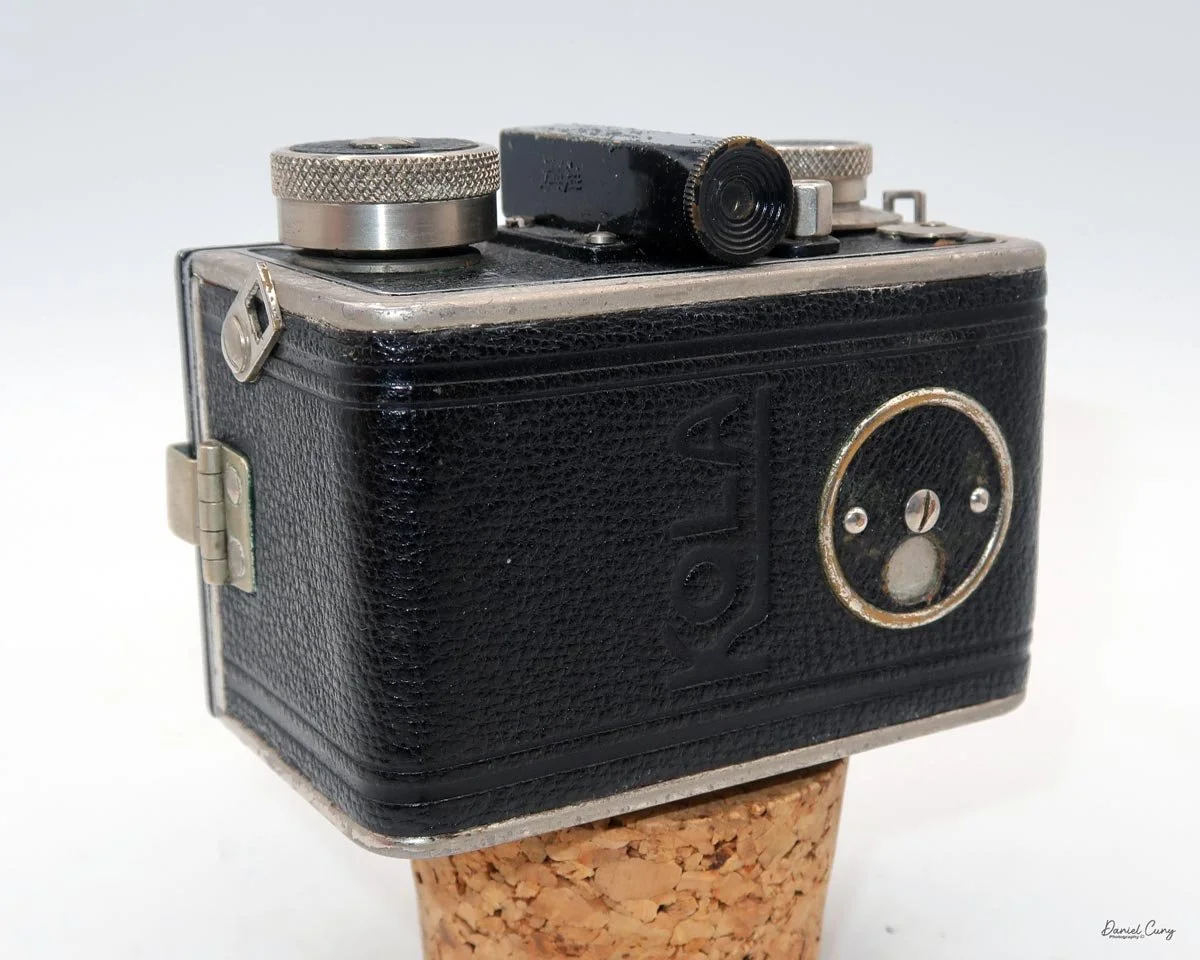
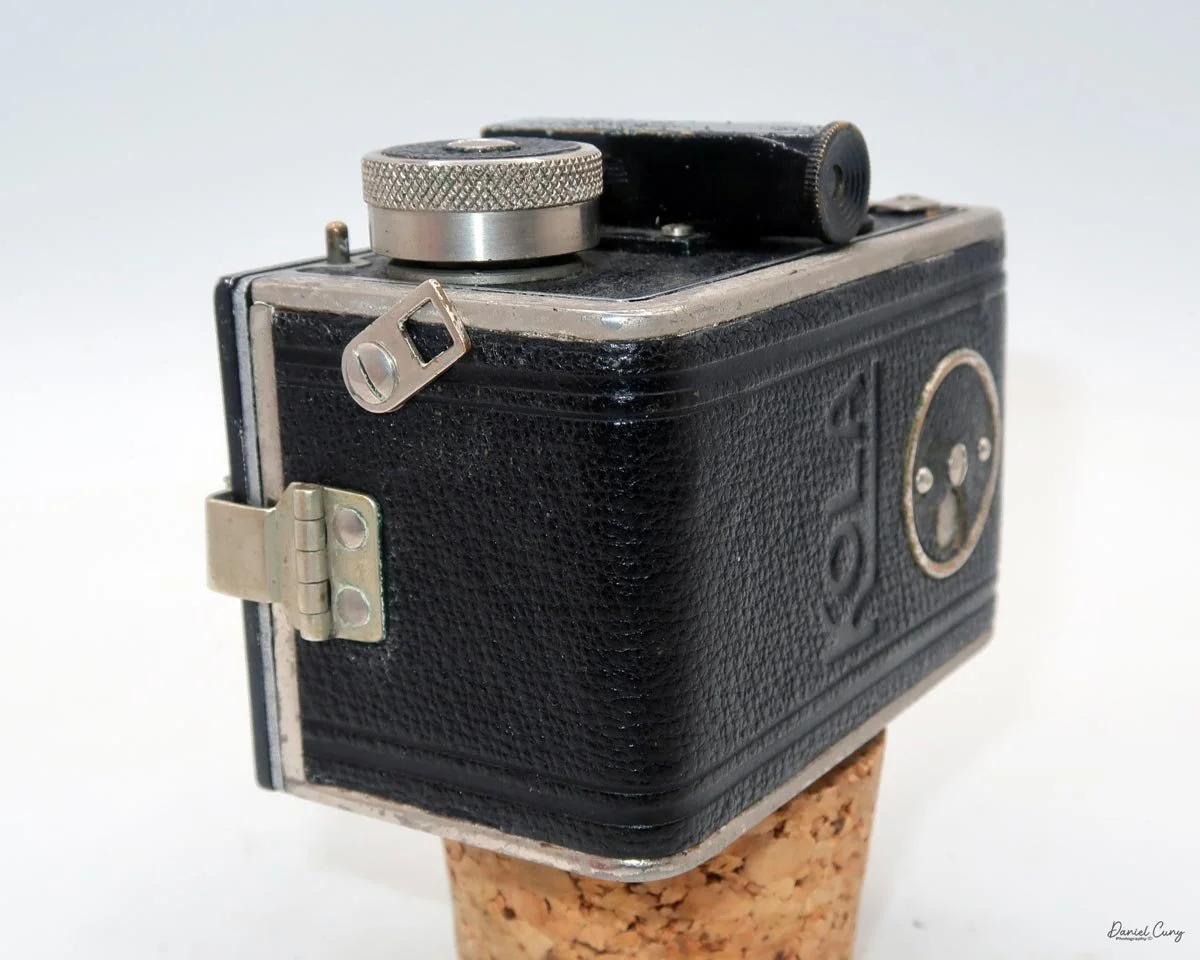
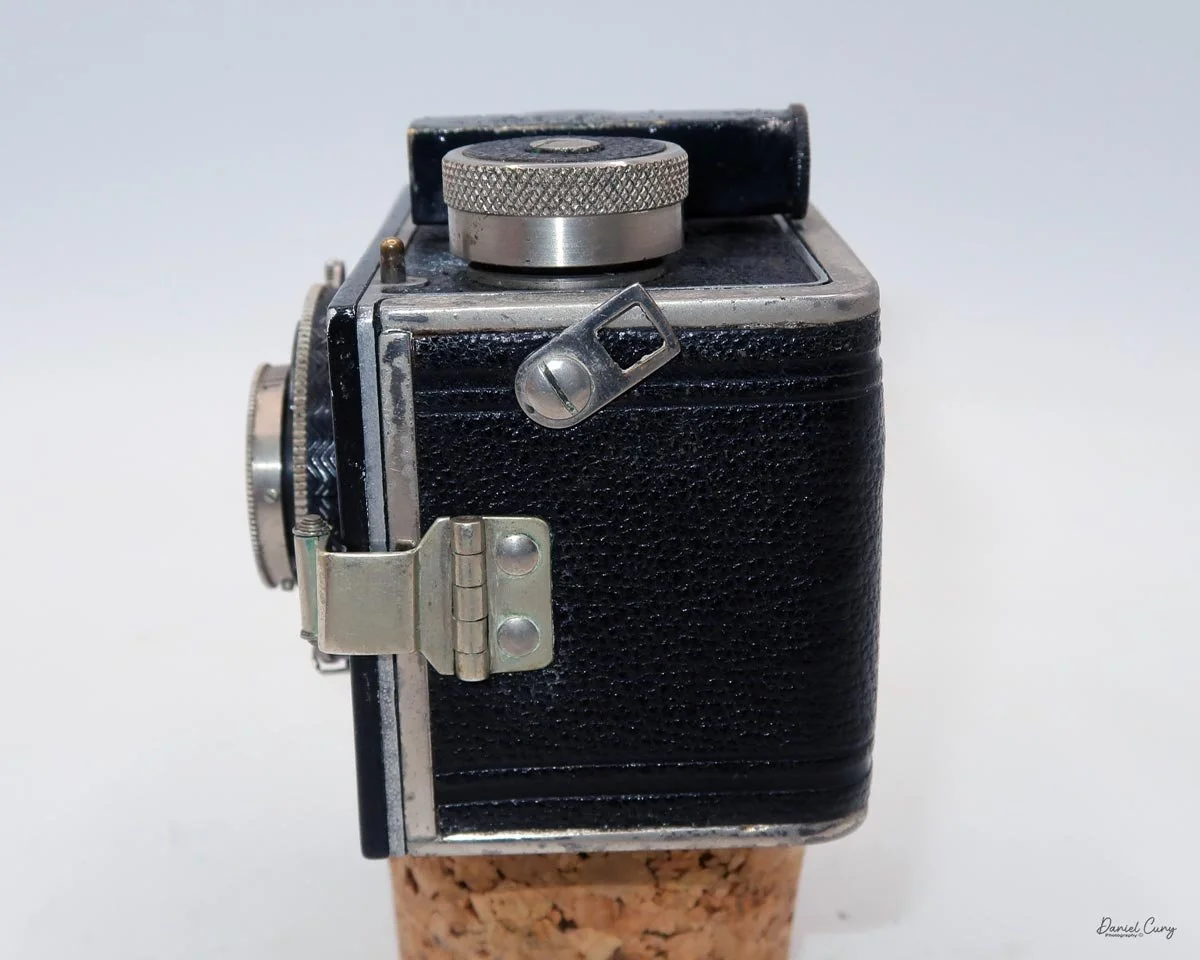
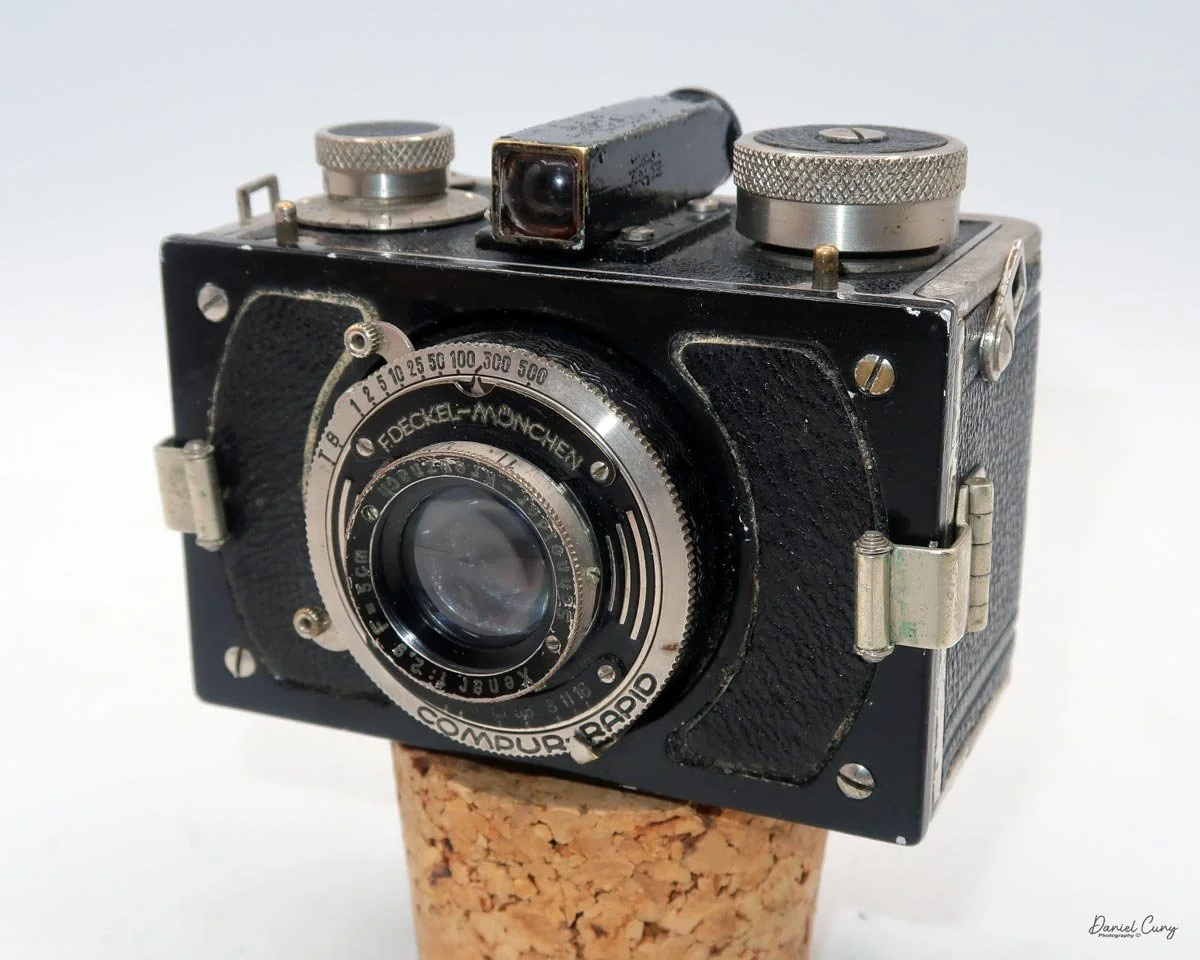
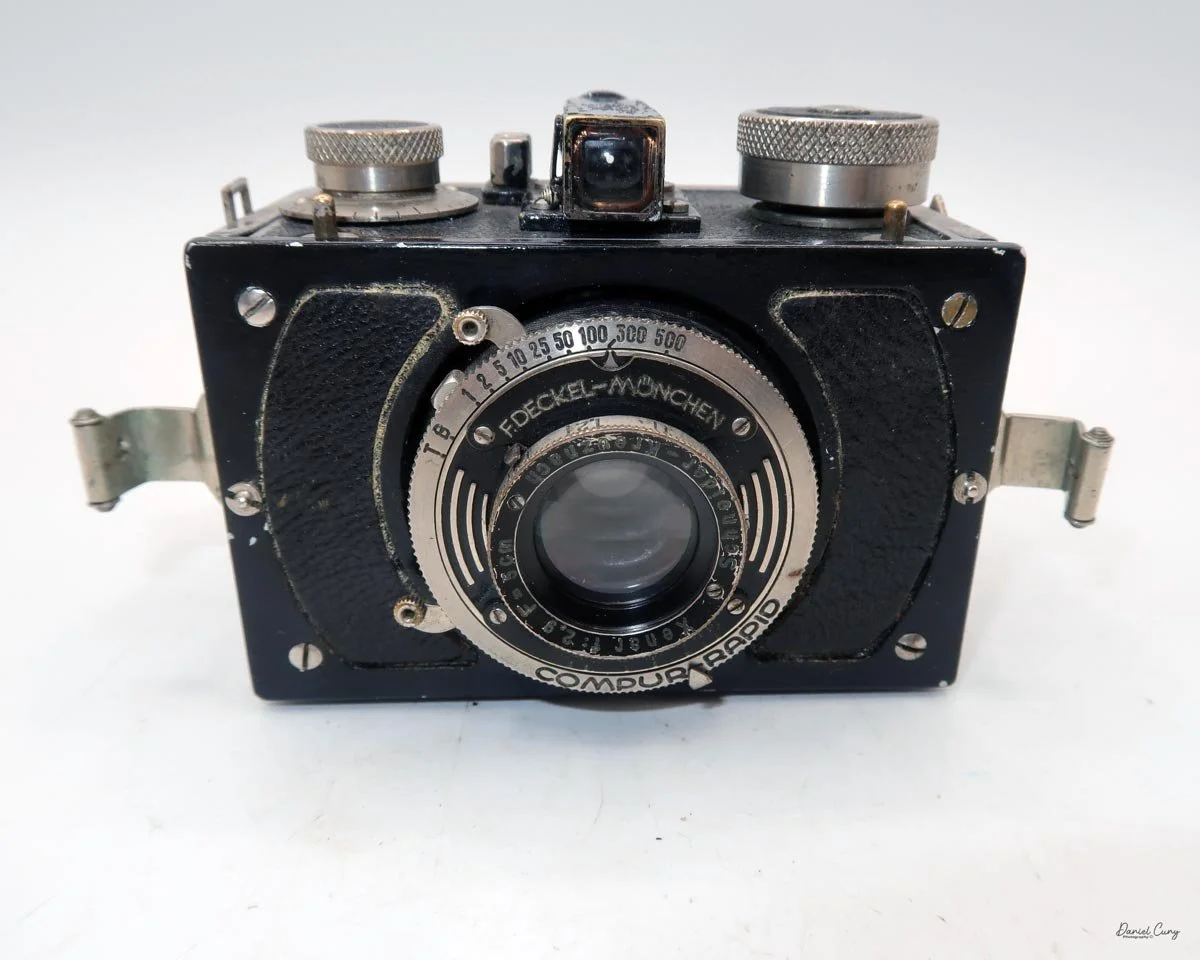
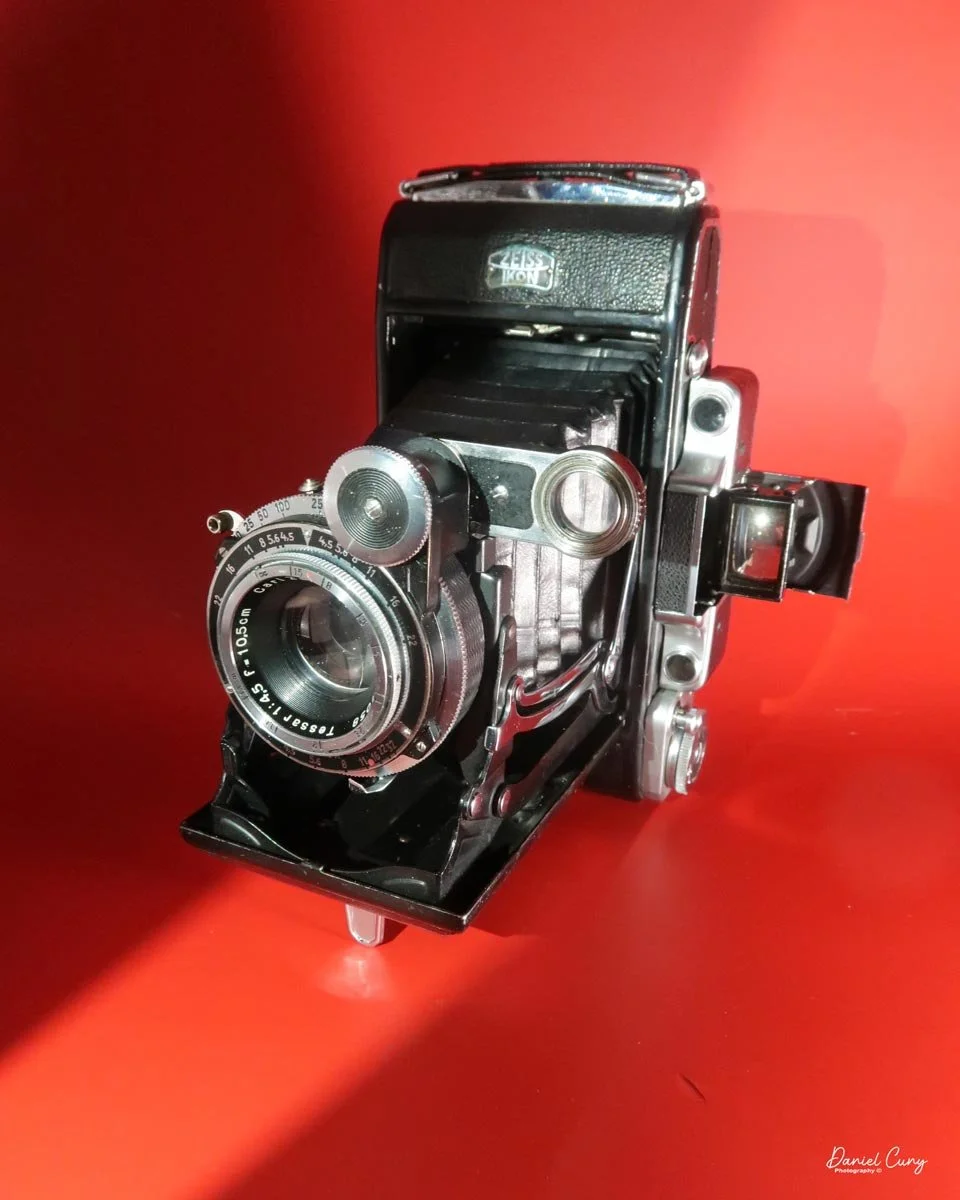
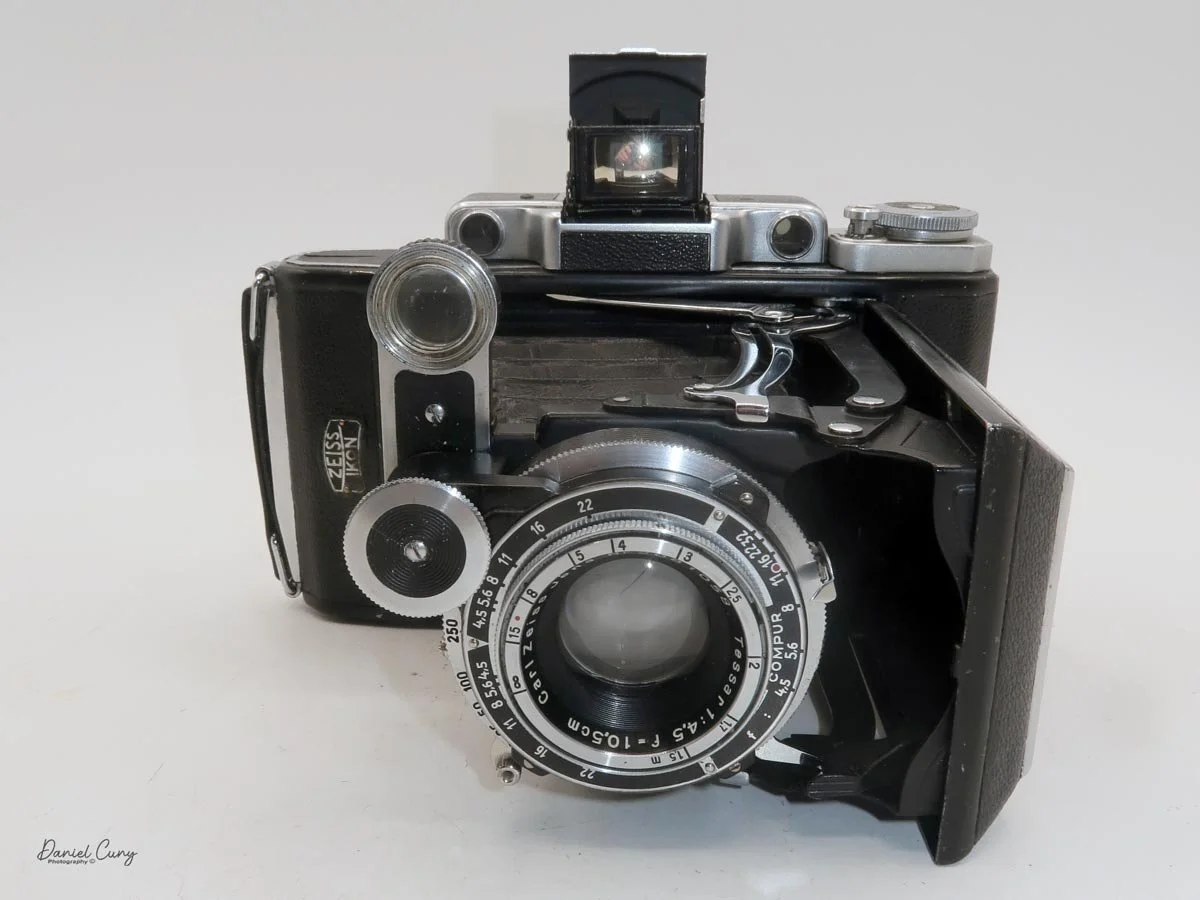
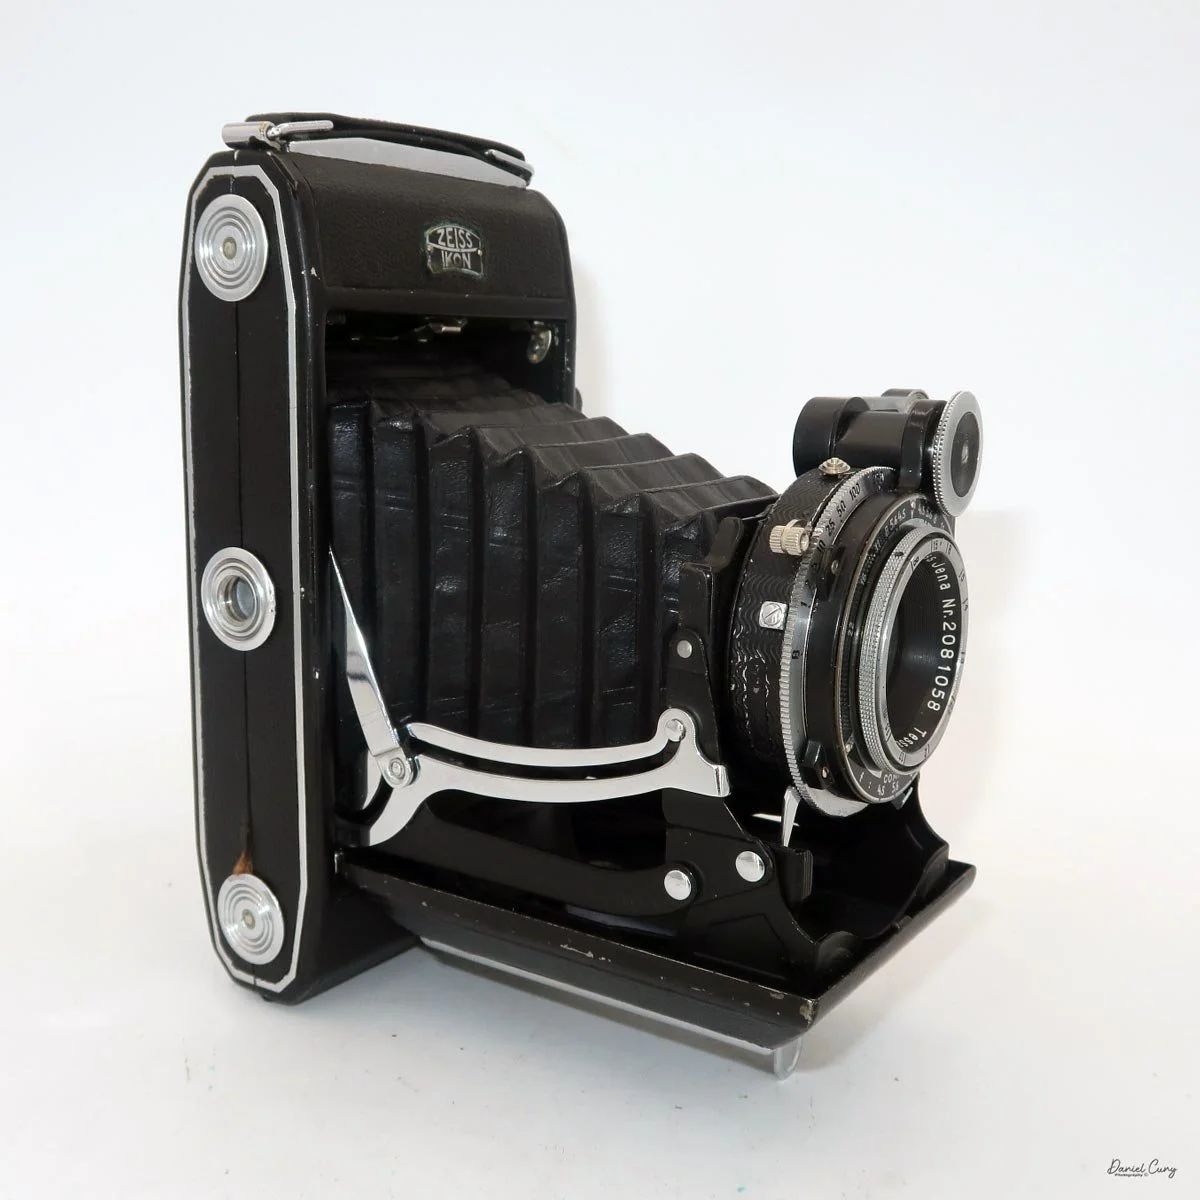
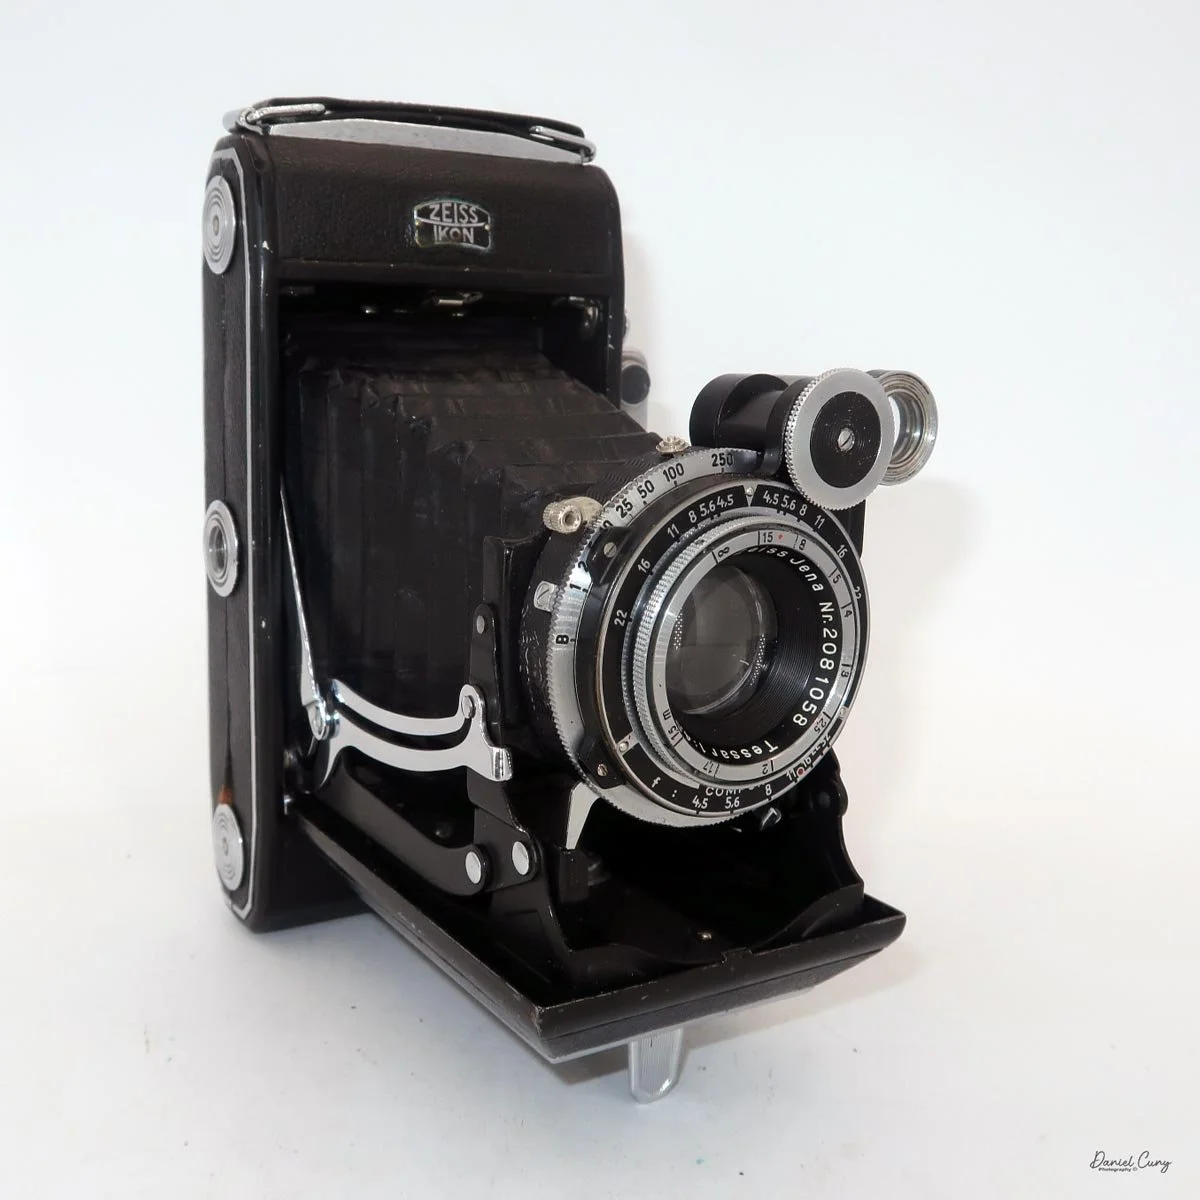
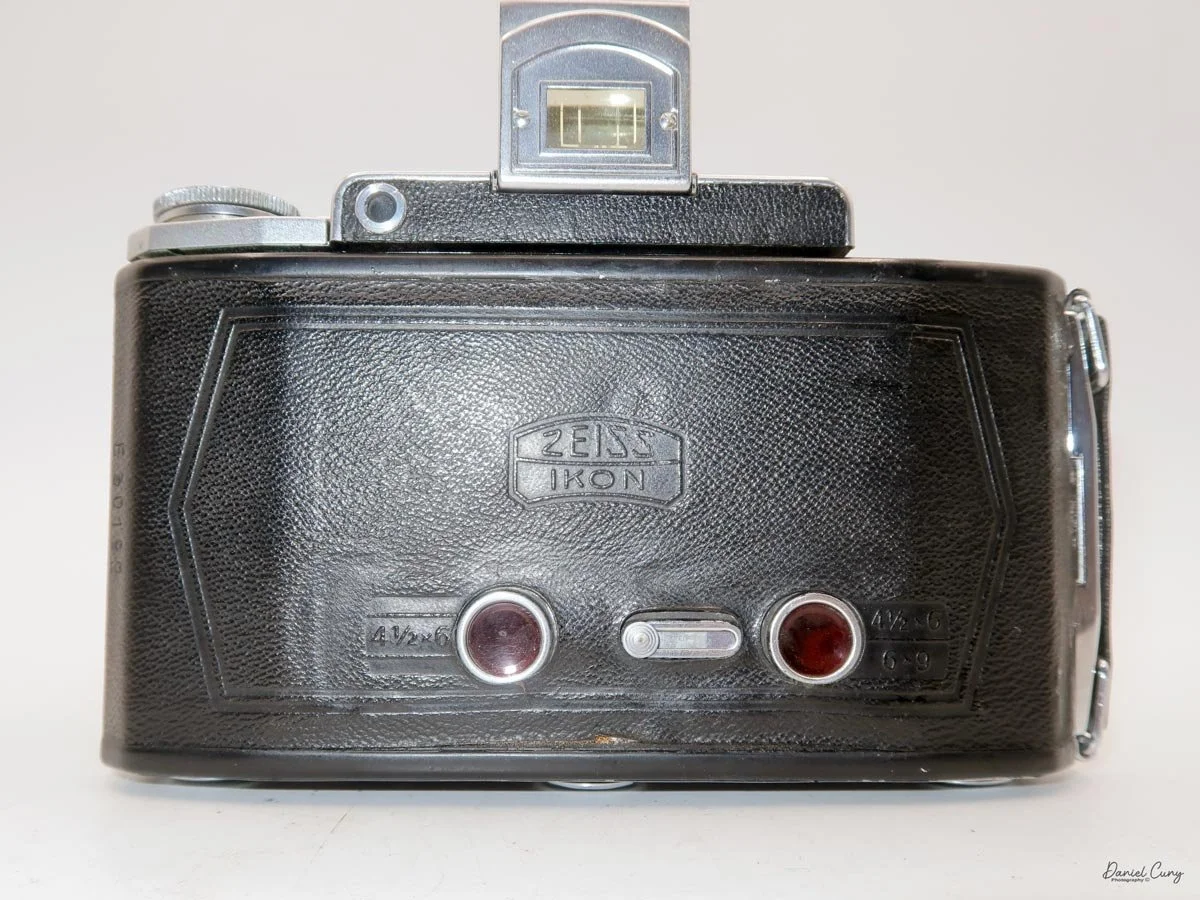
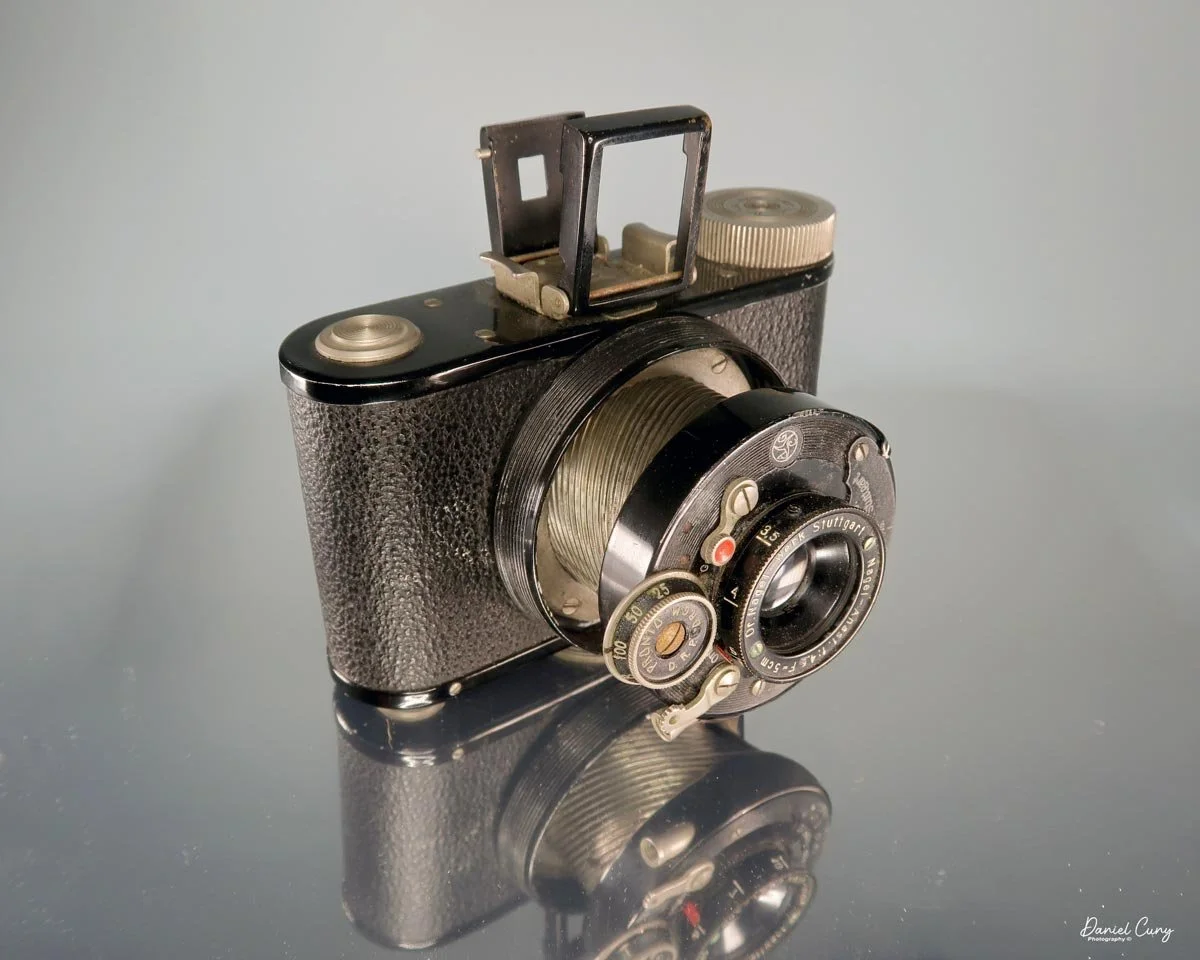
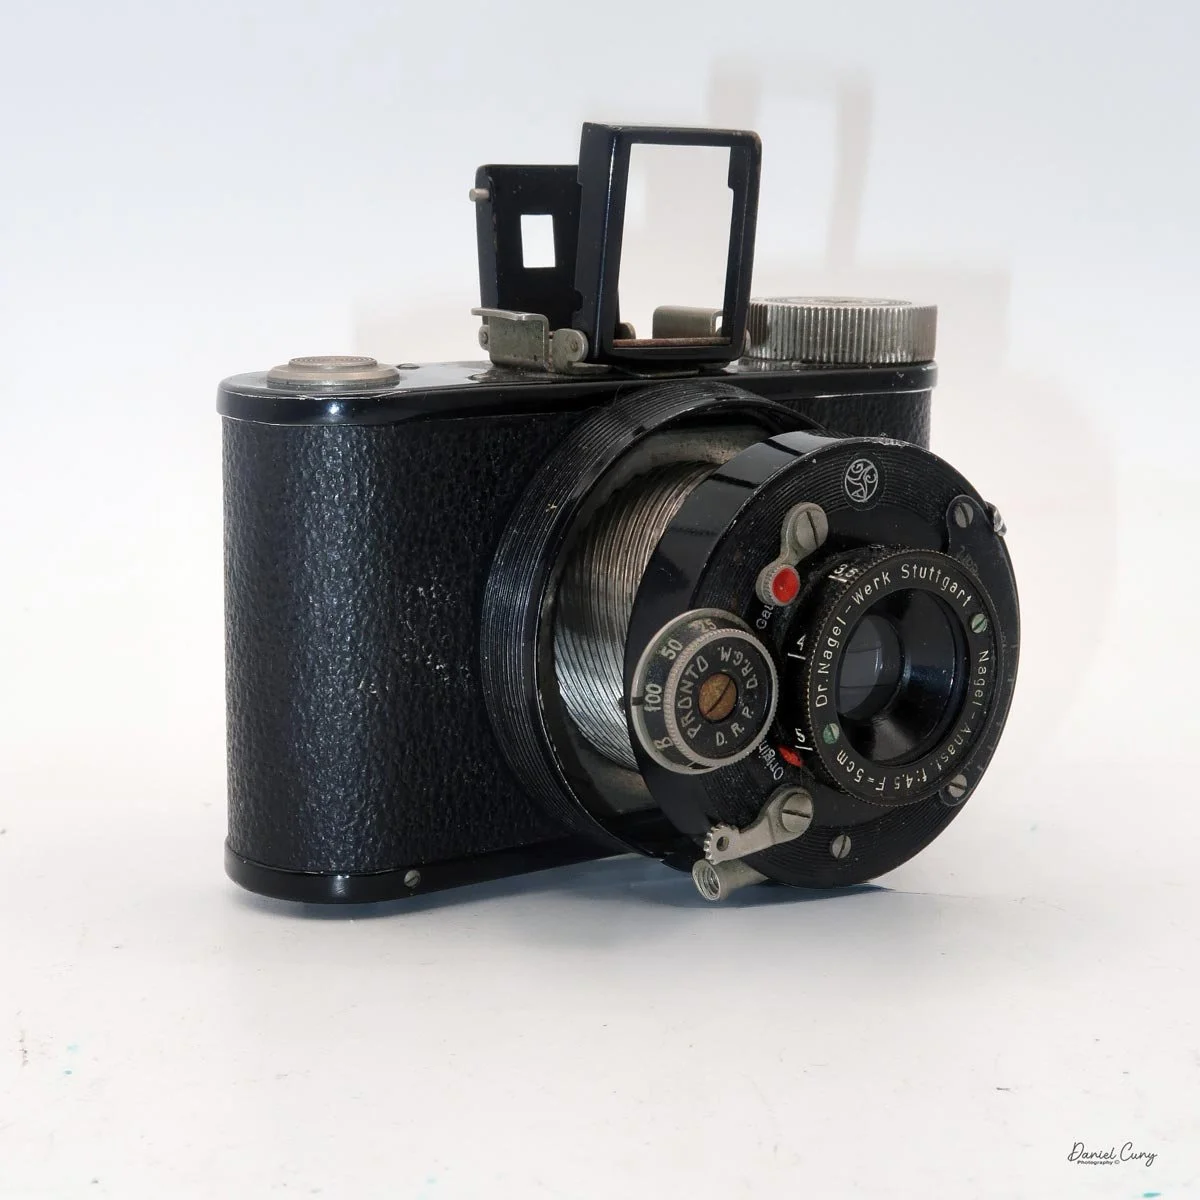
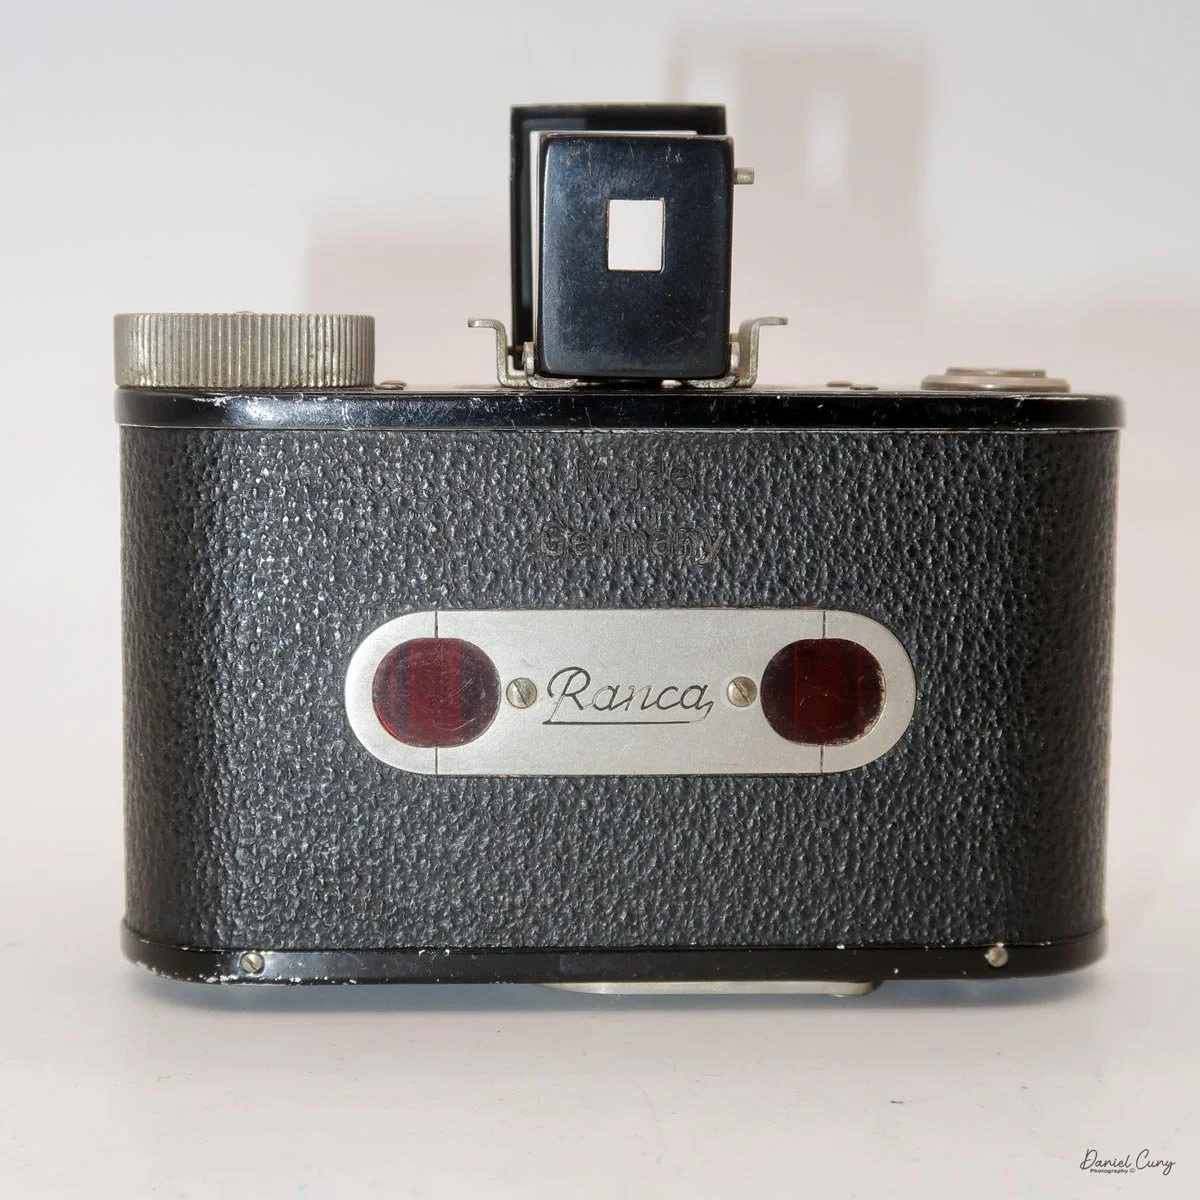
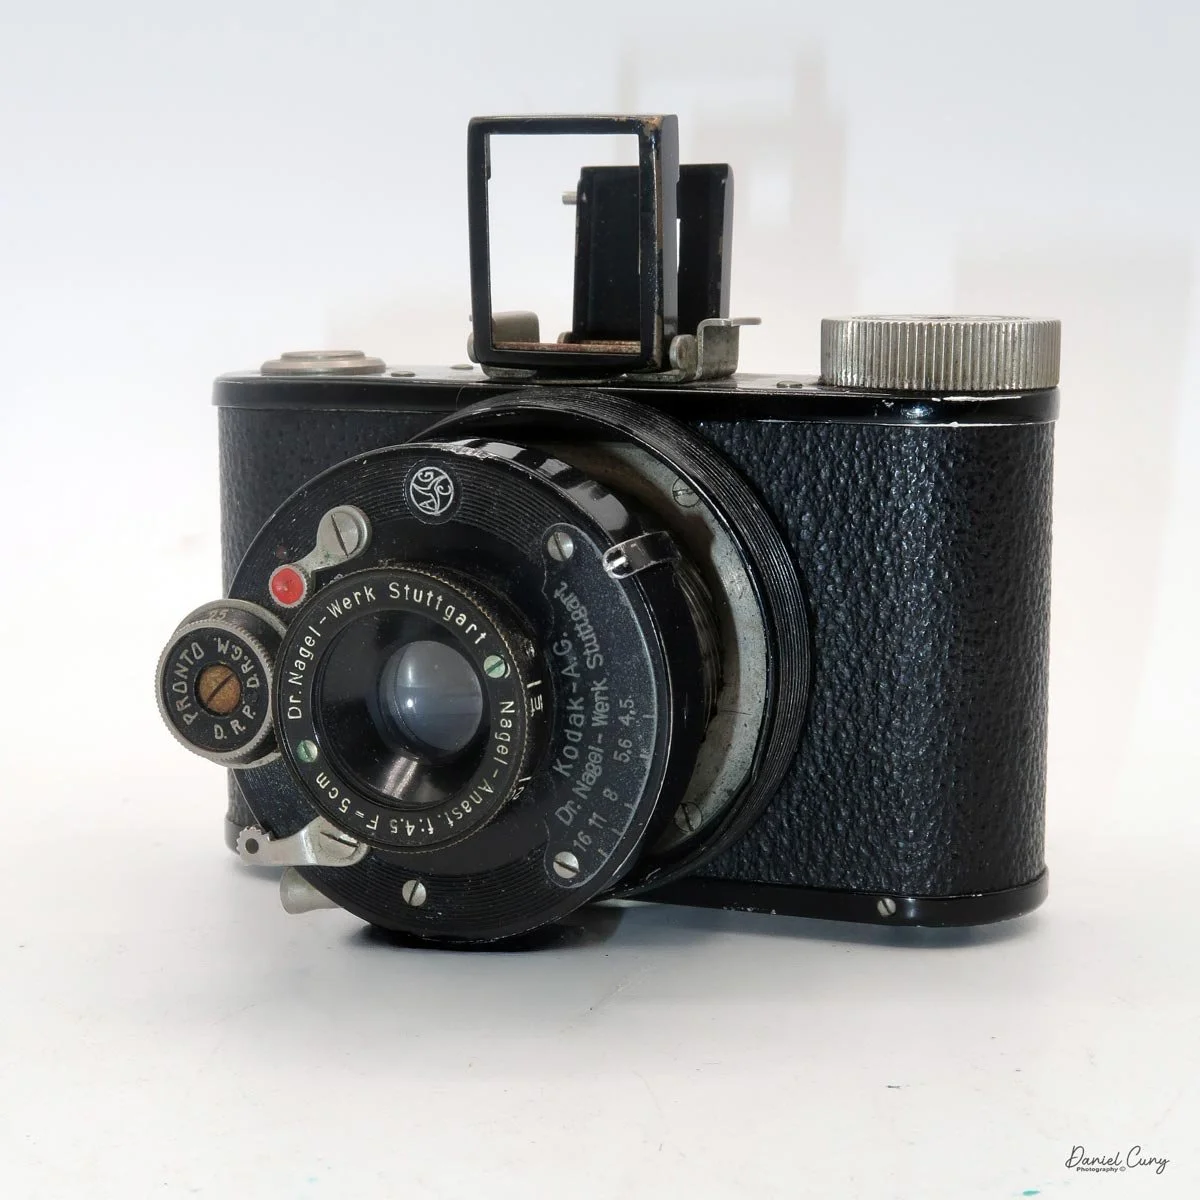
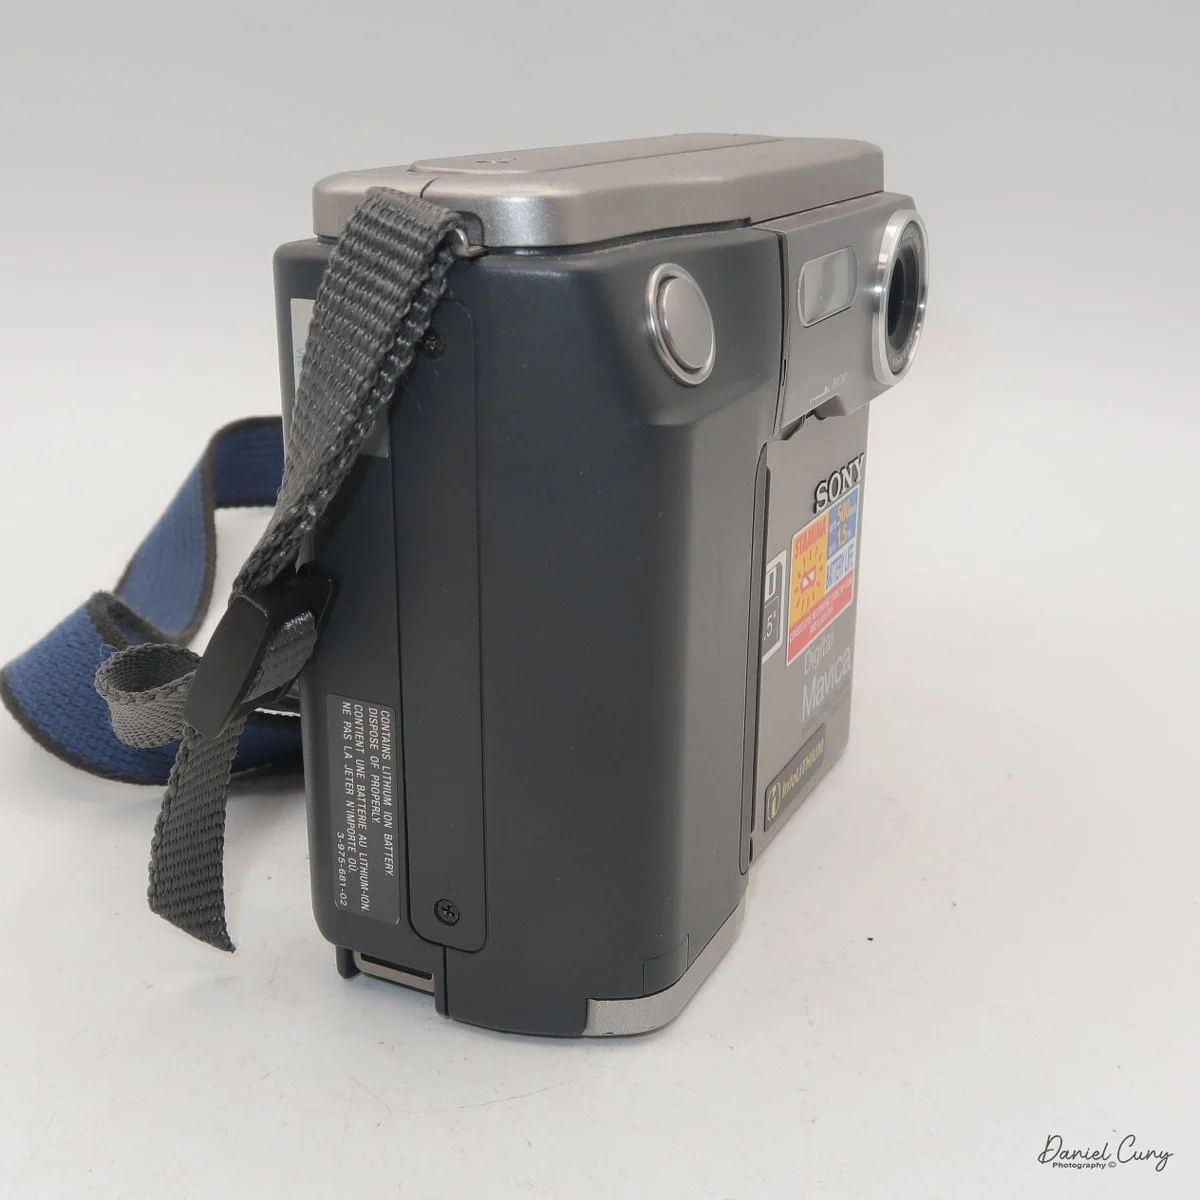
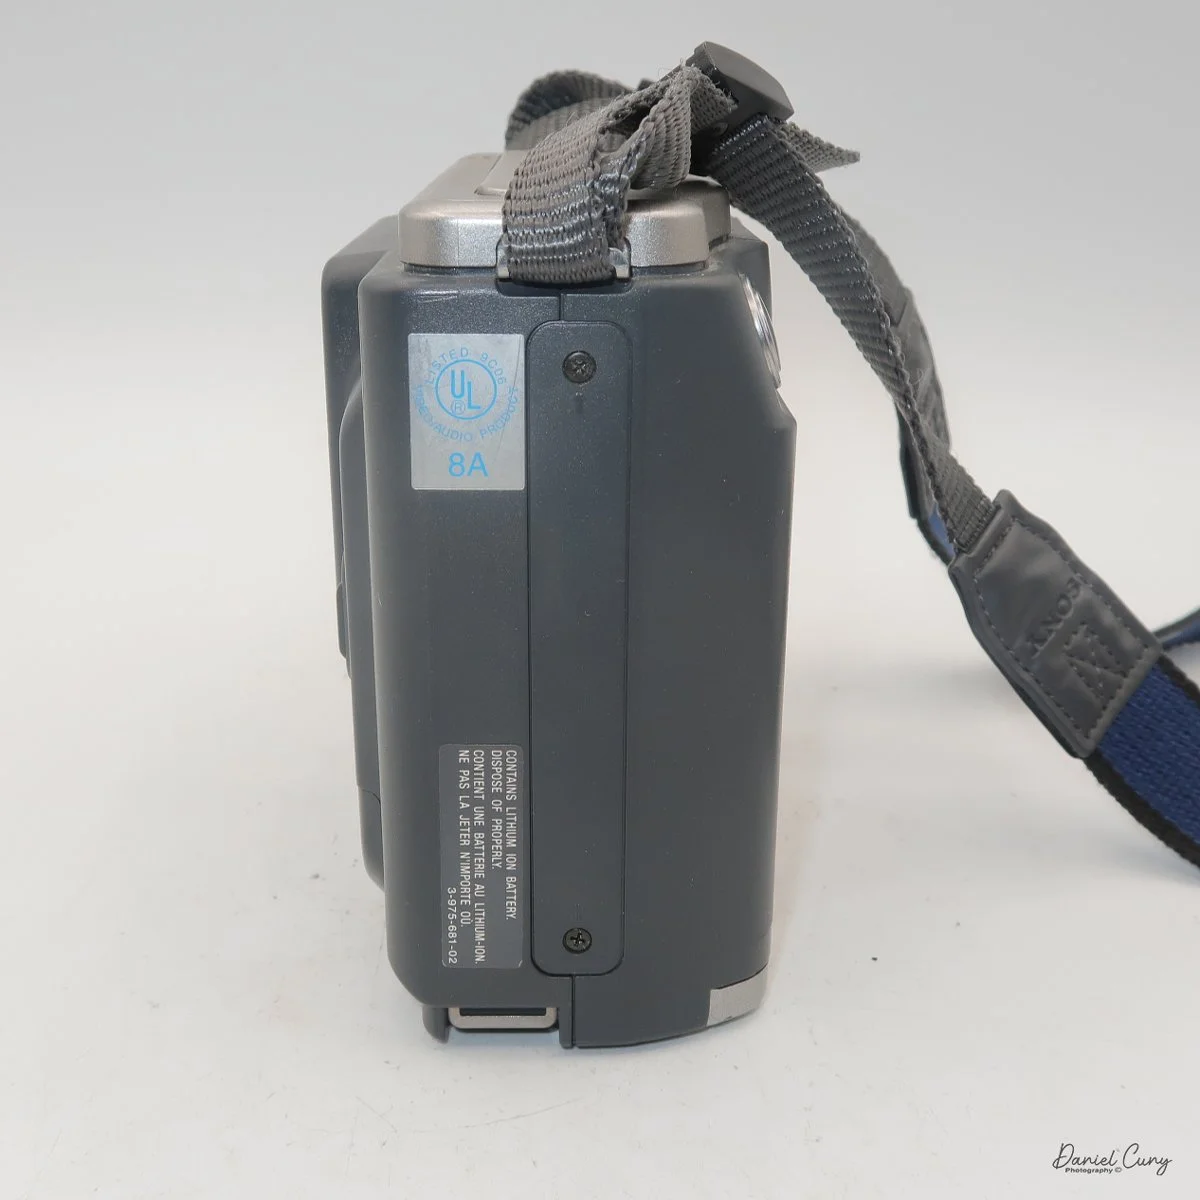
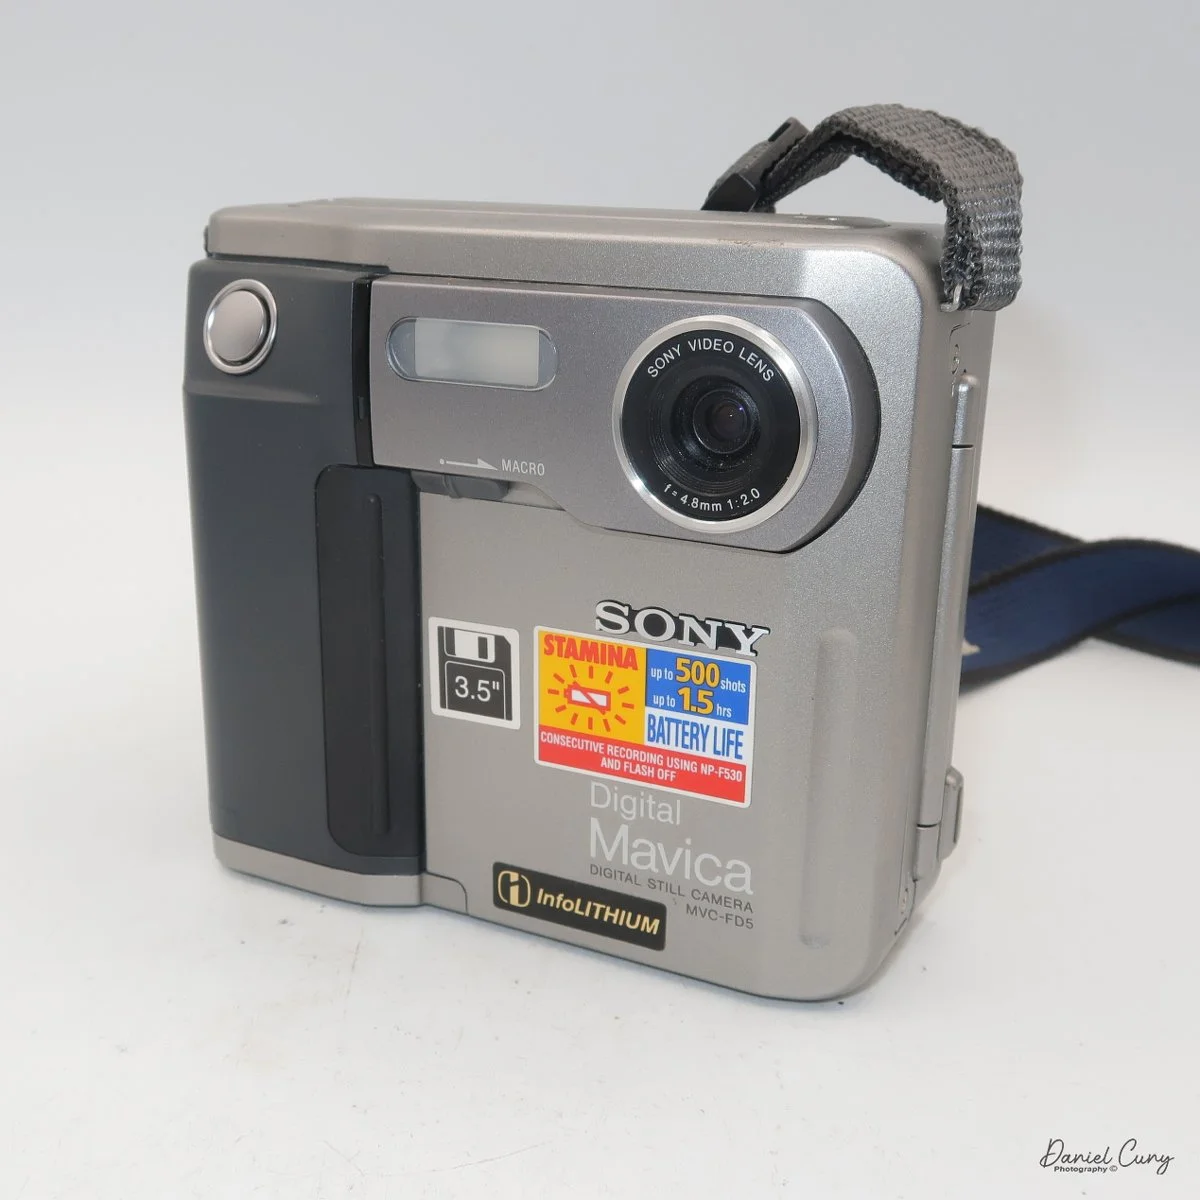
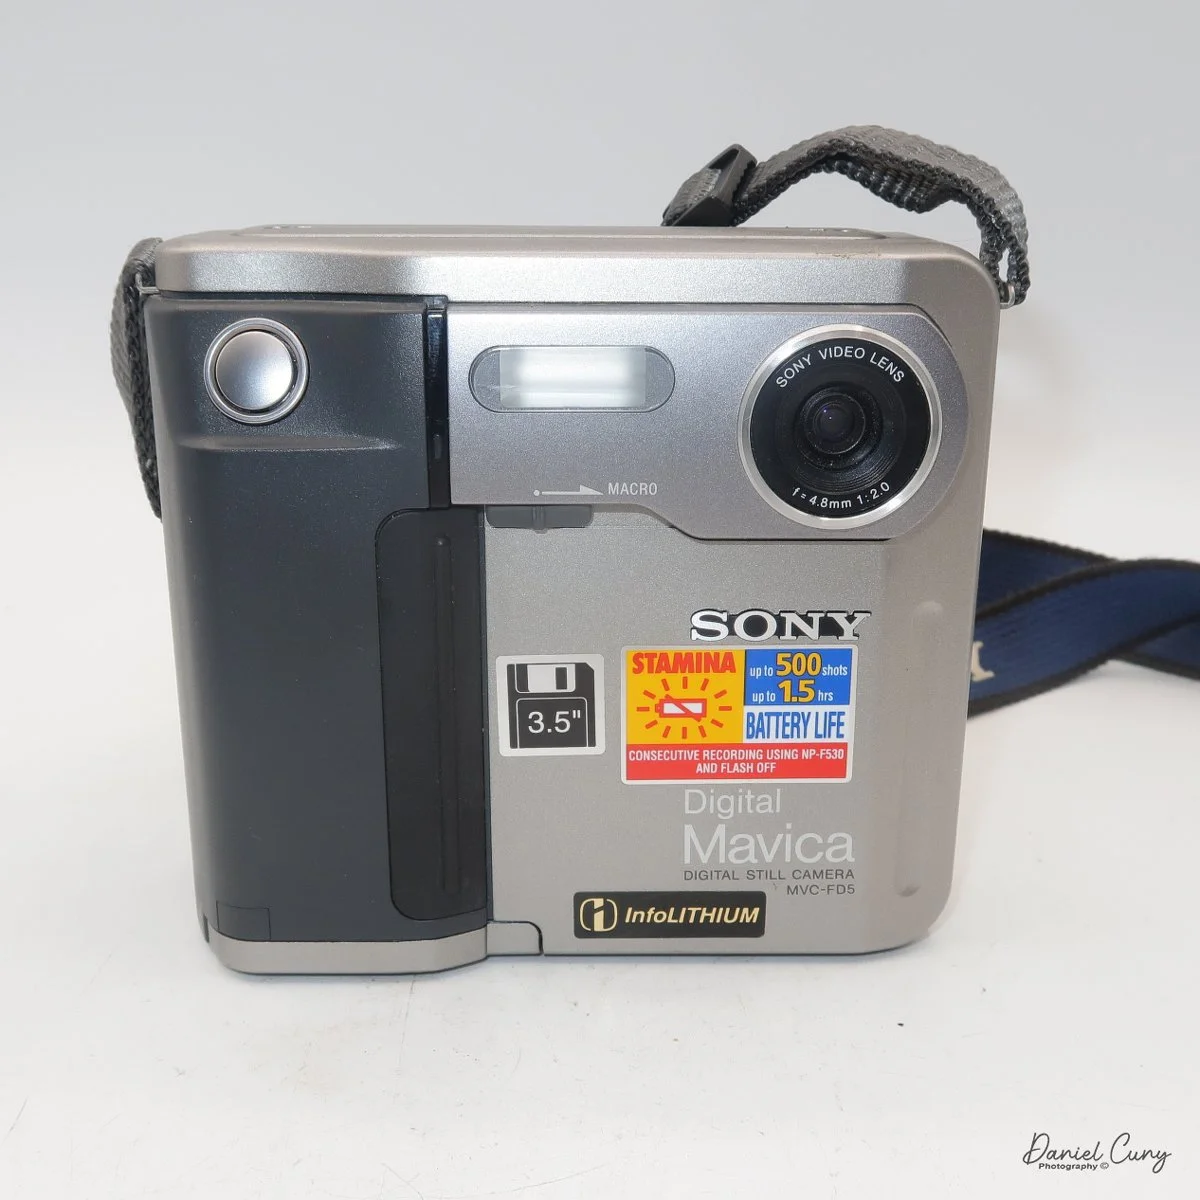
The Minolta Vest is a fairly simple and basic camera. There aren't many frills, except for the beautiful three-tier stacking bellows system. The camera is one of the early examples made from Bakelite. It is also known as the Minolta Best or Minolta Marble, due to the prominent Everset Marble shutter on the camera's face.
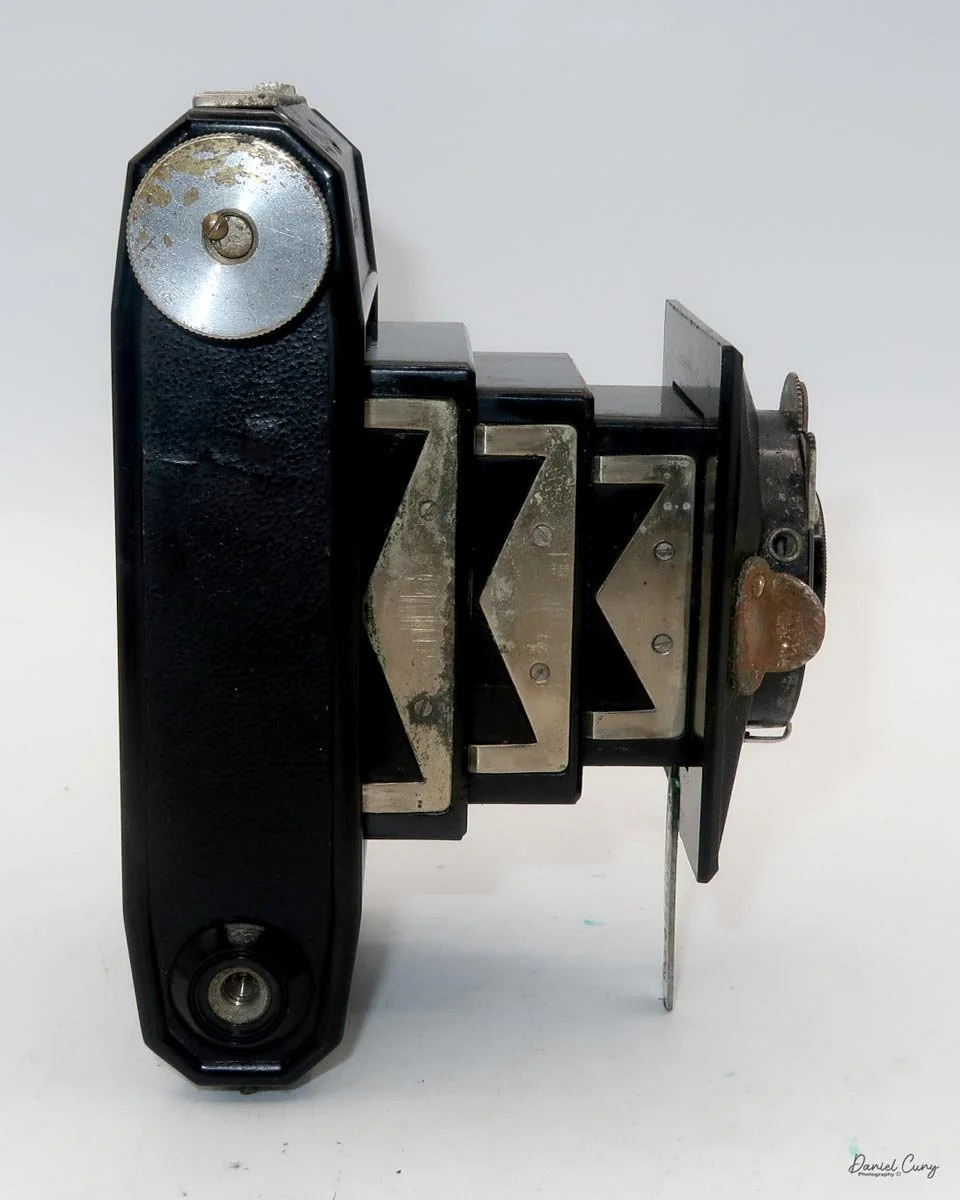
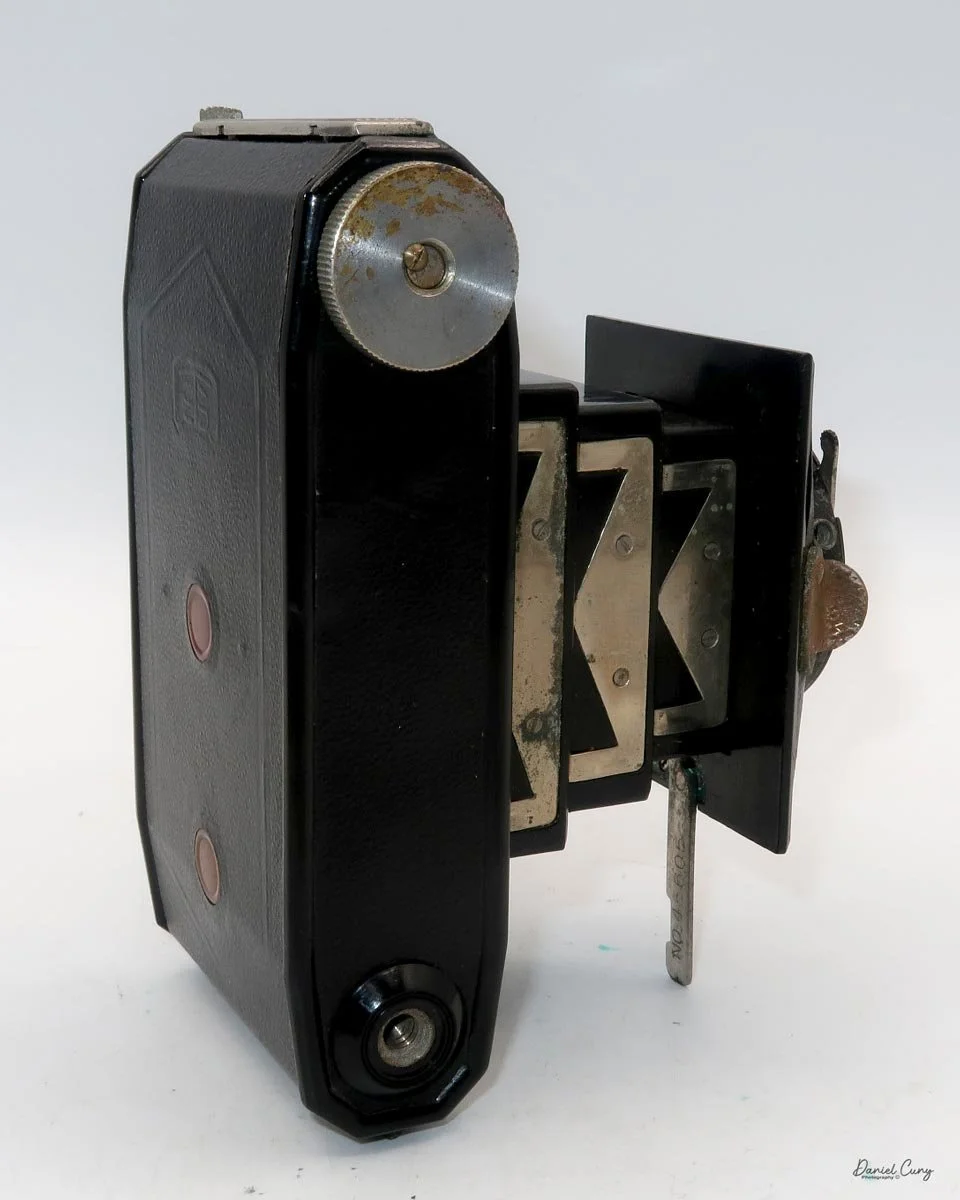

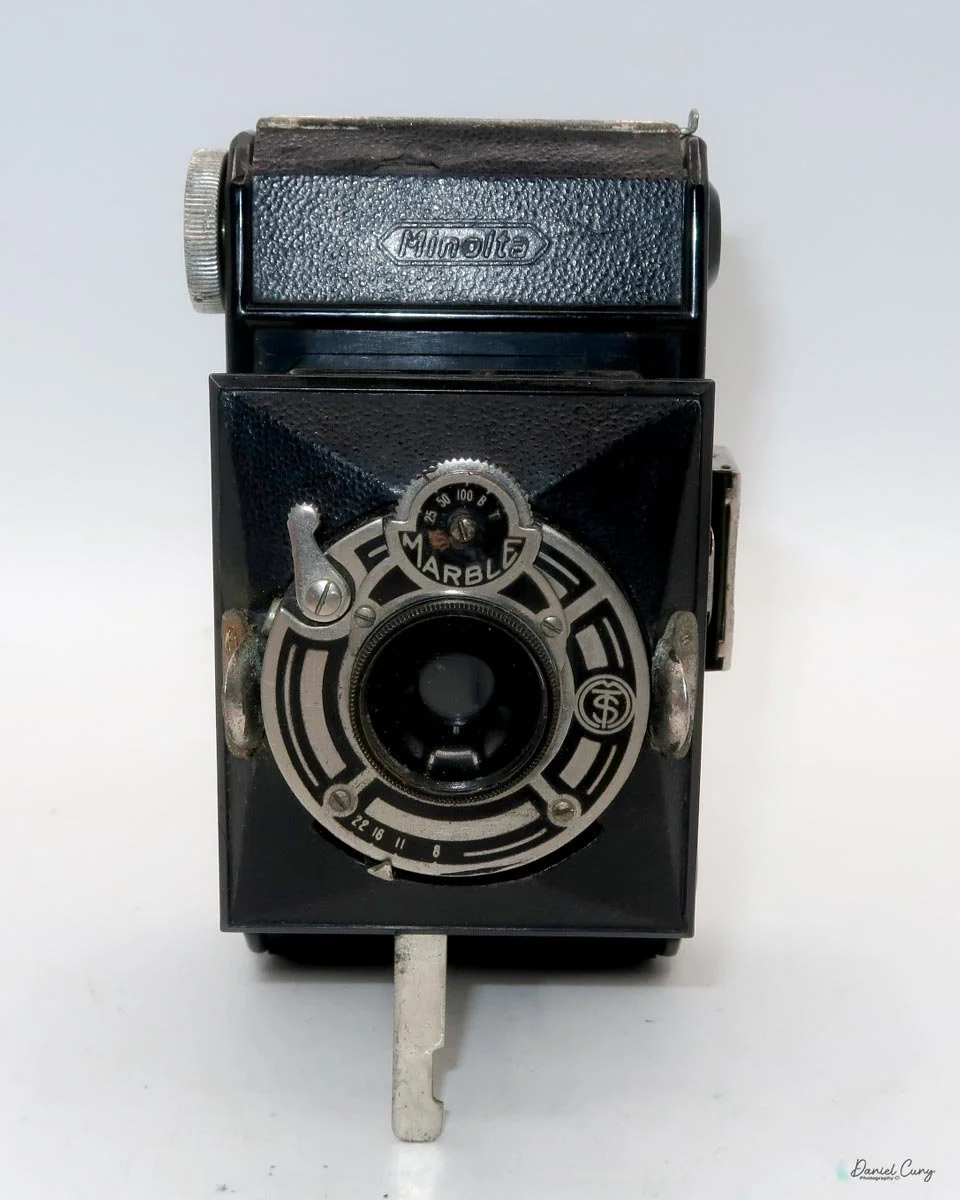
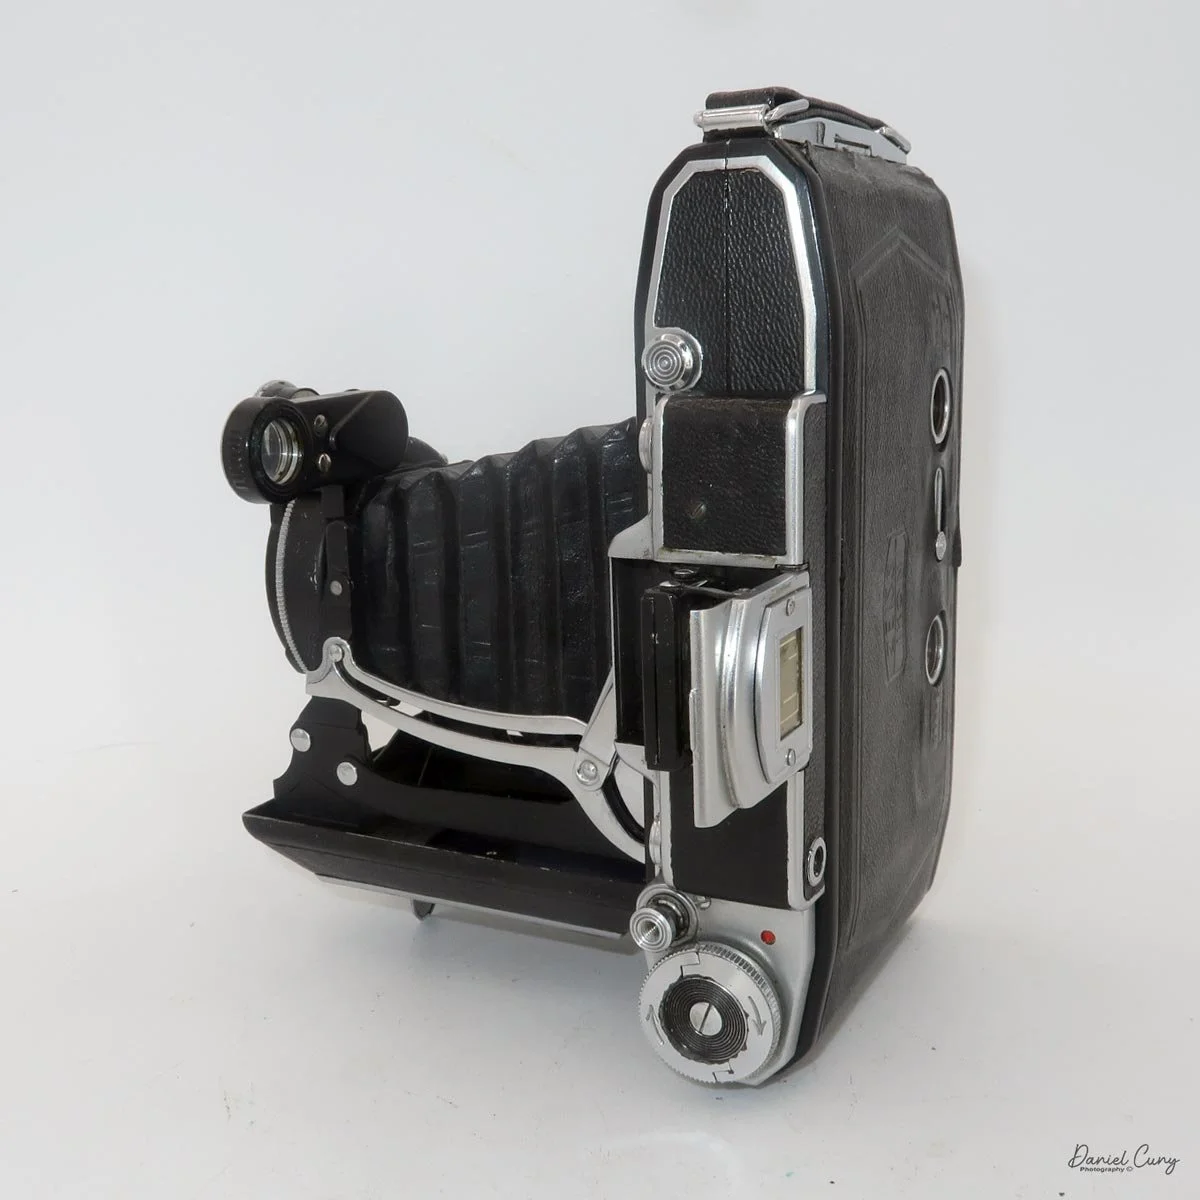
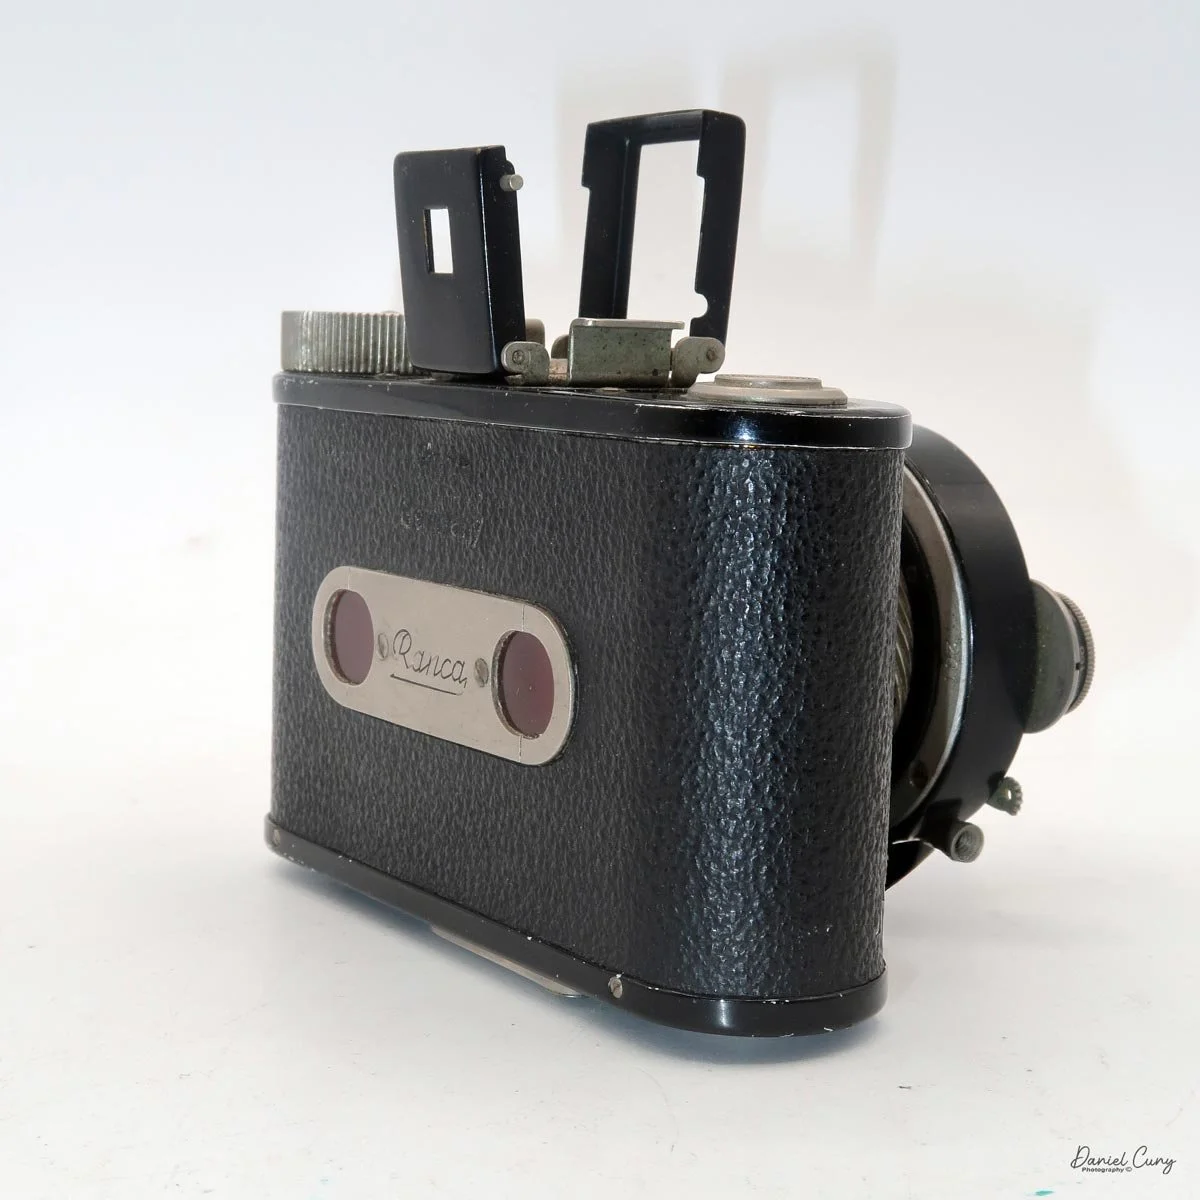
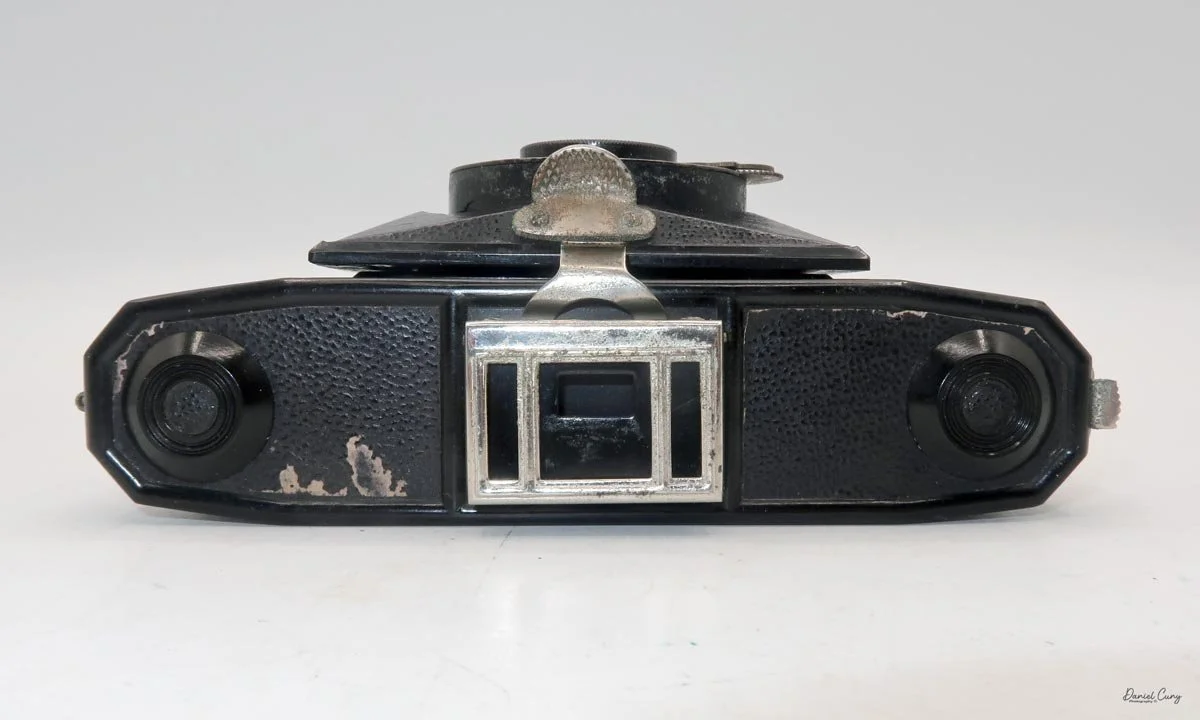
It's also a compact camera, measuring 5.25 inches wide by 3 inches tall without the metal viewfinder extended, and 4 inches with it extended, by 2 inches deep with the lens retracted into the camera body, and 3.75 inches with the three-tier Bakelite bellows extended.
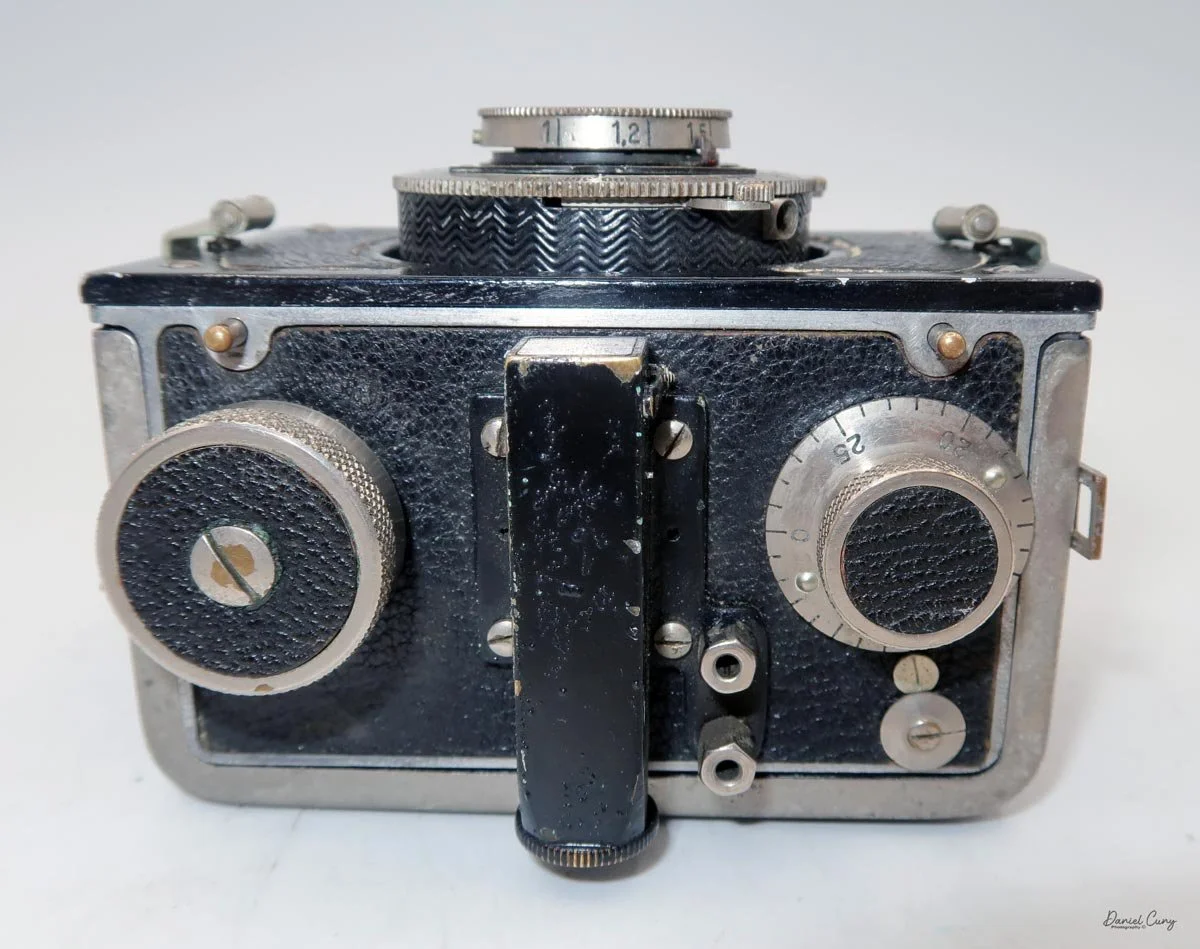
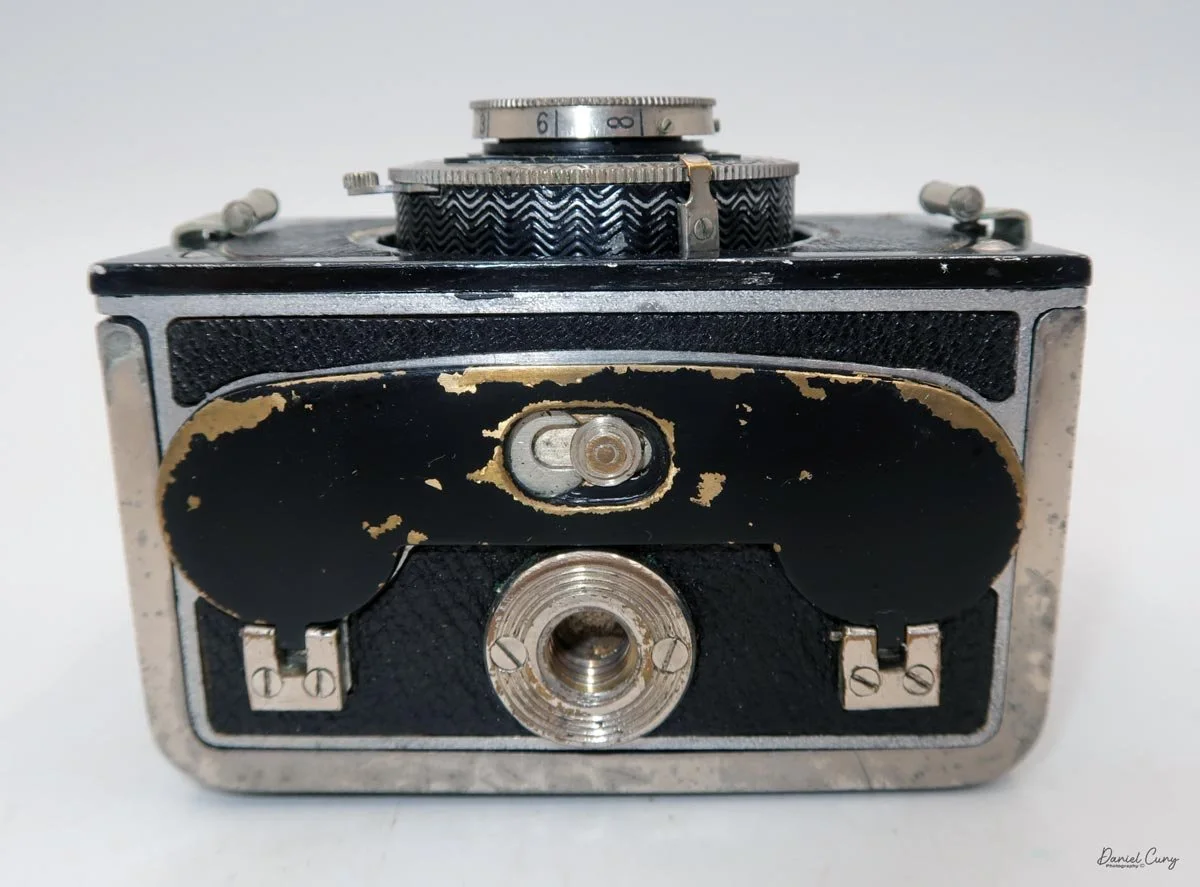
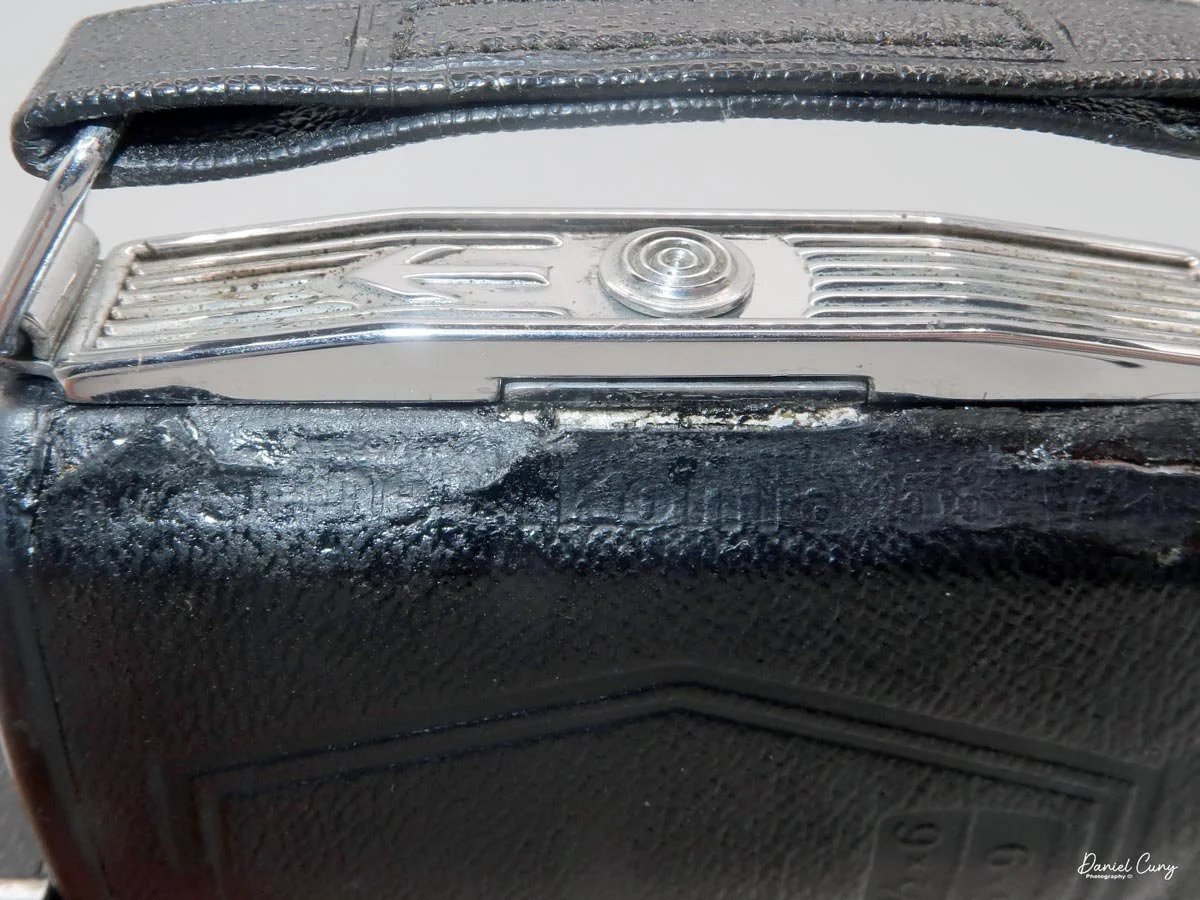
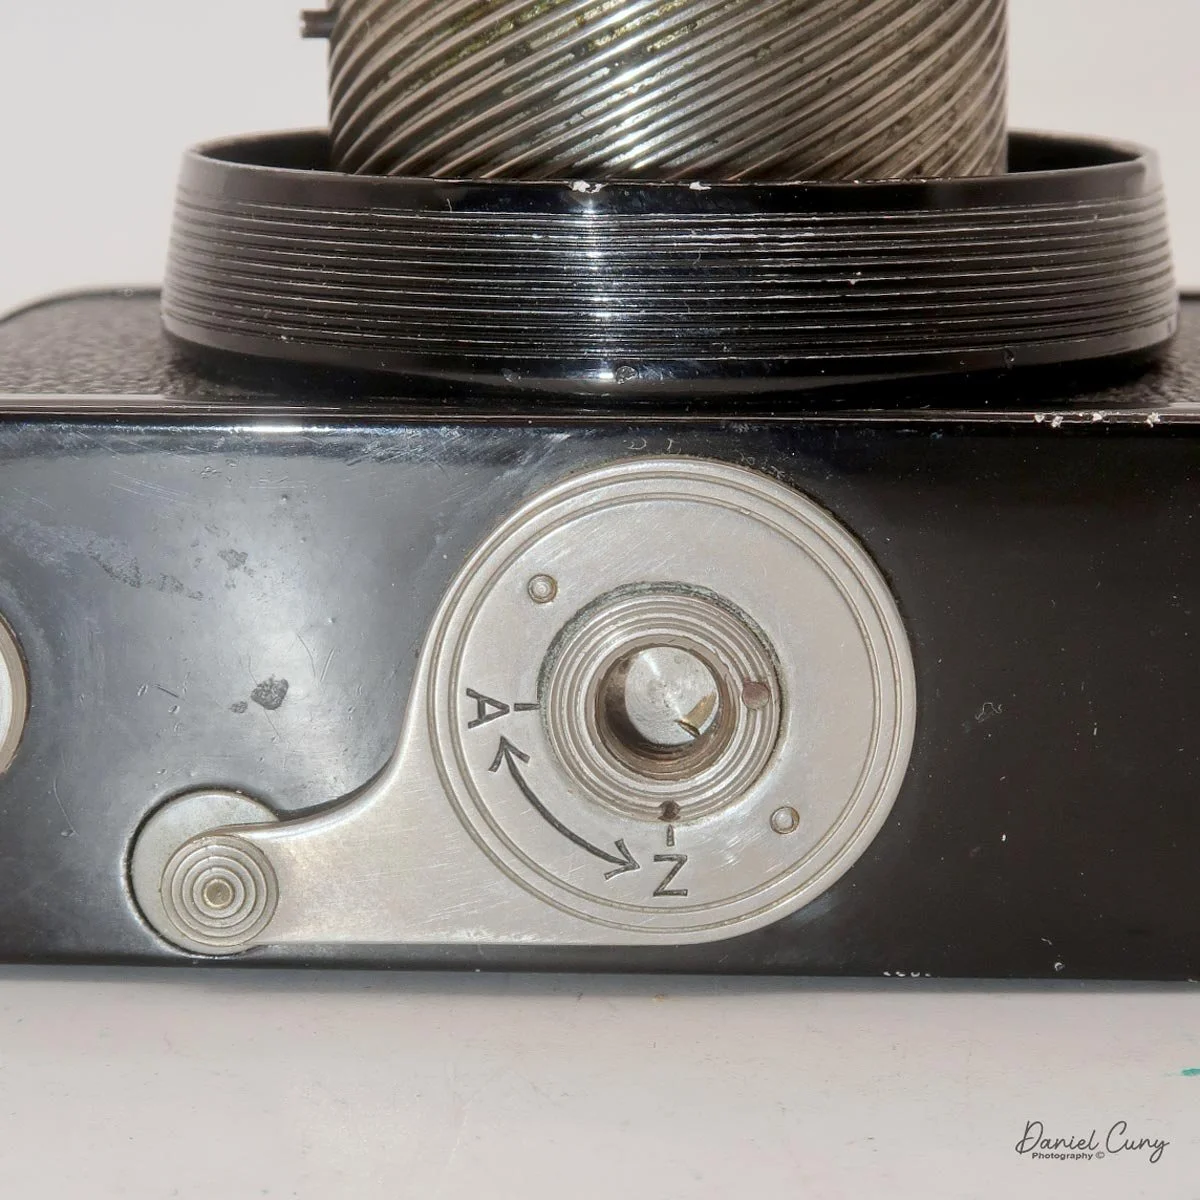
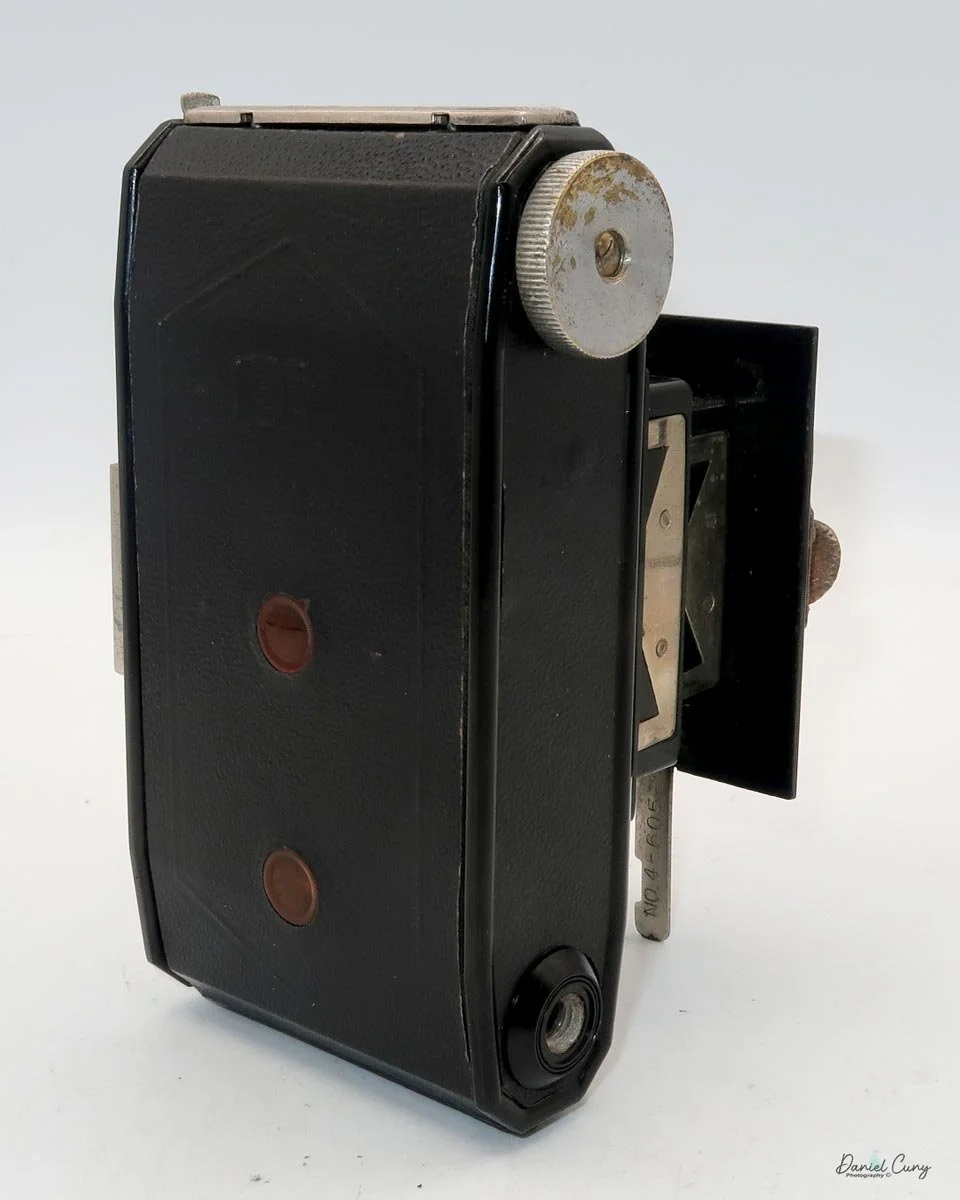
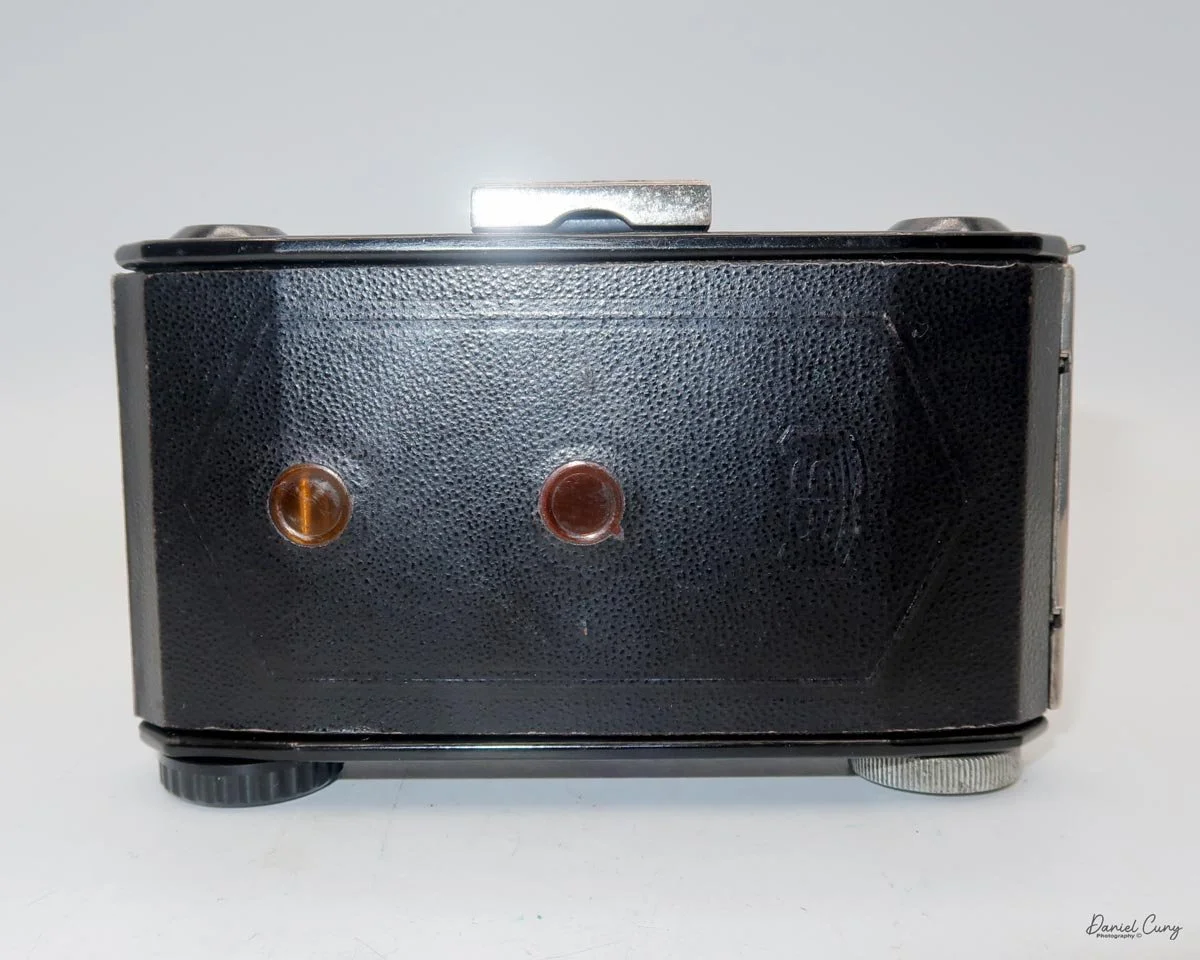
The Minolta Vest camera's serial number is stamped on the leg that extends, allowing the camera to stand vertically. My camera is serial number 45605.
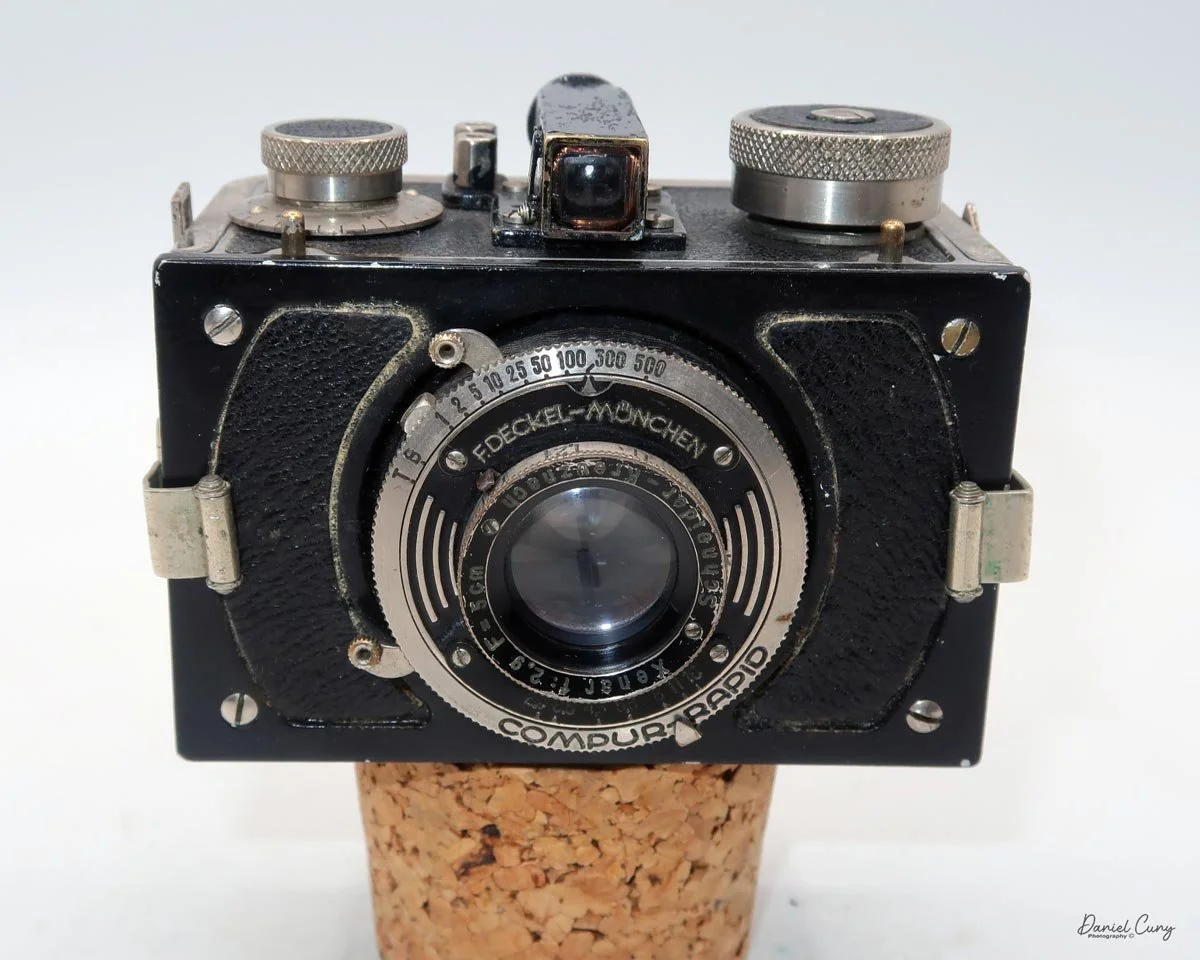
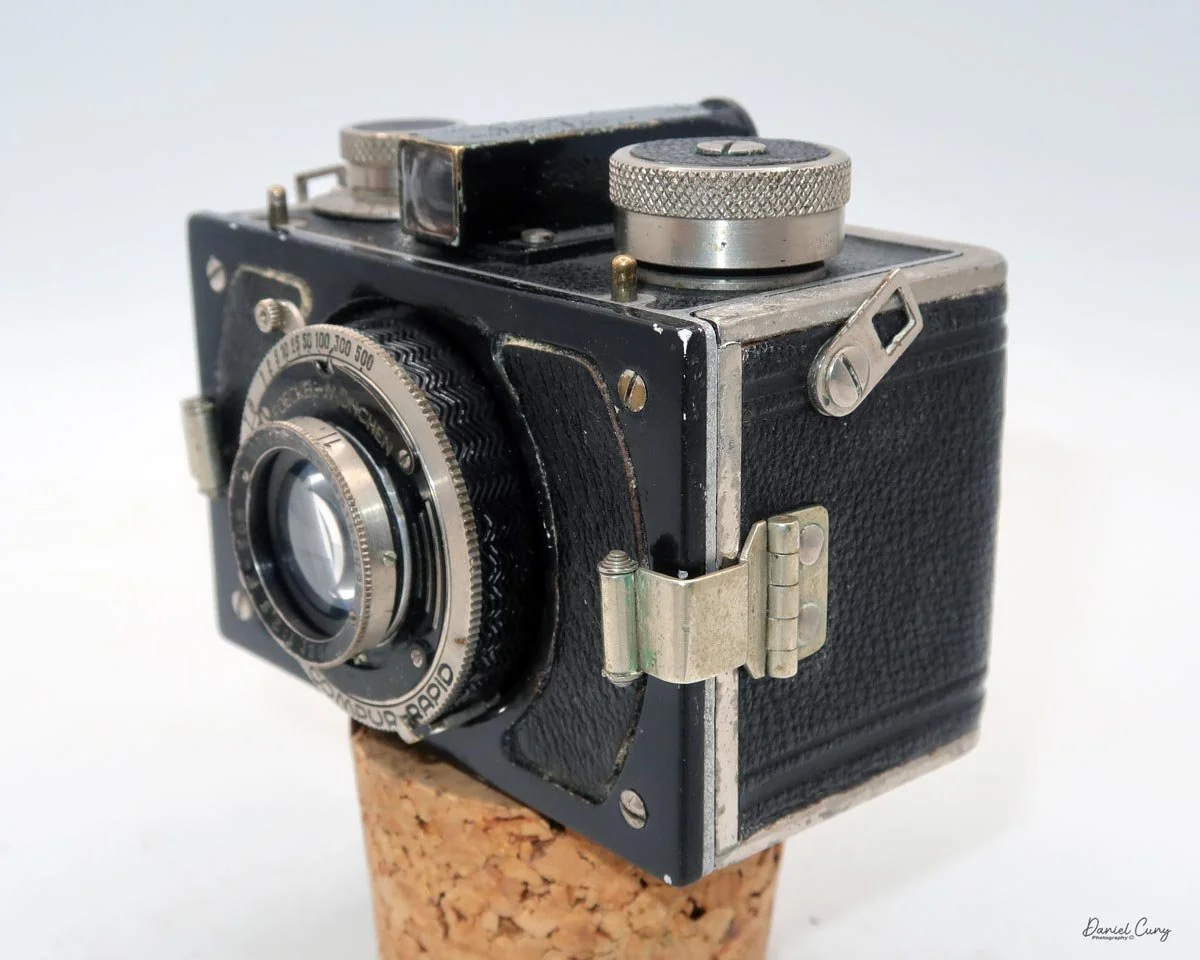
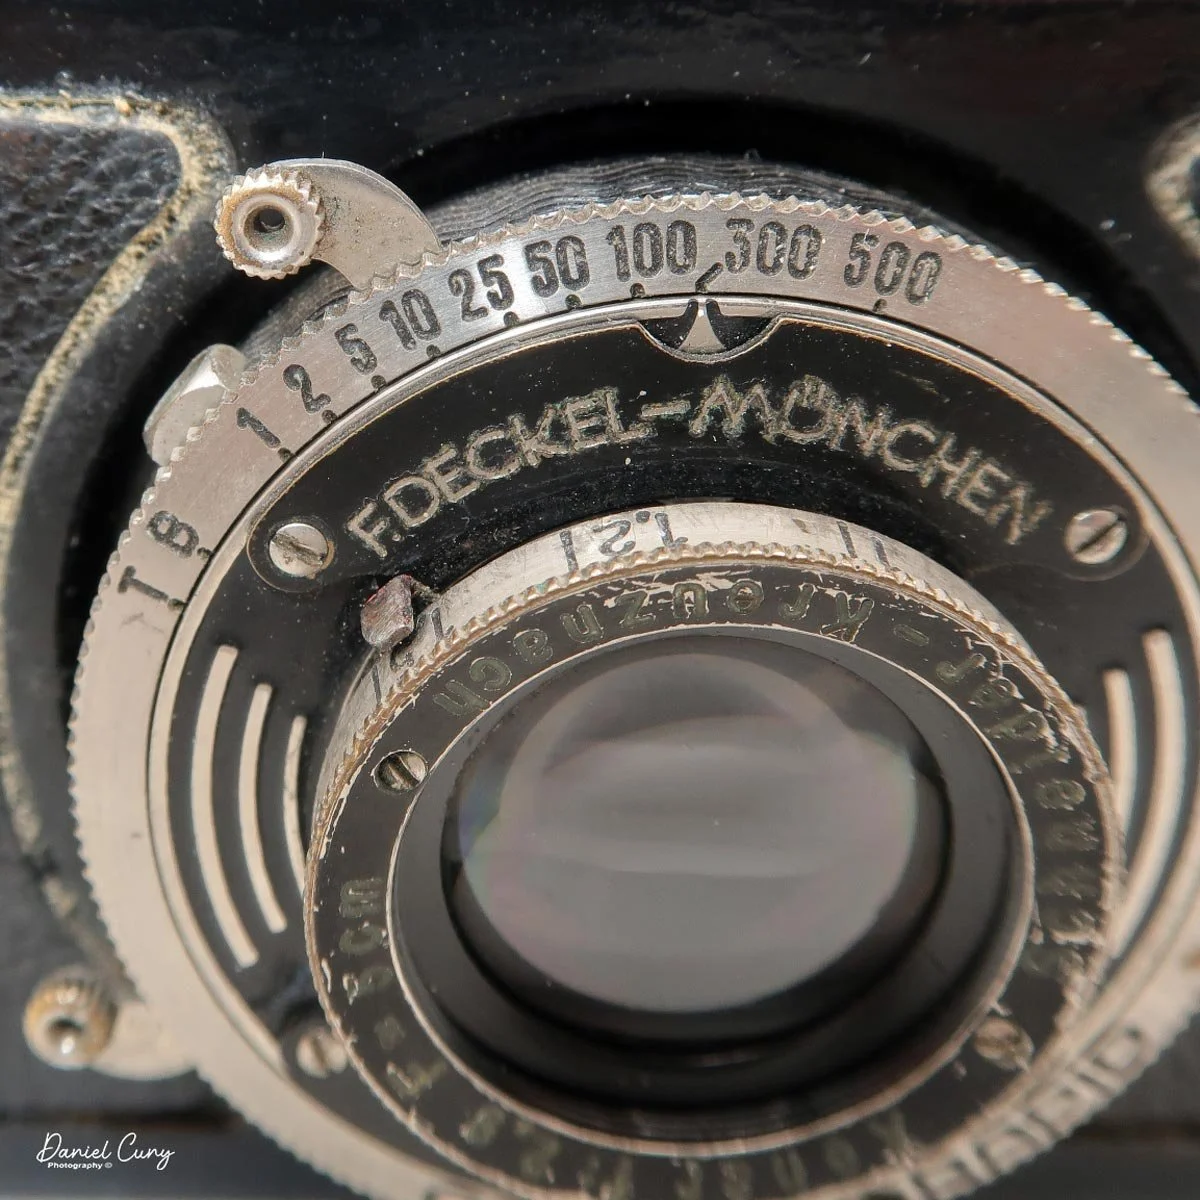
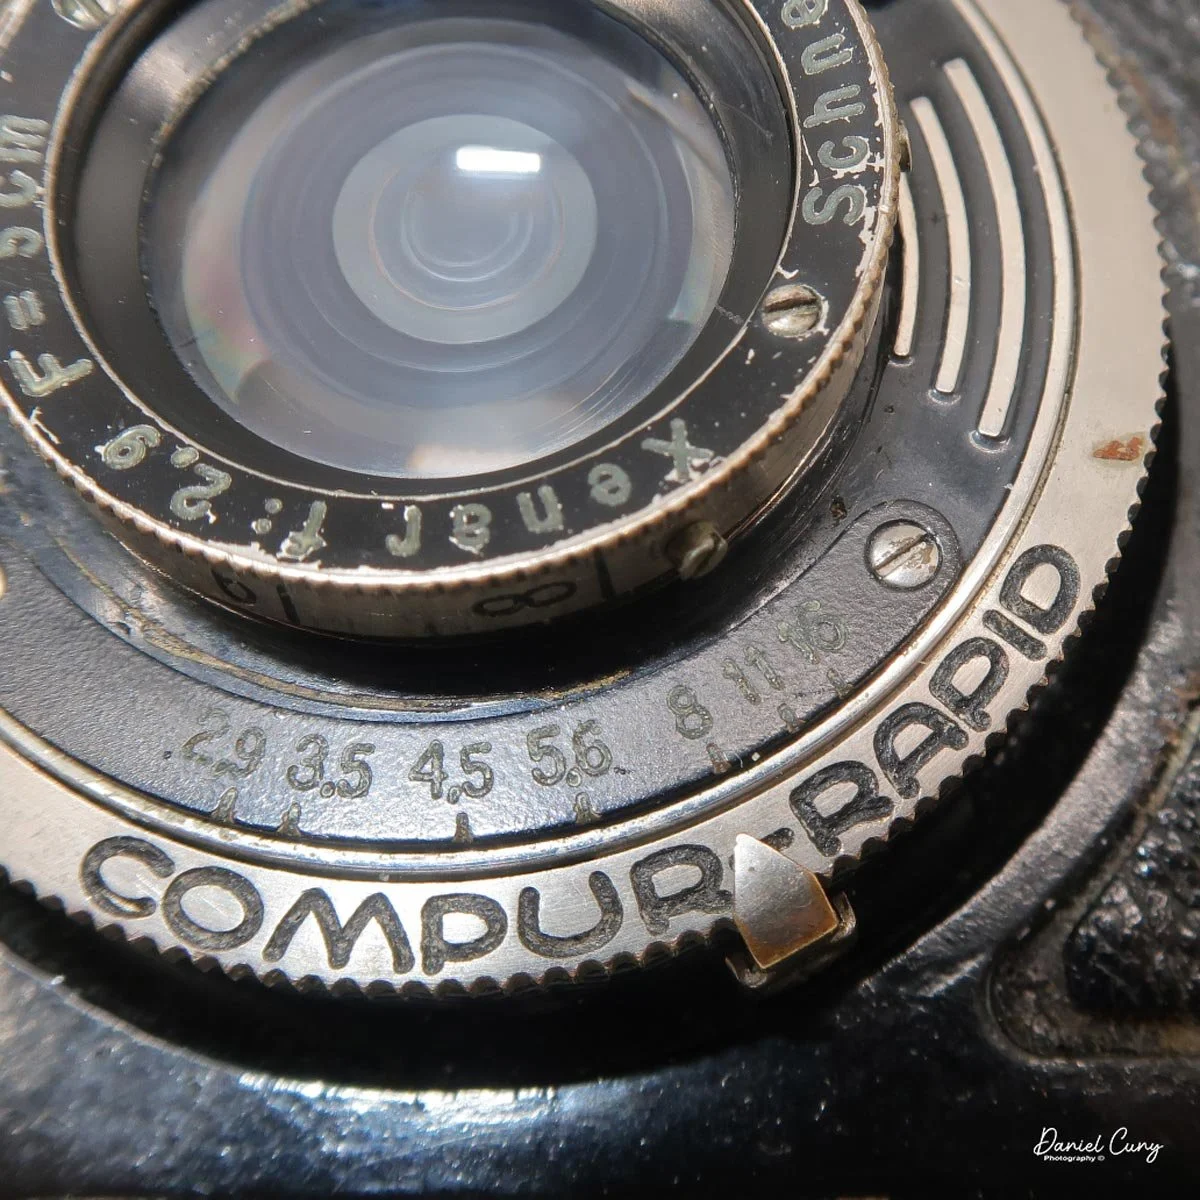
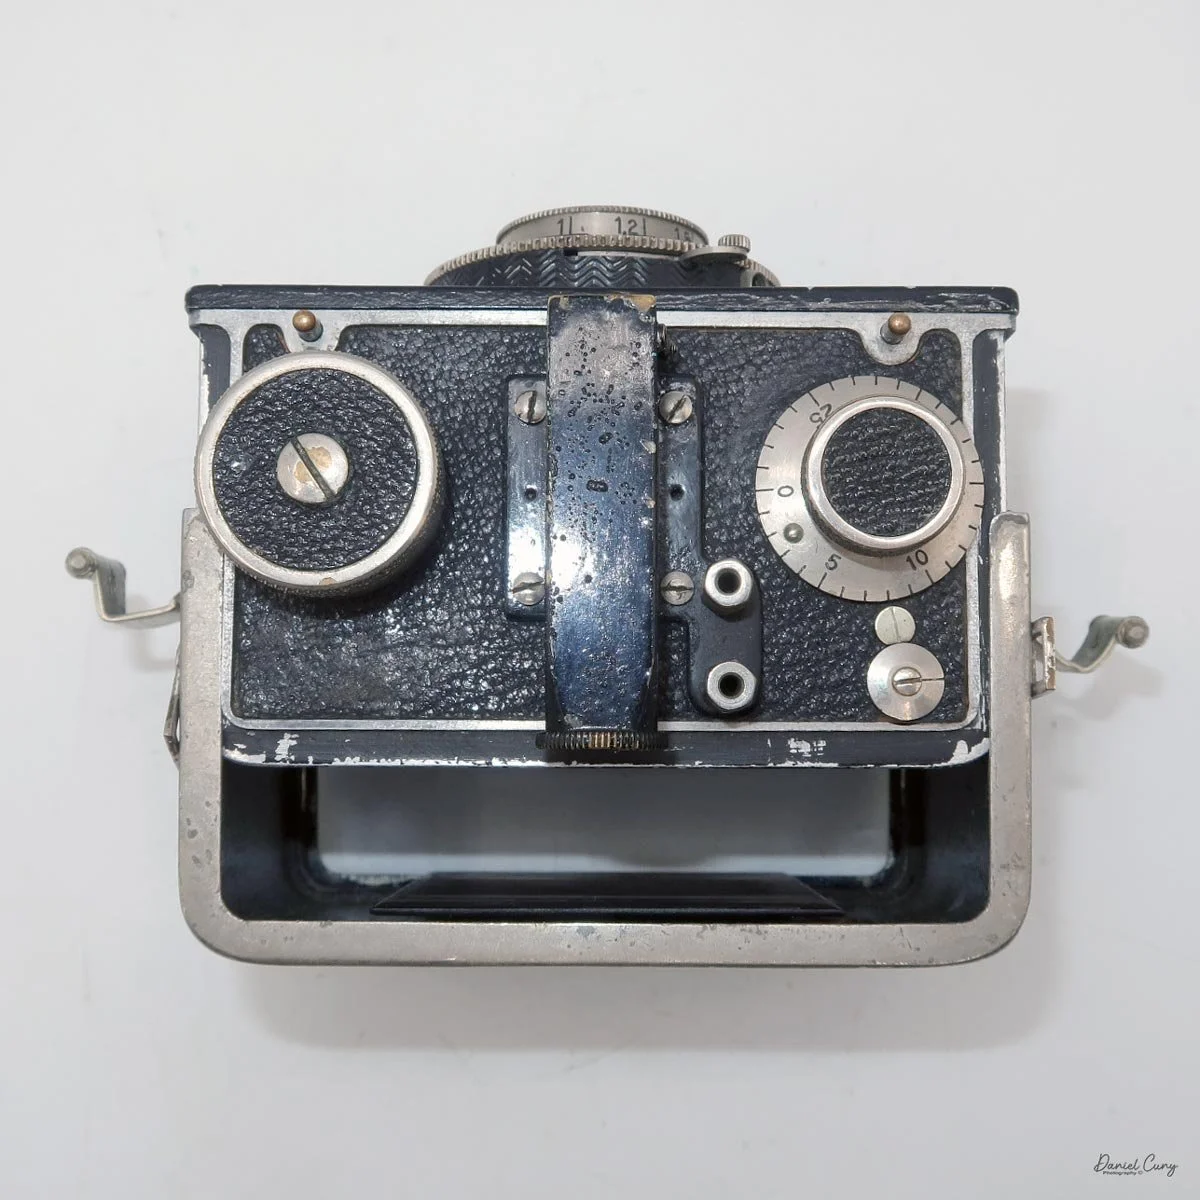
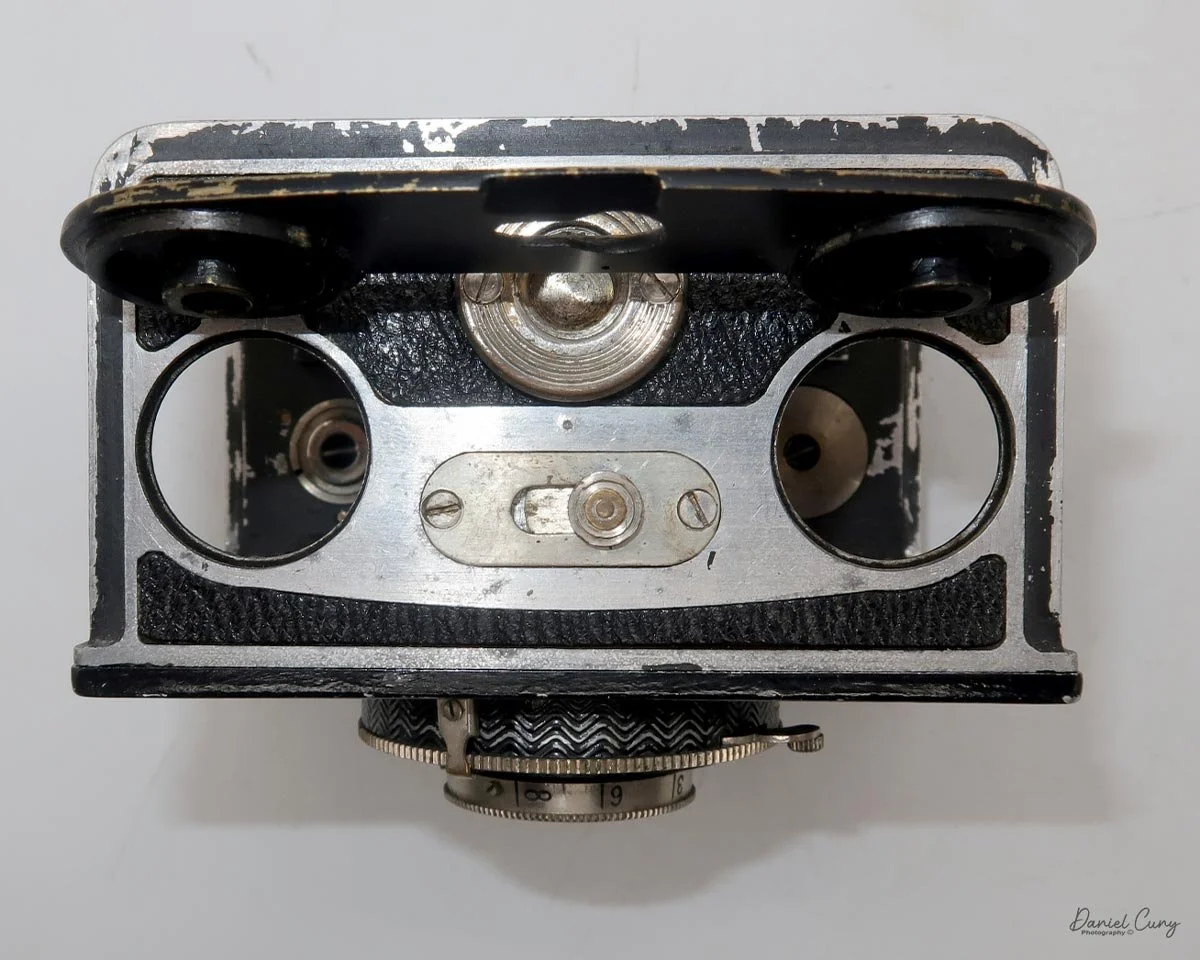
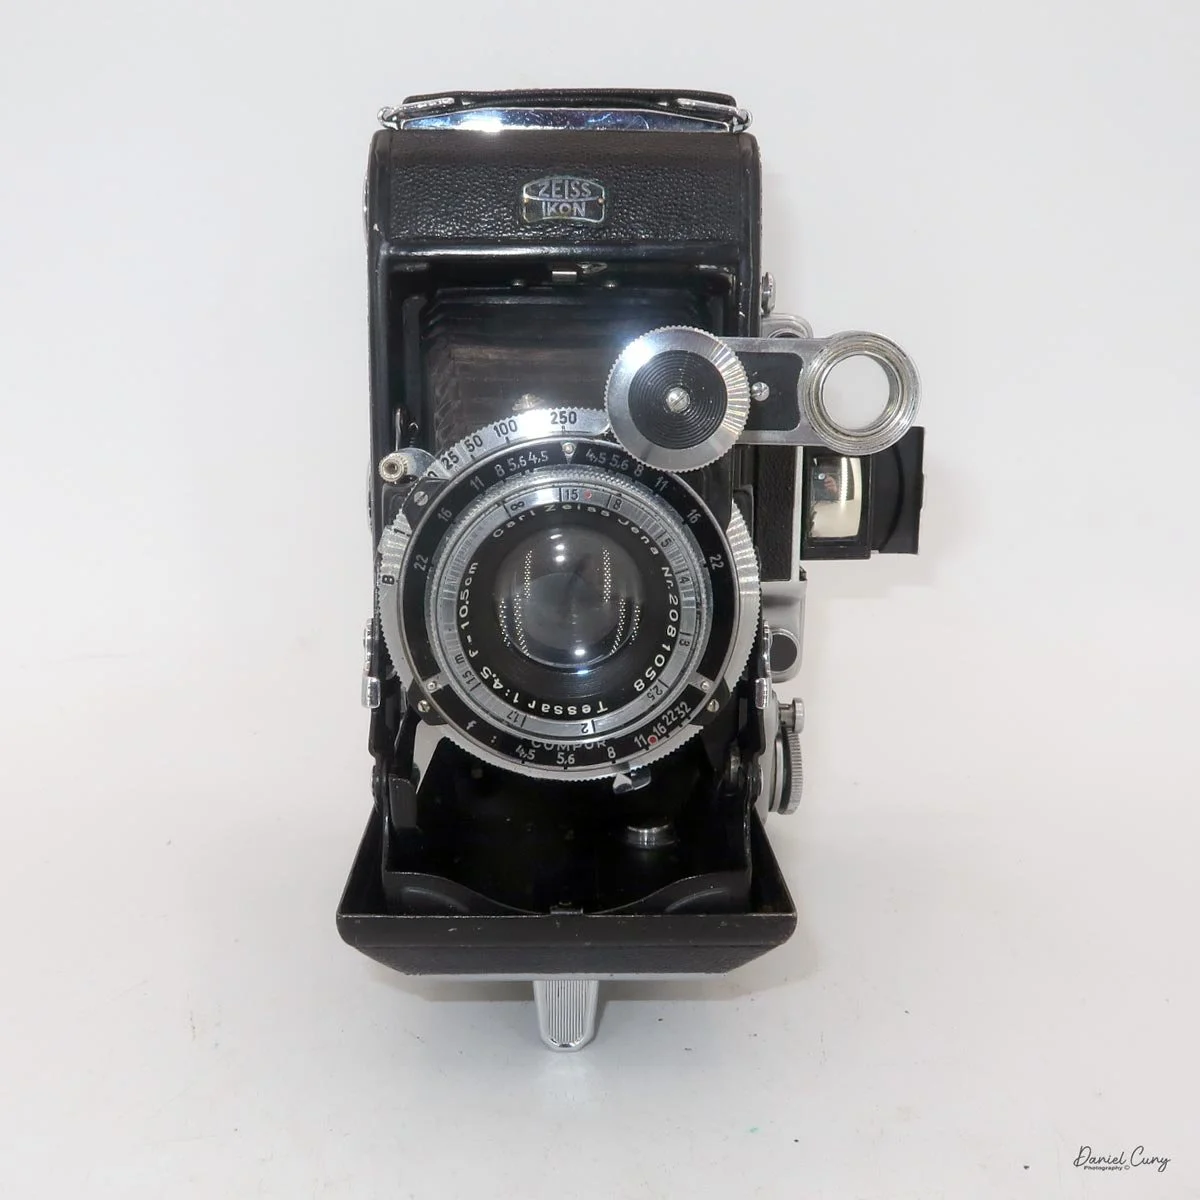
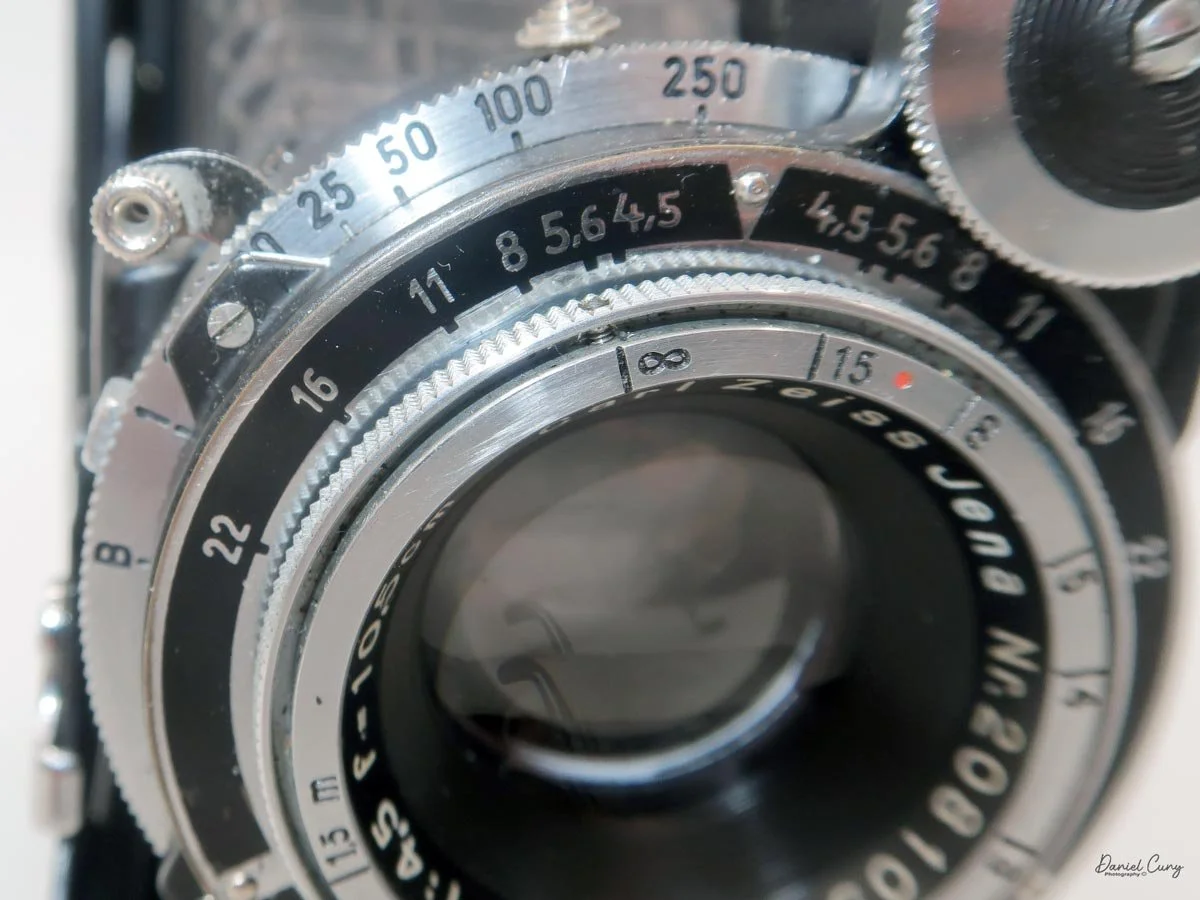
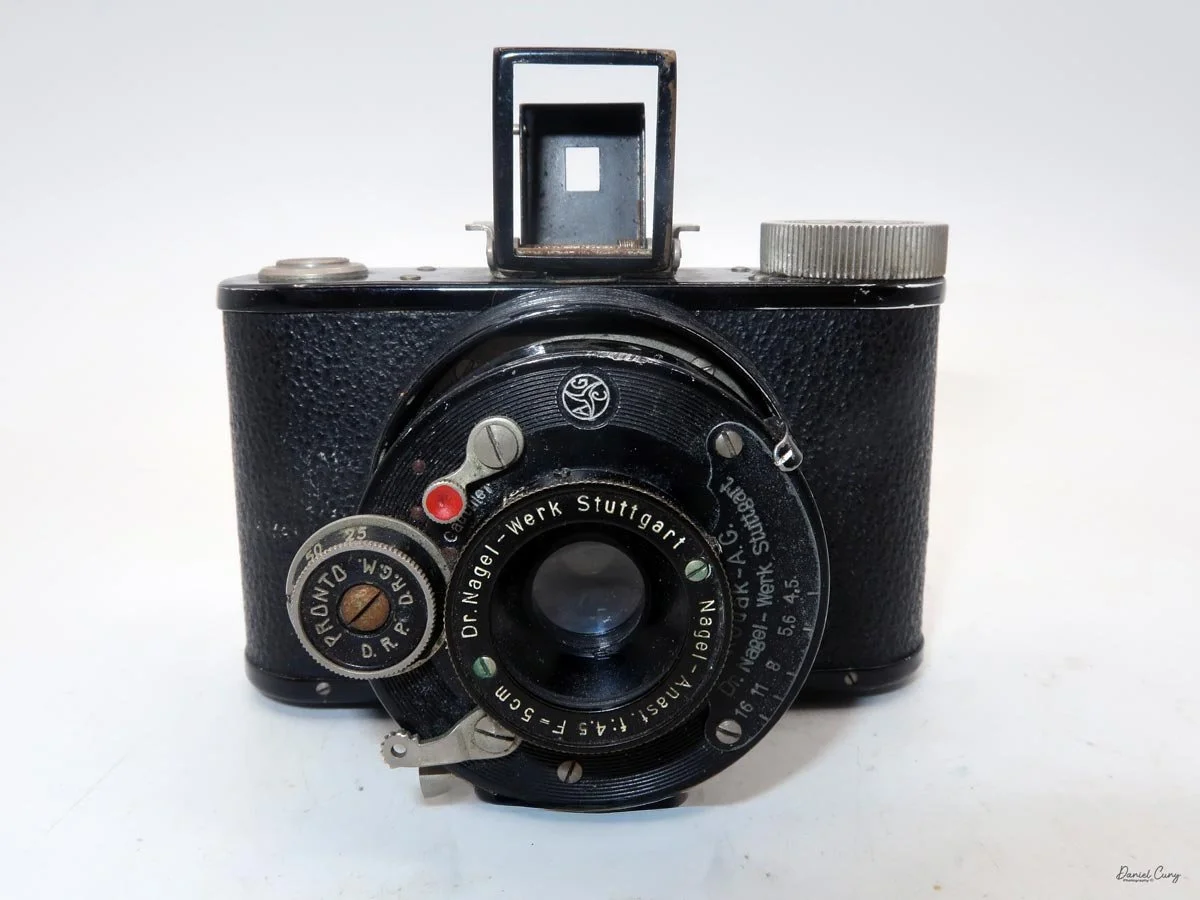
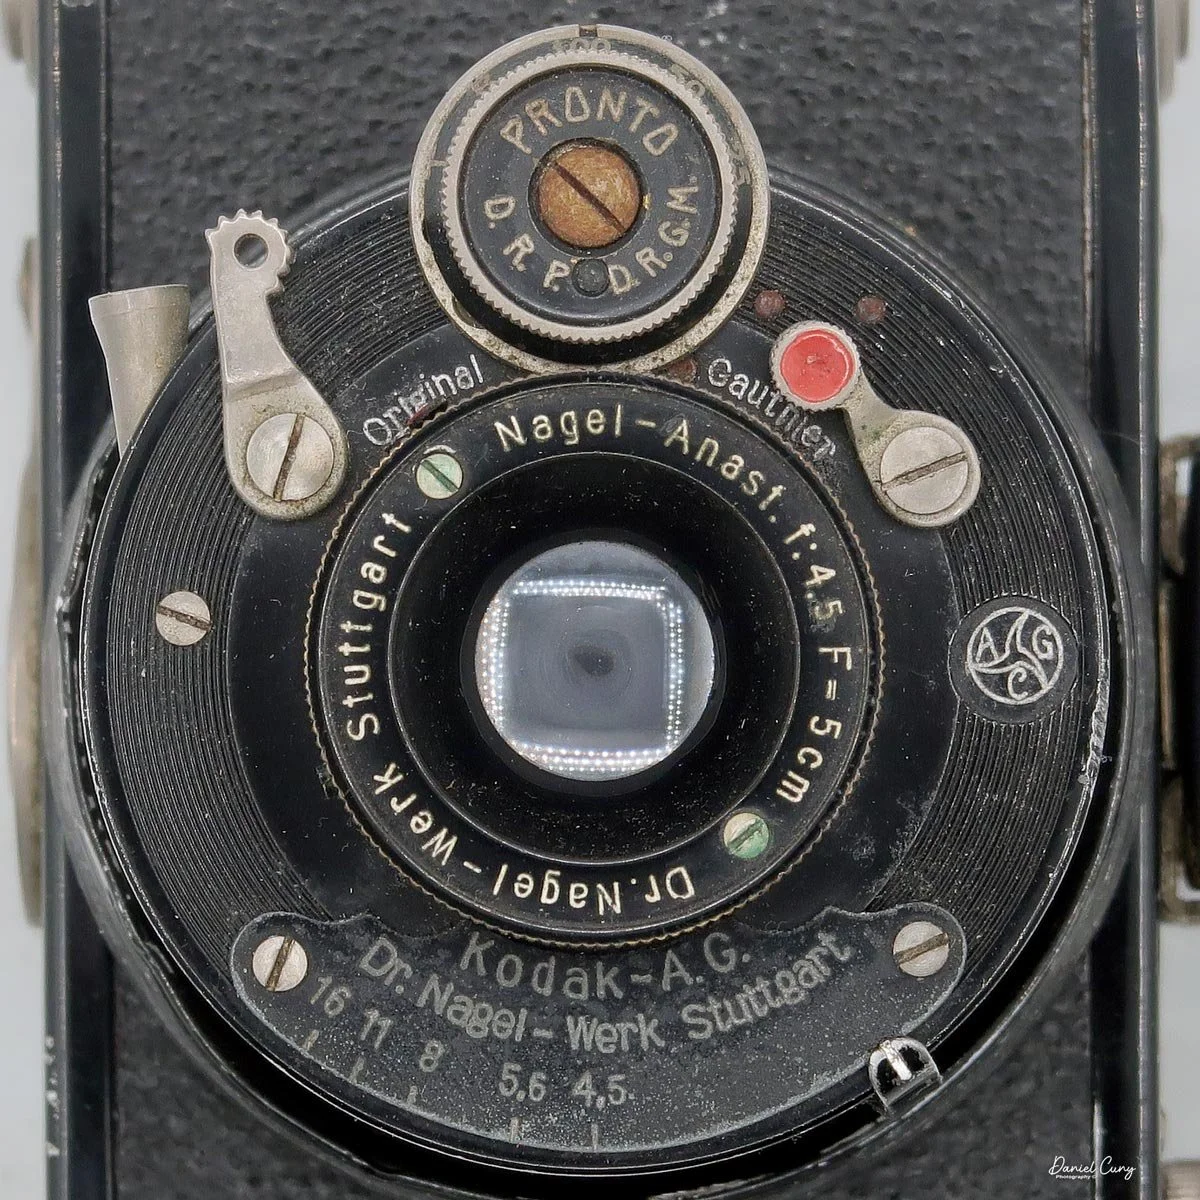
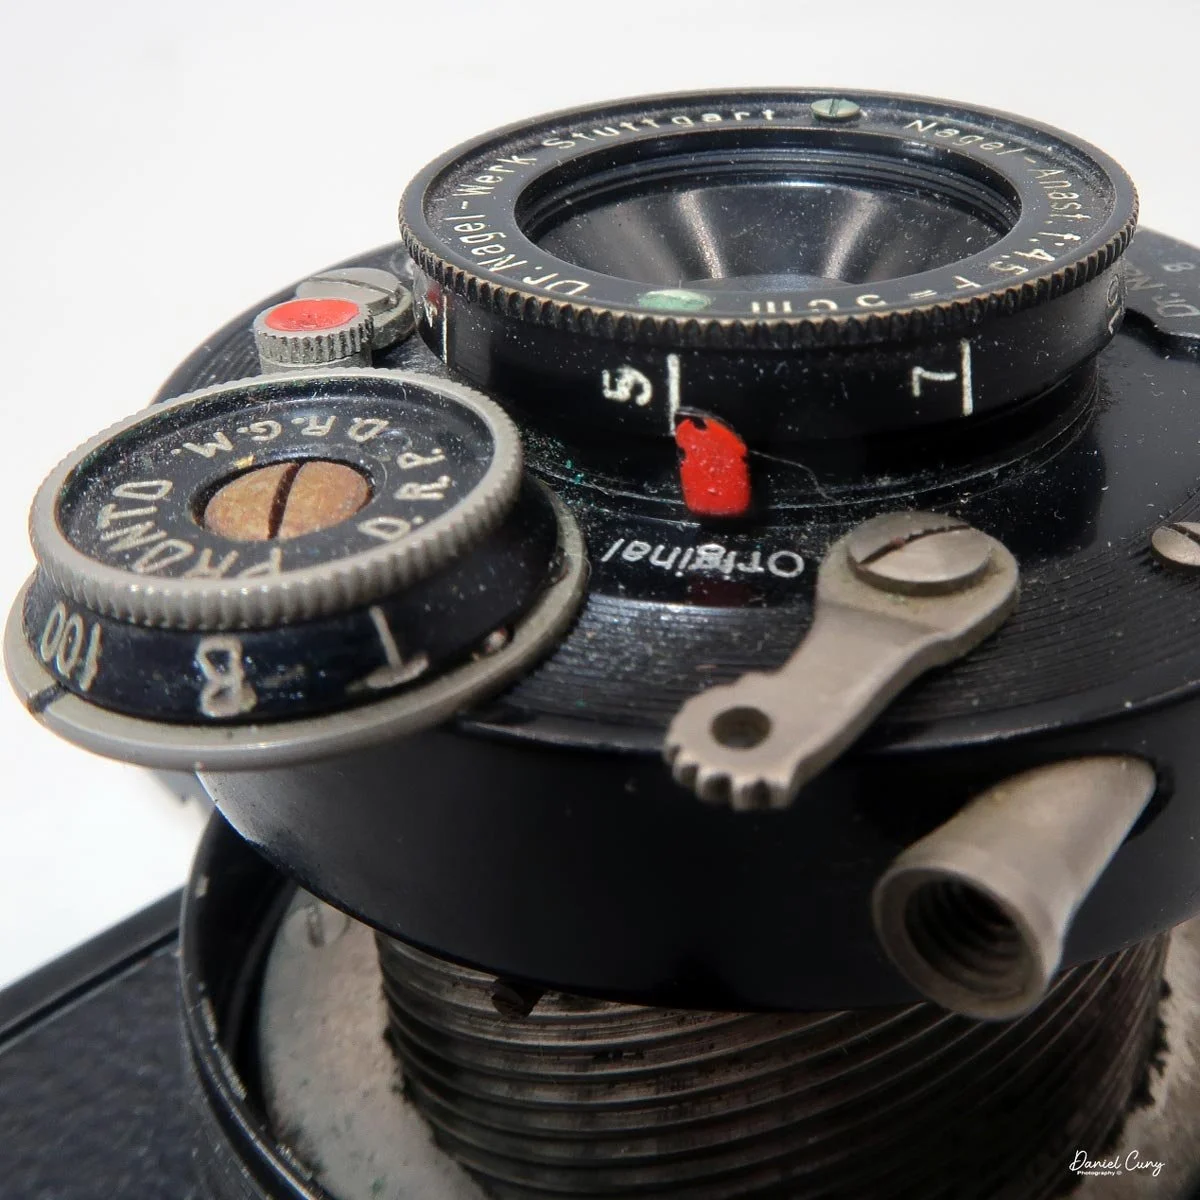
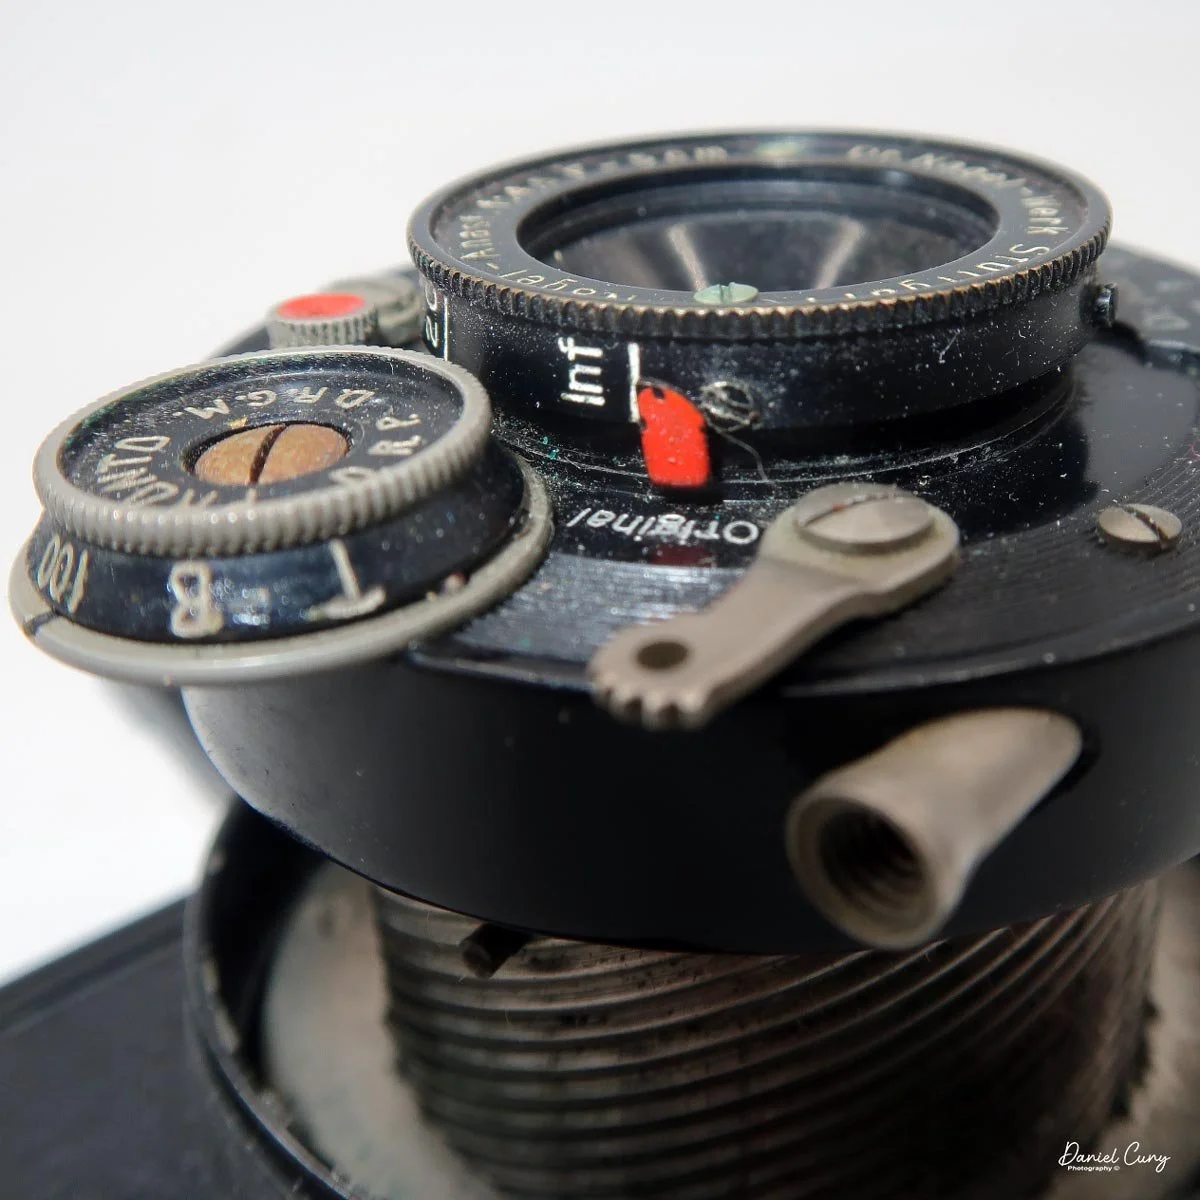
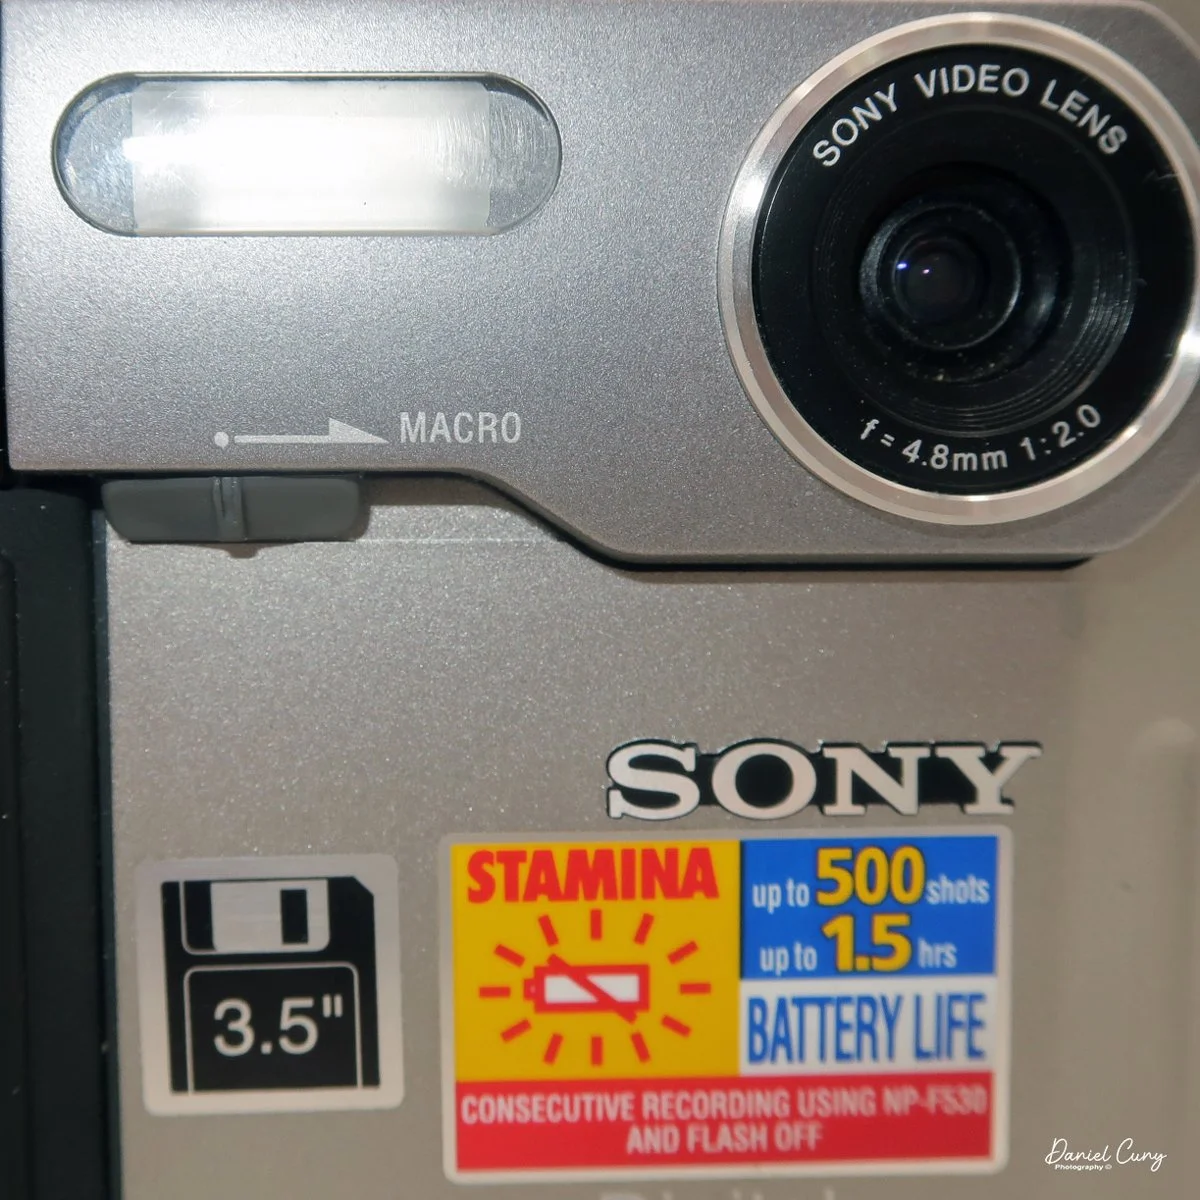
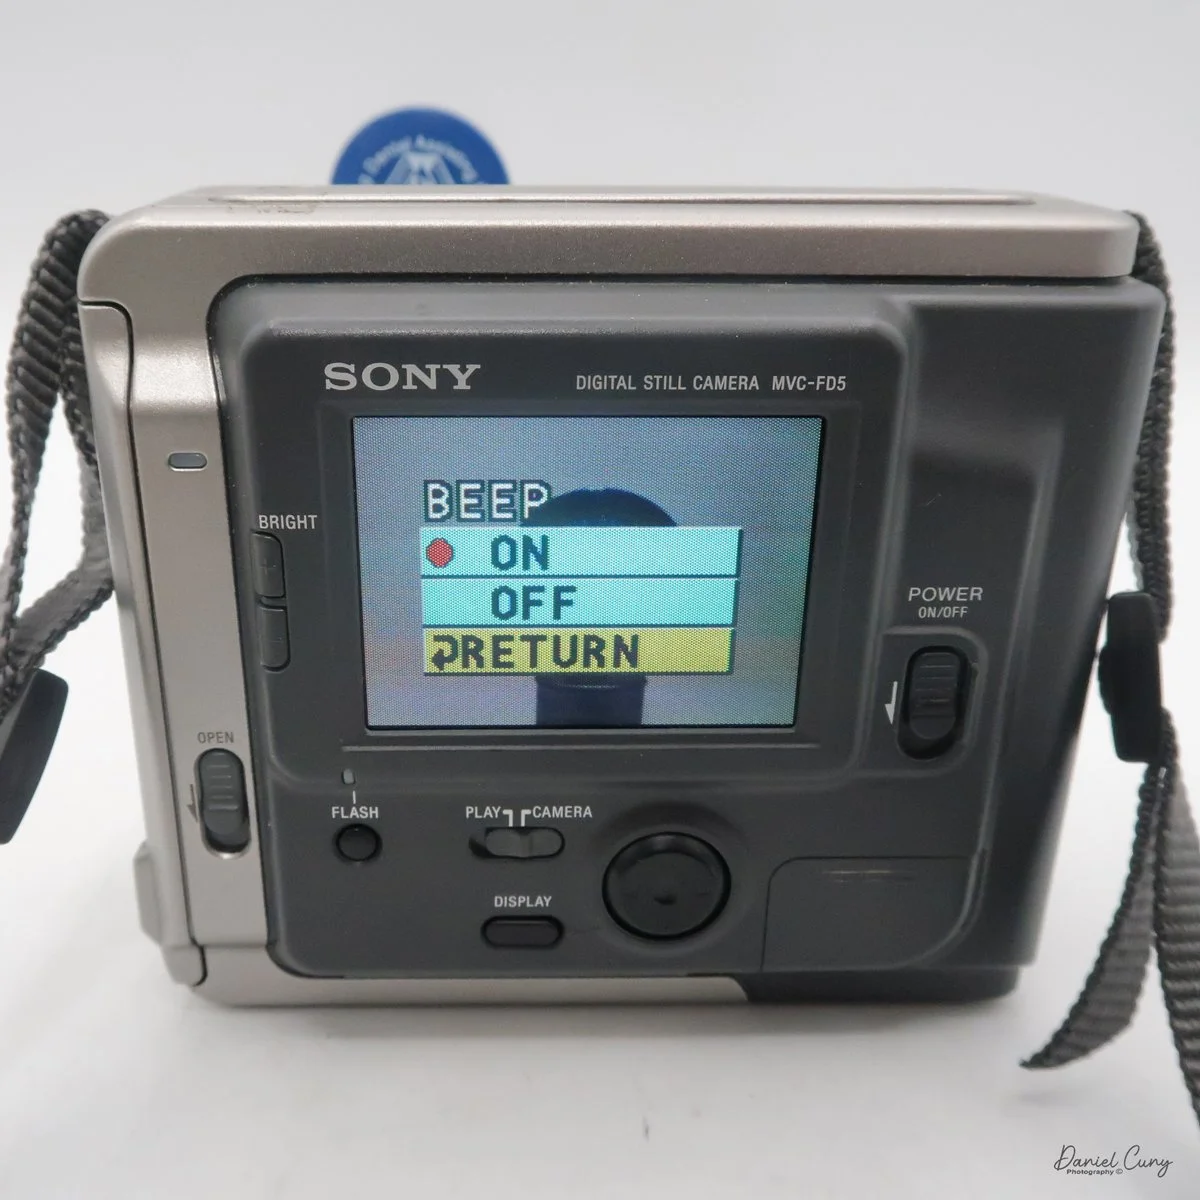
The Marble shutter has three shutter speeds: 1/100, 1/50, and 1/25, along with B and T. The shutter is set via a wheel on the top of the lens, and it's just to the right of the lens as you're holding it to take a photo. As mentioned previously, my camera's shutter doesn't fire consistently. It works best at 1/100 and fires pretty regularly at that speed. At 1/50 and 1/25, it takes two or three tries for the shutter to fire, so I'll need to keep that in mind when I take the camera out for a shoot.
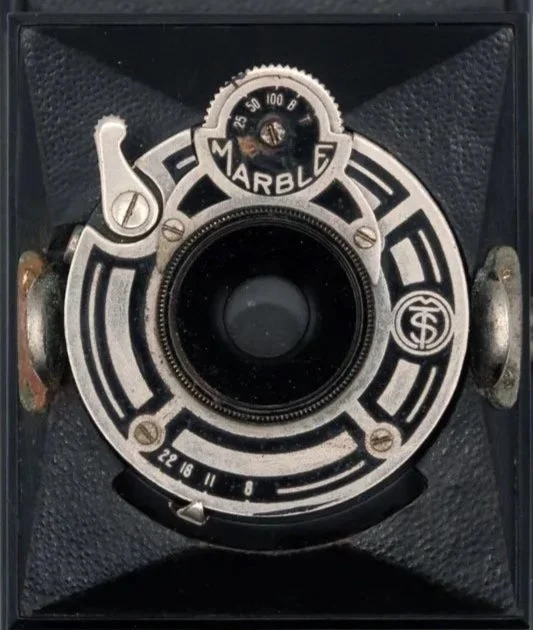
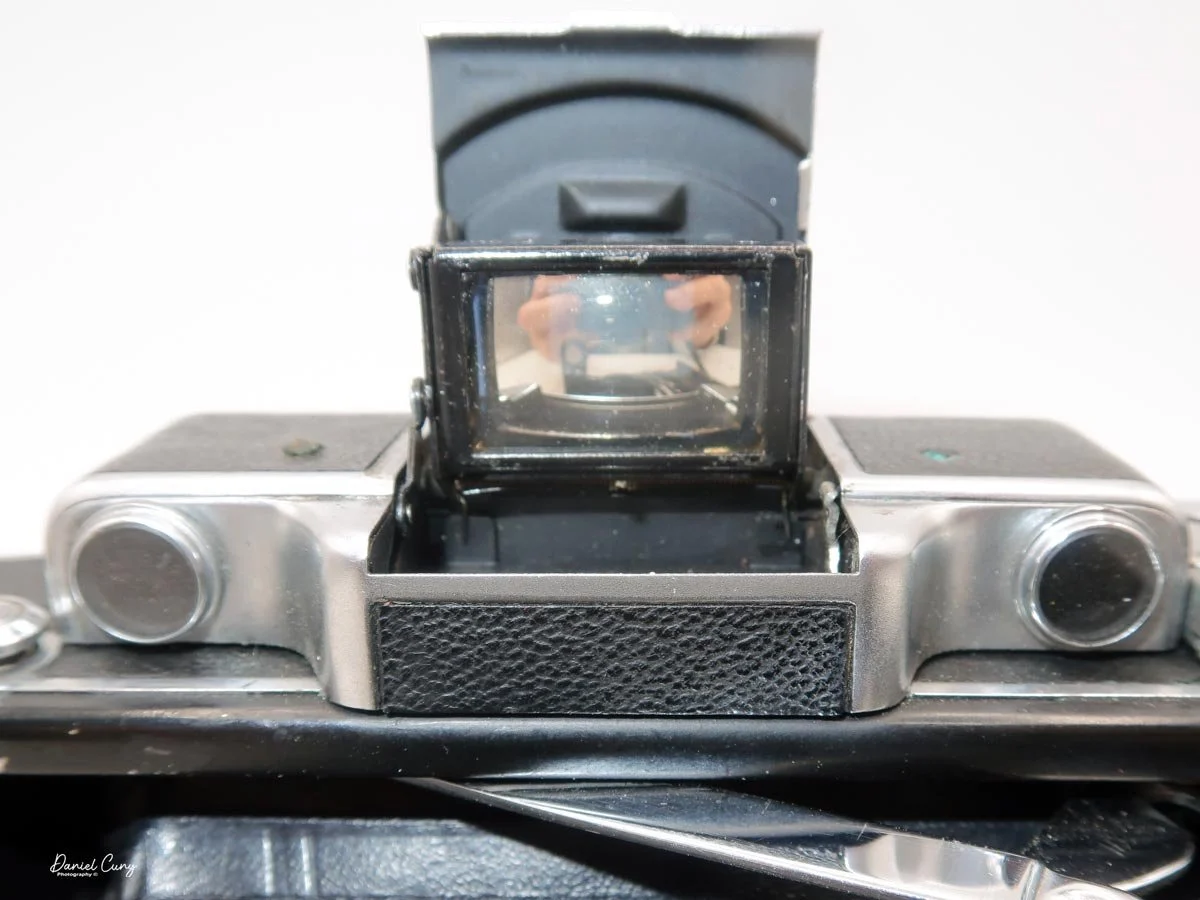
Shutter release, shutter speeds, and aperture settings on the Minolta Vest camera
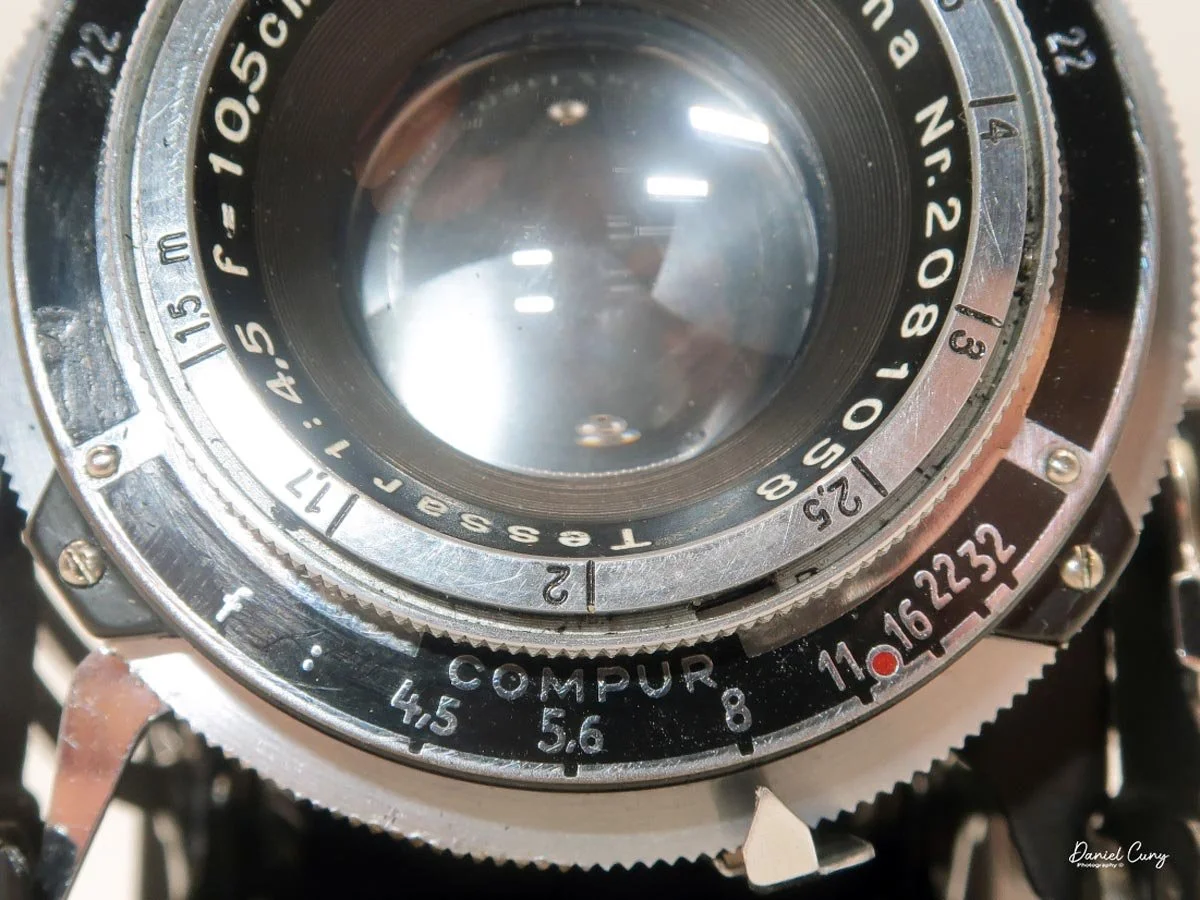
The nondescript lens, which I'm guessing is approximately 75mm, has a maximum aperture of f/8 and extends to f/22. The aperture is set via a sliding lever under the lens.
I believe my camera is one of the earlier examples because the shutter looks different from those on others I've seen. There is no "Patents Nippon" on the face, and the design has an earlier Art Deco appearance.
Like many earlier models, the lens is fixed focus, whereas I have seen other models with a focusable lens and a maximum aperture of f/4.5.
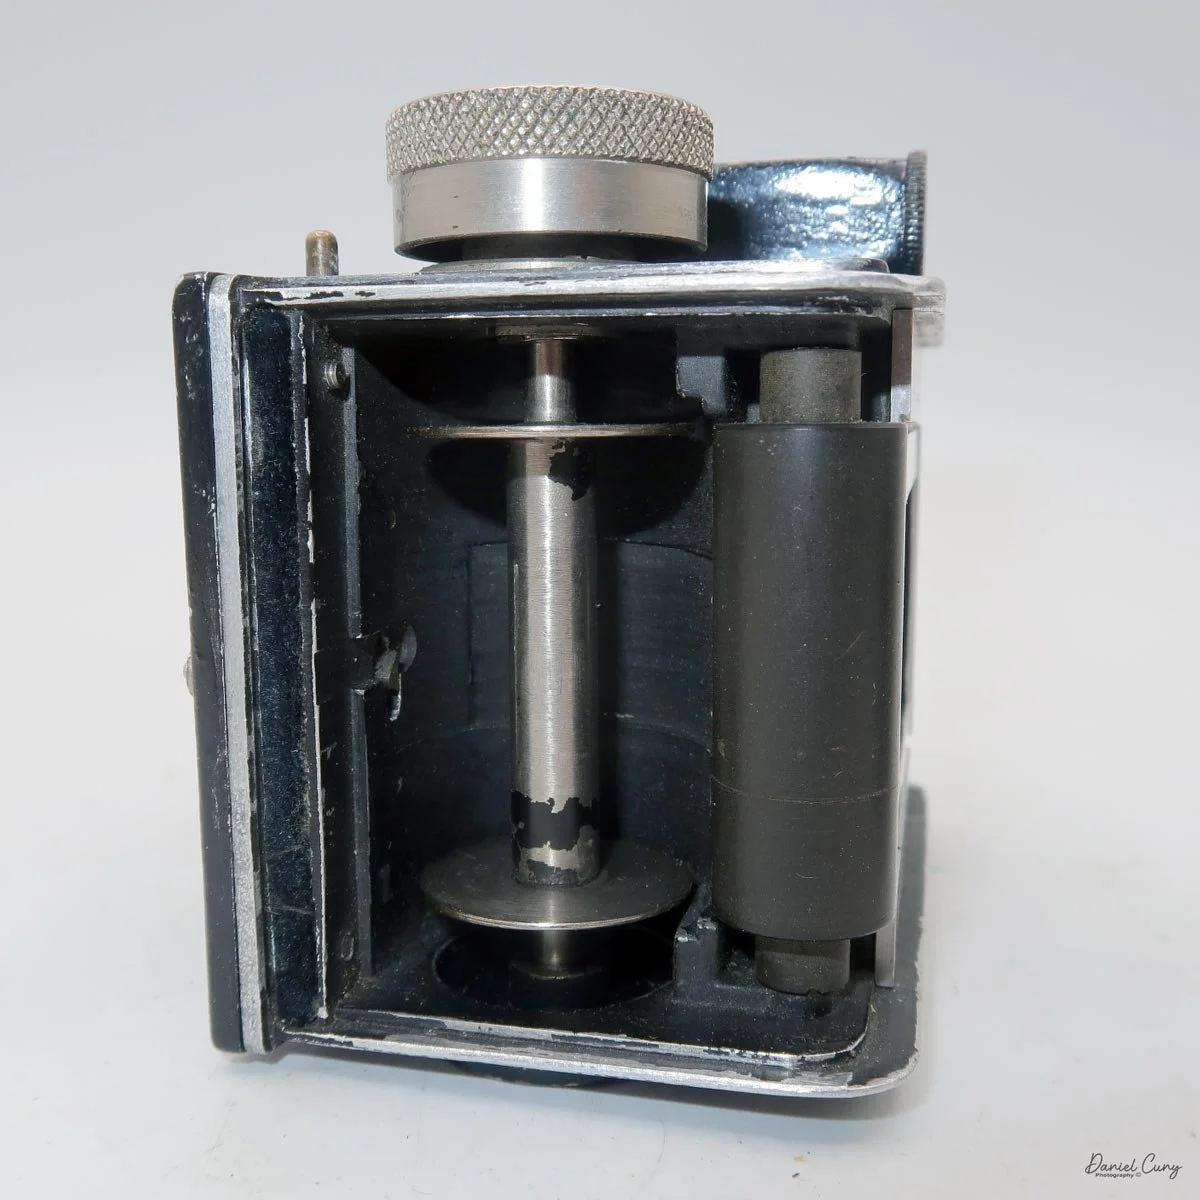
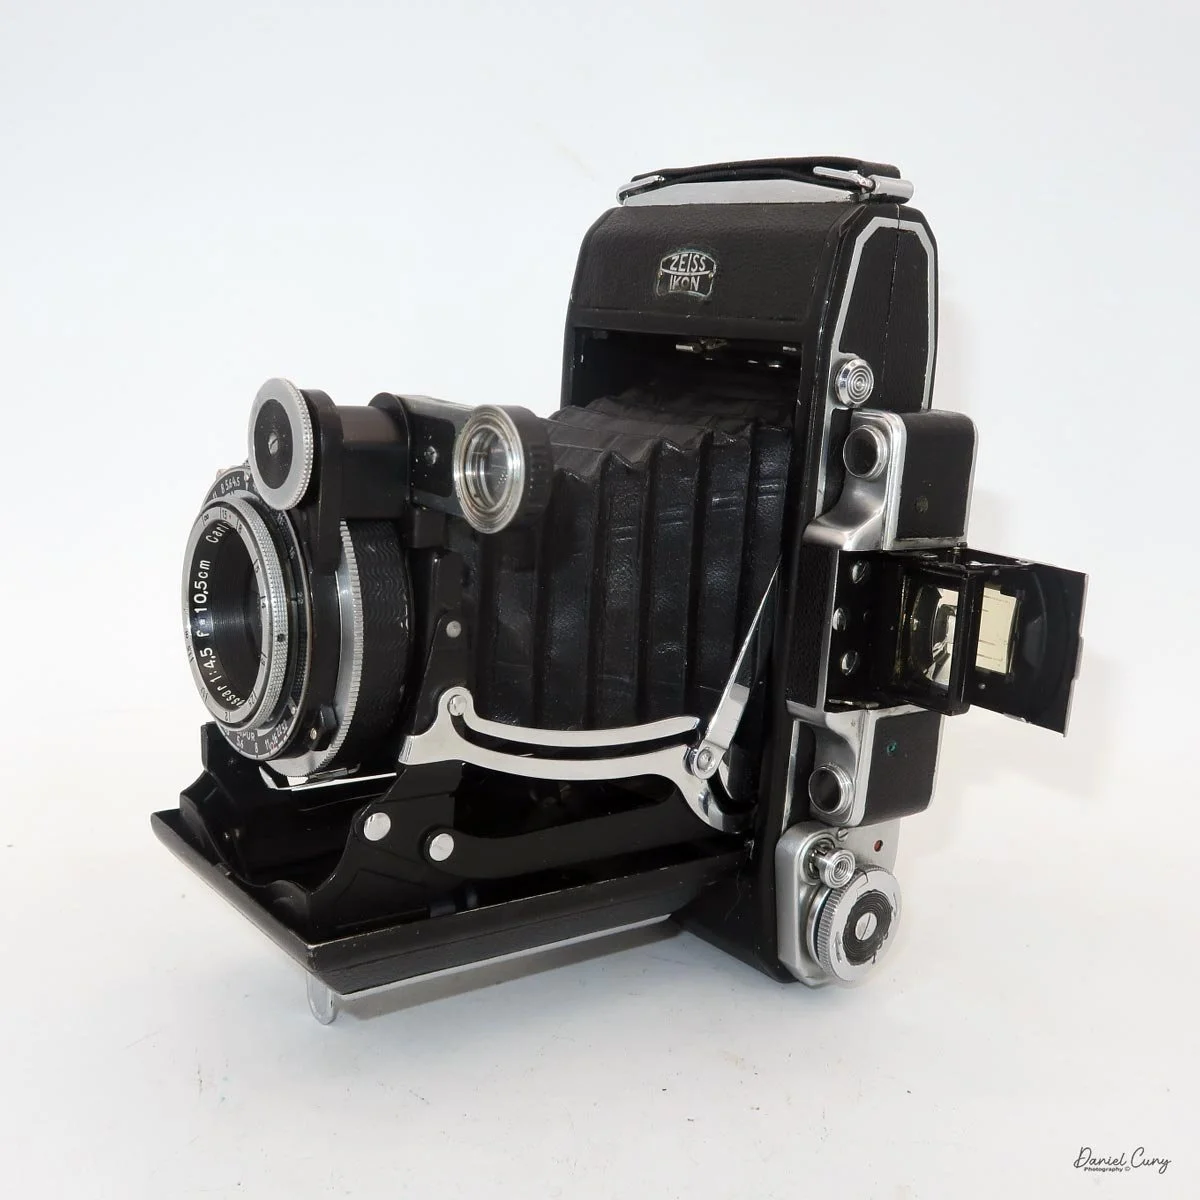
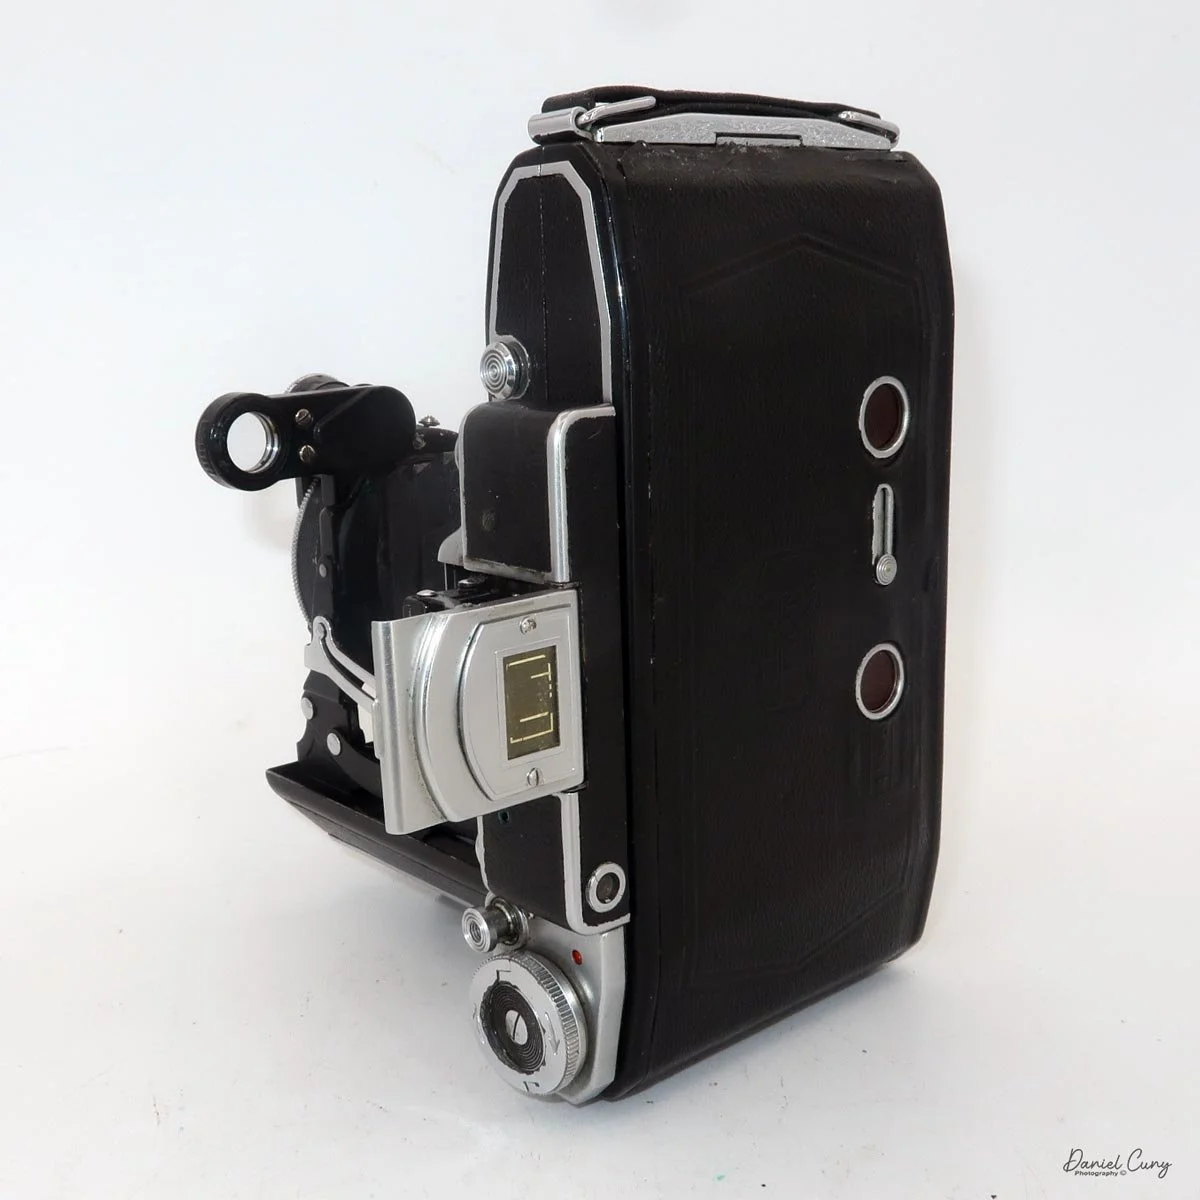
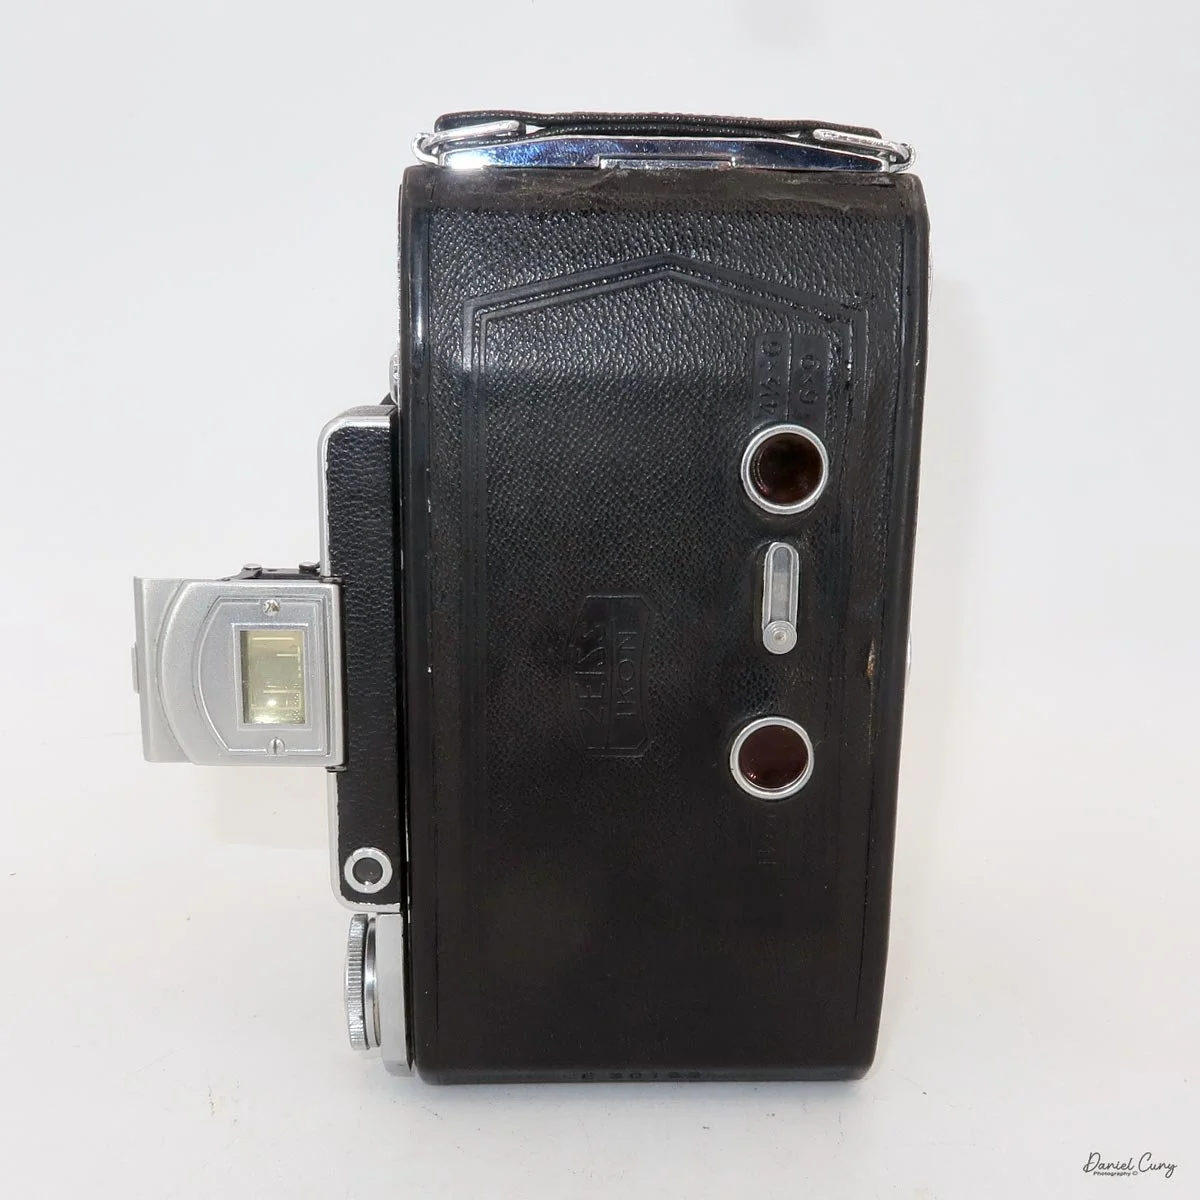
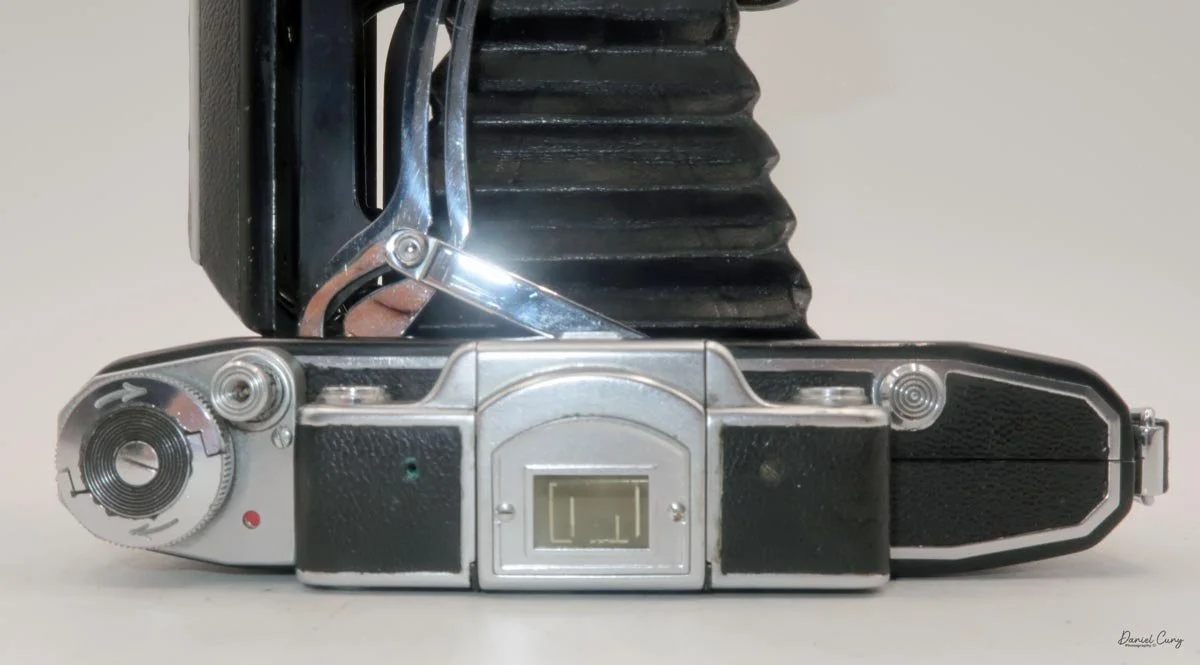
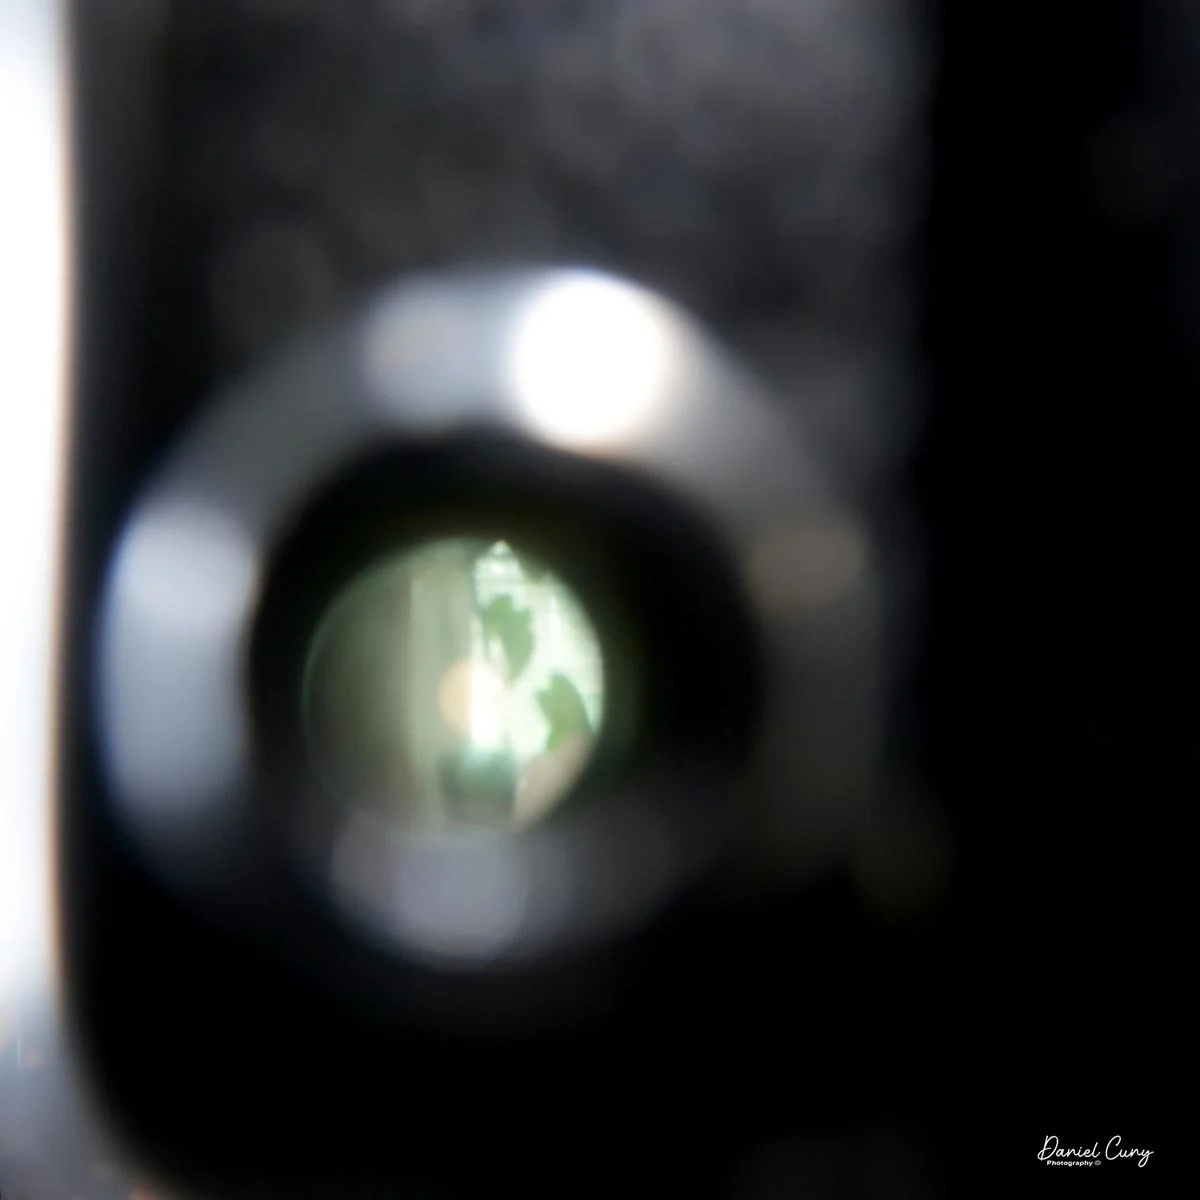
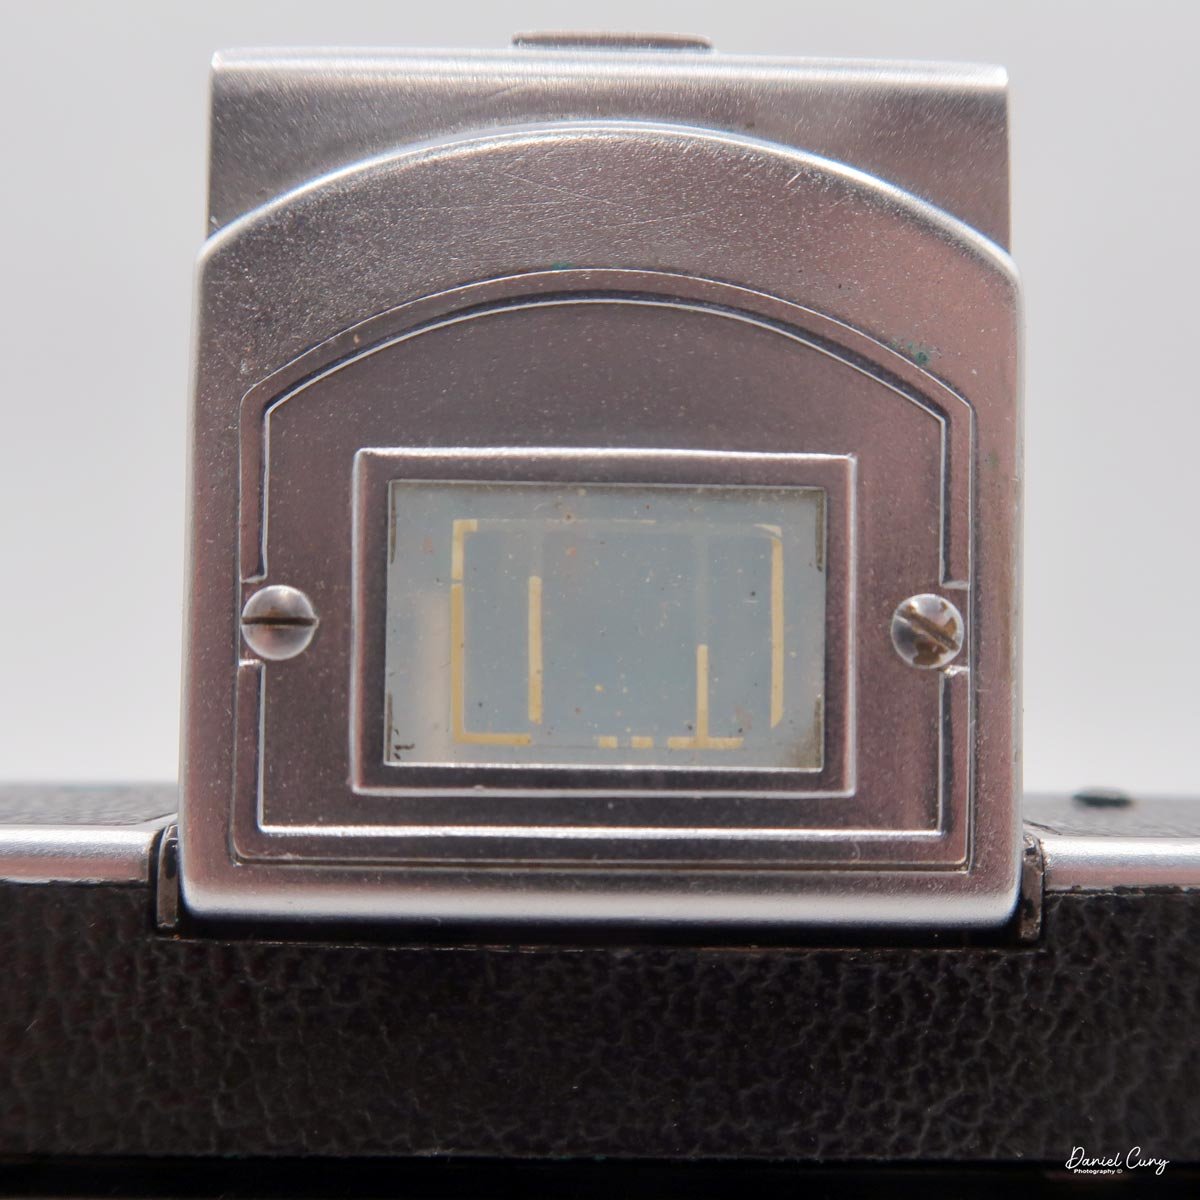
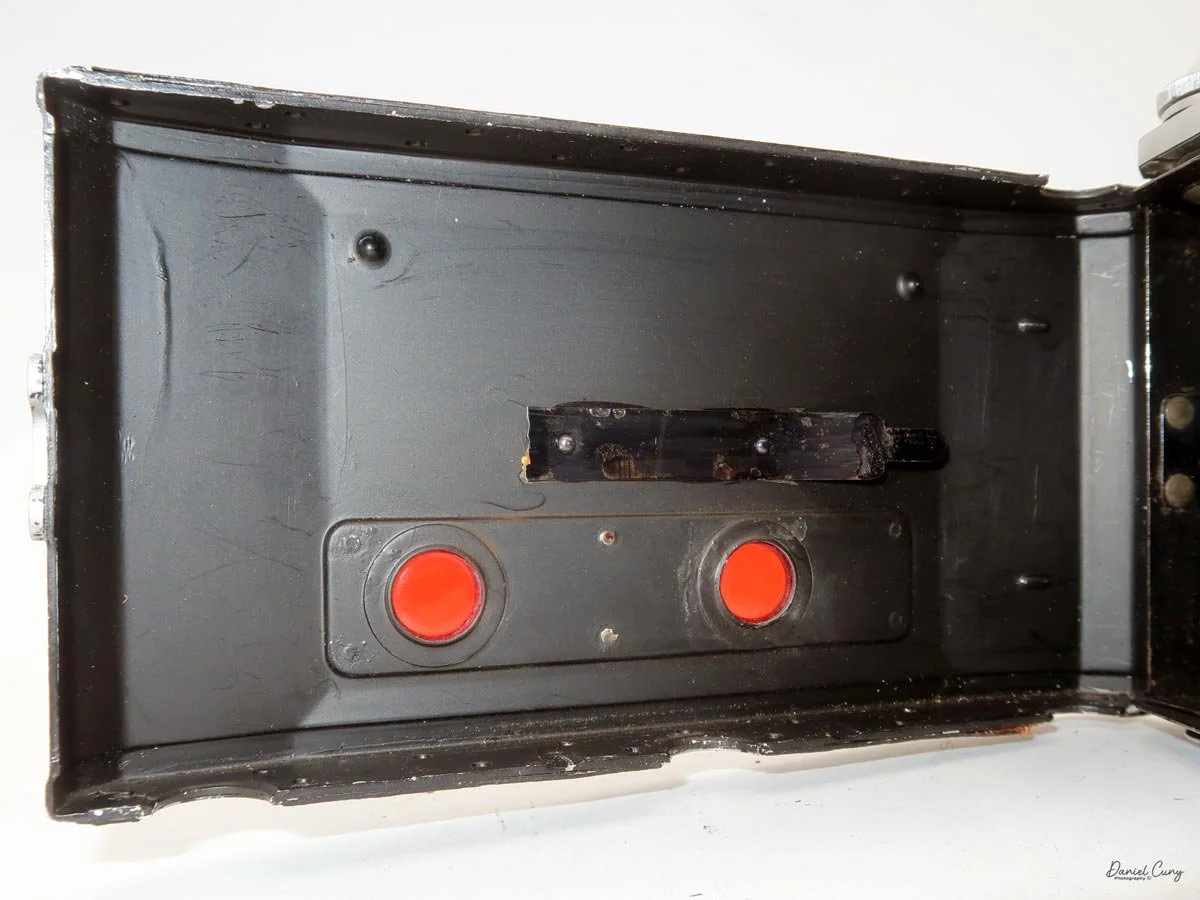
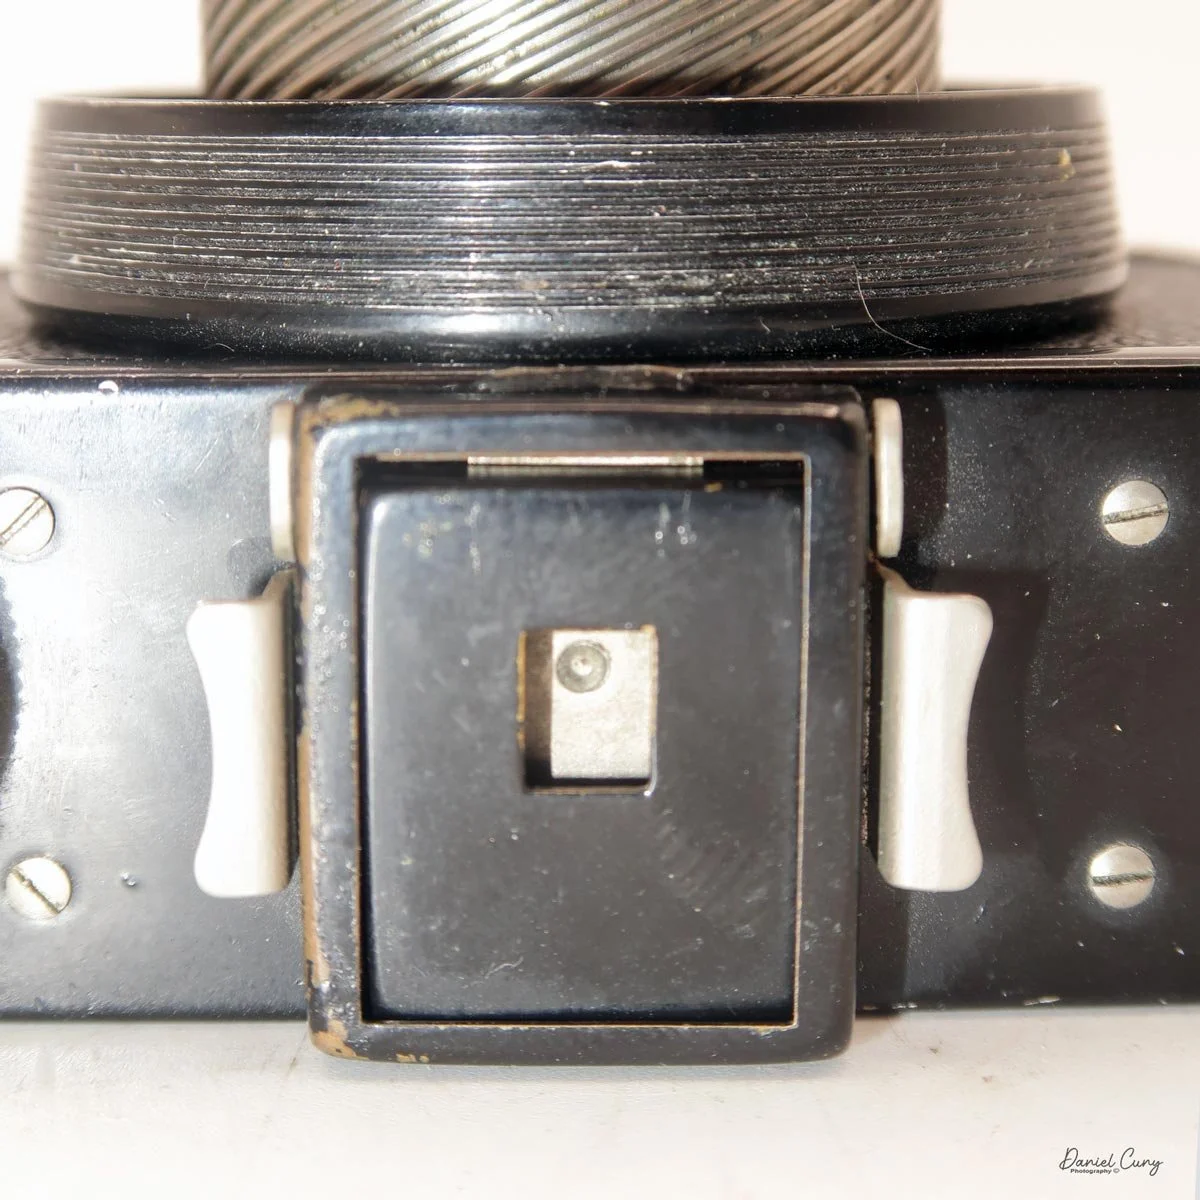
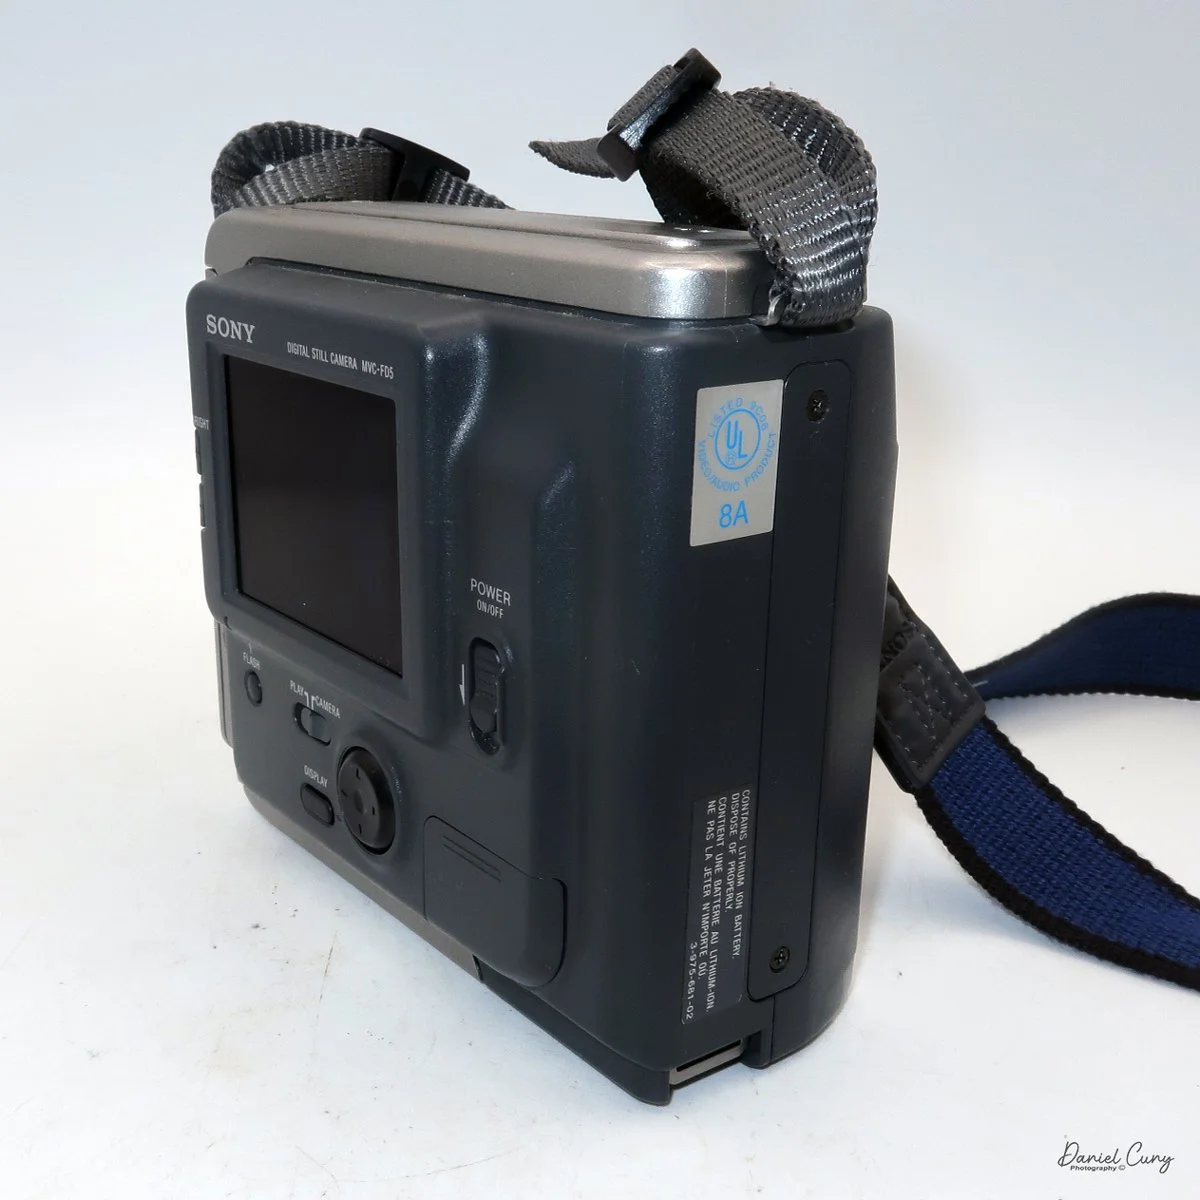
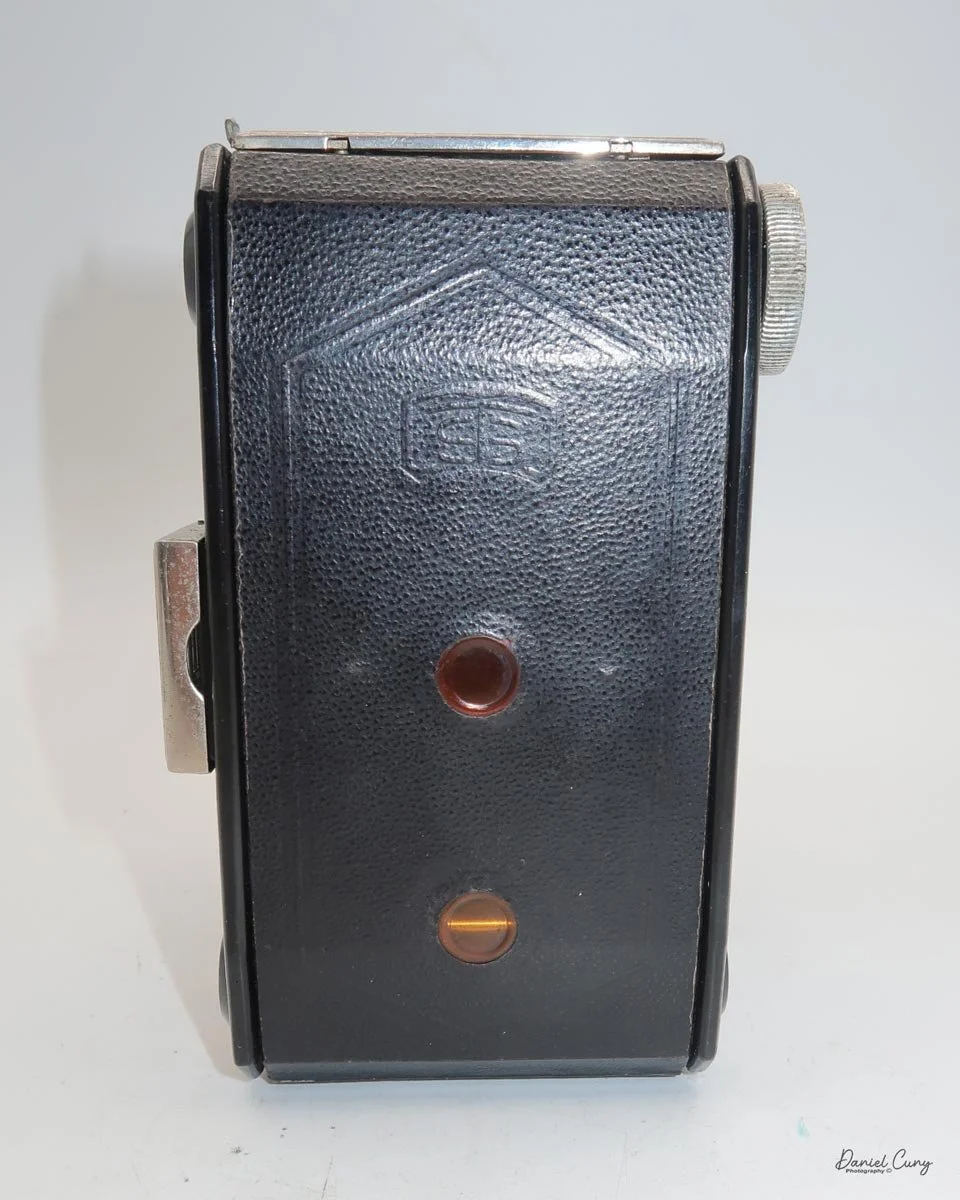
Looking at the back of the camera, there are two red windows, which indicate to me that the film format is 3 x 4 cm. Opening the back of the camera, which is done by pulling up a small knob at the end, opens the rear door. When doing so, it shows that the camera's format is 6 x 4.5 cm, so there must have been an insert in the camera to change the format. My camera doesn't have the insert, so mine will always be 6 x 4.5 cm.

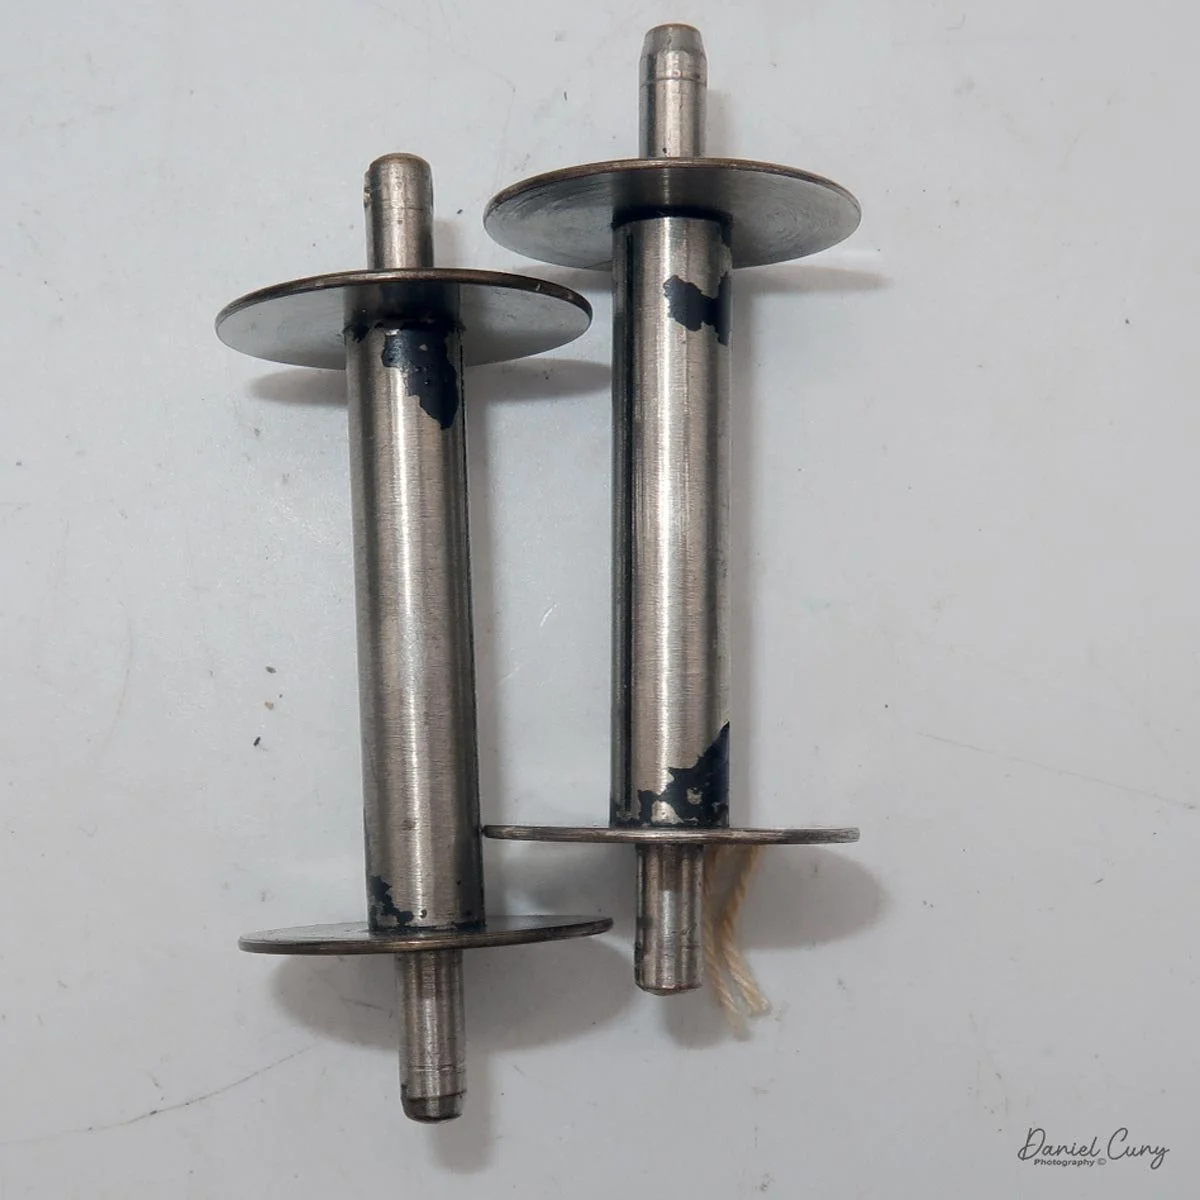
Once the back is open, you load the camera just like you would any roll-film camera by putting the empty spool on the take-up side, which has the film advance knob. Put the fresh, unexposed film on the other side, slip the film leader into the slot on the take-up reel, and wind the knob, making sure the film is transporting until you see the arrows pointing outward. Close the film back, and wind until you see the number one in the center red window.
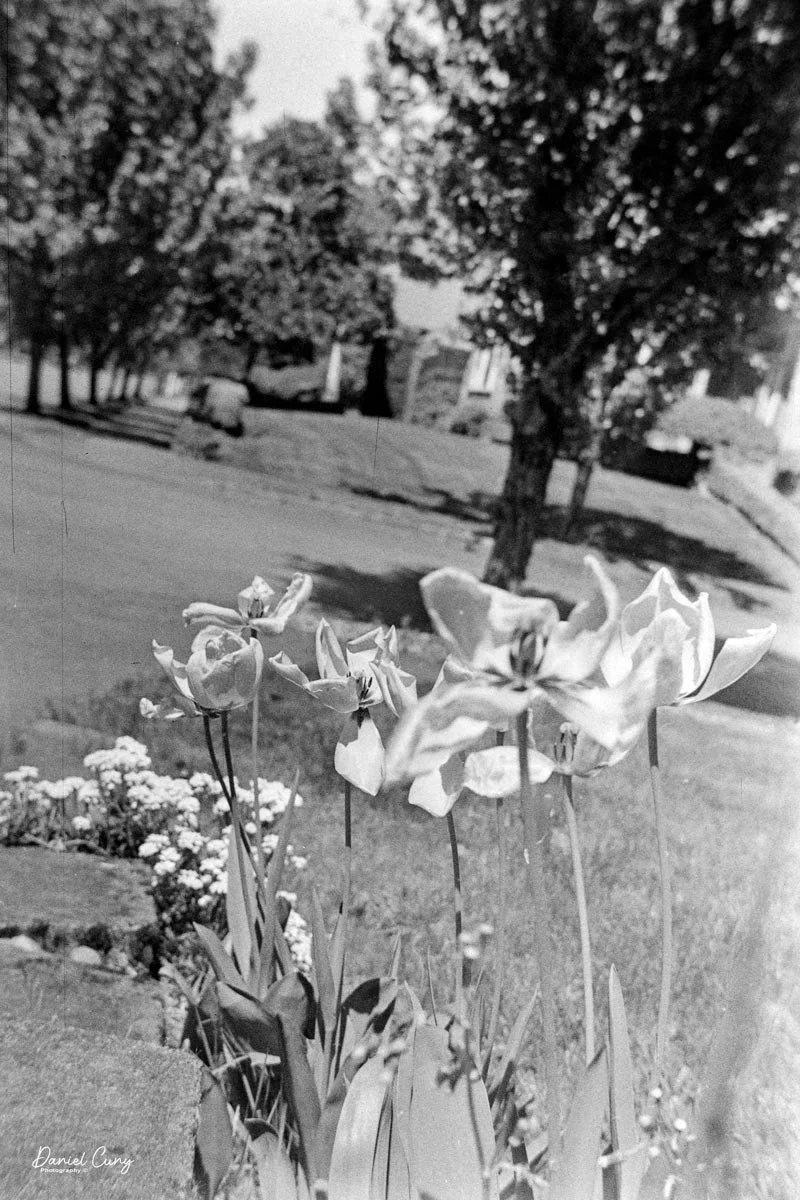
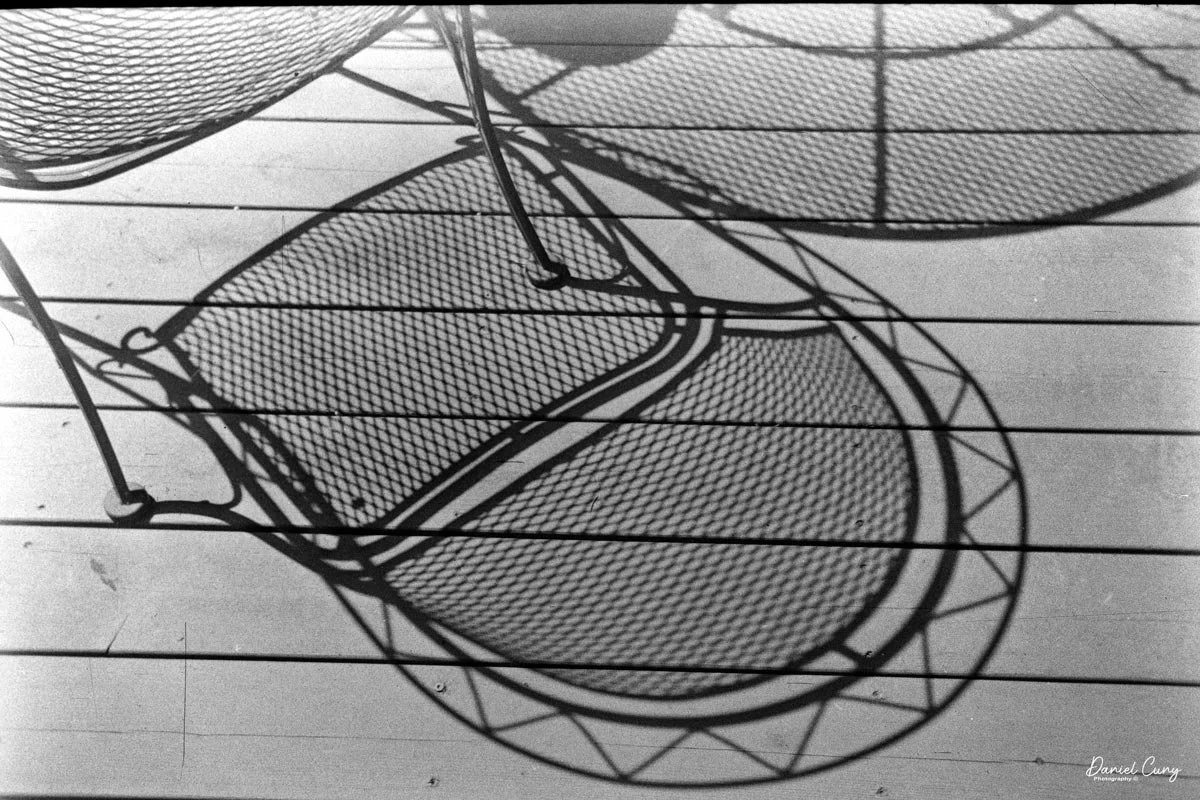
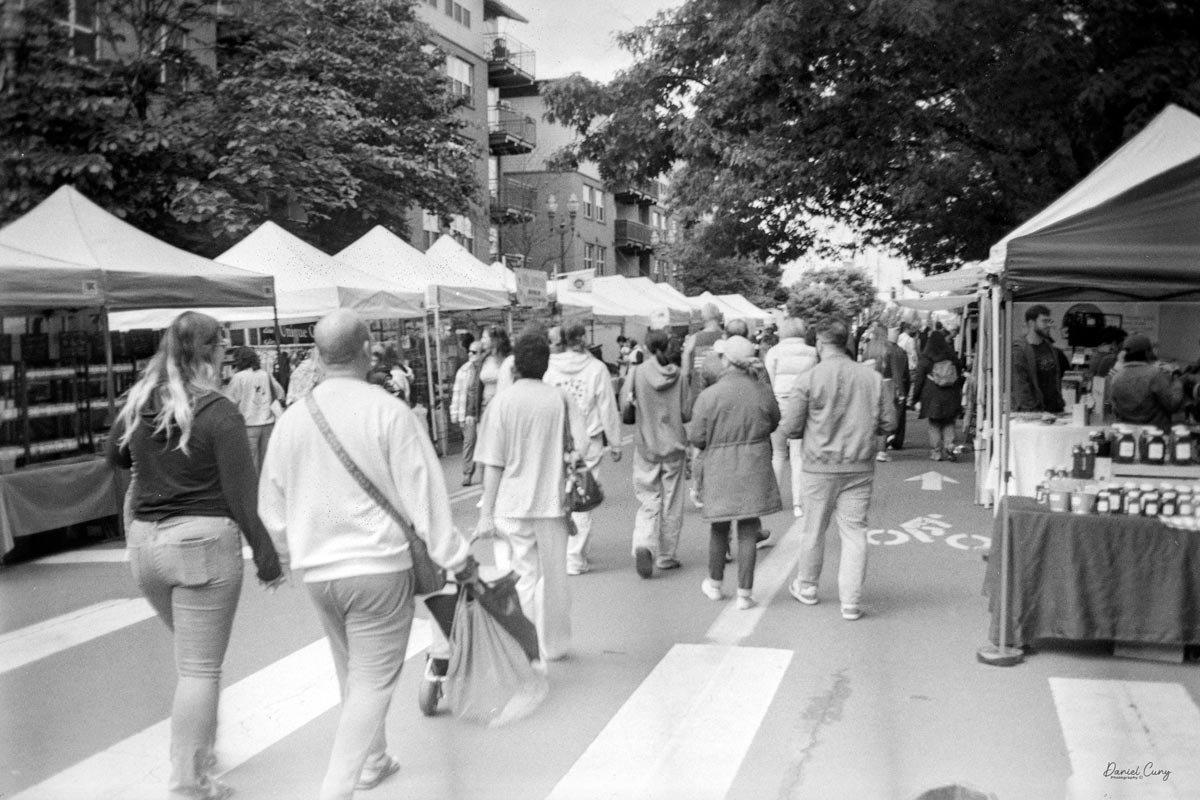
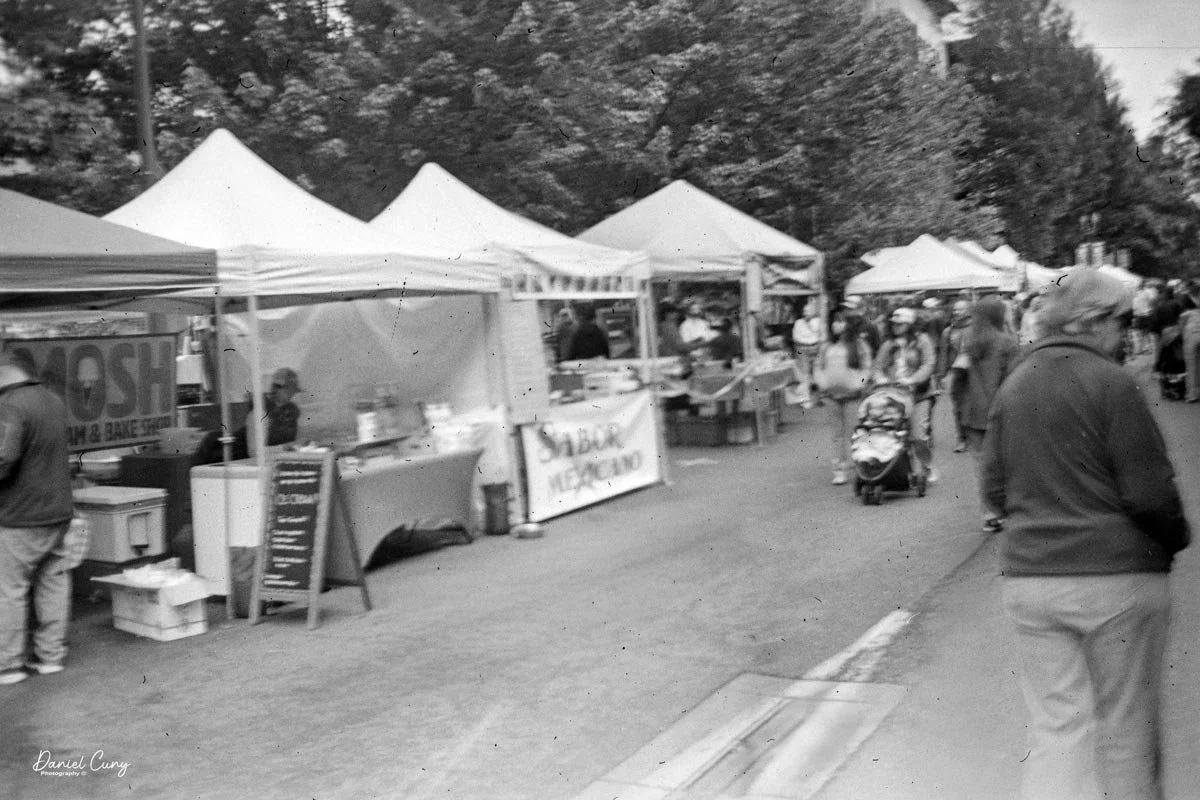
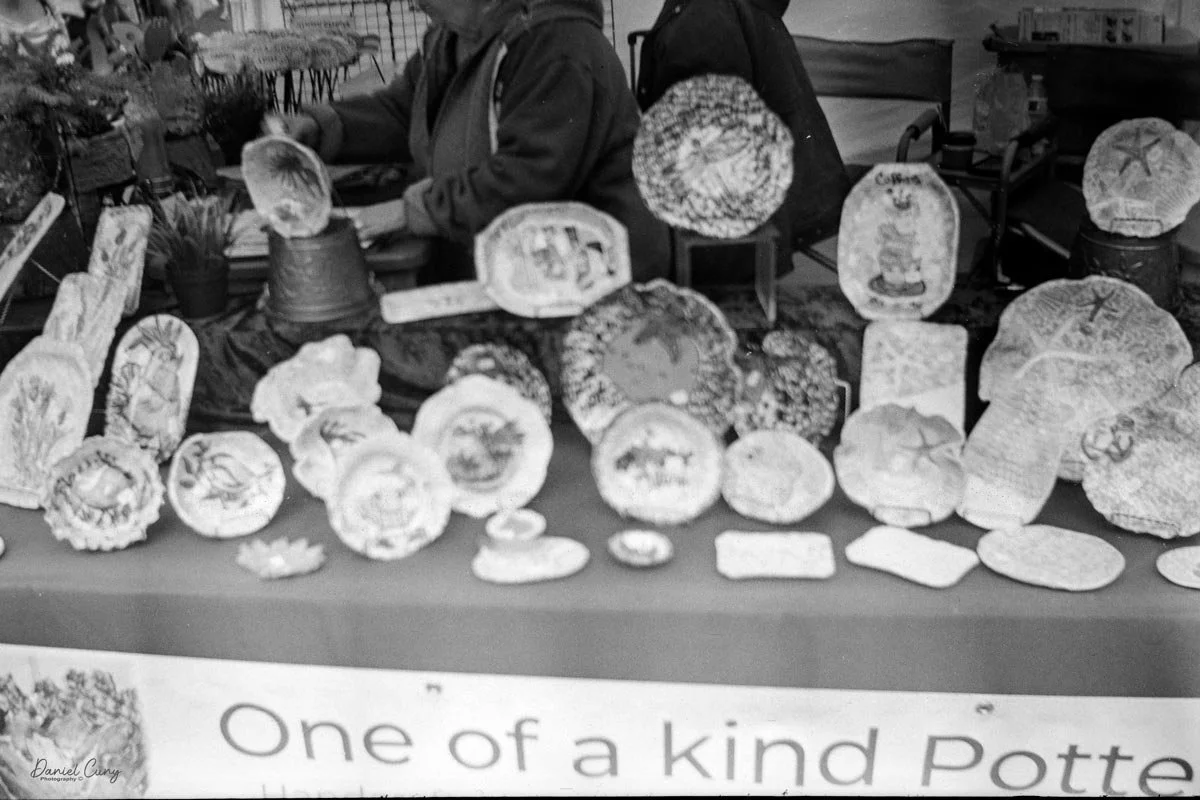
Now that the film is loaded in the camera and my wife and I are headed to the local farmer's market, it's time for me to take some photos and see how this camera performs.
Click on the image to view video
My Results
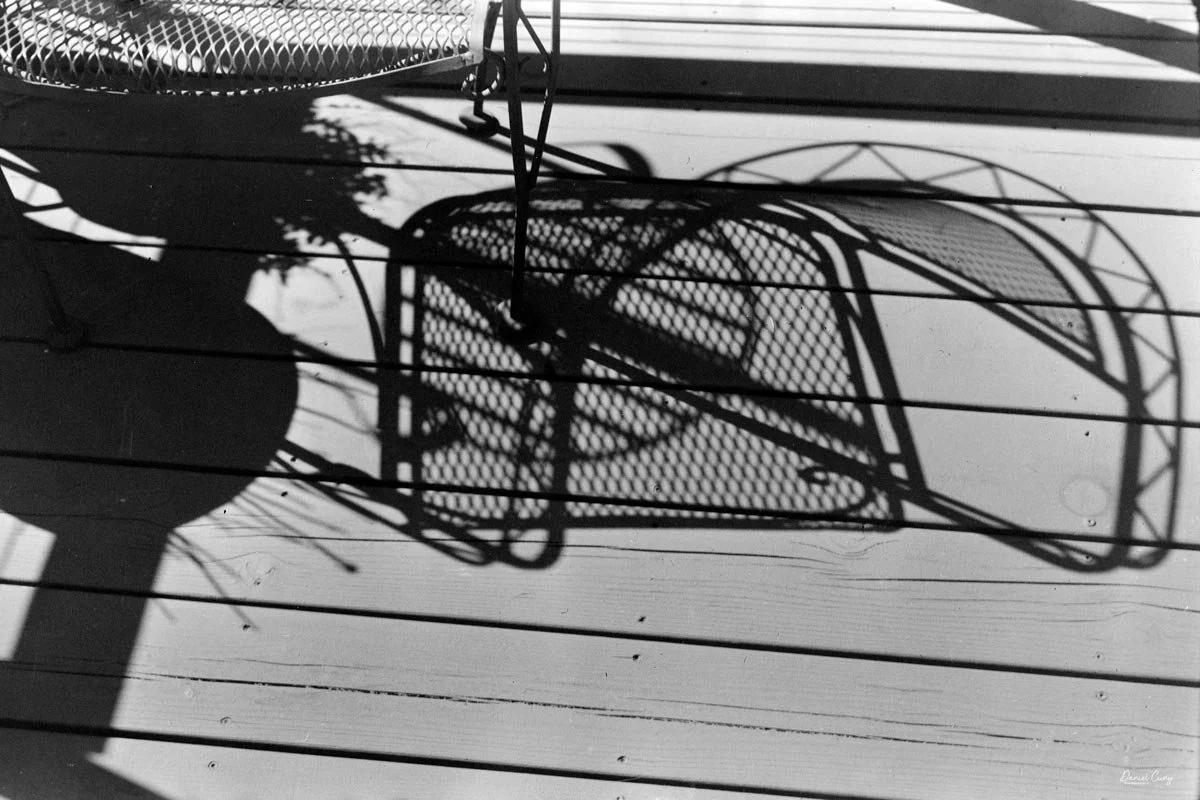
Using a light meter and 100 ISO film in the camera, the recommended setting was 1/100 at f/7.1. I needed to fudge it a bit and shoot at 1/100 at f/8, and hope for the best.
As previously mentioned, there is no focus on this camera, and I tried to be about 10 feet from the subjects when taking images.
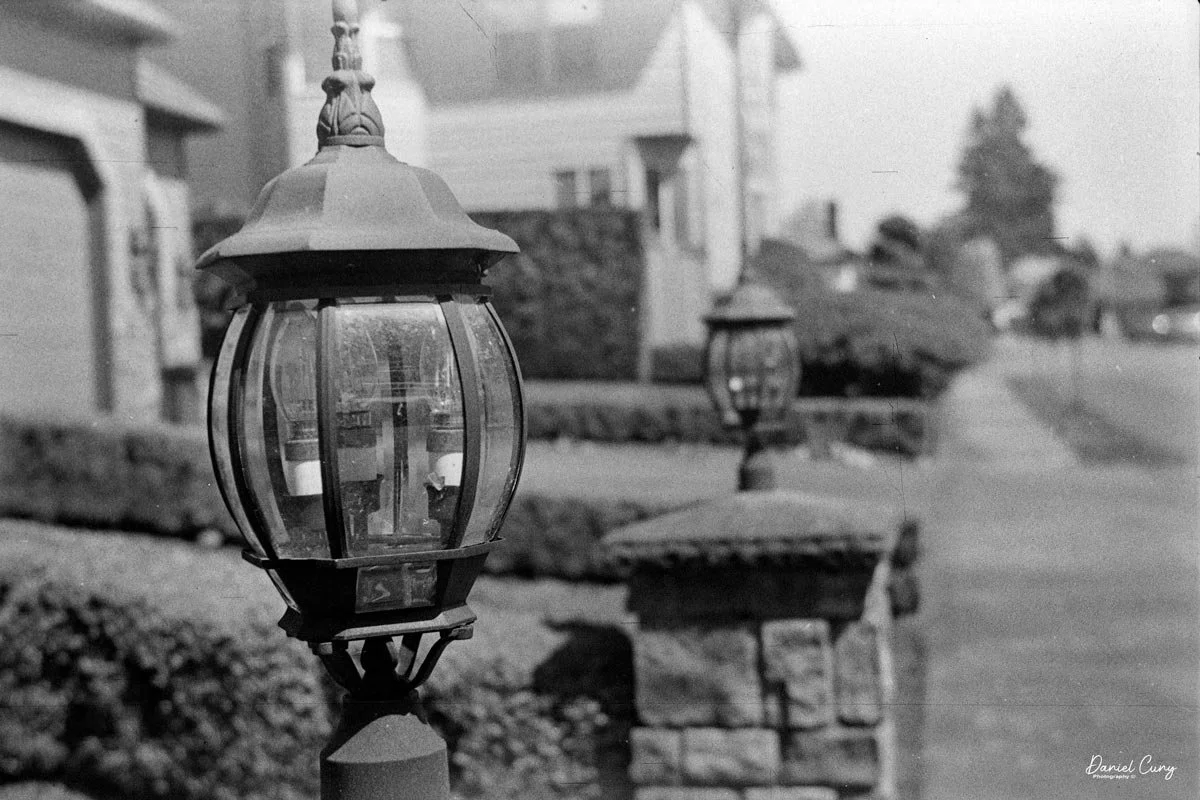
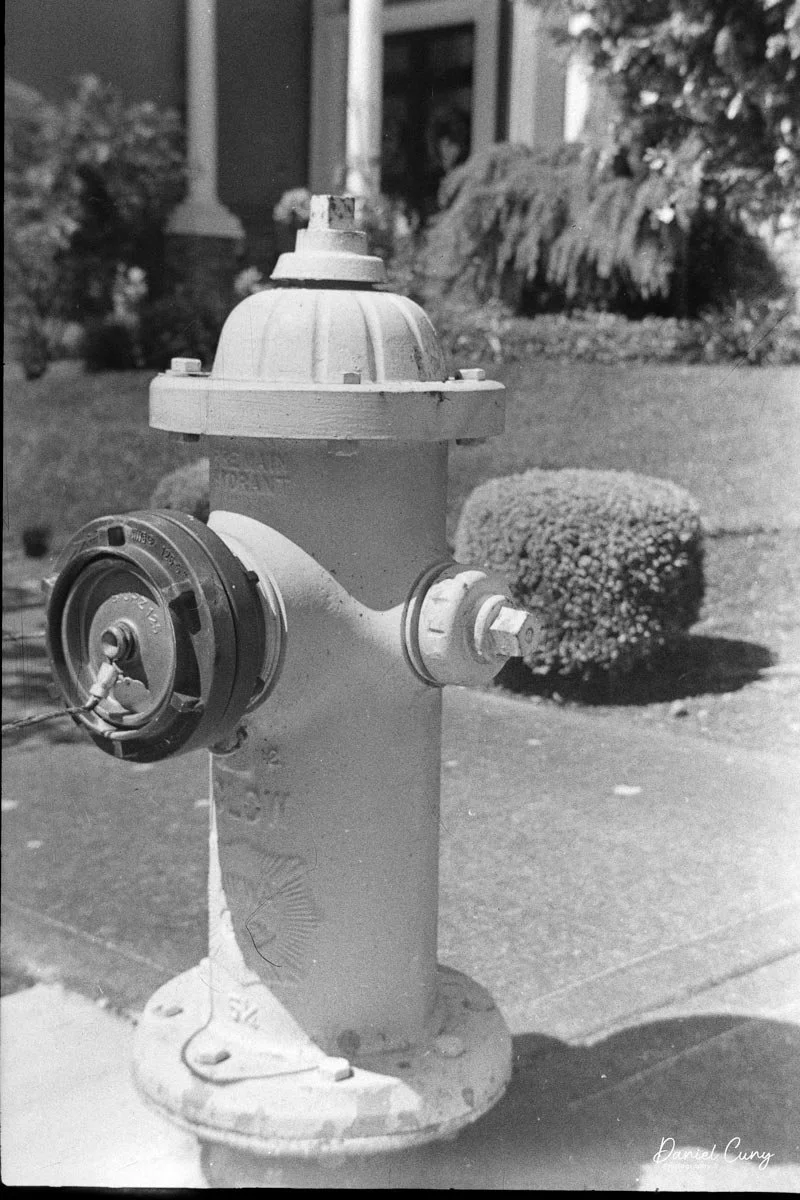
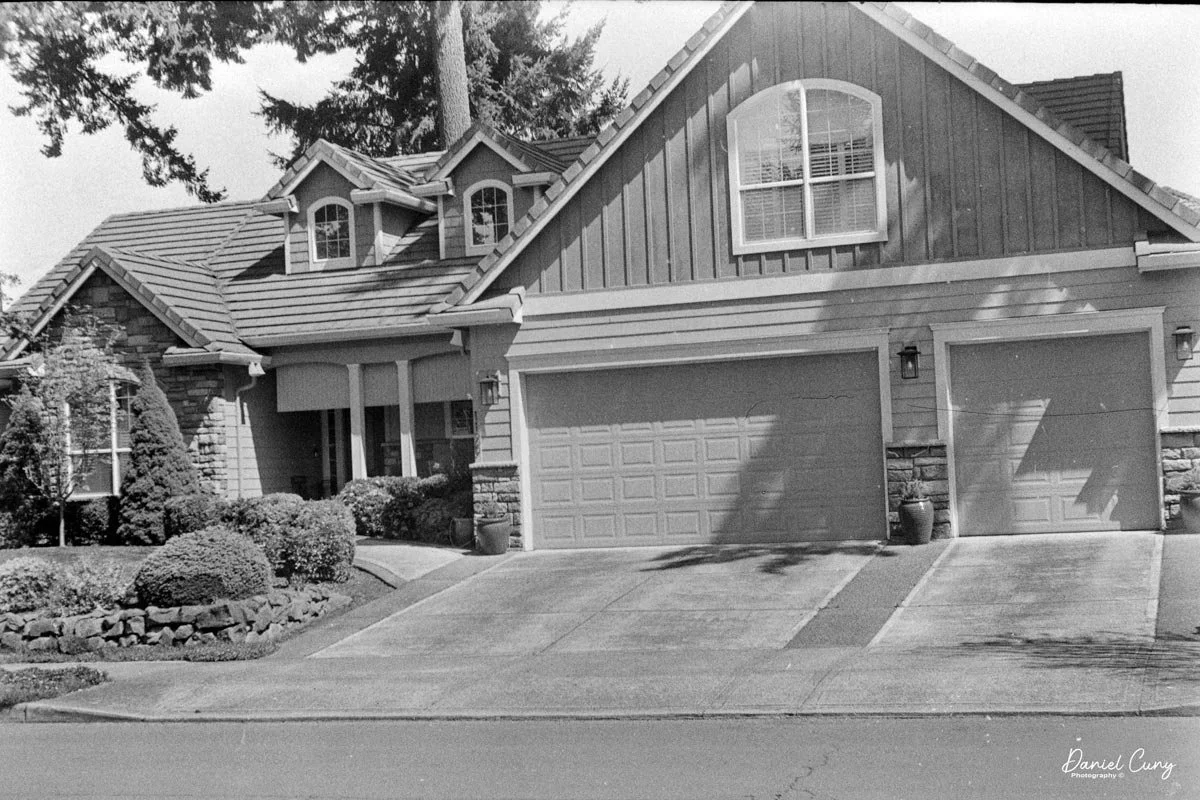
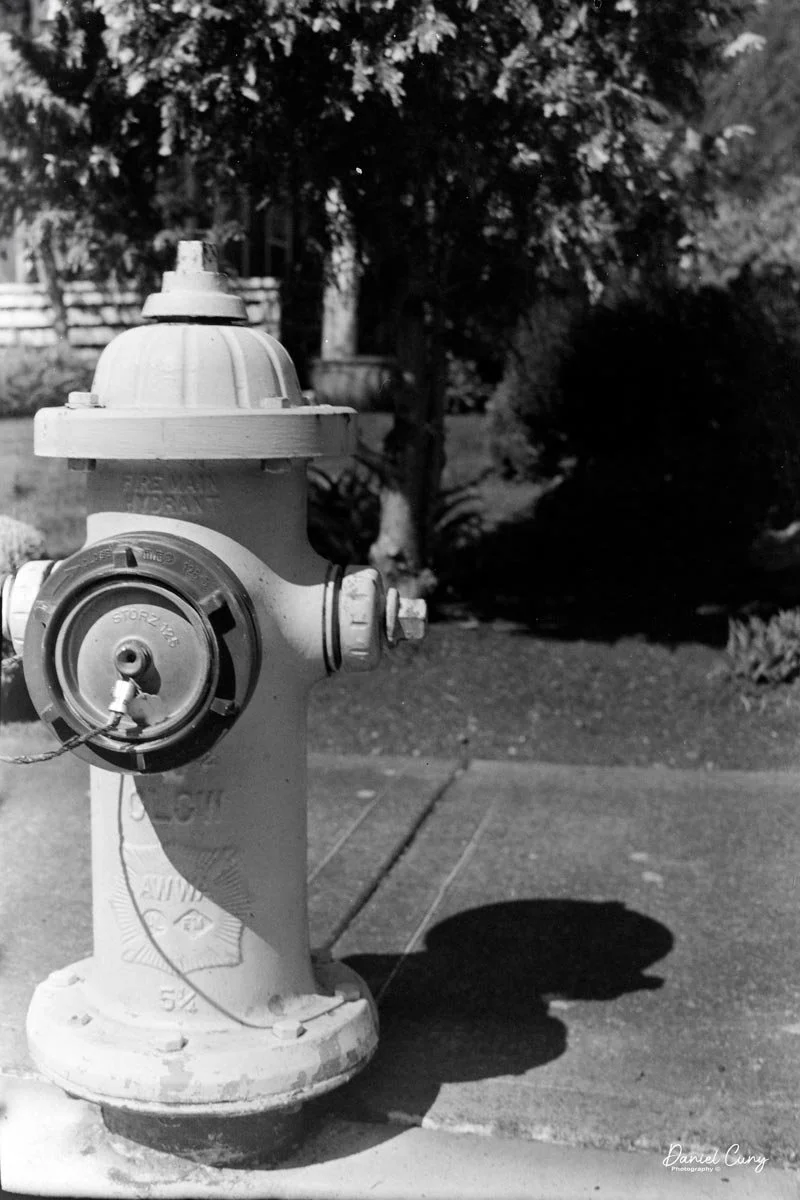
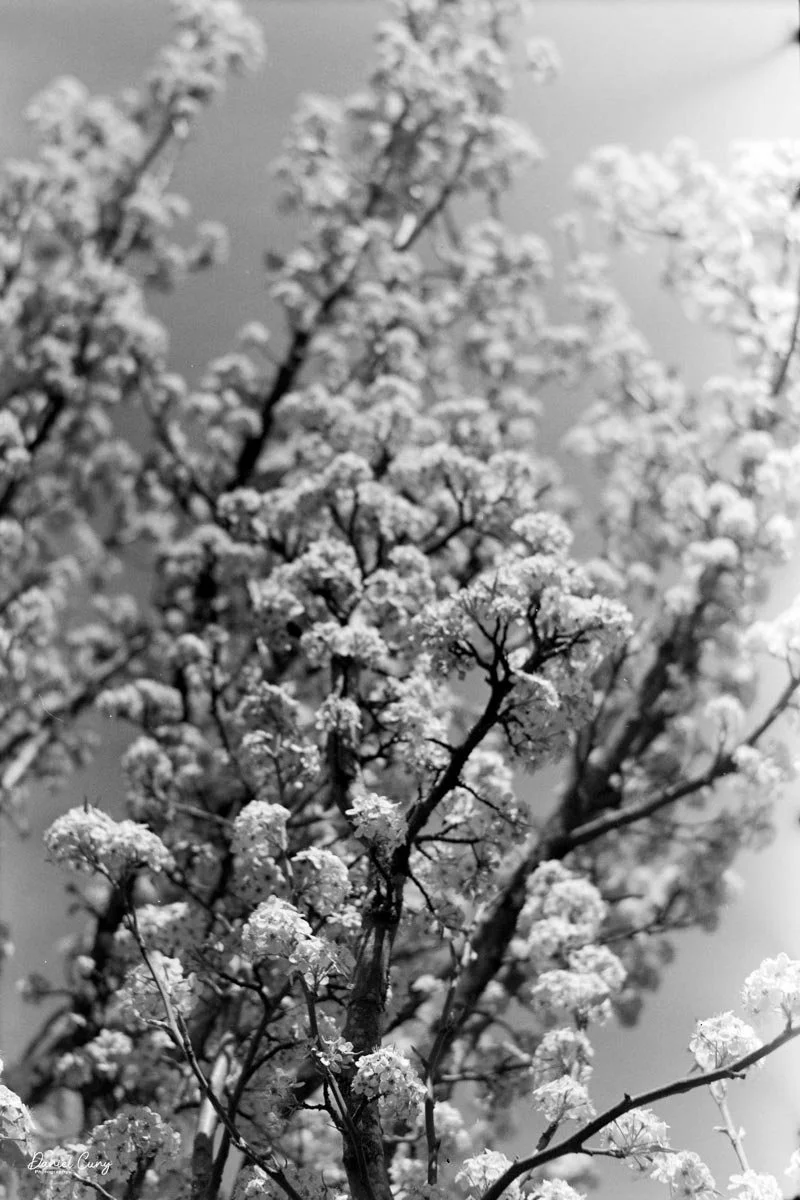
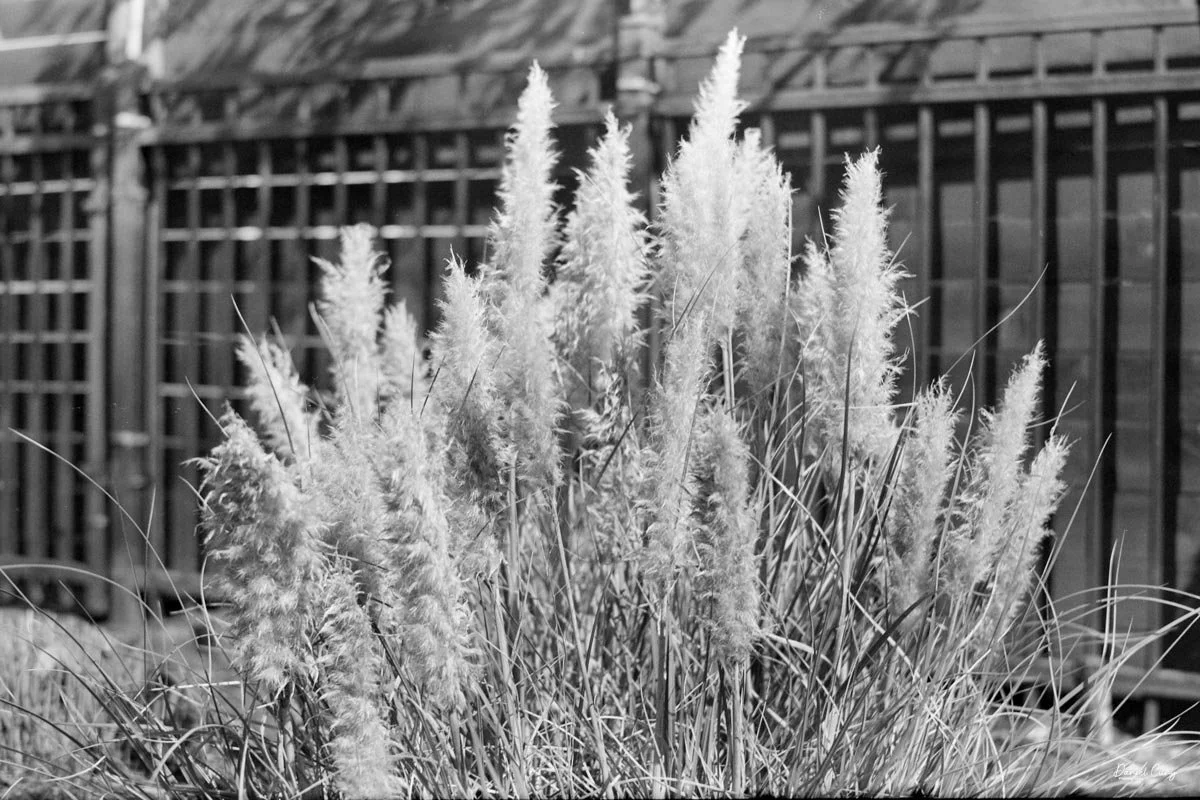
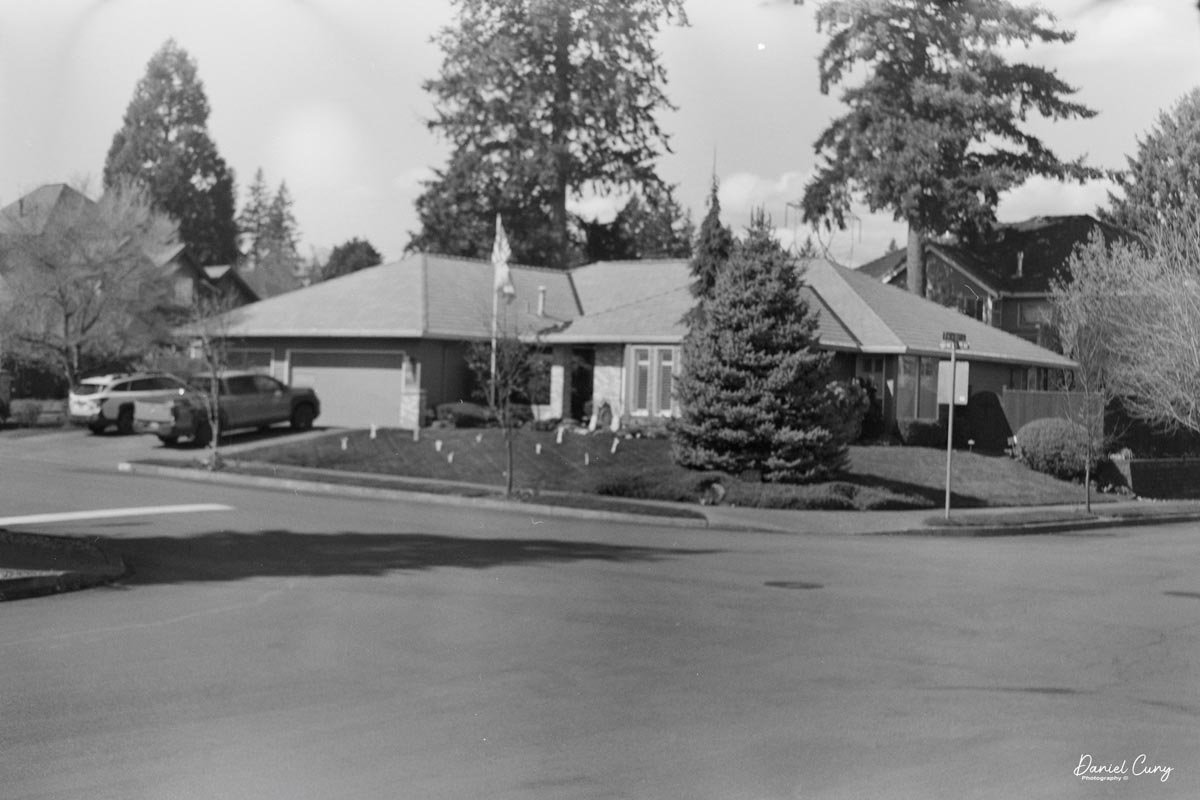
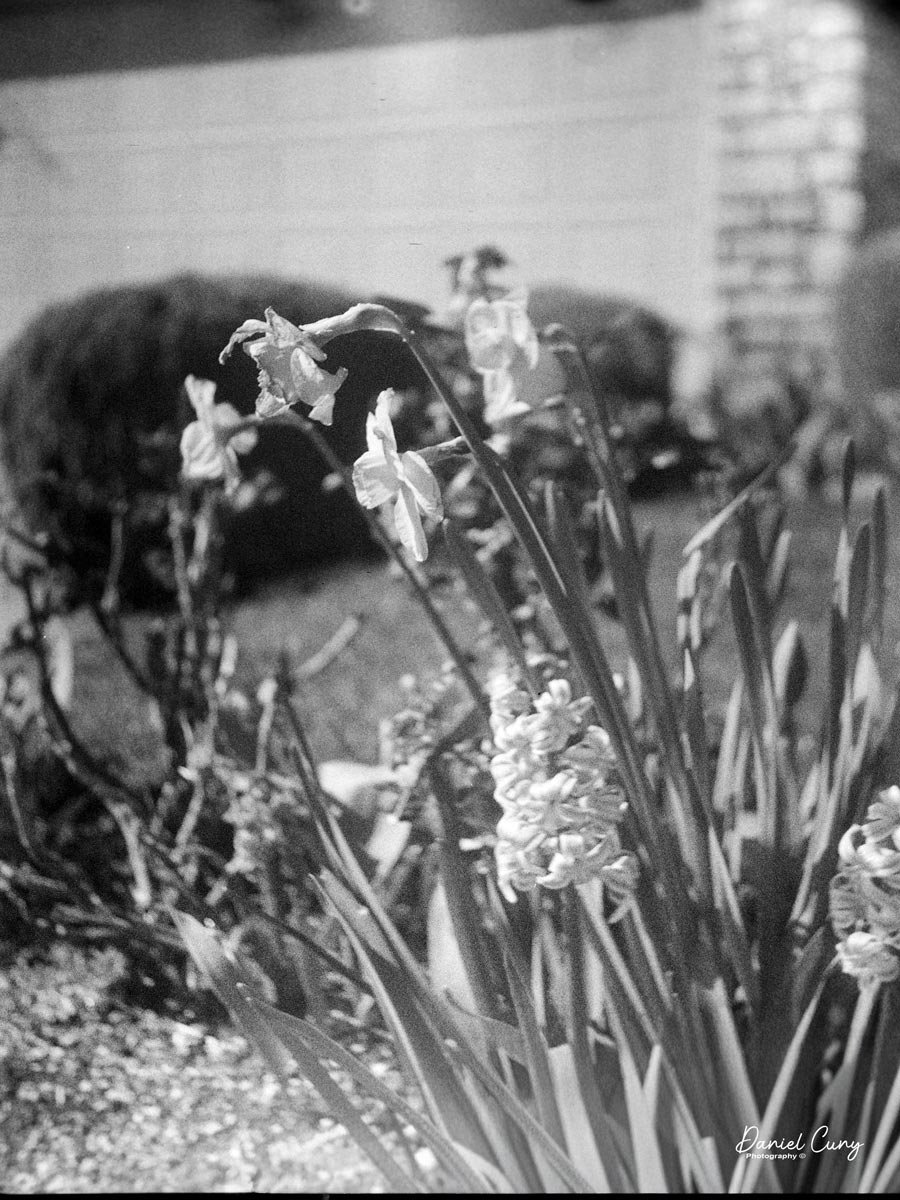
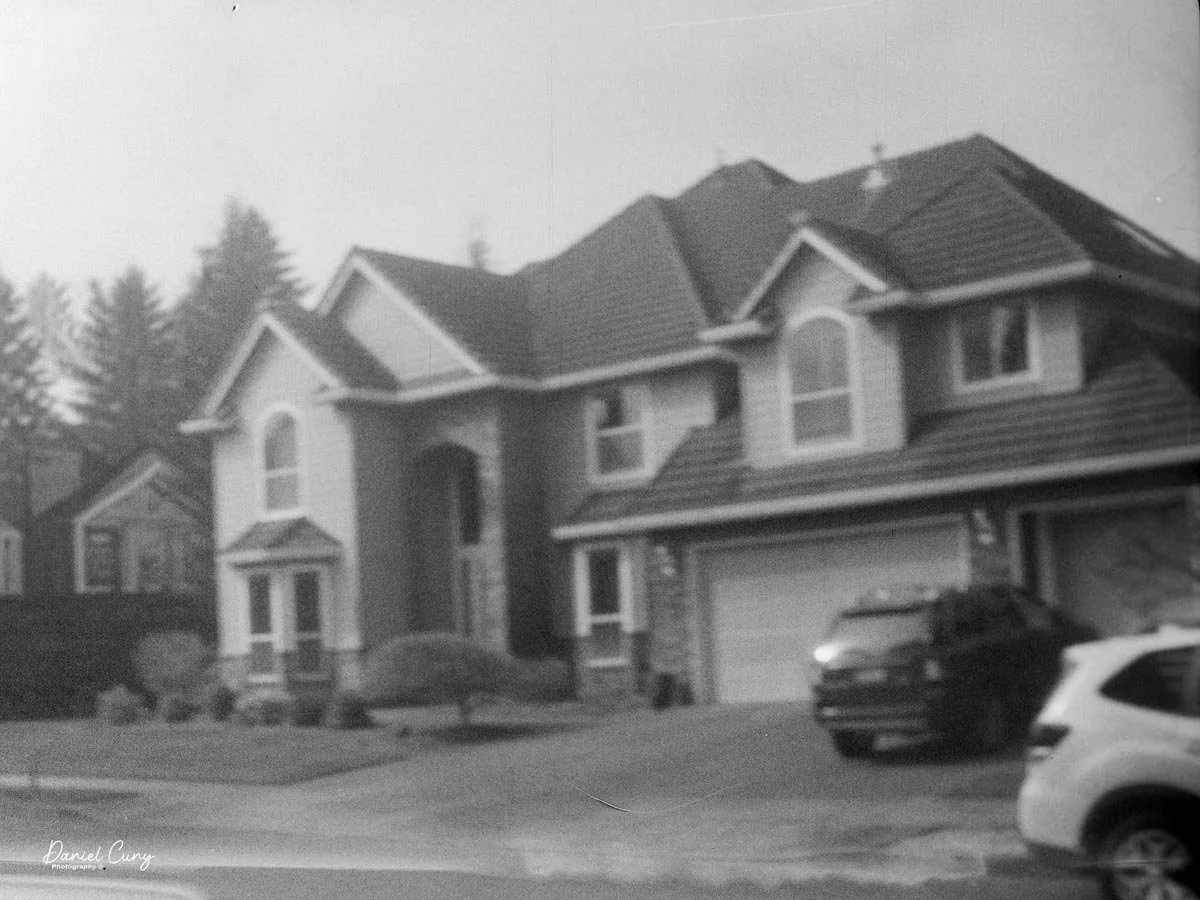
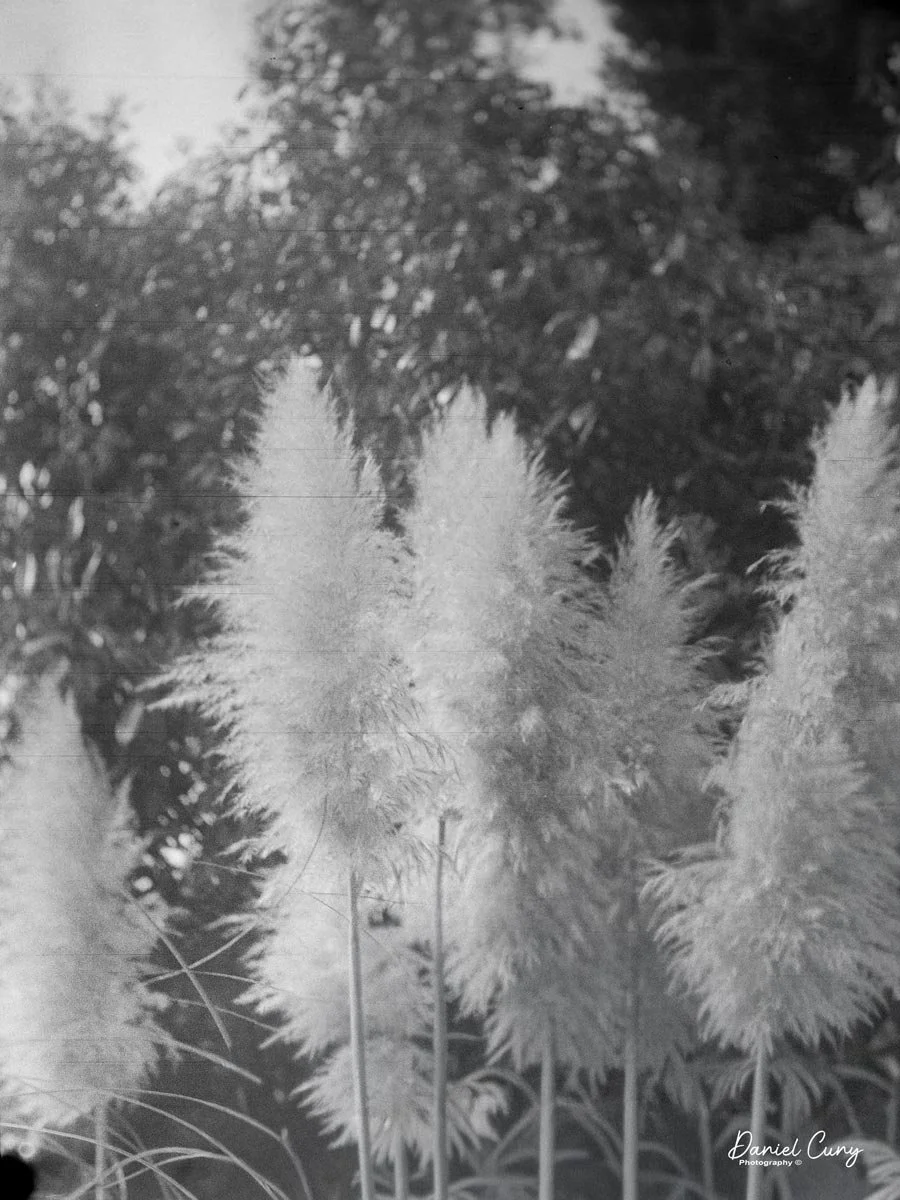
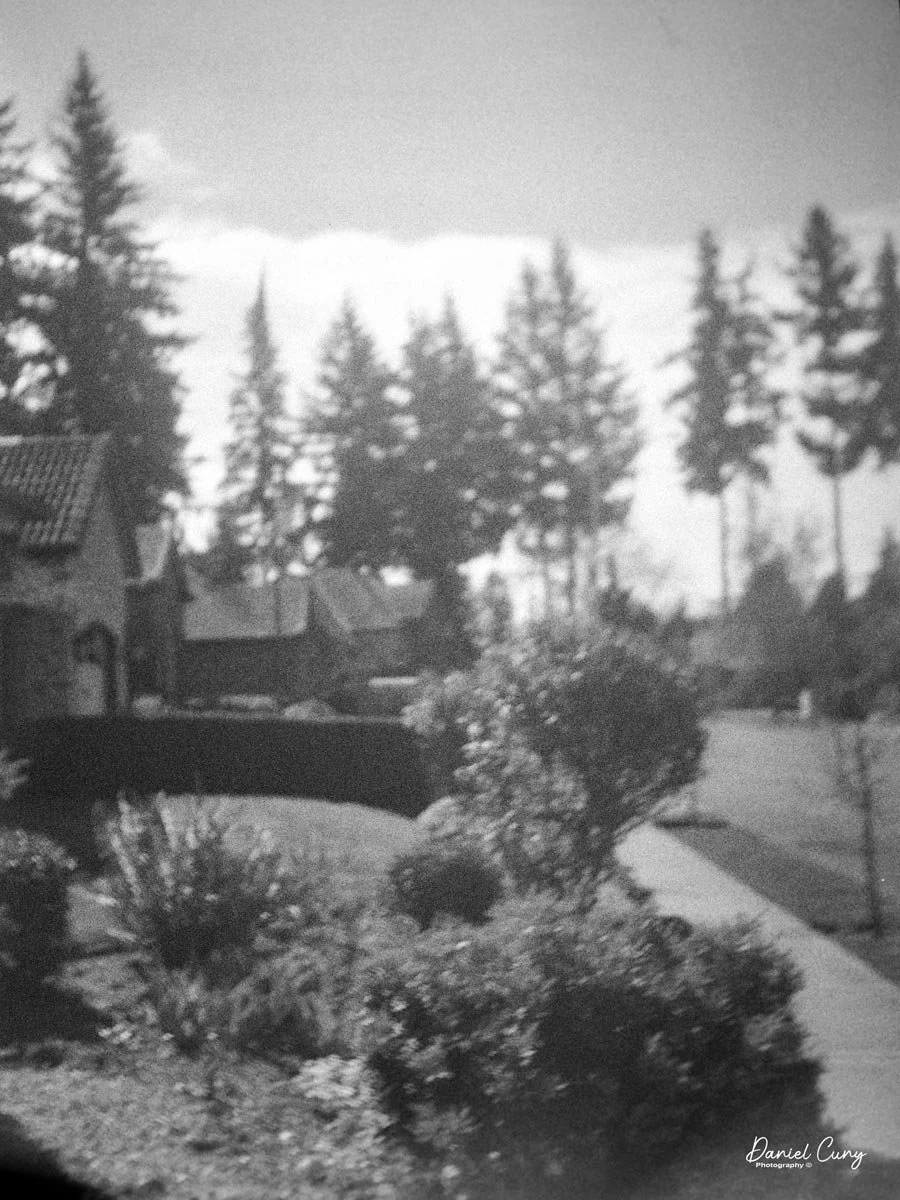
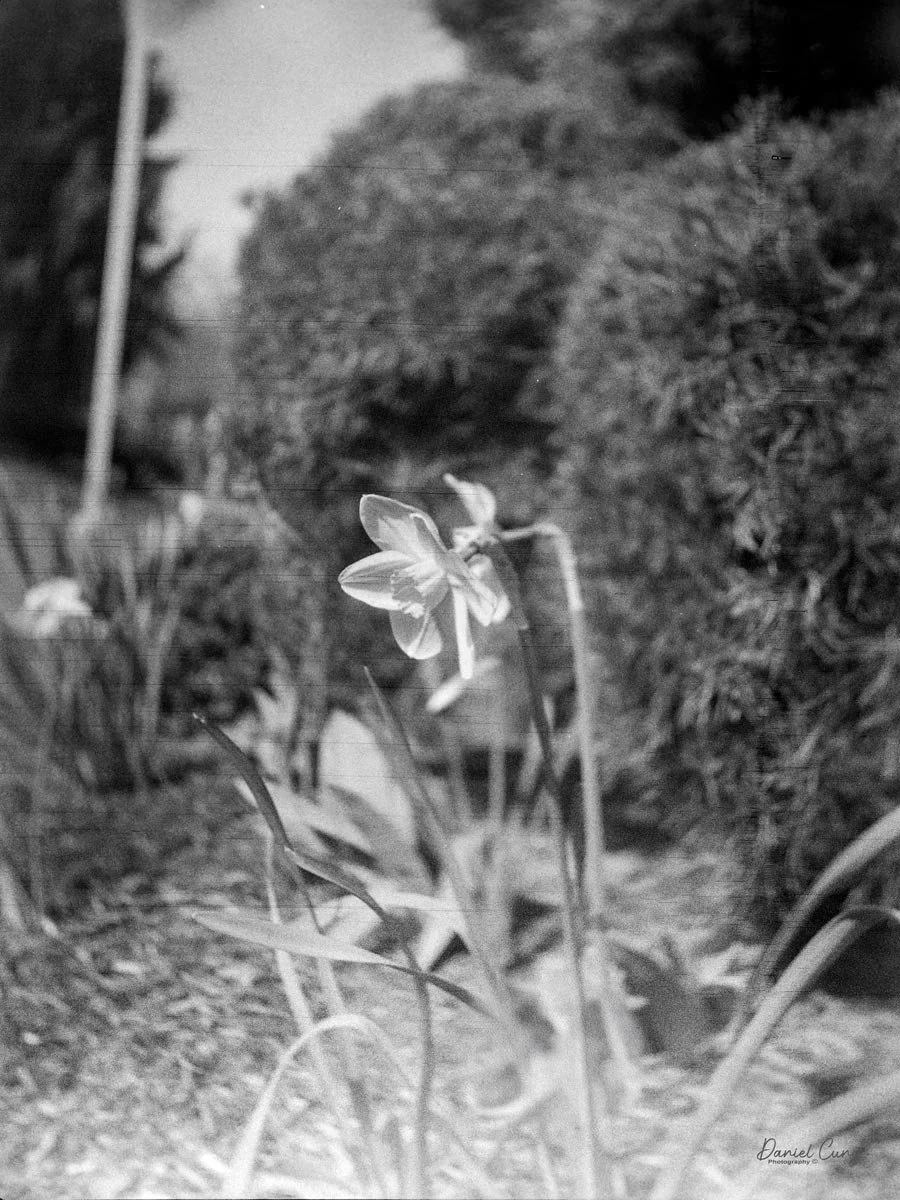
Here are some of the results:

Conclusion
As I scan the images from the farmers' market, some turned out better than others. I'm not sure what was going on, but some of the photos are sharper than others. I didn't pull out and push back the lens once I got to the farmers' market; I pulled the lens away from the camera body and adjusted the settings to the lighting conditions.
There were a couple of times when I set the shutter to 1/50, but the focus was pretty inconsistent in many of the images. I was expecting slightly better results. Maybe there were a couple of times when there was some movement, especially since the shutter is a bit wonky and the images look unfocused.
Who knows what this camera has been through over the past 90 years, but all in all, it was fun to shoot with. The bellows look amazing, and I was complimented on the camera a few times as we walked through the farmers' market, so that was fun.
Thank you for taking the time to learn a bit about this early example of a Bakelite camera from Japan, made in the early to late 1930s.
I'd love to hear from you regarding this or some of my other camera reviews.
Cuny's Camera and Photos is my online eBay store, where I sell some of the cameras reviewed, along with other camera and photo odds and ends.
Until next week, please be safe.