Durst Duca

A Tiny Full‑Frame Surprise: Shooting the Durst Duca

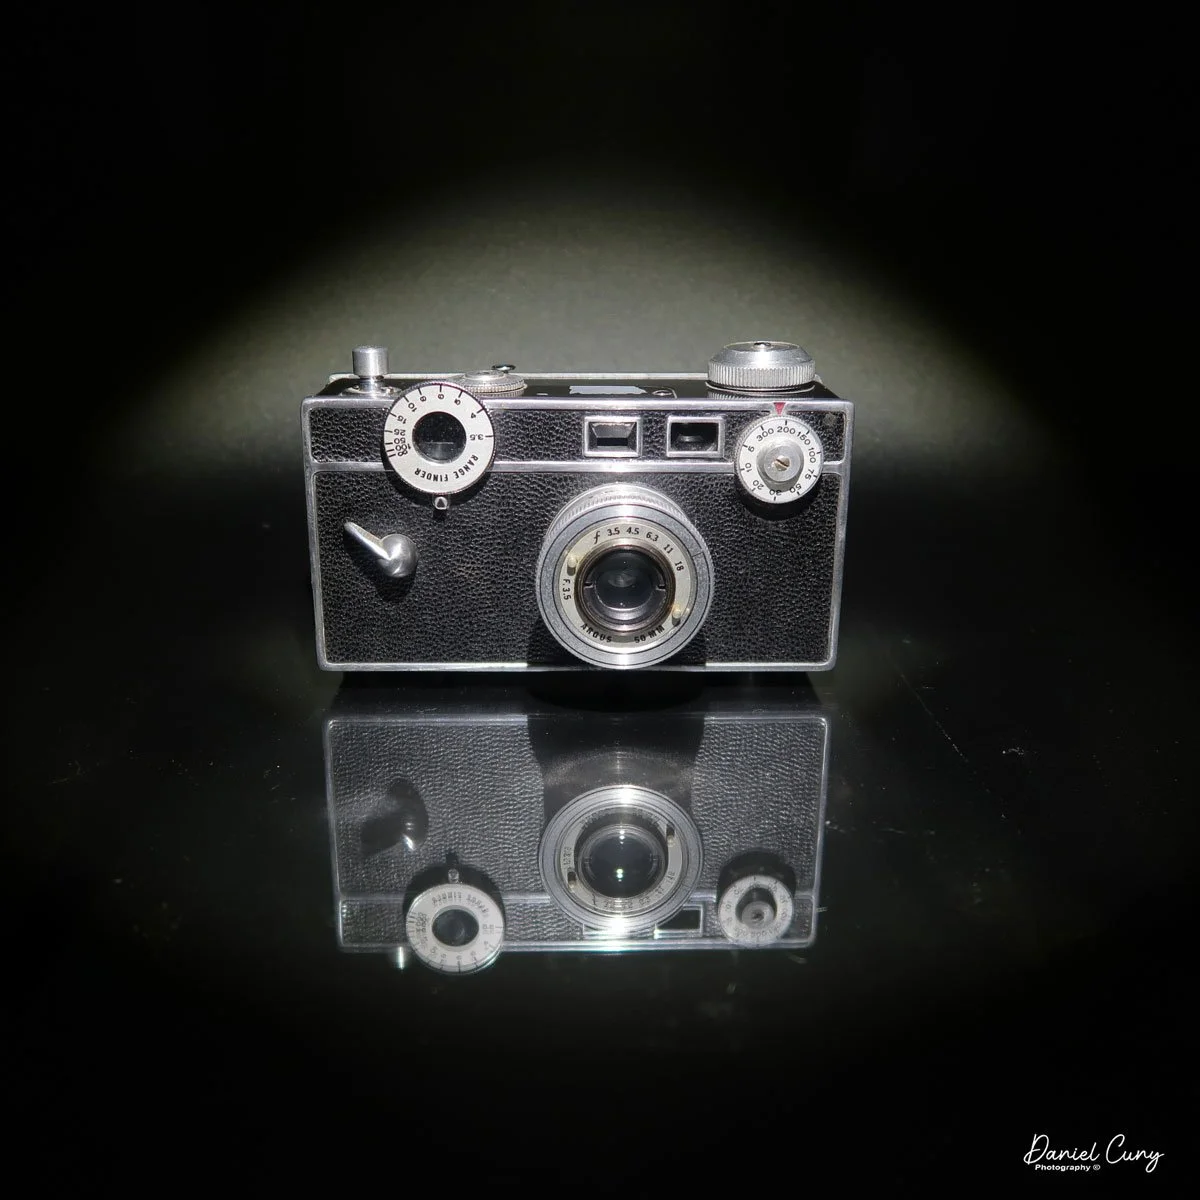
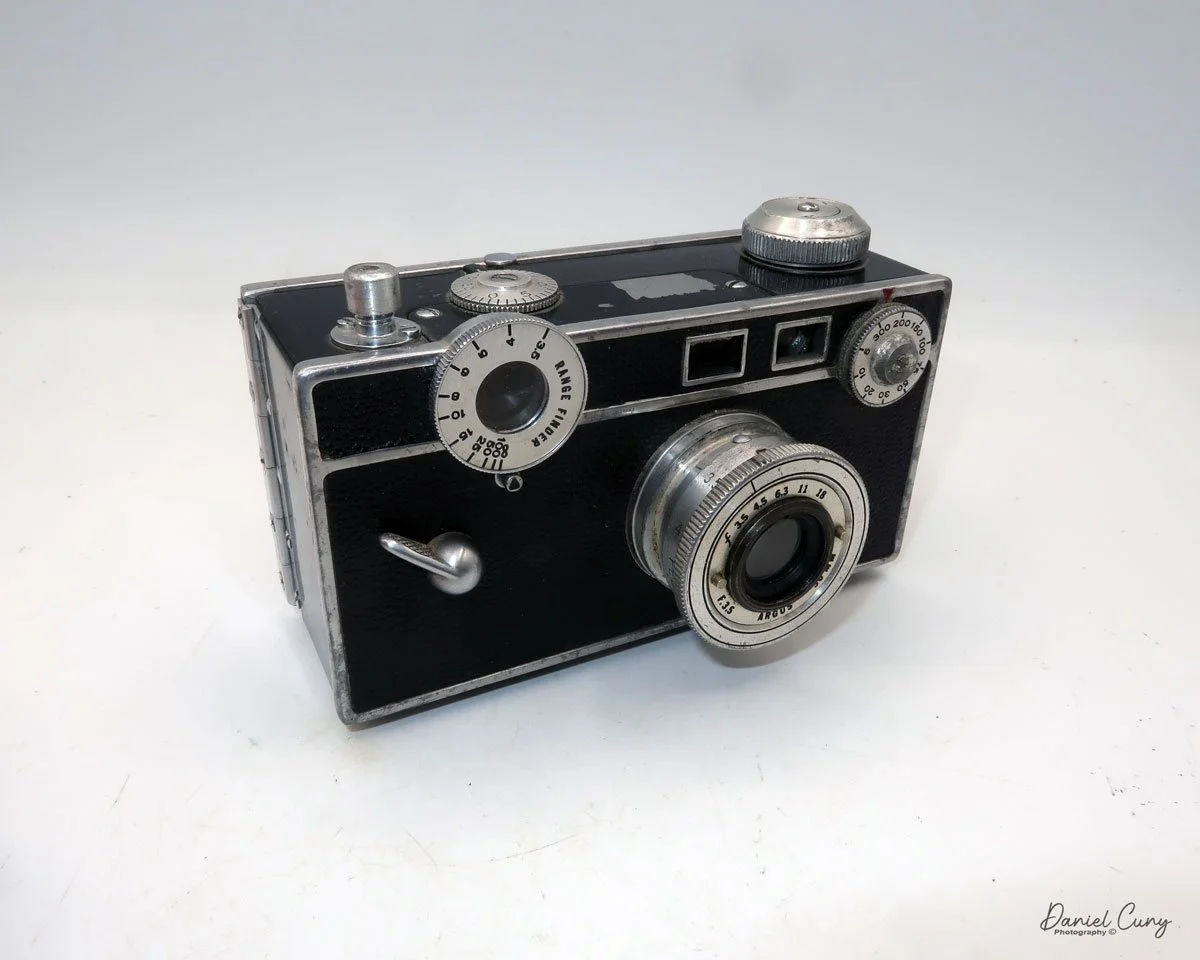
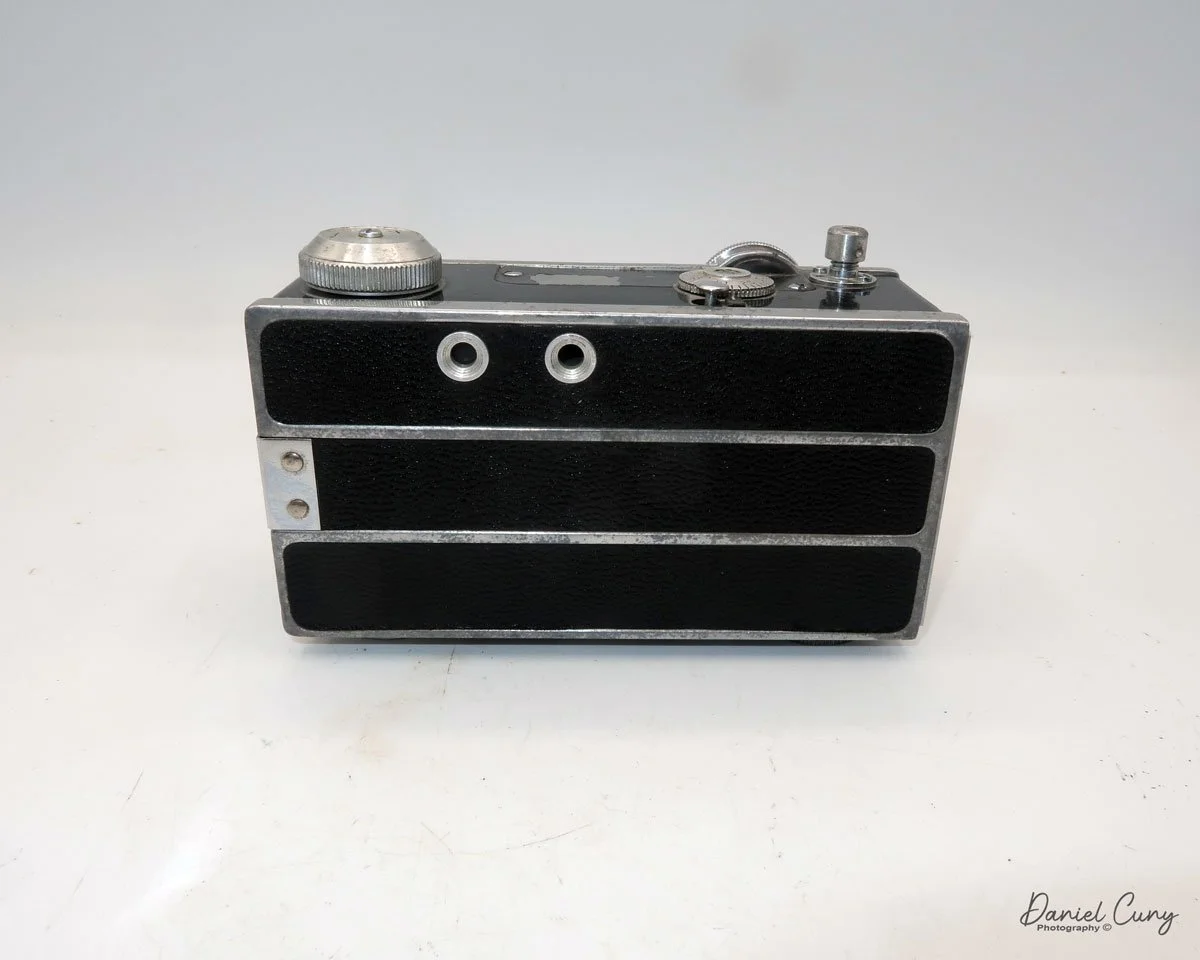
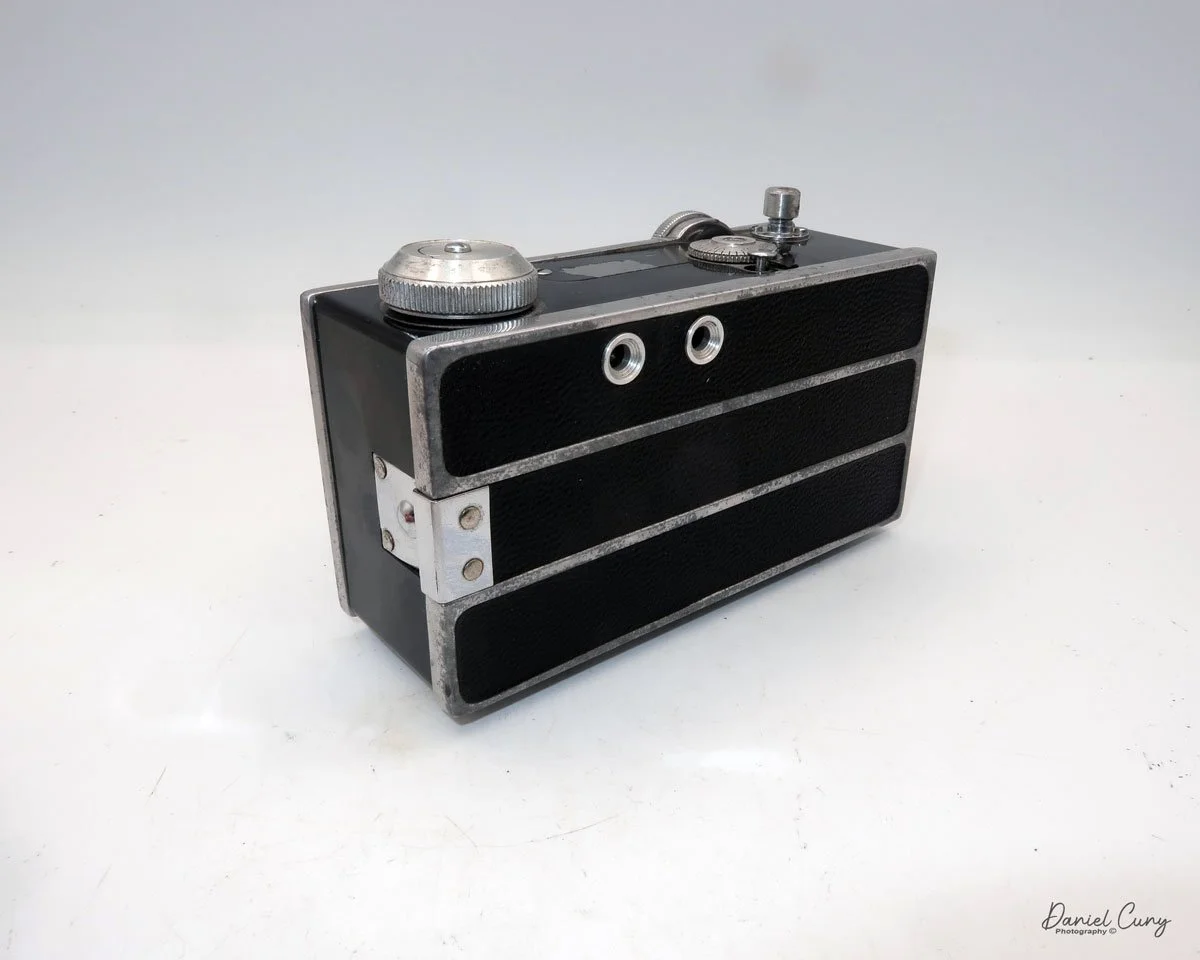
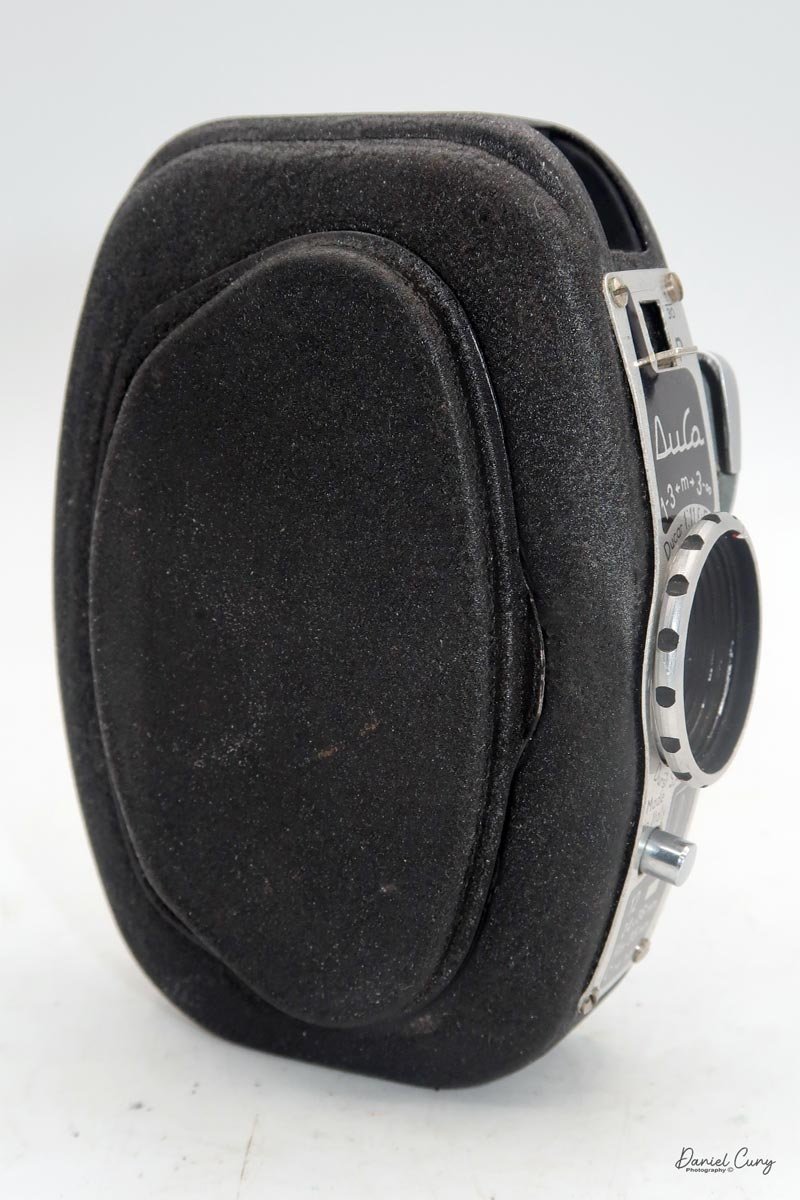
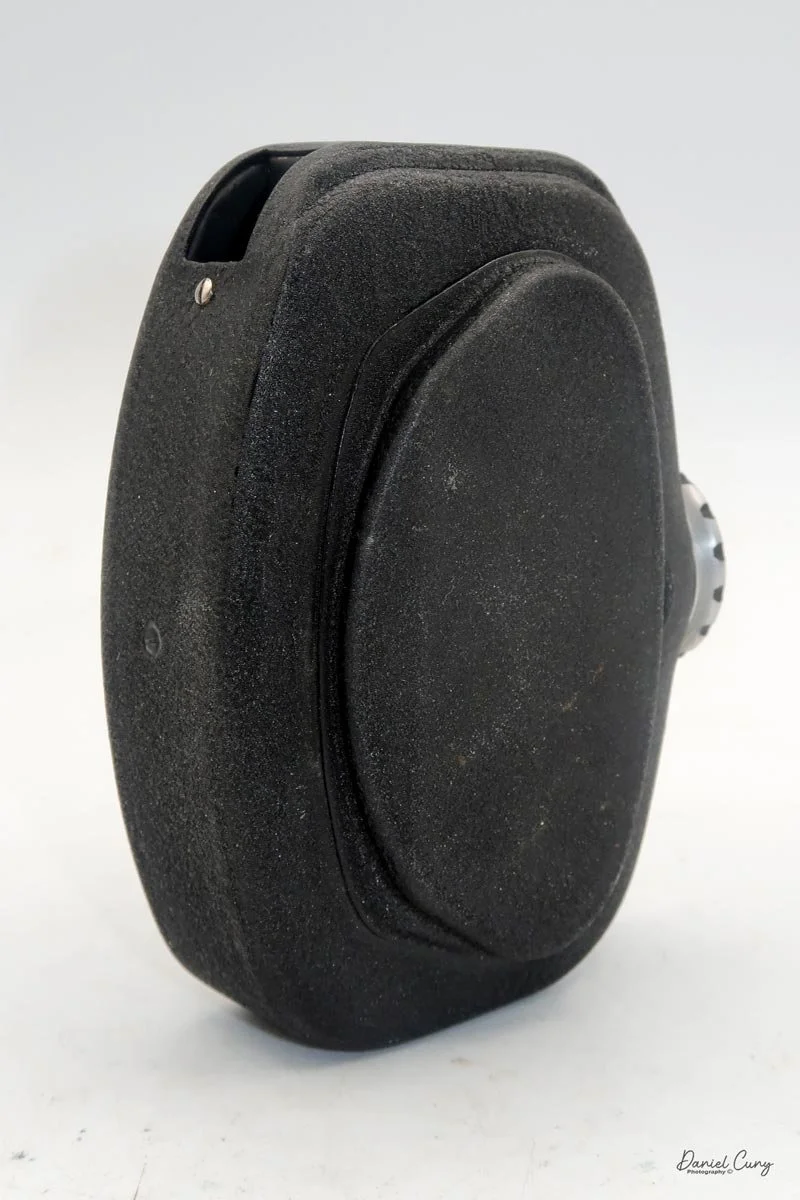
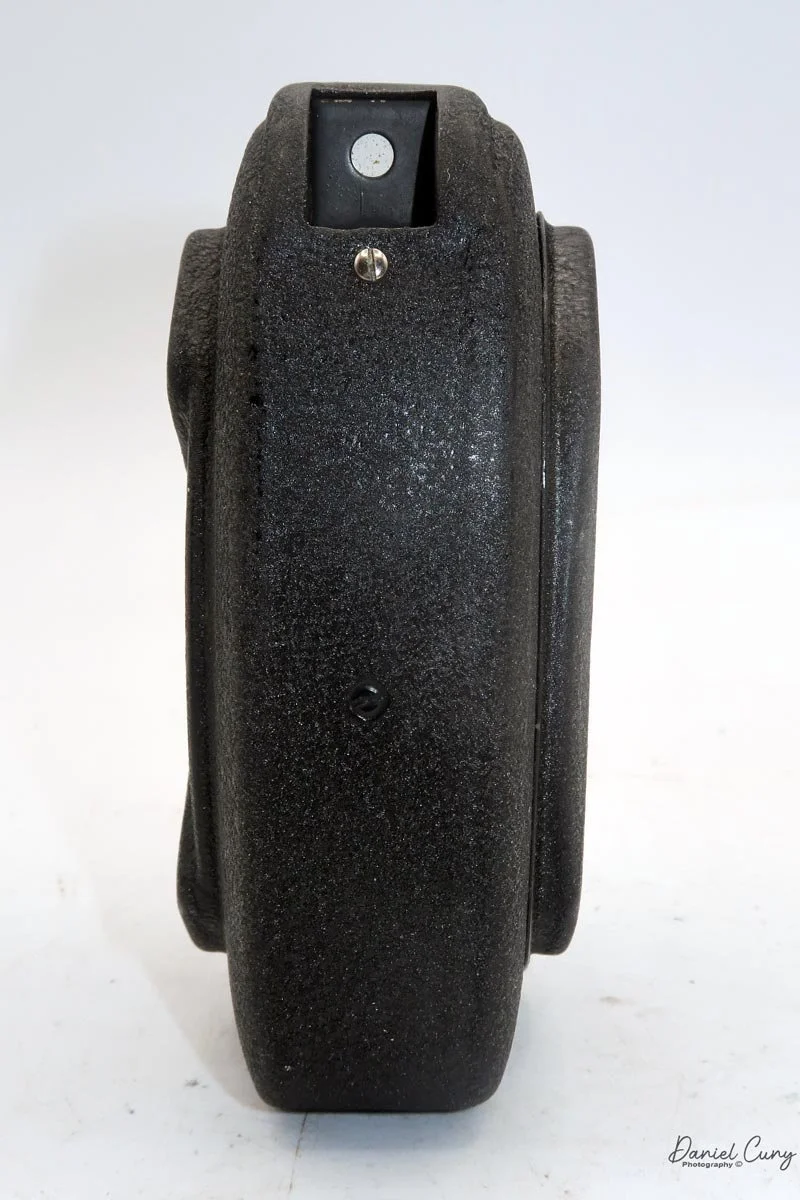
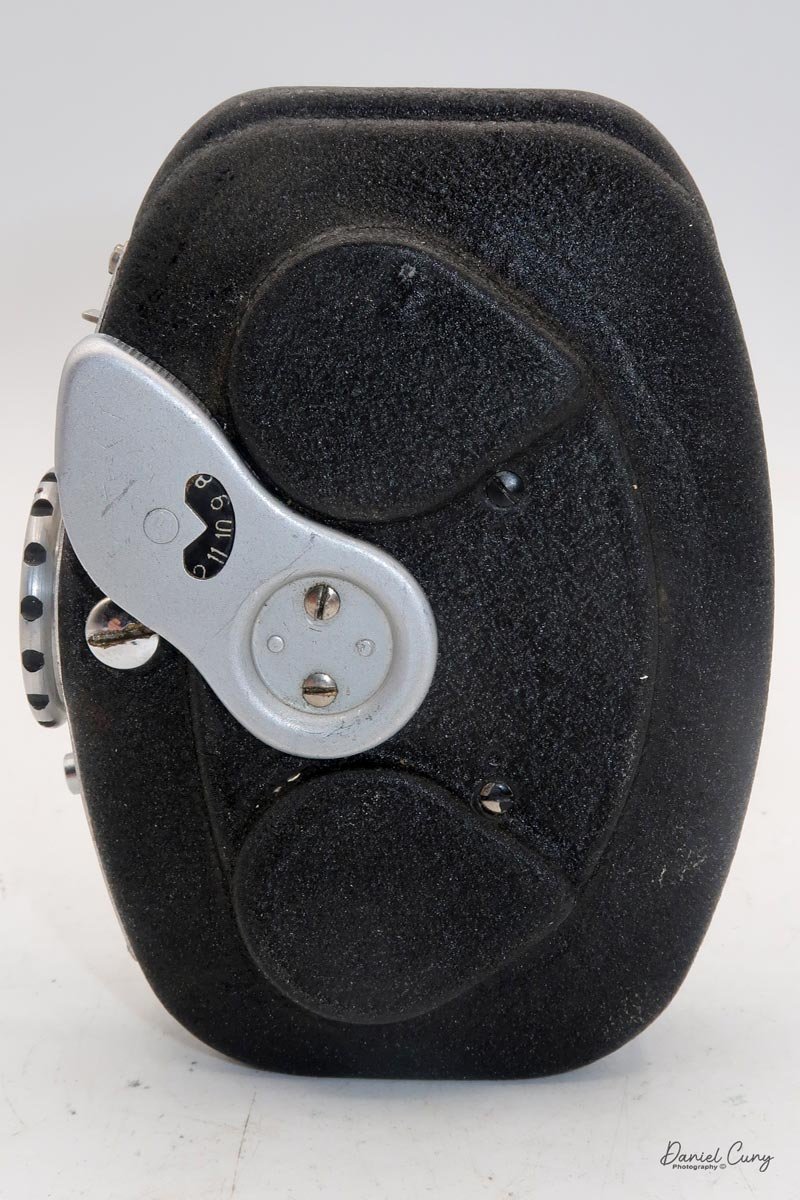
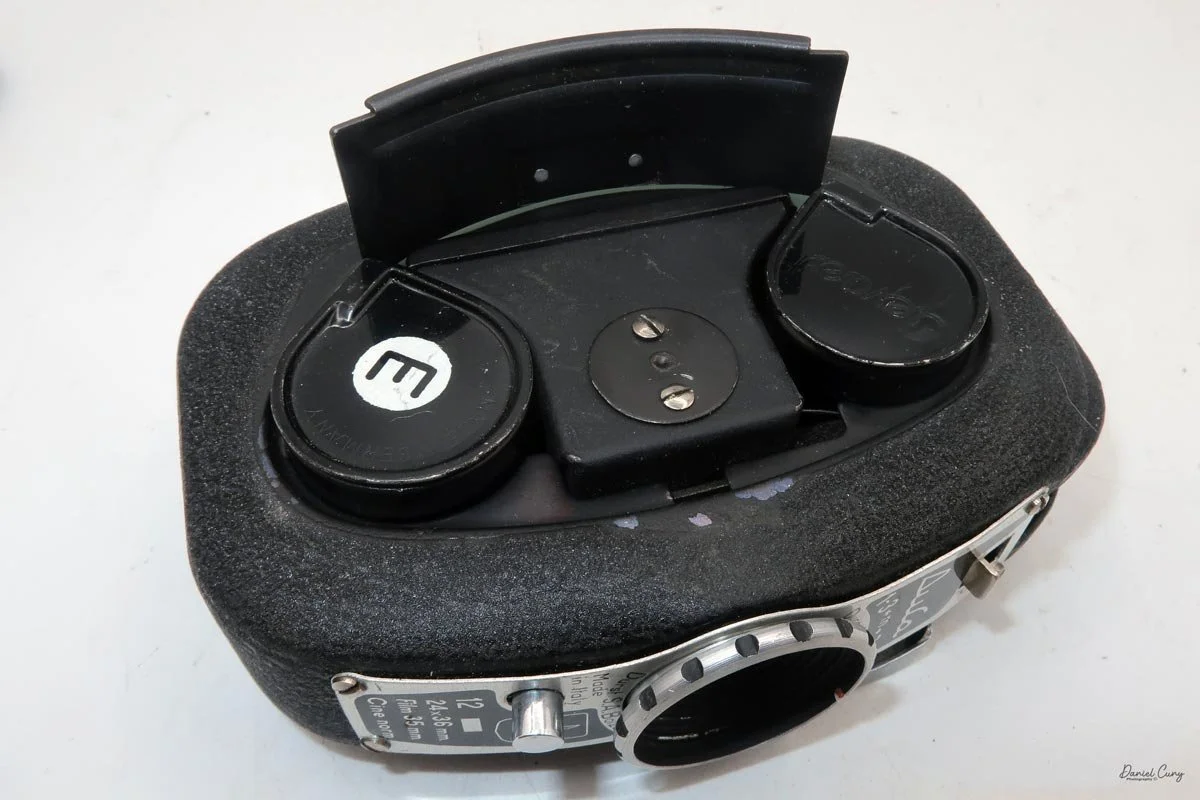
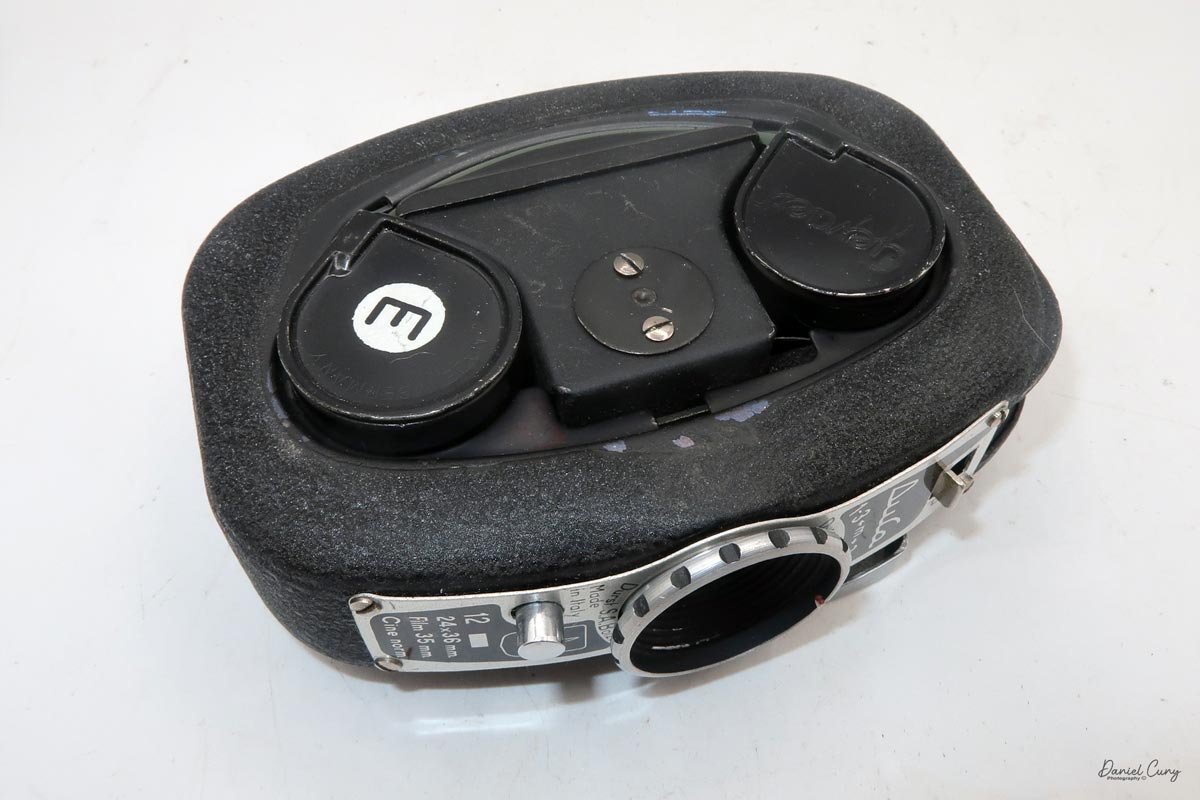
My Durst Duca camera.

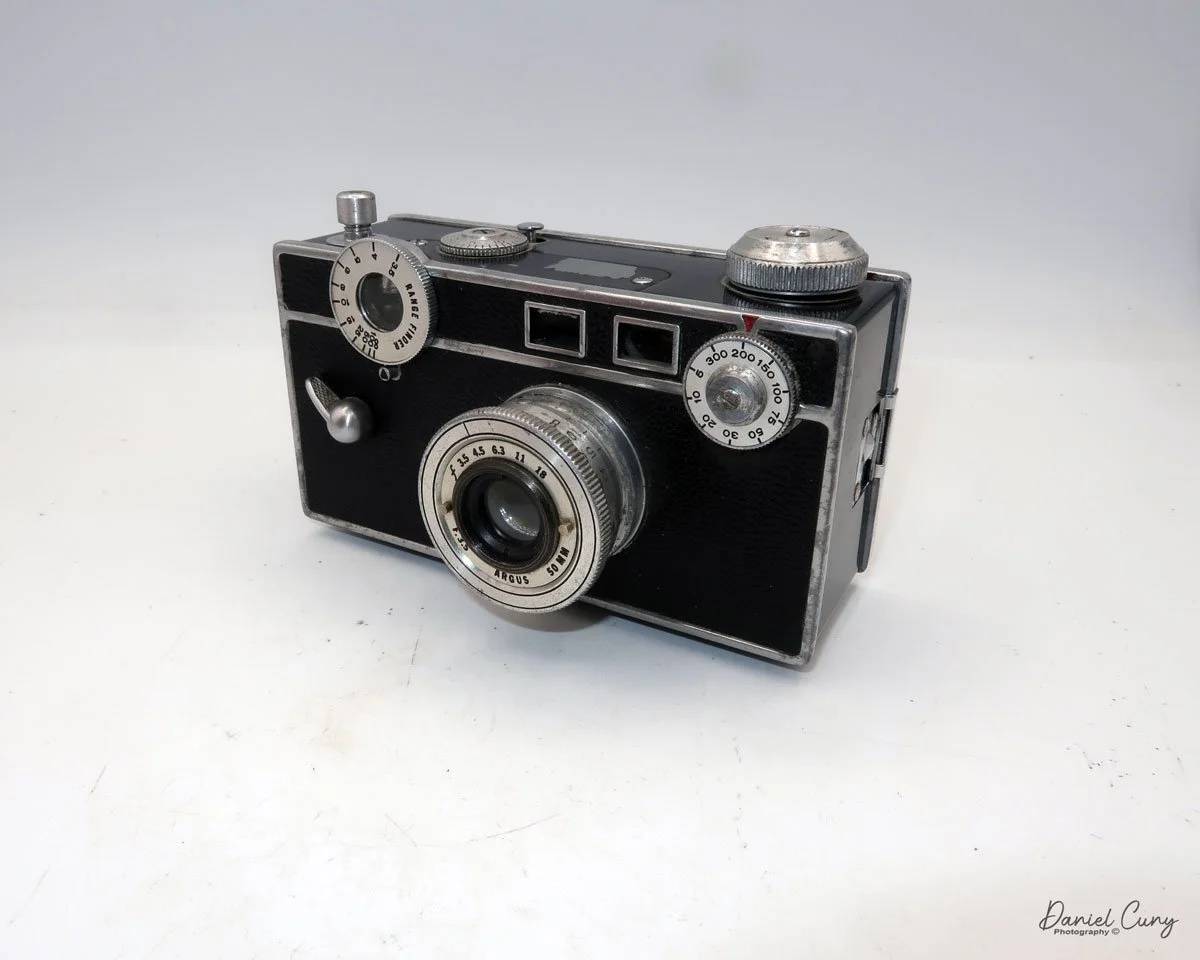
I first saw the Durst Duca in McKeown's Camera Guide probably 30 years ago, and I can still remember my first instinct: this had to be a miniature camera. The tall, narrow body looked more like a tiny cine camera than anything that could handle standard 35mm film. With its vertical form, I assumed it used a 16mm cassette like a Minolta 16. So when I read that the Duca is actually a full‑frame 35mm camera, I was shocked.

 It just didn't seem possible. The camera looked too small and too skinny to hide a 35mm cassette sideways, especially with that unusual vertical format. For years, it stayed in the back of my mind as one of those oddball cameras I never expected to actually run across.

Finding My Duca

Being in the U.S., this little Italian camera rarely shows up at the usual places I haunt for gear—flea markets, garage sales, estate sales. On the big auction sites, I do see them once in a while. Still, they're usually priced higher than I'm willing to pay, especially once you tack on international shipping.

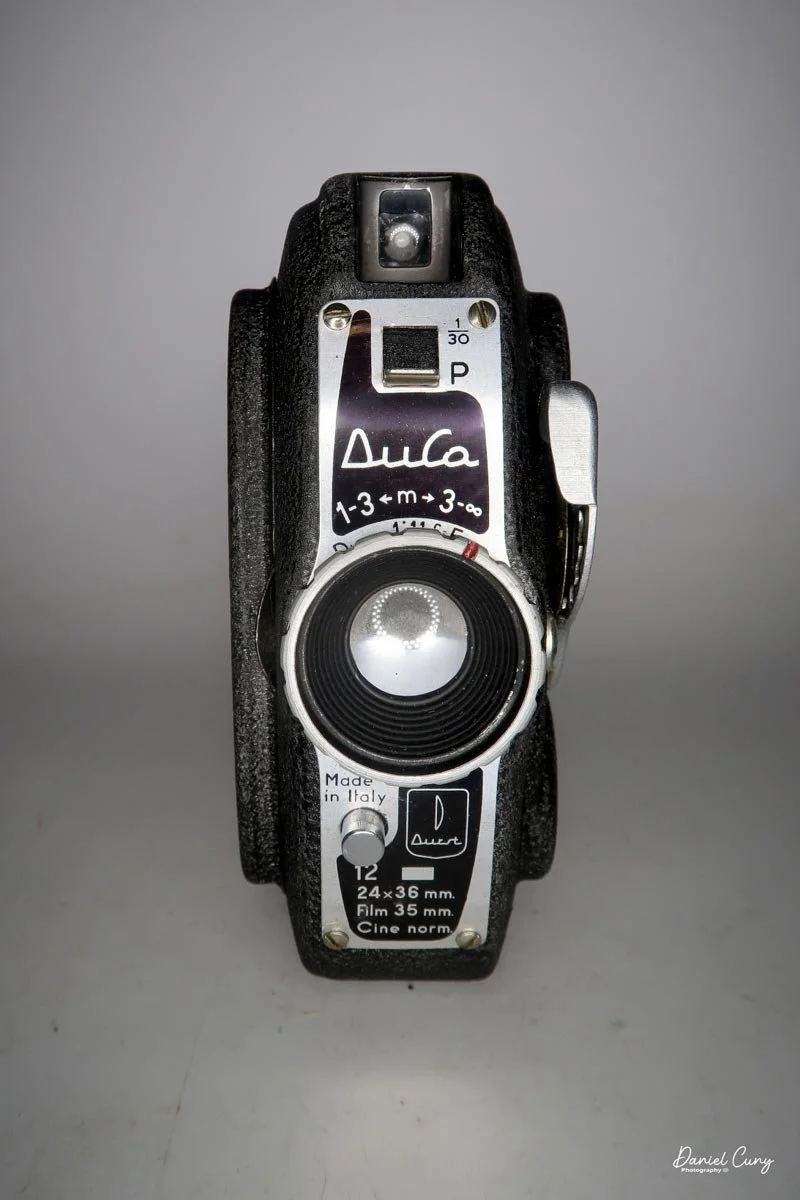
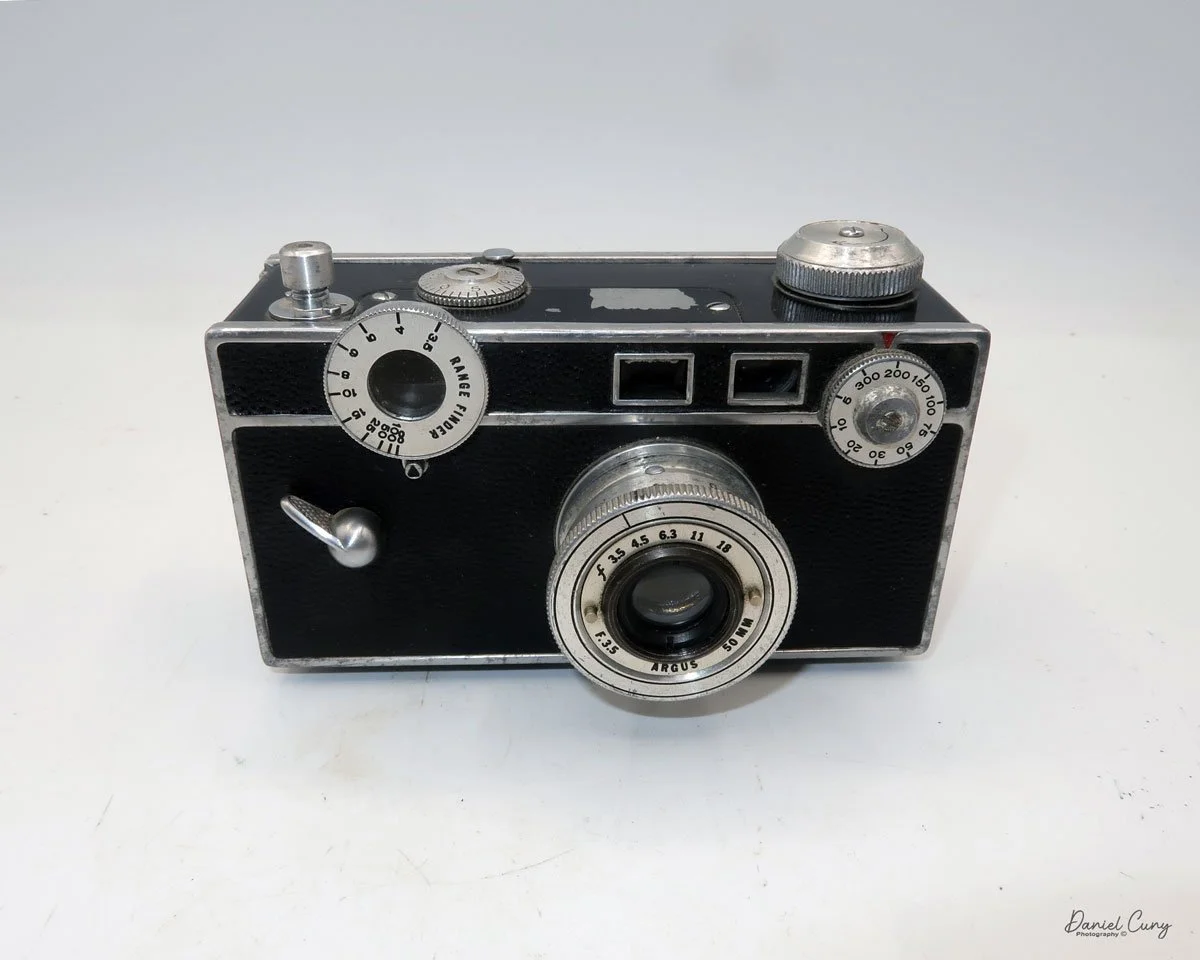
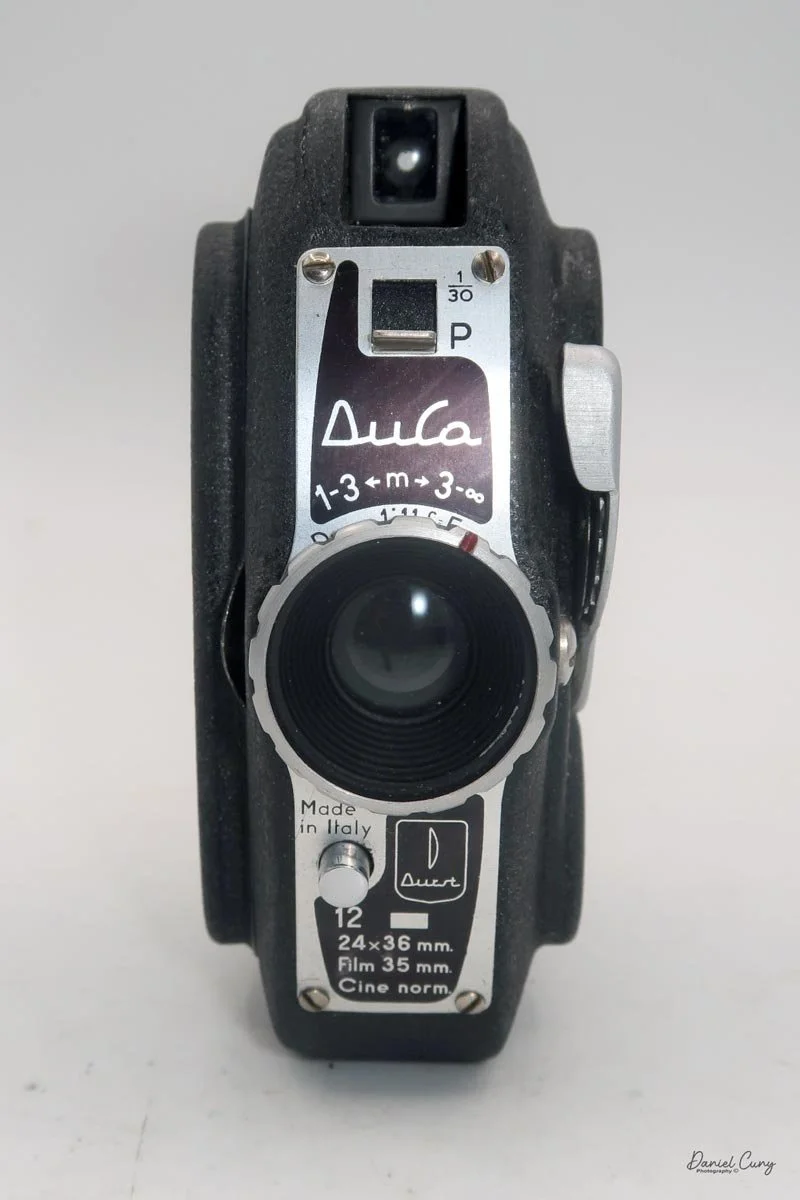
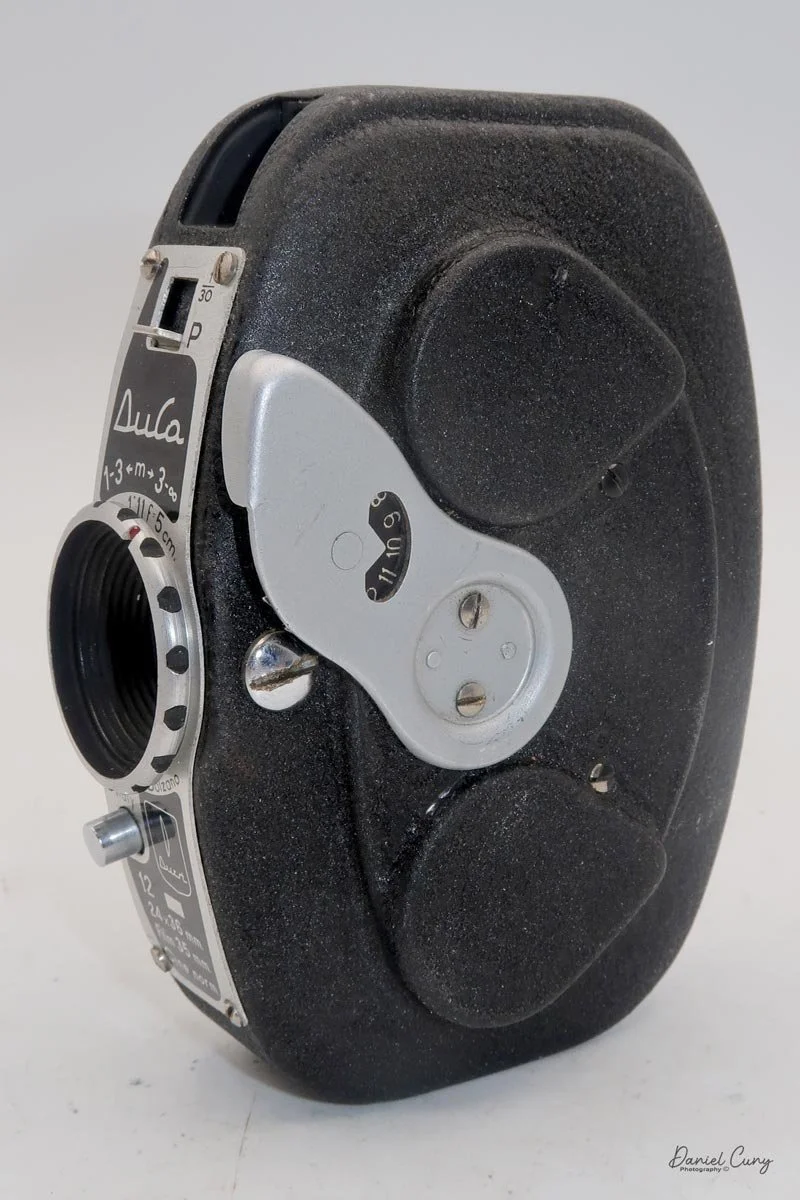
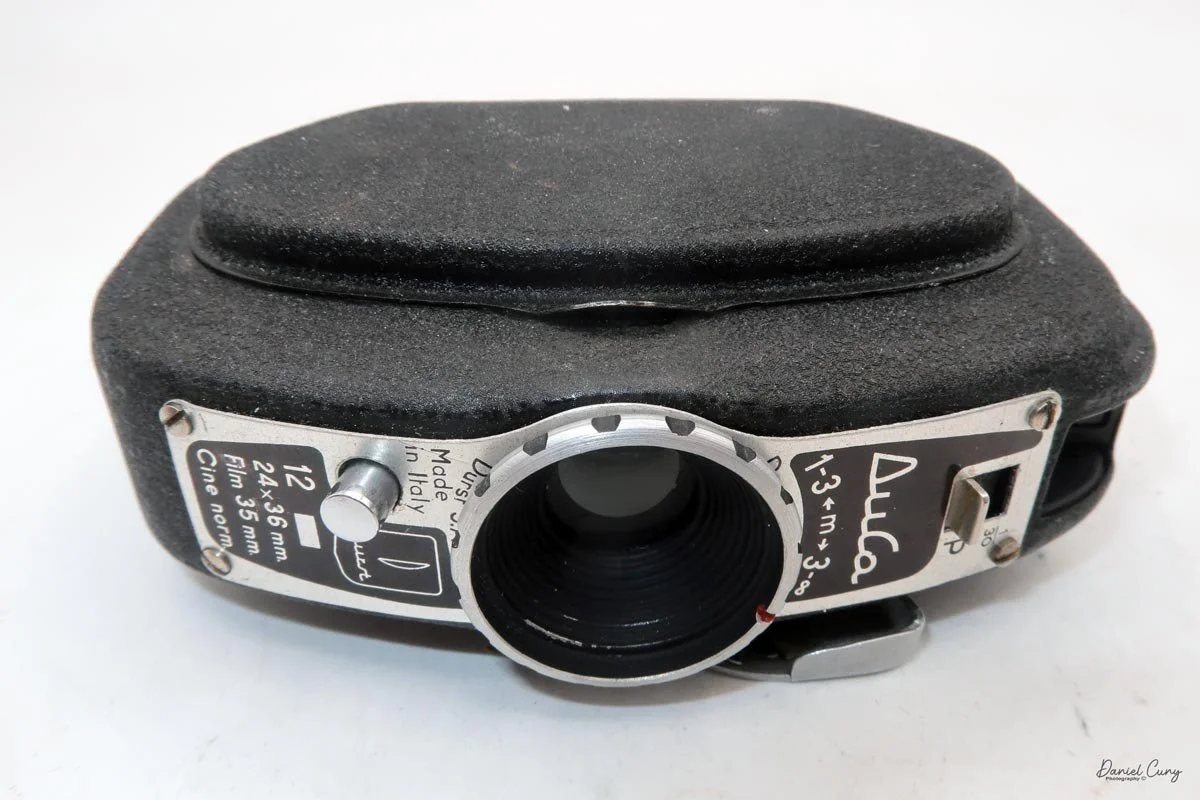
Front view of Durst Duca camera.

 When the auction was about to end, I logged in about 10 minutes before the finish. The price on the Duca had jumped up a bit, and I was outbid, so I nudged my max up—still on the low side—and watched the timer count down. No one else jumped in, and I ended up winning the camera.

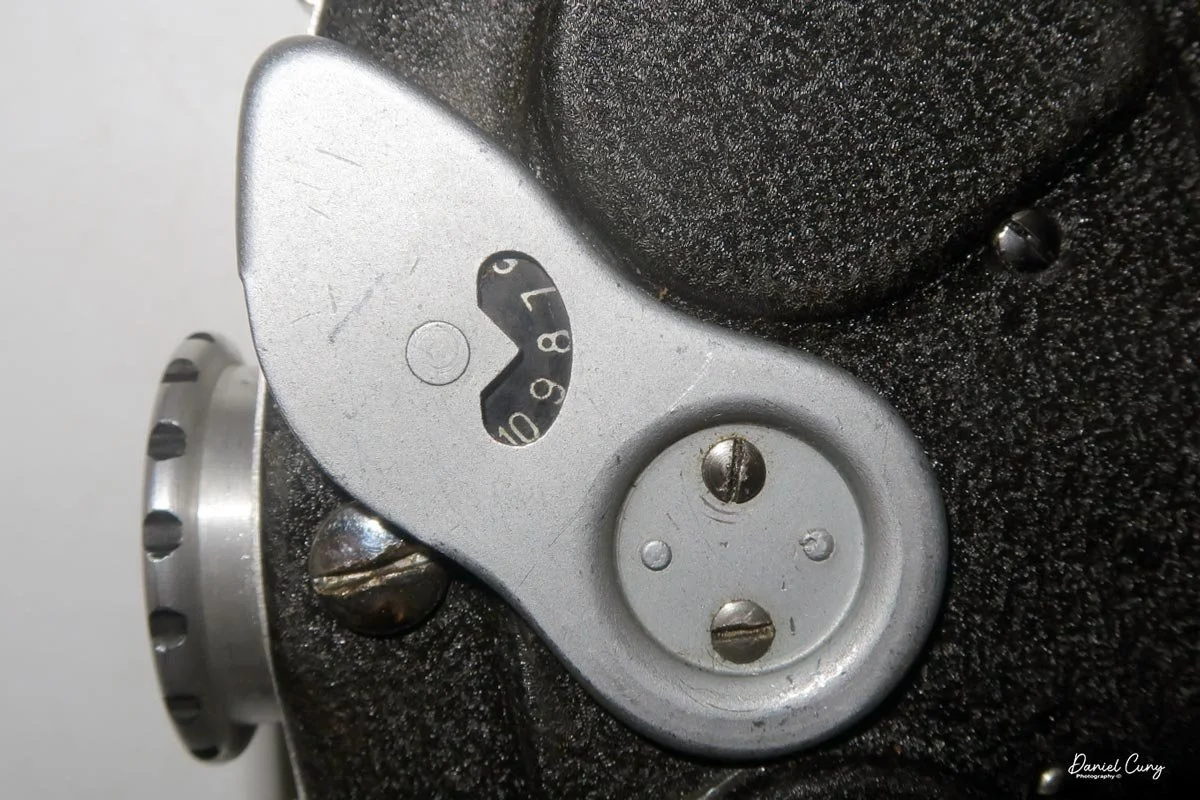
The auction house shipped quickly. When I opened the box, I was still surprised by how small the camera is in person. It was even smaller than I'd pictured. I started to check it over, winding the advance lever on the side and cocking the shutter. I heard a faint click, but it was so quiet I wasn't sure the shutter was actually opening and closing.

 I pulled the side of the camera off to get at the film chamber and saw that one of the two film cassettes was still inside—that was a nice bonus, since it meant I only needed to scare up one more cassette. Digging around in the drawer where I keep odds and ends of camera accessories, I found another cassette that would work.

 In my darkroom, I shone a flashlight through the lens and fired the shutter. At first, I saw no light at all, and my heart sank; I figured the camera might be dead. Then I noticed the pressure plate that holds the film flat against the rails. I pulled the pressure plate out, pointed the flashlight into the front of the lens again, and tripped the shutter. This time, I saw a brief flash of light through the gate—success. The shutter was working. That was the moment I decided the Durst Duca would be the camera I'd write about for this week's blog.

A Little Durst History

Durst is best known today for its darkroom enlargers. Still, for about 25 years, the company also made a small, innovative line of cameras that reflected the same experimental mindset they brought to the darkroom. Founded in 1936 in northern Italy by brothers Julius and Gilbert Durst, the firm quickly gravitated toward photographic equipment, especially enlargers, which eventually became its main business.

 Durst's camera story starts with the Gil, a simple 120 roll‑film box camera introduced in 1938 for the growing amateur market. After World War II, Durst resumed production of the Gil and then shifted toward more compact designs, setting the stage for its 35mm experiments.

Australian Ad for Durst Duca camera

The Duca followed as a tiny 35mm still camera that used Agfa Karat cassettes instead of standard 35mm cartridges. That choice let Durst play with miniaturized body shapes: an oval, cine‑style form in a pocketable size, offered in several colors. This focus on unusual styling and packaging mirrored their enlargers, which often looked different from competitors but emphasized precision and usability.

 Next came the Durst 66, a modestly specified camera with an unconventional shutter and a quirky way of measuring exposure. You can already see Durst thinking outside the box, trying to rethink mechanisms rather than just copying others' work.

 All of that leads to the Durst Automatica, made from 1956 to 1963 and often regarded as the first 35mm camera with aperture‑priority automatic exposure. It used a pneumatic shutter derived from the Durst 66 and wrapped it in a very elegant body. For such a small camera line, it was an ambitious finale and shows how far Durst was willing to push design and automation.

My Durst Duca

The Durst Duca was introduced at the Milan Trade Fair in September 1946 and stayed in production until around 1952. It's a vertical‑format, full‑frame 35mm camera that uses Agfa Karat cassettes, and it was available in five colors: black, blue, red, white, and brown. I've only ever seen the black, blue, and red versions in photos. Still, now that I know more are out there, I'll keep an eye out—even if I suspect the more unusual colors will be priced higher than I'm willing to pay.

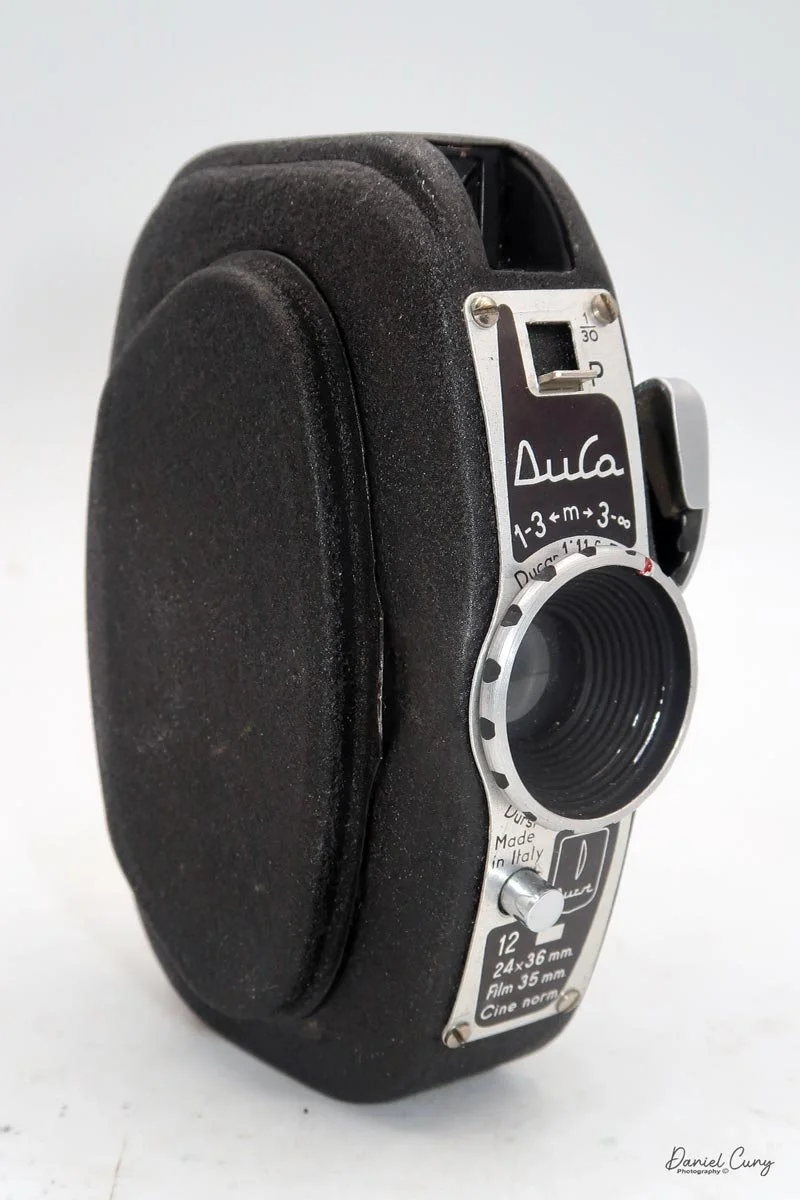
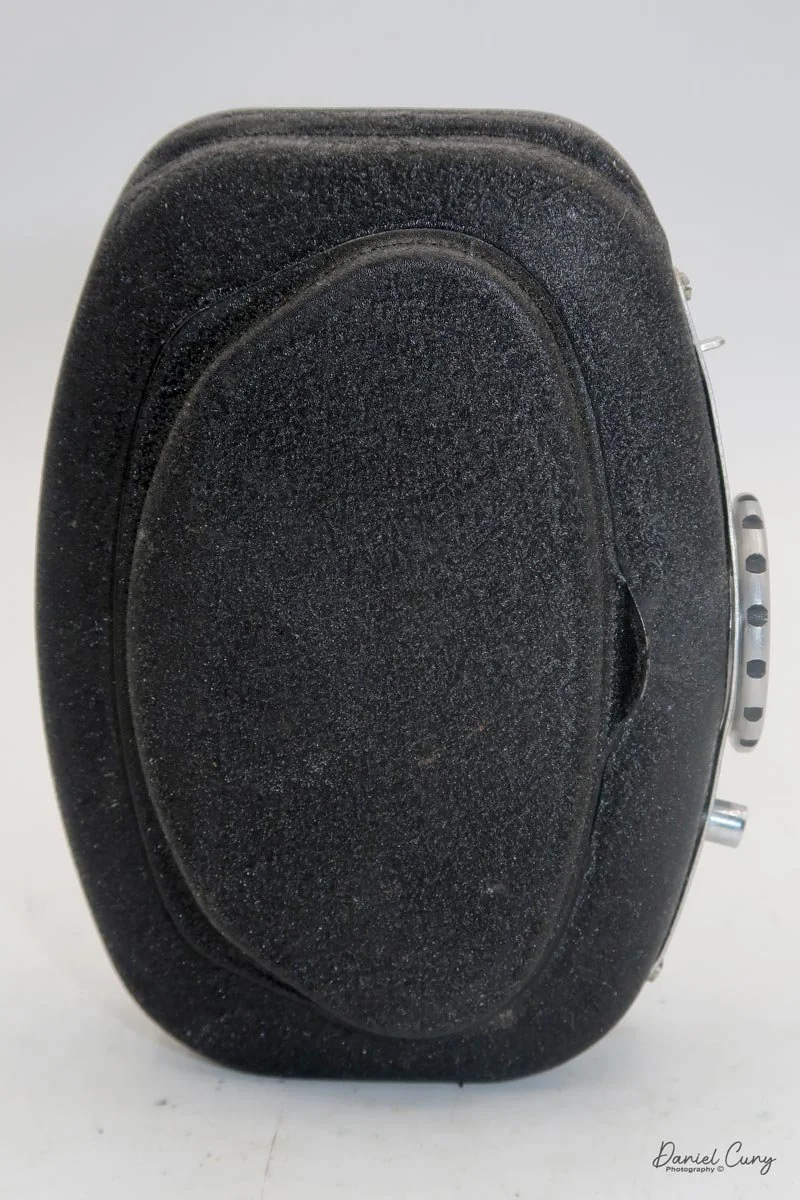
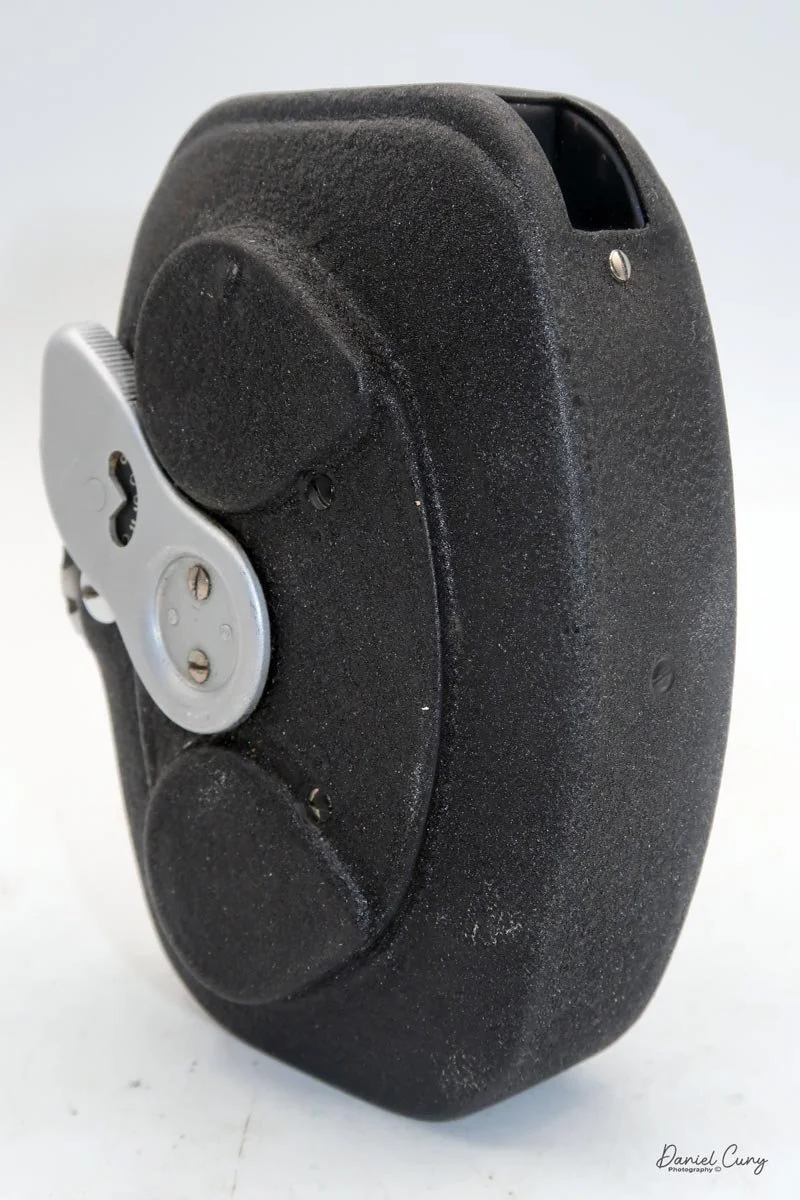
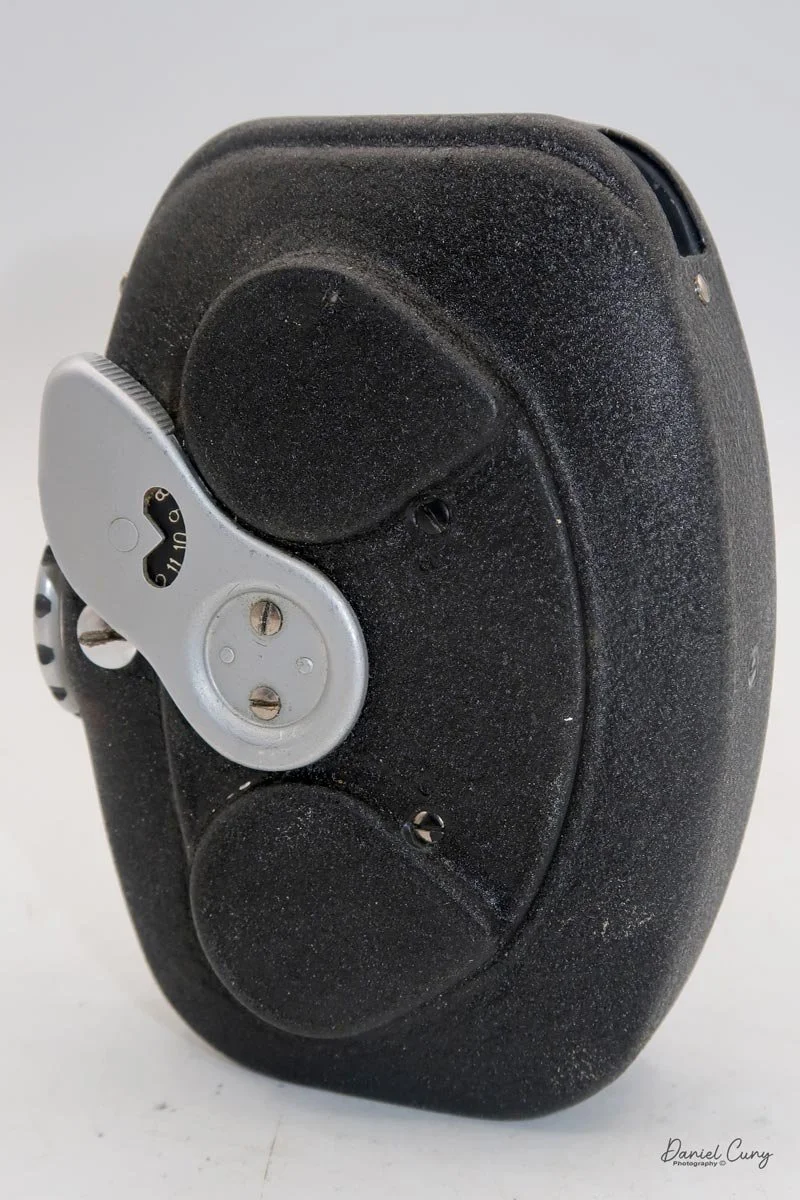
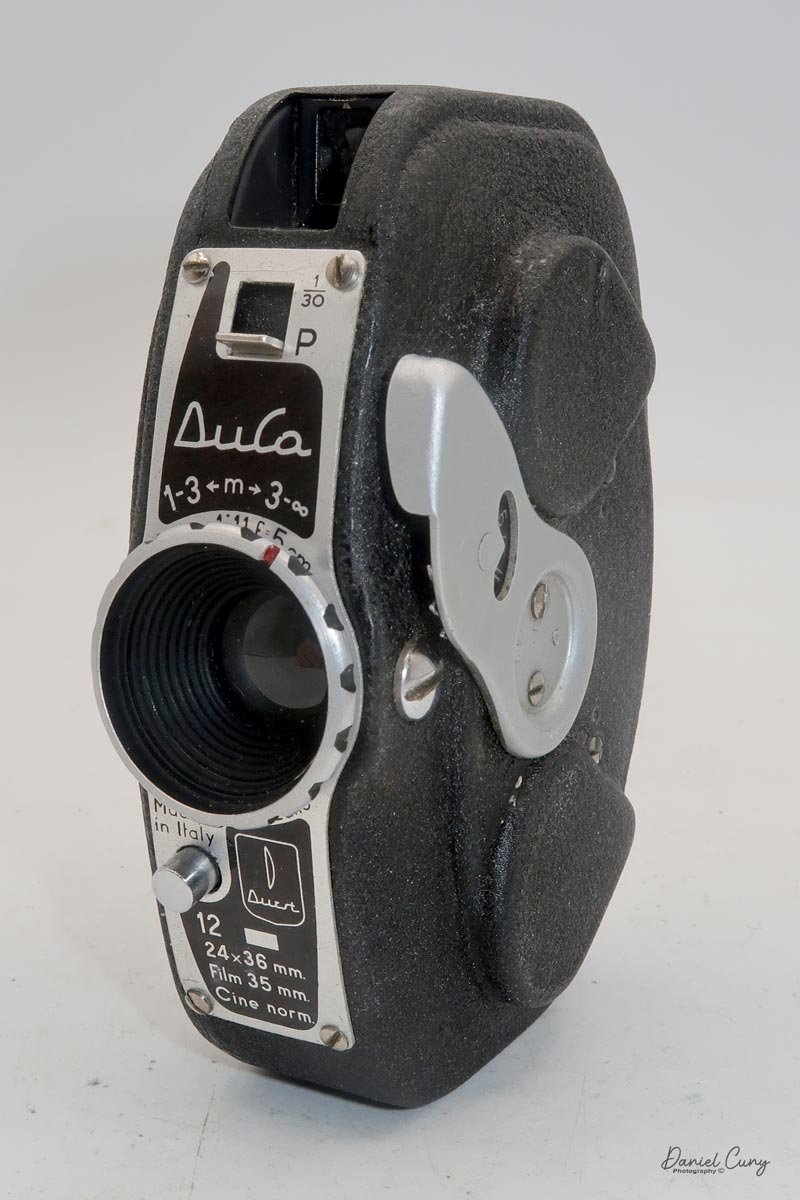
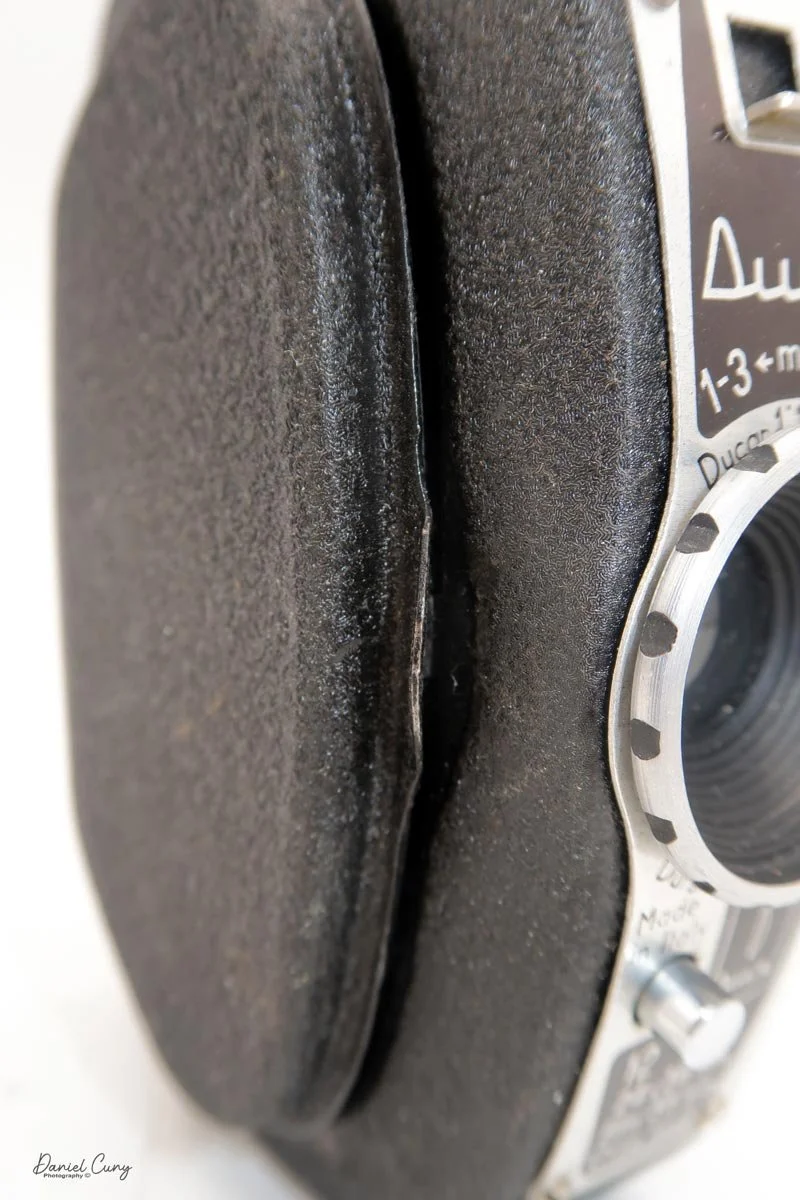
Physically, the Duca is tiny: only about 4 inches tall by 3.25 inches deep and just over 1.5 inches wide, and it weighs 10.1 ounces with the cassettes in place. The body is nicely rounded and fits well in the hand—definitely a camera you could drop in a coat pocket and forget about until you need it.

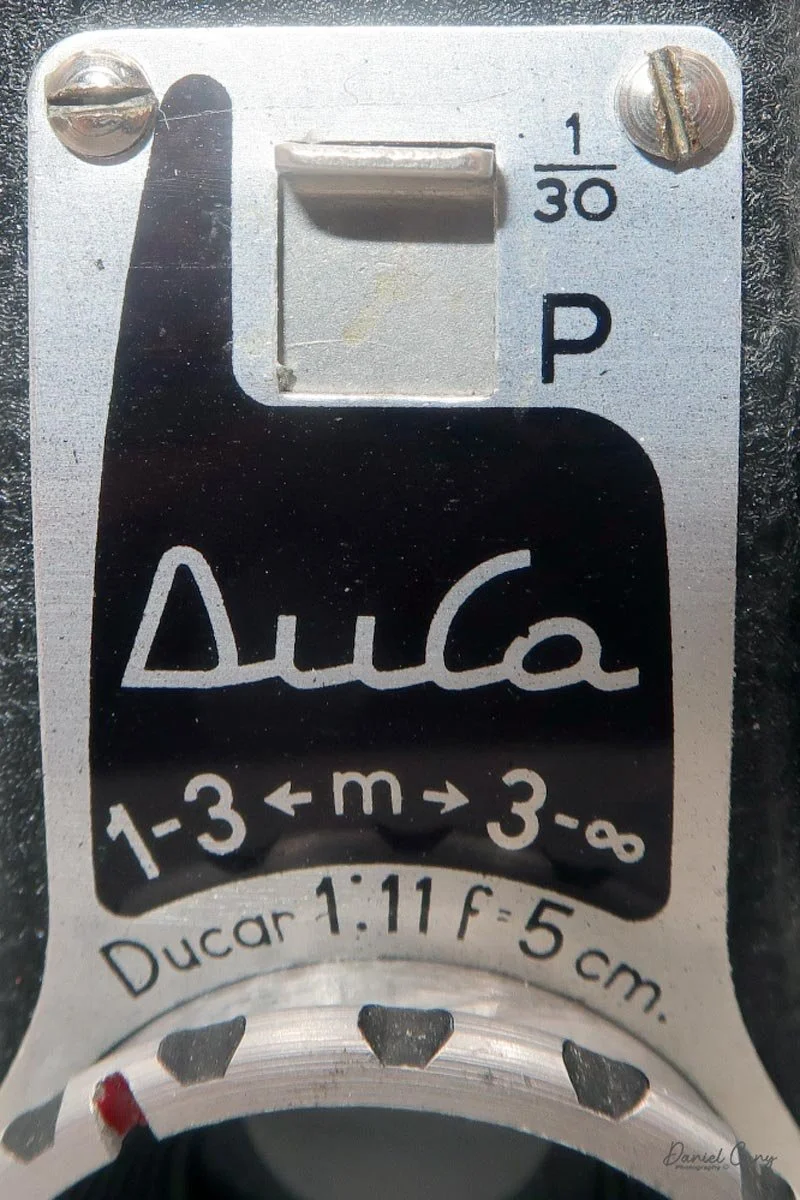
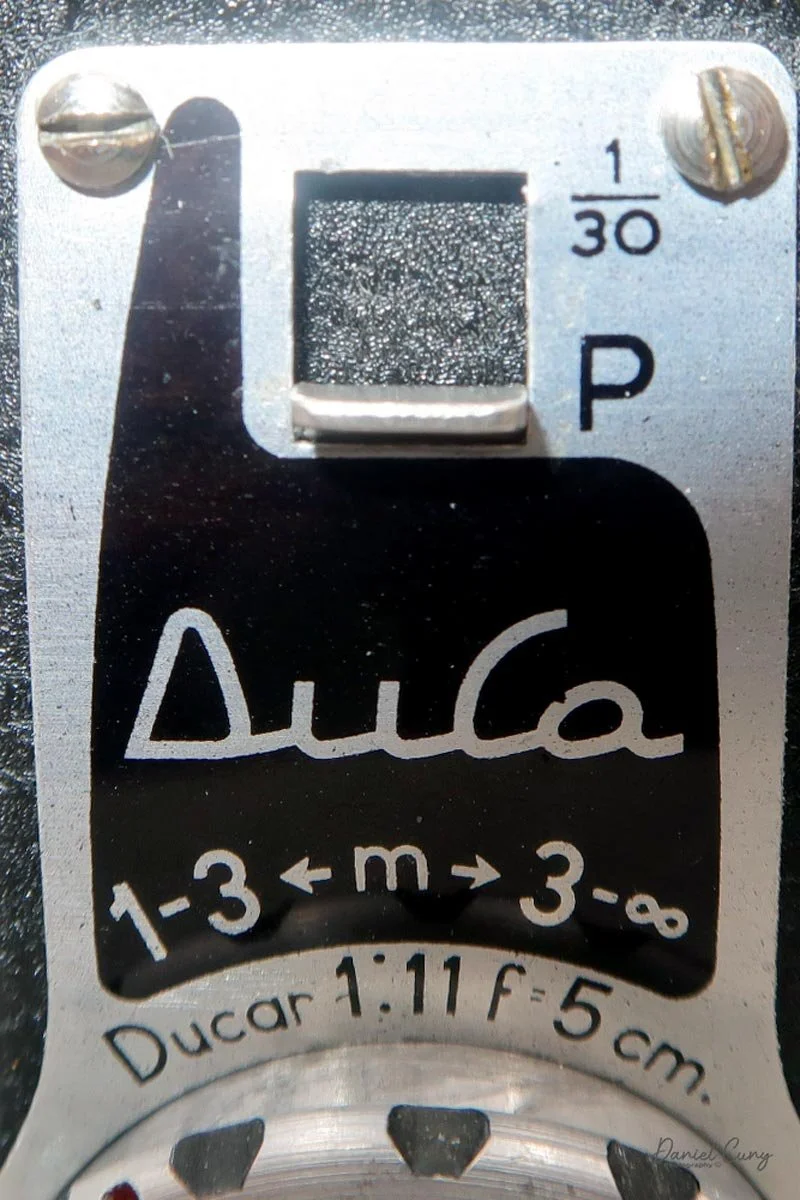
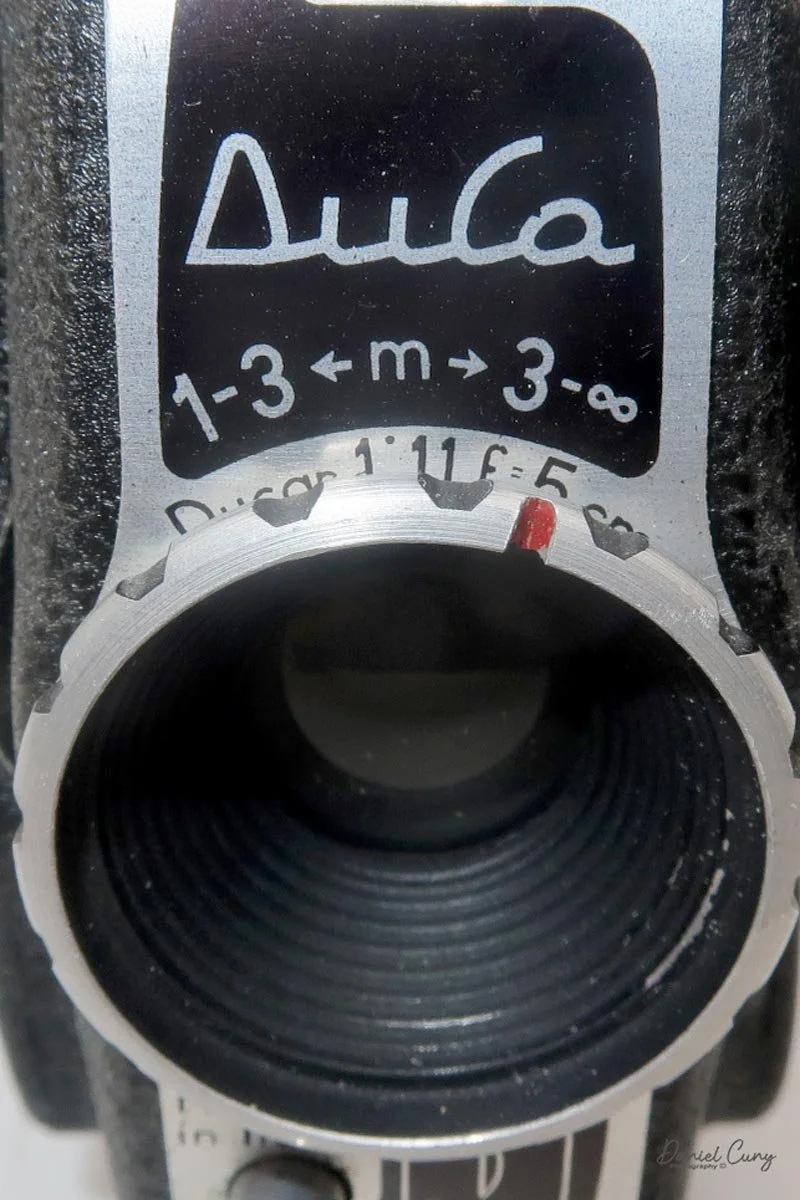
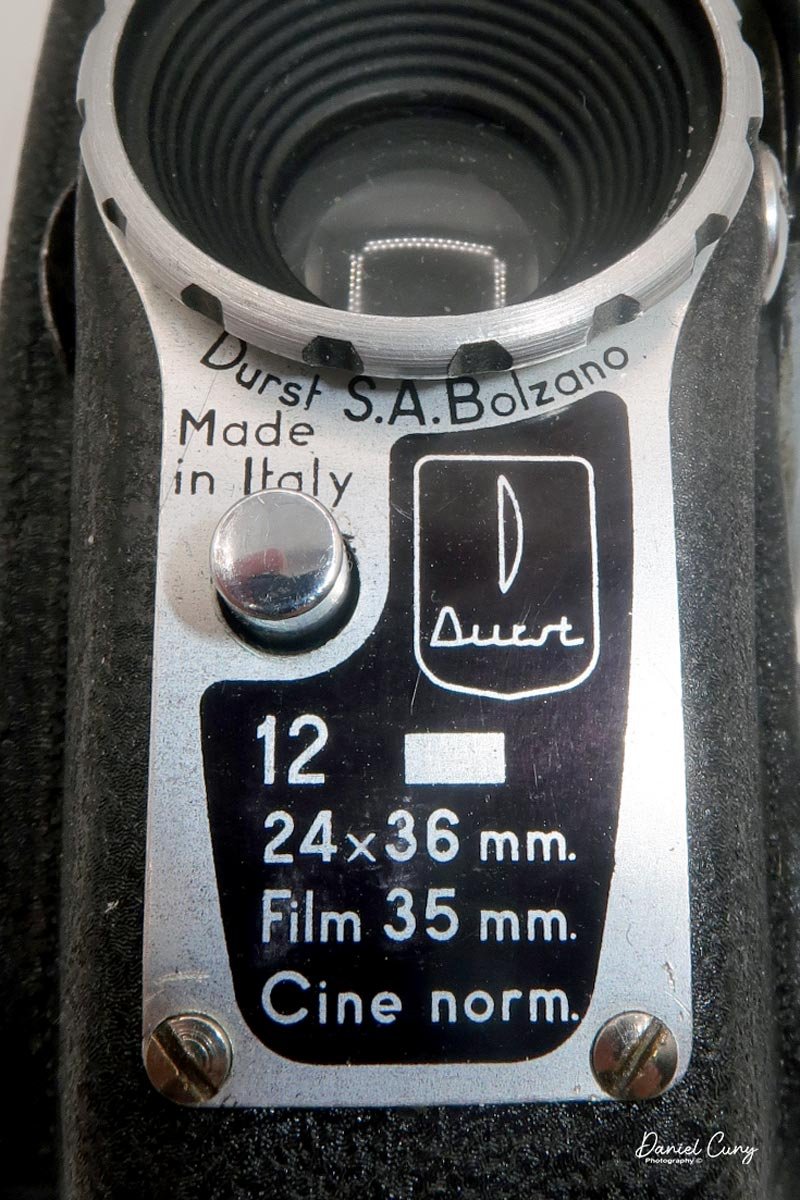
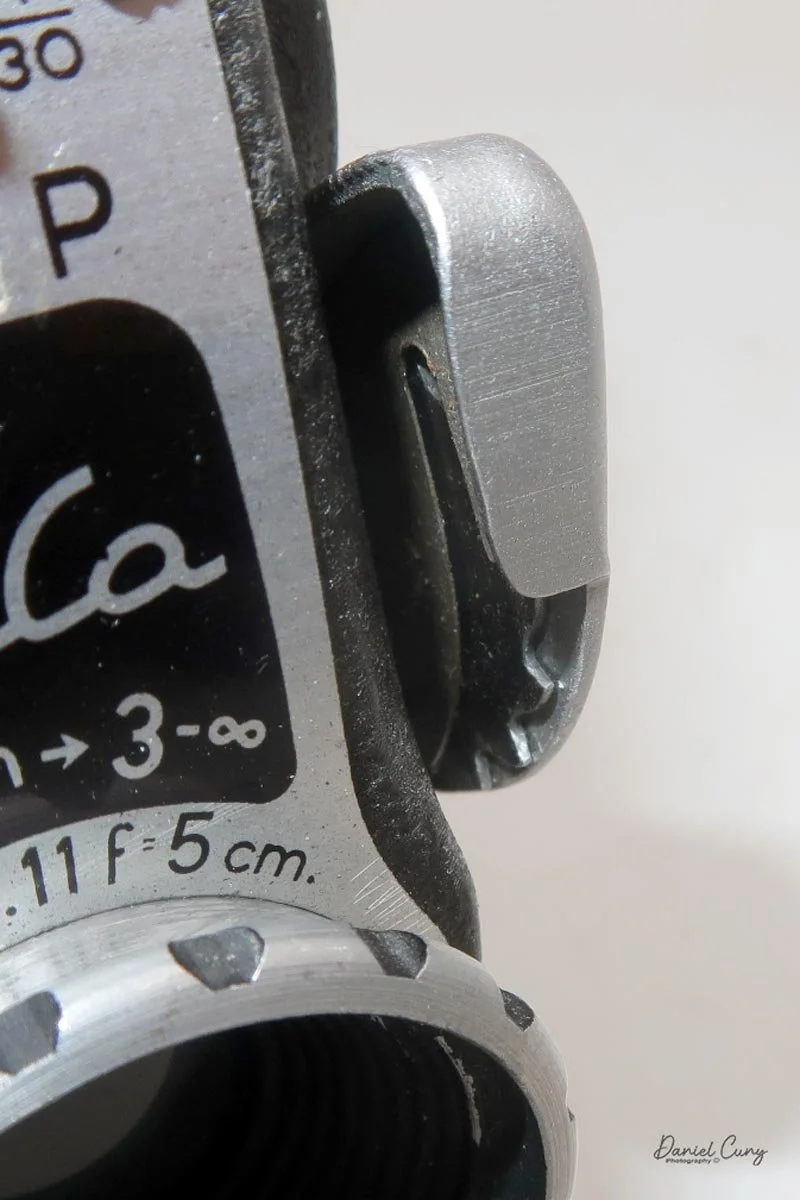
 The camera is very basic. The lens is a fixed 5 cm, f/11 meniscus design, though a rarer f/8 version is supposed to exist. Shutter speeds are limited to just two settings: 1/30 of a second and "P" for timed exposures. A small switch on the camera's faceplate, just below the viewfinder, sets the speed. I've also seen a version where the speeds are marked "I" for instant and "T" for timed. My guess is that mine is a later version, but I can't say that for sure.

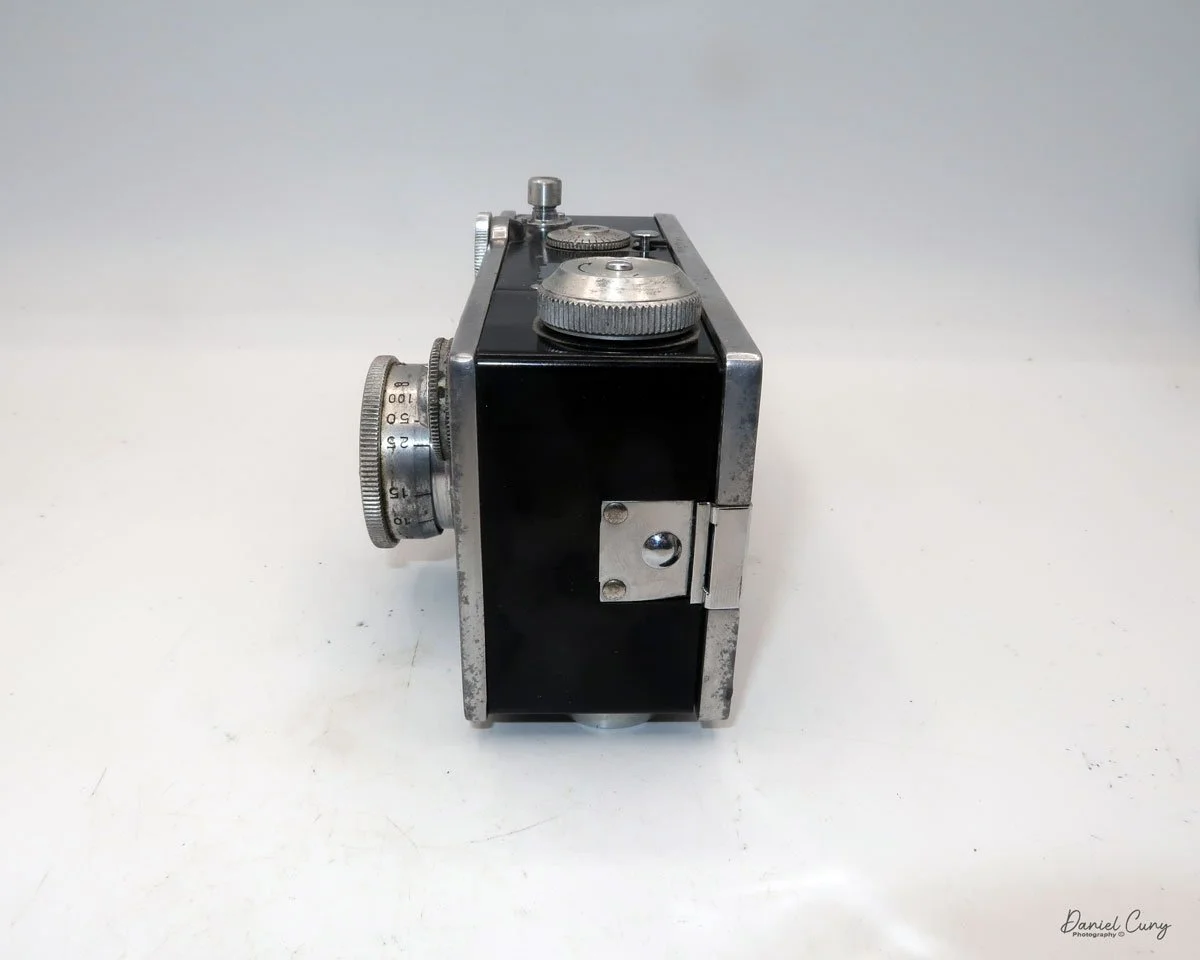
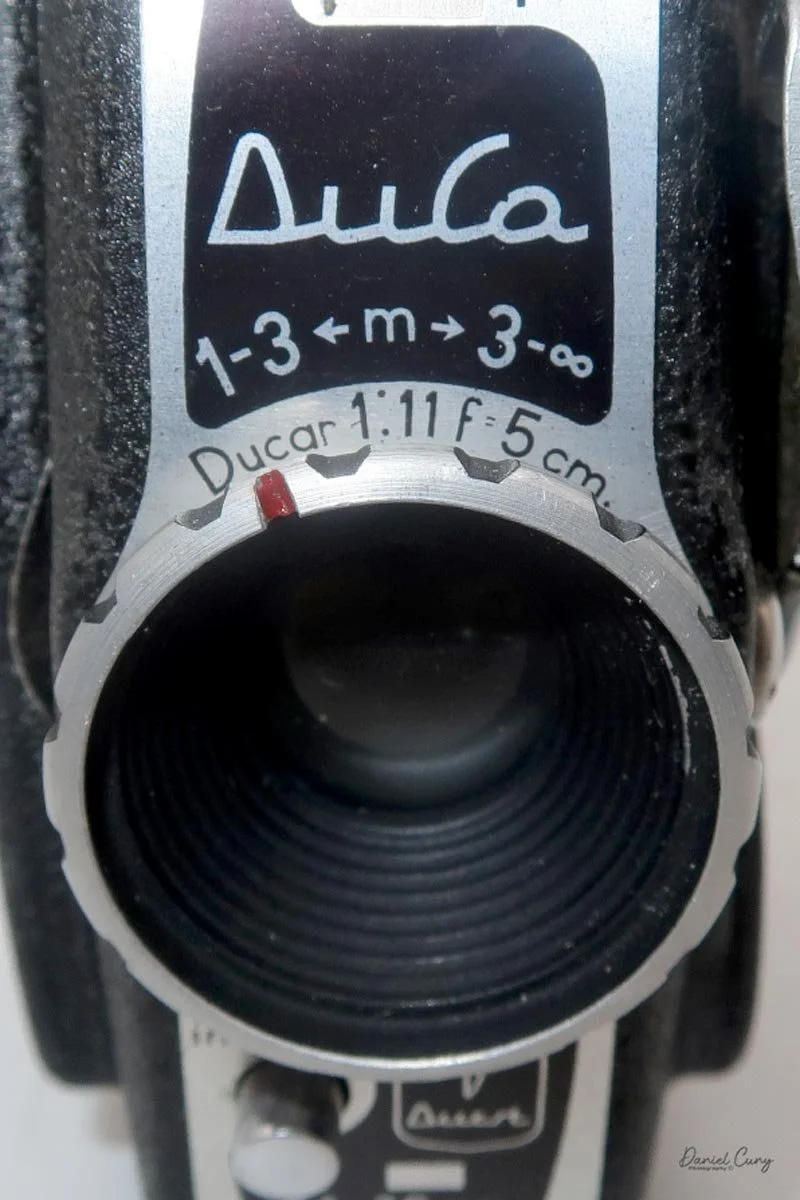
 Focusing is done in only two zones. You can set the lens for 1–3 meters or 3 meters to infinity. To focus, you turn the outer ring of the lens until the red line points to the distance you want.

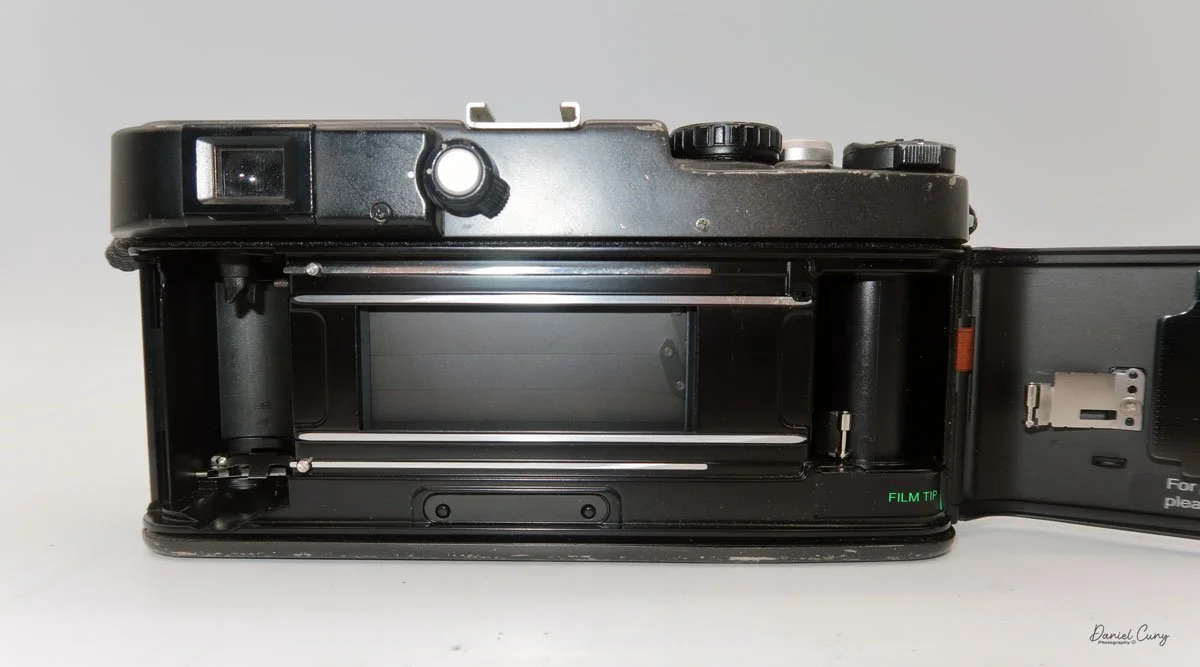
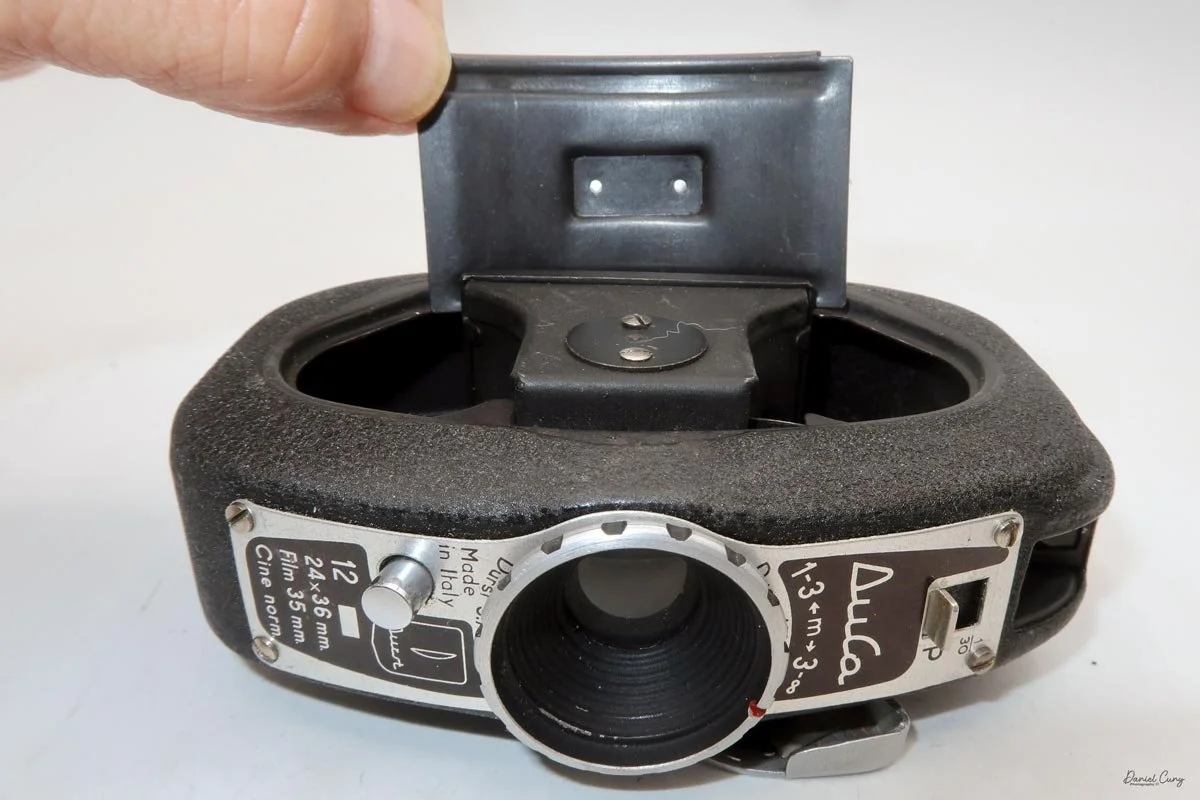
Loading Film and Getting the Duca Ready

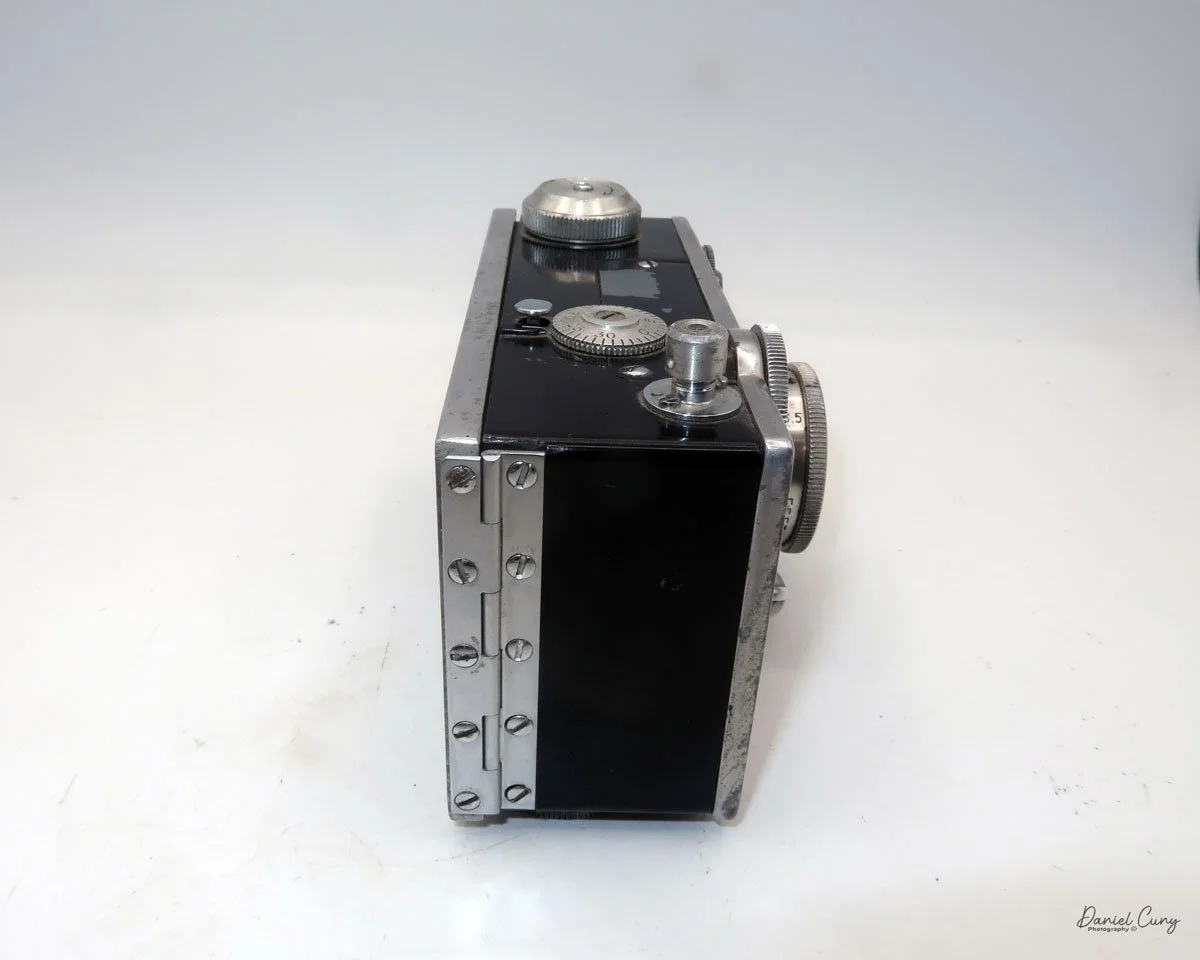
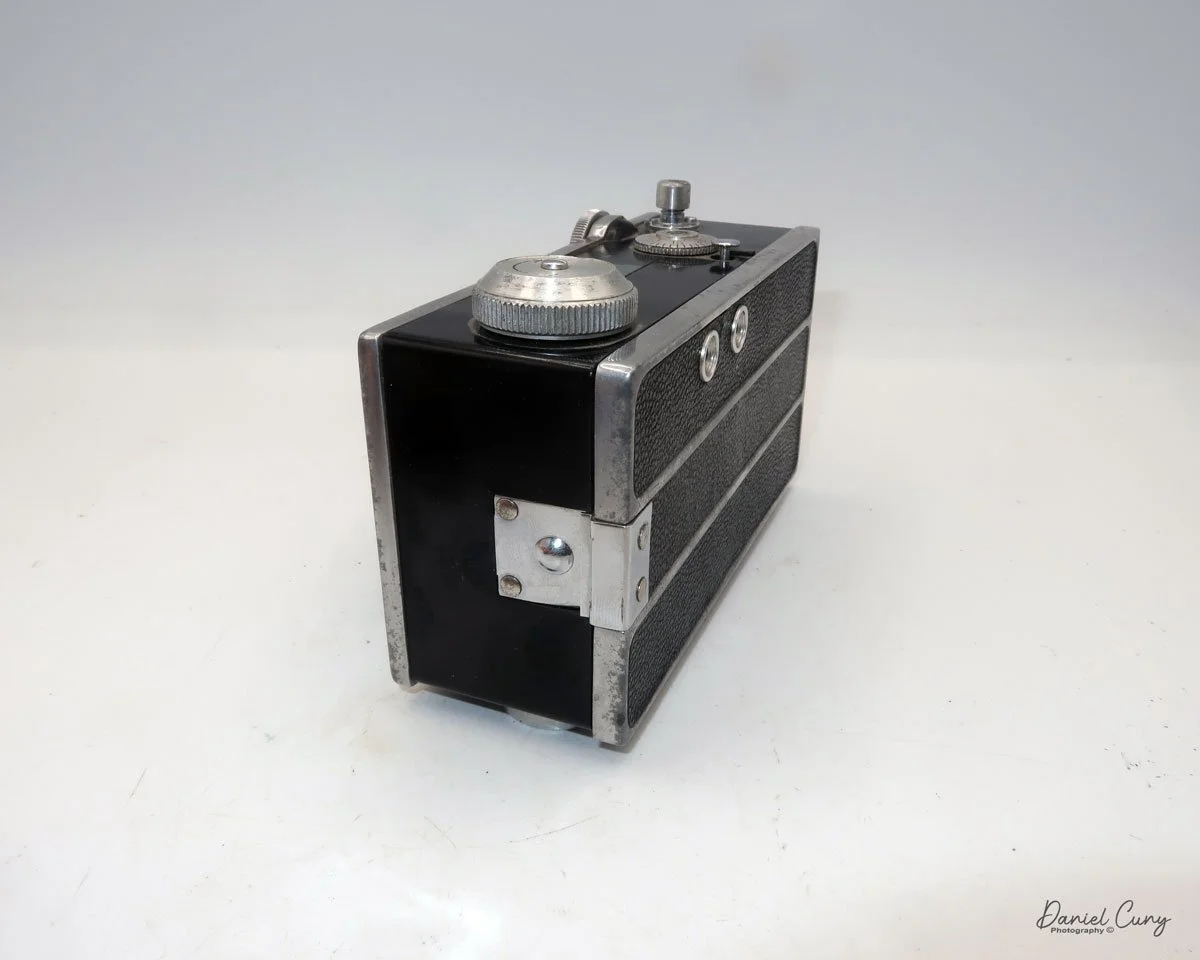
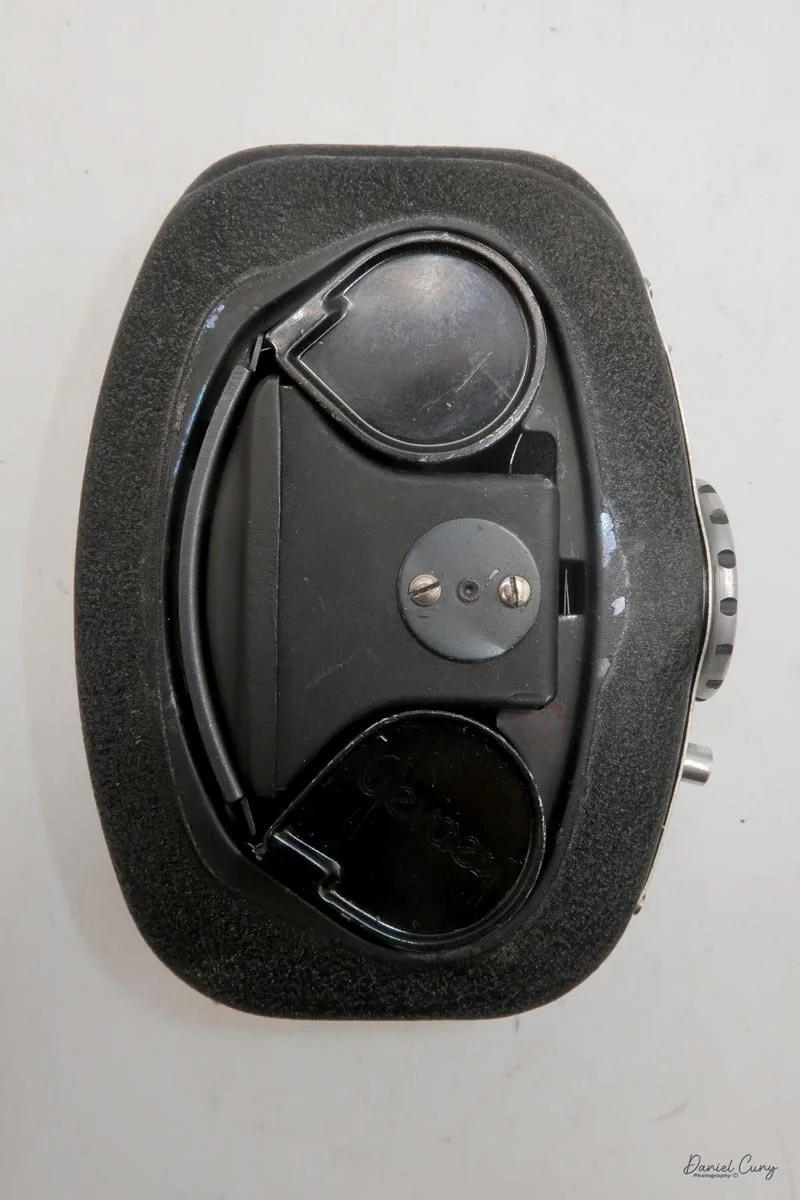
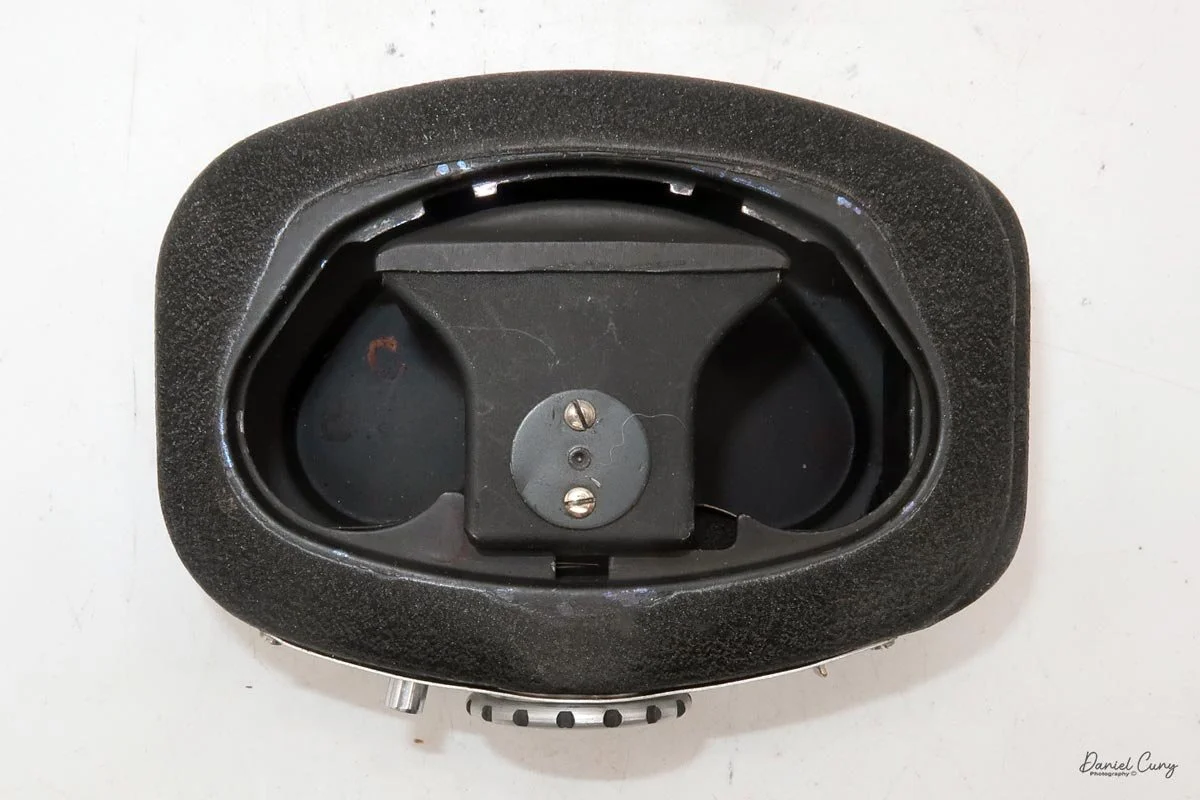
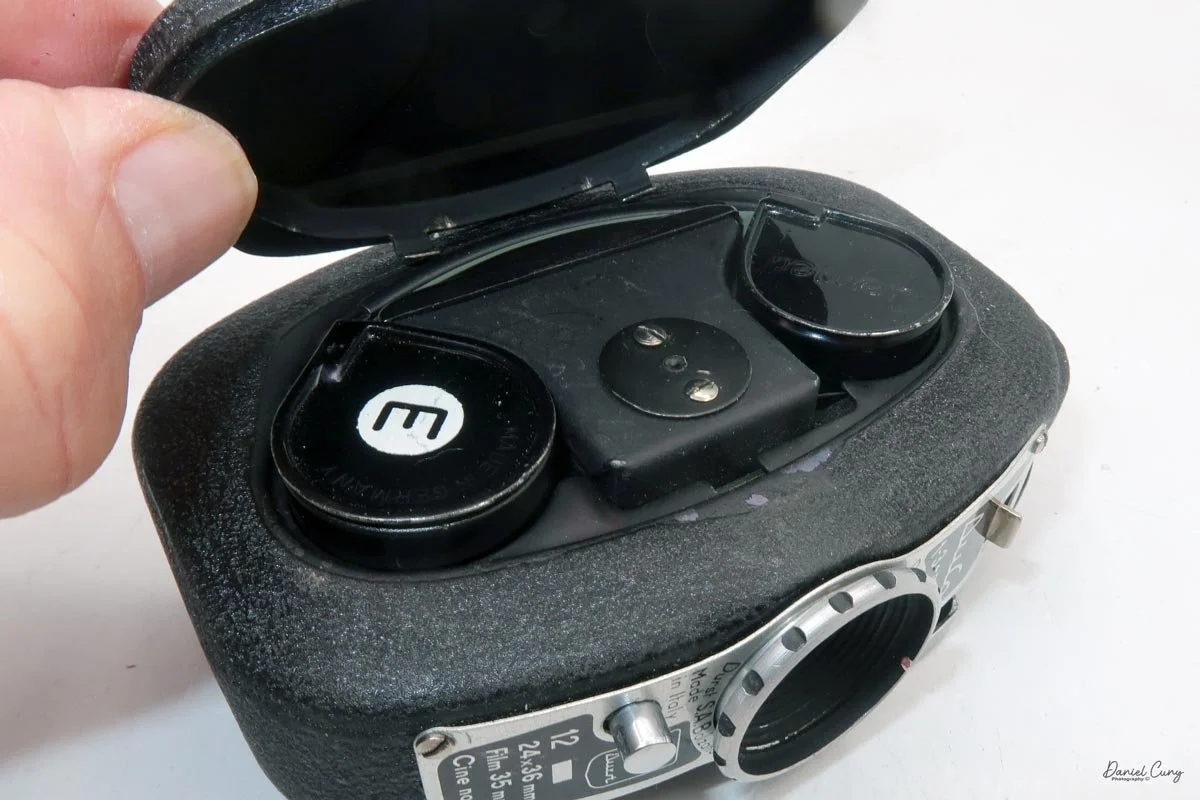
To open the camera for loading, there's a small curled‑up lip on the right side of the body that you lift to swing open the film door. Inside, you'll see the two Agfa Karat cassettes. They pop out along with the pressure plate, which sits just behind the film gate and pulls straight up and out for loading.

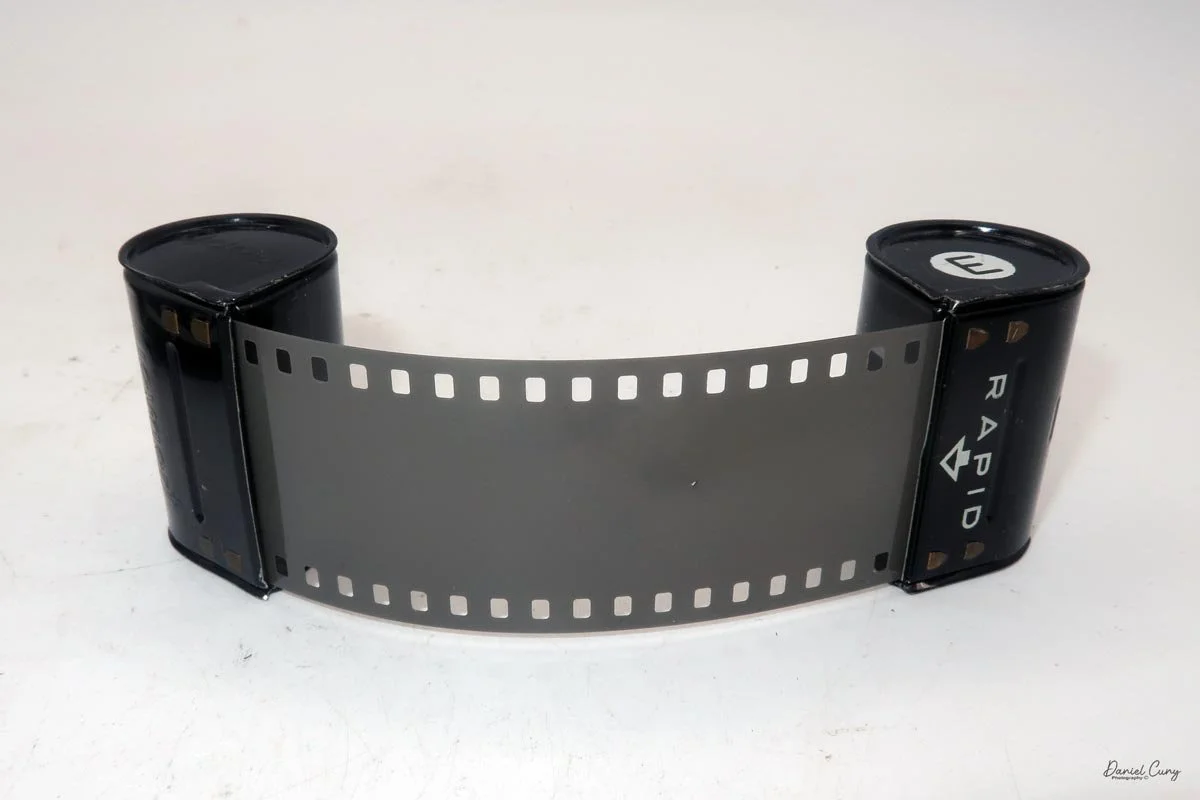
 As mentioned, the camera takes Agfa Karat cassettes. When these were sold new, each roll of 35mm film was cut for 12 exposures, and the front of the camera proudly states that it takes 12 photos per roll. Since I have bulk 35mm film and two cassettes, I loaded my own.

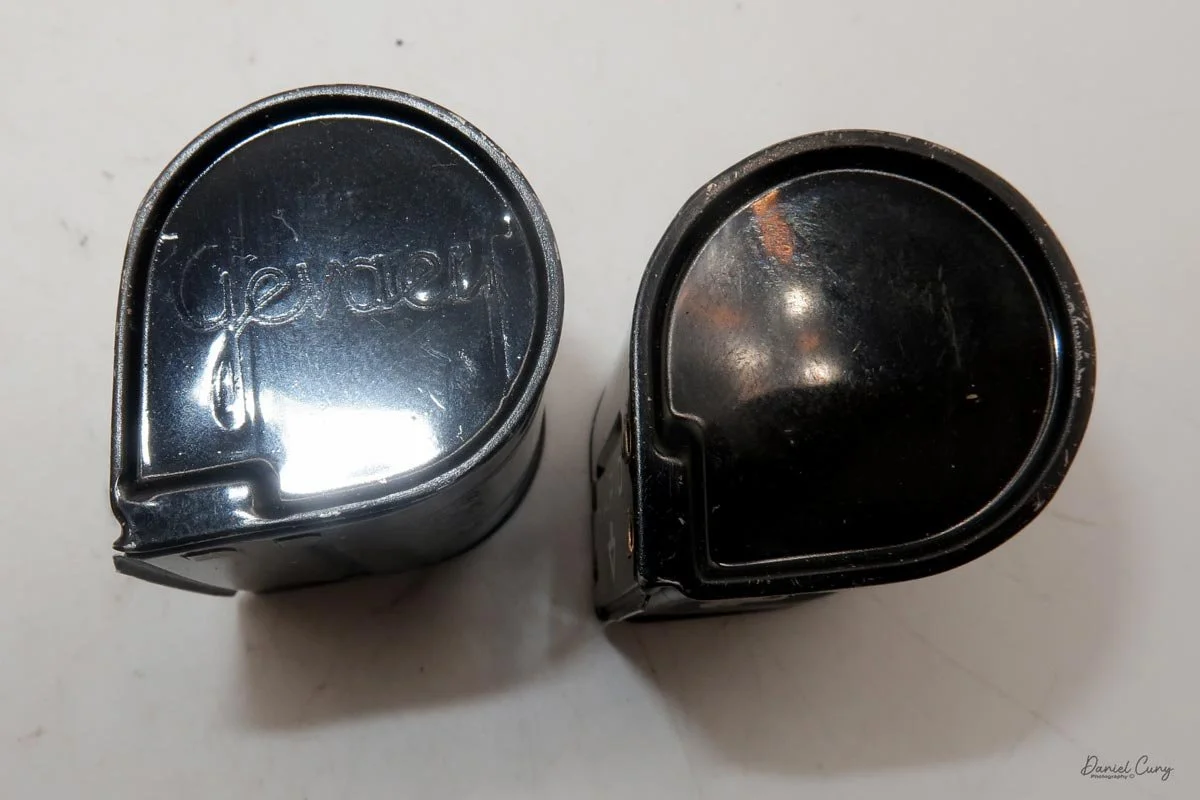
I put one of the cassettes and my bulk loader into a dark bag. Inside the bag, I opened the loader, pulled out what I guessed would be enough film for 12 exposures, and added a bit more to be safe. I fed the film into the first cassette and closed up the loader, leaving a short length to thread into the second cassette. Then I unzipped the dark bag and removed the loaded cassette.

In the light, I could now feed the end of the film from the first cassette into the second one, slide both cassettes into the side of the camera, and drop the pressure plate back into place, making sure the film sat flat against the gate. Before closing the door, I advanced the film a bit to confirm that it was transporting. With the cassettes and pressure plate removed earlier, I'd noticed a small brass pin—very similar to the one in the Ansco Memo—that pops out, grabs a film sprocket, and moves up to advance the film.

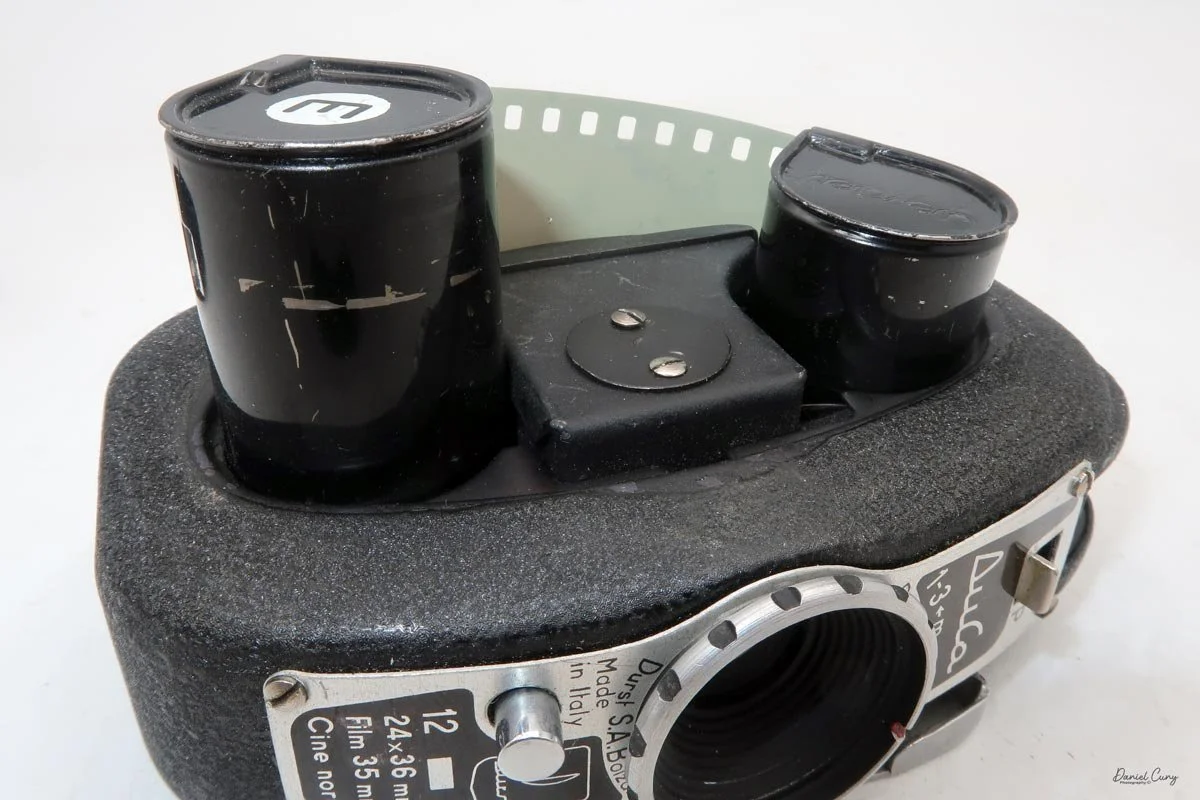
Once everything looked right, I swung the back door into position and pressed it firmly against the body. Two small notches on the back have to line up with the body; if they're off even a little, the door won't sit snugly.

 Before heading out, I took a look at the lens and saw that the front element was pretty grimy. With some lens cleaner and tissues, I managed to clean the front, but because the camera is built the way it is, I couldn't get to the rear element at all. With the film loaded and the transport confirmed, I was ready to go for a walk through the neighborhood.


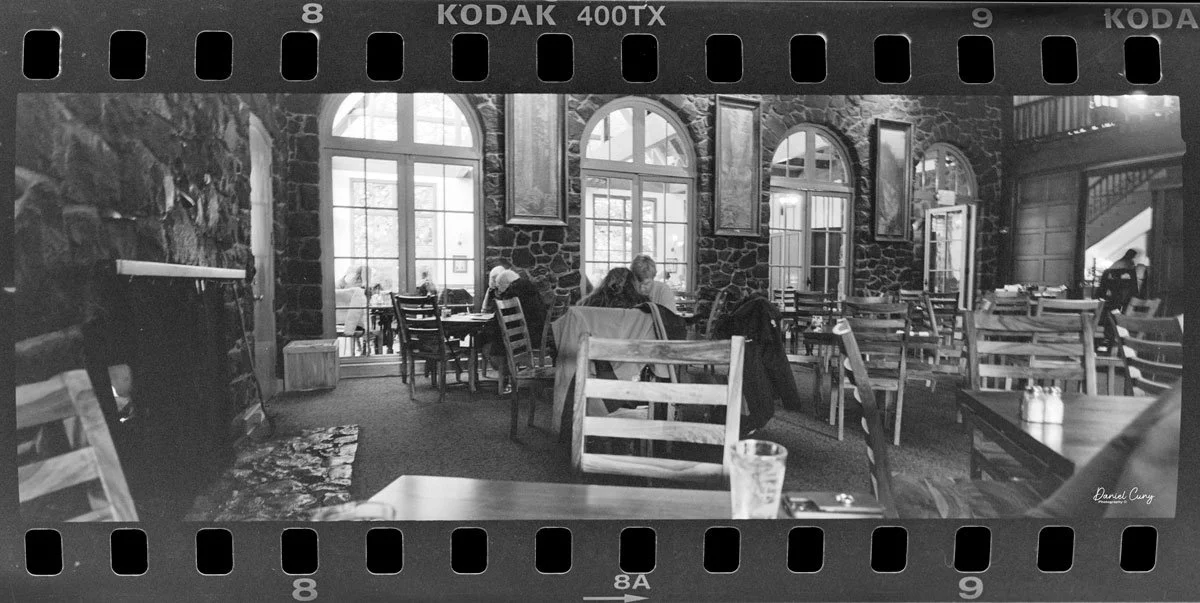
Shooting with a Vertical 35mm

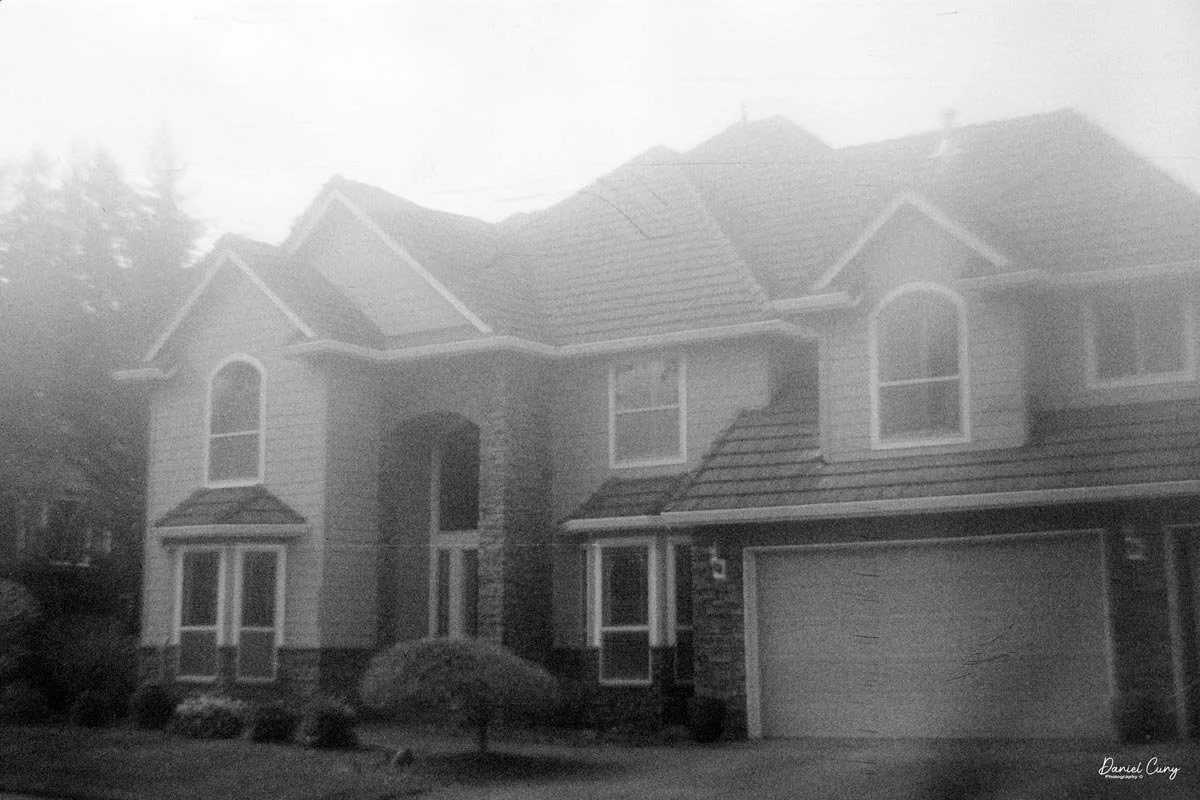
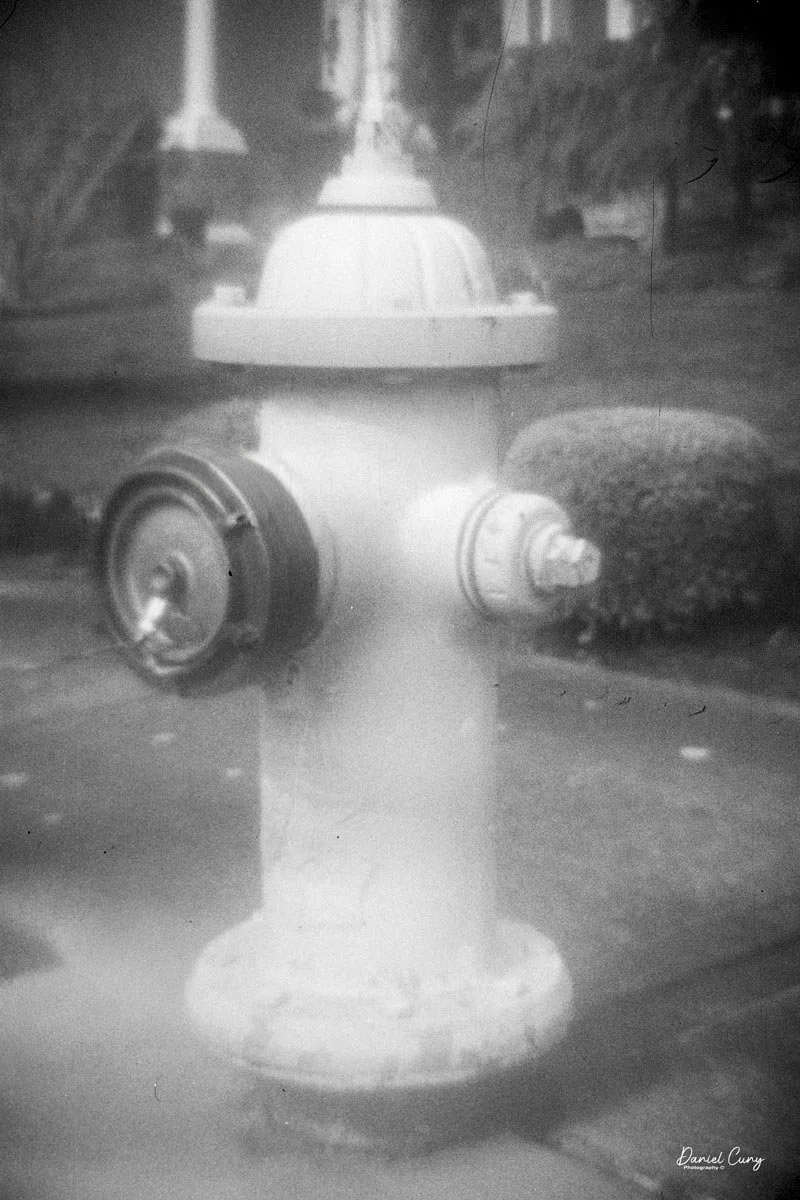
With film in the camera, I headed out around the neighborhood, trying to photograph some of the same subjects I usually shoot—houses, parked cars, trees, little details I run across on my walks.

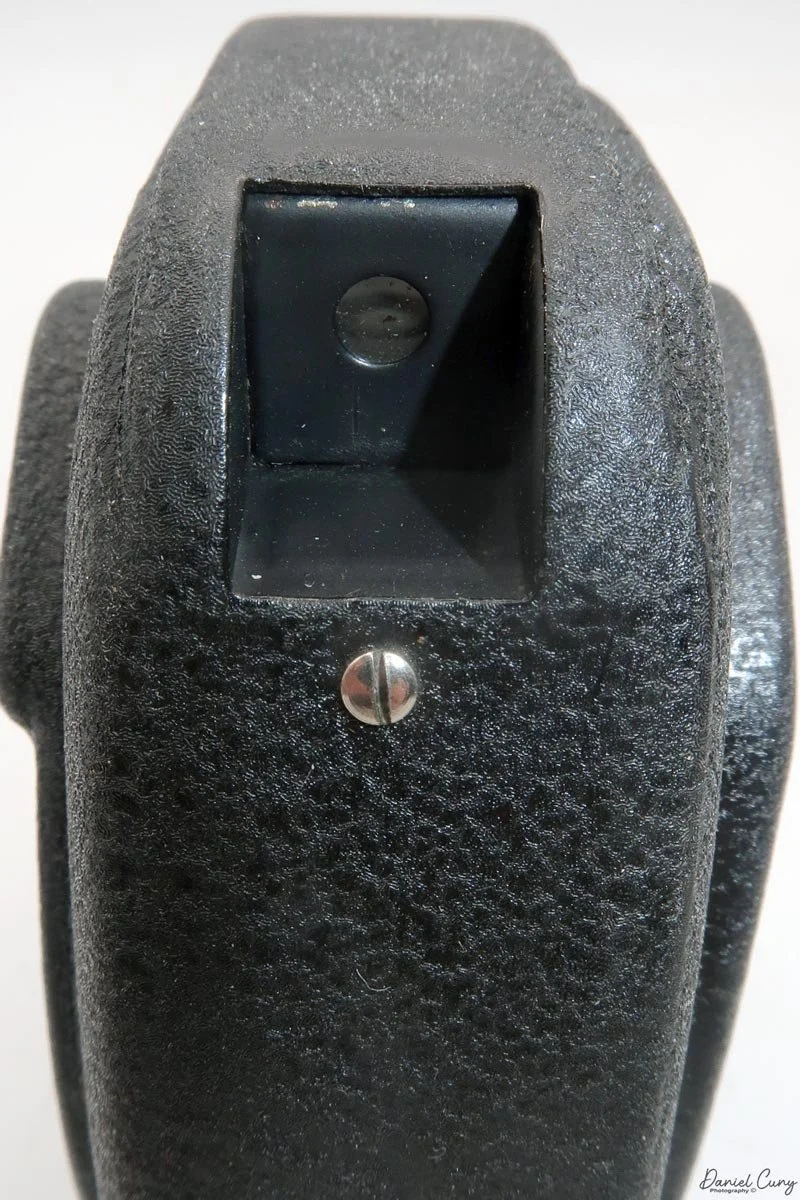
 The camera's faceplate shows a horizontal rectangle next to the number 12, while the viewfinder is vertical. I found that confusing at first. Was this meant to be a horizontal or a vertical camera? With only 12 exposures per roll, it seemed logical that they'd be in a horizontal orientation to match most 35mm cameras. Still, the vertical viewfinder was telling me otherwise. I wasn't sure, so I shot in both orientations early on, turning the camera back and forth.

 Once I processed the film and looked through the negatives, it was obvious: the Duca is a vertical‑format camera. If you want a horizontal image, you turn the whole camera on its side. It's not complicated, but it does take a little mental adjustment when you're used to most 35mm cameras being the other way around.

Results and Thoughts

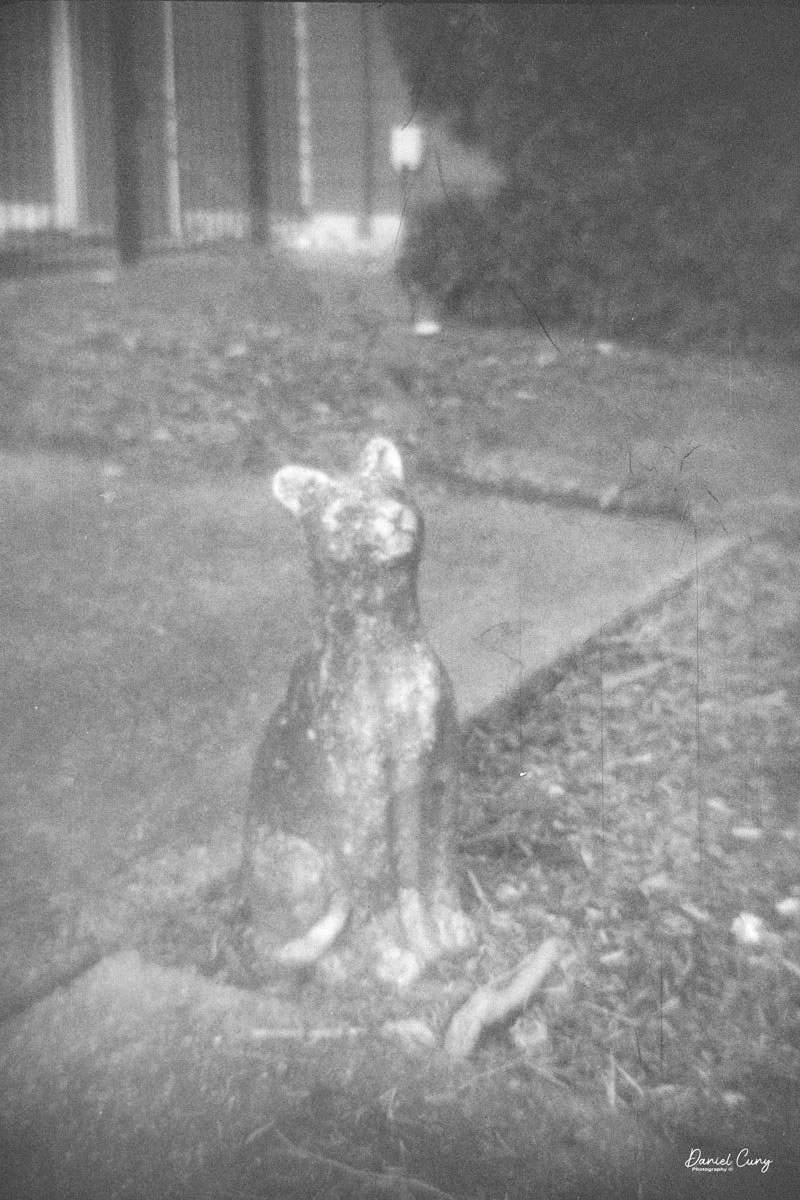
Some of the images turned out great, and some didn't. There are a few reasons for that. One is focus—I didn't always remember to switch between the two focus zones when I changed subject distance. The other is exposure. With only one shutter speed and one aperture, you're basically at the mercy of the light. The negatives showed some variation, but nothing I couldn't deal with in post‑processing. It reminded me a lot of shooting with an Instamatic: pick a film with a wide exposure latitude and let it do the heavy lifting.

 I got 14 frames on the roll before the film refused to advance into the second cassette, which tells me my length estimate in the dark bag was close. The camera itself handled well. The viewfinder is on the small side and can be difficult to look through, especially if you wear glasses, but it's usable once you get used to it.

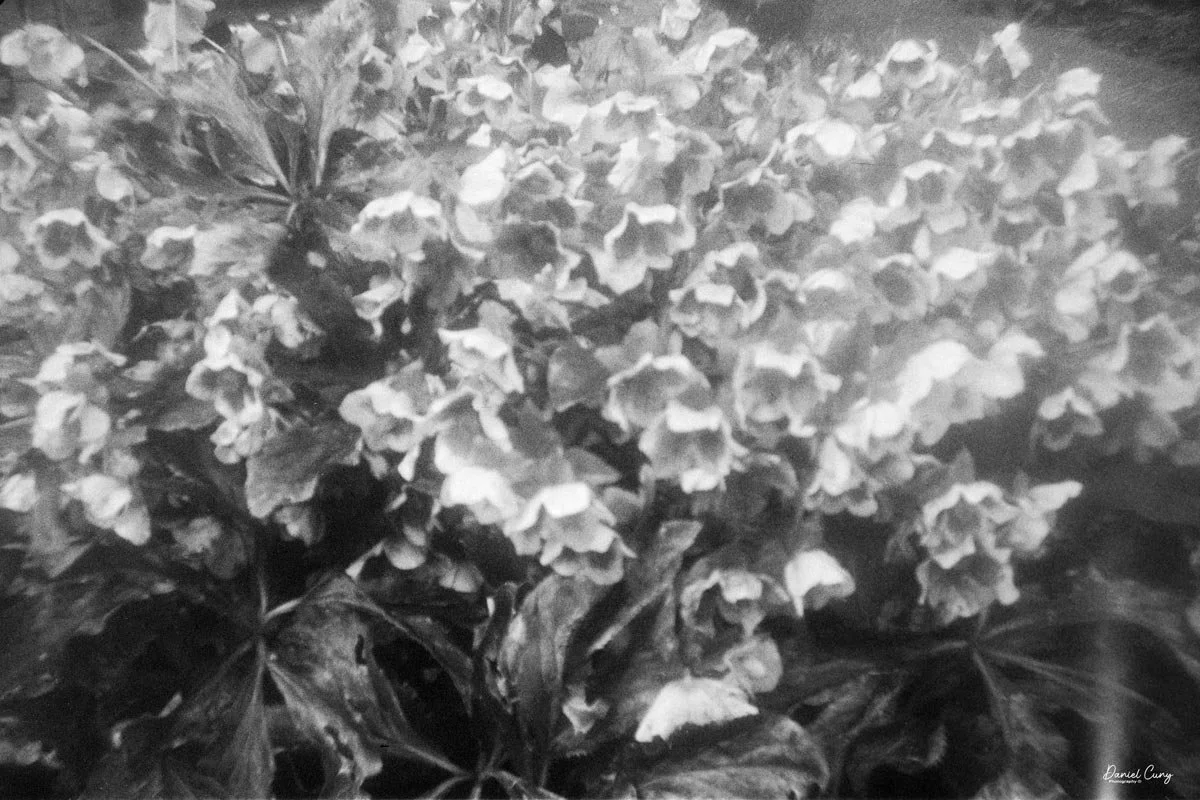
 The transport worked smoothly, and the shutter opened and closed as it should. The lens, however, is still dirty on the rear element, and there's really no easy way to clean it without taking the camera apart. That shows up in the photos as a general softness, almost like shooting with a soft‑focus filter. On some subjects, the look can actually be pleasant; on others, it just makes things a bit mushy.

 Overall, the Duca was a fun camera to use, and I'll definitely shoot it again. The whole process—from loading the Karat cassettes, to working with the vertical format, to seeing the results—was enjoyable. It's the kind of camera you could toss in a pocket when you head out on a trip and forget about until something catches your eye. I like that it's doing all of this as a full‑frame 35mm camera in such a tiny body.

 Thanks for taking the time to read about my experience with this little Italian wonder of a camera.

 If you'd like to see more of my camera adventures, here's a link to my other camera reviews. And if you're interested in cameras, lenses, or other photo gear I'm letting go of as I thin the collection, you can visit my Cuny's Cameras and Photos online store.

 Until next week, please be safe.

Hasselblad X-Pan

My Hasselblad X-Pan w/finder

Throughout my photographic career, my passion for panoramic images and cameras, as well as daguerreotypes, has consumed a significant part of my interest in collecting photographic items, including those with unusual or colored features. I recall the timeline when I first acquired specific working models of panoramic cameras.

 In my early days of collecting, I recall purchasing my first panoramic camera, a Russian-made 35mm Horizont camera. That camera helped spark the purchase and use of more panoramic cameras. When I bought a Kodak Panoram 1, I just put it on my shelf. When I found out that 120 film fit into the Kodak Panoram, Model 1 camera, I almost jumped for joy, because I could use it, rather than look and admire it.

 Wanting to add to the panoramic camera family, the elusive Widelux F7 was still years away, as I had a young family and was careful about the types of cameras I purchased to grow my collection. During this time, I came across a few Multiscope Al-Vista cameras, particularly the Baby, because, like the Kodak Panoram 1, the Baby Al-Vista also uses 120 film.

 As time went on, and the kids grew, and I advanced in my career, more funds became available to acquire the more exotic items that were previously out of reach financially when I was younger. A coworker had a friend who was selling an early Panon 120 panoramic camera for a very reasonable price, which I purchased and took with me to Peru’s Machu Picchu when my wife and I took a trip there.

 It was a decade ago when I finally had the chance to acquire a Widelux F7 model at an excellent price. Despite its cosmetic condition, I was determined to bring it back to life. After a visit to Precision Camera Works in Texas, the camera was given a new lease on life. Today, it's one of the most frequently used cameras in my collection, and the one that has captured many of the images in my panoramic section on my website.

My Hasselblad X-Pan w/30mm lens, finder, center filter, 3D printed lens hood and cap.

 The Hasselblad X-Pan was a camera I recall from its introduction to the market in 1998. Like several cameras from Hasselblad during those years, it was a collaboration with Fujifilm in Japan. Hasselblad sold the X-Pan worldwide, except in Japan. In Japan, Fujifilm had the TX-1, which was the same camera, just a different name and model number.

 It wasn't until about five years ago that I had the opportunity to purchase the X-Pan I currently have and am writing about in this post. The Hasselblad X-Pan is a significant addition to my collection, not only because of its unique features but also because of its history and the challenges I faced in acquiring it. I found it on an online auction, but the camera didn't have the standard lens; it only had a 30mm lens. No finder, and the top of the camera was missing the small plastic piece in front of the flash shoe. The camera was used very well, but its working condition was unknown.

 Examining other items being sold in the auction, I discovered a group of items that included the 30mm finder for the X-Pan. I notified the auction house that the finder from this lot should go with the camera from a different lot. They placed the finder in the lot with the X-Pan, which made the items more desirable, especially to me. 

 When it came time for the lot to be sold, I was surprised at the price it sold for, and fortunately for me, I was the high bidder. The price wasn't cheap, but for the items sold, it was a great deal. One of my first reactions was, Is the camera in working condition? I paid the shipping fees, and I just crossed my fingers that the camera wasn't a total wreck, but rather a pile of parts I needed to pay to get repaired. The anticipation and uncertainty of this process added to the thrill of acquiring this unique piece for my collection.

 Once the camera arrived, the first thing I noticed was its physical condition. There were many scratches on the body, and the item missing from the top, near the flash shoe, gave the camera a very "combat" look. The great news was that the center filter was there, which I hadn't noticed, and when I put batteries in the camera, it came to life. All the displays lit up, so I started to feel very good about the purchase.

 Once I put the finder on top of the camera, and it hid the missing piece by the flash shoe, I had a huge smile on my face. The next thing I needed to do was put a roll of film in the camera and try it out. After I did that and the film turned out well, I knew I had a keeper and one I needed to start adding to the rotation of shooting with, especially since it had the lens I desired, the 30mm wide-angle lens and finder.

History:

 The history of Hasselblad, the iconic Swedish camera manufacturer, is inextricably linked to the passion and ambition of its founder, Victor Hasselblad (1906–1978). Though the family business, F.W. Hasselblad & Co., began in 1841 as a trading company, it was Victor's innate interest in photography—fueled by a childhood passion for birdwatching—that transformed the firm into a global innovator. After training in the optics industry across Europe and the United States, even working under Kodak founder George Eastman, Victor opened his own shop, Victor Foto, in Gothenburg in 1937. 

 The pivotal moment for the company arrived during World War II. In 1940, the Swedish military tasked Victor with reverse-engineering and improving a German aerial surveillance camera that had been recovered. His reported reply—"No, but I can make a better one"—set the standard for the company's future. He founded Victor Hasselblad AB in 1941 to manufacture the HK-7 military camera, laying the groundwork for the company's subsequent civilian production.

After the war, Victor applied his modular military design to the consumer market, launching the Hasselblad 1600F in 1948. This medium-format, single-lens reflex (SLR) camera, with its distinctive modular design featuring interchangeable lenses, viewfinders, and film magazines, quickly became the gold standard for professional photographers worldwide, especially with the introduction of the robust 500 series in the 1950s.

 Hasselblad secured its legendary status through its partnership with NASA, which began in 1962. Astronaut Walter Schirra, an avid photographer, suggested using his personal Hasselblad 500C to document space missions. NASA modified the cameras to withstand the harsh conditions of space, and the Hasselblad became the camera system of choice for American spaceflight. The climax of this partnership occurred on July 20, 1969, when a Hasselblad Data Camera (HDC) captured the historic first steps on the Moon, solidifying the brand's legacy as a true pioneer in imaging technology.

My Camera:

 My Hasselblad X-Pan is 7" wide by 3.25" tall without the 30mm viewfinder and 5.5" tall with the viewfinder by 3.5" deep from the back of the camera to the front of the lens. The camera weighs 2 pounds, 9.6 ounces with the 30mm f/5.6 lens. The camera body serial number is 11EE13969, and the lens serial # is 8SXP13110. I purchased an aftermarket, 3D-printed lens hood and cap for the 30mm lens, which fits well. However, it is shifting on the lens and not staying in the proper position, so I may have to spring for an actual Hasselblad-made hood and cap.

The camera is powered by 2 CR2, 3V photo batteries, which, like many cameras, fit into the bottom of the camera. Most of the controls are located on the top of the camera. Going left to right is the camera's hot shoe for flash. That's something I don't use, except for sliding the 30mm viewfinder onto the hot shoe and then screwing it down to hold it in place.

 To the right of the hot shoe is the shutter speed dial, which ranges from 1/1000 to a full 8-second exposure, accompanied by a green "A" for Auto mode. In the case of the X-Pan, when the selector is set to the green "A" position, the camera is in "aperture preferred" metering, which means you select the desired aperture, and the camera will choose the appropriate shutter speed depending on the film's ISO and the lighting conditions. Even in "auto" mode, there are warning signals within the viewfinder that indicate if you are overexposed or using a shutter speed longer than 2 seconds.

If the camera is not in the "auto" exposure mode and you're selecting both the shutter speed and aperture, a series of lights and signals, indicated by +/-, appears within the viewfinder, showing what a properly exposed image will look like depending on the selected shutter speed and aperture.

 To the right of the shutter speed dial is the shutter release, marked in silver, and a small window behind the shutter release that displays "P" if you're in panoramic mode, as well as the frame number you're on. Further to the right is the main On/Off switch at the bottom, along with "S" for single frame, "C" for continuous shooting, and a clock face for self timer. Turn the On/Off switch to the desired mode, and the camera will be on. On top of the dial is exposure compensation, which allows for up to 2 stops of light lighter or darker than the recommended meter settings when in the "A" or auto mode. These are set in half-stop increments on the dial.

On the back of the camera, from left to right and top to bottom, is the camera's viewfinder, which incorporates a coupled rangefinder. My rangefinder is very bright, which makes the camera extremely easy to focus with. Just above the camera's viewfinder is the 30mm viewfinder. The viewfinder features several different frame lines, depending on the film format used, along with a bubble or spirit level at the bottom to check if your camera is level.

To the right of the camera's viewfinder is an essential switch. The X-Pan camera is compatible with the standard 24x35mm film format. Alternatively, by depressing the button and turning the dial to the "P" position, you can shoot in a panoramic format of 24 mm x 65 mm. On the back of the camera by the shutter, the camera will move blades in or out depending on the film format you're using. I've never really heard photographers using the X-Pan as a standard 35mm camera, only for panoramic purposes, but this can change at any time, and you can go back and forth on the same roll of film if desired.

On the back of the camera, on the back door, there are three settings. Ine is "AEB", or Auto Exposure Bracketing, which allows the photographer to automatically bracket either a half or full stop in between shots. The next button is used to light up the display, which is particularly useful at night or in dark situations. The third button is a very small, indented button that you use to rewind the film before reaching the end of the roll.

 On the front of the camera, in the 11 o'clock position, is a dial to set the film speed. The camera features fully integrated DX coding for modern film. However, if you're using a self-loaded cassette or older non-DX-coded cassettes, the ISO can be set manually. Below the dial is the lens release button, which allows the photographer to change lenses. Opposite the camera is the PC flash sync port, which enables flash use via a PC cable.

On the left side of the camera, the shutter remote cable socket is located at the top, and the camera's film door lock lever is positioned at the bottom. Flip the lever up, then slide it up to open the camera's film back and load the film.

 To load the film in the X-Pan, insert the film cassette into the film area, guide the leader to the take-up wheel, and then close the back of the camera. The camera will automatically wind the film all the way out of the cassette and onto the take-up spool before you take your first image. 

As a man, and not having read the manual before loading the camera, I started to get concerned. When I closed the door on my initial roll of film and heard the film advance for so long, I thought the camera was broken and needed servicing. That's just how the X-Pan winds film. When you receive your film back and examine the frame numbers, you will notice that the first frame, or Frame #1, is actually the last image you took, and number 36 is the first image.


My Results:

 My wife and I took a drive to Multnomah Falls outside Portland, and since I was going to write about this camera, I took it with me to see how it would perform. 

 Honestly, it's only the third or fourth time I've taken the camera out to shoot with it, mainly because I shoot with the Widelux so much, but this was an excellent time to see how the camera performed.

 The day was overcast, but the crowds were small, and since it had rained recently, the falls were rushing. After shooting the falls, we went into their restaurant to have lunch.

 Here are photos from that small adventure.

Conclusion:

 WOW, what amazing images and camera. I understand why so many people enjoy shooting with this camera. It doesn't have the swing lens curvature like the Widelux has. The X-Pan offers modern advancements over the Widelux, such as auto-exposure, exposure bracketing, and other features, but is physically larger and heavier.

 There's a trade-off for all things, but I'll definitely be using the X-Pan more often. It made shooting very simple and easy. I needed to focus on my subject with the X-Pan, which isn't a bad thing, and the images turned out great.

Another excellent feature of the X-Pan is that it’s a “system” camera, allowing for the use of other lenses. There is a standard wide-angle 45mm f/4 lens, along with a compact telephoto 90mm f/4 lens.

 Thank you for taking a few minutes to read about this fantastic panoramic camera from Hasselblad. A camera I'm fortunate to have in the collection.

 Here's a link to my other Camera Reviews.

 I also have an online store, Cuny's Cameras and Photo. If you see something in my store that interests you, don't hesitate to make me an offer. I'm always looking to negotiate and make deals, and I'd love it if you could share my article.

 Until next week, please be safe.

Argus Model C camera

My Argus Model C camera

During my time working in a camera store from the mid-1970s until the mid-1990s, I must have seen hundreds, if not thousands, of Argus cameras, and to be more specific, the Argus C3, or as they were affectionately known as, "The Brick" because of their boxy shape and very sturdy construction. These cameras came in on an almost daily basis just because they were so popular back in the 1940s and '50s.

 I saw so many Argus C3 cameras in my time in the camera store that, when it came to collecting cameras, I had no interest in collecting this particular model. Yet, it seemed like every time I purchased a group or "lot" of cameras, there was always an Argus C3 in the groupings of cameras. 

 I still recall thinking that if I collected enough Argus C3 cameras, I could build a retaining wall in my front yard out of them, as it was cheaper to get the Argus C3 than to purchase real clay bricks.

 To this day, I still see the Argus C3, or similar models like the C2, C3 Matchmatic, or C33, all the time at people's garage sales, estate sales, and camera shows. It is undoubtedly one of the most sold cameras in the history of photography.

 With that said, I'm still looking for one model, which I'm certain I came across during my time at the camera shop. It's the original Argus Model C camera, featuring a dual range switch located under the shutter cocking lever. It's a little earlier than the camera in this blog post, but the pricing for one of these is higher than I'm willing to pay for, so I'll wait and see if I can find one during my quest for a camera. 

 For me, the fun is the hunt for the treasures. The thrill comes from finding a camera or other photo item I've been looking for, especially when it's in an unexpected place and hopefully at a reasonable price.

History:

 Argus Cameras holds a unique place in photographic history as a pioneering American camera manufacturer that made high-quality photography accessible to the masses. The company was founded in 1931 in Ann Arbor, Michigan, as the International Radio Corporation (IRC), by local businessmen including William E. Brown Jr., George Burke, and Charles Albert Verschoor. Initially, IRC's primary business was radios, but seasonal sales fluctuations led Verschoor to seek another product to stabilize revenue. Inspired by the success of his molded plastic radio cases, he envisioned an affordable camera built with similar materials.

This is the early version with switch under cocking lever

 In 1936, IRC launched the Argus Model A, the first low-cost 35mm camera manufactured in the United States. Priced at just $12.50 when most competing models were much more expensive, the Model A democratized 35mm photography and quickly found commercial success. The Model A's innovation lay in its molded plastic body, making it both durable and less costly to produce.

 This success prompted IRC to focus entirely on cameras, eventually adopting the name Argus, Inc. in 1944, and later Argus Cameras, Inc. in 1949. The company's most iconic product, the Argus C3, was introduced in 1939. With its brick-like appearance and robust rangefinder mechanism, the C3 became known as "The Brick" and enjoyed a production run lasting until 1966, with more than two million units sold. The C3 is widely regarded as one of the best-selling cameras in photographic history.

 During World War II, Argus shifted its production to support the war effort, manufacturing military optics and radio equipment for the U.S. and Allied armed forces. By the war's end, Argus had received multiple Army-Navy "E" Awards for excellence in production. After the war, civilian production resumed, and Argus became the second-largest U.S. camera manufacturer, trailing only Kodak.

 In the late 1950s, the company was acquired by Sylvania Electric Products and later sold to Mansfield Industries. Over time, as competition intensified, especially from Japanese manufacturers, Argus struggled to maintain its leadership. U.S. camera production ended by 1969, but the Argus brand persisted in importing photographic products.

Today, vintage Argus cameras, especially the Model A and C3, are valued collectibles. The legacy of Argus endures as a symbol of inventive American manufacturing and mass-market photographic innovation.

My Camera:

 My Argus C dates from 1938, has a serial number of 12127C, so it's not one of the earliest models, but it was introduced before the Argus C2 was introduced in late 1938. The Model C measures 5 3/8" wide by 3" tall, including the shutter release, by 3" deep, including the lens. My Argus Model C camera weighs 1 pound, 7.4 ounces without film loaded in the camera.

The camera has a 50mm f3.5 Argus lens with aperture settings of F/3.5, 4.5, 6.3, 11, & 18, which are odd compared to aperture settings now. The aperture setting is made by turning a ring with two knobs on the inside of the lens that line up with a black line on top of the lens. 

The item missing on early Model C cameras is the coupling gear connecting the focusing ring on the top left to the lens, which adjusts the lens distance during focusing. To focus this model, look through the rangefinder window on the back of the camera, bring the two lines together to focus, and then check the front of the rangefinder dial to determine your distance from the subject. Finally, set that distance on the lens. On the side of the lens, there are markings indicating the focusing distances for the subject. There is an aluminum thread in style lens cap for the Argus Model C camera I own.

The shutter speed dial is located on the top right-hand side of the camera, on the front. The shutter speed settings are 1/300, 200, 150, 100, 75, 50, 30, 20, 10 & 5. There is no "B" setting on the shutter speed dial. The "B" setting is actually set on the "mushroom" shaped shutter release. You can turn the shutter release to either settings, "I" for instant, or to "B" for bulb, or timed exposures.

 The camera's shutter also needs to be cocked before you can snap the photo. The shutter cocking lever is located on the front of the camera, positioned on the far left side, in the middle. It looks like a handle that you flip down to cock the shutter, then springs back up after the shutter is released.

 On the back of the camera are just two small viewfinders. The one on the right is the rangefinder, which has a split that, by turning the focus wheel, will bring two separated vertical lines into one straight line when focused. The other window on the left is the framing window used to frame your subject when you're ready to take the photo.

To open the back to load the film, press the bump on the left side of the camera. This presses in a bar that holds the back onto the body. My camera is very difficult to open by just pressing the button, so I sometimes need to use a small screwdriver to pry the back up slightly to get it to open.

 Once open, the camera looks like any other 35mm camera, with the take-up spool on the left side. The fresh roll fits onto the right side by pulling pot the rewind knob on the bottom of the camera, bring the lead over to the take up spool, and thread into the take up spool. The film advance knob is on top of the camera. To wind to the first frame, there is a small locking lever just behind the frame counter that needs to be pressed down. This unlocks the winding gear, allowing you to wind to the first frame. Close the back of the camera and start taking photos.

This process must be repeated every time you wish to advance to the next frame. Additionally, at the end of the roll, the locking lever must be pressed down to unlock the drive gears, allowing the film to be rewound into the 35 mm cassette.

 The real reason to write about this camera was more of an exercise on how easy it was to use the early Mode Cameras, especially during a time of rapid change with cameras. Like many cameras from this era, it's not the quick and easy cameras of today, where either the shutter or aperture is being set for you. In many circumstances, both settings are being set. 

 To use cameras from this era, you need to take your time and use an external light meter to get the proper settings for your camera. Set the shutter speed and aperture settings depending on the film used. Do you lean more to the aperture and depth of field, or shutter speeds and stopping motion? Then focus on your subject. In this case, focus, then transfer the settings to the lens regarding distance. Frame your image and take the photo.

 On my camera, I also have an accessory finder, which clips onto the top for showing what a 35mm wide-angle or 100mm telephoto will do. I leave it on my camera to hide a bit of paint scratched off by it, as it's more for show, and I don't have either of these lenses. There were several different lenses available for the Argus C line of cameras, as the lens just unthreaded from the body. 

My Results:

 Once you slow down and think about the process, which I'm very used to, the images are really nice. Here are a few from my walk around the neighborhood.

 I photograph similar items, which I am sure you'll notice if you're a regular reader.

Conclusion:

 While the camera isn't the most ergonomic one I've used, it's certainly not the worst.

 The camera performed very well. The images are sharp, and the shutter and aperture were easy to use. The one thing that slowed me down was the process of focusing, then transferring the distance to the lens before taking the photo. The addition of the coupling gear between the focusing wheel and the lens, which sets the distance on the lens, was a vast improvement for Argus. Without this improvement, I doubt they would have sold the number of cameras as they did.

 Thank you for taking a few minutes from your day to familiarize yourself with this early model camera from Argus.

 Here is a link to my other camera reviews.

I also have a shop on eBay, Cuny's Cameras and Photo. Please stop by and see what new and wonderful photo items I have for sale.

 Until next week, please be safe.